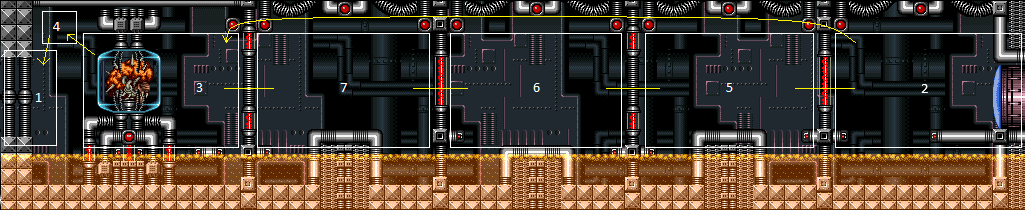
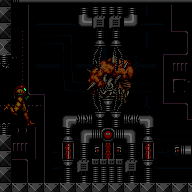
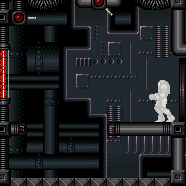
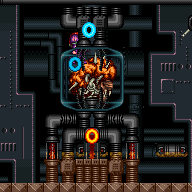
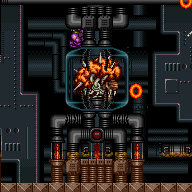
Mother Brain Room
Room ID: 238
|
Exit condition: {
"leaveWithRunway": {
"length": 1,
"openEnd": 1
}
} |
From: 1
Left Blast Door
To: 1
Left Blast Door
Exit condition: {
"leaveWithSidePlatform": {
"height": 3,
"runway": {
"length": 3,
"openEnd": 0
},
"obstruction": [
1,
0
]
}
}Dev note: Max extra run speed $0.B. This strat is included for completeness, though it apparently doesn't have any applications. |
From: 1
Left Blast Door
To: 1
Left Blast Door


Exit condition: {
"leaveWithGModeSetup": {}
} |
|

Requires: {
"enemyDamage": {
"enemy": "Rinka",
"type": "contact",
"hits": 1
}
} |
|
Entrance condition: {
"comeInWithRMode": {}
}Clears obstacles: R-Mode |
From: 1
Left Blast Door
To: 1
Left Blast Door

On entry, kill or dodge the first Rinkas then Crystal Flash on the ledge next to Mother Brain's tank. Be careful not to get boosted off into the acid after getting the Crystal Flash interrupt. Requires: {
"obstaclesCleared": [
"R-Mode"
]
}
"canRModeCrystalFlashInterrupt"
{
"ammo": {
"type": "Missile",
"count": 10
}
}
{
"ammo": {
"type": "Super",
"count": 10
}
}Resets obstacles: R-Mode Dev note: This is not possible in G-mode, because the Power Bomb will kill the Rinka and prevent more from spawning. |
|
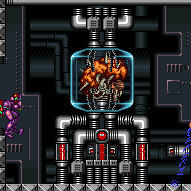
When the glass is broken, touching Mother Brain from the left will instantly transport Samus to the right. This gives Samus i-frames and knockback but does not cause damage. Requires: {
"notable": "Reverse Mother Brain"
}
"f_MotherBrainGlassBroken"
{
"or": [
{
"noBlueSuit": {}
},
"canBlueSuitSpikeJump"
]
} |
|
Entrance condition: {
"comeInWithGrappleTeleport": {
"blockPositions": [
[
12,
13
]
]
}
}Requires: "h_bypassMotherBrainRoom" |
From: 1
Left Blast Door
To: 8
Standing on Top Left of Mother Brain Tank
Freeze all 3 Rinkas at close to the same time, then quickly jump into the morph nook at the top-left of Mother Brain, and perform a Crystal Flash to stand up. If executed correctly, the Rinkas will not respawn during the Crystal Flash, so Samus will not take damage. Requires: {
"obstaclesNotCleared": [
"R-Mode"
]
}
{
"notable": "Moondance Clip"
}
{
"not": "f_MotherBrainGlassBroken"
}
"canTrickyDodgeEnemies"
"canTrickyUseFrozenEnemies"
"canCrystalFlash" |
From: 1
Left Blast Door
To: 8
Standing on Top Left of Mother Brain Tank
Use artificial morph to go inside the nook at the top-left of Mother Brain, then perform a Crystal Flash to stand up. Samus will take rapid damage from the Rinkas during the Crystal Flash but will be able to survive with the help of 75% damage reduction from suit protection. Entrance condition: {
"comeInWithGMode": {
"mode": "any",
"morphed": true
}
}Requires: {
"notable": "Moondance Clip"
}
{
"not": "f_MotherBrainGlassBroken"
}
"canTrickyGMode"
"h_artificialMorphMovement"
"h_artificialMorphCrystalFlash"
"h_fullEnemyDamageReduction"
{
"resourceCapacity": [
{
"type": "RegularEnergy",
"count": 299
}
]
}
{
"resourceAtMost": [
{
"type": "Energy",
"count": 800
}
]
}Dev note: We don't bother modeling the obstacle 'A' state here. The strat will end with R-mode if direct G-mode was used. But it doesn't matter, since this strat requires an E-Tank, which means that R-mode (for 'light pillar' during the Mother Brain 2 fight) wouldn't be useful. |
From: 1
Left Blast Door
To: 8
Standing on Top Left of Mother Brain Tank
Enter in R-mode or direct G-mode, and perform a Crystal Flash in the morph nook to the top-left of Mother Brain. During the Crystal Flash, allow the Rinkas to damage Samus down and trigger an auto-reserve refill, which will interrupt the Crystal Flash. The interruption of the Crystal Flash (due to the R-mode forced standup) limits the damage that Samus takes during it; After the reserve trigger, Samus will take just one more Rinka hit. Entrance condition: {
"comeInWithGMode": {
"mode": "direct",
"morphed": true
}
}Requires: {
"notable": "Moondance Clip"
}
{
"not": "f_MotherBrainGlassBroken"
}
"canTrickyGMode"
"h_artificialMorphMovement"
"h_artificialMorphCrystalFlash"
{
"resourceMaxCapacity": [
{
"type": "RegularEnergy",
"count": 299
}
]
}
{
"autoReserveTrigger": {
"minReserveEnergy": 100
}
}
{
  "enemyDamage": {
    "enemy": "Rinka",
    "type": "contact",
    "hits": 1
  }
}
{
"gainFlashSuit": {}
}Dev note: Having a small amount of E-Tanks ensures the reserve tanks can be filled by the Crystal Flash before the auto-reserve trigger. FIXME: A larger amount of E-Tanks can also work, but the reserves will not completely fill, so less energy would remain at the end. |
|
Entrance condition: {
"comeInWithRMode": {}
}Clears obstacles: R-Mode |
|


Carefully dodge the Rinkas, or take a hit, while carefully avoiding falling off, then use the i-frames to use the runway. Requires: {
"or": [
"canTrickyDodgeEnemies",
{
"and": [
"canUseIFrames",
{
"enemyDamage": {
"enemy": "Rinka",
"type": "contact",
"hits": 1
}
}
]
},
{
"and": [
"Ice",
"canTrickyJump"
]
}
]
}Exit condition: {
"leaveWithRunway": {
"length": 5,
"openEnd": 0
}
} |
|
Carefully dodge the Rinkas, or take a hit, while carefully avoiding falling off, then use the i-frames to use the runway. Requires: "i_MotherBrainBarrier1Clear"
{
  "or": [
    "canTrickyDodgeEnemies",
    {
      "and": [
        "canUseIFrames",
        {
          "enemyDamage": {
            "enemy": "Rinka",
            "type": "contact",
            "hits": 1
          }
        }
      ]
    },
    {
      "and": [
        "Ice",
        "canTrickyJump"
      ]
    }
  ]
}
Exit condition: {
"leaveWithRunway": {
"length": 6,
"openEnd": 0
}
} |
|
Carefully dodge the Rinkas, or take a hit, while carefully avoiding falling off, then use the i-frames to use the runway. Requires: "i_MotherBrainBarrier1Clear"
"i_MotherBrainBarrier2Clear"
{
"or": [
"canTrickyDodgeEnemies",
{
"and": [
"canUseIFrames",
{
  "enemyDamage": {
    "enemy": "Rinka",
    "type": "contact",
    "hits": 1
  }
}
]
},
{
"and": [
"Ice",
"canTrickyJump"
]
}
]
}Exit condition: {
"leaveWithRunway": {
"length": 7,
"openEnd": 0
}
} |
|
Carefully dodge the Rinkas, or take a hit, while carefully avoiding falling off, then use the i-frames to use the runway. Requires: "i_MotherBrainBarrier1Clear"
"i_MotherBrainBarrier2Clear"
"i_MotherBrainBarrier3Clear"
{
"or": [
"canTrickyDodgeEnemies",
{
"and": [
"canUseIFrames",
{
"enemyDamage": {
"enemy": "Rinka",
"type": "contact",
"hits": 1
}
}
]
},
{
"and": [
"Ice",
"canTrickyJump"
]
}
]
}Exit condition: {
"leaveWithRunway": {
"length": 8,
"openEnd": 0
}
} |
|
Carefully dodge the Rinkas, or take a hit, while carefully avoiding falling off, then use the i-frames to use the runway. Requires: "h_AllMotherBrainBarriersCleared"
{
"or": [
"canTrickyDodgeEnemies",
{
"and": [
"canUseIFrames",
{
"enemyDamage": {
"enemy": "Rinka",
"type": "contact",
"hits": 1
}
}
]
},
{
"and": [
"Ice",
"canTrickyJump"
]
}
]
}Exit condition: {
"leaveWithRunway": {
"length": 9,
"openEnd": 1
}
} |
|
Requires: "h_AllMotherBrainBarriersCleared"
"h_openZebetites"
{
"or": [
"canDodgeWhileShooting",
{
"enemyDamage": {
"enemy": "Rinka",
"type": "contact",
"hits": 1
}
}
]
}
"h_complexToCarryFlashSuit"Clears obstacles: f_KilledZebetites1 Sets flags: f_KilledZebetites1 |
From: 2
Right Door
To: 2
Right Door
Exit condition: {
"leaveWithGModeSetup": {}
} |
|

Requires: {
"enemyDamage": {
"enemy": "Rinka",
"type": "contact",
"hits": 1
}
} |
|

On entry, kill or dodge the first Rinkas then Crystal Flash almost directly above or below a Rinka Spawner. It may help to place the Power Bomb against the door, roll away and roll back to avoid the bomb boost. Requires: {
"obstaclesCleared": [
"R-Mode"
]
}
"canRModeCrystalFlashInterrupt"
{
"ammo": {
"type": "Missile",
"count": 10
}
}
{
"ammo": {
"type": "Super",
"count": 10
}
}Resets obstacles: R-Mode Dev note: This is not possible in G-mode, because the Power Bomb will kill the Rinka and prevent more from spawning. |
|

Glitch through the Mother Brain Zebetites by using a frozen Rinka and i-frames. Freeze the Rinka at its spawn location, then spin jump or down-back onto it after acquiring i-frames to clip inside of the Zebetite, then jump through. I-frames can be acquired from a Rinka hit, a turret shot, or from the Zebetite itself. Note that Zebetites cause i-frames but deal no damage. If Screw Attack is equipped, then a down-back must be used, since spin jumping will cancel i-frames. With Ice+Wave, Samus can freeze the Rinka from above with an angle-down shot; Otherwise Samus must go below, press against the wall, and freeze it with an upward shot. With Ice+Plasma, Samus must be crouched when firing the shot. Requires: "h_AllMotherBrainBarriersCleared"
{
"notable": "Ice Zebetite Skip"
}
{
"noBlueSuit": {}
}
"canUseIFrames"
"canTrickyUseFrozenEnemies"
"Morph"
{
"or": [
{
"and": [
"Wave",
{
"enemyDamage": {
"enemy": "Rinka",
"type": "contact",
"hits": 1
}
}
]
},
"canTrickyJump"
]
}
{
"or": [
{
"disableEquipment": "ScrewAttack"
},
"canDownBack"
]
}
{
"or": [
"canTrickyDodgeEnemies",
{
"enemyDamage": {
"enemy": "Mother Brain 1",
"type": "turret",
"hits": 1
}
}
]
}
"h_complexToCarryFlashSuit"Dev note: This technically requires f_KilledZebetites1 to not be set, but there is minimal risk of loss of access, because there is no reason to kill any Zebs without being able to kill them all. It is also possible to Ice Zeb skip through the second Zeb with a morph/unmorph/remorph on a frozen Rinka; this is known as a Remorph Zebetite Skip or a Spring Ball Zebetite Skip. Technically this strat involves `canWallIceClip` but we don't include that requirement, since the positioning of the Rinka is freely normalized, which makes the trick easier than this tech would normally imply. FIXME: It is possible to Ice Zeb Skip out, but it is much harder and would only be useful if getting here with canRiskPermanentLossOfAccess. |
From: 2
Right Door
To: 3
Mother Brain
Shinespark diagonally into the lower Rinka Spawner while holding down, spamming jump, then pressing forward, in order to glitch through the first Mother Brain Zebetites during Samus' i-frames. The remaining Zebetites will not spawn. Entrance condition: {
"comeInShinecharging": {
"length": 4,
"openEnd": 1
}
}Requires: "h_AllMotherBrainBarriersCleared"
{
"notable": "Speed Zebetite Skip"
}
"canUseIFrames"
"Morph"
{
"shinespark": {
"frames": 4,
"excessFrames": 0
}
}
{
"enemyDamage": {
"enemy": "Rinka",
"type": "contact",
"hits": 1
}
}Dev note: This technically requires f_KilledZebetites1 to not be set, but there is no loss of access, because there is no reason to kill any Zebs without being able to kill them all. |
From: 2
Right Door
To: 3
Mother Brain


Shinespark diagonally into the lower Rinka Spawner while holding down, spamming jump, then pressing forward, in order to glitch through the first Mother Brain Zebetites during Samus' i-frames. The remaining Zebetites will not spawn. Entrance condition: {
"comeInShinecharged": {}
}Requires: "h_AllMotherBrainBarriersCleared"
{
"shineChargeFrames": 100
}
{
"notable": "Speed Zebetite Skip"
}
"canUseIFrames"
"Morph"
{
"shinespark": {
"frames": 4,
"excessFrames": 0
}
}
{
"enemyDamage": {
"enemy": "Rinka",
"type": "contact",
"hits": 1
}
}Dev note: This technically requires f_KilledZebetites1 to not be set, but there is no loss of access, because there is no reason to kill any Zebs without being able to kill them all. |
From: 2
Right Door
To: 3
Mother Brain
Shinespark diagonally into the lower Rinka Spawner while holding down, spamming jump, then pressing forward, in order to glitch through the first Mother Brain Zebetites during Samus' i-frames. The remaining Zebetites will not spawn. Requires: "h_AllMotherBrainBarriersCleared"
{
"notable": "Speed Zebetite Skip"
}
"canUseIFrames"
"h_storedSpark"
"Morph"
{
"shinespark": {
"frames": 4,
"excessFrames": 0
}
}
{
"enemyDamage": {
"enemy": "Rinka",
"type": "contact",
"hits": 1
}
}Dev note: This technically requires f_KilledZebetites1 to not be set, but there is no loss of access, because there is no reason to kill any Zebs without being able to kill them all. |
From: 2
Right Door
To: 3
Mother Brain
Upon entering, freeze all the Rinkas and Crystal Flash away from turret paths. Bounce off of a frozen Rinka and onto the corner of Mother Brain's pedestal (which acts as a spike) to enter Spike X-Mode. Gain shinecharge, then use any Rinka to interrupt. Entrance condition: {
"comeInWithRMode": {}
}Requires: "h_AllMotherBrainBarriersCleared"
"h_CrystalFlashForReserveEnergy"
{
"or": [
"f_KilledZebetites1",
{
"obstaclesCleared": [
"f_KilledZebetites1"
]
}
]
}
{
"or": [
"f_KilledZebetites2",
{
"obstaclesCleared": [
"f_KilledZebetites2"
]
}
]
}
{
"or": [
"f_KilledZebetites3",
{
"obstaclesCleared": [
"f_KilledZebetites3"
]
}
]
}
{
"or": [
"f_KilledZebetites4",
{
"obstaclesCleared": [
"f_KilledZebetites4"
]
}
]
}
"Morph"
"canTrickyUseFrozenEnemies"
{
"notable": "Mother Brain Pedestal XMode"
}
"canXMode"
{
"spikeHits": 1
}
"h_shinechargeMaxRunway"
{
"autoReserveTrigger": {
"maxReserveEnergy": 95
}
}
"canRModeSparkInterrupt" |
|
Requires: "h_AllMotherBrainBarriersCleared"
{
"or": [
"f_KilledZebetites1",
{
"obstaclesCleared": [
"f_KilledZebetites1"
]
}
]
}
{
"or": [
"canDodgeWhileShooting",
{
"and": [
"canCarefulJump",
"ScrewAttack"
]
},
{
"enemyDamage": {
"enemy": "Rinka",
"type": "contact",
"hits": 1
}
}
]
} |
|
Requires: "h_partiallyBreakMotherBrainGlass" "h_partiallyBreakMotherBrainGlass" "h_partiallyBreakMotherBrainGlass" Sets flags: f_MotherBrainGlassBroken Dev note: Requires 18 ammo to fully break the glass, which will remain broken if Samus leaves. Or, it takes 6 ammo to partially break the glass, and then 3000 damage is required to kill Mother Brain 1, but the glass also needs to be broken. The requirements for finishing Mother Brain 1 is in the 3 to 4 link. This doesn't worry about the Rinkas because this strat is only useful when leaving the room afterwards and refilling. |
|
Requires: "h_AllMotherBrainBarriersCleared"
"h_partiallyBreakMotherBrainGlass"
{
"ammo": {
"type": "Missile",
"count": 30
}
}
{
"or": [
"canTrickyUseFrozenEnemies",
{
"and": [
"canTrickyJump",
"canDodgeWhileShooting",
{
"enemyDamage": {
"enemy": "Rinka",
"type": "contact",
"hits": 1
}
}
]
},
{
"and": [
"canDodgeWhileShooting",
{
"enemyDamage": {
"enemy": "Rinka",
"type": "contact",
"hits": 2
}
}
]
},
{
"enemyDamage": {
"enemy": "Rinka",
"type": "contact",
"hits": 3
}
}
]
} |
|
Requires: "h_AllMotherBrainBarriersCleared"
"h_partiallyBreakMotherBrainGlass"
{
"or": [
{
"ammo": {
"type": "Super",
"count": 14
}
},
{
"and": [
"h_SupersDoubleDamageMotherBrain",
{
"ammo": {
"type": "Super",
"count": 12
}
}
]
}
]
}
{
"or": [
"canTrickyUseFrozenEnemies",
{
"and": [
"canDodgeWhileShooting",
{
"enemyDamage": {
"enemy": "Rinka",
"type": "contact",
"hits": 1
}
}
]
},
{
"enemyDamage": {
"enemy": "Rinka",
"type": "contact",
"hits": 2
}
}
]
} |
|
Requires: "h_AllMotherBrainBarriersCleared"
"h_partiallyBreakMotherBrainGlass"
{
"or": [
{
"and": [
{
"ammo": {
"type": "Super",
"count": 5
}
},
{
"ammo": {
"type": "Missile",
"count": 15
}
},
{
"or": [
"canTrickyUseFrozenEnemies",
"canTrickyJump",
{
"enemyDamage": {
"enemy": "Rinka",
"type": "contact",
"hits": 1
}
}
]
}
]
},
{
"and": [
{
"ammo": {
"type": "Super",
"count": 10
}
},
{
"ammo": {
"type": "Missile",
"count": 2
}
}
]
},
{
"and": [
"h_SupersDoubleDamageMotherBrain",
{
"ammo": {
"type": "Super",
"count": 4
}
},
{
"ammo": {
"type": "Missile",
"count": 8
}
}
]
},
{
"and": [
"h_SupersDoubleDamageMotherBrain",
{
"ammo": {
"type": "Super",
"count": 2
}
},
{
"ammo": {
"type": "Missile",
"count": 18
}
},
{
"or": [
"canTrickyUseFrozenEnemies",
"canTrickyJump",
{
"enemyDamage": {
"enemy": "Rinka",
"type": "contact",
"hits": 1
}
}
]
}
]
}
]
}
{
"or": [
"canTrickyUseFrozenEnemies",
{
"and": [
"canDodgeWhileShooting",
{
"enemyDamage": {
"enemy": "Rinka",
"type": "contact",
"hits": 1
}
}
]
},
{
"enemyDamage": {
"enemy": "Rinka",
"type": "contact",
"hits": 2
}
}
]
} |
From: 3
Mother Brain
To: 4
Mother Brain (Phases 2 and 3)
Requires: "h_AllMotherBrainBarriersCleared"
"f_MotherBrainGlassBroken"
{
"or": [
{
"and": [
{
"ammo": {
"type": "Missile",
"count": 30
}
},
{
"or": [
"canTrickyUseFrozenEnemies",
"canTrickyJump",
{
"enemyDamage": {
"enemy": "Rinka",
"type": "contact",
"hits": 1
}
}
]
}
]
},
{
"and": [
{
"ammo": {
"type": "Super",
"count": 5
}
},
{
"ammo": {
"type": "Missile",
"count": 15
}
}
]
}
]
}
{
"or": [
"canTrickyUseFrozenEnemies",
{
"and": [
"canDodgeWhileShooting",
{
"enemyDamage": {
"enemy": "Rinka",
"type": "contact",
"hits": 1
}
}
]
},
{
"enemyDamage": {
"enemy": "Rinka",
"type": "contact",
"hits": 2
}
}
]
} |
From: 3
Mother Brain
To: 4
Mother Brain (Phases 2 and 3)
Requires: "h_AllMotherBrainBarriersCleared"
"f_MotherBrainGlassBroken"
{
"or": [
{
"ammo": {
"type": "Super",
"count": 10
}
},
{
"and": [
"h_SupersDoubleDamageMotherBrain",
{
"ammo": {
"type": "Super",
"count": 5
}
}
]
}
]
}
{
"or": [
"canTrickyUseFrozenEnemies",
"canDodgeWhileShooting",
{
"enemyDamage": {
"enemy": "Rinka",
"type": "contact",
"hits": 1
}
}
]
} |
|
Requires: "Morph"
{
"or": [
"f_KilledZebetites4",
{
"obstaclesCleared": [
"f_KilledZebetites4"
]
}
]
}
{
"or": [
{
"and": [
"canTrickyJump",
"canMidAirMorph"
]
},
{
"and": [
"canCarefulJump",
"h_useSpringBall"
]
},
{
"and": [
{
"enemyDamage": {
"enemy": "Rinka",
"type": "contact",
"hits": 1
}
},
{
"or": [
"canTrivialMidAirMorph",
"canNeutralDamageBoost",
"h_useSpringBall",
"h_bombThings"
]
}
]
}
]
} |
|
Requires: "f_DefeatedMotherBrain" "f_ZebesSetAblaze" |
From: 4
Mother Brain (Phases 2 and 3)
To: 4
Mother Brain (Phases 2 and 3)


The fight also brings Samus down below 100 energy, but then it fills her up Requires: "h_AllMotherBrainBarriersCleared"
{
"enemyKill": {
"enemies": [
[
"Mother Brain 2"
]
]
}
}Sets flags: f_ZebesSetAblaze, f_DefeatedMotherBrain |
From: 4
Mother Brain (Phases 2 and 3)
To: 4
Mother Brain (Phases 2 and 3)

After entering with R-mode, perform a Crystal Flash to fully refill at some point before the rainbow beam attack. An R-Mode forced stand-up will happen during the rainbow beam attack, slightly reducing the damage taken which allows surviving with one fewer tank than normal. Requires: "h_AllMotherBrainBarriersCleared"
{
"notable": "R-Mode Reduced Tanks"
}
{
"obstaclesCleared": [
"R-Mode"
]
}
"h_CrystalFlash"
{
"enemyKill": {
"enemies": [
[
"Mother Brain 2"
]
]
}
}
{
"or": [
{
"resourceAvailable": [
{
"type": "RegularEnergy",
"count": 299
},
{
"type": "ReserveEnergy",
"count": 300
}
]
},
{
"resourceAvailable": [
{
"type": "RegularEnergy",
"count": 399
},
{
"type": "ReserveEnergy",
"count": 200
}
]
},
{
"resourceAvailable": [
{
"type": "RegularEnergy",
"count": 499
},
{
"type": "ReserveEnergy",
"count": 100
}
]
}
]
}Sets flags: f_ZebesSetAblaze, f_DefeatedMotherBrain |
From: 4
Mother Brain (Phases 2 and 3)
To: 4
Mother Brain (Phases 2 and 3)
After entering with R-mode, perform a Crystal Flash to fully refill at some point before the rainbow beam attack. When Mother Brain is about to do the rainbow beam attack, set up a 'light pillar': this is done by using X-Ray, deselecting X-Ray while continuing to hold dash, then briefly releasing dash for one or two frames before repressing dash. During the rainbow beam attack, release dash while the auto-reserve refill is happening. Requires: "h_AllMotherBrainBarriersCleared"
{
"notable": "R-Mode Light Pillar"
}
{
"obstaclesCleared": [
"R-Mode"
]
}
"h_CrystalFlash"
{
"enemyKill": {
"enemies": [
[
"Mother Brain 2"
]
]
}
}
"Varia"
{
"resourceAvailable": [
{
"type": "Energy",
"count": 301
}
]
}Sets flags: f_ZebesSetAblaze, f_DefeatedMotherBrain |
|
Requires: {
"or": [
"f_KilledZebetites1",
{
"obstaclesCleared": [
"f_KilledZebetites1"
]
}
]
}
{
"or": [
"canCarefulJump",
{
"enemyDamage": {
"enemy": "Rinka",
"type": "contact",
"hits": 1
}
}
]
} |
From: 5
Between First and Second Zebetite
To: 5
Between First and Second Zebetite
Requires: "h_openZebetites"
{
"or": [
{
"and": [
"canDodgeWhileShooting",
"canInsaneJump"
]
},
{
"enemyDamage": {
"enemy": "Rinka",
"type": "contact",
"hits": 1
}
}
]
}
"h_complexToCarryFlashSuit"Clears obstacles: f_KilledZebetites2 Sets flags: f_KilledZebetites2 |
From: 5
Between First and Second Zebetite
To: 6
Between Second and Third Zebetite
Requires: "Morph"
{
"or": [
"f_KilledZebetites2",
{
"obstaclesCleared": [
"f_KilledZebetites2"
]
}
]
}
{
"or": [
{
"and": [
"canTrickyJump",
"canMidAirMorph"
]
},
{
"and": [
"canDodgeWhileShooting",
"h_useSpringBall"
]
},
{
"and": [
{
"enemyDamage": {
"enemy": "Rinka",
"type": "contact",
"hits": 1
}
},
{
"or": [
"canTrivialMidAirMorph",
"canNeutralDamageBoost",
"h_useSpringBall",
"h_bombThings"
]
}
]
}
]
}
{
"enemyDamage": {
"enemy": "Mother Brain 1",
"type": "turret",
"hits": 1
}
} |
From: 6
Between Second and Third Zebetite
To: 5
Between First and Second Zebetite
Requires: "Morph"
{
"or": [
"f_KilledZebetites2",
{
"obstaclesCleared": [
"f_KilledZebetites2"
]
}
]
}
{
"or": [
{
"and": [
"canTrickyJump",
"canMidAirMorph"
]
},
{
"and": [
"canCarefulJump",
"h_useSpringBall"
]
},
{
"and": [
{
"enemyDamage": {
"enemy": "Rinka",
"type": "contact",
"hits": 1
}
},
{
"or": [
"canTrivialMidAirMorph",
"canNeutralDamageBoost",
"h_useSpringBall",
"h_bombThings"
]
}
]
}
]
}
{
"enemyDamage": {
"enemy": "Mother Brain 1",
"type": "turret",
"hits": 1
}
} |
From: 6
Between Second and Third Zebetite
To: 6
Between Second and Third Zebetite
Requires: "h_openZebetites"
{
"or": [
{
"and": [
"canDodgeWhileShooting",
"canTrickyJump"
]
},
{
"enemyDamage": {
"enemy": "Rinka",
"type": "contact",
"hits": 1
}
}
]
}
"h_complexToCarryFlashSuit"Clears obstacles: f_KilledZebetites3 Sets flags: f_KilledZebetites3 |
From: 6
Between Second and Third Zebetite
To: 7
Between Third and Fourth Zebetite
Requires: {
"or": [
"f_KilledZebetites3",
{
"obstaclesCleared": [
"f_KilledZebetites3"
]
}
]
}
{
"or": [
"canDodgeWhileShooting",
{
"and": [
"canCarefulJump",
"ScrewAttack"
]
},
{
"enemyDamage": {
"enemy": "Rinka",
"type": "contact",
"hits": 1
}
}
]
} |
|
Requires: "Morph"
{
"or": [
"f_KilledZebetites4",
{
"obstaclesCleared": [
"f_KilledZebetites4"
]
}
]
}
{
"or": [
{
"and": [
"canTrickyJump",
"canMidAirMorph"
]
},
{
"and": [
"canDodgeWhileShooting",
"h_useSpringBall"
]
},
{
"and": [
{
"enemyDamage": {
"enemy": "Rinka",
"type": "contact",
"hits": 1
}
},
{
"or": [
"canTrivialMidAirMorph",
"canNeutralDamageBoost",
"h_useSpringBall",
"h_bombThings"
]
}
]
}
]
} |
From: 7
Between Third and Fourth Zebetite
To: 6
Between Second and Third Zebetite
Requires: {
"or": [
"f_KilledZebetites3",
{
"obstaclesCleared": [
"f_KilledZebetites3"
]
}
]
}
{
"or": [
"canCarefulJump",
{
"enemyDamage": {
"enemy": "Rinka",
"type": "contact",
"hits": 1
}
}
]
} |
From: 7
Between Third and Fourth Zebetite
To: 7
Between Third and Fourth Zebetite
Requires: "h_openZebetites"
{
"enemyDamage": {
"enemy": "Rinka",
"type": "contact",
"hits": 1
}
}
"h_complexToCarryFlashSuit"Clears obstacles: f_KilledZebetites4 Sets flags: f_KilledZebetites4 |
From: 8
Standing on Top Left of Mother Brain Tank
To: 1
Left Blast Door

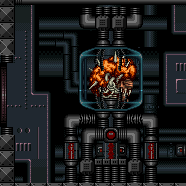
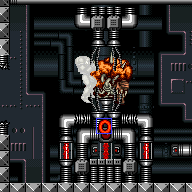
To be able to break the glass and leave out the left side, Samus must be at a specific horizontal X pixel position ($63). Therefore, the Crystal Flash should have been performed at this position; For the moondance, moonfalls must be performed only left-to-right, or Samus will fall out. After 176 moonfalls, Samus will clip down into the tank. Angle down and fire 18 Missiles into Mother Brain to break the tank. If Samus is correctly positioned, she will then fall out and be free to move to the left. If Samus is at position $62 (a pixel to the left of the correct position), it is possible for a Rinka hit to knock back Samus into position $63. Requires: {
"notable": "Moondance Clip"
}
"Wave"
"canTrickyDodgeEnemies"
{
"or": [
"Ice",
"canBeExtremelyPatient"
]
}
"canMoondance"
{
"enemyDamage": {
"enemy": "Rinka",
"type": "contact",
"hits": 1
}
}
{
"ammo": {
"type": "Missile",
"count": 18
}
}Sets flags: f_MotherBrainGlassBroken Dev note: FIXME: Using some Supers in place of Missiles could be possible, but if too many are used it might trigger the fight cutscene. |
From: 8
Standing on Top Left of Mother Brain Tank
To: 3
Mother Brain
Perform a moondance while killing the Rinkas, carefully avoiding being hit by them. After 176 moonfalls, Samus will clip down into the tank. Samus will be unable to turn around and will be invulnerable to Rinka hits. Freeze a Rinka several pixels in front of Samus, to cause Samus to clip horizontally. This will work regardless of whether Samus is facing left or right. When Samus is close enough to the end, quickly turn around back and forth to wiggle out, to avoid taking too much damage from the invisible spikes in the air. Requires: {
"notable": "Moondance Clip"
}
"Wave"
"canTrickyDodgeEnemies"
"canMoondance"
"canWallIceClip"
{
"spikeHits": 1
}
{
"or": [
{
"noBlueSuit": {}
},
{
"spikeHits": 2
}
]
} |
{
"$schema": "../../../schema/m3-room.schema.json",
"id": 238,
"name": "Mother Brain Room",
"area": "Tourian",
"subarea": "Main",
"roomAddress": "0x7DD58",
"roomEnvironments": [
{
"heated": false
}
],
"mapTileMask": [
[
1,
1,
1,
1
]
],
"nodes": [
{
"id": 1,
"name": "Left Blast Door",
"nodeType": "door",
"nodeSubType": "doorway",
"nodeAddress": "0x001aa8c",
"doorOrientation": "left",
"doorEnvironments": [
{
"physics": "air"
}
],
"locks": [
{
"name": "Mother Brain Room Escape Lock (to Escape Room 1)",
"lockType": "gameFlag",
"unlockStrats": [
{
"name": "Base",
"requires": [
"f_DefeatedMotherBrain"
],
"flashSuitChecked": true,
"blueSuitChecked": true
}
]
}
],
"mapTileMask": [
[
2,
1,
1,
1
]
]
},
{
"id": 2,
"name": "Right Door",
"nodeType": "door",
"nodeSubType": "blue",
"nodeAddress": "0x001aa80",
"doorOrientation": "right",
"doorEnvironments": [
{
"physics": "air"
}
],
"mapTileMask": [
[
1,
1,
1,
2
]
]
},
{
"id": 3,
"name": "Mother Brain",
"nodeType": "junction",
"nodeSubType": "junction",
"mapTileMask": [
[
2,
1,
1,
1
]
]
},
{
"id": 4,
"name": "Mother Brain (Phases 2 and 3)",
"nodeType": "junction",
"nodeSubType": "junction",
"mapTileMask": [
[
2,
1,
1,
1
]
]
},
{
"id": 5,
"name": "Between First and Second Zebetite",
"nodeType": "junction",
"nodeSubType": "junction",
"mapTileMask": [
[
1,
1,
2,
1
]
]
},
{
"id": 6,
"name": "Between Second and Third Zebetite",
"nodeType": "junction",
"nodeSubType": "junction",
"mapTileMask": [
[
1,
2,
2,
1
]
]
},
{
"id": 7,
"name": "Between Third and Fourth Zebetite",
"nodeType": "junction",
"nodeSubType": "junction",
"mapTileMask": [
[
1,
2,
1,
1
]
]
},
{
"id": 8,
"name": "Standing on Top Left of Mother Brain Tank",
"nodeType": "junction",
"nodeSubType": "junction",
"mapTileMask": [
[
2,
1,
1,
1
]
]
}
],
"obstacles": [
{
"id": "R-Mode",
"name": "Entered with R-Mode",
"obstacleType": "abstract"
},
{
"id": "f_KilledZebetites1",
"name": "f_KilledZebetites1"
},
{
"id": "f_KilledZebetites2",
"name": "f_KilledZebetites2"
},
{
"id": "f_KilledZebetites3",
"name": "f_KilledZebetites3"
},
{
"id": "f_KilledZebetites4",
"name": "f_KilledZebetites4"
}
],
"enemies": [
{
"id": "e1",
"groupName": "Mother Brain Right Door Rinkas",
"enemyName": "Rinka",
"quantity": 2,
"homeNodes": [
2
],
"note": "Only 3 Rinka Spawners function at a time, so one of these 2 soon stops working."
},
{
"id": "e2",
"groupName": "Zebetite 1 Rinkas",
"enemyName": "Rinka",
"quantity": 2,
"homeNodes": [
2,
5
]
},
{
"id": "e3",
"groupName": "Zebetite 2 Rinkas",
"enemyName": "Rinka",
"quantity": 2,
"homeNodes": [
5,
6
]
},
{
"id": "e4",
"groupName": "Zebetite 3 Rinkas",
"enemyName": "Rinka",
"quantity": 2,
"homeNodes": [
6,
7
]
},
{
"id": "e5",
"groupName": "Zebetite 4 Rinkas",
"enemyName": "Rinka",
"quantity": 2,
"homeNodes": [
7,
3
]
},
{
"id": "e6",
"groupName": "Mother Brain Rinka",
"enemyName": "Rinka",
"quantity": 1,
"homeNodes": [
3
]
},
{
"id": "e7",
"groupName": "Mother Brain 1",
"enemyName": "Mother Brain 1",
"quantity": 1,
"homeNodes": [
3
],
"stopSpawn": [
"f_ZebesSetAblaze"
]
},
{
"id": "e8",
"groupName": "Mother Brain 2",
"enemyName": "Mother Brain 2",
"quantity": 1,
"homeNodes": [
4
],
"stopSpawn": [
"f_ZebesSetAblaze"
]
},
{
"id": "e9",
"groupName": "Mother Brain 3",
"enemyName": "Mother Brain 3",
"quantity": 1,
"homeNodes": [
4
],
"stopSpawn": [
"f_ZebesSetAblaze"
]
}
],
"strats": [
{
"link": [
1,
1
],
"name": "Base (Unlock Door)",
"requires": [],
"unlocksDoors": [
{
"types": [
"ammo"
],
"requires": []
}
],
"flashSuitChecked": true,
"blueSuitChecked": true
},
{
"link": [
1,
1
],
"name": "Base (Come In Normally)",
"entranceCondition": {
"comeInNormally": {}
},
"requires": [],
"flashSuitChecked": true,
"blueSuitChecked": true
},
{
"link": [
1,
1
],
"name": "Base (Come In With Mockball)",
"entranceCondition": {
"comeInWithMockball": {
"adjacentMinTiles": 0,
"remoteAndLandingMinTiles": [
[
0,
0
]
],
"speedBooster": "any"
}
},
"requires": [],
"flashSuitChecked": true,
"blueSuitChecked": true
},
{
"link": [
2,
2
],
"name": "Base (Unlock Door)",
"requires": [],
"unlocksDoors": [
{
"types": [
"ammo"
],
"requires": []
}
],
"flashSuitChecked": true,
"blueSuitChecked": true
},
{
"link": [
2,
2
],
"name": "Base (Come In Normally)",
"entranceCondition": {
"comeInNormally": {}
},
"requires": [],
"flashSuitChecked": true,
"blueSuitChecked": true
},
{
"link": [
2,
2
],
"name": "Base (Come In With Mockball)",
"entranceCondition": {
"comeInWithMockball": {
"adjacentMinTiles": 0,
"remoteAndLandingMinTiles": [
[
0,
0
]
],
"speedBooster": "any"
}
},
"requires": [],
"flashSuitChecked": true,
"blueSuitChecked": true
},
{
"id": 1,
"link": [
1,
1
],
"name": "Leave with Runway",
"requires": [],
"exitCondition": {
"leaveWithRunway": {
"length": 1,
"openEnd": 1
}
},
"flashSuitChecked": true,
"blueSuitChecked": true
},
{
"id": 39,
"link": [
1,
1
],
"name": "Leave With Side Platform",
"requires": [],
"exitCondition": {
"leaveWithSidePlatform": {
"height": 3,
"runway": {
"length": 3,
"openEnd": 0
},
"obstruction": [
1,
0
]
}
},
"flashSuitChecked": true,
"blueSuitChecked": true,
"devNote": [
"Max extra run speed $0.B.",
"This strat is included for completeness, though it apparently doesn't have any applications."
]
},
{
"id": 2,
"link": [
1,
1
],
"name": "G-Mode Setup - Get Hit By Rinka",
"requires": [],
"exitCondition": {
"leaveWithGModeSetup": {}
},
"flashSuitChecked": true,
"blueSuitChecked": true
},
{
"id": 3,
"link": [
1,
1
],
"name": "G-Mode Regain Mobility",
"requires": [
{
"enemyDamage": {
"enemy": "Rinka",
"type": "contact",
"hits": 1
}
}
],
"gModeRegainMobility": {},
"flashSuitChecked": true,
"blueSuitChecked": true
},
{
"id": 40,
"link": [
1,
1
],
"name": "Come in With R-Mode",
"entranceCondition": {
"comeInWithRMode": {}
},
"requires": [],
"clearsObstacles": [
"R-Mode"
],
"flashSuitChecked": true,
"blueSuitChecked": true
},
{
"id": 47,
"link": [
1,
1
],
"name": "R-Mode Crystal Flash Interrupt",
"requires": [
{
"obstaclesCleared": [
"R-Mode"
]
},
"canRModeCrystalFlashInterrupt",
{
"ammo": {
"type": "Missile",
"count": 10
}
},
{
"ammo": {
"type": "Super",
"count": 10
}
}
],
"resetsObstacles": [
"R-Mode"
],
"flashSuitChecked": true,
"blueSuitChecked": true,
"note": [
"On entry, kill or dodge the first Rinkas then Crystal Flash on the ledge next to Mother Brain's tank.",
"Be careful not to get boosted off into the acid after getting the Crystal Flash interrupt."
],
"devNote": "This is not possible in G-mode, because the Power Bomb will kill the Rinka and prevent more from spawning."
},
{
"id": 41,
"link": [
1,
3
],
"name": "Mother Brain Knockback",
"requires": [
{
"notable": "Reverse Mother Brain"
},
"f_MotherBrainGlassBroken",
{
"or": [
{
"noBlueSuit": {}
},
"canBlueSuitSpikeJump"
]
}
],
"flashSuitChecked": true,
"blueSuitChecked": true,
"note": [
"When the glass is broken, touching Mother Brain from the left will instantly transport Samus to the right.",
"This gives Samus i-frames and knockback but does not cause damage."
]
},
{
"id": 6,
"link": [
1,
3
],
"name": "Grapple Teleport",
"entranceCondition": {
"comeInWithGrappleTeleport": {
"blockPositions": [
[
12,
13
]
]
}
},
"requires": [
"h_bypassMotherBrainRoom"
],
"flashSuitChecked": true,
"blueSuitChecked": true
},
{
"id": 42,
"link": [
1,
8
],
"name": "Suitless Crystal Flash Stand-Up With Ice",
"requires": [
{
"obstaclesNotCleared": [
"R-Mode"
]
},
{
"notable": "Moondance Clip"
},
{
"not": "f_MotherBrainGlassBroken"
},
"canTrickyDodgeEnemies",
"canTrickyUseFrozenEnemies",
"canCrystalFlash"
],
"flashSuitChecked": true,
"blueSuitChecked": true,
"note": [
"Freeze all 3 Rinkas at close to the same time, ",
"then quickly jump into the morph nook at the top-left of Mother Brain,",
"and perform a Crystal Flash to stand up.",
"If executed correctly, the Rinkas will not respawn during the Crystal Flash, so Samus will not take damage."
]
},
{
"id": 43,
"link": [
1,
8
],
"name": "G-Mode Morph Crystal Flash Stand-Up With Full Suit Protection",
"entranceCondition": {
"comeInWithGMode": {
"mode": "any",
"morphed": true
}
},
"requires": [
{
"notable": "Moondance Clip"
},
{
"not": "f_MotherBrainGlassBroken"
},
"canTrickyGMode",
"h_artificialMorphMovement",
"h_artificialMorphCrystalFlash",
"h_fullEnemyDamageReduction",
{
"resourceCapacity": [
{
"type": "RegularEnergy",
"count": 299
}
]
},
{
"resourceAtMost": [
{
"type": "Energy",
"count": 800
}
]
}
],
"flashSuitChecked": true,
"blueSuitChecked": true,
"note": [
"Use artificial morph to go inside the nook at the top-left of Mother Brain,",
"then perform a Crystal Flash to stand up.",
"Samus will take rapid damage from the Rinkas during the Crystal Flash but will be able to survive",
"with the help of 75% damage reduction from suit protection."
],
"devNote": [
"We don't bother modeling the obstacle 'A' state here.",
"The strat will end with R-mode if direct G-mode was used.",
"But it doesn't matter, since this strat requires an E-Tank,",
"which means that R-mode (for 'light pillar' during the Mother Brain 2 fight) wouldn't be useful."
]
},
{
"id": 44,
"link": [
1,
8
],
"name": "G-Mode Morph Crystal Flash Interrupt",
"entranceCondition": {
"comeInWithGMode": {
"mode": "direct",
"morphed": true
}
},
"requires": [
{
"notable": "Moondance Clip"
},
{
"not": "f_MotherBrainGlassBroken"
},
"canTrickyGMode",
"h_artificialMorphMovement",
"h_artificialMorphCrystalFlash",
{
"resourceMaxCapacity": [
{
"type": "RegularEnergy",
"count": 299
}
]
},
{
"autoReserveTrigger": {
"minReserveEnergy": 100
}
},
{
"enemyDamage": {
"enemy": "Rinka",
"type": "contact",
"hits": 1
}
},
{
"gainFlashSuit": {}
}
],
"flashSuitChecked": true,
"blueSuitChecked": true,
"note": [
"Enter in R-mode or direct G-mode, and perform a Crystal Flash in the morph nook to the top-left of Mother Brain.",
"During the Crystal Flash, allow the Rinkas to damage Samus down and trigger an auto-reserve refill,",
"which will interrupt the Crystal Flash."
],
"detailNote": [
"The interruption of the Crystal Flash (due to the R-mode forced standup) limits the damage that Samus takes during it;",
"After the reserve trigger, Samus will take just one more Rinka hit."
],
"devNote": [
"Having a small amount of E-Tanks ensures the reserve tanks can be filled by the Crystal Flash before the auto-reserve trigger.",
"FIXME: A larger amount of E-Tanks can also work, but the reserves will not completely fill, so less energy would remain at the end."
]
},
{
"id": 7,
"link": [
2,
2
],
"name": "Come in With R-Mode",
"entranceCondition": {
"comeInWithRMode": {}
},
"requires": [],
"clearsObstacles": [
"R-Mode"
],
"flashSuitChecked": true,
"blueSuitChecked": true
},
{
"id": 8,
"link": [
2,
2
],
"name": "Leave with Runway",
"requires": [
{
"or": [
"canTrickyDodgeEnemies",
{
"and": [
"canUseIFrames",
{
"enemyDamage": {
"enemy": "Rinka",
"type": "contact",
"hits": 1
}
}
]
},
{
"and": [
"Ice",
"canTrickyJump"
]
}
]
}
],
"exitCondition": {
"leaveWithRunway": {
"length": 5,
"openEnd": 0
}
},
"flashSuitChecked": true,
"blueSuitChecked": true,
"note": "Carefully dodge the Rinkas, or take a hit, while carefully avoiding falling off, then use the i-frames to use the runway."
},
{
"id": 10001,
"link": [
2,
2
],
"name": "Leave with Runway, 1 Barrier Cleared",
"requires": [
"i_MotherBrainBarrier1Clear",
{
"or": [
"canTrickyDodgeEnemies",
{
"and": [
"canUseIFrames",
{
"enemyDamage": {
"enemy": "Rinka",
"type": "contact",
"hits": 1
}
}
]
},
{
"and": [
"Ice",
"canTrickyJump"
]
}
]
}
],
"exitCondition": {
"leaveWithRunway": {
"length": 6,
"openEnd": 0
}
},
"flashSuitChecked": true,
"blueSuitChecked": true,
"note": "Carefully dodge the Rinkas, or take a hit, while carefully avoiding falling off, then use the i-frames to use the runway."
},
{
"id": 10002,
"link": [
2,
2
],
"name": "Leave with Runway, 2 Barriers Cleared",
"requires": [
"i_MotherBrainBarrier1Clear",
"i_MotherBrainBarrier2Clear",
{
"or": [
"canTrickyDodgeEnemies",
{
"and": [
"canUseIFrames",
{
"enemyDamage": {
"enemy": "Rinka",
"type": "contact",
"hits": 1
}
}
]
},
{
"and": [
"Ice",
"canTrickyJump"
]
}
]
}
],
"exitCondition": {
"leaveWithRunway": {
"length": 7,
"openEnd": 0
}
},
"flashSuitChecked": true,
"blueSuitChecked": true,
"note": "Carefully dodge the Rinkas, or take a hit, while carefully avoiding falling off, then use the i-frames to use the runway."
},
{
"id": 10003,
"link": [
2,
2
],
"name": "Leave with Runway, 3 Barriers Cleared",
"requires": [
"i_MotherBrainBarrier1Clear",
"i_MotherBrainBarrier2Clear",
"i_MotherBrainBarrier3Clear",
{
"or": [
"canTrickyDodgeEnemies",
{
"and": [
"canUseIFrames",
{
"enemyDamage": {
"enemy": "Rinka",
"type": "contact",
"hits": 1
}
}
]
},
{
"and": [
"Ice",
"canTrickyJump"
]
}
]
}
],
"exitCondition": {
"leaveWithRunway": {
"length": 8,
"openEnd": 0
}
},
"flashSuitChecked": true,
"blueSuitChecked": true,
"note": "Carefully dodge the Rinkas, or take a hit, while carefully avoiding falling off, then use the i-frames to use the runway."
},
{
"id": 10004,
"link": [
2,
2
],
"name": "Leave with Runway, 4 Barriers Cleared",
"requires": [
"h_AllMotherBrainBarriersCleared",
{
"or": [
"canTrickyDodgeEnemies",
{
"and": [
"canUseIFrames",
{
"enemyDamage": {
"enemy": "Rinka",
"type": "contact",
"hits": 1
}
}
]
},
{
"and": [
"Ice",
"canTrickyJump"
]
}
]
}
],
"exitCondition": {
"leaveWithRunway": {
"length": 9,
"openEnd": 1
}
},
"flashSuitChecked": true,
"blueSuitChecked": true,
"note": "Carefully dodge the Rinkas, or take a hit, while carefully avoiding falling off, then use the i-frames to use the runway."
},
{
"id": 38,
"link": [
2,
2
],
"name": "Destroy First Zebetite",
"requires": [
"h_AllMotherBrainBarriersCleared",
"h_openZebetites",
{
"or": [
"canDodgeWhileShooting",
{
"enemyDamage": {
"enemy": "Rinka",
"type": "contact",
"hits": 1
}
}
]
},
"h_complexToCarryFlashSuit"
],
"setsFlags": [
"f_KilledZebetites1"
],
"flashSuitChecked": true,
"blueSuitChecked": true,
"clearsObstacles": [
"f_KilledZebetites1"
]
},
{
"id": 9,
"link": [
2,
2
],
"name": "G-Mode Setup - Get Hit By Rinka or Turret Shot",
"requires": [],
"exitCondition": {
"leaveWithGModeSetup": {}
},
"flashSuitChecked": true,
"blueSuitChecked": true
},
{
"id": 10,
"link": [
2,
2
],
"name": "G-Mode Regain Mobility",
"requires": [
{
"enemyDamage": {
"enemy": "Rinka",
"type": "contact",
"hits": 1
}
}
],
"gModeRegainMobility": {},
"flashSuitChecked": true,
"blueSuitChecked": true
},
{
"id": 48,
"link": [
2,
2
],
"name": "R-Mode Crystal Flash Interrupt",
"requires": [
{
"obstaclesCleared": [
"R-Mode"
]
},
"canRModeCrystalFlashInterrupt",
{
"ammo": {
"type": "Missile",
"count": 10
}
},
{
"ammo": {
"type": "Super",
"count": 10
}
}
],
"resetsObstacles": [
"R-Mode"
],
"flashSuitChecked": true,
"blueSuitChecked": true,
"note": [
"On entry, kill or dodge the first Rinkas then Crystal Flash almost directly above or below a Rinka Spawner.",
"It may help to place the Power Bomb against the door, roll away and roll back to avoid the bomb boost."
],
"devNote": "This is not possible in G-mode, because the Power Bomb will kill the Rinka and prevent more from spawning."
},
{
"id": 30,
"link": [
2,
3
],
"name": "Ice Zebetite Skip",
"requires": [
"h_AllMotherBrainBarriersCleared",
{
"notable": "Ice Zebetite Skip"
},
{
"noBlueSuit": {}
},
"canUseIFrames",
"canTrickyUseFrozenEnemies",
"Morph",
{
"or": [
{
"and": [
"Wave",
{
"enemyDamage": {
"enemy": "Rinka",
"type": "contact",
"hits": 1
}
}
]
},
"canTrickyJump"
]
},
{
"or": [
{
"disableEquipment": "ScrewAttack"
},
"canDownBack"
]
},
{
"or": [
"canTrickyDodgeEnemies",
{
"enemyDamage": {
"enemy": "Mother Brain 1",
"type": "turret",
"hits": 1
}
}
]
},
"h_complexToCarryFlashSuit"
],
"flashSuitChecked": true,
"blueSuitChecked": true,
"note": [
"Glitch through the Mother Brain Zebetites by using a frozen Rinka and i-frames.",
"Freeze the Rinka at its spawn location, then spin jump or down-back onto it after acquiring i-frames to clip inside of the Zebetite, then jump through.",
"I-frames can be acquired from a Rinka hit, a turret shot, or from the Zebetite itself.",
"Note that Zebetites cause i-frames but deal no damage.",
"If Screw Attack is equipped, then a down-back must be used, since spin jumping will cancel i-frames.",
"With Ice+Wave, Samus can freeze the Rinka from above with an angle-down shot;",
"Otherwise Samus must go below, press against the wall, and freeze it with an upward shot.",
"With Ice+Plasma, Samus must be crouched when firing the shot."
],
"devNote": [
"This technically requires f_KilledZebetites1 to not be set, but there is minimal risk of loss of access, because there is no reason to kill any Zebs without being able to kill them all.",
"It is also possible to Ice Zeb skip through the second Zeb with a morph/unmorph/remorph on a frozen Rinka;",
"this is known as a Remorph Zebetite Skip or a Spring Ball Zebetite Skip.",
"Technically this strat involves `canWallIceClip` but we don't include that requirement,",
"since the positioning of the Rinka is freely normalized, which makes the trick easier than this tech would normally imply.",
"FIXME: It is possible to Ice Zeb Skip out, but it is much harder and would only be useful if getting here with canRiskPermanentLossOfAccess."
]
},
{
"id": 11,
"link": [
2,
3
],
"name": "Speed Zebetite Skip (Come in Shinecharging)",
"entranceCondition": {
"comeInShinecharging": {
"length": 4,
"openEnd": 1
}
},
"requires": [
"h_AllMotherBrainBarriersCleared",
{
"notable": "Speed Zebetite Skip"
},
"canUseIFrames",
"Morph",
{
"shinespark": {
"frames": 4,
"excessFrames": 0
}
},
{
"enemyDamage": {
"enemy": "Rinka",
"type": "contact",
"hits": 1
}
}
],
"flashSuitChecked": true,
"blueSuitChecked": true,
"note": [
"Shinespark diagonally into the lower Rinka Spawner while holding down, spamming jump, then pressing forward,",
"in order to glitch through the first Mother Brain Zebetites during Samus' i-frames.",
"The remaining Zebetites will not spawn."
],
"devNote": "This technically requires f_KilledZebetites1 to not be set, but there is no loss of access, because there is no reason to kill any Zebs without being able to kill them all."
},
{
"id": 12,
"link": [
2,
3
],
"name": "Speed Zebetite Skip (Come in Shinecharged)",
"entranceCondition": {
"comeInShinecharged": {}
},
"requires": [
"h_AllMotherBrainBarriersCleared",
{
"shineChargeFrames": 100
},
{
"notable": "Speed Zebetite Skip"
},
"canUseIFrames",
"Morph",
{
"shinespark": {
"frames": 4,
"excessFrames": 0
}
},
{
"enemyDamage": {
"enemy": "Rinka",
"type": "contact",
"hits": 1
}
}
],
"flashSuitChecked": true,
"blueSuitChecked": true,
"note": [
"Shinespark diagonally into the lower Rinka Spawner while holding down, spamming jump, then pressing forward,",
"in order to glitch through the first Mother Brain Zebetites during Samus' i-frames.",
"The remaining Zebetites will not spawn."
],
"devNote": "This technically requires f_KilledZebetites1 to not be set, but there is no loss of access, because there is no reason to kill any Zebs without being able to kill them all."
},
{
"id": 32,
"link": [
2,
3
],
"name": "Speed Zebetite Skip (Use Stored Spark)",
"requires": [
"h_AllMotherBrainBarriersCleared",
{
"notable": "Speed Zebetite Skip"
},
"canUseIFrames",
"h_storedSpark",
"Morph",
{
"shinespark": {
"frames": 4,
"excessFrames": 0
}
},
{
"enemyDamage": {
"enemy": "Rinka",
"type": "contact",
"hits": 1
}
}
],
"flashSuitChecked": true,
"blueSuitChecked": true,
"note": [
"Shinespark diagonally into the lower Rinka Spawner while holding down, spamming jump, then pressing forward,",
"in order to glitch through the first Mother Brain Zebetites during Samus' i-frames.",
"The remaining Zebetites will not spawn."
],
"devNote": "This technically requires f_KilledZebetites1 to not be set, but there is no loss of access, because there is no reason to kill any Zebs without being able to kill them all."
},
{
"id": 49,
"link": [
2,
3
],
"name": "X-Mode Shinecharge, R-Mode Spark Interrupt",
"entranceCondition": {
"comeInWithRMode": {}
},
"requires": [
"h_AllMotherBrainBarriersCleared",
"h_CrystalFlashForReserveEnergy",
{
"or": [
"f_KilledZebetites1",
{
"obstaclesCleared": [
"f_KilledZebetites1"
]
}
]
},
{
"or": [
"f_KilledZebetites2",
{
"obstaclesCleared": [
"f_KilledZebetites2"
]
}
]
},
{
"or": [
"f_KilledZebetites3",
{
"obstaclesCleared": [
"f_KilledZebetites3"
]
}
]
},
{
"or": [
"f_KilledZebetites4",
{
"obstaclesCleared": [
"f_KilledZebetites4"
]
}
]
},
"Morph",
"canTrickyUseFrozenEnemies",
{
"notable": "Mother Brain Pedestal XMode"
},
"canXMode",
{
"spikeHits": 1
},
"h_shinechargeMaxRunway",
{
"autoReserveTrigger": {
"maxReserveEnergy": 95
}
},
"canRModeSparkInterrupt"
],
"flashSuitChecked": true,
"blueSuitChecked": true,
"note": [
"Upon entering, freeze all the Rinkas and Crystal Flash away from turret paths.",
"Bounce off of a frozen Rinka and onto the corner of Mother Brain's pedestal (which acts as a spike) to enter Spike X-Mode.",
"Gain shinecharge, then use any Rinka to interrupt."
]
},
{
"id": 31,
"link": [
2,
5
],
"name": "Base",
"requires": [
"h_AllMotherBrainBarriersCleared",
{
"or": [
"f_KilledZebetites1",
{
"obstaclesCleared": [
"f_KilledZebetites1"
]
}
]
},
{
"or": [
"canDodgeWhileShooting",
{
"and": [
"canCarefulJump",
"ScrewAttack"
]
},
{
"enemyDamage": {
"enemy": "Rinka",
"type": "contact",
"hits": 1
}
}
]
}
],
"flashSuitChecked": true,
"blueSuitChecked": true
},
{
"id": 33,
"link": [
3,
3
],
"name": "Break Mother Brain Glass",
"requires": [
"h_partiallyBreakMotherBrainGlass",
"h_partiallyBreakMotherBrainGlass",
"h_partiallyBreakMotherBrainGlass"
],
"setsFlags": [
"f_MotherBrainGlassBroken"
],
"flashSuitChecked": true,
"blueSuitChecked": true,
"devNote": [
"Requires 18 ammo to fully break the glass, which will remain broken if Samus leaves.",
"Or, it takes 6 ammo to partially break the glass, and then 3000 damage is required to kill Mother Brain 1, but the glass also needs to be broken.",
"The requirements for finishing Mother Brain 1 is in the 3 to 4 link.",
"This doesn't worry about the Rinkas because this strat is only useful when leaving the room afterwards and refilling."
]
},
{
"id": 14,
"link": [
3,
4
],
"name": "Missiles",
"requires": [
"h_AllMotherBrainBarriersCleared",
"h_partiallyBreakMotherBrainGlass",
{
"ammo": {
"type": "Missile",
"count": 30
}
},
{
"or": [
"canTrickyUseFrozenEnemies",
{
"and": [
"canTrickyJump",
"canDodgeWhileShooting",
{
"enemyDamage": {
"enemy": "Rinka",
"type": "contact",
"hits": 1
}
}
]
},
{
"and": [
"canDodgeWhileShooting",
{
"enemyDamage": {
"enemy": "Rinka",
"type": "contact",
"hits": 2
}
}
]
},
{
"enemyDamage": {
"enemy": "Rinka",
"type": "contact",
"hits": 3
}
}
]
}
],
"flashSuitChecked": true,
"blueSuitChecked": true
},
{
"id": 15,
"link": [
3,
4
],
"name": "Supers",
"requires": [
"h_AllMotherBrainBarriersCleared",
"h_partiallyBreakMotherBrainGlass",
{
"or": [
{
"ammo": {
"type": "Super",
"count": 14
}
},
{
"and": [
"h_SupersDoubleDamageMotherBrain",
{
"ammo": {
"type": "Super",
"count": 12
}
}
]
}
]
},
{
"or": [
"canTrickyUseFrozenEnemies",
{
"and": [
"canDodgeWhileShooting",
{
"enemyDamage": {
"enemy": "Rinka",
"type": "contact",
"hits": 1
}
}
]
},
{
"enemyDamage": {
"enemy": "Rinka",
"type": "contact",
"hits": 2
}
}
]
}
],
"flashSuitChecked": true,
"blueSuitChecked": true
},
{
"id": 16,
"link": [
3,
4
],
"name": "Combined Ammo",
"requires": [
"h_AllMotherBrainBarriersCleared",
"h_partiallyBreakMotherBrainGlass",
{
"or": [
{
"and": [
{
"ammo": {
"type": "Super",
"count": 5
}
},
{
"ammo": {
"type": "Missile",
"count": 15
}
},
{
"or": [
"canTrickyUseFrozenEnemies",
"canTrickyJump",
{
"enemyDamage": {
"enemy": "Rinka",
"type": "contact",
"hits": 1
}
}
]
}
]
},
{
"and": [
{
"ammo": {
"type": "Super",
"count": 10
}
},
{
"ammo": {
"type": "Missile",
"count": 2
}
}
]
},
{
"and": [
"h_SupersDoubleDamageMotherBrain",
{
"ammo": {
"type": "Super",
"count": 4
}
},
{
"ammo": {
"type": "Missile",
"count": 8
}
}
]
},
{
"and": [
"h_SupersDoubleDamageMotherBrain",
{
"ammo": {
"type": "Super",
"count": 2
}
},
{
"ammo": {
"type": "Missile",
"count": 18
}
},
{
"or": [
"canTrickyUseFrozenEnemies",
"canTrickyJump",
{
"enemyDamage": {
"enemy": "Rinka",
"type": "contact",
"hits": 1
}
}
]
}
]
}
]
},
{
"or": [
"canTrickyUseFrozenEnemies",
{
"and": [
"canDodgeWhileShooting",
{
"enemyDamage": {
"enemy": "Rinka",
"type": "contact",
"hits": 1
}
}
]
},
{
"enemyDamage": {
"enemy": "Rinka",
"type": "contact",
"hits": 2
}
}
]
}
],
"flashSuitChecked": true,
"blueSuitChecked": true
},
{
"id": 17,
"link": [
3,
4
],
"name": "Glass Already Broken",
"requires": [
"h_AllMotherBrainBarriersCleared",
"f_MotherBrainGlassBroken",
{
"or": [
{
"and": [
{
"ammo": {
"type": "Missile",
"count": 30
}
},
{
"or": [
"canTrickyUseFrozenEnemies",
"canTrickyJump",
{
"enemyDamage": {
"enemy": "Rinka",
"type": "contact",
"hits": 1
}
}
]
}
]
},
{
"and": [
{
"ammo": {
"type": "Super",
"count": 5
}
},
{
"ammo": {
"type": "Missile",
"count": 15
}
}
]
}
]
},
{
"or": [
"canTrickyUseFrozenEnemies",
{
"and": [
"canDodgeWhileShooting",
{
"enemyDamage": {
"enemy": "Rinka",
"type": "contact",
"hits": 1
}
}
]
},
{
"enemyDamage": {
"enemy": "Rinka",
"type": "contact",
"hits": 2
}
}
]
}
],
"flashSuitChecked": true,
"blueSuitChecked": true
},
{
"id": 18,
"link": [
3,
4
],
"name": "Glass Already Broken - Super Kill",
"requires": [
"h_AllMotherBrainBarriersCleared",
"f_MotherBrainGlassBroken",
{
"or": [
{
"ammo": {
"type": "Super",
"count": 10
}
},
{
"and": [
"h_SupersDoubleDamageMotherBrain",
{
"ammo": {
"type": "Super",
"count": 5
}
}
]
}
]
},
{
"or": [
"canTrickyUseFrozenEnemies",
"canDodgeWhileShooting",
{
"enemyDamage": {
"enemy": "Rinka",
"type": "contact",
"hits": 1
}
}
]
}
],
"flashSuitChecked": true,
"blueSuitChecked": true
},
{
"id": 19,
"link": [
3,
7
],
"name": "Base",
"requires": [
"Morph",
{
"or": [
"f_KilledZebetites4",
{
"obstaclesCleared": [
"f_KilledZebetites4"
]
}
]
},
{
"or": [
{
"and": [
"canTrickyJump",
"canMidAirMorph"
]
},
{
"and": [
"canCarefulJump",
"h_useSpringBall"
]
},
{
"and": [
{
"enemyDamage": {
"enemy": "Rinka",
"type": "contact",
"hits": 1
}
},
{
"or": [
"canTrivialMidAirMorph",
"canNeutralDamageBoost",
"h_useSpringBall",
"h_bombThings"
]
}
]
}
]
}
],
"flashSuitChecked": true,
"blueSuitChecked": true
},
{
"id": 20,
"link": [
4,
1
],
"name": "Base",
"requires": [
"f_DefeatedMotherBrain",
"f_ZebesSetAblaze"
],
"flashSuitChecked": true,
"blueSuitChecked": true
},
{
"id": 34,
"link": [
4,
4
],
"name": "Mother Brain 2 and 3 Fight",
"requires": [
"h_AllMotherBrainBarriersCleared",
{
"enemyKill": {
"enemies": [
[
"Mother Brain 2"
]
]
}
}
],
"setsFlags": [
"f_ZebesSetAblaze",
"f_DefeatedMotherBrain"
],
"flashSuitChecked": true,
"blueSuitChecked": true,
"note": "The fight also brings Samus down below 100 energy, but then it fills her up"
},
{
"id": 21,
"link": [
4,
4
],
"name": "R-Mode Reduced Tanks",
"requires": [
"h_AllMotherBrainBarriersCleared",
{
"notable": "R-Mode Reduced Tanks"
},
{
"obstaclesCleared": [
"R-Mode"
]
},
"h_CrystalFlash",
{
"enemyKill": {
"enemies": [
[
"Mother Brain 2"
]
]
}
},
{
"or": [
{
"resourceAvailable": [
{
"type": "RegularEnergy",
"count": 299
},
{
"type": "ReserveEnergy",
"count": 300
}
]
},
{
"resourceAvailable": [
{
"type": "RegularEnergy",
"count": 399
},
{
"type": "ReserveEnergy",
"count": 200
}
]
},
{
"resourceAvailable": [
{
"type": "RegularEnergy",
"count": 499
},
{
"type": "ReserveEnergy",
"count": 100
}
]
}
]
}
],
"setsFlags": [
"f_ZebesSetAblaze",
"f_DefeatedMotherBrain"
],
"flashSuitChecked": true,
"blueSuitChecked": true,
"note": [
"After entering with R-mode, perform a Crystal Flash to fully refill at some point before the rainbow beam attack.",
"An R-Mode forced stand-up will happen during the rainbow beam attack, slightly reducing the damage taken which allows surviving with one fewer tank than normal."
]
},
{
"id": 22,
"link": [
4,
4
],
"name": "R-Mode Light Pillar",
"requires": [
"h_AllMotherBrainBarriersCleared",
{
"notable": "R-Mode Light Pillar"
},
{
"obstaclesCleared": [
"R-Mode"
]
},
"h_CrystalFlash",
{
"enemyKill": {
"enemies": [
[
"Mother Brain 2"
]
]
}
},
"Varia",
{
"resourceAvailable": [
{
"type": "Energy",
"count": 301
}
]
}
],
"setsFlags": [
"f_ZebesSetAblaze",
"f_DefeatedMotherBrain"
],
"flashSuitChecked": true,
"blueSuitChecked": true,
"note": [
"After entering with R-mode, perform a Crystal Flash to fully refill at some point before the rainbow beam attack.",
"When Mother Brain is about to do the rainbow beam attack, set up a 'light pillar':",
"this is done by using X-Ray, deselecting X-Ray while continuing to hold dash, then briefly releasing dash for one or two frames before repressing dash.",
"During the rainbow beam attack, release dash while the auto-reserve refill is happening."
]
},
{
"id": 24,
"link": [
5,
2
],
"name": "Base",
"requires": [
{
"or": [
"f_KilledZebetites1",
{
"obstaclesCleared": [
"f_KilledZebetites1"
]
}
]
},
{
"or": [
"canCarefulJump",
{
"enemyDamage": {
"enemy": "Rinka",
"type": "contact",
"hits": 1
}
}
]
}
],
"flashSuitChecked": true,
"blueSuitChecked": true
},
{
"id": 35,
"link": [
5,
5
],
"name": "Destroy Second Zebetite",
"requires": [
"h_openZebetites",
{
"or": [
{
"and": [
"canDodgeWhileShooting",
"canInsaneJump"
]
},
{
"enemyDamage": {
"enemy": "Rinka",
"type": "contact",
"hits": 1
}
}
]
},
"h_complexToCarryFlashSuit"
],
"setsFlags": [
"f_KilledZebetites2"
],
"flashSuitChecked": true,
"blueSuitChecked": true,
"clearsObstacles": [
"f_KilledZebetites2"
]
},
{
"id": 23,
"link": [
5,
6
],
"name": "Base",
"requires": [
"Morph",
{
"or": [
"f_KilledZebetites2",
{
"obstaclesCleared": [
"f_KilledZebetites2"
]
}
]
},
{
"or": [
{
"and": [
"canTrickyJump",
"canMidAirMorph"
]
},
{
"and": [
"canDodgeWhileShooting",
"h_useSpringBall"
]
},
{
"and": [
{
"enemyDamage": {
"enemy": "Rinka",
"type": "contact",
"hits": 1
}
},
{
"or": [
"canTrivialMidAirMorph",
"canNeutralDamageBoost",
"h_useSpringBall",
"h_bombThings"
]
}
]
}
]
},
{
"enemyDamage": {
"enemy": "Mother Brain 1",
"type": "turret",
"hits": 1
}
}
],
"flashSuitChecked": true,
"blueSuitChecked": true
},
{
"id": 25,
"link": [
6,
5
],
"name": "Base",
"requires": [
"Morph",
{
"or": [
"f_KilledZebetites2",
{
"obstaclesCleared": [
"f_KilledZebetites2"
]
}
]
},
{
"or": [
{
"and": [
"canTrickyJump",
"canMidAirMorph"
]
},
{
"and": [
"canCarefulJump",
"h_useSpringBall"
]
},
{
"and": [
{
"enemyDamage": {
"enemy": "Rinka",
"type": "contact",
"hits": 1
}
},
{
"or": [
"canTrivialMidAirMorph",
"canNeutralDamageBoost",
"h_useSpringBall",
"h_bombThings"
]
}
]
}
]
},
{
"enemyDamage": {
"enemy": "Mother Brain 1",
"type": "turret",
"hits": 1
}
}
],
"flashSuitChecked": true,
"blueSuitChecked": true
},
{
"id": 36,
"link": [
6,
6
],
"name": "Destroy Third Zebetite",
"requires": [
"h_openZebetites",
{
"or": [
{
"and": [
"canDodgeWhileShooting",
"canTrickyJump"
]
},
{
"enemyDamage": {
"enemy": "Rinka",
"type": "contact",
"hits": 1
}
}
]
},
"h_complexToCarryFlashSuit"
],
"setsFlags": [
"f_KilledZebetites3"
],
"flashSuitChecked": true,
"blueSuitChecked": true,
"clearsObstacles": [
"f_KilledZebetites3"
]
},
{
"id": 26,
"link": [
6,
7
],
"name": "Base",
"requires": [
{
"or": [
"f_KilledZebetites3",
{
"obstaclesCleared": [
"f_KilledZebetites3"
]
}
]
},
{
"or": [
"canDodgeWhileShooting",
{
"and": [
"canCarefulJump",
"ScrewAttack"
]
},
{
"enemyDamage": {
"enemy": "Rinka",
"type": "contact",
"hits": 1
}
}
]
}
],
"flashSuitChecked": true,
"blueSuitChecked": true
},
{
"id": 27,
"link": [
7,
3
],
"name": "Base",
"requires": [
"Morph",
{
"or": [
"f_KilledZebetites4",
{
"obstaclesCleared": [
"f_KilledZebetites4"
]
}
]
},
{
"or": [
{
"and": [
"canTrickyJump",
"canMidAirMorph"
]
},
{
"and": [
"canDodgeWhileShooting",
"h_useSpringBall"
]
},
{
"and": [
{
"enemyDamage": {
"enemy": "Rinka",
"type": "contact",
"hits": 1
}
},
{
"or": [
"canTrivialMidAirMorph",
"canNeutralDamageBoost",
"h_useSpringBall",
"h_bombThings"
]
}
]
}
]
}
],
"flashSuitChecked": true,
"blueSuitChecked": true
},
{
"id": 28,
"link": [
7,
6
],
"name": "Base",
"requires": [
{
"or": [
"f_KilledZebetites3",
{
"obstaclesCleared": [
"f_KilledZebetites3"
]
}
]
},
{
"or": [
"canCarefulJump",
{
"enemyDamage": {
"enemy": "Rinka",
"type": "contact",
"hits": 1
}
}
]
}
],
"flashSuitChecked": true,
"blueSuitChecked": true
},
{
"id": 37,
"link": [
7,
7
],
"name": "Destroy Fourth Zebetite",
"requires": [
"h_openZebetites",
{
"enemyDamage": {
"enemy": "Rinka",
"type": "contact",
"hits": 1
}
},
"h_complexToCarryFlashSuit"
],
"setsFlags": [
"f_KilledZebetites4"
],
"flashSuitChecked": true,
"blueSuitChecked": true,
"clearsObstacles": [
"f_KilledZebetites4"
]
},
{
"id": 45,
"link": [
8,
1
],
"name": "Moondance Clip Break Glass",
"requires": [
{
"notable": "Moondance Clip"
},
"Wave",
"canTrickyDodgeEnemies",
{
"or": [
"Ice",
"canBeExtremelyPatient"
]
},
"canMoondance",
{
"enemyDamage": {
"enemy": "Rinka",
"type": "contact",
"hits": 1
}
},
{
"ammo": {
"type": "Missile",
"count": 18
}
}
],
"setsFlags": [
"f_MotherBrainGlassBroken"
],
"flashSuitChecked": true,
"blueSuitChecked": true,
"note": [
"To be able to break the glass and leave out the left side, Samus must be at a specific horizontal X pixel position ($63).",
"Therefore, the Crystal Flash should have been performed at this position;",
"For the moondance, moonfalls must be performed only left-to-right, or Samus will fall out.",
"After 176 moonfalls, Samus will clip down into the tank.",
"Angle down and fire 18 Missiles into Mother Brain to break the tank.",
"If Samus is correctly positioned, she will then fall out and be free to move to the left."
],
"detailNote": [
"If Samus is at position $62 (a pixel to the left of the correct position),",
"it is possible for a Rinka hit to knock back Samus into position $63."
],
"devNote": [
"FIXME: Using some Supers in place of Missiles could be possible,",
"but if too many are used it might trigger the fight cutscene."
]
},
{
"id": 46,
"link": [
8,
3
],
"name": "Moondance Clip Rinka Wall Ice Clip",
"requires": [
{
"notable": "Moondance Clip"
},
"Wave",
"canTrickyDodgeEnemies",
"canMoondance",
"canWallIceClip",
{
"spikeHits": 1
},
{
"or": [
{
"noBlueSuit": {}
},
{
"spikeHits": 2
}
]
}
],
"flashSuitChecked": true,
"blueSuitChecked": true,
"note": [
"Perform a moondance while killing the Rinkas, carefully avoiding being hit by them.",
"After 176 moonfalls, Samus will clip down into the tank.",
"Samus will be unable to turn around and will be invulnerable to Rinka hits.",
"Freeze a Rinka several pixels in front of Samus, to cause Samus to clip horizontally.",
"This will work regardless of whether Samus is facing left or right.",
"When Samus is close enough to the end, quickly turn around back and forth to wiggle out,",
"to avoid taking too much damage from the invisible spikes in the air."
]
}
],
"notables": [
{
"id": 1,
"name": "Speed Zebetite Skip",
"note": [
"Shinespark diagonally into the lower Rinka Spawner while holding down, spamming jump, then pressing forward,",
"in order to glitch through the first Mother Brain Zebetites during Samus' i-frames.",
"The remaining Zebetites will not spawn."
]
},
{
"id": 2,
"name": "R-Mode Reduced Tanks",
"note": [
"After entering with R-mode, perform a Crystal Flash to fully refill at some point before the rainbow beam attack.",
"An R-Mode forced stand-up will happen during the rainbow beam attack, slightly reducing the damage taken which allows surviving with one fewer tank than normal."
]
},
{
"id": 3,
"name": "R-Mode Light Pillar",
"note": [
"After entering with R-mode, perform a Crystal Flash to fully refill at some point before the rainbow beam attack.",
"When Mother Brain is about to do the rainbow beam attack, set up a 'light pillar':",
"this is done by using X-Ray, deselecting X-Ray while continuing to hold dash, then briefly releasing dash for one or two frames before repressing dash.",
"During the rainbow beam attack, release dash while the auto-reserve refill is happening."
]
},
{
"id": 4,
"name": "Ice Zebetite Skip",
"note": [
"Glitch through the Mother Brain Zebetites by using a frozen Rinka and i-frames.",
"Freeze the Rinka at its spawn location, then spinjump or Down-Back onto it after acquiring i-frames to clip inside of the Zebetite, then jump through.",
"Note that Zebetites cause i-frames but deal no damage.",
"With Ice+Wave, the Rinka can be frozen from above. With Ice+Plasma, Samus must crouch while freezing the Rinka from below."
]
},
{
"id": 5,
"name": "Moondance Clip",
"note": [
"Perform a Crystal Flash to stand up in the nook at the top-left of the Mother Brain tank.",
"Then moondance to clip down into the tank.",
"Use frozen Rinkas to clip through Mother Brain to the right.",
"Alternatively, with precise positioning, break the glass from the left side."
]
},
{
"id": 6,
"name": "Reverse Mother Brain",
"note": [
"If the Mother Brain glass has already been broken, it is possible to initiate the fight from the left side.",
"Alternatively, touching Mother Brain from the left will instantly transport Samus to the right without causing damage."
]
},
{
"id": 7,
"name": "Mother Brain Pedestal XMode",
"note": [
"Mother Brain's pedestal can be treated as a spike.",
"Use a frozen Rinka to bounce onto the case and initiate X-Mode."
]
}
],
"nextStratId": 50,
"nextNotableId": 8,
"devNote": [
"FIXME: Add strats for destroying or clipping past Zebetites left-to-right.",
"FIXME: Maybe we can split MB into several events to properly indicate the ammo requirements?",
"FIXME: It is possible to Grapple teleport from Moat to the left of Mother Brain, through currently it has no known use."
]
}