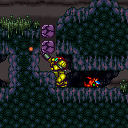
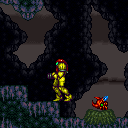
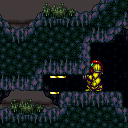
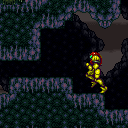
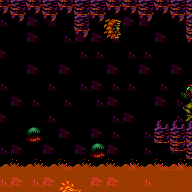
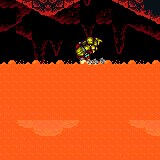
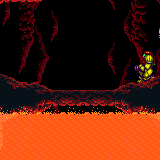
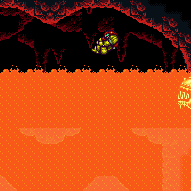
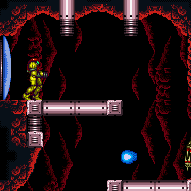
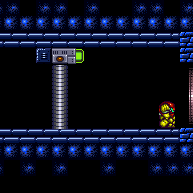
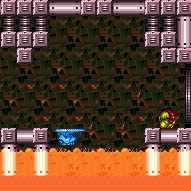
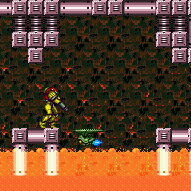
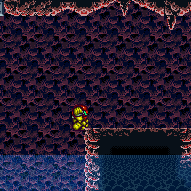
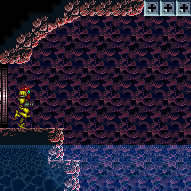
canMockball (Hard)
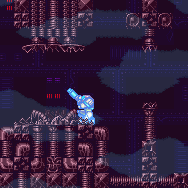
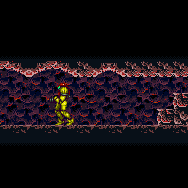
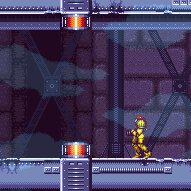
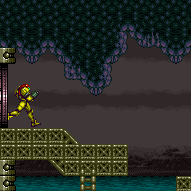
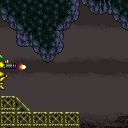
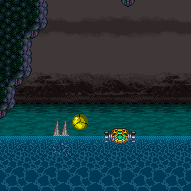
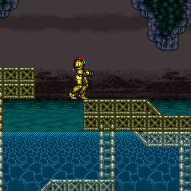
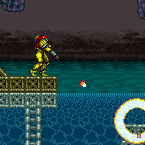
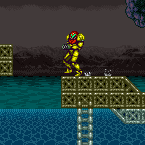
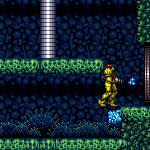
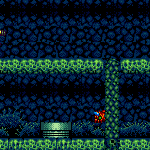
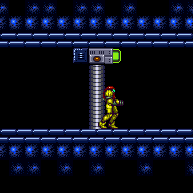
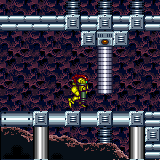
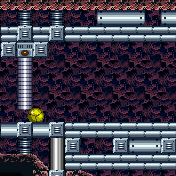
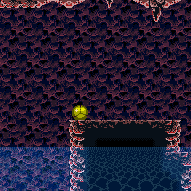
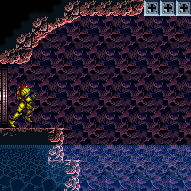
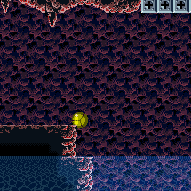
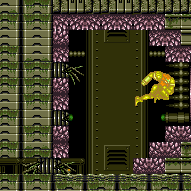
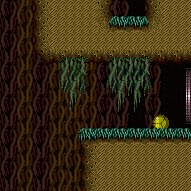
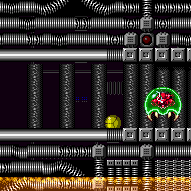
Maintaining running speed while morphed, by holding jump and down (to crouch) during a lateral jump, then morphing as Samus hits the ground while holding jump and transition from holding down to holding forward. Sometimes referred to as a Machball.
Dependencies: canMidAirMorph, canTrivialMidAirMorph, canDash
Strats ()
|
Requires: "f_DefeatedBombTorizo" Exit condition: {
"leaveWithMockball": {
"remoteRunway": {
"length": 9,
"openEnd": 1
},
"landingRunway": {
"length": 1,
"openEnd": 1
}
}
} |
|
Exit condition: {
"leaveWithMockball": {
"remoteRunway": {
"length": 6,
"openEnd": 1
},
"landingRunway": {
"length": 1,
"openEnd": 1
}
}
} |
|
Entrance condition: {
"comeInWithMockball": {
"speedBooster": "any",
"adjacentMinTiles": 0,
"remoteAndLandingMinTiles": [
[
0,
0
]
]
}
}Clears obstacles: B |
|
Exit condition: {
"leaveWithMockball": {
"remoteRunway": {
"length": 35,
"openEnd": 0
},
"landingRunway": {
"length": 3,
"openEnd": 1
}
}
} |
|
Exit condition: {
"leaveWithMockball": {
"remoteRunway": {
"length": 35,
"openEnd": 0
},
"landingRunway": {
"length": 3,
"openEnd": 1
}
}
} |
|
Gain speed using the long runway at the top-right of room, and use Space Jump to carry it across the room into a mockball (or speedball) at the doorway. Requires: "canPreciseSpaceJump"
{
  "obstaclesCleared": [
    "A"
  ]
}
Exit condition: {
"leaveWithMockball": {
"remoteRunway": {
"length": 31,
"openEnd": 1,
"steepUpTiles": 9
},
"landingRunway": {
"length": 3,
"openEnd": 1
},
"maxExtraRunSpeed": "$5.A"
}
} |
|
Exit condition: {
"leaveWithMockball": {
"remoteRunway": {
"length": 8,
"openEnd": 1
},
"landingRunway": {
"length": 3,
"openEnd": 1
}
}
} |
|
Bring temporary blue from the right side door all the way to the missile location using Springball, SpaceJump, or Morph-UnMorphs. Entrance condition: {
"comeInShinecharging": {
"length": 1,
"openEnd": 1
}
}Requires: "canTemporaryBlue"
"canInsaneJump"
{
"or": [
"canLongChainTemporaryBlue",
{
"and": [
"canSpeedball",
"canSpringBallBounce",
"canSlowShortCharge"
]
},
{
"and": [
"canBlueSpaceJump",
"canMockball",
"canSlowShortCharge"
]
}
]
}Clears obstacles: A Dev note: There is 1 unusable tile in this runway. |
|
Exit condition: {
"leaveWithMockball": {
"remoteRunway": {
"length": 5,
"openEnd": 1
},
"landingRunway": {
"length": 3,
"openEnd": 1
}
}
} |
|
Exit condition: {
"leaveWithMockball": {
"remoteRunway": {
"length": 5,
"openEnd": 1
},
"landingRunway": {
"length": 3,
"openEnd": 1
}
}
} |
|
Create a runway by destroying all but the bottom row of shot blocks. Exit condition: {
"leaveWithMockball": {
"remoteRunway": {
"length": 5,
"openEnd": 1
},
"landingRunway": {
"length": 2,
"openEnd": 1
}
}
} |
|
Exit condition: {
"leaveWithMockball": {
"remoteRunway": {
"length": 45,
"openEnd": 1
},
"landingRunway": {
"length": 3,
"openEnd": 1
}
}
} |
|
Exit condition: {
"leaveWithMockball": {
"remoteRunway": {
"length": 45,
"openEnd": 1
},
"landingRunway": {
"length": 3,
"openEnd": 1
}
}
} |
|
Exit condition: {
"leaveWithMockball": {
"remoteRunway": {
"length": 32,
"openEnd": 1,
"gentleUpTiles": 2,
"steepDownTiles": 4
},
"landingRunway": {
"length": 4,
"openEnd": 1
},
"minExtraRunSpeed": "$0.8"
}
} |
|
Requires: "Gravity" "canPreciseSpaceJump" Exit condition: {
"leaveWithMockball": {
"remoteRunway": {
"length": 18,
"openEnd": 1,
"steepUpTiles": 1,
"steepDownTiles": 2
},
"landingRunway": {
"length": 8,
"openEnd": 1,
"steepUpTiles": 1
},
"maxExtraRunSpeed": "$2.F"
}
}Dev note: A bit higher speed can also work but would be more difficult |
|
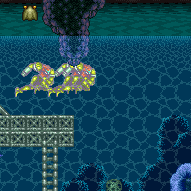
Enter the room while building a shinespark and use it on the lowest part of the ramp to cross the room and reach a raised ledge on the right side wall. From there, use SpaceJump to escape the water. Carry the shinespark to the bottom of the ramp by delaying the first Choot with two Power Beam shots, killing it, or bounceballing through it. The Choot can be shot diagonally from the middle platform, and again by running off that platform and aiming down to float above it. Entrance condition: {
"comeInShinecharging": {
"length": 6,
"openEnd": 1,
"steepDownTiles": 1
}
}Requires: "canShinechargeMovementComplex"
"canCarefulJump"
{
"or": [
{
"and": [
"canShinechargeMovementTricky",
"canTrickyDodgeEnemies"
]
},
{
"and": [
{
"enemyDamage": {
"enemy": "Choot",
"type": "contact",
"hits": 1
}
},
"canNeutralDamageBoost",
"canBounceBall"
]
},
{
"and": [
"canMockball",
{
"or": [
"canPseudoScrew",
"ScrewAttack",
"Plasma",
"Wave",
{
"ammo": {
"type": "Missile",
"count": 1
}
},
{
"ammo": {
"type": "Super",
"count": 1
}
}
]
}
]
}
]
}
{
"shinespark": {
"frames": 125,
"excessFrames": 5
}
}
"canSpaceJumpWaterBounce"
{
"or": [
{
"and": [
"canTrickyJump",
"canDownGrab"
]
},
"canWallJump"
]
}Dev note: There is 1 unusable tile in this runway. |
From: 1
Left Door
To: 2
Right Door
Enter the room while building a shinespark and use it on the lowest part of the ramp to diagonally spark up and out of the water. Unmorphing with the correct timing and positioning for the Shinespark are very precise, and there are no extra frames on the Shinespark timer to work with. Carry the shinespark to the bottom of the ramp either with a bounce ball which takes damage from the Choot, or delay the first Choot with two shots and then use a late mockball. Then shinespark up and use SpaceJump to reach the door. Entrance condition: {
"comeInShinecharging": {
"length": 6,
"openEnd": 1,
"steepDownTiles": 1
}
}Requires: {
"notable": "Shinespark Water Escape With Lower Choot Alive"
}
{
"or": [
{
"and": [
{
"enemyDamage": {
"enemy": "Choot",
"type": "contact",
"hits": 1
}
},
"canNeutralDamageBoost",
"canBounceBall"
]
},
{
"and": [
"canDodgeWhileShooting",
"canMockball"
]
}
]
}
"canShinechargeMovementComplex"
{
"shinespark": {
"frames": 14,
"excessFrames": 5
}
}
"SpaceJump"
"canTrickyJump"Dev note: There is 1 unusable tile in this runway. |
|
Run for 7 tiles for enough speed to Spring Ball from the submerged platform up to the platform enemy, above the water. Turning on Speed Booster midjump, after running 7+ tiles, will automatically hit the run speed requirement. It is not necessary to enter the water to clear the rightmost Choot. Requires: "canTrickyJump"
{
"or": [
{
"disableEquipment": "SpeedBooster"
},
"canTrickyDashJump"
]
}
"canSpeedyJump"
"canSpringBallBounce"
"canMockball"
"SpaceJump" |
|
Using an exact runway size of 7 tiles; use extremely precise, controlled Spring Ball bounces to cross the ocean. 7 tiles of runspeed can freely be achieved by requipping SpeedBooster after reaching the max normal run speed. Mockball down the submerged ramp and begin Spring Ball bouncing either above the water, or under water using the platforms. The final Spring Ball bounce must be on the left edge of the rightmost underwater platform. While the bounce is occuring, setup a mid-air Spring Ball Jump to escape the water and reach the door. Requires: {
"notable": "Speedy Spring Ball Bounce to the Door"
}
"canInsaneJump"
"canSpeedyJump"
"canSpringBallBounce"
"canDoubleSpringBallJumpMidAir"
"canMockball" |
From: 1
Left Door
To: 2
Right Door
Build up run speed and then use controlled Spring Ball bounces to cross the ocean to the far right ledge, and then use Space Jump to reach the door. Mockball down the submerged ramp and begin Spring Ball bouncing under water using the platforms. Disable Spring Ball after the final jump once Samus starts falling again as a way to gain extra speed. Requires: {
"notable": "Spring Ball Bounce to the Door with SpaceJump"
}
"canTrickyJump"
"canSpaceJumpWaterBounce"
"canSpringBallBounce"
"canSpringFling"
"canMockball"
{
"or": [
"canDownGrab",
"canWallJump"
]
} |
|
Requires: "Gravity" "SpaceJump" Exit condition: {
"leaveWithMockball": {
"remoteRunway": {
"length": 17,
"openEnd": 1,
"steepUpTiles": 3,
"steepDownTiles": 2,
"startingSteepDownTiles": 1
},
"landingRunway": {
"length": 5,
"openEnd": 1,
"steepUpTiles": 1
}
}
} |
From: 2
Upper Right Section - Top Right Door
To: 2
Upper Right Section - Top Right Door
Requires: "SpaceJump" Exit condition: {
"leaveWithMockball": {
"remoteRunway": {
"length": 45,
"openEnd": 1
},
"landingRunway": {
"length": 7,
"openEnd": 1,
"steepUpTiles": 1
}
}
} |
From: 3
Upper Right Section - Bottom Right Door
To: 3
Upper Right Section - Bottom Right Door
Exit condition: {
"leaveWithMockball": {
"remoteRunway": {
"length": 45,
"openEnd": 1
},
"landingRunway": {
"length": 11,
"openEnd": 1,
"steepUpTiles": 1
}
}
} |
From: 4
Lower Section - Top Right Door
To: 4
Lower Section - Top Right Door
Requires: "canPreciseSpaceJump" Exit condition: {
"leaveWithMockball": {
"remoteRunway": {
"length": 23,
"openEnd": 1,
"steepUpTiles": 1,
"steepDownTiles": 5
},
"landingRunway": {
"length": 1,
"openEnd": 1
}
}
} |
From: 4
Lower Section - Top Right Door
To: 5
Lower Section - Bottom Right Door
Entrance condition: {
"comeInWithMockball": {
"speedBooster": "any",
"adjacentMinTiles": 0,
"remoteAndLandingMinTiles": [
[
0,
0
]
]
}
} |
From: 5
Lower Section - Bottom Right Door
To: 5
Lower Section - Bottom Right Door
Requires: "SpaceJump" Exit condition: {
"leaveWithMockball": {
"remoteRunway": {
"length": 23,
"openEnd": 1,
"steepUpTiles": 1,
"steepDownTiles": 5
},
"landingRunway": {
"length": 9,
"openEnd": 1,
"steepUpTiles": 2
}
}
} |
|
Get a Zeb to move left into the morph passage, and reach the end of the tunnel before it. Must be quick enough to shoot the shot block first. Requires a mockball on the 4 tile floor before the tunnel. This strat is a one-shot try and failure is a softlock. Requires: {
"notable": "Bug Boost"
}
"Morph"
{
"or": [
"canMockball",
{
"and": [
"canInsaneJump",
"canBeVeryPatient"
]
}
]
}
"h_stationaryNeutralDamageBoost"
{
"enemyDamage": {
"enemy": "Zeb",
"type": "contact",
"hits": 1
}
}Dev note: FIXME: replace canBeVeryPatient with a more appropriate tech to represent the required precision and softlock risk, for doing this dashless. Could use a failure definition? |
From: 6
Middle Right Door (By Zeb Farm)
To: 12
Top Junction
Get a Zeb to move left into the morph passage, and reach the end of the tunnel before it. Shoot the block with Wave or while crouching with Spazer before luring the bug. Quickly lure the bug then use a mockball on the 4 tile floor before the tunnel. This strat is a one-shot try and failure is a softlock. Requires: {
"notable": "Bug Boost with Wave or Spazer"
}
{
"or": [
"Wave",
"Spazer"
]
}
"Morph"
{
"or": [
"canMockball",
"canInsaneJump"
]
}
"h_stationaryNeutralDamageBoost"
{
"enemyDamage": {
"enemy": "Zeb",
"type": "contact",
"hits": 1
}
}Dev note: Could use a failure definition? |
|
Exit condition: {
"leaveWithMockball": {
"remoteRunway": {
"length": 13,
"openEnd": 1
},
"landingRunway": {
"length": 0,
"openEnd": 1
},
"maxExtraRunSpeed": "$1.0"
}
} |
|
Requires: "canTrickyJump" Exit condition: {
"leaveWithMockball": {
"remoteRunway": {
"length": 16,
"openEnd": 1
},
"landingRunway": {
"length": 1,
"openEnd": 1
},
"minExtraRunSpeed": "$1.2",
"maxExtraRunSpeed": "$3.9"
}
}Unlocks doors: {"types":["ammo"],"requires":[]} |
From: 2
Right Door
To: 3
Right Door, In the Water
Entrance condition: {
"comeInWithMockball": {
"speedBooster": "any",
"adjacentMinTiles": 0,
"remoteAndLandingMinTiles": [
[
0,
0
]
]
}
} |
From: 1
Bottom Left Door
To: 1
Bottom Left Door
Exit condition: {
"leaveWithMockball": {
"remoteRunway": {
"length": 28,
"openEnd": 0
},
"landingRunway": {
"length": 3,
"openEnd": 1
}
}
} |
From: 1
Bottom Left Door
To: 1
Bottom Left Door
Requires: {
"obstaclesCleared": [
"C"
]
}Exit condition: {
"leaveWithMockball": {
"remoteRunway": {
"length": 38,
"openEnd": 1
},
"landingRunway": {
"length": 3,
"openEnd": 1
}
}
} |
|
Exit condition: {
"leaveWithMockball": {
"remoteRunway": {
"length": 5,
"openEnd": 1
},
"landingRunway": {
"length": 1,
"openEnd": 1
}
}
} |
|
Exit condition: {
"leaveWithMockball": {
"remoteRunway": {
"length": 5,
"openEnd": 1
},
"landingRunway": {
"length": 1,
"openEnd": 1
}
}
} |
|
Requires: {
"obstaclesCleared": [
"C"
]
}Exit condition: {
"leaveWithMockball": {
"remoteRunway": {
"length": 23,
"openEnd": 0
},
"landingRunway": {
"length": 4,
"openEnd": 1
}
}
} |
|
Unmorph and quickly kill the hoppers on entry. Entrance condition: {
"comeInWithMockball": {
"speedBooster": "any",
"adjacentMinTiles": 0,
"remoteAndLandingMinTiles": [
[
0,
0
]
]
}
}Requires: "canPrepareForNextRoom"
{
"or": [
"Plasma",
"ScrewAttack",
{
"and": [
"h_usePowerBomb",
{
"enemyKill": {
"enemies": [
[
"Sidehopper"
]
],
"explicitWeapons": [
"Missile",
"Super",
"PowerBomb"
]
}
}
]
}
]
} |
|
Tank a hit or use a pause abuse with a reserve refill. Entrance condition: {
"comeInWithMockball": {
"speedBooster": "any",
"adjacentMinTiles": 0,
"remoteAndLandingMinTiles": [
[
0,
0
]
]
}
}Requires: {
"or": [
{
"enemyDamage": {
"enemy": "Sidehopper",
"type": "contact",
"hits": 1
}
},
"h_pauseAbuseMinimalReserveRefill"
]
} |
From: 1
Left Door
To: 1
Left Door
This strat assumes you don't know you're entering the room beforehand. Otherwise, it's possible to kill the first two Sidehoppers without taking damage. It's possible to break the bomb blocks alongside the third Sidehopper without taking an additional hit with a mockball. Requires: {
"or": [
"canMockball",
{
"enemyDamage": {
"enemy": "Sidehopper",
"type": "contact",
"hits": 1
}
}
]
}
{
"enemyKill": {
"enemies": [
[
"Sidehopper",
"Sidehopper"
],
[
"Sidehopper"
]
],
"explicitWeapons": [
"PowerBomb"
]
}
}Clears obstacles: A, C Dev note: FIXME: There are missing Power Bomb strats that enter the room with a mockball. |
|
Roll into the room, fall off the step and roll into the corner. Roll to the right immediately as the floor hopper is going to take its second jump to get it off camera. Once it is off camera, stop and wait for the next hopper to jump towards Samus, then roll under it as it jumps again. Entrance condition: {
"comeInWithMockball": {
"speedBooster": "any",
"adjacentMinTiles": 0,
"remoteAndLandingMinTiles": [
[
0,
0
]
]
}
}Requires: "canPrepareForNextRoom" "canTrickyDodgeEnemies" "canCameraManip" "h_bombThings" Clears obstacles: A |
|
Exit condition: {
"leaveWithMockball": {
"remoteRunway": {
"length": 26,
"openEnd": 1
},
"landingRunway": {
"length": 5,
"openEnd": 1
}
}
} |
|
Exit condition: {
"leaveWithMockball": {
"remoteRunway": {
"length": 17,
"openEnd": 1
},
"landingRunway": {
"length": 7,
"openEnd": 1
}
}
}Dev note: It's also possible to do a neutral bounce into an uncontrolled spring ball bounce through the door; but it's unclear if it has any application. |
|
Exit condition: {
"leaveWithMockball": {
"remoteRunway": {
"length": 5,
"openEnd": 1
},
"landingRunway": {
"length": 1,
"openEnd": 1
}
}
} |
|
The only way the Wavers will get to the door is if the right crumble blocks are all broken. This assumes that Samus comes from the left with Speed, a mockball, or a crouch gate clip. After the crumbles are broken, shoot the ceiling block and wait by the door for the Waver to come. Note that if Samus takes more than 35 seconds after entering the room, before shooting the ceiling, the Waver will not come down. Requires: {
"obstaclesNotCleared": [
"A"
]
}
{
"or": [
"h_speedDash",
"canMockball",
{
"and": [
"canDash",
"canCrouchGateClip",
{
"or": [
"canXRayTurnaround",
"canMoonwalk"
]
}
]
},
{
"and": [
{
"notable": "Crouch Gate Clip Damage Boost"
},
"canHorizontalDamageBoost",
"canCrouchGateClip",
{
"enemyDamage": {
"enemy": "Zeb",
"type": "contact",
"hits": 2
}
},
{
"or": [
"canXRayWaitForIFrames",
{
"haveBlueSuit": {}
}
]
}
]
}
]
}Exit condition: {
"leaveWithGModeSetup": {}
}Unlocks doors: {"types":["ammo"],"requires":[]} |
|
Stand to the right of the Zeb farm and freeze the Zeb as it starts moving horizontally. get onto the platform above the Zeb and wait for the Zeb to thaw and make it close to the right edge of the screen. Use a mockball to get to the right side of the room, ending it as quickly as possible at the end to prevent the Zeb going off screen. Freeze the Zeb adjacent to the right runway in order to extend it by a short distance. Requires: {
"obstaclesNotCleared": [
"A"
]
}
"h_trickyFrozenEnemyRunway"
"canMockball"
"canTrickyJump"Exit condition: {
"leaveWithRunway": {
"length": 3,
"openEnd": 0
}
}Unlocks doors: {"types":["missiles","super"],"requires":[]}
{
"types": [
"powerbomb"
],
"requires": [
{
"or": [
"canWallJump",
"HiJump",
"SpaceJump",
"canIBJ",
"canSpringBallJumpMidAir",
"h_crouchJumpDownGrab"
]
},
{
"resetRoom": {
"nodes": [
1
]
}
}
]
} |
|
Requires: {
"notable": "Mockball"
}
{
"obstaclesNotCleared": [
"A"
]
}
"canMockball"Clears obstacles: A |
From: 2
Right Door
To: 2
Right Door
Jump into the room and mockball to get under the first shutter, to break the crumble blocks to the left. Stop before passing under the second shutter. Breaking these crumble blocks is the only way for the Wavers to reach the door. After the crumbles are broken, shoot the ceiling block and wait by the door for the Waver to come. Entrance condition: {
"comeInJumping": {
"speedBooster": "any",
"minTiles": 1
}
}Requires: "can4HighMidAirMorph" "canMockball" "canComplexGMode" Exit condition: {
"leaveWithGModeSetup": {}
}Unlocks doors: {"types":["ammo"],"requires":[]} |
|
Exit condition: {
"leaveWithMockball": {
"remoteRunway": {
"length": 7,
"openEnd": 1
},
"landingRunway": {
"length": 2,
"openEnd": 1
}
}
} |
|
Requires: "canTrickyJump" Exit condition: {
"leaveWithMockball": {
"remoteRunway": {
"length": 20,
"openEnd": 1
},
"landingRunway": {
"length": 5,
"openEnd": 1
}
}
}Collects items: 5 Dev note: The item could be avoided by using a shorter landing runway and enough speed |
|
Requires: {
"obstaclesCleared": [
"A"
]
}Exit condition: {
"leaveWithMockball": {
"remoteRunway": {
"length": 5,
"openEnd": 1
},
"landingRunway": {
"length": 3,
"openEnd": 1
}
}
} |
|
Requires: {
"obstaclesCleared": [
"A"
]
}Exit condition: {
"leaveWithMockball": {
"remoteRunway": {
"length": 5,
"openEnd": 1
},
"landingRunway": {
"length": 3,
"openEnd": 1
}
}
} |
|
This uses the runway at the top-right of the room, requiring an extremely precise jump in order to thread the needle between the platforms and reach the left door. If obtaining blue speed, a multi-stutter should be used with a 2-tap shortcharge, with an early second tap and a last-frame jump, in order to gain enough momentum for the jump; bonk the ceiling, and wait to aim down until passing between the platforms. Requires: "canInsaneJump" "canBeVeryPatient" Exit condition: {
"leaveWithMockball": {
"remoteRunway": {
"length": 17,
"openEnd": 1
},
"landingRunway": {
"length": 0,
"openEnd": 1
},
"minExtraRunSpeed": "$3.2",
"maxExtraRunSpeed": "$3.3"
}
}Dev note: TODO: The canBeVeryPatient requirement is for difficulty placement; it could be replaced with a more specific tech if one becomes applicable. |
From: 15
Right Etecoon Shaft - Upper Tunnel Entrance
To: 9
Right Etecoon Shaft - Top Left Door
Requires: "canMockball" |
From: 1
Top Left Door
To: 3
Bottom Right Door
Exit condition: {
"leaveWithMockball": {
"remoteRunway": {
"length": 25,
"openEnd": 1
},
"landingRunway": {
"length": 4,
"openEnd": 1
}
}
}Unlocks doors: {"types":["ammo"],"requires":[]} |
|
Exit condition: {
"leaveWithMockball": {
"remoteRunway": {
"length": 17,
"openEnd": 1
},
"landingRunway": {
"length": 4,
"openEnd": 1
}
}
} |
|
Exit condition: {
"leaveWithMockball": {
"remoteRunway": {
"length": 45,
"openEnd": 1
},
"landingRunway": {
"length": 1,
"openEnd": 1
}
}
} |
|
Exit condition: {
"leaveWithMockball": {
"remoteRunway": {
"length": 45,
"openEnd": 1
},
"landingRunway": {
"length": 3,
"openEnd": 1
},
"minExtraRunSpeed": "$6.2"
}
} |
|
Exit condition: {
"leaveWithMockball": {
"remoteRunway": {
"length": 16,
"openEnd": 0
},
"landingRunway": {
"length": 3,
"openEnd": 1
}
}
} |
|
Exit condition: {
"leaveWithMockball": {
"remoteRunway": {
"length": 31,
"openEnd": 0
},
"landingRunway": {
"length": 4,
"openEnd": 1
}
}
} |
From: 5
Left Side - Door Blocked by Crumble Blocks
To: 13
Central Junction
Entrance condition: {
"comeInWithMockball": {
"speedBooster": "any",
"adjacentMinTiles": 0,
"remoteAndLandingMinTiles": [
[
0,
0
]
]
}
} |
From: 6
Right Side - Top Middle Door
To: 6
Right Side - Top Middle Door
Exit condition: {
"leaveWithMockball": {
"remoteRunway": {
"length": 17,
"openEnd": 0
},
"landingRunway": {
"length": 1,
"openEnd": 1
}
}
} |
From: 13
Central Junction
To: 1
Left Side - Top Door
Shinecharge towards the top right door. Then turn around for a fast mockball after jumping the bug pipe. Requires: {
"notable": "Fast Mockball Leave With Spark"
}
{
  "obstaclesCleared": [
    "A"
  ]
}
{
"canShineCharge": {
"usedTiles": 17,
"openEnd": 0
}
}
"canShinechargeMovementComplex"
"canMockball"
{
"shinespark": {
"frames": 10,
"excessFrames": 0
}
}Exit condition: {
"leaveWithSpark": {}
}Unlocks doors: {"types":["ammo"],"requires":[]} |
|
Requires: {
"obstaclesCleared": [
"A"
]
}Exit condition: {
"leaveWithMockball": {
"remoteRunway": {
"length": 16,
"openEnd": 0
},
"landingRunway": {
"length": 20,
"openEnd": 1
},
"minExtraRunSpeed": "$2.2"
}
}Unlocks doors: {"types":["ammo"],"requires":[]} |
From: 13
Central Junction
To: 1
Left Side - Top Door
Requires: {
"obstaclesCleared": [
"A"
]
}
{
"doorUnlockedAtNode": 2
}Exit condition: {
"leaveWithMockball": {
"remoteRunway": {
"length": 17,
"openEnd": 0
},
"landingRunway": {
"length": 20,
"openEnd": 1
},
"minExtraRunSpeed": "$2.2"
}
}Unlocks doors: {"types":["ammo"],"requires":[]}
{"nodeId":2,"types":["ammo"],"requires":[]} |
|
Requires: {
"obstaclesCleared": [
"A"
]
}
{
"obstaclesNotCleared": [
"B"
]
}Exit condition: {
"leaveWithMockball": {
"remoteRunway": {
"length": 16,
"openEnd": 1
},
"landingRunway": {
"length": 3,
"openEnd": 1
},
"minExtraRunSpeed": "$1.2"
}
} |
|
Entrance condition: {
"comeInWithMockball": {
"speedBooster": "any",
"adjacentMinTiles": 0,
"remoteAndLandingMinTiles": [
[
0,
0
]
]
}
}Requires: {
"enemyDamage": {
"enemy": "Sm. Sidehopper",
"type": "contact",
"hits": 1
}
} |
|
Exit condition: {
"leaveWithMockball": {
"remoteRunway": {
"length": 20,
"openEnd": 1
},
"landingRunway": {
"length": 10,
"openEnd": 1
},
"minExtraRunSpeed": "$1.6"
}
} |
|
Build up to full run speed and speedball towards the left door. With a little luck, Samus will accelerate through the slope tiles and pass under the door. Entrance condition: {
"comeInGettingBlueSpeed": {
"length": 20,
"openEnd": 0,
"minExtraRunSpeed": "$7.0"
}
}Requires: {
"notable": "Roll Under Door"
}
"canSpeedball"Exit condition: {
"leaveWithMockball": {
"remoteRunway": {
"length": 45,
"openEnd": 1
},
"landingRunway": {
"length": 7,
"openEnd": 1
},
"minExtraRunSpeed": "$7.0"
}
}Bypasses door shell: true |
|
Requires: "Gravity" Exit condition: {
"leaveWithMockball": {
"remoteRunway": {
"length": 45,
"openEnd": 1
},
"landingRunway": {
"length": 2,
"openEnd": 1
}
}
} |
|
Requires: {
"obstaclesCleared": [
"B"
]
}
{
"or": [
{
"obstaclesCleared": [
"A"
]
},
"canTrickyJump"
]
}
"SpaceJump"Exit condition: {
"leaveWithMockball": {
"remoteRunway": {
"length": 11,
"openEnd": 1
},
"landingRunway": {
"length": 4,
"openEnd": 1
}
}
} |
|
Exit condition: {
"leaveWithMockball": {
"remoteRunway": {
"length": 5,
"openEnd": 2
},
"landingRunway": {
"length": 3,
"openEnd": 1
}
}
} |
|
Exit condition: {
"leaveWithMockball": {
"remoteRunway": {
"length": 5,
"openEnd": 2
},
"landingRunway": {
"length": 4,
"openEnd": 1
}
}
} |
|
Exit condition: {
"leaveWithMockball": {
"remoteRunway": {
"length": 8,
"openEnd": 1
},
"landingRunway": {
"length": 3,
"openEnd": 1
}
}
} |
|
Exit condition: {
"leaveWithMockball": {
"remoteRunway": {
"length": 5,
"openEnd": 1
},
"landingRunway": {
"length": 1,
"openEnd": 1
}
}
} |
|
Requires: "SpaceJump" "canTrickyJump" Exit condition: {
"leaveWithMockball": {
"remoteRunway": {
"length": 8,
"openEnd": 1
},
"landingRunway": {
"length": 3,
"openEnd": 1
}
}
} |
From: 2
Right Door
To: 2
Right Door
Space Jump all the way across the room from the left platform. Requires: "SpaceJump" "canTrickyJump" Exit condition: {
"leaveWithMockball": {
"remoteRunway": {
"length": 5,
"openEnd": 1
},
"landingRunway": {
"length": 5,
"openEnd": 1
}
}
}Dev note: Another runway tile could be added if the door at node 1 is unlocked |
|
Requires: "Gravity" Exit condition: {
"leaveWithMockball": {
"remoteRunway": {
"length": 5,
"openEnd": 1
},
"landingRunway": {
"length": 1,
"openEnd": 1
}
}
} |
|
Requires: "SpaceJump" Exit condition: {
"leaveWithMockball": {
"remoteRunway": {
"length": 4,
"openEnd": 2
},
"landingRunway": {
"length": 1,
"openEnd": 1
}
}
} |
|
Requires: "SpaceJump" Exit condition: {
"leaveWithMockball": {
"remoteRunway": {
"length": 4,
"openEnd": 2
},
"landingRunway": {
"length": 1,
"openEnd": 1
}
}
} |
|
Requires: {
"obstaclesCleared": [
"A"
]
}Exit condition: {
"leaveWithMockball": {
"remoteRunway": {
"length": 45,
"openEnd": 1
},
"landingRunway": {
"length": 3,
"openEnd": 1
}
}
} |
|
Requires: {
"obstaclesCleared": [
"A"
]
}Exit condition: {
"leaveWithMockball": {
"remoteRunway": {
"length": 45,
"openEnd": 1
},
"landingRunway": {
"length": 4,
"openEnd": 1
}
}
}Dev note: FIXME: This only needs Mini-Kraid to be defeated in order to use a shorter runway. |
From: 1
Left Door
To: 3
Bottom Right Door
Requires: {
"doorUnlockedAtNode": 1
}
"SpaceJump"
"canTrickyJump"Exit condition: {
"leaveWithMockball": {
"remoteRunway": {
"length": 5,
"openEnd": 1
},
"landingRunway": {
"length": 3,
"openEnd": 1
}
}
}Unlocks doors: {"types":["ammo"],"requires":[]} |
|
Requires: {
"or": [
"f_DefeatedKraid",
{
"obstaclesCleared": [
"f_DefeatedKraid"
]
}
]
}Exit condition: {
"leaveWithMockball": {
"remoteRunway": {
"length": 18,
"openEnd": 1
},
"landingRunway": {
"length": 4,
"openEnd": 1
}
}
} |
|
Requires: {
"or": [
"f_DefeatedKraid",
{
"obstaclesCleared": [
"f_DefeatedKraid"
]
}
]
}Exit condition: {
"leaveWithMockball": {
"remoteRunway": {
"length": 18,
"openEnd": 1
},
"landingRunway": {
"length": 4,
"openEnd": 1
}
}
} |
|
Requires: {
"obstaclesCleared": [
"A"
]
}Exit condition: {
"leaveWithMockball": {
"remoteRunway": {
"length": 6,
"openEnd": 1
},
"landingRunway": {
"length": 1,
"openEnd": 1
}
}
} |
|
Exit condition: {
"leaveWithMockball": {
"remoteRunway": {
"length": 14,
"openEnd": 0
},
"landingRunway": {
"length": 1,
"openEnd": 1
}
}
} |
|
Use Spring Ball as a movement item to reach the Kraid Mouth ledge by jumping from the elevator runway, or by jumping from below. Requires: {
"or": [
"canSpringBallBombJump",
"canSpringBallJumpMidAir",
{
"and": [
"canMockball",
"h_useSpringBall"
]
}
]
}Dev note: By reaching 4, the super wall has been broken enough to fit in morph. |
|
Use the full runway of the top-right door to jump to the ledge below the Cacatac and mockball on it. Either full jump from the left side of this platform, or do a small hop followed by a big jump to cross the gap. Disabling Springball once past the Grapple Blocks makes this much easier. Requires: "canCarefulJump"
"canSpringBallBounce"
"canMockball"
{
"or": [
{
"doorUnlockedAtNode": 7
},
"canTrickyJump"
]
} |
|
Entrance condition: {
"comeInRunning": {
"speedBooster": "any",
"minTiles": 3
}
}Requires: "canCarefulJump"
"canMockball"
{
"heatFrames": 180
} |
|
Requires: "canMockball"
{
"heatFrames": 135
} |
|
Requires: {
"heatFrames": 260
}Exit condition: {
"leaveWithMockball": {
"remoteRunway": {
"length": 22,
"openEnd": 0,
"gentleUpTiles": 3,
"gentleDownTiles": 3
},
"landingRunway": {
"length": 1,
"openEnd": 1
}
}
} |
|
Requires: "Morph"
{
"heatFrames": 160
}
{
"or": [
"canMockball",
{
"heatFrames": 45
}
]
} |
|
Pause immediately on room entry, and bounce just before Samus would roll off the runway. Unequip Spring Ball, then pause again as soon as possible and re-equip Spring Ball. In the case of entering with minimal extra run speed ($1.7): The bounce should be done on the last possible frame; otherwise the timing for the first pause is frame-perfect (with a 2-frame window for the second pause). With a first-frame pause and last-frame bounce, the second pause has a 4-frame window. With a second-frame pause and last-frame bounce, the second pause has a 3-frame window. With a third-frame pause and last-frame bounce, the second pause is frame-perfect. Entrance condition: {
"comeInWithMockball": {
"speedBooster": "yes",
"remoteAndLandingMinTiles": [
[
4,
0
]
]
}
}Requires: "canSpringBallBounce"
"canSpringFling"
"canInsaneJump"
"canBeVeryPatient"
{
"heatFrames": 145
} |
|
Entrance condition: {
"comeInWithMockball": {
"speedBooster": "yes",
"remoteAndLandingMinTiles": [
[
5,
0
]
]
}
}Requires: "canSpringBallBounce"
"canSpringFling"
{
"heatFrames": 150
} |
|
Entrance condition: {
"comeInWithMockball": {
"speedBooster": "any",
"remoteAndLandingMinTiles": [
[
6.4375,
0
]
]
}
}Requires: "canSpringBallBounce"
"canSpringFling"
{
"heatFrames": 140
} |
|
Requires: {
"obstaclesCleared": [
"A"
]
}
"h_heatedRemoteRunwaySpaceJump"
{
"heatFrames": 215
}Exit condition: {
"leaveWithMockball": {
"remoteRunway": {
"length": 12,
"openEnd": 1
},
"landingRunway": {
"length": 6,
"openEnd": 1
},
"minExtraRunSpeed": "$2.0"
}
}Unlocks doors: {"types":["super"],"requires":[]}
{"types":["missiles","powerbomb"],"requires":["never"]} |
|
Requires: "h_heatedRemoteRunwaySpaceJump"
{
"heatFrames": 185
}Exit condition: {
"leaveWithMockball": {
"remoteRunway": {
"length": 11,
"openEnd": 1
},
"landingRunway": {
"length": 6,
"openEnd": 1
},
"minExtraRunSpeed": "$2.0"
}
}Unlocks doors: {"types":["super"],"requires":[]}
{"types":["missiles","powerbomb"],"requires":["never"]} |
|
Fire a shot on the way up to clear the shot block. Perform a mockball but unmorph after exiting the Morph hole and Kill the Geruta while falling, if possible. Fire a shot to open the door, then jump forward and Shinespark out. Entrance condition: {
"comeInShinecharging": {
"length": 3,
"openEnd": 0
}
}Requires: "canShinechargeMovementTricky"
"canMockball"
{
"or": [
{
"enemyKill": {
"enemies": [
[
"Geruta"
]
],
"explicitWeapons": [
"Missile",
"Super",
"Wave",
"Spazer",
"Plasma"
]
}
},
{
"enemyDamage": {
"enemy": "Geruta",
"type": "contact",
"hits": 1
}
}
]
}
{
"heatFrames": 200
}
{
"shinespark": {
"frames": 16,
"excessFrames": 0
}
}Exit condition: {
"leaveWithSpark": {}
}Unlocks doors: {"types":["super"],"requires":[]}
{"types":["missiles","powerbomb"],"requires":["never"]} |
|
Requires: "Morph"
{
"heatFrames": 225
}
{
"or": [
{
"and": [
"canDash",
{
"or": [
{
"heatFrames": 10
},
"canMockball",
{
  "obstaclesCleared": [
    "A"
  ]
}
]
}
]
},
{
"heatFrames": 15
}
]
}Clears obstacles: A Unlocks doors: {"types":["powerbomb"],"requires":[{"heatFrames":60}]} |
From: 2
Middle Left Door
To: 5
Middle Junction (Ledge Right of Morph Tunnel)
Requires: "Morph"
{
"heatFrames": 165
}
{
"or": [
{
"and": [
"canDash",
{
"or": [
{
"heatFrames": 10
},
"canMockball",
{
"obstaclesCleared": [
"A"
]
}
]
}
]
},
{
"heatFrames": 25
}
]
}Clears obstacles: A |
|
Requires: {
"heatFrames": 250
}Exit condition: {
"leaveWithMockball": {
"remoteRunway": {
"length": 13,
"openEnd": 1
},
"landingRunway": {
"length": 1,
"openEnd": 1
}
}
} |
From: 1
Right Door
To: 1
Right Door
Very quickly cross the room, collecting both items without falling into the lava. A Power Bomb in the middle of the room sets up the Sova drops and adds lag which makes the block item easier to collect with a Flatley jump. Farming the left sova and middle dragon increases the chances of getting enough health drops, but it may still not be possible with poor drop luck. Pause abuse can be useful for reaching the right side drops if the left side's luck was bad. Entrance condition: {
"comeInRunning": {
"speedBooster": "any",
"minTiles": 2
}
}Requires: "canDash"
{
"or": [
"Wave",
"Plasma",
"Spazer",
"canBeVeryPatient"
]
}
{
"enemyKill": {
"enemies": [
[
"Sova",
"Sova",
"Sova",
"Dragon",
"Dragon"
]
],
"explicitWeapons": [
"PowerBomb"
]
}
}
"canMockball"
"canPreciseWallJump"
"canInsaneJump"
"canPauseAbuse"
"canFarmWhileShooting"
"canBePatient"
{
"resourceMissingAtMost": [
{
"type": "Missile",
"count": 0
},
{
"type": "Super",
"count": 0
}
]
}
{
"heatFrames": 392
}
{
"resourceAtMost": [
{
"type": "RegularEnergy",
"count": 1
}
]
}Collects items: 2, 3 Dev note: Not notable because it is safer to collect the items in separate trips. The first OR block is for farming the left sova for more consistency, or resetting to retry the strat multiple times. canBePatient indicates a chance of failure even if everything is performed correctly. |
|
Requires: "canTrickyJump"
{
"or": [
"h_heatProof",
"h_heatedRemoteRunwaySpaceJump",
"canInsaneJump"
]
}
{
"heatFrames": 320
}Exit condition: {
"leaveWithMockball": {
"remoteRunway": {
"length": 5,
"openEnd": 2
},
"landingRunway": {
"length": 4,
"openEnd": 1
},
"minExtraRunSpeed": "$1.B"
}
} |
|
Entrance condition: {
"comeInNormally": {}
}Requires: "Gravity"
"canTrickyJump"
"canMockball"
{
"enemyDamage": {
"enemy": "Dragon",
"type": "contact",
"hits": 1
}
}
{
"heatFrames": 480
}
{
"lavaFrames": 240
} |
|
Requires: "h_heatedRemoteRunwaySpaceJump"
{
"heatFrames": 540
}
{
"or": [
"canTrickyDodgeEnemies",
{
"and": [
{
"heatFrames": 100
},
{
"enemyKill": {
"enemies": [
[
"Dragon"
],
[
"Dragon"
]
],
"excludedWeapons": [
"Bombs"
]
}
}
]
}
]
}Exit condition: {
"leaveWithMockball": {
"remoteRunway": {
"length": 5,
"openEnd": 2
},
"landingRunway": {
"length": 4,
"openEnd": 1
},
"minExtraRunSpeed": "$1.A"
}
}Dev note: FIXME: a 1 -> 2 version of this could be added, to save heat frames. |
From: 3
Left Shaft - Middle Right Door
To: 3
Left Shaft - Middle Right Door
Requires: {
"heatFrames": 140
}Exit condition: {
"leaveWithMockball": {
"remoteRunway": {
"length": 7,
"openEnd": 1
},
"landingRunway": {
"length": 4,
"openEnd": 1
}
}
} |
From: 4
Left Shaft - Top Right Door
To: 4
Left Shaft - Top Right Door
Requires: {
"heatFrames": 140
}Exit condition: {
"leaveWithMockball": {
"remoteRunway": {
"length": 7,
"openEnd": 1
},
"landingRunway": {
"length": 4,
"openEnd": 1
}
}
} |
|
Requires: "Gravity"
"Morph"
{
"or": [
{
"and": [
"canMockball",
{
"disableEquipment": "SpeedBooster"
},
"canTrickyJump",
{
"lavaFrames": 80
}
]
},
{
"lavaFrames": 100
}
]
}
{
"or": [
{
"lavaFrames": 140
},
{
"and": [
"canDash",
{
"disableEquipment": "SpeedBooster"
},
{
"lavaFrames": 110
}
]
},
{
"and": [
"SpaceJump",
{
"lavaFrames": 40
}
]
}
]
}Exit condition: {
"leaveNormally": {}
}Unlocks doors: {"types":["missiles"],"requires":[{"lavaFrames":80}]}
{"types":["super"],"requires":[]}
{"types":["powerbomb"],"requires":[{"lavaFrames":60}]}Dev note: FIXME: A leaveWithRunway variation could be added, but it would require Speed Booster to be disabled, which would need new schema support in order to properly match entrance conditions in the next room. |
From: 1
Top Left Door
To: 2
Bottom Left Door
Requires: "canSuitlessLavaDive"
"canFarmWhileShooting"
{
"enemyKill": {
"enemies": [
[
"Fune",
"Fune"
]
],
"explicitWeapons": [
"PowerBomb"
]
}
}
{
"or": [
{
"and": [
"canTrickyJump",
{
"disableEquipment": "SpeedBooster"
},
"canMockball",
{
"lavaFramesWithEnergyDrops": {
"frames": 120,
"drops": [
{
"enemy": "Fune",
"count": 1
}
]
}
}
]
},
{
"lavaFramesWithEnergyDrops": {
"frames": 165,
"drops": [
{
"enemy": "Fune",
"count": 1
}
]
}
}
]
}
{
"lavaFrames": 35
}
{
"or": [
{
"and": [
"canSpaceJumpWaterBounce",
{
"or": [
{
"and": [
"canPreciseSpaceJump",
{
"lavaFrames": 35
}
]
},
{
"lavaFrames": 60
}
]
}
]
},
{
"lavaFrames": 150
}
]
}Exit condition: {
"leaveNormally": {}
}Unlocks doors: {"types":["missiles"],"requires":[{"lavaFrames":80}]}
{"types":["super"],"requires":[]}
{"types":["powerbomb"],"requires":[{"lavaFrames":150}]}Dev note: FIXME: a Gravity version of this could be added. |
|
Requires: "canSuitlessLavaDive"
"Morph"
{
"or": [
{
"and": [
"canTrickyJump",
{
"disableEquipment": "SpeedBooster"
},
"canMockball",
{
"lavaFrames": 155
}
]
},
{
"lavaFrames": 200
}
]
}
{
"or": [
{
"and": [
"canSpaceJumpWaterBounce",
{
"or": [
{
"and": [
"canPreciseSpaceJump",
{
"lavaFrames": 35
}
]
},
{
"lavaFrames": 60
}
]
}
]
},
{
"lavaFrames": 150
}
]
}Exit condition: {
"leaveNormally": {}
}Unlocks doors: {"types":["missiles"],"requires":[{"lavaFrames":80}]}
{"types":["super"],"requires":[]}
{"types":["powerbomb"],"requires":[{"lavaFrames":150}]} |
|
Requires: "Morph"
{
"or": [
"canMockball",
{
"and": [
"canDash",
{
"heatFrames": 35
}
]
},
{
"heatFrames": 200
}
]
}
{
"heatFrames": 420
}Exit condition: {
"leaveNormally": {}
}Unlocks doors: {"types":["missiles"],"requires":[{"heatFrames":20}]}
{"types":["super"],"requires":[]}
{"types":["powerbomb"],"requires":[{"heatFrames":60}]} |
|
Entrance condition: {
"comeInRunning": {
"speedBooster": "any",
"minTiles": 2
}
}Requires: "Morph"
"SpaceJump"
"canMockball"
{
"heatFrames": 390
}Exit condition: {
"leaveNormally": {}
}Unlocks doors: {"types":["missiles"],"requires":[{"heatFrames":20}]}
{"types":["super"],"requires":[]}
{"types":["powerbomb"],"requires":[{"heatFrames":60}]} |
|
Requires: "canDash"
"Morph"
{
"or": [
"canMockball",
{
"heatFrames": 35
}
]
}
{
"heatFrames": 380
}Exit condition: {
"leaveWithRunway": {
"length": 8,
"openEnd": 1,
"heated": true
}
}Unlocks doors: {"types":["missiles"],"requires":[{"heatFrames":50}]}
{"types":["super"],"requires":[]}
{"types":["powerbomb"],"requires":[{"heatFrames":60}]} |
|
Requires: "canDash"
"Morph"
"SpaceJump"
{
"or": [
"canMockball",
{
"heatFrames": 35
}
]
}
{
"heatFrames": 405
}Exit condition: {
"leaveNormally": {}
}Unlocks doors: {"types":["missiles"],"requires":[{"heatFrames":20}]}
{"types":["super"],"requires":[]}
{"types":["powerbomb"],"requires":[{"heatFrames":60}]} |
|
Requires: {
"obstaclesCleared": [
"A"
]
}
"h_heatedRemoteRunway"
{
"heatFrames": 360
}Exit condition: {
"leaveWithMockball": {
"remoteRunway": {
"length": 37,
"openEnd": 2,
"gentleDownTiles": 2
},
"landingRunway": {
"length": 2,
"openEnd": 1
},
"minExtraRunSpeed": "$2.6"
}
}Unlocks doors: {"types":["missiles"],"requires":[{"heatFrames":50}]}
{"types":["super"],"requires":[]}
{"types":["powerbomb"],"requires":[{"heatFrames":70}]}Dev note: FIXME: This should be changed to start at node 9. |
|
Requires: {
"heatFrames": 140
}Exit condition: {
"leaveWithMockball": {
"remoteRunway": {
"length": 3,
"openEnd": 0
},
"landingRunway": {
"length": 1,
"openEnd": 1
}
}
} |
|
Requires: "canTrickyJump" Exit condition: {
"leaveWithMockball": {
"remoteRunway": {
"length": 3,
"openEnd": 1
},
"landingRunway": {
"length": 1,
"openEnd": 0
}
}
} |
From: 1
Top Left Door
To: 1
Top Left Door
Use Spring Ball or a crumble jump while opening the door. Entrance condition: {
"comeInWithMockball": {
"speedBooster": "any",
"adjacentMinTiles": 0,
"remoteAndLandingMinTiles": [
[
0,
0
]
]
}
}Requires: {
"or": [
"canCrumbleJump",
{
"and": [
"canPrepareForNextRoom",
"h_useSpringBall"
]
}
]
}
{
"doorUnlockedAtNode": 1
}Unlocks doors: {"types":["super"],"requires":[]}
{"types":["missiles","powerbomb"],"requires":[{"or":["canTrickyJump","h_useSpringBall"]}]} |
From: 1
Top Left Door
To: 5
Junction Below Top Crumble Blocks
Entrance condition: {
"comeInWithMockball": {
"speedBooster": "any",
"adjacentMinTiles": 0,
"remoteAndLandingMinTiles": [
[
0,
0
]
]
}
} |
From: 2
Middle Left Door
To: 2
Middle Left Door
Requires: "h_usePowerBomb"
{
"or": [
{
"resetRoom": {
"nodes": [
2
]
}
},
{
"and": [
{
"resetRoom": {
"nodes": [
4
]
}
},
{
"or": [
{
"and": [
{
"getBlueSpeed": {
"usedTiles": 18,
"gentleUpTiles": 2,
"gentleDownTiles": 3,
"openEnd": 0
}
},
{
"cycleFrames": 420
}
]
},
{
"and": [
"canMockball",
{
"cycleFrames": 60
}
]
}
]
}
]
}
]
}
{
"or": [
"canWallJump",
"HiJump",
"SpaceJump",
{
"and": [
"canSpringBallJumpMidAir",
"h_doubleEquipmentScreenCycleFrames",
{
"cycleFrames": 30
}
]
}
]
}
{
"or": [
{
"and": [
"canDash",
{
"or": [
{
"and": [
"ScrewAttack",
{
"cycleFrames": 1080
}
]
},
{
"and": [
"Wave",
{
"cycleFrames": 1140
}
]
},
{
"and": [
"Spazer",
{
"cycleFrames": 990
}
]
},
{
"and": [
"Plasma",
{
"cycleFrames": 850
}
]
},
{
"and": [
"canMockball",
{
"ammo": {
"type": "PowerBomb",
"count": 1
}
},
{
"cycleFrames": 900
}
]
}
]
}
]
},
{
"and": [
{
"haveBlueSuit": {}
},
{
"cycleFrames": 1200
}
]
}
]
}Clears obstacles: A, B, C, D Farm cycle drops: 6 Mella, 3 Sm. Dessgeega Dev note: FIXME: The cycleFrame numbers for resetting at node 4 don't make sense. |
From: 2
Middle Left Door
To: 8
Right of Left Shutter, Raised Right Shutter
Entrance condition: {
"comeInWithMockball": {
"speedBooster": "any",
"adjacentMinTiles": 9.4375,
"remoteAndLandingMinTiles": [
[
5,
1
]
]
}
}Requires: "canInsaneJump" Dev note: Theoretically this can be done with 8 tiles (technically even 7.4375 tiles) but would require higher movement tech. |
From: 2
Middle Left Door
To: 8
Right of Left Shutter, Raised Right Shutter
Run into the room, and perform a very low short-hop mockball, delaying it so that Samus morphs right before the gate. Entrance condition: {
"comeInRunning": {
"speedBooster": "yes",
"minTiles": 5
}
}Requires: "h_speedJump" "canInsaneJump" "canMockball" Dev note: Theoretically this can be done with 4 tiles (technically even 3.4375 tiles) but would require higher movement tech. |
From: 2
Middle Left Door
To: 8
Right of Left Shutter, Raised Right Shutter
Entrance condition: {
"comeInWithMockball": {
"speedBooster": "any",
"adjacentMinTiles": 11.4375,
"remoteAndLandingMinTiles": [
[
8,
2
],
[
7,
3
]
]
}
} |
From: 2
Middle Left Door
To: 8
Right of Left Shutter, Raised Right Shutter
Entrance condition: {
"comeInWithMockball": {
"speedBooster": "yes",
"remoteAndLandingMinTiles": [
[
9,
1
]
]
}
} |
From: 2
Middle Left Door
To: 8
Right of Left Shutter, Raised Right Shutter
Entrance condition: {
"comeInWithMockball": {
"speedBooster": "any",
"adjacentMinTiles": 10.4375,
"remoteAndLandingMinTiles": [
[
7,
1
],
[
6,
2
],
[
5,
3
]
]
}
}Requires: "canTrickyJump" |
|
Entrance condition: {
"comeInNormally": {}
}Requires: "canMockball" |
|
Requires: {
"resetRoom": {
"nodes": [
4
]
}
}
"h_useMorphBombs"
{
"cycleFrames": 630
}
{
"or": [
"h_speedDash",
{
"and": [
"canMockball",
{
"cycleFrames": 50
}
]
}
]
}
{
"or": [
"ScrewAttack",
{
"and": [
{
"or": [
"canMidAirMorph",
"SpringBall"
]
},
{
"cycleFrames": 120
}
]
}
]
}Clears obstacles: A, B Resets obstacles: C, D Farm cycle drops: 1 Sova |
|
Requires: "canMockball" "canCarefulJump" |
|
Requires: {
"heatFrames": 180
}Exit condition: {
"leaveWithMockball": {
"remoteRunway": {
"length": 7,
"openEnd": 0
},
"landingRunway": {
"length": 1,
"openEnd": 1
}
}
} |
|
Requires: {
"heatFrames": 220
}Exit condition: {
"leaveWithMockball": {
"remoteRunway": {
"length": 5,
"openEnd": 1
},
"landingRunway": {
"length": 3,
"openEnd": 1
}
}
} |
From: 1
Left Door
To: 1
Left Door
Requires: "canMoonwalk"
"canTrickyDodgeEnemies"
{
"or": [
"h_heatProof",
"canInsaneJump"
]
}
{
"heatFrames": 260
}Exit condition: {
"leaveWithMockball": {
"remoteRunway": {
"length": 5,
"openEnd": 1
},
"landingRunway": {
"length": 3,
"openEnd": 1
},
"minExtraRunSpeed": "$1.5"
}
} |
From: 1
Left Door
To: 2
Right Door
Requires: {
"heatFrames": 170
}
"canTrickyUseFrozenEnemies"Exit condition: {
"leaveWithMockball": {
"remoteRunway": {
"length": 5,
"openEnd": 2
},
"landingRunway": {
"length": 3,
"openEnd": 1
}
}
}Unlocks doors: {"types":["missiles"],"requires":[{"heatFrames":30}]}
{"types":["super"],"requires":[]}
{"types":["powerbomb"],"requires":["never"]}Dev note: Freezing two Trippers would also be possible. |
From: 2
Right Door
To: 2
Right Door
Requires: "canTrickyDodgeEnemies"
{
"or": [
"h_heatProof",
"canInsaneJump"
]
}
{
"heatFrames": 190
}Exit condition: {
"leaveWithMockball": {
"remoteRunway": {
"length": 5,
"openEnd": 1
},
"landingRunway": {
"length": 3,
"openEnd": 1
},
"minExtraRunSpeed": "$1.5"
}
}Dev note: FIXME: This and other strats could be added while starting from the left door to save heat frames. |
|
Requires: {
"or": [
"f_DefeatedCrocomire",
{
"obstaclesCleared": [
"f_DefeatedCrocomire"
]
}
]
}
"canTrickyJump"Exit condition: {
"leaveWithMockball": {
"remoteRunway": {
"length": 45,
"openEnd": 1
},
"landingRunway": {
"length": 3,
"openEnd": 1
},
"minExtraRunSpeed": "$1.D"
}
}Dev note: With Speed Booster, speeds as low as $1.7 can work. |
|
Requires: "h_CrocomireCameraFix" "canTrickyJump" Exit condition: {
"leaveWithMockball": {
"remoteRunway": {
"length": 14,
"openEnd": 1
},
"landingRunway": {
"length": 3,
"openEnd": 1
},
"minExtraRunSpeed": "$1.D"
}
}Dev note: With Speed Booster, speeds as low as $1.7 can work. |
|
Requires: {
"enemyKill": {
"enemies": [
[
"Fune"
]
]
}
}Exit condition: {
"leaveWithMockball": {
"remoteRunway": {
"length": 4,
"openEnd": 1
},
"landingRunway": {
"length": 4,
"openEnd": 1
}
}
} |
|
Exit condition: {
"leaveWithMockball": {
"remoteRunway": {
"length": 3,
"openEnd": 0
},
"landingRunway": {
"length": 1,
"openEnd": 0
}
}
} |
From: 1
Left Door
To: 3
Junction Left of Green Gate
With at least two tiles of run speed, jump over the first moat by maximizing the jump distance and then mockball into a regular Spring Ball to jump over the second moat. Speed Booster is used to reduce Samus' jump height, to delay bonking the ceiling. Entrance condition: {
"comeInRunning": {
"speedBooster": "yes",
"minTiles": 2
}
}Requires: "canSpeedyJump" "canInsaneJump" "canMockball" "canSpringBallBounce" |
From: 1
Left Door
To: 3
Junction Left of Green Gate
With at least 6 tiles of run speed, jump over the first moat and mockball into a regular Spring Ball jump over the second moat. Aim down before reaching the ceiling to increase the jump distance. Entrance condition: {
"comeInRunning": {
"speedBooster": "any",
"minTiles": 6
}
}Requires: "canCarefulJump" "canMockball" "canSpringBallBounce" |
From: 1
Left Door
To: 3
Junction Left of Green Gate
With around four tiles of run speed, jump over the first moat and mockball into a regular Spring Ball jump over the second moat. Speed Booster makes the jump possible with a shorter runway, but the trajectory is less predictable. Entrance condition: {
"comeInRunning": {
"speedBooster": "any",
"minTiles": 4
}
}Requires: "canTrickyJump" "canMockball" "canSpringBallBounce" |
From: 4
Center Platform Junction
To: 1
Left Door
If needed, use a hero shot to open the door with a running jump, then turn around mid-air to land back on the platform. If needing to leave with Speed Booster tricky dash speed ($2.0 or $2.1), it will be necessary to begin with Speed Booster unequipped, then equip it after jumping. Requires: "canHeroShot" "canTrickyJump" Exit condition: {
"leaveWithMockball": {
"remoteRunway": {
"length": 7,
"openEnd": 2
},
"landingRunway": {
"length": 4,
"openEnd": 1
},
"minExtraRunSpeed": "$1.E"
}
}Unlocks doors: {"types":["ammo"],"requires":["never"]}Dev note: With Speed Booster equipped, speeds as low as $1.B can work. |
From: 4
Center Platform Junction
To: 2
Right Door
Requires: {
"obstaclesCleared": [
"A"
]
}
"SpaceJump"Exit condition: {
"leaveWithMockball": {
"remoteRunway": {
"length": 7,
"openEnd": 2
},
"landingRunway": {
"length": 7,
"openEnd": 1
}
}
}Unlocks doors: {"types":["ammo"],"requires":[]} |
From: 2
Right Vertical Door
To: 1
Left Door
Requires: {
"obstaclesCleared": [
"A",
"B",
"E"
]
}
"canSpeedyJump"
"canTrickyJump"Exit condition: {
"leaveWithMockball": {
"remoteRunway": {
"length": 45,
"openEnd": 1
},
"landingRunway": {
"length": 10,
"openEnd": 1
},
"minExtraRunSpeed": "$6.D"
}
}Unlocks doors: {"types":["ammo"],"requires":[],"useImplicitRequires":false} |
From: 2
Right Vertical Door
To: 1
Left Door
Requires: "HiJump"
{
"obstaclesCleared": [
"B",
"E"
]
}
"canSpeedyJump"
"canTrickyJump"Exit condition: {
"leaveWithMockball": {
"remoteRunway": {
"length": 32,
"openEnd": 1,
"gentleUpTiles": 6
},
"landingRunway": {
"length": 10,
"openEnd": 1
},
"minExtraRunSpeed": "$5.9"
}
}Unlocks doors: {"types":["ammo"],"requires":[],"useImplicitRequires":false} |
From: 5
Bottom Junction Right of Morph Tunnel
To: 2
Bottom Right Door
Requires: {
"obstaclesCleared": [
"A"
]
}
"h_heatedRemoteRunwaySpaceJump"
{
"heatFrames": 165
}Exit condition: {
"leaveWithMockball": {
"remoteRunway": {
"length": 10,
"openEnd": 1
},
"landingRunway": {
"length": 4,
"openEnd": 1
},
"minExtraRunSpeed": "$2.0"
}
}Unlocks doors: {"types":["missiles"],"requires":[{"heatFrames":50}]}
{"types":["super"],"requires":[]}
{"types":["powerbomb"],"requires":[{"heatFrames":50}]} |
From: 2
Right Door
To: 1
Left Door
Requires: {
"obstaclesCleared": [
"A",
"B"
]
}
"canDash"
"h_heatedRemoteRunwaySpaceJump"
{
"heatFrames": 200
}Exit condition: {
"leaveWithMockball": {
"remoteRunway": {
"length": 28,
"openEnd": 1
},
"landingRunway": {
"length": 5,
"openEnd": 1
},
"minExtraRunSpeed": "$4.0"
}
}Unlocks doors: {"types":["super"],"requires":[]}
{"types":["missiles","powerbomb"],"requires":[]}Dev note: If coming from the right, the Ripper on the left may still be alive, but it is not too hard to avoid. |
From: 3
Junction Left of Green Gate
To: 1
Left Door
Requires: {
"obstaclesCleared": [
"B"
]
}
"canDash"
"h_heatedRemoteRunwaySpaceJump"
{
"heatFrames": 230
}Exit condition: {
"leaveWithMockball": {
"remoteRunway": {
"length": 18,
"openEnd": 1
},
"landingRunway": {
"length": 5,
"openEnd": 1
},
"minExtraRunSpeed": "$2.0"
}
}Unlocks doors: {"types":["super"],"requires":[]}
{"types":["missiles","powerbomb"],"requires":[]}Dev note: If coming from the right, the Ripper on the left may still be alive, but it is not too hard to avoid. |
|
Requires: {
"heatFrames": 60
}Exit condition: {
"leaveWithMockball": {
"remoteRunway": {
"length": 7,
"openEnd": 1
},
"landingRunway": {
"length": 1,
"openEnd": 1
}
}
} |
|
Requires: "HiJump"
"canSpeedyJump"
{
"heatFrames": 180
}Exit condition: {
"leaveWithMockball": {
"remoteRunway": {
"length": 5,
"openEnd": 1
},
"landingRunway": {
"length": 1,
"openEnd": 1
}
}
} |
From: 2
Middle Right Door
To: 5
Junction Above Bottom Blocks
Entrance condition: {
"comeInWithMockball": {
"speedBooster": "any",
"adjacentMinTiles": 0,
"remoteAndLandingMinTiles": [
[
0,
0
]
]
}
}Requires: {
"heatFrames": 50
} |
|
Entrance condition: {
"comeInWithMockball": {
"speedBooster": "any",
"adjacentMinTiles": 0,
"remoteAndLandingMinTiles": [
[
0,
0
]
]
}
}Requires: {
"heatFrames": 280
}Clears obstacles: A |
|
Entrance condition: {
"comeInWithMockball": {
"speedBooster": "any",
"adjacentMinTiles": 0,
"remoteAndLandingMinTiles": [
[
0,
0
]
]
}
}Requires: {
"heatFrames": 180
}Clears obstacles: A |
From: 4
Top Right Door
To: 1
Top Left Door
Falling to the right of the floating platform is faster. Entrance condition: {
"comeInWithMockball": {
"speedBooster": "any",
"adjacentMinTiles": 0,
"remoteAndLandingMinTiles": [
[
0,
0
]
]
}
}Requires: {
"heatFrames": 135
} |
From: 4
Top Right Door
To: 4
Top Right Door
Fall onto the platform, then wait for the pirate to jump back to the right before returning through the door. Entrance condition: {
"comeInWithMockball": {
"speedBooster": "any",
"adjacentMinTiles": 0,
"remoteAndLandingMinTiles": [
[
0,
0
]
]
}
}Requires: {
"heatFrames": 275
} |
|
Requires: "canMockball"
"canSpringBallBounce"
{
"heatFrames": 320
} |
|
Entrance condition: {
"comeInWithMockball": {
"speedBooster": "any",
"adjacentMinTiles": 0,
"remoteAndLandingMinTiles": [
[
0,
0
]
]
}
}Requires: {
"enemyDamage": {
"enemy": "Multiviola",
"type": "contact",
"hits": 1
}
}
{
"heatFrames": 40
} |
|
Entrance condition: {
"comeInWithMockball": {
"speedBooster": "any",
"adjacentMinTiles": 0,
"remoteAndLandingMinTiles": [
[
0,
0
]
]
}
}Requires: {
"heatFrames": 85
}Clears obstacles: door_2 |
From: 2
Right Door
To: 4
Junction Above Bomb Block
Run into the acid to quickly wall jump over the first pillar. Build speed and jump over the second pillar to mockball through the tunnel without taking much acid damage. Entrance condition: {
"comeInRunning": {
"speedBooster": "any",
"minTiles": 3
}
}Requires: "canMockball"
"HiJump"
"canSpeedyJump"
"canCarefulJump"
"canWallJump"
{
"or": [
"canInsaneWallJump",
{
"acidFrames": 30
}
]
}
{
"heatFrames": 310
}
{
"acidFrames": 5
}Clears obstacles: B |
From: 2
Right Door
To: 4
Junction Above Bomb Block
Run into the acid to quickly jump over the first pillar. Build speed and jump over the second pillar to mockball through the tunnel without taking much acid damage. Requires: "canMockball"
"HiJump"
"canSpeedyJump"
"canCarefulJump"
"Gravity"
{
"heatFrames": 310
}
{
"acidFrames": 25
}Clears obstacles: B |
From: 2
Right Door
To: 4
Junction Above Bomb Block
Requires: "SpaceJump"
"Morph"
"canTrickyJump"
"canMockball"
{
"heatFrames": 290
}Clears obstacles: B Dev note: The mockball is not technically required, but without it there is more risk of getting caught by the acid. With 1 tile of cross-room runway, this could be done with 260 heat frames. |
From: 2
Right Door
To: 4
Junction Above Bomb Block
Run into the acid to quickly wall jump over the first pillar. Build speed and jump over the second pillar to mockball through the tunnel without taking much acid damage. Requires: "canInsaneJump"
"canMockball"
{
"heatFrames": 350
}
{
"acidFrames": 55
}Clears obstacles: B |
From: 7
Junction Left of Morph Tunnel
To: 4
Junction Right of Power Bomb Blocks
Let the right hopper jump twice towards Samus. At the start of the second jump, jump above where the ground Dessgeega can jump but below where the ceiling enemy can reach. Mockball below the third hopper. Requires: "Morph"
{
"or": [
"canTrickyJump",
{
"and": [
"h_usePowerBomb",
"canCarefulJump",
"canHitbox"
]
}
]
}
"canMockball"
{
"heatFrames": 210
}Dev note: FIXME: The Power Bomb from breaking the tunnel bomb block could be used for this strat. |
|
Requires: {
"obstaclesCleared": [
"A"
]
}Exit condition: {
"leaveWithMockball": {
"remoteRunway": {
"length": 9,
"openEnd": 1
},
"landingRunway": {
"length": 3,
"openEnd": 1
}
}
} |
|
Requires: {
"obstaclesCleared": [
"A"
]
}
"SpaceJump"Exit condition: {
"leaveWithMockball": {
"remoteRunway": {
"length": 38,
"openEnd": 0
},
"landingRunway": {
"length": 3,
"openEnd": 1
}
}
} |
|
Requires: {
"obstaclesCleared": [
"A"
]
}
"SpaceJump"
"f_DefeatedPhantoon"Exit condition: {
"leaveWithMockball": {
"remoteRunway": {
"length": 45,
"openEnd": 1
},
"landingRunway": {
"length": 3,
"openEnd": 1
}
}
} |
|
Requires: {
"obstaclesCleared": [
"A"
]
}Exit condition: {
"leaveWithMockball": {
"remoteRunway": {
"length": 34,
"openEnd": 1
},
"landingRunway": {
"length": 8,
"openEnd": 1
}
}
}Dev note: A couple extra tiles could be used by taking a hit and using i-frames from the atomic cage on the floor, if Phantoon is defeated; with a 12-tile shortcharge to gain invulnerability from blue speed, even more runway could be used. |
|
Exit condition: {
"leaveWithMockball": {
"remoteRunway": {
"length": 45,
"openEnd": 1
},
"landingRunway": {
"length": 3,
"openEnd": 1
}
}
} |
|
Requires: "h_shinechargeMaxRunway"
"canShinechargeMovementTricky"
"canMockball"
{
"obstaclesCleared": [
"A"
]
}
{
"shinespark": {
"frames": 3,
"excessFrames": 0
}
}Exit condition: {
"leaveWithSpark": {}
} |
From: 2
Middle Left Door
To: 2
Middle Left Door
Requires: {
"not": "f_DefeatedPhantoon"
}
"canRiskPermanentLossOfAccess"Exit condition: {
"leaveWithMockball": {
"remoteRunway": {
"length": 45,
"openEnd": 1
},
"landingRunway": {
"length": 3,
"openEnd": 1
}
}
} |
From: 2
Middle Left Door
To: 2
Middle Left Door
Requires: "SpaceJump" Exit condition: {
"leaveWithMockball": {
"remoteRunway": {
"length": 5,
"openEnd": 1
},
"landingRunway": {
"length": 3,
"openEnd": 1
}
}
} |
|
Requires: {
"obstaclesNotCleared": [
"C"
]
}Exit condition: {
"leaveWithMockball": {
"remoteRunway": {
"length": 7,
"openEnd": 1
},
"landingRunway": {
"length": 1,
"openEnd": 1
}
}
} |
|
Entrance condition: {
"comeInWithMockball": {
"speedBooster": "any",
"adjacentMinTiles": 0,
"remoteAndLandingMinTiles": [
[
0,
0
]
]
}
} |
|
Exit condition: {
"leaveWithMockball": {
"remoteRunway": {
"length": 7,
"openEnd": 1
},
"landingRunway": {
"length": 1,
"openEnd": 1
}
}
} |
|
Requires: {
"not": "f_DefeatedPhantoon"
}
"canRiskPermanentLossOfAccess"Exit condition: {
"leaveWithMockball": {
"remoteRunway": {
"length": 4,
"openEnd": 2
},
"landingRunway": {
"length": 1,
"openEnd": 1
}
}
} |
|
Enter the room from the left to get the Kzans onto the correct cycle. Jump onto the Kzan second closest to the right door as it descends. Position on its left side, then run and jump immediately after Samus crosses above the water line, mockballing onto the door frame ledge. Entrance condition: {
"comeInNormally": {}
}Requires: "canTrickyJump" Exit condition: {
"leaveWithMockball": {
"remoteRunway": {
"length": 3,
"openEnd": 1
},
"landingRunway": {
"length": 1,
"openEnd": 1
}
}
}Unlocks doors: {"types":["ammo"],"requires":[]}Dev note: Entering from the left is not technically required, but it is more tricky otherwise. |
|
Enter the room from the right to get the Kzans onto the correct cycle. Jump onto the Kzan second closest to the left door as it descends. Position on its right side, then run and jump immediately after Samus crosses above the water line, mockballing onto the door frame ledge. Entrance condition: {
"comeInNormally": {}
}Requires: "canTrickyJump" Exit condition: {
"leaveWithMockball": {
"remoteRunway": {
"length": 3,
"openEnd": 1
},
"landingRunway": {
"length": 1,
"openEnd": 1
}
}
}Unlocks doors: {"types":["ammo"],"requires":[]}Dev note: Entering from the right is not technically required, but it is more tricky otherwise. |
|
Requires: {
"not": "f_DefeatedPhantoon"
}
"canRiskPermanentLossOfAccess"Exit condition: {
"leaveWithMockball": {
"remoteRunway": {
"length": 4,
"openEnd": 2
},
"landingRunway": {
"length": 1,
"openEnd": 1
}
}
} |
|
Requires: {
"or": [
{
"and": [
{
"not": "f_DefeatedPhantoon"
},
"canRiskPermanentLossOfAccess"
]
},
"Gravity"
]
}Exit condition: {
"leaveWithMockball": {
"remoteRunway": {
"length": 15,
"openEnd": 1
},
"landingRunway": {
"length": 2,
"openEnd": 1
}
}
}Unlocks doors: {"types":["ammo"],"requires":[]}Dev note: Longer landing runway could be used but would be difficult at high run speeds. |
|
Requires: {
"or": [
{
"and": [
{
"not": "f_DefeatedPhantoon"
},
"canRiskPermanentLossOfAccess"
]
},
"Gravity"
]
}
{
"doorUnlockedAtNode": 1
}Exit condition: {
"leaveWithMockball": {
"remoteRunway": {
"length": 16,
"openEnd": 1
},
"landingRunway": {
"length": 2,
"openEnd": 1
}
}
}Unlocks doors: {"types":["ammo"],"requires":[]}Dev note: Longer landing runway could be used but would be difficult at high run speeds. |
|
Exit condition: {
"leaveWithMockball": {
"remoteRunway": {
"length": 8,
"openEnd": 1,
"steepUpTiles": 2
},
"landingRunway": {
"length": 4,
"openEnd": 1
}
}
}Unlocks doors: {"types":["ammo"],"requires":[]} |
|
Requires: {
"doorUnlockedAtNode": 2
}Exit condition: {
"leaveWithMockball": {
"remoteRunway": {
"length": 9,
"openEnd": 1,
"steepUpTiles": 2
},
"landingRunway": {
"length": 4,
"openEnd": 1
}
}
}Unlocks doors: {"types":["ammo"],"requires":[]} |
|
Run on the conveyor closest to the door; its effective length is shortened due to moving in the same direction as Samus. Requires: {
"enemyKill": {
"enemies": [
[
"Bull",
"Bull"
]
]
}
}
"canTrickyJump"Exit condition: {
"leaveWithMockball": {
"remoteRunway": {
"length": 8,
"openEnd": 0
},
"landingRunway": {
"length": 3,
"openEnd": 1
}
}
} |
From: 1
Left Door
To: 1
Left Door
Requires: {
"not": "f_DefeatedPhantoon"
}
"canRiskPermanentLossOfAccess"Exit condition: {
"leaveWithMockball": {
"remoteRunway": {
"length": 11,
"openEnd": 2
},
"landingRunway": {
"length": 3,
"openEnd": 1
}
}
} |
From: 1
Right Door
To: 2
Item
Entrance condition: {
"comeInWithMockball": {
"speedBooster": "yes",
"remoteAndLandingMinTiles": [
[
19,
0
]
]
}
}Requires: "canTrickyJump"
"canSpringBallBounce"
"canSpringFling"
{
"or": [
"canInsaneJump",
{
"thornHits": 5
}
]
}
{
"not": "f_DefeatedPhantoon"
}Dev note: The 5 thornHits are for lenience since it is difficult to get this first try. |
|
If the power is on, time the jump for when the electricity is inactive. Requires: "canTrickyJump" Exit condition: {
"leaveWithMockball": {
"remoteRunway": {
"length": 4,
"openEnd": 1
},
"landingRunway": {
"length": 3,
"openEnd": 1
}
}
} |
From: 3
Top Right Door
To: 3
Top Right Door
Requires: {
"obstaclesCleared": [
"A"
]
}
"SpaceJump"
"canTrickyJump"
Exit condition: {
"leaveWithMockball": {
"remoteRunway": {
"length": 15,
"openEnd": 2
},
"landingRunway": {
"length": 8,
"openEnd": 1
}
}
} |
|
Requires: "Gravity" Exit condition: {
"leaveWithMockball": {
"remoteRunway": {
"length": 40,
"openEnd": 0
},
"landingRunway": {
"length": 5,
"openEnd": 1
}
}
} |
|
Requires: "Gravity"
{
"obstaclesCleared": [
"A"
]
}Exit condition: {
"leaveWithMockball": {
"remoteRunway": {
"length": 45,
"openEnd": 1
},
"landingRunway": {
"length": 5,
"openEnd": 1
}
}
} |
|
Requires: "Gravity" Exit condition: {
"leaveWithMockball": {
"remoteRunway": {
"length": 3,
"openEnd": 1
},
"landingRunway": {
"length": 2,
"openEnd": 1
}
}
} |
|
Requires: "Gravity" Exit condition: {
"leaveWithMockball": {
"remoteRunway": {
"length": 3,
"openEnd": 1
},
"landingRunway": {
"length": 2,
"openEnd": 1
}
}
} |
|
Requires: "Gravity" Exit condition: {
"leaveWithMockball": {
"remoteRunway": {
"length": 9,
"openEnd": 1
},
"landingRunway": {
"length": 1,
"openEnd": 1
}
}
} |
|
Requires: "Gravity" Exit condition: {
"leaveWithMockball": {
"remoteRunway": {
"length": 16,
"openEnd": 0,
"startingSteepDownTiles": 1
},
"landingRunway": {
"length": 4,
"openEnd": 1
},
"maxExtraRunSpeed": "$3.5"
}
} |
|
Requires: "Gravity" "SpaceJump" Exit condition: {
"leaveWithMockball": {
"remoteRunway": {
"length": 20,
"openEnd": 1,
"gentleUpTiles": 3,
"gentleDownTiles": 1,
"steepUpTiles": 1
},
"landingRunway": {
"length": 2,
"openEnd": 1
}
}
} |
|
Requires: "Gravity" "SpaceJump" Exit condition: {
"leaveWithMockball": {
"remoteRunway": {
"length": 12,
"openEnd": 2,
"steepUpTiles": 5,
"steepDownTiles": 5
},
"landingRunway": {
"length": 4,
"openEnd": 1
},
"maxExtraRunSpeed": "$3.8"
}
} |
|
Requires: "Gravity" Exit condition: {
"leaveWithMockball": {
"remoteRunway": {
"length": 7,
"openEnd": 2
},
"landingRunway": {
"length": 1,
"openEnd": 1
}
}
} |
|
Requires: "Gravity" Exit condition: {
"leaveWithMockball": {
"remoteRunway": {
"length": 20,
"openEnd": 2
},
"landingRunway": {
"length": 1,
"openEnd": 1
},
"minExtraRunSpeed": "$1.2"
}
} |
|
Requires: {
"obstaclesCleared": [
"A"
]
}
"Gravity"Exit condition: {
"leaveWithMockball": {
"remoteRunway": {
"length": 21,
"openEnd": 1,
"gentleUpTiles": 2,
"gentleDownTiles": 2,
"steepUpTiles": 1
},
"landingRunway": {
"length": 3,
"openEnd": 1
}
}
} |
|
Requires: "Gravity" Exit condition: {
"leaveWithMockball": {
"remoteRunway": {
"length": 34,
"openEnd": 1
},
"landingRunway": {
"length": 3,
"openEnd": 1
}
}
} |
|
Use Speed Booster to break the Speed blocks, and run from the right side of the room, using blue speed to run on top of the sand. Requires: "Gravity"
{
"getBlueSpeed": {
"usedTiles": 22,
"openEnd": 1
}
}Exit condition: {
"leaveWithMockball": {
"remoteRunway": {
"length": 45,
"openEnd": 1
},
"landingRunway": {
"length": 3,
"openEnd": 1
},
"blue": "yes"
}
} |
From: 2
Right Door
To: 2
Right Door
Requires: "Gravity" "canTrickyJump" Exit condition: {
"leaveWithMockball": {
"remoteRunway": {
"length": 42,
"openEnd": 1
},
"landingRunway": {
"length": 4,
"openEnd": 1
}
}
} |
From: 2
Right Door
To: 2
Right Door
Requires: "Gravity" Exit condition: {
"leaveWithMockball": {
"remoteRunway": {
"length": 6,
"openEnd": 2
},
"landingRunway": {
"length": 5,
"openEnd": 1
}
}
} |
|
Requires: "Gravity" Exit condition: {
"leaveWithMockball": {
"remoteRunway": {
"length": 12,
"openEnd": 1
},
"landingRunway": {
"length": 1,
"openEnd": 1
}
}
} |
|
Requires: "Gravity" Exit condition: {
"leaveWithMockball": {
"remoteRunway": {
"length": 14,
"openEnd": 2
},
"landingRunway": {
"length": 3,
"openEnd": 1
}
}
} |
From: 1
Left Door
To: 3
Top Right Door
Use the spikes, which are not in the water, to jump from platform to platform as a way to cross the room. Requires knowing the position of every spike in the room, and hitting the spikes while morphed can help. The first jump is particularly tough. A springball rolling jump can be used to get past it. Entrance condition: {
"comeInRunning": {
"speedBooster": "any",
"minTiles": 2
}
}Requires: {
"notable": "Spike Platforming with Spring Ball (Left to Right)"
}
"canWallJump"
"Morph"
"canUseIFrames"
"h_useSpringBall"
"canMockball"
{
"spikeHits": 3
}
{
"or": [
{
"spikeHits": 1
},
"canHorizontalDamageBoost"
]
} |
|
Requires: "Gravity" Exit condition: {
"leaveWithMockball": {
"remoteRunway": {
"length": 22,
"openEnd": 0
},
"landingRunway": {
"length": 4,
"openEnd": 1
}
}
} |
|
Requires: "Gravity" Exit condition: {
"leaveWithMockball": {
"remoteRunway": {
"length": 18,
"openEnd": 2
},
"landingRunway": {
"length": 3,
"openEnd": 1
}
}
} |
From: 2
Right Door
To: 2
Right Door
Requires: "Gravity" "HiJump" "canPreciseSpaceJump" Exit condition: {
"leaveWithMockball": {
"remoteRunway": {
"length": 5,
"openEnd": 1
},
"landingRunway": {
"length": 3,
"openEnd": 1
}
}
} |
|
If needing high speed, try to prevent the Oums from falling to the floor, to prevent them from blocking the runway. Requires: "Gravity" Exit condition: {
"leaveWithMockball": {
"remoteRunway": {
"length": 45,
"openEnd": 1
},
"landingRunway": {
"length": 1,
"openEnd": 1
}
}
} |
|
Requires: {
"or": [
"Gravity",
"canCarefulJump"
]
}Exit condition: {
"leaveWithMockball": {
"remoteRunway": {
"length": 6,
"openEnd": 1
},
"landingRunway": {
"length": 3,
"openEnd": 1
}
}
} |
|
Requires: "Gravity" Exit condition: {
"leaveWithMockball": {
"remoteRunway": {
"length": 8,
"openEnd": 1
},
"landingRunway": {
"length": 2,
"openEnd": 1
}
}
} |
|
Requires: {
"obstaclesCleared": [
"A"
]
}Exit condition: {
"leaveWithMockball": {
"remoteRunway": {
"length": 8,
"openEnd": 2
},
"landingRunway": {
"length": 3,
"openEnd": 1
}
}
} |
|
Exit condition: {
"leaveWithMockball": {
"remoteRunway": {
"length": 8,
"openEnd": 2
},
"landingRunway": {
"length": 5,
"openEnd": 1
}
}
} |
From: 4
Top Right Door
To: 5
Top Junction
Entrance condition: {
"comeInWithMockball": {
"speedBooster": "yes",
"adjacentMinTiles": 20,
"remoteAndLandingMinTiles": [
[
18.4375,
0
]
]
}
}Requires: "canTrickyDashJump" "h_useSpringBall" Dev note: An extra run speed of $4.0 and $4.1 works; speeds of at least $4.5 also work. |
|
Use either the island platform or the ledge to the right of it, depending on the run speed needed. Exit condition: {
"leaveWithMockball": {
"remoteRunway": {
"length": 7,
"openEnd": 1
},
"landingRunway": {
"length": 6,
"openEnd": 1
}
}
} |
|
Exit condition: {
"leaveWithMockball": {
"remoteRunway": {
"length": 10,
"openEnd": 1
},
"landingRunway": {
"length": 6,
"openEnd": 1
},
"minExtraRunSpeed": "$2.8"
}
} |
|
Requires: "SpaceJump" Exit condition: {
"leaveWithMockball": {
"remoteRunway": {
"length": 10,
"openEnd": 1
},
"landingRunway": {
"length": 6,
"openEnd": 1
}
}
} |
From: 1
Left Door
To: 1
Left Door
Requires: "SpaceJump" "canTrickyJump" Exit condition: {
"leaveWithMockball": {
"remoteRunway": {
"length": 6,
"openEnd": 2
},
"landingRunway": {
"length": 5,
"openEnd": 1
}
}
} |
From: 1
Left Door
To: 1
Left Door
Requires: "Gravity" "SpaceJump" "canTrickyJump" Exit condition: {
"leaveWithMockball": {
"remoteRunway": {
"length": 14,
"openEnd": 1
},
"landingRunway": {
"length": 5,
"openEnd": 1
}
}
}Dev note: FIXME: An extra half tile of runway could be gained by standing up inside the last tile of the platform. |
From: 1
Left Door
To: 1
Left Door
Requires: "Gravity" Exit condition: {
"leaveWithMockball": {
"remoteRunway": {
"length": 8,
"openEnd": 0
},
"landingRunway": {
"length": 5,
"openEnd": 1
}
}
}Dev note: FIXME: An extra half tile of runway could be gained by standing up inside the last tile of the platform. |
From: 2
Right Door
To: 2
Right Door
Requires: "Gravity" Exit condition: {
"leaveWithMockball": {
"remoteRunway": {
"length": 14,
"openEnd": 1
},
"landingRunway": {
"length": 5,
"openEnd": 1
}
}
}Dev note: FIXME: If Morph or X-Ray is available, an extra half tile of runway could be gained by standing up inside the last tile of the platform. |
|
Exit condition: {
"leaveWithMockball": {
"remoteRunway": {
"length": 6,
"openEnd": 2
},
"landingRunway": {
"length": 5,
"openEnd": 1
}
}
} |
|
Entrance condition: {
"comeInWithMockball": {
"speedBooster": "any",
"adjacentMinTiles": 0,
"remoteAndLandingMinTiles": [
[
0,
0
]
]
}
} |
|
Entrance condition: {
"comeInWithMockball": {
"speedBooster": "any",
"adjacentMinTiles": 0,
"remoteAndLandingMinTiles": [
[
0,
0
]
]
}
} |
|
Requires: {
"obstaclesCleared": [
"A"
]
}Exit condition: {
"leaveWithMockball": {
"remoteRunway": {
"length": 12,
"openEnd": 1
},
"landingRunway": {
"length": 1,
"openEnd": 1
}
}
} |
|
Requires: {
"obstaclesCleared": [
"A"
]
}
"SpaceJump"
"canTrickyJump"
Exit condition: {
"leaveWithMockball": {
"remoteRunway": {
"length": 14,
"openEnd": 1
},
"landingRunway": {
"length": 1,
"openEnd": 1
}
}
}Unlocks doors: {"types":["ammo"],"requires":[]} |
|
Exit condition: {
"leaveWithMockball": {
"remoteRunway": {
"length": 7,
"openEnd": 1
},
"landingRunway": {
"length": 1,
"openEnd": 1
}
}
} |
|
Exit condition: {
"leaveWithMockball": {
"remoteRunway": {
"length": 25,
"openEnd": 1
},
"landingRunway": {
"length": 1,
"openEnd": 1
}
}
} |
|
Exit condition: {
"leaveWithMockball": {
"remoteRunway": {
"length": 25,
"openEnd": 1
},
"landingRunway": {
"length": 1,
"openEnd": 1
}
}
} |
|
Requires: {
"or": [
"canMetroidAvoid",
"Ice",
{
  "obstaclesCleared": [
    "A"
  ]
}
]
}Exit condition: {
"leaveWithMockball": {
"remoteRunway": {
"length": 28,
"openEnd": 1
},
"landingRunway": {
"length": 3,
"openEnd": 1
}
}
} |
|
Requires: {
"or": [
"canTrickyDodgeEnemies",
{
"and": [
"canMetroidAvoid",
"Ice"
]
},
"ScrewAttack",
"canPseudoScrew",
{
"obstaclesCleared": [
"A",
"B"
]
}
]
}
"canPreciseSpaceJump"Exit condition: {
"leaveWithMockball": {
"remoteRunway": {
"length": 31,
"openEnd": 1
},
"landingRunway": {
"length": 3,
"openEnd": 1
}
}
}Unlocks doors: {"types":["ammo"],"requires":[]}Dev note: It is possible to open the door with ammo and mockball out in one motion. But the timing makes it harder than crossing the room multiple times. |
|
Requires: {
"or": [
"canMetroidAvoid",
"Ice",
{
"obstaclesCleared": [
"B"
]
}
]
}Exit condition: {
"leaveWithMockball": {
"remoteRunway": {
"length": 21,
"openEnd": 0
},
"landingRunway": {
"length": 3,
"openEnd": 1
}
}
} |
|
Requires: {
"or": [
"canMetroidAvoid",
"Ice",
{
"or": [
"f_KilledMetroidRoom2",
{
"obstaclesCleared": [
"f_KilledMetroidRoom2"
]
}
]
}
]
}Exit condition: {
"leaveWithMockball": {
"remoteRunway": {
"length": 4,
"openEnd": 1
},
"landingRunway": {
"length": 1,
"openEnd": 1
}
}
} |
|
Requires: {
"or": [
"canMetroidAvoid",
"Ice",
{
"or": [
"f_KilledMetroidRoom2",
{
"obstaclesCleared": [
"f_KilledMetroidRoom2"
]
}
]
}
]
}Exit condition: {
"leaveWithMockball": {
"remoteRunway": {
"length": 8,
"openEnd": 1
},
"landingRunway": {
"length": 2,
"openEnd": 1
}
}
}Dev note: There is 1 unusable landing tile here; at low speeds (earlier jump) it could be used but wouldn't serve a purpose. |
|
Requires: {
"or": [
"canMetroidAvoid",
{
"and": [
"Ice",
"canDodgeWhileShooting"
]
},
{
"or": [
"f_KilledMetroidRoom3",
{
"obstaclesCleared": [
"f_KilledMetroidRoom3"
]
}
]
}
]
}Exit condition: {
"leaveWithMockball": {
"remoteRunway": {
"length": 29,
"openEnd": 2
},
"landingRunway": {
"length": 3,
"openEnd": 1
},
"minExtraRunSpeed": "$1.2"
}
} |
|
Exit condition: {
"leaveWithMockball": {
"remoteRunway": {
"length": 7,
"openEnd": 1
},
"landingRunway": {
"length": 2,
"openEnd": 1
}
}
} |
|
Requires: "canMetroidAvoid"
{
"or": [
"canTrickyJump",
"canMockball"
]
} |
|
Requires: {
"or": [
"canMetroidAvoid",
"Ice",
{
"or": [
"f_KilledMetroidRoom3",
{
"obstaclesCleared": [
"f_KilledMetroidRoom3"
]
}
]
}
]
}Exit condition: {
"leaveWithMockball": {
"remoteRunway": {
"length": 6,
"openEnd": 2
},
"landingRunway": {
"length": 5,
"openEnd": 1
}
}
} |
|
Requires: "canMetroidAvoid"
{
"or": [
"canTrickyJump",
"canMockball"
]
} |
|
Exit condition: {
"leaveWithMockball": {
"remoteRunway": {
"length": 2,
"openEnd": 2
},
"landingRunway": {
"length": 1,
"openEnd": 1
}
}
} |
|
Exit condition: {
"leaveWithMockball": {
"remoteRunway": {
"length": 7,
"openEnd": 1
},
"landingRunway": {
"length": 1,
"openEnd": 1
}
}
}Dev note: There is one unusable remote runway tile here, in order to allow space to reasonably perform the mockball. |
|
Exit condition: {
"leaveWithMockball": {
"remoteRunway": {
"length": 4,
"openEnd": 1
},
"landingRunway": {
"length": 1,
"openEnd": 1
}
}
}Unlocks doors: {"types":["ammo"],"requires":[]} |
|
Requires: {
"doorUnlockedAtNode": 2
}Exit condition: {
"leaveWithMockball": {
"remoteRunway": {
"length": 5,
"openEnd": 1
},
"landingRunway": {
"length": 1,
"openEnd": 1
}
}
}Unlocks doors: {"types":["ammo"],"requires":[]} |
|
Use the floating platform near the bottom-left of the room. Exit condition: {
"leaveWithMockball": {
"remoteRunway": {
"length": 3,
"openEnd": 2
},
"landingRunway": {
"length": 1,
"openEnd": 1
},
"minExtraRunSpeed": "$0.E"
}
} |
|
Exit condition: {
"leaveWithMockball": {
"remoteRunway": {
"length": 43,
"openEnd": 1
},
"landingRunway": {
"length": 2,
"openEnd": 1
}
}
} |
|
Requires: {
"obstaclesCleared": [
"A"
]
}Exit condition: {
"leaveWithMockball": {
"remoteRunway": {
"length": 23,
"openEnd": 1
},
"landingRunway": {
"length": 1,
"openEnd": 1
}
}
} |
|
Exit condition: {
"leaveWithMockball": {
"remoteRunway": {
"length": 4,
"openEnd": 1
},
"landingRunway": {
"length": 1,
"openEnd": 1
}
}
} |
|
Requires: "SpaceJump" Exit condition: {
"leaveWithMockball": {
"remoteRunway": {
"length": 9,
"openEnd": 0
},
"landingRunway": {
"length": 4,
"openEnd": 1
}
}
} |
|
Exit condition: {
"leaveWithMockball": {
"remoteRunway": {
"length": 5,
"openEnd": 1
},
"landingRunway": {
"length": 1,
"openEnd": 1
}
}
} |
From: 2
Left Door
To: 2
Left Door
Entrance condition: {
"comeInWithMockball": {
"speedBooster": "any",
"adjacentMinTiles": 0,
"remoteAndLandingMinTiles": [
[
0,
0
]
]
}
}Requires: {
"or": [
{
"enemyDamage": {
"enemy": "Blue Sidehopper",
"type": "contact",
"hits": 1
}
},
"h_pauseAbuseMinimalReserveRefill"
]
}Unlocks doors: {"types":["super"],"requires":[]}
{"types":["missiles","powerbomb"],"requires":["never"]}Dev note: This is used to fulfill the requirement on exiting the previous room. FIXME: The hopper hit can be avoided depending on the entry speed and canPrepareForNextRoom. |
From: 2
Left Door
To: 2
Left Door
Requires: {
"obstaclesCleared": [
"A"
]
}Exit condition: {
"leaveWithMockball": {
"remoteRunway": {
"length": 9,
"openEnd": 1
},
"landingRunway": {
"length": 1,
"openEnd": 1
}
}
}Unlocks doors: {"types":["ammo"],"requires":[]} |


