canShinechargeMovementTricky (Expert)

The ability to make precise and potentially unintuitive movement actions with a shinespark charge timer running to get into position to shinespark. A common example is using the shinespark wind-up period to wait for a hero shot to open an off-camera door.
Dependencies: canHorizontalMidairShinespark, canMidairShinespark, canShinechargeMovement, canShinespark, canHorizontalShinespark, canShinechargeMovementComplex
Strats ()
From: 1
Top Left Door
To: 4
Top Junction (Right of Spikes)
Run, jump, and spark mid-air at a specific height to be able to down-grab onto the ledge. Entrance condition: {
"comeInShinecharged": {}
}Requires: {
"shineChargeFrames": 80
}
"canShinechargeMovementTricky"
"canDownGrab"
{
"shinespark": {
"frames": 38,
"excessFrames": 0
}
} |
From: 1
Top Left Door
To: 4
Top Junction (Right of Spikes)

After gaining a shinecharge, run back to the door, then run right, jump, and spark mid-air at a specific height to be able to down-grab onto the ledge. Entrance condition: {
"comeInShinecharging": {
"length": 5,
"openEnd": 0
}
}Requires: "canShinechargeMovementTricky"
"canDownGrab"
{
"shinespark": {
"frames": 35,
"excessFrames": 0
}
} |
|
Requires: {
"canShineCharge": {
"usedTiles": 23,
"openEnd": 2
}
}
"canShinechargeMovementTricky"
{
"or": [
"canHorizontalDamageBoost",
"canLateralMidAirMorph"
]
}
{
"enemyDamage": {
"enemy": "Boyon",
"type": "contact",
"hits": 1
}
}
{
"or": [
{
"shinespark": {
"frames": 121,
"excessFrames": 6
}
},
{
"and": [
"canSpeedyJump",
{
"shinespark": {
"frames": 118,
"excessFrames": 6
}
}
]
},
{
"and": [
"HiJump",
{
"shinespark": {
"frames": 117,
"excessFrames": 6
}
}
]
},
{
"and": [
"HiJump",
"canSpeedyJump",
{
"shinespark": {
"frames": 113,
"excessFrames": 6
}
}
]
}
]
} |
From: 4
Top Junction (Right of Spikes)
To: 1
Top Left Door
Requires: "h_storedSpark"
"canDash"
{
"or": [
{
"shinespark": {
"frames": 44,
"excessFrames": 7
}
},
{
"and": [
"canShinechargeMovementTricky",
{
"shinespark": {
"frames": 38,
"excessFrames": 0
}
}
]
},
{
"and": [
"canShinechargeMovementTricky",
"canSpeedyJump",
{
"shinespark": {
"frames": 35,
"excessFrames": 0
}
}
]
}
]
} |
From: 1
Left Door
To: 1
Left Door


Entrance condition: {
"comeInShinecharged": {}
}Requires: {
"or": [
{
"and": [
"Plasma",
{
"shineChargeFrames": 160
}
]
},
{
"and": [
"Ice",
"Plasma",
{
"shineChargeFrames": 105
}
]
},
{
"and": [
"Wave",
"Plasma",
{
"shineChargeFrames": 120
}
]
},
{
"and": [
"Charge",
"Ice",
"Wave",
"Spazer",
{
"shineChargeFrames": 105
}
]
},
{
"and": [
{
"or": [
{
"ammo": {
"type": "Missile",
"count": 1
}
},
{
"ammo": {
"type": "Super",
"count": 1
}
}
]
},
{
"shineChargeFrames": 130
}
]
},
{
"and": [
"canShinechargeMovementTricky",
"canInsaneJump",
{
"shineChargeFrames": 105
}
]
}
]
}
"canMidAirMorph"
"h_spikeSuitSpikeHitLeniency"
{
"spikeHits": 1
}
"canTrickySpikeSuit"
{
"shinespark": {
"frames": 1,
"excessFrames": 1
}
} |
From: 1
Left Door
To: 1
Left Door

Entrance condition: {
"comeInShinecharging": {
"length": 4,
"openEnd": 0
}
}Requires: {
"or": [
"Plasma",
{
"ammo": {
"type": "Missile",
"count": 1
}
},
{
"ammo": {
"type": "Super",
"count": 1
}
},
{
"and": [
"Charge",
"Ice",
"Wave",
"Spazer"
]
},
{
"and": [
"canShinechargeMovementTricky",
{
"shineChargeFrames": 175
}
]
}
]
}
"canMidAirMorph"
"h_spikeSuitSpikeHitLeniency"
{
"spikeHits": 1
}
"canTrickySpikeSuit"
{
"shinespark": {
"frames": 1,
"excessFrames": 1
}
} |
From: 1
Left Door
To: 2
Right Door


Tight movement is needed to enter with a shinecharge, carry it through the morph tunnel, and spark out the right door in time. Entrance condition: {
"comeInShinecharging": {
"length": 2,
"openEnd": 0
}
}Requires: "canMidAirMorph"
"canShinechargeMovementTricky"
{
"shineChargeFrames": 175
}
{
"shinespark": {
"frames": 7,
"excessFrames": 0
}
}Exit condition: {
"leaveWithSpark": {
"position": "bottom"
}
}Unlocks doors: {"types":["super"],"requires":[]}
{"types":["missiles","powerbomb"],"requires":["never"]}Dev note: There doesn't appear to be enough time to spark out in a 'top' position. |
|
Store the spark on the right side of the ledge. Run left and do a big jump towards the top left door and then midair spark at the right time. Do not jump to max height or Samus will run out of shinecharge frames, instead short the jump a little. The lines in the background make for a good way to measure height. Requires: "canShinechargeMovementComplex"
{
"canShineCharge": {
"usedTiles": 19,
"steepUpTiles": 2,
"steepDownTiles": 1,
"openEnd": 2
}
}
{
"or": [
{
"and": [
"h_speedJump",
{
"shinespark": {
"frames": 95,
"excessFrames": 33
}
}
]
},
{
"and": [
"h_speedJump",
"canShinechargeMovementTricky",
{
"shinespark": {
"frames": 87,
"excessFrames": 33
}
}
]
},
{
"shinespark": {
"frames": 104,
"excessFrames": 33
}
},
{
"and": [
"canShinechargeMovementTricky",
{
"shinespark": {
"frames": 103,
"excessFrames": 33
}
}
]
}
]
}Clears obstacles: A |
From: 4
Bottom Right Door
To: 1
Top Left Door


Store the spark on the right side of the ledge. Run left and do a big jump towards the gauntlet door and then midair spark at the right time. Do not jump to max height or Samus will run out of shinecharge frames, instead short the jump a little. The lines in the background make for a good way to measure height. Requires: {
"obstaclesCleared": [
"C"
]
}
"canShinechargeMovementComplex"
{
"canShineCharge": {
"usedTiles": 19,
"steepUpTiles": 2,
"steepDownTiles": 1,
"openEnd": 2
}
}
{
"or": [
{
"and": [
"h_speedJump",
{
"shinespark": {
"frames": 96,
"excessFrames": 0
}
}
]
},
{
"and": [
"h_speedJump",
"canShinechargeMovementTricky",
{
"shinespark": {
"frames": 88,
"excessFrames": 0
}
}
]
},
{
"shinespark": {
"frames": 105,
"excessFrames": 0
}
}
]
}Exit condition: {
"leaveWithSpark": {
"position": "top"
}
}Unlocks doors: {"types":["ammo"],"requires":[],"useImplicitRequires":false}Dev note: Unlocking the door is free since the obstacle C cleared means that any lock was already taken care of. |
From: 2
Middle Left Door
To: 3
Bottom Left Horizontal Door


Entrance condition: {
"comeInShinecharging": {
"length": 2,
"openEnd": 0
}
}Requires: "Morph"
"canShinechargeMovementTricky"
{
"shinespark": {
"frames": 6,
"excessFrames": 0
}
}Exit condition: {
"leaveWithSpark": {}
}Unlocks doors: {"types":["super"],"requires":[]}
{"types":["missiles","powerbomb"],"requires":["never"]} |
From: 6
Bottom Right Door (On the Left Shaft)
To: 7
Bottom Left Vertical Door
Walk off the ledge (rather than running off), aim down, and shoot. Depending on your momentum coming in, if Zebes is awake you may need to shoot down twice, once to kill the Geemer and once to open the door. Press forward against the floating platform to make it through the door. Entrance condition: {
"comeInShinecharged": {}
}Requires: {
"shineChargeFrames": 121
}
"canShinechargeMovementTricky"Exit condition: {
"leaveShinecharged": {}
}Unlocks doors: {"types":["ammo"],"requires":["never"]} |
From: 8
Central Junction
To: 5
Alcatraz Door


Perform a soft unmorph and run toward the door (shooting it open if needed). If needing to spark out the bottom of the doorway, then stop on a dime at the bottom of the runway before activating the spark; this requires precise movement, as there is barely enough time to make it. Requires: {
"canShineCharge": {
"usedTiles": 25,
"steepUpTiles": 3,
"steepDownTiles": 3,
"openEnd": 1
}
}
"Morph"
"canShinechargeMovementTricky"
"canInsaneJump"
{
"shinespark": {
"frames": 6,
"excessFrames": 0
}
}Exit condition: {
"leaveWithSpark": {}
}Unlocks doors: {"types":["super"],"requires":[]}
{"types":["missiles","powerbomb"],"requires":["never"]} |
From: 8
Central Junction
To: 5
Alcatraz Door
Unmorph a few tiles above the ground, and hold right to land on the platform aligning Samus with the top of the doorway. If needed, shoot the door open while falling, and hold jump to buffer the shinespark activation as soon as Samus lands. Requires: {
"canShineCharge": {
"usedTiles": 25,
"steepUpTiles": 3,
"steepDownTiles": 3,
"openEnd": 1
}
}
"Morph"
"canResetFallSpeed"
"canShinechargeMovementTricky"
{
"shinespark": {
"frames": 12,
"excessFrames": 0
}
}Exit condition: {
"leaveWithSpark": {
"position": "top"
}
}Unlocks doors: {"types":["super"],"requires":[]}
{"types":["missiles","powerbomb"],"requires":["never"]} |
|
Use SpeedBooster to break the runway Bomb block and then to shinespark across the room, saving Power Bombs. One Power Bomb is still needed to break the tunnel block. The shinespark timer is very tight and breaking the runway block while storing the Shinespark is required as it saves movement frames. Entrance condition: {
"comeInShinecharging": {
"length": 8,
"openEnd": 0
}
}Requires: {
"notable": "Spark Master"
}
"canSlowShortCharge"
"canShinechargeMovementTricky"
"h_usePowerBomb"
"HiJump"
"Gravity"
{
"acidFrames": 16
}
"canInsaneJump"
{
"shinespark": {
"frames": 93,
"excessFrames": 15
}
}Dev note: There are variations with Screw or Bombs that wouldn't need Gravity. But then you can cross the room normally. |
From: 2
Left Door
To: 2
Left Door
The ideal setup begins by standing 5 tiles away from the water, at the top of the slope. Run toward the water, releasing forward for 5 frames before re-pressing it on the last possible frame before entering the water. Other positions and timings can work but will gain the shinecharge further from the door. Requires: "canPreciseStutterWaterShineCharge"
"canShinechargeMovementTricky"
"canInsaneJump"
{
"shineChargeFrames": 155
}
{
"or": [
"canBeVeryPatient",
{
"shineChargeFrames": 15
}
]
}Exit condition: {
"leaveShinecharged": {}
} |
|
Requires: "Gravity"
"HiJump"
{
"canShineCharge": {
"usedTiles": 20,
"steepUpTiles": 4,
"steepDownTiles": 2,
"startingSteepDownTiles": 1,
"openEnd": 0
}
}
"canShinechargeMovementTricky"
{
"shineChargeFrames": 150
}Exit condition: {
"leaveShinecharged": {}
} |
|

Requires: "Gravity"
"HiJump"
{
"canShineCharge": {
"usedTiles": 12,
"steepUpTiles": 3,
"steepDownTiles": 1,
"openEnd": 1
}
}
"canShinechargeMovementTricky"
{
"shineChargeFrames": 135
}Exit condition: {
"leaveShinecharged": {}
} |
|


Requires: "Gravity"
"canWallJump"
{
"canShineCharge": {
"usedTiles": 12,
"steepUpTiles": 3,
"steepDownTiles": 1,
"openEnd": 1
}
}
"canShinechargeMovementTricky"
{
"shineChargeFrames": 145
}Exit condition: {
"leaveShinecharged": {}
} |
|
Requires: "Gravity"
{
"canShineCharge": {
"usedTiles": 20,
"steepUpTiles": 4,
"steepDownTiles": 2,
"startingSteepDownTiles": 1,
"openEnd": 0
}
}
"canShinechargeMovementTricky"
{
"shinespark": {
"frames": 18,
"excessFrames": 0
}
}Exit condition: {
"leaveWithSpark": {
"position": "bottom"
}
} |
|
Enter the room while building a shinespark and use it on the lowest part of the ramp to cross the room and reach a raised ledge on the right side wall. From there, use SpaceJump to escape the water. Carry the shinespark to the bottom of the ramp by delaying the first Choot with two Power Beam shots, killing it, or bounceballing through it. The Choot can be shot diagonally from the middle platform, and again by running off that platform and aiming down to float above it. Entrance condition: {
"comeInShinecharging": {
"length": 6,
"openEnd": 1,
"steepDownTiles": 1
}
}Requires: "canShinechargeMovementComplex"
"canCarefulJump"
{
"or": [
{
"and": [
"canShinechargeMovementTricky",
"canTrickyDodgeEnemies"
]
},
{
"and": [
{
"enemyDamage": {
"enemy": "Choot",
"type": "contact",
"hits": 1
}
},
"canNeutralDamageBoost",
"canBounceBall"
]
},
{
"and": [
"canMockball",
{
"or": [
"canPseudoScrew",
"ScrewAttack",
"Plasma",
"Wave",
{
"ammo": {
"type": "Missile",
"count": 1
}
},
{
"ammo": {
"type": "Super",
"count": 1
}
}
]
}
]
}
]
}
{
"shinespark": {
"frames": 125,
"excessFrames": 5
}
}
"canSpaceJumpWaterBounce"
{
"or": [
{
"and": [
"canTrickyJump",
"canDownGrab"
]
},
"canWallJump"
]
}Dev note: There is 1 unusable tile in this runway. |
From: 1
Left Door
To: 2
Right Door
Use a Waver to damage boost across part of the room, then pass through any remaining enemies while i-frames are active. Killing the first waver and damage boosting with the second may be easier. Entrance condition: {
"comeInShinecharged": {}
}Requires: {
"shineChargeFrames": 140
}
"canShinechargeMovementTricky"
"canHorizontalDamageBoost"
"canTrickyJump"
"canUseIFrames"
{
"enemyDamage": {
"enemy": "Waver",
"type": "contact",
"hits": 1
}
}Exit condition: {
"leaveShinecharged": {}
}Unlocks doors: {"types":["super"],"requires":[]}
{"types":["missiles","powerbomb"],"requires":["never"]} |
From: 1
Left Door
To: 2
Right Door
Gain a shinecharge while entering the room. Move quickly to the right, either dodging the enemies or using them to damage boost. Shoot open the door and spark through. Entrance condition: {
"comeInShinecharging": {
"length": 4,
"openEnd": 1,
"steepDownTiles": 2
}
}Requires: "canShinechargeMovementTricky"
{
"shinespark": {
"frames": 15,
"excessFrames": 0
}
}Exit condition: {
"leaveWithSpark": {
"position": "bottom"
}
}Unlocks doors: {"types":["super"],"requires":[]}
{"types":["missiles","powerbomb"],"requires":["never"]} |
|
Fire a Plasma shot while running into the room, jump and activate the shinespark wind-up mid-air. Wait to spark right until just as the Plasma shot goes off screen. Entrance condition: {
"comeInShinecharged": {}
}Requires: {
"shineChargeFrames": 40
}
"Plasma"
"canHeroShot"
"canShinechargeMovementTricky"
{
"shinespark": {
"frames": 37,
"excessFrames": 0
}
}Exit condition: {
"leaveWithSpark": {
"position": "bottom"
}
}Unlocks doors: {
"types": [
"super"
],
"requires": [],
"devNote": "FIXME: Using a Super seems extremely awkward but possible; add a higher-level tech requirement here."
}
{"types":["missiles","powerbomb"],"requires":["never"]} |
From: 2
Right Door
To: 1
Left Door
Gain a shinecharge while entering the room. Move quickly to the left, dodging the enemies. Shoot open the door and spark through. Entrance condition: {
"comeInShinecharging": {
"length": 8,
"openEnd": 1,
"steepDownTiles": 2
}
}Requires: "canShinechargeMovementTricky"
{
"shinespark": {
"frames": 9,
"excessFrames": 0
}
}Exit condition: {
"leaveWithSpark": {}
}Unlocks doors: {"types":["super"],"requires":[]}
{"types":["missiles","powerbomb"],"requires":["never"]} |
|
Run into the room, and fire a Plasma shot. Depending on the vertical position needed for the spark, either stop on a dime and activate the shinespark from the ground, or continue running and jump into a midair shinespark. Wait to spark until just as the Plasma shot goes off screen. Entrance condition: {
"comeInShinecharged": {}
}Requires: {
"shineChargeFrames": 40
}
"Plasma"
"canHeroShot"
"canShinechargeMovementTricky"
{
"shinespark": {
"frames": 28,
"excessFrames": 0
}
}Exit condition: {
"leaveWithSpark": {}
}Unlocks doors: {
"types": [
"super"
],
"requires": [],
"devNote": "FIXME: Using a Super seems extremely awkward but possible; add a higher-level tech requirement here."
}
{"types":["missiles","powerbomb"],"requires":["never"]} |
|
Jump into the Choot to damage boost across part of the room, then pass through any remaining enemies while i-frames are active. Entrance condition: {
"comeInShinecharged": {}
}Requires: {
"shineChargeFrames": 150
}
"canShinechargeMovementTricky"
"canHorizontalDamageBoost"
"canTrickyJump"
"canUseIFrames"
{
"enemyDamage": {
"enemy": "Choot",
"type": "contact",
"hits": 1
}
}Exit condition: {
"leaveShinecharged": {}
}Unlocks doors: {"types":["super"],"requires":[]}
{"types":["missiles","powerbomb"],"requires":["never"]} |
|

Run and jump, fire a shot mid-air, and activate the shinespark wind-up. Wait until the shot is at a specific position before sparking. Sparking too late will cause the shot to despawn before reaching the door. Sparking too early will cause Samus to bonk the door as it will not yet be open. A beam shot, Missile, or Super can be used. Entrance condition: {
"comeInShinecharged": {}
}Requires: {
"shineChargeFrames": 40
}
"canShinechargeMovementTricky"
"canHeroShot"
{
"shinespark": {
"frames": 38,
"excessFrames": 0
}
}Exit condition: {
"leaveWithSpark": {
"position": "top"
}
}Unlocks doors: {"types":["super"],"requires":[]}
{"types":["missiles","powerbomb"],"requires":["never"]}Dev note: Sparking in top position means the item will be avoided. |
|
Run and jump, fire a shot mid-air, and activate the shinespark wind-up. Wait until the shot is at a specific position before sparking. Sparking too late will cause the shot to despawn before reaching the door. Sparking too early will cause Samus to bonk the door as it will not yet be open. A beam shot, Missile, or Super can be used. Entrance condition: {
"comeInShinecharged": {}
}Requires: {
"shineChargeFrames": 40
}
"canShinechargeMovementTricky"
"canHeroShot"
{
"shinespark": {
"frames": 38,
"excessFrames": 0
}
}Clears obstacles: B, C Collects items: 3 Dev note: Sparking in bottom position means the item will be collected along the way. |
|


Run, jump, fire a shot mid-air, and activate a mid-air shinespark to the left. Sparking too late will cause the shot to despawn before reaching the door. Sparking too early will cause Samus to bonk the door as it will not yet be open. A beam shot, Missile, or Super can be used. Entrance condition: {
"comeInShinecharged": {}
}Requires: {
"shineChargeFrames": 25
}
"canShinechargeMovementTricky"
"canHeroShot"
{
"shinespark": {
"frames": 17,
"excessFrames": 0
}
}Clears obstacles: A, C Collects items: 3 |
From: 2
Upper Right Section - Top Right Door
To: 2
Upper Right Section - Top Right Door
Gain a shinecharge while running left-to-right. Continue running right for a precise distance of 7 tiles, then jump and walljump to reach the top-right door with shinecharge frames remaining. Requires: {
"canShineCharge": {
"usedTiles": 18,
"steepUpTiles": 4,
"openEnd": 1
}
}
"canTrickyDashJump"
"canWallJump"
"canShinechargeMovementTricky"
"canInsaneJump"
{
"shineChargeFrames": 170
}Exit condition: {
"leaveShinecharged": {}
} |
From: 2
Upper Right Section - Top Right Door
To: 2
Upper Right Section - Top Right Door
Gain a shinecharge while bonking the door below the top-right door. Then turn around, run a precise distance of 7 tiles, and jump and walljump to approach the top-right door and shinespark out. Requires: {
"canShineCharge": {
"usedTiles": 32,
"steepUpTiles": 4,
"openEnd": 1
}
}
"canTrickyDashJump"
"canWallJump"
"canShinechargeMovementTricky"
{
"shinespark": {
"frames": 10,
"excessFrames": 0
}
}Exit condition: {
"leaveWithSpark": {}
} |
From: 4
Lower Section - Top Right Door
To: 5
Lower Section - Bottom Right Door

While falling out of the door, swing out to the left a couple tiles before moving back right, in order to make the camera scroll. Run, jump, fire a shot mid-air, and activate a well-timed mid-air shinespark to make it through the door. Entrance condition: {
"comeInShinecharging": {
"length": 0,
"openEnd": 1
}
}Requires: "canShinechargeMovementTricky"
"canHeroShot"
{
"shinespark": {
"frames": 26,
"excessFrames": 0
}
}Exit condition: {
"leaveWithSpark": {}
}Unlocks doors: {"types":["super"],"requires":[]}
{"types":["missiles","powerbomb"],"requires":["never"]} |
From: 12
Top Junction
To: 6
Middle Right Door (By Zeb Farm)
Farm up on the Zeb, drain energy back down, and then return to the upper runway. Preopen the shotblock, then go back and charge a shinespark. Springball through the short morphball tunnel to just have enough time to shinespark in the Zeb's path and interrupt. Requires: {
"obstaclesCleared": [
"R-Mode"
]
}
{
"notable": "Shinespark, Morph Tunnel Rush"
}
"canShinechargeMovementTricky"
"h_useSpringBall"
{
"refill": [
"Energy"
]
}
"h_shinechargeMaxRunway"
{
"autoReserveTrigger": {}
}
"canRModeSparkInterrupt"Resets obstacles: R-Mode |
From: 13
Bottom Junction
To: 4
Lower Section - Top Right Door

Spacejump out of the water then use walljumps up to the gravity suit room door. Requires: "canShinechargeMovementTricky"
"canFastWallJumpClimb"
"HiJump"
"Gravity"
"SpaceJump"
"h_shinechargeMaxRunway"
{
"shineChargeFrames": 145
}Exit condition: {
"leaveShinecharged": {}
}Unlocks doors: {"types":["ammo"],"requires":[]} |
From: 13
Bottom Junction
To: 4
Lower Section - Top Right Door


Use walljumps to climb from the ocean floor up to the gravity suit room door. Requires: "canShinechargeMovementTricky"
"canFastWallJumpClimb"
"HiJump"
"Gravity"
"h_shinechargeMaxRunway"
{
"shineChargeFrames": 162
}Exit condition: {
"leaveShinecharged": {}
}Unlocks doors: {"types":["ammo"],"requires":[]} |
From: 1
Left Door
To: 2
Right Door
Gain a shinecharge running left to right, leaving about 3 tiles of runway to gain speed to jump directly into the doorway. Requires: {
"canShineCharge": {
"usedTiles": 16,
"openEnd": 1
}
}
"canShinechargeMovementTricky"
"canTrickyJump"
{
"shineChargeFrames": 80
}Exit condition: {
"leaveShinecharged": {}
}Unlocks doors: {"types":["ammo"],"requires":[]} |
From: 2
Top Left Door
To: 2
Top Left Door
Requires: {
"notable": "Leave With Spark (Fast Wall Climb)"
}
{
"obstaclesCleared": [
"A",
"C"
]
}
"HiJump"
{
"canShineCharge": {
"usedTiles": 35,
"openEnd": 1
}
}
"canShinechargeMovementTricky"
"canFastWallJumpClimb"
{
"shinespark": {
"frames": 8,
"excessFrames": 0
}
}Exit condition: {
"leaveWithSpark": {
"position": "top"
}
} |
From: 4
Right Item
To: 2
Top Left Door

Requires: {
"obstaclesCleared": [
"B"
]
}
"Morph"
{
"canShineCharge": {
"usedTiles": 31,
"openEnd": 0
}
}
{
"shinespark": {
"frames": 40,
"excessFrames": 3
}
}
"canShinechargeMovementTricky"Clears obstacles: A |
|
Gain a shinecharge on the long, lower platform in the screen above, then carry it left and down. Use crumble quick drops, land on the floor at the bottom, spin jump left into the doorway, and activate the spark. The required movement here is very precise, as the 180 shinecharge frames is only barely enough. Requires: {
"obstaclesNotCleared": [
"A"
]
}
"h_crouchJumpDownGrab"
{
"canShineCharge": {
"usedTiles": 17,
"openEnd": 0
}
}
"canShinechargeMovementTricky"
"canQuickDrop"
{
"shineChargeFrames": 175
}
{
"shinespark": {
"frames": 1,
"excessFrames": 0
}
}Exit condition: {
"leaveWithSpark": {}
}Dev note: This starts at node 1 to be able to unlock the door first if needed. Getting up to the platform above is possible by running to the right and crouch-jumping up. |
From: 2
Top Right Door
To: 3
Bottom Left Door
Requires: {
"canShineCharge": {
"usedTiles": 20,
"openEnd": 1
}
}
"canShinechargeMovementTricky"
{
"thornHits": 1
}
"canRiskySpikeSuit"
{
"shinespark": {
"frames": 12,
"excessFrames": 12
}
} |
|
Gain a shinecharge running left-to-right at the top of the room. Then run to the left, jump across the room, and shinespark through the door. Requires: {
"canShineCharge": {
"usedTiles": 16,
"openEnd": 1
}
}
"canShinechargeMovementTricky"
{
"shinespark": {
"frames": 13,
"excessFrames": 0
}
}Exit condition: {
"leaveWithSpark": {}
} |
From: 4
Above Power Bomb Blocks - Middle Left Door
To: 2
Above Power Bomb Blocks - Top Left Door


Entrance condition: {
"comeInShinecharged": {}
}Requires: {
"shineChargeFrames": 160
}
"canShinechargeMovementTricky"Exit condition: {
"leaveShinecharged": {}
}Unlocks doors: {"types":["super"],"requires":[]}
{"types":["missiles","powerbomb"],"requires":["never"]} |
From: 4
Above Power Bomb Blocks - Middle Left Door
To: 2
Above Power Bomb Blocks - Top Left Door


Entrance condition: {
"comeInShinecharged": {}
}Requires: {
"shineChargeFrames": 130
}
"canShinechargeMovementTricky"
{
"shinespark": {
"frames": 8,
"excessFrames": 0
}
}Exit condition: {
"leaveWithSpark": {}
}Unlocks doors: {"types":["super"],"requires":[]}
{"types":["missiles","powerbomb"],"requires":["never"]} |
From: 4
Above Power Bomb Blocks - Middle Left Door
To: 2
Above Power Bomb Blocks - Top Left Door


Entrance condition: {
"comeInShinecharging": {
"length": 2,
"openEnd": 0
}
}Requires: "canShinechargeMovementTricky"
{
"shineChargeFrames": 170
}Exit condition: {
"leaveShinecharged": {}
}Unlocks doors: {"types":["super"],"requires":[]}
{"types":["missiles","powerbomb"],"requires":["never"]} |
From: 4
Above Power Bomb Blocks - Middle Left Door
To: 3
Above Power Bomb Blocks - Top Right Door


Entrance condition: {
"comeInShinecharged": {}
}Requires: {
"shineChargeFrames": 160
}
"canShinechargeMovementTricky"Exit condition: {
"leaveShinecharged": {}
}Unlocks doors: {"types":["super"],"requires":[]}
{"types":["missiles","powerbomb"],"requires":["never"]} |
From: 4
Above Power Bomb Blocks - Middle Left Door
To: 3
Above Power Bomb Blocks - Top Right Door


Entrance condition: {
"comeInShinecharged": {}
}Requires: {
"shineChargeFrames": 130
}
"canShinechargeMovementTricky"
{
"shinespark": {
"frames": 14,
"excessFrames": 0
}
}Exit condition: {
"leaveWithSpark": {}
}Unlocks doors: {"types":["super"],"requires":[]}
{"types":["missiles","powerbomb"],"requires":["never"]} |
From: 4
Above Power Bomb Blocks - Middle Left Door
To: 3
Above Power Bomb Blocks - Top Right Door


Entrance condition: {
"comeInShinecharging": {
"length": 2,
"openEnd": 0
}
}Requires: "canShinechargeMovementTricky"
{
"shinespark": {
"frames": 6,
"excessFrames": 0
}
}Exit condition: {
"leaveWithSpark": {}
}Unlocks doors: {"types":["super"],"requires":[]}
{"types":["missiles","powerbomb"],"requires":["never"]} |
From: 5
Above Power Bomb Blocks - Bottom Left Door
To: 2
Above Power Bomb Blocks - Top Left Door


Entrance condition: {
"comeInShinecharged": {}
}Requires: {
"shineChargeFrames": 165
}
"HiJump"
"canShinechargeMovementTricky"
{
"shinespark": {
"frames": 12,
"excessFrames": 0
}
}Exit condition: {
"leaveWithSpark": {}
}Unlocks doors: {"types":["super"],"requires":[]}
{"types":["missiles","powerbomb"],"requires":["never"]} |
From: 5
Above Power Bomb Blocks - Bottom Left Door
To: 3
Above Power Bomb Blocks - Top Right Door


Entrance condition: {
"comeInShinecharged": {}
}Requires: {
"shineChargeFrames": 165
}
"HiJump"
"canShinechargeMovementTricky"
{
"shinespark": {
"frames": 12,
"excessFrames": 0
}
}Exit condition: {
"leaveWithSpark": {}
}Unlocks doors: {"types":["super"],"requires":[]}
{"types":["missiles","powerbomb"],"requires":["never"]} |
From: 5
Above Power Bomb Blocks - Bottom Left Door
To: 4
Above Power Bomb Blocks - Middle Left Door


Entrance condition: {
"comeInShinecharged": {}
}Requires: {
"shineChargeFrames": 145
}
"canShinechargeMovementTricky"Exit condition: {
"leaveShinecharged": {}
}Unlocks doors: {"types":["super"],"requires":[]}
{"types":["missiles","powerbomb"],"requires":["never"]} |
From: 5
Above Power Bomb Blocks - Bottom Left Door
To: 4
Above Power Bomb Blocks - Middle Left Door


Entrance condition: {
"comeInShinecharged": {}
}Requires: {
"shineChargeFrames": 75
}
"canShinechargeMovementTricky"
{
"shinespark": {
"frames": 5,
"excessFrames": 0
}
}Exit condition: {
"leaveWithSpark": {}
}Unlocks doors: {"types":["super"],"requires":[]}
{"types":["missiles","powerbomb"],"requires":["never"]} |
From: 5
Above Power Bomb Blocks - Bottom Left Door
To: 4
Above Power Bomb Blocks - Middle Left Door


Entrance condition: {
"comeInShinecharged": {}
}Requires: {
"shineChargeFrames": 130
}
"canShinechargeMovementTricky"
{
"shinespark": {
"frames": 5,
"excessFrames": 0
}
}Exit condition: {
"leaveWithSpark": {}
}Unlocks doors: {"types":["super"],"requires":[]}
{"types":["missiles","powerbomb"],"requires":["never"]} |
From: 7
Below Power Bomb Blocks - Top Right Door
To: 8
Below Power Bomb Blocks - Bottom Left Door
Come in with a shinecharge, and perform a moonfall off the ledge. While falling, fire a shot at the door and immediately activate the shinespark wind-up, to horizontally spark through the door. Entrance condition: {
"comeInShinecharged": {}
}Requires: {
"shineChargeFrames": 140
}
{
"notable": "Main Shaft Moonfall Spark"
}
"canMoonfall"
"canShinechargeMovementTricky"
{
"shinespark": {
"frames": 12,
"excessFrames": 0
}
}Exit condition: {
"leaveWithSpark": {}
}Unlocks doors: {"types":["super"],"requires":[]}
{"types":["missiles","powerbomb"],"requires":["never"]}Dev note: This is more difficult than the one in the Etecoon Shaft since there is not time to activate the spark after landing. Instead it must be activated mid-air while falling at high speed. With the vanilla door connection, this strat doesn't seem possible, due to just barely not having enough shinecharge frames. |
From: 9
Right Etecoon Shaft - Top Left Door
To: 10
Right Etecoon Shaft - Bottom Left Door
Run from left to right to gain a shinecharge, then immediately moonfall down the shaft. There is just barely enough time to shoot the door open (if not already open) and spark out. Requires: {
"notable": "Etecoon Shaft Moonfall Spark"
}
{
"canShineCharge": {
"usedTiles": 17,
"openEnd": 0
}
}
"canMoonfall"
"canShinechargeMovementTricky"
{
"shinespark": {
"frames": 12,
"excessFrames": 0
}
}Exit condition: {
"leaveWithSpark": {}
}Unlocks doors: {"types":["missiles","powerbomb"],"requires":[{"or":["SpaceJump","canLongIBJ","canConsecutiveWallJump"]}]}
{"types":["super"],"requires":[]} |
From: 1
Top Left Door
To: 1
Top Left Door


Use the short runway below the door to gain a shinecharge and reach the door with shinecharge frames remaining. Requires: {
"canShineCharge": {
"usedTiles": 14,
"openEnd": 1
}
}
{
"or": [
{
"canShineCharge": {
"usedTiles": 14,
"openEnd": 0
}
},
{
"shineChargeFrames": 15
}
]
}
"canShinechargeMovementTricky"
{
"or": [
{
"and": [
"HiJump",
{
"shineChargeFrames": 75
}
]
},
{
"shineChargeFrames": 80
}
]
}Exit condition: {
"leaveShinecharged": {}
} |
|
Use the runway below the bug pipe to gain a shinecharge and reach the door with shinecharge frames remaining. Requires: {
"canShineCharge": {
"usedTiles": 17,
"openEnd": 1
}
}
"canShinechargeMovementTricky"
{
"or": [
{
"and": [
"HiJump",
{
"shineChargeFrames": 130
}
]
},
{
"and": [
"canWallJump",
{
"shineChargeFrames": 170
}
]
},
{
"shineChargeFrames": 175
}
]
}Exit condition: {
"leaveShinecharged": {}
}Dev note: One tile of runway is considered unusable in order to have space to quickly jump up onto the bomb blocks above. It could also be possible to break the bomb blocks, potentially increasing the framesRemaining slightly. |
From: 2
Top Right Door
To: 2
Top Right Door
Use the runway below the door to gain a shinecharge and leave with shinecharge frames remaining. Requires: {
"canShineCharge": {
"usedTiles": 14,
"openEnd": 1
}
}
"canShinechargeMovementComplex"
{
"or": [
{
"and": [
"HiJump",
{
"shineChargeFrames": 135
}
]
},
{
"and": [
"canTrickyDashJump",
"canWallJump",
"canShinechargeMovementTricky",
{
"shineChargeFrames": 155
}
]
}
]
}Exit condition: {
"leaveShinecharged": {}
} |
|


Use the runway below the bug pipe to gain a shinecharge. Then walljump off the bomb blocks and the bug pipe to approach the door and spark out. Requires: "canPreciseWallJump"
{
"canShineCharge": {
"usedTiles": 17,
"openEnd": 1
}
}
"canShinechargeMovementTricky"
{
"shinespark": {
"frames": 19,
"excessFrames": 0
}
}Exit condition: {
"leaveWithSpark": {}
}Dev note: One tile of runway is considered unusable in order to have space to quickly jump up to the bomb blocks above. It could also be possible to break the bomb blocks, but this doesn't seem very worth considering. |
From: 4
Left Side - Door Behind Power Bomb Blocks
To: 4
Left Side - Door Behind Power Bomb Blocks
Use the morph tunnel that used to have crumble blocks as a faster path to the Mission Impossible transition. Requires: "Morph"
{
"canShineCharge": {
"usedTiles": 16,
"openEnd": 0
}
}
{
"or": [
"canShinechargeMovementTricky",
{
"and": [
"canShinechargeMovement",
"h_useSpringBall"
]
}
]
}
{
"obstaclesCleared": [
"C"
]
}
{
"shineChargeFrames": 120
}Exit condition: {
"leaveShinecharged": {}
} |
From: 1
Right Door
To: 1
Right Door
Land in the Samus Eater while moving forward. Continue holding dash and forward to gain a shinecharge while running in place inside the Samus Eater. Requires: "canSamusEaterStandUp"
{
"samusEaterCycles": 1
}
{
"or": [
"canShinechargeMovementTricky",
{
"samusEaterCycles": 2
}
]
}
"h_shinechargeMaxRunway"
{
"shineChargeFrames": 80
}Exit condition: {
"leaveShinecharged": {}
} |
From: 1
Right Door
To: 1
Right Door

Land in the far left side of the Samus Eater while moving forward to the right. Continue holding dash, forward, and angle-up or angle-down to gain a shinecharge while running in place inside the Samus Eater. The down press for the shinecharge must be precisely timed to occur after the Samus Eater releases Samus but before running into the wall (~2-frame window). Then use X-Ray to cancel the shinecharge frames, in order to jump out with temporary blue before the Samus Eater begins another cycle. If the down press for the shinecharge occurs too early, Samus will end up in an aim-down pose before landing and will not be able to gain temporary blue. Requires: "canSamusEaterStandUp"
{
"samusEaterCycles": 1
}
{
"or": [
"canShinechargeMovementTricky",
{
"samusEaterCycles": 2
}
]
}
"h_shinechargeMaxRunway"
"canXRayCancelShinecharge"
"canChainTemporaryBlue"Exit condition: {
"leaveWithTemporaryBlue": {}
} |
|


Run and jump, fire a shot mid-air, and activate the shinespark wind-up. Wait until the shot is at a specific position before sparking. Sparking too late will cause the shot to despawn before reaching the door. Sparking too early will cause Samus to bonk the door as it will not yet be open. A beam shot, Missile, or Super can be used. Entrance condition: {
"comeInShinecharged": {}
}Requires: {
"shineChargeFrames": 40
}
"canShinechargeMovementTricky"
"canHeroShot"
{
"shinespark": {
"frames": 38,
"excessFrames": 0
}
}Exit condition: {
"leaveWithSpark": {}
}Unlocks doors: {"types":["super"],"requires":[]}
{"types":["missiles","powerbomb"],"requires":["never"]} |
|
Slow rolling or getting a fast mockball work equally well. Requires: {
"canShineCharge": {
"usedTiles": 17,
"openEnd": 0
}
}
"canShinechargeMovementTricky"
"Morph"
{
"obstaclesCleared": [
"A"
]
}
{
"shinespark": {
"frames": 22,
"excessFrames": 0
}
}Exit condition: {
"leaveWithSpark": {}
}Dev note: One tile longer runway could be used if the door to the right of the gate were known to be unlocked |
From: 2
Middle Left Door
To: 1
Top Left Door
Entrance condition: {
"comeInShinecharged": {}
}Requires: {
"shineChargeFrames": 160
}
"HiJump"
"canShinechargeMovementTricky"
{
"shinespark": {
"frames": 11,
"excessFrames": 0
}
}Exit condition: {
"leaveWithSpark": {}
}Unlocks doors: {"types":["super"],"requires":[]}
{"types":["missiles","powerbomb"],"requires":["never"]} |
From: 2
Middle Left Door
To: 4
Bottom Right Door
Ledge grab precisely in front of the Cacatac, and jump immediately before it would hit you. Entrance condition: {
"comeInShinecharged": {}
}Requires: {
"shineChargeFrames": 110
}
"HiJump"
"canShinechargeMovementTricky"Exit condition: {
"leaveShinecharged": {}
}Unlocks doors: {"types":["super"],"requires":[]}
{"types":["missiles","powerbomb"],"requires":["never"]} |
From: 2
Middle Left Door
To: 4
Bottom Right Door
Ledge grab precisely in front of the Cacatac, and jump immediately before it would hit you. Entrance condition: {
"comeInShinecharged": {}
}Requires: {
"shineChargeFrames": 145
}
"canWallJump"
"canShinechargeMovementTricky"Exit condition: {
"leaveShinecharged": {}
}Unlocks doors: {"types":["super"],"requires":[]}
{"types":["missiles","powerbomb"],"requires":["never"]} |
From: 2
Middle Left Door
To: 4
Bottom Right Door
Ledge grab precisely in front of the Cacatac, and jump immediately before it would hit you. If the shinespark wind-up is activated as early as possible, then a Cacatac spike hit will be taken. Entrance condition: {
"comeInShinecharged": {}
}Requires: {
"shineChargeFrames": 120
}
"canWallJump"
"canShinechargeMovementTricky"
{
"enemyDamage": {
"enemy": "Cacatac",
"type": "spike",
"hits": 1
}
}
{
"shinespark": {
"frames": 6,
"excessFrames": 0
}
}Exit condition: {
"leaveWithSpark": {}
}Unlocks doors: {"types":["super"],"requires":[]}
{"types":["missiles","powerbomb"],"requires":["never"]} |
From: 2
Middle Left Door
To: 4
Bottom Right Door
Ledge grab precisely in front of the Cacatac, and jump immediately before it would hit you. Entrance condition: {
"comeInShinecharging": {
"length": 7,
"openEnd": 0
}
}Requires: "HiJump"
"canShinechargeMovementTricky"
{
"shineChargeFrames": 100
}Exit condition: {
"leaveShinecharged": {}
}Unlocks doors: {"types":["super"],"requires":[]}
{"types":["missiles","powerbomb"],"requires":["never"]}Dev note: One runway tile is considered unusable, in order to be able quickly jump up (without turning around) after gaining a shinecharge. |
From: 2
Middle Left Door
To: 4
Bottom Right Door
Ledge grab precisely in front of the Cacatac, and jump immediately before it would hit you. Entrance condition: {
"comeInShinecharging": {
"length": 7,
"openEnd": 0
}
}Requires: "canWallJump"
"canShinechargeMovementTricky"
{
"shineChargeFrames": 135
}Exit condition: {
"leaveShinecharged": {}
}Unlocks doors: {"types":["super"],"requires":[]}
{"types":["missiles","powerbomb"],"requires":["never"]}Dev note: One runway tile is considered unusable, in order to be able quickly jump up (without turning around) after gaining a shinecharge. |
From: 2
Right Door
To: 1
Left Door


Use the really small runway in the pit in the middle of the room. The door must be already opened. Requires: {
"obstaclesCleared": [
"A"
]
}
"canShinechargeMovementTricky"
{
"canShineCharge": {
"usedTiles": 13,
"openEnd": 0
}
}
{
"shinespark": {
"frames": 107,
"excessFrames": 0
}
}Exit condition: {
"leaveWithSpark": {}
}Unlocks doors: {"types":["ammo"],"requires":[],"useImplicitRequires":false}Dev note: Unlocking the door is free since obstacle A being cleared implies it was already unlocked earlier if needed. |
|
Use the really small runway in the pit in the middle of the room. Requires: "canShinechargeMovementTricky"
{
"canShineCharge": {
"usedTiles": 13,
"openEnd": 0
}
}
{
"shinespark": {
"frames": 107,
"excessFrames": 6
}
} |
|

Use X-mode to gain a shinecharge on the right side of the room, and use it to spark across to the left side of the room. Bumping a solid tile before activating X-Mode will remove dash state, preventing shinecharging. Requires: "canXMode"
{
"spikeHits": 2
}
"h_shinechargeMaxRunway"
"canShinechargeMovementTricky"
{
"shinespark": {
"frames": 105,
"excessFrames": 6
}
}Dev note: Omitting leniency spikeHits, since the firefleas provide an opportunity to farm after a failed attempt. |
From: 2
Right Door
To: 2
Right Door
Requires opening the door, then going to the pit in the middle of the room to use the really small runway. Requires: "canShinechargeMovementTricky"
{
"canShineCharge": {
"usedTiles": 13,
"openEnd": 0
}
}
{
"shinespark": {
"frames": 50,
"excessFrames": 0
}
}Exit condition: {
"leaveWithSpark": {}
} |
From: 3
Safe Block in the Middle of the Room
To: 1
Left Door
Use the spikes in the center of the room to gain a shinecharge with X-Mode. Then arm pump until Samus reaches the middle Yapping Maw. Exit X-mode, gain run speed, and use Space Jump to reach the door. Requires: {
"obstaclesCleared": [
"A"
]
}
"SpaceJump"
"h_spikeXModeShinecharge"
"canUseIFrames"
"canShinechargeMovementTricky"
{
"shineChargeFrames": 160
}Exit condition: {
"leaveShinecharged": {}
}Unlocks doors: {"types":["ammo"],"requires":[],"useImplicitRequires":false}Dev note: Unlocking the door is free since obstacle A being cleared implies it was already unlocked earlier if needed. |
|
Run and jump, fire a shot mid-air, and activate the shinespark wind-up. Wait until the shot is at a specific position before sparking. Sparking too late will cause the shot to despawn before reaching the door. Sparking too early will cause Samus to bonk the door as it will not yet be open. A beam shot, Missile, or Super can be used. Entrance condition: {
"comeInShinecharged": {}
}Requires: {
"shineChargeFrames": 45
}
"canShinechargeMovementTricky"
"canHeroShot"
{
"shinespark": {
"frames": 38,
"excessFrames": 0
}
}Exit condition: {
"leaveWithSpark": {}
}Unlocks doors: {"types":["super"],"requires":[]}
{"types":["missiles","powerbomb"],"requires":["never"]} |
|
Run and jump, fire a shot mid-air, and activate the shinespark wind-up. Wait until the shot is at a specific position before sparking. Sparking too late will cause the shot to despawn before reaching the door. Sparking too early will cause Samus to bonk the door as it will not yet be open. A beam shot, Missile, or Super can be used. Entrance condition: {
"comeInShinecharged": {}
}Requires: {
"shineChargeFrames": 45
}
"canShinechargeMovementTricky"
"canHeroShot"
{
"enemyDamage": {
"enemy": "Skree",
"type": "contact",
"hits": 1
}
}
{
"shinespark": {
"frames": 38,
"excessFrames": 0
}
}Exit condition: {
"leaveWithSpark": {}
}Unlocks doors: {"types":["super"],"requires":[]}
{"types":["missiles","powerbomb"],"requires":["never"]} |
|
Gain a shinecharge while running into the room, then quickly jump into the morph tunnel. Use the shinespark to break the bomb block. Entrance condition: {
"comeInShinecharging": {
"length": 4,
"openEnd": 0
}
}Requires: "HiJump"
"Morph"
"canShinechargeMovementTricky"
{
"shinespark": {
"frames": 5,
"excessFrames": 0
}
}Clears obstacles: A Dev note: 3 runway tiles are considered unusable, to allow a reasonable amount of space to gain run speed to morph into the tunnel. Using more runway for the shinecharge can work but with greater difficulty. |
From: 1
Right Door
To: 2
Item
Gain a shinecharge while running into the room, stopping just before running into the wall. Without holding dash, spin-jump to the left and mid-air morph into the morph tunnel. The mid-air morph must be delayed in order for Samus to move far enough left to avoid catching on the ceiling. Use the shinespark to break the bomb block. Entrance condition: {
"comeInShinecharging": {
"length": 6,
"openEnd": 1
}
}Requires: "Morph"
"canShinechargeMovementTricky"
"canInsaneJump"
{
"shinespark": {
"frames": 5,
"excessFrames": 0
}
}Clears obstacles: A |
|
Use quick ledge-grabs to reach the door in time. Entrance condition: {
"comeInShinecharged": {}
}Requires: {
"shineChargeFrames": 160
}
"canShinechargeMovementTricky"Exit condition: {
"leaveShinecharged": {}
}Unlocks doors: {"types":["super"],"requires":[]}
{"types":["missiles","powerbomb"],"requires":["never"]} |
From: 1
Left Door
To: 3
Bottom Right Door
Gain a shinecharge while running into the room, sliding off the ledge, then jump to the center of the room. Fire a shot to open the door, jump over the pillar, and spark out of the room. Entrance condition: {
"comeInShinecharging": {
"length": 4,
"openEnd": 1
}
}Requires: "canShinechargeMovementTricky"
{
"shinespark": {
"frames": 16,
"excessFrames": 0
}
}Exit condition: {
"leaveWithSpark": {}
}Unlocks doors: {"types":["super"],"requires":[]}
{"types":["missiles","powerbomb"],"requires":["never"]} |
|


Run and jump, fire a shot mid-air, and activate the shinespark wind-up. Wait until the shot is at a specific position before sparking. Sparking too late will cause the shot to despawn before reaching the door. Sparking too early will cause Samus to bonk the door as it will not yet be open. A beam shot, Missile, or Super can be used. Entrance condition: {
"comeInShinecharged": {}
}Requires: {
"shineChargeFrames": 40
}
"canShinechargeMovementTricky"
"canHeroShot"
{
"shinespark": {
"frames": 36,
"excessFrames": 0
}
}Exit condition: {
"leaveWithSpark": {
"position": "top"
}
}Unlocks doors: {"types":["super"],"requires":[]}
{"types":["missiles","powerbomb"],"requires":["never"]} |
|


Entrance condition: {
"comeInShinecharged": {}
}Requires: {
"shineChargeFrames": 115
}
"canDownBack"
"canShinechargeMovementTricky"Exit condition: {
"leaveShinecharged": {}
}Unlocks doors: {"types":["super"],"requires":[]}
{"types":["missiles","powerbomb"],"requires":["never"]} |
Come in Shinecharging, Gain Flash Suit (Spikesuit) - Leave with Shinespark
(Extreme+)
Kraid Eye Door Room
From: 2
Top Right Door
To: 1
Left Door


Requires precise movement. Down-back during the fall to clear the lower platform while shooting out the blocks. Unmorphing on the first possible frame leaves in top position; second frame leaves in middle position. Entrance condition: {
"comeInShinecharging": {
"length": 3,
"openEnd": 0
}
}Requires: "canUseFlashSuitInitialSpark"
{
"shineChargeFrames": 175
}
"canDownBack"
"canShinechargeMovementTricky"
{
"thornHits": 1
}
"canPatientSpikeSuit"
{
"shinespark": {
"frames": 19,
"excessFrames": 0
}
}Exit condition: {
"leaveWithSpark": {
"position": "top"
}
}Unlocks doors: {"types":["ammo"],"requires":["never"]}Dev note: It may be possible to open a green/red door with a super missile but it is on the edge of possibility. |
From: 2
Top Right Door
To: 2
Top Right Door

Requires precice movement. Down-back during the fall to clear the lower platform while shooting out the blocks. Entrance condition: {
"comeInShinecharging": {
"length": 3,
"openEnd": 0
}
}Requires: {
"shineChargeFrames": 175
}
"canDownBack"
"canShinechargeMovementTricky"
{
"thornHits": 1
}
"canPatientSpikeSuit"
{
"shinespark": {
"frames": 4,
"excessFrames": 4
}
}Dev note: Leniency is not included, because a farm is available. |
|


Run and jump, fire a shot mid-air, and activate the shinespark wind-up. Wait until the shot is at a specific position before sparking. Sparking too late will cause the shot to despawn before reaching the door. Sparking too early will cause Samus to bonk the door as it will not yet be open. A beam shot, Missile, or Super can be used. Entrance condition: {
"comeInShinecharged": {}
}Requires: {
"shineChargeFrames": 40
}
"canShinechargeMovementTricky"
"canHeroShot"
{
"shinespark": {
"frames": 38,
"excessFrames": 0
}
}Exit condition: {
"leaveWithSpark": {
"position": "top"
}
}Unlocks doors: {"types":["super"],"requires":[]}
{"types":["missiles","powerbomb"],"requires":["never"]} |
From: 5
Kihunter Junction
To: 2
Bottom Right Door
Break the shot block, then gain a shinecharge while sliding off the ledge, down toward the bottom right door. Requires: "canShinechargeMovementTricky"
{
"obstaclesCleared": [
"C"
]
}
{
"obstaclesNotCleared": [
"D"
]
}
{
"canShineCharge": {
"usedTiles": 17,
"openEnd": 1
}
}
{
"shineChargeFrames": 140
}Exit condition: {
"leaveShinecharged": {}
}Unlocks doors: {"types":["super"],"requires":[]}
{"types":["missiles","powerbomb"],"requires":["never"]} |
From: 5
Kihunter Junction
To: 3
Top Right Door


Generate a charge on the left side and carry it through the morph tunnel and out the right door. Requires: {
"obstaclesCleared": [
"B",
"C",
"D"
]
}
{
"canShineCharge": {
"usedTiles": 13,
"openEnd": 2
}
}
"canShinechargeMovementTricky"
"Morph"
{
"shinespark": {
"frames": 13,
"excessFrames": 0
}
}Exit condition: {
"leaveWithSpark": {}
}Unlocks doors: {"types":["super"],"requires":[]}
{"types":["missiles","powerbomb"],"requires":["never"]} |
From: 5
Kihunter Junction
To: 3
Top Right Door
Generate a charge on the left side and carry it through the morph tunnel and out the right door. Requires: {
"obstaclesCleared": [
"B",
"C"
]
}
{
"obstaclesNotCleared": [
"D"
]
}
{
"canShineCharge": {
"usedTiles": 31,
"openEnd": 1
}
}
"canShinechargeMovementTricky"
"Morph"
{
"shinespark": {
"frames": 13,
"excessFrames": 0
}
}Exit condition: {
"leaveWithSpark": {}
}Unlocks doors: {"types":["super"],"requires":[]}
{"types":["missiles","powerbomb"],"requires":["never"]} |
From: 1
Top Left Door
To: 2
Bottom Left Door
Enter with a shinecharge, jumping and aiming down and shoot the block. While falling, kill the Zeela or perform a Kago through it. Quickly reach the door below and spark out. Entrance condition: {
"comeInShinecharged": {}
}Requires: {
"shineChargeFrames": 165
}
{
"or": [
{
"enemyKill": {
"enemies": [
[
"Zeela"
]
],
"explicitWeapons": [
"Wave",
"Spazer",
"Plasma",
"Missile",
"Super"
]
}
},
{
"and": [
"canKago",
{
"enemyDamage": {
"enemy": "Zeela",
"type": "contact",
"hits": 1
}
}
]
}
]
}
"canShinechargeMovementTricky"
{
"shinespark": {
"frames": 4,
"excessFrames": 0
}
}Exit condition: {
"leaveWithSpark": {}
}Unlocks doors: {"types":["super"],"requires":[]}
{"types":["missiles","powerbomb"],"requires":["never"]}Dev note: FIXME: Add faster strat that morphs and takes a neutral damage boost off the Zeela and then down-backs. |
From: 1
Top Left Door
To: 2
Bottom Left Door
Gain a shinecharging while entering the room, and angle diagonally down to shoot the block. While falling, kill the Zeela or perform a Kago through it. Quickly reach the door below and spark out. Entrance condition: {
"comeInShinecharging": {
"length": 5,
"openEnd": 0
}
}Requires: {
"or": [
{
"enemyKill": {
"enemies": [
[
"Zeela"
]
],
"explicitWeapons": [
"Wave",
"Spazer",
"Plasma",
"Missile",
"Super"
]
}
},
{
"and": [
"canKago",
{
"enemyDamage": {
"enemy": "Zeela",
"type": "contact",
"hits": 1
}
}
]
}
]
}
"canShinechargeMovementTricky"
{
"shinespark": {
"frames": 5,
"excessFrames": 0
}
}Exit condition: {
"leaveWithSpark": {}
}Unlocks doors: {"types":["super"],"requires":[]}
{"types":["missiles","powerbomb"],"requires":["never"]} |
From: 2
Bottom Left Door
To: 1
Top Left Door
Enter with a shinecharge, and move up toward the door above. Use Wave or Plasma to shoot open the door from below while killing the approaching Zeelas. Entrance condition: {
"comeInShinecharged": {}
}Requires: {
"shineChargeFrames": 160
}
{
"enemyKill": {
"enemies": [
[
"Zeela"
]
],
"explicitWeapons": [
"Wave",
"Plasma"
]
}
}
"canShinechargeMovementTricky"
{
"shinespark": {
"frames": 2,
"excessFrames": 0
}
}Exit condition: {
"leaveWithSpark": {}
}Unlocks doors: {"types":["super"],"requires":[]}
{"types":["missiles","powerbomb"],"requires":["never"]} |
From: 2
Bottom Left Door
To: 1
Top Left Door
Enter with a shinecharge, and move up toward the door above. Use Wave or Plasma to shoot open the door from below while killing the approaching Zeelas. Entrance condition: {
"comeInShinecharging": {
"length": 4,
"openEnd": 0
}
}Requires: {
"enemyKill": {
"enemies": [
[
"Zeela"
]
],
"explicitWeapons": [
"Wave",
"Plasma"
]
}
}
"canShinechargeMovementTricky"
{
"shinespark": {
"frames": 2,
"excessFrames": 0
}
}Exit condition: {
"leaveWithSpark": {}
}Unlocks doors: {"types":["super"],"requires":[]}
{"types":["missiles","powerbomb"],"requires":["never"]} |
From: 2
Top Right Door
To: 1
Bottom Left Door
Fall through the shot blocks and shoot around the Skree to open the door without falling into the lava to shinespark out of the room. Entrance condition: {
"comeInShinecharged": {}
}Requires: {
"shineChargeFrames": 115
}
"canShinechargeMovementTricky"
{
"heatFrames": 165
}
{
"shinespark": {
"frames": 15,
"excessFrames": 0
}
}Exit condition: {
"leaveWithSpark": {}
}Unlocks doors: {"types":["super"],"requires":[]}
{"types":["missiles","powerbomb"],"requires":["never"]} |
From: 2
Top Right Door
To: 1
Bottom Left Door
Fall through the shot blocks and shoot around the Skree to open the door without falling into the lava to shinespark out of the room. Entrance condition: {
"comeInShinecharging": {
"length": 6,
"openEnd": 0
}
}Requires: "canShinechargeMovementTricky"
{
"heatFrames": 165
}
{
"shinespark": {
"frames": 15,
"excessFrames": 0
}
}Exit condition: {
"leaveWithSpark": {}
}Unlocks doors: {"types":["super"],"requires":[]}
{"types":["missiles","powerbomb"],"requires":["never"]} |
From: 1
Left Side - Top Door
To: 3
Left Side - Bottom Middle Door


Slide off the edge to kill the Waver with blue. Entrance condition: {
"comeInShinecharging": {
"length": 3,
"openEnd": 1
}
}Requires: "canShinechargeMovementTricky"
{
"shineChargeFrames": 156
}Exit condition: {
"leaveShinecharged": {}
}Unlocks doors: {"types":["super"],"requires":[]}
{"types":["missiles","powerbomb"],"requires":["never"]} |
From: 2
Left Side - Top Middle Door
To: 1
Left Side - Top Door

Entrance condition: {
"comeInShinecharged": {}
}Requires: {
"shineChargeFrames": 125
}
"HiJump"
"canPreciseWallJump"
"canShinechargeMovementTricky"
{
"shinespark": {
"frames": 18,
"excessFrames": 0
}
}Exit condition: {
"leaveWithSpark": {}
}Unlocks doors: {"types":["super"],"requires":[]}
{"types":["missiles","powerbomb"],"requires":["never"]} |
From: 2
Left Side - Top Middle Door
To: 1
Left Side - Top Door


Entrance condition: {
"comeInShinecharging": {
"length": 2,
"openEnd": 0
}
}Requires: "HiJump"
"canPreciseWallJump"
"canShinechargeMovementTricky"
{
"shineChargeFrames": 160
}Exit condition: {
"leaveShinecharged": {}
}Unlocks doors: {"types":["super"],"requires":[]}
{"types":["missiles","powerbomb"],"requires":["never"]} |
From: 2
Left Side - Top Middle Door
To: 7
Top Right Door


Entrance condition: {
"comeInShinecharged": {}
}Requires: {
"or": [
{
"and": [
"canSpeedyJump",
{
"shineChargeFrames": 125
}
]
},
{
"and": [
{
"shineChargeFrames": 160
},
{
"enemyDamage": {
"enemy": "Waver",
"type": "contact",
"hits": 1
}
}
]
}
]
}
"canHeroShot"
"HiJump"
"canWallJump"
"canShinechargeMovementTricky"
{
"shinespark": {
"frames": 27,
"excessFrames": 0
}
}
{
"or": [
"canBeLucky",
{
"enemyDamage": {
"enemy": "Cacatac",
"type": "spike",
"hits": 1
}
}
]
}Exit condition: {
"leaveWithSpark": {}
}Unlocks doors: {"types":["super"],"requires":[]}
{"types":["missiles","powerbomb"],"requires":["never"]} |
From: 6
Middle Right Door
To: 7
Top Right Door


Entrance condition: {
"comeInShinecharging": {
"length": 4,
"openEnd": 0
}
}Requires: "canShinechargeMovementTricky"
{
"shinespark": {
"frames": 5,
"excessFrames": 0
}
}Exit condition: {
"leaveWithSpark": {}
}Unlocks doors: {"types":["super"],"requires":[]}
{"types":["missiles","powerbomb"],"requires":["never"]} |
|


Run and jump, fire a shot mid-air, and activate the shinespark wind-up. Wait until the shot is at a specific position before sparking. Sparking too late will cause the shot to despawn before reaching the door. Sparking too early will cause Samus to bonk the door as it will not yet be open. A beam shot, Missile, or Super can be used. Entrance condition: {
"comeInShinecharged": {}
}Requires: {
"shineChargeFrames": 45
}
"canHeroShot"
"canShinechargeMovementTricky"
{
"shinespark": {
"frames": 36,
"excessFrames": 0
}
}Exit condition: {
"leaveWithSpark": {}
}Unlocks doors: {"types":["super"],"requires":[]}
{"types":["missiles","powerbomb"],"requires":["never"]} |
|

Entrance condition: {
"comeInShinecharging": {
"length": 5,
"openEnd": 0,
"gentleUpTiles": 2
}
}Requires: "canShinechargeMovementTricky"
{
"heatFrames": 225
}
{
"shinespark": {
"frames": 53,
"excessFrames": 0
}
}
{
"heatFrames": 105
} |
|
Requires: "h_spikeXModeShinecharge"
{
"or": [
{
"and": [
{
"heatFrames": 480
},
{
"shineChargeFrames": 140
},
"HiJump"
]
},
{
"and": [
{
"heatFrames": 540
},
"canWallJump",
"canShinechargeMovementTricky",
{
"shineChargeFrames": 160
}
]
}
]
}Exit condition: {
"leaveShinecharged": {}
}Dev note: Two spike hits are expected per attempt (with any additional leniency hits being multiplied by this amount). |
|
Fire a shot on the way up to clear the shot block. Perform a mockball but unmorph after exiting the Morph hole and Kill the Geruta while falling, if possible. Fire a shot to open the door, then jump forward and Shinespark out. Entrance condition: {
"comeInShinecharging": {
"length": 3,
"openEnd": 0
}
}Requires: "canShinechargeMovementTricky"
"canMockball"
{
"or": [
{
"enemyKill": {
"enemies": [
[
"Geruta"
]
],
"explicitWeapons": [
"Missile",
"Super",
"Wave",
"Spazer",
"Plasma"
]
}
},
{
"enemyDamage": {
"enemy": "Geruta",
"type": "contact",
"hits": 1
}
}
]
}
{
"heatFrames": 200
}
{
"shinespark": {
"frames": 16,
"excessFrames": 0
}
}Exit condition: {
"leaveWithSpark": {}
}Unlocks doors: {"types":["super"],"requires":[]}
{"types":["missiles","powerbomb"],"requires":["never"]} |
|
Store the shinespark on the last possible pixels of runway. Quickly drop to the nearby Namihe and damage boost using its flame. Hold the damage boost until just before being below the above platform and spark upwards Entrance condition: {
"comeInShinecharging": {
"length": 4,
"openEnd": 1
}
}Requires: {
"notable": "Damage Boost Shinespark"
}
"Gravity"
{
"or": [
"h_lavaProof",
"canSuitlessLavaDive"
]
}
"canShinechargeMovementTricky"
"canHorizontalDamageBoost"
{
"shinespark": {
"frames": 33
}
}
{
"heatFrames": 320
}
{
"lavaFrames": 155
}
{
"enemyDamage": {
"enemy": "Namihe",
"type": "fireball",
"hits": 1
}
} |
From: 1
Top Door
To: 3
Bottom Right Door
Entrance condition: {
"comeInShinecharged": {},
"comesThroughToilet": "any"
}Requires: "canShinechargeMovementTricky"
{
"shineChargeFrames": 150
}
{
"heatFrames": 185
}
{
"shinespark": {
"frames": 9,
"excessFrames": 0
}
}Exit condition: {
"leaveWithSpark": {}
}Unlocks doors: {"types":["super"],"requires":[]}
{"types":["missiles","powerbomb"],"requires":["never"]} |
From: 3
Bottom Right Door
To: 2
Top Right Door
Entrance condition: {
"comeInShinecharging": {
"length": 12,
"openEnd": 0
}
}Requires: "canShinechargeMovementTricky"
{
"heatFrames": 165
}
{
"shineChargeFrames": 165
}Exit condition: {
"leaveShinecharged": {}
}Unlocks doors: {"types":["super"],"requires":[]}
{"types":["missiles","powerbomb"],"requires":["never"]} |
From: 1
Left Shaft - Top Left Door
To: 1
Left Shaft - Top Left Door
Store the shinecharge while falling off the ledge then quickly morph and place the Power Bomb on the descent. Entrance condition: {
"comeInShinecharging": {
"length": 7,
"openEnd": 1
}
}Requires: "canShinechargeMovementTricky"
"canInsaneJump"
{
"or": [
{
"and": [
"h_enemyDrops",
"h_heatedCrystalSparkWithoutLenience"
]
},
"h_heatedCrystalSpark"
]
}Dev note: No lenience, since the Alcoons are a good Power Bomb farm. Since this can not be done with a flash suit, it is implicitly assumed Samus can crouch jump and down grab. |
From: 1
Left Shaft - Top Left Door
To: 4
Left Shaft - Top Right Door


Entrance condition: {
"comeInShinecharging": {
"length": 7,
"openEnd": 1
}
}Requires: {
"or": [
{
"and": [
"canShinechargeMovementComplex",
{
"heatFrames": 225
},
{
"shinespark": {
"frames": 15,
"excessFrames": 0
}
}
]
},
{
"and": [
"canShinechargeMovementTricky",
{
"heatFrames": 215
},
{
"shinespark": {
"frames": 6,
"excessFrames": 0
}
}
]
}
]
}Exit condition: {
"leaveWithSpark": {}
}Unlocks doors: {"types":["super"],"requires":[]}
{"types":["missiles","powerbomb"],"requires":["never"]} |
From: 3
Left Shaft - Middle Right Door
To: 2
Left Shaft - Bottom Right Door


Entrance condition: {
"comeInShinecharging": {
"length": 3,
"openEnd": 1
}
}Requires: "canShinechargeMovementTricky"
{
"heatFrames": 180
}
{
"shineChargeFrames": 170
}Exit condition: {
"leaveShinecharged": {}
}Unlocks doors: {"types":["super"],"requires":[]}
{"types":["missiles","powerbomb"],"requires":["never"]} |
From: 3
Left Shaft - Middle Right Door
To: 4
Left Shaft - Top Right Door


Entrance condition: {
"comeInShinecharging": {
"length": 3,
"openEnd": 0
}
}Requires: "HiJump"
"canTrickyJump"
"canShinechargeMovementTricky"
{
"heatFrames": 170
}
{
"shineChargeFrames": 165
}Exit condition: {
"leaveShinecharged": {}
}Unlocks doors: {"types":["super"],"requires":[]}
{"types":["missiles","powerbomb"],"requires":["never"]} |
From: 4
Left Shaft - Top Right Door
To: 1
Left Shaft - Top Left Door


Entrance condition: {
"comeInShinecharging": {
"length": 3,
"openEnd": 0
}
}Requires: "HiJump"
"canTrickyJump"
"canShinechargeMovementTricky"
{
"or": [
{
"ammo": {
"type": "Missile",
"count": 1
}
},
"Plasma"
]
}
{
"shinespark": {
"frames": 14,
"excessFrames": 0
}
}
{
"heatFrames": 190
}Exit condition: {
"leaveWithSpark": {}
}Unlocks doors: {"types":["super"],"requires":[]}
{"types":["missiles","powerbomb"],"requires":["never"]} |
From: 4
Left Shaft - Top Right Door
To: 3
Left Shaft - Middle Right Door


Entrance condition: {
"comeInShinecharging": {
"length": 3,
"openEnd": 1
}
}Requires: {
"or": [
{
"and": [
"canShinechargeMovementComplex",
{
"heatFrames": 215
},
{
"shinespark": {
"frames": 15,
"excessFrames": 0
}
}
]
},
{
"and": [
"canShinechargeMovementTricky",
{
"heatFrames": 195
},
{
"shinespark": {
"frames": 5,
"excessFrames": 0
}
}
]
}
]
}Exit condition: {
"leaveWithSpark": {}
}Unlocks doors: {"types":["super"],"requires":[]}
{"types":["missiles","powerbomb"],"requires":["never"]} |
|
Align with the right side of a wall or door then turn around and shinespark in order to avoid colliding with a slope. Requires: {
"obstaclesCleared": [
"A"
]
}
"canShinechargeMovementTricky"
"h_shinechargeMaxRunway"
{
"heatFrames": 335
}
{
"shinespark": {
"frames": 221
}
}Dev note: There is enough time to visit 3 and return to 2 before performing this strat with the shinespark. The obstacle being broken means Samus has run far enough to charge a shinespark. |
From: 1
Top Left Door
To: 2
Bottom Left Door
Entrance condition: {
"comeInShinecharging": {
"length": 11,
"openEnd": 1
}
}Requires: "Wave"
"canShinechargeMovementTricky"
{
"heatFrames": 160
}
{
"shineChargeFrames": 160
}Exit condition: {
"leaveShinecharged": {}
}Unlocks doors: {"types":["ammo"],"requires":["never"]} |
From: 1
Top Left Door
To: 2
Bottom Left Door


Requires: {
"or": [
"Wave",
{
"obstaclesCleared": [
"A"
]
}
]
}
{
"or": [
{
"canShineCharge": {
"usedTiles": 11,
"openEnd": 1
}
},
{
"and": [
{
"canShineCharge": {
"usedTiles": 12,
"openEnd": 1
}
},
{
"doorUnlockedAtNode": 1
}
]
}
]
}
"canShinechargeMovementTricky"
{
"heatFrames": 250
}
{
"shineChargeFrames": 160
}Exit condition: {
"leaveShinecharged": {}
}Unlocks doors: {"types":["ammo"],"requires":[{"obstaclesCleared":["A"]}]} |
From: 1
Top Left Door
To: 3
Top Right Door


Entrance condition: {
"comeInShinecharged": {}
}Requires: {
"shineChargeFrames": 35
}
"canShinechargeMovementTricky"
"canHeroShot"
{
"heatFrames": 85
}
{
"shinespark": {
"frames": 37,
"excessFrames": 0
}
}Exit condition: {
"leaveWithSpark": {}
}Unlocks doors: {"types":["super"],"requires":[]}
{"types":["missiles","powerbomb"],"requires":["never"]} |
From: 3
Top Right Door
To: 1
Top Left Door


Entrance condition: {
"comeInShinecharged": {}
}Requires: {
"shineChargeFrames": 35
}
"canShinechargeMovementTricky"
"canHeroShot"
{
"heatFrames": 85
}
{
"shinespark": {
"frames": 37,
"excessFrames": 0
}
}Exit condition: {
"leaveWithSpark": {}
}Unlocks doors: {"types":["super"],"requires":[]}
{"types":["missiles","powerbomb"],"requires":["never"]} |
From: 3
Top Right Door
To: 2
Bottom Left Door
Entrance condition: {
"comeInShinecharging": {
"length": 11,
"openEnd": 1
}
}Requires: "Wave"
"canShinechargeMovementTricky"
{
"heatFrames": 160
}
{
"shineChargeFrames": 160
}Exit condition: {
"leaveShinecharged": {}
}Unlocks doors: {"types":["ammo"],"requires":["never"]} |
From: 3
Top Right Door
To: 2
Bottom Left Door


Requires: {
"or": [
"Wave",
{
"obstaclesCleared": [
"A"
]
}
]
}
{
"or": [
{
"canShineCharge": {
"usedTiles": 11,
"openEnd": 1
}
},
{
"and": [
{
"canShineCharge": {
"usedTiles": 12,
"openEnd": 1
}
},
{
"doorUnlockedAtNode": 2
}
]
}
]
}
"canShinechargeMovementTricky"
{
"heatFrames": 255
}
{
"shineChargeFrames": 160
}Exit condition: {
"leaveShinecharged": {}
}Unlocks doors: {"types":["ammo"],"requires":[{"obstaclesCleared":["A"]}]} |
From: 1
Top Left Door
To: 3
Bottom Left Door


Entrance condition: {
"comeInShinecharging": {
"length": 4,
"openEnd": 1,
"gentleDownTiles": 2
}
}Requires: "canShinechargeMovementTricky"
"canDownBack"
{
"shineChargeFrames": 150
}Exit condition: {
"leaveShinecharged": {}
}Unlocks doors: {"types":["super"],"requires":[]}
{"types":["missiles","powerbomb"],"requires":["never"]} |
From: 2
Middle Left Door
To: 1
Top Left Door


Wall jump off the side of the platform and weave around the Sova to get onto the ledge above. Entrance condition: {
"comeInShinecharged": {}
}Requires: {
"shineChargeFrames": 125
}
"canShinechargeMovementTricky"
"canPreciseWallJump"Exit condition: {
"leaveShinecharged": {}
}Unlocks doors: {"types":["super"],"requires":[]}
{"types":["missiles","powerbomb"],"requires":["never"]} |
From: 2
Middle Left Door
To: 4
Bottom Right Door


Entrance condition: {
"comeInShinecharging": {
"length": 3,
"openEnd": 1
}
}Requires: "canShinechargeMovementTricky"
{
"shinespark": {
"frames": 12,
"excessFrames": 0
}
}Exit condition: {
"leaveWithSpark": {
"position": "top"
}
}Unlocks doors: {"types":["super"],"requires":[]}
{"types":["missiles","powerbomb"],"requires":["never"]} |
|


Requires very efficient movement. Entrance condition: {
"comeInShinecharging": {
"length": 2,
"openEnd": 0
}
}Requires: "canShinechargeMovementTricky"
"canTrickyJump"
"HiJump"
{
"shineChargeFrames": 155
}Exit condition: {
"leaveShinecharged": {}
}Unlocks doors: {"types":["super"],"requires":[]}
{"types":["missiles","powerbomb"],"requires":["never"]}Dev note: 1 unusable tile. |
From: 3
Bottom Left Door
To: 1
Top Left Door


Entrance condition: {
"comeInShinecharging": {
"length": 12,
"openEnd": 0
}
}Requires: "HiJump"
"canShinechargeMovementTricky"
{
"shinespark": {
"frames": 10,
"excessFrames": 0
}
}Exit condition: {
"leaveWithSpark": {}
}Unlocks doors: {"types":["super"],"requires":[]}
{"types":["missiles","powerbomb"],"requires":["never"]} |
From: 3
Bottom Left Door
To: 6
Top Right Door


Entrance condition: {
"comeInShinecharging": {
"length": 12,
"openEnd": 0
}
}Requires: "HiJump"
"canShinechargeMovementTricky"
"canInsaneJump"
{
"shinespark": {
"frames": 6,
"excessFrames": 0
}
}Exit condition: {
"leaveWithSpark": {}
}Unlocks doors: {"types":["super"],"requires":[]}
{"types":["missiles","powerbomb"],"requires":["never"]}Dev note: Sparking out in top position is very tight, hence the canInsaneJump requirement. |
From: 3
Bottom Left Door
To: 6
Top Right Door
Entrance condition: {
"comeInShinecharging": {
"length": 12,
"openEnd": 0
}
}Requires: "HiJump"
"canShinechargeMovementTricky"
{
"shinespark": {
"frames": 10,
"excessFrames": 0
}
}Exit condition: {
"leaveWithSpark": {
"position": "bottom"
}
}Unlocks doors: {"types":["super"],"requires":[]}
{"types":["missiles","powerbomb"],"requires":["never"]} |
From: 4
Bottom Right Door
To: 3
Bottom Left Door


Entrance condition: {
"comeInShinecharged": {}
}Requires: {
"shineChargeFrames": 140
}
"canShinechargeMovementTricky"
{
"shinespark": {
"frames": 8,
"excessFrames": 0
}
}Exit condition: {
"leaveWithSpark": {}
}Unlocks doors: {"types":["super"],"requires":[]}
{"types":["missiles","powerbomb"],"requires":["never"]} |
From: 4
Bottom Right Door
To: 3
Bottom Left Door


Entrance condition: {
"comeInShinecharged": {}
}Requires: {
"shineChargeFrames": 120
}
"HiJump"
"canShinechargeMovementTricky"
{
"shinespark": {
"frames": 9,
"excessFrames": 0
}
}Exit condition: {
"leaveWithSpark": {}
}Unlocks doors: {"types":["super"],"requires":[]}
{"types":["missiles","powerbomb"],"requires":["never"]} |
From: 4
Bottom Right Door
To: 3
Bottom Left Door


Entrance condition: {
"comeInShinecharging": {
"length": 8,
"openEnd": 0,
"gentleUpTiles": 4
}
}Requires: "canShinechargeMovementTricky"
{
"shineChargeFrames": 160
}Exit condition: {
"leaveShinecharged": {}
}Unlocks doors: {"types":["super"],"requires":[]}
{"types":["missiles","powerbomb"],"requires":["never"]} |
From: 4
Bottom Right Door
To: 3
Bottom Left Door


Entrance condition: {
"comeInShinecharging": {
"length": 8,
"openEnd": 0,
"gentleUpTiles": 4
}
}Requires: "canShinechargeMovementTricky"
"HiJump"
{
"shineChargeFrames": 140
}Exit condition: {
"leaveShinecharged": {}
}Unlocks doors: {"types":["super"],"requires":[]}
{"types":["missiles","powerbomb"],"requires":["never"]} |
From: 4
Bottom Right Door
To: 5
Middle Right Door


Entrance condition: {
"comeInShinecharged": {}
}Requires: {
"shineChargeFrames": 140
}
"canShinechargeMovementTricky"
{
"shinespark": {
"frames": 8,
"excessFrames": 0
}
}Exit condition: {
"leaveWithSpark": {}
}Unlocks doors: {"types":["super"],"requires":[]}
{"types":["missiles","powerbomb"],"requires":["never"]} |
From: 4
Bottom Right Door
To: 5
Middle Right Door


Entrance condition: {
"comeInShinecharged": {}
}Requires: {
"shineChargeFrames": 115
}
"HiJump"
"canShinechargeMovementTricky"
{
"shinespark": {
"frames": 9,
"excessFrames": 0
}
}Exit condition: {
"leaveWithSpark": {}
}Unlocks doors: {"types":["super"],"requires":[]}
{"types":["missiles","powerbomb"],"requires":["never"]} |
From: 4
Bottom Right Door
To: 5
Middle Right Door


Entrance condition: {
"comeInShinecharging": {
"length": 8,
"openEnd": 0,
"gentleUpTiles": 4
}
}Requires: "canShinechargeMovementTricky"
{
"shineChargeFrames": 160
}Exit condition: {
"leaveShinecharged": {}
}Unlocks doors: {"types":["super"],"requires":[]}
{"types":["missiles","powerbomb"],"requires":["never"]} |
From: 4
Bottom Right Door
To: 5
Middle Right Door


Entrance condition: {
"comeInShinecharging": {
"length": 8,
"openEnd": 0,
"gentleUpTiles": 4
}
}Requires: "canShinechargeMovementTricky"
"HiJump"
{
"shineChargeFrames": 140
}Exit condition: {
"leaveShinecharged": {}
}Unlocks doors: {"types":["super"],"requires":[]}
{"types":["missiles","powerbomb"],"requires":["never"]} |
From: 5
Middle Right Door
To: 1
Top Left Door


Quickly climb the left side of the room to just have enough time to shinespark out the door. Requires precise ledge grabs, but some precise walljumps can make it slightly easier. Entrance condition: {
"comeInShinecharging": {
"length": 12,
"openEnd": 0
}
}Requires: "HiJump"
"canShinechargeMovementTricky"
"canInsaneJump"
{
"shinespark": {
"frames": 5,
"excessFrames": 0
}
}Exit condition: {
"leaveWithSpark": {}
}Unlocks doors: {"types":["super"],"requires":[]}
{"types":["missiles","powerbomb"],"requires":["never"]} |
From: 5
Middle Right Door
To: 1
Top Left Door


Quickly climb the right side of the room to just have enough time to shinespark out the door. Entrance condition: {
"comeInShinecharging": {
"length": 4,
"openEnd": 1
}
}Requires: "HiJump"
"canShinechargeMovementTricky"
{
"shinespark": {
"frames": 6,
"excessFrames": 0
}
}Exit condition: {
"leaveWithSpark": {}
}Unlocks doors: {"types":["super"],"requires":[]}
{"types":["missiles","powerbomb"],"requires":["never"]} |
From: 5
Middle Right Door
To: 6
Top Right Door


Quickly climb the right side of the room to just have enough time to shinespark out the door. Entrance condition: {
"comeInShinecharging": {
"length": 4,
"openEnd": 1
}
}Requires: "HiJump"
"canShinechargeMovementTricky"
"canInsaneJump"
{
"shinespark": {
"frames": 6,
"excessFrames": 0
}
}Exit condition: {
"leaveWithSpark": {}
}Unlocks doors: {"types":["super"],"requires":[]}
{"types":["missiles","powerbomb"],"requires":["never"]}Dev note: Sparking out in top position is very tight, hence the canInsaneJump requirement. |
From: 5
Middle Right Door
To: 6
Top Right Door
Quickly climb the right side of the room to just have enough time to shinespark out the door. Entrance condition: {
"comeInShinecharging": {
"length": 5,
"openEnd": 1
}
}Requires: "HiJump"
"canShinechargeMovementTricky"
{
"shinespark": {
"frames": 10,
"excessFrames": 0
}
}Exit condition: {
"leaveWithSpark": {
"position": "bottom"
}
}Unlocks doors: {"types":["super"],"requires":[]}
{"types":["missiles","powerbomb"],"requires":["never"]} |
From: 6
Top Right Door
To: 2
Middle Left Door


If Screw Attack is unavailable, do a low spin jump to make it over the Sova without taking a hit. Entrance condition: {
"comeInShinecharged": {}
}Requires: {
"shineChargeFrames": 115
}
{
"or": [
"canShinechargeMovementTricky",
{
"and": [
"canShinechargeMovementComplex",
"ScrewAttack"
]
}
]
}Exit condition: {
"leaveShinecharged": {}
}Unlocks doors: {"types":["super"],"requires":[]}
{"types":["missiles","powerbomb"],"requires":["never"]} |
From: 6
Top Right Door
To: 2
Middle Left Door
Shoot the top Sova while falling to delay its movement. Entrance condition: {
"comeInShinecharging": {
"length": 3,
"openEnd": 0
}
}Requires: "canShinechargeMovementTricky"
"canDownBack"
{
"shineChargeFrames": 110
}Exit condition: {
"leaveShinecharged": {}
}Unlocks doors: {"types":["super"],"requires":[]}
{"types":["missiles","powerbomb"],"requires":["never"]}Dev note: Closed end because this strat might not work if sliding off, depending on the run speed. |
From: 6
Top Right Door
To: 3
Bottom Left Door


Slide off the ledge while gaining a shinecharge, and hold forward to clear both platforms, killing the Sova with temporary blue. Weave down the left side of the room, avoiding landing on any platforms. Entrance condition: {
"comeInShinecharging": {
"length": 4,
"openEnd": 1
}
}Requires: "h_shinechargeSlideTemporaryBlue"
{
"shineChargeFrames": 150
}Exit condition: {
"leaveShinecharged": {}
}Unlocks doors: {"types":["super"],"requires":[]}
{"types":["missiles","powerbomb"],"requires":["never"]} |
From: 6
Top Right Door
To: 7
Elevator


Jump onto the Sova platform, and off again, without getting hit. This requires a very clean ledge grab. Entrance condition: {
"comeInShinecharged": {}
}Requires: {
"shineChargeFrames": 105
}
"canInsaneJump"
"canShinechargeMovementTricky"Exit condition: {
"leaveShinecharged": {}
} |
From: 6
Top Right Door
To: 7
Elevator
Jump onto the Sova platform without getting hit. This requires a very clean ledge grab. Entrance condition: {
"comeInShinecharging": {
"length": 3,
"openEnd": 0
}
}Requires: "canInsaneJump"
"canShinechargeMovementTricky"
{
"shineChargeFrames": 100
}Exit condition: {
"leaveShinecharged": {}
} |
|


Requires: "HiJump"
{
"or": [
{
"and": [
{
"doorUnlockedAtNode": 3
},
{
"doorUnlockedAtNode": 5
},
{
"canShineCharge": {
"usedTiles": 14,
"openEnd": 0
}
}
]
},
{
"and": [
{
"or": [
{
"doorUnlockedAtNode": 3
},
{
"doorUnlockedAtNode": 5
}
]
},
{
"canShineCharge": {
"usedTiles": 13,
"openEnd": 0
}
}
]
},
{
"canShineCharge": {
"usedTiles": 12,
"openEnd": 0
}
}
]
}
"canShinechargeMovementTricky"
{
"shinespark": {
"frames": 10,
"excessFrames": 0
}
}Exit condition: {
"leaveWithSpark": {}
}Unlocks doors: {"nodeId":1,"types":["ammo"],"requires":[]}
{"nodeId":3,"types":["ammo"],"requires":[]}
{"nodeId":5,"types":["ammo"],"requires":[]} |
|


Requires: "HiJump"
{
"or": [
{
"and": [
{
"doorUnlockedAtNode": 3
},
{
"doorUnlockedAtNode": 5
},
{
"canShineCharge": {
"usedTiles": 14,
"openEnd": 0
}
}
]
},
{
"and": [
{
"or": [
{
"doorUnlockedAtNode": 3
},
{
"doorUnlockedAtNode": 5
}
]
},
{
"canShineCharge": {
"usedTiles": 13,
"openEnd": 0
}
}
]
},
{
"canShineCharge": {
"usedTiles": 12,
"openEnd": 0
}
}
]
}
"canShinechargeMovementTricky"
"canInsaneJump"
{
"shinespark": {
"frames": 6,
"excessFrames": 0
}
}Exit condition: {
"leaveWithSpark": {}
}Unlocks doors: {"nodeId":3,"types":["ammo"],"requires":[]}
{"nodeId":5,"types":["ammo"],"requires":[]}
{"nodeId":6,"types":["ammo"],"requires":[]}Dev note: Sparking out in top position is very tight, hence the canInsaneJump requirement. |
|
Requires: "HiJump"
{
"or": [
{
"and": [
{
"doorUnlockedAtNode": 3
},
{
"doorUnlockedAtNode": 5
},
{
"canShineCharge": {
"usedTiles": 14,
"openEnd": 0
}
}
]
},
{
"and": [
{
"or": [
{
"doorUnlockedAtNode": 3
},
{
"doorUnlockedAtNode": 5
}
]
},
{
"canShineCharge": {
"usedTiles": 13,
"openEnd": 0
}
}
]
},
{
"canShineCharge": {
"usedTiles": 12,
"openEnd": 0
}
}
]
}
"canShinechargeMovementTricky"
{
"shinespark": {
"frames": 10,
"excessFrames": 0
}
}Exit condition: {
"leaveWithSpark": {
"position": "bottom"
}
}Unlocks doors: {"nodeId":3,"types":["ammo"],"requires":[]}
{"nodeId":5,"types":["ammo"],"requires":[]}
{"nodeId":6,"types":["ammo"],"requires":[]} |
From: 2
Right Door
To: 2
Right Door

Enter from the right door and spin jump onto the first ledge while barely landing on the ledge in order to prevent getting the Geruta on camera. Walk against the left wall and jump to trigger the Geruta. It should now be moving leftwards. Stand on the next platform against the right wall and shoot the Geruta to get it one shot away from being frozen. After a few swoops, it will come down; either freeze it or tank a hit. Then go up and stand on the corner and freeze it when it is in position. The Geruta will be stuck below and keep swooping, so if Energy permits, Samus will have several attempts. Quickly shinecharge left to right, kill the Geruta and spark out the bottom right door. Entrance condition: {
"comeInNormally": {}
}Requires: {
"notable": "Frozen Geruta Shinecharge"
}
"h_trickyFrozenEnemyRunway"
"canCarefulJump"
{
"canShineCharge": {
"usedTiles": 17,
"openEnd": 1
}
}
"canShinechargeMovementTricky"
{
"heatFrames": 1260
}
{
"shinespark": {
"frames": 2,
"excessFrames": 0
}
}Exit condition: {
"leaveWithSpark": {}
}Unlocks doors: {"types":["ammo"],"requires":[]} |
|


Farm the Dragons and Geruta. Shinecharge on the upper platform with the Geruta, then weave back down to the Dragon by the door to interrupt. Entrance condition: {
"comeInWithRMode": {}
}Requires: "h_heatProof"
{
"or": [
"h_heatedCrystalFlashForReserveEnergy",
{
"and": [
"h_RModeCanRefillReserves",
{
"or": [
{
"and": [
{
"enemyKill": {
"enemies": [
[
"Dragon"
],
[
"Dragon"
],
[
"Dragon"
],
[
"Dragon"
],
[
"Dragon"
]
],
"explicitWeapons": [
"Missile",
"Super",
"Charge",
"Plasma"
]
}
},
"Grapple"
]
},
{
"and": [
{
"enemyKill": {
"enemies": [
[
"Dragon"
],
[
"Dragon"
],
[
"Dragon"
],
[
"Dragon"
],
[
"Dragon"
]
]
}
},
"h_lavaProof"
]
}
]
},
{
"partialRefill": {
"type": "ReserveEnergy",
"limit": 20
}
}
]
}
]
}
"canTrickyJump"
{
"or": [
{
"canShineCharge": {
"usedTiles": 15,
"openEnd": 2
}
},
{
"and": [
{
"notable": "Frozen Geruta Shinecharge"
},
"h_trickyFrozenEnemyRunway",
{
"canShineCharge": {
"usedTiles": 17,
"openEnd": 1
}
},
"canShinechargeMovementTricky"
]
}
]
}
{
"autoReserveTrigger": {
"maxReserveEnergy": 95
}
}
"canRModeSparkInterrupt" |
From: 2
Right Door
To: 3
Item
Move quickly to avoid being hit by the Geruta before sparking. Samus can still take damage from the Geruta during the shinespark wind-up; this can be avoided by activating the spark quickly enough. Entrance condition: {
"comeInShinecharged": {}
}Requires: {
"shineChargeFrames": 100
}
"canShinechargeMovementTricky"
{
"shinespark": {
"frames": 70,
"excessFrames": 12
}
}
{
"heatFrames": 290
}
{
"or": [
{
"enemyDamage": {
"enemy": "Geruta",
"type": "contact",
"hits": 1
}
},
"canInsaneJump"
]
}Collects items: 3 |
|


Enter the room with between 93 and 102 energy and quickly mid-air spark to the left through the Speed blocks. After the shinespark ends, run left and press pause before reaching zero energy, tanking the Pirate hit while at zero energy. Refill some energy (at least 11), and continue running to the left, using i-frames to pass through the next Pirate. Continue to pause abuse several more times. Arm pumping may be used but is not required and has little benefit; in any case, arm pumping should not be used until beginning to run through the Speed blocks, otherwise Samus will not obtain blue speed in time and will bonk into them. Entrance condition: {
"comeInShinecharged": {},
"comesThroughToilet": "any"
}Requires: {
"shineChargeFrames": 35
}
{
"notable": "Reverse Spark With Pause Abuse"
}
"canShinechargeMovementTricky"
"canTrickyJump"
"canControlShinesparkEnd"
"canPauseAbuse"
{
"resourceAvailable": [
{
"type": "RegularEnergy",
"count": 93
}
]
}
{
"shinespark": {
"frames": 0,
"excessFrames": 0
}
}
{
"resourceConsumed": [
{
"type": "ReserveEnergy",
"count": 61
}
]
}
"h_speedDash"
"h_getBlueSpeedMaxRunway"
{
"or": [
"canPreciseReserveRefill",
{
"resourceConsumed": [
{
"type": "ReserveEnergy",
"count": 15
}
]
}
]
}
{
"resourceAtMost": [
{
"type": "RegularEnergy",
"count": 1
}
]
}
{
"heatFrames": 0
}Clears obstacles: A Dev note: The zero shinespark requirement is to satisfy the tests, by marking that the shinecharge is used; the actual shinespark energy usage is accounted for in the resourceConsumed. This could possibly be rewritten to express the energy usage in the normal way. We don't include a `h_ShinesparksCostEnergy` requirement here, because even if shinesparks don't cost energy, it is still possible to use heat damage to make the shinespark stop in the correct place. FIXME: the regular energy required could be reduced in that case. FIXME: This should be split into 3->9 and 9->2 strats. FIXME: A h_speedButSlow variant could be added. |
From: 4
Bottom Right Door
To: 2
Far Left Door
Start a shinespark on the other side of the door with between 94 and 103 energy. After the shinespark ends, run left and press pause before reaching zero energy, tanking the Pirate hit while at zero energy. Refill some energy (at least 11), and continue running to the left, using i-frames to pass through the next Pirate. Continue to pause abuse several more times. Arm pumping may be used but is not required and has little benefit; in any case, arm pumping should not be used until beginning to run through the Speed blocks, otherwise Samus will not obtain blue speed in time and will bonk into them. Entrance condition: {
"comeInWithSpark": {
"position": "bottom"
}
}Requires: {
"notable": "Reverse Spark With Pause Abuse"
}
"canShinechargeMovementTricky"
"canTrickyJump"
"canControlShinesparkEnd"
"canPauseAbuse"
{
"resourceAvailable": [
{
"type": "RegularEnergy",
"count": 94
}
]
}
{
"shinespark": {
"frames": 0,
"excessFrames": 0
}
}
{
"resourceConsumed": [
{
"type": "ReserveEnergy",
"count": 61
}
]
}
"h_speedDash"
"h_getBlueSpeedMaxRunway"
{
"or": [
"canPreciseReserveRefill",
{
"resourceConsumed": [
{
"type": "ReserveEnergy",
"count": 15
}
]
}
]
}
{
"resourceAtMost": [
{
"type": "RegularEnergy",
"count": 1
}
]
}
{
"heatFrames": 0
}Clears obstacles: A Dev note: The zero shinespark requirement is to satisfy the tests, by marking that the shinecharge is used; the actual shinespark energy usage is accounted for in the resourceConsumed. This could possibly be rewritten to express the energy usage in the normal way. We don't include a `h_ShinesparksCostEnergy` requirement here, because even if shinesparks don't cost energy, it is still possible to use heat damage to make the shinespark stop in the correct place. FIXME: the regular energy required could be reduced in that case. FIXME: This should be split into 4->9 and 9->2 strats. FIXME: A h_speedButSlow variant could be added. |
From: 4
Bottom Right Door
To: 5
Top Right Door
Entrance condition: {
"comeInShinecharging": {
"length": 1,
"openEnd": 1
}
}Requires: "canShinechargeMovementTricky"
"canInsaneJump"
"canBePatient"
{
"or": [
{
"enemyDamage": {
"enemy": "Cacatac",
"type": "contact",
"hits": 1
}
},
"Plasma",
{
"and": [
"Wave",
"Spazer"
]
}
]
}
{
"shineChargeFrames": 177
}
{
"shinespark": {
"frames": 10,
"excessFrames": 0
}
}
{
"heatFrames": 220
}Exit condition: {
"leaveWithSpark": {}
}Unlocks doors: {"types":["super"],"requires":[]}
{"types":["missiles","powerbomb"],"requires":["never"]}Dev note: The canBePatient requirement represents the possible need to retry in case bad RNG causes a Cac spike hit to mess up the strat. |
|


Either jump over a Cacatac or tank a spike hit. Perform a mid-air spark through the speed blocks. Then run to the right and back to get speed to go through the rest. If performing the spark with low energy, there is a risk of ending the spark above the spikes or in front of the Pirate; to be safe, assuming Samus has heat protection, begin the shinespark with between 73 and 88 energy, or at least 106 energy; with a buffered crumble jump to the right, up to 94 energy can work. Entrance condition: {
"comeInShinecharging": {
"length": 5,
"openEnd": 1
}
}Requires: {
"notable": "Reverse Spark"
}
"canShinechargeMovementTricky"
"canTrickyJump"
{
"or": [
{
"enemyDamage": {
"enemy": "Cacatac",
"type": "spike",
"hits": 1
}
},
"canBePatient"
]
}
{
"or": [
{
"shinespark": {
"frames": 88,
"excessFrames": 11
}
},
{
"and": [
"h_heatProof",
"canControlShinesparkEnd",
{
"shinespark": {
"frames": 88,
"excessFrames": 44
}
}
]
}
]
}
{
"heatFrames": 825
}
{
"or": [
"h_speedDash",
{
"and": [
"h_speedButSlow",
{
"heatFrames": 270
}
]
}
]
}
"h_getBlueSpeedMaxRunway"
{
"or": [
"canSpeedball",
{
"heatFrames": 15
}
]
}Clears obstacles: A Dev note: The canBePatient represents retrying until RNG works out to be able to jump over one of the Cacatacs without taking a hit. There is a possibility of getting a lucky drop from one of the two Pirates; but since it is low probability, we don't model it. The speedball exit is technically not a valid way to leave normally (e.g. in case the next room is heated and Samus needs to jump); but if necessary, it is possible to unmorph near the transition. FIXME: This should be split into 5->9 and 9->2 strats. |
From: 5
Top Right Door
To: 2
Far Left Door
Either jump over a Cacatac, tank a spike hit, or farm it if possible. While preparing to spark left through the speed blocks, press pause so that the pause hits during the shinespark wind-up Using reserves, try to refill to exactly 84 energy, the minimum amount needed to reliably break through the Speed blocks (assuming no heat protection). Hold jump and left while unpausing, to buffer activating the horizontal shinespark. After the shinespark ends, run left and press pause before reaching zero energy, tanking the Pirate hit while at zero energy. Refill to between about 11 and 13 energy, and continue running to the left, using i-frames to pass through the next Pirate. Continue to pause abuse 4 more times, trying to refill to between 11 and 13 energy each time except for the last. Arm pumping may be used but is not required and has little benefit; in any case, arm pumping should not be used until beginning to run through the Speed blocks, otherwise Samus will not obtain blue speed in time and will bonk into them. Entrance condition: {
"comeInShinecharging": {
"length": 5,
"openEnd": 1
}
}Requires: {
"notable": "Reverse Spark With Pause Abuse"
}
"canShinechargeMovementTricky"
"canTrickyJump"
"canControlShinesparkEnd"
"canPauseAbuse"
{
"resourceAvailable": [
{
"type": "RegularEnergy",
"count": 99
}
]
}
{
"shinespark": {
"frames": 0,
"excessFrames": 0
}
}
{
"resourceConsumed": [
{
"type": "ReserveEnergy",
"count": 80
}
]
}
"h_speedDash"
"h_getBlueSpeedMaxRunway"
{
"or": [
{
"resourceConsumed": [
{
"type": "ReserveEnergy",
"count": 20
}
]
},
{
"and": [
{
"resourceMissingAtMost": [
{
"type": "Super",
"count": 0
}
]
},
{
"or": [
{
"ammo": {
"type": "Missile",
"count": 1
}
},
"Grapple",
"Plasma",
{
"and": [
"Wave",
"Spazer"
]
}
]
}
]
}
]
}
{
"or": [
"canPreciseReserveRefill",
{
"resourceConsumed": [
{
"type": "ReserveEnergy",
"count": 15
}
]
}
]
}
{
"resourceAtMost": [
{
"type": "RegularEnergy",
"count": 1
}
]
}
{
"heatFrames": 0
}Clears obstacles: A Dev note: The zero shinespark requirement is to satisfy the tests, by marking that the shinecharge is used; the actual shinespark energy usage is accounted for in the resourceConsumed. This could possibly be rewritten to express the energy usage in the normal way. We don't include a `h_ShinesparksCostEnergy` requirement here, because even if shinesparks don't cost energy, it is still possible to use heat damage to make the shinespark stop in the correct place. FIXME: the regular energy required could be reduced in that case. FIXME: This should be split into 5->9 and 9->2 strats. FIXME: A h_speedButSlow variant could be added. |
From: 5
Top Right Door
To: 4
Bottom Right Door
Entrance condition: {
"comeInShinecharging": {
"length": 5,
"openEnd": 1
}
}Requires: "canShinechargeMovementTricky"
"canTrickyJump"
{
"or": [
{
"enemyDamage": {
"enemy": "Cacatac",
"type": "spike",
"hits": 1
}
},
"canBePatient"
]
}
{
"shinespark": {
"frames": 10,
"excessFrames": 0
}
}
{
"heatFrames": 210
}Exit condition: {
"leaveWithSpark": {}
}Unlocks doors: {"types":["super"],"requires":[]}
{"types":["missiles","powerbomb"],"requires":["never"]}Dev note: The canBePatient represents retrying until RNG works out to be able to jump over one of the Cacatacs without taking a hit. |
|
Move very quickly to bring a shinespark from the speedway up to the Save Room door. Preclear the Cacatacs, and it may help to not run while platforming if HiJump is not available. Requires: "h_heatProof"
{
"obstaclesCleared": [
"A"
]
}
"canShinechargeMovementTricky"
"h_shinechargeMaxRunway"
{
"shinespark": {
"frames": 12,
"excessFrames": 0
}
}Exit condition: {
"leaveWithSpark": {}
}Unlocks doors: {"types":["ammo"],"requires":[]}Dev note: FIXME: This could be done without heat proof. FIXME: This should be changed to start at node 9. |
From: 1
Top Right Door
To: 2
Middle Right Door

Entrance condition: {
"comeInShinecharging": {
"length": 0,
"openEnd": 1
}
}Requires: "canShinechargeMovementTricky"
"canTrivialMidAirMorph"
{
"or": [
"canUsePowerBombLag",
{
"and": [
"canInsaneJump",
"canOffScreenMovement"
]
}
]
}
{
"heatFrames": 200
}
{
"shinespark": {
"frames": 17,
"excessFrames": 0
}
}Exit condition: {
"leaveWithSpark": {}
}Unlocks doors: {"types":["super"],"requires":[]}
{"types":["missiles","powerbomb"],"requires":["never"]}Dev note: Technically Samus isn't moving off-camera but is close to the edge; 'canOffScreenMovement' is for the difficulty of timing the unmorph, given limited visibility of the end of the passage and the Sova. If a Power Bomb is available, then lag from the explosion can make the movement much easier. |
From: 3
Bottom Right Door
To: 1
Top Right Door
Entrance condition: {
"comeInShinecharged": {}
}Requires: {
"shineChargeFrames": 85
}
{
"doorUnlockedAtNode": 1
}
"canMidAirMorph"
"h_crouchJumpDownGrab"
"canShinechargeMovementTricky"
{
"shinespark": {
"frames": 20,
"excessFrames": 0
}
}
{
"heatFrames": 285
}Unlocks doors: {"types":["ammo"],"requires":["never"]}Dev note: Unlocking the door would be possible but would require more than the default amount of heat frames, which would need testing. |
From: 3
Bottom Right Door
To: 1
Top Right Door

Entrance condition: {
"comeInShinecharging": {
"length": 11,
"openEnd": 0
}
}Requires: {
"doorUnlockedAtNode": 1
}
"canShinechargeMovementTricky"
"canMidAirMorph"
"h_crouchJumpDownGrab"
{
"shinespark": {
"frames": 19,
"excessFrames": 0
}
}
{
"heatFrames": 370
}Unlocks doors: {"types":["ammo"],"requires":["never"]}Dev note: Unlocking the door would be possible but would require more than the default amount of heat frames, which would need testing. |
From: 3
Bottom Right Door
To: 2
Middle Right Door


Entrance condition: {
"comeInShinecharged": {}
}Requires: {
"shineChargeFrames": 85
}
"canShinechargeMovementTricky"
"canMidAirMorph"
{
"shinespark": {
"frames": 20,
"excessFrames": 0
}
}
"h_usePowerBomb"
{
"heatFrames": 385
} |
From: 3
Bottom Right Door
To: 2
Middle Right Door
Entrance condition: {
"comeInShinecharged": {}
}Requires: {
"shineChargeFrames": 85
}
"canShinechargeMovementTricky"
"canMidAirMorph"
{
"shinespark": {
"frames": 20,
"excessFrames": 0
}
}
{
"enemyDamage": {
"enemy": "Sova",
"type": "contact",
"hits": 1
}
}
{
"heatFrames": 395
} |
From: 3
Bottom Right Door
To: 2
Middle Right Door
Entrance condition: {
"comeInShinecharging": {
"length": 11,
"openEnd": 0
}
}Requires: "canShinechargeMovementTricky"
"canMidAirMorph"
{
"shinespark": {
"frames": 19,
"excessFrames": 0
}
}
"h_usePowerBomb"
{
"heatFrames": 465
} |
From: 3
Bottom Right Door
To: 2
Middle Right Door
Entrance condition: {
"comeInShinecharging": {
"length": 11,
"openEnd": 0
}
}Requires: "canShinechargeMovementTricky"
"canMidAirMorph"
{
"shinespark": {
"frames": 19,
"excessFrames": 0
}
}
{
"enemyDamage": {
"enemy": "Sova",
"type": "contact",
"hits": 1
}
}
{
"heatFrames": 475
} |
|

Entrance condition: {
"comeInShinecharged": {}
}Requires: {
"shineChargeFrames": 45
}
"canShinechargeMovementTricky"
{
"heatFrames": 110
}
{
"shinespark": {
"frames": 34,
"excessFrames": 0
}
}Exit condition: {
"leaveWithSpark": {}
}Unlocks doors: {"types":["super"],"requires":[]}
{"types":["missiles","powerbomb"],"requires":["never"]} |
|
Entrance condition: {
"comeInShinecharged": {}
}Requires: {
"shineChargeFrames": 45
}
"canShinechargeMovementTricky"
{
"heatFrames": 110
}
{
"shinespark": {
"frames": 36,
"excessFrames": 0
}
}Exit condition: {
"leaveWithSpark": {}
}Unlocks doors: {"types":["super"],"requires":[]}
{"types":["missiles","powerbomb"],"requires":["never"]} |
From: 1
Left Door
To: 2
Right Door

Entrance condition: {
"comeInShinecharged": {}
}Requires: {
"shineChargeFrames": 145
}
"canLateralMidAirMorph"
"canTrickyJump"
"canShinechargeMovementTricky"
{
"heatFrames": 190
}
{
"shinespark": {
"frames": 21,
"excessFrames": 0
}
}Exit condition: {
"leaveWithSpark": {}
}Unlocks doors: {"types":["super"],"requires":[]}
{"types":["missiles","powerbomb"],"requires":["never"]} |
From: 1
Left Door
To: 2
Right Door
Entrance condition: {
"comeInShinecharging": {
"length": 3,
"openEnd": 0
}
}Requires: "canLateralMidAirMorph"
"canTrickyJump"
"canShinechargeMovementTricky"
{
"heatFrames": 235
}
{
"shinespark": {
"frames": 22,
"excessFrames": 0
}
}Exit condition: {
"leaveWithSpark": {
"position": "bottom"
}
}Unlocks doors: {"types":["super"],"requires":[]}
{"types":["missiles","powerbomb"],"requires":["never"]} |
From: 2
Bottom Right Door
To: 1
Top Right Door
Entrance condition: {
"comeInShinecharging": {
"length": 0,
"openEnd": 1
}
}Requires: "canShinechargeMovementTricky"
"canFastWallJumpClimb"
"canInsaneJump"
{
"shinespark": {
"frames": 5,
"excessFrames": 0
}
}Exit condition: {
"leaveWithSpark": {}
}Unlocks doors: {"types":["super"],"requires":[]}
{"types":["missiles","powerbomb"],"requires":["never"]} |
Come In Shinecharging, Leave With Spark (HiJump Wall Climb, Full Runway)
(Extreme)
Grapple Beam Room
From: 2
Bottom Right Door
To: 1
Top Right Door

Entrance condition: {
"comeInShinecharging": {
"length": 9,
"openEnd": 0
}
}Requires: "HiJump"
"canShinechargeMovementTricky"
"canFastWallJumpClimb"
"canInsaneJump"
{
"shinespark": {
"frames": 5,
"excessFrames": 0
}
}Exit condition: {
"leaveWithSpark": {}
}Unlocks doors: {"types":["super"],"requires":[]}
{"types":["missiles","powerbomb"],"requires":["never"]} |
Come In Shinecharging, Leave With Spark (HiJump Wall Climb, Partial Runway)
(Expert)
Grapple Beam Room
From: 2
Bottom Right Door
To: 1
Top Right Door
Entrance condition: {
"comeInShinecharging": {
"length": 5,
"openEnd": 0
}
}Requires: "HiJump"
"canShinechargeMovementTricky"
"canFastWallJumpClimb"
{
"shinespark": {
"frames": 5,
"excessFrames": 0
}
}Exit condition: {
"leaveWithSpark": {}
}Unlocks doors: {"types":["super"],"requires":[]}
{"types":["missiles","powerbomb"],"requires":["never"]} |
From: 1
Left Door
To: 2
Right Door
Build some run speed to jump to the opposite runway to open the door before shinesparking. Entrance condition: {
"comeInShinecharging": {
"length": 9,
"openEnd": 0
}
}Requires: "canShinechargeMovementComplex"
{
"or": [
{
"shinespark": {
"frames": 15,
"excessFrames": 0
}
},
{
"and": [
"canShinechargeMovementTricky",
{
"shinespark": {
"frames": 7,
"excessFrames": 0
}
}
]
}
]
}Exit condition: {
"leaveWithSpark": {}
}Unlocks doors: {"types":["super"],"requires":[]}
{"types":["missiles","powerbomb"],"requires":["never"]} |
|
Entrance condition: {
"comeInShinecharged": {}
}Requires: {
"shineChargeFrames": 40
}
"canShinechargeMovementTricky"
"canHeroShot"
{
"shinespark": {
"frames": 35,
"excessFrames": 0
}
}Exit condition: {
"leaveWithSpark": {}
}Unlocks doors: {"types":["super"],"requires":[]}
{"types":["missiles","powerbomb"],"requires":["never"]} |
From: 2
Right Door
To: 1
Left Door


Build some run speed to jump to the opposite runway to open the door before shinesparking. Entrance condition: {
"comeInShinecharging": {
"length": 8,
"openEnd": 0
}
}Requires: "canShinechargeMovementComplex"
{
"or": [
{
"shinespark": {
"frames": 16,
"excessFrames": 0
}
},
{
"and": [
"canShinechargeMovementTricky",
{
"shinespark": {
"frames": 8,
"excessFrames": 0
}
}
]
}
]
}Exit condition: {
"leaveWithSpark": {}
}Unlocks doors: {"types":["super"],"requires":[]}
{"types":["missiles","powerbomb"],"requires":["never"]} |
|
Entrance condition: {
"comeInShinecharged": {}
}Requires: {
"shineChargeFrames": 40
}
"canShinechargeMovementTricky"
"canHeroShot"
{
"shinespark": {
"frames": 35,
"excessFrames": 0
}
}Exit condition: {
"leaveWithSpark": {}
}Unlocks doors: {"types":["super"],"requires":[]}
{"types":["missiles","powerbomb"],"requires":["never"]} |
From: 1
Left Door
To: 1
Left Door
Shinecharge on the edge then quickly jump into the hole and place the Power Bomb on the descent. Alternatively, it is possible to kill the Fune with a Super immediately after shinecharging. Entrance condition: {
"comeInShinecharging": {
"length": 3,
"openEnd": 0
},
"comesInHeated": "no"
}Requires: "canShinechargeMovementTricky" "canInsaneJump" "h_CrystalSpark" Dev note: It not currently possible to represent the Super variant, because the Super would not be muliplied by the lenience factor. |
Come In Shinecharging, Leave With Spark (Bootless Wall Climb, Bottom Position)
(Extreme)
Grapple Tutorial Room 2
From: 1
Left Door
To: 2
Right Door
Entrance condition: {
"comeInShinecharging": {
"length": 3,
"openEnd": 0
}
}Requires: "canShinechargeMovementTricky"
"canFastWallJumpClimb"
"canInsaneJump"
{
"shinespark": {
"frames": 20,
"excessFrames": 0
}
}Exit condition: {
"leaveWithSpark": {
"position": "bottom"
}
}Unlocks doors: {"types":["super"],"requires":[]}
{"types":["missiles","powerbomb"],"requires":["never"]} |
From: 1
Left Door
To: 2
Right Door
Entrance condition: {
"comeInShinecharging": {
"length": 3,
"openEnd": 0
}
}Requires: "HiJump"
"canShinechargeMovementTricky"
"canTrickyDashJump"
{
"shineChargeFrames": 175
}
{
"shinespark": {
"frames": 6,
"excessFrames": 0
}
}Exit condition: {
"leaveWithSpark": {}
}Unlocks doors: {"types":["super"],"requires":[]}
{"types":["missiles","powerbomb"],"requires":["never"]} |
From: 1
Left Door
To: 2
Right Door
Entrance condition: {
"comeInShinecharging": {
"length": 3,
"openEnd": 0
}
}Requires: "HiJump"
"canShinechargeMovementTricky"
"canFastWallJumpClimb"
{
"shinespark": {
"frames": 19,
"excessFrames": 0
}
}Exit condition: {
"leaveWithSpark": {}
}Unlocks doors: {"types":["super"],"requires":[]}
{"types":["missiles","powerbomb"],"requires":["never"]} |
From: 1
Left Door
To: 2
Right Door

Entrance condition: {
"comeInShinecharging": {
"length": 3,
"openEnd": 0
}
}Requires: "canShinechargeMovementComplex"
{
"or": [
{
"shinespark": {
"frames": 19,
"excessFrames": 5
}
},
{
"and": [
"canShinechargeMovementTricky",
{
"shinespark": {
"frames": 11,
"excessFrames": 5
}
}
]
}
]
} |
From: 2
Right Door
To: 1
Left Door
Entrance condition: {
"comeInShinecharging": {
"length": 0,
"openEnd": 1
}
}Requires: "canShinechargeMovementTricky"
{
"or": [
"Wave",
"Grapple",
{
"shineChargeFrames": 5
}
]
}
{
"shineChargeFrames": 165
}Exit condition: {
"leaveShinecharged": {}
}Unlocks doors: {"types":["ammo"],"requires":["never"]}Dev note: FIXME: A Super door could still be unlocked as part of this strat, but Wave/Grapple would no longer help; there doesn't seem to be a way to model that interaction without making a separate strat. |
From: 2
Right Door
To: 1
Left Door
Entrance condition: {
"comeInShinecharging": {
"length": 0,
"openEnd": 1
}
}Requires: "canShinechargeMovementTricky"
{
"shinespark": {
"frames": 5,
"excessFrames": 0
}
}Exit condition: {
"leaveWithSpark": {}
}Unlocks doors: {"types":["super"],"requires":[]}
{"types":["missiles","powerbomb"],"requires":["never"]} |
|
Store a shinespark near the left door and use the remaining runway to jump as far as possible to the right. Once near the acid platforms, Shinespark diagonally to reach the item location. Entrance condition: {
"comeInShinecharged": {}
}Requires: {
"shineChargeFrames": 155
}
{
"notable": "Left Side Diagonal Shinespark"
}
"h_speedJump"
"canTrickyJump"
"canShinechargeMovementTricky"
{
"shinespark": {
"frames": 40
}
} |
From: 2
Right Vertical Door
To: 1
Left Door


Charge a spark to the right a specific distance of about 6 tiles past the broken Speed blocks. Then turn around, run and jump, and diagonal spark as late as possible. By shortening the jump it is easier but uses more Energy. With a shortened jump, it is possible but not expected to kill a Ripper and collect its drop while falling. Alternatively, it is possible to shinecharge right to left, then run and jump and then shinespark just before hitting the acid; This is a bit tighter and uses more Energy, but doesn't rely on the larger jump from Speed Booster. Requires: {
"notable": "Big Jump Shinespark"
}
"canShinechargeMovementTricky"
{
"obstaclesCleared": [
"B"
]
}
{
"canShineCharge": {
"usedTiles": 23,
"gentleDownTiles": 6,
"openEnd": 1
}
}
{
"or": [
{
"and": [
"h_speedJump",
{
"shinespark": {
"frames": 30,
"excessFrames": 2
}
}
]
},
{
"shinespark": {
"frames": 46,
"excessFrames": 2
}
}
]
}Dev note: There is a large variance in the number of shinespark frames based on the runway used and how long jump is held. The frames included are a reasonable approximation, although a tighter set of frames could be included with more specific details. |
From: 1
Top Left Door
To: 1
Top Left Door
Leave Gamet drops uncollected to prevent them from respawning. Run right-to-left to gain a shinecharge, then use between 1 and 2 tiles of remaining runway to gain speed to reach the top-left with a wall jump. Requires: "HiJump"
"h_runOverRespawningEnemies"
{
"or": [
{
"canShineCharge": {
"usedTiles": 16,
"gentleUpTiles": 2,
"gentleDownTiles": 4,
"openEnd": 1
}
},
{
"and": [
{
"doorUnlockedAtNode": 3
},
{
"canShineCharge": {
"usedTiles": 17,
"gentleUpTiles": 2,
"gentleDownTiles": 4,
"openEnd": 1
}
}
]
}
]
}
"canShinechargeMovementTricky"
"canTrickyDashJump"
"canWallJump"
{
"shineChargeFrames": 160
}Exit condition: {
"leaveShinecharged": {}
}Unlocks doors: {"nodeId":3,"types":["ammo"],"requires":[]} |
Leave With Spark (Tricky Dash Jump, Wall Jump, Bottom Position)
(Expert)
Post Crocomire Farming Room
From: 1
Top Left Door
To: 1
Top Left Door

Leave Gamet drops uncollected to prevent them from respawning. Run left-to-right to gain a shinecharge, then run back to the left to gain speed to reach the top-left with a wall jump. By leaving the right door closed and sliding into it, the frame window for the tricky dash jump will align with the last two possible frames to jump at the end of the runway. Requires: "h_runOverRespawningEnemies"
{
"canShineCharge": {
"usedTiles": 18,
"gentleUpTiles": 2,
"gentleDownTiles": 4,
"openEnd": 1
}
}
"canShinechargeMovementTricky"
"canTrickyDashJump"
"canWallJump"
{
"shinespark": {
"frames": 12,
"excessFrames": 0
}
}Exit condition: {
"leaveWithSpark": {
"position": "bottom"
}
} |
From: 3
Bottom Right Door
To: 1
Top Left Door

Leave Gamet drops uncollected to prevent them from respawning. Run left-to-right to gain a shinecharge, then run left and jump (just underneath the Kamer) to the top-left ledge without needing to wall jump. Requires: "HiJump"
"h_runOverRespawningEnemies"
{
"canShineCharge": {
"usedTiles": 18,
"gentleUpTiles": 2,
"gentleDownTiles": 4,
"openEnd": 1
}
}
"canShinechargeMovementTricky"
{
"shineChargeFrames": 170
}Exit condition: {
"leaveShinecharged": {}
}Unlocks doors: {"types":["ammo"],"requires":[]} |
Come In Shinecharging, Leave With Spark (Space Jump, Tricky Movement)
(Expert)
Post Crocomire Farming Room
From: 3
Bottom Right Door
To: 4
Top Right Door
Entrance condition: {
"comeInShinecharging": {
"length": 7,
"openEnd": 1,
"gentleDownTiles": 3
}
}Requires: "SpaceJump"
"canShinechargeMovementTricky"
{
"shinespark": {
"frames": 5,
"excessFrames": 0
}
}Exit condition: {
"leaveWithSpark": {}
}Unlocks doors: {"types":["super"],"requires":[]}
{"types":["missiles","powerbomb"],"requires":["never"]} |
From: 3
Bottom Right Door
To: 4
Top Right Door


Leave Gamet drops uncollected to prevent them from respawning. Run left-to-right to gain a shinecharge. Then use HiJump to quickly reach the top-right door. Requires: "HiJump"
"h_runOverRespawningEnemies"
{
"canShineCharge": {
"usedTiles": 18,
"gentleUpTiles": 2,
"gentleDownTiles": 4,
"openEnd": 1
}
}
"canShinechargeMovementTricky"
{
"shineChargeFrames": 150
}Exit condition: {
"leaveShinecharged": {}
}Unlocks doors: {"types":["ammo"],"requires":[]} |
From: 3
Bottom Right Door
To: 4
Top Right Door
Leave Gamet drops uncollected to prevent them from respawning. To maximize shinecharge frames remaining, perform a tight shortcharge left-to-right, spin jump to the right, then immediately turn left to land on the Kamer. Requires: "canWallJump"
{
"canShineCharge": {
"usedTiles": 13,
"gentleUpTiles": 2,
"gentleDownTiles": 2,
"openEnd": 2
}
}
"canShinechargeMovementTricky"
{
"shineChargeFrames": 165
}Exit condition: {
"leaveShinecharged": {}
}Unlocks doors: {"types":["ammo"],"requires":[]} |
From: 4
Top Right Door
To: 4
Top Right Door
Leave Gamet drops uncollected to prevent them from respawning. Run left-to-right to gain a shinecharge. Then jump onto the Kamer and use Space Jump to reach the top of the room and spark out. Requires: "SpaceJump"
"h_runOverRespawningEnemies"
{
"canShineCharge": {
"usedTiles": 18,
"gentleUpTiles": 2,
"gentleDownTiles": 4,
"openEnd": 1
}
}
"canShinechargeMovementTricky"
{
  "shinespark": {
    "frames": 15,
    "excessFrames": 0
  }
}
Exit condition: {
"leaveWithSpark": {
"position": "bottom"
}
} |
From: 4
Top Right Door
To: 4
Top Right Door
Leave Gamet drops uncollected to prevent them from respawning. Run left-to-right to gain a shinecharge. Then jump onto the Kamer and use Space Jump to reach the top of the room and spark out. Requires: "SpaceJump"
"h_runOverRespawningEnemies"
{
"canShineCharge": {
"usedTiles": 17,
"gentleUpTiles": 2,
"gentleDownTiles": 4,
"openEnd": 1
}
}
"canShinechargeMovementTricky"
"canInsaneJump"
{
"shinespark": {
"frames": 5,
"excessFrames": 0
}
}Exit condition: {
"leaveWithSpark": {}
}Dev note: This is the trickier variant of the strat which allows getting close enough to the door to spark in top position. |
From: 4
Top Right Door
To: 4
Top Right Door
Leave Gamet drops uncollected to prevent them from respawning. Run left-to-right to gain a shinecharge. Then jump onto the Kamer and use a wall jump to reach the top of the room and spark out. Requires: "h_runOverRespawningEnemies"
{
"canShineCharge": {
"usedTiles": 18,
"gentleUpTiles": 2,
"gentleDownTiles": 4,
"openEnd": 1
}
}
"canWallJump"
"canShinechargeMovementTricky"
{
"shinespark": {
"frames": 5,
"excessFrames": 0
}
}Exit condition: {
"leaveWithSpark": {}
}Dev note: This is the trickier variant of the strat which allows getting close enough to the door to spark in top position. |
|
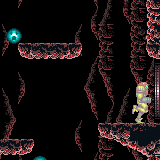
Entrance condition: {
"comeInShinecharged": {},
"comesThroughToilet": "any"
}Requires: {
"shineChargeFrames": 125
}
"HiJump"
"canShinechargeMovementTricky"Exit condition: {
"leaveShinecharged": {}
}Unlocks doors: {"types":["super"],"requires":[]}
{"types":["missiles","powerbomb"],"requires":["never"]} |
From: 2
Bottom Door
To: 3
Bottom Right Door

Entrance condition: {
"comeInShinecharged": {},
"comesThroughToilet": "any"
}Requires: {
"shineChargeFrames": 110
}
"HiJump"
"canShinechargeMovementTricky"
{
"shinespark": {
"frames": 7,
"excessFrames": 0
}
}Exit condition: {
"leaveWithSpark": {}
}Unlocks doors: {"types":["super"],"requires":[]}
{"types":["missiles","powerbomb"],"requires":["never"]} |
From: 1
Left Door
To: 1
Left Door


Use Supers to kill all the Rippers and open the green gate. From the right door, run right-to-left to gain a shinecharge; use the remaining runway (at least about 10 tiles) to gain speed to jump to the left and cross the room quickly. Entrance condition: {
"comeInNormally": {}
}Requires: {
"ammo": {
"type": "Super",
"count": 2
}
}
{
"canShineCharge": {
"usedTiles": 17,
"openEnd": 1
}
}
"canShinechargeMovementTricky"
"h_speedJump"
{
"heatFrames": 870
}
{
"shineChargeFrames": 175
}
{
"shinespark": {
"frames": 15,
"excessFrames": 0
}
}Exit condition: {
"leaveWithSpark": {}
}Unlocks doors: {"types":["ammo"],"requires":[]} |
From: 1
Left Door
To: 1
Left Door


Entrance condition: {
"comeInNormally": {}
}Requires: {
"ammo": {
"type": "Super",
"count": 2
}
}
{
"or": [
{
"canShineCharge": {
"usedTiles": 18,
"openEnd": 0
}
},
{
"and": [
{
"ammo": {
"type": "Super",
"count": 1
}
},
{
"canShineCharge": {
"usedTiles": 28,
"openEnd": 0
}
},
{
"heatFrames": 100
}
]
}
]
}
{
"heatFrames": 645
}
{
"or": [
"canTrickyJump",
{
"and": [
{
"heatFrames": 200
},
{
"enemyDamage": {
"enemy": "Ripper 2 (red)",
"type": "contact",
"hits": 2
}
}
]
}
]
}
{
"or": [
{
"shinespark": {
"frames": 43,
"excessFrames": 0
}
},
{
"and": [
"canShinechargeMovementComplex",
{
"shinespark": {
"frames": 27,
"excessFrames": 0
}
},
{
"heatFrames": 10
}
]
},
{
"and": [
"canShinechargeMovementTricky",
{
"shinespark": {
"frames": 17,
"excessFrames": 0
}
},
{
"heatFrames": 135
}
]
}
]
}Exit condition: {
"leaveWithSpark": {
"position": "top"
}
}Unlocks doors: {"types":["ammo"],"requires":[]} |
From: 2
Middle Right Door
To: 1
Bottom Left Door
In the previous room, press down precisely to gain the shinecharge while sliding off the ledge. Maintain the temporary blue state to break through the blocks at the bottom of the room. Entrance condition: {
"comeInShinecharging": {
"length": 0,
"openEnd": 1
}
}Requires: "h_shinechargeSlideTemporaryBlue"
{
"heatFrames": 115
}
{
"shineChargeFrames": 115
}Exit condition: {
"leaveShinecharged": {}
}Unlocks doors: {"types":["super"],"requires":[]}
{"types":["missiles","powerbomb"],"requires":["never"]} |
From: 2
Middle Right Door
To: 4
Item
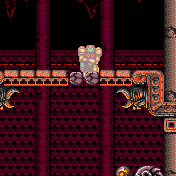
Store the shinecharge just before the door transition, so that Samus slides off the ledge, to gain a temporary blue state to break the blocks. Entrance condition: {
"comeInShinecharging": {
"length": 0,
"openEnd": 1
}
}Requires: "h_shinechargeSlideTemporaryBlue"
{
"heatFrames": 80
}
{
"shineChargeFrames": 80
}Clears obstacles: B |
From: 2
Middle Right Door
To: 4
Item
Entrance condition: {
"comeInShinecharging": {
"length": 0,
"openEnd": 1
}
}Requires: "canShinechargeMovementTricky"
"canTemporaryBlue"
{
"heatFrames": 80
}Clears obstacles: B Dev note: If the previous room is heated and canXRayCancelShinecharge is not an option, then this strat saves heat frames compared to waiting out the shinecharge frames in the other room. |
From: 3
Top Right Door
To: 1
Bottom Left Door
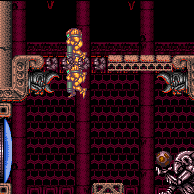
Press down precisely to gain the shinecharge while sliding off the ledge. Maintain the temporary blue state to break through the blocks at the bottom of the room. Entrance condition: {
"comeInShinecharging": {
"length": 3,
"openEnd": 1
}
}Requires: "h_shinechargeSlideTemporaryBlue"
{
"heatFrames": 160
}
{
"shineChargeFrames": 160
}Exit condition: {
"leaveShinecharged": {}
}Unlocks doors: {"types":["super"],"requires":[]}
{"types":["missiles","powerbomb"],"requires":["never"]} |
From: 3
Top Right Door
To: 1
Bottom Left Door
Entrance condition: {
"comeInShinecharging": {
"length": 12,
"openEnd": 0
}
}Requires: "ScrewAttack"
"canShinechargeMovementTricky"
{
"heatFrames": 190
}
{
"shinespark": {
"frames": 7,
"excessFrames": 0
}
}Exit condition: {
"leaveWithSpark": {}
}Unlocks doors: {"types":["super"],"requires":[]}
{"types":["missiles","powerbomb"],"requires":["never"]} |
From: 3
Top Right Door
To: 1
Bottom Left Door
Press down precisely to gain the shinecharge while sliding off the ledge. Maintain the temporary blue state to break through the blocks at the bottom of the room. Entrance condition: {
"comeInShinecharging": {
"length": 3,
"openEnd": 1
}
}Requires: "h_shinechargeSlideTemporaryBlue"
{
"heatFrames": 165
}
{
"shinespark": {
"frames": 3,
"excessFrames": 0
}
}Exit condition: {
"leaveWithSpark": {}
}Unlocks doors: {"types":["super"],"requires":[]}
{"types":["missiles","powerbomb"],"requires":["never"]} |
From: 3
Top Right Door
To: 2
Middle Right Door
Press down somewhat precisely to gain the shinecharge while breaking the bomb block. Then morph, roll off the edge, and unmorph near the door to shoot it open. Entrance condition: {
"comeInShinecharging": {
"length": 3,
"openEnd": 1
}
}Requires: "canShinechargeMovementTricky"
"canResetFallSpeed"
{
"heatFrames": 120
}
{
"shineChargeFrames": 120
}Exit condition: {
"leaveShinecharged": {}
}Unlocks doors: {"types":["super"],"requires":[]}
{"types":["missiles","powerbomb"],"requires":["never"]} |
From: 3
Top Right Door
To: 2
Middle Right Door
Press down precisely to gain the shinecharge while sliding off the ledge. Entrance condition: {
"comeInShinecharging": {
"length": 3,
"openEnd": 1
}
}Requires: "canShinechargeMovementTricky"
"canWallJump"
{
"heatFrames": 145
}
{
"shineChargeFrames": 145
}Exit condition: {
"leaveShinecharged": {}
}Unlocks doors: {"types":["super"],"requires":[]}
{"types":["missiles","powerbomb"],"requires":["never"]} |
From: 3
Top Right Door
To: 4
Item
Enter with a shinecharge, and use Screw Attack to break the bomb blocks and descend quickly. Reach the item while still having a shinecharge. Doing a moonfall can save a few frames. Entrance condition: {
"comeInShinecharged": {}
}Requires: {
"shineChargeFrames": 140
}
"canShinechargeMovementTricky"
"ScrewAttack"
{
"heatFrames": 140
}
{
"or": [
"canMoonfall",
{
"and": [
{
"heatFrames": 5
},
{
"shineChargeFrames": 5
}
]
}
]
}Clears obstacles: A, B Unlocks doors: {"types":["super"],"requires":[]}
{"types":["missiles","powerbomb"],"requires":["never"]} |
From: 3
Top Right Door
To: 4
Item
Store a shinecharge then use Screw Attack to break through the bomb blocks down to the item location. Reach the item while still having a shinecharge. Doing a moonfall can save a few frames. Entrance condition: {
"comeInShinecharging": {
"length": 12,
"openEnd": 0
}
}Requires: "ScrewAttack"
"canShinechargeMovementTricky"
{
"heatFrames": 155
}
{
"shineChargeFrames": 155
}
{
"or": [
"canMoonfall",
{
"and": [
{
"heatFrames": 5
},
{
"shineChargeFrames": 5
}
]
}
]
}Clears obstacles: B Unlocks doors: {"types":["super"],"requires":[]}
{"types":["missiles","powerbomb"],"requires":["never"]}Dev note: Storing the shinecharge on the left side of the runway takes fine control over shinecharge spacing, but that is ok at this difficulty. |
From: 3
Top Right Door
To: 4
Item
Press down precisely to gain the shinecharge while sliding off the ledge. Maintain the temporary blue state to break through the blocks at the bottom of the room. Reach the item while still having a shinecharge. Entrance condition: {
"comeInShinecharging": {
"length": 3,
"openEnd": 1
}
}Requires: "h_shinechargeSlideTemporaryBlue"
{
"heatFrames": 140
}
{
"shineChargeFrames": 140
}Clears obstacles: A, B Unlocks doors: {"types":["super"],"requires":[]}
{"types":["missiles","powerbomb"],"requires":["never"]} |
From: 1
Left Door
To: 2
Right Door


Gain run speed using 4 tiles, and jump on the last frame through the transition. Frame-perfectly activate a diagonal spark just below the tip of the stalactite. If successful, Samus will clip through the slope at the end of the ledge and make it to the top of the room. Entrance condition: {
"comeInJumping": {
"speedBooster": "any",
"minTiles": 4
}
}Requires: "canShinechargeMovementTricky"
{
"notable": "Thread the Needle Shinespark"
}
{
"useFlashSuit": {}
}
{
"shinespark": {
"frames": 49,
"excessFrames": 8
}
}
{
"heatFrames": 315
} |
From: 1
Left Door
To: 4
Center Floating Platforms Junction


Spark diagonally to bonk the underside of the top floating platform, far enough right to be able to land on the next platform over. Entrance condition: {
"comeInShinecharged": {}
}Requires: "canShinechargeMovementTricky"
"canInsaneJump"
{
"shineChargeFrames": 145
}
{
"shinespark": {
"frames": 37,
"excessFrames": 0
}
}
"canDash"
{
"heatFrames": 280
}Dev note: This assumes a worst-case entry, e.g. from water physics. FIXME: add other variants with different amounts of momentum, once this is able to be represented. |
From: 1
Left Door
To: 4
Center Floating Platforms Junction


Spark diagonally to bonk the underside of the top floating platform, far enough right to be able to land on the next platform over. Entrance condition: {
"comeInJumping": {
"speedBooster": "any",
"minTiles": 1
}
}Requires: "canShinechargeMovementTricky"
{
"useFlashSuit": {}
}
{
"shinespark": {
"frames": 31,
"excessFrames": 0
}
}
{
"heatFrames": 250
} |
From: 1
Left Door
To: 4
Center Floating Platforms Junction


Spark diagonally to bonk the underside of the top floating platform, far enough right to be able to land on the next platform over. Entrance condition: {
"comeInJumping": {
"speedBooster": "any",
"minTiles": 3
}
}Requires: "canShinechargeMovementTricky"
{
"useFlashSuit": {}
}
{
"shinespark": {
"frames": 27,
"excessFrames": 0
}
}
{
"heatFrames": 235
} |
From: 1
Top Left Door
To: 1
Top Left Door

Requires: {
"or": [
{
"canShineCharge": {
"usedTiles": 21,
"gentleUpTiles": 3,
"gentleDownTiles": 3,
"openEnd": 1
}
},
{
"and": [
{
"doorUnlockedAtNode": 1
},
{
"canShineCharge": {
"usedTiles": 22,
"gentleUpTiles": 3,
"gentleDownTiles": 3,
"openEnd": 1
}
}
]
}
]
}
{
"enemyDamage": {
"enemy": "Boulder",
"type": "contact",
"hits": 1
}
}
"canSlopeXMode"
"h_XModeSpikeHitLeniency"
"h_XModeSpikeHitLeniency"
"canShinechargeMovementTricky"
{
"shinespark": {
"frames": 0
}
}
{
"gainBlueSuit": {}
} |
From: 1
Top Left Door
To: 3
Top Right Door
Entrance condition: {
"comeInShinecharging": {
"length": 3,
"openEnd": 0
}
}Requires: "canShinechargeMovementTricky"
{
"or": [
{
"and": [
"canDownBack",
"canInsaneJump",
{
"shineChargeFrames": 125
},
{
"heatFrames": 125
}
]
},
{
"and": [
{
"shineChargeFrames": 160
},
{
"heatFrames": 160
}
]
}
]
}Exit condition: {
"leaveShinecharged": {}
}Unlocks doors: {"types":["super"],"requires":[]}
{"types":["missiles","powerbomb"],"requires":["never"]} |
From: 2
Bottom Left Door
To: 4
Junction Above Bomb Blocks
Vertically Shinespark two tiles from the left on the floating platform. Shinesparking farther right will make it very likely a fireball hits Samus during the crash animation. There is a small position that crashes the shinespark early but does not take fireball damage. Entrance condition: {
"comeInShinecharged": {}
}Requires: {
"shineChargeFrames": 60
}
"canMidairShinespark"
{
"or": [
{
"and": [
"canShinechargeMovementTricky",
{
"shineChargeFrames": 10
},
{
"shinespark": {
"frames": 23,
"excessFrames": 2
}
}
]
},
{
"and": [
"canTrickyJump",
{
"shinespark": {
"frames": 36,
"excessFrames": 3
}
}
]
},
{
"and": [
{
"shineChargeFrames": 10
},
{
"shinespark": {
"frames": 22,
"excessFrames": 0
}
},
{
"enemyDamage": {
"enemy": "Namihe",
"type": "fireball",
"hits": 1
}
},
{
"heatFrames": 25
}
]
}
]
}
{
"heatFrames": 220
}Clears obstacles: A |
From: 2
Bottom Left Door
To: 4
Junction Above Bomb Blocks
Vertically Shinespark two tiles from the left on the floating platform. Shinesparking farther right will make it very likely a fireball hits Samus during the crash animation. There is a small position that crashes the shinespark early but does not take fireball damage. Entrance condition: {
"comeInShinecharging": {
"length": 3,
"openEnd": 0
}
}Requires: "canMidairShinespark"
{
"or": [
{
"and": [
"canShinechargeMovementTricky",
{
"shinespark": {
"frames": 22,
"excessFrames": 2
}
}
]
},
{
"and": [
"canTrickyJump",
{
"shinespark": {
"frames": 33,
"excessFrames": 3
}
}
]
},
{
"and": [
{
"shinespark": {
"frames": 22,
"excessFrames": 0
}
},
{
"enemyDamage": {
"enemy": "Namihe",
"type": "fireball",
"hits": 1
}
},
{
"heatFrames": 25
}
]
}
]
}
{
"heatFrames": 250
}Clears obstacles: A |
|
Entrance condition: {
"comeInShinecharged": {}
}Requires: "HiJump"
"canShinechargeMovementTricky"
{
"shineChargeFrames": 140
}
{
"heatFrames": 140
}Exit condition: {
"leaveShinecharged": {}
}Unlocks doors: {"types":["super"],"requires":[]}
{"types":["missiles","powerbomb"],"requires":["never"]} |
From: 3
Top Right Door
To: 1
Top Left Door
Entrance condition: {
"comeInShinecharged": {}
}Requires: "canShinechargeMovementTricky"
{
"or": [
{
"and": [
{
"shineChargeFrames": 135
},
{
"heatFrames": 170
},
{
"shinespark": {
"frames": 11,
"excessFrames": 0
}
}
]
},
{
"and": [
"HiJump",
{
"shineChargeFrames": 125
},
{
"heatFrames": 160
},
{
"shinespark": {
"frames": 7,
"excessFrames": 0
}
}
]
}
]
}Exit condition: {
"leaveWithSpark": {}
}Unlocks doors: {"types":["super"],"requires":[]}
{"types":["missiles","powerbomb"],"requires":["never"]} |
From: 3
Top Right Door
To: 1
Top Left Door

Entrance condition: {
"comeInShinecharging": {
"length": 2,
"openEnd": 1
}
}Requires: "canShinechargeMovementTricky"
{
"or": [
"canWallJump",
"canInsaneJump"
]
}
{
"heatFrames": 205
}
{
"shinespark": {
"frames": 6,
"excessFrames": 0
}
}Exit condition: {
"leaveWithSpark": {}
}Unlocks doors: {"types":["super"],"requires":[]}
{"types":["missiles","powerbomb"],"requires":["never"]} |
From: 4
Junction Right of Power Bomb Blocks
To: 4
Junction Right of Power Bomb Blocks
Requires: {
"obstaclesCleared": [
"A",
"C",
"D"
]
}
"h_heatProof"
"canShinechargeMovementTricky"
{
"canShineCharge": {
"usedTiles": 30,
"openEnd": 0
}
}
{
"shineChargeFrames": 175
}
"h_spikeSuitSpikeHitLeniency"
{
"spikeHits": 1
}
"canTrickySpikeSuit"
{
"shinespark": {
"frames": 5,
"excessFrames": 5
}
} |
From: 4
Junction Right of Power Bomb Blocks
To: 4
Junction Right of Power Bomb Blocks
Use i-frames from the first Dessgeega to run through the remaining enemies and store a shinespark. 1-tap Shortcharge, then run back towards the Hoppers and try to hit all three at once by shinesparking horizontally midair when the closest hopper jumps. Requires: {
"canShineCharge": {
"usedTiles": 25,
"steepUpTiles": 4,
"openEnd": 1
}
}
{
"enemyDamage": {
"enemy": "Dessgeega",
"type": "contact",
"hits": 1
}
}
{
"or": [
"canInsaneJump",
{
"enemyDamage": {
"enemy": "Dessgeega",
"type": "contact",
"hits": 1
}
}
]
}
"canUseIFrames"
"canShinechargeMovementTricky"
{
"shinespark": {
"frames": 25
}
}
{
"heatFrames": 420
}Clears obstacles: D |
From: 4
Junction Right of Power Bomb Blocks
To: 8
Junction Below Top Right Door
Requires: {
"obstaclesCleared": [
"D"
]
}
"h_heatProof"
{
"or": [
{
"and": [
{
"getBlueSpeed": {
"usedTiles": 20,
"openEnd": 1
}
},
"canSpeedball"
]
},
{
"and": [
"h_additionalBomb",
"h_bombThings"
]
}
]
}
{
"canShineCharge": {
"usedTiles": 25,
"steepDownTiles": 4,
"openEnd": 1
}
}
"canShinechargeMovementTricky"
"canOffScreenMovement"
"h_spikeSuitSpikeHitLeniency"
{
"spikeHits": 1
}
"canTrickySpikeSuit"
{
"shinespark": {
"frames": 4,
"excessFrames": 4
}
} |
From: 7
Junction Left of Morph Tunnel
To: 7
Junction Left of Morph Tunnel
Use i-frames from the first Dessgeega to run through the remaining enemies and store a shinespark. It helps to run towards the first hopper to take damage and then not stutter. Mid-air spark to kill all three at once. Requires: {
"canShineCharge": {
"usedTiles": 17,
"openEnd": 1
}
}
{
"enemyDamage": {
"enemy": "Dessgeega",
"type": "contact",
"hits": 1
}
}
"canUseIFrames"
"canShinechargeMovementTricky"
{
"shinespark": {
"frames": 40
}
}
{
"heatFrames": 310
}Clears obstacles: D |
|
Requires: "h_shinechargeMaxRunway"
"canShinechargeMovementTricky"
"canMockball"
{
"obstaclesCleared": [
"A"
]
}
{
"shinespark": {
"frames": 3,
"excessFrames": 0
}
}Exit condition: {
"leaveWithSpark": {}
} |
From: 2
Middle Left Door
To: 1
Top Left Door


Jump close to ceiling, and activate a shinespark to the right. If successful, Samus will clip into the wall behind the Chozo statue and be able to X-Ray climb up. Only certain horizontal positions will cause Samus to clip into the wall. It will work to activate the spark while Samus is centered under the second Grapple block or slightly to the left. Entrance condition: {
"comeInShinecharged": {}
}Requires: {
"shineChargeFrames": 50
}
"canShinechargeMovementTricky"
{
"shinespark": {
"frames": 88,
"excessFrames": 0
}
}
"canShinesparkSlopeClip"
"canXRayClimb"
{
"or": [
{
"getBlueSpeed": {
"usedTiles": 16,
"steepDownTiles": 4,
"openEnd": 0
}
},
"can4HighMidAirMorph"
]
}Exit condition: {
"leaveNormally": {}
}Unlocks doors: {"types":["ammo"],"requires":[]}Dev note: The leaveNormally is to ensure it won't be required to do the Speed block moondance blind up there. |
From: 2
Middle Left Door
To: 1
Top Left Door


Jump close to ceiling, and activate a shinespark to the right. If successful, Samus will clip into the wall behind the Chozo statue and be able to X-Ray climb up. Only certain horizontal positions will cause Samus to clip into the wall. It will work to activate the spark while Samus is centered under the second Grapple block or slightly to the left. Requires: "h_storedSpark"
"canDash"
"canShinechargeMovementTricky"
{
"shinespark": {
"frames": 88,
"excessFrames": 0
}
}
"canShinesparkSlopeClip"
"canXRayClimb"
{
"or": [
{
"getBlueSpeed": {
"usedTiles": 16,
"steepDownTiles": 4,
"openEnd": 0
}
},
"can4HighMidAirMorph"
]
}Exit condition: {
"leaveNormally": {}
}Unlocks doors: {"types":["ammo"],"requires":[]}Dev note: The leaveNormally is to ensure it won't be required to do the Speed block moondance blind up there. |
|
Wall jump repeatedly off of the left wall, jump before the spikes and hold jump while passing them to avoid wall jump checking them. Requires: {
"or": [
{
"obstaclesCleared": [
"A"
]
},
"h_usePowerBomb"
]
}
{
"or": [
{
"canShineCharge": {
"usedTiles": 35,
"openEnd": 1
}
},
{
"and": [
"f_DefeatedPhantoon",
"h_shinechargeMaxRunway"
]
}
]
}
"canShinechargeMovementComplex"
"canConsecutiveWallJump"
{
"or": [
{
"shinespark": {
"frames": 17,
"excessFrames": 2
}
},
{
"and": [
"HiJump",
{
"shinespark": {
"frames": 10,
"excessFrames": 2
}
}
]
},
{
"and": [
"canShinechargeMovementTricky",
"canFastWallJumpClimb",
{
"or": [
{
"shinespark": {
"frames": 10,
"excessFrames": 2
}
},
{
"and": [
"HiJump",
{
"shinespark": {
"frames": 6,
"excessFrames": 2
}
}
]
}
]
}
]
}
]
}Clears obstacles: A |
|


Land on the first spike platform, and use it to run and jump far enough through the room to trigger the fourth spike platform to fall. Fire a shot mid-air and activate the shinespark wind-up. Wait until the shot is at a specific position before sparking. Sparking too late will cause the shot to despawn before reaching the door. Sparking too early will cause Samus to bonk the door as it will not yet be open. A beam shot, Missile, or Super can be used. Entrance condition: {
"comeInShinecharged": {}
}Requires: {
"shineChargeFrames": 85
}
"Gravity"
"canShinechargeMovementTricky"
"canHeroShot"
{
"shinespark": {
"frames": 31,
"excessFrames": 0
}
}Exit condition: {
"leaveWithSpark": {}
}Unlocks doors: {"types":["super"],"requires":[]}
{"types":["missiles","powerbomb"],"requires":["never"]} |
|


Land on the floor, then jump and fire a shot mid-air and activate the shinespark wind-up. Wait until the shot is at a specific position before sparking. Sparking too late will cause the shot to despawn before reaching the door. Sparking too early will cause Samus to bonk the door as it will not yet be open. A beam shot, Missile, or Super can be used. Entrance condition: {
"comeInShinecharged": {}
}Requires: {
"shineChargeFrames": 70
}
{
"not": "f_DefeatedPhantoon"
}
"canRiskPermanentLossOfAccess"
"canShinechargeMovementTricky"
"canHeroShot"
{
"shinespark": {
"frames": 37,
"excessFrames": 0
}
}Exit condition: {
"leaveWithSpark": {}
}Unlocks doors: {"types":["super"],"requires":[]}
{"types":["missiles","powerbomb"],"requires":["never"]} |
From: 1
Left Door
To: 2
Right Door


Entrance condition: {
"comeInShinecharging": {
"length": 0,
"openEnd": 1
}
}Requires: {
"not": "f_DefeatedPhantoon"
}
"canRiskPermanentLossOfAccess"
"canShinechargeMovementTricky"
{
"shinespark": {
"frames": 8,
"excessFrames": 0
}
}Exit condition: {
"leaveWithSpark": {}
}Unlocks doors: {"types":["super"],"requires":[]}
{"types":["missiles","powerbomb"],"requires":["never"]} |
|


Wait for the first spike platform to fall, jump onto it, and use it to run and jump far enough through the room to trigger the fourth spike platform to fall. Fire a shot mid-air and activate the shinespark wind-up. Wait until the shot is at a specific position before sparking. Sparking too late will cause the shot to despawn before reaching the door. Sparking too early will cause Samus to bonk the door as it will not yet be open. A beam shot, Missile, or Super can be used. Entrance condition: {
"comeInShinecharged": {}
}Requires: {
"shineChargeFrames": 115
}
"Gravity"
"canShinechargeMovementTricky"
"canHeroShot"
{
"shinespark": {
"frames": 31,
"excessFrames": 0
}
}Exit condition: {
"leaveWithSpark": {
"position": "top"
}
}Unlocks doors: {"types":["super"],"requires":[]}
{"types":["missiles","powerbomb"],"requires":["never"]} |
|


Land on the floor, then jump and fire a shot mid-air and activate the shinespark wind-up. Wait until the shot is at a specific position before sparking. Sparking too late will cause the shot to despawn before reaching the door. Sparking too early will cause Samus to bonk the door as it will not yet be open. A beam shot, Missile, or Super can be used. Entrance condition: {
"comeInShinecharged": {}
}Requires: {
"shineChargeFrames": 70
}
{
"not": "f_DefeatedPhantoon"
}
"canRiskPermanentLossOfAccess"
"canShinechargeMovementTricky"
"canHeroShot"
{
"shinespark": {
"frames": 37,
"excessFrames": 0
}
}Exit condition: {
"leaveWithSpark": {}
}Unlocks doors: {"types":["super"],"requires":[]}
{"types":["missiles","powerbomb"],"requires":["never"]} |
From: 2
Right Door
To: 1
Left Door


Entrance condition: {
"comeInShinecharging": {
"length": 0,
"openEnd": 1
}
}Requires: {
"not": "f_DefeatedPhantoon"
}
"canRiskPermanentLossOfAccess"
"canShinechargeMovementTricky"
{
"shinespark": {
"frames": 8,
"excessFrames": 0
}
}Exit condition: {
"leaveWithSpark": {}
}Unlocks doors: {"types":["super"],"requires":[]}
{"types":["missiles","powerbomb"],"requires":["never"]} |
From: 1
Left Door
To: 1
Left Door
Either kill the Bull or shoot it to force it to move to the right side of the room. Starting from inside the doorway, using the full runway, run toward the water; ideally, release forward for between 4 and 6 frames before re-pressing it on the last possible frame before entering the water. Other positions and timings can work but will gain the shinecharge further from the door. Depending on subpixels and the exact timing of the stutter, Samus may fall off the stairs. Good subpixels can be obtained by pressing against the door (or the wall above it) before turning around and moonwalking back, stopping at either of the two possible positions on the last pixel before Samus would touch the transition. Requires: {
"or": [
"f_DefeatedPhantoon",
{
"canShineCharge": {
"usedTiles": 21,
"steepUpTiles": 3,
"openEnd": 0
}
}
]
}
"canPreciseStutterWaterShineCharge"
"canShinechargeMovementTricky"
"canInsaneJump"
{
"shineChargeFrames": 150
}
{
"or": [
"canBeVeryPatient",
{
"shineChargeFrames": 15
}
]
}Exit condition: {
"leaveShinecharged": {}
} |
|
If Phantoon is defeated, start at least 2 tiles from the water line, and stutter just before entering it in order to charge a spark in room. Requires: {
"or": [
"f_DefeatedPhantoon",
{
"canShineCharge": {
"usedTiles": 21,
"steepUpTiles": 3,
"openEnd": 0
}
}
]
}
"canStutterWaterShineCharge"
"canShinechargeMovementTricky"
"canWallJump"
{
"or": [
"canSpaceJumpWaterBounce",
"HiJump"
]
}
"h_shinechargeMaxRunway"
{
"shinespark": {
"frames": 29,
"excessFrames": 0
}
}Exit condition: {
"leaveWithSpark": {}
}Unlocks doors: {"types":["ammo"],"requires":[]}Dev note: Using the dry runway and leaving with shinecharged would require canRiskPermanentLossOfAccess. |
|
Enter the room with a shinecharge. Run and jump off the ledge. Fire a shot mid-air and activate the shinespark wind-up. Take a hit from the the Bull (if power is on). Wait until the shot is at a specific position before sparking. Sparking too late will cause the shot to despawn before reaching the door. Sparking too early will cause Samus to bonk the door as it will not yet be open. A beam shot, Missile, or Super can be used. Entrance condition: {
"comeInShinecharged": {}
}Requires: {
"shineChargeFrames": 60
}
"canShinechargeMovementTricky"
"canHeroShot"
{
"or": [
{
"enemyDamage": {
"enemy": "Bull",
"type": "contact",
"hits": 1
}
},
{
"and": [
{
"not": "f_DefeatedPhantoon"
},
"canRiskPermanentLossOfAccess"
]
}
]
}
{
"shinespark": {
"frames": 32,
"excessFrames": 0
}
}Exit condition: {
"leaveWithSpark": {}
}Unlocks doors: {"types":["super"],"requires":[]}
{"types":["missiles","powerbomb"],"requires":["never"]} |
From: 1
Left Door
To: 1
Left Door


Entrance condition: {
"comeInShinecharged": {}
}Requires: "f_DefeatedPhantoon"
{
"or": [
{
"and": [
{
"shineChargeFrames": 55
},
{
"spikeHits": 1
},
"h_spikeSuitSpikeHitLeniency",
"canPatientSpikeSuit",
{
"shinespark": {
"frames": 4,
"excessFrames": 4
}
}
]
},
{
"and": [
{
"shineChargeFrames": 135
},
{
"enemyDamage": {
"enemy": "Bull",
"type": "contact",
"hits": 1
}
},
{
"or": [
"canShinechargeMovementTricky",
{
"thornHits": 3
}
]
},
{
"thornHits": 1
},
"h_spikeSuitThornHitLeniency",
"canPatientSpikeSuit",
{
"shinespark": {
"frames": 1,
"excessFrames": 1
}
}
]
}
]
} |
From: 1
Left Door
To: 1
Left Door


Entrance condition: {
"comeInShinecharging": {
"length": 5,
"openEnd": 0
}
}Requires: "f_DefeatedPhantoon"
{
"thornHits": 1
}
"h_spikeSuitThornHitLeniency"
{
"enemyDamage": {
"enemy": "Bull",
"type": "contact",
"hits": 1
}
}
{
"or": [
"canShinechargeMovementTricky",
{
"thornHits": 3
}
]
}
"canPatientSpikeSuit"
{
"shinespark": {
"frames": 1,
"excessFrames": 1
}
} |
|

Gain a shinecharge running right to left through the open gate. Requires: {
"obstaclesCleared": [
"A"
]
}
{
"canShineCharge": {
"usedTiles": 15,
"openEnd": 1
}
}
"h_speedJump"
"canShinechargeMovementTricky"
{
"shineChargeFrames": 175
}
{
"shinespark": {
"frames": 22,
"excessFrames": 0
}
}Exit condition: {
"leaveWithSpark": {}
} |
From: 4
Farm Junction Left of Gate
To: 1
Bottom Left Door
Gain a shinecharge running left to right through the open gate. Then turn back and quickly jump directly into the hidden passage to the bottom of the room, to spark out. Requires: {
"obstaclesCleared": [
"A"
]
}
{
"canShineCharge": {
"usedTiles": 15,
"openEnd": 1
}
}
"h_speedJump"
"canShinechargeMovementTricky"
"canInsaneJump"
{
"shinespark": {
"frames": 8,
"excessFrames": 0
}
}Exit condition: {
"leaveWithSpark": {}
}Unlocks doors: {"types":["super"],"requires":[]}
{"types":["missiles","powerbomb"],"requires":["never"]} |
From: 4
Farm Junction Left of Gate
To: 2
Bottom Right Door

Gain a shinecharge running left to right through the open gate. Then turn back and quickly jump directly into the hidden passage to the bottom of the room, to spark out. Requires: {
"obstaclesCleared": [
"A"
]
}
{
"canShineCharge": {
"usedTiles": 15,
"openEnd": 1
}
}
"h_speedJump"
"canShinechargeMovementTricky"
"canInsaneJump"
{
"shinespark": {
"frames": 17,
"excessFrames": 0
}
}Exit condition: {
"leaveWithSpark": {}
}Unlocks doors: {"types":["super"],"requires":[]}
{"types":["missiles","powerbomb"],"requires":["never"]} |
From: 4
Farm Junction Left of Gate
To: 4
Farm Junction Left of Gate


Fill up on the respawning Zebbos. Shinecharge between the bottom doors, then jump back up to the Boyon. Requires: {
"obstaclesCleared": [
"R-Mode"
]
}
{
"refill": [
"Energy"
]
}
"canShinechargeMovementTricky"
{
"or": [
"canWallJump",
{
"and": [
"SpaceJump",
"HiJump"
]
},
{
"and": [
"HiJump",
"canSpringBallJumpMidAir"
]
}
]
}
{
"or": [
{
"and": [
{
"doorUnlockedAtNode": 1
},
{
"doorUnlockedAtNode": 2
},
{
"canShineCharge": {
"usedTiles": 13,
"openEnd": 1
}
}
]
},
{
"and": [
{
"doorUnlockedAtNode": 1
},
{
"canShineCharge": {
"usedTiles": 12,
"openEnd": 1
}
}
]
},
{
"and": [
{
"doorUnlockedAtNode": 2
},
{
"canShineCharge": {
"usedTiles": 13,
"openEnd": 0
}
}
]
},
{
"canShineCharge": {
"usedTiles": 12,
"openEnd": 0
}
}
]
}
{
"autoReserveTrigger": {
"maxReserveEnergy": 95
}
}
"canRModeSparkInterrupt"Resets obstacles: R-Mode Unlocks doors: {"nodeId":1,"types":["ammo"],"requires":[]}
{"nodeId":2,"types":["ammo"],"requires":[]} |
From: 1
Left Door
To: 1
Left Door

With only 1 tile of runway in the other room, Samus should ideally start on the last pixel of runway with X subpixels of $3FFF or less. Run toward the door, releasing forward for exactly 1 frame and pressing it again on the last possible frame before the transition. Starting with X subpixels of $7FFF can also work (e.g., by simply backing against the door ledge, then jumping and turning around mid-air); in this case, Samus must advance 1 or 2 pixels with an arm pump before the transition (e.g., firing a shot or pressing and/or releasing an angle button), and the shinecharge will be gained slightly further away from the door. After gaining the shinecharge, continue holding forward in order to make Samus stand. Then turnaround spin jump back toward the door, and shoot it open, making the Sciser fall; spin jump over the Sciser to reach the transition with a shinecharge. Ideal subpixels ($3FFF) can be achieved using one of several methods: 1) press forward against the door ledge (or a wall aligned with it); jump, and while mid-air, tap forward for exactly 1 frame to land with subpixels $BFFF, moonwalk back for exactly 1 frame to end with subpixels $3FFF. 2) press forward against the door ledge (from a platform below, assuming one exists) turn around (while on the ground), and moonwalk back two pixels, then jump and mid-air turnaround onto the ledge; if Samus jumped from the correct pixel but does not land on the ledge, then it was needed to moonwalk back 1 more frame; in this case it is possible to retry by doing a mid-air turnaround back onto the platform, and moonwalking back for 1 frame. 3) if X-Ray is available, press against the door ledge (from a platform below, assuming one exists) turn around (while on the ground), then jump and mid-air turnaround toward the door, and use X-Ray to turnaround in place away from the door; repeat this sequence 3 more times: jump, mid-air turnaround, X-Ray turnaround; then do one more jump and mid-air turnaround, high enough to land on the door ledge, and Samus should be in the correct position with subpixels $3FFF. Entrance condition: {
"comeInStutterShinecharging": {
"minTiles": 1
}
}Requires: "canPreciseStutterWaterShineCharge"
"canInsaneJump"
"canBeVeryPatient"
"canShinechargeMovementTricky"
{
"shineChargeFrames": 160
}Exit condition: {
"leaveShinecharged": {}
}Unlocks doors: {"types":["super"],"requires":[]}
{"types":["missiles","powerbomb"],"requires":["never"]} |
From: 1
Left Door
To: 1
Left Door
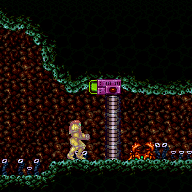
With only a runway of 2 tiles (open end) in the other room, the ideal timing for the stutter is to release forward for 3 frames, and repress forward on the last possible frame before the transition. Other timings can work, but will gain the shinecharge further from the door, leaving fewer shinecharge frames remaining. After gaining the shinecharge, continue holding forward in order to make Samus stand. Then turnaround spin jump back toward the door, and shoot it open, making the Sciser fall; spin jump over the Sciser to reach the transition with a shinecharge. Entrance condition: {
"comeInStutterShinecharging": {
"minTiles": 2
}
}Requires: "canPreciseStutterWaterShineCharge"
"canShinechargeMovementTricky"
"canInsaneJump"
{
"shineChargeFrames": 150
}
{
"or": [
"canBeVeryPatient",
{
"shineChargeFrames": 15
}
]
}Exit condition: {
"leaveShinecharged": {}
}Unlocks doors: {"types":["super"],"requires":[]}
{"types":["missiles","powerbomb"],"requires":["never"]} |
From: 1
Left Door
To: 1
Left Door
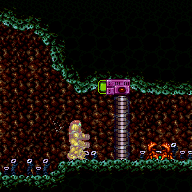
With only a runway of 3 tiles (open end) in the other room, the ideal timing for the stutter is to release forward for 3 or 4 frames, and repress forward on the last possible frame before the transition. Other timings can work, but will gain the shinecharge further from the door, leaving fewer shinecharge frames remaining. After gaining the shinecharge, continue holding forward in order to make Samus stand. Then turnaround spin jump back toward the door, and shoot it open, making the Sciser fall; spin jump over the Sciser to reach the transition with a shinecharge. Entrance condition: {
"comeInStutterShinecharging": {
"minTiles": 3
}
}Requires: "canPreciseStutterWaterShineCharge"
"canShinechargeMovementTricky"
"canInsaneJump"
{
"shineChargeFrames": 145
}
{
"or": [
"canBeVeryPatient",
{
"shineChargeFrames": 10
}
]
}Exit condition: {
"leaveShinecharged": {}
}Unlocks doors: {"types":["super"],"requires":[]}
{"types":["missiles","powerbomb"],"requires":["never"]}Dev note: The same shinecharge frames could be achieved with a closed end runway (effective length of 2.4375), with a 3-frame stutter, but there doesn't appear to be any application. |
From: 1
Left Door
To: 1
Left Door
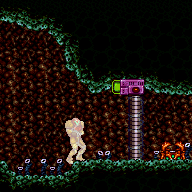

With only a runway of 4 tiles (open end) in the other room, the ideal timing for the stutter is to release forward for 4 frames, and repress forward on the last possible frame before the transition. It also works well to release forward for 3 frames and repress on the last possible frame. Other timings can also work, but may gain the shinecharge further from the door, leaving fewer shinecharge frames remaining. After gaining the shinecharge, continue holding forward in order to make Samus stand. Then turnaround spin jump back toward the door, and shoot it open, making the Sciser fall; spin jump over the Sciser to reach the transition with a shinecharge. Entrance condition: {
"comeInStutterShinecharging": {
"minTiles": 4
}
}Requires: "canPreciseStutterWaterShineCharge"
"canShinechargeMovementTricky"
"canInsaneJump"
{
"shineChargeFrames": 140
}
{
"or": [
"canBeVeryPatient",
{
"shineChargeFrames": 10
}
]
}Exit condition: {
"leaveShinecharged": {}
}Unlocks doors: {"types":["super"],"requires":[]}
{"types":["missiles","powerbomb"],"requires":["never"]} |
From: 1
Left Door
To: 1
Left Door
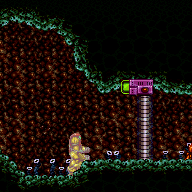
With a runway of 5 tiles (open end) in the other room, the ideal timing for the stutter is to release forward for 5 frames, and repress forward on the last possible frame before the transition. Other timings can work, but will gain the shinecharge further from the door, leaving fewer shinecharge frames remaining. After gaining the shinecharge, continue holding forward in order to make Samus stand. Then turnaround spin jump back toward the door, and continue spin jumping to reach the transition with a shinecharge. Entrance condition: {
"comeInStutterShinecharging": {
"minTiles": 5
}
}Requires: "canPreciseStutterWaterShineCharge"
"canShinechargeMovementTricky"
"canInsaneJump"
{
"shineChargeFrames": 130
}
{
"or": [
"canBeVeryPatient",
{
"shineChargeFrames": 15
}
]
}Exit condition: {
"leaveShinecharged": {}
}Unlocks doors: {"types":["super"],"requires":[]}
{"types":["missiles","powerbomb"],"requires":["never"]} |
From: 1
Top Left Doorway
To: 2
Bottom Left Door
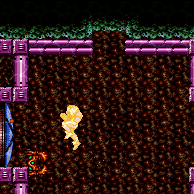
Entrance condition: {
"comeInShinecharging": {
"length": 2,
"openEnd": 1
}
}Requires: "Gravity"
"Morph"
"canShinechargeMovementTricky"
{
"enemyDamage": {
"enemy": "Sciser",
"type": "contact",
"hits": 1
}
}
{
"shinespark": {
"frames": 9,
"excessFrames": 0
}
}Exit condition: {
"leaveWithSpark": {}
}Unlocks doors: {"types":["super"],"requires":[]}
{"types":["missiles","powerbomb"],"requires":["never"]} |
From: 1
Top Left Doorway
To: 3
Bottom Right Door
Entrance condition: {
"comeInShinecharging": {
"length": 2,
"openEnd": 1
}
}Requires: "Gravity"
"Morph"
"canShinechargeMovementTricky"
{
"enemyDamage": {
"enemy": "Sciser",
"type": "contact",
"hits": 1
}
}
{
"shinespark": {
"frames": 9,
"excessFrames": 0
}
}Exit condition: {
"leaveWithSpark": {}
}Unlocks doors: {"types":["super"],"requires":[]}
{"types":["missiles","powerbomb"],"requires":["never"]} |
From: 2
Bottom Left Door
To: 1
Top Left Doorway

Pass through the tunnel to the left, tanking a crab hit. Entrance condition: {
"comeInShinecharged": {}
}Requires: "canShinechargeMovementTricky"
"Gravity"
"SpaceJump"
"canMidAirMorph"
{
"enemyDamage": {
"enemy": "Sciser",
"type": "contact",
"hits": 1
}
}
{
"or": [
{
"and": [
"HiJump",
{
"shineChargeFrames": 140
}
]
},
{
"and": [
"canKago",
{
"shineChargeFrames": 155
}
]
}
]
}Exit condition: {
"leaveShinecharged": {}
}Unlocks doors: {"types":["super"],"requires":[]}
{"types":["missiles","powerbomb"],"requires":["never"]} |
From: 2
Bottom Left Door
To: 1
Top Left Doorway
Pass through the tunnel to the right, then spark to the left. Entrance condition: {
"comeInShinecharged": {}
}Requires: "canShinechargeMovementTricky"
"Gravity"
"SpaceJump"
"canMidAirMorph"
{
"or": [
{
"and": [
"HiJump",
{
"shineChargeFrames": 120
}
]
},
{
"and": [
"HiJump",
"canSpeedyJump",
{
"shineChargeFrames": 115
}
]
},
{
"shineChargeFrames": 130
}
]
}
{
"shinespark": {
"frames": 14,
"excessFrames": 0
}
}Exit condition: {
"leaveWithSpark": {}
}Unlocks doors: {"types":["super"],"requires":[]}
{"types":["missiles","powerbomb"],"requires":["never"]} |
From: 2
Bottom Left Door
To: 4
Top Right Doorway
Entrance condition: {
"comeInShinecharged": {}
}Requires: "canShinechargeMovementTricky"
"Gravity"
"SpaceJump"
"canMidAirMorph"
{
"or": [
{
"and": [
"HiJump",
{
"shineChargeFrames": 135
}
]
},
{
"shineChargeFrames": 150
}
]
}Exit condition: {
"leaveShinecharged": {}
}Unlocks doors: {"types":["super"],"requires":[]}
{"types":["missiles","powerbomb"],"requires":["never"]} |
From: 2
Bottom Left Door
To: 4
Top Right Doorway
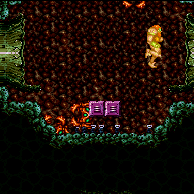
Entrance condition: {
"comeInShinecharged": {}
}Requires: "canShinechargeMovementTricky"
"Gravity"
"SpaceJump"
"canMidAirMorph"
{
"or": [
{
"and": [
"HiJump",
{
"shineChargeFrames": 120
}
]
},
{
"and": [
"HiJump",
"canSpeedyJump",
{
"shineChargeFrames": 115
}
]
},
{
"shineChargeFrames": 130
}
]
}
{
"shinespark": {
"frames": 7,
"excessFrames": 0
}
}Exit condition: {
"leaveWithSpark": {}
}Unlocks doors: {"types":["super"],"requires":[]}
{"types":["missiles","powerbomb"],"requires":["never"]} |
From: 3
Bottom Right Door
To: 1
Top Left Doorway
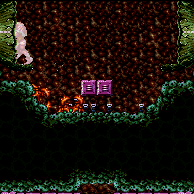

Pass through the tunnel to the left, tanking a crab hit. Entrance condition: {
"comeInShinecharged": {}
}Requires: "canShinechargeMovementTricky"
"Gravity"
"SpaceJump"
"canMidAirMorph"
{
"enemyDamage": {
"enemy": "Sciser",
"type": "contact",
"hits": 1
}
}
{
"or": [
{
"and": [
"HiJump",
{
"shineChargeFrames": 140
}
]
},
{
"and": [
"canKago",
{
"shineChargeFrames": 155
}
]
}
]
}Exit condition: {
"leaveShinecharged": {}
}Unlocks doors: {"types":["super"],"requires":[]}
{"types":["missiles","powerbomb"],"requires":["never"]} |
From: 3
Bottom Right Door
To: 1
Top Left Doorway

Pass through the tunnel to the right, then spark to the left. Entrance condition: {
"comeInShinecharged": {}
}Requires: "canShinechargeMovementTricky"
"Gravity"
"SpaceJump"
"canMidAirMorph"
{
"or": [
{
"and": [
"HiJump",
{
"shineChargeFrames": 120
}
]
},
{
"and": [
"HiJump",
"canSpeedyJump",
{
"shineChargeFrames": 115
}
]
},
{
"shineChargeFrames": 130
}
]
}
{
"shinespark": {
"frames": 14,
"excessFrames": 0
}
}Exit condition: {
"leaveWithSpark": {}
}Unlocks doors: {"types":["super"],"requires":[]}
{"types":["missiles","powerbomb"],"requires":["never"]} |
From: 3
Bottom Right Door
To: 4
Top Right Doorway

Entrance condition: {
"comeInShinecharged": {}
}Requires: "canShinechargeMovementTricky"
"Gravity"
"SpaceJump"
"canMidAirMorph"
{
"or": [
{
"and": [
"HiJump",
{
"shineChargeFrames": 135
}
]
},
{
"shineChargeFrames": 150
}
]
}Exit condition: {
"leaveShinecharged": {}
}Unlocks doors: {"types":["super"],"requires":[]}
{"types":["missiles","powerbomb"],"requires":["never"]} |
From: 3
Bottom Right Door
To: 4
Top Right Doorway
Entrance condition: {
"comeInShinecharged": {}
}Requires: "canShinechargeMovementTricky"
"Gravity"
"SpaceJump"
"canMidAirMorph"
{
"or": [
{
"and": [
"HiJump",
{
"shineChargeFrames": 120
}
]
},
{
"and": [
"HiJump",
"canSpeedyJump",
{
"shineChargeFrames": 115
}
]
},
{
"shineChargeFrames": 130
}
]
}
{
"shinespark": {
"frames": 7,
"excessFrames": 0
}
}Exit condition: {
"leaveWithSpark": {}
}Unlocks doors: {"types":["super"],"requires":[]}
{"types":["missiles","powerbomb"],"requires":["never"]} |
From: 4
Top Right Doorway
To: 2
Bottom Left Door

Entrance condition: {
"comeInShinecharging": {
"length": 2,
"openEnd": 1
}
}Requires: "Gravity"
"Morph"
"canShinechargeMovementTricky"
{
"enemyDamage": {
"enemy": "Sciser",
"type": "contact",
"hits": 1
}
}
{
"shinespark": {
"frames": 9,
"excessFrames": 0
}
}Exit condition: {
"leaveWithSpark": {}
}Unlocks doors: {"types":["super"],"requires":[]}
{"types":["missiles","powerbomb"],"requires":["never"]} |
From: 4
Top Right Doorway
To: 3
Bottom Right Door
Entrance condition: {
"comeInShinecharging": {
"length": 2,
"openEnd": 1
}
}Requires: "Gravity"
"Morph"
"canShinechargeMovementTricky"
{
"enemyDamage": {
"enemy": "Sciser",
"type": "contact",
"hits": 1
}
}
{
"shinespark": {
"frames": 9,
"excessFrames": 0
}
}Exit condition: {
"leaveWithSpark": {}
}Unlocks doors: {"types":["super"],"requires":[]}
{"types":["missiles","powerbomb"],"requires":["never"]} |
From: 2
Bottom Right Door
To: 2
Bottom Right Door
With only 1 tile of runway in the other room, Samus should ideally start on the last pixel of runway with X subpixels of $3FFF or less. Run toward the door, releasing forward for exactly 1 frame and pressing it again on the last possible frame before the transition. Starting with X subpixels of $7FFF can also work (e.g., by simply backing against the door ledge, then jumping and turning around mid-air); in this case, Samus must advance 1 or 2 pixels with an arm pump before the transition (e.g., firing a shot or pressing and/or releasing an angle button), and the shinecharge will be gained slightly further away from the door. After gaining the shinecharge, continue holding forward in order to make Samus stand. Then turnaround spin jump back toward the door, and continue spin jumping to reach the transition with a shinecharge. Alternatively, with greater difficulty but saving some shinecharge frames, after performing the turnaround spin jump, briefly moonwalk back, then retain momentum by boomeranging forward (switching from pressing backward to pressing forward on the next frame), and arm pump to reach the door quickly. Ideal subpixels ($3FFF) can be achieved using one of several methods: 1) press forward against the door ledge (or a wall aligned with it); jump, and while mid-air, tap forward for exactly 1 frame to land with subpixels $BFFF, moonwalk back for exactly 1 frame to end with subpixels $3FFF. 2) press forward against the door ledge (from a platform below, assuming one exists) turn around (while on the ground), and moonwalk back two pixels, then jump and mid-air turnaround onto the ledge; if Samus jumped from the correct pixel but does not land on the ledge, then it was needed to moonwalk back 1 more frame; in this case it is possible to retry by doing a mid-air turnaround back onto the platform, and moonwalking back for 1 frame. 3) if X-Ray is available, press against the door ledge (from a platform below, assuming one exists) turn around (while on the ground), then jump and mid-air turnaround toward the door, and use X-Ray to turnaround in place away from the door; repeat this sequence 3 more times: jump, mid-air turnaround, X-Ray turnaround; then do one more jump and mid-air turnaround, high enough to land on the door ledge, and Samus should be in the correct position with subpixels $3FFF. Entrance condition: {
"comeInStutterShinecharging": {
"minTiles": 1
}
}Requires: "canPreciseStutterWaterShineCharge"
"canInsaneJump"
"canBeVeryPatient"
"canShinechargeMovementTricky"
{
"shineChargeFrames": 160
}Exit condition: {
"leaveShinecharged": {}
}Unlocks doors: {"types":["super"],"requires":[]}
{"types":["missiles","powerbomb"],"requires":["never"]} |
From: 2
Bottom Right Door
To: 2
Bottom Right Door
With only a runway of 2 tiles (open end) in the other room, the ideal timing for the stutter is to release forward for 3 frames, and repress forward on the last possible frame before the transition. Other timings can work, but will gain the shinecharge further from the door, leaving fewer shinecharge frames remaining. After gaining the shinecharge, continue holding forward in order to make Samus stand. Then turnaround spin jump back toward the door, and continue spin jumping to reach the transition with a shinecharge. Alternatively, with greater difficulty but saving some shinecharge frames, after performing the turnaround spin jump, briefly moonwalk back, then retain momentum by boomeranging forward (switching from pressing backward to pressing forward on the next frame), and arm pump to reach the door quickly. Entrance condition: {
"comeInStutterShinecharging": {
"minTiles": 2
}
}Requires: "canPreciseStutterWaterShineCharge"
"canShinechargeMovementTricky"
"canInsaneJump"
{
"shineChargeFrames": 150
}
{
"or": [
"canBeVeryPatient",
{
"shineChargeFrames": 15
}
]
}Exit condition: {
"leaveShinecharged": {}
}Unlocks doors: {"types":["super"],"requires":[]}
{"types":["missiles","powerbomb"],"requires":["never"]}Dev note: FIXME: The canBeVeryPatient requirement is for difficulty placement of the boomerang method; but the boomerang (or maybe specifically the moonwalk boomerang) should possibly be its own tech, and the same with rapid arm pumping. |
From: 2
Bottom Right Door
To: 2
Bottom Right Door
With only a runway of 3 tiles (open end) in the other room, the ideal timing for the stutter is to release forward for 3 or 4 frames, and repress forward on the last possible frame before the transition. Other timings can work, but will gain the shinecharge further from the door, leaving fewer shinecharge frames remaining. After gaining the shinecharge, continue holding forward in order to make Samus stand. Then turnaround spin jump back toward the door, and continue spin jumping to reach the transition with a shinecharge. Alternatively, with greater difficulty but saving some shinecharge frames, after performing the turnaround spin jump, briefly moonwalk back, then retain momentum by boomeranging forward (switching from pressing backward to pressing forward on the next frame), and arm pump to reach the door quickly. Entrance condition: {
"comeInStutterShinecharging": {
"minTiles": 3
}
}Requires: "canPreciseStutterWaterShineCharge"
"canShinechargeMovementTricky"
"canInsaneJump"
{
"shineChargeFrames": 145
}
{
"or": [
"canBeVeryPatient",
{
"shineChargeFrames": 10
}
]
}Exit condition: {
"leaveShinecharged": {}
}Unlocks doors: {"types":["super"],"requires":[]}
{"types":["missiles","powerbomb"],"requires":["never"]}Dev note: The same shinecharge frames could be achieved with a closed end runway (effective length of 2.4375), with a 3-frame stutter, but there doesn't appear to be any application. |
From: 2
Bottom Right Door
To: 2
Bottom Right Door
With only a runway of 4 tiles (open end) in the other room, the ideal timing for the stutter is to release forward for 4 frames, and repress forward on the last possible frame before the transition. It also works well to release forward for 3 frames and repress on the last possible frame. Other timings can also work, but may gain the shinecharge further from the door, leaving fewer shinecharge frames remaining. After gaining the shinecharge, continue holding forward in order to make Samus stand. Then turnaround spin jump back toward the door, and continue spin jumping to reach the transition with a shinecharge. Entrance condition: {
"comeInStutterShinecharging": {
"minTiles": 4
}
}Requires: "canPreciseStutterWaterShineCharge"
"canShinechargeMovementTricky"
"canInsaneJump"
{
"shineChargeFrames": 140
}
{
"or": [
"canBeVeryPatient",
{
"shineChargeFrames": 10
}
]
}Exit condition: {
"leaveShinecharged": {}
}Unlocks doors: {"types":["super"],"requires":[]}
{"types":["missiles","powerbomb"],"requires":["never"]} |
From: 2
Bottom Right Door
To: 2
Bottom Right Door
With a runway of 5 tiles (open end) in the other room, the ideal timing for the stutter is to release forward for 5 frames, and repress forward on the last possible frame before the transition. Other timings can work, but will gain the shinecharge further from the door, leaving fewer shinecharge frames remaining. After gaining the shinecharge, continue holding forward in order to make Samus stand. Then turnaround spin jump back toward the door, and continue spin jumping to reach the transition with a shinecharge. Entrance condition: {
"comeInStutterShinecharging": {
"minTiles": 5
}
}Requires: "canPreciseStutterWaterShineCharge"
"canShinechargeMovementTricky"
"canInsaneJump"
{
"shineChargeFrames": 130
}
{
"or": [
"canBeVeryPatient",
{
"shineChargeFrames": 15
}
]
}Exit condition: {
"leaveShinecharged": {}
}Unlocks doors: {"types":["super"],"requires":[]}
{"types":["missiles","powerbomb"],"requires":["never"]} |
From: 2
Bottom Right Door
To: 2
Bottom Right Door
Entrance condition: {
"comeInStutterShinecharging": {
"minTiles": 2
}
}Requires: "canStutterWaterShineCharge"
"canShinechargeMovementComplex"
{
"or": [
{
"shinespark": {
"frames": 12,
"excessFrames": 0
}
},
{
"and": [
"canShinechargeMovementTricky",
{
"shinespark": {
"frames": 3,
"excessFrames": 0
}
}
]
}
]
}Exit condition: {
"leaveWithSpark": {}
}Unlocks doors: {"types":["super"],"requires":[]}
{"types":["missiles","powerbomb"],"requires":["never"]} |
From: 2
Bottom Right Door
To: 2
Bottom Right Door
With only 1 tile of runway, this requires a single-frame stutter (release forward then repress on the next frame), on the last possible frame. Entrance condition: {
"comeInStutterShinecharging": {
"minTiles": 1
}
}Requires: "canShinechargeMovementComplex"
"canPreciseStutterWaterShineCharge"
"canInsaneJump"
"h_shinechargeMaxRunway"
{
"or": [
{
"shinespark": {
"frames": 12,
"excessFrames": 0
}
},
{
"and": [
"canShinechargeMovementTricky",
{
"shinespark": {
"frames": 3,
"excessFrames": 0
}
}
]
}
]
}Exit condition: {
"leaveWithSpark": {}
}Unlocks doors: {"types":["super"],"requires":[]}
{"types":["missiles","powerbomb"],"requires":["never"]} |
From: 2
Bottom Right Door
To: 2
Bottom Right Door
Start with low run speed by positioning exactly 2 pixels from the door. Entrance condition: {
"comeInRunning": {
"speedBooster": "yes",
"minTiles": 0.4375
}
}Requires: "canWaterShineCharge"
"canShinechargeMovementTricky"
"canHeroShot"
{
"shinespark": {
"frames": 29,
"excessFrames": 0
}
}Exit condition: {
"leaveWithSpark": {}
}Unlocks doors: {"types":["super"],"requires":[]}
{"types":["missiles","powerbomb"],"requires":["never"]} |
From: 4
Top Left Door
To: 1
Bottom Left Door
Entrance condition: {
"comeInShinechargedJumping": {},
"comesThroughToilet": "any"
}Requires: "canShinechargeMovementTricky"
{
"shineChargeFrames": 125
}
{
"shinespark": {
"frames": 7,
"excessFrames": 0
}
}Exit condition: {
"leaveWithSpark": {}
}Unlocks doors: {"types":["super"],"requires":[]}
{"types":["missiles","powerbomb"],"requires":["never"]}Dev note: FIXME: model the need to enter spinning; for now, extra shinecharge frames are included to compensate. |
From: 3
Middle Right Door
To: 3
Middle Right Door
With only 1 tile of runway in the other room, Samus should ideally start on the last pixel of runway with X subpixels of $3FFF or less. Run toward the door, releasing forward for exactly 1 frame and pressing it again on the last possible frame before the transition. Starting with X subpixels of $7FFF can also work (e.g., by simply backing against the door ledge, then jumping and turning around mid-air); in this case, Samus must advance 1 or 2 pixels with an arm pump before the transition (e.g., firing a shot or pressing and/or releasing an angle button), and the shinecharge will be gained slightly further away from the door. After gaining the shinecharge, continue holding forward in order to make Samus stand. Then turnaround spin jump back toward the door, and continue spin jumping to reach the transition with a shinecharge. Alternatively, with greater difficulty but saving some shinecharge frames, after performing the turnaround spin jump, briefly moonwalk back, then retain momentum by boomeranging forward (switching from pressing backward to pressing forward on the next frame), and arm pump to reach the door quickly. Ideal subpixels ($3FFF) can be achieved using one of several methods: 1) press forward against the door ledge (or a wall aligned with it); jump, and while mid-air, tap forward for exactly 1 frame to land with subpixels $BFFF, moonwalk back for exactly 1 frame to end with subpixels $3FFF. 2) press forward against the door ledge (from a platform below, assuming one exists) turn around (while on the ground), and moonwalk back two pixels, then jump and mid-air turnaround onto the ledge; if Samus jumped from the correct pixel but does not land on the ledge, then it was needed to moonwalk back 1 more frame; in this case it is possible to retry by doing a mid-air turnaround back onto the platform, and moonwalking back for 1 frame. 3) if X-Ray is available, press against the door ledge (from a platform below, assuming one exists) turn around (while on the ground), then jump and mid-air turnaround toward the door, and use X-Ray to turnaround in place away from the door; repeat this sequence 3 more times: jump, mid-air turnaround, X-Ray turnaround; then do one more jump and mid-air turnaround, high enough to land on the door ledge, and Samus should be in the correct position with subpixels $3FFF. Entrance condition: {
"comeInStutterShinecharging": {
"minTiles": 1
}
}Requires: "canPreciseStutterWaterShineCharge"
"canInsaneJump"
"canBeVeryPatient"
"canShinechargeMovementTricky"
{
"shineChargeFrames": 160
}Exit condition: {
"leaveShinecharged": {}
}Unlocks doors: {"types":["super"],"requires":[]}
{"types":["missiles","powerbomb"],"requires":["never"]} |
From: 3
Middle Right Door
To: 3
Middle Right Door
With only a runway of 2 tiles (open end) in the other room, the ideal timing for the stutter is to release forward for 3 frames, and repress forward on the last possible frame before the transition. Other timings can work, but will gain the shinecharge further from the door, leaving fewer shinecharge frames remaining. After gaining the shinecharge, continue holding forward in order to make Samus stand. Then turnaround spin jump back toward the door, and continue spin jumping to reach the transition with a shinecharge. Alternatively, with greater difficulty but saving some shinecharge frames, after performing the turnaround spin jump, briefly moonwalk back, then retain momentum by boomeranging forward (switching from pressing backward to pressing forward on the next frame), and arm pump to reach the door quickly. Entrance condition: {
"comeInStutterShinecharging": {
"minTiles": 2
}
}Requires: "canPreciseStutterWaterShineCharge"
"canShinechargeMovementTricky"
"canInsaneJump"
{
"shineChargeFrames": 150
}
{
"or": [
"canBeVeryPatient",
{
"shineChargeFrames": 15
}
]
}Exit condition: {
"leaveShinecharged": {}
}Unlocks doors: {"types":["super"],"requires":[]}
{"types":["missiles","powerbomb"],"requires":["never"]}Dev note: FIXME: The canBeVeryPatient requirement is for difficulty placement of the boomerang method; but the boomerang (or maybe specifically the moonwalk boomerang) should possibly be its own tech, and the same with rapid arm pumping. |
From: 3
Middle Right Door
To: 3
Middle Right Door
With only a runway of 3 tiles (open end) in the other room, the ideal timing for the stutter is to release forward for 3 or 4 frames, and repress forward on the last possible frame before the transition. Other timings can work, but will gain the shinecharge further from the door, leaving fewer shinecharge frames remaining. After gaining the shinecharge, continue holding forward in order to make Samus stand. Then turnaround spin jump back toward the door, and continue spin jumping to reach the transition with a shinecharge. Alternatively, with greater difficulty but saving some shinecharge frames, after performing the turnaround spin jump, briefly moonwalk back, then retain momentum by boomeranging forward (switching from pressing backward to pressing forward on the next frame), and arm pump to reach the door quickly. Entrance condition: {
"comeInStutterShinecharging": {
"minTiles": 3
}
}Requires: "canPreciseStutterWaterShineCharge"
"canShinechargeMovementTricky"
"canInsaneJump"
{
"shineChargeFrames": 145
}
{
"or": [
"canBeVeryPatient",
{
"shineChargeFrames": 10
}
]
}Exit condition: {
"leaveShinecharged": {}
}Unlocks doors: {"types":["super"],"requires":[]}
{"types":["missiles","powerbomb"],"requires":["never"]}Dev note: The same shinecharge frames could be achieved with a closed end runway (effective length of 2.4375), with a 3-frame stutter, but there doesn't appear to be any application. |
From: 3
Middle Right Door
To: 3
Middle Right Door
With only a runway of 4 tiles (open end) in the other room, the ideal timing for the stutter is to release forward for 4 frames, and repress forward on the last possible frame before the transition. It also works well to release forward for 3 frames and repress on the last possible frame. Other timings can also work, but may gain the shinecharge further from the door, leaving fewer shinecharge frames remaining. After gaining the shinecharge, continue holding forward in order to make Samus stand. Then turnaround spin jump back toward the door, and continue spin jumping to reach the transition with a shinecharge. Entrance condition: {
"comeInStutterShinecharging": {
"minTiles": 4
}
}Requires: "canPreciseStutterWaterShineCharge"
"canShinechargeMovementTricky"
"canInsaneJump"
{
"shineChargeFrames": 140
}
{
"or": [
"canBeVeryPatient",
{
"shineChargeFrames": 10
}
]
}Exit condition: {
"leaveShinecharged": {}
}Unlocks doors: {"types":["super"],"requires":[]}
{"types":["missiles","powerbomb"],"requires":["never"]} |
From: 3
Middle Right Door
To: 3
Middle Right Door
With a runway of 5 tiles (open end) in the other room, the ideal timing for the stutter is to release forward for 5 frames, and repress forward on the last possible frame before the transition. Other timings can work, but will gain the shinecharge further from the door, leaving fewer shinecharge frames remaining. After gaining the shinecharge, continue holding forward in order to make Samus stand. Then turnaround spin jump back toward the door, and continue spin jumping to reach the transition with a shinecharge. Entrance condition: {
"comeInStutterShinecharging": {
"minTiles": 5
}
}Requires: "canPreciseStutterWaterShineCharge"
"canShinechargeMovementTricky"
"canInsaneJump"
{
"shineChargeFrames": 130
}
{
"or": [
"canBeVeryPatient",
{
"shineChargeFrames": 15
}
]
}Exit condition: {
"leaveShinecharged": {}
}Unlocks doors: {"types":["super"],"requires":[]}
{"types":["missiles","powerbomb"],"requires":["never"]} |
From: 3
Middle Right Door
To: 3
Middle Right Door
Entrance condition: {
"comeInStutterShinecharging": {
"minTiles": 2
}
}Requires: "canStutterWaterShineCharge"
"canShinechargeMovementComplex"
{
"or": [
{
"shinespark": {
"frames": 12,
"excessFrames": 0
}
},
{
"and": [
"canShinechargeMovementTricky",
{
"shinespark": {
"frames": 3,
"excessFrames": 0
}
}
]
}
]
}Exit condition: {
"leaveWithSpark": {}
}Unlocks doors: {"types":["super"],"requires":[]}
{"types":["missiles","powerbomb"],"requires":["never"]} |
From: 3
Middle Right Door
To: 3
Middle Right Door
With only 1 tile of runway, this requires a single-frame stutter (release forward then repress on the next frame), on the last possible frame. Entrance condition: {
"comeInStutterShinecharging": {
"minTiles": 1
}
}Requires: "canShinechargeMovementComplex"
"canPreciseStutterWaterShineCharge"
"canInsaneJump"
"h_shinechargeMaxRunway"
{
"or": [
{
"shinespark": {
"frames": 12,
"excessFrames": 0
}
},
{
"and": [
"canShinechargeMovementTricky",
{
"shinespark": {
"frames": 3,
"excessFrames": 0
}
}
]
}
]
}Exit condition: {
"leaveWithSpark": {}
}Unlocks doors: {"types":["super"],"requires":[]}
{"types":["missiles","powerbomb"],"requires":["never"]} |
From: 3
Middle Right Door
To: 3
Middle Right Door
Start with low run speed by positioning exactly 2 pixels from the door. Entrance condition: {
"comeInRunning": {
"speedBooster": "yes",
"minTiles": 0.4375
}
}Requires: "canWaterShineCharge"
"canShinechargeMovementTricky"
"canHeroShot"
{
"shinespark": {
"frames": 29,
"excessFrames": 0
}
}Exit condition: {
"leaveWithSpark": {}
}Unlocks doors: {"types":["super"],"requires":[]}
{"types":["missiles","powerbomb"],"requires":["never"]} |
From: 4
Top Right Door
To: 4
Top Right Door
With only 1 tile of runway in the other room, Samus should ideally start on the last pixel of runway with X subpixels of $3FFF or less. Run toward the door, releasing forward for exactly 1 frame and pressing it again on the last possible frame before the transition. Starting with X subpixels of $7FFF can also work (e.g., by simply backing against the door ledge, then jumping and turning around mid-air); in this case, Samus must advance 1 or 2 pixels with an arm pump before the transition (e.g., firing a shot or pressing and/or releasing an angle button), and the shinecharge will be gained slightly further away from the door. After gaining the shinecharge, continue holding forward in order to make Samus stand. Then turnaround spin jump back toward the door, and shoot it open, making the Sciser fall; spin jump over the Sciser to reach the transition with a shinecharge. Ideal subpixels ($3FFF) can be achieved using one of several methods: 1) press forward against the door ledge (or a wall aligned with it); jump, and while mid-air, tap forward for exactly 1 frame to land with subpixels $BFFF, moonwalk back for exactly 1 frame to end with subpixels $3FFF. 2) press forward against the door ledge (from a platform below, assuming one exists) turn around (while on the ground), and moonwalk back two pixels, then jump and mid-air turnaround onto the ledge; if Samus jumped from the correct pixel but does not land on the ledge, then it was needed to moonwalk back 1 more frame; in this case it is possible to retry by doing a mid-air turnaround back onto the platform, and moonwalking back for 1 frame. 3) if X-Ray is available, press against the door ledge (from a platform below, assuming one exists) turn around (while on the ground), then jump and mid-air turnaround toward the door, and use X-Ray to turnaround in place away from the door; repeat this sequence 3 more times: jump, mid-air turnaround, X-Ray turnaround; then do one more jump and mid-air turnaround, high enough to land on the door ledge, and Samus should be in the correct position with subpixels $3FFF. Entrance condition: {
"comeInStutterShinecharging": {
"minTiles": 1
}
}Requires: "canPreciseStutterWaterShineCharge"
"canInsaneJump"
"canBeVeryPatient"
"canShinechargeMovementTricky"
{
  "shineChargeFrames": 170
}
Exit condition: {
"leaveShinecharged": {}
}Unlocks doors: {"types":["super"],"requires":[]}
{"types":["missiles","powerbomb"],"requires":["never"]} |
From: 4
Top Right Door
To: 4
Top Right Door
With only a runway of 2 tiles (open end) in the other room, the ideal timing for the stutter is to release forward for 3 frames, and repress forward on the last possible frame before the transition. Other timings can work, but will gain the shinecharge further from the door, leaving fewer shinecharge frames remaining. After gaining the shinecharge, continue holding forward in order to make Samus stand. Then turnaround spin jump back toward the door, and shoot it open, making the Sciser fall; spin jump over the Sciser to reach the transition with a shinecharge. Entrance condition: {
"comeInStutterShinecharging": {
"minTiles": 2
}
}Requires: "canPreciseStutterWaterShineCharge"
"canShinechargeMovementTricky"
"canInsaneJump"
{
"shineChargeFrames": 165
}Exit condition: {
"leaveShinecharged": {}
}Unlocks doors: {"types":["super"],"requires":[]}
{"types":["missiles","powerbomb"],"requires":["never"]}Dev note: FIXME: The canBeVeryPatient requirement is for difficulty placement of the boomerang method; but the boomerang (or maybe specifically the moonwalk boomerang) should possibly be its own tech, and the same with rapid arm pumping. |
From: 4
Top Right Door
To: 4
Top Right Door
With only a runway of 3 tiles (open end) in the other room, the ideal timing for the stutter is to release forward for 3 or 4 frames, and repress forward on the last possible frame before the transition. Other timings can work, but will gain the shinecharge further from the door, leaving fewer shinecharge frames remaining. After gaining the shinecharge, continue holding forward in order to make Samus stand. Then turnaround spin jump back toward the door, and shoot it open, making the Sciser fall; spin jump over the Sciser to reach the transition with a shinecharge. Entrance condition: {
"comeInStutterShinecharging": {
"minTiles": 3
}
}Requires: "canPreciseStutterWaterShineCharge"
"canShinechargeMovementTricky"
"canInsaneJump"
{
"shineChargeFrames": 155
}Exit condition: {
"leaveShinecharged": {}
}Unlocks doors: {"types":["super"],"requires":[]}
{"types":["missiles","powerbomb"],"requires":["never"]}Dev note: The same shinecharge frames could be achieved with a closed end runway (effective length of 2.4375), with a 3-frame stutter, but there doesn't appear to be any application. |
From: 4
Top Right Door
To: 4
Top Right Door
With only a runway of 4 tiles (open end) in the other room, the ideal timing for the stutter is to release forward for 4 frames, and repress forward on the last possible frame before the transition. It also works well to release forward for 3 frames and repress on the last possible frame. Other timings can also work, but may gain the shinecharge further from the door, leaving fewer shinecharge frames remaining. After gaining the shinecharge, continue holding forward in order to make Samus stand. Then turnaround spin jump back toward the door, and shoot it open, making the Sciser fall; spin jump over the Sciser to reach the transition with a shinecharge. Entrance condition: {
"comeInStutterShinecharging": {
"minTiles": 4
}
}Requires: "canPreciseStutterWaterShineCharge"
"canShinechargeMovementTricky"
"canInsaneJump"
{
"shineChargeFrames": 140
}
{
"or": [
"canBeVeryPatient",
{
"shineChargeFrames": 10
}
]
}Exit condition: {
"leaveShinecharged": {}
}Unlocks doors: {"types":["super"],"requires":[]}
{"types":["missiles","powerbomb"],"requires":["never"]} |
From: 4
Top Right Door
To: 4
Top Right Door
With a runway of 5 tiles (open end) in the other room, the ideal timing for the stutter is to release forward for 5 frames, and repress forward on the last possible frame before the transition. Other timings can work, but will gain the shinecharge further from the door, leaving fewer shinecharge frames remaining. After gaining the shinecharge, continue holding forward in order to make Samus stand. Then turnaround spin jump back toward the door, and shoot it open, making the Sciser fall; spin jump over the Sciser to reach the transition with a shinecharge. Entrance condition: {
"comeInStutterShinecharging": {
"minTiles": 5
}
}Requires: "canPreciseStutterWaterShineCharge"
"canShinechargeMovementTricky"
"canInsaneJump"
{
"shineChargeFrames": 130
}
{
"or": [
"canBeVeryPatient",
{
"shineChargeFrames": 15
}
]
}Exit condition: {
"leaveShinecharged": {}
}Unlocks doors: {"types":["super"],"requires":[]}
{"types":["missiles","powerbomb"],"requires":["never"]} |
From: 4
Top Right Door
To: 4
Top Right Door
Entrance condition: {
"comeInStutterShinecharging": {
"minTiles": 2
}
}Requires: "canStutterWaterShineCharge"
"canShinechargeMovementComplex"
{
"or": [
{
"shinespark": {
"frames": 12,
"excessFrames": 0
}
},
{
"and": [
"canShinechargeMovementTricky",
{
"shinespark": {
"frames": 3,
"excessFrames": 0
}
}
]
}
]
}Exit condition: {
"leaveWithSpark": {}
}Unlocks doors: {"types":["super"],"requires":[]}
{"types":["missiles","powerbomb"],"requires":["never"]} |
From: 4
Top Right Door
To: 4
Top Right Door
With only 1 tile of runway, this requires a single-frame stutter (release forward then repress on the next frame), on the last possible frame. Entrance condition: {
"comeInStutterShinecharging": {
"minTiles": 1
}
}Requires: "canShinechargeMovementComplex"
"canPreciseStutterWaterShineCharge"
"canInsaneJump"
"h_shinechargeMaxRunway"
{
"or": [
{
"shinespark": {
"frames": 12,
"excessFrames": 0
}
},
{
"and": [
"canShinechargeMovementTricky",
{
"shinespark": {
"frames": 3,
"excessFrames": 0
}
}
]
}
]
}Exit condition: {
"leaveWithSpark": {}
}Unlocks doors: {"types":["super"],"requires":[]}
{"types":["missiles","powerbomb"],"requires":["never"]} |
From: 1
Left Door
To: 1
Left Door
With only 1 tile of runway in the other room, Samus should ideally start on the last pixel of runway with X subpixels of $3FFF or less. Run toward the door, releasing forward for exactly 1 frame and pressing it again on the last possible frame before the transition. Starting with X subpixels of $7FFF can also work (e.g., by simply backing against the door ledge, then jumping and turning around mid-air); in this case, Samus must advance 1 or 2 pixels with an arm pump before the transition (e.g., firing a shot or pressing and/or releasing an angle button), and the shinecharge will be gained slightly further away from the door. After gaining the shinecharge, continue holding forward in order to make Samus stand. Then turnaround spin jump back toward the door, and continue spin jumping to reach the transition with a shinecharge. Alternatively, with greater difficulty but saving some shinecharge frames, after performing the turnaround spin jump, briefly moonwalk back, then retain momentum by boomeranging forward (switching from pressing backward to pressing forward on the next frame), and arm pump to reach the door quickly. Ideal subpixels ($3FFF) can be achieved using one of several methods: 1) press forward against the door ledge (or a wall aligned with it); jump, and while mid-air, tap forward for exactly 1 frame to land with subpixels $BFFF, moonwalk back for exactly 1 frame to end with subpixels $3FFF. 2) press forward against the door ledge (from a platform below, assuming one exists) turn around (while on the ground), and moonwalk back two pixels, then jump and mid-air turnaround onto the ledge; if Samus jumped from the correct pixel but does not land on the ledge, then it was needed to moonwalk back 1 more frame; in this case it is possible to retry by doing a mid-air turnaround back onto the platform, and moonwalking back for 1 frame. 3) if X-Ray is available, press against the door ledge (from a platform below, assuming one exists) turn around (while on the ground), then jump and mid-air turnaround toward the door, and use X-Ray to turnaround in place away from the door; repeat this sequence 3 more times: jump, mid-air turnaround, X-Ray turnaround; then do one more jump and mid-air turnaround, high enough to land on the door ledge, and Samus should be in the correct position with subpixels $3FFF. Entrance condition: {
"comeInStutterShinecharging": {
"minTiles": 1
}
}Requires: "canPreciseStutterWaterShineCharge"
"canInsaneJump"
"canBeVeryPatient"
"canShinechargeMovementTricky"
{
"shineChargeFrames": 160
}Exit condition: {
"leaveShinecharged": {}
}Unlocks doors: {"types":["super"],"requires":[]}
{"types":["missiles","powerbomb"],"requires":["never"]} |
From: 1
Left Door
To: 1
Left Door
With only a runway of 2 tiles (open end) in the other room, the ideal timing for the stutter is to release forward for 3 frames, and repress forward on the last possible frame before the transition. Other timings can work, but will gain the shinecharge further from the door, leaving fewer shinecharge frames remaining. After gaining the shinecharge, continue holding forward in order to make Samus stand. Then turnaround spin jump back toward the door, and continue spin jumping to reach the transition with a shinecharge. Alternatively, with greater difficulty but saving some shinecharge frames, after performing the turnaround spin jump, briefly moonwalk back, then retain momentum by boomeranging forward (switching from pressing backward to pressing forward on the next frame), and arm pump to reach the door quickly. Entrance condition: {
"comeInStutterShinecharging": {
"minTiles": 2
}
}Requires: "canPreciseStutterWaterShineCharge"
"canShinechargeMovementTricky"
"canInsaneJump"
{
"shineChargeFrames": 150
}
{
"or": [
"canBeVeryPatient",
{
"shineChargeFrames": 15
}
]
}Exit condition: {
"leaveShinecharged": {}
}Unlocks doors: {"types":["super"],"requires":[]}
{"types":["missiles","powerbomb"],"requires":["never"]}Dev note: FIXME: The canBeVeryPatient requirement is for difficulty placement of the boomerang method; but the boomerang (or maybe specifically the moonwalk boomerang) should possibly be its own tech, and the same with rapid arm pumping. |
From: 1
Left Door
To: 1
Left Door
With only a runway of 3 tiles (open end) in the other room, the ideal timing for the stutter is to release forward for 3 or 4 frames, and repress forward on the last possible frame before the transition. Other timings can work, but will gain the shinecharge further from the door, leaving fewer shinecharge frames remaining. After gaining the shinecharge, continue holding forward in order to make Samus stand. Then turnaround spin jump back toward the door, and continue spin jumping to reach the transition with a shinecharge. Alternatively, with greater difficulty but saving some shinecharge frames, after performing the turnaround spin jump, briefly moonwalk back, then retain momentum by boomeranging forward (switching from pressing backward to pressing forward on the next frame), and arm pump to reach the door quickly. Entrance condition: {
"comeInStutterShinecharging": {
"minTiles": 3
}
}Requires: "canPreciseStutterWaterShineCharge"
"canShinechargeMovementTricky"
"canInsaneJump"
{
"shineChargeFrames": 145
}
{
"or": [
"canBeVeryPatient",
{
"shineChargeFrames": 10
}
]
}Exit condition: {
"leaveShinecharged": {}
}Unlocks doors: {"types":["super"],"requires":[]}
{"types":["missiles","powerbomb"],"requires":["never"]}Dev note: The same shinecharge frames could be achieved with a closed end runway (effective length of 2.4375), with a 3-frame stutter, but there doesn't appear to be any application. |
From: 1
Left Door
To: 1
Left Door
With only a runway of 4 tiles (open end) in the other room, the ideal timing for the stutter is to release forward for 4 frames, and repress forward on the last possible frame before the transition. It also works well to release forward for 3 frames and repress on the last possible frame. Other timings can also work, but may gain the shinecharge further from the door, leaving fewer shinecharge frames remaining. After gaining the shinecharge, continue holding forward in order to make Samus stand. Then turnaround spin jump back toward the door, and continue spin jumping to reach the transition with a shinecharge. Entrance condition: {
"comeInStutterShinecharging": {
"minTiles": 4
}
}Requires: "canPreciseStutterWaterShineCharge"
"canShinechargeMovementTricky"
"canInsaneJump"
{
"shineChargeFrames": 140
}
{
"or": [
"canBeVeryPatient",
{
"shineChargeFrames": 10
}
]
}Exit condition: {
"leaveShinecharged": {}
}Unlocks doors: {"types":["super"],"requires":[]}
{"types":["missiles","powerbomb"],"requires":["never"]} |
From: 1
Left Door
To: 1
Left Door
With a runway of 5 tiles (open end) in the other room, the ideal timing for the stutter is to release forward for 5 frames, and repress forward on the last possible frame before the transition. Other timings can work, but will gain the shinecharge further from the door, leaving fewer shinecharge frames remaining. After gaining the shinecharge, continue holding forward in order to make Samus stand. Then turnaround spin jump back toward the door, and continue spin jumping to reach the transition with a shinecharge. Entrance condition: {
"comeInStutterShinecharging": {
"minTiles": 5
}
}Requires: "canPreciseStutterWaterShineCharge"
"canShinechargeMovementTricky"
"canInsaneJump"
{
"shineChargeFrames": 130
}
{
"or": [
"canBeVeryPatient",
{
"shineChargeFrames": 15
}
]
}Exit condition: {
"leaveShinecharged": {}
}Unlocks doors: {"types":["super"],"requires":[]}
{"types":["missiles","powerbomb"],"requires":["never"]} |
From: 1
Left Door
To: 1
Left Door
Entrance condition: {
"comeInStutterShinecharging": {
"minTiles": 2
}
}Requires: "canStutterWaterShineCharge"
"canShinechargeMovementComplex"
{
"or": [
{
"shinespark": {
"frames": 12,
"excessFrames": 0
}
},
{
"and": [
"canShinechargeMovementTricky",
{
"shinespark": {
"frames": 3,
"excessFrames": 0
}
}
]
}
]
}Exit condition: {
"leaveWithSpark": {}
}Unlocks doors: {"types":["super"],"requires":[]}
{"types":["missiles","powerbomb"],"requires":["never"]} |
From: 1
Left Door
To: 1
Left Door
With only 1 tile of runway, this requires a single-frame stutter (release forward then repress on the next frame), on the last possible frame. Entrance condition: {
"comeInStutterShinecharging": {
"minTiles": 1
}
}Requires: "canShinechargeMovementComplex"
"canPreciseStutterWaterShineCharge"
"canInsaneJump"
"h_shinechargeMaxRunway"
{
"or": [
{
"shinespark": {
"frames": 12,
"excessFrames": 0
}
},
{
"and": [
"canShinechargeMovementTricky",
{
"shinespark": {
"frames": 3,
"excessFrames": 0
}
}
]
}
]
}Exit condition: {
"leaveWithSpark": {}
}Unlocks doors: {"types":["super"],"requires":[]}
{"types":["missiles","powerbomb"],"requires":["never"]} |
From: 1
Left Doorway
To: 2
Bottom Right Door

Entrance condition: {
"comeInShinecharged": {}
}Requires: {
"or": [
"f_MaridiaTubeBroken",
{
"obstaclesCleared": [
"f_MaridiaTubeBroken"
]
}
]
}
"canShinechargeMovementTricky"
{
"shineChargeFrames": 145
}
{
"shinespark": {
"frames": 11,
"excessFrames": 0
}
}Exit condition: {
"leaveWithSpark": {
"position": "bottom"
}
}Unlocks doors: {"types":["super"],"requires":[]}
{"types":["missiles","powerbomb"],"requires":["never"]} |
From: 1
Left Doorway
To: 2
Bottom Right Door
Entrance condition: {
"comeInShinecharged": {}
}Requires: {
"or": [
"f_MaridiaTubeBroken",
{
"obstaclesCleared": [
"f_MaridiaTubeBroken"
]
}
]
}
"canShinechargeMovementTricky"
{
"shineChargeFrames": 135
}
{
"shinespark": {
"frames": 11,
"excessFrames": 0
}
}Exit condition: {
"leaveWithSpark": {
"position": "top"
}
}Unlocks doors: {"types":["super"],"requires":[]}
{"types":["missiles","powerbomb"],"requires":["never"]} |
From: 1
Left Doorway
To: 2
Bottom Right Door

Entrance condition: {
"comeInShinecharging": {
"length": 1,
"openEnd": 0
}
}Requires: {
"or": [
"f_MaridiaTubeBroken",
{
"obstaclesCleared": [
"f_MaridiaTubeBroken"
]
}
]
}
"canShinechargeMovementTricky"
{
"shinespark": {
"frames": 5,
"excessFrames": 0
}
}Exit condition: {
"leaveWithSpark": {}
}Unlocks doors: {"types":["super"],"requires":[]}
{"types":["missiles","powerbomb"],"requires":["never"]} |
|
Entrance condition: {
"comeInShinecharged": {}
}Requires: {
"or": [
"f_MaridiaTubeBroken",
{
"obstaclesCleared": [
"f_MaridiaTubeBroken"
]
}
]
}
"Gravity"
"HiJump"
"canShinechargeMovementTricky"
{
"shineChargeFrames": 125
}Exit condition: {
"leaveShinecharged": {}
}Unlocks doors: {"types":["super"],"requires":[]}
{"types":["missiles","powerbomb"],"requires":["never"]} |
From: 1
Left Doorway
To: 4
Top Door
Entrance condition: {
"comeInShinecharging": {
"length": 1,
"openEnd": 0
}
}Requires: {
"or": [
"f_MaridiaTubeBroken",
{
"obstaclesCleared": [
"f_MaridiaTubeBroken"
]
}
]
}
"canShinechargeMovementTricky"
{
"shineChargeFrames": 140
}Exit condition: {
"leaveShinecharged": {}
}Unlocks doors: {"types":["super"],"requires":[]}
{"types":["missiles","powerbomb"],"requires":["never"]} |
From: 2
Bottom Right Door
To: 1
Left Doorway
Entrance condition: {
"comeInShinecharging": {
"length": 1,
"openEnd": 1
}
}Requires: {
"or": [
"f_MaridiaTubeBroken",
{
"obstaclesCleared": [
"f_MaridiaTubeBroken"
]
}
]
}
"canSuitlessMaridia"
"HiJump"
"canShinechargeMovementTricky"
{
"shineChargeFrames": 175
}
{
"shinespark": {
"frames": 7,
"excessFrames": 0
}
}Exit condition: {
"leaveWithSpark": {}
} |
From: 2
Bottom Right Door
To: 1
Left Doorway

Entrance condition: {
"comeInShinecharging": {
"length": 1,
"openEnd": 1
}
}Requires: {
"or": [
"f_MaridiaTubeBroken",
{
"obstaclesCleared": [
"f_MaridiaTubeBroken"
]
}
]
}
"canSuitlessMaridia"
"HiJump"
"canShinechargeMovementTricky"
{
"shinespark": {
"frames": 8,
"excessFrames": 0
}
}Exit condition: {
"leaveWithSpark": {}
} |
From: 2
Bottom Right Door
To: 3
Top Right Doorway
Entrance condition: {
"comeInShinecharging": {
"length": 4,
"openEnd": 0
}
}Requires: {
"or": [
"f_MaridiaTubeBroken",
{
"obstaclesCleared": [
"f_MaridiaTubeBroken"
]
}
]
}
"canSuitlessMaridia"
"HiJump"
"canShinechargeMovementTricky"
{
"shineChargeFrames": 175
}
{
"shinespark": {
"frames": 4,
"excessFrames": 0
}
}Exit condition: {
"leaveWithSpark": {}
} |
From: 2
Bottom Right Door
To: 3
Top Right Doorway
Entrance condition: {
"comeInShinecharging": {
"length": 4,
"openEnd": 0
}
}Requires: {
"or": [
"f_MaridiaTubeBroken",
{
"obstaclesCleared": [
"f_MaridiaTubeBroken"
]
}
]
}
"canSuitlessMaridia"
"HiJump"
"canShinechargeMovementTricky"
{
"shinespark": {
"frames": 6,
"excessFrames": 0
}
}Exit condition: {
"leaveWithSpark": {
"position": "bottom"
}
} |
From: 3
Top Right Doorway
To: 2
Bottom Right Door

Entrance condition: {
"comeInShinecharging": {
"length": 1,
"openEnd": 0
}
}Requires: {
"or": [
"f_MaridiaTubeBroken",
{
"obstaclesCleared": [
"f_MaridiaTubeBroken"
]
}
]
}
"canShinechargeMovementTricky"
{
"shinespark": {
"frames": 3,
"excessFrames": 0
}
}Exit condition: {
"leaveWithSpark": {}
}Unlocks doors: {"types":["super"],"requires":[]}
{"types":["missiles","powerbomb"],"requires":["never"]} |
|
Entrance condition: {
"comeInShinecharged": {}
}Requires: {
"or": [
"f_MaridiaTubeBroken",
{
"obstaclesCleared": [
"f_MaridiaTubeBroken"
]
}
]
}
"Gravity"
"HiJump"
"canShinechargeMovementTricky"
{
"shineChargeFrames": 125
}Exit condition: {
"leaveShinecharged": {}
}Unlocks doors: {"types":["super"],"requires":[]}
{"types":["missiles","powerbomb"],"requires":["never"]} |
From: 3
Top Right Doorway
To: 4
Top Door
Entrance condition: {
"comeInShinecharging": {
"length": 1,
"openEnd": 0
}
}Requires: {
"or": [
"f_MaridiaTubeBroken",
{
"obstaclesCleared": [
"f_MaridiaTubeBroken"
]
}
]
}
"canShinechargeMovementTricky"
{
"shineChargeFrames": 140
}Exit condition: {
"leaveShinecharged": {}
}Unlocks doors: {"types":["super"],"requires":[]}
{"types":["missiles","powerbomb"],"requires":["never"]} |
|
Climb to the morph tunnel with wall jumps or a Gravity Jump. Requires: "Gravity"
"canMidAirMorph"
"h_EverestMorphTunnelExpanded"
"h_shinechargeMaxRunway"
"canShinechargeMovementTricky"
{
"or": [
{
"and": [
"canWallJump",
{
"shineChargeFrames": 145
}
]
},
{
"and": [
"canGravityJump",
{
"shineChargeFrames": 155
}
]
}
]
}Exit condition: {
"leaveShinecharged": {}
}Dev note: The frames remaining accounts for time needed to unmorph before going through the transition. Leaving with a shinecharge could be done even if the morph tunnel isn't expanded, but this would mean leaving shinecharged while morphed, which wouldn't technically adhere to what this exit condition specifies. |
From: 8
Higher Hill Junction
To: 6
Left Morph Passage Doorway
Requires: "Gravity"
"canMidAirMorph"
"h_EverestMorphTunnelExpanded"
{
"canShineCharge": {
"usedTiles": 12,
"steepUpTiles": 5,
"steepDownTiles": 5,
"openEnd": 1
}
}
"canShinechargeMovementTricky"
{
"shineChargeFrames": 110
}Exit condition: {
"leaveShinecharged": {}
}Dev note: The frames remaining accounts for time needed to unmorph before going through the transition. Leaving with a shinecharge could be done even if the morph tunnel isn't expanded, but this would mean leaving shinecharged while morphed, which wouldn't technically adhere to what this exit condition specifies. |
From: 9
Platform Below Top Door
To: 1
Top Left Door
Requires: "h_storedSpark"
"canHeroShot"
"canShinechargeMovementTricky"
{
"shinespark": {
"frames": 57,
"excessFrames": 0
}
}Exit condition: {
"leaveWithSpark": {}
}Unlocks doors: {"types":["ammo"],"requires":["never"]} |
From: 9
Platform Below Top Door
To: 4
Top Right Door
Requires: "h_storedSpark"
"canHeroShot"
"canShinechargeMovementTricky"
"canInsaneJump"
{
"shinespark": {
"frames": 80,
"excessFrames": 0
}
}Exit condition: {
"leaveWithSpark": {
"position": "bottom"
}
}Unlocks doors: {"types":["ammo"],"requires":["never"]} |
|
Requires: "Gravity"
{
"or": [
{
"obstaclesCleared": [
"A"
]
},
"h_usePowerBomb"
]
}
"h_shinechargeMaxRunway"
"canShinechargeMovementComplex"
{
"or": [
{
"and": [
"HiJump",
"canWallJump",
{
"shineChargeFrames": 100
}
]
},
{
"and": [
"HiJump",
"SpaceJump",
{
"shineChargeFrames": 105
}
]
},
{
"and": [
"HiJump",
{
"shineChargeFrames": 125
}
]
},
{
"and": [
"canWallJump",
{
"shineChargeFrames": 125
}
]
},
{
"and": [
"SpaceJump",
{
"shineChargeFrames": 130
}
]
},
{
"and": [
"canGravityJump",
"canShinechargeMovementTricky",
{
"shineChargeFrames": 125
}
]
}
]
}Exit condition: {
"leaveShinecharged": {}
}Unlocks doors: {"types":["ammo"],"requires":[]} |
From: 2
Bottom Left Door
To: 1
Middle Left Door
With only 1 tile of runway, this requires a single-frame stutter (release forward then repress on the next frame), on the last possible frame. Entrance condition: {
"comeInStutterShinecharging": {
"minTiles": 1
}
}Requires: "h_usePowerBomb"
"canPreciseStutterWaterShineCharge"
"canInsaneJump"
"canShinechargeMovementTricky"
"h_shinechargeMaxRunway"
{
"shinespark": {
"frames": 22,
"excessFrames": 11
}
}Clears obstacles: A |
From: 2
Bottom Left Door
To: 2
Bottom Left Door
With only 1 tile of runway in the other room, Samus should ideally start on the last pixel of runway with X subpixels of $3FFF or less. Run toward the door, releasing forward for exactly 1 frame and pressing it again on the last possible frame before the transition. Starting with X subpixels of $7FFF can also work (e.g., by simply backing against the door ledge, then jumping and turning around mid-air); in this case, Samus must advance 1 or 2 pixels with an arm pump before the transition (e.g., firing a shot or pressing and/or releasing an angle button), and the shinecharge will be gained slightly further away from the door. After gaining the shinecharge, continue holding forward in order to make Samus stand. Then turnaround spin jump back toward the door, and continue spin jumping to reach the transition with a shinecharge. Alternatively, with greater difficulty but saving some shinecharge frames, after performing the turnaround spin jump, briefly moonwalk back, then retain momentum by boomeranging forward (switching from pressing backward to pressing forward on the next frame), and arm pump to reach the door quickly. Ideal subpixels ($3FFF) can be achieved using one of several methods: 1) press forward against the door ledge (or a wall aligned with it); jump, and while mid-air, tap forward for exactly 1 frame to land with subpixels $BFFF, moonwalk back for exactly 1 frame to end with subpixels $3FFF. 2) press forward against the door ledge (from a platform below, assuming one exists) turn around (while on the ground), and moonwalk back two pixels, then jump and mid-air turnaround onto the ledge; if Samus jumped from the correct pixel but does not land on the ledge, then it was needed to moonwalk back 1 more frame; in this case it is possible to retry by doing a mid-air turnaround back onto the platform, and moonwalking back for 1 frame. 3) if X-Ray is available, press against the door ledge (from a platform below, assuming one exists) turn around (while on the ground), then jump and mid-air turnaround toward the door, and use X-Ray to turnaround in place away from the door; repeat this sequence 3 more times: jump, mid-air turnaround, X-Ray turnaround; then do one more jump and mid-air turnaround, high enough to land on the door ledge, and Samus should be in the correct position with subpixels $3FFF. Entrance condition: {
"comeInStutterShinecharging": {
"minTiles": 1
}
}Requires: "canPreciseStutterWaterShineCharge"
"canInsaneJump"
"canBeVeryPatient"
"canShinechargeMovementTricky"
{
"shineChargeFrames": 160
}Exit condition: {
"leaveShinecharged": {}
}Unlocks doors: {"types":["super"],"requires":[]}
{"types":["missiles","powerbomb"],"requires":["never"]} |
From: 2
Bottom Left Door
To: 2
Bottom Left Door
With only a runway of 2 tiles (open end) in the other room, the ideal timing for the stutter is to release forward for 3 frames, and repress forward on the last possible frame before the transition. Other timings can work, but will gain the shinecharge further from the door, leaving fewer shinecharge frames remaining. After gaining the shinecharge, continue holding forward in order to make Samus stand. Then turnaround spin jump back toward the door, and continue spin jumping to reach the transition with a shinecharge. Alternatively, with greater difficulty but saving some shinecharge frames, after performing the turnaround spin jump, briefly moonwalk back, then retain momentum by boomeranging forward (switching from pressing backward to pressing forward on the next frame), and arm pump to reach the door quickly. Entrance condition: {
"comeInStutterShinecharging": {
"minTiles": 2
}
}Requires: "canPreciseStutterWaterShineCharge"
"canShinechargeMovementTricky"
"canInsaneJump"
{
"shineChargeFrames": 150
}
{
"or": [
"canBeVeryPatient",
{
"shineChargeFrames": 15
}
]
}Exit condition: {
"leaveShinecharged": {}
}Unlocks doors: {"types":["super"],"requires":[]}
{"types":["missiles","powerbomb"],"requires":["never"]}Dev note: FIXME: The canBeVeryPatient requirement is for difficulty placement of the boomerang method; but the boomerang (or maybe specifically the moonwalk boomerang) should possibly be its own tech, and the same with rapid arm pumping. |
From: 2
Bottom Left Door
To: 2
Bottom Left Door
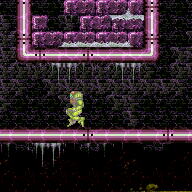
With only a runway of 3 tiles (open end) in the other room, the ideal timing for the stutter is to release forward for 3 or 4 frames, and repress forward on the last possible frame before the transition. Other timings can work, but will gain the shinecharge further from the door, leaving fewer shinecharge frames remaining. After gaining the shinecharge, continue holding forward in order to make Samus stand. Then turnaround spin jump back toward the door, and continue spin jumping to reach the transition with a shinecharge. Alternatively, with greater difficulty but saving some shinecharge frames, after performing the turnaround spin jump, briefly moonwalk back, then retain momentum by boomeranging forward (switching from pressing backward to pressing forward on the next frame), and arm pump to reach the door quickly. Entrance condition: {
"comeInStutterShinecharging": {
"minTiles": 3
}
}Requires: "canPreciseStutterWaterShineCharge"
"canShinechargeMovementTricky"
"canInsaneJump"
{
"shineChargeFrames": 145
}
{
"or": [
"canBeVeryPatient",
{
"shineChargeFrames": 10
}
]
}Exit condition: {
"leaveShinecharged": {}
}Unlocks doors: {"types":["super"],"requires":[]}
{"types":["missiles","powerbomb"],"requires":["never"]}Dev note: The same shinecharge frames could be achieved with a closed end runway (effective length of 2.4375), with a 3-frame stutter, but there doesn't appear to be any application. |
From: 2
Bottom Left Door
To: 2
Bottom Left Door
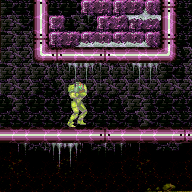
With only a runway of 4 tiles (open end) in the other room, the ideal timing for the stutter is to release forward for 4 frames, and repress forward on the last possible frame before the transition. It also works well to release forward for 3 frames and repress on the last possible frame. Other timings can also work, but may gain the shinecharge further from the door, leaving fewer shinecharge frames remaining. After gaining the shinecharge, continue holding forward in order to make Samus stand. Then turnaround spin jump back toward the door, and continue spin jumping to reach the transition with a shinecharge. Entrance condition: {
"comeInStutterShinecharging": {
"minTiles": 4
}
}Requires: "canPreciseStutterWaterShineCharge"
"canShinechargeMovementTricky"
"canInsaneJump"
{
"shineChargeFrames": 140
}
{
"or": [
"canBeVeryPatient",
{
"shineChargeFrames": 10
}
]
}Exit condition: {
"leaveShinecharged": {}
}Unlocks doors: {"types":["super"],"requires":[]}
{"types":["missiles","powerbomb"],"requires":["never"]} |
From: 2
Bottom Left Door
To: 2
Bottom Left Door
With a runway of 5 tiles (open end) in the other room, the ideal timing for the stutter is to release forward for 5 frames, and repress forward on the last possible frame before the transition. Other timings can work, but will gain the shinecharge further from the door, leaving fewer shinecharge frames remaining. After gaining the shinecharge, continue holding forward in order to make Samus stand. Then turnaround spin jump back toward the door, and continue spin jumping to reach the transition with a shinecharge. Entrance condition: {
"comeInStutterShinecharging": {
"minTiles": 5
}
}Requires: "canPreciseStutterWaterShineCharge"
"canShinechargeMovementTricky"
"canInsaneJump"
{
"shineChargeFrames": 130
}
{
"or": [
"canBeVeryPatient",
{
"shineChargeFrames": 15
}
]
}Exit condition: {
"leaveShinecharged": {}
}Unlocks doors: {"types":["super"],"requires":[]}
{"types":["missiles","powerbomb"],"requires":["never"]} |
From: 2
Bottom Left Door
To: 2
Bottom Left Door

Entrance condition: {
"comeInStutterShinecharging": {
"minTiles": 2
}
}Requires: "canStutterWaterShineCharge"
"canShinechargeMovementComplex"
{
"or": [
{
"shinespark": {
"frames": 12,
"excessFrames": 0
}
},
{
"and": [
"canShinechargeMovementTricky",
{
"shinespark": {
"frames": 3,
"excessFrames": 0
}
}
]
}
]
}Exit condition: {
"leaveWithSpark": {}
}Unlocks doors: {"types":["super"],"requires":[]}
{"types":["missiles","powerbomb"],"requires":["never"]} |
From: 2
Bottom Left Door
To: 2
Bottom Left Door
With only 1 tile of runway, this requires a single-frame stutter (release forward then repress on the next frame), on the last possible frame. Entrance condition: {
"comeInStutterShinecharging": {
"minTiles": 1
}
}Requires: "canShinechargeMovementComplex"
"canPreciseStutterWaterShineCharge"
"canInsaneJump"
"h_shinechargeMaxRunway"
{
"or": [
{
"shinespark": {
"frames": 12,
"excessFrames": 0
}
},
{
"and": [
"canShinechargeMovementTricky",
{
"shinespark": {
"frames": 3,
"excessFrames": 0
}
}
]
}
]
}Exit condition: {
"leaveWithSpark": {}
}Unlocks doors: {"types":["super"],"requires":[]}
{"types":["missiles","powerbomb"],"requires":["never"]} |
From: 2
Bottom Left Door
To: 2
Bottom Left Door
Start with low run speed by positioning exactly 2 pixels from the door. Entrance condition: {
"comeInRunning": {
"speedBooster": "yes",
"minTiles": 0.4375
}
}Requires: "canWaterShineCharge"
"canShinechargeMovementTricky"
"canHeroShot"
{
"shinespark": {
"frames": 29,
"excessFrames": 0
}
}Exit condition: {
"leaveWithSpark": {}
}Unlocks doors: {"types":["super"],"requires":[]}
{"types":["missiles","powerbomb"],"requires":["never"]} |
From: 4
Right Door
To: 4
Right Door
With only 1 tile of runway in the other room, Samus should ideally start on the last pixel of runway with X subpixels of $3FFF or less. Run toward the door, releasing forward for exactly 1 frame and pressing it again on the last possible frame before the transition. Starting with X subpixels of $7FFF can also work (e.g., by simply backing against the door ledge, then jumping and turning around mid-air); in this case, Samus must advance 1 or 2 pixels with an arm pump before the transition (e.g., firing a shot or pressing and/or releasing an angle button), and the shinecharge will be gained slightly further away from the door. After gaining the shinecharge, continue holding forward in order to make Samus stand. Then turnaround spin jump back toward the door, and continue spin jumping to reach the transition with a shinecharge. Alternatively, with greater difficulty but saving some shinecharge frames, after performing the turnaround spin jump, briefly moonwalk back, then retain momentum by boomeranging forward (switching from pressing backward to pressing forward on the next frame), and arm pump to reach the door quickly. Ideal subpixels ($3FFF) can be achieved using one of several methods: 1) press forward against the door ledge (or a wall aligned with it); jump, and while mid-air, tap forward for exactly 1 frame to land with subpixels $BFFF, moonwalk back for exactly 1 frame to end with subpixels $3FFF. 2) press forward against the door ledge (from a platform below, assuming one exists) turn around (while on the ground), and moonwalk back two pixels, then jump and mid-air turnaround onto the ledge; if Samus jumped from the correct pixel but does not land on the ledge, then it was needed to moonwalk back 1 more frame; in this case it is possible to retry by doing a mid-air turnaround back onto the platform, and moonwalking back for 1 frame. 3) if X-Ray is available, press against the door ledge (from a platform below, assuming one exists) turn around (while on the ground), then jump and mid-air turnaround toward the door, and use X-Ray to turnaround in place away from the door; repeat this sequence 3 more times: jump, mid-air turnaround, X-Ray turnaround; then do one more jump and mid-air turnaround, high enough to land on the door ledge, and Samus should be in the correct position with subpixels $3FFF. Entrance condition: {
"comeInStutterShinecharging": {
"minTiles": 1
}
}Requires: "canPreciseStutterWaterShineCharge"
"canInsaneJump"
"canBeVeryPatient"
"canShinechargeMovementTricky"
{
"shineChargeFrames": 160
}Exit condition: {
"leaveShinecharged": {}
}Unlocks doors: {"types":["super"],"requires":[]}
{"types":["missiles","powerbomb"],"requires":["never"]} |
From: 4
Right Door
To: 4
Right Door
With only a runway of 2 tiles (open end) in the other room, the ideal timing for the stutter is to release forward for 3 frames, and repress forward on the last possible frame before the transition. Other timings can work, but will gain the shinecharge further from the door, leaving fewer shinecharge frames remaining. After gaining the shinecharge, continue holding forward in order to make Samus stand. Then turnaround spin jump back toward the door, and continue spin jumping to reach the transition with a shinecharge. Alternatively, with greater difficulty but saving some shinecharge frames, after performing the turnaround spin jump, briefly moonwalk back, then retain momentum by boomeranging forward (switching from pressing backward to pressing forward on the next frame), and arm pump to reach the door quickly. Entrance condition: {
"comeInStutterShinecharging": {
"minTiles": 2
}
}Requires: "canPreciseStutterWaterShineCharge"
"canShinechargeMovementTricky"
"canInsaneJump"
{
"shineChargeFrames": 150
}
{
"or": [
"canBeVeryPatient",
{
"shineChargeFrames": 15
}
]
}Exit condition: {
"leaveShinecharged": {}
}Unlocks doors: {"types":["super"],"requires":[]}
{"types":["missiles","powerbomb"],"requires":["never"]}Dev note: FIXME: The canBeVeryPatient requirement is for difficulty placement of the boomerang method; but the boomerang (or maybe specifically the moonwalk boomerang) should possibly be its own tech, and the same with rapid arm pumping. |
From: 4
Right Door
To: 4
Right Door
With only a runway of 3 tiles (open end) in the other room, the ideal timing for the stutter is to release forward for 3 or 4 frames, and repress forward on the last possible frame before the transition. Other timings can work, but will gain the shinecharge further from the door, leaving fewer shinecharge frames remaining. After gaining the shinecharge, continue holding forward in order to make Samus stand. Then turnaround spin jump back toward the door, and continue spin jumping to reach the transition with a shinecharge. Alternatively, with greater difficulty but saving some shinecharge frames, after performing the turnaround spin jump, briefly moonwalk back, then retain momentum by boomeranging forward (switching from pressing backward to pressing forward on the next frame), and arm pump to reach the door quickly. Entrance condition: {
"comeInStutterShinecharging": {
"minTiles": 3
}
}Requires: "canPreciseStutterWaterShineCharge"
"canShinechargeMovementTricky"
"canInsaneJump"
{
"shineChargeFrames": 145
}
{
"or": [
"canBeVeryPatient",
{
"shineChargeFrames": 10
}
]
}Exit condition: {
"leaveShinecharged": {}
}Unlocks doors: {"types":["super"],"requires":[]}
{"types":["missiles","powerbomb"],"requires":["never"]}Dev note: The same shinecharge frames could be achieved with a closed end runway (effective length of 2.4375), with a 3-frame stutter, but there doesn't appear to be any application. |
From: 4
Right Door
To: 4
Right Door
With only a runway of 4 tiles (open end) in the other room, the ideal timing for the stutter is to release forward for 4 frames, and repress forward on the last possible frame before the transition. It also works well to release forward for 3 frames and repress on the last possible frame. Other timings can also work, but may gain the shinecharge further from the door, leaving fewer shinecharge frames remaining. After gaining the shinecharge, continue holding forward in order to make Samus stand. Then turnaround spin jump back toward the door, and continue spin jumping to reach the transition with a shinecharge. Entrance condition: {
"comeInStutterShinecharging": {
"minTiles": 4
}
}Requires: "canPreciseStutterWaterShineCharge"
"canShinechargeMovementTricky"
"canInsaneJump"
{
"shineChargeFrames": 140
}
{
"or": [
"canBeVeryPatient",
{
"shineChargeFrames": 10
}
]
}Exit condition: {
"leaveShinecharged": {}
}Unlocks doors: {"types":["super"],"requires":[]}
{"types":["missiles","powerbomb"],"requires":["never"]} |
From: 4
Right Door
To: 4
Right Door
With a runway of 5 tiles (open end) in the other room, the ideal timing for the stutter is to release forward for 5 frames, and repress forward on the last possible frame before the transition. Other timings can work, but will gain the shinecharge further from the door, leaving fewer shinecharge frames remaining. After gaining the shinecharge, continue holding forward in order to make Samus stand. Then turnaround spin jump back toward the door, and continue spin jumping to reach the transition with a shinecharge. Entrance condition: {
"comeInStutterShinecharging": {
"minTiles": 5
}
}Requires: "canPreciseStutterWaterShineCharge"
"canShinechargeMovementTricky"
"canInsaneJump"
{
"shineChargeFrames": 130
}
{
"or": [
"canBeVeryPatient",
{
"shineChargeFrames": 15
}
]
}Exit condition: {
"leaveShinecharged": {}
}Unlocks doors: {"types":["super"],"requires":[]}
{"types":["missiles","powerbomb"],"requires":["never"]} |
From: 4
Right Door
To: 4
Right Door
Entrance condition: {
"comeInStutterShinecharging": {
"minTiles": 1
}
}Requires: "canPreciseStutterWaterShineCharge"
"canShinechargeMovementTricky"
{
"shinespark": {
"frames": 15,
"excessFrames": 0
}
}Exit condition: {
"leaveWithSpark": {}
}Unlocks doors: {"types":["missiles","super"],"requires":[]}
{"types":["powerbomb"],"requires":["never"]} |
From: 4
Right Door
To: 4
Right Door
Entrance condition: {
"comeInStutterShinecharging": {
"minTiles": 2
}
}Requires: "canStutterWaterShineCharge"
"canShinechargeMovementComplex"
{
"or": [
{
"shinespark": {
"frames": 12,
"excessFrames": 0
}
},
{
"and": [
"canShinechargeMovementTricky",
{
"shinespark": {
"frames": 3,
"excessFrames": 0
}
}
]
}
]
}Exit condition: {
"leaveWithSpark": {}
}Unlocks doors: {"types":["missiles","super"],"requires":[]}
{"types":["powerbomb"],"requires":["never"]} |
From: 4
Right Door
To: 6
Junction Right of Morph Passage
Crouch jump on entry and spark horizontally at the peak of the jump. Samus will bonk on the corner of the ledge, but can down grab onto it. In order to prevent sparking during the crouch jump, hold shot or aim down until Samus leaves the ground. It is possible to move left during the jump to potentially save some health. In that case, letting go of left while jump is still held will activate the spark. Entrance condition: {
"comeInShinecharged": {}
}Requires: "canSuitlessMaridia"
"canHorizontalMidairShinespark"
"canShinechargeMovementTricky"
"h_underwaterCrouchJumpDownGrab"
{
"shineChargeFrames": 60
}
{
"shinespark": {
"frames": 43,
"excessFrames": 0
}
}Dev note: 10 leniency shineChargeFrames are added for the expected poor room entry. |
From: 8
Right of Sand with Blue Speed (Running)
To: 2
Left Sand Pit
To most quickly reach the transition while in a Shinespark ready state, sink into the sand slightly and then hold a spinjump with Gravity and HiJump disabled. Requires: "h_shinechargeMaxRunway"
"canShinechargeMovementTricky"
"canQuickDrop"
"canPlayInSand"
{
"shineChargeFrames": 75
}Exit condition: {
"leaveShinecharged": {}
}Dev note: The `h_getBlueSpeedMaxRunway` requirement is to satisfy the tests, since we don't yet have a way to represent that being at node 8 implies already having blue speed. |
From: 8
Right of Sand with Blue Speed (Running)
To: 3
Right Sand Pit
To most quickly reach the transition while in a Shinespark ready state, sink into the sand slightly and then hold a spinjump with Gravity and HiJump disabled. Requires: "h_shinechargeMaxRunway"
"canShinechargeMovementTricky"
"canQuickDrop"
"canPlayInSand"
{
"shineChargeFrames": 75
}Exit condition: {
"leaveShinecharged": {}
}Dev note: The `h_getBlueSpeedMaxRunway` requirement is to satisfy the tests, since we don't yet have a way to represent that being at node 8 implies already having blue speed. |
From: 2
Bottom Right Door
To: 1
Left Door

Entrance condition: {
"comeInShinecharged": {}
}Requires: "canGravityJump"
"HiJump"
"canShinechargeMovementTricky"
{
"or": [
{
"and": [
"canSpeedyJump",
{
"shineChargeFrames": 90
},
{
"shinespark": {
"frames": 116,
"excessFrames": 5
}
}
]
},
{
"and": [
{
"shineChargeFrames": 125
},
{
"shinespark": {
"frames": 125,
"excessFrames": 5
}
}
]
}
]
} |
|

Entrance condition: {
"comeInShinecharged": {}
}Requires: "Gravity"
"canShinechargeMovementComplex"
{
"or": [
{
"and": [
"canConsecutiveWallJump",
{
"shineChargeFrames": 120
}
]
},
{
"and": [
"HiJump",
"canWallJump",
{
"shineChargeFrames": 95
}
]
},
{
"and": [
"HiJump",
"canGravityJump",
"canShinechargeMovementTricky",
{
"shineChargeFrames": 120
}
]
}
]
}Exit condition: {
"leaveShinecharged": {}
}Unlocks doors: {"types":["super"],"requires":[]}
{"types":["missiles","powerbomb"],"requires":["never"]} |
From: 2
Bottom Right Door
To: 3
Top Right Door

Entrance condition: {
"comeInShinecharged": {}
}Requires: "Gravity"
"canShinechargeMovementComplex"
{
"or": [
{
"and": [
"canConsecutiveWallJump",
{
"shineChargeFrames": 100
},
{
"shinespark": {
"frames": 6,
"excessFrames": 0
}
}
]
},
{
"and": [
"HiJump",
"canWallJump",
{
"or": [
{
"shineChargeFrames": 75
},
{
"and": [
"canSpeedyJump",
{
"shineChargeFrames": 70
}
]
}
]
},
{
"shinespark": {
"frames": 6,
"excessFrames": 0
}
}
]
},
{
"and": [
"HiJump",
"canGravityJump",
"canShinechargeMovementTricky",
{
"or": [
{
"shineChargeFrames": 105
},
{
"and": [
"canSpeedyJump",
{
"shineChargeFrames": 90
}
]
}
]
},
{
"shinespark": {
"frames": 6,
"excessFrames": 0
}
}
]
}
]
}Exit condition: {
"leaveWithSpark": {
"position": "top"
}
}Unlocks doors: {"types":["super"],"requires":[]}
{"types":["missiles","powerbomb"],"requires":["never"]} |
From: 2
Bottom Right Door
To: 3
Top Right Door

Entrance condition: {
"comeInShinecharged": {}
}Requires: "Gravity"
"canShinechargeMovementComplex"
{
"or": [
{
"and": [
"canConsecutiveWallJump",
{
"shineChargeFrames": 100
},
{
"shinespark": {
"frames": 6,
"excessFrames": 0
}
}
]
},
{
"and": [
"HiJump",
"canWallJump",
{
"or": [
{
"shineChargeFrames": 85
},
{
"and": [
"canSpeedyJump",
{
"shineChargeFrames": 80
}
]
}
]
},
{
"shinespark": {
"frames": 5,
"excessFrames": 0
}
}
]
},
{
"and": [
"HiJump",
"canGravityJump",
"canShinechargeMovementTricky",
{
"or": [
{
"shineChargeFrames": 115
},
{
"and": [
"canSpeedyJump",
{
"shineChargeFrames": 100
}
]
}
]
},
{
"shinespark": {
"frames": 4,
"excessFrames": 0
}
}
]
}
]
}Exit condition: {
"leaveWithSpark": {
"position": "top"
}
}Unlocks doors: {"types":["super"],"requires":[]}
{"types":["missiles","powerbomb"],"requires":["never"]} |
|
Destroy the respawning shot block before gaining the shinecharge, to avoid needing to deal with it on the way up. Requires: "Gravity"
"canShinechargeMovementTricky"
{
"or": [
{
"canShineCharge": {
"usedTiles": 16,
"openEnd": 1
}
},
{
"and": [
{
"canShineCharge": {
"usedTiles": 18,
"openEnd": 1
}
},
{
"shineChargeFrames": 10
}
]
}
]
}
{
"or": [
{
"and": [
"HiJump",
{
"shineChargeFrames": 120
}
]
},
{
"shineChargeFrames": 140
}
]
}Exit condition: {
"leaveShinecharged": {}
} |
From: 1
Left Door
To: 1
Left Door
With only 1 tile of runway in the other room, Samus should ideally start on the last pixel of runway with X subpixels of $3FFF or less. Run toward the door, releasing forward for exactly 1 frame and pressing it again on the last possible frame before the transition. Starting with X subpixels of $7FFF can also work (e.g., by simply backing against the door ledge, then jumping and turning around mid-air); in this case, Samus must advance 1 or 2 pixels with an arm pump before the transition (e.g., firing a shot or pressing and/or releasing an angle button), and the shinecharge will be gained slightly further away from the door. After gaining the shinecharge, continue holding forward in order to make Samus stand. Then turnaround spin jump back toward the door, and continue spin jumping to reach the transition with a shinecharge. Alternatively, with greater difficulty but saving some shinecharge frames, after performing the turnaround spin jump, briefly moonwalk back, then retain momentum by boomeranging forward (switching from pressing backward to pressing forward on the next frame), and arm pump to reach the door quickly. Ideal subpixels ($3FFF) can be achieved using one of several methods: 1) press forward against the door ledge (or a wall aligned with it); jump, and while mid-air, tap forward for exactly 1 frame to land with subpixels $BFFF, moonwalk back for exactly 1 frame to end with subpixels $3FFF. 2) press forward against the door ledge (from a platform below, assuming one exists) turn around (while on the ground), and moonwalk back two pixels, then jump and mid-air turnaround onto the ledge; if Samus jumped from the correct pixel but does not land on the ledge, then it was needed to moonwalk back 1 more frame; in this case it is possible to retry by doing a mid-air turnaround back onto the platform, and moonwalking back for 1 frame. 3) if X-Ray is available, press against the door ledge (from a platform below, assuming one exists) turn around (while on the ground), then jump and mid-air turnaround toward the door, and use X-Ray to turnaround in place away from the door; repeat this sequence 3 more times: jump, mid-air turnaround, X-Ray turnaround; then do one more jump and mid-air turnaround, high enough to land on the door ledge, and Samus should be in the correct position with subpixels $3FFF. Entrance condition: {
"comeInStutterShinecharging": {
"minTiles": 1
}
}Requires: "canPreciseStutterWaterShineCharge"
"canInsaneJump"
"canBeVeryPatient"
"canShinechargeMovementTricky"
{
"shineChargeFrames": 160
}Exit condition: {
"leaveShinecharged": {}
}Unlocks doors: {"types":["super"],"requires":[]}
{"types":["missiles","powerbomb"],"requires":["never"]} |
From: 1
Left Door
To: 1
Left Door
With only a runway of 2 tiles (open end) in the other room, the ideal timing for the stutter is to release forward for 3 frames, and repress forward on the last possible frame before the transition. Other timings can work, but will gain the shinecharge further from the door, leaving fewer shinecharge frames remaining. After gaining the shinecharge, continue holding forward in order to make Samus stand. Then turnaround spin jump back toward the door, and continue spin jumping to reach the transition with a shinecharge. Alternatively, with greater difficulty but saving some shinecharge frames, after performing the turnaround spin jump, briefly moonwalk back, then retain momentum by boomeranging forward (switching from pressing backward to pressing forward on the next frame), and arm pump to reach the door quickly. Entrance condition: {
"comeInStutterShinecharging": {
"minTiles": 2
}
}Requires: "canPreciseStutterWaterShineCharge"
"canShinechargeMovementTricky"
"canInsaneJump"
{
"shineChargeFrames": 150
}
{
"or": [
"canBeVeryPatient",
{
"shineChargeFrames": 15
}
]
}Exit condition: {
"leaveShinecharged": {}
}Unlocks doors: {"types":["super"],"requires":[]}
{"types":["missiles","powerbomb"],"requires":["never"]}Dev note: FIXME: The canBeVeryPatient requirement is for difficulty placement of the boomerang method; but the boomerang (or maybe specifically the moonwalk boomerang) should possibly be its own tech, and the same with rapid arm pumping. |
From: 1
Left Door
To: 1
Left Door
With only a runway of 3 tiles (open end) in the other room, the ideal timing for the stutter is to release forward for 3 or 4 frames, and repress forward on the last possible frame before the transition. Other timings can work, but will gain the shinecharge further from the door, leaving fewer shinecharge frames remaining. After gaining the shinecharge, continue holding forward in order to make Samus stand. Then turnaround spin jump back toward the door, and continue spin jumping to reach the transition with a shinecharge. Alternatively, with greater difficulty but saving some shinecharge frames, after performing the turnaround spin jump, briefly moonwalk back, then retain momentum by boomeranging forward (switching from pressing backward to pressing forward on the next frame), and arm pump to reach the door quickly. Entrance condition: {
"comeInStutterShinecharging": {
"minTiles": 3
}
}Requires: "canPreciseStutterWaterShineCharge"
"canShinechargeMovementTricky"
"canInsaneJump"
{
"shineChargeFrames": 145
}
{
"or": [
"canBeVeryPatient",
{
"shineChargeFrames": 10
}
]
}Exit condition: {
"leaveShinecharged": {}
}Unlocks doors: {"types":["super"],"requires":[]}
{"types":["missiles","powerbomb"],"requires":["never"]}Dev note: The same shinecharge frames could be achieved with a closed end runway (effective length of 2.4375), with a 3-frame stutter, but there doesn't appear to be any application. |
From: 1
Left Door
To: 1
Left Door
With only a runway of 4 tiles (open end) in the other room, the ideal timing for the stutter is to release forward for 4 frames, and repress forward on the last possible frame before the transition. It also works well to release forward for 3 frames and repress on the last possible frame. Other timings can also work, but may gain the shinecharge further from the door, leaving fewer shinecharge frames remaining. After gaining the shinecharge, continue holding forward in order to make Samus stand. Then turnaround spin jump back toward the door, and continue spin jumping to reach the transition with a shinecharge. Entrance condition: {
"comeInStutterShinecharging": {
"minTiles": 4
}
}Requires: "canPreciseStutterWaterShineCharge"
"canShinechargeMovementTricky"
"canInsaneJump"
{
"shineChargeFrames": 140
}
{
"or": [
"canBeVeryPatient",
{
"shineChargeFrames": 10
}
]
}Exit condition: {
"leaveShinecharged": {}
}Unlocks doors: {"types":["super"],"requires":[]}
{"types":["missiles","powerbomb"],"requires":["never"]} |
From: 1
Left Door
To: 1
Left Door
With a runway of 5 tiles (open end) in the other room, the ideal timing for the stutter is to release forward for 5 frames, and repress forward on the last possible frame before the transition. Other timings can work, but will gain the shinecharge further from the door, leaving fewer shinecharge frames remaining. After gaining the shinecharge, continue holding forward in order to make Samus stand. Then turnaround spin jump back toward the door, and continue spin jumping to reach the transition with a shinecharge. Entrance condition: {
"comeInStutterShinecharging": {
"minTiles": 5
}
}Requires: "canPreciseStutterWaterShineCharge"
"canShinechargeMovementTricky"
"canInsaneJump"
{
"shineChargeFrames": 130
}
{
"or": [
"canBeVeryPatient",
{
"shineChargeFrames": 15
}
]
}Exit condition: {
"leaveShinecharged": {}
}Unlocks doors: {"types":["super"],"requires":[]}
{"types":["missiles","powerbomb"],"requires":["never"]} |
From: 1
Left Door
To: 2
Right Door
Slide into the hole where the shot block was and sink to the bottom. Shoot the door using a Hero shot and time the shinespark to follow the shot. Entrance condition: {
"comeInShinecharging": {
"length": 1,
"openEnd": 0
}
}Requires: "canWaterShineCharge"
"canHeroShot"
"canShinechargeMovementTricky"
{
"shinespark": {
"frames": 39,
"excessFrames": 0
}
}Exit condition: {
"leaveWithSpark": {
"position": "bottom"
}
}Unlocks doors: {"types":["super"],"requires":[]}
{"types":["missiles","powerbomb"],"requires":["never"]} |
From: 1
Left Door
To: 2
Right Door
Slide into the hole where the shot block was and sink to the bottom. Shoot the door using a Hero shot and time the shinespark to follow the shot. Either kill the ceiling crab so that Samus can jump forward, or stationary spinjump to avoid using the Shinespark early. Entrance condition: {
"comeInShinecharging": {
"length": 1,
"openEnd": 0
}
}Requires: "canWaterShineCharge"
"canHeroShot"
"canShinechargeMovementTricky"
"HiJump"
{
"or": [
{
"and": [
"Plasma",
"Wave"
]
},
"canStationarySpinJump"
]
}
{
"shinespark": {
"frames": 41,
"excessFrames": 0
}
}Exit condition: {
"leaveWithSpark": {}
}Unlocks doors: {"types":["super"],"requires":[{"ammo":{"type":"Super","count":1}}]}
{"types":["missiles","powerbomb"],"requires":["never"]} |
From: 1
Left Door
To: 2
Right Door


Spinjump through the shotblocks and fire a Plasma + Wave shot on the way down, clearing the crabs. Begin the Shinespark windup while the Beam shot travels towards the door to open it. Entrance condition: {
"comeInShinecharging": {
"length": 0,
"openEnd": 0
}
}Requires: "canWaterShineCharge"
"canHeroShot"
"canShinechargeMovementTricky"
"Plasma"
"Wave"
{
"shinespark": {
"frames": 41,
"excessFrames": 0
}
}Exit condition: {
"leaveWithSpark": {}
}Unlocks doors: {"types":["ammo"],"requires":["never"]} |
|

Shinecharge in-room, then horizontally spark through Draygon multiple times. It takes 3 Shinesparks if that is the only source of damage onto Draygon. Be careful of taking damage at the end of a Shinespark when near walls and on the killing Shinespark. Requires: {
"notable": "Shinespark Kill"
}
"Gravity"
"canShinechargeMovementComplex"
{
"or": [
{
"and": [
"canShinechargeMovementTricky",
{
"enemyDamage": {
"enemy": "Draygon",
"type": "turretProjectile",
"hits": 3
}
}
]
},
{
"and": [
"canShinechargeMovementTricky",
"canBeLucky"
]
},
"h_breakThreeDraygonTurrets"
]
}
{
"canShineCharge": {
"usedTiles": 22,
"openEnd": 0
}
}
{
"or": [
"canTrickyJump",
{
"enemyDamage": {
"enemy": "Draygon",
"type": "contact",
"hits": 1
}
}
]
}
{
"or": [
"HiJump",
{
"enemyDamage": {
"enemy": "Draygon",
"type": "contact",
"hits": 1
}
}
]
}
{
"enemyDamage": {
"enemy": "Draygon",
"type": "contact",
"hits": 2
}
}
{
"shinespark": {
"frames": 150
}
}
{
"or": [
"free",
{
"and": [
{
"not": "f_DefeatedDraygon"
},
"canRiskPermanentLossOfAccess",
"canShinechargeMovementTricky",
{
"gainBlueSuit": {}
}
]
}
]
}Clears obstacles: f_DefeatedDraygon Sets flags: f_DefeatedDraygon Dev note: 150 frames is an approximate sum of all required shinesparks. |
|

Requires: "Gravity"
"canShinechargeMovementComplex"
{
"canShineCharge": {
"usedTiles": 20,
"openEnd": 1
}
}
{
"or": [
{
"and": [
"HiJump",
"SpaceJump",
{
"shineChargeFrames": 115
}
]
},
{
"and": [
"SpaceJump",
{
"shineChargeFrames": 140
}
]
},
{
"and": [
"HiJump",
"canWallJump",
{
"shineChargeFrames": 155
}
]
},
{
"and": [
"HiJump",
"canGravityJump",
"canShinechargeMovementTricky",
{
"shineChargeFrames": 115
}
]
},
{
"and": [
"canGravityJump",
"canShinechargeMovementTricky",
{
"shineChargeFrames": 140
}
]
}
]
}Exit condition: {
"leaveShinecharged": {}
}Unlocks doors: {"types":["ammo"],"requires":[]} |
From: 2
Right Door
To: 1
Left Door

Shinecharge then jump at the end of the runway, depending on how far the jump is, a hero shot might be necessary to open the door. Entrance condition: {
"comeInShinecharging": {
"length": 1,
"openEnd": 1
}
}Requires: "canSuitlessMaridia"
"canShinechargeMovementComplex"
{
"or": [
{
"and": [
"canHeroShot",
{
"shinespark": {
"frames": 26,
"excessFrames": 0
}
}
]
},
{
"and": [
"canShinechargeMovementTricky",
{
"shinespark": {
"frames": 20,
"excessFrames": 0
}
}
]
}
]
}Exit condition: {
"leaveWithSpark": {
"grounded": false
}
}Clears obstacles: door_2 Unlocks doors: {"types":["super"],"requires":[]}
{"types":["missiles","powerbomb"],"requires":["never"]}Dev note: This runway length is assuming Samus comes in shinecharging at a relatively high speed. |
|
Requires: "h_spikeXModeShinecharge"
"canShinechargeMovementTricky"
"canTrickyJump"
"Gravity"
{
"or": [
{
"and": [
"HiJump",
"canTrickyDashJump"
]
},
{
"and": [
"canFastWallJumpClimb",
"canPreciseWallJump"
]
},
{
"and": [
"SpaceJump",
"canInsaneJump",
{
"shinespark": {
"frames": 3
}
}
]
}
]
}
{
"shinespark": {
"frames": 5
}
}Exit condition: {
"leaveWithSpark": {}
}Dev note: Two spike hits are expected per attempt (with any additional leniency hits being multiplied by this amount). |
From: 2
Bottom Left Door
To: 1
Top Left Door
Entrance condition: {
"comeInShinecharging": {
"length": 12,
"openEnd": 0
}
}Requires: "canGravityJump"
"canShinechargeMovementTricky"
{
"shineChargeFrames": 125
}Exit condition: {
"leaveShinecharged": {}
}Unlocks doors: {"types":["super"],"requires":[]}
{"types":["missiles","powerbomb"],"requires":["never"]} |
From: 2
Bottom Left Door
To: 2
Bottom Left Door
With only a runway of 2 tiles (open end) in the other room, the ideal timing for the stutter is to release forward for 3 frames, and repress forward on the last possible frame before the transition. Other timings can work, but will gain the shinecharge further from the door, leaving fewer shinecharge frames remaining. After gaining the shinecharge, continue holding forward in order to make Samus stand. Then turnaround spin jump back toward the door, and continue spin jumping to reach the transition with a shinecharge. Alternatively, with greater difficulty but saving some shinecharge frames, after performing the turnaround spin jump, briefly moonwalk back, then retain momentum by boomeranging forward (switching from pressing backward to pressing forward on the next frame), and arm pump to reach the door quickly. Entrance condition: {
"comeInStutterShinecharging": {
"minTiles": 2
}
}Requires: "canPreciseStutterWaterShineCharge"
"canShinechargeMovementTricky"
"canInsaneJump"
"canTrickyDodgeEnemies"
{
"shineChargeFrames": 150
}
{
"or": [
"canBeVeryPatient",
{
"shineChargeFrames": 15
}
]
}Exit condition: {
"leaveShinecharged": {}
}Unlocks doors: {"types":["super"],"requires":[]}
{"types":["missiles","powerbomb"],"requires":["never"]}Dev note: FIXME: The canBeVeryPatient requirement is for difficulty placement of the boomerang method; but the boomerang (or maybe specifically the moonwalk boomerang) should possibly be its own tech, and the same with rapid arm pumping. |
From: 2
Bottom Left Door
To: 2
Bottom Left Door
With only a runway of 3 tiles (open end) in the other room, the ideal timing for the stutter is to release forward for 3 or 4 frames, and repress forward on the last possible frame before the transition. Other timings can work, but will gain the shinecharge further from the door, leaving fewer shinecharge frames remaining. After gaining the shinecharge, continue holding forward in order to make Samus stand. Then turnaround spin jump back toward the door, and continue spin jumping to reach the transition with a shinecharge. Alternatively, with greater difficulty but saving some shinecharge frames, after performing the turnaround spin jump, briefly moonwalk back, then retain momentum by boomeranging forward (switching from pressing backward to pressing forward on the next frame), and arm pump to reach the door quickly. Entrance condition: {
"comeInStutterShinecharging": {
"minTiles": 3
}
}Requires: "canPreciseStutterWaterShineCharge"
"canShinechargeMovementTricky"
"canInsaneJump"
"canTrickyDodgeEnemies"
{
"shineChargeFrames": 145
}
{
"or": [
"canBeVeryPatient",
{
"shineChargeFrames": 10
}
]
}Exit condition: {
"leaveShinecharged": {}
}Unlocks doors: {"types":["super"],"requires":[]}
{"types":["missiles","powerbomb"],"requires":["never"]}Dev note: The same shinecharge frames could be achieved with a closed end runway (effective length of 2.4375), with a 3-frame stutter, but there doesn't appear to be any application. |
From: 2
Bottom Left Door
To: 2
Bottom Left Door
With only a runway of 4 tiles (open end) in the other room, the ideal timing for the stutter is to release forward for 4 frames, and repress forward on the last possible frame before the transition. It also works well to release forward for 3 frames and repress on the last possible frame. Other timings can also work, but may gain the shinecharge further from the door, leaving fewer shinecharge frames remaining. After gaining the shinecharge, continue holding forward in order to make Samus stand. Then turnaround spin jump back toward the door, and continue spin jumping to reach the transition with a shinecharge. Entrance condition: {
"comeInStutterShinecharging": {
"minTiles": 4
}
}Requires: "canPreciseStutterWaterShineCharge"
"canShinechargeMovementTricky"
"canInsaneJump"
"canTrickyDodgeEnemies"
{
"shineChargeFrames": 140
}
{
"or": [
"canBeVeryPatient",
{
"shineChargeFrames": 10
}
]
}Exit condition: {
"leaveShinecharged": {}
}Unlocks doors: {"types":["super"],"requires":[]}
{"types":["missiles","powerbomb"],"requires":["never"]} |
From: 2
Bottom Left Door
To: 2
Bottom Left Door
With a runway of 5 tiles (open end) in the other room, the ideal timing for the stutter is to release forward for 5 frames, and repress forward on the last possible frame before the transition. Other timings can work, but will gain the shinecharge further from the door, leaving fewer shinecharge frames remaining. After gaining the shinecharge, continue holding forward in order to make Samus stand. Then turnaround spin jump back toward the door, and continue spin jumping to reach the transition with a shinecharge. Entrance condition: {
"comeInStutterShinecharging": {
"minTiles": 5
}
}Requires: "canPreciseStutterWaterShineCharge"
"canShinechargeMovementTricky"
"canInsaneJump"
"canTrickyDodgeEnemies"
{
"shineChargeFrames": 130
}
{
"or": [
"canBeVeryPatient",
{
"shineChargeFrames": 15
}
]
}Exit condition: {
"leaveShinecharged": {}
}Unlocks doors: {"types":["super"],"requires":[]}
{"types":["missiles","powerbomb"],"requires":["never"]} |
From: 2
Bottom Left Door
To: 4
Top Right Door

Entrance condition: {
"comeInShinecharging": {
"length": 8,
"openEnd": 1
}
}Requires: "Gravity"
"HiJump"
"canShinechargeMovementTricky"
"canFastWallJumpClimb"
{
"shineChargeFrames": 165
}Exit condition: {
"leaveShinecharged": {}
}Unlocks doors: {"types":["super"],"requires":[]}
{"types":["missiles","powerbomb"],"requires":["never"]} |
From: 2
Bottom Left Door
To: 4
Top Right Door

Entrance condition: {
"comeInShinecharging": {
"length": 8,
"openEnd": 1
}
}Requires: "Gravity"
"canShinechargeMovementTricky"
"canFastWallJumpClimb"
{
"shineChargeFrames": 150
}
{
"or": [
"HiJump",
{
"shineChargeFrames": 27
}
]
}
{
"shinespark": {
"frames": 5,
"excessFrames": 0
}
}Exit condition: {
"leaveWithSpark": {}
}Unlocks doors: {"types":["super"],"requires":[]}
{"types":["missiles","powerbomb"],"requires":["never"]} |
|
Gain a shinecharge using the long runway on the right side of the room, carry it through the morph tunnel, and spark out the door. Requires: "Gravity"
"Morph"
"h_shinechargeMaxRunway"
"canShinechargeMovementTricky"
{
"shinespark": {
"frames": 10,
"excessFrames": 0
}
}Exit condition: {
"leaveWithSpark": {}
}Unlocks doors: {"types":["ammo"],"requires":[]} |
|
Requires: {
"shineChargeFrames": 50
}
"canShinechargeMovementComplex"
{
"or": [
{
"shinespark": {
"frames": 12,
"excessFrames": 0
}
},
{
"and": [
"canShinechargeMovementTricky",
{
"shinespark": {
"frames": 3,
"excessFrames": 0
}
}
]
}
]
}Exit condition: {
"leaveWithSpark": {}
}Unlocks doors: {"types":["super"],"requires":[]}
{"types":["missiles","powerbomb"],"requires":["never"]} |
From: 2
Bottom Left Door
To: 2
Bottom Left Door
With only a runway of 2 tiles (open end) in the other room, the ideal timing for the stutter is to release forward for 3 frames, and repress forward on the last possible frame before the transition. Other timings can work, but will gain the shinecharge further from the door, leaving fewer shinecharge frames remaining. After gaining the shinecharge, continue holding forward in order to make Samus stand. Then turnaround spin jump back toward the door, and continue spin jumping to reach the transition with a shinecharge. Alternatively, with greater difficulty but saving some shinecharge frames, after performing the turnaround spin jump, briefly moonwalk back, then retain momentum by boomeranging forward (switching from pressing backward to pressing forward on the next frame), and arm pump to reach the door quickly. Entrance condition: {
"comeInStutterShinecharging": {
"minTiles": 2
}
}Requires: "canPreciseStutterWaterShineCharge"
"canShinechargeMovementTricky"
"canInsaneJump"
{
"shineChargeFrames": 150
}
{
"or": [
"canBeVeryPatient",
{
"shineChargeFrames": 15
}
]
}Exit condition: {
"leaveShinecharged": {}
}Unlocks doors: {"types":["super"],"requires":[]}
{"types":["missiles","powerbomb"],"requires":["never"]}Dev note: FIXME: The canBeVeryPatient requirement is for difficulty placement of the boomerang method; but the boomerang (or maybe specifically the moonwalk boomerang) should possibly be its own tech, and the same with rapid arm pumping. |
From: 2
Bottom Left Door
To: 2
Bottom Left Door
With only a runway of 3 tiles (open end) in the other room, the ideal timing for the stutter is to release forward for 3 or 4 frames, and repress forward on the last possible frame before the transition. Other timings can work, but will gain the shinecharge further from the door, leaving fewer shinecharge frames remaining. After gaining the shinecharge, continue holding forward in order to make Samus stand. Then turnaround spin jump back toward the door, and continue spin jumping to reach the transition with a shinecharge. Alternatively, with greater difficulty but saving some shinecharge frames, after performing the turnaround spin jump, briefly moonwalk back, then retain momentum by boomeranging forward (switching from pressing backward to pressing forward on the next frame), and arm pump to reach the door quickly. Entrance condition: {
"comeInStutterShinecharging": {
"minTiles": 3
}
}Requires: "canPreciseStutterWaterShineCharge"
"canShinechargeMovementTricky"
"canInsaneJump"
{
"shineChargeFrames": 145
}
{
"or": [
"canBeVeryPatient",
{
"shineChargeFrames": 10
}
]
}Exit condition: {
"leaveShinecharged": {}
}Unlocks doors: {"types":["super"],"requires":[]}
{"types":["missiles","powerbomb"],"requires":["never"]}Dev note: The same shinecharge frames could be achieved with a closed end runway (effective length of 2.4375), with a 3-frame stutter, but there doesn't appear to be any application. |
From: 2
Bottom Left Door
To: 2
Bottom Left Door
With only a runway of 4 tiles (open end) in the other room, the ideal timing for the stutter is to release forward for 4 frames, and repress forward on the last possible frame before the transition. It also works well to release forward for 3 frames and repress on the last possible frame. Other timings can also work, but may gain the shinecharge further from the door, leaving fewer shinecharge frames remaining. After gaining the shinecharge, continue holding forward in order to make Samus stand. Then turnaround spin jump back toward the door, and continue spin jumping to reach the transition with a shinecharge. Entrance condition: {
"comeInStutterShinecharging": {
"minTiles": 4
}
}Requires: "canPreciseStutterWaterShineCharge"
"canShinechargeMovementTricky"
"canInsaneJump"
{
"shineChargeFrames": 140
}
{
"or": [
"canBeVeryPatient",
{
"shineChargeFrames": 10
}
]
}Exit condition: {
"leaveShinecharged": {}
}Unlocks doors: {"types":["super"],"requires":[]}
{"types":["missiles","powerbomb"],"requires":["never"]} |
From: 2
Bottom Left Door
To: 2
Bottom Left Door
With a runway of 5 tiles (open end) in the other room, the ideal timing for the stutter is to release forward for 5 frames, and repress forward on the last possible frame before the transition. Other timings can work, but will gain the shinecharge further from the door, leaving fewer shinecharge frames remaining. After gaining the shinecharge, continue holding forward in order to make Samus stand. Then turnaround spin jump back toward the door, and continue spin jumping to reach the transition with a shinecharge. Entrance condition: {
"comeInStutterShinecharging": {
"minTiles": 5
}
}Requires: "canPreciseStutterWaterShineCharge"
"canShinechargeMovementTricky"
"canInsaneJump"
{
"shineChargeFrames": 130
}
{
"or": [
"canBeVeryPatient",
{
"shineChargeFrames": 15
}
]
}Exit condition: {
"leaveShinecharged": {}
}Unlocks doors: {"types":["super"],"requires":[]}
{"types":["missiles","powerbomb"],"requires":["never"]} |
From: 1
Top Sand Entrance
To: 7
Below Morph Tunnel Junction
Break the shot block before reaching the sand and then shinespark up. A diagonal ShineSpark will most likely not have any horizontal movement when performed from the sand. Entrance condition: {
"comeInShinecharged": {},
"comesThroughToilet": "any"
}Requires: {
"shineChargeFrames": 160
}
"h_navigateUnderwater"
"canPlayInSand"
"canHeroShot"
"canTrickyJump"
"canShinechargeMovementTricky"
{
"shinespark": {
"frames": 25,
"excessFrames": 4
}
} |
From: 1
Top Sand Entrance
To: 7
Below Morph Tunnel Junction

Break the shot block before reaching the sand and then shinespark up. Samus cannot shinespark after unmorphing until she touches the sand and this can be used to shoot upwards without sparking. A diagonal ShineSpark will most likely not have any horizontal movement when performed from the sand. Entrance condition: {
"comeInShinecharged": {},
"comesThroughToilet": "any"
}Requires: {
"shineChargeFrames": 150
}
"h_navigateUnderwater"
"canPlayInSand"
"canShinechargeMovementTricky"
{
"or": [
"canResetFallSpeed",
{
"and": [
"canPrepareForNextRoom",
"h_usePowerBomb"
]
}
]
}
{
"shinespark": {
"frames": 24,
"excessFrames": 5
}
} |
From: 2
Top Right Door
To: 1
Bottom Left Door

Moonfall from the ledge just below the door, then weave between the floating platforms. It is possible to either perform the mid-air spark at high speed while falling, or to land and jump into a mid-air spark. Landing and jumping into a mid-air spark may be the easier method, especially if needing to leave in a specific position (top or bottom), but the shinecharge frames are very tight. It helps to get a good entry, by pressing down to gain the shinecharge as late as possible in the previous room; this will make Samus descend more during the crouching animation, to reach the ledge below quickly. It is recommended to initiate moonfall immediately, while still facing left, to avoid wasting time turning around. Alternatively, if activating the spark while falling at high speed, there are plenty of shinecharge frames available, but only a 2-frame window for activating the spark; if needing to leave in a specific position (top or bottom), it is frame-perfect; to leave in bottom position, break spin before the final turnaround, to adjust the alignment of Samus' vertical position, otherwise there is no frame that works. Entrance condition: {
"comeInShinecharging": {
"length": 0,
"openEnd": 1
}
}Requires: {
"notable": "Moonfall Spark"
}
"canMoonfall"
"canShinechargeMovementTricky"
"canInsaneJump"
{
"shinespark": {
"frames": 14,
"excessFrames": 0
}
}Exit condition: {
"leaveWithSpark": {}
}Unlocks doors: {"types":["super"],"requires":[]}
{"types":["missiles","powerbomb"],"requires":["never"]} |
|
Entrance condition: {
"comeInShinecharged": {}
}Requires: "canShinechargeMovementTricky"
{
"or": [
{
"and": [
"HiJump",
{
"shineChargeFrames": 125
}
]
},
{
"and": [
"canFastWallJumpClimb",
{
"shineChargeFrames": 145
}
]
}
]
}Exit condition: {
"leaveShinecharged": {}
}Unlocks doors: {"types":["super"],"requires":[]}
{"types":["missiles","powerbomb"],"requires":["never"]} |
From: 1
Bottom Left Door
To: 2
Right Door

Entrance condition: {
"comeInShinecharging": {
"length": 1,
"openEnd": 0
}
}Requires: "canShinechargeMovementTricky"
{
"or": [
{
"and": [
"HiJump",
{
"shineChargeFrames": 130
}
]
},
{
"and": [
"canFastWallJumpClimb",
{
"shineChargeFrames": 150
}
]
}
]
}Exit condition: {
"leaveShinecharged": {}
}Unlocks doors: {"types":["super"],"requires":[]}
{"types":["missiles","powerbomb"],"requires":["never"]} |
From: 3
Elevator
To: 2
Right Door


Spin jump off the elevator platform, carefully passing between the Ripper and the right wall. Entrance condition: {
"comeInShinecharged": {}
}Requires: "canShinechargeMovementTricky"
{
"shineChargeFrames": 135
}
{
"shinespark": {
"frames": 9,
"excessFrames": 0
}
}Exit condition: {
"leaveWithSpark": {}
}Unlocks doors: {"types":["super"],"requires":[]}
{"types":["missiles","powerbomb"],"requires":["never"]}Dev note: Screw Attack can make it easier to avoid getting hit by the Ripper, but it doesn't seem significant enough to affect the logic. It is also possible to moonfall, but this has little or no benefit, as it doesn't significantly reduce the shinecharge frames required, while it makes the timing of the shinespark activation much more precise. |
From: 3
Junction Left of Morph Tunnel
To: 1
Left Door
Charge a spark below towards the right then run back and jump up and spark out of the left door. Requires: "canShinechargeMovementTricky"
"canSpeedyJump"
{
"canShineCharge": {
"usedTiles": 22,
"openEnd": 2
}
}
{
"shinespark": {
"frames": 11,
"excessFrames": 0
}
}Exit condition: {
"leaveWithSpark": {}
}Unlocks doors: {"types":["ammo"],"requires":[]} |
From: 1
Top Sand Entrance
To: 2
Bottom Sand Exit

If in a falling state (as opposed to jumping), spin jump off the bottom ledge in order to be able to mid-air spark in the room below. Entrance condition: {
"comeInShinecharged": {},
"comesThroughToilet": "any"
}Requires: "canShinechargeMovementTricky"
{
"shineChargeFrames": 135
}Exit condition: {
"leaveShinecharged": {}
} |
|
Requires: {
"obstaclesCleared": [
"C"
]
}
"canShinechargeMovement"
{
"canShineCharge": {
"usedTiles": 21,
"openEnd": 0
}
}
{
"or": [
{
"and": [
{
"or": [
{
"and": [
{
"or": [
{
"obstaclesCleared": [
"A"
]
},
"canDodgeWhileShooting"
]
},
{
"or": [
"HiJump",
"canWallJump"
]
}
]
},
{
"and": [
"canShinechargeMovementComplex",
{
"or": [
"canSpeedyJump",
"canSpringBallJumpMidAir"
]
}
]
}
]
},
{
"shinespark": {
"frames": 28,
"excessFrames": 8
}
}
]
},
{
"and": [
{
"or": [
{
"and": [
"canShinechargeMovementComplex",
"canWallJump"
]
},
{
"and": [
"canShinechargeMovementTricky",
{
"or": [
"canSpeedyJump",
"canSpringBallJumpMidAir"
]
}
]
}
]
},
{
"shinespark": {
"frames": 20,
"excessFrames": 8
}
}
]
},
{
"and": [
"HiJump",
"canShinechargeMovementComplex",
{
"shinespark": {
"frames": 16,
"excessFrames": 8
}
}
]
},
{
"and": [
"HiJump",
"canSpeedyJump",
"canShinechargeMovementTricky",
{
"shinespark": {
"frames": 12,
"excessFrames": 8
}
}
]
}
]
} |
|
Using the bottom of the room, shortcharge to use the echoes created by shinesparking to kill all of the Standing Pirates. Turn around and diagonal spark the ceiling to kill the pirates. Building a spark towards the left allows for enough run speed to jump to the middle level. Then vertical shinespark out which kills the top pirate. Requires: {
"obstaclesCleared": [
"C"
]
}
"canShinechargeMovementComplex"
"canUseSpeedEchoes"
{
"canShineCharge": {
"usedTiles": 21,
"openEnd": 0
}
}
{
"or": [
{
"and": [
{
"or": [
"HiJump",
"canWallJump",
"canSpeedyJump",
"canTrickySpringBallJump",
"SpaceJump"
]
},
{
"shinespark": {
"frames": 28,
"excessFrames": 8
}
}
]
},
{
"and": [
{
"or": [
"canWallJump",
{
"and": [
"canShinechargeMovementTricky",
{
"or": [
"canSpeedyJump",
"canTrickySpringBallJump",
"SpaceJump"
]
}
]
}
]
},
{
"shinespark": {
"frames": 20,
"excessFrames": 8
}
}
]
},
{
"and": [
"HiJump",
{
"shinespark": {
"frames": 16,
"excessFrames": 8
}
}
]
},
{
"and": [
"HiJump",
"canSpeedyJump",
"canShinechargeMovementTricky",
{
"shinespark": {
"frames": 11,
"excessFrames": 8
}
}
]
}
]
}Clears obstacles: A |
From: 2
Bottom Right Door
To: 2
Bottom Right Door
With only 1 tile of runway in the other room, Samus should ideally start on the last pixel of runway with X subpixels of $3FFF or less. Run toward the door, releasing forward for exactly 1 frame and pressing it again on the last possible frame before the transition. Starting with X subpixels of $7FFF can also work (e.g., by simply backing against the door ledge, then jumping and turning around mid-air); in this case, Samus must advance 1 or 2 pixels with an arm pump before the transition (e.g., firing a shot or pressing and/or releasing an angle button), and the shinecharge will be gained slightly further away from the door. After gaining the shinecharge, continue holding forward in order to make Samus stand. Then turnaround spin jump back toward the door, and continue spin jumping to reach the transition with a shinecharge. Alternatively, with greater difficulty but saving some shinecharge frames, after performing the turnaround spin jump, briefly moonwalk back, then retain momentum by boomeranging forward (switching from pressing backward to pressing forward on the next frame), and arm pump to reach the door quickly. Ideal subpixels ($3FFF) can be achieved using one of several methods: 1) press forward against the door ledge (or a wall aligned with it); jump, and while mid-air, tap forward for exactly 1 frame to land with subpixels $BFFF, moonwalk back for exactly 1 frame to end with subpixels $3FFF. 2) press forward against the door ledge (from a platform below, assuming one exists) turn around (while on the ground), and moonwalk back two pixels, then jump and mid-air turnaround onto the ledge; if Samus jumped from the correct pixel but does not land on the ledge, then it was needed to moonwalk back 1 more frame; in this case it is possible to retry by doing a mid-air turnaround back onto the platform, and moonwalking back for 1 frame. 3) if X-Ray is available, press against the door ledge (from a platform below, assuming one exists) turn around (while on the ground), then jump and mid-air turnaround toward the door, and use X-Ray to turnaround in place away from the door; repeat this sequence 3 more times: jump, mid-air turnaround, X-Ray turnaround; then do one more jump and mid-air turnaround, high enough to land on the door ledge, and Samus should be in the correct position with subpixels $3FFF. Entrance condition: {
"comeInStutterShinecharging": {
"minTiles": 1
}
}Requires: "canPreciseStutterWaterShineCharge"
"canInsaneJump"
"canBeVeryPatient"
"canShinechargeMovementTricky"
{
"shineChargeFrames": 160
}Exit condition: {
"leaveShinecharged": {}
}Unlocks doors: {"types":["super"],"requires":[]}
{"types":["missiles","powerbomb"],"requires":["never"]} |
From: 2
Bottom Right Door
To: 2
Bottom Right Door
With only a runway of 2 tiles (open end) in the other room, the ideal timing for the stutter is to release forward for 3 frames, and repress forward on the last possible frame before the transition. Other timings can work, but will gain the shinecharge further from the door, leaving fewer shinecharge frames remaining. After gaining the shinecharge, continue holding forward in order to make Samus stand. Then turnaround spin jump back toward the door, and continue spin jumping to reach the transition with a shinecharge. Alternatively, with greater difficulty but saving some shinecharge frames, after performing the turnaround spin jump, briefly moonwalk back, then retain momentum by boomeranging forward (switching from pressing backward to pressing forward on the next frame), and arm pump to reach the door quickly. Entrance condition: {
"comeInStutterShinecharging": {
"minTiles": 2
}
}Requires: "canPreciseStutterWaterShineCharge"
"canShinechargeMovementTricky"
"canInsaneJump"
{
"shineChargeFrames": 150
}
{
"or": [
"canBeVeryPatient",
{
"shineChargeFrames": 15
}
]
}Exit condition: {
"leaveShinecharged": {}
}Unlocks doors: {"types":["super"],"requires":[]}
{"types":["missiles","powerbomb"],"requires":["never"]}Dev note: FIXME: The canBeVeryPatient requirement is for difficulty placement of the boomerang method; but the boomerang (or maybe specifically the moonwalk boomerang) should possibly be its own tech, and the same with rapid arm pumping. |
From: 2
Bottom Right Door
To: 2
Bottom Right Door
With only a runway of 3 tiles (open end) in the other room, the ideal timing for the stutter is to release forward for 3 or 4 frames, and repress forward on the last possible frame before the transition. Other timings can work, but will gain the shinecharge further from the door, leaving fewer shinecharge frames remaining. After gaining the shinecharge, continue holding forward in order to make Samus stand. Then turnaround spin jump back toward the door, and continue spin jumping to reach the transition with a shinecharge. Alternatively, with greater difficulty but saving some shinecharge frames, after performing the turnaround spin jump, briefly moonwalk back, then retain momentum by boomeranging forward (switching from pressing backward to pressing forward on the next frame), and arm pump to reach the door quickly. Entrance condition: {
"comeInStutterShinecharging": {
"minTiles": 3
}
}Requires: "canPreciseStutterWaterShineCharge"
"canShinechargeMovementTricky"
"canInsaneJump"
{
"shineChargeFrames": 145
}
{
"or": [
"canBeVeryPatient",
{
"shineChargeFrames": 10
}
]
}Exit condition: {
"leaveShinecharged": {}
}Unlocks doors: {"types":["super"],"requires":[]}
{"types":["missiles","powerbomb"],"requires":["never"]}Dev note: The same shinecharge frames could be achieved with a closed end runway (effective length of 2.4375), with a 3-frame stutter, but there doesn't appear to be any application. |
From: 2
Bottom Right Door
To: 2
Bottom Right Door
With only a runway of 4 tiles (open end) in the other room, the ideal timing for the stutter is to release forward for 4 frames, and repress forward on the last possible frame before the transition. It also works well to release forward for 3 frames and repress on the last possible frame. Other timings can also work, but may gain the shinecharge further from the door, leaving fewer shinecharge frames remaining. After gaining the shinecharge, continue holding forward in order to make Samus stand. Then turnaround spin jump back toward the door, and continue spin jumping to reach the transition with a shinecharge. Entrance condition: {
"comeInStutterShinecharging": {
"minTiles": 4
}
}Requires: "canPreciseStutterWaterShineCharge"
"canShinechargeMovementTricky"
"canInsaneJump"
{
"shineChargeFrames": 140
}
{
"or": [
"canBeVeryPatient",
{
"shineChargeFrames": 10
}
]
}Exit condition: {
"leaveShinecharged": {}
}Unlocks doors: {"types":["super"],"requires":[]}
{"types":["missiles","powerbomb"],"requires":["never"]} |
From: 2
Bottom Right Door
To: 2
Bottom Right Door
With a runway of 5 tiles (open end) in the other room, the ideal timing for the stutter is to release forward for 5 frames, and repress forward on the last possible frame before the transition. Other timings can work, but will gain the shinecharge further from the door, leaving fewer shinecharge frames remaining. After gaining the shinecharge, continue holding forward in order to make Samus stand. Then turnaround spin jump back toward the door, and continue spin jumping to reach the transition with a shinecharge. Entrance condition: {
"comeInStutterShinecharging": {
"minTiles": 5
}
}Requires: "canPreciseStutterWaterShineCharge"
"canShinechargeMovementTricky"
"canInsaneJump"
{
"shineChargeFrames": 130
}
{
"or": [
"canBeVeryPatient",
{
"shineChargeFrames": 15
}
]
}Exit condition: {
"leaveShinecharged": {}
}Unlocks doors: {"types":["super"],"requires":[]}
{"types":["missiles","powerbomb"],"requires":["never"]} |
From: 2
Bottom Right Door
To: 2
Bottom Right Door


Entrance condition: {
"comeInStutterShinecharging": {
"minTiles": 2
}
}Requires: "canStutterWaterShineCharge"
"canShinechargeMovementComplex"
{
"or": [
{
"shinespark": {
"frames": 12,
"excessFrames": 0
}
},
{
"and": [
"canShinechargeMovementTricky",
{
"shinespark": {
"frames": 3,
"excessFrames": 0
}
}
]
}
]
}Exit condition: {
"leaveWithSpark": {}
}Unlocks doors: {"types":["super"],"requires":[]}
{"types":["missiles","powerbomb"],"requires":["never"]} |
From: 2
Bottom Right Door
To: 2
Bottom Right Door
With only 1 tile of runway, this requires a single-frame stutter (release forward then repress on the next frame), on the last possible frame. Entrance condition: {
"comeInStutterShinecharging": {
"minTiles": 1
}
}Requires: "canShinechargeMovementComplex"
"canPreciseStutterWaterShineCharge"
"canInsaneJump"
"h_shinechargeMaxRunway"
{
"or": [
{
"shinespark": {
"frames": 12,
"excessFrames": 0
}
},
{
"and": [
"canShinechargeMovementTricky",
{
"shinespark": {
"frames": 3,
"excessFrames": 0
}
}
]
}
]
}Exit condition: {
"leaveWithSpark": {}
}Unlocks doors: {"types":["super"],"requires":[]}
{"types":["missiles","powerbomb"],"requires":["never"]} |
From: 2
Bottom Right Door
To: 2
Bottom Right Door
Start with low run speed by positioning exactly 2 pixels from the door. Entrance condition: {
"comeInRunning": {
"speedBooster": "yes",
"minTiles": 0.4375
}
}Requires: "canWaterShineCharge"
"canShinechargeMovementTricky"
"canHeroShot"
{
"shinespark": {
"frames": 29,
"excessFrames": 0
}
}Exit condition: {
"leaveWithSpark": {}
}Unlocks doors: {"types":["super"],"requires":[]}
{"types":["missiles","powerbomb"],"requires":["never"]} |
|


Gain a shinecharge by running right-to-left on the underwater runway on the right side of the room. Use HiJump or a Spring Ball jump to quickly exit the water to the left and spark up. Requires: "Gravity"
{
"or": [
"HiJump",
"canTrickySpringBallJump",
"canWallJump",
{
"and": [
"canGravityJump",
"canShinechargeMovementTricky"
]
}
]
}
{
"enemyKill": {
"enemies": [
[
"Owtch",
"Owtch"
]
]
}
}
"canShinechargeMovementComplex"
{
"canShineCharge": {
"usedTiles": 16,
"gentleUpTiles": 2,
"gentleDownTiles": 2,
"steepUpTiles": 1,
"steepDownTiles": 1,
"startingSteepDownTiles": 1,
"startingGentleDownTiles": 2,
"openEnd": 2
}
}
{
"shinespark": {
"frames": 43,
"excessFrames": 3
}
}Dev note: FIXME: It's technically possible to evade the Owtches without killing them, but it's unclear if this can be done reliably. A 2->5 shinespark strat from here can also be added, using less energy than the existing strat that uses the runway at the bottom of the room. |
From: 4
Top Right Door
To: 3
Middle Right Door
Entrance condition: {
"comeInShinecharged": {}
}Requires: "canShinechargeMovementTricky"
"canHeroShot"
{
"shineChargeFrames": 150
}
{
"shinespark": {
"frames": 31,
"excessFrames": 0
}
}Exit condition: {
"leaveWithSpark": {}
}Unlocks doors: {"types":["super"],"requires":[]}
{"types":["missiles","powerbomb"],"requires":["never"]} |
From: 4
Top Right Door
To: 3
Middle Right Door
Entrance condition: {
"comeInShinecharging": {
"length": 6,
"openEnd": 1
}
}Requires: "canShinechargeMovementTricky"
{
"shinespark": {
"frames": 31,
"excessFrames": 0
}
}Exit condition: {
"leaveWithSpark": {}
}Unlocks doors: {"types":["super"],"requires":[]}
{"types":["missiles","powerbomb"],"requires":["never"]} |
From: 1
Right Door
To: 1
Right Door

Kill the Choot at the bottom of the room. Freeze the two Zebs to create a runway to shinecharge with. Pixel perfect freezing of both Zebs provides the longest runway, but a slightly higher position of the second Zeb is still usable. Slide off the end of the runway while gaining a shinecharge. After landing on the center pedestal, do a short spin jump to the left, turn right, fire shot to break spin and collect the item. After the message box closes, depending on Samus' position, wait a moment to let Samus sink straight down a few pixels before activating a diagonal spark. Freezing just a single Zeb is also possible but requires a 13-tile shortcharge. Requires: "h_trickyFrozenEnemyRunway"
{
"notable": "Double Frozen Zeb Runway"
}
{
"notable": "Double Frozen Zeb Item Collect Shinespark Escape"
}
"canShinechargeMovementTricky"
{
"canShineCharge": {
"usedTiles": 19,
"openEnd": 1
}
}
{
"shinespark": {
"frames": 36,
"excessFrames": 28
}
}Collects items: 2 |
From: 1
Right Door
To: 1
Right Door

Kill the Choot at the bottom of the room. Freeze the two Zebs to create a runway to shinecharge with. Pixel perfect freezing of both Zebs provides the longest runway, but a slightly higher position of the second Zeb is still usable. Slide off the end of the runway while gaining a shinecharge. After landing on the center pedestal, do a short spin jump to the right, turn left, fire shot to break spin and collect the item. After the message box closes, depending on Samus' position, hold left and wait a moment to let Samus move down-left a few pixels before activating a diagonal spark. Freezing just a single Zeb is also possible but requires a 13-tile shortcharge. Requires: "h_trickyFrozenEnemyRunway"
{
"notable": "Double Frozen Zeb Runway"
}
{
"notable": "Double Frozen Zeb Item Collect Shinespark Escape"
}
"canShinechargeMovementTricky"
{
"canShineCharge": {
"usedTiles": 19,
"openEnd": 1
}
}
{
"shinespark": {
"frames": 20,
"excessFrames": 11
}
}
{
"or": [
"canWallJump",
"HiJump",
"SpaceJump",
"canIBJ",
"canSpringBallJumpMidAir",
"canSpringBallBombJump",
{
"and": [
"canCrouchJump",
{
"notable": "Precise Crouch Jump Down Grab"
}
]
}
]
}Collects items: 3 |
|

Entrance condition: {
"comeInShinecharged": {}
}Requires: "canShinechargeMovementTricky"
"canQuickDrop"
{
"shineChargeFrames": 40
}Exit condition: {
"leaveShinecharged": {}
}Unlocks doors: {"types":["super"],"requires":[]}
{"types":["missiles","powerbomb"],"requires":["never"]}Dev note: This requires jumping through the door, but we don't use 'comeInShinechargedJumping' because it's not required to come from an air environment. FIXME: clean up the way this kind of cross-room movement is expressed. |
From: 1
Left Door
To: 2
Bottom Sand Exit

Entrance condition: {
"comeInShinecharging": {
"length": 0,
"openEnd": 1
}
}Requires: "canShinechargeMovementTricky"
"canQuickDrop"
{
"or": [
{
"and": [
"Gravity",
{
"shineChargeFrames": 70
}
]
},
{
"shineChargeFrames": 80
}
]
}Exit condition: {
"leaveShinecharged": {}
}Unlocks doors: {"types":["super"],"requires":[]}
{"types":["missiles","powerbomb"],"requires":["never"]}Dev note: FIXME: It is possible to leave with more frames remaining by falling directly into the sand (e.g., with a down-back turnaround); but then it would not be possible to mid-air shinespark in the next room before landing, and we don't yet have a way to model that. |
|
Entrance condition: {
"comeInShinecharged": {}
}Requires: "canShinechargeMovementTricky"
"canQuickDrop"
{
"shineChargeFrames": 40
}Exit condition: {
"leaveShinecharged": {}
}Unlocks doors: {"types":["super"],"requires":[]}
{"types":["missiles","powerbomb"],"requires":["never"]}Dev note: This requires jumping through the door, but we don't use 'comeInShinechargedJumping' because it's not required to come from an air environment. FIXME: clean up the way this kind of cross-room movement is expressed. |
From: 3
Right Door
To: 2
Bottom Sand Exit

Entrance condition: {
"comeInShinecharging": {
"length": 0,
"openEnd": 1
}
}Requires: "canShinechargeMovementTricky"
"canQuickDrop"
{
"or": [
{
"and": [
"Gravity",
{
"shineChargeFrames": 70
}
]
},
{
"shineChargeFrames": 80
}
]
}Exit condition: {
"leaveShinecharged": {}
}Unlocks doors: {"types":["super"],"requires":[]}
{"types":["missiles","powerbomb"],"requires":["never"]}Dev note: FIXME: It is possible to leave with more frames remaining by falling directly into the sand (e.g., with a down-back turnaround); but then it would not be possible to mid-air shinespark in the next room before landing, and we don't yet have a way to model that. |
From: 2
Right Door
To: 1
Left Door

Entrance condition: {
"comeInShinecharging": {
"length": 6.5,
"openEnd": 1
}
}Requires: "Gravity"
"canShinechargeMovementTricky"
"canDownBack"
{
"shineChargeFrames": 130
}Exit condition: {
"leaveShinecharged": {}
}Unlocks doors: {"types":["super"],"requires":[]}
{"types":["missiles","powerbomb"],"requires":["never"]} |
From: 1
Left Door
To: 1
Left Door
With only 1 tile of runway in the other room, Samus should ideally start on the last pixel of runway with X subpixels of $3FFF or less. Run toward the door, releasing forward for exactly 1 frame and pressing it again on the last possible frame before the transition. Starting with X subpixels of $7FFF can also work (e.g., by simply backing against the door ledge, then jumping and turning around mid-air); in this case, Samus must advance 1 or 2 pixels with an arm pump before the transition (e.g., firing a shot or pressing and/or releasing an angle button), and the shinecharge will be gained slightly further away from the door. After gaining the shinecharge, continue holding forward in order to make Samus stand. Then turnaround spin jump back toward the door, and continue spin jumping to reach the transition with a shinecharge. Alternatively, with greater difficulty but saving some shinecharge frames, after performing the turnaround spin jump, briefly moonwalk back, then retain momentum by boomeranging forward (switching from pressing backward to pressing forward on the next frame), and arm pump to reach the door quickly. Ideal subpixels ($3FFF) can be achieved using one of several methods: 1) press forward against the door ledge (or a wall aligned with it); jump, and while mid-air, tap forward for exactly 1 frame to land with subpixels $BFFF, moonwalk back for exactly 1 frame to end with subpixels $3FFF. 2) press forward against the door ledge (from a platform below, assuming one exists) turn around (while on the ground), and moonwalk back two pixels, then jump and mid-air turnaround onto the ledge; if Samus jumped from the correct pixel but does not land on the ledge, then it was needed to moonwalk back 1 more frame; in this case it is possible to retry by doing a mid-air turnaround back onto the platform, and moonwalking back for 1 frame. 3) if X-Ray is available, press against the door ledge (from a platform below, assuming one exists) turn around (while on the ground), then jump and mid-air turnaround toward the door, and use X-Ray to turnaround in place away from the door; repeat this sequence 3 more times: jump, mid-air turnaround, X-Ray turnaround; then do one more jump and mid-air turnaround, high enough to land on the door ledge, and Samus should be in the correct position with subpixels $3FFF. Entrance condition: {
"comeInStutterShinecharging": {
"minTiles": 1
}
}Requires: {
"doorUnlockedAtNode": 2
}
"canPreciseStutterWaterShineCharge"
{
"or": [
"Wave",
"Spazer",
"Plasma",
{
"ammo": {
"type": "Missile",
"count": 2
}
},
{
"ammo": {
"type": "Super",
"count": 1
}
}
]
}
"canInsaneJump"
"canBeVeryPatient"
"canShinechargeMovementTricky"
{
"shineChargeFrames": 160
}Exit condition: {
"leaveShinecharged": {}
}Unlocks doors: {"nodeId":2,"types":["missiles","super"],"requires":[]}
{"nodeId":2,"types":["powerbomb"],"requires":["never"]}
{"types":["super"],"requires":[]}
{"types":["missiles","powerbomb"],"requires":["never"]} |
From: 1
Left Door
To: 1
Left Door
With only a runway of 2 tiles (open end) in the other room, the ideal timing for the stutter is to release forward for 3 frames, and repress forward on the last possible frame before the transition. Other timings can work, but will gain the shinecharge further from the door, leaving fewer shinecharge frames remaining. After gaining the shinecharge, continue holding forward in order to make Samus stand. Then turnaround spin jump back toward the door, and continue spin jumping to reach the transition with a shinecharge. Alternatively, with greater difficulty but saving some shinecharge frames, after performing the turnaround spin jump, briefly moonwalk back, then retain momentum by boomeranging forward (switching from pressing backward to pressing forward on the next frame), and arm pump to reach the door quickly. Entrance condition: {
"comeInStutterShinecharging": {
"minTiles": 2
}
}Requires: "canPreciseStutterWaterShineCharge"
{
"or": [
"Wave",
"Spazer",
"Plasma",
{
"ammo": {
"type": "Missile",
"count": 2
}
},
{
"ammo": {
"type": "Super",
"count": 1
}
}
]
}
"canShinechargeMovementTricky"
"canInsaneJump"
{
"shineChargeFrames": 150
}
{
"or": [
"canBeVeryPatient",
{
"shineChargeFrames": 15
}
]
}Exit condition: {
"leaveShinecharged": {}
}Unlocks doors: {"types":["super"],"requires":[]}
{"types":["missiles","powerbomb"],"requires":["never"]}Dev note: FIXME: The canBeVeryPatient requirement is for difficulty placement of the boomerang method; but the boomerang (or maybe specifically the moonwalk boomerang) should possibly be its own tech, and the same with rapid arm pumping. |
From: 1
Left Door
To: 1
Left Door
With only a runway of 3 tiles (open end) in the other room, the ideal timing for the stutter is to release forward for 3 or 4 frames, and repress forward on the last possible frame before the transition. Other timings can work, but will gain the shinecharge further from the door, leaving fewer shinecharge frames remaining. After gaining the shinecharge, continue holding forward in order to make Samus stand. Then turnaround spin jump back toward the door, and continue spin jumping to reach the transition with a shinecharge. Alternatively, with greater difficulty but saving some shinecharge frames, after performing the turnaround spin jump, briefly moonwalk back, then retain momentum by boomeranging forward (switching from pressing backward to pressing forward on the next frame), and arm pump to reach the door quickly. Entrance condition: {
"comeInStutterShinecharging": {
"minTiles": 3
}
}Requires: "canPreciseStutterWaterShineCharge"
{
"or": [
"Wave",
"Spazer",
"Plasma",
{
"ammo": {
"type": "Missile",
"count": 2
}
},
{
"ammo": {
"type": "Super",
"count": 1
}
}
]
}
"canShinechargeMovementTricky"
"canInsaneJump"
{
"shineChargeFrames": 145
}
{
"or": [
"canBeVeryPatient",
{
"shineChargeFrames": 10
}
]
}Exit condition: {
"leaveShinecharged": {}
}Unlocks doors: {"types":["super"],"requires":[]}
{"types":["missiles","powerbomb"],"requires":["never"]}Dev note: The same shinecharge frames could be achieved with a closed end runway (effective length of 2.4375), with a 3-frame stutter, but there doesn't appear to be any application. |
From: 1
Left Door
To: 1
Left Door
With only a runway of 4 tiles (open end) in the other room, the ideal timing for the stutter is to release forward for 4 frames, and repress forward on the last possible frame before the transition. It also works well to release forward for 3 frames and repress on the last possible frame. Other timings can also work, but may gain the shinecharge further from the door, leaving fewer shinecharge frames remaining. After gaining the shinecharge, continue holding forward in order to make Samus stand. Then turnaround spin jump back toward the door, and continue spin jumping to reach the transition with a shinecharge. Entrance condition: {
"comeInStutterShinecharging": {
"minTiles": 4
}
}Requires: "canPreciseStutterWaterShineCharge"
{
"or": [
"Wave",
"Spazer",
"Plasma",
{
"ammo": {
"type": "Missile",
"count": 2
}
},
{
"ammo": {
"type": "Super",
"count": 1
}
}
]
}
"canShinechargeMovementTricky"
"canInsaneJump"
{
"shineChargeFrames": 140
}
{
"or": [
"canBeVeryPatient",
{
"shineChargeFrames": 10
}
]
}Exit condition: {
"leaveShinecharged": {}
}Unlocks doors: {"types":["super"],"requires":[]}
{"types":["missiles","powerbomb"],"requires":["never"]} |
From: 1
Left Door
To: 1
Left Door
With a runway of 5 tiles (open end) in the other room, the ideal timing for the stutter is to release forward for 5 frames, and repress forward on the last possible frame before the transition. Other timings can work, but will gain the shinecharge further from the door, leaving fewer shinecharge frames remaining. After gaining the shinecharge, continue holding forward in order to make Samus stand. Then turnaround spin jump back toward the door, and continue spin jumping to reach the transition with a shinecharge. Entrance condition: {
"comeInStutterShinecharging": {
"minTiles": 5
}
}Requires: "canPreciseStutterWaterShineCharge"
{
"or": [
"Wave",
"Spazer",
"Plasma",
{
"ammo": {
"type": "Missile",
"count": 2
}
},
{
"ammo": {
"type": "Super",
"count": 1
}
}
]
}
"canShinechargeMovementTricky"
"canInsaneJump"
{
"shineChargeFrames": 130
}
{
"or": [
"canBeVeryPatient",
{
"shineChargeFrames": 15
}
]
}Exit condition: {
"leaveShinecharged": {}
}Unlocks doors: {"types":["super"],"requires":[]}
{"types":["missiles","powerbomb"],"requires":["never"]} |
From: 2
Right Door
To: 1
Left Door
Entrance condition: {
"comeInShinecharged": {}
}Requires: {
"or": [
{
"and": [
"Gravity",
"canShinechargeMovementTricky",
{
"shineChargeFrames": 10
},
{
"shinespark": {
"frames": 21,
"excessFrames": 0
}
}
]
},
{
"and": [
"Gravity",
"canShinechargeMovementComplex",
{
"shineChargeFrames": 30
},
{
"shinespark": {
"frames": 17,
"excessFrames": 0
}
}
]
},
{
"and": [
"canShinechargeMovementTricky",
"canInsaneJump",
{
"shineChargeFrames": 20
},
{
"shinespark": {
"frames": 21,
"excessFrames": 0
}
}
]
},
{
"and": [
{
"shineChargeFrames": 40
},
{
"shinespark": {
"frames": 19,
"excessFrames": 0
}
}
]
}
]
}Exit condition: {
"leaveWithSpark": {
"position": "top"
}
}Unlocks doors: {"types":["super"],"requires":[]}
{"types":["missiles","powerbomb"],"requires":["never"]} |
From: 2
Right Door
To: 2
Right Door
With only 1 tile of runway in the other room, Samus should ideally start on the last pixel of runway with X subpixels of $3FFF or less. Run toward the door, releasing forward for exactly 1 frame and pressing it again on the last possible frame before the transition. Starting with X subpixels of $7FFF can also work (e.g., by simply backing against the door ledge, then jumping and turning around mid-air); in this case, Samus must advance 1 or 2 pixels with an arm pump before the transition (e.g., firing a shot or pressing and/or releasing an angle button), and the shinecharge will be gained slightly further away from the door. After gaining the shinecharge, continue holding forward in order to make Samus stand. Then turnaround spin jump back toward the door, and continue spin jumping to reach the transition with a shinecharge. Alternatively, with greater difficulty but saving some shinecharge frames, after performing the turnaround spin jump, briefly moonwalk back, then retain momentum by boomeranging forward (switching from pressing backward to pressing forward on the next frame), and arm pump to reach the door quickly. Ideal subpixels ($3FFF) can be achieved using one of several methods: 1) press forward against the door ledge (or a wall aligned with it); jump, and while mid-air, tap forward for exactly 1 frame to land with subpixels $BFFF, moonwalk back for exactly 1 frame to end with subpixels $3FFF. 2) press forward against the door ledge (from a platform below, assuming one exists) turn around (while on the ground), and moonwalk back two pixels, then jump and mid-air turnaround onto the ledge; if Samus jumped from the correct pixel but does not land on the ledge, then it was needed to moonwalk back 1 more frame; in this case it is possible to retry by doing a mid-air turnaround back onto the platform, and moonwalking back for 1 frame. 3) if X-Ray is available, press against the door ledge (from a platform below, assuming one exists) turn around (while on the ground), then jump and mid-air turnaround toward the door, and use X-Ray to turnaround in place away from the door; repeat this sequence 3 more times: jump, mid-air turnaround, X-Ray turnaround; then do one more jump and mid-air turnaround, high enough to land on the door ledge, and Samus should be in the correct position with subpixels $3FFF. Entrance condition: {
"comeInStutterShinecharging": {
"minTiles": 1
}
}Requires: {
"doorUnlockedAtNode": 1
}
"canPreciseStutterWaterShineCharge"
"canInsaneJump"
"canBeVeryPatient"
"canShinechargeMovementTricky"
{
"shineChargeFrames": 160
}Exit condition: {
"leaveShinecharged": {}
}Unlocks doors: {"nodeId":1,"types":["missiles","super"],"requires":[]}
{"nodeId":1,"types":["powerbomb"],"requires":["never"]}
{"types":["super"],"requires":[]}
{"types":["missiles","powerbomb"],"requires":["never"]} |
From: 2
Right Door
To: 2
Right Door
With only a runway of 2 tiles (open end) in the other room, the ideal timing for the stutter is to release forward for 3 frames, and repress forward on the last possible frame before the transition. Other timings can work, but will gain the shinecharge further from the door, leaving fewer shinecharge frames remaining. After gaining the shinecharge, continue holding forward in order to make Samus stand. Then turnaround spin jump back toward the door, and continue spin jumping to reach the transition with a shinecharge. Alternatively, with greater difficulty but saving some shinecharge frames, after performing the turnaround spin jump, briefly moonwalk back, then retain momentum by boomeranging forward (switching from pressing backward to pressing forward on the next frame), and arm pump to reach the door quickly. Entrance condition: {
"comeInStutterShinecharging": {
"minTiles": 2
}
}Requires: "canPreciseStutterWaterShineCharge"
"canShinechargeMovementTricky"
"canInsaneJump"
{
"shineChargeFrames": 150
}
{
"or": [
"canBeVeryPatient",
{
"shineChargeFrames": 15
}
]
}Exit condition: {
"leaveShinecharged": {}
}Unlocks doors: {"types":["super"],"requires":[]}
{"types":["missiles","powerbomb"],"requires":["never"]}Dev note: FIXME: The canBeVeryPatient requirement is for difficulty placement of the boomerang method; but the boomerang (or maybe specifically the moonwalk boomerang) should possibly be its own tech, and the same with rapid arm pumping. |
From: 2
Right Door
To: 2
Right Door
With only a runway of 3 tiles (open end) in the other room, the ideal timing for the stutter is to release forward for 3 or 4 frames, and repress forward on the last possible frame before the transition. Other timings can work, but will gain the shinecharge further from the door, leaving fewer shinecharge frames remaining. After gaining the shinecharge, continue holding forward in order to make Samus stand. Then turnaround spin jump back toward the door, and continue spin jumping to reach the transition with a shinecharge. Alternatively, with greater difficulty but saving some shinecharge frames, after performing the turnaround spin jump, briefly moonwalk back, then retain momentum by boomeranging forward (switching from pressing backward to pressing forward on the next frame), and arm pump to reach the door quickly. Entrance condition: {
"comeInStutterShinecharging": {
"minTiles": 3
}
}Requires: "canPreciseStutterWaterShineCharge"
"canShinechargeMovementTricky"
"canInsaneJump"
{
"shineChargeFrames": 145
}
{
"or": [
"canBeVeryPatient",
{
"shineChargeFrames": 10
}
]
}Exit condition: {
"leaveShinecharged": {}
}Unlocks doors: {"types":["super"],"requires":[]}
{"types":["missiles","powerbomb"],"requires":["never"]}Dev note: The same shinecharge frames could be achieved with a closed end runway (effective length of 2.4375), with a 3-frame stutter, but there doesn't appear to be any application. |
From: 2
Right Door
To: 2
Right Door
With only a runway of 4 tiles (open end) in the other room, the ideal timing for the stutter is to release forward for 4 frames, and repress forward on the last possible frame before the transition. It also works well to release forward for 3 frames and repress on the last possible frame. Other timings can also work, but may gain the shinecharge further from the door, leaving fewer shinecharge frames remaining. After gaining the shinecharge, continue holding forward in order to make Samus stand. Then turnaround spin jump back toward the door, and continue spin jumping to reach the transition with a shinecharge. Entrance condition: {
"comeInStutterShinecharging": {
"minTiles": 4
}
}Requires: "canPreciseStutterWaterShineCharge"
"canShinechargeMovementTricky"
"canInsaneJump"
{
"shineChargeFrames": 140
}
{
"or": [
"canBeVeryPatient",
{
"shineChargeFrames": 10
}
]
}Exit condition: {
"leaveShinecharged": {}
}Unlocks doors: {"types":["super"],"requires":[]}
{"types":["missiles","powerbomb"],"requires":["never"]} |
From: 2
Right Door
To: 2
Right Door
With a runway of 5 tiles (open end) in the other room, the ideal timing for the stutter is to release forward for 5 frames, and repress forward on the last possible frame before the transition. Other timings can work, but will gain the shinecharge further from the door, leaving fewer shinecharge frames remaining. After gaining the shinecharge, continue holding forward in order to make Samus stand. Then turnaround spin jump back toward the door, and continue spin jumping to reach the transition with a shinecharge. Entrance condition: {
"comeInStutterShinecharging": {
"minTiles": 5
}
}Requires: "canPreciseStutterWaterShineCharge"
"canShinechargeMovementTricky"
"canInsaneJump"
{
"shineChargeFrames": 130
}
{
"or": [
"canBeVeryPatient",
{
"shineChargeFrames": 15
}
]
}Exit condition: {
"leaveShinecharged": {}
}Unlocks doors: {"types":["super"],"requires":[]}
{"types":["missiles","powerbomb"],"requires":["never"]} |
From: 1
Left Door
To: 1
Left Door
With only 1 tile of runway in the other room, Samus should ideally start on the last pixel of runway with X subpixels of $3FFF or less. Run toward the door, releasing forward for exactly 1 frame and pressing it again on the last possible frame before the transition. Starting with X subpixels of $7FFF can also work (e.g., by simply backing against the door ledge, then jumping and turning around mid-air); in this case, Samus must advance 1 or 2 pixels with an arm pump before the transition (e.g., firing a shot or pressing and/or releasing an angle button), and the shinecharge will be gained slightly further away from the door. After gaining the shinecharge, continue holding forward in order to make Samus stand. Then turnaround spin jump back toward the door, and continue spin jumping to reach the transition with a shinecharge. Alternatively, with greater difficulty but saving some shinecharge frames, after performing the turnaround spin jump, briefly moonwalk back, then retain momentum by boomeranging forward (switching from pressing backward to pressing forward on the next frame), and arm pump to reach the door quickly. Ideal subpixels ($3FFF) can be achieved using one of several methods: 1) press forward against the door ledge (or a wall aligned with it); jump, and while mid-air, tap forward for exactly 1 frame to land with subpixels $BFFF, moonwalk back for exactly 1 frame to end with subpixels $3FFF. 2) press forward against the door ledge (from a platform below, assuming one exists) turn around (while on the ground), and moonwalk back two pixels, then jump and mid-air turnaround onto the ledge; if Samus jumped from the correct pixel but does not land on the ledge, then it was needed to moonwalk back 1 more frame; in this case it is possible to retry by doing a mid-air turnaround back onto the platform, and moonwalking back for 1 frame. 3) if X-Ray is available, press against the door ledge (from a platform below, assuming one exists) turn around (while on the ground), then jump and mid-air turnaround toward the door, and use X-Ray to turnaround in place away from the door; repeat this sequence 3 more times: jump, mid-air turnaround, X-Ray turnaround; then do one more jump and mid-air turnaround, high enough to land on the door ledge, and Samus should be in the correct position with subpixels $3FFF. Entrance condition: {
"comeInStutterShinecharging": {
"minTiles": 1
}
}Requires: {
"doorUnlockedAtNode": 2
}
"canPreciseStutterWaterShineCharge"
"canInsaneJump"
"canBeVeryPatient"
"canShinechargeMovementTricky"
{
"shineChargeFrames": 160
}Exit condition: {
"leaveShinecharged": {}
}Unlocks doors: {"nodeId":2,"types":["missiles","super"],"requires":[]}
{"nodeId":2,"types":["powerbomb"],"requires":["never"]}
{"types":["super"],"requires":[]}
{"types":["missiles","powerbomb"],"requires":["never"]} |
From: 1
Left Door
To: 1
Left Door
With only a runway of 2 tiles (open end) in the other room, the ideal timing for the stutter is to release forward for 3 frames, and repress forward on the last possible frame before the transition. Other timings can work, but will gain the shinecharge further from the door, leaving fewer shinecharge frames remaining. After gaining the shinecharge, continue holding forward in order to make Samus stand. Then turnaround spin jump back toward the door, and continue spin jumping to reach the transition with a shinecharge. Alternatively, with greater difficulty but saving some shinecharge frames, after performing the turnaround spin jump, briefly moonwalk back, then retain momentum by boomeranging forward (switching from pressing backward to pressing forward on the next frame), and arm pump to reach the door quickly. Entrance condition: {
"comeInStutterShinecharging": {
"minTiles": 2
}
}Requires: "canPreciseStutterWaterShineCharge"
"canShinechargeMovementTricky"
"canInsaneJump"
{
"shineChargeFrames": 150
}
{
"or": [
"canBeVeryPatient",
{
"shineChargeFrames": 15
}
]
}Exit condition: {
"leaveShinecharged": {}
}Unlocks doors: {"types":["super"],"requires":[]}
{"types":["missiles","powerbomb"],"requires":["never"]}Dev note: FIXME: The canBeVeryPatient requirement is for difficulty placement of the boomerang method; but the boomerang (or maybe specifically the moonwalk boomerang) should possibly be its own tech, and the same with rapid arm pumping. |
From: 1
Left Door
To: 1
Left Door
With only a runway of 3 tiles (open end) in the other room, the ideal timing for the stutter is to release forward for 3 or 4 frames, and repress forward on the last possible frame before the transition. Other timings can work, but will gain the shinecharge further from the door, leaving fewer shinecharge frames remaining. After gaining the shinecharge, continue holding forward in order to make Samus stand. Then turnaround spin jump back toward the door, and continue spin jumping to reach the transition with a shinecharge. Alternatively, with greater difficulty but saving some shinecharge frames, after performing the turnaround spin jump, briefly moonwalk back, then retain momentum by boomeranging forward (switching from pressing backward to pressing forward on the next frame), and arm pump to reach the door quickly. Entrance condition: {
"comeInStutterShinecharging": {
"minTiles": 3
}
}Requires: "canPreciseStutterWaterShineCharge"
"canShinechargeMovementTricky"
"canInsaneJump"
{
"shineChargeFrames": 145
}
{
"or": [
"canBeVeryPatient",
{
"shineChargeFrames": 10
}
]
}Exit condition: {
"leaveShinecharged": {}
}Unlocks doors: {"types":["super"],"requires":[]}
{"types":["missiles","powerbomb"],"requires":["never"]}Dev note: The same shinecharge frames could be achieved with a closed end runway (effective length of 2.4375), with a 3-frame stutter, but there doesn't appear to be any application. |
From: 1
Left Door
To: 1
Left Door
With only a runway of 4 tiles (open end) in the other room, the ideal timing for the stutter is to release forward for 4 frames, and repress forward on the last possible frame before the transition. It also works well to release forward for 3 frames and repress on the last possible frame. Other timings can also work, but may gain the shinecharge further from the door, leaving fewer shinecharge frames remaining. After gaining the shinecharge, continue holding forward in order to make Samus stand. Then turnaround spin jump back toward the door, and continue spin jumping to reach the transition with a shinecharge. Entrance condition: {
"comeInStutterShinecharging": {
"minTiles": 4
}
}Requires: "canPreciseStutterWaterShineCharge"
"canShinechargeMovementTricky"
"canInsaneJump"
{
"shineChargeFrames": 140
}
{
"or": [
"canBeVeryPatient",
{
"shineChargeFrames": 10
}
]
}Exit condition: {
"leaveShinecharged": {}
}Unlocks doors: {"types":["super"],"requires":[]}
{"types":["missiles","powerbomb"],"requires":["never"]} |
From: 1
Left Door
To: 1
Left Door
With a runway of 5 tiles (open end) in the other room, the ideal timing for the stutter is to release forward for 5 frames, and repress forward on the last possible frame before the transition. Other timings can work, but will gain the shinecharge further from the door, leaving fewer shinecharge frames remaining. After gaining the shinecharge, continue holding forward in order to make Samus stand. Then turnaround spin jump back toward the door, and continue spin jumping to reach the transition with a shinecharge. Entrance condition: {
"comeInStutterShinecharging": {
"minTiles": 5
}
}Requires: "canPreciseStutterWaterShineCharge"
"canShinechargeMovementTricky"
"canInsaneJump"
{
"shineChargeFrames": 130
}
{
"or": [
"canBeVeryPatient",
{
"shineChargeFrames": 15
}
]
}Exit condition: {
"leaveShinecharged": {}
}Unlocks doors: {"types":["super"],"requires":[]}
{"types":["missiles","powerbomb"],"requires":["never"]} |
From: 1
Left Door
To: 3
Top Door


Entrance condition: {
"comeInShinecharging": {
"length": 3,
"openEnd": 0
}
}Requires: "Gravity"
"ScrewAttack"
"canShinechargeMovementTricky"
{
"or": [
{
"and": [
"HiJump",
{
"shineChargeFrames": 130
}
]
},
{
"shineChargeFrames": 145
}
]
}Exit condition: {
"leaveShinecharged": {}
}Unlocks doors: {"types":["super"],"requires":[]}
{"types":["missiles","powerbomb"],"requires":["never"]}Dev note: FIXME: It can be possible to use a longer runway, or a stutter shinecharge with Gravity re-equip, with a cost of some shinecharge frames. |
From: 2
Right Door
To: 2
Right Door
With only 1 tile of runway in the other room, Samus should ideally start on the last pixel of runway with X subpixels of $3FFF or less. Run toward the door, releasing forward for exactly 1 frame and pressing it again on the last possible frame before the transition. Starting with X subpixels of $7FFF can also work (e.g., by simply backing against the door ledge, then jumping and turning around mid-air); in this case, Samus must advance 1 or 2 pixels with an arm pump before the transition (e.g., firing a shot or pressing and/or releasing an angle button), and the shinecharge will be gained slightly further away from the door. After gaining the shinecharge, continue holding forward in order to make Samus stand. Then turnaround spin jump back toward the door, and continue spin jumping to reach the transition with a shinecharge. Alternatively, with greater difficulty but saving some shinecharge frames, after performing the turnaround spin jump, briefly moonwalk back, then retain momentum by boomeranging forward (switching from pressing backward to pressing forward on the next frame), and arm pump to reach the door quickly. Ideal subpixels ($3FFF) can be achieved using one of several methods: 1) press forward against the door ledge (or a wall aligned with it); jump, and while mid-air, tap forward for exactly 1 frame to land with subpixels $BFFF, moonwalk back for exactly 1 frame to end with subpixels $3FFF. 2) press forward against the door ledge (from a platform below, assuming one exists) turn around (while on the ground), and moonwalk back two pixels, then jump and mid-air turnaround onto the ledge; if Samus jumped from the correct pixel but does not land on the ledge, then it was needed to moonwalk back 1 more frame; in this case it is possible to retry by doing a mid-air turnaround back onto the platform, and moonwalking back for 1 frame. 3) if X-Ray is available, press against the door ledge (from a platform below, assuming one exists) turn around (while on the ground), then jump and mid-air turnaround toward the door, and use X-Ray to turnaround in place away from the door; repeat this sequence 3 more times: jump, mid-air turnaround, X-Ray turnaround; then do one more jump and mid-air turnaround, high enough to land on the door ledge, and Samus should be in the correct position with subpixels $3FFF. Entrance condition: {
"comeInStutterShinecharging": {
"minTiles": 1
}
}Requires: {
"doorUnlockedAtNode": 1
}
"canPreciseStutterWaterShineCharge"
"canInsaneJump"
"canBeVeryPatient"
"canShinechargeMovementTricky"
{
"shineChargeFrames": 160
}Exit condition: {
"leaveShinecharged": {}
}Unlocks doors: {"nodeId":1,"types":["missiles","super"],"requires":[]}
{"nodeId":1,"types":["powerbomb"],"requires":["never"]}
{"types":["super"],"requires":[]}
{"types":["missiles","powerbomb"],"requires":["never"]} |
From: 2
Right Door
To: 2
Right Door
With only a runway of 2 tiles (open end) in the other room, the ideal timing for the stutter is to release forward for 3 frames, and repress forward on the last possible frame before the transition. Other timings can work, but will gain the shinecharge further from the door, leaving fewer shinecharge frames remaining. After gaining the shinecharge, continue holding forward in order to make Samus stand. Then turnaround spin jump back toward the door, and continue spin jumping to reach the transition with a shinecharge. Alternatively, with greater difficulty but saving some shinecharge frames, after performing the turnaround spin jump, briefly moonwalk back, then retain momentum by boomeranging forward (switching from pressing backward to pressing forward on the next frame), and arm pump to reach the door quickly. Entrance condition: {
"comeInStutterShinecharging": {
"minTiles": 2
}
}Requires: "canPreciseStutterWaterShineCharge"
"canShinechargeMovementTricky"
"canInsaneJump"
{
"shineChargeFrames": 150
}
{
"or": [
"canBeVeryPatient",
{
"shineChargeFrames": 15
}
]
}Exit condition: {
"leaveShinecharged": {}
}Unlocks doors: {"types":["super"],"requires":[]}
{"types":["missiles","powerbomb"],"requires":["never"]}Dev note: FIXME: The canBeVeryPatient requirement is for difficulty placement of the boomerang method; but the boomerang (or maybe specifically the moonwalk boomerang) should possibly be its own tech, and the same with rapid arm pumping. |
From: 2
Right Door
To: 2
Right Door
With only a runway of 3 tiles (open end) in the other room, the ideal timing for the stutter is to release forward for 3 or 4 frames, and repress forward on the last possible frame before the transition. Other timings can work, but will gain the shinecharge further from the door, leaving fewer shinecharge frames remaining. After gaining the shinecharge, continue holding forward in order to make Samus stand. Then turnaround spin jump back toward the door, and continue spin jumping to reach the transition with a shinecharge. Alternatively, with greater difficulty but saving some shinecharge frames, after performing the turnaround spin jump, briefly moonwalk back, then retain momentum by boomeranging forward (switching from pressing backward to pressing forward on the next frame), and arm pump to reach the door quickly. Entrance condition: {
"comeInStutterShinecharging": {
"minTiles": 3
}
}Requires: "canPreciseStutterWaterShineCharge"
"canShinechargeMovementTricky"
"canInsaneJump"
{
"shineChargeFrames": 145
}
{
"or": [
"canBeVeryPatient",
{
"shineChargeFrames": 10
}
]
}Exit condition: {
"leaveShinecharged": {}
}Unlocks doors: {"types":["super"],"requires":[]}
{"types":["missiles","powerbomb"],"requires":["never"]}Dev note: The same shinecharge frames could be achieved with a closed end runway (effective length of 2.4375), with a 3-frame stutter, but there doesn't appear to be any application. |
From: 2
Right Door
To: 2
Right Door
With only a runway of 4 tiles (open end) in the other room, the ideal timing for the stutter is to release forward for 4 frames, and repress forward on the last possible frame before the transition. It also works well to release forward for 3 frames and repress on the last possible frame. Other timings can also work, but may gain the shinecharge further from the door, leaving fewer shinecharge frames remaining. After gaining the shinecharge, continue holding forward in order to make Samus stand. Then turnaround spin jump back toward the door, and continue spin jumping to reach the transition with a shinecharge. Entrance condition: {
"comeInStutterShinecharging": {
"minTiles": 4
}
}Requires: "canPreciseStutterWaterShineCharge"
"canShinechargeMovementTricky"
"canInsaneJump"
{
"shineChargeFrames": 140
}
{
"or": [
"canBeVeryPatient",
{
"shineChargeFrames": 10
}
]
}Exit condition: {
"leaveShinecharged": {}
}Unlocks doors: {"types":["super"],"requires":[]}
{"types":["missiles","powerbomb"],"requires":["never"]} |
From: 2
Right Door
To: 2
Right Door
With a runway of 5 tiles (open end) in the other room, the ideal timing for the stutter is to release forward for 5 frames, and repress forward on the last possible frame before the transition. Other timings can work, but will gain the shinecharge further from the door, leaving fewer shinecharge frames remaining. After gaining the shinecharge, continue holding forward in order to make Samus stand. Then turnaround spin jump back toward the door, and continue spin jumping to reach the transition with a shinecharge. Entrance condition: {
"comeInStutterShinecharging": {
"minTiles": 5
}
}Requires: "canPreciseStutterWaterShineCharge"
"canShinechargeMovementTricky"
"canInsaneJump"
{
"shineChargeFrames": 130
}
{
"or": [
"canBeVeryPatient",
{
"shineChargeFrames": 15
}
]
}Exit condition: {
"leaveShinecharged": {}
}Unlocks doors: {"types":["super"],"requires":[]}
{"types":["missiles","powerbomb"],"requires":["never"]} |
From: 2
Right Door
To: 3
Top Door

Entrance condition: {
"comeInShinecharging": {
"length": 3,
"openEnd": 0
}
}Requires: "Gravity"
"ScrewAttack"
"canShinechargeMovementTricky"
{
"or": [
{
"and": [
"HiJump",
{
"shineChargeFrames": 130
}
]
},
{
"shineChargeFrames": 145
}
]
}Exit condition: {
"leaveShinecharged": {}
}Unlocks doors: {"types":["super"],"requires":[]}
{"types":["missiles","powerbomb"],"requires":["never"]}Dev note: FIXME: It can be possible to use a longer runway, or a stutter shinecharge with Gravity re-equip, with a cost of some shinecharge frames. |
|
Entrance condition: {
"comeInShinecharged": {},
"comesThroughToilet": "any"
}Requires: "Gravity"
"ScrewAttack"
"canShinechargeMovementTricky"
{
"shineChargeFrames": 160
}
{
"shinespark": {
"frames": 6,
"excessFrames": 0
}
}Exit condition: {
"leaveWithSpark": {}
}Unlocks doors: {"types":["super"],"requires":[]}
{"types":["missiles","powerbomb"],"requires":["never"]} |
|

Entrance condition: {
"comeInShinecharged": {},
"comesThroughToilet": "any"
}Requires: "Gravity"
"ScrewAttack"
"canShinechargeMovementTricky"
{
"shineChargeFrames": 160
}
{
"shinespark": {
"frames": 6,
"excessFrames": 0
}
}Exit condition: {
"leaveWithSpark": {}
}Unlocks doors: {"types":["super"],"requires":[]}
{"types":["missiles","powerbomb"],"requires":["never"]} |
From: 1
West Leg Left Door
To: 2
East Leg Right Door
Preselect Grapple and be ready to use it when entering the room. Release up or angle up before releasing Grapple so the shinespark does not activate instantly. Fall into the sand below the Grapple block with Gravity disabled. Sink into the sand slightly before shinesparking diagonally. Use the windup frames for a shinespark to extend the duration timer. Entrance condition: {
"comeInShinecharged": {}
}Requires: {
"shineChargeFrames": 100
}
{
"notable": "Shinespark"
}
"h_navigateUnderwater"
"canShinechargeMovementTricky"
"canPlayInSand"
"Grapple"
{
"or": [
{
"shinespark": {
"frames": 63,
"excessFrames": 0
}
},
{
"and": [
{
"shinespark": {
"frames": 63,
"excessFrames": 9
}
},
{
"enemyDamage": {
"enemy": "Menu",
"type": "contact",
"hits": 1
}
}
]
}
]
} |
From: 3
West Leg Right Door
To: 2
East Leg Right Door
Preselect Grapple and be ready to use it when entering the room. Release up or angle up before releasing Grapple so the shinespark does not activate instantly. Fall into the sand below the Grapple block with Gravity disabled. Sink into the sand slightly before shinesparking diagonally. Use the windup frames for a shinespark to extend the duration timer. Entrance condition: {
"comeInShinecharged": {}
}Requires: {
"shineChargeFrames": 100
}
{
"notable": "Shinespark"
}
"h_navigateUnderwater"
"canShinechargeMovementTricky"
"canPlayInSand"
"Grapple"
{
"or": [
{
"shinespark": {
"frames": 63,
"excessFrames": 0
}
},
{
"and": [
{
"shinespark": {
"frames": 63,
"excessFrames": 9
}
},
{
"enemyDamage": {
"enemy": "Menu",
"type": "contact",
"hits": 1
}
}
]
}
]
} |
|
Gain a shinecharge by running right-to-left on the leftmost runway. Then run toward the right, jumping twice before sparking mid-air. Requires: {
"obstaclesCleared": [
"A"
]
}
"canShinechargeMovementTricky"
{
"canShineCharge": {
"usedTiles": 15,
"openEnd": 0
}
}
{
"shinespark": {
"frames": 35,
"excessFrames": 0
}
}Exit condition: {
"leaveWithSpark": {}
}Unlocks doors: {"types":["ammo"],"requires":[]} |
|


Once the camera unlocks, back up against the right bubble. Start running once the Big Boy attaches, and begin wind-up before Samus's energy reaches 1. Entrance condition: {
"comeInNormally": {}
}Requires: "canShinechargeMovementTricky"
{
"notable": "Baby Drain Spark Interrupt"
}
{
"or": [
{
"resourceAvailable": [
{
"type": "Energy",
"count": 799
}
]
},
{
"and": [
"Varia",
{
"resourceAvailable": [
{
"type": "Energy",
"count": 399
}
]
}
]
}
]
}
{
"or": [
{
"canShineCharge": {
"usedTiles": 18,
"openEnd": 0
}
},
{
"useFlashSuit": {}
}
]
}
{
"tech": "canRModeSparkInterrupt"
}
{
"shinespark": {
"frames": 0,
"excessFrames": 0
}
}
{
"gainBlueSuit": {}
}
{
"resourceAtMost": [
{
"type": "RegularEnergy",
"count": 1
}
]
}Clears obstacles: A |
|
If Metroids are alive, minimizing damage from them requires tricky movement to manipulate them: the moonfalling option must be done starting from almost a tile to the left of the opening; likewise, the morphing option should soft-morph about a tile to the left of the opening. Entrance condition: {
"comeInShinecharged": {}
}Requires: {
"shineChargeFrames": 140
}
"canShinechargeMovementTricky"
{
"or": [
"canMoonfall",
"Morph",
"canTwoTileSqueeze"
]
}
{
"or": [
{
"or": [
"f_KilledMetroidRoom2",
{
"obstaclesCleared": [
"f_KilledMetroidRoom2"
]
}
]
},
{
"metroidFrames": 100
},
{
"and": [
"canInsaneJump",
"canTrickyDodgeEnemies",
{
"metroidFrames": 10
}
]
}
]
}Exit condition: {
"leaveShinecharged": {}
}Unlocks doors: {"types":["powerbomb"],"requires":[]}
{"types":["missiles","super"],"requires":["never"]}Dev note: FIXME: Unmorphing and downbacking through the gap can leave with more frames remaining but is more difficult. |
From: 1
Top Right Door
To: 2
Bottom Right Door
Entrance condition: {
"comeInShinecharged": {}
}Requires: {
"shineChargeFrames": 102
}
"canShinechargeMovementTricky"
{
"shinespark": {
"frames": 22,
"excessFrames": 0
}
}
{
"or": [
{
"or": [
"f_KilledMetroidRoom2",
{
"obstaclesCleared": [
"f_KilledMetroidRoom2"
]
}
]
},
"canMetroidAvoid"
]
}Exit condition: {
"leaveWithSpark": {}
}Unlocks doors: {"types":["super"],"requires":[]}
{"types":["missiles","powerbomb"],"requires":["never"]} |
From: 1
Top Right Door
To: 2
Bottom Right Door
Entrance condition: {
"comeInShinecharging": {
"length": 2,
"openEnd": 1
}
}Requires: "canShinechargeMovementTricky"
{
"or": [
"canMoonfall",
"Morph"
]
}
{
"or": [
{
"or": [
"f_KilledMetroidRoom2",
{
"obstaclesCleared": [
"f_KilledMetroidRoom2"
]
}
]
},
{
"metroidFrames": 25
}
]
}
{
"shineChargeFrames": 130
}Exit condition: {
"leaveShinecharged": {}
}Unlocks doors: {"types":["powerbomb"],"requires":[]}
{"types":["missiles","super"],"requires":["never"]}Dev note: FIXME: refine this and add a canTwoTileSqueeze option. |
From: 1
Top Right Door
To: 2
Bottom Right Door
Entrance condition: {
"comeInShinecharging": {
"length": 2,
"openEnd": 1
}
}Requires: "canShinechargeMovementTricky"
{
"shinespark": {
"frames": 7,
"excessFrames": 0
}
}
{
"or": [
{
"or": [
"f_KilledMetroidRoom2",
{
"obstaclesCleared": [
"f_KilledMetroidRoom2"
]
}
]
},
"canMetroidAvoid"
]
}Exit condition: {
"leaveWithSpark": {}
}Unlocks doors: {"types":["super"],"requires":[]}
{"types":["missiles","powerbomb"],"requires":["never"]} |
|
Wall jump up the right wall and use a mid-air wiggle to reduce the height of Samus' hitbox after the walljump, to be able to fit through the gap without morphing. Entrance condition: {
"comeInShinecharged": {}
}Requires: {
"shineChargeFrames": 120
}
"canWallJump"
"canMidairWiggle"
"canShinechargeMovementTricky"
{
"or": [
{
"or": [
"f_KilledMetroidRoom2",
{
"obstaclesCleared": [
"f_KilledMetroidRoom2"
]
}
]
},
"canMetroidAvoid"
]
}Exit condition: {
"leaveShinecharged": {}
}Unlocks doors: {"types":["super"],"requires":[]}
{"types":["missiles","powerbomb"],"requires":["never"]} |
From: 2
Bottom Right Door
To: 1
Top Right Door
Go up the left side of the room and spark out the top door. If tanking Metroid damage, then the Metroid can block the shot to open the door; to avoid this, either jump toward the door with dash speed or use Plasma, Wave, or a Missile. Do a big initial jump to land in the middle of the lower platform, and jump before running more than 2.75 tiles, to avoid a Speed Booster dropoff in jump height. Entrance condition: {
"comeInShinecharged": {}
}Requires: {
"shineChargeFrames": 130
}
"canTrickyDashJump"
"canShinechargeMovementTricky"
{
"or": [
{
"and": [
{
"or": [
{
"or": [
"f_KilledMetroidRoom2",
{
"obstaclesCleared": [
"f_KilledMetroidRoom2"
]
}
]
},
"ScrewAttack",
{
"and": [
{
"metroidFrames": 145
},
{
"or": [
"Plasma",
"Wave",
{
"ammo": {
"type": "Missile",
"count": 1
}
}
]
}
]
}
]
},
{
"shinespark": {
"frames": 13,
"excessFrames": 0
}
}
]
},
{
"and": [
{
"metroidFrames": 150
},
{
"shineChargeFrames": 10
},
{
"shinespark": {
"frames": 7,
"excessFrames": 0
}
}
]
}
]
}Exit condition: {
"leaveWithSpark": {}
}Unlocks doors: {
"types": [
"super"
],
"requires": [
{
"or": [
{
"or": [
"f_KilledMetroidRoom2",
{
"obstaclesCleared": [
"f_KilledMetroidRoom2"
]
}
]
},
"ScrewAttack"
]
}
]
}
{"types":["missiles","powerbomb"],"requires":["never"]} |
From: 2
Bottom Right Door
To: 1
Top Right Door
Wall jump up the right wall and use a mid-air wiggle to reduce the height of Samus' hitbox after the wall jump, to be able to fit through the gap without morphing. Shoot the door open and spark out. Entrance condition: {
"comeInShinecharged": {}
}Requires: {
"shineChargeFrames": 105
}
"canWallJump"
"canMidairWiggle"
"canShinechargeMovementTricky"
{
"shinespark": {
"frames": 5,
"excessFrames": 0
}
}
{
"or": [
{
"or": [
"f_KilledMetroidRoom2",
{
"obstaclesCleared": [
"f_KilledMetroidRoom2"
]
}
]
},
"canMetroidAvoid"
]
}Exit condition: {
"leaveWithSpark": {}
}Unlocks doors: {"types":["super"],"requires":[]}
{"types":["missiles","powerbomb"],"requires":["never"]} |
From: 2
Bottom Right Door
To: 1
Top Right Door
Spinjump into the opening below the top door. Entrance condition: {
"comeInShinecharging": {
"length": 2,
"openEnd": 0
}
}Requires: "canShinechargeMovementComplex"
"HiJump"
"canCarefulJump"
{
"or": [
{
"or": [
"f_KilledMetroidRoom2",
{
"obstaclesCleared": [
"f_KilledMetroidRoom2"
]
}
]
},
{
"and": [
"canMetroidAvoid",
"canShinechargeMovementTricky"
]
}
]
}
{
"shineChargeFrames": 130
}Exit condition: {
"leaveShinecharged": {}
}Unlocks doors: {"types":["super"],"requires":[]}
{"types":["missiles","powerbomb"],"requires":["never"]}Dev note: FIXME: Add variations for tanking the Metroid damage (taking into account how they can block the shot to open the door) |
From: 2
Bottom Right Door
To: 1
Top Right Door

Go up the left side of the room to make it out the top door with a few shinecharge frames remaining. Avoid getting more than 2.75 tiles of run speed on the lower platform (or Speed Booster will shorten Samus' jump): either release run early, or do a big initial jump to land in the middle of the lower platform before starting to run. Entrance condition: {
"comeInShinecharging": {
"length": 0,
"openEnd": 1
}
}Requires: {
"shineChargeFrames": 170
}
"canTrickyDashJump"
"canShinechargeMovementTricky"
{
"or": [
{
"or": [
"f_KilledMetroidRoom2",
{
"obstaclesCleared": [
"f_KilledMetroidRoom2"
]
}
]
},
"ScrewAttack",
{
"metroidFrames": 160
}
]
}Exit condition: {
"leaveShinecharged": {}
}Unlocks doors: {
"types": [
"super"
],
"requires": [
{
"or": [
{
"or": [
"f_KilledMetroidRoom2",
{
"obstaclesCleared": [
"f_KilledMetroidRoom2"
]
}
]
},
"ScrewAttack"
]
}
]
}
{"types":["missiles","powerbomb"],"requires":["never"]} |
From: 2
Bottom Right Door
To: 1
Top Right Door
Use a mid-air wiggle to reduce the height of Samus' hitbox after the walljump, to be able to fit through the gap without morphing. Entrance condition: {
"comeInShinecharging": {
"length": 2,
"openEnd": 0
}
}Requires: "canWallJump"
"canMidairWiggle"
"canShinechargeMovementTricky"
{
"or": [
"f_KilledMetroidRoom2",
{
"obstaclesCleared": [
"f_KilledMetroidRoom2"
]
}
]
}
{
"shineChargeFrames": 130
}Exit condition: {
"leaveShinecharged": {}
}Unlocks doors: {"types":["super"],"requires":[]}
{"types":["missiles","powerbomb"],"requires":["never"]}Dev note: FIXME: Add variations for tanking the Metroid damage (taking into account how they can block the shot to open the door) |
From: 2
Middle Left Door
To: 1
Top Left Door
Entrance condition: {
"comeInShinecharged": {}
}Requires: {
"shineChargeFrames": 165
}
"canShinechargeMovementTricky"
{
"shinespark": {
"frames": 5,
"excessFrames": 0
}
}Exit condition: {
"leaveWithSpark": {}
}Unlocks doors: {"types":["super"],"requires":[]}
{"types":["missiles","powerbomb"],"requires":["never"]} |
From: 3
Bottom Left Door
To: 2
Middle Left Door
Entrance condition: {
"comeInShinecharging": {
"length": 12,
"openEnd": 0
}
}Requires: "canShinechargeMovementTricky"
{
"shinespark": {
"frames": 6,
"excessFrames": 0
}
}Exit condition: {
"leaveWithSpark": {}
}Unlocks doors: {"types":["super"],"requires":[]}
{"types":["missiles","powerbomb"],"requires":["never"]} |
From: 1
Top Right Doorway
To: 3
Bottom Right Door
Use Missiles to clear the seaweed quickly. Entrance condition: {
"comeInShinecharging": {
"length": 4,
"openEnd": 0
}
}Requires: "canShinechargeMovementTricky"
{
"ammo": {
"type": "Missile",
"count": 7
}
}
{
"shineChargeFrames": 150
}Exit condition: {
"leaveShinecharged": {}
}Unlocks doors: {"types":["ammo"],"requires":["never"]}Dev note: It may be possible to use fewer Missiles by switching weapons. |
From: 1
Top Right Doorway
To: 3
Bottom Right Door


Use Wave or Spazer to clear the seaweed quickly. Entrance condition: {
"comeInShinecharging": {
"length": 4,
"openEnd": 0
}
}Requires: {
"or": [
{
"and": [
"Wave",
"canShinechargeMovementComplex"
]
},
{
"and": [
"Spazer",
"canShinechargeMovementTricky"
]
}
]
}
{
"shineChargeFrames": 140
}Exit condition: {
"leaveShinecharged": {}
}Unlocks doors: {"types":["ammo"],"requires":["never"]} |
From: 1
Top Right Doorway
To: 3
Bottom Right Door
Clear the seaweed one block at a time, with just barely enough time remaining to spark out the door. Entrance condition: {
"comeInShinecharging": {
"length": 4,
"openEnd": 0
}
}Requires: "canShinechargeMovementTricky"
{
"shinespark": {
"frames": 2,
"excessFrames": 0
}
}Exit condition: {
"leaveWithSpark": {}
}Unlocks doors: {"types":["ammo"],"requires":["never"]} |
|
Crouch and shoot three times to break the lower two rows of seaweed. Shoot one more time while moving forward to break the upper row of seaweed. Then spin jump across the room. Entrance condition: {
"comeInShinecharged": {}
}Requires: {
"shineChargeFrames": 145
}
"canShinechargeMovementTricky"Exit condition: {
"leaveShinecharged": {}
}Unlocks doors: {"types":["ammo"],"requires":["never"]} |
From: 2
Left Door
To: 3
Bottom Right Door

Crouch and shoot three times to break the lower two rows of seaweed. Shoot one more time while moving forward to break the upper row of seaweed. Then shinespark through the door. Entrance condition: {
"comeInShinecharged": {}
}Requires: {
"shineChargeFrames": 75
}
"canShinechargeMovementTricky"
{
"shinespark": {
"frames": 21,
"excessFrames": 0
}
}Exit condition: {
"leaveWithSpark": {
"position": "bottom"
}
}Unlocks doors: {"types":["ammo"],"requires":["never"]} |
From: 2
Left Door
To: 3
Bottom Right Door

Perform a small spin jump and fire a well-timed Wave shot to break the blocks. Then activate the shinespark mid-air. Entrance condition: {
"comeInShinecharged": {}
}Requires: "Wave"
{
"shineChargeFrames": 10
}
"canShinechargeMovementTricky"
{
"shinespark": {
"frames": 22,
"excessFrames": 0
}
}Exit condition: {
"leaveWithSpark": {
"position": "top"
}
}Unlocks doors: {"types":["ammo"],"requires":["never"]} |
From: 2
Left Door
To: 3
Bottom Right Door
Gain a shinecharge while entering the room. Shoot three times to break the lower two rows of seaweed. Shoot one more time while moving forward to break the upper row of seaweed. Spin jump across the room. Entrance condition: {
"comeInShinecharging": {
"length": 2,
"openEnd": 0
}
}Requires: "canShinechargeMovementTricky"
{
"shineChargeFrames": 140
}Exit condition: {
"leaveShinecharged": {}
}Unlocks doors: {"types":["ammo"],"requires":["never"]} |
From: 2
Left Door
To: 3
Bottom Right Door

Gain a shinecharge while entering the room. Hold run and forward to stand up and press against the seaweed. Then fire a Wave shot to clear the seaweed and open the door, and run and jump across the room. If you fire the Wave shot too early (while having forward momentum), it will shoot too high and not break the blocks at Samus' knees. Entrance condition: {
"comeInShinecharging": {
"length": 2,
"openEnd": 0
}
}Requires: "canShinechargeMovementTricky"
{
"shineChargeFrames": 105
}Exit condition: {
"leaveShinecharged": {}
}Unlocks doors: {"types":["ammo"],"requires":["never"]} |
From: 3
Bottom Right Door
To: 1
Top Right Doorway

Entrance condition: {
"comeInShinecharging": {
"length": 0,
"openEnd": 1
}
}Requires: {
"shineChargeFrames": 165
}
"HiJump"
"canWallJump"
"canShinechargeMovementTricky"Exit condition: {
"leaveShinecharged": {}
} |
From: 3
Bottom Right Door
To: 1
Top Right Doorway
Entrance condition: {
"comeInShinecharging": {
"length": 0,
"openEnd": 1
}
}Requires: "canConsecutiveWallJump"
"canShinechargeMovementTricky"
{
"shineChargeFrames": 176
}
{
"shinespark": {
"frames": 5,
"excessFrames": 0
}
}Exit condition: {
"leaveWithSpark": {
"position": "top"
}
} |
From: 3
Bottom Right Door
To: 1
Top Right Doorway
Entrance condition: {
"comeInShinecharging": {
"length": 0,
"openEnd": 1
}
}Requires: "canConsecutiveWallJump"
"canShinechargeMovementTricky"
{
"shineChargeFrames": 170
}
{
"shinespark": {
"frames": 6,
"excessFrames": 0
}
}Exit condition: {
"leaveWithSpark": {
"position": "bottom"
}
} |
|

Buffer a shot while entering the room. Jump underneath the seaweed, then clear a path to the door from below. Entrance condition: {
"comeInShinecharged": {}
}Requires: {
"shineChargeFrames": 140
}
"canShinechargeMovementTricky"Exit condition: {
"leaveShinecharged": {}
}Unlocks doors: {"types":["super"],"requires":[]}
{"types":["missiles","powerbomb"],"requires":["never"]} |
From: 3
Bottom Right Door
To: 2
Left Door
Use five shots to destroy the seaweed blocks: Buffer the first shot while entering the room. Spin jump for the second shot (landing on the slightly raised platform), firing at an intermediate height in order to destroy two blocks. Fire two shots while standing on the platform. Spin jump for the final shot, and activate the shinespark mid-air. Entrance condition: {
"comeInShinecharged": {}
}Requires: {
"shineChargeFrames": 80
}
"canShinechargeMovementTricky"
{
"shinespark": {
"frames": 15,
"excessFrames": 0
}
}Exit condition: {
"leaveWithSpark": {
"position": "bottom"
}
}Unlocks doors: {"types":["ammo"],"requires":["never"]} |
From: 3
Bottom Right Door
To: 2
Left Door

Use single well-timed mid-air Wave shot to clear the seaweed quickly. Entrance condition: {
"comeInShinecharged": {}
}Requires: {
"shineChargeFrames": 40
}
"Wave"
"canShinechargeMovementTricky"
{
"shinespark": {
"frames": 18,
"excessFrames": 0
}
}Exit condition: {
"leaveWithSpark": {
"position": "top"
}
}Unlocks doors: {"types":["ammo"],"requires":["never"]} |
From: 3
Bottom Right Door
To: 2
Left Door
Squeeze underneath the seaweed, then clear a path to the door from below. Entrance condition: {
"comeInShinecharging": {
"length": 0,
"openEnd": 1
}
}Requires: {
"shineChargeFrames": 130
}
"canTwoTileSqueeze"
"canShinechargeMovementTricky"Exit condition: {
"leaveShinecharged": {}
}Unlocks doors: {"types":["super"],"requires":[]}
{"types":["missiles","powerbomb"],"requires":["never"]} |
From: 1
Top Door
To: 2
Right Door
Entrance condition: {
"comeInShinecharged": {},
"comesThroughToilet": "any"
}Requires: {
"shineChargeFrames": 95
}
{
"or": [
{
"ammo": {
"type": "Super",
"count": 1
}
},
{
"and": [
"Plasma",
"Wave"
]
},
{
"and": [
"Plasma",
"canHitbox"
]
}
]
}
"canShinechargeMovementTricky"
{
"shinespark": {
"frames": 2,
"excessFrames": 0
}
}Exit condition: {
"leaveWithSpark": {}
}Unlocks doors: {"types":["ammo"],"requires":["never"]} |
From: 2
Right Door
To: 1
Top Door
Enter shinecharged with a spin-jump. Perform quick ledge-grabs to reach the top of the room and spark out. Entrance condition: {
"comeInShinecharged": {}
}Requires: {
"shineChargeFrames": 130
}
"canPrepareForNextRoom"
"ScrewAttack"
"HiJump"
"canWallJump"
"canShinechargeMovementTricky"
{
  "shinespark": {
    "frames": 6,
    "excessFrames": 0
  }
}
Exit condition: {
"leaveWithSpark": {}
}Unlocks doors: {"types":["super"],"requires":[]}
{"types":["missiles","powerbomb"],"requires":["never"]} |
From: 2
Right Door
To: 1
Top Door
Enter shinecharged with a spin-jump. Perform quick ledge-grabs to reach the top of the room and spark out. Entrance condition: {
"comeInShinecharged": {}
}Requires: {
"shineChargeFrames": 155
}
"canPrepareForNextRoom"
"canShinechargeMovementTricky"
{
"shinespark": {
"frames": 6,
"excessFrames": 0
}
}Exit condition: {
"leaveWithSpark": {}
}Unlocks doors: {"types":["super"],"requires":[]}
{"types":["missiles","powerbomb"],"requires":["never"]} |
|
Gain a shinecharge by running right-to-left at the bottom of the room, performing a stutter just before the acid reaches Samus' feet. Use spin jumps to minimize damage from the acid, and spark diagonally (to the left) mid-air to make it up the shaft. Requires: {
"notable": "Suitless Acid Bath Shinespark"
}
"canStutterWaterShineCharge"
"canInsaneJump"
{
"acidFrames": 215
}
"canShinechargeMovementTricky"
{
"shinespark": {
"frames": 83,
"excessFrames": 2
}
} |
|
Entrance condition: {
"comeInShinecharged": {}
}Requires: {
"shineChargeFrames": 150
}
"canWallJump"
"canShinechargeMovementTricky"Exit condition: {
"leaveShinecharged": {}
} |
|
Entrance condition: {
"comeInShinecharged": {}
}Requires: {
"shineChargeFrames": 140
}
"canShinechargeMovementTricky"Exit condition: {
"leaveShinecharged": {}
} |
From: 1
Top Right Door
To: 2
Left Door
Entrance condition: {
"comeInShinecharged": {},
"comesThroughToilet": "no"
}Requires: {
"shineChargeFrames": 95
}
"canShinechargeMovementTricky"
{
"or": [
{
"enemyDamage": {
"enemy": "Blue Sidehopper",
"type": "contact",
"hits": 1
}
},
"h_pauseAbuseMinimalReserveRefill"
]
}
{
"shinespark": {
"frames": 21,
"excessFrames": 0
}
}Exit condition: {
"leaveWithSpark": {}
}Unlocks doors: {"types":["super"],"requires":[]}
{"types":["missiles","powerbomb"],"requires":["never"]} |
From: 2
Left Door
To: 1
Top Right Door
Entrance condition: {
"comeInShinecharged": {}
}Requires: {
"shineChargeFrames": 160
}
"canShinechargeMovementTricky"
{
"enemyDamage": {
"enemy": "Blue Sidehopper",
"type": "contact",
"hits": 1
}
}Exit condition: {
"leaveShinecharged": {}
}Unlocks doors: {"types":["super"],"requires":[]}
{"types":["missiles","powerbomb"],"requires":["never"]} |