canIBJ (Medium)
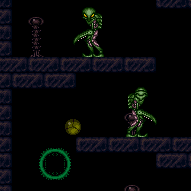
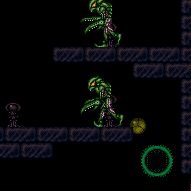
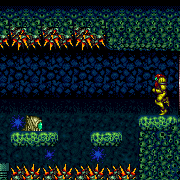
Infinite Bomb Jump (IBJ) uses consecutive bomb jumps to gain height indefinitely. To start and continue an IBJ, place a bomb as the previous one is exploding. The vertical speed with which Samus moves is controlled by how high or how low each bomb is placed relative to the previous one. The speed of the IBJ ranges from moving fairly fast with high bombs, to no movement or even losing height with low bomb placements. This tech alone only requires maintaining an IBJ for a vertical distance of approximately 11 tiles (the same distance as Samus can jump with HiJump), however, it may require doing this multiple times consecutively (i.e. if there is a ledge to land on mid-way).
Strats ()
|
Entrance condition: {
"comeInWithGMode": {
"mode": "direct",
"morphed": true
},
"comesThroughToilet": "any"
}Requires: "h_artificialMorphMovement" Exit condition: {
"leaveWithGMode": {
"morphed": true
}
} |
|

Overload PLMs using the scroll block next to the bomb blocks. Entrance condition: {
"comeInWithGMode": {
"mode": "any",
"morphed": true
},
"comesThroughToilet": "any"
}Requires: "h_artificialMorphMovement" Dev note: PBs cannot be used, as they will solidify the bomb blocks. |
|
Overload PLMs using the scroll blocks next to the bomb wall After passing through, you need to go from the bottom to the top of Climb and into the bomb blocks while still in G-mode Morph. Samus will not be visible at all; the only available feedback is audio and position on the map. Entrance condition: {
"comeInWithGMode": {
"mode": "any",
"morphed": true
}
}Requires: {
"notable": "G-Mode Morph Blind Climb to the Top"
}
{
"or": [
"canTrickyGMode",
"Morph"
]
}
"h_artificialMorphMovement"
"canOffScreenMovement"
{
  "or": [
    "h_ClimbWithoutLava",
    {
      "and": [
        "h_lavaProof",
        {
          "or": [
            "h_artificialMorphSpringBall",
            "Morph",
            "Gravity"
          ]
        }
      ]
    }
  ]
}
Clears obstacles: B |
|


Overload PLMs using the scroll blocks next to the bomb wall Navigate to the lower right bomb blocks while still morphed. Samus will be off-camera and not visible, requiring blind movement. Enemies will not hurt Samus since they are non-global and also off-camera. Entrance condition: {
"comeInWithGMode": {
"mode": "any",
"morphed": true
}
}Requires: "h_artificialMorphMovement"
"canOffScreenMovement"
{
"or": [
"h_ClimbWithoutLava",
{
"and": [
"h_lavaProof",
{
"or": [
"h_artificialMorphSpringBall",
"Morph",
"Gravity"
]
}
]
}
]
}Clears obstacles: B |
|
Overload PLMs using the scroll block at the top of the stairs next to the bomb blocks. A long series of precise bomb jumps and enemy manipulations are required to reach the top without taking a hit. Entrance condition: {
"comeInWithGMode": {
"mode": "any",
"morphed": true
}
}Requires: {
"notable": "G-Mode Morph Insane IBJ to Top"
}
"canTrickyGMode"
"h_artificialMorphIBJ"
"canBeExtremelyPatient" |
|
Overload PLMs using the scroll block at the top of the stairs next to the bomb blocks. Place Power Bombs as high as possible to occasionally kill multiple pirates at a time. Entrance condition: {
"comeInWithGMode": {
"mode": "any",
"morphed": true
}
}Requires: {
"or": [
"h_artificialMorphSpringBall",
"h_artificialMorphIBJ"
]
}
{
"ammo": {
"type": "PowerBomb",
"count": 7
}
} |
|
Overload PLMs using the scroll block next to any of the bomb blocks in the room, allowing passage through the bomb blocks at the top by making them become air. If Morph is not available, careful movement is needed with SpringBall to reach the top without taking a hit from the pirates or their stationary, invisible lasers. Entrance condition: {
"comeInWithGMode": {
"mode": "any",
"morphed": true
}
}Requires: {
"or": [
"Morph",
{
"and": [
"h_artificialMorphSpringBall",
{
"or": [
"HiJump",
"canTrickyDodgeEnemies"
]
}
]
},
{
"and": [
"h_ZebesNotAwake",
"h_artificialMorphMovement"
]
}
]
} |
|
Using a blue suit and IBJ to get from to bottom to the top of Climb without unmorphing. Precise timing and enemy manipulations are required to reach the top without taking a hit, because the pirates will kill Samus if they touch her while midair from a bomb boost. Use the lowest part of the room to manipulate the pirates and overload their stationary, invisible lasers, which takes 18 shots, then climb the center of the room. Let a pirate walk down to see Samus, then when it is jumping back and forth above her, place a bomb when it is in the center of the room and use it to double bomb jump to an upper wide platform. When the pirate jumps again, be moving horizontally when it gets to Samus to kill it. Entrance condition: {
"comeInWithGMode": {
"mode": "any",
"morphed": true
}
}Requires: {
"notable": "G-Mode Morph Blue Suit IBJ to Top"
}
"h_blueSuitGMode"
"canTrickyGMode"
"h_artificialMorphIBJ"
"canBeVeryPatient" |
|
A long series of precise bomb jumps and enemy manipulations are required to reach the top without taking a hit or unmorphing. Overload PLMs using the scroll block next to the bomb blocks at the top, allowing passage through them by making them become air. Entrance condition: {
"comeInWithGMode": {
"mode": "any",
"morphed": true
}
}Requires: {
"notable": "G-Mode Morph Insane IBJ to Top"
}
"canTrickyGMode"
"h_artificialMorphIBJ"
"canBeExtremelyPatient" |
|
Overload PLMs using the scroll block at the top of the stairs next to the bomb blocks. Place PBs as high as possible to occasionally kill multiple pirates at a time. Overload the PLMs at the bottom, if the top bomb block is hit with a PB before PLMs are overloaded, they will remain solid. Entrance condition: {
"comeInWithGMode": {
"mode": "any",
"morphed": true
}
}Requires: {
"or": [
"h_artificialMorphSpringBall",
"h_artificialMorphIBJ"
]
}
{
"ammo": {
"type": "PowerBomb",
"count": 8
}
} |
|
Overload PLMs using the scroll block next to the bottom right bomb blocks, allowing passage through them by making them become air. If Morph is unavailable, then careful movement will be required to get past the Pirates without taking a hit from them or their stationary, invisible lasers. If using a PB to kill the pirates, overload the PLMs at the bottom. If the top bomb block is hit with a PB before PLMs are overloaded, they will remain solid. Entrance condition: {
"comeInWithGMode": {
"mode": "any",
"morphed": true
}
}Requires: {
"or": [
"Morph",
{
"and": [
"h_artificialMorphSpringBall",
{
"or": [
"HiJump",
"canTrickyDodgeEnemies"
]
}
]
},
{
"and": [
"h_artificialMorphIBJ",
"canTrickyGMode"
]
},
{
"and": [
"h_artificialMorphMovement",
"h_artificialMorphPowerBomb"
]
},
{
"and": [
"h_ZebesNotAwake",
"h_artificialMorphMovement"
]
}
]
} |
|

It is possible to cross the spike pit with spring flings and two spike hits. Pause then jump just before the fade out ends and turn Spring Ball off in order to get more horizontal distance at the start and avoid one spike hit. Turn Spring Ball off and on again while jumping on the spikes to get across to avoid another. Entrance condition: {
"comeInWithGMode": {
"mode": "any",
"morphed": true
}
}Requires: {
"or": [
"h_artificialMorphLongCeilingBombJump",
{
"and": [
"h_artificialMorphSpringBall",
{
"spikeHits": 4
}
]
},
{
"and": [
"h_artificialMorphSpringBall",
"h_artificialMorphBombHorizontally",
{
"spikeHits": 3
}
]
},
{
"and": [
"h_artificialMorphSpringFling",
"canTrickyJump",
{
"spikeHits": 2
}
]
},
{
"and": [
"h_artificialMorphIBJ",
{
"spikeHits": 10
},
{
"or": [
"h_artificialMorphBombHorizontally",
{
"spikeHits": 2
}
]
}
]
}
]
}Dev note: This is a softlock unless the item is Morph. The IBJ strat has 2 extra spike hits added as a leniency. |
From: 1
Top Left Door
To: 5
Bottom Junction (Right of Boyons)
It is possible to cross the spike pit with spring flings and two spike hits. Pause then jump just before the fade out ends and turn Spring Ball off in order to get more horizontal distance at the start and avoid one spike hit. Turn Spring Ball off and on again while jumping on the spikes to get across to avoid another. Entrance condition: {
"comeInWithGMode": {
"mode": "any",
"morphed": true
}
}Requires: "h_artificialMorphBombs"
{
"or": [
{
"and": [
"h_artificialMorphSpringBall",
{
"spikeHits": 4
}
]
},
{
"and": [
"h_artificialMorphSpringBall",
"h_artificialMorphBombHorizontally",
{
"spikeHits": 3
}
]
},
{
"and": [
"h_artificialMorphSpringFling",
"canTrickyJump",
{
"spikeHits": 2
}
]
},
{
"and": [
"Morph",
{
"or": [
"SpaceJump",
{
"and": [
{
"spikeHits": 1
},
{
"or": [
"canUseIFrames",
{
"spikeHits": 1
}
]
}
]
}
]
}
]
},
{
"and": [
"h_artificialMorphIBJ",
{
"spikeHits": 10
},
{
"or": [
"h_artificialMorphBombHorizontally",
{
"spikeHits": 2
}
]
}
]
},
"h_artificialMorphLongCeilingBombJump"
]
}Dev note: The IBJ from spikes has 2 extra spike hits added as a leniency. |
|


Entrance condition: {
"comeInWithGMode": {
"mode": "any",
"morphed": false
}
}Requires: "h_artificialMorphPowerBomb"
{
"or": [
"h_artificialMorphMovement",
"h_artificialMorphBombHorizontally"
]
}Clears obstacles: A |
|

Overload the scroll PLMs which are one tile to the left of the bomb blocks leading to Gauntlet. Then pass through the bomb blocks (which will have become air). Entrance condition: {
"comeInWithGMode": {
"mode": "any",
"morphed": true
}
}Requires: "h_artificialMorphMovement" |
|
Entrance condition: {
"comeInWithGMode": {
"mode": "any",
"morphed": true
}
}Requires: {
"or": [
"h_artificialMorphMovement",
"h_blueSuitGMode"
]
}Dev note: There is currently no logical purpose to using a blue suit without artificial morph movement here, but it could be useful later, e.g. to unlock a Power Bomb door in the bottom left. |
|


Requires: {
"or": [
"canWallJump",
"SpaceJump",
"canIBJ",
"HiJump",
"canSpringBallJumpMidAir"
]
} |
From: 8
G-Mode Morph Junction (Ship)
To: 4
Bottom Right Door
Requires: "canGMode" "h_artificialMorphIBJ" Dev note: IBJ over the wall. |
From: 1
Top Left Door
To: 5
Alcatraz Door
There are scroll PLMs one tile to the left of the bomb blocks which can be used to overload PLMs. The bomb blocks then become air and can be passed through. Use Bombs, Spring Ball, or a Geemer damage boost to get across the gap without unmorphing. To survive a Geemer hit, you will need Varia or Gravity or to come in with more than 4 energy (e.g. by coming in with indirect G-mode after leaving with G-mode immobile). Entrance condition: {
"comeInWithGMode": {
"mode": "any",
"morphed": true
}
}Requires: {
"or": [
"h_artificialMorphMovement",
"h_artificialMorphBombHorizontally",
{
"and": [
"canTrickyGMode",
"h_stationaryNeutralDamageBoost",
"h_ZebesIsAwake",
{
"enemyDamage": {
"enemy": "Geemer (blue)",
"type": "contact",
"hits": 1
}
}
]
}
]
} |
From: 2
Middle Left Door
To: 5
Alcatraz Door
Use artificial morph to pass through the tunnel at the entrance of the room. Use Bombs or Spring Ball to navigate to Alcatraz without unmorphing. Entrance condition: {
"comeInWithGMode": {
"mode": "any",
"morphed": true
}
}Requires: "h_artificialMorphMovement" |
From: 3
Bottom Left Horizontal Door
To: 2
Middle Left Door

Use Bombs or Spring Ball to navigate with artificial morph without unmorphing. Entrance condition: {
"comeInWithGMode": {
"mode": "any",
"morphed": true
}
}Requires: "h_artificialMorphMovement" |
From: 3
Bottom Left Horizontal Door
To: 5
Alcatraz Door
Use Bombs or Spring Ball to navigate with artificial morph without unmorphing. Entrance condition: {
"comeInWithGMode": {
"mode": "any",
"morphed": true
}
}Requires: "h_artificialMorphMovement" |
From: 4
Top Right Door
To: 2
Middle Left Door
A single Power Bomb, placed precisely and as early as possible, can get you over the Geemers and onto the ledge above Alcatraz without taking a hit. Alternatively Bombs or Spring Ball can be used. Go down to the Save door by just falling and moving back and forth in the right places. Once you start going down you will be off-screen. Entrance condition: {
"comeInWithGMode": {
"mode": "any",
"morphed": true
}
}Requires: "canOffScreenMovement"
{
"or": [
"h_artificialMorphMovement",
"h_artificialMorphBombHorizontally"
]
} |
|
There are scroll PLMs one tile to the right of the bomb blocks which can be used to overload PLMs, turning the bomb blocks to air. However, if Zebes is awake, two Geemers block the way. The Geemer hits can be avoided with Bombs or Spring Ball. Alternatively, use a Power Bombs, to kill the Geemers and another to boost over to the left Alcatraz entrance, as the Power Bomb blast will render the bomb blocks solid, unable to be turned to air. This is possible but tricky to do with a single Power Bomb: In direct G-mode, use Samus' i-frames to roll through the first Geemer and horizontally bomb boost onto the ledge. In indirect G-mode, roll immediately and place the Power Bomb just after the first downward slope to jump over both Geemers. Entrance condition: {
"comeInWithGMode": {
"mode": "any",
"morphed": true
}
}Requires: {
"or": [
"h_artificialMorphMovement",
{
"and": [
"h_artificialMorphPowerBomb",
{
"or": [
"h_additionalBomb",
"canTrickyGMode"
]
}
]
},
{
"enemyDamage": {
"enemy": "Geemer (blue)",
"type": "contact",
"hits": 1
}
},
"h_ZebesNotAwake"
]
} |
From: 5
Alcatraz Door
To: 1
Top Left Door

There are scroll PLMs next to the bomb blocks and on the ledge below the Alcatraz exit, which will overload PLMs when going through them. Samus will need to briefly navigate off-screen while to the right of Alcatraz before coming back left. Note that the global Geemer may still be in this area if traversing the room quickly, and can hit Samus off-screen. Entrance condition: {
"comeInWithGMode": {
"mode": "any",
"morphed": true
}
}Requires: "h_artificialMorphMovement"
{
"or": [
"canTrickyDodgeEnemies",
"canOffScreenMovement",
{
"and": [
"h_artificialMorphSpringBall",
{
"haveBlueSuit": {}
}
]
},
{
"enemyDamage": {
"enemy": "Geemer (blue)",
"type": "contact",
"hits": 1
}
},
"h_ZebesNotAwake"
]
} |
From: 5
Alcatraz Door
To: 2
Middle Left Door
There are scroll PLMs next to the bomb blocks and on the ledge below the Alcatraz exit, which will overload PLMs when going through them. Samus will need to briefly navigate off-screen while to the right of Alcatraz before coming back left. Note that the global Geemer may still be in this area if traversing the room quickly, and can hit Samus off-screen. Again traverse off-screen while going down the left shaft and through the morph tunnel. Entrance condition: {
"comeInWithGMode": {
"mode": "any",
"morphed": true
}
}Requires: "canOffScreenMovement" "h_artificialMorphMovement" |
From: 5
Alcatraz Door
To: 8
Central Junction
There are scroll PLMs next to the bomb blocks and on the ledge below the Alcatraz exit, which will overload PLMs when going through them. Samus will need to briefly navigate off-screen while to the right of Alcatraz before coming back left. With Spring Ball or fast IBJ, watch the ceiling to wait for the two global Geemers to pass. Once out of the area, roll over the hill away from the global Geemers and Crystal Flash. Use the runway to shinecharge and shinespark towards the left door to waste energy, careful not to hit the global Geemer(s) with speed echoes. After 29 energy, the Geemer will be needed to finish damaging down. Shinecharge and get interrupted by the Geemer. Entrance condition: {
"comeInWithGMode": {
"mode": "direct",
"morphed": true
}
}Requires: "h_ZebesIsAwake"
{
"not": "f_ZebesSetAblaze"
}
"h_artificialMorphMovement"
"h_artificialMorphCrystalFlash"
{
"canShineCharge": {
"usedTiles": 25,
"steepUpTiles": 3,
"steepDownTiles": 3,
"openEnd": 0
}
}
{
"autoReserveTrigger": {}
}
"canRModeSparkInterrupt"
{
"partialRefill": {
"type": "Energy",
"limit": 50
}
} |
From: 5
Alcatraz Door
To: 8
Central Junction
There are scroll PLMs next to the bomb blocks and on the ledge below the Alcatraz exit, which will overload PLMs when going through them. Samus will need to briefly navigate off-screen while to the right of Alcatraz before coming back left. With a fast ascent, the global Geemers may still be in the top right section and can hit Samus off-screen. Use X-Ray until the beam reaches full width to exit G-mode and remain in R-mode. Kill the Skree while in health-bomb range, then the Geemers until Samus has Reserve Energy. Shinecharge and interrupt on a Geemer or the Ripper on the left. With unlucky drops, it is possible to not get Reserve Energy. It is possible to farm the top right off-screen Geemer to help reduce the chance. With Morph, partially enter the Alcatraz morph tunnel in order to fix the camera. Without Morph, kill the Geemer with a Power Bomb once in this section after overloading PLMs and before unmorphing and exiting G-mode. Entrance condition: {
"comeInWithGMode": {
"mode": "direct",
"morphed": true
}
}Requires: "h_ZebesIsAwake"
{
"not": "f_ZebesSetAblaze"
}
"h_artificialMorphMovement"
{
"or": [
{
"and": [
{
"or": [
"canRiskPermanentLossOfAccess",
{
"disableEquipment": "ETank"
}
]
},
{
"or": [
{
"partialRefill": {
"type": "ReserveEnergy",
"limit": 5
}
},
{
"and": [
{
"or": [
"Morph",
"canBeLucky",
"h_artificialMorphPowerBomb"
]
},
{
"partialRefill": {
"type": "ReserveEnergy",
"limit": 20
}
}
]
}
]
}
]
},
{
"and": [
"canRiskPermanentLossOfAccess",
{
"resourceMissingAtMost": [
{
"type": "RegularEnergy",
"count": 5
}
]
},
{
"partialRefill": {
"type": "ReserveEnergy",
"limit": 50
}
}
]
},
{
"and": [
{
"disableEquipment": "ETank"
},
{
"resourceAvailable": [
{
"type": "RegularEnergy",
"count": 94
}
]
},
{
"partialRefill": {
"type": "ReserveEnergy",
"limit": 50
}
}
]
}
]
}
{
"canShineCharge": {
"usedTiles": 25,
"steepUpTiles": 3,
"steepDownTiles": 3,
"openEnd": 0
}
}
{
"autoReserveTrigger": {}
}
"canRModeSparkInterrupt" |
From: 5
Alcatraz Door
To: 8
Central Junction
There are scroll PLMs next to the bomb blocks and on the ledge below the Alcatraz exit, which will overload PLMs when going through them. Samus will need to briefly navigate off-screen while to the right of Alcatraz before coming back left. Note that the global Geemer may still be in this area if traversing the room quickly, and can hit Samus off-screen. Entrance condition: {
"comeInWithGMode": {
"mode": "any",
"morphed": true
}
}Requires: "h_artificialMorphMovement"
{
"or": [
"canTrickyDodgeEnemies",
"canOffScreenMovement",
{
"and": [
"h_artificialMorphSpringBall",
{
"haveBlueSuit": {}
}
]
},
{
"enemyDamage": {
"enemy": "Geemer (blue)",
"type": "contact",
"hits": 1
}
},
"h_ZebesNotAwake"
]
} |
From: 6
Bottom Right Door (On the Left Shaft)
To: 2
Middle Left Door

Use Bombs or Spring Ball to navigate with artificial morph without unmorphing. Entrance condition: {
"comeInWithGMode": {
"mode": "any",
"morphed": true
}
}Requires: "h_artificialMorphMovement" |
From: 6
Bottom Right Door (On the Left Shaft)
To: 5
Alcatraz Door
Use Bombs or Spring Ball to navigate with artificial morph without unmorphing. Entrance condition: {
"comeInWithGMode": {
"mode": "any",
"morphed": true
}
}Requires: "h_artificialMorphMovement" |
From: 7
Bottom Left Vertical Door
To: 2
Middle Left Door
Use Bombs or Spring Ball to navigate with artificial morph without unmorphing. Entrance condition: {
"comeInWithGMode": {
"mode": "any",
"morphed": true
},
"comesThroughToilet": "any"
}Requires: "h_artificialMorphMovement" |
From: 7
Bottom Left Vertical Door
To: 5
Alcatraz Door
Use Bombs or Spring Ball to navigate with artificial morph without unmorphing. Entrance condition: {
"comeInWithGMode": {
"mode": "any",
"morphed": true
},
"comesThroughToilet": "any"
}Requires: "h_artificialMorphMovement" |
|
Without Morph, the pirates will not spawn. Overload PLMs using the scroll block directly above the bomb block leading down to the item. Carefully land on the solid block and avoid falling further. Use a Bomb to boost Samus, then on the descent place one in the air, one on the ground, and quickly use X-Ray before they explode to exit G-mode and break the blocks. Entrance condition: {
"comeInWithGMode": {
"mode": "any",
"morphed": true
}
}Requires: "canComplexGMode" "h_artificialMorphIBJ" "canTrickyJump" Clears obstacles: A |
From: 2
Right Door
To: 1
Left Door
Roll through the item to overload PLMs then quickly fall into the morph tunnel, unmorph at the correct spot and jump out before the acid touches Samus. With a careful, blind, Space Jump with Screw Attack, move through the bomb walls while avoiding the spikes. Entrance condition: {
"comeInWithGMode": {
"mode": "direct",
"morphed": true
}
}Requires: "canComplexGMode"
"canRemoteAcquire"
{
"itemNotCollectedAtNode": 3
}
"canRiskPermanentLossOfAccess"
"h_artificialMorphMovement"
"canInsaneJump"
"canOffScreenMovement"
"SpaceJump"
"ScrewAttack"Exit condition: {
"leaveNormally": {}
}Collects items: 3 Unlocks doors: {"types":["ammo"],"requires":[]}Dev note: This strat leaves the room, as it would be unreasonable and may not be possible to do anything at 1 with the broken camera movement. With a blue suit, there is no need to overload PLMs, so the camera will not be broken and the requirements could be relaxed; but it is covered by a 2->4 strat. |
From: 3
Bottom Left Door
To: 10
G-Mode Morph Junction (Middle Right Door)
With Spring Ball, it is possible to save a Power Bomb by placing it on the descent of the first jump by the bottom corner of the overhang, then bouncing on it on the ascent of the second. It is also possible but tighter to get high enough from bouncing on a Power Bomb with a single jump, similar to jumping into an IBJ. This doesn't save anything if breaking the Power Bomb blocks above. With an extra Power Bomb to spare, simply Spring Ball Bomb Jump. Entrance condition: {
"comeInWithGMode": {
"mode": "any",
"morphed": true
}
}Requires: {
"or": [
"h_artificialMorphIBJ",
{
"and": [
"h_artificialMorphSpringBall",
"h_artificialMorphPowerBomb",
"h_additionalBomb",
{
"or": [
"HiJump",
"h_artificialMorphSpringBallBombJump",
{
"tech": "canJumpIntoIBJ"
}
]
}
]
},
{
"and": [
"h_artificialMorphSpringBall",
"HiJump",
{
"enemyDamage": {
"enemy": "Green Space Pirate (standing)",
"type": "contact",
"hits": 5
}
}
]
}
]
} |
From: 4
Bottom Right Door
To: 2
Middle Right Door
Enter with G-mode direct and kill the bottom Pirate with Bombs or a Power Bomb. Back up to between 1 and 6 pixels from the door transition, and activate X-ray to get very deep stuck in the door. Climb up 2 screens, and perform a turnaround buffered spin-jump away from the door to trigger the transition, bypassing any lock on the door. Entrance condition: {
"comeInWithGMode": {
"mode": "direct",
"morphed": true
}
}Requires: "canGModeXRayClimb"
"canLongXRayClimb"
{
"or": [
"h_artificialMorphPowerBomb",
"h_artificialMorphIBJ"
]
}Bypasses door shell: true |
From: 4
Bottom Right Door
To: 10
G-Mode Morph Junction (Middle Right Door)
With Spring Ball, it is possible to save a Power Bomb by placing it on the descent of the first jump by the bottom corner of the overhang, then bouncing on it on the ascent of the second. It is also possible but tighter to get high enough from bouncing on a Power Bomb with a single jump, similar to jumping into an IBJ. This doesn't save anything if breaking the Power Bomb blocks above. With an extra Power Bomb to spare, simply Spring Ball Bomb Jump. Entrance condition: {
"comeInWithGMode": {
"mode": "any",
"morphed": true
}
}Requires: {
"or": [
"h_artificialMorphIBJ",
{
"and": [
"h_artificialMorphSpringBall",
"h_artificialMorphPowerBomb",
"h_additionalBomb",
{
"or": [
"HiJump",
"h_artificialMorphSpringBallBombJump",
{
"tech": "canJumpIntoIBJ"
}
]
}
]
},
{
"and": [
"h_artificialMorphSpringBall",
"HiJump",
{
"enemyDamage": {
"enemy": "Green Space Pirate (standing)",
"type": "contact",
"hits": 5
}
}
]
}
]
} |
|


Requires: "f_TourianOpen"
"Gravity"
{
"or": [
"HiJump",
"SpaceJump",
"canIBJ",
"canSpringBallJumpMidAir",
"canWallJump",
"canGravityJump"
]
} |
|
Entrance condition: {
"comeInWithGMode": {
"mode": "direct",
"morphed": true
},
"comesThroughToilet": "any"
}Requires: "h_artificialMorphMovement" Exit condition: {
"leaveWithGMode": {
"morphed": true
}
} |
From: 1
Top Door
To: 2
Left Door
Take the first left above the waterline. Place bombs in the single tile nook on the left to overload PLMs. Evade the Sciser and either go through the rest of the Morph maze or an overloaded crumble block, and navigate to the bomb block shortcut tunnel. Crystal Flash under the bomb block; Samus can then no longer use X-Ray. Jump through, and drop through to the other side. Avoid the Scisers, and manipulate one to the far right. Shinecharge and windup near the Sciser to interrupt. Entrance condition: {
"comeInWithGMode": {
"mode": "direct",
"morphed": true
},
"comesThroughToilet": "no"
}Requires: "h_artificialMorphBombs"
"h_artificialMorphMovement"
"h_artificialMorphCrystalFlash"
{
"or": [
{
"and": [
{
"or": [
"HiJump",
"canSunkenTileWideWallClimb"
]
},
"canWaterShineCharge"
]
},
"Gravity"
]
}
{
"canShineCharge": {
"usedTiles": 20,
"openEnd": 0
}
}
{
"autoReserveTrigger": {}
}
"canRModeSparkInterrupt"
{
"partialRefill": {
"type": "Energy",
"limit": 65
}
}Dev note: Also possible to escape with Space Jump + frame perfect downgrab |
From: 1
Top Door
To: 2
Left Door
Without Springball or Gravity, it is possible to overload PLMs with the crumble blocks with bombs. Take the first left above the waterline. Place bombs in the single tile nook on the left. The Sciser that starts inside the Morph maze area will move off-screen: wait for it to come back out. Once outside of the Morph tunnel area, use X-Ray until the beam reaches full width to exit G-Mode and remain in R-Mode, then collect drops. Farm the rest of the Scisers, keeping the slower local Sciser at the bottom left corner to use for the interrupt. Position it in the ceiling cubby hole to safely perform the Shinecharge and jump into the Sciser as it walks back down. Entrance condition: {
"comeInWithGMode": {
"mode": "direct",
"morphed": true
},
"comesThroughToilet": "no"
}Requires: {
"or": [
"h_artificialMorphSpringBall",
{
"and": [
"h_artificialMorphBombThings",
"Gravity"
]
},
"h_artificialMorphIBJ"
]
}
{
"resourceMissingAtMost": [
{
"type": "PowerBomb",
"count": 0
}
]
}
{
"or": [
{
"and": [
{
"disableEquipment": "ETank"
},
{
"partialRefill": {
"type": "ReserveEnergy",
"limit": 40
}
}
]
},
{
"and": [
"canRiskPermanentLossOfAccess",
{
"resourceMissingAtMost": [
{
"type": "RegularEnergy",
"count": 120
}
]
},
{
"partialRefill": {
"type": "ReserveEnergy",
"limit": 20
}
}
]
},
{
"and": [
"canRiskPermanentLossOfAccess",
{
"resourceMissingAtMost": [
{
"type": "RegularEnergy",
"count": 0
}
]
},
{
"partialRefill": {
"type": "ReserveEnergy",
"limit": 100
}
}
]
}
]
}
{
"or": [
"canWaterShineCharge",
"Gravity"
]
}
{
"canShineCharge": {
"usedTiles": 20,
"openEnd": 0
}
}
{
"autoReserveTrigger": {}
}
"canRModeSparkInterrupt" |
|

Without Springball or Gravity, it is possible to overload PLMs with the crumble blocks with bombs. Take the first left above the waterline. Place bombs in the single tile nook on the left. Entrance condition: {
"comeInWithGMode": {
"mode": "any",
"morphed": true
},
"comesThroughToilet": "any"
}Requires: {
"or": [
"h_artificialMorphSpringBall",
{
"and": [
"h_artificialMorphBombThings",
"Gravity"
]
},
"h_artificialMorphIBJ"
]
} |
|
Overload PLMs by placing Bombs at the far right, against the bottom of the crumble block, at the right of the low underwater ceiling. With artificial morph, safely bomb the fast crab by waiting just left of where it falls. Lure a crab to the top door or wait for the global crab to come back around, which can take up to 2.5 minutes. Shoot a Super to knock the crab off, then quickly freeze it at the right height and use it to clip up past the door shell. Knock it off while it is on the sloped tiles near the top door, not on the door itself, otherwise it will never be in the correct height. Because of the shot firing rate, it can help to crouch and shoot the Super to the side to give it a bit more time to knock the crab off. Entrance condition: {
"comeInWithGMode": {
"mode": "any",
"morphed": true
}
}Requires: "canBeVeryPatient"
"canTrickyGMode"
"h_artificialMorphBombs"
{
"or": [
{
"and": [
"Morph",
{
"or": [
"HiJump",
"canSpringBallJumpMidAir",
"canSunkenTileWideWallClimb"
]
}
]
},
{
"and": [
"Gravity",
"h_artificialMorphIBJ"
]
},
{
"and": [
"h_artificialMorphSpringBall",
"HiJump"
]
}
]
}
"h_preciseIceClip"
{
"ammo": {
"type": "Super",
"count": 1
}
}Exit condition: {
"leaveWithGMode": {
"morphed": false
}
}Bypasses door shell: true |
From: 2
Left Door
To: 1
Top Door

Overload PLMs by placing Bombs at the far right, against the bottom of the crumble block, at the right of the low underwater ceiling. To safely bomb the fast crab, wait just left of where it falls. Entrance condition: {
"comeInWithGMode": {
"mode": "any",
"morphed": true
}
}Requires: {
"or": [
{
"and": [
"Gravity",
"h_artificialMorphIBJ"
]
},
{
"and": [
"h_artificialMorphSpringBall",
"HiJump",
"h_artificialMorphBombs"
]
}
]
} |
|

Requires: {
"or": [
"canCarefulJump",
"canUseFrozenEnemies",
"SpaceJump",
{
"and": [
"Gravity",
{
"or": [
"HiJump",
"canWallJump",
"h_crouchJumpDownGrab",
"canIBJ",
"canSpringBallJumpMidAir"
]
}
]
}
]
} |
From: 2
Right Door
To: 4
Junction (Right side Pit)
It is required to avoid double hitting the Skultera with the Power Bomb, and to position the Crystal Flash so that the Skultera can hit Samus from above so it avoids the light orb. To do this, use the bottom-right Skultera, and position Samus against the right pillar, or on the slope in front of the pillar. Place the Power Bomb to hit the fish as it reaches the left wall. If Samus has 75% enemy damage reduction, it is required to Crystal Flash on the sloped tile, otherwise she can use either tile. Entrance condition: {
"comeInWithGMode": {
"mode": "direct",
"morphed": true
}
}Requires: {
"or": [
{
"and": [
"Gravity",
"h_artificialMorphIBJ"
]
},
{
"and": [
"Gravity",
"h_artificialMorphSpringBall"
]
},
{
"and": [
"HiJump",
"h_artificialMorphSpringBall"
]
}
]
}
"h_artificialMorphComplexRModeCrystalFlashInterrupt"
{
"ammo": {
"type": "Missile",
"count": 10
}
}
{
"ammo": {
"type": "Super",
"count": 5
}
}
{
"or": [
"h_partialEnemyDamageReduction",
{
"resourceAtMost": [
{
"type": "RegularEnergy",
"count": 19
}
]
},
{
"and": [
{
"resourceCapacity": [
{
"type": "RegularEnergy",
"count": 199
}
]
},
{
"resourceCapacity": [
{
"type": "ReserveEnergy",
"count": 199
}
]
}
]
}
]
} |
|
Entrance condition: {
"comeInWithGMode": {
"mode": "direct",
"morphed": true
},
"comesThroughToilet": "any"
}Requires: "h_artificialMorphMovement" Exit condition: {
"leaveWithGMode": {
"morphed": true
}
} |
|
Entrance condition: {
"comeInWithGMode": {
"mode": "direct",
"morphed": true
},
"comesThroughToilet": "any"
}Requires: "h_artificialMorphMovement" Exit condition: {
"leaveWithGMode": {
"morphed": true
}
} |
From: 4
Lower Section - Top Right Door
To: 15
G-Mode Morph Junction (By Left Door)
Entrance condition: {
"comeInWithGMode": {
"mode": "any",
"morphed": true
}
}Requires: {
"or": [
"Morph",
{
"and": [
"Gravity",
"h_artificialMorphIBJ"
]
},
"h_artificialMorphSpringBall",
"h_artificialMorphHBJ",
"h_artificialMorphDiagonalBombJump"
]
} |
From: 4
Lower Section - Top Right Door
To: 17
G-Mode Morph Junction Direct (By Left Door)
Entrance condition: {
"comeInWithGMode": {
"mode": "direct",
"morphed": true
}
}Requires: {
"or": [
"Morph",
{
"and": [
"Gravity",
"h_artificialMorphIBJ"
]
},
"h_artificialMorphSpringBall",
"h_artificialMorphHBJ",
"h_artificialMorphDiagonalBombJump"
]
}Clears obstacles: R-Mode |
From: 5
Lower Section - Bottom Right Door
To: 15
G-Mode Morph Junction (By Left Door)
Entrance condition: {
"comeInWithGMode": {
"mode": "any",
"morphed": true
}
}Requires: {
"or": [
"Morph",
{
"and": [
"Gravity",
"h_artificialMorphIBJ"
]
},
"h_artificialMorphSpringBall",
"h_artificialMorphHBJ",
"h_artificialMorphDiagonalBombJump"
]
} |
From: 5
Lower Section - Bottom Right Door
To: 17
G-Mode Morph Junction Direct (By Left Door)
Entrance condition: {
"comeInWithGMode": {
"mode": "direct",
"morphed": true
}
}Requires: {
"or": [
"Morph",
{
"and": [
"Gravity",
"h_artificialMorphIBJ"
]
},
"h_artificialMorphSpringBall",
"h_artificialMorphHBJ",
"h_artificialMorphDiagonalBombJump"
]
}Clears obstacles: R-Mode |
From: 10
Left Morph Maze Item
To: 14
Morph Maze Junction (Below Super Block)
Requires: {
"or": [
"canTrivialMidAirMorph",
"h_useSpringBall",
"canIBJ"
]
}
{
"or": [
{
"obstaclesNotCleared": [
"B"
]
},
"canRiskPermanentLossOfAccess"
]
} |
|
Requires: "Gravity"
{
"or": [
"canWallJump",
"HiJump",
"canIBJ",
"canGravityJump"
]
}Dev note: A speedy jump would be obsoleted by another strat for being tricky. |
From: 5
G-Mode Morph Junction (Bottom)
To: 2
Top Left Door
Overload PLMs by repeatidly bombing the Power Bomb blocks or the side of the crumble block, then enter through the crumble block. If Samus is then going to IBJ up the shaft, and she has Morph, it is worth exiting G-mode first to allow the camera to follow her. Requires: "canGMode"
"h_artificialMorphIBJ"
{
"or": [
"canConsecutiveWallJump",
"SpaceJump",
{
"and": [
"h_artificialMorphLongIBJ",
"canOffScreenMovement"
]
},
{
"and": [
{
"blueSuitShinecharge": {}
},
{
"or": [
{
"shinespark": {
"frames": 32,
"excessFrames": 3
}
},
{
"and": [
"HiJump",
{
"shinespark": {
"frames": 29,
"excessFrames": 3
}
}
]
}
]
}
]
}
]
}
{
"or": [
"h_ZebesIsAwake",
{
"notable": "G-Mode Flashing Lights"
}
]
}Dev note: The off screen movement is just during an artificial morphed IBJ - the IBJ is long and Samus is covered for most of it. |
From: 5
G-Mode Morph Junction (Bottom)
To: 2
Top Left Door
Overload PLMs with a single Power Bomb by hitting the ceiling block item. This can be done with a single precisely placed Power Bomb. There should be one empty tile between Samus and the right wall. Because the item is in a shot block, this does not require Direct G-mode, nor does it require the item to be uncollected. Requires: "canPowerBombItemOverloadPLMs"
"canGMode"
"h_artificialMorphPowerBomb"
"h_artificialMorphMovement"
{
"or": [
"canConsecutiveWallJump",
"SpaceJump",
{
"and": [
{
"blueSuitShinecharge": {}
},
{
"or": [
{
"shinespark": {
"frames": 32,
"excessFrames": 3
}
},
{
"and": [
"HiJump",
{
"shinespark": {
"frames": 29,
"excessFrames": 3
}
}
]
}
]
}
]
}
]
}Clears obstacles: B, C Dev note: This strat is useless if Samus has Morph, so there will be no flashing lights. |
From: 6
G-Mode Morph Junction Direct (Bottom)
To: 1
Bottom Left Door
Touch the item then roll back to the left before exiting G-Mode and remotely collect it. Requires: "canRemoteAcquire" "h_artificialMorphMovement" Collects items: 4 Dev note: This does not include canRiskPermanentLossOfAccess if Samus only uses this to return to the left with the item. This strat is useless if Samus has Morph, so there will be no flashing lights. |
From: 1
Left Door
To: 1
Left Door


Enter with direct G-mode artificial morph, and hold right to roll through the bomb blocks using a blue suit. Touch the item, and return to the left side of the room before exiting G-mode to collect the item. Entrance condition: {
"comeInWithGMode": {
"mode": "direct",
"morphed": true
}
}Requires: "h_blueSuitGMode"
{
"or": [
"h_artificialMorphSpringBall",
"h_artificialMorphIBJ",
"h_artificialMorphPowerBomb"
]
}
"canRemoteAcquire"Clears obstacles: A, C Collects items: 5 |
From: 1
Left Door
To: 5
Left Item
Tank the Sidehopper hits or kill them after a single hit by quickly placing a Power Bomb. It is also possible to kill the Sidehoppers with a very fast Screw Attack, if Samus has Morph Ball. Overload the PLMs by rolling through the camera scroll blocks which are 4 tiles to the right of the stair by the door. Roll under the last Sidehopper and through the bomb blocks. Place a Power Bomb next to the right wall then quickly exit G-mode before it explodes to destroy the blocks. Entrance condition: {
"comeInWithGMode": {
"mode": "direct",
"morphed": true
}
}Requires: {
"or": [
"canComplexGMode",
{
"enemyDamage": {
"enemy": "Sidehopper",
"type": "contact",
"hits": 2
}
},
{
"and": [
"h_artificialMorphPowerBomb",
{
"or": [
"canTrickyDodgeEnemies",
{
"enemyDamage": {
"enemy": "Sidehopper",
"type": "contact",
"hits": 1
}
}
]
}
]
},
"h_blueSuitGMode"
]
}
"h_artificialMorphPowerBomb"
{
"or": [
"h_artificialMorphMovement",
"h_additionalBomb"
]
}Clears obstacles: B |
From: 1
Left Door
To: 5
Left Item

Overload the PLMs by rolling through the camera scroll blocks which are 4 tiles to the right of the stair by the door. Place a Power Bomb next to the right wall then quickly exit G-mode before it explodes to destroy the blocks. Entrance condition: {
"comeInWithGMode": {
"mode": "any",
"morphed": true
}
}Requires: "h_ZebesNotAwake"
"h_artificialMorphPowerBomb"
{
"or": [
"h_artificialMorphMovement",
"h_additionalBomb"
]
}Clears obstacles: B |
From: 1
Left Door
To: 5
Left Item
Place a Power Bomb next to the right wall then quickly exit G-mode before it explodes to destroy the blocks. Entrance condition: {
"comeInWithGMode": {
"mode": "any",
"morphed": true
}
}Requires: "h_blueSuitGMode"
"h_artificialMorphPowerBomb"
{
"or": [
"h_artificialMorphMovement",
"h_additionalBomb"
]
}Clears obstacles: A, B, C |
From: 1
Left Door
To: 5
Left Item
Either kill the Sidehoppers immediately on entry by placing a Power Bomb while rolling off the stair, dodge them multiple times, or tank their hits. If Samus has Morph Ball, it is also possible to kill the Sidehoppers upon room entry with Screw Attack or a powerful beam. Overload the PLMs by rolling through the camera scroll blocks which are 4 tiles to the right of the stair by the door. Roll under the last Sidehopper and through the bomb blocks. Place a Power Bomb next to the right wall then quickly exit G-mode before it explodes to destroy the blocks. Entrance condition: {
"comeInWithGMode": {
"mode": "indirect",
"morphed": true
}
}Requires: {
"or": [
{
"enemyDamage": {
"enemy": "Sidehopper",
"type": "contact",
"hits": 2
}
},
"h_artificialMorphPowerBomb",
"canComplexGMode"
]
}
"h_artificialMorphPowerBomb"
{
"or": [
"h_artificialMorphMovement",
"h_additionalBomb"
]
}Clears obstacles: B |
|
Place the Power Bomb, then exit g-mode before the bomb goes off. Entrance condition: {
"comeInWithGMode": {
"mode": "any",
"morphed": true
}
}Requires: "h_artificialMorphPowerBomb" "h_artificialMorphMovement" Clears obstacles: B |
|

Entrance condition: {
"comeInWithGMode": {
"mode": "any",
"morphed": true
}
}Requires: "h_blueSuitGMode" "h_artificialMorphMovement" |
|

Entrance condition: {
"comeInWithGMode": {
"mode": "any",
"morphed": true
}
}Requires: "h_blueSuitGMode" "h_artificialMorphMovement" |
|
Blindly grab the item before PLMs are overloaded, then return and exit G-mode to remotely acquire the item. Starting a completely blind IBJ can be somewhat tricky, even if for such a short distance. Entrance condition: {
"comeInWithGMode": {
"mode": "direct",
"morphed": true
}
}Requires: "canRemoteAcquire"
{
"or": [
"h_artificialMorphSpringBall",
{
"and": [
"h_artificialMorphIBJ",
"canOffScreenMovement"
]
}
]
}Collects items: 3 |
From: 1
Left Door
To: 1
Left Door


Entrance condition: {
"comeInWithGMode": {
"mode": "any",
"morphed": true
}
}Requires: "canComplexGMode" "h_artificialMorphIBJ" "canOffScreenMovement" Collects items: 4 |
From: 1
Left Door
To: 4
Top Left Item
Climbing the room and remaining at the top has a very high risk of getting hit by a Waver. Quickly move to the right and exit G-mode to fix the camera. It is possible to kill the Wavers off-screen with one or two Power Bombs or a blue suit; Screw Attack is also relatively safe. Without any of those, it is best to roll to the right without unmorphing, and requires a bit of luck. Entrance condition: {
"comeInWithGMode": {
"mode": "any",
"morphed": true
}
}Requires: "canOffScreenMovement"
"canComplexGMode"
"h_artificialMorphIBJ"
{
"or": [
"ScrewAttack",
"h_artificialMorphPowerBomb",
"canBeLucky",
{
"haveBlueSuit": {}
},
{
"enemyDamage": {
"enemy": "Waver",
"type": "contact",
"hits": 1
}
}
]
} |
|


Before running across the speedway, use the Zeb spawner to get enough Reserves. Use the runway on the upper screen. There are many enemies up there to clear out of the way, but leave one alive. Entrance condition: {
"comeInWithRMode": {}
}Requires: {
"refill": [
"Energy"
]
}
{
"or": [
"canWallJump",
"HiJump",
"SpaceJump",
"canIBJ",
"canSpringBallJumpMidAir",
"h_crouchJumpDownGrab"
]
}
{
"canShineCharge": {
"usedTiles": 25,
"openEnd": 1
}
}
{
"autoReserveTrigger": {
"maxReserveEnergy": 95
}
}
"canRModeSparkInterrupt"Clears obstacles: A |
|
Use the runway on the screen above to gain a shinecharge near the edge of the runway. Requires: {
"or": [
"canWallJump",
"HiJump",
"SpaceJump",
"canIBJ",
"canSpringBallJumpMidAir",
"h_crouchJumpDownGrab"
]
}
{
"canShineCharge": {
"usedTiles": 25,
"openEnd": 1
}
}
"canShinechargeMovement"
{
"shineChargeFrames": 95
}Exit condition: {
"leaveShinecharged": {}
}Unlocks doors: {"types":["ammo"],"requires":[]} |
|


Requires: {
"or": [
"canWallJump",
"HiJump",
"SpaceJump",
"canIBJ",
"canSpringBallJumpMidAir"
]
}Clears obstacles: A |
|
Use the runway on the upper screen. There are many enemies up there to clear out of the way and will helpfully provide Reserves. Or else Crystal Flash. Leave one waver or small hopper alive. You can farm the rest for drops. Entrance condition: {
"comeInWithRMode": {}
}Requires: {
"or": [
"canWallJump",
"HiJump",
"SpaceJump",
"canIBJ",
"canSpringBallJumpMidAir",
"h_crouchJumpDownGrab"
]
}
{
"or": [
"h_CrystalFlashForReserveEnergy",
{
"and": [
{
"disableEquipment": "ETank"
},
{
"resourceAvailable": [
{
"type": "Energy",
"count": 80
}
]
},
{
"resourceMissingAtMost": [
{
"type": "Missile",
"count": 0
}
]
},
{
"resourceMissingAtMost": [
{
"type": "Super",
"count": 0
}
]
},
{
"partialRefill": {
"type": "ReserveEnergy",
"limit": 1
}
}
]
}
]
}
{
"canShineCharge": {
"usedTiles": 25,
"openEnd": 1
}
}
{
"autoReserveTrigger": {
"maxReserveEnergy": 95
}
}
"canRModeSparkInterrupt"Clears obstacles: A |
From: 4
Bottom Right Door
To: 5
Top Item


Cross the room while killing the Beetoms, then use two precisely positioned Power Bombs to overload PLMs. Place the Power Bombs at the same height as the tile above the door. This ends up being the max height Samus can jump and place it while at the very bottom of the room, with a midair morph or artificially morphed Spring Ball jump. Entrance condition: {
"comeInWithGMode": {
"mode": "direct",
"morphed": true
}
}Requires: "canPowerBombItemOverloadPLMs"
{
"itemNotCollectedAtNode": 5
}
"canRiskPermanentLossOfAccess"
"h_artificialMorphMovement"
{
"or": [
{
"and": [
{
"ammo": {
"type": "PowerBomb",
"count": 2
}
},
{
"or": [
"canComplexGMode",
{
"ammo": {
"type": "PowerBomb",
"count": 1
}
}
]
},
{
"or": [
"canTrickyGMode",
{
"ammo": {
"type": "PowerBomb",
"count": 1
}
}
]
}
]
},
{
"and": [
"Morph",
{
"or": [
"ScrewAttack",
"Ice",
{
"ammo": {
"type": "Missile",
"count": 5
}
},
{
"ammo": {
"type": "Super",
"count": 5
}
}
]
}
]
}
]
}
{
"ammo": {
"type": "PowerBomb",
"count": 2
}
}
{
"or": [
"canWallJump",
"SpaceJump",
{
"and": [
"HiJump",
"canSpringBallJumpMidAir"
]
},
"h_artificialMorphLongIBJ"
]
}Clears obstacles: A Dev note: This requires canRiskPermanentLossOfAccess unless Samus returns through the crumble blocks. |
From: 4
Bottom Right Door
To: 5
Top Item

Samus is only able to kill enemies with blue suit while moving and not falling. With bombs as the only movement option, Samus should only touch the enemies while grounded and moving horizontally. After crossing the spikeway, use two precisely positioned Power Bombs to overload PLMs. Place the Power Bombs at the same height as the tile above the door. This ends up being the max height Samus can jump and place it while at the very bottom of the room, with a midair morph or artificially morphed Spring Ball jump. Entrance condition: {
"comeInWithGMode": {
"mode": "direct",
"morphed": true
}
}Requires: "h_blueSuitGMode"
"canPowerBombItemOverloadPLMs"
{
"itemNotCollectedAtNode": 5
}
"canRiskPermanentLossOfAccess"
{
"or": [
"Morph",
"h_artificialMorphSpringBall",
"h_artificialMorphIBJ"
]
}
{
"ammo": {
"type": "PowerBomb",
"count": 2
}
}
{
"or": [
"canWallJump",
"SpaceJump",
{
"and": [
"HiJump",
"canSpringBallJumpMidAir"
]
},
"h_artificialMorphLongIBJ",
{
"and": [
{
"blueSuitShinecharge": {}
},
{
"or": [
{
"shinespark": {
"frames": 13,
"excessFrames": 3
}
},
{
"and": [
"HiJump",
{
"shinespark": {
"frames": 9,
"excessFrames": 3
}
}
]
}
]
}
]
}
]
}Clears obstacles: A Dev note: This requires canRiskPermanentLossOfAccess unless Samus returns through the crumble blocks. FIXME: This could include a Crystal Flash before shinesparking. |
From: 7
Below Power Bomb Blocks - Top Right Door
To: 10
Right Etecoon Shaft - Bottom Left Door
Roll through the camera scroll blocks in front of the bomb block, then go through the morph tunnel and exit g-mode. Entrance condition: {
"comeInWithGMode": {
"mode": "any",
"morphed": true
}
}Requires: "h_artificialMorphMovement" Exit condition: {
"leaveNormally": {}
}Unlocks doors: {"types":["ammo"],"requires":[]} |
From: 7
Below Power Bomb Blocks - Top Right Door
To: 10
Right Etecoon Shaft - Bottom Left Door
Roll through the camera scroll blocks in front of the bomb block, then go through the morph tunnel and exit g-mode. Entrance condition: {
"comeInWithGMode": {
"mode": "any",
"morphed": true
}
}Requires: "h_artificialMorphMovement" "canOffScreenMovement" Dev note: Staying in the room and doing more will require canOffScreenMovement. FIXME: Find a way to prevent needing to do things that are too unreasonable to do, even with canOffScreenMovement. |
From: 7
Below Power Bomb Blocks - Top Right Door
To: 12
Above Power Bomb Blocks - Main Junction

Place a Power Bomb while on the top single tile platform, then exit g-mode before the Power Bomb explodes in order to break the blocks above. Entrance condition: {
"comeInWithGMode": {
"mode": "any",
"morphed": true
}
}Requires: "h_artificialMorphMovement" "h_artificialMorphPowerBomb" Clears obstacles: A |
From: 8
Below Power Bomb Blocks - Bottom Left Door
To: 10
Right Etecoon Shaft - Bottom Left Door
Roll through the camera scroll blocks in front of the bomb block, then go through the morph tunnel and exit g-mode. Entrance condition: {
"comeInWithGMode": {
"mode": "any",
"morphed": true
}
}Requires: "h_artificialMorphMovement" Exit condition: {
"leaveNormally": {}
}Unlocks doors: {"types":["ammo"],"requires":[]} |
From: 8
Below Power Bomb Blocks - Bottom Left Door
To: 10
Right Etecoon Shaft - Bottom Left Door
Roll through the camera scroll blocks in front of the bomb block, then go through the morph tunnel and exit g-mode. Entrance condition: {
"comeInWithGMode": {
"mode": "any",
"morphed": true
}
}Requires: "h_artificialMorphMovement" "canOffScreenMovement" Dev note: Staying in the room and doing more will require canOffScreenMovement. FIXME: Find a way to prevent needing to do things that are too unreasonable to do, even with canOffScreenMovement. |
From: 8
Below Power Bomb Blocks - Bottom Left Door
To: 12
Above Power Bomb Blocks - Main Junction

Place a Power Bomb while on the top single tile platform, then exit g-mode before the Power Bomb explodes in order to break the blocks above. Entrance condition: {
"comeInWithGMode": {
"mode": "any",
"morphed": true
}
}Requires: "h_artificialMorphPowerBomb"
{
"or": [
"h_artificialMorphIBJ",
{
"and": [
"h_artificialMorphSpringBall",
"HiJump"
]
},
{
"and": [
"h_artificialMorphSpringBall",
{
"tech": "canSpringBallBombJump"
},
{
"ammo": {
"type": "PowerBomb",
"count": 6
}
}
]
}
]
}Clears obstacles: A |
From: 9
Right Etecoon Shaft - Top Left Door
To: 11
Right Etecoon Shaft - Item
This is only useful if the item is Morph. Entrance condition: {
"comeInWithGMode": {
"mode": "any",
"morphed": true
}
}Requires: "h_artificialMorphMovement" |
From: 9
Right Etecoon Shaft - Top Left Door
To: 13
Below Power Bomb Blocks - Main Junction
Place bombs against the item Chozo ball to overload PLMs. Then go through the bomb blocks and tunnel, then exit G-mode. Alternatively, with Spring Ball and a Power Bomb, place a Power Bomb 3 tiles in from the left opening to overload PLMs all at once. Entrance condition: {
"comeInWithGMode": {
"mode": "any",
"morphed": true
}
}Requires: {
"itemNotCollectedAtNode": 11
}
"canRiskPermanentLossOfAccess"
{
"or": [
"h_artificialMorphIBJ",
{
"and": [
"canPowerBombItemOverloadPLMs",
"h_artificialMorphSpringBall",
"h_artificialMorphPowerBomb"
]
}
]
} |
From: 9
Right Etecoon Shaft - Top Left Door
To: 15
Right Etecoon Shaft - Upper Tunnel Entrance
Requires: {
"or": [
"canMidAirMorph",
"h_useSpringBall",
{
"and": [
"canTrivialMidAirMorph",
{
"or": [
"SpaceJump",
"canConsecutiveWallJump"
]
}
]
},
{
"and": [
"canIBJ",
"canBombHorizontally"
]
}
]
}Dev note: Doable with just a very long IBJ, but if bombing horizontally is too hard, that will be too. |
|
Requires: {
"or": [
"SpaceJump",
"canIBJ",
"HiJump",
"canSpringBallJumpMidAir",
{
"and": [
"canSpeedyJump",
"canWallJump"
]
}
]
} |
From: 1
Top Left Door
To: 2
Top Right Door

Roll under the first bug, wait for the second to spawn before rolling off the ledge. IBJ, bomb boost spring ball jump, or HiJump Spring Fling into the pipe. While in G-mode, touch the item, roll out of the pipe, then get to the top right door before exiting G-mode and obtaining the item. With Bombs alone, it may help to kill the top respawning bug before descending to make it easier to get back up. Alternatively, on the way back up, IBJ directly below the pipe until the bug spawns, then quickly boost horizontally and move to the left. Get as far right as possible without another bug spawning, IBJ then boost horizontally at the top. Entrance condition: {
"comeInWithGMode": {
"mode": "direct",
"morphed": true
}
}Requires: "canRemoteAcquire"
{
"or": [
{
"and": [
"h_artificialMorphIBJ",
"canComplexGMode",
"canInsaneJump"
]
},
{
"and": [
"h_artificialMorphIBJ",
"h_artificialMorphPowerBomb"
]
},
{
"and": [
"h_artificialMorphSpringBallBombJump",
"h_additionalBomb",
"h_additionalBomb"
]
}
]
}Collects items: 4 |
|

Kill or Spring Ball over the first bug. Once on the pipe, bomb boost horizontally to the left then Spring Ball jump up to the door. With Bombs alone, IBJ far enough to the left to avoid spawning the bug; if it spawns, roll under it or let it swoop down and then roll to the left and it will eventually swoop back up over Samus. Entrance condition: {
"comeInWithGMode": {
"mode": "any",
"morphed": true
}
}Requires: {
"or": [
{
"and": [
"h_artificialMorphIBJ",
"canTrickyDodgeEnemies",
"h_artificialMorphBombHorizontally"
]
},
{
"and": [
"h_artificialMorphIBJ",
"h_artificialMorphPowerBomb"
]
},
"h_artificialMorphSpringBallBombJump"
]
} |
From: 1
Top Left Door
To: 2
Top Right Door
Kill the first bug by rolling into it as it swoops down at Samus. Wait for the next pipe's bug to spawn before rolling off. IBJ into the pipe, touch the item, roll out of the pipe, then get to the top right door before exiting G-mode and obtaining the item. Kill the lower bug by bombing underneath the pipe and placing a bomb at the peak of the boost. Note that Samus is vulnerable to damage while being boosted from a bomb. Entrance condition: {
"comeInWithGMode": {
"mode": "any",
"morphed": true
}
}Requires: "h_blueSuitGMode" "canRemoteAcquire" "h_artificialMorphIBJ" "canTrickyDodgeEnemies" Collects items: 4 Dev note: With other item combinations, another strat will be used instead. |
From: 2
Top Right Door
To: 2
Top Right Door


Roll under the first bug, wait for the second to spawn before rolling off the ledge. IBJ, bomb boost spring ball jump, or HiJump Spring Fling into the pipe. While in G-mode, touch the item, roll out of the pipe, then get to the top right door before exiting G-mode and obtaining the item. With Bombs alone, it may help to kill the top respawning bug before descending to make it easier to get back up. Alternatively, on the way back up, IBJ directly below the pipe until the bug spawns, then quickly boost horizontally and move to the left. Get as far right as possible without another bug spawning, IBJ then boost horizontally at the top. Entrance condition: {
"comeInWithGMode": {
"mode": "direct",
"morphed": true
}
}Requires: "canRemoteAcquire"
{
"or": [
{
"and": [
"h_artificialMorphIBJ",
"canComplexGMode",
"canInsaneJump"
]
},
{
"and": [
"h_artificialMorphIBJ",
"h_artificialMorphPowerBomb"
]
},
{
"and": [
"h_artificialMorphSpringBallBombJump",
"h_additionalBomb",
"h_additionalBomb"
]
}
]
}Collects items: 4 |
From: 2
Top Right Door
To: 2
Top Right Door
Kill the first bug by rolling into it as it swoops down at Samus. Wait for the next pipe's bug to spawn before rolling off. IBJ into the pipe, touch the item, roll out of the pipe, then get to the top right door before exiting G-mode and obtaining the item. Kill the lower bug by bombing underneath the pipe and placing a bomb at the peak of the boost. Note that Samus is vulnerable to damage while being boosted from a bomb. Entrance condition: {
"comeInWithGMode": {
"mode": "any",
"morphed": true
}
}Requires: "h_blueSuitGMode" "canRemoteAcquire" "h_artificialMorphIBJ" "canTrickyDodgeEnemies" Collects items: 4 Dev note: With other item combinations, another strat will be used instead. |
From: 3
Bottom Right Door
To: 2
Top Right Door
Use a Power Bombs to kill the first three hoppers, or carefully roll under the third one. The next hopper can be killed safely with many Bombs by staying on the top left of the raised ground; stay near the left edge of it without overhanging - otherwise it can hit Samus. Alternatively, lure and spring ball jump past it. Placing a Bomb next to a bug pipe can kill a bug inside of it. After killing a bug from a pipe, they will stop respawning there. The last hopper can be carefully killed with Bombs, killed with a Power Bomb, or dodged and lured off the edge. Getting past the last bug pipe can be the trickiest. This is easiest with an IBJ directly below the pipe until the bug spawns, then quickly boost horizontally and move to the left. Get as far right as possible without another bug spawning, IBJ then boost horizontally at the top. Entrance condition: {
"comeInWithGMode": {
"mode": "indirect",
"morphed": true
}
}Requires: {
"or": [
"canTrickyDodgeEnemies",
{
"ammo": {
"type": "PowerBomb",
"count": 2
}
},
{
"haveBlueSuit": {}
}
]
}
{
"or": [
{
"and": [
"h_artificialMorphIBJ",
{
"ammo": {
"type": "PowerBomb",
"count": 2
}
}
]
},
{
"and": [
"h_artificialMorphIBJ",
"canComplexGMode",
"canInsaneJump"
]
},
{
"and": [
"h_artificialMorphSpringBallBombJump",
"h_additionalBomb"
]
}
]
} |
From: 3
Bottom Right Door
To: 4
Item (Through the Pipe)
Use a Power Bombs to kill the first three hoppers, or carefully roll under the third one. The next hopper can be killed safely with many Bombs by staying on the top left of the raised ground; stay near the left edge of it without overhanging - otherwise it can hit Samus. Alternatively, lure and spring ball jump past it. Placing a Bomb next to a bug pipe can kill a bug inside of it. After killing a bug from a pipe, they will stop respawning there. The last hopper can be carefully killed with Bombs, killed with a Power Bomb, or dodged and lured off the edge. IBJ, bomb boost spring ball jump, or HiJump Spring Fling up to the pipe. Entrance condition: {
"comeInWithGMode": {
"mode": "indirect",
"morphed": true
}
}Requires: {
"or": [
"canTrickyDodgeEnemies",
{
"ammo": {
"type": "PowerBomb",
"count": 2
}
}
]
}
{
"or": [
{
"and": [
"h_artificialMorphIBJ",
{
"or": [
"canComplexGMode",
"h_artificialMorphPowerBomb"
]
}
]
},
"h_artificialMorphSpringBallBombJump",
{
"and": [
"HiJump",
"h_artificialMorphSpringFling"
]
}
]
}Dev note: This cannot be used to obtain the item remotely, as the item only spawns in direct G-mode. |
From: 3
Bottom Right Door
To: 4
Item (Through the Pipe)
Climb the room while safely killing the enemies by rolling into them. With Bombs alone, it is possible to kill the bugs in lower bug spawners by bombing underneath the pipe and placing a bomb at the peak of the boost. Note that Samus is vulnerable to damage while being boosted from a bomb. Entrance condition: {
"comeInWithGMode": {
"mode": "indirect",
"morphed": true
}
}Requires: "h_blueSuitGMode"
{
"or": [
"h_artificialMorphIBJ",
"h_artificialMorphSpringBallBombJump",
{
"and": [
"HiJump",
"h_artificialMorphSpringFling"
]
}
]
}Dev note: With other item combinations, another strat will be used instead. |
From: 2
Top Right Door
To: 2
Top Right Door
With Spring Ball alone, quickly jump over the Kihunter and wait for it to move away, then Spring Ball Bomb Jump through the door. Alternatively, place a Power Bomb and roll to the left on entry to kill the Kihunter, then quickly IBJ through the door before more arrive. Entrance condition: {
"comeInWithGMode": {
"mode": "direct",
"morphed": true
},
"comesThroughToilet": "any"
}Requires: {
"or": [
"canTrickyJump",
{
"enemyDamage": {
"enemy": "Kihunter (green)",
"type": "contact",
"hits": 1
}
}
]
}
{
"or": [
"h_artificialMorphSpringBallBombJump",
{
"and": [
"h_artificialMorphSpringBall",
"HiJump"
]
},
{
"and": [
"h_artificialMorphIBJ",
"h_artificialMorphPowerBomb"
]
},
"Morph"
]
}Exit condition: {
"leaveWithGMode": {
"morphed": true
}
}Dev note: It is possible to do this with Bombs alone, but it is pretty chaotic. |
From: 1
Left Side - Top Door
To: 15
G-Mode Morph Junction (Middle Right)
Roll through the camera scroll blocks and then through the bomb block. Avoiding the hoppers can be tricky. Power Bomb them or lure them off-camera to the right while above. It is possible to kill the Zebs by placing a bomb next to the tube. It is also possible to kill them and get on top of the pipe with a single Power Bomb; boost vertically then fall and delay the forward press. Entrance condition: {
"comeInWithGMode": {
"mode": "any",
"morphed": true
}
}Requires: {
"or": [
"Morph",
"canTrickyDodgeEnemies",
"h_artificialMorphPowerBomb",
{
"and": [
"h_artificialMorphSpringBall",
{
"haveBlueSuit": {}
}
]
},
{
"enemyDamage": {
"enemy": "Sm. Sidehopper",
"type": "contact",
"hits": 1
}
}
]
}
{
"or": [
"h_artificialMorphMovement",
{
"and": [
"h_artificialMorphPowerBomb",
"h_artificialMorphPowerBomb"
]
}
]
} |
From: 1
Left Side - Top Door
To: 17
Direct G-Mode Morph Junction (Middle Item)
Roll directly through the bomb block on entry without rolling much in the morph tunnel to overload PLMs as little as possible. Avoiding the hoppers can be tricky; if possible, Power Bomb them or jump into them with Spring Ball. It is possible to kill the Zebs by placing a bomb next to the tube. Entrance condition: {
"comeInWithGMode": {
"mode": "direct",
"morphed": true
}
}Requires: {
"haveBlueSuit": {}
}
{
"or": [
"Morph",
"canTrickyDodgeEnemies",
"h_artificialMorphPowerBomb",
"h_artificialMorphSpringBall",
{
"enemyDamage": {
"enemy": "Sm. Sidehopper",
"type": "contact",
"hits": 1
}
}
]
}
{
"or": [
"h_artificialMorphMovement",
{
"ammo": {
"type": "PowerBomb",
"count": 3
}
}
]
} |
|

Roll through the camera scroll blocks and then through the bomb block. It is possible to kill the Zeb by placing a Bomb next to its tube. Entrance condition: {
"comeInWithGMode": {
"mode": "any",
"morphed": true
}
}Requires: "h_artificialMorphMovement" |
From: 2
Right Side - Top Door
To: 15
G-Mode Morph Junction (Middle Right)
Avoiding the hoppers can be tricky. Power Bomb them or lure them off-camera to the right while above. It is possible to kill the Zebs by placing a bomb next to the tube. It is also possible to kill them and get on top of the pipe with a single Power Bomb; boost vertically then fall and delay the forward press. Entrance condition: {
"comeInWithGMode": {
"mode": "any",
"morphed": true
}
}Requires: {
"or": [
"Morph",
{
"and": [
{
"or": [
"canTrickyDodgeEnemies",
{
"and": [
"h_artificialMorphSpringBall",
{
"haveBlueSuit": {}
}
]
},
{
"enemyDamage": {
"enemy": "Sm. Sidehopper",
"type": "contact",
"hits": 1
}
}
]
},
{
"or": [
"h_artificialMorphSpringBall",
"h_artificialMorphIBJ"
]
}
]
},
"h_artificialMorphPowerBomb"
]
}
{
"or": [
"h_artificialMorphMovement",
{
"and": [
"h_artificialMorphPowerBomb",
"h_artificialMorphPowerBomb"
]
}
]
} |
From: 2
Right Side - Top Door
To: 17
Direct G-Mode Morph Junction (Middle Item)
Avoiding the hoppers can be tricky. Power Bomb them or lure them off-camera to the right while above. It is possible to kill the Zebs by placing a bomb next to the tube. Entrance condition: {
"comeInWithGMode": {
"mode": "direct",
"morphed": true
}
}Requires: {
"or": [
"Morph",
"canTrickyDodgeEnemies",
"h_artificialMorphPowerBomb",
{
"and": [
"h_artificialMorphSpringBall",
{
"haveBlueSuit": {}
}
]
},
{
"enemyDamage": {
"enemy": "Sm. Sidehopper",
"type": "contact",
"hits": 1
}
}
]
}
{
"or": [
"h_artificialMorphMovement",
{
"ammo": {
"type": "PowerBomb",
"count": 3
}
}
]
} |
From: 4
Left Side - Door Behind Power Bomb Blocks
To: 12
Bottom Chozo Item
On entry, artificial morph and land on the doorsill without touching the crumble blocks below. Place 8 Power Bombs to hit the item just above and overload PLMs while killing the Sidehoppers. It is possible to save one Power Bomb by placing 6 of them up against the ceiling, then the 7th low to kill the Sidehoppers. Entrance condition: {
"comeInWithGMode": {
"mode": "direct",
"morphed": true
}
}Requires: "canPowerBombItemOverloadPLMs"
"canComplexGMode"
{
"itemNotCollectedAtNode": 10
}
"canRiskPermanentLossOfAccess"
"canArtificialMorph"
{
"ammo": {
"type": "PowerBomb",
"count": 7
}
}
{
"or": [
"h_artificialMorphMovement",
"h_artificialMorphPowerBomb"
]
} |
From: 4
Left Side - Door Behind Power Bomb Blocks
To: 15
G-Mode Morph Junction (Middle Right)
On entry, artificial morph and land on the doorsill without touching the crumble blocks below. Move to the edge of the ledge in order to be able to place bombs that will hit the Power Bomb blocks while avoiding falling. Use a Power Bomb, Wave, or a quick Plasma shot while falling to kill the Sidehoppers. With a blue suit it is also possible to kill the hoppers with Spring Ball. Hold jump and exit the tunnel and keep holding jump until both hoppers are killed. If Samus exits the tunnel and falls without jumping, she will take a hopper hit. Entrance condition: {
"comeInWithGMode": {
"mode": "direct",
"morphed": true
}
}Requires: "canComplexGMode"
"canArtificialMorph"
"h_artificialMorphIBJ"
{
"or": [
"h_artificialMorphPowerBomb",
{
"and": [
"Morph",
"Wave"
]
},
{
"and": [
"Morph",
"Plasma"
]
},
{
"and": [
"h_useSpringBall",
{
"haveBlueSuit": {}
}
]
}
]
}Dev note: It's possible to drop down past the Sidehoppers and Reos without killing them, but it's very difficult. FIXME: This could be done in indirect G-mode, but it would require entering unmorphed or with upward momentum to avoid touching the crumble block. |
From: 4
Left Side - Door Behind Power Bomb Blocks
To: 15
G-Mode Morph Junction (Middle Right)
On entry, artificial morph and land on the doorsill without touching the crumble blocks below. Place 8 Power Bombs to hit the item just above and overload PLMs while killing the Sidehoppers. It is possible to save one Power Bomb by placing 6 of them up against the ceiling, then the 7th low to kill the Sidehoppers. Entrance condition: {
"comeInWithGMode": {
"mode": "direct",
"morphed": true
}
}Requires: "canPowerBombItemOverloadPLMs"
"canComplexGMode"
{
"itemNotCollectedAtNode": 10
}
"canRiskPermanentLossOfAccess"
"canArtificialMorph"
"h_artificialMorphMovement"
{
"ammo": {
"type": "PowerBomb",
"count": 7
}
} |
|

Entrance condition: {
"comeInWithGMode": {
"mode": "any",
"morphed": true
}
}Requires: "h_artificialMorphMovement" |
From: 6
Right Side - Top Middle Door
To: 12
Bottom Chozo Item
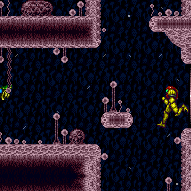
Overload PLMs by moving through the camera scroll blocks in front of the passageway leading to the exit of Spore Spawn Supers. Entrance condition: {
"comeInWithGMode": {
"mode": "any",
"morphed": true
}
}Requires: "h_artificialMorphMovement" |
From: 6
Right Side - Top Middle Door
To: 15
G-Mode Morph Junction (Middle Right)
If using Bombs, lure and kill the Reo. If using Spring Ball, it's important to release jump before reaching to peak of each jump to outrun the Reo. Entrance condition: {
"comeInWithGMode": {
"mode": "any",
"morphed": true
}
}Requires: "h_artificialMorphMovement" |
|
Entrance condition: {
"comeInWithGMode": {
"mode": "any",
"morphed": true
}
}Requires: "h_artificialMorphMovement" |
From: 8
Right Side - Bottom Door
To: 12
Bottom Chozo Item
Overload PLMs by moving through the camera scroll blocks in front of the passageway leading to the exit of Spore Spawn Supers. It is possible to get up with a Spring Fling; pause and just before the screen is fully black, jump, disable Spring ball, then buffer right on the unpause. Entrance condition: {
"comeInWithGMode": {
"mode": "any",
"morphed": true
}
}Requires: {
"or": [
"Morph",
"h_artificialMorphIBJ",
{
"and": [
"h_artificialMorphSpringBall",
"HiJump"
]
},
"h_artificialMorphSpringFling"
]
}Dev note: Using a Power Bomb boost into Spring Ball will not work, as it will make the blocks remain solid. FIXME: The spring fling variant would force collecting the item, if in direct G-mode. |
From: 8
Right Side - Bottom Door
To: 12
Bottom Chozo Item
Entrance condition: {
"comeInWithGMode": {
"mode": "any",
"morphed": true
}
}Requires: "h_blueSuitGMode" "h_artificialMorphMovement" Clears obstacles: D Dev note: This is only useful if the item is Morph, because otherwise there is no way out. |
From: 8
Right Side - Bottom Door
To: 15
G-Mode Morph Junction (Middle Right)
If climbing the room with Spring Ball bomb boosts, note that one Power Bomb can be saved with a Spring Fling; pause and just before the screen is fully black, jump, disable Spring ball, then buffer right on the unpause. Another can be saved by carefully jumping out of the morph passageway in front of the off-screen Super block. Entrance condition: {
"comeInWithGMode": {
"mode": "any",
"morphed": true
}
}Requires: {
"or": [
"h_artificialMorphIBJ",
"Morph",
{
"and": [
"h_artificialMorphSpringBall",
"HiJump"
]
},
{
"and": [
"h_artificialMorphSpringFling",
{
"or": [
"h_artificialMorphSpringBallBombJump",
"canTrickyJump"
]
}
]
}
]
}Dev note: This strat does not have a Power Bomb Spring Ball jump option to avoid the Spring Fling, because it would solidify the block and make 8->15->12 unsound. These strats are split off and don't stop at 15 first. FIXME: The spring fling variant would force collecting the item, if in direct G-mode, unless leaving through 4. |
From: 8
Right Side - Bottom Door
To: 17
Direct G-Mode Morph Junction (Middle Item)
Entrance condition: {
"comeInWithGMode": {
"mode": "direct",
"morphed": true
}
}Requires: "h_artificialMorphMovement" |
From: 9
Left Side - Bottom Door
To: 11
Middle Item
Go into the morph tunnel below the Charge Beam location and Crystal Flash to force a standup and jump through. Samus is now unable to use X-Ray. Without Morph, be careful not to overload PLMs using the camera scroll blocks on the path upward. Then partially floor clip into the left side of the bomb block, and jump to clip through and escape. To exit G-Mode, damage down until the reserves trigger, which can be done most quickly using the Sidehoppers. Entrance condition: {
"comeInWithGMode": {
"mode": "any",
"morphed": true
}
}Requires: "canComplexGMode"
{
"or": [
"h_artificialMorphIBJ",
"Morph",
{
"and": [
"h_artificialMorphSpringBall",
{
"or": [
"HiJump",
{
"and": [
"h_artificialMorphSpringBallBombJump",
"h_additionalBomb",
"h_additionalBomb",
"h_additionalBomb"
]
}
]
}
]
}
]
}
"h_artificialMorphCrystalFlash"
{
"or": [
"Morph",
{
"and": [
"canInsaneJump",
"canTwoTileSqueeze",
"canPartialFloorClip",
"canCeilingClip"
]
}
]
}
"canBePatient"
{
"autoReserveTrigger": {}
}Dev note: This assumes Samus has many Energy Tanks, which will take a while to empty. |
From: 9
Left Side - Bottom Door
To: 13
Central Junction
Go into the Morph Tunnel below the Charge Beam location and Crystal Flash to force a standup and jump through. Samus is now unable to use X-Ray. Without Morph, be careful not to overload PLMs using the camera scroll blocks on the path upward. Partially floor clip into the left side of the bomb block and jump to clip through and escape. Go to the 'main' left door's runway and shinecharge. Do not kill any Zebs during the ascent as they will not respawn until G-Mode ends. Shinecharge and jump to the Zeb pipe above the runway to interrupt. G-Mode will end and the Zeb pipe can be farmed to refill if needed. Entrance condition: {
"comeInWithGMode": {
"mode": "direct",
"morphed": true
}
}Requires: "canComplexGMode"
{
"or": [
"h_artificialMorphIBJ",
"Morph",
{
"and": [
"h_artificialMorphSpringBall",
{
"or": [
"HiJump",
{
"and": [
"h_artificialMorphSpringBallBombJump",
"h_additionalBomb",
"h_additionalBomb",
"h_additionalBomb"
]
}
]
}
]
}
]
}
"h_artificialMorphCrystalFlash"
{
"or": [
"Morph",
{
"and": [
"canInsaneJump",
"canTwoTileSqueeze",
"canPartialFloorClip",
"canCeilingClip"
]
}
]
}
{
"canShineCharge": {
"usedTiles": 25,
"openEnd": 1
}
}
{
"autoReserveTrigger": {
"maxReserveEnergy": 95
}
}
"canRModeSparkInterrupt"
{
"partialRefill": {
"type": "Energy",
"limit": 50
}
}Clears obstacles: E |
From: 13
Central Junction
To: 7
Right Side - Door Behind Super Block


Requires: {
"or": [
"canTrivialMidAirMorph",
"h_useSpringBall",
"canIBJ",
{
"and": [
"Morph",
"canCarefulJump"
]
}
]
}
{
"obstaclesCleared": [
"F"
]
}Dev note: This base strat represents only backtracking after entering from 7. It is possible to avoid a mid-air morph by rolling off the platform above With HiJump, a full jump won't work, so the midair morph may not be very trivial. |
From: 15
G-Mode Morph Junction (Middle Right)
To: 1
Left Side - Top Door

Carefully dodge the Sidehoppers, or kill them with a Power Bomb. Be careful not to hit the bomb block with the Power Bomb or it will remain solid. With IBJ alone, it is easiest to IBJ from the bug pipe below to the ceiling, luring the Sidehoppers to the left. At the top, overload PLMs using the camera scroll block just in front of the block, then roll through it. Requires: "canGMode"
{
"or": [
"Morph",
{
"and": [
"h_artificialMorphSpringBall",
"HiJump"
]
},
"h_artificialMorphIBJ"
]
}
{
"or": [
"Morph",
"canTrickyDodgeEnemies",
{
"and": [
"h_artificialMorphSpringBall",
{
"haveBlueSuit": {}
}
]
},
{
"enemyDamage": {
"enemy": "Sm. Sidehopper",
"type": "contact",
"hits": 1
}
},
"h_artificialMorphPowerBomb"
]
} |
From: 15
G-Mode Morph Junction (Middle Right)
To: 8
Right Side - Bottom Door
Requires: "canGMode" "h_artificialMorphMovement" |
From: 15
G-Mode Morph Junction (Middle Right)
To: 12
Bottom Chozo Item


Overload PLMs by moving through the camera scroll blocks in front of the passageway leading to the exit of Spore Spawn Supers. Requires: "canGMode" "h_artificialMorphMovement" |
From: 15
G-Mode Morph Junction (Middle Right)
To: 14
G-Mode Morph, Behind the Power Bomb Blocks
If there are no Sidehoppers in the bottom right corner of their pen, roll down and carefully place bombs while luring and killing them. Otherwise, go down into the hallway below and carefully kill the two Reos and lure the Sidehoppers to the left. If they don't stay on the left, exit this hallway and enter it again to reset the camera and try again. Go up through the crumble blocks to the left. If PLMs are not yet overloaded, place Bombs next to the crumble blocks. Requires: "canGMode"
"h_artificialMorphIBJ"
{
"or": [
"canTrickyDodgeEnemies",
"h_artificialMorphPowerBomb",
{
"and": [
"h_artificialMorphSpringBall",
{
"haveBlueSuit": {}
}
]
},
{
"enemyDamage": {
"enemy": "Sm. Sidehopper",
"type": "contact",
"hits": 1
}
}
]
} |
From: 16
Direct G-Mode Morph (Top Item, Above Hopper Pit)
To: 1
Left Side - Top Door
Avoiding the top Sidehoppers without Power Bombs can be tricky; if starting at the top of the room, it may help to lure them to the left before going down the room. For safety, it is also possible to lure the hoppers to the left from below with several IBJs or HiJump and Spring Ball. Requires: "canRemoteAcquire"
{
"or": [
"Morph",
"h_artificialMorphIBJ",
{
"and": [
"HiJump",
"h_artificialMorphSpringBall"
]
},
{
"and": [
"h_artificialMorphSpringBallBombJump",
{
"ammo": {
"type": "PowerBomb",
"count": 2
}
}
]
}
]
}
{
"or": [
"Morph",
"canTrickyDodgeEnemies",
"h_artificialMorphPowerBomb",
{
"and": [
"h_artificialMorphSpringBall",
{
"haveBlueSuit": {}
}
]
},
{
"enemyDamage": {
"enemy": "Sm. Sidehopper",
"type": "contact",
"hits": 1
}
}
]
}Collects items: 10 |
From: 16
Direct G-Mode Morph (Top Item, Above Hopper Pit)
To: 4
Left Side - Door Behind Power Bomb Blocks
Without Bombs, fully overload PLMs with the item before dropping into the Sidehopper pit. Dodge or kill the Sidehoppers then go through the crumble block before exiting G-mode. With Bombs, it can help to not overload the PLMs fully, to IBJ off of the lower crumble blocks, then Bomb the side of the upper crumble to go through it. Requires: "canRemoteAcquire"
"h_artificialMorphMovement"
{
"or": [
"Morph",
"h_artificialMorphIBJ",
"canTrickyDodgeEnemies",
"h_artificialMorphPowerBomb",
{
"haveBlueSuit": {}
},
{
"enemyDamage": {
"enemy": "Sm. Sidehopper",
"type": "contact",
"hits": 1
}
}
]
}Collects items: 10 Dev note: With Morph or Bombs, Samus will have already killed the Sidehoppers before getting here. |
From: 16
Direct G-Mode Morph (Top Item, Above Hopper Pit)
To: 8
Right Side - Bottom Door
Fully overload PLMs with the item before dropping into the Sidehopper pit. Dodge or kill the Sidehoppers then go through the lower crumble blocks and avoid the Reos while traversing to the bottom right door. Requires: "canRemoteAcquire"
"h_artificialMorphMovement"
{
"or": [
"Morph",
"h_artificialMorphIBJ",
"canTrickyDodgeEnemies",
"h_artificialMorphPowerBomb",
{
"haveBlueSuit": {}
},
{
"enemyDamage": {
"enemy": "Sm. Sidehopper",
"type": "contact",
"hits": 1
}
}
]
}Collects items: 10 Dev note: With Morph or Bombs, Samus will have already killed the Sidehoppers before getting here. |
From: 16
Direct G-Mode Morph (Top Item, Above Hopper Pit)
To: 12
Bottom Chozo Item
Fully overload PLMs with the item before dropping into the Sidehopper pit. Dodge or kill the Sidehoppers then go through the lower crumble blocks and avoid the Reos while traversing to the bottom right door. Requires: "canRemoteAcquire"
"h_artificialMorphMovement"
{
"or": [
"Morph",
"h_artificialMorphIBJ",
"canTrickyDodgeEnemies",
"h_artificialMorphPowerBomb",
{
"haveBlueSuit": {}
},
{
"enemyDamage": {
"enemy": "Sm. Sidehopper",
"type": "contact",
"hits": 1
}
}
]
}Collects items: 10 Dev note: With Morph or Bombs, Samus will have already killed the Sidehoppers before getting here. Traversing the room could be done with Power Bombs, without artificial morph movement, but it's required to get here already. |
From: 17
Direct G-Mode Morph Junction (Middle Item)
To: 1
Left Side - Top Door


Fully overload PLMs with the item before climbing the room. The hardest part is getting past the Reo without Power Bombs, if it is stuck in the stairwell just above the door. Either manipulate it until it can escape, get it stuck swooping in the top right corner of the stairwell then kill it with Bombs, or avoid it entirely, and go up through the crumble blocks to the left after manipulating the Sidehoppers to be off-camera at the right of their pit. Avoiding the top Sidehoppers without Power Bombs can also be tricky; if starting at the top of the room, it may help to lure them to the left before going down the room. For safety, it is also possible to lure the hoppers to the left from below with several IBJs or HiJump and Spring Ball. Requires: "canRemoteAcquire"
{
"or": [
"Morph",
"h_artificialMorphIBJ",
{
"and": [
"HiJump",
"h_artificialMorphSpringBall"
]
},
{
"and": [
"h_artificialMorphSpringBallBombJump",
{
"ammo": {
"type": "PowerBomb",
"count": 2
}
},
{
"or": [
"h_artificialMorphPowerBomb",
"h_artificialMorphSpringFling"
]
},
{
"or": [
"h_artificialMorphPowerBomb",
"canTrickyJump"
]
}
]
}
]
}
{
"or": [
"Morph",
"canComplexGMode",
{
"and": [
"canTrickyDodgeEnemies",
"h_artificialMorphSpringBall"
]
},
{
"and": [
"h_artificialMorphSpringBall",
{
"haveBlueSuit": {}
}
]
},
"h_artificialMorphPowerBomb",
{
"enemyDamage": {
"enemy": "Reo",
"type": "contact",
"hits": 1
}
}
]
}
{
"or": [
"Morph",
"canTrickyDodgeEnemies",
"h_artificialMorphPowerBomb",
{
"and": [
"h_artificialMorphSpringBall",
{
"haveBlueSuit": {}
}
]
},
{
"enemyDamage": {
"enemy": "Sm. Sidehopper",
"type": "contact",
"hits": 1
}
}
]
}Collects items: 11 |
From: 17
Direct G-Mode Morph Junction (Middle Item)
To: 4
Left Side - Door Behind Power Bomb Blocks
Fully overload PLMs with the item before climbing the room. The hardest part is getting past the Reo without Power Bombs, if it is stuck in the stairwell just above the door. Either manipulate it until it can escape, get it stuck swooping in the top right corner of the stairwell then kill it with Bombs, or avoid it entirely, and go up through the crumble blocks to the left after manipulating the Sidehoppers to be off-camera at the right of their pit. Dodge or kill the Sidehoppers then go through the crumble block before exiting G-mode. Requires: "canRemoteAcquire"
{
"or": [
"Morph",
"h_artificialMorphIBJ",
{
"and": [
"HiJump",
"h_artificialMorphSpringBall"
]
},
{
"and": [
{
"or": [
"h_artificialMorphSpringBallBombJump",
"h_artificialMorphSpringFling"
]
},
{
"or": [
"h_artificialMorphSpringBallBombJump",
"canTrickyJump"
]
}
]
}
]
}
{
"or": [
"Morph",
"canComplexGMode",
{
"and": [
"canTrickyDodgeEnemies",
"h_artificialMorphSpringBall"
]
},
{
"and": [
"h_artificialMorphSpringBall",
{
"haveBlueSuit": {}
}
]
},
"h_artificialMorphPowerBomb",
{
"enemyDamage": {
"enemy": "Reo",
"type": "contact",
"hits": 1
}
}
]
}Collects items: 11 |
From: 17
Direct G-Mode Morph Junction (Middle Item)
To: 4
Left Side - Door Behind Power Bomb Blocks
Fully overload PLMs with the item before climbing the room. The hardest part is getting past the Reo without Power Bombs, if it is stuck in the stairwell just above the door. Either manipulate it until it can escape, get it stuck swooping in the top right corner of the stairwell then kill it with Bombs, or avoid it entirely, and go up through the crumble blocks to the left after manipulating the Sidehoppers to be off-camera at the right of their pit. Dodge or kill the Sidehoppers then go through the crumble block. Place a Power Bomb then quickly exit G-mode before it explodes to break the Power Bomb blocks. Requires: "canRemoteAcquire"
{
"or": [
"Morph",
"h_artificialMorphIBJ",
{
"and": [
"HiJump",
"h_artificialMorphSpringBall"
]
},
{
"and": [
{
"or": [
"h_artificialMorphSpringBallBombJump",
"h_artificialMorphSpringFling"
]
},
{
"or": [
"h_artificialMorphSpringBallBombJump",
"canTrickyJump"
]
}
]
}
]
}
{
"or": [
"Morph",
"canComplexGMode",
{
"and": [
"canTrickyDodgeEnemies",
"h_artificialMorphSpringBall"
]
},
"h_artificialMorphPowerBomb",
{
"and": [
"h_artificialMorphSpringBall",
{
"haveBlueSuit": {}
}
]
},
{
"enemyDamage": {
"enemy": "Reo",
"type": "contact",
"hits": 1
}
}
]
}
"h_artificialMorphPowerBomb"Collects items: 11 |
From: 17
Direct G-Mode Morph Junction (Middle Item)
To: 8
Right Side - Bottom Door
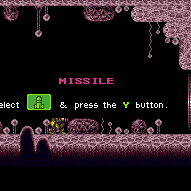
Requires: "canRemoteAcquire" "h_artificialMorphMovement" Collects items: 11 |
From: 1
Top Right Door
To: 1
Top Right Door
Place a Power Bomb on entry to kill the first Sidehopper, then cross to the left side of the room. It is required to avoid double hitting the ceiling Sidehopper with the Power Bomb, so lure it to the right, place a Power Bomb in the corner, roll over to lure the hopper and quickly roll back to Crystal Flash. In unlucky situations it is possible that the hopper only does small jumps and never hits Samus. It is possible to cross all the spikes and avoid damaging the ceiling hopper with just Power Bombs. Place a Power Bomb at the edge of the runway then hold forward with precise timing to get a boost to skip the first two then have a small bounce over the third spike. The optimal starting position is on the second-to-last pixel of the ledge and press forward on the 1st, 3rd, or 5th frame which gives Samus a large horizontal boost. (On the last pixel, only the 1st and 3rd frames work, and further to the right only has at most one usable frame. Rolling into the bomb with momentum is not recommended and gives only a 1-frame window.) Entrance condition: {
"comeInWithGMode": {
"mode": "direct",
"morphed": true
}
}Requires: "h_artificialMorphPowerBomb"
{
"or": [
"h_artificialMorphMovement",
{
"and": [
"h_artificialMorphPowerBomb",
"canTrickyGMode"
]
},
{
"spikeHits": 3
},
{
"and": [
"h_artificialMorphPowerBomb",
{
"spikeHits": 1
}
]
}
]
}
"h_artificialMorphComplexRModeCrystalFlashInterrupt"
{
"ammo": {
"type": "Missile",
"count": 10
}
}
{
"ammo": {
"type": "Super",
"count": 10
}
}
{
"ammo": {
"type": "PowerBomb",
"count": 5
}
}
{
"or": [
"h_partialEnemyDamageReduction",
{
"resourceAtMost": [
{
"type": "RegularEnergy",
"count": 19
}
]
},
{
"and": [
{
"resourceCapacity": [
{
"type": "RegularEnergy",
"count": 199
}
]
},
{
"resourceCapacity": [
{
"type": "ReserveEnergy",
"count": 199
}
]
}
]
}
]
}Dev note: It is possible to kill the first Sidehopper with just Bombs and a lot of luck, but that is ignored. |
|
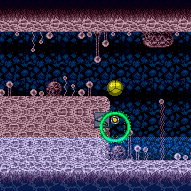
Requires: "canSuitlessMaridia"
{
"or": [
"canBombJumpWaterEscape",
{
"and": [
"h_useSpringBall",
"canIBJ",
{
"tech": "canJumpIntoIBJ"
}
]
}
]
} |
From: 3
Dry Platform Junction
To: 3
Dry Platform Junction
Requires: {
"or": [
"SpaceJump",
"canPreciseWallJump",
"canTrickySpringBallJump",
{
"and": [
"h_useSpringBall",
"canIBJ",
{
"tech": "canJumpIntoIBJ"
}
]
}
]
}
{
"canShineCharge": {
"usedTiles": 32,
"openEnd": 1
}
}
{
"or": [
{
"and": [
"h_enemyDrops",
"h_CrystalSparkWithoutLenience"
]
},
"h_CrystalSpark"
]
}Dev note: No lenience, because Power Bombs can be farmed from the Zeros. Only Includes methods to get to 3 quickly. FIXME: With a heated room and the vanilla 5 Energy from small drops, farming would not be possible without Varia, Gravity, or energy free shinesparks. |
From: 1
Right Door
To: 2
Chozo Item

Traverse the room while avoiding or killing the Boyons. If the Chozo item is still there, it is best to exit G-Mode before the final Power Bomb goes off to ensure that PLMs aren't overloaded. If Samus falls into a Samus Eater, she will often be teleported into it when exiting G-Mode. Entrance condition: {
"comeInWithGMode": {
"mode": "any",
"morphed": true
}
}Requires: "h_artificialMorphPowerBomb"
{
"or": [
"h_artificialMorphMovement",
{
"and": [
"h_artificialMorphBombs",
"canBePatient"
]
}
]
}Clears obstacles: B |
|
Requires: {
"noBlueSuit": {}
}
{
"or": [
"HiJump",
"SpaceJump",
"canWallJump",
"canSpringBallJumpMidAir",
"canJumpIntoIBJ",
{
"and": [
"Gravity",
"canIBJ"
]
}
]
} |
|
Requires: {
"haveBlueSuit": {}
}
{
"or": [
"canConsecutiveWallJump",
"SpaceJump",
{
"and": [
"Gravity",
"canIBJ"
]
},
{
"and": [
"Gravity",
"canSpringBallJumpMidAir"
]
},
{
"and": [
{
"doorUnlockedAtNode": 1
},
{
"or": [
"HiJump",
"canSpringBallJumpMidAir",
{
"and": [
"canJumpIntoIBJ",
"can4HighMidAirMorph"
]
}
]
}
]
},
{
"and": [
"canBombJumpWaterEscape",
"canLongIBJ"
]
}
]
}Dev note: With a blue suit, the bomb blocks in front of the door cannot be used as a platform. |
|
Requires: {
"obstaclesCleared": [
"B"
]
}
{
"or": [
"HiJump",
"canWallJump",
"canSpringBallJumpMidAir",
"SpaceJump",
"canIBJ",
"canSpringBallBombJump"
]
} |
From: 1
Top Left Door
To: 1
Top Left Door
Entrance condition: {
"comeInShinecharging": {
"length": 4,
"openEnd": 0
},
"comesInHeated": "no"
}Requires: {
"or": [
"h_CrystalSpark",
{
"and": [
"canBePatient",
{
"or": [
"HiJump",
"canWallJump",
"SpaceJump",
"canIBJ",
"canSpringBallJumpMidAir"
]
},
"h_CrystalSparkWithoutLenience"
]
}
]
}Dev note: Lenience is not included for variants that can kill the Zeros and climb back up quickly. |
|

It takes around 3 minutes to get the Zero to this door. The Zero only moves on camera and the camera scrolls when exiting the morph tunnel. Let the Zero lead through the morph tunnel or wait for the it to get very close to Samus before touching the scroll block at the exit. Requires: "canBeVeryPatient"
"Morph"
{
"or": [
"HiJump",
"canWallJump",
"SpaceJump",
"canIBJ",
"canTrickyUseFrozenEnemies",
"canSpringBallJumpMidAir"
]
}Exit condition: {
"leaveWithGModeSetup": {}
} |
From: 1
Top Left Door
To: 7
G-Mode Morph Indirect (In Morph Tunnel)
Entrance condition: {
"comeInWithGMode": {
"mode": "indirect",
"morphed": true
}
}Requires: {
"or": [
"h_artificialMorphMovement",
{
"and": [
"h_artificialMorphBombThings",
"h_additionalBomb"
]
}
]
} |
From: 2
Middle Left Door
To: 2
Middle Left Door
It takes around 4 minutes to get the Zero to this door with Morph, or 90 seconds with 2 Supers. The Zero only moves on camera and the camera scrolls when exiting the morph tunnel. Let the Zero lead through the morph tunnel or wait for the it to get very close to Samus before touching the scroll block at the exit. To speed this up and avoid the Morph requirement, use a Super when the Zero is at the tip of the platform extending out below the morph tunnel. The Zero will fall onto a lower platform, and another Super can be used to make it fall on the left platform. Requires: {
"or": [
{
"and": [
"Morph",
"canBeVeryPatient"
]
},
{
"and": [
"canBePatient",
{
"ammo": {
"type": "Super",
"count": 2
}
}
]
}
]
}
{
"or": [
"HiJump",
"canWallJump",
"SpaceJump",
"canIBJ",
"canTrickyUseFrozenEnemies",
"canSpringBallJumpMidAir"
]
}Exit condition: {
"leaveWithGModeSetup": {}
} |
|
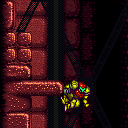
Requires: {
"or": [
"HiJump",
"canWallJump",
"SpaceJump",
"canIBJ",
"canSpringBallJumpMidAir"
]
} |
|

Entrance condition: {
"comeInWithGMode": {
"mode": "any",
"morphed": true
}
}Requires: {
"or": [
"h_artificialMorphIBJ",
"h_artificialMorphSpringBallBombJump"
]
} |
|
Entrance condition: {
"comeInWithGMode": {
"mode": "any",
"morphed": true
}
}Requires: {
"or": [
"h_artificialMorphIBJ",
{
"and": [
"h_artificialMorphSpringBallBombJump",
"h_additionalBomb"
]
},
{
"and": [
"h_artificialMorphSpringBallBombJump",
"h_crouchJumpDownGrab"
]
}
]
}Exit condition: {
"leaveWithGMode": {
"morphed": false
}
} |
From: 2
Middle Left Door
To: 7
G-Mode Morph Indirect (In Morph Tunnel)
Entrance condition: {
"comeInWithGMode": {
"mode": "indirect",
"morphed": true
}
}Requires: {
"or": [
"h_artificialMorphIBJ",
{
"and": [
"h_artificialMorphSpringBallBombJump",
"h_additionalBomb"
]
},
{
"and": [
"h_artificialMorphSpringBall",
"HiJump"
]
},
{
"and": [
"Morph",
{
"or": [
"HiJump",
"canWallJump",
"SpaceJump",
"canSpringBallJumpMidAir",
{
"and": [
"canTrickyDashJump",
"h_crouchJumpDownGrab"
]
}
]
}
]
}
]
} |
|
Requires: {
"or": [
"HiJump",
"canWallJump",
"SpaceJump",
"canIBJ"
]
} |
From: 4
Bottom Right Door
To: 4
Bottom Right Door
Entrance condition: {
"comeInShinecharging": {
"length": 2,
"openEnd": 0
},
"comesInHeated": "no"
}Requires: {
"or": [
"h_CrystalSpark",
{
"and": [
"h_enemyDrops",
"canBePatient",
{
"or": [
"HiJump",
"canWallJump",
"SpaceJump",
"canIBJ",
"canSpringBallJumpMidAir"
]
},
"h_CrystalSparkWithoutLenience"
]
}
]
}Dev note: Lenience is not included. Only variants that can kill the Zeros and climb back up quickly are included. This room is shorter than the 3 tile limit normally used for these strats; it is only included because it has a good Power Bomb farm. |
From: 4
Bottom Right Door
To: 4
Bottom Right Door
Requires: {
"or": [
"HiJump",
"canWallJump",
"SpaceJump",
"canIBJ",
"canTrickyUseFrozenEnemies",
"canSpringBallJumpMidAir"
]
}Exit condition: {
"leaveWithGModeSetup": {}
}Dev note: It takes around 50 seconds to get the Zero to this door. |
|
Entrance condition: {
"comeInWithGMode": {
"mode": "any",
"morphed": false
}
}Requires: {
"or": [
"HiJump",
"canWallJump",
"SpaceJump",
"canIBJ",
"canSpringBallJumpMidAir",
"h_crouchJumpDownGrab"
]
}Exit condition: {
"leaveWithGMode": {
"morphed": false
}
}Dev note: There could be an artificial morph IBJ option, but that would just bypass a crouch jump + down grab requirement. |
From: 4
Bottom Right Door
To: 7
G-Mode Morph Indirect (In Morph Tunnel)
Entrance condition: {
"comeInWithGMode": {
"mode": "indirect",
"morphed": true
}
}Requires: {
"or": [
"h_artificialMorphIBJ",
"h_artificialMorphSpringBallBombJump",
{
"and": [
"h_artificialMorphSpringBall",
"HiJump"
]
},
{
"and": [
"Morph",
{
"or": [
"HiJump",
"canWallJump",
"SpaceJump",
"canSpringBallJumpMidAir",
"h_crouchJumpDownGrab"
]
}
]
}
]
} |
From: 5
Top Right Door (Through Morph Tunnel)
To: 1
Top Left Door
Entrance condition: {
"comeInWithGMode": {
"mode": "indirect",
"morphed": true
}
}Requires: {
"or": [
"h_artificialMorphMovement",
"h_artificialMorphBombThings"
]
} |
From: 5
Top Right Door (Through Morph Tunnel)
To: 5
Top Right Door (Through Morph Tunnel)
Entrance condition: {
"comeInShinecharging": {
"length": 7,
"openEnd": 0
},
"comesInHeated": "no"
}Requires: {
"or": [
"h_CrystalSpark",
{
"and": [
"h_enemyDrops",
"canBePatient",
{
"or": [
"HiJump",
"canWallJump",
"SpaceJump",
"canIBJ",
"canSpringBallJumpMidAir"
]
},
"h_CrystalSparkWithoutLenience"
]
}
]
}Dev note: Lenience is not included for variants that can kill the Zeros and climb back up quickly. |
From: 5
Top Right Door (Through Morph Tunnel)
To: 5
Top Right Door (Through Morph Tunnel)
Requires: {
"obstaclesCleared": [
"A"
]
}
{
"canShineCharge": {
"usedTiles": 17,
"openEnd": 0
}
}
{
"or": [
"h_CrystalSpark",
{
"and": [
"h_enemyDrops",
"canBePatient",
{
"or": [
"HiJump",
"canWallJump",
"SpaceJump",
"canIBJ",
"canSpringBallJumpMidAir"
]
},
"h_CrystalSparkWithoutLenience"
]
}
]
}
{
"resetRoom": {
"nodes": [
5
]
}
}Clears obstacles: A Resets obstacles: B Dev note: Lenience is not included for variants that can kill the Zeros and climb back up quickly. Requires resetting the room at 5, to prevent requiring doing something slow to open the gate. |
From: 5
Top Right Door (Through Morph Tunnel)
To: 5
Top Right Door (Through Morph Tunnel)
It takes around 2 minutes to get the Zero to this door. Requires: "canBePatient"
{
"or": [
{
"ammo": {
"type": "Super",
"count": 1
}
},
{
"obstaclesCleared": [
"A"
]
}
]
}
"Morph"
{
"or": [
"HiJump",
"canWallJump",
"SpaceJump",
"canIBJ",
"canTrickyUseFrozenEnemies",
"canSpringBallJumpMidAir"
]
}Exit condition: {
"leaveWithGModeSetup": {}
} |
From: 5
Top Right Door (Through Morph Tunnel)
To: 5
Top Right Door (Through Morph Tunnel)


Open the gate, farm the Cacatacs and Zeros, while leading one back up to the Morph tunnel. Shinecharge under the gate, then get hit by the Zero to interrupt. Entrance condition: {
"comeInWithRMode": {}
}Requires: {
"ammo": {
"type": "Super",
"count": 1
}
}
"Morph"
{
"or": [
"h_CrystalFlashForReserveEnergy",
{
"and": [
"h_RModeCanRefillReserves",
{
"or": [
{
"and": [
{
"resourceMissingAtMost": [
{
"type": "Super",
"count": 1
}
]
},
{
"partialRefill": {
"type": "ReserveEnergy",
"limit": 20
}
}
]
},
{
"and": [
{
"resourceMissingAtMost": [
{
"type": "PowerBomb",
"count": 0
}
]
},
{
"partialRefill": {
"type": "ReserveEnergy",
"limit": 15
}
}
]
}
]
}
]
}
]
}
{
"or": [
"HiJump",
"canWallJump",
"SpaceJump",
"canIBJ",
"canSpringBallJumpMidAir",
"canTrickyUseFrozenEnemies",
{
"and": [
"canNeutralDamageBoost",
{
"or": [
{
"and": [
"canTrickyDodgeEnemies",
"h_crouchJumpDownGrab",
{
"enemyDamage": {
"enemy": "Cacatac",
"type": "spike",
"hits": 1
}
}
]
},
{
"and": [
"canMidAirMorph",
"canTrickyJump",
"canCrouchJump",
{
"enemyDamage": {
"enemy": "Zero",
"type": "contact",
"hits": 1
}
}
]
}
]
}
]
}
]
}
"canBePatient"
{
"canShineCharge": {
"usedTiles": 17,
"openEnd": 0
}
}
{
"autoReserveTrigger": {}
}
"canRModeSparkInterrupt"Clears obstacles: A, B |
From: 5
Top Right Door (Through Morph Tunnel)
To: 6
Elevator
Entrance condition: {
"comeInWithGMode": {
"mode": "indirect",
"morphed": true
}
}Requires: {
"or": [
"h_artificialMorphMovement",
"h_artificialMorphBombThings"
]
}
"canOffScreenMovement"Exit condition: {
"leaveWithGMode": {
"morphed": false
}
} |
From: 2
Right Door
To: 1
Left Door
This is a very long ceiling bomb jump. Crossing the room with artificial morph is particularly difficult without a good way to kill the Wavers. It is recommended to avoid killing the Firefleas, as the room gets dark fast. Entrance condition: {
"comeInWithGMode": {
"mode": "any",
"morphed": true
}
}Requires: {
"notable": "Long Ceiling Bomb Jump"
}
"h_artificialMorphBombHorizontally"
"h_artificialMorphIBJ"
"h_artificialMorphLongCeilingBombJump"
"canBeVeryPatient"
"canTrickyGMode" |
|


Requires: {
"noBlueSuit": {}
}
{
"or": [
"HiJump",
"SpaceJump",
"canIBJ",
"canWallJump"
]
} |
From: 3
Bottom Left Door
To: 2
Middle Left Door (Behind Power Bomb Blocks)
Gain R-mode while entering the room. Use the respawning bugs to refill reserve energy. Get grabbed by the Beetom and carry it to the 4-tile high gap one screen above the bottom-left door. Position Samus one pixel to the right of being against the wall. Jump and aim down, reaching the ceiling at the same time that reserves are triggered. This will force Samus to stand up, briefly clipping into the wall above. Immediately freeze the Beetom inside the wall, by buffering a shot during the reserve trigger. Use a Ripper to get knocked back onto the frozen Beetom. This will clip Samus one pixel left into the wall, making it possible to X-ray climb. X-ray climb up 2 screens. Entrance condition: {
"comeInWithRMode": {}
}Requires: {
"notable": "R-Mode Frozen Beetom X-Ray Climb"
}
{
"noBlueSuit": {}
}
{
  "or": [
    "canWallJump",
    "HiJump",
    "SpaceJump",
    "canIBJ",
    "canSpringBallJumpMidAir"
  ]
}
{
"refill": [
"Energy"
]
}
{
"autoReserveTrigger": {}
}
{
"enemyDamage": {
"enemy": "Beetom",
"type": "contact",
"hits": 1
}
}
{
"enemyDamage": {
"enemy": "Ripper",
"type": "contact",
"hits": 1
}
}
"canWallIceClip"
"canLongXRayClimb" |
|
Shinespark up to the middle portion to farm on Geegas. Time the shinespark to avoid killing the lowest Ripper. Go back down, shinecarge between the doors, and jump into the Ripper to interrupt. Entrance condition: {
"comeInWithRMode": {}
}Requires: {
"canShineCharge": {
"usedTiles": 14,
"openEnd": 0
}
}
{
"shinespark": {
"frames": 45,
"excessFrames": 5
}
}
{
"or": [
"canWallJump",
"HiJump",
"canSpringBallJumpMidAir",
"SpaceJump",
"canIBJ",
{
"and": [
"canTrickyUseFrozenEnemies",
"h_crouchJumpDownGrab"
]
}
]
}
{
"or": [
{
"canShineCharge": {
"usedTiles": 12,
"openEnd": 0
}
},
{
"and": [
{
"or": [
{
"doorUnlockedAtNode": 3
},
{
"doorUnlockedAtNode": 4
}
]
},
{
"canShineCharge": {
"usedTiles": 13,
"openEnd": 0
}
}
]
},
{
"and": [
{
"doorUnlockedAtNode": 3
},
{
"doorUnlockedAtNode": 4
},
{
"canShineCharge": {
"usedTiles": 14,
"openEnd": 0
}
}
]
}
]
}
{
"autoReserveTrigger": {
"maxReserveEnergy": 95
}
}
"canRModeSparkInterrupt"Unlocks doors: {"nodeId":3,"types":["ammo"],"requires":[]}
{"nodeId":4,"types":["ammo"],"requires":[]} |
From: 4
Bottom Right Door
To: 2
Middle Left Door (Behind Power Bomb Blocks)
Gain R-mode while entering the room. Use the respawning bugs to refill reserve energy. Get grabbed by the Beetom and carry it to the 4-tile high gap one screen above the bottom-left door. Position Samus one pixel to the right of being against the wall. Jump and aim down, reaching the ceiling at the same time that reserves are triggered. This will force Samus to stand up, briefly clipping into the wall above. Immediately freeze the Beetom inside the wall, by buffering a shot during the reserve trigger. Use a Ripper to get knocked back onto the frozen Beetom. This will clip Samus one pixel left into the wall, making it possible to X-ray climb. X-ray climb up 2 screens. Entrance condition: {
"comeInWithRMode": {}
}Requires: {
"notable": "R-Mode Frozen Beetom X-Ray Climb"
}
{
"noBlueSuit": {}
}
{
"or": [
"canWallJump",
"HiJump",
"SpaceJump",
"canIBJ",
"canSpringBallJumpMidAir"
]
}
{
"refill": [
"Energy"
]
}
{
"autoReserveTrigger": {}
}
{
"enemyDamage": {
"enemy": "Beetom",
"type": "contact",
"hits": 1
}
}
{
"enemyDamage": {
"enemy": "Ripper",
"type": "contact",
"hits": 1
}
}
"canWallIceClip"
"canLongXRayClimb" |
|
Shinespark up to the middle portion to farm on Geegas. Time the shinespark to avoid killing the lowest Ripper. Go back down, shinecarge between the doors, and jump into the Ripper to interrupt. Entrance condition: {
"comeInWithRMode": {}
}Requires: {
"canShineCharge": {
"usedTiles": 14,
"openEnd": 0
}
}
{
"shinespark": {
"frames": 45,
"excessFrames": 5
}
}
{
"or": [
"canWallJump",
"HiJump",
"canSpringBallJumpMidAir",
"SpaceJump",
"canIBJ",
{
"and": [
"canTrickyUseFrozenEnemies",
"h_crouchJumpDownGrab"
]
}
]
}
{
"refill": [
"Energy"
]
}
{
"or": [
{
"canShineCharge": {
"usedTiles": 12,
"openEnd": 0
}
},
{
"and": [
{
"or": [
{
"doorUnlockedAtNode": 3
},
{
"doorUnlockedAtNode": 4
}
]
},
{
"canShineCharge": {
"usedTiles": 13,
"openEnd": 0
}
}
]
},
{
"and": [
{
"doorUnlockedAtNode": 3
},
{
"doorUnlockedAtNode": 4
},
{
"canShineCharge": {
"usedTiles": 14,
"openEnd": 0
}
}
]
}
]
}
{
"autoReserveTrigger": {
"maxReserveEnergy": 95
}
}
"canRModeSparkInterrupt"Unlocks doors: {"nodeId":3,"types":["ammo"],"requires":[]}
{"nodeId":4,"types":["ammo"],"requires":[]} |
|
Requires: {
"or": [
"canWallJump",
"HiJump",
"canSpringBallJumpMidAir",
"SpaceJump",
"canIBJ"
]
} |
From: 7
Junction (Bottom of Room)
To: 6
Junction (Above Bottom Rippers)
Requires: "canTrivialUseFrozenEnemies"
{
"or": [
"HiJump",
"canWallJump",
"canSpringBallJumpMidAir",
"canIBJ"
]
} |
|
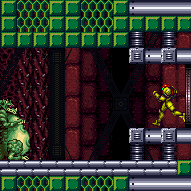
Kill all of the enemies with Bombs. Samus will take a Baby Kraid spike hit while rolling through the invisible projectiles. It is not too difficult to IBJ and then bomb horizontally over the cluster of invisible spikes, but there is some risk because they are invisible. They occupy a slightly smaller space than what Baby Kraid was occupying. Entrance condition: {
"comeInWithGMode": {
"mode": "any",
"morphed": true
}
}Requires: "h_artificialMorphBombs"
{
"or": [
{
"and": [
"h_artificialMorphIBJ",
"h_artificialMorphBombHorizontally",
"canTrickyDodgeEnemies"
]
},
{
"enemyDamage": {
"enemy": "Mini-Kraid",
"type": "spike",
"hits": 1
}
}
]
}Clears obstacles: A, door_2 |
|
Requires: {
"or": [
"SpaceJump",
"canIBJ",
"HiJump"
]
} |
|
The Kihunters can be killed from below but there is a chance one will drop down the hole. Watch them before breaking the shot block. Requires: {
"or": [
"HiJump",
"SpaceJump",
"canIBJ",
"canWallJump"
]
}Clears obstacles: C, D |
|
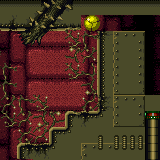
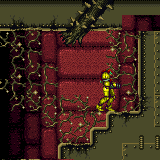
Requires: {
"or": [
"canMidAirMorph",
"h_useSpringBall",
"canIBJ"
]
}
{
"obstaclesCleared": [
"A"
]
} |
|


Requires: "h_usePowerBomb"
{
"or": [
"canMidAirMorph",
"h_useSpringBall",
"canIBJ"
]
}Clears obstacles: A, B, C |
From: 3
Right Vertical Door
To: 3
Right Vertical Door
Entrance condition: {
"comeInWithGMode": {
"mode": "direct",
"morphed": true
},
"comesThroughToilet": "any"
}Requires: {
"or": [
"h_artificialMorphSpringBallBombJump",
{
"and": [
"h_artificialMorphSpringBall",
"HiJump"
]
},
"h_artificialMorphIBJ",
"Morph"
]
}Exit condition: {
"leaveWithGMode": {
"morphed": true
}
} |
From: 4
Left Side - Bottom Door
To: 4
Left Side - Bottom Door
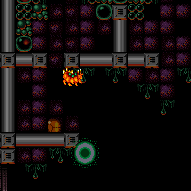

Place a Power Bomb high enough to reach the blocks above. Entrance condition: {
"comeInWithGMode": {
"mode": "any",
"morphed": true
}
}Requires: "h_artificialMorphMovement" "h_artificialMorphPowerBomb" Clears obstacles: A |
From: 4
Left Side - Bottom Door
To: 9
Main Junction
Entrance condition: {
"comeInWithGMode": {
"mode": "any",
"morphed": true
}
}Requires: "h_blueSuitGMode"
{
"or": [
"h_artificialMorphIBJ",
"h_artificialMorphSpringBall"
]
} |
From: 5
Bottom Door
To: 5
Bottom Door
Place a Power Bomb high enough to reach the blocks above. Entrance condition: {
"comeInWithGMode": {
"mode": "indirect",
"morphed": true
},
"comesThroughToilet": "any"
}Requires: "h_artificialMorphMovement" "h_artificialMorphPowerBomb" Clears obstacles: A |
|
Requires: "h_useMorphBombs"
{
"or": [
"canMidAirMorph",
"h_useSpringBall",
"canIBJ"
]
} |
|
Requires: {
"haveBlueSuit": {}
}
"Morph"
{
"or": [
"canMidAirMorph",
"h_useSpringBall",
"canIBJ"
]
} |
From: 6
Middle Right Door
To: 10
G-Mode Morph, Above the Power Bomb Blocks

Lower the camera to watch the Wavers and to help avoid them. With Bombs alone, it may be helpful to kill the top Waver; this can be done by placing Bombs in a vertical line and then moving out of the way as it approaches. Entrance condition: {
"comeInWithGMode": {
"mode": "any",
"morphed": true
}
}Requires: "h_artificialMorphMovement"
{
"or": [
{
"and": [
"canTrickyJump",
"canCameraManip"
]
},
"h_artificialMorphPowerBomb",
{
"enemyDamage": {
"enemy": "Waver",
"type": "contact",
"hits": 1
}
}
]
} |
From: 7
Top Right Door
To: 10
G-Mode Morph, Above the Power Bomb Blocks
Lower the camera to watch the Wavers and to help avoid them. With Bombs alone, it may be helpful to kill the top Waver; this can be done by placing Bombs in a vertical line and then moving out of the way as it approaches. Entrance condition: {
"comeInWithGMode": {
"mode": "any",
"morphed": true
}
}Requires: "h_artificialMorphMovement"
{
"or": [
{
"and": [
"canTrickyJump",
"canCameraManip"
]
},
"h_artificialMorphPowerBomb",
{
"enemyDamage": {
"enemy": "Waver",
"type": "contact",
"hits": 1
}
}
]
} |
|
Either kill the Ripper, or dodge it by jumping into IBJ. Requires: "canIBJ"
{
"or": [
{
"enemyKill": {
"enemies": [
[
"Ripper"
]
],
"explicitWeapons": [
"ScrewAttack",
"Super",
"PowerBomb"
]
}
},
"canJumpIntoIBJ"
]
} |
|
Requires: {
"noBlueSuit": {}
}
"ScrewAttack"
{
"or": [
"canWallJump",
"HiJump",
"SpaceJump",
{
"and": [
"canSpringBallJumpMidAir",
"h_doubleEquipmentScreenCycleFrames",
{
"cycleFrames": 20
}
]
},
{
"and": [
"canIBJ",
{
"cycleFrames": 600
}
]
}
]
}
{
"or": [
{
"and": [
{
"resetRoom": {
"nodes": [
1
]
}
},
{
"or": [
{
"and": [
"SpaceJump",
{
"cycleFrames": 1050
}
]
},
{
"and": [
"canDash",
"HiJump",
"canTrickyWallJump",
{
"cycleFrames": 970
}
]
},
{
"and": [
"HiJump",
"canSpringBallJumpMidAir",
{
"cycleFrames": 970
},
"h_doubleEquipmentScreenCycleFrames"
]
}
]
}
]
},
{
"and": [
{
"resetRoom": {
"nodes": [
2
]
}
},
{
"cycleFrames": 840
}
]
},
{
"and": [
{
"resetRoom": {
"nodes": [
3
]
}
},
{
"cycleFrames": 960
}
]
},
{
"and": [
{
"resetRoom": {
"nodes": [
4
]
}
},
{
"cycleFrames": 1800
},
"h_useMorphBombs"
]
},
{
"and": [
{
"resetRoom": {
"nodes": [
5
]
}
},
{
"cycleFrames": 1800
},
"h_useMorphBombs"
]
}
]
}Resets obstacles: A Farm cycle drops: 1 Ripper 2 (red), 1 Waver |
|
Unmorph after exiting the morph tunnel and get to the other side of the room. Killing the Dessgeegas can be done with no beam upgrades; Samus can jump over them while shooting the last few hits or retreat to the left. It is possible to kill a Sova on the door and pause abuse to grab its Energy drop on G-mode exit. Samus will likely need to wait at the door for about a minute for the global Sova gets there. Entrance condition: {
"comeInWithGMode": {
"mode": "any",
"morphed": true
}
}Requires: "h_artificialMorphMovement"
{
"or": [
"canTrickyJump",
"h_artificialMorphPowerBomb",
"h_hasBeamUpgrade",
{
"enemyKill": {
"enemies": [
[
"Sm. Dessgeega",
"Sm. Dessgeega"
]
],
"explicitWeapons": [
"Missile",
"Super",
"ScrewAttack"
]
}
},
{
"enemyDamage": {
"enemy": "Sm. Dessgeega",
"type": "contact",
"hits": 1
}
}
]
}
{
"or": [
"HiJump",
"SpaceJump",
"canSpringBallJumpMidAir",
"canIBJ",
"canTrickyDashJump",
{
"and": [
"canTrickyUseFrozenEnemies",
"canWallJump"
]
},
{
"and": [
{
"canShineCharge": {
"usedTiles": 43,
"openEnd": 0
}
},
{
"shinespark": {
"frames": 9,
"excessFrames": 5
}
}
]
},
{
"and": [
"canInsaneWallJump",
"canWallJumpInstantMorph",
"canUnmorphBombBoost",
"canDownGrab"
]
}
]
}
{
"or": [
{
"and": [
"h_heatedGModePauseAbuse",
"canBePatient"
]
},
"h_heatedGModeOpenDifferentDoor"
]
}Dev note: FIXME: Methods that require a Sova damage boost could be added |
|

Carefully roll under the Sm. Desgeegas or kill them with a Power Bomb (while avoiding killing the Sova). It is possible to kill a Sova on the door and pause abuse to grab its Energy drop on G-mode exit. Samus will likely need to wait at the door for about a minute for the global Sova gets there. Entrance condition: {
"comeInWithGMode": {
"mode": "any",
"morphed": true
}
}Requires: "h_artificialMorphIBJ"
{
"or": [
"canTrickyDodgeEnemies",
{
"and": [
"h_artificialMorphPowerBomb",
"h_artificialMorphPowerBomb"
]
},
{
"haveBlueSuit": {}
}
]
}
{
"or": [
{
"and": [
"h_heatedGModePauseAbuse",
"canBePatient"
]
},
"h_heatedGModeOpenDifferentDoor"
]
} |
|

Wait for the Sova to pass then carefully roll under the Sm. Desgeegas or kill them with a Power Bomb (while avoiding killing the Sova). It is possible to kill a Sova on the door and pause abuse to grab its Energy drop on G-mode exit. The local or global Sova can be used. To use the local one, keep it off camera when possible and horizontally boost to jump over both stairs at once. With Spring Ball or a moderately good IBJ, Samus should be able to get through the morph tunnel before the global Sova, otherwise it takes just over a minute for it to return. Entrance condition: {
"comeInWithGMode": {
"mode": "any",
"morphed": true
}
}Requires: {
"or": [
"canTrickyDodgeEnemies",
"h_artificialMorphPowerBomb",
{
"enemyDamage": {
"enemy": "Sm. Dessgeega",
"type": "contact",
"hits": 1
}
},
{
"haveBlueSuit": {}
}
]
}
{
"or": [
"h_artificialMorphIBJ",
"h_artificialMorphSpringBall"
]
}
{
"or": [
"h_heatedGModePauseAbuse",
"h_heatedGModeOpenDifferentDoor"
]
} |
|
Requires: "h_heatProof"
{
"resetRoom": {
"nodes": [
2
]
}
}
{
"or": [
{
"and": [
"HiJump",
{
"cycleFrames": 550
}
]
},
{
"and": [
"SpaceJump",
{
"cycleFrames": 610
}
]
},
{
"and": [
"h_useSpringBall",
"h_doubleEquipmentScreenCycleFrames",
{
"cycleFrames": 600
}
]
},
{
"and": [
"canIBJ",
{
"cycleFrames": 1220
}
]
},
{
"and": [
"canJumpIntoIBJ",
{
"cycleFrames": 830
}
]
}
]
}
{
"or": [
{
"and": [
"canDash",
{
"or": [
"Plasma",
{
"and": [
"Spazer",
{
"cycleFrames": 50
}
]
},
{
"and": [
"Wave",
{
"cycleFrames": 50
}
]
},
{
"and": [
"Ice",
{
"cycleFrames": 260
}
]
},
{
"and": [
"ScrewAttack",
{
"cycleFrames": 80
}
]
},
{
"and": [
"canPseudoScrew",
{
"cycleFrames": 160
}
]
},
{
"and": [
"canTrickyJump",
{
"cycleFrames": 540
}
]
}
]
}
]
},
{
"and": [
{
"haveBlueSuit": {}
},
{
"cycleFrames": 260
}
]
}
]
}Resets obstacles: R-Mode Farm cycle drops: 2 Sova, 2 Sm. Dessgeega |
|
Requires: {
"or": [
{
"and": [
"canIBJ",
{
"heatFrames": 1020
}
]
},
{
"and": [
"canDoubleBombJump",
{
"heatFrames": 510
}
]
}
]
} |
From: 1
Top Left Door
To: 3
Right Door
Bomb boost onto the crumble blocks in the middle of the spike pit, then on the right side, move the Ripper off camera and IBJ. If the camera gets shifted so that the Ripper stays on camera, shift it back to the right by IBJng up a bit on the left side of the 4 crumbles then move to the right as Samus falls. Entrance condition: {
"comeInWithGMode": {
"mode": "indirect",
"morphed": true
}
}Requires: "h_artificialMorphIBJ" "h_artificialMorphBombHorizontally" "canCameraManip" "canTrickyJump" "h_heatedGModeOpenDifferentDoor" |
|
Entrance condition: {
"comeInWithGMode": {
"mode": "any",
"morphed": true
}
}Requires: "h_artificialMorphIBJ" "h_heatedGModeOpenDifferentDoor" |
From: 2
Bottom Left Door
To: 3
Right Door
Bomb boost onto the crumble blocks in the middle of the spike pit, then on the right side, move the Ripper off camera and IBJ. If the camera gets shifted so that the Ripper stays on camera, shift it back to the right by IBJng up a bit on the left side of the 4 crumbles then move to the right as Samus falls. Entrance condition: {
"comeInWithGMode": {
"mode": "indirect",
"morphed": true
}
}Requires: "h_artificialMorphIBJ" "h_artificialMorphBombHorizontally" "canCameraManip" "canTrickyJump" "h_heatedGModeOpenDifferentDoor" |
|
Entrance condition: {
"comeInWithGMode": {
"mode": "indirect",
"morphed": true
}
}Requires: "h_artificialMorphIBJ"
{
"heatFrames": 0
} |
From: 2
Bottom Left Door
To: 4
Item
Stand under where the gate will spawn when exiting G-mode to open it before grabbing the item. Entrance condition: {
"comeInWithGMode": {
"mode": "indirect",
"morphed": true
}
}Requires: "h_artificialMorphIBJ"
{
"heatFrames": 25
}Clears obstacles: A |
|
Bomb horizontally on room entry to jump over the Ripper and land on the crumble blocks, or use a Power Bomb to kill the Ripper. Avoid touching all 6 crumbles, so Samus can use the item to overload PLMs and go through one of the crumbles to get to the left side of the room. If the item has already been obtained, Samus can shoot or Bomb the gate many times to overload PLMs. Entrance condition: {
"comeInWithGMode": {
"mode": "direct",
"morphed": true
}
}Requires: "canRemoteAcquire"
{
"or": [
"h_artificialMorphCeilingBombJump",
{
"and": [
"h_artificialMorphBombHorizontally",
"h_artificialMorphIBJ",
"h_artificialMorphPowerBomb"
]
},
{
"and": [
"h_artificialMorphBombHorizontally",
"canTrickyDodgeEnemies",
"h_artificialMorphDoubleBombJump",
"h_artificialMorphStaggeredIBJ"
]
}
]
}
"h_heatedGModeOpenDifferentDoor"Collects items: 4 |
From: 3
Right Door
To: 1
Top Left Door

Bomb horizontally on room entry to jump over the Ripper and land on the crumble blocks, or use a Power Bomb to kill the Ripper. Entrance condition: {
"comeInWithGMode": {
"mode": "indirect",
"morphed": true
}
}Requires: {
"or": [
"h_artificialMorphCeilingBombJump",
{
"and": [
"h_artificialMorphBombHorizontally",
"h_artificialMorphIBJ",
"h_artificialMorphPowerBomb"
]
},
{
"and": [
"h_artificialMorphBombHorizontally",
"canTrickyDodgeEnemies",
"h_artificialMorphDoubleBombJump",
"h_artificialMorphStaggeredIBJ"
]
}
]
}
"h_heatedGModeOpenDifferentDoor" |
From: 3
Right Door
To: 2
Bottom Left Door
Bomb horizontally on room entry to jump over the Ripper and land on the crumble blocks, or use a Power Bomb to kill the Ripper. Avoid touching all 6 crumbles, so Samus can use the item to overload PLMs and go through one of the crumbles to get to the left side of the room. If the item has already been obtained, Samus can shoot or Bomb the gate many times to overload PLMs. Entrance condition: {
"comeInWithGMode": {
"mode": "direct",
"morphed": true
}
}Requires: "canRemoteAcquire"
{
"or": [
"h_artificialMorphCeilingBombJump",
{
"and": [
"h_artificialMorphBombHorizontally",
"h_artificialMorphIBJ",
"h_artificialMorphPowerBomb"
]
},
{
"and": [
"h_artificialMorphBombHorizontally",
"canTrickyDodgeEnemies",
"h_artificialMorphDoubleBombJump",
"h_artificialMorphStaggeredIBJ"
]
}
]
}
"h_heatedGModeOpenDifferentDoor"Collects items: 4 |
From: 3
Right Door
To: 2
Bottom Left Door
Bomb horizontally on room entry to jump over the Ripper and land on the crumble blocks, or use a Power Bomb to kill the Ripper. Entrance condition: {
"comeInWithGMode": {
"mode": "indirect",
"morphed": true
}
}Requires: {
"or": [
"h_artificialMorphCeilingBombJump",
{
"and": [
"h_artificialMorphBombHorizontally",
"h_artificialMorphIBJ",
"h_artificialMorphPowerBomb"
]
},
{
"and": [
"h_artificialMorphBombHorizontally",
"canTrickyDodgeEnemies",
"h_artificialMorphDoubleBombJump",
"h_artificialMorphStaggeredIBJ"
]
}
]
}
"h_heatedGModeOpenDifferentDoor" |
From: 3
Right Door
To: 3
Right Door


Bomb horizontally on room entry to jump over the Ripper and land on the crumble blocks, or use a Power Bomb to kill the Ripper. Entrance condition: {
"comeInWithGMode": {
"mode": "direct",
"morphed": true
}
}Requires: "canRemoteAcquire"
{
"or": [
"h_artificialMorphLongCeilingBombJump",
{
"and": [
"h_artificialMorphBombHorizontally",
"h_artificialMorphIBJ",
"h_artificialMorphPowerBomb"
]
},
{
"and": [
"h_artificialMorphBombHorizontally",
"canTrickyDodgeEnemies",
"h_artificialMorphDoubleBombJump",
"h_artificialMorphStaggeredIBJ"
]
}
]
}
"h_heatedDirectGModeLeaveSameDoor"Collects items: 4 |
From: 3
Right Door
To: 3
Right Door
Jump onto the crumble blocks to make them solid, then use them as a platform to cross the room. Entrance condition: {
"comeInWithGMode": {
"mode": "direct",
"morphed": false
}
}Requires: "canRemoteAcquire"
{
"or": [
"ScrewAttack",
"h_usePowerBomb",
{
"ammo": {
"type": "Missile",
"count": 2
}
},
{
"ammo": {
"type": "Super",
"count": 1
}
}
]
}
"canIBJ"
"canBombHorizontally"
"h_heatedDirectGModeLeaveSameDoor"Collects items: 4 |
|
Bomb horizontally on room entry to jump over the Ripper and land on the crumble blocks, or use a Power Bomb to kill the Ripper. Entrance condition: {
"comeInWithGMode": {
"mode": "any",
"morphed": true
}
}Requires: {
"or": [
"h_artificialMorphCeilingBombJump",
{
"and": [
"h_artificialMorphBombHorizontally",
"h_artificialMorphIBJ",
"h_artificialMorphPowerBomb"
]
},
{
"and": [
"h_artificialMorphBombHorizontally",
"canTrickyDodgeEnemies",
"h_artificialMorphDoubleBombJump",
"h_artificialMorphStaggeredIBJ"
]
}
]
}
{
"heatFrames": 0
} |
|
Bomb horizontally on room entry to jump over the Ripper and land on the crumble blocks, or use a Power Bomb to kill the Ripper. In indirect G-mode, stand where the gate will spawn and exit G-mode to open the gate. In direct G-mode, overload PLMs by shooting the gate then position Samus a few pixels away from the gate to where upward diagonal shots go through it. Crouch then shoot diagonally and quickly exit G-mode (3-7 frames later) to open the gate on G-mode exit. Entrance condition: {
"comeInWithGMode": {
"mode": "any",
"morphed": true
}
}Requires: "canComplexGMode"
"h_heatedGMode"
{
"or": [
"h_artificialMorphCeilingBombJump",
{
"and": [
"h_artificialMorphBombHorizontally",
"h_artificialMorphIBJ",
"h_artificialMorphPowerBomb"
]
},
{
"and": [
"h_artificialMorphBombHorizontally",
"canTrickyDodgeEnemies",
"h_artificialMorphDoubleBombJump",
"h_artificialMorphStaggeredIBJ"
]
}
]
}
{
"heatFrames": 35
}Clears obstacles: A Dev note: Artificial morph strats can be useful, for instance, in indirect G-mode without heat protection, where Samus needs to collect the item. The canComplexGMode is only used here to describe opening the gate in direct G-mode without gate glitching. However, the indirect variant still requires canHeatedGMode or Varia - with Varia, indirect strats can instead be used to go to the top left door and return. |
|
Jump onto the crumble blocks to make them solid, then use them as a platform to cross the room. Entrance condition: {
"comeInWithGMode": {
"mode": "any",
"morphed": false
}
}Requires: {
"or": [
{
"and": [
"ScrewAttack",
{
"noBlueSuit": {}
}
]
},
"h_usePowerBomb",
{
"ammo": {
"type": "Missile",
"count": 2
}
},
{
"ammo": {
"type": "Super",
"count": 1
}
}
]
}
"canIBJ"
"canBombHorizontally"
{
"heatFrames": 0
} |
|
Jump onto the crumble blocks to make them solid, then use them as a platform to cross the room. In indirect G-mode, stand where the gate will spawn and exit G-mode to open the gate. In direct G-mode, overload PLMs by shooting the gate then position Samus a few pixels away from the gate to where upward diagonal shots go through it. Crouch then shoot diagonally and quickly exit G-mode (3-7 frames later) to open the gate on G-mode exit. Entrance condition: {
"comeInWithGMode": {
"mode": "any",
"morphed": false
}
}Requires: "canComplexGMode"
"h_heatedGMode"
{
"or": [
{
"and": [
"ScrewAttack",
{
"noBlueSuit": {}
}
]
},
"h_usePowerBomb",
{
"ammo": {
"type": "Missile",
"count": 2
}
},
{
"ammo": {
"type": "Super",
"count": 1
}
}
]
}
"canIBJ"
"canBombHorizontally"
{
"heatFrames": 35
}Clears obstacles: A Dev note: The canComplexGMode is only used here to describe opening the gate in direct G-mode without gate glitching. However, the indirect variant still requires canHeatedGMode or Varia - with Varia, indirect strats can instead be used to go to the top left door and return. |
From: 3
Right Door
To: 6
G-Mode, Remote Acquire Junction (Bottom Right)
Bomb horizontally on room entry to jump over the Ripper and land on the crumble blocks, or use a Power Bomb to kill the Ripper. Avoid touching all 6 crumbles, so Samus can use the item to overload PLMs and go through one of the crumbles to get to the left side of the room. If the item has already been obtained, Samus can shoot or Bomb the gate many times to overload PLMs. Entrance condition: {
"comeInWithGMode": {
"mode": "direct",
"morphed": true
}
}Requires: "canRemoteAcquire"
{
"or": [
"h_artificialMorphCeilingBombJump",
{
"and": [
"h_artificialMorphBombHorizontally",
"h_artificialMorphIBJ",
"h_artificialMorphPowerBomb"
]
},
{
"and": [
"h_artificialMorphBombHorizontally",
"canTrickyDodgeEnemies",
"h_artificialMorphDoubleBombJump",
"h_artificialMorphStaggeredIBJ"
]
}
]
}
{
"heatFrames": 0
}Dev note: This is only useful if the item is Morph, because with Morph, another strat would have been used. |
From: 3
Right Door
To: 6
G-Mode, Remote Acquire Junction (Bottom Right)
Jump onto the crumble blocks to make them solid, then use them as a platform to get to the item. Avoid touching all 6 crumbles, so Samus can use the item to overload PLMs and go through one of the crumbles to get to the left side of the room. If the item has already been obtained, Samus can shoot the gate many times to overload PLMs. Entrance condition: {
"comeInWithGMode": {
"mode": "direct",
"morphed": false
}
}Requires: "canRemoteAcquire"
{
"or": [
{
"and": [
"ScrewAttack",
{
"noBlueSuit": {}
}
]
},
"h_usePowerBomb",
{
"ammo": {
"type": "Missile",
"count": 2
}
},
{
"ammo": {
"type": "Super",
"count": 1
}
}
]
}
"canIBJ"
"canBombHorizontally"
{
"heatFrames": 0
} |
From: 3
Right Door
To: 6
G-Mode, Remote Acquire Junction (Bottom Right)
Jump onto the crumble blocks to make them solid, then use them as a platform to get to the item. With Grapple, a running jump then single Grapple swing can be used before PLMs are overloaded, alternatively jump on the crumble blocks and Grapple the Ripper. Avoid touching all 6 crumbles, so Samus can use the item to overload PLMs and go through one of the crumbles to get to the left side of the room. If the item has already been obtained, Samus can shoot the gate many times to overload PLMs. Entrance condition: {
"comeInWithGMode": {
"mode": "direct",
"morphed": false
}
}Requires: "canRemoteAcquire"
{
"or": [
"SpaceJump",
"canCeilingBombJump",
{
"and": [
"canBombHorizontally",
"canIBJ",
"h_usePowerBomb"
]
},
{
"and": [
"canStaggeredIBJ",
"canDoubleBombJump",
"canBombHorizontally"
]
},
{
"and": [
"canPreciseGrapple",
"canUseEnemies"
]
},
{
"and": [
"canDash",
{
"or": [
"canTrickySpringBallJump",
"canInsaneWallJump",
{
"and": [
"HiJump",
"canWallJump"
]
},
{
"and": [
"HiJump",
"canSpeedyJump"
]
},
"h_IBJFromSpikes"
]
}
]
}
]
}
{
"heatFrames": 0
} |
From: 3
Right Door
To: 7
G-Mode Junction (Bottom Right)
Jump onto the crumble blocks to make them solid, then use them as a platform to cross the room. With Grapple, a running jump then single Grapple swing can be used before PLMs are overloaded, alternatively jump on the crumble blocks and Grapple the Ripper. Entrance condition: {
"comeInWithGMode": {
"mode": "indirect",
"morphed": false
}
}Requires: "Morph"
{
"or": [
"SpaceJump",
"canCeilingBombJump",
{
"and": [
"canStaggeredIBJ",
"canDoubleBombJump",
"canBombHorizontally"
]
},
{
"and": [
"canBombHorizontally",
"canIBJ",
"h_usePowerBomb"
]
},
{
"and": [
"canDash",
{
"or": [
"canTrickySpringBallJump",
"canInsaneWallJump",
{
"and": [
"HiJump",
"canWallJump"
]
},
{
"and": [
"HiJump",
"canSpeedyJump"
]
},
"h_IBJFromSpikes"
]
}
]
},
{
"and": [
"canPreciseGrapple",
{
"or": [
"canDash",
"canUseEnemies",
"canInsaneJump"
]
}
]
}
]
}
{
"heatFrames": 0
}Dev note: With Grapple, Morph isn't needed, but there's no reason to go there without Morph. |
From: 3
Right Door
To: 7
G-Mode Junction (Bottom Right)
Jump onto the crumble blocks to make them solid, then use them as a platform to cross the room. Entrance condition: {
"comeInWithGMode": {
"mode": "indirect",
"morphed": false
}
}Requires: {
"or": [
{
"and": [
"ScrewAttack",
{
"noBlueSuit": {}
}
]
},
"h_usePowerBomb",
{
"ammo": {
"type": "Missile",
"count": 2
}
},
{
"ammo": {
"type": "Super",
"count": 1
}
}
]
}
"canIBJ"
"canBombHorizontally"
{
"heatFrames": 0
} |
From: 6
G-Mode, Remote Acquire Junction (Bottom Right)
To: 1
Top Left Door
It is possible to climb the left side of the room with SpeedBooster alone, with either a tricky dash jump or a vertical shinespark. Requires: "canRemoteAcquire"
"Morph"
{
"or": [
"SpaceJump",
"canSpringBallJumpMidAir",
"canWallJump",
{
"and": [
"HiJump",
"canSpeedyJump"
]
},
"canIBJ",
"canTrickyDashJump",
{
"and": [
{
"canShineCharge": {
"usedTiles": 28,
"gentleUpTiles": 3,
"gentleDownTiles": 3,
"openEnd": 0
}
},
{
"or": [
{
"shinespark": {
"frames": 18,
"excessFrames": 8
}
},
{
"and": [
"canSpeedyJump",
{
"shinespark": {
"frames": 16,
"excessFrames": 10
}
}
]
}
]
}
]
}
]
}
"h_heatedGModeOpenDifferentDoor"Collects items: 4 |
From: 6
G-Mode, Remote Acquire Junction (Bottom Right)
To: 1
Top Left Door
With Plasma and a pause abuse, it is possible to kill the Kago and exit G-mode while killing the Kago bugs and make it to the door with a small amount of Energy remaining. Shoot Plasma and quickly exit G-Mode, so that the bugs die immediately. Avoid having spent much time on the left side of the room, as the Fune fireballs will reduce the number of drops obtained. Note that it is possible to climb the left side of the room with SpeedBooster alone, with either a tricky dash jump or a vertical shinespark. Requires: "canComplexGMode"
"canRemoteAcquire"
"Morph"
{
"or": [
"SpaceJump",
"canSpringBallJumpMidAir",
"canWallJump",
{
"and": [
"HiJump",
"canSpeedyJump"
]
},
"canIBJ",
"canTrickyDashJump",
{
"and": [
{
"canShineCharge": {
"usedTiles": 28,
"gentleUpTiles": 3,
"gentleDownTiles": 3,
"openEnd": 0
}
},
{
"or": [
{
"shinespark": {
"frames": 18,
"excessFrames": 8
}
},
{
"and": [
"canSpeedyJump",
{
"shinespark": {
"frames": 16,
"excessFrames": 10
}
}
]
}
]
}
]
}
]
}
"Plasma"
"h_heatedGModePauseAbuse"
"canInsaneJump"Collects items: 4 Dev note: All of these methods are fast enough to be able to escape after obtaining the drops. The shinespark is longer than 1 frame, but is modeled this way because the drops aren't properly modeled. FIXME: The item that was remote acquired could be Morph, one of the items needed to climb the room, or maybe Plasma. |
|
It is possible to climb the left side of the room with SpeedBooster alone, with either a tricky dash jump or a vertical shinespark. Requires: "Morph"
{
"or": [
"SpaceJump",
"canSpringBallJumpMidAir",
"canWallJump",
{
"and": [
"HiJump",
"canSpeedyJump"
]
},
"canIBJ",
"canTrickyDashJump",
{
"and": [
{
"canShineCharge": {
"usedTiles": 28,
"gentleUpTiles": 3,
"gentleDownTiles": 3,
"openEnd": 0
}
},
{
"or": [
{
"shinespark": {
"frames": 18,
"excessFrames": 8
}
},
{
"and": [
"canSpeedyJump",
{
"shinespark": {
"frames": 16,
"excessFrames": 10
}
}
]
}
]
}
]
}
]
}
"h_heatedGModeOpenDifferentDoor" |
From: 1
Top Left Door
To: 2
Middle Left Door

Entrance condition: {
"comeInWithGMode": {
"mode": "indirect",
"morphed": true
}
}Requires: {
"or": [
"h_artificialMorphMovement",
"h_artificialMorphBombHorizontally"
]
}
"h_heatedGModeOffCameraDoor"Dev note: It is possible to open the gate as it closes, but isn't expected since this is off camera. To do that would require resetting the room. |
From: 3
Bottom Left Door
To: 2
Middle Left Door

Entrance condition: {
"comeInWithGMode": {
"mode": "indirect",
"morphed": true
}
}Requires: "h_artificialMorphMovement" "h_heatedGModeOffCameraDoor" Dev note: It is possible to open the gate as it closes, but isn't expected since this is off camera. To do that would require resetting the room. |
From: 4
Top Right Door
To: 2
Middle Left Door
Entrance condition: {
"comeInWithGMode": {
"mode": "indirect",
"morphed": true
}
}Requires: {
"or": [
"h_artificialMorphMovement",
"h_artificialMorphBombHorizontally"
]
}
"h_heatedGModeOffCameraDoor"Dev note: It is possible to open the gate as it closes, but isn't expected since this is off camera. To do that would require resetting the room. |
|
Entrance condition: {
"comeInWithGMode": {
"mode": "direct",
"morphed": true
},
"comesThroughToilet": "any"
}Requires: {
"or": [
"h_artificialMorphIBJ",
"h_artificialMorphSpringBallBombJump",
{
"and": [
"HiJump",
"h_artificialMorphSpringBall"
]
}
]
}Exit condition: {
"leaveWithGMode": {
"morphed": true
}
} |
From: 1
Left Shaft - Top Left Door
To: 5
Far Right Door


It is important avoid touching the invisible fireballs the Alcoons place. It is possible to bomb from the edge of the top door runway into the hidden morph tunnel, but if Samus is not at the edge, she will bonk and fall. After entering the morph tunnel, roll through the two camera scroll blocks a few times to overload PLMs. They are at the entrance and two tiles in the tunnel. Exit G-mode and go through the room to the far right door. Entrance condition: {
"comeInWithGMode": {
"mode": "any",
"morphed": true
}
}Requires: "canTrickyDodgeEnemies"
{
"or": [
"h_artificialMorphBombHorizontally",
"h_artificialMorphJumpIntoIBJ",
{
"and": [
"h_artificialMorphIBJ",
"h_artificialMorphPowerBomb"
]
},
{
"and": [
"h_artificialMorphSpringBall",
"HiJump"
]
},
"h_artificialMorphSpringBallBombJump"
]
}
"h_heatedGModeOffCameraDoor" |
From: 1
Left Shaft - Top Left Door
To: 5
Far Right Door

It is important avoid touching the invisible fireballs the Alcoons place. It is possible to kill them without any beam upgrades or ammo by jumping and shooting horizontally near the floor surface. Stay near the far wall when shooting to prevent getting too close and triggering their jump. After entering the morph tunnel, roll through the two camera scroll blocks a few times to overload PLMs. They are at the entrance and two tiles in the tunnel. Exit G-mode and go through the room to the far right door. Entrance condition: {
"comeInWithGMode": {
"mode": "any",
"morphed": false
}
}Requires: "Morph"
{
"or": [
{
"and": [
"canBombHorizontally",
"canTrickyJump"
]
},
"HiJump",
"canWallJump",
"SpaceJump",
"canSpringBallJumpMidAir",
"canIBJ",
"canTrickyUseFrozenEnemies"
]
}
"h_heatedGModeOffCameraDoor"Dev note: It is possible to go from 5->1 with a bomb spread, but it requires difficult off-screen movement to escape the room. |
From: 2
Left Shaft - Bottom Right Door
To: 3
Left Shaft - Middle Right Door
It is important avoid touching the invisible fireballs the Alcoons place. Entrance condition: {
"comeInWithGMode": {
"mode": "any",
"morphed": false
}
}Requires: {
"or": [
"h_crouchJumpDownGrab",
"HiJump",
"canWallJump",
"SpaceJump",
"canSpringBallJumpMidAir",
"canIBJ"
]
}
"h_heatedGModeOpenDifferentDoor"Dev note: Frozen Alcoon platforms and Artificial morph IBJ are not included, as Samus can crouch jump and down grab; they can be considered if G-mode + flash suits are added, though they are still likely not useful. |
From: 2
Left Shaft - Bottom Right Door
To: 4
Left Shaft - Top Right Door
It is important avoid touching the invisible fireballs the Alcoons place. Entrance condition: {
"comeInWithGMode": {
"mode": "any",
"morphed": false
}
}Requires: {
"or": [
"h_crouchJumpDownGrab",
"HiJump",
"canWallJump",
"SpaceJump",
"canSpringBallJumpMidAir",
"canIBJ"
]
}
"h_heatedGModeOpenDifferentDoor"Dev note: Frozen Alcoon platforms and Artificial morph IBJ are not included, as Samus can crouch jump and down grab; they can be considered if G-mode + flash suits are added, though they are still likely not useful. FIXME: It is possible to kill a Multiviola in the gap in the floor, but Samus only gets one attempt, and its very difficult to escape with a small Energy drop. |
From: 2
Left Shaft - Bottom Right Door
To: 5
Far Right Door
It is important avoid touching the invisible fireballs the Alcoons place. Jump over them or kill the Alcoons with Power Bombs. After entering the morph tunnel, roll through the two camera scroll blocks a few times to overload PLMs. They are at the entrance and two tiles in the tunnel. Exit G-mode and go through the room to the far right door. Entrance condition: {
"comeInWithGMode": {
"mode": "any",
"morphed": true
}
}Requires: {
"or": [
{
"and": [
"h_artificialMorphIBJ",
{
"ammo": {
"type": "PowerBomb",
"count": 3
}
}
]
},
{
"and": [
"h_artificialMorphSpringBall",
"HiJump"
]
},
{
"and": [
"h_artificialMorphSpringBallBombJump",
{
"or": [
"h_artificialMorphBombs",
{
"ammo": {
"type": "PowerBomb",
"count": 4
}
}
]
}
]
}
]
}
"h_heatedGModeOffCameraDoor" |
From: 2
Left Shaft - Bottom Right Door
To: 5
Far Right Door
It is important avoid touching the invisible fireballs the Alcoons place. It is possible to kill them without any beam upgrades or ammo by jumping and shooting horizontally near the floor surface. Stay near the far wall when shooting to prevent getting too close and triggering their jump. After entering the morph tunnel, roll through the two camera scroll blocks a few times to overload PLMs. They are at the entrance and two tiles in the tunnel. Exit G-mode and go through the room to the far right door. Entrance condition: {
"comeInWithGMode": {
"mode": "any",
"morphed": false
}
}Requires: "Morph"
{
"or": [
"HiJump",
"canWallJump",
"SpaceJump",
"canSpringBallJumpMidAir",
"canIBJ",
{
"and": [
"h_crouchJumpDownGrab",
"canBombHorizontally"
]
},
{
"and": [
"h_crouchJumpDownGrab",
"canTrickyUseFrozenEnemies"
]
}
]
}
"h_heatedGModeOffCameraDoor"Dev note: Frozen Alcoon platforms and Artificial morph IBJ are not included, as Samus can crouch jump and down grab; they can be considered if G-mode + flash suits are added, though they are still likely not useful. |
From: 3
Left Shaft - Middle Right Door
To: 4
Left Shaft - Top Right Door
It is important avoid touching the invisible fireballs the Alcoons place. Entrance condition: {
"comeInWithGMode": {
"mode": "any",
"morphed": false
}
}Requires: {
"or": [
"h_crouchJumpDownGrab",
"HiJump",
"canWallJump",
"SpaceJump",
"canSpringBallJumpMidAir",
"canIBJ"
]
}
"h_heatedGModeOpenDifferentDoor"Dev note: Frozen Alcoon platforms and Artificial morph IBJ are not included, as Samus can crouch jump and down grab; they can be considered if G-mode + flash suits are added, though they are still likely not useful. FIXME: It is possible to kill a Multiviola in the gap in the floor, but Samus only gets one attempt, and its very difficult to escape with a small Energy drop. |
From: 3
Left Shaft - Middle Right Door
To: 5
Far Right Door
It is important avoid touching the invisible fireballs the Alcoons place. Jump over them or kill the Alcoons with Power Bombs. After entering the morph tunnel, roll through the two camera scroll blocks a few times to overload PLMs. They are at the entrance and two tiles in the tunnel. Exit G-mode and go through the room to the far right door. Entrance condition: {
"comeInWithGMode": {
"mode": "any",
"morphed": true
}
}Requires: {
"or": [
{
"and": [
"h_artificialMorphIBJ",
{
"ammo": {
"type": "PowerBomb",
"count": 2
}
}
]
},
{
"and": [
"h_artificialMorphSpringBall",
"HiJump"
]
},
{
"and": [
"h_artificialMorphSpringBallBombJump",
{
"or": [
"h_artificialMorphBombs",
{
"ammo": {
"type": "PowerBomb",
"count": 3
}
}
]
}
]
}
]
}
"h_heatedGModeOffCameraDoor" |
From: 3
Left Shaft - Middle Right Door
To: 5
Far Right Door
It is important avoid touching the invisible fireballs the Alcoons place. It is possible to kill them without any beam upgrades or ammo by jumping and shooting horizontally near the floor surface. Stay near the far wall when shooting to prevent getting too close and triggering their jump. After entering the morph tunnel, roll through the two camera scroll blocks a few times to overload PLMs. They are at the entrance and two tiles in the tunnel. Exit G-mode and go through the room to the far right door. Entrance condition: {
"comeInWithGMode": {
"mode": "any",
"morphed": false
}
}Requires: "Morph"
{
"or": [
"HiJump",
"canWallJump",
"SpaceJump",
"canSpringBallJumpMidAir",
"canIBJ",
{
"and": [
"h_crouchJumpDownGrab",
"canBombHorizontally"
]
},
{
"and": [
"h_crouchJumpDownGrab",
"canTrickyUseFrozenEnemies"
]
}
]
}
"h_heatedGModeOffCameraDoor"Dev note: Frozen Alcoon platforms and Artificial morph IBJ are not included, as Samus can crouch jump and down grab; they can be considered if G-mode + flash suits are added, though they are still likely not useful. |
From: 3
Left Shaft - Middle Right Door
To: 7
Left Shaft - Middle Junction
Requires: "canIBJ"
{
"or": [
{
"heatFrames": 770
},
{
"and": [
"canJumpIntoIBJ",
{
"heatFrames": 320
}
]
},
{
"and": [
"canDoubleBombJump",
{
"heatFrames": 275
}
]
}
]
} |
From: 4
Left Shaft - Top Right Door
To: 5
Far Right Door
It is important avoid touching the invisible fireballs the Alcoons place. Jump over them or kill the Alcoons with Power Bombs. After entering the morph tunnel, roll through the two camera scroll blocks a few times to overload PLMs. They are at the entrance and two tiles in the tunnel. Exit G-mode and go through the room to the far right door. Entrance condition: {
"comeInWithGMode": {
"mode": "any",
"morphed": true
}
}Requires: {
"or": [
{
"and": [
"h_artificialMorphIBJ",
"h_artificialMorphPowerBomb"
]
},
{
"and": [
"h_artificialMorphSpringBall",
"HiJump"
]
},
{
"and": [
"h_artificialMorphSpringBallBombJump",
"h_additionalBomb"
]
}
]
}
"h_heatedGModeOffCameraDoor" |
From: 4
Left Shaft - Top Right Door
To: 5
Far Right Door
It is important avoid touching the invisible fireballs the Alcoons place. It is possible to kill them without any beam upgrades or ammo by jumping and shooting horizontally near the floor surface. Stay near the far wall when shooting to prevent getting too close and triggering their jump. After entering the morph tunnel, roll through the two camera scroll blocks a few times to overload PLMs. They are at the entrance and two tiles in the tunnel. Exit G-mode and go through the room to the far right door. Entrance condition: {
"comeInWithGMode": {
"mode": "any",
"morphed": false
}
}Requires: "Morph"
{
"or": [
"HiJump",
"canWallJump",
"SpaceJump",
"canSpringBallJumpMidAir",
"canIBJ",
{
"and": [
"h_crouchJumpDownGrab",
"canBombHorizontally"
]
},
{
"and": [
"h_crouchJumpDownGrab",
"canTrickyUseFrozenEnemies"
]
}
]
}
"h_heatedGModeOffCameraDoor"Dev note: Frozen Alcoon platforms and Artificial morph IBJ are not included, as Samus can crouch jump and down grab; they can be considered if G-mode + flash suits are added, though they are still likely not useful. |
|
Kill the enemies, then IBJ. Requires: "canIBJ"
{
"or": [
{
"heatFrames": 735
},
{
"and": [
"canJumpIntoIBJ",
{
"heatFrames": 285
}
]
},
{
"and": [
"canDoubleBombJump",
{
"heatFrames": 240
}
]
}
]
}
{
"or": [
"canTrickyDodgeEnemies",
{
"heatFrames": 100
}
]
}
{
"or": [
"canDash",
{
"and": [
{
"haveBlueSuit": {}
},
{
"heatFrames": 40
}
]
}
]
} |
|
Kill the enemies or carefully dodge them, then IBJ. Requires: "canIBJ"
{
"or": [
{
"heatFrames": 1500
},
{
"and": [
"canTrickyDodgeEnemies",
"canJumpIntoIBJ",
{
"heatFrames": 185
}
]
}
]
} |
|
Requires: "canIBJ"
{
"or": [
{
"heatFrames": 670
},
{
"and": [
"canJumpIntoIBJ",
{
"heatFrames": 220
}
]
},
{
"and": [
"canDoubleBombJump",
{
"heatFrames": 175
}
]
}
]
} |
From: 8
Left Shaft - Bottom Junction
To: 3
Left Shaft - Middle Right Door
Requires: "canIBJ"
{
"or": [
{
"heatFrames": 670
},
{
"and": [
"canJumpIntoIBJ",
{
"heatFrames": 220
}
]
},
{
"and": [
"canDoubleBombJump",
{
"heatFrames": 175
}
]
}
]
} |
|

Morph and ride the Trippers. It is possible to Bomb boost off of the Tripper then IBJ until the next Tripper. It may help to roll into the Bomb to make the placement a little more lenient, but avoid falling off the Tripper to be able to keep trying. Entrance condition: {
"comeInWithGMode": {
"mode": "any",
"morphed": true
}
}Requires: {
"or": [
"Morph",
"h_artificialMorphSpringBall",
{
"and": [
"canInsaneJump",
"h_artificialMorphIBJ"
]
}
]
}
"h_heatedGModeOpenDifferentDoor"Dev note: FIXME: It is possible to cross the room with Power Bombs, but requires avoiding killing the off-screen Tripper with them. |
From: 5
Bottom Floating Platform Junction
To: 4
Top Floating Platform Junction


If starting the IBJ from the ground, first kill a Gamet and don't pick up its drops, so that they won't spawn while performing the IBJ. Requires: "canIBJ"
{
"or": [
{
"and": [
"h_runOverRespawningEnemies",
{
"heatFrames": 680
}
]
},
{
"and": [
"canJumpIntoIBJ",
{
"heatFrames": 200
}
]
}
]
}Dev note: The helper h_runOverRespawningEnemies is not an exact match; if a tech is ever added for leaving drops uncollected, we can use that. |
|

Enter the morph tunnel then exit G-mode. Shooting the shot block off screen can be done by jumping and shooting up or with Grapple or a Power Bomb. Getting positioned under the shot block can be done by walking into the camera scroll block and then walking against the right wall, jump to the left and walk a little more (about one more tile). This will also give some visibility of Samus. Without heat damage, it is recommended to jump up past the shot block and wait for it to respawn; with the block intact, Samus can't accidentally touch the lava. Entrance condition: {
"comeInWithGMode": {
"mode": "any",
"morphed": true
}
}Requires: "h_heatedGMode"
"canComplexGMode"
"canOffScreenMovement"
{
"or": [
"h_artificialMorphMovement",
{
"ammo": {
"type": "PowerBomb",
"count": 3
}
}
]
}
{
"or": [
"canInsaneJump",
{
"and": [
"canTrickyJump",
"h_heatProof"
]
},
{
"and": [
"h_heatProof",
"h_lavaProof",
{
"or": [
"Gravity",
"HiJump"
]
}
]
}
]
}
{
"heatFrames": 1000
}
{
"or": [
"canTrickyGMode",
{
"heatFrames": 500
}
]
}Exit condition: {
"leaveNormally": {}
}Unlocks doors: {"types":["missiles"],"requires":[{"heatFrames":20}]}
{"types":["super"],"requires":[]}
{"types":["powerbomb"],"requires":[{"heatFrames":60}]}Dev note: These heat frames are not very tight, as the room is difficult to do consistently. |
|


Entrance condition: {
"comeInWithGMode": {
"mode": "indirect",
"morphed": true
}
}Requires: "h_artificialMorphMovement" "h_heatedGModeOpenDifferentDoor" |
From: 2
Far Left Door
To: 8
G-Mode, Bottom Right (Started at Left)
While artificially morphed, carefully dodge or kill the enemies in the first half of the room. Go over the first set of Speed Blocks, then kill the first Red Pirate with a Power Bomb or after unmorphing. It is possible to kill or jump over the second pirate, but be careful to prevent it from shooting invisible lasers. Without any Power Bombs, this requires precise movement with Spring Ball or very precise movement with just Bombs. Entrance condition: {
"comeInWithGMode": {
"mode": "any",
"morphed": true
}
}Requires: "canDash"
"canTrickyDodgeEnemies"
{
"or": [
{
"ammo": {
"type": "PowerBomb",
"count": 6
}
},
{
"and": [
"h_artificialMorphMovement",
{
"or": [
"canInsaneJump",
"h_artificialMorphPowerBomb"
]
},
{
"or": [
"h_artificialMorphPowerBomb",
"h_hasBeamUpgrade",
{
"enemyKill": {
"enemies": [
[
"Red Space Pirate (standing)"
]
],
"explicitWeapons": [
"Missile",
"Super",
"ScrewAttack"
]
}
},
{
"enemyDamage": {
"enemy": "Red Space Pirate (standing)",
"type": "contact",
"hits": 1
}
}
]
}
]
}
]
}
{
"heatFrames": 0
}Dev note: It is possible to jump over the left bridge pirate, but it is incredibly precise and not expected. |
From: 1
Left Door
To: 1
Left Door

A Blue Suit allows Samus to pass through the morph tunnel bomb blocks without overloading PLMS and be able to collect the right item. With Hi-Jump and SpringBall or IBJ, reach the top left item, quickly roll through it and the morph tunnel to reach the right item. After returning to the door, exiting G-Mode will collect both Items. Entrance condition: {
"comeInWithGMode": {
"mode": "direct",
"morphed": true
}
}Requires: "h_blueSuitGMode"
{
"or": [
"h_artificialMorphIBJ",
{
"and": [
"HiJump",
"h_artificialMorphSpringBall"
]
}
]
}
"canRemoteAcquire"Collects items: 3, 4 |
From: 1
Left Door
To: 3
Top Right Item

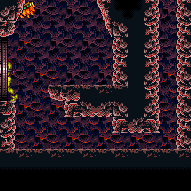
Roll through the camera scroll block in the morph tunnel at the bottom of the room to overload PLMs, then get to the right side through the crumble blocks or bomb blocks near the left item. This can be done with an IBJ or two Spring Ball Bomb Jumps. Entrance condition: {
"comeInWithGMode": {
"mode": "any",
"morphed": true
}
}Requires: {
"or": [
"h_artificialMorphIBJ",
{
"and": [
"h_artificialMorphSpringBallBombJump",
"h_additionalBomb"
]
},
{
"and": [
"HiJump",
"h_artificialMorphSpringBall"
]
},
{
"and": [
"Morph",
{
"or": [
"HiJump",
"canWallJump",
"canSpringBallJumpMidAir",
"SpaceJump"
]
}
]
}
]
} |
|
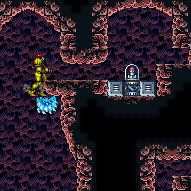
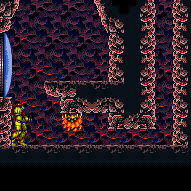
Requires: "Morph"
{
"or": [
"canWallJump",
"HiJump",
"SpaceJump",
"canIBJ",
"canUseFrozenEnemies",
"canSpringBallJumpMidAir"
]
} |
|
Artificial morph IBJ or use two bomb boost spring ball jumps. Entrance condition: {
"comeInWithGMode": {
"mode": "any",
"morphed": true
}
}Requires: {
"or": [
"h_artificialMorphIBJ",
{
"and": [
"h_artificialMorphSpringBallBombJump",
"h_additionalBomb"
]
},
{
"and": [
"HiJump",
"h_artificialMorphSpringBall"
]
}
]
}Dev note: This is only useful if the item is Morph. |
From: 1
Left Door
To: 4
Top Left Item
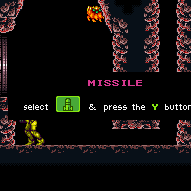
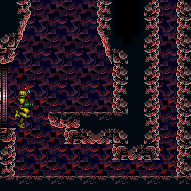
Get to the item without overloading PLMs by avoiding entering the morph tunnel at the bottom of the room. Entrance condition: {
"comeInWithGMode": {
"mode": "direct",
"morphed": true
}
}Requires: "canRemoteAcquire"
{
"or": [
"h_artificialMorphIBJ",
{
"and": [
"HiJump",
"h_artificialMorphSpringBall"
]
},
{
"and": [
"Morph",
{
"or": [
"HiJump",
"canWallJump",
"canSpringBallJumpMidAir",
"SpaceJump"
]
}
]
}
]
}Clears obstacles: D |
From: 2
Right Door
To: 1
Left Door
IBJ or SpringBall jump into the morph tunnel and quickly roll thorough to avoid overloading PLMS and making remote acquisition impossible. Touch the item, and continue to the left side of the room before exiting G-mode to collect the item. Entrance condition: {
"comeInWithGMode": {
"mode": "direct",
"morphed": true
}
}Requires: "h_blueSuitGMode"
{
"or": [
"h_artificialMorphSpringBall",
"h_artificialMorphIBJ"
]
}
"canRemoteAcquire"Collects items: 4 |
From: 2
Right Door
To: 1
Left Door
Touch both the item and the camera scroll blocks in the morph tunnel before PLMs are overloaded, then use either to finish overloading them. This will make it so that Samus can fix the camera after exiting G-mode on the left. It is possible to wait for the Sova to appear on screen before going to the left, in order to ensure Samus won't touch it. With only a Power Bomb boost to touch the item, it is not possible to fix the camera, but it is possible to kill the Sova. Entrance condition: {
"comeInWithGMode": {
"mode": "direct",
"morphed": true
}
}Requires: "canRemoteAcquire"
{
"itemNotCollectedAtNode": 3
}
"canRiskPermanentLossOfAccess"
{
"or": [
"h_artificialMorphMovement",
"h_artificialMorphPowerBomb"
]
}Collects items: 3 Dev note: The only loss of access here is the camera fix, but there is another strat that can be used without. |
|
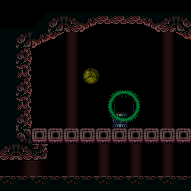
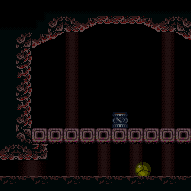
Overload PLMs using the camera scroll blocks in the morph tunnel. Samus can fix the camera after exiting G-mode on the left. It is possible to wait for the Sova to appear on screen before going to the left, in order to ensure Samus won't touch it. Entrance condition: {
"comeInWithGMode": {
"mode": "any",
"morphed": true
}
}Requires: "h_artificialMorphMovement" |
From: 2
Right Door
To: 2
Right Door

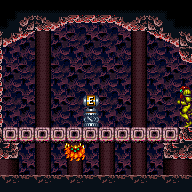
Avoid the right item if it is uncollected as it will overload PLMS if touched too many times in G-Mode. Either IBJ or SpringBall jump into the morph tunnel and quickly roll thorough to avoid overloading PLMS. The camera will not follow Samus through the tunnel so the collection is done blind. Due to the effects of Blue Suit, right direction must be pressed after the bomb explodes when returning. Entrance condition: {
"comeInWithGMode": {
"mode": "direct",
"morphed": true
}
}Requires: "h_blueSuitGMode"
{
"or": [
"h_artificialMorphSpringBall",
"h_artificialMorphIBJ"
]
}
"canRemoteAcquire"Collects items: 4 |
From: 2
Right Door
To: 4
Top Left Item
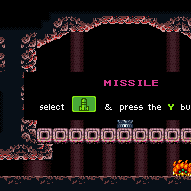

Overload PLMs using the camera scroll blocks in the morph tunnel. Samus can fix the camera after exiting G-mode on the left. It is possible to wait for the Sova to appear on screen before going to the left, in order to ensure Samus won't touch it. Entrance condition: {
"comeInWithGMode": {
"mode": "any",
"morphed": true
}
}Requires: "h_artificialMorphMovement" Dev note: This is only useful if the item is Morph or if Samus has Morph but no way up to this item location. |
From: 2
Right Door
To: 4
Top Left Item


Touch both the item and the camera scroll blocks in the morph tunnel before PLMs are overloaded, then use either to finish overloading them. This will make it so that Samus can fix the camera after exiting G-mode on the left. It is possible to wait for the Sova to appear on screen before going to the left, in order to ensure Samus won't touch it. Entrance condition: {
"comeInWithGMode": {
"mode": "direct",
"morphed": true
}
}Requires: "canRemoteAcquire" "h_artificialMorphMovement" Collects items: 3 Dev note: This is only useful if the item is Morph or if Samus has Morph but no way up to this item location. |
|
Requires: {
"or": [
"h_bombThings",
{
"obstaclesCleared": [
"C"
]
}
]
}
{
"or": [
"canMidAirMorph",
"h_useSpringBall",
"canIBJ"
]
}Clears obstacles: C |
From: 3
Bottom Left Door
To: 7
Junction Below Power Bomb Blocks
It is tricky but possible to cross the room without any damage by utilizing Samus' i-frames on room entry. After morphing, immediately roll to the right, through the Small Dessgeega. Either precisely dodge all of the enemies or quickly place a Power Bomb to kill several of them. Note that crossing the room damageless is easier in indirect G-Mode. After crossing the room, use a Power Bomb then quickly exit G-Mode before it explodes in order to break the bomb and Power Bomb blocks above. Without Spring Ball, it is still possible to place the Power Bomb high enough to break all the blocks above from an IBJ and still exit G-Mode before it explodes. Entrance condition: {
"comeInWithGMode": {
"mode": "direct",
"morphed": true
}
}Requires: "h_artificialMorphMovement"
{
"or": [
{
"and": [
"h_artificialMorphPowerBomb",
"canInsaneJump"
]
},
"canTrickyGMode",
{
"enemyDamage": {
"enemy": "Sm. Dessgeega",
"type": "contact",
"hits": 2
}
}
]
}
"h_artificialMorphPowerBomb"Clears obstacles: A, B, C |
From: 3
Bottom Left Door
To: 7
Junction Below Power Bomb Blocks


It is tricky but possible to cross the room without any damage by rolling through the room. The enemies can be killed with extra Power Bombs, but without them, it's arguably easier to roll through the room without the use of Spring Ball or Bombs. After crossing the room, use a Power Bomb then quickly exit G-Mode before it explodes in order to break the bomb and Power Bomb blocks above. Without Spring Ball, it is still possible to place the Power Bomb high enough to break all the blocks above from an IBJ and still exit G-Mode before it explodes. Entrance condition: {
"comeInWithGMode": {
"mode": "indirect",
"morphed": true
}
}Requires: "h_artificialMorphMovement"
{
"or": [
"canTrickyDodgeEnemies",
{
"and": [
"h_artificialMorphPowerBomb",
"h_artificialMorphPowerBomb"
]
},
{
"enemyDamage": {
"enemy": "Sm. Dessgeega",
"type": "contact",
"hits": 2
}
}
]
}
"h_artificialMorphPowerBomb"Clears obstacles: A, B, C |
|
Place Bombs against the crumble block to overload PLMs, then go through it and through the bomb blocks at the left. Entrance condition: {
"comeInWithGMode": {
"mode": "any",
"morphed": true
}
}Requires: "h_artificialMorphIBJ"
{
"or": [
"canBePatient",
"h_artificialMorphSpringBall",
"h_artificialMorphCeilingBombJump"
]
} |
From: 4
Right Door
To: 2
Middle Left Door

Place Bombs against the crumble block to overload PLMs, then go through it and through the bomb blocks at the left. Place a Power Bomb and quickly exit G-Mode before it goes off in order to break the blocks. Entrance condition: {
"comeInWithGMode": {
"mode": "any",
"morphed": true
}
}Requires: "h_artificialMorphIBJ"
{
"or": [
"canBePatient",
"h_artificialMorphSpringBall",
"h_artificialMorphCeilingBombJump"
]
}
"h_artificialMorphPowerBomb"Clears obstacles: A, B, C |
|
Requires: {
"obstaclesCleared": [
"C"
]
}
{
"or": [
"canWallJump",
"HiJump",
"SpaceJump",
"canIBJ",
"canSpringBallJumpMidAir"
]
} |
From: 1
Top Right Door
To: 2
Middle Right Door
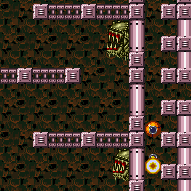

Entrance condition: {
"comeInWithGMode": {
"mode": "any",
"morphed": true
}
}Requires: {
"or": [
"h_artificialMorphIBJ",
{
"and": [
"HiJump",
"h_artificialMorphSpringBall"
]
},
{
"and": [
"h_artificialMorphSpringBallBombJump",
"h_additionalBomb"
]
}
]
}
"h_heatedGModeOffCameraDoor"Dev note: It is probably possible to farm the Sovas at this door, but it would be difficult and slow and isn't expected. |
From: 1
Top Right Door
To: 2
Middle Right Door
Entrance condition: {
"comeInWithGMode": {
"mode": "any",
"morphed": false
}
}Requires: "Morph"
{
"or": [
"HiJump",
"canWallJump",
"canSpringBallJumpMidAir",
"SpaceJump",
"canIBJ",
"canTrickyUseFrozenEnemies"
]
}
"h_heatedGModeOffCameraDoor"Dev note: It is probably possible to farm the Sovas at this door, but it would be difficult and slow and isn't expected. |
From: 2
Middle Right Door
To: 1
Top Right Door
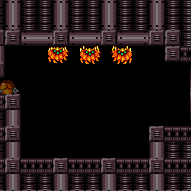

Kill the Sovas or wait at around 25 seconds for them to get out of the way before going down and passing them while climbing to the top door. It is possible to wait 2.5 minutes for the Sovas to return on camera to be sure Samus won't touch them. Entrance condition: {
"comeInWithGMode": {
"mode": "any",
"morphed": true
}
}Requires: "h_artificialMorphMovement" "canOffScreenMovement" "h_heatedGModeOffCameraDoor" Dev note: The single tile ledge at this door doesn't seem to make it any slower to exit. It is probably possible to farm the Sovas at this door, but it would be difficult and isn't expected. |
From: 2
Middle Right Door
To: 3
Bottom Right Door
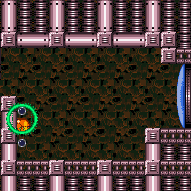
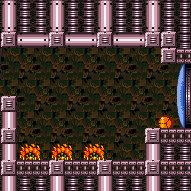
Kill the Sovas or wait at least 20 seconds for them to get out of the way before going to the bottom door. It is slightly safer but very slow to wait 2.5 minutes for the Sovas to return on camera to be sure Samus won't touch them. Entrance condition: {
"comeInWithGMode": {
"mode": "any",
"morphed": true
}
}Requires: "h_artificialMorphMovement" "h_heatedGModeOffCameraDoor" Dev note: It is probably possible to farm the Sovas at this door, but it would be difficult and isn't expected. |
From: 2
Middle Right Door
To: 4
Junction Below Morph Tunnel
Kill the Sovas or wait at around 25 seconds for them to get out of the way before going down. Exit G-mode on the first ledge on the left, then jump and press against the right wall to touch the camera scroll block and fix the camera. Entrance condition: {
"comeInWithGMode": {
"mode": "any",
"morphed": true
}
}Requires: "h_heatedGMode"
"h_artificialMorphMovement"
{
"heatFrames": 120
} |
From: 3
Bottom Right Door
To: 2
Middle Right Door
Entrance condition: {
"comeInWithGMode": {
"mode": "any",
"morphed": true
}
}Requires: {
"or": [
"h_artificialMorphIBJ",
{
"and": [
"HiJump",
"h_artificialMorphSpringBall"
]
},
{
"and": [
"h_artificialMorphSpringBallBombJump",
"h_additionalBomb"
]
}
]
}
"h_heatedGModeOffCameraDoor"Dev note: It is probably possible to farm the Sovas at this door, but it would be difficult and slow and isn't expected. |
From: 3
Bottom Right Door
To: 2
Middle Right Door
Entrance condition: {
"comeInWithGMode": {
"mode": "any",
"morphed": false
}
}Requires: "Morph"
{
"or": [
"HiJump",
"canWallJump",
"canSpringBallJumpMidAir",
"SpaceJump",
"canIBJ",
"canTrickyUseFrozenEnemies"
]
}
"h_heatedGModeOffCameraDoor"Dev note: It is probably possible to farm the Sovas at this door, but it would be difficult and slow and isn't expected. |
|


Either use a Power Bomb or Wave + Plasma to kill all the Sovas off-camera, or if heat protection is available, wait for all the Sovas to come out of the tunnel. Requires: {
"or": [
{
"and": [
"HiJump",
{
"or": [
"canTrivialMidAirMorph",
"h_useSpringBall"
]
}
]
},
{
"and": [
"SpaceJump",
"canTrivialMidAirMorph",
{
"heatFrames": 40
}
]
},
{
"and": [
"canWallJump",
"canTrivialMidAirMorph"
]
},
"canSpringBallJumpMidAir",
{
"and": [
"canIBJ",
{
"heatFrames": 900
}
]
},
{
"and": [
"canJumpIntoIBJ",
{
"heatFrames": 520
}
]
},
{
"and": [
"canJumpIntoIBJ",
"canDoubleBombJump",
{
"heatFrames": 400
}
]
}
]
}
{
"or": [
"h_heatProof",
{
"and": [
"canDash",
{
"or": [
"h_usePowerBomb",
{
"and": [
"Wave",
"Plasma",
"canTrickyJump",
{
"heatFrames": 80
}
]
}
]
}
]
},
{
"and": [
{
"haveBlueSuit": {}
},
{
"heatFrames": 40
}
]
}
]
}
{
"or": [
{
"heatFrames": 180
},
{
"and": [
"canFarmWhileShooting",
{
"heatFramesWithEnergyDrops": {
"frames": 115,
"drops": [
{
"enemy": "Sova",
"count": 3
}
]
}
},
{
"heatFrames": 65
}
]
}
]
} |
|
Getting across the lava while artificially morphed requires an HBJ or Spring Fling. For the Spring Fling, jump immediately before the pause triggers. To save Energy, it is possible to kill to the Ripper at the far right, stand over where the drop will spawn and pause abuse to grab its Energy drop on G-mode exit. With a Power Bomb, place on the left edge when the Ripper is moving left, 2/3 of the way to the left edge. It is also possible to kill it with Screw Attack and a precise wall jump. Entrance condition: {
"comeInWithGMode": {
"mode": "any",
"morphed": true
}
}Requires: {
"or": [
{
"and": [
"h_artificialMorphSpringFling",
"canTrickyJump"
]
},
"h_artificialMorphHBJ",
{
"and": [
"Gravity",
"h_artificialMorphIBJ",
"h_artificialMorphBombHorizontally",
{
"lavaFrames": 160
}
]
},
{
"and": [
"Gravity",
"h_artificialMorphSpringBall",
{
"lavaFrames": 40
}
]
}
]
}
{
"or": [
"h_heatedGModeOpenDifferentDoor",
{
"and": [
"h_heatedGModePauseAbuse",
{
"or": [
{
"ammo": {
"type": "Super",
"count": 1
}
},
"h_artificialMorphPowerBomb",
{
"and": [
"ScrewAttack",
{
"or": [
"h_lavaProof",
"SpaceJump",
"canWallJump"
]
}
]
}
]
}
]
}
]
} |
|
Getting across the lava while artificially morphed requires an HBJ or Bomb boosting out and freezing a Boyon below. Entrance condition: {
"comeInWithGMode": {
"mode": "any",
"morphed": true
}
}Requires: {
"or": [
{
"and": [
"h_artificialMorphMovement",
"h_lavaProof"
]
},
{
"and": [
"Morph",
"canTrickyUseFrozenEnemies"
]
},
{
"and": [
"h_artificialMorphIBJ",
"h_artificialMorphBombHorizontally",
"canTrickyUseFrozenEnemies"
]
},
{
"and": [
"canInsaneJump",
{
"or": [
"h_artificialMorphHBJ",
"h_artificialMorphDiagonalBombJump"
]
}
]
}
]
}
"h_heatedGModeOpenDifferentDoor"Dev note: FIXME: It is also possible with a rolling speed bomb boost down back. |
|
Spring Fling or IBJ across the right pit and damage boost or lava dive in the second; to Spring Fling, jump immediately before the pause triggers. Entrance condition: {
"comeInWithGMode": {
"mode": "any",
"morphed": true
}
}Requires: {
"or": [
"Morph",
{
"and": [
"h_artificialMorphSpringFling",
"canTrickyJump"
]
},
{
"and": [
"h_artificialMorphIBJ",
"h_artificialMorphBombHorizontally"
]
},
{
"and": [
"Gravity",
"h_artificialMorphSpringBall",
{
"lavaFrames": 20
}
]
},
{
"and": [
"h_artificialMorphSpringBall",
{
"lavaFrames": 50
}
]
}
]
}
{
"or": [
{
"and": [
{
"notable": "Impressive Damage Boost"
},
"canHorizontalDamageBoost",
"canTrickyJump",
{
"enemyDamage": {
"enemy": "Boyon",
"type": "contact",
"hits": 1
}
}
]
},
{
"lavaFrames": 90
},
{
"and": [
"Gravity",
{
"lavaFrames": 35
}
]
}
]
}
"h_heatedGModeOpenDifferentDoor" |
|
Wait for the acid to lower then quickly roll part way forward to trigger the Metarees and return. Then go again without any difficulty. Killing any of the Gamets will prevent them from respawning. With Bombs, horizontally boost then IBJ above the acid while waiting for it. It is possible with Spring Ball alone, but it is easy to take damage; perform small jumps but hold jump before landing to prevent a small bounce in which Samus can't jump. On the return route, jump over the Gamets to let them pass instead of racing to get them off screen. Entrance condition: {
"comeInWithGMode": {
"mode": "direct",
"morphed": true
}
}Requires: "canComplexGMode"
"canRemoteAcquire"
{
"or": [
{
"and": [
"h_artificialMorphIBJ",
{
"or": [
"canInsaneJump",
{
"acidFrames": 106
}
]
}
]
},
{
"and": [
"h_artificialMorphSpringBall",
{
"or": [
"h_artificialMorphBombThings",
"canTrickyJump"
]
}
]
}
]
}Collects items: 2 Dev note: The requirements here are to get the item and return, as the item cannot be used during the return. |
|
Entrance condition: {
"comeInWithGMode": {
"mode": "direct",
"morphed": false
},
"comesThroughToilet": "any"
}Requires: {
"or": [
"canSpeedyJump",
"HiJump",
"SpaceJump",
"canIBJ",
"canWallJump",
"canSpringBallJumpMidAir"
]
}Exit condition: {
"leaveWithGMode": {
"morphed": false
}
}Clears obstacles: door_2 |
|
Entrance condition: {
"comeInWithGMode": {
"mode": "direct",
"morphed": true
},
"comesThroughToilet": "any"
}Requires: {
"or": [
"h_artificialMorphIBJ",
{
"and": [
"HiJump",
"h_artificialMorphSpringBall"
]
}
]
}Exit condition: {
"leaveWithGMode": {
"morphed": true
}
}Clears obstacles: door_2 |
|


Requires: {
"or": [
"canSpeedyJump",
"HiJump",
"SpaceJump",
"canIBJ",
"canWallJump",
"canSpringBallJumpMidAir"
]
} |
|
Requires: "Gravity"
{
"or": [
"canWallJump",
"HiJump",
"canSpringBallJumpMidAir",
"canIBJ",
"canUseFrozenEnemies",
"canGravityJump"
]
} |
From: 1
Left Door
To: 6
G-Mode Morph Junction (At Speed Blocks)
Bomb boost horizontally at the top of an IBJ and land in the acid, then roll to the right and bomb out to safety. To save some Energy, it is possible to IBJ or double IBJ out of the acid onto the first solid platform. Entrance condition: {
"comeInWithGMode": {
"mode": "any",
"morphed": true
}
}Requires: "Gravity"
"h_artificialMorphIBJ"
"h_artificialMorphBombHorizontally"
"canSuitlessLavaDive"
{
"or": [
{
"acidFrames": 280
},
{
"and": [
"canTrickyJump",
{
"acidFrames": 220
}
]
},
{
"and": [
"canInsaneJump",
"h_artificialMorphDoubleBombJump",
{
"acidFrames": 175
}
]
}
]
} |
From: 2
Right Vertical Door
To: 2
Right Vertical Door
Entrance condition: {
"comeInWithGMode": {
"mode": "direct",
"morphed": true
},
"comesThroughToilet": "any"
}Requires: "h_artificialMorphMovement" Exit condition: {
"leaveWithGMode": {
"morphed": true
}
} |
From: 2
Bottom Left Door
To: 6
G-Mode Morph Junction (Bottom)
Entrance condition: {
"comeInWithGMode": {
"mode": "indirect",
"morphed": true
},
"comesThroughToilet": "any"
}Requires: "h_artificialMorphMovement" Dev note: It is possible to do this with direct G-mode, but it requires entering the room at the very edge of the transition, which isn't modeled. it could be possible to get to wherever 6 is defined with Power Bombs, but there is nothing useful to do at 6, except maybe unlock door 3, which isn't modeled. |
|
Entrance condition: {
"comeInWithGMode": {
"mode": "direct",
"morphed": true
},
"comesThroughToilet": "any"
}Requires: {
"or": [
"h_artificialMorphIBJ",
"h_artificialMorphSpringBallBombJump",
{
"and": [
"HiJump",
"h_artificialMorphSpringBall"
]
}
]
}Exit condition: {
"leaveWithGMode": {
"morphed": true
}
} |
From: 1
Top Right Door
To: 5
Bottom Junction Right of Morph Tunnel
Enter the room in Direct G-mode, otherwise the acid will still be present. Jump in the vertical shaft to touch the camera scroll block and overload PLMs, then roll through the bomb blocks. Exit G-mode and jump multiple times to fix the camera before crossing the section with the Holtzes. Entrance condition: {
"comeInWithGMode": {
"mode": "direct",
"morphed": true
}
}Requires: "h_heatedGMode"
{
"or": [
"f_UsedAcidChozoStatue",
{
"obstaclesCleared": [
"f_UsedAcidChozoStatue"
]
}
]
}
"h_artificialMorphMovement"
{
"heatFrames": 200
}Dev note: It is possible but not expected to cross the lower section while completely blind. The Holtz still damage Samus, and the middle one is low enough to make it difficult to bomb boost across. Other strats in the room are ignored because Samus needs real Morph and Varia or a lot of Energy to use the statue, and there is no way to overload PLMs to go through the bomb blocks from the bottom of the room. |
From: 1
Bottom Left Door
To: 5
Junction Above Bottom Blocks
Bomb the blocks before exiting G-mode and jumping through. Entrance condition: {
"comeInWithGMode": {
"mode": "any",
"morphed": true
}
}Requires: "h_heatedGMode"
{
"or": [
"h_artificialMorphPowerBomb",
{
"and": [
"h_artificialMorphBombs",
"h_artificialMorphMovement"
]
}
]
}
{
"heatFrames": 80
}Clears obstacles: B, C Dev note: FIXME: If Bombs are available (vs. Power Bombs), it's not necessary to break all the bottom blocks. |
From: 2
Middle Right Door
To: 2
Middle Right Door
Entrance condition: {
"comeInWithGMode": {
"mode": "direct",
"morphed": false
}
}Requires: {
"or": [
"SpaceJump",
"canWallJump",
"HiJump",
"canSpringBallJumpMidAir",
"canSpeedyJump",
"h_crouchJumpDownGrab",
"canIBJ"
]
}Exit condition: {
"leaveWithGMode": {
"morphed": false
}
} |
From: 2
Middle Right Door
To: 3
Top Right Door
Enter with G-mode direct, back up to between 1 and 6 pixels from the door transition, and activate X-ray to get very deep stuck in the door. Climb up 1 screen, and perform a turnaround buffered spin-jump away from the door to trigger the transition, bypassing any lock on the door. Entrance condition: {
"comeInWithGMode": {
"mode": "direct",
"morphed": false
}
}Requires: "canGModeXRayClimb"
"h_heatProof"
{
"or": [
"canWallJump",
"h_crouchJumpDownGrab",
"HiJump",
"SpaceJump",
"canIBJ",
"canArtificialMorph"
]
}
"canXRayClimb"Bypasses door shell: true |
|
Requires: {
"or": [
{
"and": [
"HiJump",
{
"heatFrames": 45
}
]
},
{
"and": [
"SpaceJump",
{
"heatFrames": 80
}
]
},
{
"and": [
"canWallJump",
{
"heatFrames": 50
}
]
},
{
"and": [
"h_crouchJumpDownGrab",
{
"heatFrames": 65
}
]
},
{
"and": [
"canSpringBallJumpMidAir",
{
"heatFrames": 80
}
]
},
{
"and": [
"canIBJ",
{
"heatFrames": 520
}
]
},
{
"and": [
"canJumpIntoIBJ",
{
"heatFrames": 160
}
]
}
]
} |
From: 1
Top Left Door
To: 4
Top Right Door
IBJ up the room while avoiding any of the invisible, stationary lasers that the pirates have placed; it is possible to manipulate the bottom pirate to place several lasers, in order to overload them, and then IBJ over the pirate and IBJ again from the right corner. Overloading the lasers can prevent the wall pirates from placing one when they jump. Abort the IBJ and fall if necessary to avoid a pirate hit. It is then possible to shoot at the door and then use X-Ray, so the shot hits immediately afterwards. Entrance condition: {
"comeInWithGMode": {
"mode": "any",
"morphed": true
}
}Requires: "h_heatedGMode"
"h_artificialMorphIBJ"
"canTrickyGMode"
{
"heatFrames": 70
} |
From: 1
Top Left Door
To: 4
Top Right Door
Use 3 Power Bombs to kill the pirate. If done quickly, it is possible to also kill one of the wall pirates. IBJ up the room while avoiding any of the invisible, stationary lasers that the pirates have placed; it is also possible to manipulate the bottom pirate to place several lasers before killing it, in order to overload them and prevent the wall pirates from placing one when they jump. Abort the IBJ and fall if necessary to avoid a pirate hit. It is then possible to shoot at the door and then use X-Ray, so the shot hits immediately afterwards. Entrance condition: {
"comeInWithGMode": {
"mode": "any",
"morphed": true
}
}Requires: "h_heatedGMode"
{
"ammo": {
"type": "PowerBomb",
"count": 3
}
}
"h_artificialMorphIBJ"
{
"or": [
"canInsaneJump",
{
"ammo": {
"type": "PowerBomb",
"count": 3
}
}
]
}
{
"heatFrames": 70
}Clears obstacles: A Dev note: FIXME: It may be possible to kill the upper pirates in a way where Samus can collect their drops on the path to the door. |
|
Kill the pirates to free up the full runway for a speedy jump, or to start an IBJ. If the wall pirate jumps over a Samus who is not crouched, it will climb offscreen on its own. But may still need to be killed after. Requires: {
"or": [
{
"and": [
"canTrickyDodgeEnemies",
{
"enemyKill": {
"enemies": [
[
"Yellow Space Pirate (standing)"
],
[
"Yellow Space Pirate (wall)"
]
],
"explicitWeapons": [
"Charge"
]
}
},
{
"heatFrames": 2100
}
]
},
{
"and": [
"canDodgeWhileShooting",
{
"enemyKill": {
"enemies": [
[
"Yellow Space Pirate (standing)"
],
[
"Yellow Space Pirate (wall)"
]
],
"explicitWeapons": [
"Charge+Plasma"
]
}
},
{
"heatFrames": 240
}
]
},
{
"and": [
"canDodgeWhileShooting",
{
"enemyKill": {
"enemies": [
[
"Yellow Space Pirate (standing)"
],
[
"Yellow Space Pirate (wall)"
]
],
"explicitWeapons": [
"Charge+Ice+Wave+Spazer"
]
}
},
{
"heatFrames": 660
}
]
},
{
"and": [
{
"enemyKill": {
"enemies": [
[
"Yellow Space Pirate (standing)"
],
[
"Yellow Space Pirate (wall)"
]
],
"explicitWeapons": [
"Missile",
"Super"
]
}
},
{
"heatFrames": 330
}
]
},
{
"and": [
"canDash",
"ScrewAttack",
"canDodgeWhileShooting",
{
"heatFrames": 80
}
]
},
{
"and": [
{
"haveBlueSuit": {}
},
"canDodgeWhileShooting",
{
"heatFrames": 100
}
]
}
]
}
{
"or": [
{
"and": [
"canTrickyDashJump",
{
"heatFrames": 150
}
]
},
{
"and": [
"canIBJ",
{
"heatFrames": 1320
}
]
},
{
"and": [
"canJumpIntoIBJ",
{
"heatFrames": 540
}
]
},
{
"and": [
"canDoubleBombJump",
{
"heatFrames": 310
}
]
}
]
} |
From: 2
Bottom Left Door
To: 5
Bottom Junction
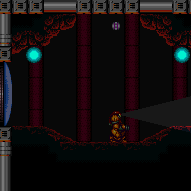
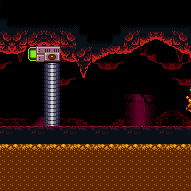
Place a Power Bomb at the top of the room, then exit G-mode to have the blocks above break. Entrance condition: {
"comeInWithGMode": {
"mode": "any",
"morphed": true
}
}Requires: "h_heatedGMode"
"h_artificialMorphMovement"
"h_artificialMorphPowerBomb"
{
"heatFrames": 0
}Clears obstacles: A |
From: 3
Bottom Right Door
To: 5
Bottom Junction
Place a Power Bomb at the top of the room, then exit G-mode to have the blocks above break. Entrance condition: {
"comeInWithGMode": {
"mode": "any",
"morphed": true
}
}Requires: "h_heatedGMode"
"h_artificialMorphMovement"
"h_artificialMorphPowerBomb"
{
"heatFrames": 0
}Clears obstacles: A |
|
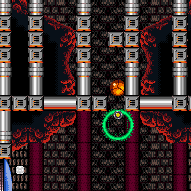
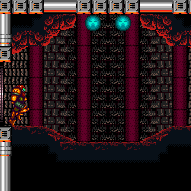
The shot block may respawn while bomb jumping and can be cleared by weaving a Power Bomb into the IBJ, or with a bomb placed overhead while bomb jumping. The Power Bomb can be placed one tile higher than the doors to also clear the Power Bomb Blocks above at the same time. Requires: "canIBJ"
{
"or": [
{
"and": [
{
"or": [
"canBombAboveIBJ",
"canPowerBombMidIBJ"
]
},
{
"heatFrames": 1000
}
]
},
{
"and": [
"canJumpIntoIBJ",
{
"heatFrames": 480
}
]
},
{
"and": [
"canDoubleBombJump",
"canJumpIntoIBJ",
{
"heatFrames": 300
}
]
}
]
}
{
"or": [
{
"and": [
"h_usePowerBomb",
{
"heatFrames": 50
}
]
},
{
"obstaclesCleared": [
"A"
]
}
]
}Clears obstacles: A Unlocks doors: {"types":["missiles"],"requires":[{"heatFrames":30}]}
{"types":["powerbomb"],"requires":[],"useImplicitRequires":false}Dev note: Placing a power bomb to break the shot block and the power bomb blocks without dropping the IBJ is the same level of control as canBombAboveIBJ. |
From: 1
Left Door
To: 7
Junction By Lower Alcoons (Left of Spike Pits)
Crystal Flash near the edge - just before Samus goes off-screen - to clear the runway Alcoon. Shinecharge to the left, then weave down and into the Alcoon to interrupt. Entrance condition: {
"comeInWithGMode": {
"mode": "direct",
"morphed": false
}
}Requires: {
"or": [
"canWallJump",
"HiJump",
"canSpringBallJumpMidAir",
"SpaceJump",
{
"and": [
"canIBJ",
"canBombHorizontally",
"canJumpIntoIBJ"
]
},
{
"and": [
"canUseFrozenEnemies",
"canInsaneJump"
]
}
]
}
"h_CrystalFlashForReserveEnergy"
{
"canShineCharge": {
"usedTiles": 27,
"gentleUpTiles": 2,
"openEnd": 0
}
}
{
"or": [
"canDownBack",
"canTrickyJump"
]
}
{
"or": [
{
"and": [
{
"disableEquipment": "ETank"
},
{
"autoReserveTrigger": {}
},
"canRModeSparkInterrupt",
{
"enemyDamage": {
"enemy": "Alcoon",
"type": "contact",
"hits": 1
}
}
]
},
{
"and": [
"canReserveTriggerBufferXRay",
{
"autoReserveTrigger": {
"implicitHeatFrames": "no"
}
},
"canRModePauseAbuseSparkInterrupt",
{
"heatFrames": 30
}
]
}
]
}Clears obstacles: A |
From: 3
Bottom Horizontal Door
To: 1
Left Door
Entrance condition: {
"comeInWithGMode": {
"mode": "any",
"morphed": true
}
}Requires: {
"or": [
{
"and": [
"h_artificialMorphSpringBall",
"h_artificialMorphSpringBallBombJump"
]
},
{
"and": [
"h_artificialMorphIBJ",
"h_artificialMorphBombHorizontally"
]
}
]
}
"h_heatedGModeOpenDifferentDoor" |
From: 3
Bottom Horizontal Door
To: 2
Right Vertical Door
PLMs will be overloaded using the camera scroll blocks while climbing the room. Blindly traverse the maze until the end, where Samus will be stuck at the far right next to the shot block. Exit G-mode just one tile to the left, Morph, use a Bomb or Power Bomb to destroy the shot block and escape through the door. Note that it is possible to climb up with a tricky dash jump and no wall jump. Either kill the Alcoon before it spawns and stationary, invisible lasers, or let the right alcoons shoot enough to overload projectiles. Entrance condition: {
"comeInWithGMode": {
"mode": "any",
"morphed": false
}
}Requires: "canOffScreenMovement"
{
"or": [
"canWallJump",
"HiJump",
"canSpringBallJumpMidAir",
"SpaceJump",
"canUseFrozenEnemies",
"canIBJ",
{
"and": [
"canTrickyDashJump",
"canTrickyDodgeEnemies"
]
}
]
}
"h_bombThings"
"h_heatedGModeOffCameraDoor"
{
"heatFrames": 200
} |
|
It is possible to climb up with a tricky dash jump and no wall jump. Either kill the Alcoon before it spawns any stationary, invisible fireballs, or let the right Alcoons shoot enough to overload projectiles. Entrance condition: {
"comeInWithGMode": {
"mode": "any",
"morphed": true
}
}Requires: "h_heatedGMode"
{
"or": [
{
"and": [
"h_artificialMorphSpringBall",
"h_artificialMorphSpringBallBombJump"
]
},
{
"and": [
"h_artificialMorphIBJ",
"h_artificialMorphBombHorizontally"
]
}
]
}
{
"heatFrames": 0
} |
From: 3
Bottom Horizontal Door
To: 7
Junction By Lower Alcoons (Left of Spike Pits)
Kill the spike Alcoons before climbing to the upper runway. Be sure to jump over the invisible fireball projectiles. Crystal Flash at the top right, just before Samus goes off-screen, to clear the runway Alcoon. Shinecharge to the left, then weave down and into the Alcoon to interrupt. Entrance condition: {
"comeInWithGMode": {
"mode": "direct",
"morphed": false
}
}Requires: {
"or": [
"canWallJump",
"HiJump",
"canSpringBallJumpMidAir",
"SpaceJump",
{
"and": [
"canIBJ",
"canBombHorizontally",
"canJumpIntoIBJ"
]
},
{
"and": [
"canUseFrozenEnemies",
"canInsaneJump"
]
}
]
}
"h_CrystalFlashForReserveEnergy"
{
"canShineCharge": {
"usedTiles": 27,
"gentleUpTiles": 2,
"openEnd": 0
}
}
{
"or": [
"canDownBack",
"canTrickyJump"
]
}
{
"or": [
{
"and": [
{
"disableEquipment": "ETank"
},
{
"autoReserveTrigger": {}
},
"canRModeSparkInterrupt",
{
"enemyDamage": {
"enemy": "Alcoon",
"type": "contact",
"hits": 1
}
}
]
},
{
"and": [
"canReserveTriggerBufferXRay",
{
"autoReserveTrigger": {
"implicitHeatFrames": "no"
}
},
"canRModePauseAbuseSparkInterrupt",
{
"heatFrames": 30
}
]
}
]
}Clears obstacles: A |
From: 3
Bottom Horizontal Door
To: 7
Junction By Lower Alcoons (Left of Spike Pits)
Get past the spike Alcoons, and climb up - leave the lower left Alcoon alive to use for later. Clear the runway Alcoon and get the shinecharge, then drop into the lower left Alcoon to interrupt. If you Crystal Flash early, stay near the door to ensure you kill only the two spike Alcoons. Entrance condition: {
"comeInWithRMode": {}
}Requires: {
"or": [
{
"and": [
"h_heatedCrystalFlashForReserveEnergy",
{
"heatFrames": 100
}
]
},
{
"and": [
"ScrewAttack",
"canCarefulJump",
{
"heatFrames": 100
}
]
},
{
"and": [
"canDodgeWhileShooting",
{
"or": [
"h_heatProof",
{
"enemyKill": {
"enemies": [
[
"Alcoon"
]
],
"explicitWeapons": [
"Missile",
"Super",
"Wave+Plasma"
]
}
},
{
"and": [
"canPseudoScrew",
{
"heatFrames": 30
}
]
}
]
},
"canCarefulJump",
{
"heatFrames": 100
}
]
},
{
"and": [
{
"enemyKill": {
"enemies": [
[
"Alcoon",
"Alcoon"
]
],
"explicitWeapons": [
"Missile",
"Super",
"Plasma",
"Wave+Spazer"
]
}
},
{
"heatFrames": 200
}
]
},
{
"and": [
"canCarefulJump",
{
"heatFrames": 199
}
]
},
{
"and": [
{
"enemyDamage": {
"enemy": "Alcoon",
"type": "contact",
"hits": 1
}
},
{
"heatFrames": 180
}
]
}
]
}
{
"heatFrames": 160
}
{
"or": [
"canWallJump",
"HiJump",
"canSpringBallJumpMidAir",
"SpaceJump",
{
"and": [
"canSpringBallBombJump",
{
"heatFrames": 60
}
]
},
{
"and": [
"canIBJ",
"canBombHorizontally",
"canJumpIntoIBJ",
{
"heatFrames": 110
},
{
"or": [
"canDoubleBombJump",
{
"heatFrames": 190
}
]
}
]
},
{
"and": [
"canTrickyDashJump",
"canInsaneJump",
{
"heatFrames": 20
}
]
},
{
"and": [
"canUseFrozenEnemies",
"canInsaneJump",
{
"heatFrames": 150
}
]
}
]
}
{
"or": [
{
"and": [
"canDodgeWhileShooting",
{
"enemyKill": {
"enemies": [
[
"Alcoon"
]
],
"explicitWeapons": [
"Missile",
"Super",
"Charge+Plasma"
]
}
},
{
"heatFrames": 120
}
]
},
{
"and": [
{
"enemyKill": {
"enemies": [
[
"Alcoon"
]
],
"explicitWeapons": [
"Wave",
"Ice+Spazer",
"Plasma",
"ScrewAttack",
"PseudoScrew",
"PowerBomb"
]
}
},
{
"heatFrames": 180
}
]
},
{
"heatFrames": 200
}
]
}
{
"or": [
{
"resourceAvailable": [
{
"type": "ReserveEnergy",
"count": 1
}
]
},
{
"and": [
"h_heatProof",
"h_RModeCanRefillReserves",
{
"or": [
{
"and": [
{
"resourceMissingAtMost": [
{
"type": "PowerBomb",
"count": 0
}
]
},
{
"partialRefill": {
"type": "ReserveEnergy",
"limit": 20
}
}
]
},
{
"and": [
{
"resourceMissingAtMost": [
{
"type": "PowerBomb",
"count": 3
}
]
},
{
"partialRefill": {
"type": "ReserveEnergy",
"limit": 5
}
}
]
}
]
}
]
}
]
}
{
"canShineCharge": {
"usedTiles": 27,
"gentleUpTiles": 2,
"openEnd": 0
}
}
{
"or": [
"canDownBack",
"canTrickyJump"
]
}
{
"heatFrames": 120
}
{
"autoReserveTrigger": {
"maxReserveEnergy": 95
}
}
"canRModeSparkInterrupt"Clears obstacles: A |
From: 7
Junction By Lower Alcoons (Left of Spike Pits)
To: 1
Left Door
Requires: "canIBJ"
{
"or": [
{
"and": [
"canBombHorizontally",
{
"heatFrames": 840
}
]
},
{
"and": [
"canJumpIntoIBJ",
"canDoubleBombJump",
{
"heatFrames": 275
}
]
},
{
"and": [
"canJumpIntoIBJ",
{
"heatFrames": 420
}
]
}
]
}
{
"or": [
"canDash",
{
"heatFrames": 20
}
]
}Unlocks doors: {"types":["powerbomb"],"requires":[{"heatFrames":60}]} |
From: 7
Junction By Lower Alcoons (Left of Spike Pits)
To: 1
Left Door

Requires: "canIBJ"
{
"or": [
{
"enemyKill": {
"enemies": [
[
"Alcoon"
]
],
"explicitWeapons": [
"Missile",
"Super",
"Plasma",
"Wave+Spazer",
"PseudoScrew",
"ScrewAttack"
]
}
},
{
"heatFrames": 270
}
]
}
{
"heatFrames": 910
}Unlocks doors: {"types":["powerbomb"],"requires":[{"heatFrames":60}]} |
From: 7
Junction By Lower Alcoons (Left of Spike Pits)
To: 6
Junction By Left Door (Right of Pit)
Requires: "canIBJ"
{
"or": [
{
"and": [
"canBombHorizontally",
{
"heatFrames": 820
}
]
},
{
"and": [
"canJumpIntoIBJ",
"canDoubleBombJump",
{
"heatFrames": 255
}
]
},
{
"and": [
"canJumpIntoIBJ",
{
"heatFrames": 400
}
]
}
]
}
{
"or": [
"canDash",
{
"heatFrames": 25
}
]
} |
From: 7
Junction By Lower Alcoons (Left of Spike Pits)
To: 6
Junction By Left Door (Right of Pit)
Requires: "canIBJ"
{
"or": [
{
"enemyKill": {
"enemies": [
[
"Alcoon"
]
],
"explicitWeapons": [
"Missile",
"Super",
"Plasma",
"Wave+Spazer",
"PseudoScrew",
"ScrewAttack"
]
}
},
{
"heatFrames": 270
}
]
}
{
"heatFrames": 890
} |
|
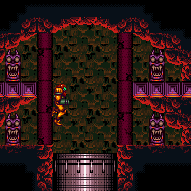
Overload PLMs by rolling through the camera scroll block just right of the bomb blocks, then roll through the morph tunnel and use a bomb boost or Spring Ball to escape the tunnel and get to the door. Without a way to boost out of the tunnel, exit G-mode and use a two-turn X-Ray climb, then ceiling clip by jumping out of the tunnel. Note that the Kihunter is global, and will hit Samus. Without any way to know where the Kihunter will be, a contact hit is expected without Screw Attack or blue suit. Entrance condition: {
"comeInWithGMode": {
"mode": "any",
"morphed": true
},
"comesThroughToilet": "any"
}Requires: "h_artificialMorphMovement"
"canOffScreenMovement"
{
"or": [
"h_artificialMorphBombThings",
"h_artificialMorphSpringBall",
{
"and": [
"canXRayClimb",
"canCeilingClip",
{
"heatFrames": 450
},
{
"or": [
"canTrickyGMode",
{
"heatFrames": 200
}
]
}
]
}
]
}
{
"or": [
"ScrewAttack",
{
"haveBlueSuit": {}
},
{
"enemyDamage": {
"enemy": "Kihunter (red)",
"type": "contact",
"hits": 1
}
}
]
}
"h_heatedGModeOffCameraDoor"Exit condition: {
"leaveNormally": {}
}Unlocks doors: {"types":["missiles"],"requires":[{"heatFrames":50}]}
{"types":["super"],"requires":[]}
{"types":["powerbomb"],"requires":[{"heatFrames":110}]}Dev note: It is also possible, but not expected, to kill the Kihunter by the door and use its drop to get out of the room. Because this is blind and there doesn't appear to be a way to fix the camera, it is not expected to climb higher in the room. FIXME: These door unlock heat frames could be lowered, but it depends on if the Kihunter is alive, and if Samus had to exit G-mode to get out of the tunnel. FIXME: It is possible to pause abuse a drop from the Kihunter. |
|
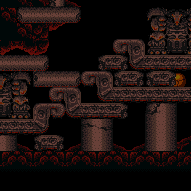
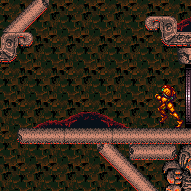
Overload PLMs by rolling through the camera scroll block just left of the bomb blocks, then roll through to the door. Jump and shoot down to hit the door, or use Grapple to save a few heat frames. Entrance condition: {
"comeInWithGMode": {
"mode": "any",
"morphed": true
}
}Requires: "h_artificialMorphMovement"
{
"heatFrames": 30
}
"h_heatedGModeOffCameraDoor"Dev note: This door is slightly slower to get through than normal off-camera doors because it's vertical. |
|
It is possible to get back up with Spring Ball alone with a foosball off of the crumble block. Entrance condition: {
"comeInWithGMode": {
"mode": "direct",
"morphed": true
},
"comesThroughToilet": "any"
}Requires: {
"or": [
"h_artificialMorphIBJ",
"h_artificialMorphSpringBallBombJump",
{
"and": [
"HiJump",
"h_artificialMorphSpringBall"
]
},
{
"and": [
"canTrickyJump",
"h_artificialMorphSpringBall"
]
}
]
}Exit condition: {
"leaveWithGMode": {
"morphed": true
}
}Dev note: This is one of the easier foosballs because it is free to retry, because there is no heat damage in G-Mode. |
From: 3
Top Right Door
To: 2
Bottom Left Door
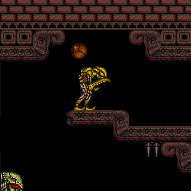
Get to the bomb blocks while morphed, use a Power Bomb, then exit G-mode and drop to the bottom of the room. It is possible to go through the top pirate while it is being hit by a Power Bomb explosion, otherwise it is possible to jump over it with Morph or Spring Ball. With Bombs, it is possible but tricky to IBJ over the pirate or Bomb it many times to kill it without it placing any of its stationary, invisible lasers. Note that the pirate will not turn towards Samus and place a laser if it is moving its head back and forth. Entrance condition: {
"comeInWithGMode": {
"mode": "any",
"morphed": true
}
}Requires: "h_heatedGMode"
"h_artificialMorphPowerBomb"
{
"or": [
{
"and": [
"h_artificialMorphPowerBomb",
"canHitbox"
]
},
"canLateralMidAirMorph",
"h_artificialMorphSpringBall",
{
"and": [
"canTrickyGMode",
"h_artificialMorphIBJ"
]
},
{
"and": [
"Morph",
{
"or": [
"Charge",
{
"ammo": {
"type": "Super",
"count": 3
}
},
{
"ammo": {
"type": "Missile",
"count": 9
}
},
{
"enemyDamage": {
"enemy": "Yellow Space Pirate (standing)",
"type": "contact",
"hits": 1
}
}
]
}
]
},
{
"and": [
"h_artificialMorphBombs",
{
"enemyDamage": {
"enemy": "Yellow Space Pirate (standing)",
"type": "contact",
"hits": 1
}
}
]
}
]
}
{
"heatFrames": 160
}Clears obstacles: A |
From: 4
Junction Above Bomb Block
To: 1
Top Left Door
Firing upwards has a good chance of hitting multiple Kihunters. And charge shot double hits will instantly kill a Kihunter. Requires: "canDash"
"Ice"
"Wave"
"Plasma"
{
"or": [
"Charge",
{
"heatFrames": 240
}
]
}
{
"or": [
"h_crouchJumpDownGrab",
"canWallJump",
"HiJump",
{
"and": [
"canSpringBallJumpMidAir",
{
"heatFrames": 120
}
]
},
"SpaceJump",
{
"and": [
"canIBJ",
"h_heatProof"
]
},
{
"and": [
"canSpringBallBombJump",
"h_additionalBomb",
"h_additionalBomb",
{
"heatFrames": 250
}
]
}
]
}
{
"heatFrames": 550
}Clears obstacles: A, B |
From: 4
Junction Above Bomb Block
To: 1
Top Left Door
Fire up from below and try not to jump too high as that will out the camera in a bad position. Requires: "canDash"
"Ice"
"Wave"
"Spazer"
{
"or": [
"Charge",
"canCarefulJump",
"h_heatProof"
]
}
{
"or": [
"h_crouchJumpDownGrab",
"canWallJump",
"HiJump",
{
"and": [
"canSpringBallJumpMidAir",
{
"heatFrames": 120
}
]
},
"SpaceJump",
{
"and": [
"canIBJ",
"h_heatProof"
]
},
{
"and": [
"canSpringBallBombJump",
"h_additionalBomb",
"h_additionalBomb",
{
"heatFrames": 250
}
]
}
]
}
{
"heatFrames": 1520
}Clears obstacles: A, B Dev note: FIXME IBJ strats could be added with heat frames. |
From: 4
Junction Above Bomb Block
To: 1
Top Left Door
Requires: {
"or": [
"canDash",
{
"heatFrames": 40
}
]
}
{
"or": [
{
"obstaclesCleared": [
"A"
]
},
{
"and": [
{
"haveBlueSuit": {}
},
{
"heatFrames": 10
},
{
"or": [
"Wave",
{
"heatFrames": 30
}
]
}
]
}
]
}
{
"or": [
{
"and": [
"h_heatedCrouchJumpDownGrab",
{
"heatFrames": 340
}
]
},
{
"and": [
"canWallJump",
{
"heatFrames": 290
}
]
},
{
"and": [
"HiJump",
{
"heatFrames": 240
}
]
},
{
"and": [
"canSpringBallJumpMidAir",
{
"heatFrames": 450
}
]
},
{
"and": [
"SpaceJump",
{
"heatFrames": 380
}
]
},
{
"and": [
"canIBJ",
"h_heatProof"
]
},
{
"and": [
"canJumpIntoIBJ",
{
"heatFrames": 660
},
{
"or": [
{
"obstaclesCleared": [
"A"
]
},
{
"heatFrames": 380
}
]
}
]
},
{
"and": [
"canSpringBallBombJump",
"h_additionalBomb",
"h_additionalBomb",
{
"heatFrames": 560
}
]
}
]
}Clears obstacles: B |
|
Fire up from below and try not to jump too high as that will put the camera in a bad position. Requires: "canDash"
"Plasma"
{
"or": [
"canCarefulJump",
{
"heatFrames": 100
}
]
}
{
"or": [
"h_crouchJumpDownGrab",
"canWallJump",
"HiJump",
{
"and": [
"canSpringBallJumpMidAir",
{
"heatFrames": 120
}
]
},
"SpaceJump",
{
"and": [
"canIBJ",
"h_heatProof"
]
},
{
"and": [
"canSpringBallBombJump",
"h_additionalBomb",
"h_additionalBomb",
{
"heatFrames": 250
}
]
}
]
}
{
"heatFrames": 1360
}Clears obstacles: A, B Dev note: FIXME IBJ strats could be added with heat frames. |
|


Depending on which movement items are available, it is often safest to carefully kill each Kihunter from below before attempting to get onto its platform: lure the Kihunter over to the opening and spin jump directly up into it. If wall jumping up, do so from low enough that Samus bonks the opposite wall before touching the Kihunter: otherwise the wall jumping movement may prevent Screw Attack from taking effect. Requires: "canDash"
"ScrewAttack"
{
"or": [
"HiJump",
"SpaceJump",
"canCarefulJump"
]
}
{
"or": [
{
"and": [
"canWallJump",
{
"heatFrames": 360
}
]
},
{
"and": [
"h_crouchJumpDownGrab",
{
"heatFrames": 520
}
]
},
{
"and": [
"HiJump",
{
"heatFrames": 310
}
]
},
{
"and": [
"canSpringBallJumpMidAir",
{
"heatFrames": 720
}
]
},
{
"and": [
"SpaceJump",
{
"heatFrames": 440
}
]
},
{
"and": [
"canIBJ",
"h_heatProof"
]
},
{
"and": [
"canJumpIntoIBJ",
{
"heatFrames": 1060
}
]
}
]
}
{
"or": [
"Wave",
{
"heatFrames": 40
}
]
}Clears obstacles: A, B |
From: 4
Junction Above Bomb Block
To: 1
Top Left Door
Shoot them from below. It is possible for the Kihunters to fall through the gaps in the side, but is unlikely. Jumping may lower the camera position making it harder to shoot the Kihunters. But once it is lowered, jump to make them active and vulnerable to damage. Requires: "h_heatProof"
"canBePatient"
{
"enemyKill": {
"enemies": [
[
"Kihunter (red)",
"Kihunter (red)",
"Kihunter (red)"
]
]
}
}
{
"or": [
"h_crouchJumpDownGrab",
"canWallJump",
"HiJump",
"canSpringBallJumpMidAir",
"SpaceJump",
"canIBJ",
{
"and": [
"canSpringBallBombJump",
"h_additionalBomb",
"h_additionalBomb"
]
}
]
}Clears obstacles: A Dev note: SpringBallBombJump uses 3 powerbombs total. |
|
Fire up from below and try not to jump too high as that will put the camera in a bad position. Requires: "canDash"
{
"enemyKill": {
"enemies": [
[
"Kihunter (red)",
"Kihunter (red)",
"Kihunter (red)"
]
],
"explicitWeapons": [
"Super"
]
}
}
{
"or": [
"canCarefulJump",
{
"heatFrames": 210
}
]
}
{
"or": [
"h_crouchJumpDownGrab",
"canWallJump",
"HiJump",
{
"and": [
"canSpringBallJumpMidAir",
{
"heatFrames": 120
}
]
},
"SpaceJump",
{
"and": [
"canIBJ",
"h_heatProof"
]
},
{
"and": [
"canSpringBallBombJump",
"h_additionalBomb",
"h_additionalBomb",
{
"heatFrames": 250
}
]
}
]
}
{
"heatFrames": 1300
}Clears obstacles: A, B |
From: 4
Junction Above Bomb Block
To: 1
Top Left Door
Requires: "canDash"
"Wave"
"Plasma"
{
"or": [
"h_crouchJumpDownGrab",
"canWallJump",
"HiJump",
{
"and": [
"canSpringBallJumpMidAir",
{
"heatFrames": 120
}
]
},
"SpaceJump",
{
"and": [
"canIBJ",
"h_heatProof"
]
},
{
"and": [
"canSpringBallBombJump",
"h_additionalBomb",
"h_additionalBomb",
{
"heatFrames": 250
}
]
}
]
}
{
"heatFrames": 940
}Clears obstacles: A, B |
From: 5
G-Mode Morph Junction (Above Bomb Block)
To: 1
Top Left Door
Kill the Kihunters then shoot the shot blocks and escape. Requires: "h_heatedGMode"
{
"obstaclesCleared": [
"A"
]
}
{
"or": [
"h_crouchJumpDownGrab",
"canWallJump",
"HiJump",
"canSpringBallJumpMidAir",
"SpaceJump",
"canIBJ"
]
}
{
"heatFrames": 200
} |
From: 5
G-Mode Morph Junction (Above Bomb Block)
To: 5
G-Mode Morph Junction (Above Bomb Block)
Kill the Kihunters then either exit the room at the top or go to the item. Requires: "h_heatedGMode"
{
"or": [
{
"enemyKill": {
"enemies": [
[
"Kihunter (red)",
"Kihunter (red)",
"Kihunter (red)"
]
],
"explicitWeapons": [
"Super",
"Missile",
"Plasma",
"ScrewAttack"
]
}
},
{
"haveBlueSuit": {}
},
{
"and": [
"Ice",
{
"or": [
"Wave",
"Spazer",
"canBeVeryPatient",
{
"and": [
"Charge",
"canBePatient"
]
}
]
}
]
},
{
"and": [
"Charge",
{
"or": [
"Wave",
"Spazer",
"canBeVeryPatient"
]
}
]
},
{
"and": [
"Spazer",
{
"or": [
"Wave",
"canBePatient"
]
}
]
}
]
}
{
"or": [
"h_crouchJumpDownGrab",
"canWallJump",
"HiJump",
"canSpringBallJumpMidAir",
"SpaceJump",
"canIBJ"
]
}
{
"heatFrames": 0
}Clears obstacles: A |
|
Entrance condition: {
"comeInWithGMode": {
"mode": "direct",
"morphed": true
},
"comesThroughToilet": "any"
}Requires: "h_artificialMorphMovement" Exit condition: {
"leaveWithGMode": {
"morphed": true
}
} |
From: 2
Top Right Door
To: 9
G-Mode Morph, Left of Morph Tunnel (Off-Camera)
Get into the cove next to the bomb block and carefully wiggle in that camera scroll block to overload PLMs and move to the item to the left. Entrance condition: {
"comeInWithGMode": {
"mode": "any",
"morphed": true
},
"comesThroughToilet": "any"
}Requires: "h_artificialMorphMovement"
{
"heatFrames": 0
}Dev note: It is possible to damage boost off of the Hibashi instead of requiring artificial morph movement, but there is no known way to get here with Energy and artificial morph (a Power Bomb will solidify the bomb block). |
From: 2
Top Right Door
To: 9
G-Mode Morph, Left of Morph Tunnel (Off-Camera)
Get into the cove next to the bomb block and carefully wiggle in that camera scroll block to overload PLMs and move to the item to the left. Then use a Power Bomb to activate the shutter. Entrance condition: {
"comeInWithGMode": {
"mode": "any",
"morphed": true
},
"comesThroughToilet": "any"
}Requires: "h_artificialMorphMovement"
"h_artificialMorphPowerBomb"
{
"heatFrames": 0
}Clears obstacles: E Dev note: It is possible to damage boost off of the Hibashi instead of requiring artificial morph movement, but there is no known way to get here with Energy and artificial morph (a Power Bomb will solidify the bomb block). |
From: 9
G-Mode Morph, Left of Morph Tunnel (Off-Camera)
To: 1
Bottom Left Door
With a way to move while morphed, use a Power Bomb while on the Power Bomb blocks and quickly exit G-mode. Otherwise, do so to the right of the Power Bomb blocks, quickly exit G-mode, and jump up and over to fall through the blocks. Fall down the spiky shaft and get to the door. Avoiding a spike hit is possible but tricky. Requires: "h_heatedGMode"
"canOffScreenMovement"
"h_artificialMorphPowerBomb"
{
"or": [
"h_artificialMorphMovement",
{
"heatFrames": 100
}
]
}
{
"or": [
"canTrickyGMode",
{
"spikeHits": 1
}
]
}
{
"heatFrames": 350
} |
|
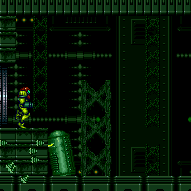
Use the camera scroll blocks just left of the bomb blocks, in order to overload PLMs and go through them. Entrance condition: {
"comeInWithGMode": {
"mode": "any",
"morphed": true
}
}Requires: "h_artificialMorphMovement" |
|


With Bombs, it may be helpful to roll off the platform and kill the Atomics before safely leaving the room. Entrance condition: {
"comeInWithGMode": {
"mode": "direct",
"morphed": true
},
"comesThroughToilet": "any"
}Requires: "h_artificialMorphMovement" Exit condition: {
"leaveWithGMode": {
"morphed": true
}
} |
|
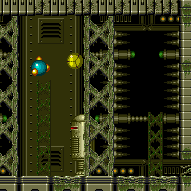

Use the camera scroll blocks just left of the bomb blocks, in order to overload PLMs and go through them. Entrance condition: {
"comeInWithGMode": {
"mode": "any",
"morphed": true
},
"comesThroughToilet": "any"
}Requires: "h_artificialMorphMovement" |
From: 6
Bowling Chozo Statue
To: 1
Top Left Door
Jump or Spring Ball jump into a breakable Grapple block. The timing is precise and it can help to break two Grapple blocks to use one as a cue. Crystal Flash then X-ray climb to the region above (less than 1 screen). There is a chance that Samus will not be able to Crystal Flash unless first placing a Bomb or Power Bomb. Requires: {
"notable": "Grapple Block Crystal Flash"
}
"canUseGrapple"
"canJumpIntoRespawningBlock"
"canTrickyJump"
{
"or": [
"HiJump",
"canTrickySpringBallJump",
{
"and": [
"canSpringBallJumpMidAir",
{
"not": "f_DefeatedPhantoon"
},
"canRiskPermanentLossOfAccess"
]
}
]
}
"h_bombThings"
"h_CrystalFlash"
"canXRayClimb"
{
"or": [
"h_fourTileJumpMorph",
"h_useSpringBall",
"canIBJ",
{
"getBlueSpeed": {
"usedTiles": 16,
"steepDownTiles": 4,
"openEnd": 0
}
},
{
"and": [
{
"not": "f_DefeatedPhantoon"
},
"canRiskPermanentLossOfAccess"
]
}
]
}Exit condition: {
"leaveNormally": {}
}Unlocks doors: {"types":["ammo"],"requires":[]}Dev note: FIXME: This may be possible with a spike hit and speedy jump. |
From: 6
Bowling Chozo Statue
To: 1
Top Left Door
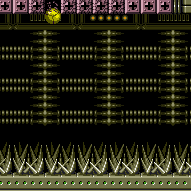

Use a Grapple fling to get stuck inside a breakable Grapple block. It can help to break two or more Grapple blocks in a row. Crystal Flash then X-ray climb to the region above (less than 1 screen). There is a chance that Samus will not be able to Crystal Flash unless first placing a Bomb or Power Bomb. Requires: {
"notable": "Grapple Block Crystal Flash"
}
"canPreciseGrapple"
"canJumpIntoRespawningBlock"
"canInsaneJump"
"h_bombThings"
"h_CrystalFlash"
"canXRayClimb"
{
"or": [
"h_fourTileJumpMorph",
"h_useSpringBall",
"canIBJ",
{
"getBlueSpeed": {
"usedTiles": 16,
"steepDownTiles": 4,
"openEnd": 0
}
},
{
"and": [
{
"not": "f_DefeatedPhantoon"
},
"canRiskPermanentLossOfAccess"
]
}
]
}Exit condition: {
"leaveNormally": {}
}Unlocks doors: {"types":["ammo"],"requires":[]} |
|
Entrance condition: {
"comeInWithGMode": {
"mode": "direct",
"morphed": true
},
"comesThroughToilet": "any"
}Requires: "h_artificialMorphMovement" Exit condition: {
"leaveWithGMode": {
"morphed": true
}
} |
From: 2
Top Left Door
To: 2
Top Left Door
It is required to avoid double hitting the Atomic with the Power Bomb, and to position the Crystal Flash so that the Atomic can hit Samus from above or below so it avoids the light orb. With Bombs, IBJ a small distance to where the top bomb is placed near the top of the doorframe to the right, to barely lure the Atomic a bit off-screen, then fall to the ground and Crystal Flash. With Spring Ball, perform three full-height jumps in front of the door to the right, then Crystal Flash. With no movement items this will use more ammo; roll down to the next platform attached to the left wall, then Crystal Flash at the right edge of it. This can be done with up to 2 E-Tanks while suitless, or no E-Tanks and up to 50% damage reduction. Entrance condition: {
"comeInWithGMode": {
"mode": "direct",
"morphed": true
}
}Requires: "f_DefeatedPhantoon"
"h_artificialMorphComplexRModeCrystalFlashInterrupt"
{
"ammo": {
"type": "Missile",
"count": 10
}
}
{
"or": [
"h_artificialMorphSpringBall",
{
"and": [
"h_artificialMorphIBJ",
{
"ammo": {
"type": "Super",
"count": 10
}
}
]
},
{
"and": [
{
"ammo": {
"type": "Super",
"count": 10
}
},
{
"ammo": {
"type": "PowerBomb",
"count": 10
}
}
]
}
]
} |
From: 3
Bottom Left Door
To: 3
Bottom Left Door
It is required to avoid double hitting the Atomic with the Power Bomb, and to position the Crystal Flash so that the Atomic can hit Samus from above so it avoids the light orb. With Bombs, IBJ a small distance to where the top bomb is placed near the center of the doorframe, to barely lure the Atomic a bit off-screen, then fall to the ground and Crystal Flash. With Spring Ball, perform one full-height jump then place a Power Bomb to Crystal Flash; it is possible to do this with fewer Power Bombs by then performing one more full-height jump and landing in the Power Bomb explosion just in time to Crystal Flash. This can be done with up to 2 E-Tanks while suitless, or no E-Tanks and up to 50% damage reduction. Entrance condition: {
"comeInWithGMode": {
"mode": "direct",
"morphed": true
}
}Requires: "f_DefeatedPhantoon"
"h_artificialMorphComplexRModeCrystalFlashInterrupt"
{
"ammo": {
"type": "Missile",
"count": 10
}
}
{
"ammo": {
"type": "Super",
"count": 10
}
}
{
"or": [
"h_artificialMorphSpringBall",
{
"and": [
"h_artificialMorphIBJ",
{
"ammo": {
"type": "PowerBomb",
"count": 10
}
}
]
}
]
} |
|
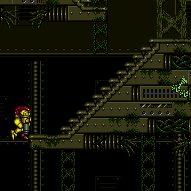
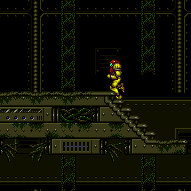
Requires: {
"or": [
"canWallJump",
"HiJump",
"SpaceJump",
"canIBJ",
"canSpeedyJump",
"h_crouchJumpDownGrab",
"canSpringBallJumpMidAir",
"canSpringBallBombJump",
"canUseFrozenEnemies"
]
}Dev note: FIXME: It is possible to get up with a damage boost, with or without Morph, which could preserve a flash suit. |
From: 3
Bottom Left Door
To: 8
Item
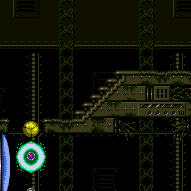

Use the camera scroll blocks just right of the bomb blocks, in order to overload PLMs and go through them. Exit g-mode and travel to the item and back while off screen. Entrance condition: {
"comeInWithGMode": {
"mode": "any",
"morphed": true
}
}Requires: {
"or": [
"h_artificialMorphIBJ",
"h_artificialMorphSpringBallBombJump",
{
"and": [
"h_artificialMorphSpringBall",
"HiJump"
]
}
]
}
{
"or": [
{
"and": [
"canOffScreenMovement",
"canTrickyGMode"
]
},
{
"and": [
{
"not": "f_DefeatedPhantoon"
},
"canRiskPermanentLossOfAccess"
]
}
]
}Dev note: This is only useful if the item is Morph. If Samus already has Morph, she can fix the camera, using another strat. |
|
Requires: "f_DefeatedPhantoon"
{
"or": [
{
"and": [
{
"resetRoom": {
"nodes": [
1
]
}
},
{
"cycleFrames": 1740
}
]
},
{
"and": [
{
"resetRoom": {
"nodes": [
2
]
}
},
{
"cycleFrames": 1200
}
]
},
{
"and": [
{
"resetRoom": {
"nodes": [
3
]
}
},
{
"cycleFrames": 1400
}
]
},
{
"and": [
{
"resetRoom": {
"nodes": [
4
]
}
},
{
"cycleFrames": 1050
}
]
},
{
"and": [
{
"resetRoom": {
"nodes": [
5
]
}
},
{
"cycleFrames": 1050
}
]
},
{
"and": [
{
"resetRoom": {
"nodes": [
6
]
}
},
{
"cycleFrames": 1830
},
"h_useMorphBombs"
]
},
{
"and": [
{
"resetRoom": {
"nodes": [
7
]
}
},
{
"cycleFrames": 2000
},
"Morph",
{
"or": [
"Wave",
"Bombs",
"Spazer"
]
},
{
"or": [
"Bombs",
"SpringBall",
{
"and": [
"canMidAirMorph",
"canCrouchJump"
]
}
]
}
]
}
]
}
{
"or": [
"ScrewAttack",
{
"haveBlueSuit": {}
},
"Plasma",
{
"and": [
"Wave",
{
"cycleFrames": 60
}
]
},
{
"and": [
"Spazer",
{
"cycleFrames": 330
}
]
},
{
"and": [
"canDodgeWhileShooting",
{
"cycleFrames": 900
}
]
}
]
}
{
"or": [
"canDash",
{
"cycleFrames": 200
}
]
}
{
"or": [
"canWallJump",
"h_crouchJumpDownGrabCycleFrames",
"HiJump",
"SpaceJump",
{
"and": [
"canIBJ",
{
"cycleFrames": 750
}
]
},
{
"and": [
"canSpringBallJumpMidAir",
{
"cycleFrames": 30
},
"h_doubleEquipmentScreenCycleFrames"
]
}
]
}Resets obstacles: A, B, C, R-Mode Farm cycle drops: 4 Atomic |
From: 4
Top Right Door
To: 4
Top Right Door
There is additional movement expected to represent reaching the Atomics who appear when the power is on. Requires: {
"not": "f_DefeatedPhantoon"
}
{
"or": [
{
"and": [
{
"resetRoom": {
"nodes": [
1,
2,
3,
4,
5
]
}
},
{
"cycleFrames": 2000
}
]
},
{
"and": [
{
"resetRoom": {
"nodes": [
6
]
}
},
{
"cycleFrames": 2000
},
"h_useMorphBombs"
]
},
{
"and": [
{
"resetRoom": {
"nodes": [
7
]
}
},
{
"cycleFrames": 2000
},
"Morph",
{
"or": [
"Wave",
"Bombs",
"Spazer"
]
},
{
"or": [
"Bombs",
"SpringBall",
{
"and": [
"canMidAirMorph",
"canCrouchJump"
]
}
]
}
]
}
]
}
{
"or": [
"ScrewAttack",
{
"haveBlueSuit": {}
},
"Plasma",
{
"and": [
"Wave",
{
"cycleFrames": 60
}
]
},
{
"and": [
"Spazer",
{
"cycleFrames": 150
}
]
},
{
"and": [
"Ice",
"canDodgeWhileShooting",
{
"cycleFrames": 240
}
]
}
]
}
{
"or": [
"canDash",
{
"cycleFrames": 200
}
]
}
{
"or": [
"canWallJump",
"h_crouchJumpDownGrabCycleFrames",
"HiJump",
"SpaceJump",
{
"and": [
"canIBJ",
{
"cycleFrames": 750
}
]
},
{
"and": [
"canSpringBallJumpMidAir",
{
"cycleFrames": 30
},
"h_doubleEquipmentScreenCycleFrames"
]
}
]
}Resets obstacles: A, B, C, R-Mode Farm cycle drops: 4 Custom Covern (Atomic) Dev note: This is Covern farm with a reduced drop chance so as to be applicable while powered off without breaking the powered on state. Cycle frames represent the slower of killing 4 atomics or killing 4 coverns. These Coverns have reduced Power Bomb and Super drop chance. |
From: 4
Top Right Door
To: 4
Top Right Door
It is required to avoid double hitting the Atomic with the Power Bomb, and to position the Crystal Flash so that the Atomic can hit Samus from above or below so it avoids the light orb. With Bombs, IBJ a small distance to where the top bomb is placed near the top of the doorframe, to barely lure the Atomic a bit off-screen, then fall to the ground and Crystal Flash. With Spring Ball, perform three full-height jumps in front of the door, then Crystal Flash. With no movement items this will use more ammo; roll down to the next platform attached to the left wall, then Crystal Flash at the right edge of it. This can be done with up to 2 E-Tanks while suitless, or no E-Tanks and up to 50% damage reduction. Entrance condition: {
"comeInWithGMode": {
"mode": "direct",
"morphed": true
}
}Requires: "f_DefeatedPhantoon"
"h_artificialMorphComplexRModeCrystalFlashInterrupt"
{
"ammo": {
"type": "Missile",
"count": 10
}
}
{
"or": [
"h_artificialMorphSpringBall",
{
"and": [
"h_artificialMorphIBJ",
{
"ammo": {
"type": "Super",
"count": 10
}
}
]
},
{
"and": [
{
"ammo": {
"type": "Super",
"count": 10
}
},
{
"ammo": {
"type": "PowerBomb",
"count": 10
}
}
]
}
]
} |
From: 6
Bottom Right Door
To: 8
Item

Roll through the bomb blocks then exit g-mode and travel to the item and back while off screen. If a Spring Ball bomb jump off of a Power Bomb is the only way up, first overload PLMs using the camera scroll block in front of the bottom bomb block or the top block will remain solid. Entrance condition: {
"comeInWithGMode": {
"mode": "any",
"morphed": true
}
}Requires: "h_blueSuitGMode"
{
"or": [
"h_artificialMorphIBJ",
"h_artificialMorphSpringBallBombJump",
{
"and": [
"h_artificialMorphSpringBall",
"HiJump"
]
}
]
}
{
"or": [
{
"and": [
"canOffScreenMovement",
"canTrickyGMode"
]
},
{
"and": [
{
"not": "f_DefeatedPhantoon"
},
"canRiskPermanentLossOfAccess"
]
}
]
}Clears obstacles: A Dev note: This is only useful if the item is Morph. |
From: 1
Top Left Doorway
To: 1
Top Left Doorway

Crystal Flash on the right edge of the floating blocks. Place the Power Bomb shortly after the slow crab leaves the screen; there should be a single slow crab on the ceiling, just to the left of center. This will avoid killing the fast crab and give it just enough time to come hit Samus from below. Entrance condition: {
"comeInWithGMode": {
"mode": "direct",
"morphed": true,
"mobility": "mobile"
}
}Requires: {
"or": [
"h_artificialMorphSpringBall",
{
"and": [
"Gravity",
"h_artificialMorphIBJ"
]
}
]
}
"h_artificialMorphComplexRModeCrystalFlashInterrupt"
{
"ammo": {
"type": "Missile",
"count": 10
}
}
{
"ammo": {
"type": "Super",
"count": 10
}
}
{
"ammo": {
"type": "PowerBomb",
"count": 5
}
}
{
"or": [
"h_fullEnemyDamageReduction",
{
"and": [
"h_partialEnemyDamageReduction",
{
"resourceAtMost": [
{
"type": "RegularEnergy",
"count": 39
}
]
}
]
},
{
"and": [
{
"resourceCapacity": [
{
"type": "RegularEnergy",
"count": 199
}
]
},
{
"resourceCapacity": [
{
"type": "ReserveEnergy",
"count": 199
}
]
}
]
}
]
}Dev note: This could be done with more tanks in order to end with more Energy, but this is already a good farming room. |
From: 1
Top Left Doorway
To: 1
Top Left Doorway

Crystal Flash on the right edge of the floating blocks. Place the Power Bomb shortly after the slow crab leaves the screen; there should be a single slow crab on the ceiling, just to the left of center. This will avoid killing the fast crab and give it just enough time to come hit Samus from below. Entrance condition: {
"comeInWithGMode": {
"mode": "direct",
"morphed": true,
"mobility": "immobile"
}
}Requires: {
"or": [
"h_artificialMorphSpringBall",
{
"and": [
"Gravity",
"h_artificialMorphIBJ"
]
}
]
}
"h_artificialMorphComplexRModeCrystalFlashInterrupt"
{
"ammo": {
"type": "Missile",
"count": 10
}
}
{
"ammo": {
"type": "Super",
"count": 10
}
}
{
"ammo": {
"type": "PowerBomb",
"count": 5
}
}
{
"or": [
"h_fullEnemyDamageReduction",
{
"and": [
"h_partialEnemyDamageReduction",
{
"resourceAtMost": [
{
"type": "RegularEnergy",
"count": 39
}
]
}
]
},
{
"and": [
{
"resourceCapacity": [
{
"type": "RegularEnergy",
"count": 199
}
]
},
{
"resourceCapacity": [
{
"type": "ReserveEnergy",
"count": 199
}
]
}
]
}
]
}Dev note: This could be done with more tanks in order to end with more Energy, but this is already a good farming room. |
From: 3
Bottom Right Door
To: 3
Bottom Right Door
Crystal Flash in front of the lower-right door. Wait for the fast crab to cycle the lower half of the room twice, then place the Power Bomb to Crystal Flash just after a slow crab enters the room and is on the middle of the right ceiling. This will avoid killing the fast crab and give it just enough time to come hit Samus from above. Entrance condition: {
"comeInWithGMode": {
"mode": "direct",
"morphed": true,
"mobility": "immobile"
}
}Requires: {
"or": [
"h_artificialMorphSpringBall",
{
"and": [
"Gravity",
"h_artificialMorphIBJ"
]
}
]
}
"h_artificialMorphComplexRModeCrystalFlashInterrupt"
{
"ammo": {
"type": "Missile",
"count": 10
}
}
{
"ammo": {
"type": "Super",
"count": 10
}
}
{
"ammo": {
"type": "PowerBomb",
"count": 5
}
}
{
"or": [
"h_fullEnemyDamageReduction",
{
"and": [
"h_partialEnemyDamageReduction",
{
"resourceAtMost": [
{
"type": "RegularEnergy",
"count": 39
}
]
}
]
},
{
"and": [
{
"resourceCapacity": [
{
"type": "RegularEnergy",
"count": 199
}
]
},
{
"resourceCapacity": [
{
"type": "ReserveEnergy",
"count": 199
}
]
}
]
}
]
}Dev note: This could be done with more tanks in order to end with more Energy, but this is already a good farming room. |
From: 4
Top Right Doorway
To: 1
Top Left Doorway
To save a bomb, it is possible to roll from the doorway onto the platform with similar to a Gravity jump - hold forward just before the pause to disable gravity. Entrance condition: {
"comeInWithGMode": {
"mode": "any",
"morphed": true
}
}Requires: {
"or": [
"Morph",
"h_artificialMorphSpringBall",
{
"and": [
"Gravity",
"h_artificialMorphIBJ"
]
},
{
"and": [
"Gravity",
"h_artificialMorphBombHorizontally",
{
"or": [
"h_additionalBomb",
"canTrickyGMode",
{
"and": [
"canTrickyJump",
"canGravityJump"
]
}
]
}
]
}
]
}Exit condition: {
"leaveWithGMode": {
"morphed": true
}
}Dev note: It is possible to cross with a single Power Bomb, but it requires a last pixel jump with a frame perfect forward press. A crab hit could bounce Samus onto the middle platform, but the gravity jump is better. If Samus has a blue suit and cant pause, then she also cant boost from the crab. |
From: 1
Bottom Left Door
To: 2
Bottom Right Door

Reach the bottom middle of the room with an IBJ or gravity jump and avoid letting the pirate shoot any stationary, invisible lasers. The pirate will not touch Samus if she is high enough on the sloped tiles, but move too high and it will see Samus. Time the Power Bomb to go off so that Samus starts Crystal Flashing during or before the pirate turns around, and while ensuring that Samus will get hit by the lasers that will not move from their spawned location. With Gravity equipped, Samus will need to be boosted by the Power Bomb only while the pirate is moving its head. Samus will need to be able to survive a second hit after the Reserve trigger. This can be done with a 50% enemy damage reduction and no E-Tanks; a 75% reduction is not recommended and would require disabling and reenabling suits with a precise pause abuse. Without suits, this is possible with an E-Tank and two R-Tanks; it is sometimes possible to jump away after the Reserve trigger, but can require some luck. Entrance condition: {
"comeInWithGMode": {
"mode": "direct",
"morphed": true
}
}Requires: "Gravity"
{
"or": [
"h_artificialMorphIBJ",
{
"and": [
"h_artificialMorphSpringBall",
"canGravityJump"
]
}
]
}
"h_artificialMorphRModeCrystalFlashInterrupt"
{
"ammo": {
"type": "Missile",
"count": 10
}
}
{
"or": [
{
"and": [
"h_partialEnemyDamageReduction",
{
"resourceAtMost": [
{
"type": "RegularEnergy",
"count": 19
}
]
}
]
},
{
"and": [
"canTrickyCarryFlashSuit",
{
"resourceCapacity": [
{
"type": "RegularEnergy",
"count": 199
}
]
},
{
"resourceCapacity": [
{
"type": "ReserveEnergy",
"count": 199
}
]
}
]
}
]
}Dev note: FIXME: A 75% damage reduction method needs to be documented for if Samus only has Gravity and it provides 75% reduction. |
|


Requires: "Gravity"
{
"or": [
"HiJump",
"canWallJump",
"SpaceJump",
"canIBJ",
{
"and": [
"canDash",
"canCarefulJump"
]
},
"canSpringBallJumpMidAir",
"canGravityJump",
{
"enemyDamage": {
"enemy": "Pink Space Pirate (standing)",
"type": "contact",
"hits": 1
}
},
{
"enemyKill": {
"enemies": [
[
"Pink Space Pirate (standing)"
]
],
"explicitWeapons": [
"Plasma",
"ScrewAttack"
]
}
}
]
} |
From: 3
Top Right Door
To: 1
Bottom Left Door
It is required to avoid double hitting the Skultera with the Power Bomb, and to position the Crystal Flash so that the Skultera can hit Samus from above so it avoids the light orb. To do this, Crystal Flash on the left-most flat tile just in front of the door and time the Power Bomb so that its first hit is when the Skultera is near the right wall. This can be done with no enemy damage reduction and up to 2 E-Tanks or a 50% enemy damage reduction and no E-Tanks; a 75% reduction is not recommended and would require disabling and reenabling suits with a precise pause abuse. Entrance condition: {
"comeInWithGMode": {
"mode": "direct",
"morphed": true
},
"comesThroughToilet": "no"
}Requires: {
"or": [
{
"and": [
"Gravity",
"h_artificialMorphIBJ"
]
},
{
"and": [
"h_artificialMorphSpringBall",
{
"or": [
"Gravity",
"HiJump"
]
}
]
}
]
}
"h_artificialMorphComplexRModeCrystalFlashInterrupt"
{
"ammo": {
"type": "Missile",
"count": 10
}
}
{
"ammo": {
"type": "Super",
"count": 10
}
}
{
"or": [
"h_partialEnemyDamageReduction",
{
"resourceAtMost": [
{
"type": "RegularEnergy",
"count": 19
}
]
},
{
"and": [
{
"resourceCapacity": [
{
"type": "RegularEnergy",
"count": 199
}
]
},
{
"resourceCapacity": [
{
"type": "ReserveEnergy",
"count": 199
}
]
}
]
}
]
}Dev note: FIXME: A 75% damage reduction method needs to be documented for if Samus only has Gravity and it provides 75% reduction. |
From: 3
Top Right Door
To: 2
Bottom Right Door
Reach the bottom middle of the room and avoid letting the pirate shoot any stationary, invisible lasers. The pirate will not touch Samus if she is high enough on the sloped tiles, but move too high and it will see Samus. Time the Power Bomb to go off so that Samus starts Crystal Flashing during or before the pirate turns around, and while ensuring that Samus will get hit by the lasers that will not move from their spawned location. With Gravity equipped, Samus will need to be boosted by the Power Bomb only while the pirate is moving its head. Samus will need to be able to survive a second hit after the Reserve trigger. This can be done with a 50% enemy damage reduction and no E-Tanks; a 75% reduction is not recommended and would require disabling and reenabling suits with a precise pause abuse. Without suits, this is possible with an E-Tank and two R-Tanks; it is sometimes possible to jump away after the Reserve trigger, but can require some luck. Entrance condition: {
"comeInWithGMode": {
"mode": "direct",
"morphed": true
},
"comesThroughToilet": "no"
}Requires: {
"or": [
{
"and": [
"Gravity",
"h_artificialMorphIBJ"
]
},
{
"and": [
"h_artificialMorphSpringBall",
{
"or": [
"Gravity",
"HiJump",
"canInsaneJump",
"h_artificialMorphSpringFling"
]
}
]
}
]
}
"h_artificialMorphRModeCrystalFlashInterrupt"
{
"ammo": {
"type": "Missile",
"count": 10
}
}
{
"or": [
{
"and": [
"h_partialEnemyDamageReduction",
{
"resourceAtMost": [
{
"type": "RegularEnergy",
"count": 19
}
]
}
]
},
{
"and": [
"canTrickyCarryFlashSuit",
{
"resourceCapacity": [
{
"type": "RegularEnergy",
"count": 199
}
]
},
{
"resourceCapacity": [
{
"type": "ReserveEnergy",
"count": 199
}
]
}
]
}
]
}Dev note: It is possible but extremely difficult to use one of the other pirates instead, but with these items, Samus can get back up from this location. FIXME: A 75% damage reduction method needs to be documented for if Samus only has Gravity and it provides 75% reduction. |
|
Entrance condition: {
"comeInWithGMode": {
"mode": "direct",
"morphed": true
},
"comesThroughToilet": "any"
}Requires: "h_navigateUnderwater"
{
"or": [
{
"and": [
"h_artificialMorphIBJ",
"Gravity"
]
},
{
"and": [
"h_artificialMorphSpringBall",
"Gravity"
]
},
{
"and": [
"h_artificialMorphSpringBall",
"HiJump"
]
}
]
}Exit condition: {
"leaveWithGMode": {
"morphed": true
}
} |
From: 4
Top Left Door
To: 2
Bottom Right Door
Reach the bottom middle of the room with an IBJ or gravity jump and avoid letting the pirate shoot any stationary, invisible lasers. The pirate will not touch Samus if she is high enough on the sloped tiles, but move too high and it will see Samus. Time the Power Bomb to go off so that Samus starts Crystal Flashing during or before the pirate turns around, and while ensuring that Samus will get hit by the lasers that will not move from their spawned location. With Gravity equipped, Samus will need to be boosted by the Power Bomb only while the pirate is moving its head. Samus will need to be able to survive a second hit after the Reserve trigger. This can be done with a 50% enemy damage reduction and no E-Tanks; a 75% reduction is not recommended and would require disabling and reenabling suits with a precise pause abuse. Without suits, this is possible with an E-Tank and two R-Tanks; it is sometimes possible to jump away after the Reserve trigger, but can require some luck. Entrance condition: {
"comeInWithGMode": {
"mode": "direct",
"morphed": true
},
"comesThroughToilet": "no"
}Requires: "Gravity"
{
"or": [
"h_artificialMorphIBJ",
{
"and": [
"h_artificialMorphSpringBall",
"canGravityJump"
]
}
]
}
"h_artificialMorphRModeCrystalFlashInterrupt"
{
"ammo": {
"type": "Missile",
"count": 10
}
}
{
"or": [
{
"and": [
"h_partialEnemyDamageReduction",
{
"resourceAtMost": [
{
"type": "RegularEnergy",
"count": 19
}
]
}
]
},
{
"and": [
"canTrickyCarryFlashSuit",
{
"resourceCapacity": [
{
"type": "RegularEnergy",
"count": 199
}
]
},
{
"resourceCapacity": [
{
"type": "ReserveEnergy",
"count": 199
}
]
}
]
}
]
}Dev note: FIXME: A 75% damage reduction method needs to be documented for if Samus only has Gravity and it provides 75% reduction. |
From: 6
Middle Junction Near Top Left Pirate
To: 7
Platform Below Top Right Door
Requires: "Gravity"
{
"or": [
"HiJump",
"canWallJump",
"SpaceJump",
"canIBJ",
"canGravityJump",
{
"and": [
"canDash",
"canCarefulJump"
]
},
"canSpringBallJumpMidAir",
{
"enemyDamage": {
"enemy": "Pink Space Pirate (standing)",
"type": "contact",
"hits": 1
}
},
{
"enemyKill": {
"enemies": [
[
"Pink Space Pirate (standing)"
]
],
"explicitWeapons": [
"Plasma",
"ScrewAttack"
]
}
},
{
"haveBlueSuit": {}
}
]
} |
From: 1
Bottom Door
To: 1
Bottom Door
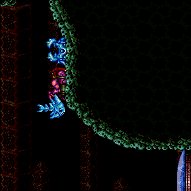
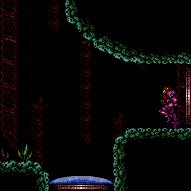
Freeze the bottom Skulltera and a Sciser above the door, to set up a moonfall between them, and aim down. After gaining enough speed, press forward to fall down and clip past the door shell below. Falling with too much speed can cause Samus to go out of bounds. Gravity Suit is needed in order to gain enough fall speed before the enemies thaw. Requires: "Gravity"
{
"or": [
"canWallJump",
"canGravityJump",
"SpaceJump",
"canIBJ",
"HiJump",
"canSpringBallJumpMidAir"
]
}
"canEnemyStuckMoonfall"
"canFreeFallClip"
"canTrickyUseFrozenEnemies"Bypasses door shell: true |
From: 1
Bottom Door
To: 13
G-Mode Morph Junction By Middle Right Door
Entrance condition: {
"comeInWithGMode": {
"mode": "direct",
"morphed": true
},
"comesThroughToilet": "no"
}Requires: {
"or": [
{
"and": [
"Gravity",
{
"or": [
"h_artificialMorphIBJ",
{
"and": [
"h_artificialMorphSpringBall",
"HiJump"
]
},
{
"and": [
"h_artificialMorphSpringBall",
"canGravityJump"
]
}
]
}
]
},
"h_artificialMorphDoubleSpringBallJump"
]
}Clears obstacles: B |
From: 1
Bottom Door
To: 13
G-Mode Morph Junction By Middle Right Door
Entrance condition: {
"comeInWithGMode": {
"mode": "indirect",
"morphed": true
},
"comesThroughToilet": "any"
}Requires: {
"or": [
{
"and": [
"Gravity",
"h_artificialMorphIBJ"
]
},
"h_artificialMorphDoubleSpringBallJump"
]
} |
From: 2
Bottom Right Door
To: 13
G-Mode Morph Junction By Middle Right Door
Entrance condition: {
"comeInWithGMode": {
"mode": "direct",
"morphed": true
}
}Requires: {
"or": [
{
"and": [
"Gravity",
{
"or": [
"h_artificialMorphIBJ",
{
"and": [
"h_artificialMorphSpringBall",
"HiJump"
]
},
{
"and": [
"h_artificialMorphSpringBall",
"canGravityJump"
]
}
]
}
]
},
"h_artificialMorphDoubleSpringBallJump"
]
}Clears obstacles: B |
From: 2
Bottom Right Door
To: 13
G-Mode Morph Junction By Middle Right Door
Entrance condition: {
"comeInWithGMode": {
"mode": "indirect",
"morphed": true
}
}Requires: {
"or": [
{
"and": [
"Gravity",
"h_artificialMorphIBJ"
]
},
"h_artificialMorphDoubleSpringBallJump"
]
} |
|
This is a long climb, and getting around the fish under the missiles can be tricky or slow. Entrance condition: {
"comeInWithGMode": {
"mode": "any",
"morphed": true
}
}Requires: "h_artificialMorphIBJ"
"Gravity"
{
"or": [
"h_artificialMorphJumpIntoIBJ",
"h_artificialMorphDoubleBombJump",
"h_artificialMorphStaggeredIBJ",
"canBeVeryPatient"
]
} |
|


Requires: "Gravity"
{
"or": [
"HiJump",
"canWallJump",
"SpaceJump",
"canIBJ",
"canUseFrozenEnemies",
"canSpringBallJumpMidAir",
"canGravityJump"
]
} |
From: 4
Top Right Door
To: 11
G-Mode, Below Speed Blocks (Overloaded PLMs)
Place bombs against the speed blocks until they are overloaded. Entrance condition: {
"comeInWithGMode": {
"mode": "direct",
"morphed": true
}
}Requires: {
"notable": "G-Mode Overload Speed Blocks then use Global Crab"
}
"canComplexGMode"
"h_navigateUnderwater"
"h_artificialMorphBombs"
{
"or": [
{
"and": [
"h_artificialMorphSpringBall",
{
"or": [
"Gravity",
"HiJump"
]
}
]
},
{
"and": [
"Morph",
{
"or": [
"Gravity",
"HiJump",
"h_underwaterCrouchJump"
]
}
]
},
{
"and": [
"Gravity",
"h_artificialMorphCeilingBombJump"
]
},
{
"and": [
"Gravity",
"h_artificialMorphIBJ",
"canBeVeryPatient"
]
}
]
}Clears obstacles: B |
From: 4
Top Right Door
To: 11
G-Mode, Below Speed Blocks (Overloaded PLMs)
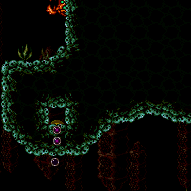
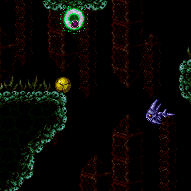
Place bombs against the speed blocks until they are overloaded. Entrance condition: {
"comeInWithGMode": {
"mode": "indirect",
"morphed": true
}
}Requires: {
"notable": "G-Mode Overload Speed Blocks then use Global Crab"
}
"canComplexGMode"
"h_navigateUnderwater"
"h_artificialMorphBombs"
{
"or": [
{
"and": [
"h_artificialMorphSpringBall",
{
"or": [
"Gravity",
"HiJump"
]
}
]
},
{
"and": [
"Morph",
{
"or": [
"Gravity",
"HiJump",
"h_underwaterCrouchJump"
]
}
]
},
{
"and": [
"Gravity",
"h_artificialMorphCeilingBombJump"
]
},
{
"and": [
"Gravity",
"h_artificialMorphIBJ",
"canBeVeryPatient"
]
}
]
} |
|

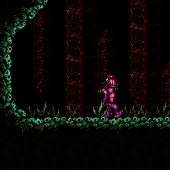
Requires: "Gravity"
{
"or": [
"HiJump",
"canWallJump",
"SpaceJump",
"canIBJ",
"canSpringBallJumpMidAir",
"canGravityJump"
]
} |
|


Requires: "Gravity"
{
"or": [
"HiJump",
"canWallJump",
"SpaceJump",
"canIBJ",
"canSpringBallJumpMidAir",
"h_crouchJumpDownGrab",
"canGravityJump",
"canTrickyUseFrozenEnemies"
]
} |
From: 10
Direct G-Mode Morph, On Ledge Above Speed Blocks
To: 4
Top Right Door
It is required to avoid double hitting the Skultera with the Power Bomb, and to position the Crystal Flash so that the Skultera can hit Samus from above so it avoids the light orb. This is particularly precise because the fish is not global, which makes it so Samus needs to be closer to the fish when laying the Power Bomb. Samus also needs to be able to manipulate the camera, which can be difficult while morphed. Roll up the hill a bit until the Skultera is close to the wall, then move away so that it is a bit off camera. Crystal Flash while Samus is on one of the two lower sloped tiles and the Skultera is just off camera to the right, in order to lure it back to the left. This can be done with no enemy damage reduction and up to 2 E-Tanks or a 50% enemy damage reduction and no E-Tanks; a 75% reduction is not recommended and would require disabling and reenabling suits with a precise pause abuse. Requires: {
"or": [
{
"and": [
"Gravity",
"h_artificialMorphIBJ"
]
},
{
"and": [
"Gravity",
"HiJump",
"h_artificialMorphSpringBall"
]
},
{
"and": [
"h_artificialMorphSpringBall",
"canGravityJump"
]
},
"h_artificialMorphDoubleSpringBallJump"
]
}
"canCameraManip"
"h_artificialMorphComplexRModeCrystalFlashInterrupt"
{
"ammo": {
"type": "Missile",
"count": 10
}
}
{
"ammo": {
"type": "Super",
"count": 10
}
}
{
"ammo": {
"type": "PowerBomb",
"count": 3
}
}
{
"or": [
"h_partialEnemyDamageReduction",
{
"resourceAtMost": [
{
"type": "RegularEnergy",
"count": 19
}
]
},
{
"and": [
{
"resourceCapacity": [
{
"type": "RegularEnergy",
"count": 199
}
]
},
{
"resourceCapacity": [
{
"type": "ReserveEnergy",
"count": 199
}
]
}
]
}
]
}Dev note: FIXME: A 75% damage reduction method needs to be documented for if Samus only has Gravity and it provides 75% reduction. |
From: 13
G-Mode Morph Junction By Middle Right Door
To: 4
Top Right Door
Climb the room with IBJ or double Spring Ball jump. Requires: "canGMode"
"h_navigateUnderwater"
{
"or": [
{
"and": [
"h_artificialMorphIBJ",
"Gravity",
{
"or": [
"h_artificialMorphDoubleBombJump",
"h_artificialMorphStaggeredIBJ",
"canBePatient",
"h_artificialMorphPowerBomb"
]
}
]
},
"h_artificialMorphDoubleSpringBallJump"
]
} |
From: 13
G-Mode Morph Junction By Middle Right Door
To: 10
Direct G-Mode Morph, On Ledge Above Speed Blocks
This is a long climb, and getting around the fish under the speed blocks can be tricky or slow. Requires: "h_navigateUnderwater"
{
"obstaclesCleared": [
"B"
]
}
{
"or": [
{
"and": [
"Gravity",
{
"or": [
"h_artificialMorphJumpIntoIBJ",
"h_artificialMorphDoubleBombJump",
"h_artificialMorphStaggeredIBJ",
{
"and": [
"h_artificialMorphIBJ",
"canBeVeryPatient"
]
},
{
"and": [
"h_artificialMorphIBJ",
"h_artificialMorphPowerBomb"
]
},
{
"and": [
"h_artificialMorphSpringBall",
"HiJump"
]
},
{
"and": [
"h_artificialMorphSpringBall",
"canGravityJump"
]
}
]
}
]
},
"h_artificialMorphDoubleSpringBallJump"
]
}Dev note: FIXME: Some IBJ strats may need canBeVeryPatient if they can't be done before the crab is in position |
From: 13
G-Mode Morph Junction By Middle Right Door
To: 11
G-Mode, Below Speed Blocks (Overloaded PLMs)
This is a long climb, and getting around the fish under the missiles can be tricky or slow. Place bombs against the speed blocks until they are overloaded. Requires: "canComplexGMode"
{
"notable": "G-Mode Overload Speed Blocks then use Global Crab"
}
"h_navigateUnderwater"
"h_artificialMorphBombs"
{
"or": [
{
"and": [
"Gravity",
{
"or": [
"h_artificialMorphIBJ",
{
"and": [
"h_artificialMorphSpringBall",
"HiJump"
]
},
{
"and": [
"h_artificialMorphSpringBall",
"canGravityJump"
]
}
]
},
{
"or": [
"h_artificialMorphSpringBall",
"h_artificialMorphCeilingBombJump",
"canBeVeryPatient"
]
}
]
},
"h_artificialMorphDoubleSpringBallJump"
]
} |
|
Entrance condition: {
"comeInWithGMode": {
"mode": "any",
"morphed": true
}
}Requires: {
"or": [
"Morph",
"h_artificialMorphSpringBall",
{
"and": [
"Gravity",
"h_artificialMorphIBJ"
]
},
{
"and": [
"Gravity",
"h_artificialMorphBombHorizontally",
"h_artificialMorphBombThings"
]
},
{
"and": [
{
"not": "f_MaridiaTubeBroken"
},
"canRiskPermanentLossOfAccess"
]
}
]
}Exit condition: {
"leaveWithGMode": {
"morphed": true
}
}Dev note: Bomb jumping across the broken tube uses a second bomb to climb up to the tube. FIXME: Moving before the bomb explodes gives enough momentum to only need one power bomb. |
|
Entrance condition: {
"comeInWithGMode": {
"mode": "any",
"morphed": true
}
}Requires: {
"or": [
"f_MaridiaTubeBroken",
{
"obstaclesCleared": [
"f_MaridiaTubeBroken"
]
}
]
}
{
"or": [
{
"and": [
"Gravity",
"h_artificialMorphMovement"
]
},
{
"and": [
"h_artificialMorphSpringBall",
"HiJump"
]
}
]
}Exit condition: {
"leaveWithGMode": {
"morphed": true
}
} |
|
The tube will break when exiting G-Mode or when the Power Bomb finishes detonating, whichever is later. Entrance condition: {
"comeInWithGMode": {
"mode": "any",
"morphed": true
}
}Requires: "h_artificialMorphPowerBomb"
{
"or": [
"h_artificialMorphSpringBall",
{
"and": [
"Gravity",
"h_artificialMorphIBJ"
]
}
]
}Clears obstacles: f_MaridiaTubeBroken Sets flags: f_MaridiaTubeBroken |
From: 2
Bottom Right Door
To: 3
Top Right Doorway
Entrance condition: {
"comeInWithGMode": {
"mode": "any",
"morphed": true
}
}Requires: {
"or": [
"f_MaridiaTubeBroken",
{
"obstaclesCleared": [
"f_MaridiaTubeBroken"
]
}
]
}
{
"or": [
{
"and": [
"Gravity",
"h_artificialMorphMovement"
]
},
{
"and": [
"h_artificialMorphSpringBall",
"HiJump"
]
}
]
}Exit condition: {
"leaveWithGMode": {
"morphed": true
}
} |
|
Entrance condition: {
"comeInWithGMode": {
"mode": "any",
"morphed": true
}
}Requires: {
"or": [
"Morph",
"h_artificialMorphSpringBall",
{
"and": [
"Gravity",
"h_artificialMorphIBJ"
]
},
{
"and": [
"Gravity",
"h_artificialMorphBombHorizontally",
"h_additionalBomb"
]
},
{
"and": [
{
"not": "f_MaridiaTubeBroken"
},
"canRiskPermanentLossOfAccess"
]
}
]
}Exit condition: {
"leaveWithGMode": {
"morphed": true
}
}Dev note: Bomb jumping across the broken tube uses a second bomb to climb up to the tube. FIXME: Moving before the bomb explodes gives enough momentum to only need one power bomb. |
|
Entrance condition: {
"comeInWithGMode": {
"mode": "direct",
"morphed": true
},
"comesThroughToilet": "any"
}Requires: {
"or": [
"Gravity",
"h_artificialMorphDoubleSpringBallJump",
{
"and": [
{
"not": "f_MaridiaTubeBroken"
},
"canRiskPermanentLossOfAccess"
]
}
]
}
{
"or": [
"h_artificialMorphIBJ",
{
"and": [
"HiJump",
"h_artificialMorphSpringBall"
]
},
{
"and": [
"h_artificialMorphSpringBallBombJump",
"h_artificialMorphSpringBall"
]
},
{
"and": [
"canGravityJump",
"h_artificialMorphSpringBall"
]
}
]
}Exit condition: {
"leaveWithGMode": {
"morphed": true
}
} |
|
Requires: "Gravity"
{
"or": [
"HiJump",
"canWallJump",
"canSpeedyJump",
"SpaceJump",
"canIBJ",
"canSpringBallJumpMidAir",
"canSpringBallBombJump"
]
} |
|
Entrance condition: {
"comeInWithGMode": {
"mode": "any",
"morphed": true
},
"comesThroughToilet": "any"
}Requires: "h_artificialMorphIBJ" "Gravity" |
From: 2
Bottom Left Door
To: 12
G-Mode Junction (In Morph Tunnel)
Entrance condition: {
"comeInWithGMode": {
"mode": "any",
"morphed": true
},
"comesThroughToilet": "any"
}Requires: "Gravity"
{
"or": [
"h_artificialMorphIBJ",
{
"and": [
"h_artificialMorphSpringBall",
{
"or": [
"canGravityJump",
"HiJump"
]
}
]
},
{
"and": [
"h_artificialMorphSpringBallBombJump",
"h_additionalBomb"
]
}
]
}Dev note: It is assumed that the door is open. |
|
Requires: "Gravity"
{
"or": [
"HiJump",
"canWallJump",
"SpaceJump",
"canIBJ",
"canSpringBallJumpMidAir"
]
} |
From: 3
Bottom Right Door
To: 12
G-Mode Junction (In Morph Tunnel)
Entrance condition: {
"comeInWithGMode": {
"mode": "indirect",
"morphed": false
},
"comesThroughToilet": "any"
}Requires: "Morph"
{
"or": [
{
"and": [
"Gravity",
{
"or": [
"HiJump",
"canWallJump",
"SpaceJump",
"canIBJ",
"canSpringBallJumpMidAir",
"canSpringBallBombJump",
"canGravityJump"
]
}
]
},
{
"and": [
"canSuitlessMaridia",
{
"or": [
{
"and": [
"HiJump",
"canSpringBallJumpMidAir"
]
},
"canUnderwaterWallJump"
]
}
]
},
{
"and": [
"h_navigateUnderwater",
"canTrickyUseFrozenEnemies",
{
"ammo": {
"type": "Super",
"count": 1
}
},
{
"or": [
"canInsaneJump",
"Spazer",
"Wave",
"Plasma",
{
"ammo": {
"type": "Super",
"count": 1
}
}
]
}
]
}
]
}Dev note: Direct G-mode will have an open door and Samus will fall. Indirect will require a doorlock bypass in the room below. FIXME: A direct G-mode regain mobility and fall through the door would be possible if entering on the right side of the door, but there is not a way to represent that yet. |
|
Entrance condition: {
"comeInWithGMode": {
"mode": "any",
"morphed": true
}
}Requires: "Gravity"
{
"or": [
{
"and": [
"h_artificialMorphSpringBall",
{
"or": [
"canGravityJump",
"HiJump"
]
}
]
},
"h_artificialMorphLongIBJ",
{
"and": [
"h_artificialMorphIBJ",
"h_artificialMorphBombHorizontally"
]
},
"h_artificialMorphSpringBallBombJump"
]
} |
|
Note that it is possible to get up with Grapple alone by using the Powamps. Fling from the Powamp into the side of the top platform to align horizontally. Entrance condition: {
"comeInWithGMode": {
"mode": "direct",
"morphed": false
},
"comesThroughToilet": "any"
}Requires: "h_navigateUnderwater"
{
"or": [
{
"and": [
"Gravity",
{
"or": [
"HiJump",
"canSpringBallJumpMidAir",
"SpaceJump",
"canIBJ",
"canGravityJump"
]
}
]
},
{
"and": [
"canUseEnemies",
"canPreciseGrapple"
]
},
{
"and": [
"HiJump",
"canSpringBallJumpMidAir"
]
}
]
}Exit condition: {
"leaveWithGMode": {
"morphed": false
}
} |
|
Entrance condition: {
"comeInWithGMode": {
"mode": "direct",
"morphed": true
},
"comesThroughToilet": "any"
}Requires: {
"or": [
{
"and": [
"Gravity",
{
"or": [
"h_artificialMorphIBJ",
{
"and": [
"HiJump",
"h_artificialMorphSpringBall"
]
},
{
"and": [
"canGravityJump",
"h_artificialMorphSpringBall"
]
}
]
}
]
},
"h_artificialMorphDoubleSpringBallJump"
]
}Exit condition: {
"leaveWithGMode": {
"morphed": true
}
} |
From: 6
Left Morph Passage Doorway
To: 7
Lower Hills Junction
After entering the room, quickly leave the morph tunnel in order to prevent getting hit by the crab. Entrance condition: {
"comeInWithGMode": {
"mode": "any",
"morphed": true
}
}Requires: "Gravity"
{
"or": [
"h_artificialMorphIBJ",
"h_artificialMorphSpringBallBombJump"
]
}Dev note: The tunnel does not need to be expanded for Samus to get into the morph tunnel without getting stuck, regardless of if she has Morph or artificial morph, and is in direct or indirect G-mode. |
|
With a running jump from the peak of the island, this requires no other movement tech or items. Requires: "Gravity"
{
"or": [
{
"and": [
"canDash",
"canCarefulJump"
]
},
"HiJump",
"SpaceJump",
"canWallJump",
"canGravityJump",
"canIBJ",
"canSpringBallJumpMidAir"
]
} |
|
Requires: "Gravity"
{
"or": [
"HiJump",
"canSpringBallJumpMidAir",
"SpaceJump",
"canIBJ"
]
} |
|

Enter the room on the far right or left side in order to not fall back through the open doorway. Entrance condition: {
"comeInWithGMode": {
"mode": "any",
"morphed": true
},
"comesThroughToilet": "any"
}Requires: "Gravity"
{
"or": [
"h_artificialMorphLongIBJ",
{
"and": [
"h_artificialMorphIBJ",
"h_artificialMorphBombHorizontally"
]
},
{
"and": [
"h_artificialMorphSpringBall",
"HiJump"
]
}
]
} |
|


Requires: {
"or": [
"HiJump",
"canWallJump",
"SpaceJump",
{
"and": [
"canIBJ",
"canBombHorizontally"
]
},
"canSpringBallJumpMidAir"
]
}
{
"or": [
"canMidAirMorph",
"h_useSpringBall",
"h_bombThings"
]
} |
From: 5
Right Door
To: 10
G-Mode Morph Junction (By Bottom Left Door)
Entrance condition: {
"comeInWithGMode": {
"mode": "any",
"morphed": true
}
}Requires: {
"or": [
"h_artificialMorphSpringBall",
"Morph",
{
"and": [
"Gravity",
"h_artificialMorphIBJ"
]
}
]
} |
From: 5
Right Door
To: 11
G-Mode Overloaded PLMs (By Bottom Left Door)
Entrance condition: {
"comeInWithGMode": {
"mode": "any",
"morphed": true
}
}Requires: "h_artificialMorphBombs"
{
"or": [
"h_artificialMorphSpringBall",
"Morph",
{
"and": [
"Gravity",
"h_artificialMorphIBJ"
]
}
]
} |
|
Entrance condition: {
"comeInWithGMode": {
"mode": "direct",
"morphed": true
},
"comesThroughToilet": "any"
}Requires: {
"or": [
{
"and": [
"Gravity",
"h_artificialMorphIBJ"
]
},
{
"and": [
"Gravity",
"h_artificialMorphSpringBall"
]
},
{
"and": [
"HiJump",
"h_artificialMorphSpringBall"
]
}
]
}Exit condition: {
"leaveWithGMode": {
"morphed": true
}
} |
|


Requires: "Gravity"
{
"or": [
"canMidAirMorph",
"h_useSpringBall",
{
"and": [
"canIBJ",
"canBombHorizontally"
]
}
]
}Collects items: 5 |
|

Entrance condition: {
"comeInWithGMode": {
"mode": "any",
"morphed": true
}
}Requires: {
"or": [
{
"and": [
"Gravity",
"h_artificialMorphIBJ"
]
},
{
"and": [
"h_artificialMorphSpringBall",
{
"or": [
"Gravity",
"HiJump"
]
},
{
"or": [
"canInsaneJump",
{
"and": [
"Gravity",
"canTrickyDodgeEnemies"
]
},
"h_artificialMorphBombThings",
{
"haveBlueSuit": {}
},
{
"enemyDamage": {
"enemy": "Puyo",
"type": "contact",
"hits": 1
}
}
]
}
]
}
]
}Collects items: 5 |
|
Be careful not to touch or bomb the sand in order to grab the item before PLMs are overloaded. Entrance condition: {
"comeInWithGMode": {
"mode": "direct",
"morphed": true
}
}Requires: {
"or": [
{
"and": [
"Gravity",
"h_artificialMorphIBJ",
"canDodgeWhileShooting"
]
},
{
"and": [
"h_artificialMorphSpringBall",
{
"or": [
"Gravity",
"HiJump"
]
},
{
"or": [
"canInsaneJump",
{
"and": [
"Gravity",
"canTrickyDodgeEnemies"
]
},
"h_artificialMorphBombThings",
{
"haveBlueSuit": {}
},
{
"enemyDamage": {
"enemy": "Puyo",
"type": "contact",
"hits": 1
}
}
]
}
]
}
]
}Clears obstacles: B Collects items: 5 |
|
With Gravity, or Spring Ball and HiJump, it is easiest to go through the Morph maze at the top of the room and fall into the the sand. Otherwise, the overload PLMs by touching the sand, or by bombing the speed blocks, to be able to go through to the left. Killing the Zoas with Bombs or Power Bombs will prevent them from respawning, although it is possible but tricky to dodge them with just Spring Ball. Entrance condition: {
"comeInWithGMode": {
"mode": "any",
"morphed": true
}
}Requires: {
"or": [
{
"and": [
"h_artificialMorphSpringBall",
{
"or": [
"Gravity",
"HiJump"
]
}
]
},
{
"and": [
"Gravity",
"h_artificialMorphIBJ"
]
},
{
"and": [
"h_artificialMorphSpringBall",
{
"or": [
"canTrickyJump",
"h_artificialMorphBombThings"
]
}
]
}
]
}Exit condition: {
"leaveWithGMode": {
"morphed": true
}
} |
|
With bombs, kill the Zoas and they will stop spawning. Entrance condition: {
"comeInWithGMode": {
"mode": "any",
"morphed": true
}
}Requires: {
"or": [
{
"and": [
"Gravity",
"h_artificialMorphIBJ"
]
},
{
"and": [
"h_artificialMorphSpringBall",
{
"or": [
"Gravity",
"HiJump"
]
}
]
}
]
}Collects items: 5 |
|


Be careful not to touch or bomb the sand in order to grab the item before PLMs are overloaded. With bombs, kill the Zoas and they will stop spawning. Entrance condition: {
"comeInWithGMode": {
"mode": "direct",
"morphed": true
}
}Requires: {
"or": [
{
"and": [
"Gravity",
"h_artificialMorphIBJ"
]
},
{
"and": [
"h_artificialMorphSpringBall",
{
"or": [
"Gravity",
"HiJump"
]
}
]
}
]
}Clears obstacles: B Collects items: 5 |
From: 1
Top Left Sand Entrance
To: 4
Bottom Right Sand Exit
Enter the room on the right side and land on the ledge just below the hidden tunnel then Power Bomb boost to get into the tunnel and kil the Bulls. Alternatively, enter the room near the right with a bit of right momentum and land directly in the tunnel while taking a Bull hit. Entrance condition: {
"comeInWithGMode": {
"mode": "any",
"morphed": true
},
"comesThroughToilet": "any"
}Requires: "canComplexGMode"
"canInsaneJump"
{
"or": [
{
"enemyDamage": {
"enemy": "Bull",
"type": "contact",
"hits": 1
}
},
{
"haveBlueSuit": {}
},
{
"and": [
"h_artificialMorphPowerBomb",
{
"or": [
"h_additionalBomb",
"h_artificialMorphMovement"
]
}
]
}
]
}Exit condition: {
"leaveWithGMode": {
"morphed": true
}
}Dev note: This room does not have water, so Samus can be boosted by bomb boosts without Gravity after PLMs are overloaded. It is possible to do this with 1 Power Bomb, but it is very precise and significantly depends on room entry. |
From: 3
Top Right Sand Entrance
To: 2
Bottom Left Sand Exit


Enter the room on the left side and land on the ledge just below the hidden tunnel then Power Bomb boost to get into the tunnel and kil the Bulls. Alternatively, enter the room near the left with a bit of left momentum and land directly in the tunnel while taking a Bull hit. Entrance condition: {
"comeInWithGMode": {
"mode": "any",
"morphed": true
},
"comesThroughToilet": "any"
}Requires: "canComplexGMode"
"canInsaneJump"
{
"or": [
{
"enemyDamage": {
"enemy": "Bull",
"type": "contact",
"hits": 1
}
},
{
"haveBlueSuit": {}
},
{
"and": [
"h_artificialMorphPowerBomb",
{
"or": [
"h_additionalBomb",
"h_artificialMorphMovement"
]
}
]
}
]
}Exit condition: {
"leaveWithGMode": {
"morphed": true
}
}Dev note: This room does not have water, so Samus can be boosted by bomb boosts without Gravity after PLMs are overloaded. It is possible to do this with 1 Power Bomb, but it is very precise and significantly depends on room entry. |
|
Requires: "Gravity"
{
"or": [
"HiJump",
"canWallJump",
"SpaceJump",
"canIBJ",
"canUseFrozenEnemies",
"canGravityJump",
"canSpringBallJumpMidAir"
]
} |
|


Entrance condition: {
"comeInWithGMode": {
"mode": "any",
"morphed": true
}
}Requires: {
"or": [
{
"and": [
"Gravity",
"h_artificialMorphIBJ"
]
},
"h_artificialMorphDoubleSpringBallJump"
]
} |
|
Entrance condition: {
"comeInWithGMode": {
"mode": "direct",
"morphed": true
},
"comesThroughToilet": "any"
}Requires: {
"or": [
{
"and": [
"Gravity",
"h_artificialMorphIBJ"
]
},
{
"and": [
"Gravity",
"h_artificialMorphSpringBall"
]
},
{
"and": [
"HiJump",
"h_artificialMorphSpringBall"
]
}
]
}Exit condition: {
"leaveWithGMode": {
"morphed": true
}
} |
|
Requires: "Gravity"
{
"or": [
"SpaceJump",
"canHBJ",
{
"and": [
"canDash",
{
"or": [
"canTrickyJump",
"canResetFallSpeed",
{
"enemyDamage": {
"enemy": "Cacatac",
"type": "spike",
"hits": 1
}
}
]
}
]
}
]
}
{
"or": [
"SpaceJump",
"canWallJump",
"HiJump",
"canIBJ",
"canHBJ",
"canSpringBallBombJump",
{
"spikeHits": 1
}
]
} |
|
IBJ or Spring Ball Bomb Jump through two sets of Crumble Blocks. Entrance condition: {
"comeInWithGMode": {
"mode": "any",
"morphed": true
},
"comesThroughToilet": "any"
}Requires: {
"or": [
{
"and": [
"Gravity",
{
"or": [
"h_artificialMorphIBJ",
{
"and": [
"h_artificialMorphSpringBallBombJump",
"h_additionalBomb"
]
},
{
"and": [
"HiJump",
"h_artificialMorphSpringBall"
]
},
{
"and": [
"canGravityJump",
"h_artificialMorphSpringBall"
]
}
]
}
]
},
"h_artificialMorphDoubleSpringBallJump"
]
}Dev note: Without this being Morph, there is no way to escape. PLMs are already overloaded from the sand. |
|
Requires: "HiJump" "h_underwaterCrouchJump" "canBombJumpWaterEscape" "canIBJ" |
From: 3
Bottom Right Door
To: 3
Bottom Right Door

Climb up and lure and Oum to the right pit, then time the Crystal Flash so that the Oum can hit Samus. This is fairly lenient, but one method is to Crystal Flash near the shot block pillar while the Oum is to the right of Samus moving right. With some testing, it seemed like the Oum was more likely to hit Samus when it is moving to the left. This is possible with a Bomb into Spring Ball jump using a precisely timed bomb boost to propel Samus upward just long enough to get the mid-air Spring Ball jump. Entrance condition: {
"comeInWithGMode": {
"mode": "direct",
"morphed": true
}
}Requires: {
"or": [
{
"and": [
"HiJump",
"h_artificialMorphSpringBall"
]
},
{
"and": [
"Gravity",
"h_artificialMorphIBJ"
]
},
"h_artificialMorphUnderwaterBombIntoSpringBallJump"
]
}
"h_artificialMorphRModeCrystalFlashInterrupt"
{
"ammo": {
"type": "Missile",
"count": 10
}
}
{
"or": [
{
"tech": "canComplexRModeCrystalFlashInterrupt"
},
{
"ammo": {
"type": "Super",
"count": 10
}
}
]
}
{
"or": [
"h_fullEnemyDamageReduction",
{
"and": [
"h_partialEnemyDamageReduction",
{
"resourceAtMost": [
{
"type": "RegularEnergy",
"count": 49
}
]
}
]
},
{
"and": [
{
"resourceCapacity": [
{
"type": "RegularEnergy",
"count": 199
}
]
},
{
"resourceCapacity": [
{
"type": "ReserveEnergy",
"count": 199
}
]
}
]
}
]
}Dev note: It is possible to enter with G-mode for the left side of the room and do this off-camera, but it is unreasonably difficult. |
From: 3
Bottom Right Door
To: 5
G-Mode Morph, In Morph Tunnel
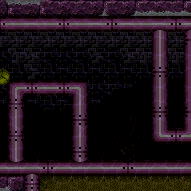
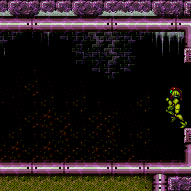
Entrance condition: {
"comeInWithGMode": {
"mode": "any",
"morphed": true
}
}Requires: {
"or": [
{
"and": [
"Gravity",
"h_artificialMorphIBJ"
]
},
{
"and": [
"h_artificialMorphSpringBall",
{
"or": [
"Gravity",
"HiJump"
]
}
]
}
]
} |
|


Requires: "Gravity"
{
"or": [
"SpaceJump",
"canIBJ",
"canSpringBallJumpMidAir",
"HiJump"
]
} |
|


Entrance condition: {
"comeInWithGMode": {
"mode": "any",
"morphed": true
}
}Requires: {
"or": [
{
"and": [
"Gravity",
"h_artificialMorphIBJ"
]
},
"h_artificialMorphDoubleSpringBallJump"
]
} |
|


Requires: "Gravity"
{
"or": [
"h_crouchJumpDownGrab",
"canUseFrozenEnemies",
"canGravityJump",
"canWallJump",
"HiJump",
"canSpringBallJumpMidAir",
"SpaceJump",
"canIBJ",
"canSpringBallBombJump"
]
}Dev note: The canCrouchJump is not a h_underwaterCrouchJump, because Gravity is required. |
|
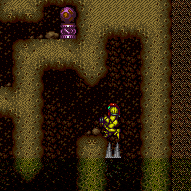
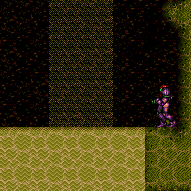
Gravity with a good jump from the sand can reach the Solid Rock Maze region. Requires: "Gravity"
"canPlayInSand"
{
"or": [
"HiJump",
"canSpringBallJumpMidAir",
"canWallJump",
"canIBJ",
"canGravityJump"
]
} |
|
Requires: {
"or": [
"h_useSpringBall",
"canIBJ"
]
} |
|
Requires: {
"or": [
"HiJump",
"SpaceJump",
"canIBJ",
"canWallJump",
"h_crouchJumpDownGrab",
"canSpringBallJumpMidAir"
]
} |
|
The off screen portion can be simple with Spring Ball or two short IBJs. Entrance condition: {
"comeInWithGMode": {
"mode": "any",
"morphed": true
}
}Requires: {
"or": [
"h_artificialMorphSpringBall",
{
"and": [
"h_artificialMorphIBJ",
"Gravity"
]
}
]
} |
|


With Bombs alone, this is much more difficult. After going off screen, roll to the left until Samus is back on screen. Once Samus is obstructed by the first block, boost horizontally onto where the right edge of where the other on-screen platform is. Then peform an IBJ which is completely blind at the top. Boost onto the left or right platform then exit G-mode and fix the camera if necessary. Entrance condition: {
"comeInWithGMode": {
"mode": "any",
"morphed": true
}
}Requires: "canOffScreenMovement"
"h_artificialMorphIBJ"
{
"or": [
"h_artificialMorphSpringBall",
"h_artificialMorphPowerBomb",
"canInsaneJump",
{
"enemyDamage": {
"enemy": "Menu",
"type": "contact",
"hits": 1
}
}
]
}
{
"or": [
"h_artificialMorphSpringBall",
"Gravity",
"canTrickyGMode"
]
}Dev note: This strat is only useful for avoiding a wall jump. A simpler variant exits G-Mode after the morph tunnel. |
From: 3
Junction Left of Morph Tunnel
To: 1
Left Door


Requires: {
"or": [
"canIBJ",
"canWallJump",
"canSpringBallJumpMidAir"
]
}
{
"or": [
{
"enemyKill": {
"enemies": [
[
"Menu",
"Menu",
"Menu"
]
],
"explicitWeapons": [
"PowerBomb",
"ScrewAttack",
"Plasma",
"Missile",
"Super",
"Grapple"
]
}
},
{
"haveBlueSuit": {}
},
{
"and": [
{
"enemyKill": {
"enemies": [
[
"Menu",
"Menu",
"Menu"
]
]
}
},
{
"or": [
"canFarmWhileShooting",
{
"and": [
"canDodgeWhileShooting",
{
"or": [
"Wave",
"Spazer",
{
"enemyDamage": {
"enemy": "Menu",
"type": "contact",
"hits": 1
}
},
"h_pauseAbuseMinimalReserveRefill"
]
}
]
},
{
"enemyDamage": {
"enemy": "Menu",
"type": "contact",
"hits": 3
}
}
]
}
]
}
]
}Dev note: The Menus are relatively hard to dodge, and would end up with the same requirements as killing them with the Power Beam. |
|
Requires: "canIBJ"
{
"or": [
{
"and": [
"canJumpIntoIBJ",
"canDodgeWhileShooting"
]
},
{
"obstaclesCleared": [
"C"
]
}
]
} |
|
Requires: {
"or": [
"HiJump",
"canWallJump",
"SpaceJump",
"canSpringBallJumpMidAir",
{
"and": [
"canIBJ",
"canBombHorizontally"
]
},
{
"and": [
"canLongIBJ",
"Gravity"
]
},
{
"and": [
"canSpringBallBombJump",
"h_additionalBomb",
"h_additionalBomb"
]
}
]
} |
|
Entrance condition: {
"comeInWithGMode": {
"mode": "any",
"morphed": true
},
"comesThroughToilet": "any"
}Requires: {
"or": [
{
"and": [
"h_artificialMorphIBJ",
"h_artificialMorphBombHorizontally"
]
},
{
"and": [
"h_artificialMorphLongIBJ",
"Gravity"
]
},
{
"and": [
"h_artificialMorphSpringBallBombJump",
"h_additionalBomb",
"h_additionalBomb",
"h_additionalBomb"
]
},
{
"and": [
"h_artificialMorphSpringBallBombJump",
{
"notable": "Left Shaft Precise Crouch Jump Down Grab"
}
]
}
]
} |
|
Requires: "Gravity"
{
"or": [
"canWallJump",
"HiJump",
"canSpringBallJumpMidAir",
"SpaceJump",
"canLongIBJ",
{
"and": [
"canIBJ",
"canBombHorizontally"
]
}
]
} |
|
Entrance condition: {
"comeInWithGMode": {
"mode": "any",
"morphed": true
}
}Requires: {
"or": [
{
"and": [
"Gravity",
{
"or": [
"h_artificialMorphLongIBJ",
{
"and": [
"h_artificialMorphIBJ",
"h_artificialMorphBombHorizontally"
]
}
]
}
]
},
{
"and": [
"h_artificialMorphDoubleSpringBallJump",
"canDownGrab"
]
},
{
"and": [
"canGravityJump",
"h_artificialMorphSpringBallBombJump"
]
}
]
} |
From: 2
Bottom Right Door
To: 1
Left Vertical Door


Start the dash as close to the door transition as possible to help avoid getting hit by the first Owtch. Store the shine charge while high up on the left slope. Spark up while on the right side of the platform. To avoid the Owtch on the platform, it may help to jump on the left side of the platform then jump again and spark midair above the right side. Entrance condition: {
"comeInRunning": {
"speedBooster": "yes",
"minTiles": 0.4375
}
}Requires: "canWaterShineCharge"
"canShinechargeMovementComplex"
{
"or": [
{
"shinespark": {
"frames": 90,
"excessFrames": 50
}
},
{
"and": [
{
"shinespark": {
"frames": 90,
"excessFrames": 59
}
},
{
"or": [
"canWallJump",
"HiJump",
"canSpringBallJumpMidAir",
"SpaceJump",
{
"and": [
"canIBJ",
"canBombHorizontally"
]
},
{
"and": [
"h_crouchJumpDownGrab",
{
"notable": "Left Shaft Precise Crouch Jump Down Grab"
}
]
}
]
}
]
}
]
} |
From: 2
Bottom Right Door
To: 2
Bottom Right Door

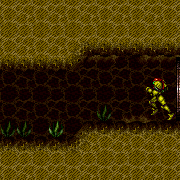
It is required to avoid double hitting the Skultera with the Power Bomb, and to position the Crystal Flash so that the Skultera can hit Samus from above so it avoids the light orb. To do this, Crystal Flash just left of the top left corner of the raised floor and time the Power Bomb so that its first hit is when the Skultera is far to the left. This can be done with no enemy damage reduction and up to 2 E-Tanks or a 50% enemy damage reduction and no E-Tanks; a 75% reduction is not recommended and would require disabling and reenabling suits with a precise pause abuse. Entrance condition: {
"comeInWithGMode": {
"mode": "direct",
"morphed": true
}
}Requires: {
"or": [
{
"and": [
"Gravity",
"h_artificialMorphIBJ"
]
},
"h_artificialMorphSpringBall"
]
}
"h_artificialMorphComplexRModeCrystalFlashInterrupt"
{
"ammo": {
"type": "Missile",
"count": 10
}
}
{
"ammo": {
"type": "Super",
"count": 10
}
}
{
"or": [
"h_partialEnemyDamageReduction",
{
"resourceAtMost": [
{
"type": "RegularEnergy",
"count": 19
}
]
},
{
"and": [
{
"resourceCapacity": [
{
"type": "RegularEnergy",
"count": 199
}
]
},
{
"resourceCapacity": [
{
"type": "ReserveEnergy",
"count": 199
}
]
}
]
}
]
}Dev note: FIXME: A 75% damage reduction method needs to be documented for if Samus only has Gravity and it provides 75% reduction. |
|

Entrance condition: {
"comeInWithGMode": {
"mode": "any",
"morphed": true
}
}Requires: {
"or": [
"Gravity",
{
"and": [
"canSuitlessMaridia",
"HiJump",
"h_artificialMorphSpringBall"
]
}
]
}
{
"or": [
"h_artificialMorphLongIBJ",
{
"and": [
"Gravity",
"h_artificialMorphIBJ",
"h_artificialMorphBombHorizontally"
]
},
{
"and": [
"canGravityJump",
"h_artificialMorphSpringBallBombJump",
{
"or": [
"h_additionalBomb",
{
"tech": "canDoubleSpringBallJumpMidAir"
}
]
},
{
"or": [
{
"and": [
"h_additionalBomb",
"h_additionalBomb"
]
},
{
"notable": "Left Shaft Precise Crouch Jump Down Grab"
}
]
}
]
}
]
} |
|

Entrance condition: {
"comeInWithGMode": {
"mode": "any",
"morphed": true
}
}Requires: {
"or": [
"h_artificialMorphLongIBJ",
{
"and": [
"Gravity",
"h_artificialMorphIBJ",
"h_artificialMorphBombHorizontally"
]
},
{
"and": [
"canGravityJump",
"h_artificialMorphSpringBallBombJump",
{
"or": [
"h_additionalBomb",
{
"tech": "canDoubleSpringBallJumpMidAir"
}
]
},
{
"or": [
{
"and": [
"h_additionalBomb",
"h_additionalBomb"
]
},
{
"notable": "Left Shaft Precise Crouch Jump Down Grab"
}
]
}
]
}
]
} |
|
Avoid moving too much between the right of the Owtch and the item to avoid overloading PLMs until after touching the item. Entrance condition: {
"comeInWithGMode": {
"mode": "direct",
"morphed": true
}
}Requires: "canRemoteAcquire"
{
"or": [
{
"and": [
"Gravity",
"h_artificialMorphIBJ"
]
},
{
"and": [
"Gravity",
"h_artificialMorphSpringBallBombJump"
]
},
"h_artificialMorphDoubleSpringBallJump"
]
}Collects items: 3 |
|
Entrance condition: {
"comeInWithGMode": {
"mode": "any",
"morphed": true
},
"comesThroughToilet": "any"
}Requires: "canRemoteAcquire"
{
"or": [
{
"and": [
"Gravity",
{
"or": [
"h_artificialMorphIBJ",
"h_artificialMorphSpringBallBombJump"
]
}
]
},
"h_artificialMorphDoubleSpringBallJump"
]
}Collects items: 3 |
|

Requires: "Gravity"
{
"or": [
"HiJump",
"canWallJump",
"SpaceJump",
"canIBJ",
"canSpeedyJump",
"h_crouchJumpDownGrab",
"canSpringBallJumpMidAir",
"canGravityJump"
]
}Dev note: The canCrouchJump is not a h_underwaterCrouchJump, because Gravity is required. |
|


Entrance condition: {
"comeInWithGMode": {
"mode": "any",
"morphed": true
},
"comesThroughToilet": "any"
}Requires: {
"or": [
{
"and": [
"Gravity",
{
"or": [
"h_artificialMorphIBJ",
"h_artificialMorphSpringBallBombJump"
]
}
]
},
"h_artificialMorphDoubleSpringBallJump"
]
} |
From: 1
Right Door
To: 1
Right Door

Kill the Choot at the bottom of the room. Freeze the two Zebs to create a runway to shinecharge with. Pixel perfect freezing of both Zebs provides the longest runway, but a slightly higher position of the second Zeb is still usable. Slide off the end of the runway while gaining a shinecharge. After landing on the center pedestal, do a short spin jump to the right, turn left, fire shot to break spin and collect the item. After the message box closes, depending on Samus' position, hold left and wait a moment to let Samus move down-left a few pixels before activating a diagonal spark. Freezing just a single Zeb is also possible but requires a 13-tile shortcharge. Requires: "h_trickyFrozenEnemyRunway"
{
"notable": "Double Frozen Zeb Runway"
}
{
"notable": "Double Frozen Zeb Item Collect Shinespark Escape"
}
"canShinechargeMovementTricky"
{
"canShineCharge": {
"usedTiles": 19,
"openEnd": 1
}
}
{
"shinespark": {
"frames": 20,
"excessFrames": 11
}
}
{
"or": [
"canWallJump",
"HiJump",
"SpaceJump",
"canIBJ",
"canSpringBallJumpMidAir",
"canSpringBallBombJump",
{
"and": [
"canCrouchJump",
{
"notable": "Precise Crouch Jump Down Grab"
}
]
}
]
}Collects items: 3 |
|
Requires: "Gravity"
{
"or": [
"canWallJump",
"HiJump",
"SpaceJump",
"canIBJ",
"canSpringBallJumpMidAir",
"canSpringBallBombJump"
]
} |
|
Entrance condition: {
"comeInWithGMode": {
"mode": "any",
"morphed": true
}
}Requires: {
"or": [
"h_artificialMorphPowerBomb",
{
"and": [
"h_artificialMorphIBJ",
"Gravity"
]
},
{
"and": [
"h_artificialMorphSpringBall",
"h_artificialMorphBombs"
]
}
]
}Clears obstacles: A |
|

Entrance condition: {
"comeInWithGMode": {
"mode": "any",
"morphed": true
}
}Requires: {
"or": [
"h_artificialMorphPowerBomb",
{
"and": [
"h_artificialMorphIBJ",
"Gravity"
]
},
{
"and": [
"h_artificialMorphSpringBall",
"h_artificialMorphBombs"
]
}
]
}Clears obstacles: A |
|
Entrance condition: {
"comeInWithGMode": {
"mode": "direct",
"morphed": true
},
"comesThroughToilet": "any"
}Requires: {
"or": [
{
"and": [
"Gravity",
"h_artificialMorphIBJ"
]
},
{
"and": [
"Gravity",
"h_artificialMorphSpringBall"
]
},
{
"and": [
"HiJump",
"h_artificialMorphSpringBall"
]
}
]
}Exit condition: {
"leaveWithGMode": {
"morphed": true
}
} |
|
Requires: {
"or": [
"h_usePowerBomb",
{
"and": [
"Gravity",
"ScrewAttack"
]
},
{
"and": [
"Gravity",
"canIBJ"
]
},
{
"and": [
"h_useMorphBombs",
"h_useSpringBall"
]
},
{
"and": [
"h_useMorphBombs",
"canTrivialMidAirMorph",
"canDisableEquipment"
]
}
]
}Clears obstacles: A |
|

The Snails will dig through the sand without showing any visual difference. Each block they pass through gets closer to overloading PLMs. In order to Power Bomb the left wall before PLMs are overloaded, it is necessary to only allow one snail to dig, either by bombing one or by facing one to prevent movement until it is off screen. If using mobile G-mode, it is easiest to get past the bottom one and prevent it from digging. If using immobile G-mode, it is easiest to have whichever one hits Samus go off screen. It is important to place the Power Bomb while as far right as possible to ensure that PLMs have not been overloaded before breaking the wall, or, wait until the snail has fully overloaded PLMs and dug a small place where Samus can unmorph against the wall to place the Power Bomb before quickly unmorphing and exiting G-mode. The green stone changes one tile earlier than the wall, and can be used as a visual cue to place the Power Bomb. Note that the Snails will not dig while off screen or while Samus is facing them, even while she is morphed. Entrance condition: {
"comeInWithGMode": {
"mode": "any",
"morphed": true
}
}Requires: {
"notable": "Reverse G-Mode Morph"
}
"canComplexGMode"
{
"or": [
{
"and": [
"Gravity",
"h_artificialMorphIBJ"
]
},
"h_artificialMorphSpringBall"
]
}
"h_artificialMorphPowerBomb"Clears obstacles: A, B, f_ShaktoolDoneDigging Sets flags: f_ShaktoolDoneDigging |
|
Enter the room in direct G-mode, and land on the doorsill while artificially morphed. Use a bomb to boost over the the left runway, or land on a snail and bomb off of it while the water is low. If entering in immobile, it is important to avoid being pulled through the floor and into the water by the snail. The Snails will dig through the sand without showing any visual difference. Each block they pass through gets closer to overloading PLMs. In order to Power Bomb the left wall before PLMs are overloaded, it is necessary to only allow one snail to dig, either by bombing one or by facing one to prevent movement until it is off screen. It is important to place the Power Bomb while as far right as possible to ensure that PLMs have not been overloaded before breaking the wall, or, wait until the snail has fully overloaded PLMs and dug a small place where Samus can unmorph against the wall to place the Power Bomb before quickly unmorphing and exiting G-mode. The green stone changes one tile earlier than the wall, and can be used as a visual cue to place the Power Bomb. Note that the Snails will not dig while off screen or while Samus is facing them, even while she is morphed. Entrance condition: {
"comeInWithGMode": {
"mode": "direct",
"morphed": true
}
}Requires: {
"notable": "Reverse G-Mode Morph"
}
"canComplexGMode"
"h_artificialMorphIBJ"
"h_artificialMorphPowerBomb"Clears obstacles: A, B, f_ShaktoolDoneDigging Sets flags: f_ShaktoolDoneDigging |
|
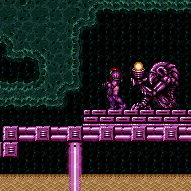
It may be necessary to turn off Gravity Suit in order have more time to jump and morph underwater. Requires: "Gravity"
{
"or": [
"canIBJ",
"canSpringBallBombJump",
"canSpringBallJumpMidAir",
{
"and": [
"canMidAirMorph",
{
"or": [
"canWallJump",
"HiJump",
"canGravityJump",
"SpaceJump",
{
"and": [
"canUnmorphBombBoost",
"canTrickyJump"
]
}
]
}
]
},
{
"and": [
"h_useSpringBall",
{
"or": [
"HiJump",
"canGravityJump"
]
}
]
}
]
} |
|
Time a bomb to hit Samus when she is morphed, 1 pixel into the sand, inside a sandfall, and moving horizontally. There is a setup using a Sand IBJ to rise up the sandfall from the floor and Sandfall Bounce with the correct timing. An alternate setup places the bomb before entering the sand and jumps into it with a very fast jump morph, using HiJump. Requires: {
"notable": "Insane Bomb Jump"
}
"canTrickyJump"
"canSandfallBounce"
"h_useMorphBombs"
{
"or": [
"canIBJ",
{
"and": [
"HiJump",
"can4HighMidAirMorph"
]
}
]
}
{
"noBlueSuit": {}
}Dev note: FIXME: A Power Bomb can be used with the jump morph. Bombs are only listed for leniency in that case. |
|
Requires: {
"or": [
"canDash",
{
"and": [
"canCarefulJump",
{
"disableEquipment": "HiJump"
}
]
},
{
"and": [
{
"or": [
"canIBJ",
{
"tech": "canJumpIntoIBJ"
}
]
},
"canBombHorizontally"
]
},
"canSpringFling",
{
"and": [
"canMidAirMorph",
"h_useSpringBall",
"canInsaneJump",
"canResetFallSpeed"
]
},
"SpaceJump",
{
"and": [
"HiJump",
{
"acidFrames": 20
}
]
}
]
} |
From: 1
Left Blast Door
To: 8
Standing on Top Left of Mother Brain Tank
Enter in R-mode or direct G-mode, and perform a Crystal Flash in the morph nook to the top-left of Mother Brain. During the Crystal Flash, allow the Rinkas to damage Samus down and trigger an auto-reserve refill, which will interrupt the Crystal Flash. The interruption of the Crystal Flash (due to the R-mode forced standup) limits the damage that Samus takes during it; After the reserve trigger, Samus will take just one more Rinka hit. Entrance condition: {
"comeInWithGMode": {
"mode": "direct",
"morphed": true
}
}Requires: {
"notable": "Moondance Clip"
}
{
"not": "f_MotherBrainGlassBroken"
}
"canTrickyGMode"
"h_artificialMorphMovement"
"h_artificialMorphCrystalFlash"
{
"resourceMaxCapacity": [
{
"type": "RegularEnergy",
"count": 299
}
]
}
{
"autoReserveTrigger": {
"minReserveEnergy": 100
}
}
{
"enemyDamage": {
"enemy": "Rinka",
"type": "contact",
"hits": 1
}
}
{
"gainFlashSuit": {}
}Dev note: Having a small amount of E-Tanks ensures the reserve tanks can be filled by the Crystal Flash before the auto-reserve trigger. FIXME: A larger amount of E-Tanks can also work, but the reserves will not completely fill, so less energy would remain at the end. |
From: 1
Left Blast Door
To: 8
Standing on Top Left of Mother Brain Tank
Use artificial morph to go inside the nook at the top-left of Mother Brain, then perform a Crystal Flash to stand up. Samus will take rapid damage from the Rinkas during the Crystal Flash but will be able to survive with the help of 75% damage reduction from suit protection. Entrance condition: {
"comeInWithGMode": {
"mode": "any",
"morphed": true
}
}Requires: {
"notable": "Moondance Clip"
}
{
"not": "f_MotherBrainGlassBroken"
}
"canTrickyGMode"
"h_artificialMorphMovement"
"h_artificialMorphCrystalFlash"
"h_fullEnemyDamageReduction"
{
"resourceCapacity": [
{
"type": "RegularEnergy",
"count": 299
}
]
}
{
"resourceAtMost": [
{
"type": "Energy",
"count": 800
}
]
}Dev note: We don't bother modeling the obstacle 'A' state here. The strat will end with R-mode if direct G-mode was used. But it doesn't matter, since this strat requires an E-Tank, which means that R-mode (for 'light pillar' during the Mother Brain 2 fight) wouldn't be useful. |
|
Entrance condition: {
"comeInWithGMode": {
"mode": "direct",
"morphed": true
},
"comesThroughToilet": "any"
}Requires: "h_artificialMorphMovement" Exit condition: {
"leaveWithGMode": {
"morphed": true
}
} |
From: 1
Top Door
To: 2
Right Door
At the bottom of the room, Crystal Flash below a wall pirate to have it walk into Samus. The pirate will randomly walk up and down and wall, but if it sees Samus and jumps across, it will start climbing up the left wall or down the right wall. With a lot of luck, the pirate will sometimes climb down and hit Samus before it goes off camera. Be sure to avoid any stationary, invisible lasers that they might place. Entrance condition: {
"comeInWithGMode": {
"mode": "direct",
"morphed": true
},
"comesThroughToilet": "no"
}Requires: {
"or": [
"h_artificialMorphMovement",
"canBeVeryLucky"
]
}
"h_artificialMorphComplexRModeCrystalFlashInterrupt"
{
"ammo": {
"type": "Missile",
"count": 10
}
} |
From: 2
Right Door
To: 2
Right Door

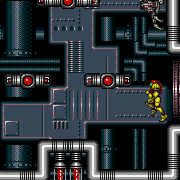
At the bottom of the room, Crystal Flash below a wall pirate to have it walk into Samus. The pirate will randomly walk up and down and wall, but if it sees Samus and jumps across, it will start climbing up the left wall or down the right wall. With some luck, the pirate will sometimes climb down and hit Samus before it goes off camera. Entrance condition: {
"comeInWithGMode": {
"mode": "direct",
"morphed": true
}
}Requires: {
"or": [
"h_artificialMorphMovement",
"canBeLucky"
]
}
"h_artificialMorphComplexRModeCrystalFlashInterrupt"
{
"ammo": {
"type": "Missile",
"count": 10
}
} |
|
Tank 3 pirate hits then IBJ or spring ball bomb jump to avoid the wall jump. Entrance condition: {
"comeInWithGMode": {
"mode": "any",
"morphed": true
}
}Requires: {
"or": [
"h_artificialMorphIBJ",
"h_artificialMorphSpringBallBombJump"
]
}
{
"enemyDamage": {
"enemy": "Tourian Space Pirate (all)",
"type": "contact",
"hits": 3
}
} |
From: 1
Left Door
To: 2
Right Door
IBJ or spring ball bomb jump to avoid the wall jump. Using a total of 3 Power Bombs will allow Samus to roll through the bottom four pirates. Entrance condition: {
"comeInWithGMode": {
"mode": "any",
"morphed": true
}
}Requires: {
"or": [
"h_artificialMorphIBJ",
"h_artificialMorphSpringBallBombJump"
]
}
"h_artificialMorphPowerBomb"
"h_artificialMorphPowerBomb"
"h_artificialMorphPowerBomb"
"canHitbox" |
From: 1
Left Door
To: 2
Right Door
IBJ or spring ball bomb jump to avoid the wall jump. Killing the first pirate takes 2 Power Bombs, the next three can be killed with 3 total Power Bombs if they are placed under the middle pirate. Entrance condition: {
"comeInWithGMode": {
"mode": "any",
"morphed": true
}
}Requires: {
"or": [
"h_artificialMorphIBJ",
"h_artificialMorphSpringBallBombJump"
]
}
{
"ammo": {
"type": "PowerBomb",
"count": 5
}
}Clears obstacles: A |
|

Roll through the pirates then IBJ or spring ball bomb jump to avoid the wall jump. Entrance condition: {
"comeInWithGMode": {
"mode": "any",
"morphed": true
}
}Requires: "h_blueSuitGMode"
{
"or": [
"h_artificialMorphIBJ",
"h_artificialMorphSpringBallBombJump"
]
} |
|
Safely kill the first pirate, then walk through the rest while taking damage or by using Plasma Beam. It is possible to get through the lower three pirates with a single hit while using i-frames to prevent a second hit. Either go below the pirates and use the camera to manipulate them to be closer together, or arm-pump or horizontal damage boost to get through them fast enough. Requires: {
"or": [
"HiJump",
"canWallJump",
"SpaceJump",
"canIBJ",
"canSpringBallJumpMidAir"
]
}
{
"or": [
{
"enemyDamage": {
"enemy": "Tourian Space Pirate (all)",
"type": "contact",
"hits": 3
}
},
{
"and": [
"Plasma",
"canHitbox"
]
},
{
"and": [
"canUseIFrames",
{
"enemyDamage": {
"enemy": "Tourian Space Pirate (all)",
"type": "contact",
"hits": 2
}
},
{
"or": [
"canCameraManip",
"canHorizontalDamageBoost"
]
},
"canTrickyJump"
]
}
]
} |
|
Requires: {
"obstaclesCleared": [
"A"
]
}
{
"or": [
"HiJump",
"canWallJump",
"SpaceJump",
"canIBJ",
"canSpringBallJumpMidAir"
]
} |
|
At the bottom of the room, Crystal Flash below a wall pirate to have it walk into Samus. The pirate will randomly walk up and down and wall, but if it sees Samus and jumps across, it will start climbing up the left wall or down the right wall. Without any movement options, it is possible to do this in the left doorframe without any luck, as the pirate just above will start moving down once on screen. Entrance condition: {
"comeInWithRMode": {}
}Requires: "canComplexRModeCrystalFlashInterrupt"
{
"ammo": {
"type": "Missile",
"count": 10
}
}
{
"or": [
"canWallJump",
"HiJump",
"SpaceJump",
"canIBJ",
"canSpringBallJumpMidAir",
{
"and": [
"canTrickyUseFrozenEnemies",
"canTrickyDodgeEnemies"
]
},
{
"and": [
"canInsaneJump",
{
"doorUnlockedAtNode": 1
}
]
}
]
}Unlocks doors: {"types":["missiles","super"],"requires":[]}
{"types":["powerbomb"],"requires":["never"]}Dev note: It is possible to get up with nothing but morph and a neutral damage boost, but its pretty tricky, especially with a flash suit. |
|
Go up safely by killing the Pirates. Requires: {
"or": [
"HiJump",
"SpaceJump",
"canWallJump",
"canJumpIntoIBJ",
{
"and": [
"canIBJ",
"canBePatient"
]
},
"canSpringBallJumpMidAir"
]
}
{
"or": [
"canBePatient",
{
"enemyKill": {
"enemies": [
[
"Tourian Space Pirate (all)"
],
[
"Tourian Space Pirate (all)"
],
[
"Tourian Space Pirate (all)"
],
[
"Tourian Space Pirate (all)"
]
],
"explicitWeapons": [
"Missile",
"Super",
"PowerBomb",
"Wave",
"Spazer",
"Plasma",
"ScrewAttack"
]
}
},
{
"haveBlueSuit": {}
}
]
}
"h_complexToCarryFlashSuit" |
From: 1
Left Door
To: 4
Top of Shaft Without Acid Triggered
IBJ and use 10 Power Bombs to kill the pirates and get to the top. Exit G-mode and fall to the bottom. Note that there is a path up to the right that doesn't need wall jumps, but a crouch jump down grab is needed to get to the final platform. Entrance condition: {
"comeInWithGMode": {
"mode": "any",
"morphed": true
}
}Requires: "h_artificialMorphIBJ"
{
"ammo": {
"type": "PowerBomb",
"count": 10
}
} |