canMidairShinespark (Medium)

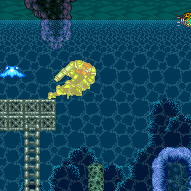
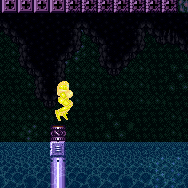
The ability to jump and shinespark mid-air: vertically or diagonally. This is often used to save Energy when shinesparking. This is typically done from a spin jump, in order to not spark immediately, while still on the ground. To shinespark vertically, either press up while midair, or release jump and then press angle up. To spark diagonally, press angle up while midair while still holding jump (or repressing jump) but while not holding forward.
Midair shinesparking is complex and there are other methods to trigger them, but these are some of the easiest. It is also possible to shinespark horizontally, but that is not expected here. Note that mid-air shinesparks can't be performed from a fall, only from a jump.
Dependencies: canShinechargeMovement, canShinespark
Strats ()
From: 2
Bottom Left Door
To: 2
Bottom Left Door


Crystal Flash then Shinespark up to the item, touch it, and return through the speed block that is now air. Use the Boyons and acid to reserve trigger to exit G-mode below to collect the item. Entrance condition: {
"comeInWithGMode": {
"mode": "direct",
"morphed": true
}
}Requires: "canComplexGMode"
"canRemoteAcquire"
"h_artificialMorphCrystalFlash"
{
"or": [
{
"and": [
"canTrivialUseFrozenEnemies",
"h_shinechargeMaxRunway",
"canMidairShinespark",
{
"shinespark": {
"frames": 118,
"excessFrames": 6
}
}
]
},
{
"and": [
"canShinechargeMovementComplex",
{
"canShineCharge": {
"usedTiles": 34,
"openEnd": 0
}
},
{
"shinespark": {
"frames": 128,
"excessFrames": 6
}
}
]
},
{
"and": [
{
"blueSuitShinecharge": {}
},
{
"shinespark": {
"frames": 121,
"excessFrames": 5
}
}
]
}
]
}
{
"autoReserveTrigger": {
"minReserveEnergy": 1
}
}Collects items: 3 Dev note: These shinespark frames could be reduced with more items or tech, but in direct G-mode, Samus will need to Crystal Flash and reserve trigger to collect the item. |
|


Requires: "canTrivialUseFrozenEnemies"
"h_shinechargeMaxRunway"
"canMidairShinespark"
{
"or": [
{
"shinespark": {
"frames": 118,
"excessFrames": 6
}
},
{
"and": [
"HiJump",
{
"shinespark": {
"frames": 113,
"excessFrames": 6
}
}
]
}
]
} |
|
Use the runway to the right of the Boyons to gain a shinecharge. If the rightmost Boyon is cleared, an extra half tile of runway is available. Requires: {
"or": [
{
"canShineCharge": {
"usedTiles": 14,
"openEnd": 0
}
},
{
"and": [
{
"or": [
{
"enemyKill": {
"enemies": [
[
"Boyon"
]
]
}
},
{
"obstaclesCleared": [
"A"
]
}
]
},
{
"canShineCharge": {
"usedTiles": 14,
"openEnd": 1
}
}
]
}
]
}
"canMidairShinespark"
{
"or": [
{
"shinespark": {
"frames": 121,
"excessFrames": 6
}
},
{
"and": [
{
"shinespark": {
"frames": 117,
"excessFrames": 6
}
},
"HiJump"
]
},
{
"and": [
{
"shinespark": {
"frames": 112,
"excessFrames": 6
}
},
"HiJump",
"canSpeedyJump"
]
},
{
"and": [
"canFastWallJumpClimb",
{
"shinespark": {
"frames": 93,
"excessFrames": 6
}
}
]
},
{
"and": [
"HiJump",
"canFastWallJumpClimb",
{
"shinespark": {
"frames": 83,
"excessFrames": 6
}
}
]
}
]
} |
From: 1
Top Left Door
To: 1
Top Left Door
Overload the scroll PLMs which are one tile to the left of the bomb blocks, then pass through them. Refill at the ship, then return. Entrance condition: {
"comeInWithGMode": {
"mode": "any",
"morphed": false
}
}Requires: "canComplexGMode"
{
"refill": [
"Energy",
"Missile",
"Super",
"PowerBomb"
]
}
{
"or": [
"SpaceJump",
{
"and": [
"HiJump",
"canSpringBallJumpMidAir"
]
},
"canTrickyWallJump",
{
"and": [
"canSpeedyJump",
{
"or": [
"HiJump",
"canSpringBallJumpMidAir",
"canWallJump"
]
}
]
},
{
"and": [
"h_shinechargeMaxRunway",
"canMidairShinespark",
{
"or": [
{
"shinespark": {
"frames": 29,
"excessFrames": 1
}
},
{
"and": [
"canShinechargeMovementComplex",
"h_speedJump",
{
"shinespark": {
"frames": 22,
"excessFrames": 1
}
}
]
},
{
"and": [
"HiJump",
{
"shinespark": {
"frames": 17,
"excessFrames": 11
}
}
]
}
]
}
]
}
]
} |
|
Shinespark through the top of the door to reach the breakable blocks. Entrance condition: {
"comeInWithSpark": {
"position": "top"
}
}Requires: {
"shinespark": {
"frames": 154,
"excessFrames": 37
}
}Clears obstacles: A Dev note: With less Energy, Samus will drop to 5 and can get to 4 if she has SpeedBooster (she may not, i.e. elevator crystal flash). |
|

Shinespark through the top of the door to reach the breakable blocks. Entrance condition: {
"comeInWithSpark": {
"position": "top"
}
}Requires: {
"shinespark": {
"frames": 154,
"excessFrames": 107
}
}Clears obstacles: A Dev note: With more Energy, Samus will spark to 4, but can freely access 5 from there. |
|
Open the top left door then shinecharge near the top right door, drop down and horizontally spark through the open door. Requires: {
"obstaclesCleared": [
"C"
]
}
{
"or": [
{
"canShineCharge": {
"usedTiles": 30,
"steepUpTiles": 9,
"openEnd": 1
}
},
{
"and": [
{
"canShineCharge": {
"usedTiles": 31,
"steepUpTiles": 9,
"openEnd": 1
}
},
{
"doorUnlockedAtNode": 3
}
]
}
]
}
{
"shinespark": {
"frames": 125,
"excessFrames": 0
}
}Exit condition: {
"leaveWithSpark": {
"position": "top",
"grounded": true
}
}Unlocks doors: {"types":["ammo"],"requires":[],"useImplicitRequires":false}Dev note: The top left door must be open, so an entrance condition at this node cannot be used. Unlocking the door is free since the obstacle C cleared means that any lock was already taken care of. |
From: 4
Bottom Right Door
To: 1
Top Left Door


Store the spark on the right side of the ledge. Run left and do a big jump towards the gauntlet door and then midair spark at the right time. Do not jump to max height or Samus will run out of shinecharge frames, instead short the jump a little. The lines in the background make for a good way to measure height. Requires: {
"obstaclesCleared": [
"C"
]
}
"canShinechargeMovementComplex"
{
"canShineCharge": {
"usedTiles": 19,
"steepUpTiles": 2,
"steepDownTiles": 1,
"openEnd": 2
}
}
{
"or": [
{
"and": [
"h_speedJump",
{
"shinespark": {
"frames": 96,
"excessFrames": 0
}
}
]
},
{
"and": [
"h_speedJump",
"canShinechargeMovementTricky",
{
"shinespark": {
"frames": 88,
"excessFrames": 0
}
}
]
},
{
"shinespark": {
"frames": 105,
"excessFrames": 0
}
}
]
}Exit condition: {
"leaveWithSpark": {
"position": "top"
}
}Unlocks doors: {"types":["ammo"],"requires":[],"useImplicitRequires":false}Dev note: Unlocking the door is free since the obstacle C cleared means that any lock was already taken care of. |
|


Open the top left door then shinecharge on the plateau and horizontally spark through the open door. Requires: {
"obstaclesCleared": [
"C"
]
}
{
"canShineCharge": {
"usedTiles": 19,
"steepUpTiles": 2,
"steepDownTiles": 1,
"openEnd": 2
}
}
{
"shinespark": {
"frames": 125,
"excessFrames": 0
}
}Exit condition: {
"leaveWithSpark": {
"position": "top",
"grounded": true
}
}Unlocks doors: {"types":["ammo"],"requires":[],"useImplicitRequires":false}Dev note: Unlocking the door is free since the obstacle C cleared means that any lock was already taken care of. |
|
Requires: {
"canShineCharge": {
"usedTiles": 19,
"steepUpTiles": 2,
"steepDownTiles": 1,
"openEnd": 2
}
}
{
"or": [
{
"shinespark": {
"frames": 41,
"excessFrames": 14
}
},
{
"and": [
"canMidairShinespark",
{
"shinespark": {
"frames": 34,
"excessFrames": 15
}
}
]
},
{
"and": [
"HiJump",
"canMidairShinespark",
{
"shinespark": {
"frames": 30,
"excessFrames": 15
}
}
]
}
]
} |
|


Requires: "h_storedSpark"
"canMidairShinespark"
{
"or": [
{
"shinespark": {
"frames": 34,
"excessFrames": 15
}
},
{
"and": [
"HiJump",
{
"shinespark": {
"frames": 30,
"excessFrames": 15
}
}
]
}
]
} |
|
Shinespark diagonally from the small hill left of the ship to break part way into the hidden bomb wall, then use Bombs or another means to continue to the left. Requires: "h_shinechargeMaxRunway"
{
"or": [
{
"shinespark": {
"frames": 39,
"excessFrames": 2
}
},
{
"and": [
"canMidairShinespark",
{
"or": [
{
"shinespark": {
"frames": 32,
"excessFrames": 3
}
},
{
"and": [
"HiJump",
{
"shinespark": {
"frames": 28,
"excessFrames": 2
}
}
]
},
{
"and": [
"h_speedJump",
"HiJump",
{
"shinespark": {
"frames": 24,
"excessFrames": 3
}
}
]
}
]
}
]
}
]
}
{
"or": [
"h_carefullyDestroyBombWalls",
{
"obstaclesCleared": [
"A"
]
}
]
}Clears obstacles: A |
|


Finish a shinecharge right of the ship, then run left and jump from the hill left of the ship. Turnaround to prevent moving too far horizontally, then spark diagonally at the peak of the jump. With a higher speed, Samus can jump higher and lose less energy, but the shinecharge is tighter. Requires: "h_shinechargeMaxRunway"
"canSpeedyJump"
"canMidairShinespark"
{
"or": [
{
"shinespark": {
"frames": 29,
"excessFrames": 1
}
},
{
"and": [
"canShinechargeMovementComplex",
{
"shinespark": {
"frames": 22,
"excessFrames": 1
}
}
]
}
]
}
{
"or": [
{
"obstaclesCleared": [
"A"
]
},
"h_usePowerBomb",
"ScrewAttack"
]
}Clears obstacles: A |
|
Requires: "h_storedSpark"
"canMidairShinespark"
{
"shinespark": {
"frames": 31,
"excessFrames": 2
}
}
"h_carefullyDestroyBombWalls"Clears obstacles: A |
|
Requires: "h_shinechargeMaxRunway"
{
"or": [
{
"shinespark": {
"frames": 78,
"excessFrames": 11
}
},
{
"and": [
"canShinechargeMovement",
{
"shinespark": {
"frames": 73,
"excessFrames": 15
}
}
]
},
{
"and": [
"canMidairShinespark",
{
"shinespark": {
"frames": 65,
"excessFrames": 15
}
}
]
},
{
"and": [
"canMidairShinespark",
"HiJump",
{
"shinespark": {
"frames": 61,
"excessFrames": 14
}
}
]
},
{
"and": [
"canShinechargeMovementComplex",
"HiJump",
"h_speedJump",
{
"shinespark": {
"frames": 55,
"excessFrames": 13
}
}
]
}
]
} |
|
Requires: "h_storedSpark"
"canMidairShinespark"
{
"or": [
{
"shinespark": {
"frames": 20,
"excessFrames": 10
}
},
{
"and": [
"HiJump",
{
"shinespark": {
"frames": 17,
"excessFrames": 12
}
}
]
}
]
} |
From: 2
Middle Left Door
To: 6
Bottom Right Door (On the Left Shaft)

Entrance condition: {
"comeInShinecharged": {}
}Requires: {
"shineChargeFrames": 140
}
"Morph"
"canShinechargeMovementComplex"
{
"shinespark": {
"frames": 5,
"excessFrames": 0
}
}Exit condition: {
"leaveWithSpark": {
"position": "top"
}
}Unlocks doors: {"types":["super"],"requires":[]}
{"types":["missiles","powerbomb"],"requires":["never"]} |
From: 3
Bottom Left Horizontal Door
To: 2
Middle Left Door
Entrance condition: {
"comeInShinecharged": {}
}Requires: {
"or": [
{
"shineChargeFrames": 160
},
{
"and": [
"canSpeedyJump",
{
"shineChargeFrames": 155
}
]
}
]
}
"canShinechargeMovementComplex"
"HiJump"
"Morph"
{
"shinespark": {
"frames": 3,
"excessFrames": 0
}
}Exit condition: {
"leaveWithSpark": {
"position": "top"
}
}Unlocks doors: {"types":["super"],"requires":[]}
{"types":["missiles","powerbomb"],"requires":["never"]} |
From: 3
Bottom Left Horizontal Door
To: 6
Bottom Right Door (On the Left Shaft)
Entrance condition: {
"comeInShinecharged": {}
}Requires: {
"shineChargeFrames": 90
}
"canShinechargeMovementComplex"
"canCarefulJump"
{
"shinespark": {
"frames": 5,
"excessFrames": 0
}
}Exit condition: {
"leaveWithSpark": {
"position": "top"
}
}Unlocks doors: {"types":["super"],"requires":[]}
{"types":["missiles","powerbomb"],"requires":["never"]} |
From: 6
Bottom Right Door (On the Left Shaft)
To: 2
Middle Left Door
Entrance condition: {
"comeInShinecharged": {}
}Requires: {
"or": [
{
"shineChargeFrames": 165
},
{
"and": [
"canSpeedyJump",
{
"shineChargeFrames": 160
}
]
}
]
}
"canShinechargeMovementComplex"
"HiJump"
"canWallJump"
"Morph"
{
"shinespark": {
"frames": 3,
"excessFrames": 0
}
}Exit condition: {
"leaveWithSpark": {
"position": "top"
}
}Unlocks doors: {"types":["super"],"requires":[]}
{"types":["missiles","powerbomb"],"requires":["never"]} |
From: 6
Bottom Right Door (On the Left Shaft)
To: 3
Bottom Left Horizontal Door
Entrance condition: {
"comeInShinecharged": {}
}Requires: {
"shineChargeFrames": 80
}
"canShinechargeMovementComplex"
{
"shinespark": {
"frames": 9,
"excessFrames": 0
}
}Exit condition: {
"leaveWithSpark": {
"position": "top"
}
}Unlocks doors: {"types":["super"],"requires":[]}
{"types":["missiles","powerbomb"],"requires":["never"]} |
From: 7
Bottom Left Vertical Door
To: 6
Bottom Right Door (On the Left Shaft)
Entrance condition: {
"comeInShinecharged": {},
"comesThroughToilet": "any"
}Requires: {
"shineChargeFrames": 120
}
"HiJump"
"canShinechargeMovementComplex"
{
"shinespark": {
"frames": 5,
"excessFrames": 0
}
}Exit condition: {
"leaveWithSpark": {
"position": "top"
}
}Unlocks doors: {"types":["super"],"requires":[]}
{"types":["missiles","powerbomb"],"requires":["never"]} |
From: 8
Central Junction
To: 1
Top Left Door
Break the bomb wall while blue, or spark diagonally next to it. Open the door then charge the spark again and spark through the wall and door. Requires: {
"or": [
{
"and": [
"h_getBlueSpeedMaxRunway",
"canCarefulJump",
"h_blueJump"
]
},
{
"and": [
"h_shinechargeMaxRunway",
{
"shinespark": {
"frames": 2,
"excessFrames": 0
}
}
]
}
]
}
{
"canShineCharge": {
"usedTiles": 25,
"steepUpTiles": 3,
"steepDownTiles": 3,
"openEnd": 1
}
}
{
"shinespark": {
"frames": 28,
"excessFrames": 0
}
}Exit condition: {
"leaveWithSpark": {
"position": "top",
"grounded": true
}
}Unlocks doors: {"types":["ammo"],"requires":[]}Dev note: The canCarefulJump or 2 spark frames could be reduced by having the door already open, but that's probably not worth modeling. FIXME: The extra long runway requirements are only included to satisfy speed state transition tests. |
From: 8
Central Junction
To: 5
Alcatraz Door
Unmorph a few tiles above the ground, and hold right to land on the platform aligning Samus with the top of the doorway. If needed, shoot the door open while falling, and hold jump to buffer the shinespark activation as soon as Samus lands. Requires: {
"canShineCharge": {
"usedTiles": 25,
"steepUpTiles": 3,
"steepDownTiles": 3,
"openEnd": 1
}
}
"Morph"
"canResetFallSpeed"
"canShinechargeMovementTricky"
{
  "shinespark": {
    "frames": 12,
    "excessFrames": 0
  }
}
Exit condition: {
"leaveWithSpark": {
"position": "top"
}
}Unlocks doors: {"types":["super"],"requires":[]}
{"types":["missiles","powerbomb"],"requires":["never"]} |
|
It is possible to run through the Yapping Maw while it is attacking a different direction. But that likely requires acid damage and isn't entirely reliable. Requires: {
"obstaclesCleared": [
"A"
]
}
{
"canShineCharge": {
"usedTiles": 18,
"steepUpTiles": 2,
"steepDownTiles": 1,
"openEnd": 1
}
}
{
"shinespark": {
"frames": 45,
"excessFrames": 0
}
}Exit condition: {
"leaveWithSpark": {
"position": "top"
}
} |
|
Requires: {
"obstaclesCleared": [
"A"
]
}
{
"enemyKill": {
"enemies": [
[
"Yapping Maw"
]
]
}
}
{
"canShineCharge": {
"usedTiles": 21,
"steepUpTiles": 2,
"steepDownTiles": 2,
"startingSteepDownTiles": 1,
"openEnd": 0
}
}
{
"shinespark": {
"frames": 45,
"excessFrames": 0
}
}Exit condition: {
"leaveWithSpark": {
"position": "top"
}
} |
|
Freeze the Yapping Maw while it is in the air, extended. Requires: {
"obstaclesCleared": [
"A"
]
}
"canUseFrozenEnemies"
{
"canShineCharge": {
"usedTiles": 21,
"steepUpTiles": 2,
"steepDownTiles": 2,
"startingSteepDownTiles": 1,
"openEnd": 0
}
}
{
"shinespark": {
"frames": 45,
"excessFrames": 0
}
}Exit condition: {
"leaveWithSpark": {
"position": "top"
}
} |
From: 2
Right Door
To: 2
Right Door


Requires: {
"obstaclesCleared": [
"A"
]
}
{
"canShineCharge": {
"usedTiles": 18,
"steepUpTiles": 1,
"steepDownTiles": 3,
"startingSteepDownTiles": 2,
"openEnd": 1
}
}
{
"shinespark": {
"frames": 45,
"excessFrames": 0
}
}Exit condition: {
"leaveWithSpark": {
"position": "top"
}
}Dev note: The yapping maw prevents use of an extra runway tile because it will move to grab Samus |
|


Requires: {
"obstaclesCleared": [
"A"
]
}
{
"enemyKill": {
"enemies": [
[
"Yapping Maw"
]
]
}
}
{
"canShineCharge": {
"usedTiles": 22,
"steepUpTiles": 2,
"steepDownTiles": 3,
"startingSteepDownTiles": 2,
"openEnd": 0
}
}
{
"shinespark": {
"frames": 45,
"excessFrames": 0
}
}Exit condition: {
"leaveWithSpark": {
"position": "top"
}
} |
|

Jump towards the Yapping Maw before it is on screen so it moves up. Quickly move it off camera so it will be `frozen` in place. Shortcharge like normal. If the Yapping Maw is returning to its hole, it will usually not grab Samus. Requires: {
"notable": "Shinecharge Under Yapping Maw"
}
{
"obstaclesCleared": [
"A"
]
}
"canCameraManip"
"canTrickyDodgeEnemies"
{
"canShineCharge": {
"usedTiles": 22,
"steepUpTiles": 2,
"steepDownTiles": 3,
"startingSteepDownTiles": 2,
"openEnd": 0
}
}
{
"shinespark": {
"frames": 45,
"excessFrames": 0
}
}Exit condition: {
"leaveWithSpark": {
"position": "top"
}
} |
From: 1
Left Door
To: 2
Right Door

Enter the room while building a shinespark and use it on the lowest part of the ramp to diagonally spark up and out of the water. Use very low jump height space jumps to carry momentum to the far side of the submerged ramp. Freeze the first Choot from the middle platform. Either SpaceJump just right so as to pass above the second Choot, or freeze it as it touches Samus to pass through without losing speed. Then shinespark up and use SpaceJump to reach the door. Entrance condition: {
"comeInShinecharging": {
"length": 6,
"openEnd": 1,
"steepDownTiles": 1
}
}Requires: {
"notable": "Shinespark Water Escape With Lower Choot Alive"
}
"Ice"
"Wave"
"Spazer"
"canDodgeWhileShooting"
"canShinechargeMovementComplex"
{
"shinespark": {
"frames": 14,
"excessFrames": 5
}
}
"canMidairShinespark"
"SpaceJump"
"canTrickyJump"Dev note: There is 1 unusable tile in this runway. |
|

Run and jump, fire a shot mid-air, and activate the shinespark wind-up. Wait until the shot is at a specific position before sparking. Sparking too late will cause the shot to despawn before reaching the door. Sparking too early will cause Samus to bonk the door as it will not yet be open. A beam shot, Missile, or Super can be used. Entrance condition: {
"comeInShinecharged": {}
}Requires: {
"shineChargeFrames": 40
}
"canShinechargeMovementTricky"
"canHeroShot"
{
"shinespark": {
"frames": 38,
"excessFrames": 0
}
}Exit condition: {
"leaveWithSpark": {
"position": "top"
}
}Unlocks doors: {"types":["super"],"requires":[]}
{"types":["missiles","powerbomb"],"requires":["never"]}Dev note: Sparking in top position means the item will be avoided. |
|
Entrance condition: {
"comeInWithSpark": {
"position": "top"
}
}Requires: {
"shinespark": {
"frames": 42,
"excessFrames": 9
}
}Dev note: Sparking in top position means the item will be avoided. |
From: 4
Lower Section - Top Right Door
To: 4
Lower Section - Top Right Door
Entrance condition: {
"comeInWithGMode": {
"mode": "direct",
"morphed": false
}
}Requires: {
"or": [
"SpaceJump",
"canWallJump",
{
"and": [
"canLongIBJ",
"Gravity"
]
},
{
"and": [
"HiJump",
"canJumpIntoIBJ"
]
},
{
"and": [
"canLongIBJ",
"canBombHorizontally",
"canResetFallSpeed"
]
},
{
"and": [
"canJumpIntoIBJ",
"canLongIBJ",
"canTrickyJump"
]
},
{
"and": [
"HiJump",
{
"or": [
"canSpeedyJump",
"canSpringBallJumpMidAir"
]
}
]
},
{
"and": [
"canTrickyJump",
"canPreciseGrapple"
]
},
{
"and": [
"Gravity",
"canMidairShinespark",
"h_shinechargeMaxRunway",
{
"shinespark": {
"frames": 35,
"excessFrames": 10
}
}
]
}
]
}Exit condition: {
"leaveWithGMode": {
"morphed": false
}
} |
From: 4
Lower Section - Top Right Door
To: 8
Bridge Right Door (Leads to Bottom Right Door)
Climb up 1 screen. Entrance condition: {
"comeInWithGMode": {
"mode": "direct",
"morphed": false
}
}Requires: "canComplexGMode"
"canGModeXRayClimb"
{
"notable": "Get Inside the Bridge"
}
"canSkipDoorLock"
{
"or": [
"canArtificialMorph",
"canWallJump",
"SpaceJump",
{
"and": [
"canLongIBJ",
"Gravity"
]
},
{
"and": [
"HiJump",
"canJumpIntoIBJ"
]
},
{
"and": [
"canLongIBJ",
"canBombHorizontally",
"canResetFallSpeed"
]
},
{
"and": [
"canJumpIntoIBJ",
"canLongIBJ",
"canTrickyJump"
]
},
{
"and": [
"HiJump",
{
"or": [
"canSpeedyJump",
"canSpringBallJumpMidAir"
]
}
]
},
{
"and": [
"canTrickyJump",
"canPreciseGrapple"
]
},
{
"and": [
"Gravity",
"canMidairShinespark",
"h_shinechargeMaxRunway",
{
"shinespark": {
"frames": 35,
"excessFrames": 10
}
}
]
}
]
}
"canXRayClimb" |
From: 4
Lower Section - Top Right Door
To: 8
Bridge Right Door (Leads to Bottom Right Door)

Enter with G-mode direct, back up to between 1 and 6 pixels from the door transition, and activate X-ray to get very deep stuck in the door. Climb up 1 screen, and perform a turnaround buffered spin-jump away from the door to trigger the transition, bypassing any lock on the door. Entrance condition: {
"comeInWithGMode": {
"mode": "direct",
"morphed": false
}
}Requires: "canComplexGMode"
"canGModeXRayClimb"
{
"notable": "Get Inside the Bridge"
}
{
"or": [
"canArtificialMorph",
"canWallJump",
"SpaceJump",
{
"and": [
"canLongIBJ",
"Gravity"
]
},
{
"and": [
"HiJump",
"canJumpIntoIBJ"
]
},
{
"and": [
"canLongIBJ",
"canBombHorizontally",
"canResetFallSpeed"
]
},
{
"and": [
"canJumpIntoIBJ",
"canLongIBJ",
"canTrickyJump"
]
},
{
"and": [
"HiJump",
{
"or": [
"canSpeedyJump",
"canSpringBallJumpMidAir"
]
}
]
},
{
"and": [
"canTrickyJump",
"canPreciseGrapple"
]
},
{
"and": [
"Gravity",
"canMidairShinespark",
"h_shinechargeMaxRunway",
{
"shinespark": {
"frames": 35,
"excessFrames": 10
}
}
]
}
]
}
"canXRayClimb"Bypasses door shell: true |
From: 4
Lower Section - Top Right Door
To: 12
Top Junction

Climb up 2 screens. Entrance condition: {
"comeInWithGMode": {
"mode": "direct",
"morphed": false
}
}Requires: "canGModeXRayClimb"
{
"or": [
"canArtificialMorph",
"canWallJump",
"SpaceJump",
{
"and": [
"canLongIBJ",
"Gravity"
]
},
{
"and": [
"HiJump",
"canJumpIntoIBJ"
]
},
{
"and": [
"canLongIBJ",
"canBombHorizontally",
"canResetFallSpeed"
]
},
{
"and": [
"canJumpIntoIBJ",
"canLongIBJ",
"canTrickyJump"
]
},
{
"and": [
"HiJump",
{
"or": [
"canSpeedyJump",
"canSpringBallJumpMidAir"
]
}
]
},
{
"and": [
"canTrickyJump",
"canPreciseGrapple"
]
},
{
"and": [
"Gravity",
"canMidairShinespark",
"h_shinechargeMaxRunway",
{
"shinespark": {
"frames": 35,
"excessFrames": 10
}
}
]
}
]
}
"canLongXRayClimb"Clears obstacles: R-Mode |
|

Requires: "canCarefulJump"
"h_shinechargeMaxRunway"
"canShinechargeMovement"
{
"or": [
{
"shinespark": {
"frames": 36,
"excessFrames": 2
}
},
{
"and": [
"canShinechargeMovement",
{
"shinespark": {
"frames": 28,
"excessFrames": 3
}
}
]
},
{
"and": [
"canMidairShinespark",
{
"shinespark": {
"frames": 20,
"excessFrames": 2
}
}
]
},
{
"and": [
"HiJump",
"canMidairShinespark",
{
"shinespark": {
"frames": 17,
"excessFrames": 3
}
}
]
},
{
"and": [
"HiJump",
"canSpeedyJump",
"canShinechargeMovementComplex",
{
"shinespark": {
"frames": 9,
"excessFrames": 2
}
}
]
}
]
} |
From: 13
Bottom Junction
To: 4
Lower Section - Top Right Door


Jump to the submerged platform, then jump again. Requires: "Gravity"
"canMidairShinespark"
"h_shinechargeMaxRunway"
{
"shinespark": {
"frames": 35,
"excessFrames": 10
}
} |
From: 13
Bottom Junction
To: 5
Lower Section - Bottom Right Door
Requires: "Gravity"
"h_shinechargeMaxRunway"
{
"or": [
{
"shinespark": {
"frames": 17,
"excessFrames": 6
}
},
{
"and": [
"canMidairShinespark",
{
"shinespark": {
"frames": 10,
"excessFrames": 8
}
}
]
}
]
} |
From: 2
Right Door
To: 1
Left Door

Sparking only to the edge of the invisible platform helps prevent taking a boulder hit. If sparking early, a down-back can help with reaching the platform. Entrance condition: {
"comeInShinecharged": {}
}Requires: {
"shineChargeFrames": 15
}
"canMidairShinespark"
{
"shinespark": {
"frames": 7,
"excessFrames": 1
}
}
{
"or": [
"canTrickyJump",
{
"enemyDamage": {
"enemy": "Boulder",
"type": "contact",
"hits": 1
}
}
]
} |
From: 1
Bottom Left Door
To: 3
Hidden Ceiling Item

After shinesparking against the ceiling, if the item is not immediately collected, hold the direction (left or right) toward the item to collect it while falling. Holding a direction helps because Samus clips vertically a couple pixels into the ceiling at the end of the shinespark, which allows time to press against the item to collect it while falling. This works regardless of whether Samus is facing the item (and holding forward) or away from the item (holding backward to turn around). Requires: "canShinechargeMovement"
{
"or": [
{
"canShineCharge": {
"usedTiles": 31,
"openEnd": 0
}
},
{
"and": [
{
"obstaclesCleared": [
"C"
]
},
{
"canShineCharge": {
"usedTiles": 42,
"openEnd": 0
}
}
]
}
]
}
{
"or": [
{
"shinespark": {
"frames": 10,
"excessFrames": 2
}
},
{
"and": [
"canMidairShinespark",
{
"shinespark": {
"frames": 3,
"excessFrames": 2
}
}
]
}
]
} |
From: 2
Top Left Door
To: 2
Top Left Door
Requires: {
"notable": "Leave With Spark (Fast Wall Climb)"
}
{
"obstaclesCleared": [
"A",
"C"
]
}
"HiJump"
{
"canShineCharge": {
"usedTiles": 35,
"openEnd": 1
}
}
"canShinechargeMovementTricky"
"canFastWallJumpClimb"
{
"shinespark": {
"frames": 8,
"excessFrames": 0
}
}Exit condition: {
"leaveWithSpark": {
"position": "top"
}
} |
|
Requires: {
"or": [
"h_usePowerBomb",
{
"obstaclesCleared": [
"C"
]
}
]
}
{
"canShineCharge": {
"usedTiles": 42,
"openEnd": 0
}
}
{
"or": [
{
"shinespark": {
"frames": 43,
"excessFrames": 2
}
},
{
"and": [
"canMidairShinespark",
{
"shinespark": {
"frames": 36,
"excessFrames": 3
}
}
]
},
{
"and": [
"HiJump",
"canMidairShinespark",
{
"shinespark": {
"frames": 32,
"excessFrames": 3
}
}
]
}
]
}Clears obstacles: A, B, C Dev note: FIXME: add a variant that uses a crumble jump to save some shinespark frames. |
From: 10
Right Etecoon Shaft - Bottom Left Door
To: 9
Right Etecoon Shaft - Top Left Door
Entrance condition: {
"comeInShinecharging": {
"length": 8,
"openEnd": 0
}
}Requires: {
"or": [
{
"shinespark": {
"frames": 75,
"excessFrames": 5
}
},
{
"and": [
"canMidairShinespark",
{
"shinespark": {
"frames": 68,
"excessFrames": 8
}
}
]
},
{
"and": [
"HiJump",
"canMidairShinespark",
{
"shinespark": {
"frames": 64,
"excessFrames": 8
}
}
]
},
{
"and": [
"HiJump",
"canSpeedyJump",
"canMidairShinespark",
{
"shinespark": {
"frames": 60,
"excessFrames": 8
}
}
]
}
]
} |
From: 10
Right Etecoon Shaft - Bottom Left Door
To: 14
Right Etecoon Shaft - Wall Jump Checkpoint
With HiJump, spark diagonally to the left in order to bonk and stop the spark early; otherwise a vertical spark is needed. Entrance condition: {
"comeInShinecharging": {
"length": 8,
"openEnd": 0
}
}Requires: {
"or": [
{
"shinespark": {
"frames": 75,
"excessFrames": 64
}
},
{
"and": [
"canMidairShinespark",
{
"shinespark": {
"frames": 68,
"excessFrames": 57
}
}
]
},
{
"and": [
"HiJump",
"canMidairShinespark",
{
"shinespark": {
"frames": 20,
"excessFrames": 13
}
}
]
},
{
"and": [
"HiJump",
"canSpeedyJump",
"canMidairShinespark",
{
"shinespark": {
"frames": 16,
"excessFrames": 13
}
}
]
}
]
} |
From: 10
Right Etecoon Shaft - Bottom Left Door
To: 14
Right Etecoon Shaft - Wall Jump Checkpoint
This is a diagonal shinespark into the underside of the left side middle ledge, minimizing energy usage. Needs HiJump to bonk at the right place without walljumping. Entrance condition: {
"comeInShinecharged": {}
}Requires: {
"shineChargeFrames": 60
}
"HiJump"
"canMidairShinespark"
{
"shinespark": {
"frames": 20,
"excessFrames": 11
}
} |
|


Requires: "canMidairShinespark"
{
"canShineCharge": {
"usedTiles": 18,
"openEnd": 1
}
}
{
"shinespark": {
"frames": 9,
"excessFrames": 5
}
} |
|
Shinespark to the upper section, then quick run through the bomb blocks to get to the Zeelas and Reos. Farm for reserves or Crystal Flash, then get the shinecharge and use any remaining enemy to interrupt. Te Metarees are still available if you don't go too far right during the setup. Entrance condition: {
"comeInWithRMode": {}
}Requires: {
"or": [
"h_CrystalFlashForReserveEnergy",
"free"
]
}
"h_shinechargeMaxRunway"
{
"or": [
{
"and": [
"HiJump",
"canMidairShinespark",
"canSpeedyJump",
{
"shinespark": {
"frames": 85,
"excessFrames": 3
}
}
]
},
{
"and": [
"canFastWallJumpClimb",
"canMidairShinespark",
{
"or": [
{
"and": [
"HiJump",
{
"shinespark": {
"frames": 67,
"excessFrames": 3
}
}
]
},
{
"shinespark": {
"frames": 73,
"excessFrames": 3
}
}
]
}
]
},
{
"shinespark": {
"frames": 110,
"excessFrames": 3
}
}
]
}
{
"or": [
{
"resourceAvailable": [
{
"type": "ReserveEnergy",
"count": 1
}
]
},
{
"and": [
"h_RModeCanRefillReserves",
{
"resourceMissingAtMost": [
{
"type": "Missile",
"count": 0
}
]
},
{
"partialRefill": {
"type": "ReserveEnergy",
"limit": 20
}
}
]
}
]
}
"h_shinechargeMaxRunway"
{
"autoReserveTrigger": {}
}
"canRModeSparkInterrupt"Clears obstacles: A Dev note: With Disable E-Tanks or Energy-Free Shinesparks, the Reo/Zeela farm remains viable. Without either QoL option, however, the Crystal Flash will be expected (not enough enemies with good drops to guarantee a full e-tank's worth). When using disable E-Tanks the player must be able to disable to 99 *after* the shinespark. |
|
Diagonal spark up left to save Energy. Requires: "h_shinechargeMaxRunway"
{
"or": [
{
"shinespark": {
"frames": 110,
"excessFrames": 5
}
},
{
"and": [
"canMidairShinespark",
{
"shinespark": {
"frames": 103,
"excessFrames": 6
}
}
]
},
{
"and": [
"HiJump",
"canMidairShinespark",
{
"shinespark": {
"frames": 99,
"excessFrames": 6
}
}
]
},
{
"and": [
"HiJump",
"canSpeedyJump",
"canMidairShinespark",
{
"shinespark": {
"frames": 89,
"excessFrames": 6
}
}
]
}
]
} |
From: 1
Left Door
To: 1
Left Door


A one frame dash jump will give Samus 4 pixels of leniency for the bounce position, two frames is pixel perfect and more than two frames it doesn't work. Samus will jump approximately two tiles higher with a one frame jump compared to a two frame jump. Requires: {
"obstaclesCleared": [
"A"
]
}
{
"or": [
"h_destroyBombWalls",
{
"haveBlueSuit": {}
}
]
}
"canBeVeryPatient"
"h_spikeXModeSpikeSuit"
"canUseFlashSuitInitialSpark"
{
"shinespark": {
"frames": 26,
"excessFrames": 0
}
}Exit condition: {
"leaveWithSpark": {
"position": "top"
}
} |
From: 2
Right Door
To: 3
Top Junction

Entrance condition: {
"comeInShinecharging": {
"length": 5,
"openEnd": 1
}
}Requires: {
"or": [
{
"shinespark": {
"frames": 22,
"excessFrames": 4
}
},
{
"and": [
"canMidairShinespark",
{
"shinespark": {
"frames": 15,
"excessFrames": 3
}
}
]
},
{
"and": [
"canMidairShinespark",
"HiJump",
{
"shinespark": {
"frames": 12,
"excessFrames": 4
}
}
]
},
{
"and": [
"canMidairShinespark",
"HiJump",
"canSpeedyJump",
{
"shinespark": {
"frames": 9,
"excessFrames": 4
}
}
]
}
]
}Clears obstacles: B |
|
Entrance condition: {
"comeInWithSpark": {
"position": "top"
}
}Requires: {
"shinespark": {
"frames": 42,
"excessFrames": 12
}
}Clears obstacles: A Dev note: Sparking into the room through the middle of the door also works. |
|
Entrance condition: {
"comeInShinecharging": {
"length": 10,
"openEnd": 1
}
}Requires: {
"or": [
{
"shinespark": {
"frames": 68,
"excessFrames": 29
}
},
{
"and": [
"canMidairShinespark",
{
"shinespark": {
"frames": 60,
"excessFrames": 28
}
}
]
}
]
}
"canUseFrozenEnemies" |
From: 1
Top Left Door
To: 5
Top Right Door
Entrance condition: {
"comeInShinecharged": {}
}Requires: {
"shineChargeFrames": 50
}
"canMidairShinespark"
{
"shinespark": {
"frames": 60,
"excessFrames": 28
}
}
"canUseFrozenEnemies" |
From: 3
Bottom Left Door
To: 6
Junction (Above Bottom Rippers)
Entrance condition: {
"comeInShinecharging": {
"length": 12,
"openEnd": 0
}
}Requires: {
"or": [
{
"shinespark": {
"frames": 45,
"excessFrames": 6
}
},
{
"and": [
"canMidairShinespark",
{
"shinespark": {
"frames": 37,
"excessFrames": 6
}
}
]
},
{
"and": [
"canMidairShinespark",
"HiJump",
{
"shinespark": {
"frames": 33,
"excessFrames": 6
}
}
]
},
{
"and": [
"canShinechargeMovementComplex",
"HiJump",
"canSpeedyJump",
{
"shinespark": {
"frames": 26,
"excessFrames": 5
}
}
]
}
]
}Dev note: One tile longer runway could be used if the opposite door can be shot open while running. This could be done if the door is blue (and run speed is low enough), or pink/green with a Super. It's not obvious if this is worth modeling though. |
From: 4
Bottom Right Door
To: 6
Junction (Above Bottom Rippers)
Entrance condition: {
"comeInShinecharging": {
"length": 12,
"openEnd": 0
}
}Requires: {
"or": [
{
"shinespark": {
"frames": 45,
"excessFrames": 6
}
},
{
"and": [
"canMidairShinespark",
{
"shinespark": {
"frames": 37,
"excessFrames": 6
}
}
]
},
{
"and": [
"canMidairShinespark",
"HiJump",
{
"shinespark": {
"frames": 33,
"excessFrames": 6
}
}
]
},
{
"and": [
"canShinechargeMovementComplex",
"HiJump",
"canSpeedyJump",
{
"shinespark": {
"frames": 26,
"excessFrames": 5
}
}
]
}
]
}Dev note: One tile longer runway could be used if the opposite door can be shot open while running. This could be done if the door is blue (and run speed is low enough), or pink/green with a Super. It's not obvious if this is worth modeling though. |
From: 7
Junction (Bottom of Room)
To: 6
Junction (Above Bottom Rippers)


Requires: {
"or": [
{
"canShineCharge": {
"usedTiles": 12,
"openEnd": 0
}
},
{
"and": [
{
"or": [
{
"doorUnlockedAtNode": 3
},
{
"doorUnlockedAtNode": 4
}
]
},
{
"canShineCharge": {
"usedTiles": 13,
"openEnd": 0
}
}
]
},
{
"and": [
{
"doorUnlockedAtNode": 3
},
{
"doorUnlockedAtNode": 4
},
{
"canShineCharge": {
"usedTiles": 14,
"openEnd": 0
}
}
]
}
]
}
"canMidairShinespark"
{
"or": [
{
"shinespark": {
"frames": 37,
"excessFrames": 6
}
},
{
"and": [
"HiJump",
{
"shinespark": {
"frames": 33,
"excessFrames": 6
}
}
]
},
{
"and": [
"canShinechargeMovementComplex",
"HiJump",
"canSpeedyJump",
{
"shinespark": {
"frames": 26,
"excessFrames": 5
}
}
]
}
]
}Unlocks doors: {"nodeId":3,"types":["ammo"],"requires":[]}
{"nodeId":4,"types":["ammo"],"requires":[]} |
Come in Shinecharged, Gain Flash Suit (Spikesuit) - Leave with Shinespark
(Extreme+)
Kraid Eye Door Room
From: 1
Left Door
To: 1
Left Door

Unmorphing on the first possible frame leaves in top position; second frame leaves in middle position. Entrance condition: {
"comeInShinecharged": {}
}Requires: "canUseFlashSuitInitialSpark"
{
"shineChargeFrames": 125
}
{
"thornHits": 1
}
"canPatientSpikeSuit"
{
"shinespark": {
"frames": 19,
"excessFrames": 0
}
}Exit condition: {
"leaveWithSpark": {
"position": "top"
}
}Unlocks doors: {"types":["super","powerbomb"],"requires":[]}
{"types":["missiles"],"requires":["never"]} |
Come in Shinecharging, Gain Flash Suit (Spikesuit) - Leave with Shinespark
(Extreme+)
Kraid Eye Door Room
From: 1
Left Door
To: 1
Left Door
Unmorphing on the first possible frame leaves in top position; second frame leaves in middle position. Entrance condition: {
"comeInShinecharging": {
"length": 4,
"openEnd": 1
}
}Requires: "canUseFlashSuitInitialSpark"
{
"thornHits": 1
}
"canPatientSpikeSuit"
{
"shinespark": {
"frames": 19,
"excessFrames": 0
}
}Exit condition: {
"leaveWithSpark": {
"position": "top"
}
}Unlocks doors: {"types":["super","powerbomb"],"requires":[]}
{"types":["missiles"],"requires":["never"]} |
From: 1
Left Door
To: 1
Left Door

A 1-frame dash jump will give more leniency to land in the thorns. Unmorphing on the first possible frame leaves in top position; second frame leaves in middle position. Requires: "canBeVeryPatient"
"canUseFlashSuitInitialSpark"
"h_thornXModeSpikeSuit"
{
"shinespark": {
"frames": 19,
"excessFrames": 0
}
}Exit condition: {
"leaveWithSpark": {
"position": "top"
}
} |
From: 1
Left Door
To: 1
Left Door

Failing the spikesuit attempt with a spark early by 1 frame will lose the original flash suit. Unmorphing on the first possible frame leaves in top position; second frame leaves in middle position. Requires: {
"useFlashSuit": {}
}
"canUseFlashSuitInitialSpark"
"canTrickyCarryFlashSuit"
{
"thornHits": 1
}
"canPatientSpikeSuit"
{
"shinespark": {
"frames": 19,
"excessFrames": 0
}
}Exit condition: {
"leaveWithSpark": {
"position": "top"
}
} |
|


Run and jump, fire a shot mid-air, and activate the shinespark wind-up. Wait until the shot is at a specific position before sparking. Sparking too late will cause the shot to despawn before reaching the door. Sparking too early will cause Samus to bonk the door as it will not yet be open. A beam shot, Missile, or Super can be used. Entrance condition: {
"comeInShinecharged": {}
}Requires: {
"shineChargeFrames": 40
}
"canShinechargeMovementTricky"
"canHeroShot"
{
"shinespark": {
"frames": 36,
"excessFrames": 0
}
}Exit condition: {
"leaveWithSpark": {
"position": "top"
}
}Unlocks doors: {"types":["super"],"requires":[]}
{"types":["missiles","powerbomb"],"requires":["never"]} |
Come in Shinecharging, Gain Flash Suit (Spikesuit) - Leave with Shinespark
(Extreme+)
Kraid Eye Door Room
From: 2
Top Right Door
To: 1
Left Door


Requires precise movement. Down-back during the fall to clear the lower platform while shooting out the blocks. Unmorphing on the first possible frame leaves in top position; second frame leaves in middle position. Entrance condition: {
"comeInShinecharging": {
"length": 3,
"openEnd": 0
}
}Requires: "canUseFlashSuitInitialSpark"
{
"shineChargeFrames": 175
}
"canDownBack"
"canShinechargeMovementTricky"
{
"thornHits": 1
}
"canPatientSpikeSuit"
{
"shinespark": {
"frames": 19,
"excessFrames": 0
}
}Exit condition: {
"leaveWithSpark": {
"position": "top"
}
}Unlocks doors: {"types":["ammo"],"requires":["never"]}Dev note: It may be possible to open a green/red door with a super missile but it is on the edge of possibility. |
|


Run and jump, fire a shot mid-air, and activate the shinespark wind-up. Wait until the shot is at a specific position before sparking. Sparking too late will cause the shot to despawn before reaching the door. Sparking too early will cause Samus to bonk the door as it will not yet be open. A beam shot, Missile, or Super can be used. Entrance condition: {
"comeInShinecharged": {}
}Requires: {
"shineChargeFrames": 40
}
"canShinechargeMovementTricky"
"canHeroShot"
{
"shinespark": {
"frames": 38,
"excessFrames": 0
}
}Exit condition: {
"leaveWithSpark": {
"position": "top"
}
}Unlocks doors: {"types":["super"],"requires":[]}
{"types":["missiles","powerbomb"],"requires":["never"]} |
From: 3
Bottom Right Door
To: 3
Bottom Right Door

Use the thorns on the left side of the room. A 1-frame dash jump will give more leniency to land in the thorns. Only unmorphing on the first possible frame will work; second frame will bonk the pillar. Requires: "canUseFlashSuitInitialSpark"
"canBeVeryPatient"
"h_thornXModeSpikeSuit"
{
"shinespark": {
"frames": 31,
"excessFrames": 0
}
}Exit condition: {
"leaveWithSpark": {
"position": "top"
}
} |
From: 2
Left Side - Top Middle Door
To: 1
Left Side - Top Door
Entrance condition: {
"comeInShinecharged": {}
}Requires: {
"shineChargeFrames": 25
}
"canMidairShinespark"
{
"shinespark": {
"frames": 20,
"excessFrames": 4
}
} |
From: 2
Left Side - Top Middle Door
To: 7
Top Right Door
Entrance condition: {
"comeInShinecharging": {
"length": 2,
"openEnd": 1
}
}Requires: {
"or": [
{
"shinespark": {
"frames": 22,
"excessFrames": 2
}
},
{
"and": [
"canMidairShinespark",
{
"shinespark": {
"frames": 14,
"excessFrames": 3
}
}
]
}
]
} |
|
Entrance condition: {
"comeInWithSpark": {
"position": "top"
}
}Requires: {
"heatFrames": 240
}
{
"shinespark": {
"frames": 57,
"excessFrames": 0
}
} |
|
Requires: {
"canShineCharge": {
"usedTiles": 28,
"gentleUpTiles": 3,
"gentleDownTiles": 3,
"openEnd": 0
}
}
{
"or": [
{
"shinespark": {
"frames": 27,
"excessFrames": 4
}
},
{
"and": [
"canMidairShinespark",
{
"shinespark": {
"frames": 17,
"excessFrames": 4
}
}
]
}
]
}
{
"heatFrames": 380
} |
|
Entrance condition: {
"comeInWithSpark": {
"position": "top"
}
}Requires: "canDownGrab"
{
"shinespark": {
"frames": 39,
"excessFrames": 0
}
}
{
"heatFrames": 142
} |
|
Entrance condition: {
"comeInShinecharged": {}
}Requires: {
"shineChargeFrames": 10
}
{
"shinespark": {
"frames": 21,
"excessFrames": 0
}
}Exit condition: {
"leaveWithSpark": {
"position": "top"
}
}Unlocks doors: {"types":["super"],"requires":[]}
{"types":["missiles","powerbomb"],"requires":["never"]} |
|
Spark in line with the top of the door. Sparking too low or too high will crash early. Entrance condition: {
"comeInWithSpark": {
"position": "top"
}
}Requires: {
"heatFrames": 195
}
{
"shinespark": {
"frames": 95,
"excessFrames": 5
}
} |
|
Spark in line with the top of the door. Sparking too low or too high will crash early. Entrance condition: {
"comeInWithSpark": {
"position": "top"
}
}Requires: {
"heatFrames": 195
}
{
"shinespark": {
"frames": 95,
"excessFrames": 3
}
} |
From: 3
Left Shaft - Middle Right Door
To: 2
Left Shaft - Bottom Right Door


Entrance condition: {
"comeInShinecharged": {}
}Requires: {
"shineChargeFrames": 145
}
"canShinechargeMovementComplex"
{
"shinespark": {
"frames": 18,
"excessFrames": 0
}
}
{
"heatFrames": 190
}Exit condition: {
"leaveWithSpark": {
"position": "top"
}
}Unlocks doors: {"types":["super"],"requires":[]}
{"types":["missiles","powerbomb"],"requires":["never"]} |
From: 3
Left Shaft - Middle Right Door
To: 2
Left Shaft - Bottom Right Door


Entrance condition: {
"comeInShinecharging": {
"length": 3,
"openEnd": 1
}
}Requires: "canShinechargeMovementComplex"
{
"shinespark": {
"frames": 5,
"excessFrames": 0
}
}
{
"heatFrames": 220
}Exit condition: {
"leaveWithSpark": {
"position": "top"
}
}Unlocks doors: {"types":["super"],"requires":[]}
{"types":["missiles","powerbomb"],"requires":["never"]} |
From: 2
Middle Left Door
To: 4
Bottom Right Door


Entrance condition: {
"comeInShinecharging": {
"length": 3,
"openEnd": 1
}
}Requires: "canShinechargeMovementTricky"
{
"shinespark": {
"frames": 12,
"excessFrames": 0
}
}Exit condition: {
"leaveWithSpark": {
"position": "top"
}
}Unlocks doors: {"types":["super"],"requires":[]}
{"types":["missiles","powerbomb"],"requires":["never"]} |
From: 3
Bottom Left Door
To: 4
Bottom Right Door


Fall around the floating platform with either a Downback or by jumping down with a Spinjump. Entrance condition: {
"comeInShinecharged": {}
}Requires: {
"shineChargeFrames": 100
}
"canShinechargeMovementComplex"
{
"shinespark": {
"frames": 11,
"excessFrames": 0
}
}Exit condition: {
"leaveWithSpark": {
"position": "top"
}
}Unlocks doors: {"types":["super"],"requires":[]}
{"types":["missiles","powerbomb"],"requires":["never"]} |
From: 5
Middle Right Door
To: 4
Bottom Right Door


Fall around the floating platform with either a Downback or by jumping down with a Spinjump. Entrance condition: {
"comeInShinecharged": {}
}Requires: {
"shineChargeFrames": 100
}
"canShinechargeMovementComplex"
{
"shinespark": {
"frames": 11,
"excessFrames": 0
}
}Exit condition: {
"leaveWithSpark": {
"position": "top"
}
}Unlocks doors: {"types":["super"],"requires":[]}
{"types":["missiles","powerbomb"],"requires":["never"]} |
From: 1
Top of the Shaft Left Door
To: 5
Top Right Door
Entrance condition: {
"comeInShinecharged": {}
}Requires: {
"shineChargeFrames": 105
}
{
"heatFrames": 130
}
{
"shinespark": {
"frames": 2,
"excessFrames": 0
}
}Exit condition: {
"leaveWithSpark": {
"position": "top"
}
}Unlocks doors: {"types":["super"],"requires":[]}
{"types":["missiles","powerbomb"],"requires":["never"]} |
|


Requires: {
"or": [
{
"canShineCharge": {
"usedTiles": 31,
"openEnd": 0
}
},
{
"and": [
{
"or": [
"f_DefeatedCrocomire",
{
"obstaclesCleared": [
"f_DefeatedCrocomire"
]
}
]
},
"h_shinechargeMaxRunway"
]
}
]
}
"canShinechargeMovement"
{
"or": [
{
"shinespark": {
"frames": 9,
"excessFrames": 0
}
},
{
"and": [
"canMidairShinespark",
{
"shinespark": {
"frames": 2,
"excessFrames": 0
}
}
]
}
]
}Exit condition: {
"leaveWithSpark": {}
}Unlocks doors: {"types":["ammo"],"requires":[]} |
From: 2
Bottom Right Door
To: 1
Top Right Door
Entrance condition: {
"comeInShinecharging": {
"length": 9,
"openEnd": 0
}
}Requires: {
"or": [
{
"shinespark": {
"frames": 40,
"excessFrames": 5
}
},
{
"and": [
"canMidairShinespark",
{
"shinespark": {
"frames": 33,
"excessFrames": 6
}
}
]
}
]
} |
|

Requires: {
"obstaclesCleared": [
"B"
]
}
"canMidairShinespark"
{
"or": [
{
"canShineCharge": {
"usedTiles": 32,
"gentleUpTiles": 6,
"openEnd": 1
}
},
{
"and": [
"h_shinechargeMaxRunway",
{
"obstaclesCleared": [
"A"
]
}
]
}
]
}
{
"or": [
{
"shinespark": {
"frames": 31,
"excessFrames": 6
}
},
{
"and": [
"HiJump",
{
"shinespark": {
"frames": 25,
"excessFrames": 5
}
}
]
},
{
"and": [
"HiJump",
"canSpeedyJump",
{
"shinespark": {
"frames": 19,
"excessFrames": 6
}
}
]
}
]
}Dev note: FIXME: A big jump spark could be used to save Energy. |
From: 3
Bottom Right Door
To: 1
Top Left Door
Entrance condition: {
"comeInShinecharging": {
"length": 10,
"openEnd": 0,
"gentleDownTiles": 4
}
}Requires: {
"or": [
{
"shinespark": {
"frames": 22,
"excessFrames": 4
}
},
{
"and": [
"canMidairShinespark",
{
"shinespark": {
"frames": 15,
"excessFrames": 4
}
}
]
}
]
} |
From: 3
Bottom Right Door
To: 1
Top Left Door
Kill the Gamets with Wave Beam when entering the room. Entrance condition: {
"comeInShinecharging": {
"length": 18,
"openEnd": 1,
"gentleUpTiles": 2,
"gentleDownTiles": 4
}
}Requires: "Wave"
"canDodgeWhileShooting"
{
"or": [
{
"shinespark": {
"frames": 23,
"excessFrames": 4
}
},
{
"and": [
"canMidairShinespark",
{
"shinespark": {
"frames": 14,
"excessFrames": 4
}
}
]
}
]
} |
|
Requires: "h_runOverRespawningEnemies"
{
"or": [
{
"canShineCharge": {
"usedTiles": 18,
"gentleUpTiles": 2,
"gentleDownTiles": 4,
"openEnd": 1
}
},
{
"and": [
{
"doorUnlockedAtNode": 3
},
{
"canShineCharge": {
"usedTiles": 19,
"gentleUpTiles": 2,
"gentleDownTiles": 4,
"openEnd": 1
}
}
]
}
]
}
{
"or": [
{
"shinespark": {
"frames": 23,
"excessFrames": 5
}
},
{
"and": [
"canMidairShinespark",
{
"shinespark": {
"frames": 15,
"excessFrames": 5
}
}
]
}
]
}Unlocks doors: {"nodeId":3,"types":["ammo"],"requires":[]} |
From: 3
Bottom Right Door
To: 4
Top Right Door
Entrance condition: {
"comeInShinecharging": {
"length": 10,
"openEnd": 0,
"gentleDownTiles": 4
}
}Requires: "canShinechargeMovement"
{
"or": [
{
"shinespark": {
"frames": 22,
"excessFrames": 4
}
},
{
"and": [
"canMidairShinespark",
{
"shinespark": {
"frames": 14,
"excessFrames": 5
}
}
]
}
]
} |
From: 3
Bottom Right Door
To: 4
Top Right Door
Kill the Gamets with Wave Beam when entering the room. Entrance condition: {
"comeInShinecharging": {
"length": 18,
"openEnd": 1,
"gentleUpTiles": 2,
"gentleDownTiles": 4
}
}Requires: "Wave"
"canDodgeWhileShooting"
{
"or": [
{
"shinespark": {
"frames": 22,
"excessFrames": 4
}
},
{
"and": [
"canMidairShinespark",
{
"shinespark": {
"frames": 14,
"excessFrames": 5
}
}
]
}
]
} |
|
Requires: "h_runOverRespawningEnemies"
{
"or": [
{
"canShineCharge": {
"usedTiles": 18,
"gentleUpTiles": 2,
"gentleDownTiles": 4,
"openEnd": 1
}
},
{
"and": [
{
"doorUnlockedAtNode": 3
},
{
"canShineCharge": {
"usedTiles": 19,
"gentleUpTiles": 2,
"gentleDownTiles": 4,
"openEnd": 1
}
}
]
}
]
}
{
"or": [
{
"shinespark": {
"frames": 22,
"excessFrames": 4
}
},
{
"and": [
"canMidairShinespark",
{
"shinespark": {
"frames": 14,
"excessFrames": 5
}
}
]
}
]
}Unlocks doors: {"nodeId":3,"types":["ammo"],"requires":[]} |
From: 3
Bottom Right Door
To: 4
Top Door
Entrance condition: {
"comeInShinecharging": {
"length": 3,
"openEnd": 0
}
}Requires: {
"or": [
{
"shinespark": {
"frames": 58,
"excessFrames": 4
}
},
{
"and": [
"canMidairShinespark",
{
"shinespark": {
"frames": 50,
"excessFrames": 4
}
}
]
},
{
"and": [
"HiJump",
"canMidairShinespark",
{
"shinespark": {
"frames": 46,
"excessFrames": 4
}
}
]
},
{
"and": [
"canShinechargeMovementComplex",
{
"shinespark": {
"frames": 37,
"excessFrames": 2
}
}
]
},
{
"and": [
"HiJump",
"canShinechargeMovementComplex",
{
"shinespark": {
"frames": 34,
"excessFrames": 5
}
}
]
},
{
"and": [
"HiJump",
"canShinechargeMovementComplex",
"canSpeedyJump",
{
"shinespark": {
"frames": 32,
"excessFrames": 3
}
}
]
}
]
} |
From: 1
Left Door
To: 1
Left Door
Entrance condition: {
"comeInNormally": {}
}Requires: "h_usePowerBomb"
{
"canShineCharge": {
"usedTiles": 18,
"openEnd": 0
}
}
{
"heatFrames": 630
}
{
"shinespark": {
"frames": 43,
"excessFrames": 0
}
}Exit condition: {
"leaveWithSpark": {
"position": "top"
}
}Unlocks doors: {"types":["ammo"],"requires":[]} |
|


Entrance condition: {
"comeInNormally": {}
}Requires: "ScrewAttack"
{
"canShineCharge": {
"usedTiles": 18,
"openEnd": 0
}
}
{
"heatFrames": 585
}
{
"or": [
"canTrickyJump",
{
"heatFrames": 200
}
]
}
{
"shinespark": {
"frames": 43,
"excessFrames": 0
}
}Exit condition: {
"leaveWithSpark": {
"position": "top"
}
}Unlocks doors: {"types":["ammo"],"requires":[]} |
From: 1
Left Door
To: 1
Left Door


Entrance condition: {
"comeInNormally": {}
}Requires: {
"ammo": {
"type": "Super",
"count": 2
}
}
{
"or": [
{
"canShineCharge": {
"usedTiles": 18,
"openEnd": 0
}
},
{
"and": [
{
"ammo": {
"type": "Super",
"count": 1
}
},
{
"canShineCharge": {
"usedTiles": 28,
"openEnd": 0
}
},
{
"heatFrames": 100
}
]
}
]
}
{
"heatFrames": 645
}
{
"or": [
"canTrickyJump",
{
"and": [
{
"heatFrames": 200
},
{
"enemyDamage": {
"enemy": "Ripper 2 (red)",
"type": "contact",
"hits": 2
}
}
]
}
]
}
{
"or": [
{
"shinespark": {
"frames": 43,
"excessFrames": 0
}
},
{
"and": [
"canShinechargeMovementComplex",
{
"shinespark": {
"frames": 27,
"excessFrames": 0
}
},
{
"heatFrames": 10
}
]
},
{
"and": [
"canShinechargeMovementTricky",
{
"shinespark": {
"frames": 17,
"excessFrames": 0
}
},
{
"heatFrames": 135
}
]
}
]
}Exit condition: {
"leaveWithSpark": {
"position": "top"
}
}Unlocks doors: {"types":["ammo"],"requires":[]} |
|
Entrance condition: {
"comeInNormally": {}
}Requires: "canHorizontalDamageBoost"
"canTrickyJump"
{
"enemyDamage": {
"enemy": "Ripper 2 (red)",
"type": "contact",
"hits": 2
}
}
{
"canShineCharge": {
"usedTiles": 18,
"openEnd": 0
}
}
{
"heatFrames": 525
}
{
"shinespark": {
"frames": 43,
"excessFrames": 0
}
}Exit condition: {
"leaveWithSpark": {
"position": "top"
}
}Unlocks doors: {"types":["ammo"],"requires":[]} |
|
Entrance condition: {
"comeInWithSpark": {
"position": "top"
}
}Requires: "h_navigateHeatRooms"
{
"shinespark": {
"frames": 19,
"excessFrames": 8
}
}
{
"heatFrames": 120
}Dev note: Sparking in from the top position requires more heat frames, because you end up on top of the item pedestal and need to move off of it. FIXME: The heat frames for the crash animation (and for moving off the pedestal) occur after the item collection, which could matter if the item is an ETank. Likewise, 3 shinespark frames of damage occur after the item collection (assuming not stopping early). |
|

Entrance condition: {
"comeInShinecharged": {}
}Requires: {
"shineChargeFrames": 40
}
{
"heatFrames": 220
}
{
"or": [
{
"shinespark": {
"frames": 41,
"excessFrames": 4
}
},
{
"and": [
"canMidairShinespark",
{
"shinespark": {
"frames": 37,
"excessFrames": 4
}
}
]
}
]
}Clears obstacles: A, B |
From: 4
Item
To: 2
Middle Right Door
Requires: "HiJump"
"canShinechargeMovementComplex"
{
"or": [
"ScrewAttack",
{
"obstaclesCleared": [
"B"
]
}
]
}
{
"shineChargeFrames": 95
}
{
"heatFrames": 120
}
{
"shinespark": {
"frames": 2,
"excessFrames": 0
}
}Exit condition: {
"leaveWithSpark": {
"position": "top"
}
}Unlocks doors: {"types":["super"],"requires":[]}
{"types":["missiles","powerbomb"],"requires":["never"]} |
Come In Shinecharged, Leave With Spark (Wall Jump, Top Position)
(Very Hard)
Fast Pillars Setup Room
From: 1
Top Left Door
To: 4
Top Right Door

Entrance condition: {
"comeInShinecharged": {}
}Requires: {
"shineChargeFrames": 105
}
"canShinechargeMovementComplex"
"canWallJump"
"canDodgeWhileShooting"
{
"heatFrames": 140
}
{
"shinespark": {
"frames": 11,
"excessFrames": 0
}
}Exit condition: {
"leaveWithSpark": {
"position": "top"
}
}Unlocks doors: {"types":["super"],"requires":[]}
{"types":["missiles","powerbomb"],"requires":["never"]} |
From: 7
Fireflea Statue's Claw Junction
To: 6
Junction Behind Fune

Requires: {
"canShineCharge": {
"usedTiles": 17,
"gentleUpTiles": 6,
"steepUpTiles": 1,
"openEnd": 1
}
}
{
"or": [
{
"shinespark": {
"frames": 21,
"excessFrames": 4
}
},
{
"and": [
"canMidairShinespark",
{
"shinespark": {
"frames": 13,
"excessFrames": 4
}
}
]
},
{
"and": [
"HiJump",
"canMidairShinespark",
{
"shinespark": {
"frames": 9,
"excessFrames": 3
}
}
]
},
{
"and": [
"canShinechargeMovementComplex",
"canSpeedyJump",
{
"shinespark": {
"frames": 9,
"excessFrames": 3
}
}
]
}
]
} |
|

Entrance condition: {
"comeInWithSpark": {
"position": "top"
}
}Requires: {
"heatFrames": 79
}
{
"or": [
{
"and": [
{
"shinespark": {
"frames": 79,
"excessFrames": 5
}
},
{
"heatFrames": 105
}
]
},
{
"and": [
{
"shinespark": {
"frames": 79,
"excessFrames": 15
}
},
{
"heatFrames": 165
}
]
}
]
}Unlocks doors: {"types":["missiles"],"requires":[{"heatFrames":50}]}
{"types":["super"],"requires":[]}
{"types":["powerbomb"],"requires":[{"heatFrames":110}]}Dev note: 5 excess frames is the maximum for which it is still be possible to reach the door without running out of energy, in the case where the shinespark ends at 29 energy and Samus has no heat protection (or reserves to refill from). The alternative with 15 excess frames is mainly useful in the heat-proof case. |
|
Entrance condition: {
"comeInWithSpark": {
"position": "top"
}
}Requires: {
"heatFrames": 79
}
{
"or": [
{
"and": [
{
"shinespark": {
"frames": 79,
"excessFrames": 5
}
},
{
"heatFrames": 105
}
]
},
{
"and": [
{
"shinespark": {
"frames": 79,
"excessFrames": 16
}
},
"canCarefulJump",
{
"or": [
"canInsaneJump",
{
"and": [
"canTrickyJump",
"canWallJump"
]
},
{
"acidFrames": 5
}
]
},
{
"heatFrames": 200
}
]
}
]
}Unlocks doors: {"types":["missiles"],"requires":[{"heatFrames":50}]}
{"types":["super"],"requires":[]}
{"types":["powerbomb"],"requires":[{"heatFrames":110}]}Dev note: 5 excess frames is the maximum for which it is still be possible to reach the door without running out of energy, in the case where the shinespark ends at 29 energy and Samus has no heat protection (or reserves to refill from). The alternative with 16 excess frames is mainly useful in the heat-proof case. |
From: 1
Top Left Door
To: 3
Top Right Door

Entrance condition: {
"comeInShinecharged": {}
}Requires: "canShinechargeMovementComplex"
{
"shineChargeFrames": 95
}
{
"heatFrames": 125
}
{
"shinespark": {
"frames": 10,
"excessFrames": 0
}
}Exit condition: {
"leaveWithSpark": {
"position": "top"
}
}Unlocks doors: {"types":["super"],"requires":[]}
{"types":["missiles","powerbomb"],"requires":["never"]} |
From: 2
Bottom Left Door
To: 4
Junction Above Bomb Blocks
Vertically Shinespark two tiles from the left on the floating platform. Shinesparking farther right will make it very likely a fireball hits Samus during the crash animation. There is a small position that crashes the shinespark early but does not take fireball damage. Entrance condition: {
"comeInShinecharged": {}
}Requires: {
"shineChargeFrames": 60
}
"canMidairShinespark"
{
"or": [
{
"and": [
"canShinechargeMovementTricky",
{
"shineChargeFrames": 10
},
{
"shinespark": {
"frames": 23,
"excessFrames": 2
}
}
]
},
{
"and": [
"canTrickyJump",
{
"shinespark": {
"frames": 36,
"excessFrames": 3
}
}
]
},
{
"and": [
{
"shineChargeFrames": 10
},
{
"shinespark": {
"frames": 22,
"excessFrames": 0
}
},
{
"enemyDamage": {
"enemy": "Namihe",
"type": "fireball",
"hits": 1
}
},
{
"heatFrames": 25
}
]
}
]
}
{
"heatFrames": 220
}Clears obstacles: A |
From: 2
Bottom Left Door
To: 4
Junction Above Bomb Blocks
Vertically Shinespark two tiles from the left on the floating platform. Shinesparking farther right will make it very likely a fireball hits Samus during the crash animation. There is a small position that crashes the shinespark early but does not take fireball damage. Entrance condition: {
"comeInShinecharging": {
"length": 3,
"openEnd": 0
}
}Requires: "canMidairShinespark"
{
"or": [
{
"and": [
"canShinechargeMovementTricky",
{
"shinespark": {
"frames": 22,
"excessFrames": 2
}
}
]
},
{
"and": [
"canTrickyJump",
{
"shinespark": {
"frames": 33,
"excessFrames": 3
}
}
]
},
{
"and": [
{
"shinespark": {
"frames": 22,
"excessFrames": 0
}
},
{
"enemyDamage": {
"enemy": "Namihe",
"type": "fireball",
"hits": 1
}
},
{
"heatFrames": 25
}
]
}
]
}
{
"heatFrames": 250
}Clears obstacles: A |
|


Requires: {
"or": [
{
"obstaclesCleared": [
"A"
]
},
"h_usePowerBomb"
]
}
{
"or": [
{
"canShineCharge": {
"usedTiles": 35,
"openEnd": 1
}
},
{
"and": [
"f_DefeatedPhantoon",
"h_shinechargeMaxRunway"
]
}
]
}
{
"or": [
{
"shinespark": {
"frames": 40,
"excessFrames": 3
}
},
{
"and": [
"canMidairShinespark",
{
"shinespark": {
"frames": 32,
"excessFrames": 2
}
}
]
},
{
"and": [
"canMidairShinespark",
"HiJump",
{
"shinespark": {
"frames": 29,
"excessFrames": 3
}
}
]
},
{
"and": [
"canShinechargeMovementComplex",
"canSpeedyJump",
{
"or": [
{
"shinespark": {
"frames": 27,
"excessFrames": 2
}
},
{
"and": [
"HiJump",
{
"shinespark": {
"frames": 18,
"excessFrames": 2
}
}
]
}
]
}
]
}
]
}Clears obstacles: A |
|


Wait for the first spike platform to fall, jump onto it, and use it to run and jump far enough through the room to trigger the fourth spike platform to fall. Fire a shot mid-air and activate the shinespark wind-up. Wait until the shot is at a specific position before sparking. Sparking too late will cause the shot to despawn before reaching the door. Sparking too early will cause Samus to bonk the door as it will not yet be open. A beam shot, Missile, or Super can be used. Entrance condition: {
"comeInShinecharged": {}
}Requires: {
"shineChargeFrames": 115
}
"Gravity"
"canShinechargeMovementTricky"
"canHeroShot"
{
"shinespark": {
"frames": 31,
"excessFrames": 0
}
}Exit condition: {
"leaveWithSpark": {
"position": "top"
}
}Unlocks doors: {"types":["super"],"requires":[]}
{"types":["missiles","powerbomb"],"requires":["never"]} |
From: 1
Bottom Left Door
To: 4
Farm Junction Left of Gate
Entrance condition: {
"comeInShinecharged": {}
}Requires: "canCarefulJump"
"canMidairShinespark"
{
"shineChargeFrames": 35
}
{
"shinespark": {
"frames": 20,
"excessFrames": 6
}
} |
From: 1
Bottom Left Door
To: 4
Farm Junction Left of Gate
It is typically easiest to jump into the ceiling hole before sparking to align Samus. Entrance condition: {
"comeInShinecharging": {
"length": 13,
"openEnd": 0
}
}Requires: "canCarefulJump"
"canMidairShinespark"
{
"or": [
{
"shinespark": {
"frames": 16,
"excessFrames": 6
}
},
{
"and": [
"HiJump",
{
"shinespark": {
"frames": 12,
"excessFrames": 6
}
}
]
}
]
} |
From: 2
Bottom Right Door
To: 4
Farm Junction Left of Gate
Entrance condition: {
"comeInShinecharged": {}
}Requires: "canCarefulJump"
"canMidairShinespark"
{
"shineChargeFrames": 45
}
{
"shinespark": {
"frames": 20,
"excessFrames": 6
}
} |
From: 2
Bottom Right Door
To: 4
Farm Junction Left of Gate
It is typically easiest to jump into the ceiling hole before sparking to align Samus. Entrance condition: {
"comeInShinecharging": {
"length": 13,
"openEnd": 0
}
}Requires: "canCarefulJump"
"canMidairShinespark"
{
"or": [
{
"shinespark": {
"frames": 16,
"excessFrames": 6
}
},
{
"and": [
"HiJump",
{
"shinespark": {
"frames": 12,
"excessFrames": 6
}
}
]
}
]
} |
From: 1
Top Left Doorway
To: 4
Top Right Doorway
Entrance condition: {
"comeInShinecharged": {}
}Requires: {
"or": [
{
"and": [
"Gravity",
{
"shineChargeFrames": 10
}
]
},
{
"shineChargeFrames": 20
}
]
}
{
"shinespark": {
"frames": 21,
"excessFrames": 0
}
}Exit condition: {
"leaveWithSpark": {
"position": "top"
}
}Unlocks doors: {"types":["super"],"requires":[]}
{"types":["missiles","powerbomb"],"requires":["never"]} |
From: 2
Bottom Left Door
To: 3
Bottom Right Door

Entrance condition: {
"comeInShinecharged": {}
}Requires: {
"or": [
{
"and": [
"Gravity",
{
"shineChargeFrames": 10
}
]
},
{
"shineChargeFrames": 20
}
]
}
{
"shinespark": {
"frames": 21,
"excessFrames": 0
}
}Exit condition: {
"leaveWithSpark": {
"position": "top"
}
}Unlocks doors: {"types":["super"],"requires":[]}
{"types":["missiles","powerbomb"],"requires":["never"]} |
From: 3
Bottom Right Door
To: 2
Bottom Left Door
Entrance condition: {
"comeInShinecharged": {}
}Requires: {
"or": [
{
"and": [
"Gravity",
{
"shineChargeFrames": 10
}
]
},
{
"shineChargeFrames": 20
}
]
}
{
"shinespark": {
"frames": 21,
"excessFrames": 0
}
}Exit condition: {
"leaveWithSpark": {
"position": "top"
}
}Unlocks doors: {"types":["super"],"requires":[]}
{"types":["missiles","powerbomb"],"requires":["never"]} |
From: 4
Top Right Doorway
To: 1
Top Left Doorway

Entrance condition: {
"comeInShinecharged": {}
}Requires: {
"or": [
{
"and": [
"Gravity",
{
"shineChargeFrames": 10
}
]
},
{
"shineChargeFrames": 20
}
]
}
{
"shinespark": {
"frames": 21,
"excessFrames": 0
}
}Exit condition: {
"leaveWithSpark": {
"position": "top"
}
}Unlocks doors: {"types":["super"],"requires":[]}
{"types":["missiles","powerbomb"],"requires":["never"]} |
From: 2
Bottom Right Door
To: 5
Platform Junction Near Top Left Door
Start the dash as close to the door transition as possible in order to store the shinespark in time. Stand 2 or 3 pixels from the door for run speed to be low enough going into the next room. Entrance condition: {
"comeInRunning": {
"speedBooster": "yes",
"minTiles": 0.4375
}
}Requires: "canWaterShineCharge"
"canTrickyJump"
"h_shinechargeMaxRunway"
{
"or": [
{
"shinespark": {
"frames": 41,
"excessFrames": 7
}
},
{
"and": [
"canDodgeWhileShooting",
"canMidairShinespark",
{
"or": [
{
"shinespark": {
"frames": 38,
"excessFrames": 7
}
},
{
"and": [
"HiJump",
{
"shinespark": {
"frames": 34,
"excessFrames": 7
}
}
]
}
]
}
]
}
]
} |
From: 2
Bottom Right Door
To: 5
Platform Junction Near Top Left Door
Reduce Samus' run speed with a stutter or late dash tap in order to complete the shinecharge in time. Entrance condition: {
"comeInRunning": {
"speedBooster": "yes",
"minTiles": 4.4375
}
}Requires: "canWaterShineCharge"
{
"canShineCharge": {
"usedTiles": 23,
"openEnd": 2
}
}
{
"or": [
{
"shinespark": {
"frames": 41,
"excessFrames": 7
}
},
{
"and": [
"canDodgeWhileShooting",
"canMidairShinespark",
{
"or": [
{
"shinespark": {
"frames": 38,
"excessFrames": 7
}
},
{
"and": [
"HiJump",
{
"shinespark": {
"frames": 34,
"excessFrames": 7
}
}
]
}
]
}
]
}
]
} |
From: 2
Bottom Right Door
To: 6
Middle Junction Near Top Left Pirate
Reduce Samus' run speed with a stutter or late dash tap in order to complete the shinecharge in time. With low energy, shinespark diagonally to the middle ledge on the left. Entrance condition: {
"comeInRunning": {
"speedBooster": "yes",
"minTiles": 4.4375
}
}Requires: "canWaterShineCharge"
{
"canShineCharge": {
"usedTiles": 23,
"openEnd": 2
}
}
{
"or": [
{
"shinespark": {
"frames": 43,
"excessFrames": 26
}
},
{
"and": [
"canMidairShinespark",
{
"shinespark": {
"frames": 38,
"excessFrames": 25
}
}
]
}
]
}
{
"or": [
{
"enemyDamage": {
"enemy": "Pink Space Pirate (standing)",
"type": "contact",
"hits": 1
}
},
{
"enemyKill": {
"enemies": [
[
"Pink Space Pirate (standing)"
]
],
"explicitWeapons": [
"Plasma"
]
}
},
"h_pauseAbuseMinimalReserveRefill",
{
"and": [
"canControlShinesparkEnd",
"canUseSpeedEchoes",
{
"resourceAtMost": [
{
"type": "RegularEnergy",
"count": 29
}
]
}
]
},
{
"and": [
"canInsaneJump",
"canTrickyDodgeEnemies"
]
}
]
}
{
"or": [
"h_underwaterCrouchJumpDownGrab",
"canSpringBallJumpMidAir",
{
"and": [
"Ice",
"Plasma"
]
}
]
} |
From: 2
Bottom Right Door
To: 6
Middle Junction Near Top Left Pirate


Start the dash as close to the door transition as possible in order to store the shinespark in time. Stand 2 or 3 pixels from the door for run speed to be low enough going into the next room. With low energy, shinespark diagonally to the middle ledge on the left. Entrance condition: {
"comeInRunning": {
"speedBooster": "yes",
"minTiles": 0.4375
}
}Requires: "canWaterShineCharge"
"canTrickyJump"
"h_shinechargeMaxRunway"
{
"or": [
{
"shinespark": {
"frames": 43,
"excessFrames": 26
}
},
{
"and": [
"canDodgeWhileShooting",
"canMidairShinespark",
{
"shinespark": {
"frames": 38,
"excessFrames": 25
}
}
]
}
]
}
{
"or": [
{
"enemyDamage": {
"enemy": "Pink Space Pirate (standing)",
"type": "contact",
"hits": 1
}
},
{
"enemyKill": {
"enemies": [
[
"Pink Space Pirate (standing)"
]
],
"explicitWeapons": [
"Plasma"
]
}
},
"h_pauseAbuseMinimalReserveRefill",
{
"and": [
"canControlShinesparkEnd",
"canUseSpeedEchoes",
{
"resourceAtMost": [
{
"type": "RegularEnergy",
"count": 29
}
]
}
]
},
{
"and": [
"canInsaneJump",
"canTrickyDodgeEnemies"
]
}
]
}
{
"or": [
"h_underwaterCrouchJumpDownGrab",
"canSpringBallJumpMidAir",
{
"and": [
"Ice",
"Plasma"
]
}
]
} |
From: 2
Bottom Right Door
To: 6
Middle Junction Near Top Left Pirate
Reduce Samus' run speed with a stutter or late dash tap in order to complete the shinecharge in time. Spark up and fall onto the platform left of the fish. Entrance condition: {
"comeInRunning": {
"speedBooster": "yes",
"minTiles": 4.4375
}
}Requires: "canWaterShineCharge"
"canShinechargeMovement"
"canDodgeWhileShooting"
{
"canShineCharge": {
"usedTiles": 23,
"openEnd": 2
}
}
{
"or": [
{
"shinespark": {
"frames": 43,
"excessFrames": 9
}
},
{
"and": [
"canMidairShinespark",
{
"shinespark": {
"frames": 38,
"excessFrames": 9
}
}
]
},
{
"and": [
"HiJump",
"canMidairShinespark",
{
"shinespark": {
"frames": 34,
"excessFrames": 9
}
}
]
}
]
} |
From: 2
Bottom Right Door
To: 6
Middle Junction Near Top Left Pirate
Start the dash as close to the door transition as possible in order to store the shinespark in time. Stand 2 or 3 pixels from the door for run speed to be low enough going into the next room. Spark up and fall onto the platform left of the fish. Entrance condition: {
"comeInRunning": {
"speedBooster": "yes",
"minTiles": 0.4375
}
}Requires: "canWaterShineCharge"
"canShinechargeMovement"
"canDodgeWhileShooting"
"canTrickyJump"
"h_shinechargeMaxRunway"
{
"or": [
{
"shinespark": {
"frames": 43,
"excessFrames": 9
}
},
{
"and": [
"canMidairShinespark",
{
"shinespark": {
"frames": 38,
"excessFrames": 9
}
}
]
}
]
} |
|
Requires Samus to enter in a state that can diagonally spark immediately. Entrance condition: {
"comeInShinecharged": {},
"comesThroughToilet": "any"
}Requires: {
"shineChargeFrames": 10
}
"h_navigateUnderwater"
"canPrepareForNextRoom"
"canMidairShinespark"
{
"shinespark": {
"frames": 3,
"excessFrames": 0
}
}Dev note: FIXME: The requirement to be in a pose that can spark immediately may not align with the exit condition in the other room. We need a way to make this requirement explicit and take it into account. |
|
Entrance condition: {
"comeInShinecharged": {},
"comesThroughToilet": "any"
}Requires: {
"shineChargeFrames": 80
}
"Gravity"
{
"or": [
{
"shinespark": {
"frames": 77,
"excessFrames": 3
}
},
{
"and": [
"canMidairShinespark",
{
"shinespark": {
"frames": 69,
"excessFrames": 3
}
}
]
}
]
}Clears obstacles: A |
|
To avoid breaking the speed blocks, align Samus on the first plant, just to the left of the door. Entrance condition: {
"comeInShinecharged": {},
"comesThroughToilet": "any"
}Requires: {
"shineChargeFrames": 60
}
"Gravity"
"canMidairShinespark"
{
"shinespark": {
"frames": 71,
"excessFrames": 3
}
} |
|
Entrance condition: {
"comeInShinecharged": {},
"comesThroughToilet": "any"
}Requires: {
"shineChargeFrames": 100
}
"canSuitlessMaridia"
"canMidairShinespark"
{
"shinespark": {
"frames": 73,
"excessFrames": 3
}
} |
From: 2
Bottom Right Door
To: 6
Speed Blocked Item
Entrance condition: {
"comeInShinecharged": {}
}Requires: {
"shineChargeFrames": 120
}
"Gravity"
{
"or": [
{
"shinespark": {
"frames": 77,
"excessFrames": 3
}
},
{
"and": [
"canMidairShinespark",
{
"shinespark": {
"frames": 69,
"excessFrames": 3
}
}
]
}
]
}Clears obstacles: A |
From: 2
Bottom Right Door
To: 6
Speed Blocked Item
Entrance condition: {
"comeInShinecharging": {
"length": 4,
"openEnd": 1,
"steepDownTiles": 1
}
}Requires: "Gravity"
{
"or": [
{
"shinespark": {
"frames": 77,
"excessFrames": 3
}
},
{
"and": [
"canMidairShinespark",
{
"shinespark": {
"frames": 69,
"excessFrames": 3
}
}
]
},
{
"and": [
"HiJump",
"canMidairShinespark",
{
"shinespark": {
"frames": 65,
"excessFrames": 3
}
}
]
}
]
}Clears obstacles: A Dev note: This does not require canShinechargeMovement, because this is the easiest and vanilla expected variant. |
From: 2
Bottom Right Door
To: 9
Junction Below Speed Blocks
To avoid breaking the speed blocks, align Samus on the first plant, just to the left of the door. Entrance condition: {
"comeInShinecharged": {}
}Requires: {
"shineChargeFrames": 70
}
"Gravity"
{
"or": [
{
"shinespark": {
"frames": 76,
"excessFrames": 3
}
},
{
"and": [
"canMidairShinespark",
{
"shinespark": {
"frames": 71,
"excessFrames": 3
}
}
]
}
]
} |
From: 2
Bottom Right Door
To: 9
Junction Below Speed Blocks
Entrance condition: {
"comeInShinecharged": {}
}Requires: {
"shineChargeFrames": 100
}
"canSuitlessMaridia"
"canShinechargeMovement"
{
"or": [
{
"shinespark": {
"frames": 76,
"excessFrames": 3
}
},
{
"and": [
"canMidairShinespark",
{
"shinespark": {
"frames": 71,
"excessFrames": 3
}
}
]
}
]
}Dev note: This also requires coming in with a small amount of momentum. Even running less than the distance of a door frame is enough, but isn't able to be modeled currently. |
From: 2
Bottom Right Door
To: 9
Junction Below Speed Blocks
To avoid breaking the speed blocks, align Samus on the first plant, just to the left of the door. Entrance condition: {
"comeInShinecharging": {
"length": 4,
"openEnd": 1,
"steepDownTiles": 1
}
}Requires: "Gravity"
{
"or": [
{
"shinespark": {
"frames": 76,
"excessFrames": 3
}
},
{
"and": [
"canMidairShinespark",
{
"shinespark": {
"frames": 68,
"excessFrames": 3
}
}
]
}
]
} |
From: 2
Bottom Right Door
To: 9
Junction Below Speed Blocks
Entrance condition: {
"comeInShinecharging": {
"length": 1,
"openEnd": 1
}
}Requires: "canSuitlessMaridia"
"canShinechargeMovement"
{
"or": [
{
"shinespark": {
"frames": 76,
"excessFrames": 3
}
},
{
"and": [
"canMidairShinespark",
{
"shinespark": {
"frames": 71,
"excessFrames": 3
}
}
]
}
]
} |
From: 3
Middle Right Door
To: 6
Speed Blocked Item
Entrance condition: {
"comeInShinecharged": {}
}Requires: {
"shineChargeFrames": 150
}
"Gravity"
"canMidairShinespark"
"canCarefulJump"
{
"shinespark": {
"frames": 50,
"excessFrames": 2
}
}Clears obstacles: A |
|
Requires: "Gravity"
{
"or": [
{
"canShineCharge": {
"usedTiles": 24,
"gentleUpTiles": 3,
"gentleDownTiles": 3,
"openEnd": 1
}
},
{
"and": [
{
"doorUnlockedAtNode": 3
},
{
"canShineCharge": {
"usedTiles": 25,
"gentleUpTiles": 3,
"gentleDownTiles": 3,
"openEnd": 1
}
}
]
}
]
}
{
"or": [
{
"shinespark": {
"frames": 77,
"excessFrames": 2
}
},
{
"and": [
"canMidairShinespark",
{
"shinespark": {
"frames": 50,
"excessFrames": 2
}
}
]
}
]
}Clears obstacles: A |
|
Entrance condition: {
"comeInShinecharging": {
"length": 24,
"openEnd": 1,
"gentleUpTiles": 3,
"gentleDownTiles": 3
}
}Requires: "Gravity"
{
"or": [
{
"shinespark": {
"frames": 77,
"excessFrames": 2
}
},
{
"and": [
"canMidairShinespark",
{
"shinespark": {
"frames": 50,
"excessFrames": 2
}
}
]
}
]
}Clears obstacles: A |
From: 3
Middle Right Door
To: 6
Speed Blocked Item

This can be done with only a door-frame runway in the adjacent room. Entrance condition: {
"comeInStutterShinecharging": {
"minTiles": 1
}
}Requires: "canStutterWaterShineCharge"
"canMidairShinespark"
"h_shinechargeMaxRunway"
{
"shinespark": {
"frames": 62,
"excessFrames": 2
}
}Clears obstacles: A Dev note: It can technically be done without a stutter, but it's not really easier. |
|
Entrance condition: {
"comeInShinecharging": {
"length": 7,
"openEnd": 1
}
}Requires: "canWaterShineCharge"
"canMidairShinespark"
"canCarefulJump"
{
"shinespark": {
"frames": 62,
"excessFrames": 2
}
}Clears obstacles: A Dev note: This runway length is just an estimate of the worst case scenario for difficulties that can't use canStutterWaterShineCharge. |
From: 3
Middle Right Door
To: 9
Junction Below Speed Blocks
Entrance condition: {
"comeInShinecharged": {}
}Requires: {
"shineChargeFrames": 80
}
"Gravity"
"canMidairShinespark"
{
"shinespark": {
"frames": 50,
"excessFrames": 3
}
} |
From: 3
Middle Right Door
To: 9
Junction Below Speed Blocks
Entrance condition: {
"comeInShinecharged": {}
}Requires: {
"shineChargeFrames": 145
}
"canSuitlessMaridia"
"canMidairShinespark"
{
"shinespark": {
"frames": 55,
"excessFrames": 3
}
}Dev note: This also requires coming in with a small amount of momentum. Even running less than the distance of a door frame is enough, but isn't able to be modeled currently. |
From: 3
Middle Right Door
To: 9
Junction Below Speed Blocks
Entrance condition: {
"comeInShinecharging": {
"length": 24,
"openEnd": 1,
"gentleUpTiles": 3,
"gentleDownTiles": 3
}
}Requires: "Gravity"
{
"or": [
{
"shinespark": {
"frames": 76,
"excessFrames": 3
}
},
{
"and": [
"canMidairShinespark",
{
"shinespark": {
"frames": 50,
"excessFrames": 3
}
}
]
}
]
} |
|
Requires: "Gravity"
{
"or": [
{
"canShineCharge": {
"usedTiles": 24,
"gentleUpTiles": 3,
"gentleDownTiles": 3,
"openEnd": 1
}
},
{
"and": [
{
"doorUnlockedAtNode": 3
},
{
"canShineCharge": {
"usedTiles": 25,
"gentleUpTiles": 3,
"gentleDownTiles": 3,
"openEnd": 1
}
}
]
}
]
}
{
"or": [
{
"shinespark": {
"frames": 76,
"excessFrames": 3
}
},
{
"and": [
"canMidairShinespark",
{
"shinespark": {
"frames": 50,
"excessFrames": 3
}
}
]
}
]
} |
From: 3
Middle Right Door
To: 9
Junction Below Speed Blocks
This can be done with only a door-frame runway in the adjacent room. Entrance condition: {
"comeInStutterShinecharging": {
"minTiles": 1
}
}Requires: "canStutterWaterShineCharge"
"canMidairShinespark"
"h_shinechargeMaxRunway"
{
"shinespark": {
"frames": 35,
"excessFrames": 3
}
}Dev note: This can technically be done without a stutter, but it's not really easier. |
From: 3
Middle Right Door
To: 9
Junction Below Speed Blocks
Entrance condition: {
"comeInShinecharging": {
"length": 7,
"openEnd": 1
}
}Requires: "canWaterShineCharge"
"canMidairShinespark"
{
"shinespark": {
"frames": 35,
"excessFrames": 3
}
}Dev note: This runway length is just an estimate of the worst case scenario for difficulties that can't use canStutterWaterShineCharge. |
|
Requires: "Gravity"
{
"canShineCharge": {
"usedTiles": 17,
"steepUpTiles": 1,
"openEnd": 0
}
}
{
"or": [
{
"shinespark": {
"frames": 77,
"excessFrames": 3
}
},
{
"and": [
"canMidairShinespark",
{
"shinespark": {
"frames": 68,
"excessFrames": 3
}
}
]
},
{
"and": [
"HiJump",
"canMidairShinespark",
{
"shinespark": {
"frames": 64,
"excessFrames": 3
}
}
]
}
]
}Clears obstacles: A Dev note: The short charge actually has 2 steep up tiles, but one is against a wall so it was excluded. |
From: 8
Bottom Junction
To: 9
Junction Below Speed Blocks


To avoid breaking the speed blocks, align Samus on the first plant, just to the left of the door. Requires: "Gravity"
{
"canShineCharge": {
"usedTiles": 17,
"steepUpTiles": 1,
"openEnd": 0
}
}
{
"or": [
{
"shinespark": {
"frames": 76,
"excessFrames": 3
}
},
{
"and": [
"canMidairShinespark",
{
"shinespark": {
"frames": 69,
"excessFrames": 3
}
}
]
}
]
}Dev note: The short charge actually has 2 steep up tiles, but one is against a wall so it was excluded. |
|
Entrance condition: {
"comeInShinecharging": {
"length": 18,
"openEnd": 1,
"gentleUpTiles": 2
}
}Requires: "Gravity"
"canShinechargeMovement"
{
"or": [
{
"shinespark": {
"frames": 60,
"excessFrames": 5
}
},
{
"and": [
"canMidairShinespark",
{
"shinespark": {
"frames": 55,
"excessFrames": 5
}
}
]
},
{
"and": [
"canMidairShinespark",
"HiJump",
{
"shinespark": {
"frames": 50,
"excessFrames": 5
}
}
]
},
{
"and": [
"canShinechargeMovementComplex",
"HiJump",
{
"shinespark": {
"frames": 47,
"excessFrames": 5
}
}
]
},
{
"and": [
"canShinechargeMovementComplex",
"HiJump",
"canSpeedyJump",
{
"shinespark": {
"frames": 44,
"excessFrames": 5
}
}
]
}
]
}Clears obstacles: B Dev note: This could have a few more excess frames if not getting on top of the block to go to 2. |
|
Requires: "Gravity"
{
"canShineCharge": {
"usedTiles": 19,
"gentleUpTiles": 2,
"openEnd": 1
}
}
"canShinechargeMovement"
{
"or": [
{
"shinespark": {
"frames": 60,
"excessFrames": 5
}
},
{
"and": [
"canMidairShinespark",
{
"shinespark": {
"frames": 55,
"excessFrames": 5
}
}
]
},
{
"and": [
"canMidairShinespark",
"HiJump",
{
"shinespark": {
"frames": 50,
"excessFrames": 5
}
}
]
},
{
"and": [
"canShinechargeMovementComplex",
"HiJump",
{
"shinespark": {
"frames": 47,
"excessFrames": 5
}
}
]
},
{
"and": [
"canShinechargeMovementComplex",
"HiJump",
"canSpeedyJump",
{
"shinespark": {
"frames": 44,
"excessFrames": 5
}
}
]
}
]
}Clears obstacles: B Dev note: This could have a few more excess frames if not getting on top of the block at 2. |
|
With only 1 tile of runway, this requires releasing forward for 1 or 2 frames and repressing forward on the last possible frame. Entrance condition: {
"comeInStutterShinecharging": {
"minTiles": 1
}
}Requires: "canPreciseStutterWaterShineCharge"
"canShinechargeMovement"
{
"or": [
{
"shinespark": {
"frames": 61,
"excessFrames": 7
}
},
{
"and": [
"canMidairShinespark",
{
"shinespark": {
"frames": 56,
"excessFrames": 7
}
}
]
},
{
"and": [
"canMidairShinespark",
"HiJump",
{
"shinespark": {
"frames": 52,
"excessFrames": 7
}
}
]
}
]
}Clears obstacles: B Dev note: This could have a few more excess frames if not getting on top of the block to go to 2. |
|


Entrance condition: {
"comeInStutterShinecharging": {
"minTiles": 2
}
}Requires: "canStutterWaterShineCharge"
"canShinechargeMovement"
{
"or": [
{
"shinespark": {
"frames": 61,
"excessFrames": 7
}
},
{
"and": [
"canMidairShinespark",
{
"shinespark": {
"frames": 56,
"excessFrames": 7
}
}
]
},
{
"and": [
"canMidairShinespark",
"HiJump",
{
"shinespark": {
"frames": 52,
"excessFrames": 7
}
}
]
}
]
}Clears obstacles: B Dev note: This could have a few more excess frames if not getting on top of the block to go to 2. |
|
Entrance condition: {
"comeInShinecharging": {
"length": 4,
"openEnd": 1
}
}Requires: "canWaterShineCharge"
"canShinechargeMovement"
{
"or": [
{
"shinespark": {
"frames": 61,
"excessFrames": 7
}
},
{
"and": [
"canMidairShinespark",
{
"shinespark": {
"frames": 56,
"excessFrames": 7
}
}
]
},
{
"and": [
"canMidairShinespark",
"HiJump",
{
"shinespark": {
"frames": 52,
"excessFrames": 7
}
}
]
}
]
}Clears obstacles: B Dev note: This could have a few more excess frames if not getting on top of the block to go to 2. This runway length is just an estimate of the worst case scenario for difficulties that can't use canStutterWaterShineCharge. |
From: 1
Left Door
To: 6
Top Right Junction
Entrance condition: {
"comeInShinecharging": {
"length": 18,
"openEnd": 1,
"gentleUpTiles": 2
}
}Requires: "Gravity"
{
"or": [
{
"shinespark": {
"frames": 43,
"excessFrames": 4
}
},
{
"and": [
"canMidairShinespark",
{
"shinespark": {
"frames": 37,
"excessFrames": 5
}
}
]
},
{
"and": [
"canMidairShinespark",
"HiJump",
{
"shinespark": {
"frames": 32,
"excessFrames": 4
}
}
]
},
{
"and": [
"canShinechargeMovementComplex",
"HiJump",
"canSpeedyJump",
{
"shinespark": {
"frames": 26,
"excessFrames": 5
}
}
]
}
]
} |
|

Requires: "Gravity"
{
"canShineCharge": {
"usedTiles": 19,
"gentleUpTiles": 2,
"openEnd": 1
}
}
{
"or": [
{
"shinespark": {
"frames": 43,
"excessFrames": 4
}
},
{
"and": [
"canMidairShinespark",
{
"shinespark": {
"frames": 37,
"excessFrames": 5
}
}
]
},
{
"and": [
"canMidairShinespark",
"HiJump",
{
"shinespark": {
"frames": 32,
"excessFrames": 4
}
}
]
},
{
"and": [
"canShinechargeMovementComplex",
"HiJump",
"canSpeedyJump",
{
"shinespark": {
"frames": 24,
"excessFrames": 5
}
}
]
}
]
} |
From: 1
Left Door
To: 6
Top Right Junction

Requires at least 2 tiles in the adjacent room. Entrance condition: {
"comeInStutterShinecharging": {
"minTiles": 2
}
}Requires: "canShinechargeMovement"
{
"or": [
{
"shinespark": {
"frames": 47,
"excessFrames": 5
}
},
{
"and": [
"canMidairShinespark",
{
"shinespark": {
"frames": 44,
"excessFrames": 5
}
}
]
},
{
"and": [
"canMidairShinespark",
"HiJump",
{
"shinespark": {
"frames": 41,
"excessFrames": 5
}
}
]
}
]
} |
|
Entrance condition: {
"comeInShinecharging": {
"length": 4,
"openEnd": 1
}
}Requires: "canWaterShineCharge"
"canShinechargeMovement"
{
"or": [
{
"shinespark": {
"frames": 47,
"excessFrames": 5
}
},
{
"and": [
"canMidairShinespark",
{
"shinespark": {
"frames": 44,
"excessFrames": 5
}
}
]
},
{
"and": [
"canMidairShinespark",
"HiJump",
{
"shinespark": {
"frames": 41,
"excessFrames": 5
}
}
]
}
]
}Dev note: This runway length is just an estimate of the worst case scenario for difficulties that can't use canStutterWaterShineCharge. |
From: 1
Left Door
To: 6
Top Right Junction
With only 1 tile of runway, this requires a single-frame stutter (release forward then repress on the next frame), on the last possible frame. Entrance condition: {
"comeInStutterShinecharging": {
"minTiles": 1
}
}Requires: "canPreciseStutterWaterShineCharge"
"canInsaneJump"
"canShinechargeMovement"
{
"or": [
{
"shinespark": {
"frames": 47,
"excessFrames": 5
}
},
{
"and": [
"canMidairShinespark",
{
"shinespark": {
"frames": 44,
"excessFrames": 5
}
}
]
},
{
"and": [
"canMidairShinespark",
"HiJump",
{
"shinespark": {
"frames": 41,
"excessFrames": 5
}
}
]
}
]
} |
From: 1
Left Doorway
To: 2
Bottom Right Door
Entrance condition: {
"comeInShinecharged": {}
}Requires: {
"or": [
"f_MaridiaTubeBroken",
{
"obstaclesCleared": [
"f_MaridiaTubeBroken"
]
}
]
}
"canShinechargeMovementTricky"
{
"shineChargeFrames": 135
}
{
"shinespark": {
"frames": 11,
"excessFrames": 0
}
}Exit condition: {
"leaveWithSpark": {
"position": "top"
}
}Unlocks doors: {"types":["super"],"requires":[]}
{"types":["missiles","powerbomb"],"requires":["never"]} |
From: 1
Left Doorway
To: 3
Top Right Doorway
Entrance condition: {
"comeInShinecharged": {}
}Requires: {
"or": [
{
"and": [
"Gravity",
{
"shineChargeFrames": 10
}
]
},
{
"shineChargeFrames": 20
}
]
}
{
"shinespark": {
"frames": 21,
"excessFrames": 0
}
}Exit condition: {
"leaveWithSpark": {
"position": "top"
}
}Unlocks doors: {"types":["super"],"requires":[]}
{"types":["missiles","powerbomb"],"requires":["never"]} |
From: 3
Top Right Doorway
To: 1
Left Doorway
Entrance condition: {
"comeInShinecharged": {}
}Requires: {
"or": [
{
"and": [
"Gravity",
{
"shineChargeFrames": 10
}
]
},
{
"shineChargeFrames": 20
}
]
}
{
"shinespark": {
"frames": 21,
"excessFrames": 0
}
}Exit condition: {
"leaveWithSpark": {
"position": "top"
}
}Unlocks doors: {"types":["super"],"requires":[]}
{"types":["missiles","powerbomb"],"requires":["never"]} |
|
Shinespark up right through the rightmost gap to land directly by the door. Requires: "Gravity"
"h_shinechargeMaxRunway"
{
"or": [
{
"shinespark": {
"frames": 59,
"excessFrames": 5
}
},
{
"and": [
"canMidairShinespark",
{
"shinespark": {
"frames": 53,
"excessFrames": 6
}
}
]
},
{
"and": [
"HiJump",
"canMidairShinespark",
{
"shinespark": {
"frames": 50,
"excessFrames": 6
}
}
]
},
{
"and": [
"canShinechargeMovementComplex",
"HiJump",
{
"shinespark": {
"frames": 36,
"excessFrames": 5
}
}
]
},
{
"and": [
"canShinechargeMovementComplex",
"HiJump",
"canSpeedyJump",
{
"shinespark": {
"frames": 31,
"excessFrames": 4
}
}
]
}
]
} |
|
Shinespark up in the middle of the three upward pathways near either the right or left wall. Requires: "Gravity"
"h_shinechargeMaxRunway"
"canShinechargeMovement"
{
"or": [
{
"shinespark": {
"frames": 61,
"excessFrames": 8
}
},
{
"and": [
"canMidairShinespark",
{
"shinespark": {
"frames": 54,
"excessFrames": 8
}
}
]
},
{
"and": [
"HiJump",
"canMidairShinespark",
{
"shinespark": {
"frames": 50,
"excessFrames": 8
}
}
]
},
{
"and": [
"canShinechargeMovementComplex",
"HiJump",
{
"shinespark": {
"frames": 36,
"excessFrames": 8
}
}
]
},
{
"and": [
"canShinechargeMovementComplex",
"HiJump",
"canSpeedyJump",
{
"shinespark": {
"frames": 30,
"excessFrames": 5
}
}
]
}
]
} |
From: 6
Left Morph Passage Doorway
To: 11
Upper Left Ledge Junction
Perform a horizontal shinespark through the top of the door transition, from a horizontal position that triggers a deep door transition. Sparking from one or two pixels away from the door is an example position that works (if possible in the neighboring room). If successful, after the shinespark crash animation ends Samus should be standing inside the wall and be able to X-Ray climb. X-Ray climb up a little less than 1 screen, and the slopes will push Samus up. Entrance condition: {
"comeInWithSpark": {
"position": "top"
}
}Requires: "canDeepTransition"
{
"shinespark": {
"frames": 2,
"excessFrames": 2
}
}
"canXRayClimb"Dev note: If the morph tunnel is not expanded, then a deep transition is not necessary; any horizontal shinespark in top position would work. |
|

Open the door then drop down and use the runway below. Requires: "Gravity"
"h_shinechargeMaxRunway"
"canShinechargeMovement"
{
"or": [
{
"shinespark": {
"frames": 64,
"excessFrames": 0
}
},
{
"and": [
"canMidairShinespark",
{
"shinespark": {
"frames": 56,
"excessFrames": 0
}
}
]
},
{
"and": [
"HiJump",
"canMidairShinespark",
{
"shinespark": {
"frames": 52,
"excessFrames": 0
}
}
]
},
{
"and": [
"HiJump",
"canMidairShinespark",
"canSpeedyJump",
{
"shinespark": {
"frames": 44,
"excessFrames": 0
}
}
]
}
]
}Exit condition: {
"leaveWithSpark": {}
}Unlocks doors: {"types":["ammo"],"requires":[]}Dev note: There is no link directly from 2 to 5 because the door must be opened first. |
|

Requires: "Gravity"
"h_shinechargeMaxRunway"
{
"or": [
{
"shinespark": {
"frames": 40,
"excessFrames": 7
}
},
{
"and": [
"canMidairShinespark",
{
"shinespark": {
"frames": 34,
"excessFrames": 7
}
}
]
}
]
} |
|

Enter this room while holding dash in the previous room, before the door transition. Do not release dash in the water or Samus will not be able to get blue speed. Entrance condition: {
"comeInRunning": {
"speedBooster": "yes",
"minTiles": 0.4375
}
}Requires: "canWaterShineCharge"
"h_shinechargeMaxRunway"
{
"or": [
{
"shinespark": {
"frames": 40,
"excessFrames": 7
}
},
{
"and": [
"canMidairShinespark",
{
"shinespark": {
"frames": 37,
"excessFrames": 7
}
}
]
},
{
"and": [
"HiJump",
"canMidairShinespark",
{
"shinespark": {
"frames": 34,
"excessFrames": 7
}
}
]
}
]
} |
|
Requires: "Gravity"
"h_shinechargeMaxRunway"
{
"or": [
{
"shinespark": {
"frames": 37,
"excessFrames": 3
}
},
{
"and": [
"canMidairShinespark",
{
"shinespark": {
"frames": 29,
"excessFrames": 3
}
}
]
},
{
"and": [
"HiJump",
"canMidairShinespark",
{
"shinespark": {
"frames": 25,
"excessFrames": 3
}
}
]
},
{
"and": [
"HiJump",
"canMidairShinespark",
"canSpeedyJump",
{
"shinespark": {
"frames": 17,
"excessFrames": 3
}
}
]
}
]
}Dev note: It's possible to include more precise speedy jump variants to save Energy, But it's assumed you can do a Gravity jump. |
|
Spark diagonally to the right in order to save some Energy. Requires: "Gravity"
"canShinechargeMovement"
{
"or": [
{
"canShineCharge": {
"usedTiles": 20,
"openEnd": 2
}
},
{
"and": [
"canEnemyExtendRunway",
{
"canShineCharge": {
"usedTiles": 21,
"openEnd": 2
}
}
]
}
]
}
{
"or": [
{
"shinespark": {
"frames": 19,
"excessFrames": 4
}
},
{
"and": [
"canMidairShinespark",
{
"shinespark": {
"frames": 13,
"excessFrames": 4
}
}
]
}
]
}Dev note: It is possible, although not overly useful, to extend the runway here using a snail. FIXME: It is possible to use a snail here and in Shaktool's room to extend the runway at the door. This can be useful when short charging, but can not be used to leave running, as running on the snail does not work. |
From: 4
Right Door
To: 6
Junction Right of Morph Passage
Shinespark diagonally over the zoa pit or run through the speed blocks and shinespark after turning around. Entrance condition: {
"comeInStutterShinecharging": {
"minTiles": 1
}
}Requires: "Morph"
"canPreciseStutterWaterShineCharge"
{
"or": [
{
"shinespark": {
"frames": 8,
"excessFrames": 2
}
},
{
"and": [
"canMidairShinespark",
{
"shinespark": {
"frames": 5,
"excessFrames": 2
}
}
]
}
]
} |
From: 4
Right Door
To: 6
Junction Right of Morph Passage
Shinespark diagonally over the zoa pit or run through the speed blocks and shinespark after turning around. Entrance condition: {
"comeInStutterShinecharging": {
"minTiles": 2
}
}Requires: "Morph"
"canStutterWaterShineCharge"
{
"or": [
{
"shinespark": {
"frames": 8,
"excessFrames": 2
}
},
{
"and": [
"canMidairShinespark",
{
"shinespark": {
"frames": 5,
"excessFrames": 2
}
}
]
}
]
} |
From: 4
Right Door
To: 6
Junction Right of Morph Passage
Shinespark diagonally over the zoa pit or run through the speed blocks and shinespark after turning around. Entrance condition: {
"comeInShinecharging": {
"length": 6,
"openEnd": 1
}
}Requires: "Morph"
"canWaterShineCharge"
{
"or": [
{
"shinespark": {
"frames": 8,
"excessFrames": 2
}
},
{
"and": [
"canMidairShinespark",
{
"shinespark": {
"frames": 5,
"excessFrames": 2
}
}
]
}
]
}Dev note: This is just a rough estimate of the minimum number of tiles that this runway can represent. It is designed for a skill level that won't be able to use canStutterWaterShineCharge. |
From: 2
Bottom Right Door
To: 3
Top Right Door
Entrance condition: {
"comeInShinecharged": {}
}Requires: "Gravity"
"canShinechargeMovementComplex"
{
"or": [
{
"and": [
"canConsecutiveWallJump",
{
"shineChargeFrames": 100
},
{
"shinespark": {
"frames": 6,
"excessFrames": 0
}
}
]
},
{
"and": [
"HiJump",
"canWallJump",
{
"or": [
{
"shineChargeFrames": 75
},
{
"and": [
"canSpeedyJump",
{
"shineChargeFrames": 70
}
]
}
]
},
{
"shinespark": {
"frames": 6,
"excessFrames": 0
}
}
]
},
{
"and": [
"HiJump",
"canGravityJump",
"canShinechargeMovementTricky",
{
"or": [
{
"shineChargeFrames": 105
},
{
"and": [
"canSpeedyJump",
{
"shineChargeFrames": 90
}
]
}
]
},
{
"shinespark": {
"frames": 6,
"excessFrames": 0
}
}
]
}
]
}Exit condition: {
"leaveWithSpark": {
"position": "top"
}
}Unlocks doors: {"types":["super"],"requires":[]}
{"types":["missiles","powerbomb"],"requires":["never"]} |
From: 2
Bottom Right Door
To: 3
Top Right Door

Entrance condition: {
"comeInShinecharged": {}
}Requires: "Gravity"
"canShinechargeMovementComplex"
{
"or": [
{
"and": [
"canConsecutiveWallJump",
{
"shineChargeFrames": 100
},
{
"shinespark": {
"frames": 6,
"excessFrames": 0
}
}
]
},
{
"and": [
"HiJump",
"canWallJump",
{
"or": [
{
"shineChargeFrames": 85
},
{
"and": [
"canSpeedyJump",
{
"shineChargeFrames": 80
}
]
}
]
},
{
"shinespark": {
"frames": 5,
"excessFrames": 0
}
}
]
},
{
"and": [
"HiJump",
"canGravityJump",
"canShinechargeMovementTricky",
{
"or": [
{
"shineChargeFrames": 115
},
{
"and": [
"canSpeedyJump",
{
"shineChargeFrames": 100
}
]
}
]
},
{
"shinespark": {
"frames": 4,
"excessFrames": 0
}
}
]
}
]
}Exit condition: {
"leaveWithSpark": {
"position": "top"
}
}Unlocks doors: {"types":["super"],"requires":[]}
{"types":["missiles","powerbomb"],"requires":["never"]} |
From: 1
Left Door
To: 4
Platform Below Top Door
Sparking up right will get Samus to bonk on the floating platform which will save some Energy. Entrance condition: {
"comeInShinecharging": {
"length": 13,
"openEnd": 0
}
}Requires: "Gravity"
"canShinechargeMovement"
{
"or": [
{
"shinespark": {
"frames": 40,
"excessFrames": 6
}
},
{
"and": [
"canMidairShinespark",
{
"shinespark": {
"frames": 28,
"excessFrames": 3
}
}
]
}
]
}Dev note: FIXME: It is possible to shinespark through the top door. --Open the top door, shortcharge, turn off gravity while jumping up the left shaft, diagonal spark to the right. |
|
Requires: "Gravity"
{
"canShineCharge": {
"usedTiles": 22,
"openEnd": 1
}
}
{
"or": [
{
"shinespark": {
"frames": 26,
"excessFrames": 5
}
},
{
"and": [
"canMidairShinespark",
{
"shinespark": {
"frames": 20,
"excessFrames": 4
}
}
]
},
{
"and": [
"HiJump",
"canMidairShinespark",
{
"shinespark": {
"frames": 14,
"excessFrames": 5
}
}
]
}
]
} |
From: 1
Top Left Door
To: 2
Bottom Left Door
Entrance condition: {
"comeInShinecharged": {}
}Requires: {
"shineChargeFrames": 70
}
"Gravity"
"canShinechargeMovementComplex"
{
"shinespark": {
"frames": 4,
"excessFrames": 0
}
}Exit condition: {
"leaveWithSpark": {
"position": "top"
}
}Unlocks doors: {"types":["super"],"requires":[]}
{"types":["missiles","powerbomb"],"requires":["never"]} |
From: 1
Top Left Door
To: 2
Bottom Left Door
Entrance condition: {
"comeInShinecharged": {}
}Requires: {
"shineChargeFrames": 130
}
"canShinechargeMovementComplex"
{
"shinespark": {
"frames": 4,
"excessFrames": 0
}
}Exit condition: {
"leaveWithSpark": {
"position": "top"
}
}Unlocks doors: {"types":["super"],"requires":[]}
{"types":["missiles","powerbomb"],"requires":["never"]} |
From: 4
Top Right Door
To: 1
Top Left Door

Entrance condition: {
"comeInShinecharged": {}
}Requires: {
"shineChargeFrames": 85
}
"canShinechargeMovementComplex"
{
"shinespark": {
"frames": 4,
"excessFrames": 0
}
}Exit condition: {
"leaveWithSpark": {
"position": "top"
}
}Unlocks doors: {"types":["super"],"requires":[]}
{"types":["missiles","powerbomb"],"requires":["never"]} |
From: 4
Top Right Door
To: 1
Top Left Door
Entrance condition: {
"comeInShinecharged": {}
}Requires: {
"shineChargeFrames": 75
}
"canShinechargeMovementComplex"
{
"shinespark": {
"frames": 10,
"excessFrames": 0
}
}Exit condition: {
"leaveWithSpark": {
"position": "top"
}
}Unlocks doors: {"types":["super"],"requires":[]}
{"types":["missiles","powerbomb"],"requires":["never"]} |
From: 4
Top Right Door
To: 2
Bottom Left Door
Entrance condition: {
"comeInShinecharged": {}
}Requires: {
"shineChargeFrames": 145
}
"canShinechargeMovementComplex"
{
"shinespark": {
"frames": 4,
"excessFrames": 0
}
}Exit condition: {
"leaveWithSpark": {
"position": "top"
}
}Unlocks doors: {"types":["super"],"requires":[]}
{"types":["missiles","powerbomb"],"requires":["never"]} |
From: 4
Top Right Door
To: 2
Bottom Left Door
Entrance condition: {
"comeInShinecharged": {}
}Requires: {
"shineChargeFrames": 130
}
"canShinechargeMovementComplex"
{
"shinespark": {
"frames": 4,
"excessFrames": 0
}
}Exit condition: {
"leaveWithSpark": {
"position": "top"
}
}Unlocks doors: {"types":["super"],"requires":[]}
{"types":["missiles","powerbomb"],"requires":["never"]} |
|
Requires: {
"shineChargeFrames": 70
}
{
"or": [
{
"shinespark": {
"frames": 20,
"excessFrames": 3
}
},
{
"and": [
"canMidairShinespark",
{
"shinespark": {
"frames": 17,
"excessFrames": 3
}
}
]
},
{
"and": [
"HiJump",
"canMidairShinespark",
{
"shinespark": {
"frames": 13,
"excessFrames": 3
}
}
]
}
]
} |
|

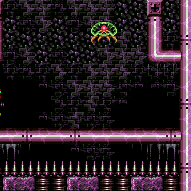
Requires: {
"shineChargeFrames": 60
}
{
"or": [
{
"shinespark": {
"frames": 38,
"excessFrames": 3
}
},
{
"and": [
"canMidairShinespark",
{
"shinespark": {
"frames": 35,
"excessFrames": 3
}
}
]
},
{
"and": [
"HiJump",
"canMidairShinespark",
{
"shinespark": {
"frames": 31,
"excessFrames": 3
}
}
]
}
]
} |
From: 2
Bottom Left Door
To: 1
Top Left Door


Entrance condition: {
"comeInShinecharged": {}
}Requires: {
"shineChargeFrames": 40
}
"canSuitlessMaridia"
{
"or": [
{
"shinespark": {
"frames": 40,
"excessFrames": 8
}
},
{
"and": [
"canMidairShinespark",
{
"shinespark": {
"frames": 37,
"excessFrames": 8
}
}
]
}
]
} |
From: 2
Bottom Left Door
To: 1
Top Left Door


Entrance condition: {
"comeInShinecharged": {}
}Requires: "Gravity"
{
"or": [
{
"and": [
{
"shineChargeFrames": 20
},
{
"shinespark": {
"frames": 40,
"excessFrames": 8
}
}
]
},
{
"and": [
{
"shineChargeFrames": 30
},
"canMidairShinespark",
{
"shinespark": {
"frames": 33,
"excessFrames": 8
}
}
]
}
]
} |
From: 4
Bottom Right Shinecharged
To: 1
Top Left Door
Requires: {
"shineChargeFrames": 60
}
{
"or": [
{
"shinespark": {
"frames": 40,
"excessFrames": 8
}
},
{
"and": [
"canMidairShinespark",
{
"shinespark": {
"frames": 37,
"excessFrames": 8
}
}
]
},
{
"and": [
"Gravity",
"canMidairShinespark",
{
"shinespark": {
"frames": 33,
"excessFrames": 8
}
}
]
}
]
} |
From: 1
Bottom Left Door
To: 2
Top Right Door
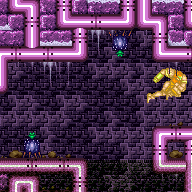
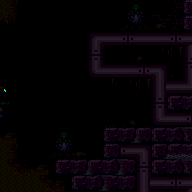
Entrance condition: {
"comeInShinecharged": {}
}Requires: "Gravity"
"canShinechargeMovementComplex"
{
"or": [
{
"and": [
"HiJump",
"canSpeedyJump",
{
"shineChargeFrames": 100
}
]
},
{
"and": [
"HiJump",
{
"shineChargeFrames": 110
}
]
},
{
"and": [
"canWallJump",
{
"shineChargeFrames": 110
}
]
}
]
}
{
"shinespark": {
"frames": 5,
"excessFrames": 0
}
}Exit condition: {
"leaveWithSpark": {
"position": "top"
}
}Unlocks doors: {"types":["super"],"requires":[]}
{"types":["missiles","powerbomb"],"requires":["never"]} |
From: 1
Bottom Left Door
To: 3
Elevator
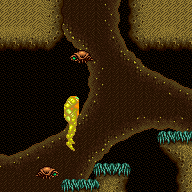
Use Hijump or one walljump on the left before a diagonal spark. Entrance condition: {
"comeInShinecharged": {}
}Requires: "canMidairShinespark"
{
"or": [
{
"and": [
"HiJump",
{
"shineChargeFrames": 35
},
{
"shinespark": {
"frames": 43,
"excessFrames": 11
}
}
]
},
{
"and": [
"HiJump",
{
"or": [
{
"shineChargeFrames": 65
},
{
"and": [
"canSpeedyJump",
{
"shineChargeFrames": 60
}
]
}
]
},
{
"shinespark": {
"frames": 31,
"excessFrames": 3
}
}
]
},
{
"and": [
"HiJump",
{
"shineChargeFrames": 115
},
{
"or": [
{
"shinespark": {
"frames": 21,
"excessFrames": 3
}
},
{
"and": [
"canSpeedyJump",
{
"shinespark": {
"frames": 19,
"excessFrames": 3
}
}
]
}
]
}
]
},
{
"and": [
"canWallJump",
{
"shineChargeFrames": 40
},
{
"shinespark": {
"frames": 43,
"excessFrames": 11
}
}
]
}
]
}Dev note: We don't worry about optimizing energy with the walljump method since it's possible to use staggered walljumps to climb with no energy loss. |
|
Entrance condition: {
"comeInShinecharging": {
"length": 2,
"openEnd": 1
}
}Requires: {
"or": [
{
"shinespark": {
"frames": 31,
"excessFrames": 1
}
},
{
"and": [
"canMidairShinespark",
{
"shinespark": {
"frames": 24,
"excessFrames": 2
}
}
]
},
{
"and": [
"HiJump",
"canMidairShinespark",
{
"shinespark": {
"frames": 20,
"excessFrames": 2
}
}
]
},
{
"and": [
"HiJump",
"canShinechargeMovementComplex",
"canSpeedyJump",
{
"shinespark": {
"frames": 17,
"excessFrames": 2
}
}
]
}
]
} |
|
Either lead the pirate to the left wall or take a hit to gain i-frames to use the full runway to charge a spark To lead a pirate, have it shoot in the direction you want it to go. Then jump overhead and crouch on the other side. Or, jump and aim down while on the sloped tiles just above to lower the camera and wait for the pirate to move to the correct spot. Requires: {
"or": [
"Morph",
"canCarefulJump",
"canCameraManip"
]
}
{
"or": [
{
"getBlueSpeed": {
"usedTiles": 19,
"openEnd": 0
}
},
{
"and": [
{
"enemyDamage": {
"enemy": "Pink Space Pirate (standing)",
"type": "contact",
"hits": 2
}
},
"canUseIFrames",
{
"canShineCharge": {
"usedTiles": 21,
"openEnd": 0
}
},
{
"or": [
{
"and": [
"canMidairShinespark",
"canUseSpeedEchoes",
{
"shinespark": {
"frames": 1,
"excessFrames": 1
}
}
]
},
{
"and": [
"canHorizontalShinespark",
{
"shinespark": {
"frames": 25,
"excessFrames": 20
}
}
]
}
]
}
]
}
]
}Clears obstacles: C Dev note: A leniency laser hit is included for the i-frames method. |
|


Start the dash close to the door to help avoid getting hit by the first Owtch. Spark up while on the right side of the platform. To avoid the Owtch on the platform, it may help to jump on the left side of the platform then jump again and spark midair above the right side. Requires: "Gravity"
"h_shinechargeMaxRunway"
"canShinechargeMovement"
"canCarefulJump"
{
"or": [
{
"shinespark": {
"frames": 90,
"excessFrames": 49
}
},
{
"and": [
"canMidairShinespark",
{
"shinespark": {
"frames": 82,
"excessFrames": 49
}
}
]
}
]
} |
|
Start the dash close to the door to help avoid getting hit by the first Owtch. Spark up while on the right side of the platform. To avoid the Owtch on the platform, it may help to jump on the left side of the platform then jump again and spark midair above the right side. This is possible tankless, but it requires sparking fairly close to the right possible side while facing to the right. Requires: "Gravity"
"h_shinechargeMaxRunway"
"canShinechargeMovement"
{
"or": [
{
"shinespark": {
"frames": 90,
"excessFrames": 11
}
},
{
"and": [
"canMidairShinespark",
{
"shinespark": {
"frames": 82,
"excessFrames": 11
}
}
]
},
{
"and": [
"canShinechargeMovementComplex",
{
"shinespark": {
"frames": 82,
"excessFrames": 12
}
}
]
}
]
} |
From: 2
Bottom Door
To: 4
Water Level Junction
Shortcharge to kill the Owtch or kill it with Plasma, a Power Bomb, or a Charge shot while it is moving to the left. It is possible to wait for the Owtch to be at the far end of the flat portion to have a bit extra room to get blue speed. Shinespark into the floating platform to get up without using too much Energy. Requires: "Gravity"
{
"or": [
"Plasma",
"h_usePowerBomb",
{
"getBlueSpeed": {
"usedTiles": 20,
"gentleUpTiles": 2,
"gentleDownTiles": 4,
"steepUpTiles": 1,
"steepDownTiles": 2,
"openEnd": 1
}
}
]
}
"h_shinechargeMaxRunway"
"canShinechargeMovement"
{
"or": [
{
"shinespark": {
"frames": 14,
"excessFrames": 4
}
},
{
"and": [
"canMidairShinespark",
{
"shinespark": {
"frames": 6,
"excessFrames": 5
}
}
]
}
]
}Dev note: Charge isn't included here, as it's unintuitive enough that killing the Owtch with blue speed will be a bit lower difficulty. Manipulating the Owtch's position is also not expected. This runway assumes a worst-case positioning of the Owtch. |
|
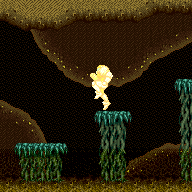
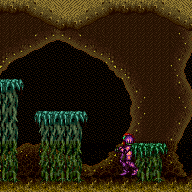
A half tile is considered unusable, in order to be able to quickly spin jump forward after gaining the shinecharge. Requires: "Gravity"
{
"canShineCharge": {
"usedTiles": 15,
"openEnd": 1
}
}
"canShinechargeMovementComplex"
{
"shinespark": {
"frames": 28,
"excessFrames": 0
}
}Exit condition: {
"leaveWithSpark": {
"position": "top"
}
}Dev note: FIXME: If Morph or X-Ray is available, an extra half tile of runway could be gained by standing up inside the last tile of the platform. |
|
Enter with a high shinespark through the door then shoot the opposite door and fall into it. Entrance condition: {
"comeInWithSpark": {
"position": "top"
}
}Requires: "canPrepareForNextRoom"
{
"shinespark": {
"frames": 20,
"excessFrames": 3
}
}
{
"doorUnlockedAtNode": 3
}Unlocks doors: {"types":["super"],"requires":[]}
{"types":["missiles","powerbomb"],"requires":["never"]} |
|

Enter with a high shinespark through the door then shoot the opposite door and fall into it. Entrance condition: {
"comeInWithSpark": {
"position": "top"
}
}Requires: "canPrepareForNextRoom"
{
"shinespark": {
"frames": 20,
"excessFrames": 3
}
}
{
"doorUnlockedAtNode": 1
}Unlocks doors: {"types":["super"],"requires":[]}
{"types":["missiles","powerbomb"],"requires":["never"]} |
|
Spark through the top of the door to avoid bonking. Entrance condition: {
"comeInWithSpark": {
"position": "top"
}
}Requires: "Gravity"
{
"shinespark": {
"frames": 61,
"excessFrames": 6
}
} |
|


Spark through the top of the door to avoid bonking. Entrance condition: {
"comeInWithSpark": {
"position": "top"
}
}Requires: {
"shinespark": {
"frames": 75,
"excessFrames": 7
}
} |
|
Spark through the top of the door to avoid bonking. Entrance condition: {
"comeInWithSpark": {
"position": "top"
}
}Requires: "Gravity"
{
"shinespark": {
"frames": 61,
"excessFrames": 6
}
} |
|


Spark through the top of the door to avoid bonking. Entrance condition: {
"comeInWithSpark": {
"position": "top"
}
}Requires: {
"shinespark": {
"frames": 75,
"excessFrames": 7
}
} |
From: 1
Left Door
To: 2
Right Door
Entrance condition: {
"comeInShinecharged": {}
}Requires: {
"or": [
{
"and": [
"Gravity",
{
"shineChargeFrames": 10
}
]
},
{
"shineChargeFrames": 20
}
]
}
{
"shinespark": {
"frames": 21,
"excessFrames": 0
}
}Exit condition: {
"leaveWithSpark": {
"position": "top"
}
}Unlocks doors: {"types":["super"],"requires":[]}
{"types":["missiles","powerbomb"],"requires":["never"]} |
From: 2
Right Door
To: 1
Left Door
Entrance condition: {
"comeInShinecharged": {}
}Requires: {
"or": [
{
"and": [
"Gravity",
"canShinechargeMovementTricky",
{
"shineChargeFrames": 10
},
{
"shinespark": {
"frames": 21,
"excessFrames": 0
}
}
]
},
{
"and": [
"Gravity",
"canShinechargeMovementComplex",
{
"shineChargeFrames": 30
},
{
"shinespark": {
"frames": 17,
"excessFrames": 0
}
}
]
},
{
"and": [
"canShinechargeMovementTricky",
"canInsaneJump",
{
"shineChargeFrames": 20
},
{
"shinespark": {
"frames": 21,
"excessFrames": 0
}
}
]
},
{
"and": [
{
"shineChargeFrames": 40
},
{
"shinespark": {
"frames": 19,
"excessFrames": 0
}
}
]
}
]
}Exit condition: {
"leaveWithSpark": {
"position": "top"
}
}Unlocks doors: {"types":["super"],"requires":[]}
{"types":["missiles","powerbomb"],"requires":["never"]} |
From: 1
Left Door
To: 2
Right Door
Entrance condition: {
"comeInShinecharged": {}
}Requires: {
"or": [
{
"and": [
"Gravity",
{
"shineChargeFrames": 10
}
]
},
{
"shineChargeFrames": 20
}
]
}
{
"shinespark": {
"frames": 21,
"excessFrames": 0
}
}Exit condition: {
"leaveWithSpark": {
"position": "top"
}
}Unlocks doors: {"types":["super"],"requires":[]}
{"types":["missiles","powerbomb"],"requires":["never"]} |
From: 1
Left Door
To: 6
Junction Above Bomb Blocks
Spark vertically through the bomb blocks. It is still possible to break the blocks while below 30 Energy by jumping before sparking. Entrance condition: {
"comeInShinecharged": {}
}Requires: {
"shineChargeFrames": 25
}
"h_navigateUnderwater"
{
"or": [
{
"shinespark": {
"frames": 10,
"excessFrames": 8
}
},
{
"and": [
"canMidairShinespark",
{
"shinespark": {
"frames": 7,
"excessFrames": 7
}
}
]
},
{
"and": [
"canTrickyJump",
{
"shinespark": {
"frames": 1,
"excessFrames": 1
}
}
]
}
]
}Clears obstacles: A Dev note: This does not require canWaterShineCharge, as you can store the shinecharge before entering the room. Note that it is possible to spark into the ceiling to break the blocks without energy loss, but it has collision oscillation. |
From: 2
Right Door
To: 1
Left Door
Entrance condition: {
"comeInShinecharged": {}
}Requires: {
"or": [
{
"and": [
"Gravity",
{
"shineChargeFrames": 10
}
]
},
{
"shineChargeFrames": 20
}
]
}
{
"shinespark": {
"frames": 21,
"excessFrames": 0
}
}Exit condition: {
"leaveWithSpark": {
"position": "top"
}
}Unlocks doors: {"types":["super"],"requires":[]}
{"types":["missiles","powerbomb"],"requires":["never"]} |
From: 2
Right Door
To: 6
Junction Above Bomb Blocks


Spark vertically through the bomb blocks. It is still possible to break the blocks while below 30 Energy by jumping before sparking. Entrance condition: {
"comeInShinecharged": {}
}Requires: {
"shineChargeFrames": 25
}
"h_navigateUnderwater"
{
"or": [
{
"shinespark": {
"frames": 10,
"excessFrames": 8
}
},
{
"and": [
"canMidairShinespark",
{
"shinespark": {
"frames": 7,
"excessFrames": 7
}
}
]
},
{
"and": [
"canTrickyJump",
{
"shinespark": {
"frames": 1,
"excessFrames": 1
}
}
]
}
]
}Clears obstacles: A Dev note: This does not require canWaterShineCharge, as you can store the shinecharge before entering the room. Note that it is possible to spark into the ceiling to break the blocks without energy loss, but it has collision oscillation. FIXME: Add temporary blue strats. |
From: 7
Bottom Left Shinecharged
To: 6
Junction Above Bomb Blocks


Spark vertically through the bomb blocks. It is still possible to break the blocks while below 30 Energy by jumping before sparking. Requires: {
"shineChargeFrames": 50
}
{
"or": [
{
"shinespark": {
"frames": 10,
"excessFrames": 8
}
},
{
"and": [
"canMidairShinespark",
{
"shinespark": {
"frames": 7,
"excessFrames": 7
}
}
]
},
{
"and": [
"canTrickyJump",
"canMidairShinespark",
{
"shinespark": {
"frames": 1,
"excessFrames": 1
}
}
]
}
]
}Clears obstacles: A Dev note: It is possible to save some energy by sparking into the left wall, but it won't work with midair sparking, which saves the same amount and is easier. Note that it is possible to spark into the ceiling to break the blocks without energy loss, but it has collision oscillation. FIXME: Add temporary blue strats. |
From: 8
Bottom Right Shinecharged
To: 6
Junction Above Bomb Blocks


Spark vertically through the bomb blocks. It is still possible to break the blocks while below 30 Energy by jumping before sparking. Requires: {
"shineChargeFrames": 50
}
{
"or": [
{
"shinespark": {
"frames": 10,
"excessFrames": 8
}
},
{
"and": [
"canMidairShinespark",
{
"shinespark": {
"frames": 7,
"excessFrames": 7
}
}
]
},
{
"and": [
"canTrickyJump",
"canMidairShinespark",
{
"shinespark": {
"frames": 1,
"excessFrames": 1
}
}
]
}
]
}Clears obstacles: A Dev note: It is possible to save some energy by sparking into the left wall, but it won't work with midair sparking, which saves the same amount and is easier. Note that it is possible to spark into the ceiling to break the blocks without energy loss, but it has collision oscillation. FIXME: Add temporary blue strats. |
|

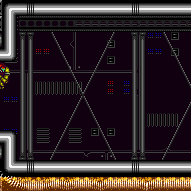
Spark through the top of the door to avoid the platforms. Entrance condition: {
"comeInWithSpark": {
"position": "top"
}
}Requires: {
"shinespark": {
"frames": 112,
"excessFrames": 16
}
}Dev note: FIXME: Add strats that come in charged and spark to save energy. |
|
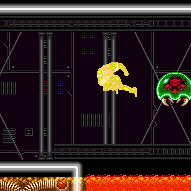
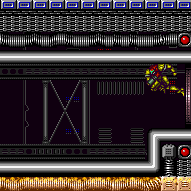
Spark through the top of the door to avoid the platforms. Entrance condition: {
"comeInWithSpark": {
"position": "top"
}
}Requires: {
"shinespark": {
"frames": 112,
"excessFrames": 35
}
}Dev note: FIXME: Add strats that come in charged and spark to save energy. |
From: 2
Left Door
To: 3
Bottom Right Door
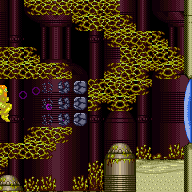

Perform a small spin jump and fire a well-timed Wave shot to break the blocks. Then activate the shinespark mid-air. Entrance condition: {
"comeInShinecharged": {}
}Requires: "Wave"
{
"shineChargeFrames": 10
}
"canShinechargeMovementTricky"
{
"shinespark": {
"frames": 22,
"excessFrames": 0
}
}Exit condition: {
"leaveWithSpark": {
"position": "top"
}
}Unlocks doors: {"types":["ammo"],"requires":["never"]} |
From: 3
Bottom Right Door
To: 1
Top Right Doorway
Entrance condition: {
"comeInShinecharging": {
"length": 0,
"openEnd": 1
}
}Requires: "canConsecutiveWallJump"
"canShinechargeMovementTricky"
{
"shineChargeFrames": 176
}
{
"shinespark": {
"frames": 5,
"excessFrames": 0
}
}Exit condition: {
"leaveWithSpark": {
"position": "top"
}
} |
From: 3
Bottom Right Door
To: 2
Left Door

Use single well-timed mid-air Wave shot to clear the seaweed quickly. Entrance condition: {
"comeInShinecharged": {}
}Requires: {
"shineChargeFrames": 40
}
"Wave"
"canShinechargeMovementTricky"
{
"shinespark": {
"frames": 18,
"excessFrames": 0
}
}Exit condition: {
"leaveWithSpark": {
"position": "top"
}
}Unlocks doors: {"types":["ammo"],"requires":["never"]} |
From: 1
Left Door
To: 4
Top of Shaft Without Acid Triggered
Entrance condition: {
"comeInShinecharged": {}
}Requires: {
"shineChargeFrames": 15
}
"canPrepareForNextRoom"
"canMidairShinespark"
{
"shinespark": {
"frames": 57,
"excessFrames": 13
}
} |
From: 2
Left Door
To: 1
Top Right Door
Entrance condition: {
"comeInWithSpark": {
"position": "top"
}
}Requires: {
"shinespark": {
"frames": 43,
"excessFrames": 19
}
} |