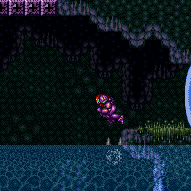
canSpeedyJump (Medium)
The ability to use dash speed with Speed Booster to jump higher and possibly further. Without HiJump, it is also possible to use a short speedy jump to jump lower; this has fewer applications, but can be useful, i.e. to jump further if there is a low ceiling.
Dependencies: canDash
Strats ()
|
Requires: {
"canShineCharge": {
"usedTiles": 23,
"openEnd": 2
}
}
"canShinechargeMovementTricky"
{
"or": [
"canHorizontalDamageBoost",
"canLateralMidAirMorph"
]
}
{
"enemyDamage": {
"enemy": "Boyon",
"type": "contact",
"hits": 1
}
}
{
"or": [
{
"shinespark": {
"frames": 121,
"excessFrames": 6
}
},
{
"and": [
"canSpeedyJump",
{
"shinespark": {
"frames": 118,
"excessFrames": 6
}
}
]
},
{
"and": [
"HiJump",
{
"shinespark": {
"frames": 117,
"excessFrames": 6
}
}
]
},
{
"and": [
"HiJump",
"canSpeedyJump",
{
"shinespark": {
"frames": 113,
"excessFrames": 6
}
}
]
}
]
} |
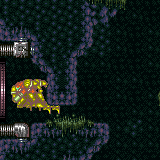
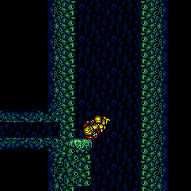
From: 2
Bottom Left Door
To: 3
Item


Starting from the door, use a 1-tap shortcharge to gain a shinecharge running to the right. Use the remaining runway to gain speed to clear the pits with a single jump. Spark mid-air to conserve energy. Requires: {
"obstaclesCleared": [
"A"
]
}
"canShinechargeMovementComplex"
{
"canShineCharge": {
"usedTiles": 25,
"openEnd": 2
}
}
{
"or": [
{
"shinespark": {
"frames": 121,
"excessFrames": 6
}
},
{
"and": [
"canSpeedyJump",
{
"shinespark": {
"frames": 118,
"excessFrames": 6
}
}
]
},
{
"and": [
"HiJump",
{
"shinespark": {
"frames": 117,
"excessFrames": 6
}
}
]
},
{
"and": [
"HiJump",
"canSpeedyJump",
{
"shinespark": {
"frames": 113,
"excessFrames": 6
}
}
]
}
]
} |
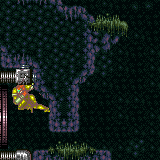
From: 2
Bottom Left Door
To: 3
Item


Requires: "canTrivialUseFrozenEnemies"
"h_shinechargeMaxRunway"
"canSpeedyJump"
"canShinechargeMovementComplex"
{
"or": [
{
"shinespark": {
"frames": 111,
"excessFrames": 6
}
},
{
"and": [
"HiJump",
{
"shinespark": {
"frames": 103,
"excessFrames": 6
}
}
]
}
]
} |
|

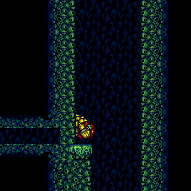
Starting from the door, use a 1-tap shortcharge to gain a shinecharge running to the right. Use the remaining runway to gain speed to clear the pits with a single jump, using Screw Attack to avoid Boyon damage. Then spark vertically or diagonally. Requires: "canShinechargeMovementComplex"
"canCarefulJump"
{
"canShineCharge": {
"usedTiles": 23,
"openEnd": 2
}
}
"ScrewAttack"
{
"or": [
{
"shinespark": {
"frames": 121,
"excessFrames": 6
}
},
{
"and": [
"canSpeedyJump",
{
"shinespark": {
"frames": 118,
"excessFrames": 6
}
}
]
},
{
"and": [
"HiJump",
{
"shinespark": {
"frames": 117,
"excessFrames": 6
}
}
]
},
{
"and": [
"HiJump",
"canSpeedyJump",
{
"shinespark": {
"frames": 113,
"excessFrames": 6
}
}
]
}
]
}Dev note: There could be another tile if the door is open, but it shouldn't matter at this runway length with canCarefulJump. |
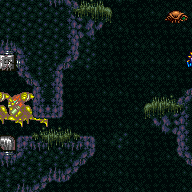
From: 4
Top Junction (Right of Spikes)
To: 1
Top Left Door
Requires: "h_storedSpark"
"canDash"
{
"or": [
{
"shinespark": {
"frames": 44,
"excessFrames": 7
}
},
{
"and": [
"canShinechargeMovementTricky",
{
"shinespark": {
"frames": 38,
"excessFrames": 0
}
}
]
},
{
"and": [
"canShinechargeMovementTricky",
"canSpeedyJump",
{
"shinespark": {
"frames": 35,
"excessFrames": 0
}
}
]
}
]
} |
|
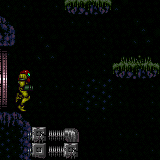
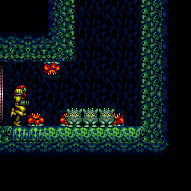
Use the runway to the right of the Boyons to gain a shinecharge. If the rightmost Boyon is cleared, an extra half tile of runway is available. Requires: {
"or": [
{
"canShineCharge": {
"usedTiles": 14,
"openEnd": 0
}
},
{
"and": [
{
"or": [
{
"enemyKill": {
"enemies": [
[
"Boyon"
]
]
}
},
{
"obstaclesCleared": [
"A"
]
}
]
},
{
"canShineCharge": {
"usedTiles": 14,
"openEnd": 1
}
}
]
}
]
}
"canMidairShinespark"
{
"or": [
{
"shinespark": {
"frames": 121,
"excessFrames": 6
}
},
{
"and": [
{
"shinespark": {
"frames": 117,
"excessFrames": 6
}
},
"HiJump"
]
},
{
"and": [
{
"shinespark": {
"frames": 112,
"excessFrames": 6
}
},
"HiJump",
"canSpeedyJump"
]
},
{
"and": [
"canFastWallJumpClimb",
{
"shinespark": {
"frames": 93,
"excessFrames": 6
}
}
]
},
{
"and": [
"HiJump",
"canFastWallJumpClimb",
{
"shinespark": {
"frames": 83,
"excessFrames": 6
}
}
]
}
]
} |
From: 5
Bottom Junction (Right of Boyons)
To: 3
Item
Requires: "h_storedSpark"
{
"or": [
{
"shinespark": {
"frames": 121,
"excessFrames": 6
}
},
{
"and": [
{
"shinespark": {
"frames": 117,
"excessFrames": 6
}
},
"HiJump"
]
},
{
"and": [
{
"shinespark": {
"frames": 112,
"excessFrames": 6
}
},
"HiJump",
"canSpeedyJump"
]
}
]
}Dev note: There is no point in using a blue suit to spark or sparking at the bottom if Samus can wall jump. |
From: 1
Top Left Door
To: 1
Top Left Door
Overload the scroll PLMs which are one tile to the left of the bomb blocks, then pass through them. Refill at the ship, then return. Entrance condition: {
"comeInWithGMode": {
"mode": "any",
"morphed": false
}
}Requires: "canComplexGMode"
{
"refill": [
"Energy",
"Missile",
"Super",
"PowerBomb"
]
}
{
"or": [
"SpaceJump",
{
"and": [
"HiJump",
"canSpringBallJumpMidAir"
]
},
"canTrickyWallJump",
{
"and": [
"canSpeedyJump",
{
"or": [
"HiJump",
"canSpringBallJumpMidAir",
"canWallJump"
]
}
]
},
{
"and": [
"h_shinechargeMaxRunway",
"canMidairShinespark",
{
"or": [
{
"shinespark": {
"frames": 29,
"excessFrames": 1
}
},
{
"and": [
"canShinechargeMovementComplex",
"h_speedJump",
{
"shinespark": {
"frames": 22,
"excessFrames": 1
}
}
]
},
{
"and": [
"HiJump",
{
"shinespark": {
"frames": 17,
"excessFrames": 11
}
}
]
}
]
}
]
}
]
} |
|

Requires: "canSpeedyJump" "canCarefulJump" "h_avoidScrewStuck" Clears obstacles: A |
|
Requires: "canSpeedyJump" "HiJump" "canTrickySpringBallJump" |
|


Finish a shinecharge right of the ship, then run left and jump from the hill left of the ship. Turnaround to prevent moving too far horizontally, then spark diagonally at the peak of the jump. With a higher speed, Samus can jump higher and lose less energy, but the shinecharge is tighter. Requires: "h_shinechargeMaxRunway"
"canSpeedyJump"
"canMidairShinespark"
{
"or": [
{
"shinespark": {
"frames": 29,
"excessFrames": 1
}
},
{
"and": [
"canShinechargeMovementComplex",
{
"shinespark": {
"frames": 22,
"excessFrames": 1
}
}
]
}
]
}
{
"or": [
{
"obstaclesCleared": [
"A"
]
},
"h_usePowerBomb",
"ScrewAttack"
]
}Clears obstacles: A |
|
Requires: {
"or": [
"SpaceJump",
"canLongIBJ",
"canSpeedyJump",
{
"and": [
"HiJump",
"canSpringBallJumpMidAir"
]
},
{
"and": [
"HiJump",
"canJumpIntoIBJ"
]
}
]
} |
|


Requires: "HiJump"
{
"or": [
{
"obstaclesCleared": [
"A"
]
},
"h_bombThings",
{
"and": [
"h_avoidScrewStuck",
{
"or": [
"canTunnelCrawl",
"canSpeedyJump",
{
"and": [
"canXRayStandUp",
"Morph"
]
}
]
}
]
}
]
}Clears obstacles: A Dev note: HiJump alone can only reach the lower bomb block. |
From: 7
Junction (Left Ledge Below Bomb Blocks)
To: 1
Top Left Door
Requires: "canHorizontalMidairShinespark"
"h_storedSpark"
{
"shinespark": {
"frames": 54,
"excessFrames": 43
}
}
{
"or": [
"canWallJump",
"SpaceJump",
{
"and": [
"HiJump",
{
"or": [
"canSpeedyJump",
"canInsaneJump"
]
}
]
}
]
}Clears obstacles: A Dev note: This can be done with HiJump alone; it requires a precise spin jump and then a very precise horizontal spark at the top of the jump. |
From: 3
Bottom Left Horizontal Door
To: 2
Middle Left Door

If needing to spark low through the door, hold angle-down while activating the spark, in order to avoid getting extra height from a crouch jump. Entrance condition: {
"comeInShinecharged": {}
}Requires: {
"or": [
{
"shineChargeFrames": 150
},
{
"and": [
"canSpeedyJump",
{
"shineChargeFrames": 145
}
]
}
]
}
"canShinechargeMovementComplex"
"HiJump"
"Morph"
{
"shinespark": {
"frames": 4,
"excessFrames": 0
}
}Exit condition: {
"leaveWithSpark": {
"position": "bottom"
}
}Unlocks doors: {"types":["super"],"requires":[]}
{"types":["missiles","powerbomb"],"requires":["never"]} |
From: 3
Bottom Left Horizontal Door
To: 2
Middle Left Door
Entrance condition: {
"comeInShinecharged": {}
}Requires: {
"or": [
{
"shineChargeFrames": 160
},
{
"and": [
"canSpeedyJump",
{
"shineChargeFrames": 155
}
]
}
]
}
"canShinechargeMovementComplex"
"HiJump"
"Morph"
{
"shinespark": {
"frames": 3,
"excessFrames": 0
}
}Exit condition: {
"leaveWithSpark": {
"position": "top"
}
}Unlocks doors: {"types":["super"],"requires":[]}
{"types":["missiles","powerbomb"],"requires":["never"]} |
From: 6
Bottom Right Door (On the Left Shaft)
To: 2
Middle Left Door

Entrance condition: {
"comeInShinecharged": {}
}Requires: {
"or": [
{
"shineChargeFrames": 155
},
{
"and": [
"canSpeedyJump",
{
"shineChargeFrames": 150
}
]
}
]
}
"canShinechargeMovementComplex"
"HiJump"
"canWallJump"
"Morph"
{
"shinespark": {
"frames": 5,
"excessFrames": 0
}
}Exit condition: {
"leaveWithSpark": {
"position": "bottom"
}
}Unlocks doors: {"types":["super"],"requires":[]}
{"types":["missiles","powerbomb"],"requires":["never"]} |
From: 6
Bottom Right Door (On the Left Shaft)
To: 2
Middle Left Door
Entrance condition: {
"comeInShinecharged": {}
}Requires: {
"or": [
{
"shineChargeFrames": 165
},
{
"and": [
"canSpeedyJump",
{
"shineChargeFrames": 160
}
]
}
]
}
"canShinechargeMovementComplex"
"HiJump"
"canWallJump"
"Morph"
{
"shinespark": {
"frames": 3,
"excessFrames": 0
}
}Exit condition: {
"leaveWithSpark": {
"position": "top"
}
}Unlocks doors: {"types":["super"],"requires":[]}
{"types":["missiles","powerbomb"],"requires":["never"]} |
|
Run for 7 tiles for enough speed to Spring Ball from the submerged platform up to the platform enemy, above the water. Turning on Speed Booster midjump, after running 7+ tiles, will automatically hit the run speed requirement. It is not necessary to enter the water to clear the rightmost Choot. Requires: "canTrickyJump"
{
"or": [
{
"disableEquipment": "SpeedBooster"
},
"canTrickyDashJump"
]
}
"canSpeedyJump"
"canSpringBallBounce"
"canMockball"
"SpaceJump" |
|


Using an exact runway size of 7 tiles; use extremely precise, controlled Spring Ball bounces to cross the ocean. 7 tiles of runspeed can freely be achieved by requipping SpeedBooster after reaching the max normal run speed. Mockball down the submerged ramp and begin Spring Ball bouncing either above the water, or under water using the platforms. The final Spring Ball bounce must be on the left edge of the rightmost underwater platform. While the bounce is occuring, setup a mid-air Spring Ball Jump to escape the water and reach the door. Requires: {
"notable": "Speedy Spring Ball Bounce to the Door"
}
"canInsaneJump"
"canSpeedyJump"
"canSpringBallBounce"
"canDoubleSpringBallJumpMidAir"
"canMockball" |
|

Requires: "Gravity"
{
"or": [
{
"and": [
"canTrickySpringBallJump",
{
"or": [
"canLateralMidAirMorph",
"canTrickyJump"
]
}
]
},
{
"and": [
"HiJump",
"canWallJump",
{
"or": [
"canDash",
"canTrickyJump"
]
}
]
},
{
"and": [
"HiJump",
"canSpringBallJumpMidAir"
]
},
{
"and": [
"HiJump",
"canSpeedyJump"
]
}
]
}
{
"obstaclesNotCleared": [
"A",
"B",
"C"
]
} |
From: 4
Lower Section - Top Right Door
To: 4
Lower Section - Top Right Door
Entrance condition: {
"comeInWithGMode": {
"mode": "direct",
"morphed": false
}
}Requires: {
"or": [
"SpaceJump",
"canWallJump",
{
"and": [
"canLongIBJ",
"Gravity"
]
},
{
"and": [
"HiJump",
"canJumpIntoIBJ"
]
},
{
"and": [
"canLongIBJ",
"canBombHorizontally",
"canResetFallSpeed"
]
},
{
"and": [
"canJumpIntoIBJ",
"canLongIBJ",
"canTrickyJump"
]
},
{
"and": [
"HiJump",
{
"or": [
"canSpeedyJump",
"canSpringBallJumpMidAir"
]
}
]
},
{
"and": [
"canTrickyJump",
"canPreciseGrapple"
]
},
{
"and": [
"Gravity",
"canMidairShinespark",
"h_shinechargeMaxRunway",
{
"shinespark": {
"frames": 35,
"excessFrames": 10
}
}
]
}
]
}Exit condition: {
"leaveWithGMode": {
"morphed": false
}
} |
From: 4
Lower Section - Top Right Door
To: 8
Bridge Right Door (Leads to Bottom Right Door)
Climb up 1 screen. Entrance condition: {
"comeInWithGMode": {
"mode": "direct",
"morphed": false
}
}Requires: "canComplexGMode"
"canGModeXRayClimb"
{
"notable": "Get Inside the Bridge"
}
"canSkipDoorLock"
{
"or": [
"canArtificialMorph",
"canWallJump",
"SpaceJump",
{
"and": [
"canLongIBJ",
"Gravity"
]
},
{
"and": [
"HiJump",
"canJumpIntoIBJ"
]
},
{
"and": [
"canLongIBJ",
"canBombHorizontally",
"canResetFallSpeed"
]
},
{
"and": [
"canJumpIntoIBJ",
"canLongIBJ",
"canTrickyJump"
]
},
{
"and": [
"HiJump",
{
"or": [
"canSpeedyJump",
"canSpringBallJumpMidAir"
]
}
]
},
{
"and": [
"canTrickyJump",
"canPreciseGrapple"
]
},
{
"and": [
"Gravity",
"canMidairShinespark",
"h_shinechargeMaxRunway",
{
"shinespark": {
"frames": 35,
"excessFrames": 10
}
}
]
}
]
}
"canXRayClimb" |
From: 4
Lower Section - Top Right Door
To: 8
Bridge Right Door (Leads to Bottom Right Door)

Enter with G-mode direct, back up to between 1 and 6 pixels from the door transition, and activate X-ray to get very deep stuck in the door. Climb up 1 screen, and perform a turnaround buffered spin-jump away from the door to trigger the transition, bypassing any lock on the door. Entrance condition: {
"comeInWithGMode": {
"mode": "direct",
"morphed": false
}
}Requires: "canComplexGMode"
"canGModeXRayClimb"
{
"notable": "Get Inside the Bridge"
}
{
"or": [
"canArtificialMorph",
"canWallJump",
"SpaceJump",
{
"and": [
"canLongIBJ",
"Gravity"
]
},
{
"and": [
"HiJump",
"canJumpIntoIBJ"
]
},
{
"and": [
"canLongIBJ",
"canBombHorizontally",
"canResetFallSpeed"
]
},
{
"and": [
"canJumpIntoIBJ",
"canLongIBJ",
"canTrickyJump"
]
},
{
"and": [
"HiJump",
{
"or": [
"canSpeedyJump",
"canSpringBallJumpMidAir"
]
}
]
},
{
"and": [
"canTrickyJump",
"canPreciseGrapple"
]
},
{
"and": [
"Gravity",
"canMidairShinespark",
"h_shinechargeMaxRunway",
{
"shinespark": {
"frames": 35,
"excessFrames": 10
}
}
]
}
]
}
"canXRayClimb"Bypasses door shell: true |
From: 4
Lower Section - Top Right Door
To: 12
Top Junction

Climb up 2 screens. Entrance condition: {
"comeInWithGMode": {
"mode": "direct",
"morphed": false
}
}Requires: "canGModeXRayClimb"
{
"or": [
"canArtificialMorph",
"canWallJump",
"SpaceJump",
{
"and": [
"canLongIBJ",
"Gravity"
]
},
{
"and": [
"HiJump",
"canJumpIntoIBJ"
]
},
{
"and": [
"canLongIBJ",
"canBombHorizontally",
"canResetFallSpeed"
]
},
{
"and": [
"canJumpIntoIBJ",
"canLongIBJ",
"canTrickyJump"
]
},
{
"and": [
"HiJump",
{
"or": [
"canSpeedyJump",
"canSpringBallJumpMidAir"
]
}
]
},
{
"and": [
"canTrickyJump",
"canPreciseGrapple"
]
},
{
"and": [
"Gravity",
"canMidairShinespark",
"h_shinechargeMaxRunway",
{
"shinespark": {
"frames": 35,
"excessFrames": 10
}
}
]
}
]
}
"canLongXRayClimb"Clears obstacles: R-Mode |
From: 5
Lower Section - Bottom Right Door
To: 4
Lower Section - Top Right Door

Requires: "HiJump" "canSpeedyJump" |
|

Requires: "canCarefulJump"
"h_shinechargeMaxRunway"
"canShinechargeMovement"
{
"or": [
{
"shinespark": {
"frames": 36,
"excessFrames": 2
}
},
{
"and": [
"canShinechargeMovement",
{
"shinespark": {
"frames": 28,
"excessFrames": 3
}
}
]
},
{
"and": [
"canMidairShinespark",
{
"shinespark": {
"frames": 20,
"excessFrames": 2
}
}
]
},
{
"and": [
"HiJump",
"canMidairShinespark",
{
"shinespark": {
"frames": 17,
"excessFrames": 3
}
}
]
},
{
"and": [
"HiJump",
"canSpeedyJump",
"canShinechargeMovementComplex",
{
"shinespark": {
"frames": 9,
"excessFrames": 2
}
}
]
}
]
} |
|
Requires: "HiJump" "canSpeedyJump" |
|

Requires: "canSpeedyJump" "canLateralMidAirMorph" "canCarefulJump" |
From: 2
Right Door
To: 1
Left Door
Jump and diagonally spark to the invisible platform. There is a small pixel range which lands on the platform and does not touch the boulder. It is possible to do this even below 29 Energy. It requires a last frame jump and then 4 frame spark window. It is more lenient with SpeedBooster. Requires: "h_storedSpark"
{
"or": [
{
"shinespark": {
"frames": 2,
"excessFrames": 0
}
},
{
"and": [
{
"shinespark": {
"frames": 2,
"excessFrames": 2
}
},
{
"or": [
"canMoonwalk",
"canMorphTurnaround"
]
},
{
"or": [
{
"and": [
"canTrickyJump",
"canSpeedyJump"
]
},
"canInsaneJump"
]
}
]
}
]
} |
From: 1
Bottom Left Door
To: 3
Hidden Ceiling Item
Does not require a shinespark. You can shoot the block, then just run and jump. Requires: "canSpeedyJump" "canCarefulJump" |
From: 10
Right Etecoon Shaft - Bottom Left Door
To: 9
Right Etecoon Shaft - Top Left Door
Entrance condition: {
"comeInShinecharging": {
"length": 8,
"openEnd": 0
}
}Requires: {
"or": [
{
"shinespark": {
"frames": 75,
"excessFrames": 5
}
},
{
"and": [
"canMidairShinespark",
{
"shinespark": {
"frames": 68,
"excessFrames": 8
}
}
]
},
{
"and": [
"HiJump",
"canMidairShinespark",
{
"shinespark": {
"frames": 64,
"excessFrames": 8
}
}
]
},
{
"and": [
"HiJump",
"canSpeedyJump",
"canMidairShinespark",
{
"shinespark": {
"frames": 60,
"excessFrames": 8
}
}
]
}
]
} |
From: 10
Right Etecoon Shaft - Bottom Left Door
To: 9
Right Etecoon Shaft - Top Left Door


Requires: "h_storedSpark"
{
"or": [
{
"shinespark": {
"frames": 68,
"excessFrames": 8
}
},
{
"and": [
"HiJump",
{
"shinespark": {
"frames": 64,
"excessFrames": 8
}
}
]
},
{
"and": [
"HiJump",
"canSpeedyJump",
{
"shinespark": {
"frames": 60,
"excessFrames": 8
}
}
]
}
]
} |
Direct G-Mode, Blue Suit Spark, Overload PLMs with Chozo Ball Item
(Expert+)
Green Brinstar Main Shaft
From: 10
Right Etecoon Shaft - Bottom Left Door
To: 13
Below Power Bomb Blocks - Main Junction
Spark up the shaft, then shoot the Chozo ball to overload PLMs. Then go down, through the bomb blocks and tunnel, then exit G-mode. Entrance condition: {
"comeInWithGMode": {
"mode": "direct",
"morphed": false
}
}Requires: "Morph"
{
"blueSuitShinecharge": {}
}
{
"or": [
{
"shinespark": {
"frames": 68,
"excessFrames": 8
}
},
{
"and": [
"HiJump",
{
"shinespark": {
"frames": 64,
"excessFrames": 8
}
}
]
},
{
"and": [
"HiJump",
"canSpeedyJump",
{
"shinespark": {
"frames": 60,
"excessFrames": 8
}
}
]
}
]
} |
From: 10
Right Etecoon Shaft - Bottom Left Door
To: 14
Right Etecoon Shaft - Wall Jump Checkpoint
With HiJump, spark diagonally to the left in order to bonk and stop the spark early; otherwise a vertical spark is needed. Entrance condition: {
"comeInShinecharging": {
"length": 8,
"openEnd": 0
}
}Requires: {
"or": [
{
"shinespark": {
"frames": 75,
"excessFrames": 64
}
},
{
"and": [
"canMidairShinespark",
{
"shinespark": {
"frames": 68,
"excessFrames": 57
}
}
]
},
{
"and": [
"HiJump",
"canMidairShinespark",
{
"shinespark": {
"frames": 20,
"excessFrames": 13
}
}
]
},
{
"and": [
"HiJump",
"canSpeedyJump",
"canMidairShinespark",
{
"shinespark": {
"frames": 16,
"excessFrames": 13
}
}
]
}
]
} |
From: 10
Right Etecoon Shaft - Bottom Left Door
To: 14
Right Etecoon Shaft - Wall Jump Checkpoint
With a runway of at least 4 tiles in the adjacent room, jump just before hitting the right wall then spark diagonally to the left at the top of the jump. Entrance condition: {
"comeInRunning": {
"speedBooster": "yes",
"minTiles": 3.4375
}
}Requires: "canSpeedyJump"
{
"useFlashSuit": {}
}
{
"shinespark": {
"frames": 21,
"excessFrames": 12
}
}Dev note: FIXME: This could be done with a blue suit but is not possible to model currently. |
From: 10
Right Etecoon Shaft - Bottom Left Door
To: 14
Right Etecoon Shaft - Wall Jump Checkpoint
With a runway of at least 12 tiles in the adjacent room, Samus should always be able to jump high enough if she jumps just before hitting the right wall. Entrance condition: {
"comeInRunning": {
"speedBooster": "yes",
"minTiles": 12
}
}Requires: "canSpeedyJump" "canTrickySpringBallJump" |
From: 10
Right Etecoon Shaft - Bottom Left Door
To: 14
Right Etecoon Shaft - Wall Jump Checkpoint
Run into the room and jump just before hitting the right wall. Requires at least 3 tiles (with no open end) in the adjacent room, but is easier with more. Entrance condition: {
"comeInRunning": {
"speedBooster": "yes",
"minTiles": 2.4375
}
}Requires: "canSpeedyJump" "canCarefulJump" "HiJump" |
From: 10
Right Etecoon Shaft - Bottom Left Door
To: 14
Right Etecoon Shaft - Wall Jump Checkpoint
Entrance condition: {
"comeInRunning": {
"speedBooster": "yes",
"minTiles": 3.4375
}
}Requires: "canSpeedyJump" "HiJump" |
From: 10
Right Etecoon Shaft - Bottom Left Door
To: 14
Right Etecoon Shaft - Wall Jump Checkpoint
Requires: "HiJump"
"h_storedSpark"
{
"or": [
{
"shinespark": {
"frames": 20,
"excessFrames": 13
}
},
{
"and": [
"canSpeedyJump",
{
"shinespark": {
"frames": 16,
"excessFrames": 13
}
}
]
}
]
} |
From: 14
Right Etecoon Shaft - Wall Jump Checkpoint
To: 9
Right Etecoon Shaft - Top Left Door
Requires: "h_storedSpark"
{
"or": [
{
"shinespark": {
"frames": 49,
"excessFrames": 8
}
},
{
"and": [
"HiJump",
{
"shinespark": {
"frames": 45,
"excessFrames": 7
}
}
]
},
{
"and": [
"HiJump",
"canSpeedyJump",
{
"shinespark": {
"frames": 43,
"excessFrames": 8
}
}
]
}
]
} |
|
Requires: {
"or": [
"SpaceJump",
"canIBJ",
"HiJump",
"canSpringBallJumpMidAir",
{
"and": [
"canSpeedyJump",
"canWallJump"
]
}
]
} |
From: 1
Left Side - Top Door
To: 16
Direct G-Mode Morph (Top Item, Above Hopper Pit)
Roll directly through the bomb block on entry without rolling much in the morph tunnel to overload PLMs as little as possible. Entrance condition: {
"comeInWithGMode": {
"mode": "direct",
"morphed": false
}
}Requires: "h_blueSuitGMode"
"Morph"
{
"or": [
"SpaceJump",
"canWallJump",
{
"and": [
"HiJump",
"canSpeedyJump"
]
},
{
"and": [
"HiJump",
"canSpringBallJumpMidAir"
]
},
"canTrickyUseFrozenEnemies",
{
"and": [
"canDash",
"canTrickyJump",
"canHorizontalDamageBoost",
{
"enemyDamage": {
"enemy": "Zeb",
"type": "contact",
"hits": 1
}
}
]
},
{
"and": [
{
"or": [
{
"canShineCharge": {
"usedTiles": 24,
"openEnd": 1
}
},
{
"blueSuitShinecharge": {}
}
]
},
{
"shinespark": {
"frames": 9,
"excessFrames": 3
}
}
]
}
]
} |
From: 2
Right Side - Top Door
To: 16
Direct G-Mode Morph (Top Item, Above Hopper Pit)
Entrance condition: {
"comeInWithGMode": {
"mode": "direct",
"morphed": false
}
}Requires: "Morph"
{
"or": [
"SpaceJump",
"canWallJump",
"canPreciseGrapple",
{
"and": [
"HiJump",
"canSpeedyJump"
]
},
{
"and": [
"HiJump",
"canSpringBallJumpMidAir"
]
},
"canTrickyUseFrozenEnemies",
{
"and": [
"canDash",
"canTrickyJump",
"canHorizontalDamageBoost",
{
"enemyDamage": {
"enemy": "Zeb",
"type": "contact",
"hits": 1
}
}
]
},
{
"and": [
{
"or": [
{
"canShineCharge": {
"usedTiles": 24,
"openEnd": 1
}
},
{
"blueSuitShinecharge": {}
}
]
},
{
"shinespark": {
"frames": 9,
"excessFrames": 3
}
}
]
}
]
} |
From: 3
Left Side - Top Middle Door (Main Entrance)
To: 16
Direct G-Mode Morph (Top Item, Above Hopper Pit)
Entrance condition: {
"comeInWithGMode": {
"mode": "direct",
"morphed": false
}
}Requires: "Morph"
{
"or": [
"SpaceJump",
"canWallJump",
"canPreciseGrapple",
{
"and": [
"HiJump",
"canSpeedyJump"
]
},
{
"and": [
"HiJump",
"canSpringBallJumpMidAir"
]
},
"canTrickyUseFrozenEnemies",
{
"and": [
"canDash",
"canTrickyJump",
"canHorizontalDamageBoost",
{
"enemyDamage": {
"enemy": "Zeb",
"type": "contact",
"hits": 1
}
}
]
},
{
"and": [
{
"or": [
{
"canShineCharge": {
"usedTiles": 24,
"openEnd": 1
}
},
{
"blueSuitShinecharge": {}
}
]
},
{
"shinespark": {
"frames": 9,
"excessFrames": 3
}
}
]
}
]
} |
From: 6
Right Side - Top Middle Door
To: 16
Direct G-Mode Morph (Top Item, Above Hopper Pit)
Entrance condition: {
"comeInWithGMode": {
"mode": "direct",
"morphed": false
}
}Requires: "Morph"
{
"or": [
"SpaceJump",
"canWallJump",
"canPreciseGrapple",
{
"and": [
"HiJump",
"canSpeedyJump"
]
},
{
"and": [
"HiJump",
"canSpringBallJumpMidAir"
]
},
"canTrickyUseFrozenEnemies",
{
"and": [
"canDash",
"canTrickyJump",
"canHorizontalDamageBoost",
{
"enemyDamage": {
"enemy": "Zeb",
"type": "contact",
"hits": 1
}
}
]
},
{
"and": [
{
"or": [
{
"canShineCharge": {
"usedTiles": 24,
"openEnd": 1
}
},
{
"blueSuitShinecharge": {}
}
]
},
{
"shinespark": {
"frames": 9,
"excessFrames": 3
}
}
]
}
]
} |
From: 8
Right Side - Bottom Door
To: 16
Direct G-Mode Morph (Top Item, Above Hopper Pit)
Entrance condition: {
"comeInWithGMode": {
"mode": "direct",
"morphed": false
}
}Requires: "Morph"
{
"or": [
"SpaceJump",
"canWallJump",
"canPreciseGrapple",
{
"and": [
"HiJump",
"canSpeedyJump"
]
},
{
"and": [
"HiJump",
"canSpringBallJumpMidAir"
]
},
"canTrickyUseFrozenEnemies",
{
"and": [
"canDash",
"canTrickyJump",
"canHorizontalDamageBoost",
{
"enemyDamage": {
"enemy": "Zeb",
"type": "contact",
"hits": 1
}
}
]
},
{
"and": [
{
"or": [
{
"canShineCharge": {
"usedTiles": 24,
"openEnd": 1
}
},
{
"blueSuitShinecharge": {}
}
]
},
{
"shinespark": {
"frames": 9,
"excessFrames": 3
}
}
]
}
]
} |
|

Requires: {
"or": [
"Grapple",
"SpaceJump",
"canWallJump",
"canLongIBJ",
{
"and": [
"HiJump",
"canJumpIntoIBJ"
]
},
{
"and": [
"HiJump",
"canSpringBallJumpMidAir"
]
},
{
"and": [
"HiJump",
"canSpeedyJump"
]
}
]
} |
|
Shinespark to the upper section, then quick run through the bomb blocks to get to the Zeelas and Reos. Farm for reserves or Crystal Flash, then get the shinecharge and use any remaining enemy to interrupt. Te Metarees are still available if you don't go too far right during the setup. Entrance condition: {
"comeInWithRMode": {}
}Requires: {
"or": [
"h_CrystalFlashForReserveEnergy",
"free"
]
}
"h_shinechargeMaxRunway"
{
"or": [
{
"and": [
"HiJump",
"canMidairShinespark",
"canSpeedyJump",
{
"shinespark": {
"frames": 85,
"excessFrames": 3
}
}
]
},
{
"and": [
"canFastWallJumpClimb",
"canMidairShinespark",
{
"or": [
{
"and": [
"HiJump",
{
"shinespark": {
"frames": 67,
"excessFrames": 3
}
}
]
},
{
"shinespark": {
"frames": 73,
"excessFrames": 3
}
}
]
}
]
},
{
"shinespark": {
"frames": 110,
"excessFrames": 3
}
}
]
}
{
"or": [
{
"resourceAvailable": [
{
"type": "ReserveEnergy",
"count": 1
}
]
},
{
"and": [
"h_RModeCanRefillReserves",
{
"resourceMissingAtMost": [
{
"type": "Missile",
"count": 0
}
]
},
{
"partialRefill": {
"type": "ReserveEnergy",
"limit": 20
}
}
]
}
]
}
"h_shinechargeMaxRunway"
{
"autoReserveTrigger": {}
}
"canRModeSparkInterrupt"Clears obstacles: A Dev note: With Disable E-Tanks or Energy-Free Shinesparks, the Reo/Zeela farm remains viable. Without either QoL option, however, the Crystal Flash will be expected (not enough enemies with good drops to guarantee a full e-tank's worth). When using disable E-Tanks the player must be able to disable to 99 *after* the shinespark. |
|
Diagonal spark up left to save Energy. Requires: "h_shinechargeMaxRunway"
{
"or": [
{
"shinespark": {
"frames": 110,
"excessFrames": 5
}
},
{
"and": [
"canMidairShinespark",
{
"shinespark": {
"frames": 103,
"excessFrames": 6
}
}
]
},
{
"and": [
"HiJump",
"canMidairShinespark",
{
"shinespark": {
"frames": 99,
"excessFrames": 6
}
}
]
},
{
"and": [
"HiJump",
"canSpeedyJump",
"canMidairShinespark",
{
"shinespark": {
"frames": 89,
"excessFrames": 6
}
}
]
}
]
} |
|
Requires: "h_storedSpark"
{
"or": [
{
"shinespark": {
"frames": 103,
"excessFrames": 6
}
},
{
"and": [
"HiJump",
{
"shinespark": {
"frames": 99,
"excessFrames": 6
}
}
]
},
{
"and": [
"HiJump",
"canSpeedyJump",
{
"shinespark": {
"frames": 89,
"excessFrames": 6
}
}
]
}
]
} |
From: 1
Left Door
To: 3
Top Junction

Perform a Spring Ball jump from a speedy jump in the previous room. Entrance condition: {
"comeInJumping": {
"speedBooster": "yes",
"minTiles": 7
}
}Requires: "canPrepareForNextRoom" "canTrickySpringBallJump" "canSpeedyJump" |
|
Jump into the room and onto the Grapple block. Entrance condition: {
"comeInJumping": {
"speedBooster": "yes",
"minTiles": 6.4375
}
}Requires: "canPrepareForNextRoom" "HiJump" "canSpeedyJump" |
|
Jump into the room and onto the Grapple block. Entrance condition: {
"comeInJumping": {
"speedBooster": "yes",
"minTiles": 34.4375
}
}Requires: "canPrepareForNextRoom" "canSpeedyJump" "canTrickyJump" |
From: 1
Left Door
To: 3
Top Junction
Run from the left side to the right, then jump just before or at the end of the runway to get up onto the Grapple block. Requires: "HiJump"
"canTrickyJump"
"canSpeedyJump"
{
"obstaclesCleared": [
"A"
]
} |
From: 1
Left Door
To: 3
Top Junction
Jump into the room and spark up onto the grapple block. Entrance condition: {
"comeInJumping": {
"speedBooster": "any",
"minTiles": 0.4375
}
}Requires: {
"useFlashSuit": {}
}
{
"or": [
{
"shinespark": {
"frames": 16,
"excessFrames": 8
}
},
{
"and": [
"HiJump",
{
"shinespark": {
"frames": 11,
"excessFrames": 7
}
}
]
},
{
"and": [
"HiJump",
"canSpeedyJump",
{
"shinespark": {
"frames": 9,
"excessFrames": 7
}
}
]
}
]
} |
From: 2
Right Door
To: 3
Top Junction

Entrance condition: {
"comeInShinecharging": {
"length": 5,
"openEnd": 1
}
}Requires: {
"or": [
{
"shinespark": {
"frames": 22,
"excessFrames": 4
}
},
{
"and": [
"canMidairShinespark",
{
"shinespark": {
"frames": 15,
"excessFrames": 3
}
}
]
},
{
"and": [
"canMidairShinespark",
"HiJump",
{
"shinespark": {
"frames": 12,
"excessFrames": 4
}
}
]
},
{
"and": [
"canMidairShinespark",
"HiJump",
"canSpeedyJump",
{
"shinespark": {
"frames": 9,
"excessFrames": 4
}
}
]
}
]
}Clears obstacles: B |
|
Jump at the end of the runway in-room. Assumes there is a runway in the adjacent room of at least 7 tiles. Entrance condition: {
"comeInRunning": {
"speedBooster": "yes",
"minTiles": 7
}
}Requires: "canSpeedyJump" "HiJump" |
|

Jump near the end of the runway in-room. Assumes there is a runway in the adjacent room of at least 37 tiles. Entrance condition: {
"comeInRunning": {
"speedBooster": "yes",
"minTiles": 37
}
}Requires: "canSpeedyJump" |
|


Entrance condition: {
"comeInRunning": {
"speedBooster": "yes",
"minTiles": 14
}
}Requires: "canSpeedyJump" "canTrickySpringBallJump" |
|
Jump at the very end of the runway in-room. Requires a runway in the adjacent room of at least 6 tiles. Entrance condition: {
"comeInRunning": {
"speedBooster": "yes",
"minTiles": 6
}
}Requires: "HiJump" "canSpeedyJump" "canTrickyJump" |
|
With a 10 tile runway in the adjacent room, Samus will need to jump after the shot blocks. With a longer runway the positioning is more lenient. Entrance condition: {
"comeInRunning": {
"speedBooster": "yes",
"minTiles": 10
}
}Requires: "canSpeedyJump"
{
"or": [
{
"enemyDamage": {
"enemy": "Cacatac",
"type": "contact",
"hits": 1
}
},
"ScrewAttack",
{
"and": [
"canDodgeWhileShooting",
{
"or": [
"canPseudoScrew",
"Plasma",
{
"and": [
"Wave",
"Ice"
]
},
{
"and": [
"Wave",
"Spazer"
]
},
{
"and": [
"Spazer",
"Ice"
]
}
]
}
]
}
]
}Dev note: This amount of runway is fairly lenient, and it is possible to jump to the upper left with a flash suit. FIXME: A shorter runway option should be added without requiring a tricky dash jump. |
|

Entrance condition: {
"comeInRunning": {
"speedBooster": "yes",
"minTiles": 38
}
}Requires: "canSpeedyJump" "canTrickyJump" |
From: 2
Right Door
To: 3
Safe Block in the Middle of the Room


Requires: "HiJump"
"canSpeedyJump"
{
"or": [
{
"spikeHits": 1
},
{
"and": [
"canHorizontalDamageBoost",
{
"enemyDamage": {
"enemy": "Fireflea",
"type": "contact",
"hits": 1
}
}
]
}
]
} |
|

Run and jump from the safe stair to just reach the door ledge. To avoid walljumping, use a full speed jump or jump from on top of the spikes (stairs or floor). Requires: "HiJump"
"canSpeedyJump"
{
"or": [
{
"and": [
"canWallJump",
{
"or": [
"canTrickyJump",
{
"and": [
{
"spikeHits": 1
},
"canUseIFrames"
]
}
]
}
]
},
{
"and": [
"canTrickyDashJump",
"h_backIntoCorner",
"canInsaneJump"
]
},
{
"and": [
"canTrickyDashJump",
{
"spikeHits": 1
}
]
}
]
} |
From: 3
Bottom Left Door
To: 6
Junction (Above Bottom Rippers)
Entrance condition: {
"comeInShinecharging": {
"length": 12,
"openEnd": 0
}
}Requires: {
"or": [
{
"shinespark": {
"frames": 45,
"excessFrames": 6
}
},
{
"and": [
"canMidairShinespark",
{
"shinespark": {
"frames": 37,
"excessFrames": 6
}
}
]
},
{
"and": [
"canMidairShinespark",
"HiJump",
{
"shinespark": {
"frames": 33,
"excessFrames": 6
}
}
]
},
{
"and": [
"canShinechargeMovementComplex",
"HiJump",
"canSpeedyJump",
{
"shinespark": {
"frames": 26,
"excessFrames": 5
}
}
]
}
]
}Dev note: One tile longer runway could be used if the opposite door can be shot open while running. This could be done if the door is blue (and run speed is low enough), or pink/green with a Super. It's not obvious if this is worth modeling though. |
From: 4
Bottom Right Door
To: 6
Junction (Above Bottom Rippers)
Entrance condition: {
"comeInShinecharging": {
"length": 12,
"openEnd": 0
}
}Requires: {
"or": [
{
"shinespark": {
"frames": 45,
"excessFrames": 6
}
},
{
"and": [
"canMidairShinespark",
{
"shinespark": {
"frames": 37,
"excessFrames": 6
}
}
]
},
{
"and": [
"canMidairShinespark",
"HiJump",
{
"shinespark": {
"frames": 33,
"excessFrames": 6
}
}
]
},
{
"and": [
"canShinechargeMovementComplex",
"HiJump",
"canSpeedyJump",
{
"shinespark": {
"frames": 26,
"excessFrames": 5
}
}
]
}
]
}Dev note: One tile longer runway could be used if the opposite door can be shot open while running. This could be done if the door is blue (and run speed is low enough), or pink/green with a Super. It's not obvious if this is worth modeling though. |
|
Requires: {
"or": [
"SpaceJump",
{
"and": [
"HiJump",
"canSpeedyJump",
{
"or": [
"canTrickyJump",
"canWallJump"
]
}
]
},
{
"and": [
"HiJump",
"canConsecutiveWallJump",
"canPreciseWallJump"
]
}
]
} |
From: 7
Junction (Bottom of Room)
To: 6
Junction (Above Bottom Rippers)


Requires: {
"or": [
{
"canShineCharge": {
"usedTiles": 12,
"openEnd": 0
}
},
{
"and": [
{
"or": [
{
"doorUnlockedAtNode": 3
},
{
"doorUnlockedAtNode": 4
}
]
},
{
"canShineCharge": {
"usedTiles": 13,
"openEnd": 0
}
}
]
},
{
"and": [
{
"doorUnlockedAtNode": 3
},
{
"doorUnlockedAtNode": 4
},
{
"canShineCharge": {
"usedTiles": 14,
"openEnd": 0
}
}
]
}
]
}
"canMidairShinespark"
{
"or": [
{
"shinespark": {
"frames": 37,
"excessFrames": 6
}
},
{
"and": [
"HiJump",
{
"shinespark": {
"frames": 33,
"excessFrames": 6
}
}
]
},
{
"and": [
"canShinechargeMovementComplex",
"HiJump",
"canSpeedyJump",
{
"shinespark": {
"frames": 26,
"excessFrames": 5
}
}
]
}
]
}Unlocks doors: {"nodeId":3,"types":["ammo"],"requires":[]}
{"nodeId":4,"types":["ammo"],"requires":[]} |
|


Entrance condition: {
"comeInRunning": {
"speedBooster": "any",
"minTiles": 2
}
}Requires: {
"or": [
"canTrickyJump",
{
"and": [
"canSpeedyJump",
"canCarefulJump"
]
}
]
}
{
"or": [
"ScrewAttack",
{
"and": [
"canNeutralDamageBoost",
{
"enemyDamage": {
"enemy": "Cacatac",
"type": "contact",
"hits": 1
}
}
]
}
]
} |
From: 2
Left Side - Top Middle Door
To: 1
Left Side - Top Door
Entrance condition: {
"comeInRunning": {
"speedBooster": "yes",
"minTiles": 8
}
}Requires: "canSpeedyJump"
"canCarefulJump"
"HiJump"
{
"or": [
"ScrewAttack",
{
"enemyDamage": {
"enemy": "Waver",
"type": "contact",
"hits": 1
}
}
]
} |
From: 2
Left Side - Top Middle Door
To: 1
Left Side - Top Door

Entrance condition: {
"comeInRunning": {
"speedBooster": "yes",
"minTiles": 35
}
}Requires: "canSpeedyJump" "canTrickyJump" |
From: 2
Left Side - Top Middle Door
To: 1
Left Side - Top Door

Entrance condition: {
"comeInRunning": {
"speedBooster": "yes",
"minTiles": 25
}
}Requires: "canSpeedyJump" "canPreciseGrapple" "h_midAirShootUp" |
From: 2
Left Side - Top Middle Door
To: 1
Left Side - Top Door

Entrance condition: {
"comeInRunning": {
"speedBooster": "yes",
"minTiles": 15
}
}Requires: "canSpeedyJump"
"canTrickyJump"
"canTrickySpringBallJump"
"canNeutralDamageBoost"
{
"enemyDamage": {
"enemy": "Waver",
"type": "contact",
"hits": 1
}
} |
From: 2
Left Side - Top Middle Door
To: 1
Left Side - Top Door

Entrance condition: {
"comeInRunning": {
"speedBooster": "yes",
"minTiles": 7
}
}Requires: "canSpeedyJump"
"canTrickyJump"
"HiJump"
{
"or": [
"ScrewAttack",
{
"enemyDamage": {
"enemy": "Waver",
"type": "contact",
"hits": 1
}
}
]
} |
From: 2
Left Side - Top Middle Door
To: 7
Top Right Door


Entrance condition: {
"comeInShinecharged": {}
}Requires: {
"or": [
{
"and": [
"canSpeedyJump",
{
"shineChargeFrames": 125
}
]
},
{
"and": [
{
"shineChargeFrames": 160
},
{
"enemyDamage": {
"enemy": "Waver",
"type": "contact",
"hits": 1
}
}
]
}
]
}
"canHeroShot"
"HiJump"
"canWallJump"
"canShinechargeMovementTricky"
{
"shinespark": {
"frames": 27,
"excessFrames": 0
}
}
{
"or": [
"canBeLucky",
{
"enemyDamage": {
"enemy": "Cacatac",
"type": "spike",
"hits": 1
}
}
]
}Exit condition: {
"leaveWithSpark": {}
}Unlocks doors: {"types":["super"],"requires":[]}
{"types":["missiles","powerbomb"],"requires":["never"]} |
|

Entrance condition: {
"comeInRunning": {
"speedBooster": "yes",
"minTiles": 7
}
}Requires: "canSpeedyJump"
"canCarefulJump"
"HiJump"
{
"or": [
"ScrewAttack",
{
"enemyDamage": {
"enemy": "Cacatac",
"type": "contact",
"hits": 1
}
}
]
} |
|
Entrance condition: {
"comeInRunning": {
"speedBooster": "yes",
"minTiles": 35
}
}Requires: "canSpeedyJump" "canTrickyJump" |
From: 2
Left Side - Top Middle Door
To: 7
Top Right Door
Entrance condition: {
"comeInRunning": {
"speedBooster": "yes",
"minTiles": 15
}
}Requires: "canSpeedyJump"
"canTrickyJump"
"canTrickySpringBallJump"
"canNeutralDamageBoost"
{
"enemyDamage": {
"enemy": "Cacatac",
"type": "contact",
"hits": 1
}
} |
From: 6
Middle Right Door
To: 7
Top Right Door


Entrance condition: {
"comeInShinecharged": {}
}Requires: "HiJump"
"canShinechargeMovementComplex"
{
"or": [
{
"and": [
"canWallJump",
"canSpeedyJump",
{
"shineChargeFrames": 80
},
{
"shinespark": {
"frames": 11,
"excessFrames": 0
}
}
]
},
{
"and": [
"canWallJump",
{
"shineChargeFrames": 95
},
{
"shinespark": {
"frames": 10,
"excessFrames": 0
}
}
]
},
{
"and": [
"canSpeedyJump",
{
"shineChargeFrames": 95
},
{
"shinespark": {
"frames": 15,
"excessFrames": 0
}
}
]
},
{
"and": [
{
"shineChargeFrames": 110
},
{
"shinespark": {
"frames": 17,
"excessFrames": 0
}
}
]
}
]
}Exit condition: {
"leaveWithSpark": {}
}Unlocks doors: {"types":["super"],"requires":[]}
{"types":["missiles","powerbomb"],"requires":["never"]} |
|
Jump from the Save room door runway and use Grapple to grab onto the Grapple Blocks. Requires: "HiJump" "canSpeedyJump" "canPreciseGrapple" "h_midAirShootUp" |
|
Requires: {
"or": [
{
"and": [
"canPreciseWallJump",
{
"heatFrames": 150
}
]
},
{
"and": [
"SpaceJump",
{
"heatFrames": 210
}
]
},
{
"and": [
"HiJump",
"canWallJump",
{
"heatFrames": 180
}
]
},
{
"and": [
"HiJump",
"canSpeedyJump",
"canCarefulJump",
{
"heatFrames": 100
}
]
}
]
}
{
"or": [
"canHeroShot",
{
"and": [
{
"heatFrames": 100
},
"h_midAirShootUp"
]
}
]
}
{
"or": [
"canDash",
{
"heatFrames": 20
}
]
} |
|
With Grapple, a running jump then single Grapple swing can be used before PLMs are overloaded, alternatively jump on the crumble blocks and Grapple the Ripper. Entrance condition: {
"comeInWithGMode": {
"mode": "indirect",
"morphed": false
}
}Requires: {
"or": [
"SpaceJump",
"canTrickySpringBallJump",
{
"and": [
"canWallJump",
{
"or": [
"canDash",
"HiJump",
{
"and": [
"canBlueSuitSpikeJump",
{
"spikeHits": 1
}
]
}
]
}
]
},
{
"and": [
"HiJump",
"canSpeedyJump"
]
},
{
"and": [
"canPreciseGrapple",
{
"or": [
"canDash",
"canUseEnemies",
"canInsaneJump"
]
}
]
}
]
}
"h_heatedGModeOpenDifferentDoor" |
|
Overload PLMs by shooting the gate, then go through the crumble blocks below and get to the item. Entrance condition: {
"comeInWithGMode": {
"mode": "direct",
"morphed": false
}
}Requires: "Morph"
{
"or": [
"SpaceJump",
{
"and": [
"canPreciseGrapple",
"canUseEnemies"
]
},
{
"and": [
"HiJump",
"canSpringBallJumpMidAir"
]
},
"canInsaneWallJump",
{
"and": [
"HiJump",
"canUseIFrames",
{
"noBlueSuit": {}
},
{
"enemyDamage": {
"enemy": "Ripper 2 (green)",
"type": "contact",
"hits": 1
}
},
{
"or": [
"canWallJump",
"canSpeedyJump"
]
}
]
},
"h_IBJFromSpikes"
]
}
{
"heatFrames": 0
} |
From: 2
Bottom Left Door
To: 1
Top Left Door

Entrance condition: {
"comeInGettingBlueSpeed": {
"length": 0,
"openEnd": 1,
"minExtraRunSpeed": "$2.0"
}
}Requires: "HiJump"
"canSpeedyJump"
"canLateralMidAirMorph"
"canInsaneJump"
"canPauseRemorphTemporaryBlue"
"canXRayTurnaround"
{
"heatFrames": 360
}Exit condition: {
"leaveWithTemporaryBlue": {}
}Unlocks doors: {"types":["super","powerbomb"],"requires":[]}
{"types":["missiles"],"requires":[{"heatFrames":50}]} |
Blue Cross-Room Jump, Leave With Temporary Blue (Speedy Jump, Spring Ball Jump)
(Extreme+)
Double Chamber
From: 2
Bottom Left Door
To: 1
Top Left Door


Entrance condition: {
"comeInGettingBlueSpeed": {
"length": 0,
"openEnd": 1,
"minExtraRunSpeed": "$2.0"
}
}Requires: "canSpeedyJump"
"canLateralMidAirMorph"
"canTrickySpringBallJump"
"canInsaneJump"
"canPauseRemorphTemporaryBlue"
"canXRayTurnaround"
{
"heatFrames": 440
}Exit condition: {
"leaveWithTemporaryBlue": {}
}Unlocks doors: {"types":["super","powerbomb"],"requires":[]}
{"types":["missiles"],"requires":[{"heatFrames":50}]} |
|
It is possible to climb the left side of the room with SpeedBooster alone, with either a tricky dash jump or a vertical shinespark. Entrance condition: {
"comeInWithGMode": {
"mode": "any",
"morphed": false
}
}Requires: {
"or": [
"SpaceJump",
"canWallJump",
{
"and": [
"HiJump",
"canSpeedyJump"
]
},
"canTrickyDashJump",
{
"and": [
{
"canShineCharge": {
"usedTiles": 28,
"gentleUpTiles": 3,
"gentleDownTiles": 3,
"openEnd": 0
}
},
{
"or": [
{
"shinespark": {
"frames": 18,
"excessFrames": 8
}
},
{
"and": [
"canSpeedyJump",
{
"shinespark": {
"frames": 16,
"excessFrames": 10
}
}
]
}
]
}
]
}
]
}
"h_heatedGModeOpenDifferentDoor"Dev note: This is only for strats without Morph, otherwise the strats can stop at 7 first. |
|


Run from the right wall to 2/3 of the way across the room and jump up onto the moving platforms. Requires: "canSpeedyJump"
"HiJump"
{
"heatFrames": 350
} |
|
It is possible to climb the left side of the room with SpeedBooster alone, with either a tricky dash jump or a vertical shinespark, then Grapple the Ripper or ceiling blocks. With Grapple, a running jump then single Grapple swing can be used before PLMs are overloaded, alternatively jump on the crumble blocks and Grapple the Ripper. Entrance condition: {
"comeInWithGMode": {
"mode": "indirect",
"morphed": false
}
}Requires: {
"or": [
"SpaceJump",
"canTrickySpringBallJump",
{
"and": [
"canWallJump",
{
"or": [
"canDash",
"HiJump",
{
"and": [
"canBlueSuitSpikeJump",
{
"spikeHits": 1
}
]
}
]
}
]
},
{
"and": [
"HiJump",
"canSpeedyJump"
]
},
{
"and": [
"canTrickyDashJump",
"canPreciseGrapple"
]
},
{
"and": [
"canPreciseGrapple",
{
"canShineCharge": {
"usedTiles": 28,
"gentleUpTiles": 3,
"gentleDownTiles": 3,
"openEnd": 0
}
},
{
"or": [
{
"shinespark": {
"frames": 18,
"excessFrames": 8
}
},
{
"and": [
"canSpeedyJump",
{
"shinespark": {
"frames": 16,
"excessFrames": 10
}
}
]
}
]
}
]
}
]
}
"h_heatedGModeOpenDifferentDoor" |
|


Entrance condition: {
"comeInJumping": {
"speedBooster": "yes",
"minTiles": 4
}
}Requires: "HiJump"
"canSpeedyJump"
{
"heatFrames": 220
}
{
"or": [
{
"noFlashSuit": {}
},
"canComplexCarryFlashSuit",
"Ice",
"Wave",
"Spazer",
"Plasma",
{
"heatFrames": 300
}
]
}Clears obstacles: A |
|
Overload PLMs by shooting the gate, then go through the crumble blocks below and get to the item. The gate can be shot while precisely positioned from below without requiring any items. The positioning is precise and off camera; while facing left, position Samus front foot barely on the flat part after the slope. Entrance condition: {
"comeInWithGMode": {
"mode": "direct",
"morphed": false
}
}Requires: "Morph"
{
"or": [
"SpaceJump",
{
"and": [
"canPreciseGrapple",
"canUseEnemies"
]
},
{
"and": [
"HiJump",
"canSpringBallJumpMidAir"
]
},
"canInsaneWallJump",
{
"and": [
"HiJump",
"canUseIFrames",
{
"noBlueSuit": {}
},
{
"enemyDamage": {
"enemy": "Ripper 2 (green)",
"type": "contact",
"hits": 1
}
},
{
"or": [
"canWallJump",
"canSpeedyJump"
]
}
]
},
"h_IBJFromSpikes"
]
}
{
"heatFrames": 0
} |
|


Requires: "HiJump"
"canSpeedyJump"
{
"heatFrames": 220
}
{
"or": [
{
"noFlashSuit": {}
},
{
"and": [
{
"heatFrames": 20
},
{
"or": [
"Wave",
"canTrickyCarryFlashSuit"
]
}
]
},
{
"and": [
{
"heatFrames": 50
},
{
"or": [
"canComplexCarryFlashSuit",
"Ice",
"Spazer",
"Plasma"
]
}
]
},
{
"heatFrames": 300
}
]
}Clears obstacles: A |
|
It is possible to climb the left side of the room with SpeedBooster alone, with either a tricky dash jump or a vertical shinespark. Entrance condition: {
"comeInWithGMode": {
"mode": "indirect",
"morphed": false
}
}Requires: {
"or": [
"SpaceJump",
"canSpringBallJumpMidAir",
"canWallJump",
{
"and": [
"HiJump",
"canSpeedyJump"
]
},
"canTrickyDashJump",
{
"and": [
{
"canShineCharge": {
"usedTiles": 28,
"gentleUpTiles": 3,
"gentleDownTiles": 3,
"openEnd": 0
}
},
{
"or": [
{
"shinespark": {
"frames": 18,
"excessFrames": 8
}
},
{
"and": [
"canSpeedyJump",
{
"shinespark": {
"frames": 16,
"excessFrames": 10
}
}
]
}
]
}
]
}
]
}
{
"heatFrames": 0
} |
From: 2
Bottom Left Door
To: 4
Item
Stand under where the gate will spawn when exiting G-mode to open it before grabbing the item. Entrance condition: {
"comeInWithGMode": {
"mode": "indirect",
"morphed": false
}
}Requires: {
"or": [
"SpaceJump",
"canSpringBallJumpMidAir",
"canWallJump",
{
"and": [
"HiJump",
"canSpeedyJump"
]
},
"canTrickyDashJump",
{
"and": [
{
"canShineCharge": {
"usedTiles": 28,
"gentleUpTiles": 3,
"gentleDownTiles": 3,
"openEnd": 0
}
},
{
"or": [
{
"shinespark": {
"frames": 18,
"excessFrames": 8
}
},
{
"and": [
"canSpeedyJump",
{
"shinespark": {
"frames": 16,
"excessFrames": 10
}
}
]
}
]
}
]
}
]
}
{
"heatFrames": 25
}Clears obstacles: A |
|

Jump onto the crumble blocks to make them solid, then use them as a platform to cross the room. With Grapple, a running jump then single Grapple swing can be used before PLMs are overloaded, alternatively jump on the crumble blocks and Grapple the Ripper. Entrance condition: {
"comeInWithGMode": {
"mode": "indirect",
"morphed": false
}
}Requires: {
"or": [
"SpaceJump",
{
"and": [
"canPreciseGrapple",
{
"or": [
"canDash",
"canUseEnemies",
"canInsaneJump"
]
}
]
},
"canInsaneWallJump",
{
"and": [
"HiJump",
"canWallJump"
]
},
{
"and": [
"HiJump",
"canSpeedyJump"
]
}
]
}
"h_heatedGModeOpenDifferentDoor"Dev note: This is only for strats that can't go to 7 - variants without Morph, or without a way to get back up after going down. |
From: 3
Right Door
To: 2
Bottom Left Door
Jump onto the crumble blocks to make them solid, then use them as a platform to cross the room. With Grapple, a running jump then single Grapple swing can be used before PLMs are overloaded, alternatively jump on the crumble blocks and Grapple the Ripper. Entrance condition: {
"comeInWithGMode": {
"mode": "indirect",
"morphed": false
}
}Requires: {
"or": [
"SpaceJump",
{
"and": [
"canPreciseGrapple",
{
"or": [
"canDash",
"canUseEnemies",
"canInsaneJump"
]
}
]
},
"canInsaneWallJump",
{
"and": [
"HiJump",
"canWallJump"
]
},
{
"and": [
"HiJump",
"canSpeedyJump"
]
}
]
}
"h_heatedGModeOpenDifferentDoor"Dev note: This is only for strats that can't go to 7 - variants without Morph. |
|
Jump onto the crumble blocks to make them solid, then use them as a platform to cross the room. Entrance condition: {
"comeInWithGMode": {
"mode": "direct",
"morphed": false
}
}Requires: "canRemoteAcquire"
{
"or": [
"SpaceJump",
{
"and": [
"canPreciseGrapple",
"canUseEnemies"
]
},
"canSpringBallJumpMidAir",
"canInsaneWallJump",
{
"and": [
"HiJump",
"canWallJump"
]
},
{
"and": [
"HiJump",
"canSpeedyJump"
]
},
{
"and": [
"canStaggeredIBJ",
"canDoubleBombJump",
"canBombHorizontally"
]
},
{
"and": [
"h_IBJFromSpikes",
"h_IBJFromSpikes"
]
},
{
"and": [
"h_IBJFromSpikes",
"canCameraManip",
"canMoonwalk"
]
}
]
}
"h_heatedDirectGModeLeaveSameDoor"Collects items: 4 |
|
Jump onto the crumble blocks to make them solid, then use them as a platform to cross the room. With Grapple, a running jump then single Grapple swing can be used before PLMs are overloaded, alternatively jump on the crumble blocks and Grapple the Ripper. Entrance condition: {
"comeInWithGMode": {
"mode": "any",
"morphed": false
}
}Requires: {
"or": [
"SpaceJump",
{
"and": [
"canStaggeredIBJ",
"canDoubleBombJump",
"canBombHorizontally"
]
},
{
"and": [
"canDash",
{
"or": [
"canTrickySpringBallJump",
"canInsaneWallJump",
{
"and": [
"HiJump",
"canWallJump"
]
},
{
"and": [
"HiJump",
"canSpeedyJump"
]
},
"h_IBJFromSpikes"
]
}
]
},
{
"and": [
"canPreciseGrapple",
{
"or": [
"canDash",
"canUseEnemies",
"canInsaneJump"
]
}
]
}
]
}
{
"heatFrames": 0
}Dev note: FIXME: some more of these options may be possible with a blue suit, with greater difficulty. |
|

Jump onto the crumble blocks to make them solid, then use them as a platform to cross the room. With Grapple, a running jump then single Grapple swing can be used before PLMs are overloaded, alternatively jump on the crumble blocks and Grapple the Ripper. In indirect G-mode, stand where the gate will spawn and exit G-mode to open the gate. In direct G-mode, overload PLMs by shooting the gate then position Samus a few pixels away from the gate to where upward diagonal shots go through it. Crouch then shoot diagonally and quickly exit G-mode (3-7 frames later) to open the gate on G-mode exit. Entrance condition: {
"comeInWithGMode": {
"mode": "any",
"morphed": false
}
}Requires: "canComplexGMode"
"h_heatedGMode"
{
"or": [
"SpaceJump",
{
"and": [
"canStaggeredIBJ",
"canDoubleBombJump",
"canBombHorizontally"
]
},
{
"and": [
"canDash",
{
"or": [
"canTrickySpringBallJump",
"canInsaneWallJump",
{
"and": [
"HiJump",
"canWallJump"
]
},
{
"and": [
"HiJump",
"canSpeedyJump"
]
},
"h_IBJFromSpikes"
]
}
]
},
{
"and": [
"canPreciseGrapple",
{
"or": [
"canDash",
"canUseEnemies",
"canInsaneJump"
]
}
]
}
]
}
{
"heatFrames": 35
}Clears obstacles: A Dev note: The canComplexGMode is only used here to describe opening the gate in direct G-mode without gate glitching. However, the indirect variant still requires canHeatedGMode or Varia - with Varia, indirect strats can instead be used to go to the top left door and return. FIXME: some more of these options may be possible with a blue suit, with greater difficulty. |
|

Requires: "canUseIFrames"
{
"or": [
{
"spikeHits": 1
},
{
"and": [
"canTrickyJump",
{
"enemyDamage": {
"enemy": "Ripper 2 (green)",
"type": "contact",
"hits": 1
}
},
{
"heatFrames": 20
}
]
}
]
}
"canSpeedyJump"
"HiJump"
{
"heatFrames": 200
} |
|
A running jump over the pit without a wall jump requires a runway in the previous room of 12 tiles with a last-frame jump. Entrance condition: {
"comeInRunning": {
"speedBooster": "yes",
"minTiles": 11.4375
}
}Requires: "canSpeedyJump"
"canTrickyJump"
{
"heatFrames": 100
}Dev note: This becomes easier with a very long runway, but probably not easy enough to remove the canTrickyJump, since a missed jump likely means death. |
|
Entrance condition: {
"comeInRunning": {
"speedBooster": "yes",
"minTiles": 8
}
}Requires: "canSpeedyJump"
"canInsaneJump"
{
"or": [
{
"and": [
"canPreciseWallJump",
{
"heatFrames": 150
}
]
},
{
"and": [
"canLateralMidAirMorph",
{
"heatFrames": 110
}
]
}
]
}Dev note: A running jump over the pit requires a runway in the previous room of 8 tiles with an open end, with a last-frame jump into a very precise air ball or wall jump. |
From: 3
Right Door
To: 6
G-Mode, Remote Acquire Junction (Bottom Right)
Jump onto the crumble blocks to make them solid, then use them as a platform to get to the item. With Grapple, a running jump then single Grapple swing can be used before PLMs are overloaded, alternatively jump on the crumble blocks and Grapple the Ripper. Avoid touching all 6 crumbles, so Samus can use the item to overload PLMs and go through one of the crumbles to get to the left side of the room. If the item has already been obtained, Samus can shoot the gate many times to overload PLMs. Entrance condition: {
"comeInWithGMode": {
"mode": "direct",
"morphed": false
}
}Requires: "canRemoteAcquire"
{
"or": [
"SpaceJump",
"canCeilingBombJump",
{
"and": [
"canBombHorizontally",
"canIBJ",
"h_usePowerBomb"
]
},
{
"and": [
"canStaggeredIBJ",
"canDoubleBombJump",
"canBombHorizontally"
]
},
{
"and": [
"canPreciseGrapple",
"canUseEnemies"
]
},
{
"and": [
"canDash",
{
"or": [
"canTrickySpringBallJump",
"canInsaneWallJump",
{
"and": [
"HiJump",
"canWallJump"
]
},
{
"and": [
"HiJump",
"canSpeedyJump"
]
},
"h_IBJFromSpikes"
]
}
]
}
]
}
{
"heatFrames": 0
} |
From: 3
Right Door
To: 7
G-Mode Junction (Bottom Right)
Jump onto the crumble blocks to make them solid, then use them as a platform to cross the room. With Grapple, a running jump then single Grapple swing can be used before PLMs are overloaded, alternatively jump on the crumble blocks and Grapple the Ripper. Entrance condition: {
"comeInWithGMode": {
"mode": "indirect",
"morphed": false
}
}Requires: "Morph"
{
"or": [
"SpaceJump",
"canCeilingBombJump",
{
"and": [
"canStaggeredIBJ",
"canDoubleBombJump",
"canBombHorizontally"
]
},
{
"and": [
"canBombHorizontally",
"canIBJ",
"h_usePowerBomb"
]
},
{
"and": [
"canDash",
{
"or": [
"canTrickySpringBallJump",
"canInsaneWallJump",
{
"and": [
"HiJump",
"canWallJump"
]
},
{
"and": [
"HiJump",
"canSpeedyJump"
]
},
"h_IBJFromSpikes"
]
}
]
},
{
"and": [
"canPreciseGrapple",
{
"or": [
"canDash",
"canUseEnemies",
"canInsaneJump"
]
}
]
}
]
}
{
"heatFrames": 0
}Dev note: With Grapple, Morph isn't needed, but there's no reason to go there without Morph. |
|
Requires: "canUseIFrames"
{
"or": [
{
"spikeHits": 1
},
{
"and": [
"canTrickyJump",
{
"enemyDamage": {
"enemy": "Ripper 2 (green)",
"type": "contact",
"hits": 1
}
}
]
}
]
}
"HiJump"
"canSpeedyJump"
{
"heatFrames": 250
}Collects items: 4 |
|
Requires: "h_heatProof"
"Morph"
{
"or": [
{
"and": [
{
"resetRoom": {
"nodes": [
1
]
}
},
{
"or": [
{
"and": [
"SpaceJump",
{
"cycleFrames": 1060
}
]
},
{
"and": [
"HiJump",
"canSpeedyJump",
{
"cycleFrames": 940
}
]
}
]
}
]
},
{
"and": [
{
"resetRoom": {
"nodes": [
2
]
}
},
{
"cycleFrames": 830
}
]
},
{
"and": [
{
"resetRoom": {
"nodes": [
3
]
}
},
{
"or": [
{
"and": [
"SpaceJump",
{
"cycleFrames": 1160
}
]
},
{
"and": [
"HiJump",
"canSpeedyJump",
{
"or": [
"Grapple",
"canWallJump"
]
},
{
"cycleFrames": 1190
}
]
}
]
}
]
}
]
}
{
"or": [
"canDash",
{
"cycleFrames": 120
}
]
}Resets obstacles: A, R-Mode Farm cycle drops: 1 Kago Dev note: FIXME: There are more possible item combinations. |
From: 6
G-Mode, Remote Acquire Junction (Bottom Right)
To: 1
Top Left Door
It is possible to climb the left side of the room with SpeedBooster alone, with either a tricky dash jump or a vertical shinespark. Requires: "canRemoteAcquire"
"Morph"
{
"or": [
"SpaceJump",
"canSpringBallJumpMidAir",
"canWallJump",
{
"and": [
"HiJump",
"canSpeedyJump"
]
},
"canIBJ",
"canTrickyDashJump",
{
"and": [
{
"canShineCharge": {
"usedTiles": 28,
"gentleUpTiles": 3,
"gentleDownTiles": 3,
"openEnd": 0
}
},
{
"or": [
{
"shinespark": {
"frames": 18,
"excessFrames": 8
}
},
{
"and": [
"canSpeedyJump",
{
"shinespark": {
"frames": 16,
"excessFrames": 10
}
}
]
}
]
}
]
}
]
}
"h_heatedGModeOpenDifferentDoor"Collects items: 4 |
From: 6
G-Mode, Remote Acquire Junction (Bottom Right)
To: 1
Top Left Door
With Plasma and a pause abuse, it is possible to kill the Kago and exit G-mode while killing the Kago bugs and make it to the door with a small amount of Energy remaining. Shoot Plasma and quickly exit G-Mode, so that the bugs die immediately. Avoid having spent much time on the left side of the room, as the Fune fireballs will reduce the number of drops obtained. Note that it is possible to climb the left side of the room with SpeedBooster alone, with either a tricky dash jump or a vertical shinespark. Requires: "canComplexGMode"
"canRemoteAcquire"
"Morph"
{
"or": [
"SpaceJump",
"canSpringBallJumpMidAir",
"canWallJump",
{
"and": [
"HiJump",
"canSpeedyJump"
]
},
"canIBJ",
"canTrickyDashJump",
{
"and": [
{
"canShineCharge": {
"usedTiles": 28,
"gentleUpTiles": 3,
"gentleDownTiles": 3,
"openEnd": 0
}
},
{
"or": [
{
"shinespark": {
"frames": 18,
"excessFrames": 8
}
},
{
"and": [
"canSpeedyJump",
{
"shinespark": {
"frames": 16,
"excessFrames": 10
}
}
]
}
]
}
]
}
]
}
"Plasma"
"h_heatedGModePauseAbuse"
"canInsaneJump"Collects items: 4 Dev note: All of these methods are fast enough to be able to escape after obtaining the drops. The shinespark is longer than 1 frame, but is modeled this way because the drops aren't properly modeled. FIXME: The item that was remote acquired could be Morph, one of the items needed to climb the room, or maybe Plasma. |
|
It is possible to climb the left side of the room with SpeedBooster alone, with either a tricky dash jump or a vertical shinespark. Requires: "Morph"
{
"or": [
"SpaceJump",
"canSpringBallJumpMidAir",
"canWallJump",
{
"and": [
"HiJump",
"canSpeedyJump"
]
},
"canIBJ",
"canTrickyDashJump",
{
"and": [
{
"canShineCharge": {
"usedTiles": 28,
"gentleUpTiles": 3,
"gentleDownTiles": 3,
"openEnd": 0
}
},
{
"or": [
{
"shinespark": {
"frames": 18,
"excessFrames": 8
}
},
{
"and": [
"canSpeedyJump",
{
"shinespark": {
"frames": 16,
"excessFrames": 10
}
}
]
}
]
}
]
}
]
}
"h_heatedGModeOpenDifferentDoor" |
From: 7
G-Mode Junction (Bottom Right)
To: 1
Top Left Door
With Plasma and a pause abuse, it is possible to kill the Kago and exit G-mode while killing the Kago bugs and make it to the door with a small amount of Energy remaining. Shoot Plasma and quickly exit G-Mode, so that the bugs die immediately. Avoid having spent much time on the left side of the room, as the Fune fireballs will reduce the number of drops obtained. Note that it is possible to climb the left side of the room with SpeedBooster alone, with either a tricky dash jump or a vertical shinespark. Requires: "Morph"
{
"or": [
"SpaceJump",
"canSpringBallJumpMidAir",
"canWallJump",
{
"and": [
"HiJump",
"canSpeedyJump"
]
},
"canTrickyDashJump",
{
"and": [
{
"canShineCharge": {
"usedTiles": 28,
"gentleUpTiles": 3,
"gentleDownTiles": 3,
"openEnd": 0
}
},
{
"or": [
{
"shinespark": {
"frames": 18,
"excessFrames": 8
}
},
{
"and": [
"canSpeedyJump",
{
"shinespark": {
"frames": 16,
"excessFrames": 10
}
}
]
}
]
}
]
}
]
}
"Plasma"
"h_heatedGModePauseAbuse"
"canInsaneJump"
"canDash"Dev note: All of these methods are fast enough to be able to escape after obtaining the drops. The shinespark is longer than 1 frame, but is modeled this way because the drops aren't properly modeled. |
From: 3
Left Shaft - Middle Right Door
To: 4
Left Shaft - Top Right Door


Entrance condition: {
"comeInShinecharged": {}
}Requires: {
"or": [
{
"shineChargeFrames": 150
},
{
"and": [
"canSpeedyJump",
{
"shineChargeFrames": 140
}
]
}
]
}
"HiJump"
"canTrickyJump"
"canShinechargeMovementComplex"
{
"shinespark": {
"frames": 9,
"excessFrames": 0
}
}
{
"heatFrames": 170
}Exit condition: {
"leaveWithSpark": {}
}Unlocks doors: {"types":["super"],"requires":[]}
{"types":["missiles","powerbomb"],"requires":["never"]} |
From: 2
Middle Left Door
To: 6
Top Right Door
Entrance condition: {
"comeInShinecharged": {}
}Requires: {
"or": [
{
"and": [
"canSpeedyJump",
{
"shineChargeFrames": 70
}
]
},
{
"shineChargeFrames": 75
}
]
}
"HiJump"
"canShinechargeMovementComplex"
{
"shinespark": {
"frames": 11,
"excessFrames": 0
}
}Exit condition: {
"leaveWithSpark": {
"position": "bottom"
}
}Unlocks doors: {"types":["super"],"requires":[]}
{"types":["missiles","powerbomb"],"requires":["never"]} |
From: 3
Bottom Left Door
To: 2
Middle Left Door


Entrance condition: {
"comeInShinecharged": {}
}Requires: {
"or": [
{
"and": [
"canSpeedyJump",
{
"shineChargeFrames": 85
}
]
},
{
"shineChargeFrames": 90
}
]
}
"HiJump"
"canShinechargeMovementComplex"
{
"shinespark": {
"frames": 8,
"excessFrames": 0
}
}Exit condition: {
"leaveWithSpark": {}
}Unlocks doors: {"types":["super"],"requires":[]}
{"types":["missiles","powerbomb"],"requires":["never"]} |
From: 1
Left Door
To: 2
Right Door


Go over the plateau, or under it with lava protection. To avoid the Dragon's fireballs, be sure to kill it quickly, overload the drops with the Dragons on the left first, or exit G-mode. Entrance condition: {
"comeInWithGMode": {
"mode": "indirect",
"morphed": false
}
}Requires: {
"or": [
"SpaceJump",
{
"and": [
"HiJump",
"canWallJump"
]
},
{
"and": [
"HiJump",
"canSpeedyJump"
]
},
{
"and": [
"canComplexGMode",
"h_lavaProof"
]
}
]
}
"h_heatedGModeOpenDifferentDoor"Dev note: FIXME: Damage through the lava could work, or maybe a Geruta damage boost. (Energy from immobile or CF) |
From: 2
Right Door
To: 1
Left Door

Entrance condition: {
"comeInWithGMode": {
"mode": "indirect",
"morphed": false
}
}Requires: {
"or": [
"SpaceJump",
{
"and": [
"HiJump",
"canSpeedyJump",
"canWallJump"
]
},
{
"and": [
"HiJump",
"canSpringBallJumpMidAir",
{
"or": [
{
"noBlueSuit": {}
},
{
"and": [
"Gravity",
{
"lavaFrames": 25
}
]
}
]
}
]
},
{
"and": [
{
"notable": "Spring Ball Bomb Boost"
},
{
"noBlueSuit": {}
},
"canSpringBallJumpMidAir",
"canUnmorphBombBoost",
"h_crouchJumpDownGrab",
{
"or": [
"canInsaneJump",
"h_additionalBomb"
]
}
]
},
{
"and": [
{
"or": [
{
"canShineCharge": {
"usedTiles": 15,
"openEnd": 2
}
},
"h_storedSpark"
]
},
"canShinechargeMovementComplex",
{
"or": [
{
"shinespark": {
"frames": 12,
"excessFrames": 2
}
},
{
"and": [
"h_speedJump",
{
"shinespark": {
"frames": 9,
"excessFrames": 3
}
}
]
}
]
}
]
},
{
"and": [
{
"notable": "Ceiling Mockball Spring Fling"
},
"h_speedJump",
"canInsaneJump",
"canMomentumConservingMorph",
"canSpringFling"
]
}
]
}
"h_heatedGModeOpenDifferentDoor" |
From: 2
Right Door
To: 1
Left Door

Lure the Geruta to the left door. This may require many jumps to get it to swoop up onto the ledge and not get stuck. Requires: "canComplexGMode"
"h_heatProof"
"canBePatient"
"canCameraManip"
"Morph"
{
"or": [
"canTrickyDodgeEnemies",
"SpaceJump",
"Charge",
"Ice",
"Plasma",
{
"ammo": {
"type": "Missile",
"count": 6
}
},
{
"ammo": {
"type": "Super",
"count": 2
}
},
{
"enemyDamage": {
"enemy": "Dragon",
"type": "fireball",
"hits": 5
}
},
{
"and": [
"h_lavaProof",
{
"or": [
"ScrewAttack",
"h_bombThings"
]
}
]
}
]
}
{
"or": [
"SpaceJump",
{
"and": [
"HiJump",
"canSpeedyJump",
"canWallJump"
]
},
{
"and": [
{
"noBlueSuit": {}
},
"HiJump",
"canSpringBallJumpMidAir"
]
},
{
"and": [
{
"noBlueSuit": {}
},
"canBeVeryPatient",
{
"or": [
"canLongIBJ",
"canJumpIntoIBJ"
]
}
]
},
{
"and": [
"canBeVeryPatient",
"Grapple",
{
"or": [
"HiJump",
"canSpringBallJumpMidAir"
]
}
]
}
]
}
{
"or": [
{
"ammo": {
"type": "Super",
"count": 1
}
},
{
"obstaclesCleared": [
"A"
]
}
]
}Exit condition: {
"leaveWithGModeSetup": {}
}Collects items: 3 Unlocks doors: {"types":["ammo"],"requires":[]}Dev note: It's possible to avoid the item, but the Geruta will get stuck on it and usually require many swoops to get past it. |
From: 2
Right Door
To: 1
Left Door


Lure the Geruta to the left door. This may require many jumps to get it to swoop up onto the ledge and not get stuck. To safely pass the Geruta without a hit, jump left below it, to get it to swoop left before going up. Requires: "canComplexGMode"
"h_heatProof"
"canBePatient"
"canCameraManip"
{
"or": [
"canInsaneJump",
"Ice",
"h_lavaProof",
{
"enemyDamage": {
"enemy": "Geruta",
"type": "contact",
"hits": 1
}
},
{
"and": [
"canUseIFrames",
{
"enemyDamage": {
"enemy": "Dragon",
"type": "fireball",
"hits": 1
}
},
{
"lavaFrames": 55
}
]
}
]
}
{
"or": [
"canTrickyDodgeEnemies",
"SpaceJump",
"Charge",
"Ice",
"Plasma",
{
"ammo": {
"type": "Missile",
"count": 6
}
},
{
"ammo": {
"type": "Super",
"count": 2
}
},
{
"enemyDamage": {
"enemy": "Dragon",
"type": "fireball",
"hits": 5
}
},
{
"and": [
"h_lavaProof",
"ScrewAttack"
]
}
]
}
{
"or": [
"SpaceJump",
{
"and": [
"HiJump",
"canSpeedyJump",
"canWallJump"
]
},
{
"and": [
"canBeVeryPatient",
"HiJump",
"Grapple"
]
}
]
}
{
"or": [
{
"ammo": {
"type": "Super",
"count": 1
}
},
{
"obstaclesCleared": [
"A"
]
}
]
}Exit condition: {
"leaveWithGModeSetup": {}
}Collects items: 3 Unlocks doors: {"types":["ammo"],"requires":[]}Dev note: It's possible to avoid the item, but the Geruta will get stuck on it and usually require many swoops to get past it. |
|
Jump and aim down to make the Dragons active by bringing them on camera. Requires: {
"noBlueSuit": {}
}
{
"resetRoom": {
"nodes": [
2
]
}
}
"h_heatProof"
{
"or": [
{
"and": [
"Morph",
"Grapple",
"Plasma",
"canCameraManip",
{
"cycleFrames": 1620
}
]
},
{
"and": [
"HiJump",
"canSpeedyJump",
"Grapple",
"Plasma",
"canCameraManip",
{
"cycleFrames": 1920
}
]
},
{
"and": [
"SpaceJump",
"Plasma",
"canCameraManip",
{
"cycleFrames": 1770
}
]
},
{
"and": [
"canPreciseSpaceJump",
"ScrewAttack",
{
"cycleFrames": 1440
}
]
}
]
}Resets obstacles: A Farm cycle drops: 5 Dragon |
From: 2
Right Door
To: 2
Right Door


Touch the item as little as possible in order to prevent PLMs from being overloaded, so the platforms below remain solid. Entrance condition: {
"comeInWithGMode": {
"mode": "direct",
"morphed": false
}
}Requires: "canRemoteAcquire"
{
"or": [
"SpaceJump",
{
"and": [
"HiJump",
"canSpeedyJump",
"canWallJump"
]
},
{
"and": [
"HiJump",
"canSpringBallJumpMidAir",
{
"or": [
{
"noBlueSuit": {}
},
{
"and": [
"Gravity",
{
"lavaFrames": 25
}
]
}
]
}
]
},
{
"and": [
{
"notable": "Spring Ball Bomb Boost"
},
{
"noBlueSuit": {}
},
"canSpringBallJumpMidAir",
"canUnmorphBombBoost",
"h_crouchJumpDownGrab",
"canInsaneJump"
]
},
{
"and": [
{
"or": [
{
"canShineCharge": {
"usedTiles": 15,
"openEnd": 2
}
},
"h_storedSpark"
]
},
"canShinechargeMovementComplex",
{
"or": [
{
"shinespark": {
"frames": 12,
"excessFrames": 2
}
},
{
"and": [
"h_speedJump",
{
"shinespark": {
"frames": 9,
"excessFrames": 3
}
}
]
}
]
}
]
},
{
"and": [
{
"notable": "Ceiling Mockball Spring Fling"
},
"h_speedJump",
"canInsaneJump",
"canMomentumConservingMorph",
"canSpringFling"
]
}
]
}
"h_heatedDirectGModeLeaveSameDoor"Collects items: 3 Dev note: There is no leniency option for using an extra Power Bomb, because it will contribute to PLM overload. (2 PBs is technically barely possible) |
|
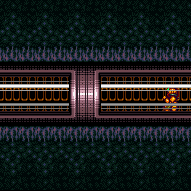
Entrance condition: {
"comeInWithGMode": {
"mode": "indirect",
"morphed": false
}
}Requires: "h_heatedGMode"
{
"or": [
"SpaceJump",
{
"and": [
"HiJump",
"canSpeedyJump",
"canWallJump"
]
},
{
"and": [
"HiJump",
"canSpringBallJumpMidAir",
{
"or": [
{
"noBlueSuit": {}
},
{
"and": [
"Gravity",
{
"lavaFrames": 25
}
]
}
]
}
]
},
{
"and": [
{
"notable": "Spring Ball Bomb Boost"
},
{
"noBlueSuit": {}
},
"canSpringBallJumpMidAir",
"canUnmorphBombBoost",
"h_crouchJumpDownGrab",
{
"or": [
"canInsaneJump",
"h_additionalBomb"
]
}
]
},
{
"and": [
{
"or": [
{
"canShineCharge": {
"usedTiles": 15,
"openEnd": 2
}
},
"h_storedSpark"
]
},
"canShinechargeMovementComplex",
{
"or": [
{
"shinespark": {
"frames": 12,
"excessFrames": 2
}
},
{
"and": [
"h_speedJump",
{
"shinespark": {
"frames": 9,
"excessFrames": 3
}
}
]
}
]
}
]
},
{
"and": [
{
"notable": "Ceiling Mockball Spring Fling"
},
"h_speedJump",
"canInsaneJump",
"canMomentumConservingMorph",
"canSpringFling"
]
}
]
}
{
"heatFrames": 90
}Clears obstacles: A Dev note: Goes to 3 because opening the gate mostly only makes sense when going back to the right for a longer runway or obtaining the item. FIXME: Variants with shinesparking or Geruta damage boost can be added. (Energy from immobile, CF, or energy free sparks) |
|
Entrance condition: {
"comeInWithGMode": {
"mode": "any",
"morphed": false
}
}Requires: "h_heatedGMode"
{
"or": [
"SpaceJump",
{
"and": [
"HiJump",
"canSpeedyJump",
"canWallJump"
]
},
{
"and": [
"HiJump",
"canSpringBallJumpMidAir",
{
"or": [
"canDash",
{
"and": [
{
"haveBlueSuit": {}
},
"Gravity"
]
}
]
}
]
},
{
"and": [
"canDash",
{
"notable": "Spring Ball Bomb Boost"
},
"canSpringBallJumpMidAir",
"canUnmorphBombBoost",
"h_crouchJumpDownGrab",
{
"or": [
"canInsaneJump",
"h_additionalBomb"
]
}
]
},
{
"and": [
{
"canShineCharge": {
"usedTiles": 15,
"openEnd": 2
}
},
"canShinechargeMovementComplex",
{
"or": [
{
"shinespark": {
"frames": 12,
"excessFrames": 2
}
},
{
"and": [
"h_speedJump",
{
"shinespark": {
"frames": 9,
"excessFrames": 3
}
}
]
}
]
}
]
},
{
"and": [
{
"notable": "Ceiling Mockball Spring Fling"
},
"h_speedJump",
"canInsaneJump",
"canMomentumConservingMorph",
"canSpringFling"
]
}
]
}
{
"heatFrames": 0
}Dev note: FIXME: Variants with Geruta damage boost can be added. (Energy from immobile or CF) |
|
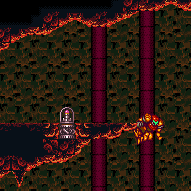
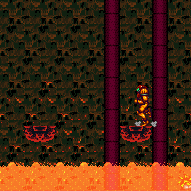
Requires: "HiJump"
"canSpeedyJump"
"canWallJump"
{
"heatFrames": 360
}
{
"or": [
"canDodgeWhileShooting",
"Ice",
{
"enemyKill": {
"enemies": [
[
"Dragon"
]
],
"explicitWeapons": [
"Missile",
"Super",
"Plasma"
]
}
},
{
"and": [
"h_lavaProof",
"h_heatProof",
{
"or": [
"Charge",
"ScrewAttack",
{
"and": [
"h_usePowerBomb",
"h_usePowerBomb"
]
}
]
}
]
},
{
"enemyDamage": {
"enemy": "Dragon",
"type": "fireball",
"hits": 1
}
}
]
}
{
"or": [
"Morph",
"canInsaneJump",
{
"and": [
"canTrickyDodgeEnemies",
{
"heatFrames": 60
}
]
},
{
"and": [
{
"enemyKill": {
"enemies": [
[
"Geruta"
]
],
"explicitWeapons": [
"Missile",
"Super",
"Wave",
"Spazer",
"Plasma"
]
}
},
{
"heatFrames": 50
}
]
},
{
"heatFrames": 160
}
]
} |
|


This can be done from the top right, single tile block. Requires: "HiJump"
"canSpeedyJump"
{
"heatFrames": 500
}Collects items: 3 |
|
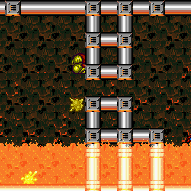
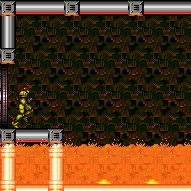
Use the full runway in order to get a good jump. If entering without run speed, a last-frame jump would be needed to reach the necessary dash speed of $1.2 to shorten Samus' jump; alternatively, turn around and open the door to extend the runway and make the jump more lenient. Requires: "canMidAirMorph"
"canSpeedyJump"
{
"heatFrames": 240
} |
|
Entrance condition: {
"comeInWithGMode": {
"mode": "direct",
"morphed": false
},
"comesThroughToilet": "any"
}Requires: {
"or": [
"canSpeedyJump",
"HiJump",
"SpaceJump",
"canIBJ",
"canWallJump",
"canSpringBallJumpMidAir"
]
}Exit condition: {
"leaveWithGMode": {
"morphed": false
}
}Clears obstacles: door_2 |
|


Requires: {
"or": [
"canSpeedyJump",
"HiJump",
"SpaceJump",
"canIBJ",
"canWallJump",
"canSpringBallJumpMidAir"
]
} |
|


Requires: "canShinechargeMovement"
{
"or": [
{
"canShineCharge": {
"usedTiles": 31,
"openEnd": 0
}
},
{
"and": [
{
"or": [
"f_DefeatedCrocomire",
{
"obstaclesCleared": [
"f_DefeatedCrocomire"
]
}
]
},
"h_shinechargeMaxRunway"
]
}
]
}
{
"shineChargeFrames": 100
}
"canSpeedyJump"Exit condition: {
"leaveShinecharged": {}
}Unlocks doors: {"types":["ammo"],"requires":[]} |
|

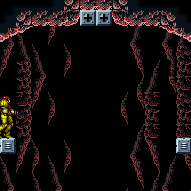
With SpeedBooster equipped, run from the top left platform and jump into an airball to reach the top right platform. It helps but is not required to moonwalk against the wall to maximize the available runway. Requires: "canSpeedyJump" "canTrickyJump" "canLateralMidAirMorph" |
|
Requires: "HiJump"
{
"or": [
"canPreciseWallJump",
"canSpeedyJump"
]
} |
From: 1
Left Door
To: 3
Junction Left of Green Gate
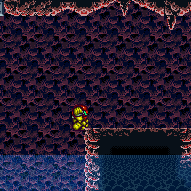
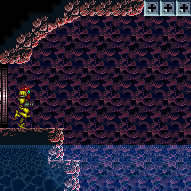
With at least two tiles of run speed, jump over the first moat by maximizing the jump distance and then mockball into a regular Spring Ball to jump over the second moat. Speed Booster is used to reduce Samus' jump height, to delay bonking the ceiling. Entrance condition: {
"comeInRunning": {
"speedBooster": "yes",
"minTiles": 2
}
}Requires: "canSpeedyJump" "canInsaneJump" "canMockball" "canSpringBallBounce" |
From: 1
Left Door
To: 4
Center Platform Junction
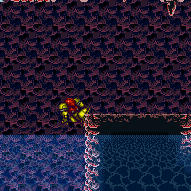

Requires: "canSpeedyJump"
"canTrickyJump"
{
"or": [
"canWallJump",
"canLateralMidAirMorph"
]
} |
From: 4
Center Platform Junction
To: 3
Junction Left of Green Gate
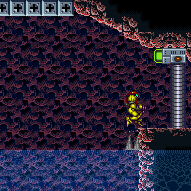
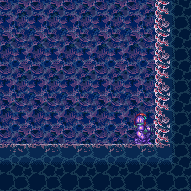
Requires: "Gravity"
{
"or": [
"canWallJump",
"canGravityJump",
"canLongIBJ",
{
"and": [
"HiJump",
"canJumpIntoIBJ"
]
},
{
"and": [
"HiJump",
"canSpeedyJump"
]
}
]
} |
|
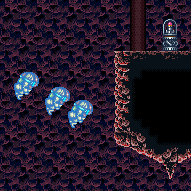
Jump with enough run speed to reach the wall below the Missile Item Location. Entrance condition: {
"comeInRunning": {
"speedBooster": "yes",
"minTiles": 29
}
}Requires: "canSpeedyJump" "canWallJump" "canCarefulJump" |
|


Carefully swing between the Rippers at the top of the room to the item. The last two swings are the hardest Morphing and unmorphing to reset Samus's fall speed can help give a bit more time to position the Rippers. It can help to Grapple the same Ripper again to get it in a better position. Position the third Ripper far to the right then fling to the fourth, which is far to the right and very close to the ceiling. Moving the fourth Ripper to the right a bit can also help in order to make the last fling less precise. Be careful not to fling directly into the ceiling, as it is easy to hit the uneven surface and fall. If Samus falls, it may be helpful to reset the room. Requires: {
"notable": "Indiana Jones Grapple (With Retries)"
}
"canUseEnemies"
"canPreciseGrapple"
"h_midAirShootUp"
{
"or": [
{
"and": [
"canInsaneJump",
"h_trickyToCarryFlashSuit"
]
},
{
"enemyDamage": {
"enemy": "Ripper 2 (green)",
"type": "contact",
"hits": 4
}
}
]
}
{
"or": [
{
"and": [
"HiJump",
"canSpringBallJumpMidAir"
]
},
{
"and": [
"canSpeedyJump",
"HiJump",
"canTrickyWallJump"
]
},
"h_trickySpringwall"
]
} |
From: 2
Right Vertical Door
To: 1
Left Door
Requires: {
"obstaclesCleared": [
"B",
"E"
]
}
"canSpeedyJump"
"canTrickySpringBallJump"
"canTrickySpringBallBounce"
"canInsaneJump"Exit condition: {
"leaveWithSpringBallBounce": {
"remoteRunway": {
"length": 32,
"openEnd": 1,
"gentleUpTiles": 6
},
"landingRunway": {
"length": 10,
"openEnd": 1
},
"minExtraRunSpeed": "$4.0",
"movementType": "controlled"
}
}Unlocks doors: {"types":["ammo"],"requires":[],"useImplicitRequires":false} |
From: 2
Right Vertical Door
To: 1
Left Door
Requires: {
"obstaclesCleared": [
"A",
"B",
"E"
]
}
"canSpeedyJump"
"canTrickyJump"Exit condition: {
"leaveWithMockball": {
"remoteRunway": {
"length": 45,
"openEnd": 1
},
"landingRunway": {
"length": 10,
"openEnd": 1
},
"minExtraRunSpeed": "$6.D"
}
}Unlocks doors: {"types":["ammo"],"requires":[],"useImplicitRequires":false} |
From: 2
Right Vertical Door
To: 1
Left Door


Requires: "HiJump"
{
"obstaclesCleared": [
"B",
"E"
]
}
"canSpeedyJump"
"canTrickyJump"Exit condition: {
"leaveWithMockball": {
"remoteRunway": {
"length": 32,
"openEnd": 1,
"gentleUpTiles": 6
},
"landingRunway": {
"length": 10,
"openEnd": 1
},
"minExtraRunSpeed": "$5.9"
}
}Unlocks doors: {"types":["ammo"],"requires":[],"useImplicitRequires":false} |
From: 2
Right Vertical Door
To: 1
Left Door
Store a shinecharge and start running below the left side of the vertical door, to set up the jump in a way that shinesparking at the apex of the jump approximately aligns with the top of the far door. Requires: {
"obstaclesCleared": [
"A",
"B",
"E"
]
}
"h_shinechargeMaxRunway"
"canSpeedyJump"
"canShinechargeMovementComplex"
{
"shinespark": {
"frames": 53
}
}Exit condition: {
"leaveWithSpark": {}
}Unlocks doors: {"types":["ammo"],"requires":[],"useImplicitRequires":false} |
From: 2
Right Vertical Door
To: 1
Left Door

Requires: "HiJump"
"canSpeedyJump"
{
"obstaclesCleared": [
"B",
"E"
]
}
{
"canShineCharge": {
"usedTiles": 32,
"gentleDownTiles": 6,
"openEnd": 1
}
}
"canShinechargeMovementComplex"
{
"shinespark": {
"frames": 56
}
}Exit condition: {
"leaveWithSpark": {}
}Unlocks doors: {"types":["ammo"],"requires":[],"useImplicitRequires":false} |
From: 2
Right Vertical Door
To: 1
Left Door

Requires: {
"obstaclesCleared": [
"B",
"E"
]
}
{
"canShineCharge": {
"usedTiles": 32,
"gentleDownTiles": 6,
"openEnd": 1
}
}
"canSpeedyJump"
"canShinechargeMovementComplex"
{
"shinespark": {
"frames": 57
}
}Exit condition: {
"leaveWithSpark": {
"position": "bottom"
}
}Unlocks doors: {"types":["ammo"],"requires":[],"useImplicitRequires":false} |
From: 2
Right Vertical Door
To: 1
Left Door


Requires: {
"obstaclesCleared": [
"B",
"E"
]
}
{
"getBlueSpeed": {
"usedTiles": 32,
"gentleUpTiles": 6,
"openEnd": 1
}
}
{
"or": [
{
"and": [
"HiJump",
"canSpeedyJump"
]
},
"SpaceJump",
{
"and": [
"canTrickySpringBallJump",
"canPauseRemorphTemporaryBlue"
]
}
]
}
"canTrickyJump"
"canChainTemporaryBlue"Exit condition: {
"leaveWithTemporaryBlue": {}
}Unlocks doors: {"types":["ammo"],"requires":[],"useImplicitRequires":false} |
|
Requires: {
"or": [
{
"and": [
"canSpeedyJump",
"canCarefulJump"
]
},
{
"and": [
"h_speedJump",
"HiJump"
]
}
]
}
{
"obstaclesCleared": [
"A",
"B"
]
}Dev note: With HiJump we don't require canSpeedyJump tech here because the jump is 'trivial': it is intended in the vanilla game, telegraphed by the ramp, and is very lenient. |
|
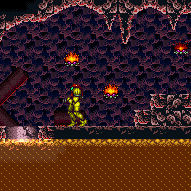
Requires: "canSpeedyJump"
{
"obstaclesCleared": [
"B"
]
}
{
"or": [
"HiJump",
{
"and": [
"canLateralMidAirMorph",
"canTrickySpringBallJump"
]
}
]
} |
|
Shoot the Mellas when they first begin to come on screen, and they will not move. Requires: {
"or": [
{
"and": [
{
"resetRoom": {
"nodes": [
1
]
}
},
{
"cycleFrames": 1020
},
"Morph",
{
"or": [
"SpaceJump",
{
"and": [
"HiJump",
"canSpeedyJump",
"canWallJump",
{
"cycleFrames": 120
}
]
},
{
"and": [
"HiJump",
"canSpringBallJumpMidAir",
"h_doubleEquipmentScreenCycleFrames",
{
"cycleFrames": 540
}
]
},
{
"and": [
"canJumpIntoIBJ",
{
"cycleFrames": 1400
}
]
}
]
}
]
},
{
"and": [
{
"resetRoom": {
"nodes": [
2
]
}
},
{
"cycleFrames": 240
}
]
}
]
}
{
"or": [
{
"and": [
"canDash",
{
"or": [
"Grapple",
"Wave",
"Spazer",
"Plasma",
{
"and": [
"ScrewAttack",
{
"cycleFrames": 60
}
]
},
{
"and": [
"canDodgeWhileShooting",
{
"cycleFrames": 300
}
]
},
{
"and": [
"canFarmWhileShooting",
{
"cycleFrames": 120
}
]
}
]
}
]
},
{
"and": [
{
"haveBlueSuit": {}
},
{
"cycleFrames": 60
}
]
}
]
}Resets obstacles: A, B, E Farm cycle drops: 5 Mella |
|
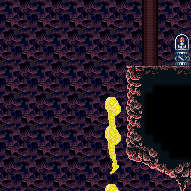

Requires: {
"obstaclesCleared": [
"B"
]
}
"canMidairShinespark"
{
"or": [
{
"canShineCharge": {
"usedTiles": 32,
"gentleUpTiles": 6,
"openEnd": 1
}
},
{
"and": [
"h_shinechargeMaxRunway",
{
"obstaclesCleared": [
"A"
]
}
]
}
]
}
{
"or": [
{
"shinespark": {
"frames": 31,
"excessFrames": 6
}
},
{
"and": [
"HiJump",
{
"shinespark": {
"frames": 25,
"excessFrames": 5
}
}
]
},
{
"and": [
"HiJump",
"canSpeedyJump",
{
"shinespark": {
"frames": 19,
"excessFrames": 6
}
}
]
}
]
}Dev note: FIXME: A big jump spark could be used to save Energy. |
|
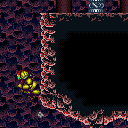
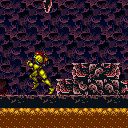
Requires: {
"obstaclesCleared": [
"B"
]
}
"HiJump"
"canSpeedyJump"
{
"or": [
"canSpringBallJumpMidAir",
"canWallJump"
]
} |
From: 5
Small Platforms Junction
To: 1
Left Door
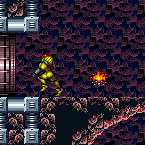
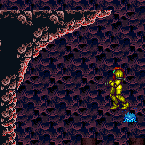
Lure a Mella from the right by breaking the speed blocks or using Morph. Then manipulate it to go high enough to be used in the left doorway. Raise the Mella up to just below the door's ledge and then climb up to the door. Reposition the Mella once towards the door, and before it finishes moving, stand in the doorframe so that the next Mella movement will hit Samus. If it drops below the camera it will be necessary to go back down and raise it again. Requires: "canManipulateMellas"
"canCameraManip"
"canBePatient"
"canComplexGMode"
{
"or": [
"SpaceJump",
"canTrickyUseFrozenEnemies",
{
"and": [
"HiJump",
"canSpringBallJumpMidAir"
]
},
{
"and": [
"HiJump",
"canSpeedyJump",
"canTrickyWallJump"
]
}
]
}
{
"or": [
"canTrickyDodgeEnemies",
{
"enemyDamage": {
"enemy": "Mella",
"type": "contact",
"hits": 2
}
}
]
}
{
"or": [
{
"obstaclesCleared": [
"B"
]
},
"Morph"
]
}Exit condition: {
"leaveWithGModeSetup": {}
}Unlocks doors: {"types":["ammo"],"requires":[]} |
|
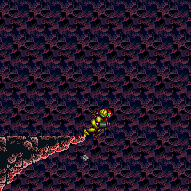

Run on the moving platform (Kamer). Requires: "canSpeedyJump" "HiJump" "canTrickyWallJump" |
From: 1
Top Left Door
To: 1
Top Left Door
Lure the Gamets to the top left door with Ice and Grapple or HiJump. First lure the Gamets vertically using the Kamer platform and Ice, which is much easier with HiJump disabled. Then freeze them again after they separate and are high enough to align with the door. With HiJump and another jump assist, jump to the left of the Gamets as they thaw and refreeze them a bit more to the left so that they will be on screen when Samus is on the left ledge. It is possible with HiJump and Ice alone, but much trickier. Use the Gamets as a platform or perform a running jump from the Kamer platform to get up to the left door. Requires: "canTrickyGMode"
"canTrickyUseFrozenEnemies"
{
"or": [
"Grapple",
{
"and": [
"HiJump",
{
"or": [
"canSpeedyJump",
"canWallJump",
"canSpringBallJumpMidAir"
]
}
]
}
]
}Exit condition: {
"leaveWithGModeSetup": {}
}Dev note: This is possible with fewer requirements, but it is already pretty terrible. |
From: 1
Top Left Door
To: 1
Top Left Door
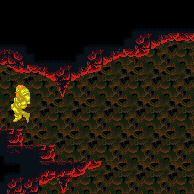
Leave Gamet drops uncollected to prevent them from respawning. Run left-to-right to gain a shinecharge, then run back to the left to gain speed to reach the top-left. Requires: "HiJump"
"h_runOverRespawningEnemies"
{
"canShineCharge": {
"usedTiles": 18,
"gentleUpTiles": 2,
"gentleDownTiles": 4,
"openEnd": 1
}
}
"canShinechargeMovementComplex"
"canSpeedyJump"
{
"shinespark": {
"frames": 6,
"excessFrames": 0
}
}Exit condition: {
"leaveWithSpark": {
"position": "bottom"
}
} |
From: 3
Bottom Right Door
To: 4
Top Door
Entrance condition: {
"comeInShinecharging": {
"length": 3,
"openEnd": 0
}
}Requires: {
"or": [
{
"shinespark": {
"frames": 58,
"excessFrames": 4
}
},
{
"and": [
"canMidairShinespark",
{
"shinespark": {
"frames": 50,
"excessFrames": 4
}
}
]
},
{
"and": [
"HiJump",
"canMidairShinespark",
{
"shinespark": {
"frames": 46,
"excessFrames": 4
}
}
]
},
{
"and": [
"canShinechargeMovementComplex",
{
"shinespark": {
"frames": 37,
"excessFrames": 2
}
}
]
},
{
"and": [
"HiJump",
"canShinechargeMovementComplex",
{
"shinespark": {
"frames": 34,
"excessFrames": 5
}
}
]
},
{
"and": [
"HiJump",
"canShinechargeMovementComplex",
"canSpeedyJump",
{
"shinespark": {
"frames": 32,
"excessFrames": 3
}
}
]
}
]
} |
|


Requires: "h_storedSpark"
{
"or": [
{
"shinespark": {
"frames": 39,
"excessFrames": 6
}
},
{
"and": [
"HiJump",
{
"shinespark": {
"frames": 35,
"excessFrames": 6
}
}
]
},
{
"and": [
"HiJump",
"canSpeedyJump",
{
"shinespark": {
"frames": 32,
"excessFrames": 3
}
}
]
}
]
} |
|
Beginning with Speed Booster unequipped, run and jump over the acid into an airball. Once Samus begins falling, equip Spring Ball and Speed Booster to safely land on the other side near the statue. Requires: "canSpringFling"
"canDisableEquipment"
"canSpeedyJump"
"canTrickyJump"
"canLateralMidAirMorph"
{
"heatFrames": 210
} |
|


Use a Crystal Flash to refill reserve energy. If Golden Torizo is alive, perform the Crystal Flash in the left corner of the room; otherwise it can be done near the door. Then use heat damage to trigger an R-mode forced standup near the crumble blocks with upward momentum, in order to clip up through them. Several different combinations of items and techniques can make this possible: 1) Space Jump, with a mid-air morph (not required but makes it easier), 2) HiJump and a mid-air Spring Ball jump, most easily by equipping both HiJump and SpringBall during the pause, 3) A walljump into Spring Ball jump, equipping Spring Ball soon after the wall jump into order to gain horizontal speed before the mid-air jump. 4) HiJump and Speedbooster, running and jumping into a mid-air morph, In every case, precise timing is needed to be in the correct location when reserves trigger, just below the crumbles but without bonking them. Having less upward momentum can provide more lenience for timing the forced standup clip, though if Samus' momentum is not enough to make it onto the ledge then a crumble jump may also be required. Entrance condition: {
"comeInWithRMode": {}
}Requires: {
"notable": "R-Mode Forced Standup Clip"
}
"canRModeStandupClip"
{
"or": [
{
"or": [
"f_DefeatedGoldenTorizo",
{
"obstaclesCleared": [
"f_DefeatedGoldenTorizo"
]
}
]
},
{
"heatFrames": 100
}
]
}
"h_heatedCrystalFlash"
{
"or": [
{
"and": [
"SpaceJump",
"can4HighMidAirMorph"
]
},
{
"and": [
"HiJump",
"canSpringBallJumpMidAir"
]
},
{
"and": [
"HiJump",
"canSpeedyJump",
"canMidAirMorph",
"canCrumbleJump"
]
},
{
"and": [
"h_trickySpringwall",
"canCrumbleJump"
]
}
]
}
{
"resourceCapacity": [
{
"type": "RegularEnergy",
"count": 99
}
]
}
{
"autoReserveTrigger": {}
}
{
"heatFrames": 100
}Clears obstacles: door_2 Dev note: FIXME: A variant of this strat could go to the item node instead of the door, possibly with slightly different heat frames at the end. FIXME: As an alternative to doing a Crystal Flash, Golden Torizo could be used as a farm, with canRiskPermanentLossOfAccess. |
|
Requires: "h_usePowerBomb"
{
"or": [
"canTrivialMidAirMorph",
"h_useSpringBall"
]
}
{
"or": [
{
"and": [
"canPreciseWallJump",
{
"heatFrames": 230
}
]
},
{
"and": [
"SpaceJump",
{
"heatFrames": 310
}
]
},
{
"and": [
"HiJump",
"canSpeedyJump",
{
"heatFrames": 320
}
]
},
{
"and": [
"HiJump",
"SpaceJump",
{
"heatFrames": 200
}
]
},
{
"and": [
"HiJump",
"canWallJump",
{
"heatFrames": 200
}
]
},
{
"and": [
"HiJump",
"canSpringBallJumpMidAir",
{
"heatFrames": 340
}
]
}
]
} |
From: 2
Right Door
To: 4
Hidden Right Item


One vertical spark is needed to open up the area directly above. A running jump is used to jump high enough into the revealed hole for a horizontal spark. Requires: {
"notable": "Right Item Double Shinespark"
}
{
"or": [
"f_DefeatedGoldenTorizo",
{
"obstaclesCleared": [
"f_DefeatedGoldenTorizo"
]
}
]
}
"canShinechargeMovementComplex"
"HiJump"
"canSpeedyJump"
{
"canShineCharge": {
"usedTiles": 28,
"openEnd": 0
}
}
{
"heatFrames": 900
}
{
"shinespark": {
"frames": 11,
"excessFrames": 3
}
} |
|

Build run speed for a jump straight into the destructible blocks. Requires: "HiJump"
"canSpeedyJump"
"ScrewAttack"
{
"heatFrames": 200
} |
From: 7
G-Mode Junction (Bottom of Room)
To: 1
Left Door

Use the camera scroll blocks below the crumble blocks to overload PLMs and go through the crumble blocks. A good jumping through them a single time is enough to overload them for the next jump. This can be done while dodging GT. With a speedy jump, it is possible to overload PLMs and run back to GT before it stands up, get into the safe spot location to get him to jump back, and use the runway again. With shinesparks, diagonally spark into the crumble blocks and hold forward three times, then spark through. Note that when GT attacks, it will place stationary invisible projectiles, so it is much more difficult if not getting up quickly. Requires: "h_heatedGMode"
{
"or": [
{
"or": [
"f_DefeatedGoldenTorizo",
{
"obstaclesCleared": [
"f_DefeatedGoldenTorizo"
]
}
]
},
"canTrickyDodgeEnemies"
]
}
{
"or": [
"SpaceJump",
{
"and": [
"HiJump",
{
"or": [
"canTrickyWallJump",
"canSpringBallJumpMidAir",
"canSpeedyJump"
]
}
]
},
{
"and": [
"canSpringBallJumpMidAir",
"canSpeedyJump",
{
"or": [
{
"or": [
"f_DefeatedGoldenTorizo",
{
"obstaclesCleared": [
"f_DefeatedGoldenTorizo"
]
}
]
},
"canInsaneJump"
]
}
]
},
{
"and": [
{
"or": [
"f_DefeatedGoldenTorizo",
{
"obstaclesCleared": [
"f_DefeatedGoldenTorizo"
]
}
]
},
"canTrickyDashJump",
"canWallJump"
]
},
{
"and": [
{
"or": [
"f_DefeatedGoldenTorizo",
{
"obstaclesCleared": [
"f_DefeatedGoldenTorizo"
]
}
]
},
"canConsecutiveWallJump",
"canInsaneWallJump"
]
},
{
"and": [
{
"or": [
"f_DefeatedGoldenTorizo",
{
"obstaclesCleared": [
"f_DefeatedGoldenTorizo"
]
}
]
},
{
"canShineCharge": {
"usedTiles": 28,
"openEnd": 0
}
},
{
"or": [
{
"and": [
"canWallJump",
{
"shinespark": {
"frames": 9,
"excessFrames": 4
}
}
]
},
{
"and": [
"canSpeedyJump",
{
"shinespark": {
"frames": 9,
"excessFrames": 4
}
}
]
},
{
"shinespark": {
"frames": 32,
"excessFrames": 4
}
}
]
}
]
}
]
}
"h_heatedGModeOpenDifferentDoor" |
From: 7
G-Mode Junction (Bottom of Room)
To: 3
Top Left Item
Use the camera scroll blocks below the crumble blocks to overload PLMs and go through the crumble blocks. A good jumping through them a single time is enough to overload them for the next jump. This can be done while dodging GT. With a speedy jump, it is possible to overload PLMs and run back to GT before it stands up, get into the safe spot location to get him to jump back, and use the runway again. With shinesparks, diagonally spark into the crumble blocks and hold forward three times, then spark through. Note that when GT attacks, it will place stationary invisible projectiles, so it is much more difficult if not getting up quickly. Requires: "h_heatedGMode"
{
"or": [
{
"or": [
"f_DefeatedGoldenTorizo",
{
"obstaclesCleared": [
"f_DefeatedGoldenTorizo"
]
}
]
},
"canTrickyDodgeEnemies"
]
}
{
"or": [
"SpaceJump",
{
"and": [
"HiJump",
{
"or": [
"canTrickyWallJump",
"canSpringBallJumpMidAir",
"canSpeedyJump"
]
}
]
},
{
"and": [
"canSpringBallJumpMidAir",
"canSpeedyJump",
{
"or": [
{
"or": [
"f_DefeatedGoldenTorizo",
{
"obstaclesCleared": [
"f_DefeatedGoldenTorizo"
]
}
]
},
"canInsaneJump"
]
}
]
},
{
"and": [
{
"or": [
"f_DefeatedGoldenTorizo",
{
"obstaclesCleared": [
"f_DefeatedGoldenTorizo"
]
}
]
},
"canTrickyDashJump",
"canWallJump"
]
},
{
"and": [
{
"or": [
"f_DefeatedGoldenTorizo",
{
"obstaclesCleared": [
"f_DefeatedGoldenTorizo"
]
}
]
},
"canConsecutiveWallJump",
"canInsaneWallJump"
]
},
{
"and": [
{
"or": [
"f_DefeatedGoldenTorizo",
{
"obstaclesCleared": [
"f_DefeatedGoldenTorizo"
]
}
]
},
{
"canShineCharge": {
"usedTiles": 28,
"openEnd": 0
}
},
{
"or": [
{
"and": [
"canWallJump",
{
"shinespark": {
"frames": 9,
"excessFrames": 4
}
}
]
},
{
"and": [
"canSpeedyJump",
{
"shinespark": {
"frames": 9,
"excessFrames": 4
}
}
]
},
{
"shinespark": {
"frames": 32,
"excessFrames": 4
}
}
]
}
]
}
]
}
{
"heatFrames": 0
} |
From: 7
G-Mode Junction (Bottom of Room)
To: 4
Hidden Right Item
Use the camera scroll blocks below the crumble blocks to overload PLMs and go through the bomb blocks near the right item. A good jumping through them a single time is enough to overload PLMs. This can be done while dodging GT. With a speedy jump, it is possible to overload PLMs and run back to GT before it stands up, get into the safe spot location to get him to jump back, and use the runway again. With shinesparks, diagonally spark into the crumble blocks and hold forward three times, to overload PLMs as much as possible. Note that when GT attacks, it will place stationary invisible projectiles, so it is much more difficult if not getting up quickly. Place a Power Bomb then quickly exit G-mode to quickly clear all of the bomb blocks, otherwise it is possible to get out with a few Bombs or Screw Attack. Requires: "h_heatedGMode"
{
"or": [
{
"or": [
"f_DefeatedGoldenTorizo",
{
"obstaclesCleared": [
"f_DefeatedGoldenTorizo"
]
}
]
},
"canTrickyDodgeEnemies"
]
}
{
"or": [
"SpaceJump",
{
"and": [
"HiJump",
{
"or": [
"canWallJump",
"canSpringBallJumpMidAir",
"canSpeedyJump"
]
}
]
},
{
"and": [
"canSpringBallJumpMidAir",
"canSpeedyJump",
{
"or": [
{
"or": [
"f_DefeatedGoldenTorizo",
{
"obstaclesCleared": [
"f_DefeatedGoldenTorizo"
]
}
]
},
"canInsaneJump"
]
}
]
},
{
"and": [
{
"or": [
"f_DefeatedGoldenTorizo",
{
"obstaclesCleared": [
"f_DefeatedGoldenTorizo"
]
}
]
},
"canTrickyDashJump",
"canWallJump"
]
},
{
"and": [
{
"or": [
"f_DefeatedGoldenTorizo",
{
"obstaclesCleared": [
"f_DefeatedGoldenTorizo"
]
}
]
},
"canPreciseWallJump"
]
},
{
"and": [
{
"or": [
"f_DefeatedGoldenTorizo",
{
"obstaclesCleared": [
"f_DefeatedGoldenTorizo"
]
}
]
},
{
"canShineCharge": {
"usedTiles": 28,
"openEnd": 0
}
},
{
"or": [
{
"and": [
"canSpeedyJump",
{
"shinespark": {
"frames": 7,
"excessFrames": 4
}
}
]
},
{
"shinespark": {
"frames": 30,
"excessFrames": 4
}
}
]
}
]
}
]
}
{
"or": [
{
"and": [
"h_usePowerBomb",
{
"heatFrames": 70
}
]
},
{
"and": [
"h_useMorphBombs",
{
"heatFrames": 250
}
]
},
{
"and": [
"ScrewAttack",
{
"heatFrames": 50
}
]
}
]
} |
From: 1
Bottom Left Door
To: 2
Middle Right Door

To get up most quickly, after using Screw Attack to break up through the bomb blocks, use the next bomb blocks as a platform. Entrance condition: {
"comeInShinecharged": {}
}Requires: "HiJump"
"ScrewAttack"
"canShinechargeMovementComplex"
{
"heatFrames": 135
}
{
"or": [
{
"and": [
"canSpeedyJump",
{
"shineChargeFrames": 100
},
{
"shinespark": {
"frames": 6,
"excessFrames": 0
}
}
]
},
{
"and": [
{
"shineChargeFrames": 105
},
{
"shinespark": {
"frames": 7,
"excessFrames": 0
}
}
]
},
{
"and": [
{
"shineChargeFrames": 110
},
{
"shinespark": {
"frames": 3,
"excessFrames": 0
}
}
]
}
]
}Exit condition: {
"leaveWithSpark": {}
}Unlocks doors: {"types":["super"],"requires":[]}
{"types":["missiles","powerbomb"],"requires":["never"]} |
From: 1
Bottom Left Door
To: 2
Middle Right Door
Jump through the lowest part of the door to enter with enough momentum to break the bomb blocks with Screw Attack. Entrance condition: {
"comeInJumping": {
"speedBooster": "yes",
"minTiles": 12.4375
}
}Requires: {
"doorUnlockedAtNode": 2
}
"HiJump"
"ScrewAttack"
"canSpeedyJump"
"canTrickyJump"
{
"heatFrames": 80
}Unlocks doors: {"nodeId":2,"types":["super"],"requires":[]}
{"nodeId":2,"types":["missiles","powerbomb"],"requires":["never"]} |
From: 2
Middle Right Door
To: 2
Middle Right Door
Entrance condition: {
"comeInWithGMode": {
"mode": "direct",
"morphed": false
}
}Requires: {
"or": [
"SpaceJump",
"canWallJump",
"HiJump",
"canSpringBallJumpMidAir",
"canSpeedyJump",
"h_crouchJumpDownGrab",
"canIBJ"
]
}Exit condition: {
"leaveWithGMode": {
"morphed": false
}
} |
|
Requires: "HiJump"
"canSpeedyJump"
{
"heatFrames": 180
}Exit condition: {
"leaveSpaceJumping": {
"remoteRunway": {
"length": 2,
"openEnd": 1
}
}
} |
|
Requires: "HiJump"
"canSpeedyJump"
{
"heatFrames": 180
}Exit condition: {
"leaveSpinning": {
"remoteRunway": {
"length": 5,
"openEnd": 1
}
}
}Dev note: FIXME: Speed Booster is not necessarily required here; but for soundness it currently must be included in case the next room requires HiJump to be unequipped, because without Speed Booster, pausing would cause all dash speed to be lost. The same applies to all other remote runway strats at this node. |
|
Requires: "HiJump"
"canSpeedyJump"
{
"heatFrames": 180
}Exit condition: {
"leaveWithMockball": {
"remoteRunway": {
"length": 5,
"openEnd": 1
},
"landingRunway": {
"length": 1,
"openEnd": 1
}
}
} |
From: 2
Middle Right Door
To: 2
Middle Right Door
Requires: "HiJump"
"canSpeedyJump"
{
"heatFrames": 180
}Exit condition: {
"leaveWithSpringBallBounce": {
"remoteRunway": {
"length": 4,
"openEnd": 2
},
"landingRunway": {
"length": 1,
"openEnd": 1
},
"movementType": "uncontrolled"
}
} |
|

Position Samus in the door way, then run and jump. Makes it possible to walljump up. Requires: {
"obstaclesCleared": [
"A"
]
}
"HiJump"
"canSpeedyJump"
"canPreciseWallJump"
"canCarefulJump"
{
"or": [
"canTrickyJump",
"h_backIntoCorner"
]
}
{
"or": [
"canInsaneJump",
{
"heatFrames": 40
}
]
}
{
"doorUnlockedAtNode": 2
}
{
"heatFrames": 160
}
{
"or": [
"canTrickyJump",
{
"heatFrames": 200
}
]
}Unlocks doors: {"nodeId":2,"types":["missiles"],"requires":[{"heatFrames":50}]}
{"nodeId":2,"types":["super"],"requires":[]}
{"nodeId":2,"types":["powerbomb"],"requires":[{"heatFrames":110}]}Dev note: Without canTrickyJump, this assumes you miss the jump and have to set it up a second time. |
|

Run through the doorway with enough momentum to break the bomb blocks with Screw. Entrance condition: {
"comeInRunning": {
"speedBooster": "yes",
"minTiles": 6
}
}Requires: {
"notable": "Transition Screw Jump"
}
"h_navigateHeatRooms"
"ScrewAttack"
"HiJump"
"canSpeedyJump"
"canWallJump"
{
"heatFrames": 150
}Clears obstacles: A |
From: 2
Middle Right Door
To: 3
Top Right Door
Run through the doorway with enough momentum to break the bomb blocks with Screw. Entrance condition: {
"comeInRunning": {
"speedBooster": "yes",
"minTiles": 7
}
}Requires: {
"notable": "Transition Screw Jump"
}
"h_navigateHeatRooms"
"ScrewAttack"
"HiJump"
"canSpeedyJump"
{
"heatFrames": 150
}Clears obstacles: A |
From: 2
Middle Right Door
To: 3
Top Right Door
Run through the doorway with enough momentum to break the bomb blocks with Screw. Entrance condition: {
"comeInRunning": {
"speedBooster": "yes",
"minTiles": 5.4375
}
}Requires: {
"notable": "Transition Screw Jump"
}
"h_navigateHeatRooms"
"ScrewAttack"
"HiJump"
"canSpeedyJump"
"canTrickyJump"
"canWallJump"
{
"heatFrames": 150
}Clears obstacles: A |
From: 2
Middle Right Door
To: 5
Junction Above Bottom Blocks
Run in the adjacent room and jump through the door, to place a Bomb to break the top bomb blocks. Entrance condition: {
"comeInJumping": {
"speedBooster": "yes",
"minTiles": 6
}
}Requires: {
"notable": "Transition Speedy Jump with Bombs"
}
"HiJump"
"canSpeedyJump"
"canMidAirMorph"
"h_useMorphBombs"
{
"heatFrames": 155
}Clears obstacles: A |
|
Requires: "canDash"
{
"obstaclesCleared": [
"A"
]
}
"HiJump"
{
"or": [
"canSpeedyJump",
{
"heatFrames": 90
}
]
}
{
"heatFrames": 270
}
{
"or": [
"canCarefulJump",
"canLateralMidAirMorph",
"ScrewAttack",
{
"and": [
{
"enemyKill": {
"enemies": [
[
"Yellow Space Pirate (standing)"
]
],
"explicitWeapons": [
"Charge+Ice+Wave+Spazer"
]
}
},
{
"heatFrames": 240
}
]
},
{
"and": [
{
"enemyKill": {
"enemies": [
[
"Yellow Space Pirate (standing)"
]
],
"explicitWeapons": [
"Missile",
"Charge+Plasma"
]
}
},
{
"heatFrames": 120
}
]
},
{
"and": [
{
"enemyKill": {
"enemies": [
[
"Yellow Space Pirate (standing)"
]
],
"explicitWeapons": [
"Super"
]
}
},
{
"heatFrames": 60
}
]
}
]
} |
From: 1
Top Left Door
To: 4
Top Right Door
Come in with blue speed, killing the lower two Pirates, with enough momentum to jump all the way up to the door. Entrance condition: {
"comeInGettingBlueSpeed": {
"length": 8,
"openEnd": 1,
"minExtraRunSpeed": "$6.9"
}
}Requires: "canSpeedyJump"
"canCarefulJump"
{
"heatFrames": 90
}Dev note: This can also be done with lower run speeds in specific ranges, namely between $2.0 and $2.1 or between $2.E and $3.1, but this would be much more difficult. |
From: 1
Top Left Door
To: 4
Top Right Door

Come in with blue speed, with enough momentum to jump, kill the lower two Pirates, and land on the platform above. Then either quickly jump through the door before the top Pirate fires its laser, or wait for it to jump to the other side and then jump over it. Entrance condition: {
"comeInGettingBlueSpeed": {
"length": 8,
"openEnd": 1,
"minExtraRunSpeed": "$3.E"
}
}Requires: "canSpeedyJump"
{
"or": [
"canDodgeWhileShooting",
{
"enemyDamage": {
"enemy": "Yellow Space Pirate (standing)",
"type": "contact",
"hits": 1
}
}
]
}
{
"heatFrames": 135
}Dev note: This can also be done with lower run speeds in specific ranges, namely between $2.0 and $2.1 or between $2.E and $3.1, but this would be much more difficult. |
From: 1
Top Left Door
To: 4
Top Right Door

Entrance condition: {
"comeInShinecharged": {}
}Requires: "HiJump"
"canShinechargeMovementComplex"
{
"or": [
{
"shineChargeFrames": 75
},
{
"and": [
"canSpeedyJump",
{
"shineChargeFrames": 70
}
]
}
]
}
"canDodgeWhileShooting"
{
"heatFrames": 105
}
{
"shinespark": {
"frames": 12,
"excessFrames": 0
}
}Exit condition: {
"leaveWithSpark": {}
}Unlocks doors: {"types":["super"],"requires":[]}
{"types":["missiles","powerbomb"],"requires":["never"]} |
From: 2
Bottom Left Door
To: 2
Bottom Left Door
Requires: {
"or": [
{
"and": [
"canTrickyDodgeEnemies",
{
"resetRoom": {
"nodes": [
1
]
}
},
{
"cycleFrames": 2900
}
]
},
{
"and": [
{
"resetRoom": {
"nodes": [
2
]
}
},
{
"cycleFrames": 1560
}
]
},
{
"and": [
"canTrickyDodgeEnemies",
{
"resetRoom": {
"nodes": [
3
]
}
},
{
"cycleFrames": 2780
}
]
}
]
}
"Morph"
{
"or": [
{
"ammo": {
"type": "PowerBomb",
"count": 1
}
},
"SpringBall",
{
"and": [
"Bombs",
{
"cycleFrames": 60
},
{
"or": [
"canTrickyJump",
{
"and": [
"Ice",
"canDodgeWhileShooting"
]
}
]
}
]
}
]
}
{
"or": [
"SpaceJump",
{
"and": [
"canDash",
"canFarmWhileShooting",
"canHorizontalDamageBoost",
{
"enemyDamage": {
"enemy": "Fireflea",
"type": "contact",
"hits": 2
}
},
{
"or": [
"canPreciseWallJump",
{
"and": [
"HiJump",
"canSpeedyJump"
]
},
{
"and": [
"canJumpIntoIBJ",
{
"cycleFrames": 1000
}
]
}
]
}
]
}
]
}
{
"or": [
"SpaceJump",
"canPreciseWallJump",
{
"and": [
"HiJump",
"canSpeedyJump"
]
}
]
}
{
"or": [
"canDash",
{
"cycleFrames": 500
}
]
}Resets obstacles: A Farm cycle drops: 5 Fireflea |
|
Requires: {
"or": [
{
"and": [
{
"resetRoom": {
"nodes": [
1
]
}
},
"canDodgeWhileShooting",
{
"cycleFrames": 2370
}
]
},
{
"and": [
{
"resetRoom": {
"nodes": [
2
]
}
},
"canMidAirMorph",
{
"or": [
{
"and": [
"canTrickyJump",
{
"cycleFrames": 2000
}
]
},
{
"and": [
{
"or": [
"Grapple",
"SpaceJump"
]
},
{
"cycleFrames": 2200
}
]
}
]
}
]
},
{
"and": [
{
"resetRoom": {
"nodes": [
3
]
}
},
"canDodgeWhileShooting",
{
"cycleFrames": 2250
}
]
}
]
}
"h_usePowerBomb"
"h_usePowerBomb"
{
"or": [
"SpaceJump",
"canPreciseWallJump",
{
"and": [
"HiJump",
"canSpeedyJump"
]
}
]
}
{
"or": [
"canDash",
{
"cycleFrames": 500
}
]
}Clears obstacles: A Farm cycle drops: 2 Fireflea, 5 Fune Dev note: An extra Power Bomb can be used but an extra Fireflea farm is included in that case. |
From: 2
Bottom Left Door
To: 2
Bottom Left Door
Requires: {
"or": [
{
"and": [
"canTrickyDodgeEnemies",
{
"resetRoom": {
"nodes": [
1
]
}
},
{
"cycleFrames": 2480
}
]
},
{
"and": [
{
"resetRoom": {
"nodes": [
2
]
}
},
{
"cycleFrames": 1140
}
]
},
{
"and": [
"canTrickyDodgeEnemies",
{
"resetRoom": {
"nodes": [
3
]
}
},
{
"cycleFrames": 2360
}
]
}
]
}
"Morph"
{
"or": [
{
"ammo": {
"type": "PowerBomb",
"count": 1
}
},
"SpringBall",
{
"and": [
"Bombs",
{
"cycleFrames": 60
},
{
"or": [
"canTrickyJump",
{
"and": [
"Ice",
"canDodgeWhileShooting"
]
}
]
}
]
}
]
}
{
"or": [
"SpaceJump",
"canPreciseWallJump",
{
"and": [
"HiJump",
"canSpeedyJump"
]
}
]
}
{
"or": [
"canDash",
{
"cycleFrames": 500
}
]
}Resets obstacles: A Farm cycle drops: 2 Fireflea |
From: 5
Firefleas Bottom Left Platform Junction
To: 7
Fireflea Statue's Claw Junction
Requires: "HiJump" "canSpeedyJump" "canCarefulJump" |
From: 7
Fireflea Statue's Claw Junction
To: 6
Junction Behind Fune

Requires: {
"canShineCharge": {
"usedTiles": 17,
"gentleUpTiles": 6,
"steepUpTiles": 1,
"openEnd": 1
}
}
{
"or": [
{
"shinespark": {
"frames": 21,
"excessFrames": 4
}
},
{
"and": [
"canMidairShinespark",
{
"shinespark": {
"frames": 13,
"excessFrames": 4
}
}
]
},
{
"and": [
"HiJump",
"canMidairShinespark",
{
"shinespark": {
"frames": 9,
"excessFrames": 3
}
}
]
},
{
"and": [
"canShinechargeMovementComplex",
"canSpeedyJump",
{
"shinespark": {
"frames": 9,
"excessFrames": 3
}
}
]
}
]
} |
From: 7
Fireflea Statue's Claw Junction
To: 6
Junction Behind Fune
If using a speedy Spring Ball jump, it is best to jump while still as far left as possible, while still clearing the corner, to use the higher runway, or jump just before hitting the right wall. Requires: "canSpeedyJump"
{
"or": [
"HiJump",
"canTrickySpringBallJump"
]
} |
|


Manipulate Ridley into a pogo pattern facing left. Morph and position near the center of the leftmost tile of the platform. When Ridley is descending above Samus and about to pound the ground with his tail, place a Power Bomb and immediately unmorph. If successful, Samus will get grabbed, triggering auto-reserves before the Power Bomb explodes. Ridley will fly away from the Power Bomb explosion, carrying Samus to the top right into the door transition. Requires: {
"notable": "Ridley Grab Door Lock Skip"
}
"canUseEnemies"
{
"heatFrames": 745
}
"h_usePowerBomb"
{
"autoReserveTrigger": {}
}
{
"enemyDamage": {
"enemy": "Ridley",
"type": "contact",
"hits": 2
}
}
{
"heatFrames": 310
}
{
"or": [
{
"and": [
{
"not": "f_DefeatedRidley"
},
"canRiskPermanentLossOfAccess"
]
},
"canWallJump",
"SpaceJump",
{
"and": [
"HiJump",
"canSpringBallJumpMidAir"
]
},
{
"and": [
"HiJump",
"canSpeedyJump",
"canTrickyJump"
]
},
"canJumpIntoIBJ"
]
}Bypasses door shell: true |
|

Entrance condition: {
"comeInWithSidePlatform": {
"platforms": [
{
"minHeight": 1,
"maxHeight": 1,
"minTiles": 17,
"speedBooster": "yes",
"obstructions": [
[
1,
0
]
],
"requires": [
{
"or": [
{
"and": [
"HiJump",
{
"heatFrames": 90
}
]
},
{
"and": [
"canTrickyDashJump",
"canTrickySpringBallJump",
{
"heatFrames": 115
}
]
}
]
}
],
"note": [
"This applies to Warehouse Entrance."
],
"detailNote": [
"For the spring ball jump, retain forward momentum until the pause hits,",
"in order for the mid-air jump to also get the 'tricky dash' boost in height."
]
},
{
"minHeight": 2,
"maxHeight": 2,
"minTiles": 11.4375,
"speedBooster": "yes",
"obstructions": [
[
1,
0
]
],
"requires": [
"canTrickyDashJump",
"canTrickySpringBallJump",
{
"heatFrames": 100
}
],
"note": [
"This applies to Ridley Tank Room, Halfie Climb Room, and Dust Torizo Room."
],
"detailNote": [
"Retain forward momentum until the pause hits,",
"in order for the mid-air jump to also get the 'tricky dash' boost in height."
]
},
{
"minHeight": 2,
"maxHeight": 2,
"minTiles": 12.4375,
"speedBooster": "yes",
"obstructions": [
[
1,
0
]
],
"requires": [
"HiJump",
{
"heatFrames": 95
}
],
"note": [
"This applies to Dust Torizo Room and Halfie Climb Room."
]
},
{
"minHeight": 3,
"maxHeight": 3,
"minTiles": 10.4375,
"speedBooster": "yes",
"obstructions": [
[
1,
0
]
],
"requires": [
"canTrickyDashJump",
"canTrickySpringBallJump",
{
"heatFrames": 120
}
],
"note": [
"This applies to Big Boy Room and Mickey Mouse Room."
],
"detailNote": [
"For the spring ball jump, retain forward momentum until the pause hits,",
"in order for the mid-air jump to also get the 'tricky dash' boost in height."
]
},
{
"minHeight": 2,
"maxHeight": 2,
"minTiles": 45,
"speedBooster": "yes",
"obstructions": [
[
2,
0
]
],
"requires": [
"canInsaneJump",
{
"heatFrames": 85
}
],
"note": [
"This applies to Waterway Energy Tank Room."
]
},
{
"minHeight": 2,
"maxHeight": 2,
"minTiles": 45,
"speedBooster": "yes",
"obstructions": [
[
3,
0
]
],
"requires": [
"canInsaneJump",
"canMomentumConservingMorph",
{
"or": [
{
"and": [
"HiJump",
"canInsaneMidAirMorph",
{
"heatFrames": 80
}
]
},
{
"and": [
"canTrickySpringBallJump",
{
"heatFrames": 100
}
]
}
]
}
],
"note": [
"This applies to Statues Hallway."
]
},
{
"minHeight": 3,
"maxHeight": 3,
"minTiles": 37.4375,
"speedBooster": "yes",
"obstructions": [
[
3,
0
]
],
"requires": [
"canInsaneJump",
"canMomentumConservingMorph",
{
"or": [
{
"and": [
"HiJump",
{
"heatFrames": 85
}
]
},
{
"and": [
"canTrickySpringBallJump",
{
"heatFrames": 100
}
]
}
]
}
],
"note": [
"This applies to Flyway."
]
},
{
"minHeight": 2,
"maxHeight": 2,
"minTiles": 45,
"speedBooster": "yes",
"obstructions": [
[
4,
0
]
],
"requires": [
"canInsaneJump",
"canMomentumConservingMorph",
"canInsaneMidAirMorph",
"canTrickySpringBallJump",
{
"heatFrames": 100
}
],
"note": [
"This applies to Baby Kraid Room."
]
},
{
"minHeight": 3,
"maxHeight": 3,
"minTiles": 39.4375,
"speedBooster": "yes",
"obstructions": [
[
3,
2
]
],
"requires": [
"canTrickyJump",
{
"or": [
{
"and": [
"HiJump",
{
"heatFrames": 75
}
]
},
{
"and": [
"canTrickySpringBallJump",
{
"heatFrames": 115
}
]
}
]
}
],
"note": [
"This applies to Metal Pirates Room."
]
}
]
}
}Requires: "canSpeedyJump" Clears obstacles: door_1 Dev note: FIXME: Many of the spring ball jump variants can be done more easily with a spring ball bounce, which should be added as a separate strat. |
|
Entrance condition: {
"comeInWithGMode": {
"mode": "direct",
"morphed": false
}
}Requires: {
"or": [
"SpaceJump",
"canWallJump",
{
"and": [
"canJumpIntoIBJ",
"canInsaneJump",
{
"or": [
"HiJump",
{
"and": [
"canLongIBJ",
"canDoubleBombJump"
]
}
]
}
]
},
{
"and": [
{
"or": [
"f_DefeatedRidley",
{
"obstaclesCleared": [
"f_DefeatedRidley"
]
}
]
},
{
"or": [
"canLongIBJ",
{
"and": [
"canJumpIntoIBJ",
"HiJump"
]
}
]
}
]
},
{
"and": [
"HiJump",
"canSpringBallJumpMidAir"
]
},
{
"and": [
"HiJump",
"canSpeedyJump",
"canTrickyJump",
{
"or": [
"canInsaneJump",
{
"or": [
"f_DefeatedRidley",
{
"obstaclesCleared": [
"f_DefeatedRidley"
]
}
]
}
]
}
]
}
]
}Exit condition: {
"leaveWithGMode": {
"morphed": false
}
}Clears obstacles: door_2 |
|
Requires starting on one of the last three pixels and then performing a last frame jump to get enough height. Requires: "HiJump"
"canSpeedyJump"
"canTrickyJump"
{
"heatFrames": 220
}
{
"or": [
"canInsaneJump",
{
"heatFrames": 300
}
]
}Dev note: This gives one leniency attempt without canInsaneJump. |
From: 2
Bottom Left Door
To: 4
Junction Above Bomb Blocks


Jump with some run speed to place the power bomb high enough to break the bomb blocks. During the explosion, jump through the left wall pirate and precisely walljump to reach the upper area. Requires: {
"notable": "New Route with HiJump, Speed, and PowerBombs"
}
"HiJump"
"canSpeedyJump"
"canPreciseWallJump"
"canTrickyDodgeEnemies"
"h_usePowerBomb"
"canTrivialMidAirMorph"
"canHitbox"
{
"heatFrames": 360
}
{
"or": [
"h_heatResistant",
"canPauseAbuse",
{
"resourceCapacity": [
{
"type": "RegularEnergy",
"count": 149
}
]
}
]
}Clears obstacles: A Dev note: With Reserves only, canPauseAbuse is used as a proxy for pause abuse or optimal reserve management and character movement. |
From: 2
Bottom Left Door
To: 4
Junction Above Bomb Blocks
Avoid the bottom Pirates and jump high enough to break the bomb blocks with a power bomb. During the explosion, climb the right wall passing through any Pirates and use a movement item to reach the top. Requires: {
"notable": "Power Bombs and a Jump Assist"
}
"canDash"
"canHitbox"
"h_usePowerBomb"
"canTrivialMidAirMorph"
{
"or": [
{
"and": [
"SpaceJump",
"canPreciseWallJump",
{
"heatFrames": 490
}
]
},
{
"and": [
"HiJump",
"canSpeedyJump",
"SpaceJump",
{
"heatFrames": 420
}
]
},
{
"and": [
"canSpringwall",
{
"heatFrames": 490
}
]
},
{
"and": [
"HiJump",
"canPreciseWallJump",
"canInsaneJump",
{
"heatFrames": 470
}
]
},
{
"and": [
"HiJump",
"canSpeedyJump",
"canTrickySpringBallJump",
"canInsaneJump",
{
"heatFrames": 410
}
]
},
{
"and": [
"HiJump",
"SpaceJump",
"canInsaneJump",
{
"heatFrames": 600
}
]
}
]
}
{
"or": [
"h_heatResistant",
"canPauseAbuse",
{
"resourceCapacity": [
{
"type": "RegularEnergy",
"count": 149
}
]
}
]
}Clears obstacles: A Dev note: With Reserves only, canPauseAbuse is used as a proxy for pause abuse or optimal reserve management and character movement. |
From: 6
Bottom Platform Junction With Pirates Killed
To: 6
Bottom Platform Junction With Pirates Killed
Requires: {
"or": [
{
"and": [
"canWallJump",
{
"heatFrames": 150
}
]
},
{
"and": [
"SpaceJump",
{
"heatFrames": 200
}
]
},
{
"and": [
"HiJump",
"SpaceJump",
{
"heatFrames": 155
}
]
},
{
"and": [
"HiJump",
"canSpeedyJump",
{
"heatFrames": 140
}
]
},
{
"and": [
"canSpringBallJumpMidAir",
{
"heatFrames": 155
}
]
}
]
}
"canTrivialMidAirMorph"
"h_usePowerBomb"Clears obstacles: A |
|
Requires: "canSpeedyJump"
{
"heatFrames": 240
}
"canTrickyJump"
"canLateralMidAirMorph"Exit condition: {
"leaveWithSidePlatform": {
"height": 3,
"runway": {
"length": 8,
"openEnd": 0
},
"obstruction": [
3,
0
]
}
}Dev note: Max extra run speed $1.D. This strat is included for completeness, though it apparently doesn't have any applications. |
From: 2
Right Door
To: 4
Junction Above Bomb Block
Run into the acid to quickly wall jump over the first pillar. Build speed and jump over the second pillar to mockball through the tunnel without taking much acid damage. Entrance condition: {
"comeInRunning": {
"speedBooster": "any",
"minTiles": 3
}
}Requires: "canMockball"
"HiJump"
"canSpeedyJump"
"canCarefulJump"
"canWallJump"
{
"or": [
"canInsaneWallJump",
{
"acidFrames": 30
}
]
}
{
"heatFrames": 310
}
{
"acidFrames": 5
}Clears obstacles: B |
From: 2
Right Door
To: 4
Junction Above Bomb Block


Run into the acid to quickly jump over the first pillar. Build speed and jump over the second pillar to mockball through the tunnel without taking much acid damage. Requires: "canMockball"
"HiJump"
"canSpeedyJump"
"canCarefulJump"
"Gravity"
{
"heatFrames": 310
}
{
"acidFrames": 25
}Clears obstacles: B |
From: 4
Junction Above Bomb Block
To: 1
Top Left Door

Read the movements of the Kihunters and jump over or roll under them as appropriate. Changing platforms is the hardest part: jumping extra high and morphing works sometimes, other times jump short and roll under. Requires: {
"notable": "Dodge Going Up"
}
"canDash"
"canInsaneJump"
{
"or": [
{
"and": [
"canWallJumpInstantMorph",
"canPreciseWallJump"
]
},
{
"and": [
"canSpeedyJump",
"HiJump",
"canMidAirMorph"
]
}
]
}
{
"heatFrames": 540
}Clears obstacles: A, B |
From: 5
G-Mode Morph Junction (Above Bomb Block)
To: 1
Top Left Door
Dodge the Kihunters then shoot the shot blocks and escape. Requires: "h_heatedGMode"
{
"notable": "Dodge Going Up"
}
"h_navigateHeatRooms"
"canInsaneJump"
{
"or": [
{
"and": [
"canWallJumpInstantMorph",
"canPreciseWallJump"
]
},
{
"and": [
"canSpeedyJump",
"HiJump",
"canMidAirMorph"
]
}
]
}
{
"heatFrames": 220
} |
|


Requires: {
"or": [
{
"obstaclesCleared": [
"A"
]
},
"h_usePowerBomb"
]
}
{
"or": [
{
"canShineCharge": {
"usedTiles": 35,
"openEnd": 1
}
},
{
"and": [
"f_DefeatedPhantoon",
"h_shinechargeMaxRunway"
]
}
]
}
{
"or": [
{
"shinespark": {
"frames": 40,
"excessFrames": 3
}
},
{
"and": [
"canMidairShinespark",
{
"shinespark": {
"frames": 32,
"excessFrames": 2
}
}
]
},
{
"and": [
"canMidairShinespark",
"HiJump",
{
"shinespark": {
"frames": 29,
"excessFrames": 3
}
}
]
},
{
"and": [
"canShinechargeMovementComplex",
"canSpeedyJump",
{
"or": [
{
"shinespark": {
"frames": 27,
"excessFrames": 2
}
},
{
"and": [
"HiJump",
{
"shinespark": {
"frames": 18,
"excessFrames": 2
}
}
]
}
]
}
]
}
]
}Clears obstacles: A |
|
Requires at least 3 tiles to work, but some longer lengths don't work without a tricky wall jump. Entrance condition: {
"comeInRunning": {
"speedBooster": "yes",
"minTiles": 3
}
}Requires: "canSuitlessMaridia"
"canCarefulJump"
"canSpeedyJump"
{
"or": [
"canWallJump",
"HiJump"
]
}Dev note: FIXME: model the requirements more accurately based on runway length. |
|

Jump while in the water, after passing the Bull. Entrance condition: {
"comeInRunning": {
"speedBooster": "yes",
"minTiles": 18.4375
}
}Requires: "canSpeedyJump" |
|
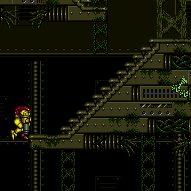
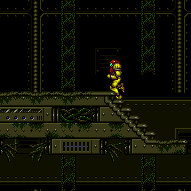
Requires: {
"or": [
"canWallJump",
"HiJump",
"SpaceJump",
"canIBJ",
"canSpeedyJump",
"h_crouchJumpDownGrab",
"canSpringBallJumpMidAir",
"canSpringBallBombJump",
"canUseFrozenEnemies"
]
}Dev note: FIXME: It is possible to get up with a damage boost, with or without Morph, which could preserve a flash suit. |
From: 1
Bottom Left Door
To: 4
Farm Junction Left of Gate
It is possible to jump up, in-room, by pressing against the right door and running and jumping up the shaft. Requires: "canSpeedyJump" "canSpringBallJumpMidAir" "canInsaneJump" Dev note: Moon walking against the door or pressing against it and turning around both work. |
From: 2
Bottom Left Door
To: 1
Top Left Doorway
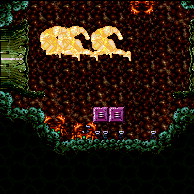
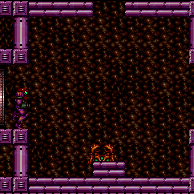
Pass through the tunnel to the right, then spark to the left. Entrance condition: {
"comeInShinecharged": {}
}Requires: "canShinechargeMovementTricky"
"Gravity"
"SpaceJump"
"canMidAirMorph"
{
"or": [
{
"and": [
"HiJump",
{
"shineChargeFrames": 120
}
]
},
{
"and": [
"HiJump",
"canSpeedyJump",
{
"shineChargeFrames": 115
}
]
},
{
"shineChargeFrames": 130
}
]
}
{
"shinespark": {
"frames": 14,
"excessFrames": 0
}
}Exit condition: {
"leaveWithSpark": {}
}Unlocks doors: {"types":["super"],"requires":[]}
{"types":["missiles","powerbomb"],"requires":["never"]} |
From: 2
Bottom Left Door
To: 4
Top Right Doorway
Entrance condition: {
"comeInShinecharged": {}
}Requires: "canShinechargeMovementTricky"
"Gravity"
"SpaceJump"
"canMidAirMorph"
{
"or": [
{
"and": [
"HiJump",
{
"shineChargeFrames": 120
}
]
},
{
"and": [
"HiJump",
"canSpeedyJump",
{
"shineChargeFrames": 115
}
]
},
{
"shineChargeFrames": 130
}
]
}
{
"shinespark": {
"frames": 7,
"excessFrames": 0
}
}Exit condition: {
"leaveWithSpark": {}
}Unlocks doors: {"types":["super"],"requires":[]}
{"types":["missiles","powerbomb"],"requires":["never"]} |
From: 3
Bottom Right Door
To: 1
Top Left Doorway

Pass through the tunnel to the right, then spark to the left. Entrance condition: {
"comeInShinecharged": {}
}Requires: "canShinechargeMovementTricky"
"Gravity"
"SpaceJump"
"canMidAirMorph"
{
"or": [
{
"and": [
"HiJump",
{
"shineChargeFrames": 120
}
]
},
{
"and": [
"HiJump",
"canSpeedyJump",
{
"shineChargeFrames": 115
}
]
},
{
"shineChargeFrames": 130
}
]
}
{
"shinespark": {
"frames": 14,
"excessFrames": 0
}
}Exit condition: {
"leaveWithSpark": {}
}Unlocks doors: {"types":["super"],"requires":[]}
{"types":["missiles","powerbomb"],"requires":["never"]} |
From: 3
Bottom Right Door
To: 4
Top Right Doorway
Entrance condition: {
"comeInShinecharged": {}
}Requires: "canShinechargeMovementTricky"
"Gravity"
"SpaceJump"
"canMidAirMorph"
{
"or": [
{
"and": [
"HiJump",
{
"shineChargeFrames": 120
}
]
},
{
"and": [
"HiJump",
"canSpeedyJump",
{
"shineChargeFrames": 115
}
]
},
{
"shineChargeFrames": 130
}
]
}
{
"shinespark": {
"frames": 7,
"excessFrames": 0
}
}Exit condition: {
"leaveWithSpark": {}
}Unlocks doors: {"types":["super"],"requires":[]}
{"types":["missiles","powerbomb"],"requires":["never"]} |
From: 1
Bottom Left Door
To: 5
Platform Junction Near Top Left Door


Requires: "Gravity" "canUseFrozenEnemies" "HiJump" "canSpeedyJump" |
|
Entrance condition: {
"comeInWithGMode": {
"mode": "direct",
"morphed": false
},
"comesThroughToilet": "any"
}Requires: {
"or": [
"canGravityJump",
{
"and": [
"Gravity",
{
"or": [
"canConsecutiveWallJump",
"SpaceJump",
"canLongIBJ",
{
"and": [
"HiJump",
"canWallJump"
]
},
{
"and": [
"HiJump",
"canTrickyDashJump",
"canDownGrab"
]
},
"h_maxHeightSpringBallJump",
{
"and": [
"HiJump",
"canSpringBallJumpMidAir"
]
}
]
}
]
},
{
"and": [
"Gravity",
"canUseFrozenEnemies",
{
"or": [
"canWallJump",
{
"and": [
"HiJump",
"canSpeedyJump"
]
},
"canSpringBallJumpMidAir"
]
}
]
},
"h_doubleSpringBallJumpWithHiJump",
{
"and": [
"canSuitlessMaridia",
"canTrickyUseFrozenEnemies",
"HiJump",
"canTrickySpringBallJump"
]
}
]
}Exit condition: {
"leaveWithGMode": {
"morphed": false
}
}Dev note: The h_maxHeightSpringBallJump is not a h_underwaterMaxHeightSpringBallJump, because Gravity is required. |
|
Run and jump up through the door using HiJump and SpeedBooster in the room below using at least 1 tile of runway. Stay to the right of the fish as you go up. Entrance condition: {
"comeInWithPlatformBelow": {
"maxHeight": 9,
"maxLeftPosition": 2,
"minRightPosition": -2
},
"comesThroughToilet": "any"
}Requires: "canCrossRoomJumpIntoWater" "canSpeedyJump" "HiJump" |
From: 1
Bottom Door
To: 3
Middle Right Door


Run from left with Speed Booster in the room below and jump up through the door. Perform a snap turnaround to the left to cancel horizontal momentum before passing through the transition. This is done by turning around and then canceling spin, e.g. by shooting. Stay to the right of the fish as you go up. Entrance condition: {
"comeInWithPlatformBelow": {
"minHeight": 9,
"maxHeight": 10,
"maxLeftPosition": -38.5,
"minRightPosition": -7
},
"comesThroughToilet": "any"
}Requires: "canCrossRoomJumpIntoWater" "canSpeedyJump" "canMidairWiggle" Dev note: This strat is applicable with Crocomire's Room and Indiana Jones Room. |
From: 1
Bottom Door
To: 3
Middle Right Door

Run from right with Speed Booster in the room below, and jump against the left side of the door frame to cancel horizontal momentum before passing through the transition. Stay to the right of the fish as you go up. Entrance condition: {
"comeInWithPlatformBelow": {
"minHeight": 9,
"maxHeight": 10,
"maxLeftPosition": 7,
"minRightPosition": 39
},
"comesThroughToilet": "any"
}Requires: "canCrossRoomJumpIntoWater" "canSpeedyJump" Dev note: This strat is applicable only with Crocomire's Room. |
From: 2
Bottom Right Door
To: 3
Middle Right Door

Run with enough speed to jump (after the transition) to reach the far left ledge. Either kill or Kago through the Fish enemy. At slightly higher run speeds, Samus can jump from the bottom of the slope and avoid the fish. Entrance condition: {
"comeInRunning": {
"speedBooster": "yes",
"minTiles": 7
}
}Requires: "HiJump"
"canSpeedyJump"
"canCrossRoomJumpIntoWater"
"canTrickyJump"
"canDodgeWhileShooting"
{
"or": [
{
"ammo": {
"type": "Super",
"count": 1
}
},
{
"and": [
"Charge",
"Plasma"
]
},
{
"and": [
"Plasma",
"canHitbox"
]
},
{
"and": [
"canKago",
"canLateralMidAirMorph",
{
"or": [
{
"enemyDamage": {
"enemy": "Skultera",
"type": "contact",
"hits": 1
}
},
"h_pauseAbuseMinimalReserveRefill"
]
}
]
}
]
} |
From: 2
Bottom Right Door
To: 3
Middle Right Door

Run with enough speed to jump (after the transition) to reach the far left ledge. Entrance condition: {
"comeInRunning": {
"speedBooster": "yes",
"minTiles": 12.4375
}
}Requires: "canSpeedyJump" "canCrossRoomJumpIntoWater" "canCarefulJump" |
|
Entrance condition: {
"comeInShinecharging": {
"length": 18,
"openEnd": 1,
"gentleUpTiles": 2
}
}Requires: "Gravity"
"canShinechargeMovement"
{
"or": [
{
"shinespark": {
"frames": 60,
"excessFrames": 5
}
},
{
"and": [
"canMidairShinespark",
{
"shinespark": {
"frames": 55,
"excessFrames": 5
}
}
]
},
{
"and": [
"canMidairShinespark",
"HiJump",
{
"shinespark": {
"frames": 50,
"excessFrames": 5
}
}
]
},
{
"and": [
"canShinechargeMovementComplex",
"HiJump",
{
"shinespark": {
"frames": 47,
"excessFrames": 5
}
}
]
},
{
"and": [
"canShinechargeMovementComplex",
"HiJump",
"canSpeedyJump",
{
"shinespark": {
"frames": 44,
"excessFrames": 5
}
}
]
}
]
}Clears obstacles: B Dev note: This could have a few more excess frames if not getting on top of the block to go to 2. |
|
Requires: "Gravity"
{
"canShineCharge": {
"usedTiles": 19,
"gentleUpTiles": 2,
"openEnd": 1
}
}
"canShinechargeMovement"
{
"or": [
{
"shinespark": {
"frames": 60,
"excessFrames": 5
}
},
{
"and": [
"canMidairShinespark",
{
"shinespark": {
"frames": 55,
"excessFrames": 5
}
}
]
},
{
"and": [
"canMidairShinespark",
"HiJump",
{
"shinespark": {
"frames": 50,
"excessFrames": 5
}
}
]
},
{
"and": [
"canShinechargeMovementComplex",
"HiJump",
{
"shinespark": {
"frames": 47,
"excessFrames": 5
}
}
]
},
{
"and": [
"canShinechargeMovementComplex",
"HiJump",
"canSpeedyJump",
{
"shinespark": {
"frames": 44,
"excessFrames": 5
}
}
]
}
]
}Clears obstacles: B Dev note: This could have a few more excess frames if not getting on top of the block at 2. |
From: 1
Left Door
To: 6
Top Right Junction
Entrance condition: {
"comeInShinecharging": {
"length": 18,
"openEnd": 1,
"gentleUpTiles": 2
}
}Requires: "Gravity"
{
"or": [
{
"shinespark": {
"frames": 43,
"excessFrames": 4
}
},
{
"and": [
"canMidairShinespark",
{
"shinespark": {
"frames": 37,
"excessFrames": 5
}
}
]
},
{
"and": [
"canMidairShinespark",
"HiJump",
{
"shinespark": {
"frames": 32,
"excessFrames": 4
}
}
]
},
{
"and": [
"canShinechargeMovementComplex",
"HiJump",
"canSpeedyJump",
{
"shinespark": {
"frames": 26,
"excessFrames": 5
}
}
]
}
]
} |
|

Requires: "Gravity"
{
"canShineCharge": {
"usedTiles": 19,
"gentleUpTiles": 2,
"openEnd": 1
}
}
{
"or": [
{
"shinespark": {
"frames": 43,
"excessFrames": 4
}
},
{
"and": [
"canMidairShinespark",
{
"shinespark": {
"frames": 37,
"excessFrames": 5
}
}
]
},
{
"and": [
"canMidairShinespark",
"HiJump",
{
"shinespark": {
"frames": 32,
"excessFrames": 4
}
}
]
},
{
"and": [
"canShinechargeMovementComplex",
"HiJump",
"canSpeedyJump",
{
"shinespark": {
"frames": 24,
"excessFrames": 5
}
}
]
}
]
} |
From: 5
Top Left Junction
To: 2
Top Item


Briefly run on the top left ledge then perform a last-frame jump to barely touch the item and then fall. It is best not to moon-walk back against the wall and instead press against it and then turn around to be 1 pixel away. A wall-jump check as Samus is close to the item can expand her hitbox and make it possible from either pixel. Note that this strat is also possible on the right side of the room, but is tighter and requires backing up against the wall. Requires: "HiJump" "canTrickyJump" "canSpeedyJump" |
|

Briefly run on the top ledge on either side (left is slightly easier) then jump and wall jump on the grapple block. Requires: "HiJump" "canTrickyJump" "canSpeedyJump" "canWallJump" Clears obstacles: B |
|
Briefly run on the top ledge on either side (left is slightly easier) then jump and wall jump on the grapple block. Requires: "HiJump" "canTrickyJump" "canSpeedyJump" "canWallJump" Clears obstacles: B |
From: 1
Top Left Door
To: 1
Top Left Door
Follow the crab from the bottom right door to the top left door. This takes approximately 90 seconds. It is also possible to knock the crab off of the middle peak with a super and follow it to the left which may save time. Requires: "Gravity"
"canBePatient"
{
"or": [
"SpaceJump",
{
"and": [
{
"ammo": {
"type": "Super",
"count": 1
}
},
{
"or": [
"HiJump",
"canSpringBallJumpMidAir",
"canGravityJump",
"canConsecutiveWallJump",
"canSpeedyJump"
]
}
]
}
]
}Exit condition: {
"leaveWithGModeSetup": {}
} |
From: 1
Top Left Door
To: 1
Top Left Door


Follow the crab from the bottom right door to the top left door. This takes approximately 90 seconds. It is also possible to knock the crab off of the middle peak with a super and follow it to the left which may save time. Requires: "h_frozenEnemyRunway"
"Gravity"
"canBePatient"
{
"or": [
"SpaceJump",
{
"and": [
{
"ammo": {
"type": "Super",
"count": 1
}
},
{
"or": [
"HiJump",
"canSpringBallJumpMidAir",
"canGravityJump",
"canConsecutiveWallJump",
"canSpeedyJump"
]
}
]
}
]
}Exit condition: {
"leaveWithRunway": {
"length": 4,
"openEnd": 0
}
} |
|
In the other room, use at least 6 runway tiles to gain an extra run speed at least $1.D, with Speed Booster unequipped. Jump into a lateral mid-air morph and touch the door transition while descending close to the ground. Hold jump to do an uncontrolled bounce immediately after the transition. Pause as Samus passes under the first ceiling Grapple block. Equip Speed Booster and unequip Spring Ball, to get a spring fling. Pause again and re-equip Spring Ball to get a second spring fling. Entrance condition: {
"comeInSpinning": {
"speedBooster": "no",
"unusableTiles": 3,
"minExtraRunSpeed": "$1.D"
}
}Requires: {
"notable": "Spring Ball Bounce Left to Right"
}
"canInsaneJump"
"canSpeedyJump"
"canCrossRoomJumpIntoWater"
"canTrickySpringBallBounce"Dev note: A comeInSpinning entrance condition is used to ensure it is possible to enter in the right position, even though technically Samus should enter morphed rather than spinning. |
|
Shinespark up right through the rightmost gap to land directly by the door. Requires: "Gravity"
"h_shinechargeMaxRunway"
{
"or": [
{
"shinespark": {
"frames": 59,
"excessFrames": 5
}
},
{
"and": [
"canMidairShinespark",
{
"shinespark": {
"frames": 53,
"excessFrames": 6
}
}
]
},
{
"and": [
"HiJump",
"canMidairShinespark",
{
"shinespark": {
"frames": 50,
"excessFrames": 6
}
}
]
},
{
"and": [
"canShinechargeMovementComplex",
"HiJump",
{
"shinespark": {
"frames": 36,
"excessFrames": 5
}
}
]
},
{
"and": [
"canShinechargeMovementComplex",
"HiJump",
"canSpeedyJump",
{
"shinespark": {
"frames": 31,
"excessFrames": 4
}
}
]
}
]
} |
|
Requires: "Gravity"
{
"or": [
"HiJump",
"canWallJump",
"canSpeedyJump",
"SpaceJump",
"canIBJ",
"canSpringBallJumpMidAir",
"canSpringBallBombJump"
]
} |
From: 2
Bottom Left Door
To: 8
Higher Hill Junction
Run and jump up through the door using HiJump and Speed Booster in the room below using at least 1 tile of runway. Entrance condition: {
"comeInWithPlatformBelow": {
"minHeight": 8,
"maxHeight": 9,
"maxLeftPosition": 2,
"minRightPosition": -2
},
"comesThroughToilet": "any"
}Requires: "canCrossRoomJumpIntoWater" "HiJump" "canSpeedyJump" |
From: 2
Bottom Left Door
To: 8
Higher Hill Junction

Run and jump up through the door using Speed Booster in the room below. Bonk the door frame or turn back left soon enough to cancel rightward momentum before passing through the transition. Entrance condition: {
"comeInWithPlatformBelow": {
"maxHeight": 10,
"maxLeftPosition": -38.5,
"minRightPosition": -7
},
"comesThroughToilet": "any"
}Requires: "canCrossRoomJumpIntoWater" "canSpeedyJump" |
|
Run and jump using Speed Booster in the room below, with HiJump equipped. Bonk the door frame before passing through the transition, to cancel your horizontal momentum. After the transition, as you reach the wall, begin holding right. Land on the small platform below the top door. Entrance condition: {
"comeInWithPlatformBelow": {
"minHeight": 9,
"maxHeight": 10,
"maxLeftPosition": -38.5,
"minRightPosition": -2
},
"comesThroughToilet": "any"
}Requires: "canCrossRoomJumpIntoWater" "canSpeedyJump" "HiJump" Dev note: This strat applies with Indiana Jones Room or Crocomire's Room below. |
|
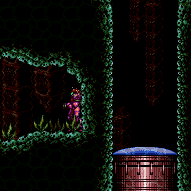
Shinespark up in the middle of the three upward pathways near either the right or left wall. Requires: "Gravity"
"h_shinechargeMaxRunway"
"canShinechargeMovement"
{
"or": [
{
"shinespark": {
"frames": 61,
"excessFrames": 8
}
},
{
"and": [
"canMidairShinespark",
{
"shinespark": {
"frames": 54,
"excessFrames": 8
}
}
]
},
{
"and": [
"HiJump",
"canMidairShinespark",
{
"shinespark": {
"frames": 50,
"excessFrames": 8
}
}
]
},
{
"and": [
"canShinechargeMovementComplex",
"HiJump",
{
"shinespark": {
"frames": 36,
"excessFrames": 8
}
}
]
},
{
"and": [
"canShinechargeMovementComplex",
"HiJump",
"canSpeedyJump",
{
"shinespark": {
"frames": 30,
"excessFrames": 5
}
}
]
}
]
} |
From: 2
Bottom Left Door
To: 11
Upper Left Ledge Junction
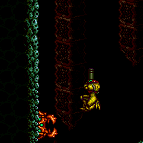

Run and jump up through the door using Speed Booster in the room below. Turn to the left immediately after jumping, to allow running further and to cancel the rightward momentum before passing through the transition. Entrance condition: {
"comeInWithPlatformBelow": {
"maxHeight": 10,
"maxLeftPosition": -38.5,
"minRightPosition": 0
},
"comesThroughToilet": "any"
}Requires: "canCrossRoomJumpIntoWater" "canSpeedyJump" |
|
Entrance condition: {
"comeInWithGMode": {
"mode": "any",
"morphed": false
},
"comesThroughToilet": "any"
}Requires: "Morph"
{
"or": [
{
"and": [
"Gravity",
{
"or": [
"HiJump",
"canWallJump",
"canSpeedyJump",
"SpaceJump",
"canSpringBallJumpMidAir",
"canSpringBallBombJump",
"canGravityJump",
{
"and": [
"h_crouchJumpDownGrab",
"canTrickyJump"
]
}
]
}
]
},
{
"and": [
"canSuitlessMaridia",
{
"or": [
"canTrickyUseFrozenEnemies",
{
"and": [
"HiJump",
"canSpringBallJumpMidAir"
]
},
"canUnderwaterWallJump"
]
}
]
}
]
}Dev note: The canCrouchJump is not a h_underwaterCrouchJump, because Gravity is required. |
From: 3
Bottom Right Door
To: 4
Top Right Door
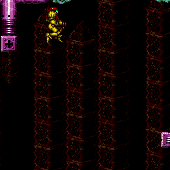
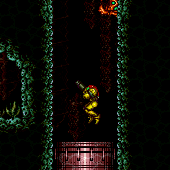
Run and jump up through the door using Speed Booster in the room below, with HiJump equipped. Immediately after jumping, break spin and turn left to avoid hitting the crab (alternatively, you can wiggle after the transition). It helps to use a little less than the full runway. Make it all the way up to the top right door. Entrance condition: {
"comeInWithPlatformBelow": {
"maxHeight": 10,
"maxLeftPosition": -38.5,
"minRightPosition": -2
},
"comesThroughToilet": "any"
}Requires: "canCrossRoomJumpIntoWater" "canSpeedyJump" "HiJump" "canTrickyJump" Dev note: This strat is applicable in Crocomire's Room and the Indiana Jones Room (with Power Bomb blocks broken). |
From: 3
Bottom Right Door
To: 7
Lower Hills Junction

Run left-to-right in the room below using Speed Booster, and jump up through the door. Hold left through the transition to avoid hitting the crab. Entrance condition: {
"comeInWithPlatformBelow": {
"minHeight": 9,
"maxHeight": 10,
"maxLeftPosition": -38.5,
"minRightPosition": -7
},
"comesThroughToilet": "any"
}Requires: "canCrossRoomJumpIntoWater" "canSpeedyJump" Dev note: This strat is applicable in Crocomire's Room and the Indiana Jones Room. Sufficient vertical speed could be obtained with fewer tiles, but it would require jumping further to the right (i.e., increasing minRightPosition) which would not work in Indiana Jones Room unless the PB blocks are broken. |
From: 3
Bottom Right Door
To: 10
Upper Right Ledge Junction
Run and jump up through the door using HiJump and Speed Booster in the room below and Spring Ball jump at the top of the jump. Entrance condition: {
"comeInWithPlatformBelow": {
"maxHeight": 6,
"maxLeftPosition": 2.5,
"minRightPosition": -2.5
},
"comesThroughToilet": "any"
}Requires: "canCrossRoomJumpIntoWater" "HiJump" "canSpeedyJump" "canTrickySpringBallJump" |
From: 3
Bottom Right Door
To: 10
Upper Right Ledge Junction
Run and jump up through the door using HiJump and Speed Booster in the room below and Spring Ball jump at the peak of the jump. Entrance condition: {
"comeInWithPlatformBelow": {
"maxHeight": 7,
"maxLeftPosition": 2.5,
"minRightPosition": -2.5
},
"comesThroughToilet": "any"
}Requires: "canCrossRoomJumpIntoWater" "HiJump" "canSpeedyJump" "canTrickySpringBallJump" "canTrickyJump" |
From: 4
Top Right Door
To: 9
Platform Below Top Door
In the previous room, gain max run speed without Speed Booster equipped, requiring about 7 tiles of runway (obtaining an extra run speed of $2.0). After the transition, jump to slightly less than full height, performing a lateral mid-air morph just early enough to avoid bonking the ceiling Grapple block. Pause to equip Speed Booster before bouncing on the first Grapple platform; this provides a boost in the bounce height to be able to make it to the Grapple platform below the top door. Entrance condition: {
"comeInRunning": {
"speedBooster": "no",
"minTiles": 6.4375
}
}Requires: {
"notable": "Spring Ball Bounce Right to Left"
}
"canSpeedyJump"
"canCrossRoomJumpIntoWater"
"canTrickySpringBallBounce" |
From: 4
Top Right Door
To: 9
Platform Below Top Door

In the previous room, gain max run speed without Speed Booster equipped, requiring about 7 tiles of runway (obtaining an extra run speed of $2.0). Enter the room either in a mockball (or process of mockballing), or descending from a controlled Spring Ball bounce. Just after the transition, jump or bounce to slightly less than full height. Pause to equip Speed Booster before bouncing on the first Grapple platform; this provides a boost in the bounce height to be able to make it to the Grapple platform below the top door. Entrance condition: {
"comeInWithSpringBallBounce": {
"speedBooster": "no",
"movementType": "controlled",
"remoteAndLandingMinTiles": [
[
6.4375,
0
]
]
}
}Requires: {
"notable": "Spring Ball Bounce Right to Left"
}
"canSpeedyJump"
"canCrossRoomJumpIntoWater"
"canTrickySpringBallBounce" |
|

Open the door then drop down and use the runway below. Requires: "Gravity"
"h_shinechargeMaxRunway"
"canShinechargeMovement"
{
"or": [
{
"shinespark": {
"frames": 64,
"excessFrames": 0
}
},
{
"and": [
"canMidairShinespark",
{
"shinespark": {
"frames": 56,
"excessFrames": 0
}
}
]
},
{
"and": [
"HiJump",
"canMidairShinespark",
{
"shinespark": {
"frames": 52,
"excessFrames": 0
}
}
]
},
{
"and": [
"HiJump",
"canMidairShinespark",
"canSpeedyJump",
{
"shinespark": {
"frames": 44,
"excessFrames": 0
}
}
]
}
]
}Exit condition: {
"leaveWithSpark": {}
}Unlocks doors: {"types":["ammo"],"requires":[]}Dev note: There is no link directly from 2 to 5 because the door must be opened first. |
|

Requires: "Gravity"
{
"or": [
"canTrickyWallJump",
{
"and": [
"HiJump",
"canPreciseWallJump"
]
},
{
"and": [
"HiJump",
"canWallJump",
"canSpeedyJump"
]
}
]
} |
|
Requires: "Gravity" "HiJump" "canSpeedyJump" |
|

Using Speed Booster in the room below, run left-to-right and jump, pressing against the right side of the door frame through the transition. Entrance condition: {
"comeInWithPlatformBelow": {
"minHeight": 9,
"maxHeight": 10,
"maxLeftPosition": -34.5,
"minRightPosition": -7
},
"comesThroughToilet": "any"
}Requires: "canCrossRoomJumpIntoWater" "canSpeedyJump" Dev note: This strat is applicable in Crocomire's Room and the Indiana Jones Room. Sufficient vertical speed could be obtained with fewer tiles, but it would require jumping further to the right (i.e., increasing minRightPosition) which would not work in Indiana Jones Room unless the PB blocks are broken; since there doesn't yet appear to be any application, we don't add a separate case for that. Speed jumps from the right side would also be possible, but again there don't yet appear to be any applications. |
|

Requires: "Gravity"
{
"or": [
"canWallJump",
"SpaceJump",
"canLongIBJ",
"canJumpIntoIBJ",
"canSpeedyJump",
"canSpringBallJumpMidAir",
"canUseEnemies"
]
}
{
"or": [
{
"obstaclesCleared": [
"A"
]
},
"h_usePowerBomb"
]
}Clears obstacles: A |
|

Requires: "Gravity"
{
"or": [
"canWallJump",
"SpaceJump",
"canLongIBJ",
"canJumpIntoIBJ",
"canSpeedyJump",
"Grapple",
{
"and": [
"HiJump",
"canSpringBallJumpMidAir"
]
},
{
"and": [
"HiJump",
"canUseEnemies"
]
}
]
}Dev note: A very precise crouch-jump down-grab, or spring ball jumping to the snail is closer to canSnailClimb. |
|
Requires: "Gravity"
"h_shinechargeMaxRunway"
{
"or": [
{
"shinespark": {
"frames": 37,
"excessFrames": 3
}
},
{
"and": [
"canMidairShinespark",
{
"shinespark": {
"frames": 29,
"excessFrames": 3
}
}
]
},
{
"and": [
"HiJump",
"canMidairShinespark",
{
"shinespark": {
"frames": 25,
"excessFrames": 3
}
}
]
},
{
"and": [
"HiJump",
"canMidairShinespark",
"canSpeedyJump",
{
"shinespark": {
"frames": 17,
"excessFrames": 3
}
}
]
}
]
}Dev note: It's possible to include more precise speedy jump variants to save Energy, But it's assumed you can do a Gravity jump. |
From: 4
Right Door
To: 6
Junction Right of Morph Passage

If using at least 8 tiles of runway, jump before going down the first slope. If using 7 tiles of runway, Samus will get a higher jump; in this case, jump later, after going down the first slope Entrance condition: {
"comeInRunning": {
"speedBooster": "yes",
"minTiles": 6.4375
}
}Requires: "canSpeedyJump" "canCrossRoomJumpIntoWater" Dev note: We don't require 'canTrickyDashJump' here, since any speed of at least $2.0 works; a different jump timing is needed for run speed between $2.0 and $2.3 compared to higher speeds, but there is a very large window in both cases, making it not difficult for the player to find a timing that works. |
From: 2
Bottom Right Door
To: 1
Left Door

Entrance condition: {
"comeInShinecharged": {}
}Requires: "canGravityJump"
"HiJump"
"canShinechargeMovementTricky"
{
"or": [
{
"and": [
"canSpeedyJump",
{
"shineChargeFrames": 90
},
{
"shinespark": {
"frames": 116,
"excessFrames": 5
}
}
]
},
{
"and": [
{
"shineChargeFrames": 125
},
{
"shinespark": {
"frames": 125,
"excessFrames": 5
}
}
]
}
]
} |
From: 2
Bottom Right Door
To: 3
Top Right Door

Entrance condition: {
"comeInShinecharged": {}
}Requires: "Gravity"
"canShinechargeMovementComplex"
{
"or": [
{
"and": [
"canConsecutiveWallJump",
{
"shineChargeFrames": 100
},
{
"shinespark": {
"frames": 6,
"excessFrames": 0
}
}
]
},
{
"and": [
"HiJump",
"canWallJump",
{
"or": [
{
"shineChargeFrames": 75
},
{
"and": [
"canSpeedyJump",
{
"shineChargeFrames": 70
}
]
}
]
},
{
"shinespark": {
"frames": 6,
"excessFrames": 0
}
}
]
},
{
"and": [
"HiJump",
"canGravityJump",
"canShinechargeMovementTricky",
{
"or": [
{
"shineChargeFrames": 105
},
{
"and": [
"canSpeedyJump",
{
"shineChargeFrames": 90
}
]
}
]
},
{
"shinespark": {
"frames": 6,
"excessFrames": 0
}
}
]
}
]
}Exit condition: {
"leaveWithSpark": {
"position": "top"
}
}Unlocks doors: {"types":["super"],"requires":[]}
{"types":["missiles","powerbomb"],"requires":["never"]} |
From: 2
Bottom Right Door
To: 3
Top Right Door
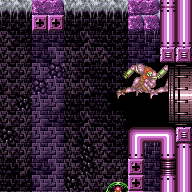

Entrance condition: {
"comeInShinecharged": {}
}Requires: "Gravity"
"canShinechargeMovementComplex"
{
"or": [
{
"and": [
"canConsecutiveWallJump",
{
"shineChargeFrames": 100
},
{
"shinespark": {
"frames": 6,
"excessFrames": 0
}
}
]
},
{
"and": [
"HiJump",
"canWallJump",
{
"or": [
{
"shineChargeFrames": 85
},
{
"and": [
"canSpeedyJump",
{
"shineChargeFrames": 80
}
]
}
]
},
{
"shinespark": {
"frames": 5,
"excessFrames": 0
}
}
]
},
{
"and": [
"HiJump",
"canGravityJump",
"canShinechargeMovementTricky",
{
"or": [
{
"shineChargeFrames": 115
},
{
"and": [
"canSpeedyJump",
{
"shineChargeFrames": 100
}
]
}
]
},
{
"shinespark": {
"frames": 4,
"excessFrames": 0
}
}
]
}
]
}Exit condition: {
"leaveWithSpark": {
"position": "top"
}
}Unlocks doors: {"types":["super"],"requires":[]}
{"types":["missiles","powerbomb"],"requires":["never"]} |
|
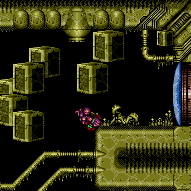
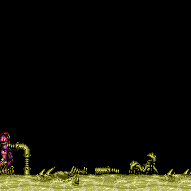
Requires: "Gravity"
"HiJump"
"canSpeedyJump"
{
"or": [
"canWallJump",
"canTrickyJump"
]
} |
|
Requires: {
"resetRoom": {
"nodes": [
1
]
}
}
{
"or": [
{
"and": [
"Gravity",
{
"or": [
{
"and": [
"HiJump",
"canSpeedyJump",
"canTrickyJump",
{
"cycleFrames": 300
}
]
},
{
"and": [
"HiJump",
"canWallJump",
{
"cycleFrames": 310
}
]
},
{
"and": [
"SpaceJump",
{
"cycleFrames": 360
}
]
},
{
"and": [
"canTrickyWallJump",
{
"cycleFrames": 380
}
]
},
{
"and": [
"canSpringBallJumpMidAir",
{
"or": [
"HiJump",
"canSpringwall",
{
"and": [
"canTrickySpringBallJump",
"canTrickyJump"
]
}
]
},
{
"cycleFrames": 340
},
"h_doubleEquipmentScreenCycleFrames"
]
},
{
"and": [
"canDoubleBombJump",
{
"cycleFrames": 830
}
]
}
]
}
]
},
{
"and": [
"canSuitlessMaridia",
{
"or": [
{
"and": [
"HiJump",
"canTrickyJump",
"canMidairWiggle",
"canTrickyWallJump",
{
"cycleFrames": 360
}
]
},
{
"and": [
"HiJump",
"canSpaceJumpWaterBounce",
"canWallJump",
{
"cycleFrames": 390
}
]
},
{
"and": [
"HiJump",
"canSpaceJumpWaterEscape",
{
"cycleFrames": 430
}
]
},
{
"and": [
{
"notable": "Suitless Bootless Space Jump"
},
"canSpaceJumpWaterBounce",
"canWallJump",
{
"cycleFrames": 440
}
]
},
{
"and": [
"HiJump",
"canTrickySpringBallJump",
{
"or": [
"canTrickyJump",
"canFlatleyJump"
]
},
{
"cycleFrames": 360
},
"h_doubleEquipmentScreenCycleFrames"
]
}
]
}
]
}
]
}Resets obstacles: R-Mode Farm cycle drops: 1 Cacatac |
From: 2
Right Door
To: 4
Top Right Ledge Junction


Requires a runway of at least 1 tile in the adjacent room, although it is easier with more. Entrance condition: {
"comeInJumping": {
"speedBooster": "any",
"minTiles": 1
}
}Requires: "HiJump"
{
"or": [
"canWallJump",
"canTrickyJump",
"canSpeedyJump"
]
}
"canCrossRoomJumpIntoWater" |
|
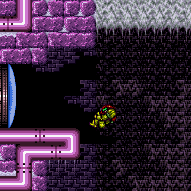
Jump from the raised alcove. This needs a jump on the last 2 possible frames. Down-grabbing does not help, and backing into the corner does not matter. Requires: "Gravity" "HiJump" "canSpeedyJump" "canTrickyJump" |
Come in Shinecharged, Leave With Spark (Gravity, HiJump, Left Wall Climb)
(Very Hard)
Halfie Climb Room
From: 1
Top Left Door
To: 4
Top Right Door
Entrance condition: {
"comeInShinecharged": {}
}Requires: {
"or": [
{
"shineChargeFrames": 80
},
{
"and": [
"canSpeedyJump",
{
"shineChargeFrames": 75
}
]
}
]
}
"Gravity"
"HiJump"
"canWallJump"
"canShinechargeMovementComplex"
{
"shinespark": {
"frames": 18,
"excessFrames": 0
}
}Exit condition: {
"leaveWithSpark": {}
}Unlocks doors: {"types":["super"],"requires":[]}
{"types":["missiles","powerbomb"],"requires":["never"]} |
Come in Shinecharged, Leave With Spark (Gravity, HiJump, Right Wall Climb)
(Very Hard)
Halfie Climb Room
From: 1
Top Left Door
To: 4
Top Right Door

Entrance condition: {
"comeInShinecharged": {}
}Requires: {
"or": [
{
"shineChargeFrames": 115
},
{
"and": [
"canSpeedyJump",
{
"shineChargeFrames": 100
}
]
}
]
}
"Gravity"
"HiJump"
"canWallJump"
"canShinechargeMovementComplex"
{
"shinespark": {
"frames": 7,
"excessFrames": 0
}
}Exit condition: {
"leaveWithSpark": {}
}Unlocks doors: {"types":["super"],"requires":[]}
{"types":["missiles","powerbomb"],"requires":["never"]} |
|

Requires: "canGravityJump" "HiJump" "canSpeedyJump" "canCarefulJump" |
|
Requires: "h_storedSpark"
{
"or": [
{
"shinespark": {
"frames": 17,
"excessFrames": 3
}
},
{
"and": [
"HiJump",
{
"shinespark": {
"frames": 14,
"excessFrames": 3
}
}
]
},
{
"and": [
"Gravity",
{
"shinespark": {
"frames": 13,
"excessFrames": 3
}
}
]
},
{
"and": [
"Gravity",
"HiJump",
{
"shinespark": {
"frames": 9,
"excessFrames": 3
}
}
]
},
{
"and": [
"Gravity",
"HiJump",
"canSpeedyJump",
{
"shinespark": {
"frames": 7,
"excessFrames": 3
}
}
]
}
]
} |
|

Requires: "Gravity"
{
"or": [
"SpaceJump",
"canLongIBJ",
"canJumpIntoIBJ",
"canWallJump",
"canGravityJump",
{
"and": [
"HiJump",
{
"or": [
"canSpringBallJumpMidAir",
"canSpeedyJump"
]
}
]
}
]
} |
From: 2
Bottom Left Door
To: 1
Top Left Door

Entrance condition: {
"comeInShinecharged": {}
}Requires: {
"or": [
{
"shineChargeFrames": 80
},
{
"and": [
"canSpeedyJump",
{
"shineChargeFrames": 75
}
]
}
]
}
"Gravity"
"HiJump"
"canWallJump"
"canShinechargeMovementComplex"
{
"shinespark": {
"frames": 2,
"excessFrames": 0
}
}Exit condition: {
"leaveWithSpark": {}
}Unlocks doors: {"types":["super"],"requires":[]}
{"types":["missiles","powerbomb"],"requires":["never"]} |
From: 1
Bottom Left Door
To: 2
Top Right Door
Entrance condition: {
"comeInShinecharged": {}
}Requires: "Gravity"
"canShinechargeMovementComplex"
{
"or": [
{
"and": [
"HiJump",
"canSpeedyJump",
{
"shineChargeFrames": 100
}
]
},
{
"and": [
"HiJump",
{
"shineChargeFrames": 110
}
]
},
{
"and": [
"canWallJump",
{
"shineChargeFrames": 110
}
]
}
]
}
{
"shinespark": {
"frames": 5,
"excessFrames": 0
}
}Exit condition: {
"leaveWithSpark": {
"position": "top"
}
}Unlocks doors: {"types":["super"],"requires":[]}
{"types":["missiles","powerbomb"],"requires":["never"]} |
From: 1
Bottom Left Door
To: 2
Right Door


Entrance condition: {
"comeInShinecharged": {}
}Requires: "canShinechargeMovementComplex"
{
"or": [
{
"and": [
"HiJump",
{
"shineChargeFrames": 75
},
{
"shinespark": {
"frames": 14,
"excessFrames": 0
}
}
]
},
{
"and": [
"HiJump",
"canSpeedyJump",
{
"shineChargeFrames": 70
},
{
"shinespark": {
"frames": 14,
"excessFrames": 0
}
}
]
},
{
"and": [
"canWallJump",
{
"shineChargeFrames": 90
},
{
"shinespark": {
"frames": 19,
"excessFrames": 0
}
}
]
}
]
}Exit condition: {
"leaveWithSpark": {}
}Unlocks doors: {"types":["super"],"requires":[]}
{"types":["missiles","powerbomb"],"requires":["never"]} |
From: 1
Bottom Left Door
To: 3
Elevator
Use Hijump or one walljump on the left before a diagonal spark. Entrance condition: {
"comeInShinecharged": {}
}Requires: "canMidairShinespark"
{
"or": [
{
"and": [
"HiJump",
{
"shineChargeFrames": 35
},
{
"shinespark": {
"frames": 43,
"excessFrames": 11
}
}
]
},
{
"and": [
"HiJump",
{
"or": [
{
"shineChargeFrames": 65
},
{
"and": [
"canSpeedyJump",
{
"shineChargeFrames": 60
}
]
}
]
},
{
"shinespark": {
"frames": 31,
"excessFrames": 3
}
}
]
},
{
"and": [
"HiJump",
{
"shineChargeFrames": 115
},
{
"or": [
{
"shinespark": {
"frames": 21,
"excessFrames": 3
}
},
{
"and": [
"canSpeedyJump",
{
"shinespark": {
"frames": 19,
"excessFrames": 3
}
}
]
}
]
}
]
},
{
"and": [
"canWallJump",
{
"shineChargeFrames": 40
},
{
"shinespark": {
"frames": 43,
"excessFrames": 11
}
}
]
}
]
}Dev note: We don't worry about optimizing energy with the walljump method since it's possible to use staggered walljumps to climb with no energy loss. |
|
Entrance condition: {
"comeInShinecharging": {
"length": 2,
"openEnd": 1
}
}Requires: {
"or": [
{
"shinespark": {
"frames": 31,
"excessFrames": 1
}
},
{
"and": [
"canMidairShinespark",
{
"shinespark": {
"frames": 24,
"excessFrames": 2
}
}
]
},
{
"and": [
"HiJump",
"canMidairShinespark",
{
"shinespark": {
"frames": 20,
"excessFrames": 2
}
}
]
},
{
"and": [
"HiJump",
"canShinechargeMovementComplex",
"canSpeedyJump",
{
"shinespark": {
"frames": 17,
"excessFrames": 2
}
}
]
}
]
} |
|


Shinespark vertically up the right side of the shaft in order to avoid getting hit by the Ripper. Requires: "h_storedSpark"
{
"or": [
{
"shinespark": {
"frames": 24,
"excessFrames": 2
}
},
{
"and": [
"HiJump",
{
"shinespark": {
"frames": 20,
"excessFrames": 2
}
}
]
},
{
"and": [
"HiJump",
"canSpeedyJump",
{
"shinespark": {
"frames": 17,
"excessFrames": 2
}
}
]
}
]
} |
From: 3
Junction Left of Morph Tunnel
To: 1
Left Door
Run to the left to gain a shinecharge, and use the last few tiles of runway to jump up to the ledge above. Requires: "canShinechargeMovementComplex"
"HiJump"
{
"canShineCharge": {
"usedTiles": 20,
"openEnd": 2
}
}
{
"or": [
{
"and": [
"canWallJump",
{
"shineChargeFrames": 125
}
]
},
{
"and": [
"canWallJump",
"canSpeedyJump",
{
"shineChargeFrames": 120
}
]
},
{
"shineChargeFrames": 150
},
{
"and": [
"canSpeedyJump",
{
"shineChargeFrames": 135
}
]
}
]
}Exit condition: {
"leaveShinecharged": {}
}Unlocks doors: {"types":["ammo"],"requires":[]} |
From: 3
Junction Left of Morph Tunnel
To: 1
Left Door
Charge a spark below towards the right then run back and jump up and spark out of the left door. Requires: "canShinechargeMovementTricky"
"canSpeedyJump"
{
"canShineCharge": {
"usedTiles": 22,
"openEnd": 2
}
}
{
"shinespark": {
"frames": 11,
"excessFrames": 0
}
}Exit condition: {
"leaveWithSpark": {}
}Unlocks doors: {"types":["ammo"],"requires":[]} |
From: 3
Junction Left of Morph Tunnel
To: 1
Left Door
Use the full runway to jump up to the higher ledge. Requires: "canSpeedyJump" "canTrickyJump" |
|


Kill most of the pirates: leave the standing pirate on the ledge above the runway. Shinecharge and jump into its beam path to interrupt. Entrance condition: {
"comeInWithRMode": {}
}Requires: {
"or": [
{
"and": [
"h_CrystalFlashForReserveEnergy",
{
"or": [
{
"and": [
"canUseIFrames",
{
"or": [
{
"enemyDamage": {
"enemy": "Pink Space Pirate (standing)",
"type": "laser",
"hits": 2
}
},
"h_pauseAbuseMinimalReserveRefill"
]
}
]
},
"ScrewAttack",
"Plasma",
{
"getBlueSpeed": {
"usedTiles": 19,
"openEnd": 0
}
}
]
}
]
},
{
"and": [
{
"or": [
"ScrewAttack",
"Plasma",
{
"and": [
"canUseSpeedEchoes",
{
"getBlueSpeed": {
"usedTiles": 19,
"openEnd": 0
}
}
]
}
]
},
"h_RModeCanRefillReserves",
{
"partialRefill": {
"type": "ReserveEnergy",
"limit": 20
}
}
]
}
]
}
{
"canShineCharge": {
"usedTiles": 21,
"openEnd": 0
}
}
{
"or": [
"HiJump",
"canWallJump",
"canSpeedyJump",
"canSpringBallJumpMidAir"
]
}
{
"autoReserveTrigger": {
"maxReserveEnergy": 95
}
}
"canRModeSparkInterrupt"Clears obstacles: A, C, door_1 |
|
Requires: {
"obstaclesCleared": [
"C"
]
}
"canShinechargeMovement"
{
"canShineCharge": {
"usedTiles": 21,
"openEnd": 0
}
}
{
"or": [
{
"and": [
{
"or": [
{
"and": [
{
"or": [
{
"obstaclesCleared": [
"A"
]
},
"canDodgeWhileShooting"
]
},
{
"or": [
"HiJump",
"canWallJump"
]
}
]
},
{
"and": [
"canShinechargeMovementComplex",
{
"or": [
"canSpeedyJump",
"canSpringBallJumpMidAir"
]
}
]
}
]
},
{
"shinespark": {
"frames": 28,
"excessFrames": 8
}
}
]
},
{
"and": [
{
"or": [
{
"and": [
"canShinechargeMovementComplex",
"canWallJump"
]
},
{
"and": [
"canShinechargeMovementTricky",
{
"or": [
"canSpeedyJump",
"canSpringBallJumpMidAir"
]
}
]
}
]
},
{
"shinespark": {
"frames": 20,
"excessFrames": 8
}
}
]
},
{
"and": [
"HiJump",
"canShinechargeMovementComplex",
{
"shinespark": {
"frames": 16,
"excessFrames": 8
}
}
]
},
{
"and": [
"HiJump",
"canSpeedyJump",
"canShinechargeMovementTricky",
{
"shinespark": {
"frames": 12,
"excessFrames": 8
}
}
]
}
]
} |
|
Using the bottom of the room, shortcharge to use the echoes created by shinesparking to kill all of the Standing Pirates. Turn around and diagonal spark the ceiling to kill the pirates. Building a spark towards the left allows for enough run speed to jump to the middle level. Then vertical shinespark out which kills the top pirate. Requires: {
"obstaclesCleared": [
"C"
]
}
"canShinechargeMovementComplex"
"canUseSpeedEchoes"
{
"canShineCharge": {
"usedTiles": 21,
"openEnd": 0
}
}
{
"or": [
{
"and": [
{
"or": [
"HiJump",
"canWallJump",
"canSpeedyJump",
"canTrickySpringBallJump",
"SpaceJump"
]
},
{
"shinespark": {
"frames": 28,
"excessFrames": 8
}
}
]
},
{
"and": [
{
"or": [
"canWallJump",
{
"and": [
"canShinechargeMovementTricky",
{
"or": [
"canSpeedyJump",
"canTrickySpringBallJump",
"SpaceJump"
]
}
]
}
]
},
{
"shinespark": {
"frames": 20,
"excessFrames": 8
}
}
]
},
{
"and": [
"HiJump",
{
"shinespark": {
"frames": 16,
"excessFrames": 8
}
}
]
},
{
"and": [
"HiJump",
"canSpeedyJump",
"canShinechargeMovementTricky",
{
"shinespark": {
"frames": 11,
"excessFrames": 8
}
}
]
}
]
}Clears obstacles: A |
|
If the bottom Pirate is still alive, lure it to the left to open up the runway for a speedy jump. Requires: "canSpeedyJump"
{
"or": [
{
"obstaclesCleared": [
"C"
]
},
"canTrickyDodgeEnemies"
]
} |
From: 3
Central Junction
To: 1
Top Left Door

If the right-side standing Pirate is still alive, let it walk towards the wall as far as possible from below. The available running space is just enough to jump up and wall jump the ledge by the door. Requires: "HiJump"
"canSpeedyJump"
"canWallJump"
{
"or": [
"canTrickyJump",
{
"obstaclesCleared": [
"B"
]
}
]
}Dev note: This is also possible without going below and manipulating the camera, by standing on the slope and carefully jumping up and back. |
From: 3
Middle Right Door
To: 4
Top Right Door
Requires: "canTrickyUseFrozenEnemies" "HiJump" "canSpeedyJump" "canTrickyJump" "canSpringBallJumpMidAir" |
From: 3
Middle Right Door
To: 4
Top Right Door
Run into the room, pressing pause immediately when entering. Jump into a mid-air spring ball jump to reach the ledge above. Perform the spring ball jump while still moving forward, in order to get a boost in jump height. Entrance condition: {
"comeInRunning": {
"speedBooster": "yes",
"minTiles": 5.4375
}
}Requires: "HiJump"
"canSpeedyJump"
"canTrickyJump"
"canLateralMidAirMorph"
"canTrickySpringBallJump"
{
"or": [
"canSpringFling",
"canInsaneJump",
"can4HighMidAirMorph"
]
}Dev note: This assumes extra run speed of $1.B entering the room, at least $2.6 when jumping (a 2-frame window in the worst case). |
From: 3
Middle Right Door
To: 4
Top Right Door
Run into the room, pressing pause immediately when entering. Jump into a mid-air spring ball jump to reach the ledge above. Perform the spring ball jump while still moving forward, in order to get a boost in jump height. Entrance condition: {
"comeInRunning": {
"speedBooster": "yes",
"minTiles": 43
}
}Requires: "canSpeedyJump" "canTrickyJump" "canLateralMidAirMorph" "canTrickySpringBallJump" Dev note: This assumes max run speed (extra run speed of $7.0). |
From: 3
Middle Right Door
To: 5
Top Junction

Run into the room, pressing pause immediately when entering. Jump into a mid-air spring ball jump to reach the top ledge above; perform the spring ball jump while still moving forward, in order to get a boost in jump height. Entrance condition: {
"comeInRunning": {
"speedBooster": "yes",
"minTiles": 21
}
}Requires: "HiJump" "canSpeedyJump" "canTrickyJump" "canTrickySpringBallJump" Dev note: This assumes extra run speed of $4.6 entering the room, at least $4.D when jumping (a 2-frame window in the worst case). |
|
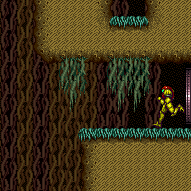
Jump on the last possible frame, and get around the ledge while remaining in spin. If at least 23 runway tiles are available, then a momentum conserving turnaround can be used to make the jump more lenient. Entrance condition: {
"comeInRunning": {
"speedBooster": "yes",
"minTiles": 21
}
}Requires: "canSpeedyJump" "canInsaneJump" Dev note: An extra run speed of at least $5.2 is needed, avoiding the spike at $6.0 and $6.1 (corresponding to 34 tiles). For a momentum conserving turnaround to help, it needs at least $5.6 speed. |
|

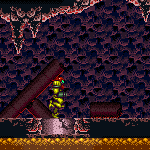
Using Speed Booster in the room below and the full length of the runway (starting with Samus hanging over the edge as far as possible), run and jump precisely to make it through without bonking the door frame. Break spin before the transition to expand Samus' hitbox and trigger the transition earlier, retaining more speed and also making it easier to avoid bonking. Hold left through the transition to initiate a turn-around while entering the room. Land on the small platform at the top of the room. Entrance condition: {
"comeInWithPlatformBelow": {
"minHeight": 9,
"maxHeight": 9,
"maxLeftPosition": -38.5,
"minRightPosition": -7
},
"comesThroughToilet": "any"
}Requires: "canCrossRoomJumpIntoWater" "canSpeedyJump" "canTrickyJump" "canInsaneJump" Dev note: This strat is applicable only with the Indiana Jones Room. |
|
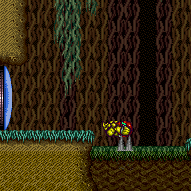

Requires: "Gravity"
{
"or": [
"HiJump",
"canWallJump",
"SpaceJump",
"canIBJ",
"canSpeedyJump",
"h_crouchJumpDownGrab",
"canSpringBallJumpMidAir",
"canGravityJump"
]
}Dev note: The canCrouchJump is not a h_underwaterCrouchJump, because Gravity is required. |
|

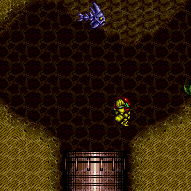
Gain a small amount of speed (<1 tile is enough) and jump through the transition, pressing right against the door frame. Entrance condition: {
"comeInWithPlatformBelow": {
"minHeight": 10,
"maxHeight": 10,
"maxLeftPosition": 2,
"minRightPosition": -2
},
"comesThroughToilet": "no"
}Requires: "canCrossRoomJumpIntoWater" "HiJump" "canSpeedyJump" Dev note: This strat only works for platforms that are 10 tiles below the door transition (Crocomire's Room). It could be done for a platform 9 tiles below the door transition, but this would require a momentum-conserving turn-around (or more horizontal speed); it is easier to just do a standing jump or spin jump in that case. |
From: 2
Bottom Door
To: 4
Water Level Junction
Gain a few tiles of run speed and jump through the transition, without bonking against the door frame. Perform a momentum-conserving turn-around to make it around the corner of the ledge above. Entrance condition: {
"comeInWithPlatformBelow": {
"minHeight": 10,
"maxHeight": 10,
"maxLeftPosition": -4,
"minRightPosition": 0
},
"comesThroughToilet": "yes"
}Requires: "canDash" "canCrossRoomJumpIntoWater" "HiJump" "canSpeedyJump" "canMomentumConservingTurnaround" |
|
Using Speed Booster in the room below, run and jump, pressing against the right side of the door frame through the transition without breaking spin. It may be necessary to use less runway than is available, to avoid getting too much vertical speed. Entrance condition: {
"comeInWithPlatformBelow": {
"minHeight": 9,
"maxHeight": 10,
"maxLeftPosition": -34.5,
"minRightPosition": -7
},
"comesThroughToilet": "no"
}Requires: "canCrossRoomJumpIntoWater" "canSpeedyJump" "canTrickyJump" Dev note: This strat is applicable in Crocomire's Room and the Indiana Jones Room. Sufficient vertical speed could be obtained with fewer tiles, but it would require jumping further to the right (i.e., increasing minRightPosition) which would not work in Indiana Jones Room unless the PB blocks are broken; since there doesn't yet appear to be any application, we don't add a separate case for that. |
From: 2
Bottom Door
To: 4
Water Level Junction
Using Speed Booster in the room below, run and jump through the door without bonking the door frame or breaking spin. Perform a mid-air wiggle to make into onto either ledge. Entrance condition: {
"comeInWithPlatformBelow": {
"minHeight": 9,
"maxHeight": 10,
"maxLeftPosition": -34.5,
"minRightPosition": -7
},
"comesThroughToilet": "yes"
}Requires: "canCrossRoomJumpIntoWater" "canSpeedyJump" "canInsaneJump" "canMidairWiggle" Dev note: This strat is applicable in Crocomire's Room and the Indiana Jones Room. |
|

Build up run speed and jump into the transition to cross this room without touching the water. Shoot open the opposite door upon entering and morph before touching the ceiling to bounce into the open door. Entrance condition: {
"comeInJumping": {
"speedBooster": "yes",
"minTiles": 5
}
}Requires: {
"notable": "Cross Room Jump Morph"
}
"Morph"
"canSpeedyJump"
"canTrickyJump"
"canLateralMidAirMorph"
{
"doorUnlockedAtNode": 3
}Unlocks doors: {"types":["super"],"requires":[]}
{"types":["missiles","powerbomb"],"requires":["never"]} |
|
Build up run speed and jump into the transition to cross this room without touching the water. Shoot open the opposite door upon entering and morph before touching the ceiling to bounce into the open door. Entrance condition: {
"comeInJumping": {
"speedBooster": "yes",
"minTiles": 5
}
}Requires: {
"notable": "Cross Room Jump Morph"
}
"Morph"
"canSpeedyJump"
"canTrickyJump"
"canLateralMidAirMorph"
{
"doorUnlockedAtNode": 1
}Unlocks doors: {"types":["super"],"requires":[]}
{"types":["missiles","powerbomb"],"requires":["never"]} |
|
Run into the room using between 10 and 12 tiles of runway, and jump at some point after the transition, to reach the center of the room. Enter with extra run speed between $2.9 and $3.3. Speeds in the center part of this range more lenient in the jump timing, allowing the jump at any time after the transition; higher speeds require jumping near the edge of the platform; lower speeds require landing on the single-tile floating block after the first Evir. Entrance condition: {
"comeInRunning": {
"speedBooster": "yes",
"minTiles": 9.4375,
"maxTiles": 12.4375
}
}Requires: "canSpeedyJump" "canTrickyJump" "canTrickyDodgeEnemies" |
|

Jump over the Baby Metroid to avoid getting grabbed. Use Wave plus a Wide Beam to clear much of the seaweed with each shot. The classic counter clockwise skip ends with a mid air morph into the transition. Requires: {
"obstaclesNotCleared": [
"A"
]
}
"Wave"
{
"or": [
"Spazer",
"Plasma"
]
}
"canMidAirMorph"
"HiJump"
"canSpeedyJump"
"canTrickyJump"
"canBabyMetroidAvoid"
"h_trickyToCarryFlashSuit"Dev note: A wide beam is used to avoid picking off stray seaweeds since that is a skill used in waveless skip. |
From: 2
Bottom Right Door
To: 1
Top Right Door
Spin jump into the opening below the top door. Entrance condition: {
"comeInShinecharged": {}
}Requires: {
"shineChargeFrames": 80
}
"HiJump"
"canShinechargeMovementComplex"
"canSpeedyJump"
{
"shinespark": {
"frames": 6,
"excessFrames": 0
}
}
{
"or": [
{
"or": [
"f_KilledMetroidRoom2",
{
"obstaclesCleared": [
"f_KilledMetroidRoom2"
]
}
]
},
"canMetroidAvoid"
]
}Exit condition: {
"leaveWithSpark": {}
}Unlocks doors: {"types":["super"],"requires":[]}
{"types":["missiles","powerbomb"],"requires":["never"]} |
From: 3
Bottom Left Door
To: 1
Top Left Door
Entrance condition: {
"comeInShinecharged": {}
}Requires: {
"shineChargeFrames": 165
}
"HiJump"
"canSpeedyJump"
"canShinechargeMovementComplex"
{
"shinespark": {
"frames": 4,
"excessFrames": 0
}
}Exit condition: {
"leaveWithSpark": {}
}Unlocks doors: {"types":["super"],"requires":[]}
{"types":["missiles","powerbomb"],"requires":["never"]} |
From: 3
Bottom Left Door
To: 2
Middle Left Door
Entrance condition: {
"comeInShinecharged": {}
}Requires: "HiJump"
"canShinechargeMovementComplex"
{
"or": [
{
"and": [
{
"shineChargeFrames": 110
},
{
"shinespark": {
"frames": 10,
"excessFrames": 0
}
}
]
},
{
"and": [
{
"shineChargeFrames": 85
},
"canSpeedyJump",
{
"shinespark": {
"frames": 7,
"excessFrames": 0
}
}
]
}
]
}Exit condition: {
"leaveWithSpark": {}
}Unlocks doors: {"types":["super"],"requires":[]}
{"types":["missiles","powerbomb"],"requires":["never"]} |
|
Requires: "canSpeedyJump" "h_shinechargeMaxRunway" "h_CrystalSpark" Clears obstacles: A Dev note: This is listed here because its free to get from 1 to 2 with SpeedBooster alone, but only with being able to dash. |
|
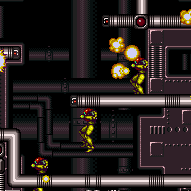
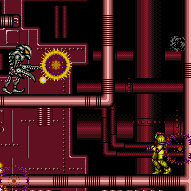
Safely kill the first pirate, then run into the rest with blue speed. A speedy jump can reach the top platform to save Energy over shinesparking. Requires: "h_getBlueSpeedMaxRunway"
{
"or": [
"canSpeedyJump",
{
"and": [
"h_shinechargeMaxRunway",
{
"shinespark": {
"frames": 15,
"excessFrames": 5
}
}
]
}
]
}Clears obstacles: A |
|


Requires: "h_storedSpark"
{
"or": [
{
"shinespark": {
"frames": 76,
"excessFrames": 5
}
},
{
"and": [
"canSpeedyJump",
{
"shinespark": {
"frames": 73,
"excessFrames": 4
}
}
]
},
{
"and": [
"HiJump",
{
"shinespark": {
"frames": 72,
"excessFrames": 4
}
}
]
},
{
"and": [
"HiJump",
"canSpeedyJump",
{
"shinespark": {
"frames": 64,
"excessFrames": 4
}
}
]
}
]
} |