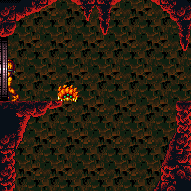
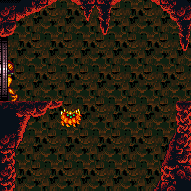
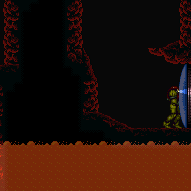
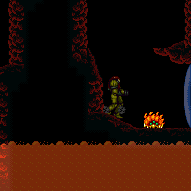
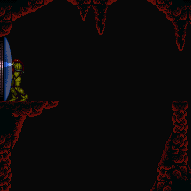
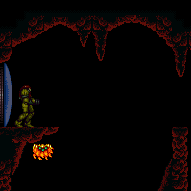
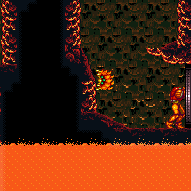
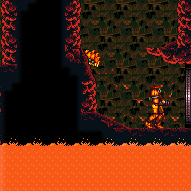
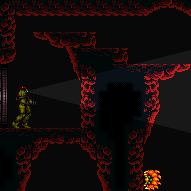
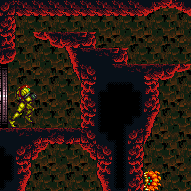
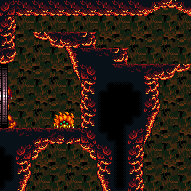
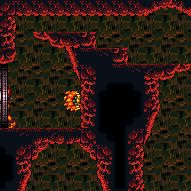
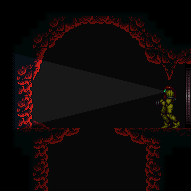
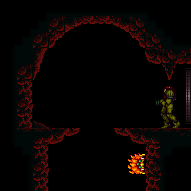
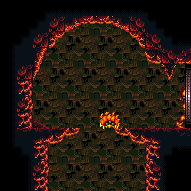
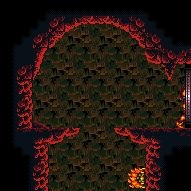
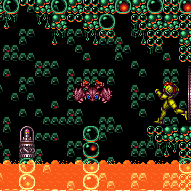
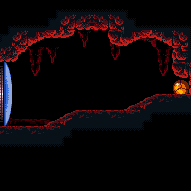
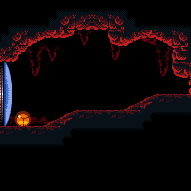
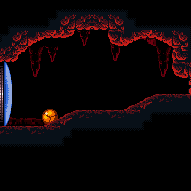
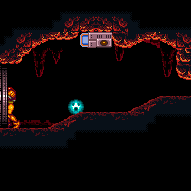
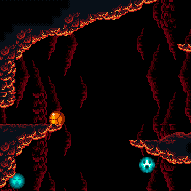
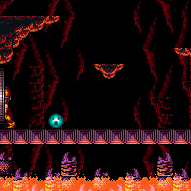
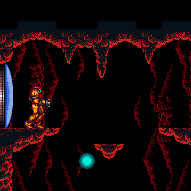
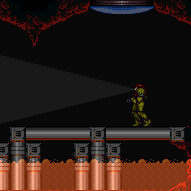
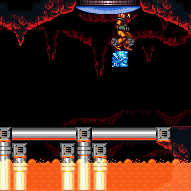
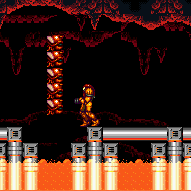
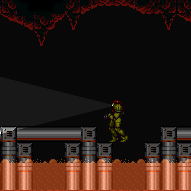
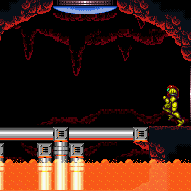
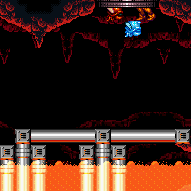
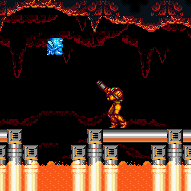
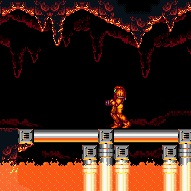
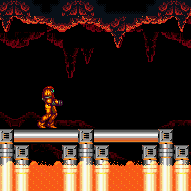
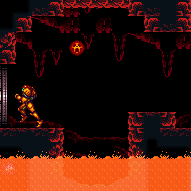
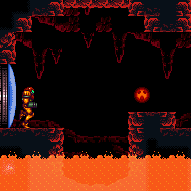
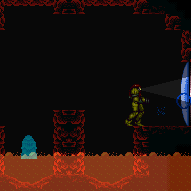
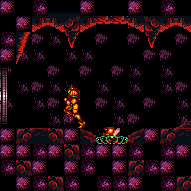
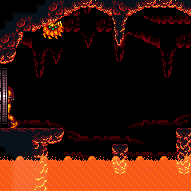
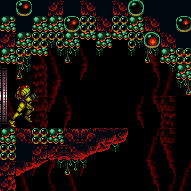
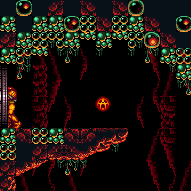
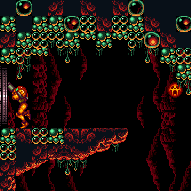
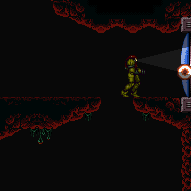
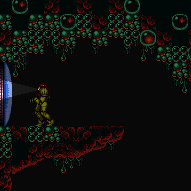
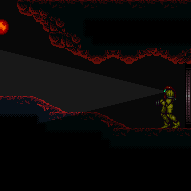
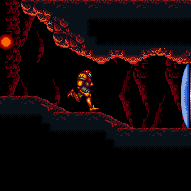
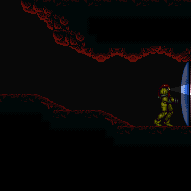
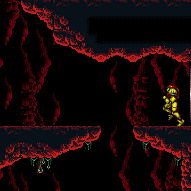
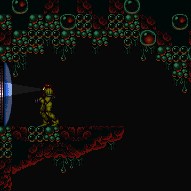
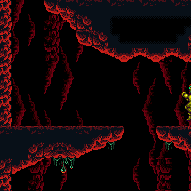
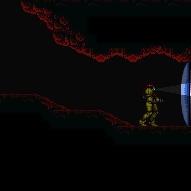
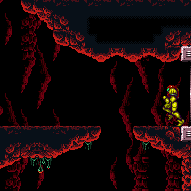
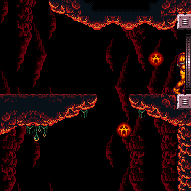
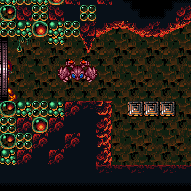
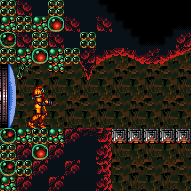
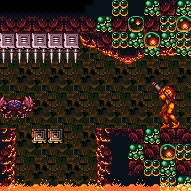
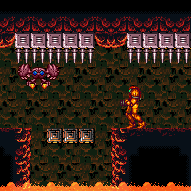
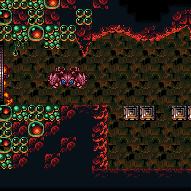
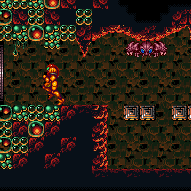
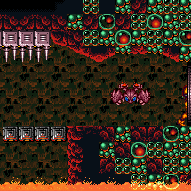
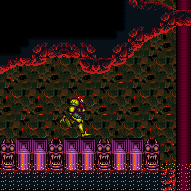
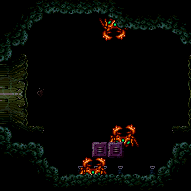
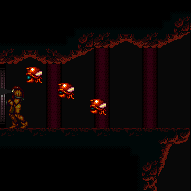
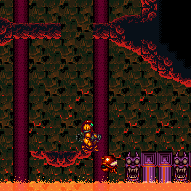
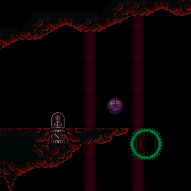
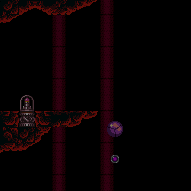
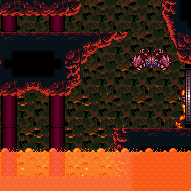
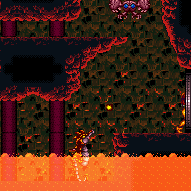
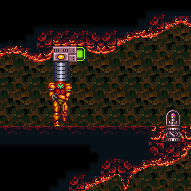
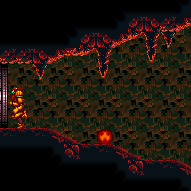
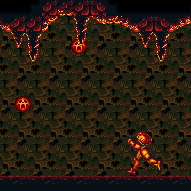
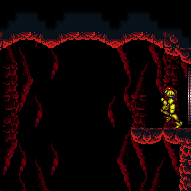
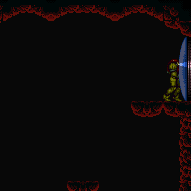
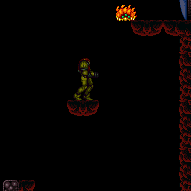
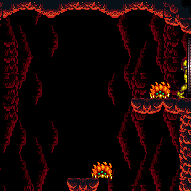
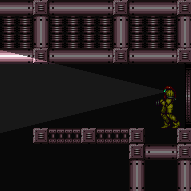
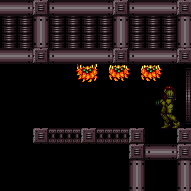
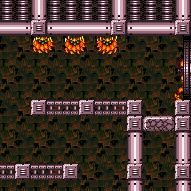
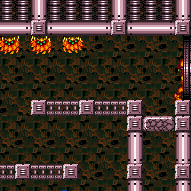
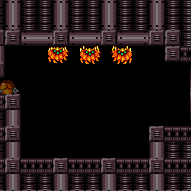
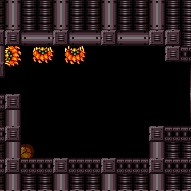
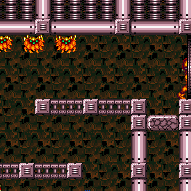
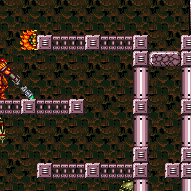
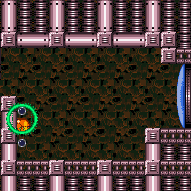
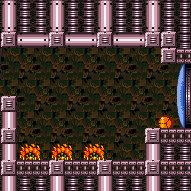
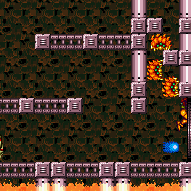
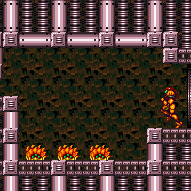
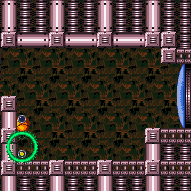
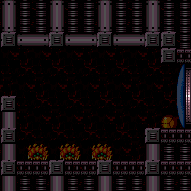
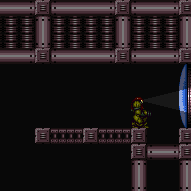
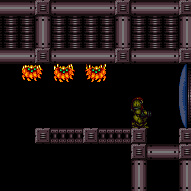
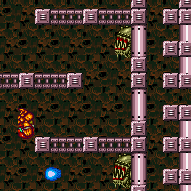
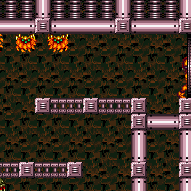
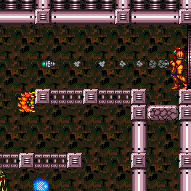
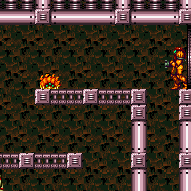
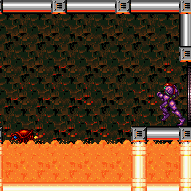
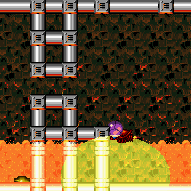
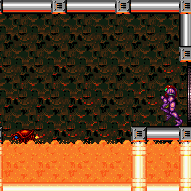
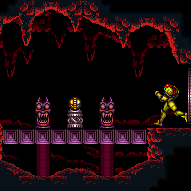
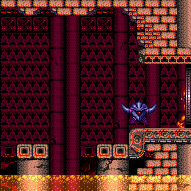
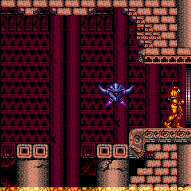
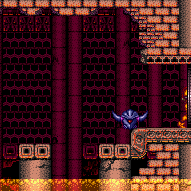
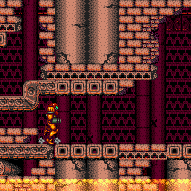
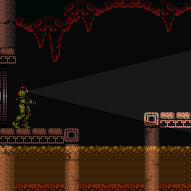
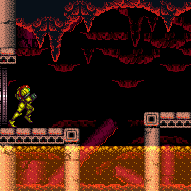
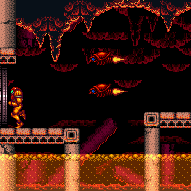
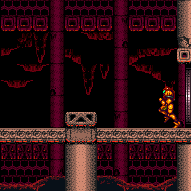
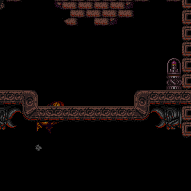
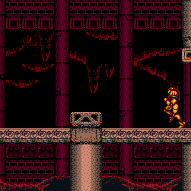
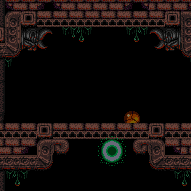
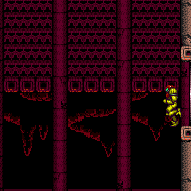
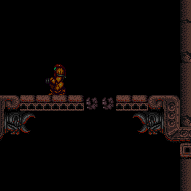
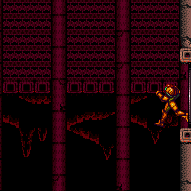
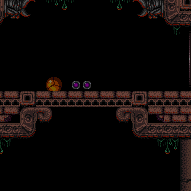
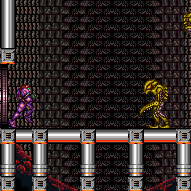
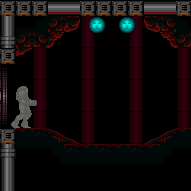
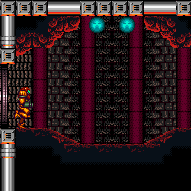
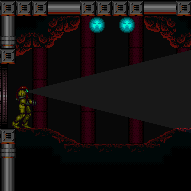
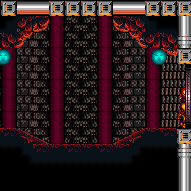
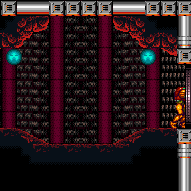
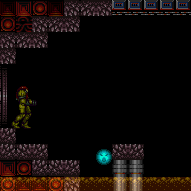
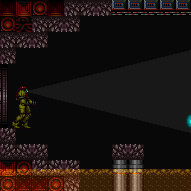
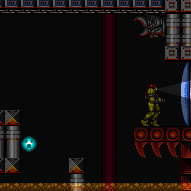
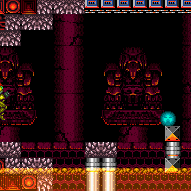
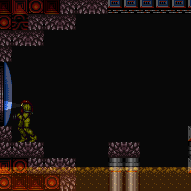
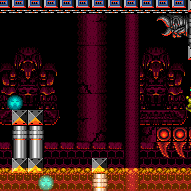
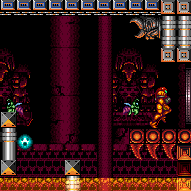
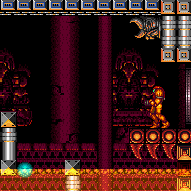
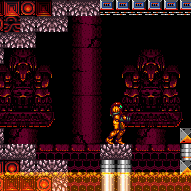
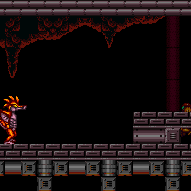
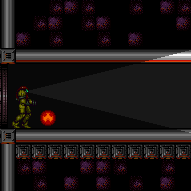
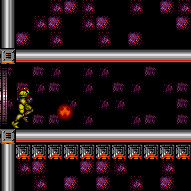
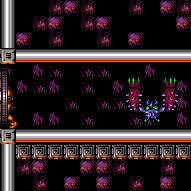
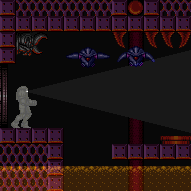
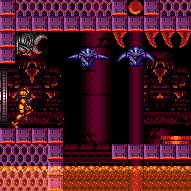
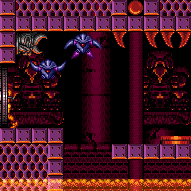
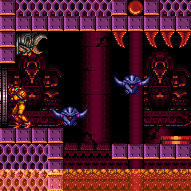
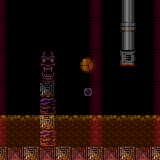
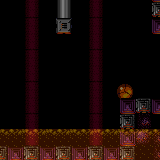
canHeatedGMode (Extreme+)
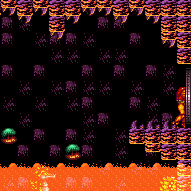
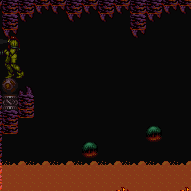
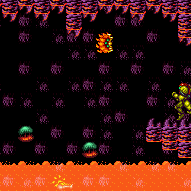
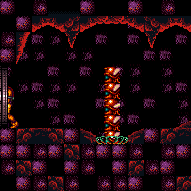
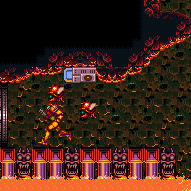
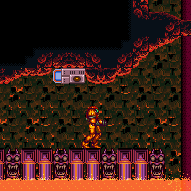
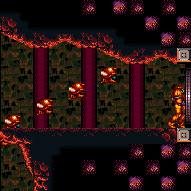
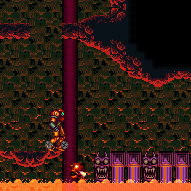
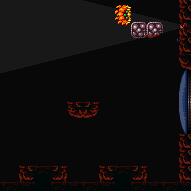
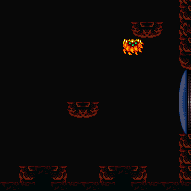
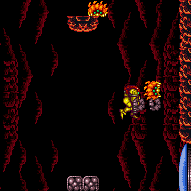
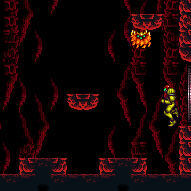
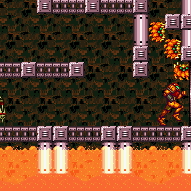
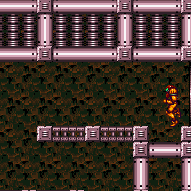
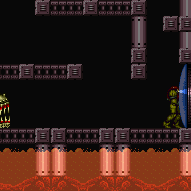
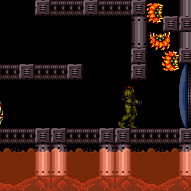
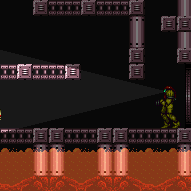
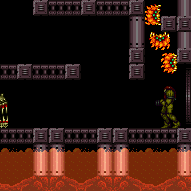
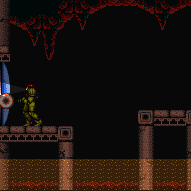
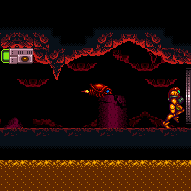
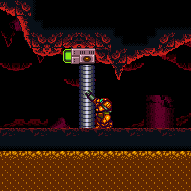
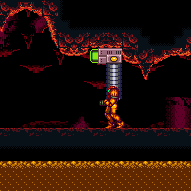
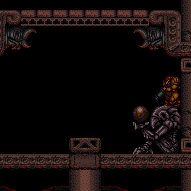
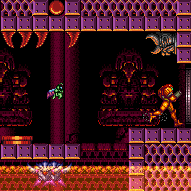
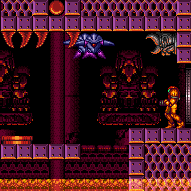
Setting up or using G-mode in a heated environment without heat protection. Positioning an enemy to set up G-mode from a heated room requires precise Energy management. With slightly too much Energy, Samus can take damage then use X-Ray until her i-frames expire to immediately be able to take damage again. While G-mode provides heat protection (sometimes referred to as 'artificial Varia'), entering G-mode in a heated room is risky, as a fail will likely result in death if Samus had only 4 Reserve Energy. Exiting G-mode while in a heated environment will remove Samus' artificial heat protection; luring and killing an enemy near the door to collect its drop with a pause abuse is possible.
Dependencies: canGMode, canUseEnemies, canPreciseReserveRefill, canManageReserves
Dev note: FIXME: This could be used for entering R-mode, with G-mode disabled. But for now, G-mode is more refined and easier to understand, so it would be somewhat odd to turn this on and not G-mode.
Strats ()
|
Requires: {
"heatFrames": 240
}Exit condition: {
"leaveWithGModeSetup": {}
}Unlocks doors: {"types":["ammo"],"requires":[]} |
|
Entrance condition: {
"comeInNormally": {}
}Requires: {
"or": [
{
"heatFrames": 1000
},
{
"and": [
{
"ammo": {
"type": "Super",
"count": 1
}
},
{
"heatFrames": 650
}
]
}
]
}Exit condition: {
"leaveWithGModeSetup": {}
}Unlocks doors: {"types":["missiles","super"],"requires":[]}
{"types":["powerbomb"],"requires":[{"heatFrames":40}]} |
|
Entrance condition: {
"comeInWithGMode": {
"mode": "any",
"morphed": false
}
}Requires: {
"or": [
"h_heatedGModePauseAbuse",
"h_heatedGModeOpenDifferentDoor"
]
} |
|
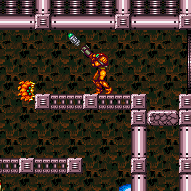
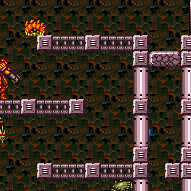
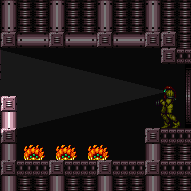
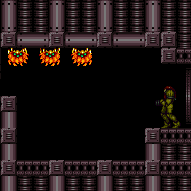
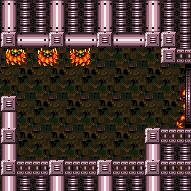
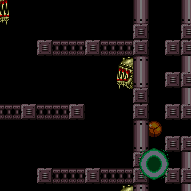
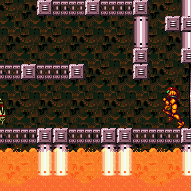
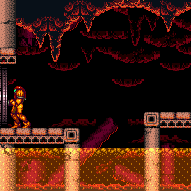
Exit G-mode then air ball into the lava to take fewer heat frames. Kill the Gerutas beforehand to make it easier to escape. Entrance condition: {
"comeInWithGMode": {
"mode": "any",
"morphed": false
}
}Requires: "h_heatedGMode"
{
"or": [
{
"and": [
"canLateralMidAirMorph",
{
"heatFrames": 60
},
{
"lavaFrames": 20
}
]
},
{
"and": [
"Morph",
{
"lavaFrames": 80
},
{
"heatFrames": 20
}
]
}
]
}Dev note: The option without canLateralMidAirMorph is for conserving a blue suit. |
|
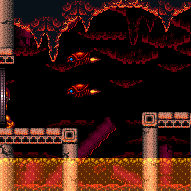
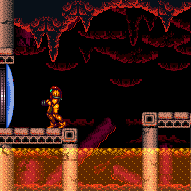
It is possible to kill a Sova on the door and pause abuse to grab its Energy drop on G-mode exit. There is a Sova below the door that can be lured over to it. Entrance condition: {
"comeInWithGMode": {
"mode": "any",
"morphed": false
}
}Requires: {
"or": [
"h_heatedGModePauseAbuse",
"h_heatedGModeOpenDifferentDoor"
]
} |
|
Jump on entry, as the Sova is not global and barely off screen. It is possible to use a Super to speed it up. Entrance condition: {
"comeInNormally": {}
}Requires: {
"or": [
{
"heatFrames": 425
},
{
"and": [
{
"ammo": {
"type": "Super",
"count": 1
}
},
{
"heatFrames": 160
}
]
}
]
}Exit condition: {
"leaveWithGModeSetup": {}
}Unlocks doors: {"types":["missiles","super"],"requires":[]}
{"types":["powerbomb"],"requires":["never"]}Dev note: Generally, coming from the left works, but that would require modeling the room traversal too. |
|
Exit G-mode then air ball into the lava to take fewer heat frames. Kill the Gerutas beforehand to make it easier to escape. Entrance condition: {
"comeInWithGMode": {
"mode": "any",
"morphed": false
}
}Requires: "h_heatedGMode"
{
"or": [
{
"and": [
"canLateralMidAirMorph",
{
"heatFrames": 60
},
{
"lavaFrames": 20
}
]
},
{
"and": [
"Morph",
{
"lavaFrames": 80
},
{
"heatFrames": 20
}
]
}
]
}Dev note: The option without canLateralMidAirMorph is for conserving a blue suit. |
|
Requires: {
"enemyDamage": {
"enemy": "Sova",
"type": "contact",
"hits": 1
}
} |
|
It is possible to use a Super to speed up the Sova. Knocking it off while it is on the overhang above requires rapid switching to get to X-Ray in time. Entrance condition: {
"comeInNormally": {}
}Requires: {
"or": [
{
"heatFrames": 560
},
{
"and": [
{
"ammo": {
"type": "Super",
"count": 1
}
},
{
"heatFrames": 420
}
]
}
]
}Exit condition: {
"leaveWithGModeSetup": {}
}Unlocks doors: {"types":["missiles","super"],"requires":[]}
{"types":["powerbomb"],"requires":["never"]}Dev note: Generally, coming from the right works, but that would require modeling the room traversal too. |
|
Unmorph after exiting the morph tunnel and get to the other side of the room. Killing the Dessgeegas can be done with no beam upgrades; Samus can jump over them while shooting the last few hits or retreat to the left. It is possible to kill a Sova on the door and pause abuse to grab its Energy drop on G-mode exit. Samus will likely need to wait at the door for about a minute for the global Sova gets there. Entrance condition: {
"comeInWithGMode": {
"mode": "any",
"morphed": true
}
}Requires: "h_artificialMorphMovement"
{
"or": [
"canTrickyJump",
"h_artificialMorphPowerBomb",
"h_hasBeamUpgrade",
{
"enemyKill": {
"enemies": [
[
"Sm. Dessgeega",
"Sm. Dessgeega"
]
],
"explicitWeapons": [
"Missile",
"Super",
"ScrewAttack"
]
}
},
{
"enemyDamage": {
"enemy": "Sm. Dessgeega",
"type": "contact",
"hits": 1
}
}
]
}
{
"or": [
"HiJump",
"SpaceJump",
"canSpringBallJumpMidAir",
"canIBJ",
"canTrickyDashJump",
{
"and": [
"canTrickyUseFrozenEnemies",
"canWallJump"
]
},
{
"and": [
{
"canShineCharge": {
"usedTiles": 43,
"openEnd": 0
}
},
{
"shinespark": {
"frames": 9,
"excessFrames": 5
}
}
]
},
{
"and": [
"canInsaneWallJump",
"canWallJumpInstantMorph",
"canUnmorphBombBoost",
"canDownGrab"
]
}
]
}
{
"or": [
{
"and": [
"h_heatedGModePauseAbuse",
"canBePatient"
]
},
"h_heatedGModeOpenDifferentDoor"
]
}Dev note: FIXME: Methods that require a Sova damage boost could be added |
|
Carefully roll under the Sm. Desgeegas or kill them with a Power Bomb (while avoiding killing the Sova). It is possible to kill a Sova on the door and pause abuse to grab its Energy drop on G-mode exit. Samus will likely need to wait at the door for about a minute for the global Sova gets there. Entrance condition: {
"comeInWithGMode": {
"mode": "any",
"morphed": true
}
}Requires: "h_artificialMorphIBJ"
{
"or": [
"canTrickyDodgeEnemies",
{
"and": [
"h_artificialMorphPowerBomb",
"h_artificialMorphPowerBomb"
]
},
{
"haveBlueSuit": {}
}
]
}
{
"or": [
{
"and": [
"h_heatedGModePauseAbuse",
"canBePatient"
]
},
"h_heatedGModeOpenDifferentDoor"
]
} |
|
Cross the room and go through the morph tunnel. Without any morph movement items, carefully air ball over the Sova and use it to damage boost into the tunnel or wait for the global Sova. It is possible to kill a Sova on the door and pause abuse to grab its Energy drop on G-mode exit. Entrance condition: {
"comeInWithGMode": {
"mode": "any",
"morphed": false
}
}Requires: "Morph"
{
"or": [
"h_bombThings",
"h_useSpringBall",
{
"and": [
"canNeutralDamageBoost",
{
"enemyDamage": {
"enemy": "Sova",
"type": "contact",
"hits": 1
}
},
{
"or": [
{
"and": [
"canTrickyJump",
"canLateralMidAirMorph"
]
},
"canBePatient",
{
"ammo": {
"type": "Super",
"count": 1
}
}
]
}
]
}
]
}
{
"or": [
"h_heatedGModePauseAbuse",
"h_heatedGModeOpenDifferentDoor"
]
} |
|
Wait for the Sova to pass then carefully roll under the Sm. Desgeegas or kill them with a Power Bomb (while avoiding killing the Sova). It is possible to kill a Sova on the door and pause abuse to grab its Energy drop on G-mode exit. The local or global Sova can be used. To use the local one, keep it off camera when possible and horizontally boost to jump over both stairs at once. With Spring Ball or a moderately good IBJ, Samus should be able to get through the morph tunnel before the global Sova, otherwise it takes just over a minute for it to return. Entrance condition: {
"comeInWithGMode": {
"mode": "any",
"morphed": true
}
}Requires: {
"or": [
"canTrickyDodgeEnemies",
"h_artificialMorphPowerBomb",
{
"enemyDamage": {
"enemy": "Sm. Dessgeega",
"type": "contact",
"hits": 1
}
},
{
"haveBlueSuit": {}
}
]
}
{
"or": [
"h_artificialMorphIBJ",
"h_artificialMorphSpringBall"
]
}
{
"or": [
"h_heatedGModePauseAbuse",
"h_heatedGModeOpenDifferentDoor"
]
} |
|
Requires: {
"enemyDamage": {
"enemy": "Sova",
"type": "contact",
"hits": 1
}
} |
|
Entrance condition: {
"comeInNormally": {}
}Requires: {
"heatFrames": 1180
}Exit condition: {
"leaveWithGModeSetup": {}
}Unlocks doors: {"types":["ammo"],"requires":[]}Dev note: Generally, coming from the left works, but that would require modeling the room traversal too. |
|
Exit G-mode below the shot blocks. Entrance condition: {
"comeInWithGMode": {
"mode": "any",
"morphed": false
}
}Requires: "h_heatedGMode"
{
"heatFrames": 0
}Dev note: This is just used to save Energy, when Samus doesn't have a way to get though the morph tunnel. |
|
Entrance condition: {
"comeInWithGMode": {
"mode": "any",
"morphed": false
}
}Requires: "h_heatedGModeOpenDifferentDoor" |
|
Entrance condition: {
"comeInWithGMode": {
"mode": "direct",
"morphed": false
}
}Requires: "Morph"
{
"or": [
"SpaceJump",
{
"and": [
"canPreciseGrapple",
"canUseEnemies"
]
},
{
"and": [
"HiJump",
"canSpringBallJumpMidAir"
]
},
{
"and": [
"canDash",
"HiJump",
"canWallJump",
"canTrickyJump"
]
},
{
"and": [
"canWallJump",
"canUseIFrames",
{
"spikeHits": 1
},
"h_spikeJumpWithActiveEnemies"
]
},
{
"and": [
"h_IBJFromSpikes",
"h_spikeJumpWithActiveEnemies"
]
}
]
}
"h_heatedGModeOpenDifferentDoor" |
From: 1
Top Left Door
To: 3
Right Door
Overload PLMs by bombing the gate or crumble blocks, then go through the crumble blocks below and get to the door. IBJ past the Ripper or kill it. The Kago bugs will not spawn until Samus exits G-mode, so it is fine to kill it or IBJ from on top of it. Entrance condition: {
"comeInWithGMode": {
"mode": "any",
"morphed": true
}
}Requires: {
"or": [
"h_artificialMorphLongIBJ",
"h_artificialMorphJumpIntoIBJ"
]
}
"h_artificialMorphBombHorizontally"
{
"or": [
"h_artificialMorphPowerBomb",
{
"and": [
"Morph",
{
"ammo": {
"type": "Missile",
"count": 2
}
}
]
},
{
"and": [
"Morph",
{
"ammo": {
"type": "Super",
"count": 1
}
}
]
},
{
"and": [
"h_artificialMorphDoubleBombJump",
"h_artificialMorphStaggeredIBJ"
]
}
]
}
"h_heatedGModeOpenDifferentDoor" |
From: 1
Top Left Door
To: 3
Right Door
Bomb boost onto the crumble blocks in the middle of the spike pit, then on the right side, move the Ripper off camera and IBJ. If the camera gets shifted so that the Ripper stays on camera, shift it back to the right by IBJng up a bit on the left side of the 4 crumbles then move to the right as Samus falls. Entrance condition: {
"comeInWithGMode": {
"mode": "indirect",
"morphed": true
}
}Requires: "h_artificialMorphIBJ" "h_artificialMorphBombHorizontally" "canCameraManip" "canTrickyJump" "h_heatedGModeOpenDifferentDoor" |
|
With Grapple, a running jump then single Grapple swing can be used before PLMs are overloaded, alternatively jump on the crumble blocks and Grapple the Ripper. Entrance condition: {
"comeInWithGMode": {
"mode": "indirect",
"morphed": false
}
}Requires: {
"or": [
"SpaceJump",
"canTrickySpringBallJump",
{
"and": [
"canWallJump",
{
"or": [
"canDash",
"HiJump",
{
"and": [
"canBlueSuitSpikeJump",
{
"spikeHits": 1
}
]
}
]
}
]
},
{
"and": [
"HiJump",
"canSpeedyJump"
]
},
{
"and": [
"canPreciseGrapple",
{
"or": [
"canDash",
"canUseEnemies",
"canInsaneJump"
]
}
]
}
]
}
"h_heatedGModeOpenDifferentDoor" |
From: 1
Top Left Door
To: 4
Item
Overload PLMs by bombing the gate or crumble blocks, then go through the crumble blocks below and get to the item. IBJ past the Ripper or kill it. The Kago bugs will not spawn until Samus exits G-mode, so it is fine to kill it or IBJ from on top of it. Entrance condition: {
"comeInWithGMode": {
"mode": "direct",
"morphed": true
}
}Requires: {
"or": [
"h_artificialMorphLongIBJ",
"h_artificialMorphJumpIntoIBJ"
]
}
"h_artificialMorphBombHorizontally"
{
"or": [
"h_artificialMorphPowerBomb",
{
"and": [
"Morph",
{
"ammo": {
"type": "Missile",
"count": 2
}
}
]
},
{
"and": [
"Morph",
{
"ammo": {
"type": "Super",
"count": 1
}
}
]
},
{
"and": [
"h_artificialMorphDoubleBombJump",
"h_artificialMorphStaggeredIBJ"
]
}
]
}
{
"heatFrames": 0
} |
|
Overload PLMs by shooting the gate, then go through the crumble blocks below and get to the item. Entrance condition: {
"comeInWithGMode": {
"mode": "direct",
"morphed": false
}
}Requires: "Morph"
{
"or": [
"SpaceJump",
{
"and": [
"canPreciseGrapple",
"canUseEnemies"
]
},
{
"and": [
"HiJump",
"canSpringBallJumpMidAir"
]
},
"canInsaneWallJump",
{
"and": [
"HiJump",
"canUseIFrames",
{
"noBlueSuit": {}
},
{
"enemyDamage": {
"enemy": "Ripper 2 (green)",
"type": "contact",
"hits": 1
}
},
{
"or": [
"canWallJump",
"canSpeedyJump"
]
}
]
},
"h_IBJFromSpikes"
]
}
{
"heatFrames": 0
} |
|
Entrance condition: {
"comeInWithGMode": {
"mode": "indirect",
"morphed": false
}
}Requires: {
"heatFrames": 0
} |
|
Stand under where the gate will spawn when exiting G-mode to open it before grabbing the item. Entrance condition: {
"comeInWithGMode": {
"mode": "indirect",
"morphed": false
}
}Requires: {
"heatFrames": 25
}Clears obstacles: A |
|
Entrance condition: {
"comeInWithGMode": {
"mode": "any",
"morphed": false
}
}Requires: "Morph"
{
"heatFrames": 0
} |
|
It is possible to climb the left side of the room with SpeedBooster alone, with either a tricky dash jump or a vertical shinespark. Entrance condition: {
"comeInWithGMode": {
"mode": "any",
"morphed": false
}
}Requires: {
"or": [
"SpaceJump",
"canWallJump",
{
"and": [
"HiJump",
"canSpeedyJump"
]
},
"canTrickyDashJump",
{
"and": [
{
"canShineCharge": {
"usedTiles": 28,
"gentleUpTiles": 3,
"gentleDownTiles": 3,
"openEnd": 0
}
},
{
"or": [
{
"shinespark": {
"frames": 18,
"excessFrames": 8
}
},
{
"and": [
"canSpeedyJump",
{
"shinespark": {
"frames": 16,
"excessFrames": 10
}
}
]
}
]
}
]
}
]
}
"h_heatedGModeOpenDifferentDoor"Dev note: This is only for strats without Morph, otherwise the strats can stop at 7 first. |
|
Climb up 1 screen. Entrance condition: {
"comeInWithGMode": {
"mode": "direct",
"morphed": false
}
}Requires: "canGModeXRayClimb" "h_heatProof" |
|
Entrance condition: {
"comeInWithGMode": {
"mode": "any",
"morphed": true
}
}Requires: "h_artificialMorphIBJ" "h_heatedGModeOpenDifferentDoor" |
|
Enter with G-mode direct, back up to between 1 and 6 pixels from the door transition, and activate X-ray to get very deep stuck in the door. Climb up 1 screen, and perform a turnaround buffered spin-jump away from the door to trigger the transition, bypassing any lock on the door. Entrance condition: {
"comeInWithGMode": {
"mode": "direct",
"morphed": false
}
}Requires: "canGModeXRayClimb" "h_heatProof" Bypasses door shell: true |
From: 2
Bottom Left Door
To: 3
Right Door
Come in with G-Mode Morph, after passing through the morph tunnel unmorph and exit G-Mode. Disable any E-Tanks and farm the Kago to put Energy into reserves. Get into postion under the top blocks and disable Varia. Time a down jump to reach the apex as reserves trigger. Release down during the reserve refil. Entrance condition: {
"comeInWithGMode": {
"mode": "direct",
"morphed": true
}
}Requires: "canArtificialMorph"
"h_heatProof"
"canRModeStandupClip"
"canBeVeryPatient"
"h_RModeCanRefillReserves"
{
"partialRefill": {
"type": "ReserveEnergy",
"limit": 100
}
}
{
"disableEquipment": "Varia"
}
{
"autoReserveTrigger": {
"implicitHeatFrames": "suitless"
}
}
{
"suitlessHeatFrames": 30
}Dev note: FIXME: Add suitless version. |
From: 2
Bottom Left Door
To: 3
Right Door
Overload PLMs by shooting the gate, then go through the crumble blocks below and get to the door. The gate can be shot while precisely positioned from below without requiring any items. The positioning is precise and off camera; while facing left, position Samus front foot barely on the flat part after the slope. Entrance condition: {
"comeInWithGMode": {
"mode": "direct",
"morphed": false
}
}Requires: "Morph"
{
"or": [
"SpaceJump",
{
"and": [
"canPreciseGrapple",
{
"or": [
"canDash",
"canUseEnemies",
"canInsaneJump"
]
}
]
},
{
"and": [
"HiJump",
"canSpringBallJumpMidAir"
]
},
{
"and": [
"canDash",
"HiJump",
"canWallJump",
"canTrickyJump"
]
},
{
"and": [
"canWallJump",
"canUseIFrames",
{
"spikeHits": 1
},
"h_spikeJumpWithActiveEnemies"
]
},
{
"and": [
"h_IBJFromSpikes",
"h_spikeJumpWithActiveEnemies"
]
}
]
}
"h_heatedGModeOpenDifferentDoor" |
From: 2
Bottom Left Door
To: 3
Right Door
Overload PLMs by bombing the gate or crumble blocks, then go through the crumble blocks below and get to the door. IBJ past the Ripper or kill it. The Kago bugs will not spawn until Samus exits G-mode, so it is fine to kill it or IBJ from on top of it. Entrance condition: {
"comeInWithGMode": {
"mode": "any",
"morphed": true
}
}Requires: {
"or": [
"h_artificialMorphLongIBJ",
"h_artificialMorphJumpIntoIBJ"
]
}
"h_artificialMorphBombHorizontally"
{
"or": [
"h_artificialMorphPowerBomb",
{
"and": [
"Morph",
{
"ammo": {
"type": "Missile",
"count": 2
}
}
]
},
{
"and": [
"Morph",
{
"ammo": {
"type": "Super",
"count": 1
}
}
]
},
{
"and": [
"h_artificialMorphDoubleBombJump",
"h_artificialMorphStaggeredIBJ"
]
}
]
}
"h_heatedGModeOpenDifferentDoor" |
From: 2
Bottom Left Door
To: 3
Right Door
Bomb boost onto the crumble blocks in the middle of the spike pit, then on the right side, move the Ripper off camera and IBJ. If the camera gets shifted so that the Ripper stays on camera, shift it back to the right by IBJng up a bit on the left side of the 4 crumbles then move to the right as Samus falls. Entrance condition: {
"comeInWithGMode": {
"mode": "indirect",
"morphed": true
}
}Requires: "h_artificialMorphIBJ" "h_artificialMorphBombHorizontally" "canCameraManip" "canTrickyJump" "h_heatedGModeOpenDifferentDoor" |
|
It is possible to climb the left side of the room with SpeedBooster alone, with either a tricky dash jump or a vertical shinespark, then Grapple the Ripper or ceiling blocks. With Grapple, a running jump then single Grapple swing can be used before PLMs are overloaded, alternatively jump on the crumble blocks and Grapple the Ripper. Entrance condition: {
"comeInWithGMode": {
"mode": "indirect",
"morphed": false
}
}Requires: {
"or": [
"SpaceJump",
"canTrickySpringBallJump",
{
"and": [
"canWallJump",
{
"or": [
"canDash",
"HiJump",
{
"and": [
"canBlueSuitSpikeJump",
{
"spikeHits": 1
}
]
}
]
}
]
},
{
"and": [
"HiJump",
"canSpeedyJump"
]
},
{
"and": [
"canTrickyDashJump",
"canPreciseGrapple"
]
},
{
"and": [
"canPreciseGrapple",
{
"canShineCharge": {
"usedTiles": 28,
"gentleUpTiles": 3,
"gentleDownTiles": 3,
"openEnd": 0
}
},
{
"or": [
{
"shinespark": {
"frames": 18,
"excessFrames": 8
}
},
{
"and": [
"canSpeedyJump",
{
"shinespark": {
"frames": 16,
"excessFrames": 10
}
}
]
}
]
}
]
}
]
}
"h_heatedGModeOpenDifferentDoor" |
From: 2
Bottom Left Door
To: 4
Item
Overload PLMs by bombing the gate or crumble blocks, then go through the crumble blocks below and get to the item. IBJ past the Ripper or kill it. The Kago bugs will not spawn until Samus exits G-mode, so it is fine to kill it or IBJ from on top of it. Entrance condition: {
"comeInWithGMode": {
"mode": "direct",
"morphed": true
}
}Requires: {
"or": [
"h_artificialMorphLongIBJ",
"h_artificialMorphJumpIntoIBJ"
]
}
"h_artificialMorphBombHorizontally"
{
"or": [
"h_artificialMorphPowerBomb",
{
"and": [
"Morph",
{
"ammo": {
"type": "Missile",
"count": 2
}
}
]
},
{
"and": [
"Morph",
{
"ammo": {
"type": "Super",
"count": 1
}
}
]
},
{
"and": [
"h_artificialMorphDoubleBombJump",
"h_artificialMorphStaggeredIBJ"
]
}
]
}
{
"heatFrames": 0
} |
|
Overload PLMs by shooting the gate, then go through the crumble blocks below and get to the item. The gate can be shot while precisely positioned from below without requiring any items. The positioning is precise and off camera; while facing left, position Samus front foot barely on the flat part after the slope. Entrance condition: {
"comeInWithGMode": {
"mode": "direct",
"morphed": false
}
}Requires: "Morph"
{
"or": [
"SpaceJump",
{
"and": [
"canPreciseGrapple",
"canUseEnemies"
]
},
{
"and": [
"HiJump",
"canSpringBallJumpMidAir"
]
},
"canInsaneWallJump",
{
"and": [
"HiJump",
"canUseIFrames",
{
"noBlueSuit": {}
},
{
"enemyDamage": {
"enemy": "Ripper 2 (green)",
"type": "contact",
"hits": 1
}
},
{
"or": [
"canWallJump",
"canSpeedyJump"
]
}
]
},
"h_IBJFromSpikes"
]
}
{
"heatFrames": 0
} |
|
Entrance condition: {
"comeInWithGMode": {
"mode": "indirect",
"morphed": true
}
}Requires: "h_artificialMorphIBJ"
{
"heatFrames": 0
} |
From: 2
Bottom Left Door
To: 4
Item
Stand under where the gate will spawn when exiting G-mode to open it before grabbing the item. Entrance condition: {
"comeInWithGMode": {
"mode": "indirect",
"morphed": true
}
}Requires: "h_artificialMorphIBJ"
{
"heatFrames": 25
}Clears obstacles: A |
|
It is possible to climb the left side of the room with SpeedBooster alone, with either a tricky dash jump or a vertical shinespark. Entrance condition: {
"comeInWithGMode": {
"mode": "indirect",
"morphed": false
}
}Requires: {
"or": [
"SpaceJump",
"canSpringBallJumpMidAir",
"canWallJump",
{
"and": [
"HiJump",
"canSpeedyJump"
]
},
"canTrickyDashJump",
{
"and": [
{
"canShineCharge": {
"usedTiles": 28,
"gentleUpTiles": 3,
"gentleDownTiles": 3,
"openEnd": 0
}
},
{
"or": [
{
"shinespark": {
"frames": 18,
"excessFrames": 8
}
},
{
"and": [
"canSpeedyJump",
{
"shinespark": {
"frames": 16,
"excessFrames": 10
}
}
]
}
]
}
]
}
]
}
{
"heatFrames": 0
} |
From: 2
Bottom Left Door
To: 4
Item
Stand under where the gate will spawn when exiting G-mode to open it before grabbing the item. Entrance condition: {
"comeInWithGMode": {
"mode": "indirect",
"morphed": false
}
}Requires: {
"or": [
"SpaceJump",
"canSpringBallJumpMidAir",
"canWallJump",
{
"and": [
"HiJump",
"canSpeedyJump"
]
},
"canTrickyDashJump",
{
"and": [
{
"canShineCharge": {
"usedTiles": 28,
"gentleUpTiles": 3,
"gentleDownTiles": 3,
"openEnd": 0
}
},
{
"or": [
{
"shinespark": {
"frames": 18,
"excessFrames": 8
}
},
{
"and": [
"canSpeedyJump",
{
"shinespark": {
"frames": 16,
"excessFrames": 10
}
}
]
}
]
}
]
}
]
}
{
"heatFrames": 25
}Clears obstacles: A |
|
Entrance condition: {
"comeInWithGMode": {
"mode": "any",
"morphed": false
}
}Requires: "Morph"
{
"heatFrames": 0
} |
|
Bomb horizontally on room entry to jump over the Ripper and land on the crumble blocks, or use a Power Bomb to kill the Ripper. Avoid touching all 6 crumbles, so Samus can use the item to overload PLMs and go through one of the crumbles to get to the left side of the room. If the item has already been obtained, Samus can shoot or Bomb the gate many times to overload PLMs. Entrance condition: {
"comeInWithGMode": {
"mode": "direct",
"morphed": true
}
}Requires: "canRemoteAcquire"
{
"or": [
"h_artificialMorphCeilingBombJump",
{
"and": [
"h_artificialMorphBombHorizontally",
"h_artificialMorphIBJ",
"h_artificialMorphPowerBomb"
]
},
{
"and": [
"h_artificialMorphBombHorizontally",
"canTrickyDodgeEnemies",
"h_artificialMorphDoubleBombJump",
"h_artificialMorphStaggeredIBJ"
]
}
]
}
"h_heatedGModeOpenDifferentDoor"Collects items: 4 |
From: 3
Right Door
To: 1
Top Left Door
Bomb horizontally on room entry to jump over the Ripper and land on the crumble blocks, or use a Power Bomb to kill the Ripper. Entrance condition: {
"comeInWithGMode": {
"mode": "indirect",
"morphed": true
}
}Requires: {
"or": [
"h_artificialMorphCeilingBombJump",
{
"and": [
"h_artificialMorphBombHorizontally",
"h_artificialMorphIBJ",
"h_artificialMorphPowerBomb"
]
},
{
"and": [
"h_artificialMorphBombHorizontally",
"canTrickyDodgeEnemies",
"h_artificialMorphDoubleBombJump",
"h_artificialMorphStaggeredIBJ"
]
}
]
}
"h_heatedGModeOpenDifferentDoor" |
|
Jump onto the crumble blocks to make them solid, then use them as a platform to cross the room. With Grapple, a running jump then single Grapple swing can be used before PLMs are overloaded, alternatively jump on the crumble blocks and Grapple the Ripper. Entrance condition: {
"comeInWithGMode": {
"mode": "indirect",
"morphed": false
}
}Requires: {
"or": [
"SpaceJump",
{
"and": [
"canPreciseGrapple",
{
"or": [
"canDash",
"canUseEnemies",
"canInsaneJump"
]
}
]
},
"canInsaneWallJump",
{
"and": [
"HiJump",
"canWallJump"
]
},
{
"and": [
"HiJump",
"canSpeedyJump"
]
}
]
}
"h_heatedGModeOpenDifferentDoor"Dev note: This is only for strats that can't go to 7 - variants without Morph, or without a way to get back up after going down. |
From: 3
Right Door
To: 2
Bottom Left Door
Bomb horizontally on room entry to jump over the Ripper and land on the crumble blocks, or use a Power Bomb to kill the Ripper. Avoid touching all 6 crumbles, so Samus can use the item to overload PLMs and go through one of the crumbles to get to the left side of the room. If the item has already been obtained, Samus can shoot or Bomb the gate many times to overload PLMs. Entrance condition: {
"comeInWithGMode": {
"mode": "direct",
"morphed": true
}
}Requires: "canRemoteAcquire"
{
"or": [
"h_artificialMorphCeilingBombJump",
{
"and": [
"h_artificialMorphBombHorizontally",
"h_artificialMorphIBJ",
"h_artificialMorphPowerBomb"
]
},
{
"and": [
"h_artificialMorphBombHorizontally",
"canTrickyDodgeEnemies",
"h_artificialMorphDoubleBombJump",
"h_artificialMorphStaggeredIBJ"
]
}
]
}
"h_heatedGModeOpenDifferentDoor"Collects items: 4 |
From: 3
Right Door
To: 2
Bottom Left Door
Bomb horizontally on room entry to jump over the Ripper and land on the crumble blocks, or use a Power Bomb to kill the Ripper. Entrance condition: {
"comeInWithGMode": {
"mode": "indirect",
"morphed": true
}
}Requires: {
"or": [
"h_artificialMorphCeilingBombJump",
{
"and": [
"h_artificialMorphBombHorizontally",
"h_artificialMorphIBJ",
"h_artificialMorphPowerBomb"
]
},
{
"and": [
"h_artificialMorphBombHorizontally",
"canTrickyDodgeEnemies",
"h_artificialMorphDoubleBombJump",
"h_artificialMorphStaggeredIBJ"
]
}
]
}
"h_heatedGModeOpenDifferentDoor" |
From: 3
Right Door
To: 2
Bottom Left Door
Jump onto the crumble blocks to make them solid, then use them as a platform to cross the room. With Grapple, a running jump then single Grapple swing can be used before PLMs are overloaded, alternatively jump on the crumble blocks and Grapple the Ripper. Entrance condition: {
"comeInWithGMode": {
"mode": "indirect",
"morphed": false
}
}Requires: {
"or": [
"SpaceJump",
{
"and": [
"canPreciseGrapple",
{
"or": [
"canDash",
"canUseEnemies",
"canInsaneJump"
]
}
]
},
"canInsaneWallJump",
{
"and": [
"HiJump",
"canWallJump"
]
},
{
"and": [
"HiJump",
"canSpeedyJump"
]
}
]
}
"h_heatedGModeOpenDifferentDoor"Dev note: This is only for strats that can't go to 7 - variants without Morph. |
From: 3
Right Door
To: 3
Right Door
Bomb horizontally on room entry to jump over the Ripper and land on the crumble blocks, or use a Power Bomb to kill the Ripper. Entrance condition: {
"comeInWithGMode": {
"mode": "direct",
"morphed": true
}
}Requires: "canRemoteAcquire"
{
"or": [
"h_artificialMorphLongCeilingBombJump",
{
"and": [
"h_artificialMorphBombHorizontally",
"h_artificialMorphIBJ",
"h_artificialMorphPowerBomb"
]
},
{
"and": [
"h_artificialMorphBombHorizontally",
"canTrickyDodgeEnemies",
"h_artificialMorphDoubleBombJump",
"h_artificialMorphStaggeredIBJ"
]
}
]
}
"h_heatedDirectGModeLeaveSameDoor"Collects items: 4 |
|
Entrance condition: {
"comeInWithGMode": {
"mode": "direct",
"morphed": false
}
}Requires: "canRemoteAcquire"
{
"or": [
"SpaceJump",
{
"and": [
"canPreciseGrapple",
"canUseEnemies"
]
},
"canSpringBallJumpMidAir",
"canInsaneWallJump",
{
"and": [
"HiJump",
"canWallJump"
]
},
{
"and": [
"HiJump",
"canSpeedyJump"
]
},
{
"and": [
"canStaggeredIBJ",
"canDoubleBombJump",
"canBombHorizontally"
]
},
{
"and": [
"h_IBJFromSpikes",
"h_IBJFromSpikes"
]
},
{
"and": [
"h_IBJFromSpikes",
"canCameraManip",
"canMoonwalk"
]
}
]
}
"h_heatedDirectGModeLeaveSameDoor"Collects items: 4 |
From: 3
Right Door
To: 3
Right Door
Jump onto the crumble blocks to make them solid, then use them as a platform to cross the room. Entrance condition: {
"comeInWithGMode": {
"mode": "direct",
"morphed": false
}
}Requires: "canRemoteAcquire"
{
"or": [
"ScrewAttack",
"h_usePowerBomb",
{
"ammo": {
"type": "Missile",
"count": 2
}
},
{
"ammo": {
"type": "Super",
"count": 1
}
}
]
}
"canIBJ"
"canBombHorizontally"
"h_heatedDirectGModeLeaveSameDoor"Collects items: 4 |
|
Jump onto the crumble blocks to make them solid, then use them as a platform to cross the room. With Grapple, a running jump then single Grapple swing can be used before PLMs are overloaded, alternatively jump on the crumble blocks and Grapple the Ripper. Entrance condition: {
"comeInWithGMode": {
"mode": "any",
"morphed": false
}
}Requires: {
"or": [
"SpaceJump",
{
"and": [
"canStaggeredIBJ",
"canDoubleBombJump",
"canBombHorizontally"
]
},
{
"and": [
"canDash",
{
"or": [
"canTrickySpringBallJump",
"canInsaneWallJump",
{
"and": [
"HiJump",
"canWallJump"
]
},
{
"and": [
"HiJump",
"canSpeedyJump"
]
},
"h_IBJFromSpikes"
]
}
]
},
{
"and": [
"canPreciseGrapple",
{
"or": [
"canDash",
"canUseEnemies",
"canInsaneJump"
]
}
]
}
]
}
{
"heatFrames": 0
}Dev note: FIXME: some more of these options may be possible with a blue suit, with greater difficulty. |
|
Bomb horizontally on room entry to jump over the Ripper and land on the crumble blocks, or use a Power Bomb to kill the Ripper. Entrance condition: {
"comeInWithGMode": {
"mode": "any",
"morphed": true
}
}Requires: {
"or": [
"h_artificialMorphCeilingBombJump",
{
"and": [
"h_artificialMorphBombHorizontally",
"h_artificialMorphIBJ",
"h_artificialMorphPowerBomb"
]
},
{
"and": [
"h_artificialMorphBombHorizontally",
"canTrickyDodgeEnemies",
"h_artificialMorphDoubleBombJump",
"h_artificialMorphStaggeredIBJ"
]
}
]
}
{
"heatFrames": 0
} |
|
Bomb horizontally on room entry to jump over the Ripper and land on the crumble blocks, or use a Power Bomb to kill the Ripper. In indirect G-mode, stand where the gate will spawn and exit G-mode to open the gate. In direct G-mode, overload PLMs by shooting the gate then position Samus a few pixels away from the gate to where upward diagonal shots go through it. Crouch then shoot diagonally and quickly exit G-mode (3-7 frames later) to open the gate on G-mode exit. Entrance condition: {
"comeInWithGMode": {
"mode": "any",
"morphed": true
}
}Requires: "canComplexGMode"
"h_heatedGMode"
{
"or": [
"h_artificialMorphCeilingBombJump",
{
"and": [
"h_artificialMorphBombHorizontally",
"h_artificialMorphIBJ",
"h_artificialMorphPowerBomb"
]
},
{
"and": [
"h_artificialMorphBombHorizontally",
"canTrickyDodgeEnemies",
"h_artificialMorphDoubleBombJump",
"h_artificialMorphStaggeredIBJ"
]
}
]
}
{
"heatFrames": 35
}Clears obstacles: A Dev note: Artificial morph strats can be useful, for instance, in indirect G-mode without heat protection, where Samus needs to collect the item. The canComplexGMode is only used here to describe opening the gate in direct G-mode without gate glitching. However, the indirect variant still requires canHeatedGMode or Varia - with Varia, indirect strats can instead be used to go to the top left door and return. |
|
Jump onto the crumble blocks to make them solid, then use them as a platform to cross the room. Entrance condition: {
"comeInWithGMode": {
"mode": "any",
"morphed": false
}
}Requires: {
"or": [
{
"and": [
"ScrewAttack",
{
"noBlueSuit": {}
}
]
},
"h_usePowerBomb",
{
"ammo": {
"type": "Missile",
"count": 2
}
},
{
"ammo": {
"type": "Super",
"count": 1
}
}
]
}
"canIBJ"
"canBombHorizontally"
{
"heatFrames": 0
} |
|
Jump onto the crumble blocks to make them solid, then use them as a platform to cross the room. In indirect G-mode, stand where the gate will spawn and exit G-mode to open the gate. In direct G-mode, overload PLMs by shooting the gate then position Samus a few pixels away from the gate to where upward diagonal shots go through it. Crouch then shoot diagonally and quickly exit G-mode (3-7 frames later) to open the gate on G-mode exit. Entrance condition: {
"comeInWithGMode": {
"mode": "any",
"morphed": false
}
}Requires: "canComplexGMode"
"h_heatedGMode"
{
"or": [
{
"and": [
"ScrewAttack",
{
"noBlueSuit": {}
}
]
},
"h_usePowerBomb",
{
"ammo": {
"type": "Missile",
"count": 2
}
},
{
"ammo": {
"type": "Super",
"count": 1
}
}
]
}
"canIBJ"
"canBombHorizontally"
{
"heatFrames": 35
}Clears obstacles: A Dev note: The canComplexGMode is only used here to describe opening the gate in direct G-mode without gate glitching. However, the indirect variant still requires canHeatedGMode or Varia - with Varia, indirect strats can instead be used to go to the top left door and return. |
|
Jump onto the crumble blocks to make them solid, then use them as a platform to cross the room. With Grapple, a running jump then single Grapple swing can be used before PLMs are overloaded, alternatively jump on the crumble blocks and Grapple the Ripper. In indirect G-mode, stand where the gate will spawn and exit G-mode to open the gate. In direct G-mode, overload PLMs by shooting the gate then position Samus a few pixels away from the gate to where upward diagonal shots go through it. Crouch then shoot diagonally and quickly exit G-mode (3-7 frames later) to open the gate on G-mode exit. Entrance condition: {
"comeInWithGMode": {
"mode": "any",
"morphed": false
}
}Requires: "canComplexGMode"
"h_heatedGMode"
{
"or": [
"SpaceJump",
{
"and": [
"canStaggeredIBJ",
"canDoubleBombJump",
"canBombHorizontally"
]
},
{
"and": [
"canDash",
{
"or": [
"canTrickySpringBallJump",
"canInsaneWallJump",
{
"and": [
"HiJump",
"canWallJump"
]
},
{
"and": [
"HiJump",
"canSpeedyJump"
]
},
"h_IBJFromSpikes"
]
}
]
},
{
"and": [
"canPreciseGrapple",
{
"or": [
"canDash",
"canUseEnemies",
"canInsaneJump"
]
}
]
}
]
}
{
"heatFrames": 35
}Clears obstacles: A Dev note: The canComplexGMode is only used here to describe opening the gate in direct G-mode without gate glitching. However, the indirect variant still requires canHeatedGMode or Varia - with Varia, indirect strats can instead be used to go to the top left door and return. FIXME: some more of these options may be possible with a blue suit, with greater difficulty. |
From: 3
Right Door
To: 6
G-Mode, Remote Acquire Junction (Bottom Right)
Bomb horizontally on room entry to jump over the Ripper and land on the crumble blocks, or use a Power Bomb to kill the Ripper. Avoid touching all 6 crumbles, so Samus can use the item to overload PLMs and go through one of the crumbles to get to the left side of the room. If the item has already been obtained, Samus can shoot or Bomb the gate many times to overload PLMs. Entrance condition: {
"comeInWithGMode": {
"mode": "direct",
"morphed": true
}
}Requires: "canRemoteAcquire"
{
"or": [
"h_artificialMorphCeilingBombJump",
{
"and": [
"h_artificialMorphBombHorizontally",
"h_artificialMorphIBJ",
"h_artificialMorphPowerBomb"
]
},
{
"and": [
"h_artificialMorphBombHorizontally",
"canTrickyDodgeEnemies",
"h_artificialMorphDoubleBombJump",
"h_artificialMorphStaggeredIBJ"
]
}
]
}
{
"heatFrames": 0
}Dev note: This is only useful if the item is Morph, because with Morph, another strat would have been used. |
From: 3
Right Door
To: 6
G-Mode, Remote Acquire Junction (Bottom Right)
Jump onto the crumble blocks to make them solid, then use them as a platform to get to the item. Avoid touching all 6 crumbles, so Samus can use the item to overload PLMs and go through one of the crumbles to get to the left side of the room. If the item has already been obtained, Samus can shoot the gate many times to overload PLMs. Entrance condition: {
"comeInWithGMode": {
"mode": "direct",
"morphed": false
}
}Requires: "canRemoteAcquire"
{
"or": [
{
"and": [
"ScrewAttack",
{
"noBlueSuit": {}
}
]
},
"h_usePowerBomb",
{
"ammo": {
"type": "Missile",
"count": 2
}
},
{
"ammo": {
"type": "Super",
"count": 1
}
}
]
}
"canIBJ"
"canBombHorizontally"
{
"heatFrames": 0
} |
From: 3
Right Door
To: 6
G-Mode, Remote Acquire Junction (Bottom Right)
Jump onto the crumble blocks to make them solid, then use them as a platform to get to the item. With Grapple, a running jump then single Grapple swing can be used before PLMs are overloaded, alternatively jump on the crumble blocks and Grapple the Ripper. Avoid touching all 6 crumbles, so Samus can use the item to overload PLMs and go through one of the crumbles to get to the left side of the room. If the item has already been obtained, Samus can shoot the gate many times to overload PLMs. Entrance condition: {
"comeInWithGMode": {
"mode": "direct",
"morphed": false
}
}Requires: "canRemoteAcquire"
{
"or": [
"SpaceJump",
"canCeilingBombJump",
{
"and": [
"canBombHorizontally",
"canIBJ",
"h_usePowerBomb"
]
},
{
"and": [
"canStaggeredIBJ",
"canDoubleBombJump",
"canBombHorizontally"
]
},
{
"and": [
"canPreciseGrapple",
"canUseEnemies"
]
},
{
"and": [
"canDash",
{
"or": [
"canTrickySpringBallJump",
"canInsaneWallJump",
{
"and": [
"HiJump",
"canWallJump"
]
},
{
"and": [
"HiJump",
"canSpeedyJump"
]
},
"h_IBJFromSpikes"
]
}
]
}
]
}
{
"heatFrames": 0
} |
From: 3
Right Door
To: 7
G-Mode Junction (Bottom Right)
Jump onto the crumble blocks to make them solid, then use them as a platform to cross the room. With Grapple, a running jump then single Grapple swing can be used before PLMs are overloaded, alternatively jump on the crumble blocks and Grapple the Ripper. Entrance condition: {
"comeInWithGMode": {
"mode": "indirect",
"morphed": false
}
}Requires: "Morph"
{
"or": [
"SpaceJump",
"canCeilingBombJump",
{
"and": [
"canStaggeredIBJ",
"canDoubleBombJump",
"canBombHorizontally"
]
},
{
"and": [
"canBombHorizontally",
"canIBJ",
"h_usePowerBomb"
]
},
{
"and": [
"canDash",
{
"or": [
"canTrickySpringBallJump",
"canInsaneWallJump",
{
"and": [
"HiJump",
"canWallJump"
]
},
{
"and": [
"HiJump",
"canSpeedyJump"
]
},
"h_IBJFromSpikes"
]
}
]
},
{
"and": [
"canPreciseGrapple",
{
"or": [
"canDash",
"canUseEnemies",
"canInsaneJump"
]
}
]
}
]
}
{
"heatFrames": 0
}Dev note: With Grapple, Morph isn't needed, but there's no reason to go there without Morph. |
From: 3
Right Door
To: 7
G-Mode Junction (Bottom Right)
Jump onto the crumble blocks to make them solid, then use them as a platform to cross the room. Entrance condition: {
"comeInWithGMode": {
"mode": "indirect",
"morphed": false
}
}Requires: {
"or": [
{
"and": [
"ScrewAttack",
{
"noBlueSuit": {}
}
]
},
"h_usePowerBomb",
{
"ammo": {
"type": "Missile",
"count": 2
}
},
{
"ammo": {
"type": "Super",
"count": 1
}
}
]
}
"canIBJ"
"canBombHorizontally"
{
"heatFrames": 0
} |
From: 6
G-Mode, Remote Acquire Junction (Bottom Right)
To: 1
Top Left Door
It is possible to climb the left side of the room with SpeedBooster alone, with either a tricky dash jump or a vertical shinespark. Requires: "canRemoteAcquire"
"Morph"
{
"or": [
"SpaceJump",
"canSpringBallJumpMidAir",
"canWallJump",
{
"and": [
"HiJump",
"canSpeedyJump"
]
},
"canIBJ",
"canTrickyDashJump",
{
"and": [
{
"canShineCharge": {
"usedTiles": 28,
"gentleUpTiles": 3,
"gentleDownTiles": 3,
"openEnd": 0
}
},
{
"or": [
{
"shinespark": {
"frames": 18,
"excessFrames": 8
}
},
{
"and": [
"canSpeedyJump",
{
"shinespark": {
"frames": 16,
"excessFrames": 10
}
}
]
}
]
}
]
}
]
}
"h_heatedGModeOpenDifferentDoor"Collects items: 4 |
From: 6
G-Mode, Remote Acquire Junction (Bottom Right)
To: 1
Top Left Door
With Plasma and a pause abuse, it is possible to kill the Kago and exit G-mode while killing the Kago bugs and make it to the door with a small amount of Energy remaining. Shoot Plasma and quickly exit G-Mode, so that the bugs die immediately. Avoid having spent much time on the left side of the room, as the Fune fireballs will reduce the number of drops obtained. Note that it is possible to climb the left side of the room with SpeedBooster alone, with either a tricky dash jump or a vertical shinespark. Requires: "canComplexGMode"
"canRemoteAcquire"
"Morph"
{
"or": [
"SpaceJump",
"canSpringBallJumpMidAir",
"canWallJump",
{
"and": [
"HiJump",
"canSpeedyJump"
]
},
"canIBJ",
"canTrickyDashJump",
{
"and": [
{
"canShineCharge": {
"usedTiles": 28,
"gentleUpTiles": 3,
"gentleDownTiles": 3,
"openEnd": 0
}
},
{
"or": [
{
"shinespark": {
"frames": 18,
"excessFrames": 8
}
},
{
"and": [
"canSpeedyJump",
{
"shinespark": {
"frames": 16,
"excessFrames": 10
}
}
]
}
]
}
]
}
]
}
"Plasma"
"h_heatedGModePauseAbuse"
"canInsaneJump"Collects items: 4 Dev note: All of these methods are fast enough to be able to escape after obtaining the drops. The shinespark is longer than 1 frame, but is modeled this way because the drops aren't properly modeled. FIXME: The item that was remote acquired could be Morph, one of the items needed to climb the room, or maybe Plasma. |
From: 6
G-Mode, Remote Acquire Junction (Bottom Right)
To: 2
Bottom Left Door
Requires: "canRemoteAcquire" "Morph" "h_heatedGModeOpenDifferentDoor" Collects items: 4 |
From: 6
G-Mode, Remote Acquire Junction (Bottom Right)
To: 2
Bottom Left Door
With Plasma and a pause abuse, it is possible to kill the Kago and exit G-mode while killing the Kago bugs and make it to the door with a small amount of Energy remaining. Shoot Plasma and quickly exit G-Mode, so that the bugs die immediately. Avoid having spent much time on the left side of the room, as the Fune fireballs will reduce the number of drops obtained. Requires: "canComplexGMode" "canRemoteAcquire" "Morph" "Plasma" "h_heatedGModePauseAbuse" Collects items: 4 Dev note: FIXME: The item that was remote acquired could be Morph or maybe Plasma. |
|
It is possible to climb the left side of the room with SpeedBooster alone, with either a tricky dash jump or a vertical shinespark. Requires: "Morph"
{
"or": [
"SpaceJump",
"canSpringBallJumpMidAir",
"canWallJump",
{
"and": [
"HiJump",
"canSpeedyJump"
]
},
"canIBJ",
"canTrickyDashJump",
{
"and": [
{
"canShineCharge": {
"usedTiles": 28,
"gentleUpTiles": 3,
"gentleDownTiles": 3,
"openEnd": 0
}
},
{
"or": [
{
"shinespark": {
"frames": 18,
"excessFrames": 8
}
},
{
"and": [
"canSpeedyJump",
{
"shinespark": {
"frames": 16,
"excessFrames": 10
}
}
]
}
]
}
]
}
]
}
"h_heatedGModeOpenDifferentDoor" |
From: 7
G-Mode Junction (Bottom Right)
To: 1
Top Left Door
With Plasma and a pause abuse, it is possible to kill the Kago and exit G-mode while killing the Kago bugs and make it to the door with a small amount of Energy remaining. Shoot Plasma and quickly exit G-Mode, so that the bugs die immediately. Avoid having spent much time on the left side of the room, as the Fune fireballs will reduce the number of drops obtained. Note that it is possible to climb the left side of the room with SpeedBooster alone, with either a tricky dash jump or a vertical shinespark. Requires: "Morph"
{
"or": [
"SpaceJump",
"canSpringBallJumpMidAir",
"canWallJump",
{
"and": [
"HiJump",
"canSpeedyJump"
]
},
"canTrickyDashJump",
{
"and": [
{
"canShineCharge": {
"usedTiles": 28,
"gentleUpTiles": 3,
"gentleDownTiles": 3,
"openEnd": 0
}
},
{
"or": [
{
"shinespark": {
"frames": 18,
"excessFrames": 8
}
},
{
"and": [
"canSpeedyJump",
{
"shinespark": {
"frames": 16,
"excessFrames": 10
}
}
]
}
]
}
]
}
]
}
"Plasma"
"h_heatedGModePauseAbuse"
"canInsaneJump"
"canDash"Dev note: All of these methods are fast enough to be able to escape after obtaining the drops. The shinespark is longer than 1 frame, but is modeled this way because the drops aren't properly modeled. |
|
Requires: "Morph" "h_heatedGModeOpenDifferentDoor" |
From: 7
G-Mode Junction (Bottom Right)
To: 2
Bottom Left Door
With Plasma and a pause abuse, it is possible to kill the Kago and exit G-mode while killing the Kago bugs and make it to the door with a small amount of Energy remaining. Shoot Plasma and quickly exit G-Mode, so that the bugs die immediately. Avoid having spent much time on the left side of the room, as the Fune fireballs will reduce the number of drops obtained. Requires: "Morph" "Plasma" "h_heatedGModePauseAbuse" |
|
Entrance condition: {
"comeInWithGMode": {
"mode": "any",
"morphed": false
}
}Requires: "h_heatedGMode"
"Morph"
{
"or": [
{
"heatFrames": 260
},
{
"and": [
{
"heatFrames": 130
},
{
"or": [
{
"enemyKill": {
"enemies": [
[
"Geruta"
]
],
"explicitWeapons": [
"Super",
"Missile",
"Plasma",
"Wave",
"PowerBomb"
]
}
},
{
"haveBlueSuit": {}
}
]
}
]
}
]
} |
|
Raise the elevator with Wave, Missiles, a Super, a Power Bomb, or a Bomb Spread to then cross the room with less heat damage. Entrance condition: {
"comeInWithGMode": {
"mode": "any",
"morphed": false
}
}Requires: "h_heatedGMode"
"Morph"
{
"or": [
"Wave",
{
"ammo": {
"type": "Super",
"count": 1
}
},
{
"ammo": {
"type": "Missile",
"count": 3
}
},
"h_usePowerBomb",
{
"and": [
"Charge",
"h_useMorphBombs"
]
},
{
"and": [
"h_lavaProof",
"ScrewAttack",
"canKago"
]
},
{
"haveBlueSuit": {}
}
]
}
{
"heatFrames": 160
}Dev note: FIXME: The item would be collected (before the heat frames) if Samus entered in direct G-mode. |
|
On entry, wait for the Geruta to swoop under the door runway, then spin jump up into the alcove on the ceiling above the end of the runway. The Geruta will often swoop around the runway and be set up to hit Samus on the next swoop. Other times it may swoop outwards instead; in this scenario, repeat the same movements for another attempt for it to swoop towards the door. Because it deals a lot of damage, it is possible to enter with ~99 Energy and use the setup whether it swoops towards the door on a first or second attempt at manipulating it. Requires: "canComplexGMode"
{
"heatFrames": 350
}Exit condition: {
"leaveWithGModeSetup": {}
}Dev note: Adding more heat frame leniency here won't really help because then if the Geruta gets into position quickly, Samus will have too much Energy to use for the setup. |
|
Entrance condition: {
"comeInWithGMode": {
"mode": "direct",
"morphed": false
}
}Requires: "canRemoteAcquire" "h_heatedDirectGModeLeaveSameDoor" Collects items: 3 |
|
Entrance condition: {
"comeInWithGMode": {
"mode": "any",
"morphed": false
}
}Requires: "h_heatedGMode"
{
"heatFrames": 0
}Collects items: 3 |
From: 1
Top Left Door
To: 2
Middle Left Door
Entrance condition: {
"comeInWithGMode": {
"mode": "indirect",
"morphed": true
}
}Requires: {
"or": [
"h_artificialMorphMovement",
"h_artificialMorphBombHorizontally"
]
}
"h_heatedGModeOffCameraDoor"Dev note: It is possible to open the gate as it closes, but isn't expected since this is off camera. To do that would require resetting the room. |
From: 1
Top Left Door
To: 4
Top Right Door
Knock the top Viola off twice to get it to the door quickly. Entrance condition: {
"comeInNormally": {}
}Requires: {
"ammo": {
"type": "Super",
"count": 2
}
}
{
"heatFrames": 780
}Exit condition: {
"leaveWithGModeSetup": {}
}Unlocks doors: {"types":["missiles"],"requires":[]}
{"types":["super"],"requires":[],"useImplicitRequires":false}
{"types":["powerbomb"],"requires":[{"heatFrames":140}]} |
|
Entrance condition: {
"comeInWithGMode": {
"mode": "any",
"morphed": false
}
}Requires: {
"heatFrames": 0
} |
From: 2
Middle Left Door
To: 1
Top Left Door
Entrance condition: {
"comeInWithGMode": {
"mode": "indirect",
"morphed": true
}
}Requires: "canOffScreenMovement" "h_heatedGModeOffCameraDoor" |
From: 2
Middle Left Door
To: 3
Bottom Left Door
Entrance condition: {
"comeInWithGMode": {
"mode": "indirect",
"morphed": true
}
}Requires: "h_heatedGModeOffCameraDoor" |
From: 2
Middle Left Door
To: 4
Top Right Door
Entrance condition: {
"comeInWithGMode": {
"mode": "indirect",
"morphed": true
}
}Requires: "canOffScreenMovement" "h_heatedGModeOffCameraDoor" |
From: 3
Bottom Left Door
To: 2
Middle Left Door
Entrance condition: {
"comeInWithGMode": {
"mode": "indirect",
"morphed": true
}
}Requires: "h_artificialMorphMovement" "h_heatedGModeOffCameraDoor" Dev note: It is possible to open the gate as it closes, but isn't expected since this is off camera. To do that would require resetting the room. |
|
Use a Super to knock off the Viola to regain mobility. The Viola on the top right of the screen is the only one that can hit Samus here. Requires: {
"ammo": {
"type": "Super",
"count": 1
}
}
{
"enemyDamage": {
"enemy": "Viola",
"type": "contact",
"hits": 1
}
} |
From: 3
Bottom Left Door
To: 3
Bottom Left Door
Use a Super to knock off the second from the bottom Viola. Be sure not to knock it off when it is on the left side, or it will get stuck on the bottom platform. Requires: {
"ammo": {
"type": "Super",
"count": 1
}
}
{
"heatFrames": 290
}Exit condition: {
"leaveWithGModeSetup": {}
} |
From: 3
Bottom Left Door
To: 4
Top Right Door
Requires: {
"ammo": {
"type": "Super",
"count": 1
}
}
{
"heatFrames": 1430
}Exit condition: {
"leaveWithGModeSetup": {}
}Unlocks doors: {"types":["missiles","super"],"requires":[]}
{"types":["powerbomb"],"requires":[{"heatFrames":150}]} |
|
Entrance condition: {
"comeInWithGMode": {
"mode": "any",
"morphed": false
}
}Requires: {
"heatFrames": 0
} |
From: 4
Top Right Door
To: 2
Middle Left Door
Entrance condition: {
"comeInWithGMode": {
"mode": "indirect",
"morphed": true
}
}Requires: {
"or": [
"h_artificialMorphMovement",
"h_artificialMorphBombHorizontally"
]
}
"h_heatedGModeOffCameraDoor"Dev note: It is possible to open the gate as it closes, but isn't expected since this is off camera. To do that would require resetting the room. |
From: 4
Top Right Door
To: 4
Top Right Door
Entrance condition: {
"comeInNormally": {}
}Requires: {
"ammo": {
"type": "Super",
"count": 2
}
}
{
"heatFrames": 780
}Exit condition: {
"leaveWithGModeSetup": {}
}Unlocks doors: {"types":["missiles"],"requires":[]}
{"types":["super"],"requires":[],"useImplicitRequires":false}
{"types":["powerbomb"],"requires":[{"heatFrames":140}]} |
|
Entrance condition: {
"comeInWithGMode": {
"mode": "any",
"morphed": false
}
}Requires: {
"heatFrames": 0
} |
From: 5
Middle Junction (Ledge Right of Morph Tunnel)
To: 1
Top Left Door
Use a Super to knock off the top Viola in the lower half. Knock it off when it on the bottom just left of middle to have it fall all the way. Requires: {
"ammo": {
"type": "Super",
"count": 1
}
}
{
"heatFrames": 2130
}Exit condition: {
"leaveWithGModeSetup": {}
}Unlocks doors: {"types":["missiles","super"],"requires":[]}
{"types":["powerbomb"],"requires":[{"heatFrames":150}]} |
From: 5
Middle Junction (Ledge Right of Morph Tunnel)
To: 2
Middle Left Door
Requires: {
"ammo": {
"type": "Super",
"count": 1
}
}
"Morph"
{
"heatFrames": 980
}
{
"or": [
"Wave",
{
"obstaclesCleared": [
"A"
]
}
]
}Exit condition: {
"leaveWithGModeSetup": {}
}Unlocks doors: {"types":["missiles","super"],"requires":[]}
{"types":["powerbomb"],"requires":[{"heatFrames":300}]}Dev note: Could save some heat frames by starting at 1 or 2, or by leaving the Viola just off camera, in the morph tunnel and gate glitch. |
From: 5
Middle Junction (Ledge Right of Morph Tunnel)
To: 3
Bottom Left Door
Use a Super to knock off the second from the bottom Viola. Be sure not to knock it off when it is on the left side, or it will get stuck on the bottom platform. Requires: {
"ammo": {
"type": "Super",
"count": 1
}
}
{
"heatFrames": 290
}Exit condition: {
"leaveWithGModeSetup": {}
}Unlocks doors: {"types":["missiles"],"requires":[]}
{"types":["super"],"requires":[],"useImplicitRequires":false}
{"types":["powerbomb"],"requires":["never"]} |
From: 5
Middle Junction (Ledge Right of Morph Tunnel)
To: 4
Top Right Door
With two Supers, knock the top Viola off twice to get it to the door quickly. Otherwise, use one Super to knock off the very bottom Viola. Requires: {
"ammo": {
"type": "Super",
"count": 1
}
}
{
"heatFrames": 820
}
{
"or": [
{
"ammo": {
"type": "Super",
"count": 1
}
},
{
"heatFrames": 720
}
]
}Exit condition: {
"leaveWithGModeSetup": {}
}Unlocks doors: {"types":["missiles","super"],"requires":[]}
{"types":["powerbomb"],"requires":[{"heatFrames":150}]} |
|
It is possible to use a Super to kill a Viola by the door and pause abuse to grab its Energy drop on G-mode exit. Requires: {
"or": [
{
"and": [
{
"ammo": {
"type": "Super",
"count": 1
}
},
"h_heatedGModePauseAbuse",
{
"heatFrames": 10
}
]
},
"h_heatedGModeOpenDifferentDoor"
]
}Dev note: As Violas only give small Energy, Samus is likely to lose a few Energy overall. |
From: 6
Right Side, In G-Mode
To: 5
Middle Junction (Ledge Right of Morph Tunnel)
Requires: "h_heatedGMode"
{
"heatFrames": 0
}Dev note: This is used to then go through the morph tunnel. Artificial morph is only be helpful in indirect, as Samus would be off camera and can't gate glitch. |
|
Entrance condition: {
"comeInWithGMode": {
"mode": "any",
"morphed": false
}
}Requires: "Gravity"
{
"or": [
{
"lavaFrames": 280
},
{
"and": [
"SpaceJump",
{
"lavaFrames": 240
}
]
}
]
}
{
"or": [
{
"and": [
"canDash",
{
"disableEquipment": "SpeedBooster"
},
{
"or": [
{
"notable": "Thread the Needle Entry"
},
{
"heatFrames": 20
}
]
}
]
},
{
"lavaFrames": 100
}
]
}
"h_heatedGModeOpenDifferentDoor" |
|
Entrance condition: {
"comeInWithGMode": {
"mode": "any",
"morphed": false
}
}Requires: "canSuitlessLavaDive"
{
"lavaFrames": 370
}
{
"or": [
"HiJump",
{
"lavaFrames": 25
}
]
}
{
"or": [
"SpaceJump",
"canSpringBallJumpMidAir",
"canWallJump",
{
"and": [
"HiJump",
{
"lavaFrames": 10
}
]
},
{
"and": [
"canBombJumpWaterEscape",
{
"lavaFrames": 30
}
]
}
]
}
"h_heatedGModeOpenDifferentDoor"Dev note: Artificial morph jump into Crystal Flash clip doesn't seem to be possible. More testing could help. FIXME: The thread the needle strats could be added to save a small amount of Energy, but may not be reasonable. |
|
The Namihe fireballs don't move while in G-mode, making it safe to IBJ straight up and out of the lava. Entrance condition: {
"comeInWithGMode": {
"mode": "any",
"morphed": true
}
}Requires: "h_lavaProof" "Gravity" "h_artificialMorphLongIBJ" "h_heatedGModeOpenDifferentDoor" |
From: 2
Right Door
To: 1
Left Door
Triple Spring Ball jump through the Lava Dive. Start with a Gravity jump, then delay the second jump as much as possible, and get all of the pauses close to as early as possible. Entrance condition: {
"comeInWithGMode": {
"mode": "any",
"morphed": true
}
}Requires: {
"notable": "Artificial Morph, Triple Spring Ball Jump"
}
"canTrickyGMode"
"canGravityJump"
{
"tech": "canDoubleSpringBallJumpMidAir"
}
"h_artificialMorphSpringBall"
"canInsaneJump"
{
"lavaFrames": 275
}
{
"gravitylessLavaFrames": 200
}
"h_heatedGModeOpenDifferentDoor" |
From: 2
Right Door
To: 1
Left Door
Triple Spring Ball jump through the Lava Dive. Delay the second jump as much as possible, and get all of the pauses close to as early as possible. Entrance condition: {
"comeInWithGMode": {
"mode": "any",
"morphed": true
}
}Requires: {
"notable": "Artificial Morph, Triple Spring Ball Jump"
}
"canTrickyGMode"
"h_artificialMorphDoubleSpringBallJump"
"canInsaneJump"
{
"gravitylessLavaFrames": 640
}
"h_heatedGModeOpenDifferentDoor" |
|
Entrance condition: {
"comeInWithGMode": {
"mode": "any",
"morphed": false
}
}Requires: {
"lavaFrames": 210
}
{
"or": [
{
"and": [
"canDash",
{
"disableEquipment": "SpeedBooster"
}
]
},
{
"lavaFrames": 60
}
]
}
"canSuitlessLavaDive"
"canGravityJump"
{
"or": [
{
"and": [
"HiJump",
{
"gravitylessLavaFrames": 115
}
]
},
{
"and": [
"canTrickyWallJump",
"canTrickyJump",
{
"gravitylessLavaFrames": 175
}
]
}
]
}
"h_heatedGModeOpenDifferentDoor"Dev note: FIXME: Many strats without Gravity have been skipped for now. |
|
Entrance condition: {
"comeInWithGMode": {
"mode": "any",
"morphed": false
}
}Requires: "Gravity"
"SpaceJump"
{
"lavaFrames": 280
}
{
"or": [
{
"and": [
{
"disableEquipment": "SpeedBooster"
},
"canDash"
]
},
{
"lavaFrames": 80
}
]
}
"h_heatedGModeOpenDifferentDoor"Dev note: FIXME: GT Max Suitless climb could be added, but is likely not reasonable. |
|
Wall jump off of the Upper-Left Namihe and then Spring Ball jump up and out of the Lava. Pausing early in order to get more horizontal distance by equiping Spring Ball may help. Entrance condition: {
"comeInWithGMode": {
"mode": "any",
"morphed": false
}
}Requires: {
"notable": "HiJump"
}
"Gravity"
"canSpringwall"
"HiJump"
"canUseEnemies"
{
"lavaFrames": 390
}
{
"or": [
{
"and": [
"canDash",
{
"disableEquipment": "SpeedBooster"
}
]
},
{
"lavaFrames": 150
}
]
}
"h_heatedGModeOpenDifferentDoor"Dev note: This strat is not useful unless Samus has lava proof but not heat proof. Otherwise, the non-G-mode variant can be used. FIXME: These lava frames are lenient, they are what it would take without Gravity (the non-G-mode variant also doesnt account for Gravity). |
|
Entrance condition: {
"comeInWithGMode": {
"mode": "any",
"morphed": false
}
}Requires: {
"or": [
"h_heatedGModePauseAbuse",
"h_heatedGModeOpenDifferentDoor"
]
}Dev note: This is not useful unless heat damage is increased or Energy capacity is reduced. |
|
Entrance condition: {
"comeInWithGMode": {
"mode": "any",
"morphed": false
}
}Requires: "h_heatedGMode"
{
"heatFrames": 50
} |
|
Jump next to the Gamet farm until one is at the correct height, which is just over one tile above Samus. Lure it to the right and use it to ice clip through the top door shell. Avoid killing any of the Gamets or they will all stop spawning. With bad positioning, move the Gamets off camera to try again; ice can help get around them. Also, be careful to avoid touching the invisible, stationary projectiles that the Dragons shoot. Entrance condition: {
"comeInWithGMode": {
"mode": "any",
"morphed": false
}
}Requires: "canComplexGMode"
{
"or": [
"h_preciseIceClip",
"h_highPixelIceClip"
]
}Exit condition: {
"leaveWithGMode": {
"morphed": false
}
}Bypasses door shell: true |
|
Kill the Gamets where Samus can grab the drops. Exit G-mode, then pause abuse to pick them up without dying. Entrance condition: {
"comeInWithGMode": {
"mode": "any",
"morphed": false
}
}Requires: "h_heatedGMode"
{
"or": [
"h_heatedGModePauseAbuse",
{
"heatFrames": 40
}
]
} |
|
Entrance condition: {
"comeInWithGMode": {
"mode": "direct",
"morphed": false
},
"comesThroughToilet": "any"
}Exit condition: {
"leaveWithGMode": {
"morphed": false
}
} |
|
Entrance condition: {
"comeInWithGMode": {
"mode": "direct",
"morphed": true
},
"comesThroughToilet": "any"
}Requires: {
"or": [
"h_artificialMorphIBJ",
"h_artificialMorphSpringBallBombJump",
{
"and": [
"HiJump",
"h_artificialMorphSpringBall"
]
}
]
}Exit condition: {
"leaveWithGMode": {
"morphed": true
}
} |
|
Jump next to the Gamet farm until one is at the correct height, which is just over one tile above Samus. Lure it to the right and use it to ice clip through the top door shell. Avoid killing any of the Gamets or they will all stop spawning. With bad positioning, move the Gamets off camera to try again; ice can help get around them. Also, be careful to avoid touching the invisible, stationary projectiles that the Dragons shoot. Entrance condition: {
"comeInWithGMode": {
"mode": "indirect",
"morphed": false
},
"comesThroughToilet": "any"
}Requires: "canComplexGMode"
{
"or": [
"h_preciseIceClip",
"h_highPixelIceClip"
]
}Exit condition: {
"leaveWithGMode": {
"morphed": false
}
}Bypasses door shell: true Dev note: This is only for indirect G-Mode, because it is trivial while in direct, and would use a different strat. |
|
Freeze the stack of Gamets together a few times to try and raise them as high as possible. Run with them to the door and freeze the top two such that Samus can stand on the lower and take damage from the higher Gamet when it unfreezes. It is possible to jump onto the Gamet without Morph, as long as it is not too high. Requires: "h_heatProof"
"canUpwardGModeSetup"
"canTrickyUseFrozenEnemies"
{
"or": [
"Morph",
"canInsaneJump"
]
}Exit condition: {
"leaveWithGModeSetup": {}
}Dev note: FIXME: h_heatProof could be dropped in favor of heatFrames + canTrickyGMode? |
|
Kill the Gamets where Samus can grab the drops. Exit G-mode, then pause abuse to pick them up without dying. Entrance condition: {
"comeInWithGMode": {
"mode": "any",
"morphed": false
},
"comesThroughToilet": "any"
}Requires: "h_heatedGMode"
{
"or": [
"h_heatedGModePauseAbuse",
{
"heatFrames": 40
}
]
} |
From: 4
Gamet Farm Junction
To: 1
Left Door
Requires: {
"heatFrames": 290
}Exit condition: {
"leaveWithGModeSetup": {}
}Unlocks doors: {"types":["ammo"],"requires":[]} |
From: 4
Gamet Farm Junction
To: 2
Right Door
Requires: "canDash"
{
"heatFrames": 440
}Exit condition: {
"leaveWithGModeSetup": {}
}Unlocks doors: {"types":["missiles","powerbomb"],"requires":["never"]}
{"types":["super"],"requires":[]}Dev note: FIXME: with Ice, this could be done dashless. |
|
Entrance condition: {
"comeInWithGMode": {
"mode": "any",
"morphed": false
}
}Requires: "SpaceJump" "h_heatedGModeOpenDifferentDoor" |
From: 1
Left Door
To: 2
Right Door
Samus can ceiling bomb jump up gentle slopes. Going down gentle slopes is also possible but harder, instead an unmorph to reset fall speed is recommended here. Entrance condition: {
"comeInWithGMode": {
"mode": "any",
"morphed": true
}
}Requires: "h_artificialMorphLongCeilingBombJump" "h_artificialMorphResetFallSpeed" "h_heatedGModeOpenDifferentDoor" |
|
Entrance condition: {
"comeInWithGMode": {
"mode": "any",
"morphed": false
}
}Requires: "canDash"
{
"or": [
{
"and": [
{
"lavaFrames": 150
},
{
"spikeHits": 7
}
]
},
{
"and": [
{
"notable": "Suitless Damage Boosts"
},
{
"lavaFrames": 80
},
{
"spikeHits": 3
},
"canUseIFrames",
"canHorizontalDamageBoost"
]
},
{
"and": [
"Gravity",
{
"disableEquipment": "SpeedBooster"
},
{
"lavaFrames": 100
},
{
"spikeHits": 2
},
{
"or": [
"canUseIFrames",
"canHorizontalDamageBoost"
]
}
]
},
{
"and": [
{
"notable": "Frozen Maw Platforms"
},
"canResetFallSpeed",
"canTrickyUseFrozenEnemies",
"canTrickyJump",
"canHorizontalDamageBoost",
"canUseIFrames",
{
"spikeHits": 2
},
{
"lavaFrames": 15
}
]
}
]
}
"h_heatedGModeOpenDifferentDoor"Dev note: FIXME: Grapple could maybe be used to skip some damage by partially swinging across the room. Blue suit damage boost options could also be added. |
|
Entrance condition: {
"comeInWithGMode": {
"mode": "any",
"morphed": false
}
}Requires: "SpaceJump" "h_heatedGModeOpenDifferentDoor" |
From: 2
Right Door
To: 1
Left Door
Samus can ceiling bomb jump up gentle slopes. Going down gentle slopes is also possible but harder, instead an unmorph to reset fall speed is recommended here. Entrance condition: {
"comeInWithGMode": {
"mode": "any",
"morphed": true
}
}Requires: "h_artificialMorphLongCeilingBombJump" "h_artificialMorphResetFallSpeed" "h_heatedGModeOpenDifferentDoor" |
|
Entrance condition: {
"comeInWithGMode": {
"mode": "any",
"morphed": false
}
}Requires: "canDash"
{
"or": [
{
"and": [
{
"lavaFrames": 150
},
{
"spikeHits": 7
}
]
},
{
"and": [
{
"notable": "Suitless Damage Boosts"
},
{
"lavaFrames": 80
},
{
"spikeHits": 3
},
"canUseIFrames",
"canHorizontalDamageBoost"
]
},
{
"and": [
"Gravity",
{
"disableEquipment": "SpeedBooster"
},
{
"lavaFrames": 100
},
{
"spikeHits": 2
},
{
"or": [
"canUseIFrames",
"canHorizontalDamageBoost"
]
}
]
},
{
"and": [
{
"notable": "Frozen Maw Platforms"
},
"canResetFallSpeed",
"canTrickyUseFrozenEnemies",
"canTrickyJump",
"canHorizontalDamageBoost",
"canUseIFrames",
{
"spikeHits": 2
},
{
"lavaFrames": 15
}
]
}
]
}
"h_heatedGModeOpenDifferentDoor"Dev note: FIXME: Grapple could maybe be used to skip some damage by partially swinging across the room. |
|
Entrance condition: {
"comeInWithGMode": {
"mode": "any",
"morphed": false
}
}Requires: "h_heatedGModeOpenDifferentDoor" |
|
Entrance condition: {
"comeInWithGMode": {
"mode": "any",
"morphed": false
}
}Requires: {
"heatFrames": 0
}Exit condition: {
"leaveWithGMode": {
"morphed": false
}
} |
|
Entrance condition: {
"comeInWithGMode": {
"mode": "any",
"morphed": false
}
}Requires: "h_heatedGModeOpenDifferentDoor" |
|
Entrance condition: {
"comeInWithGMode": {
"mode": "any",
"morphed": false
}
}Requires: {
"heatFrames": 0
}Exit condition: {
"leaveWithGMode": {
"morphed": false
}
} |
|
Entrance condition: {
"comeInWithGMode": {
"mode": "any",
"morphed": false
}
}Requires: "h_heatedGModeOpenDifferentDoor" |
|
Entrance condition: {
"comeInWithGMode": {
"mode": "any",
"morphed": false
}
}Requires: "h_heatedGModeOpenDifferentDoor" |
From: 4
Elevator
To: 4
Elevator
Entrance condition: {
"comeInWithGMode": {
"mode": "any",
"morphed": false
}
}Exit condition: {
"leaveWithGMode": {
"morphed": false
}
} |
|
Requires: "canComplexGMode"
{
"heatFrames": 1770
}
{
"or": [
"canInsaneJump",
"h_heatProof",
{
"and": [
"canTrickyDodgeEnemies",
{
"heatFrames": 460
},
{
"enemyDamage": {
"enemy": "Magdollite",
"type": "flame",
"hits": 2
}
}
]
}
]
}Exit condition: {
"leaveWithGModeSetup": {}
} |
|
Stand next to the Magdollites while they are rising so that they place their invisible flames low and out of the way. Entrance condition: {
"comeInWithGMode": {
"mode": "any",
"morphed": false
}
}Requires: {
"or": [
"canTrickyJump",
"Wave",
"Spazer",
"Plasma",
"ScrewAttack",
{
"ammo": {
"type": "Missile",
"count": 1
}
},
{
"ammo": {
"type": "Super",
"count": 1
}
},
"h_usePowerBomb",
{
"enemyDamage": {
"enemy": "Multiviola",
"type": "contact",
"hits": 1
}
}
]
}
"h_heatedGModeOpenDifferentDoor" |
|
It is possible to kill a Multiviola by the door and pause abuse to grab its Energy drop on G-mode exit. While luring the right Multiviola around the room, it is important to prevnt the Magdollites from spawning too many fireballs, otherwise the Multiviola won't give any drops. Either kill the middle Magdollite with a Super and stay away from the others when possible, or use Ice keep them frozen. Be careful not to touch any invisible flames that the Magdollites do spawn. It is also possible to do this with nothing; stand on the right platform while the Magdollite shoots to the right, then go to left edge of the runway to the right, pause abuse and exit G-mode while crouching and shooting upwards to kill and collect the flame drops. Entrance condition: {
"comeInWithGMode": {
"mode": "any",
"morphed": false
}
}Requires: "h_heatedGModePauseAbuse"
{
"or": [
"canTrickyUseFrozenEnemies",
{
"ammo": {
"type": "Super",
"count": 1
}
},
{
"and": [
"canFarmWhileShooting",
"canInsaneJump"
]
}
]
} |
|
Stand on low platforms as the Magdollites are rising so that they place their invisible flames low and out of the way. After the third Magdollite is a Multiviola that can easily hit Samus; kill or dodge it by crouching just left of the Magdollite. Entrance condition: {
"comeInWithGMode": {
"mode": "any",
"morphed": false
}
}Requires: {
"or": [
"canTrickyJump",
"Ice",
"Wave",
"Plasma",
"ScrewAttack",
{
"ammo": {
"type": "Missile",
"count": 1
}
},
{
"ammo": {
"type": "Super",
"count": 1
}
},
"h_usePowerBomb",
{
"enemyDamage": {
"enemy": "Multiviola",
"type": "contact",
"hits": 1
}
}
]
}
"h_heatedGModeOpenDifferentDoor"Dev note: Methods for crossing the room without canTrickyJump require killing the left Multiviola in two hits or less. |
|
It is possible to kill a Multiviola by the door and pause abuse to grab its Energy drop on G-mode exit. This requires luring the left Multiviola around the room multiple times. It is important to prevnt the Magdollites from spawning too many fireballs, otherwise the Multiviola won't give any drops. Either kill them with Supers or use Ice keep them frozen. Be careful not to touch any invisible flames that the Magdollites do spawn. Entrance condition: {
"comeInWithGMode": {
"mode": "any",
"morphed": false
}
}Requires: "h_heatedGModePauseAbuse"
"canTrickyDodgeEnemies"
{
"or": [
"canTrickyUseFrozenEnemies",
{
"ammo": {
"type": "Super",
"count": 3
}
}
]
}Dev note: It is possible to do this with nothing, but requires precise positioning and lucky drops. |
From: 2
Right Door
To: 2
Right Door
Requires: {
"heatFrames": 570
}
{
"or": [
"canTrickyDodgeEnemies",
{
"enemyDamage": {
"enemy": "Multiviola",
"type": "contact",
"hits": 1
}
}
]
}
{
"or": [
"canDash",
{
"heatFrames": 30
}
]
}Exit condition: {
"leaveWithGModeSetup": {}
}Dev note: Could save some heat frames by setting this up while crossing the room. |
|
Requires: {
"ammo": {
"type": "Super",
"count": 1
}
}
{
"enemyDamage": {
"enemy": "Sova",
"type": "contact",
"hits": 1
}
} |
From: 1
Right Door
To: 1
Right Door
Carefully jump over the Dragon's fireballs while the Sova is approaching, or wait on the edge of the platform, under the fireballs, for one second before using the Super. Requires: {
"ammo": {
"type": "Super",
"count": 1
}
}
{
"heatFrames": 210
}
{
"or": [
"canTrickyJump",
{
"heatFrames": 70
}
]
}Exit condition: {
"leaveWithGModeSetup": {}
} |
|
Entrance condition: {
"comeInWithGMode": {
"mode": "any",
"morphed": false
}
}Requires: "h_heatedGMode"
{
"heatFrames": 19
} |
|
The buffered item pickup is still viable. When using it to jump to the right, it is important to have prevented the middle Dragon from shooting to the left. Entrance condition: {
"comeInWithGMode": {
"mode": "any",
"morphed": false
}
}Requires: "h_heatedGMode"
{
"heatFrames": 19
} |
From: 2
Gamet Farm Junction
To: 1
Left Door
Requires: {
"heatFrames": 220
}Exit condition: {
"leaveWithGModeSetup": {}
}Unlocks doors: {"types":["ammo"],"requires":[]} |
|
Entrance condition: {
"comeInWithGMode": {
"mode": "direct",
"morphed": false
},
"comesThroughToilet": "any"
}Exit condition: {
"leaveWithGMode": {
"morphed": false
}
} |
|
Entrance condition: {
"comeInWithGMode": {
"mode": "direct",
"morphed": true
},
"comesThroughToilet": "any"
}Requires: {
"or": [
"h_artificialMorphIBJ",
"h_artificialMorphSpringBallBombJump",
{
"and": [
"HiJump",
"h_artificialMorphSpringBall"
]
}
]
}Exit condition: {
"leaveWithGMode": {
"morphed": true
}
} |
|
Entrance condition: {
"comeInWithGMode": {
"mode": "any",
"morphed": false
},
"comesThroughToilet": "any"
}Requires: "h_heatedGModeOffCameraDoor" |
|
Entrance condition: {
"comeInWithGMode": {
"mode": "any",
"morphed": false
},
"comesThroughToilet": "any"
}Requires: "h_heatedGModeOffCameraDoor" |
|
Entrance condition: {
"comeInWithGMode": {
"mode": "any",
"morphed": false
}
}Requires: "h_heatedGMode"
{
"heatFrames": 40
} |
|
Entrance condition: {
"comeInWithGMode": {
"mode": "any",
"morphed": false
}
}Requires: "h_heatedGModeOpenDifferentDoor" |
|
Entrance condition: {
"comeInWithGMode": {
"mode": "any",
"morphed": false
}
}Requires: "h_heatedGMode"
{
"heatFrames": 40
} |
|
Entrance condition: {
"comeInWithGMode": {
"mode": "any",
"morphed": false
}
}Requires: "h_heatedGModeOpenDifferentDoor" |
|
Enter with G-mode direct, back up to between 1 and 6 pixels from the door transition, and activate X-ray to get very deep stuck in the door. Climb up 1 screen, and perform a turnaround buffered spin-jump away from the door to trigger the transition, bypassing any lock on the door. Entrance condition: {
"comeInWithGMode": {
"mode": "direct",
"morphed": false
}
}Requires: "canGModeXRayClimb" "h_heatProof" Bypasses door shell: true |
|
Partially cross the room until a Sova falls from the ceiling, follow it back and forth across the room. Alternatively, to save a lot of Energy, use a Super to knock off the first Sova after the one that falls, while it is on the right side of it's platform. Requires: {
"or": [
"canDash",
{
"heatFrames": 60
}
]
}
{
"heatFrames": 1500
}
{
"or": [
{
"ammo": {
"type": "Super",
"count": 1
}
},
{
"heatFrames": 2000
}
]
}Exit condition: {
"leaveWithGModeSetup": {}
} |
|
To save Energy, it is possible to lure a Sova to the right door and pause abuse to grab its Energy drop on G-mode exit. The left-most Sova falls into the lava and walks to the right. It is important to prevent the Dragons from shooting too many fireballs, as they will eventually prevent drops from appearing. Keeping the Sova on camera and moving a reasonable amount of the time will prevent the drops from being overloaded. Entrance condition: {
"comeInWithGMode": {
"mode": "any",
"morphed": false
}
}Requires: {
"or": [
"h_heatedGModePauseAbuse",
"h_heatedGModeOpenDifferentDoor"
]
} |
|
Requires: {
"or": [
"canDash",
{
"heatFrames": 60
}
]
}
{
"heatFrames": 1390
}Exit condition: {
"leaveWithGModeSetup": {}
}Unlocks doors: {"types":["missiles","super"],"requires":[]}
{"types":["powerbomb"],"requires":["never"]} |
|
Entrance condition: {
"comeInWithGMode": {
"mode": "any",
"morphed": false
}
}Requires: "h_heatedGModeOpenDifferentDoor" |
|
Cross more than half way across the room until a Sova falls from the ceiling then follow it back and forth across the room. Alternatively, to save a lot of Energy, use a Super to knock off the Sova just before that, while it is on the right side of it's thin platform. Requires: {
"or": [
"canDash",
{
"heatFrames": 140
}
]
}
{
"heatFrames": 1780
}
{
"or": [
{
"ammo": {
"type": "Super",
"count": 1
}
},
{
"heatFrames": 2050
}
]
}Exit condition: {
"leaveWithGModeSetup": {}
}Unlocks doors: {"types":["missiles","super"],"requires":[]}
{"types":["powerbomb"],"requires":["never"]} |
|
Lure a Sova to the left door and pause abuse to grab its Energy drop on G-mode exit. It is important to prevent the Dragons from shooting too many fireballs, as they will eventually prevent drops from appearing. Either use a Super to bring the left-most Sova that circles a platform, by knocking it off while it is on the right side of the platform, or lure the left-most Sova that falls into the lava to the right and back to the left. Without a Super, Samus must quickly kill or freeze the Dragons. Only the right 3 Dragons must be killed in order to prevent the drops from being overloaded, but killing more makes it more lenient. Entrance condition: {
"comeInWithGMode": {
"mode": "any",
"morphed": false
}
}Requires: {
"or": [
"Plasma",
{
"and": [
"Charge",
"Wave"
]
},
{
"ammo": {
"type": "Super",
"count": 1
}
},
{
"ammo": {
"type": "Missile",
"count": 9
}
},
{
"and": [
"canTrickyUseFrozenEnemies",
"canTrickyJump"
]
}
]
}
"h_heatedGModePauseAbuse" |
|
Cross more than half way across the room until a Sova falls from the ceiling. Alternatively, to save Energy, use a Super to knock off the second Sova from the right, while it is on the left side of it's platform. Requires: {
"or": [
"canDash",
{
"heatFrames": 140
}
]
}
{
"heatFrames": 1500
}
{
"or": [
{
"ammo": {
"type": "Super",
"count": 1
}
},
{
"heatFrames": 320
}
]
}Exit condition: {
"leaveWithGModeSetup": {}
} |
From: 1
Left Shaft - Top Left Door
To: 1
Left Shaft - Top Left Door
Requires: {
"enemyDamage": {
"enemy": "Multiviola",
"type": "contact",
"hits": 1
}
} |
From: 1
Left Shaft - Top Left Door
To: 1
Left Shaft - Top Left Door
Requires: {
"heatFrames": 120
}Exit condition: {
"leaveWithGModeSetup": {}
} |
From: 1
Left Shaft - Top Left Door
To: 2
Left Shaft - Bottom Right Door
It is possible to kill a Multiviola by the door and pause abuse to grab its Energy drop on G-mode exit. It is important avoid touching the invisible fireballs the Alcoons place, and to prevent them from shooting too many fireballs, as they will eventually prevent drops from appearing. The Alcoons are global, so it is best to kill those at the top of the room and either kill or avoid those lower, depending on if Samus has a way to kill them quickly. Entrance condition: {
"comeInWithGMode": {
"mode": "any",
"morphed": false
}
}Requires: {
"or": [
"h_heatedGModeOpenDifferentDoor",
{
"and": [
"h_heatedGModePauseAbuse",
"canFarmWhileShooting",
"canTrickyDodgeEnemies"
]
}
]
} |
From: 1
Left Shaft - Top Left Door
To: 3
Left Shaft - Middle Right Door
It is important avoid touching the invisible fireballs the Alcoons place. Entrance condition: {
"comeInWithGMode": {
"mode": "any",
"morphed": false
}
}Requires: "h_heatedGModeOpenDifferentDoor" |
From: 1
Left Shaft - Top Left Door
To: 4
Left Shaft - Top Right Door
Entrance condition: {
"comeInWithGMode": {
"mode": "any",
"morphed": false
}
}Requires: "h_heatedGModeOpenDifferentDoor" Dev note: FIXME: It is possible to kill a Multiviola in the gap in the floor, but Samus only gets one attempt, and its very difficult to escape with a small Energy drop. |
From: 1
Left Shaft - Top Left Door
To: 5
Far Right Door
It is important avoid touching the invisible fireballs the Alcoons place. It is possible to bomb from the edge of the top door runway into the hidden morph tunnel, but if Samus is not at the edge, she will bonk and fall. After entering the morph tunnel, roll through the two camera scroll blocks a few times to overload PLMs. They are at the entrance and two tiles in the tunnel. Exit G-mode and go through the room to the far right door. Entrance condition: {
"comeInWithGMode": {
"mode": "any",
"morphed": true
}
}Requires: "canTrickyDodgeEnemies"
{
"or": [
"h_artificialMorphBombHorizontally",
"h_artificialMorphJumpIntoIBJ",
{
"and": [
"h_artificialMorphIBJ",
"h_artificialMorphPowerBomb"
]
},
{
"and": [
"h_artificialMorphSpringBall",
"HiJump"
]
},
"h_artificialMorphSpringBallBombJump"
]
}
"h_heatedGModeOffCameraDoor" |
From: 1
Left Shaft - Top Left Door
To: 5
Far Right Door
It is important avoid touching the invisible fireballs the Alcoons place. It is possible to kill them without any beam upgrades or ammo by jumping and shooting horizontally near the floor surface. Stay near the far wall when shooting to prevent getting too close and triggering their jump. After entering the morph tunnel, roll through the two camera scroll blocks a few times to overload PLMs. They are at the entrance and two tiles in the tunnel. Exit G-mode and go through the room to the far right door. Entrance condition: {
"comeInWithGMode": {
"mode": "any",
"morphed": false
}
}Requires: "Morph"
{
"or": [
{
"and": [
"canBombHorizontally",
"canTrickyJump"
]
},
"HiJump",
"canWallJump",
"SpaceJump",
"canSpringBallJumpMidAir",
"canIBJ",
"canTrickyUseFrozenEnemies"
]
}
"h_heatedGModeOffCameraDoor"Dev note: It is possible to go from 5->1 with a bomb spread, but it requires difficult off-screen movement to escape the room. |
From: 2
Left Shaft - Bottom Right Door
To: 1
Left Shaft - Top Left Door
It is possible to kill a Multiviola by the door and pause abuse to grab its Energy drop on G-mode exit. It is important avoid touching the invisible fireballs the Alcoons place, and to prevent them from shooting too many fireballs, as they will eventually prevent drops from appearing. One easy way to do this without any beam upgrades or ammo is to kill them before they jump. This can be done from below by jumping and shooting horizontally near the floor surface. Stay near the far wall when shooting to prevent getting too close and triggering their jump. Entrance condition: {
"comeInWithGMode": {
"mode": "any",
"morphed": false
}
}Requires: {
"or": [
"h_crouchJumpDownGrab",
"HiJump",
"canWallJump",
"SpaceJump",
"canSpringBallJumpMidAir"
]
}
{
"or": [
"h_heatedGModeOpenDifferentDoor",
{
"and": [
"h_heatedGModePauseAbuse",
"canFarmWhileShooting",
"canTrickyDodgeEnemies"
]
}
]
}Dev note: Frozen Alcoon platforms and Artificial morph IBJ are not included, as Samus can crouch jump and down grab; they can be considered if G-mode + flash suits are added, though they are still likely not useful. Those are also likely not compatible with preventing the Alcoons from overloading drops. |
From: 2
Left Shaft - Bottom Right Door
To: 2
Left Shaft - Bottom Right Door
Requires: {
"enemyDamage": {
"enemy": "Multiviola",
"type": "contact",
"hits": 1
}
} |
From: 2
Left Shaft - Bottom Right Door
To: 2
Left Shaft - Bottom Right Door
Enter the room and crouch next to the closed door. After the Multiviola hits the door, open it and it will be on a trajectory to hit Samus the next pass. Requires: {
"heatFrames": 920
}Exit condition: {
"leaveWithGModeSetup": {}
} |
From: 2
Left Shaft - Bottom Right Door
To: 3
Left Shaft - Middle Right Door
It is important avoid touching the invisible fireballs the Alcoons place. Entrance condition: {
"comeInWithGMode": {
"mode": "any",
"morphed": false
}
}Requires: {
"or": [
"h_crouchJumpDownGrab",
"HiJump",
"canWallJump",
"SpaceJump",
"canSpringBallJumpMidAir",
"canIBJ"
]
}
"h_heatedGModeOpenDifferentDoor"Dev note: Frozen Alcoon platforms and Artificial morph IBJ are not included, as Samus can crouch jump and down grab; they can be considered if G-mode + flash suits are added, though they are still likely not useful. |
From: 2
Left Shaft - Bottom Right Door
To: 4
Left Shaft - Top Right Door
It is important avoid touching the invisible fireballs the Alcoons place. Entrance condition: {
"comeInWithGMode": {
"mode": "any",
"morphed": false
}
}Requires: {
"or": [
"h_crouchJumpDownGrab",
"HiJump",
"canWallJump",
"SpaceJump",
"canSpringBallJumpMidAir",
"canIBJ"
]
}
"h_heatedGModeOpenDifferentDoor"Dev note: Frozen Alcoon platforms and Artificial morph IBJ are not included, as Samus can crouch jump and down grab; they can be considered if G-mode + flash suits are added, though they are still likely not useful. FIXME: It is possible to kill a Multiviola in the gap in the floor, but Samus only gets one attempt, and its very difficult to escape with a small Energy drop. |
From: 2
Left Shaft - Bottom Right Door
To: 5
Far Right Door
It is important avoid touching the invisible fireballs the Alcoons place. Jump over them or kill the Alcoons with Power Bombs. After entering the morph tunnel, roll through the two camera scroll blocks a few times to overload PLMs. They are at the entrance and two tiles in the tunnel. Exit G-mode and go through the room to the far right door. Entrance condition: {
"comeInWithGMode": {
"mode": "any",
"morphed": true
}
}Requires: {
"or": [
{
"and": [
"h_artificialMorphIBJ",
{
"ammo": {
"type": "PowerBomb",
"count": 3
}
}
]
},
{
"and": [
"h_artificialMorphSpringBall",
"HiJump"
]
},
{
"and": [
"h_artificialMorphSpringBallBombJump",
{
"or": [
"h_artificialMorphBombs",
{
"ammo": {
"type": "PowerBomb",
"count": 4
}
}
]
}
]
}
]
}
"h_heatedGModeOffCameraDoor" |
From: 2
Left Shaft - Bottom Right Door
To: 5
Far Right Door
It is important avoid touching the invisible fireballs the Alcoons place. It is possible to kill them without any beam upgrades or ammo by jumping and shooting horizontally near the floor surface. Stay near the far wall when shooting to prevent getting too close and triggering their jump. After entering the morph tunnel, roll through the two camera scroll blocks a few times to overload PLMs. They are at the entrance and two tiles in the tunnel. Exit G-mode and go through the room to the far right door. Entrance condition: {
"comeInWithGMode": {
"mode": "any",
"morphed": false
}
}Requires: "Morph"
{
"or": [
"HiJump",
"canWallJump",
"SpaceJump",
"canSpringBallJumpMidAir",
"canIBJ",
{
"and": [
"h_crouchJumpDownGrab",
"canBombHorizontally"
]
},
{
"and": [
"h_crouchJumpDownGrab",
"canTrickyUseFrozenEnemies"
]
}
]
}
"h_heatedGModeOffCameraDoor"Dev note: Frozen Alcoon platforms and Artificial morph IBJ are not included, as Samus can crouch jump and down grab; they can be considered if G-mode + flash suits are added, though they are still likely not useful. |
From: 3
Left Shaft - Middle Right Door
To: 1
Left Shaft - Top Left Door
It is possible to kill a Multiviola by the door and pause abuse to grab its Energy drop on G-mode exit. It is important avoid touching the invisible fireballs the Alcoons place, and to prevent them from shooting too many fireballs, as they will eventually prevent drops from appearing. One easy way to do this without any beam upgrades or ammo is to kill them before they jump. This can be done from below by jumping and shooting horizontally near the floor surface. Stay near the far wall when shooting to prevent getting too close and triggering their jump. Entrance condition: {
"comeInWithGMode": {
"mode": "any",
"morphed": false
}
}Requires: {
"or": [
"h_crouchJumpDownGrab",
"HiJump",
"canWallJump",
"SpaceJump",
"canSpringBallJumpMidAir"
]
}
{
"or": [
"h_heatedGModeOpenDifferentDoor",
{
"and": [
"h_heatedGModePauseAbuse",
"canFarmWhileShooting",
"canTrickyDodgeEnemies"
]
}
]
}Dev note: Frozen Alcoon platforms and Artificial morph IBJ are not included, as Samus can crouch jump and down grab; they can be considered if G-mode + flash suits are added, though they are still likely not useful. Those are also likely not compatible with preventing the Alcoons from overloading drops. |
From: 3
Left Shaft - Middle Right Door
To: 2
Left Shaft - Bottom Right Door
It is possible to kill a Multiviola by the door and pause abuse to grab its Energy drop on G-mode exit. It is important avoid touching the invisible fireballs the Alcoon places, and to prevent it from shooting too many fireballs, as they will eventually prevent drops from appearing. Either kill the Alcoon or avoid it then kill the Multiviola near the door without too much delay. Entrance condition: {
"comeInWithGMode": {
"mode": "any",
"morphed": false
}
}Requires: {
"or": [
"h_heatedGModeOpenDifferentDoor",
"h_heatedGModePauseAbuse"
]
} |
From: 3
Left Shaft - Middle Right Door
To: 4
Left Shaft - Top Right Door
It is important avoid touching the invisible fireballs the Alcoons place. Entrance condition: {
"comeInWithGMode": {
"mode": "any",
"morphed": false
}
}Requires: {
"or": [
"h_crouchJumpDownGrab",
"HiJump",
"canWallJump",
"SpaceJump",
"canSpringBallJumpMidAir",
"canIBJ"
]
}
"h_heatedGModeOpenDifferentDoor"Dev note: Frozen Alcoon platforms and Artificial morph IBJ are not included, as Samus can crouch jump and down grab; they can be considered if G-mode + flash suits are added, though they are still likely not useful. FIXME: It is possible to kill a Multiviola in the gap in the floor, but Samus only gets one attempt, and its very difficult to escape with a small Energy drop. |
From: 3
Left Shaft - Middle Right Door
To: 5
Far Right Door
It is important avoid touching the invisible fireballs the Alcoons place. Jump over them or kill the Alcoons with Power Bombs. After entering the morph tunnel, roll through the two camera scroll blocks a few times to overload PLMs. They are at the entrance and two tiles in the tunnel. Exit G-mode and go through the room to the far right door. Entrance condition: {
"comeInWithGMode": {
"mode": "any",
"morphed": true
}
}Requires: {
"or": [
{
"and": [
"h_artificialMorphIBJ",
{
"ammo": {
"type": "PowerBomb",
"count": 2
}
}
]
},
{
"and": [
"h_artificialMorphSpringBall",
"HiJump"
]
},
{
"and": [
"h_artificialMorphSpringBallBombJump",
{
"or": [
"h_artificialMorphBombs",
{
"ammo": {
"type": "PowerBomb",
"count": 3
}
}
]
}
]
}
]
}
"h_heatedGModeOffCameraDoor" |
From: 3
Left Shaft - Middle Right Door
To: 5
Far Right Door
It is important avoid touching the invisible fireballs the Alcoons place. It is possible to kill them without any beam upgrades or ammo by jumping and shooting horizontally near the floor surface. Stay near the far wall when shooting to prevent getting too close and triggering their jump. After entering the morph tunnel, roll through the two camera scroll blocks a few times to overload PLMs. They are at the entrance and two tiles in the tunnel. Exit G-mode and go through the room to the far right door. Entrance condition: {
"comeInWithGMode": {
"mode": "any",
"morphed": false
}
}Requires: "Morph"
{
"or": [
"HiJump",
"canWallJump",
"SpaceJump",
"canSpringBallJumpMidAir",
"canIBJ",
{
"and": [
"h_crouchJumpDownGrab",
"canBombHorizontally"
]
},
{
"and": [
"h_crouchJumpDownGrab",
"canTrickyUseFrozenEnemies"
]
}
]
}
"h_heatedGModeOffCameraDoor"Dev note: Frozen Alcoon platforms and Artificial morph IBJ are not included, as Samus can crouch jump and down grab; they can be considered if G-mode + flash suits are added, though they are still likely not useful. |
From: 4
Left Shaft - Top Right Door
To: 1
Left Shaft - Top Left Door
It is possible to kill a Multiviola by the door and pause abuse to grab its Energy drop on G-mode exit. It is important avoid touching the invisible fireballs the Alcoons place, and to prevent them from shooting too many fireballs, as they will eventually prevent drops from appearing. One easy way to do this without any beam upgrades or ammo is to kill them before they jump. This can be done from below by jumping and shooting horizontally near the floor surface. Stay near the far wall when shooting to prevent getting too close and triggering their jump. Entrance condition: {
"comeInWithGMode": {
"mode": "any",
"morphed": false
}
}Requires: {
"or": [
"h_crouchJumpDownGrab",
"HiJump",
"canWallJump",
"SpaceJump",
"canSpringBallJumpMidAir"
]
}
{
"or": [
"h_heatedGModeOpenDifferentDoor",
{
"and": [
"h_heatedGModePauseAbuse",
"canFarmWhileShooting",
"canTrickyDodgeEnemies"
]
}
]
}Dev note: Frozen Alcoon platforms and Artificial morph IBJ are not included, as Samus can crouch jump and down grab; they can be considered if G-mode + flash suits are added, though they are still likely not useful. Those are also likely not compatible with preventing the Alcoons from overloading drops. |
From: 4
Left Shaft - Top Right Door
To: 2
Left Shaft - Bottom Right Door
It is possible to kill a Multiviola by the door and pause abuse to grab its Energy drop on G-mode exit. It is important avoid touching the invisible fireballs the Alcoons place, and to prevent them from shooting too many fireballs, as they will eventually prevent drops from appearing. Either kill them or avoid them then kill the Multiviola near the door without too much delay. Entrance condition: {
"comeInWithGMode": {
"mode": "any",
"morphed": false
}
}Requires: {
"or": [
"h_heatedGModeOpenDifferentDoor",
"h_heatedGModePauseAbuse"
]
} |
From: 4
Left Shaft - Top Right Door
To: 3
Left Shaft - Middle Right Door
It is important avoid touching the invisible fireballs the Alcoons place. Entrance condition: {
"comeInWithGMode": {
"mode": "any",
"morphed": false
}
}Requires: "h_heatedGModeOpenDifferentDoor" |
From: 4
Left Shaft - Top Right Door
To: 4
Left Shaft - Top Right Door
Requires: "canComplexGMode"
{
"or": [
"canWallJump",
"HiJump",
"SpaceJump",
"h_heatedCrouchJumpDownGrab",
"Wave"
]
}
{
"heatFrames": 950
}
{
"or": [
"canTrickyJump",
"Wave",
"Spazer",
"Plasma",
{
"ammo": {
"type": "Missile",
"count": 1
}
},
{
"ammo": {
"type": "Super",
"count": 1
}
},
{
"enemyDamage": {
"enemy": "Alcoon",
"type": "fireball",
"hits": 1
}
}
]
}Exit condition: {
"leaveWithGModeSetup": {}
} |
From: 4
Left Shaft - Top Right Door
To: 5
Far Right Door
It is important avoid touching the invisible fireballs the Alcoons place. Jump over them or kill the Alcoons with Power Bombs. After entering the morph tunnel, roll through the two camera scroll blocks a few times to overload PLMs. They are at the entrance and two tiles in the tunnel. Exit G-mode and go through the room to the far right door. Entrance condition: {
"comeInWithGMode": {
"mode": "any",
"morphed": true
}
}Requires: {
"or": [
{
"and": [
"h_artificialMorphIBJ",
"h_artificialMorphPowerBomb"
]
},
{
"and": [
"h_artificialMorphSpringBall",
"HiJump"
]
},
{
"and": [
"h_artificialMorphSpringBallBombJump",
"h_additionalBomb"
]
}
]
}
"h_heatedGModeOffCameraDoor" |
From: 4
Left Shaft - Top Right Door
To: 5
Far Right Door
It is important avoid touching the invisible fireballs the Alcoons place. It is possible to kill them without any beam upgrades or ammo by jumping and shooting horizontally near the floor surface. Stay near the far wall when shooting to prevent getting too close and triggering their jump. After entering the morph tunnel, roll through the two camera scroll blocks a few times to overload PLMs. They are at the entrance and two tiles in the tunnel. Exit G-mode and go through the room to the far right door. Entrance condition: {
"comeInWithGMode": {
"mode": "any",
"morphed": false
}
}Requires: "Morph"
{
"or": [
"HiJump",
"canWallJump",
"SpaceJump",
"canSpringBallJumpMidAir",
"canIBJ",
{
"and": [
"h_crouchJumpDownGrab",
"canBombHorizontally"
]
},
{
"and": [
"h_crouchJumpDownGrab",
"canTrickyUseFrozenEnemies"
]
}
]
}
"h_heatedGModeOffCameraDoor"Dev note: Frozen Alcoon platforms and Artificial morph IBJ are not included, as Samus can crouch jump and down grab; they can be considered if G-mode + flash suits are added, though they are still likely not useful. |
|
Free the Geruta and lure it to this door. To speed it up, it helps to prevent breaking most of the crumbles (no more than two consecutive) so the Geruta doesn't get stuck. Requires: "canComplexGMode"
{
"heatFrames": 2100
}
{
"or": [
"h_heatProof",
"canCrumbleJump"
]
}
{
"or": [
"canDash",
{
"and": [
{
"haveBlueSuit": {}
},
{
"heatFrames": 150
}
]
}
]
}Exit condition: {
"leaveWithGModeSetup": {}
} |
|
Entrance condition: {
"comeInWithGMode": {
"mode": "any",
"morphed": false
}
}Requires: "h_heatedGModeOpenDifferentDoor" Clears obstacles: A |
|
Free the Geruta and lure it to this door. To speed it up, it helps to prevent breaking most of the crumbles (no more than two consecutive) so the Geruta doesn't get stuck. Requires: "canComplexGMode"
{
"heatFrames": 2200
}
{
"or": [
"h_heatProof",
"canCrumbleJump"
]
}
{
"or": [
"canDash",
{
"and": [
{
"haveBlueSuit": {}
},
{
"heatFrames": 750
}
]
}
]
}Exit condition: {
"leaveWithGModeSetup": {}
}Unlocks doors: {"types":["missiles","super"],"requires":[]}
{"types":["powerbomb"],"requires":["h_heatProof"]} |
|
Entrance condition: {
"comeInWithGMode": {
"mode": "any",
"morphed": false
}
}Requires: "h_heatedGMode"
{
"heatFrames": 19
}Clears obstacles: A |
|
Entrance condition: {
"comeInWithGMode": {
"mode": "any",
"morphed": false
}
}Requires: "h_heatedGModeOpenDifferentDoor" Dev note: We do not need to worry about the rising lava trap here, because it relies on a PLM to trigger it, so it will not be active until after exiting G-mode. |
|
Free the Geruta and lure it to this door. To speed it up, it helps to prevent breaking most of the crumbles (no more than two consecutive) so the Geruta doesn't get stuck. Requires: "canDash"
"h_SpeedBoosterHallNoRisingLava"
"canComplexGMode"
{
"heatFrames": 2250
}
{
"or": [
"h_heatProof",
"canCrumbleJump"
]
}Exit condition: {
"leaveWithGModeSetup": {}
}Unlocks doors: {"types":["missiles","super"],"requires":[]}
{"types":["powerbomb"],"requires":["h_heatProof"]}Dev note: FIXME: A dashless variant could be possible, either with very careful crumble block breaking, or with dipping in the lava. |
|
Free the Geruta and lure it to this door. To speed it up, it helps to prevent breaking most of the crumbles (no more than two consecutive) so the Geruta doesn't get stuck. Requires: {
"or": [
"h_SpeedBoosterHallNoRisingLava",
"h_lavaProof"
]
}
"canComplexGMode"
{
"heatFrames": 2500
}
{
"or": [
"h_heatProof",
"canCrumbleJump"
]
}
{
"or": [
"canDash",
{
"and": [
"h_lavaProof",
{
"heatFrames": 1150
}
]
}
]
}Exit condition: {
"leaveWithGModeSetup": {}
}Dev note: FIXME: A dashless variant without lava proof could be possible. |
|
It is possible to jump onto the first Tripper early enough that Samus can crouch under all of the first spikes. Jump onto it as early as possible; pressing against the wall above the first spike and breaking spin and falling neutrally can help and avoid touching the spike. Moving to the left side of the Tripper is important and Moonwalk can help. Using the second Tripper can save a lot of lava damage. With wall jumps, ride the Tripper and wall jump twice above the middle spike, fall into the lava and jump back onto the Tripper and wall jump on the opposite side of the middle spike until it returns. Without wall jumps, jump into the lava in front of the Tripper, spin jump once to move quickly then again to land on the Tripper after the middle spike. Entrance condition: {
"comeInWithGMode": {
"mode": "any",
"morphed": false
}
}Requires: {
"or": [
{
"lavaFrames": 175
},
{
"and": [
{
"or": [
"HiJump",
"canWallJump",
"Gravity"
]
},
{
"lavaFrames": 100
}
]
},
{
"and": [
"canTrickyJump",
"canConsecutiveWallJump",
{
"lavaFrames": 25
}
]
},
{
"and": [
"canTrickyJump",
{
"lavaFrames": 35
}
]
}
]
}
"h_heatedGModeOpenDifferentDoor" |
|
Entrance condition: {
"comeInWithGMode": {
"mode": "any",
"morphed": true
}
}Requires: {
"or": [
"Morph",
"h_artificialMorphSpringBall"
]
}
"h_heatedGModeOpenDifferentDoor"Dev note: FIXME: It is possible to start a Diagonal IBJ from the sinking tripper, but it's very precise (3 frame window if Samus doesn't move). Only one of these frames gives a normal IBJ, which shouldn't be expected (1 frame for the first Bomb, then 3 frames for the second). |
|
With wall jumps, ride the Tripper and wall jump twice above the middle spike, fall into the lava and jump back onto the Tripper and wall jump on the opposite side of the middle spike until it returns. Without wall jumps, jump into the lava in front of the Tripper, spin jump once to move quickly then again to land on the Tripper after the middle spike. With a very precise timing, it is possible to ride the second Tripper without touching the lava, otherwise, cross the second pit with the same method as the first. To cross the second pit, jump onto the Tripper as early as possible, then position Samus as far right as possible; this can be made easier with Moonwalk. Entrance condition: {
"comeInWithGMode": {
"mode": "any",
"morphed": false
}
}Requires: {
"or": [
{
"lavaFrames": 110
},
{
"and": [
{
"or": [
"HiJump",
"canWallJump",
"Gravity"
]
},
{
"lavaFrames": 40
}
]
},
{
"and": [
"canTrickyJump",
"canConsecutiveWallJump",
{
"lavaFrames": 25
}
]
},
{
"and": [
"canTrickyJump",
{
"lavaFrames": 35
}
]
}
]
}
{
"or": [
{
"lavaFrames": 60
},
{
"and": [
"canTrickyJump",
"canConsecutiveWallJump",
{
"lavaFrames": 35
}
]
},
{
"and": [
"canTrickyJump",
{
"lavaFrames": 40
}
]
},
"canInsaneJump"
]
}
"h_heatedGModeOpenDifferentDoor" |
|
Morph and ride the Trippers. It is possible to Bomb boost off of the Tripper then IBJ until the next Tripper. It may help to roll into the Bomb to make the placement a little more lenient, but avoid falling off the Tripper to be able to keep trying. Entrance condition: {
"comeInWithGMode": {
"mode": "any",
"morphed": true
}
}Requires: {
"or": [
"Morph",
"h_artificialMorphSpringBall",
{
"and": [
"canInsaneJump",
"h_artificialMorphIBJ"
]
}
]
}
"h_heatedGModeOpenDifferentDoor"Dev note: FIXME: It is possible to cross the room with Power Bombs, but requires avoiding killing the off-screen Tripper with them. |
|
Entrance condition: {
"comeInWithGMode": {
"mode": "any",
"morphed": false
}
}Requires: "h_heatedGModeOpenDifferentDoor" Dev note: Going to the central junction is ignored, as it is likely not very useful. FIXME: It is be possible to get to the farm with a second, frame perfect, pause abuse. |
From: 2
Bottom Left Door
To: 5
Bottom Floating Platform Junction
Kill the Gamets where Samus can grab the drops. Exit G-mode, then pause abuse to pick them up without dying. Entrance condition: {
"comeInWithGMode": {
"mode": "indirect",
"morphed": false
}
}Requires: "h_heatedGMode"
{
"or": [
"h_heatedGModePauseAbuse",
{
"heatFrames": 40
}
]
}Dev note: Ice clipping through the shot blocks is not considered reasonable, as Samus can't use X-ray, kill any Gamets, or likely take a hit. |
|
Entrance condition: {
"comeInWithGMode": {
"mode": "any",
"morphed": false
}
}Requires: "h_heatedGModeOpenDifferentDoor" Dev note: Going to the central junction is ignored, as it is likely not very useful. FIXME: It is be possible to get to the farm with a second, frame perfect, pause abuse. |
From: 5
Bottom Floating Platform Junction
To: 1
Top Left Door
Requires: "canComplexGMode"
{
"heatFrames": 480
}
{
"or": [
"canWallJump",
"HiJump",
"SpaceJump",
"h_crouchJumpDownGrab"
]
}
{
"or": [
"canTrickyUseFrozenEnemies",
"canMoonwalk",
"canInsaneJump"
]
}
{
"or": [
"canDash",
"canTrickyGMode"
]
}Exit condition: {
"leaveWithGModeSetup": {}
}Unlocks doors: {"types":["super"],"requires":[]}
{"types":["missiles","powerbomb"],"requires":["never"]}Dev note: FIXME: the frozen enemy option should use extra heat frames (e.g. with pausing to turn off ice). |
From: 5
Bottom Floating Platform Junction
To: 2
Bottom Left Door
Requires: {
"obstaclesCleared": [
"A"
]
}
{
"heatFrames": 280
}Exit condition: {
"leaveWithGModeSetup": {}
}Unlocks doors: {"types":["super"],"requires":[]}
{"types":["missiles","powerbomb"],"requires":["never"]} |
From: 5
Bottom Floating Platform Junction
To: 3
Top Right Door
Requires: {
"or": [
"canWallJump",
"HiJump",
"SpaceJump",
"h_crouchJumpDownGrab"
]
}
{
"heatFrames": 390
}Exit condition: {
"leaveWithGModeSetup": {}
}Unlocks doors: {"types":["super"],"requires":[]}
{"types":["missiles","powerbomb"],"requires":["never"]} |
|
Enter the morph tunnel then exit G-mode. Shooting the shot block off screen can be done by jumping and shooting up or with Grapple or a Power Bomb. Getting positioned under the shot block can be done by walking into the camera scroll block and then walking against the right wall, jump to the left and walk a little more (about one more tile). This will also give some visibility of Samus. Without heat damage, it is recommended to jump up past the shot block and wait for it to respawn; with the block intact, Samus can't accidentally touch the lava. Entrance condition: {
"comeInWithGMode": {
"mode": "any",
"morphed": true
}
}Requires: "h_heatedGMode"
"canComplexGMode"
"canOffScreenMovement"
{
"or": [
"h_artificialMorphMovement",
{
"ammo": {
"type": "PowerBomb",
"count": 3
}
}
]
}
{
"or": [
"canInsaneJump",
{
"and": [
"canTrickyJump",
"h_heatProof"
]
},
{
"and": [
"h_heatProof",
"h_lavaProof",
{
"or": [
"Gravity",
"HiJump"
]
}
]
}
]
}
{
"heatFrames": 1000
}
{
"or": [
"canTrickyGMode",
{
"heatFrames": 500
}
]
}Exit condition: {
"leaveNormally": {}
}Unlocks doors: {"types":["missiles"],"requires":[{"heatFrames":20}]}
{"types":["super"],"requires":[]}
{"types":["powerbomb"],"requires":[{"heatFrames":60}]}Dev note: These heat frames are not very tight, as the room is difficult to do consistently. |
From: 1
Left Door
To: 2
Right Door
Go over the plateau, or under it with lava protection. To avoid the Dragon's fireballs, be sure to kill it quickly, overload the drops with the Dragons on the left first, or exit G-mode. Entrance condition: {
"comeInWithGMode": {
"mode": "indirect",
"morphed": false
}
}Requires: {
"or": [
"SpaceJump",
{
"and": [
"HiJump",
"canWallJump"
]
},
{
"and": [
"HiJump",
"canSpeedyJump"
]
},
{
"and": [
"canComplexGMode",
"h_lavaProof"
]
}
]
}
"h_heatedGModeOpenDifferentDoor"Dev note: FIXME: Damage through the lava could work, or maybe a Geruta damage boost. (Energy from immobile or CF) |
From: 1
Left Door
To: 2
Right Door
It is possible to lure the Geruta to be used as a platform with nothing but Ice. Entrance condition: {
"comeInWithGMode": {
"mode": "indirect",
"morphed": false
}
}Requires: "canTrickyUseFrozenEnemies"
{
"or": [
"HiJump",
"canTrickyDodgeEnemies"
]
}
"h_heatedGModeOpenDifferentDoor" |
|
Entrance condition: {
"comeInWithGMode": {
"mode": "indirect",
"morphed": true
}
}Requires: "h_artificialMorphMovement" "h_heatedGModeOpenDifferentDoor" |
|
Entrance condition: {
"comeInWithGMode": {
"mode": "indirect",
"morphed": false
}
}Requires: "h_heatedGMode"
{
"heatFrames": 0
} |
|
Entrance condition: {
"comeInWithGMode": {
"mode": "indirect",
"morphed": false
}
}Requires: "h_heatedGMode"
{
"heatFrames": 90
}Clears obstacles: A Dev note: Goes to 3 because opening the gate mostly only makes sense when going back to the right for a longer runway or obtaining the item. |
|
Entrance condition: {
"comeInWithGMode": {
"mode": "indirect",
"morphed": true
}
}Requires: {
"noBlueSuit": {}
}
{
"or": [
"h_artificialMorphLongIBJ",
"h_artificialMorphJumpIntoIBJ"
]
}
"h_heatedGModeOpenDifferentDoor" |
From: 2
Right Door
To: 1
Left Door
Entrance condition: {
"comeInWithGMode": {
"mode": "indirect",
"morphed": false
}
}Requires: {
"or": [
"SpaceJump",
{
"and": [
"HiJump",
"canSpeedyJump",
"canWallJump"
]
},
{
"and": [
"HiJump",
"canSpringBallJumpMidAir",
{
"or": [
{
"noBlueSuit": {}
},
{
"and": [
"Gravity",
{
"lavaFrames": 25
}
]
}
]
}
]
},
{
"and": [
{
"notable": "Spring Ball Bomb Boost"
},
{
"noBlueSuit": {}
},
"canSpringBallJumpMidAir",
"canUnmorphBombBoost",
"h_crouchJumpDownGrab",
{
"or": [
"canInsaneJump",
"h_additionalBomb"
]
}
]
},
{
"and": [
{
"or": [
{
"canShineCharge": {
"usedTiles": 15,
"openEnd": 2
}
},
"h_storedSpark"
]
},
"canShinechargeMovementComplex",
{
"or": [
{
"shinespark": {
"frames": 12,
"excessFrames": 2
}
},
{
"and": [
"h_speedJump",
{
"shinespark": {
"frames": 9,
"excessFrames": 3
}
}
]
}
]
}
]
},
{
"and": [
{
"notable": "Ceiling Mockball Spring Fling"
},
"h_speedJump",
"canInsaneJump",
"canMomentumConservingMorph",
"canSpringFling"
]
}
]
}
"h_heatedGModeOpenDifferentDoor" |
From: 2
Right Door
To: 1
Left Door
Entrance condition: {
"comeInWithGMode": {
"mode": "indirect",
"morphed": false
}
}Requires: {
"noBlueSuit": {}
}
"canTrickyUseFrozenEnemies"
"canTrickyDodgeEnemies"
{
"or": [
"HiJump",
"canSpringBallJumpMidAir"
]
}
"h_heatedGModeOpenDifferentDoor"Dev note: FIXME: By staying up with the Geruta the whole time, this could be done without HiJump or Spring Ball and could carry a blue suit. |
From: 2
Right Door
To: 1
Left Door
Use the Geruta to get up to the top left ledge while also getting it to swoop into the top left region. This requires many jumps from below to get it to swoop up onto the ledge and not get stuck. When the Geruta is heading into the right spot, use it as a platform to get up as well. Requires: {
"noBlueSuit": {}
}
"canComplexGMode"
"h_heatProof"
"canBeVeryPatient"
"canCameraManip"
"canTrickyUseFrozenEnemies"
{
"or": [
"HiJump",
"canSpringBallJumpMidAir"
]
}
{
"or": [
{
"ammo": {
"type": "Super",
"count": 1
}
},
{
"obstaclesCleared": [
"A"
]
}
]
}Exit condition: {
"leaveWithGModeSetup": {}
}Collects items: 3 Unlocks doors: {"types":["ammo"],"requires":[]}Dev note: It's possible to avoid the item, but the Geruta will get stuck on it and usually require many swoops to get past it. |
From: 2
Right Door
To: 1
Left Door
Lure the Geruta to the left door. This may require many jumps to get it to swoop up onto the ledge and not get stuck. Requires: "canComplexGMode"
"h_heatProof"
"canBePatient"
"canCameraManip"
"Morph"
{
"or": [
"canTrickyDodgeEnemies",
"SpaceJump",
"Charge",
"Ice",
"Plasma",
{
"ammo": {
"type": "Missile",
"count": 2
}
},
{
"ammo": {
"type": "Super",
"count": 2
}
},
{
"ammo": {
"type": "PowerBomb",
"count": 2
}
},
{
"enemyDamage": {
"enemy": "Dragon",
"type": "fireball",
"hits": 5
}
},
{
"and": [
"h_lavaProof",
{
"or": [
"ScrewAttack",
"h_bombThings"
]
}
]
}
]
}
{
"or": [
"SpaceJump",
{
"and": [
"HiJump",
"canSpeedyJump",
"canWallJump"
]
},
{
"and": [
{
"noBlueSuit": {}
},
"HiJump",
"canSpringBallJumpMidAir"
]
},
{
"and": [
{
"noBlueSuit": {}
},
"canBeVeryPatient",
{
"or": [
"canLongIBJ",
"canJumpIntoIBJ"
]
}
]
},
{
"and": [
"canBeVeryPatient",
"Grapple",
{
"or": [
"HiJump",
"canSpringBallJumpMidAir"
]
}
]
}
]
}
{
"or": [
{
"ammo": {
"type": "Super",
"count": 1
}
},
{
"obstaclesCleared": [
"A"
]
}
]
}Exit condition: {
"leaveWithGModeSetup": {}
}Collects items: 3 Unlocks doors: {"types":["ammo"],"requires":[]}Dev note: It's possible to avoid the item, but the Geruta will get stuck on it and usually require many swoops to get past it. |
From: 2
Right Door
To: 1
Left Door
Lure the Geruta to the left door. This may require many jumps to get it to swoop up onto the ledge and not get stuck. To safely pass the Geruta without a hit, jump left below it, to get it to swoop left before going up. Requires: "canComplexGMode"
"h_heatProof"
"canBePatient"
"canCameraManip"
{
"or": [
"canInsaneJump",
"Ice",
"h_lavaProof",
{
"enemyDamage": {
"enemy": "Geruta",
"type": "contact",
"hits": 1
}
},
{
"and": [
"canUseIFrames",
{
"enemyDamage": {
"enemy": "Dragon",
"type": "fireball",
"hits": 1
}
},
{
"lavaFrames": 55
}
]
}
]
}
{
"or": [
"canTrickyDodgeEnemies",
"SpaceJump",
"Charge",
"Ice",
"Plasma",
{
"ammo": {
"type": "Missile",
"count": 2
}
},
{
"ammo": {
"type": "Super",
"count": 2
}
},
{
"enemyDamage": {
"enemy": "Dragon",
"type": "fireball",
"hits": 5
}
},
{
"and": [
"h_lavaProof",
"ScrewAttack"
]
}
]
}
{
"or": [
"SpaceJump",
{
"and": [
"HiJump",
"canSpeedyJump",
"canWallJump"
]
},
{
"and": [
"canBeVeryPatient",
"HiJump",
"Grapple"
]
}
]
}
{
"or": [
{
"ammo": {
"type": "Super",
"count": 1
}
},
{
"obstaclesCleared": [
"A"
]
}
]
}Exit condition: {
"leaveWithGModeSetup": {}
}Collects items: 3 Unlocks doors: {"types":["ammo"],"requires":[]}Dev note: It's possible to avoid the item, but the Geruta will get stuck on it and usually require many swoops to get past it. |
|
Entrance condition: {
"comeInWithGMode": {
"mode": "direct",
"morphed": true
}
}Requires: {
"noBlueSuit": {}
}
"canRemoteAcquire"
{
"or": [
"h_artificialMorphLongIBJ",
"h_artificialMorphJumpIntoIBJ"
]
}
"h_heatedDirectGModeLeaveSameDoor"Collects items: 3 |
|
On room entry, perform a low spin jump onto the first ledge to avoid getting the Geruta to swoop to the right. Jump against the left wall, then move right and the Geruta should come down quickly. Move back and forth until it comes down further. This can be tricky if needing to avoid contact damage. Quickly freezing the Geruta as it starts to come down can be used to avoid taking a hit. Killing the Dragon on room entry can also be helpful. Requires: "canComplexGMode"
"h_heatProof"
"canBePatient"
{
"or": [
{
"and": [
"canInsaneJump",
"canTrickyUseFrozenEnemies"
]
},
{
"enemyDamage": {
"enemy": "Geruta",
"type": "contact",
"hits": 2
}
}
]
}
{
"or": [
"canInsaneJump",
"canTrickyUseFrozenEnemies",
"Charge",
"Plasma",
"h_usePowerBomb",
{
"ammo": {
"type": "Missile",
"count": 3
}
},
{
"ammo": {
"type": "Super",
"count": 1
}
},
{
"and": [
"ScrewAttack",
{
"lavaFrames": 20
}
]
}
]
}Exit condition: {
"leaveWithGModeSetup": {}
} |
From: 2
Right Door
To: 2
Right Door
Touch the item as little as possible in order to prevent PLMs from being overloaded, so the platforms below remain solid. Entrance condition: {
"comeInWithGMode": {
"mode": "direct",
"morphed": false
}
}Requires: "canRemoteAcquire"
{
"or": [
"SpaceJump",
{
"and": [
"HiJump",
"canSpeedyJump",
"canWallJump"
]
},
{
"and": [
"HiJump",
"canSpringBallJumpMidAir",
{
"or": [
{
"noBlueSuit": {}
},
{
"and": [
"Gravity",
{
"lavaFrames": 25
}
]
}
]
}
]
},
{
"and": [
{
"notable": "Spring Ball Bomb Boost"
},
{
"noBlueSuit": {}
},
"canSpringBallJumpMidAir",
"canUnmorphBombBoost",
"h_crouchJumpDownGrab",
"canInsaneJump"
]
},
{
"and": [
{
"or": [
{
"canShineCharge": {
"usedTiles": 15,
"openEnd": 2
}
},
"h_storedSpark"
]
},
"canShinechargeMovementComplex",
{
"or": [
{
"shinespark": {
"frames": 12,
"excessFrames": 2
}
},
{
"and": [
"h_speedJump",
{
"shinespark": {
"frames": 9,
"excessFrames": 3
}
}
]
}
]
}
]
},
{
"and": [
{
"notable": "Ceiling Mockball Spring Fling"
},
"h_speedJump",
"canInsaneJump",
"canMomentumConservingMorph",
"canSpringFling"
]
}
]
}
"h_heatedDirectGModeLeaveSameDoor"Collects items: 3 Dev note: There is no leniency option for using an extra Power Bomb, because it will contribute to PLM overload. (2 PBs is technically barely possible) |
From: 2
Right Door
To: 2
Right Door
Entrance condition: {
"comeInWithGMode": {
"mode": "direct",
"morphed": false
}
}Requires: {
"noBlueSuit": {}
}
"canRemoteAcquire"
"canTrickyUseFrozenEnemies"
"canTrickyDodgeEnemies"
{
"or": [
"HiJump",
"canSpringBallJumpMidAir"
]
}
"h_heatedDirectGModeLeaveSameDoor"Collects items: 3 Dev note: FIXME: By staying up with the Geruta the whole time, this could be done without HiJump or Spring Ball and could carry blue suit. |
|
Entrance condition: {
"comeInWithGMode": {
"mode": "indirect",
"morphed": false
}
}Requires: "h_heatedGMode"
{
"or": [
"SpaceJump",
{
"and": [
"HiJump",
"canSpeedyJump",
"canWallJump"
]
},
{
"and": [
"HiJump",
"canSpringBallJumpMidAir",
{
"or": [
{
"noBlueSuit": {}
},
{
"and": [
"Gravity",
{
"lavaFrames": 25
}
]
}
]
}
]
},
{
"and": [
{
"notable": "Spring Ball Bomb Boost"
},
{
"noBlueSuit": {}
},
"canSpringBallJumpMidAir",
"canUnmorphBombBoost",
"h_crouchJumpDownGrab",
{
"or": [
"canInsaneJump",
"h_additionalBomb"
]
}
]
},
{
"and": [
{
"or": [
{
"canShineCharge": {
"usedTiles": 15,
"openEnd": 2
}
},
"h_storedSpark"
]
},
"canShinechargeMovementComplex",
{
"or": [
{
"shinespark": {
"frames": 12,
"excessFrames": 2
}
},
{
"and": [
"h_speedJump",
{
"shinespark": {
"frames": 9,
"excessFrames": 3
}
}
]
}
]
}
]
},
{
"and": [
{
"notable": "Ceiling Mockball Spring Fling"
},
"h_speedJump",
"canInsaneJump",
"canMomentumConservingMorph",
"canSpringFling"
]
}
]
}
{
"heatFrames": 90
}Clears obstacles: A Dev note: Goes to 3 because opening the gate mostly only makes sense when going back to the right for a longer runway or obtaining the item. FIXME: Variants with shinesparking or Geruta damage boost can be added. (Energy from immobile, CF, or energy free sparks) |
From: 2
Right Door
To: 3
Item
Entrance condition: {
"comeInWithGMode": {
"mode": "indirect",
"morphed": false
}
}Requires: "h_heatedGMode"
"canTrickyUseFrozenEnemies"
"canTrickyDodgeEnemies"
"canDash"
{
"or": [
"HiJump",
"canSpringBallJumpMidAir"
]
}
{
"heatFrames": 90
}Clears obstacles: A Dev note: Goes to 3 because opening the gate mostly only makes sense when going back to the right for a longer runway or obtaining the item. FIXME: A variant with only ice and reset fall speed could be added (possibly while carrying blue suit). |
|
Entrance condition: {
"comeInWithGMode": {
"mode": "any",
"morphed": true
}
}Requires: "h_heatedGMode"
{
"or": [
"h_artificialMorphLongIBJ",
"h_artificialMorphJumpIntoIBJ"
]
}
{
"or": [
{
"noBlueSuit": {}
},
{
"and": [
"h_lavaProof",
"Gravity"
]
}
]
}
{
"heatFrames": 0
} |
|
Entrance condition: {
"comeInWithGMode": {
"mode": "indirect",
"morphed": true
}
}Requires: "h_heatedGMode"
{
"or": [
"h_artificialMorphLongIBJ",
"h_artificialMorphJumpIntoIBJ"
]
}
{
"or": [
{
"noBlueSuit": {}
},
{
"and": [
"h_lavaProof",
"Gravity"
]
}
]
}
{
"heatFrames": 90
}Clears obstacles: A Dev note: Goes to 3 because opening the gate mostly only makes sense when going back to the right for a longer runway or obtaining the item. |
|
Entrance condition: {
"comeInWithGMode": {
"mode": "any",
"morphed": false
}
}Requires: "h_heatedGMode"
{
"or": [
"SpaceJump",
{
"and": [
"HiJump",
"canSpeedyJump",
"canWallJump"
]
},
{
"and": [
"HiJump",
"canSpringBallJumpMidAir",
{
"or": [
"canDash",
{
"and": [
{
"haveBlueSuit": {}
},
"Gravity"
]
}
]
}
]
},
{
"and": [
"canDash",
{
"notable": "Spring Ball Bomb Boost"
},
"canSpringBallJumpMidAir",
"canUnmorphBombBoost",
"h_crouchJumpDownGrab",
{
"or": [
"canInsaneJump",
"h_additionalBomb"
]
}
]
},
{
"and": [
{
"canShineCharge": {
"usedTiles": 15,
"openEnd": 2
}
},
"canShinechargeMovementComplex",
{
"or": [
{
"shinespark": {
"frames": 12,
"excessFrames": 2
}
},
{
"and": [
"h_speedJump",
{
"shinespark": {
"frames": 9,
"excessFrames": 3
}
}
]
}
]
}
]
},
{
"and": [
{
"notable": "Ceiling Mockball Spring Fling"
},
"h_speedJump",
"canInsaneJump",
"canMomentumConservingMorph",
"canSpringFling"
]
}
]
}
{
"heatFrames": 0
}Dev note: FIXME: Variants with Geruta damage boost can be added. (Energy from immobile or CF) |
|
Entrance condition: {
"comeInWithGMode": {
"mode": "any",
"morphed": false
}
}Requires: "canDash"
"h_heatedGMode"
"canTrickyUseFrozenEnemies"
"canTrickyDodgeEnemies"
{
"or": [
"HiJump",
"canSpringBallJumpMidAir"
]
}
{
"heatFrames": 0
}Dev note: FIXME: A variant with only ice and reset fall speed could be added (possibly while carrying blue suit). |
From: 1
Top of the Shaft Left Door
To: 7
G-Mode, Bottom Right (Started at Right)
Jump over the Cacatacs. Their projectiles remain inside of them and their hitbox is a bit smaller than it appears. Entrance condition: {
"comeInWithGMode": {
"mode": "any",
"morphed": false
}
}Requires: {
"heatFrames": 0
} |
From: 1
Top of the Shaft Left Door
To: 10
Direct G-Mode, Bottom Right (Started at Right)
Jump over the Cacatacs. Their projectiles remain inside of them and their hitbox is a bit smaller than it appears. Entrance condition: {
"comeInWithGMode": {
"mode": "direct",
"morphed": false
}
}Requires: {
"heatFrames": 0
} |
From: 2
Far Left Door
To: 2
Far Left Door
Lure the second Multiviola to the left door. The first one will require more time and heat damage. Jump over the pirates and under the first Multiviola, then return fast enough to avoid pirate lasers and contact with the second Multiviola. Requires: "canDash"
{
"heatFrames": 765
}
"canTrickyDodgeEnemies"Exit condition: {
"leaveWithGModeSetup": {}
} |
From: 2
Far Left Door
To: 2
Far Left Door
Requires: {
"heatFrames": 600
}
{
"or": [
"h_speedDash",
{
"and": [
"canDash",
{
"heatFrames": 65
}
]
},
{
"heatFrames": 200
}
]
}
{
"or": [
{
"haveBlueSuit": {}
},
"h_speedDash",
"Plasma",
"ScrewAttack",
{
"ammo": {
"type": "Missile",
"count": 2
}
},
{
"ammo": {
"type": "Super",
"count": 2
}
},
{
"and": [
"Ice",
"Wave",
"Spazer"
]
},
{
"and": [
"canDodgeWhileShooting",
{
"or": [
{
"and": [
"Ice",
"Wave"
]
},
{
"and": [
"Ice",
"Spazer"
]
},
{
"and": [
"Wave",
"Spazer"
]
}
]
}
]
}
]
}Exit condition: {
"leaveWithGModeSetup": {}
} |
From: 2
Far Left Door
To: 2
Far Left Door
Lure the second Multiviola to the left door. The first one will require more time and heat damage. Jump over the first pirate and into the second, then jump over the again on the return. Requires: "canDash"
{
"heatFrames": 720
}
{
"enemyDamage": {
"enemy": "Red Space Pirate (standing)",
"type": "contact",
"hits": 1
}
}Exit condition: {
"leaveWithGModeSetup": {}
} |
From: 2
Far Left Door
To: 4
Bottom Right Door
Use a complex lure to get the right-most Multiviola (which is initially moving to the left) to the bottom right door. Break a specific set of the speed blocks and let the Multiviola bounce off of them before breaking the rest. There are multiple ways to get the Multiviola to the right door, all of which require breaking the speed blocks to the left of the crumble bridge and some to them to the right. Break the speed blocks in one of the following ways: 1. The first 2 columns. 2. The first 8 columns. 3. The entire first chunk (10 columns). 4. The first chunk and all but the last column of the second (leaving an isolated block). 5. The first two chunks and all but the last column of the third (leaving an isolated stack of two blocks). Then let the Multiviola bounce several times until it is in a consistent pattern before breaking the rest. Note that option number 3 puts the Multiviola into an odd pattern where it has two distinct alternating cycles; wait for it to hit the right of the right stalactite, then the wall, then break the remaining blocks. Requires: "canTrickyGMode" "h_heatProof" "canBePatient" "canCameraManip" "h_getBlueSpeedMaxRunway" Exit condition: {
"leaveWithGModeSetup": {}
}Unlocks doors: {"types":["ammo"],"requires":[]}Dev note: It appears that there is no way to get the multiviola to get to one of the upper doors on the shaft; There are two known cycles to get it to start going up, but both get stuck in the same location. The first three Multiviolas aren't able to make it to the right shaft, regardless of how the door and speed blocks are manipulated. The fourth was tested by removing a single column of speed blocks at a time and clearing the rest before and after it gets to its cycle. The bottom door is rarely hit, but opening it during the cycle was not always tested thoroughly. It doesn't appear to be possible to lure it higher, but other things to try include: breaking speed blocks less than a column at a time, breaking some of the blocks then some more (not all of the remaining), or precisely timing the breaking of the crumble blocks. FIXME: This could probably be done with a blue suit. |
From: 2
Far Left Door
To: 8
G-Mode, Bottom Right (Started at Left)
Jump over as many Speed blocks as possible, to minimize PLMs overloaded. Walk part way across the crumble bridge, then jump across the last part, to avoid falling through onto the spikes as the crumble blocks finish overloading PLMs. Entrance condition: {
"comeInWithGMode": {
"mode": "any",
"morphed": false
}
}Requires: {
"haveBlueSuit": {}
}
"canInsaneJump" |
From: 2
Far Left Door
To: 8
G-Mode, Bottom Right (Started at Left)
While artificially morphed, carefully dodge or kill the enemies in the first half of the room. Go over the first set of Speed Blocks, then kill the first Red Pirate with a Power Bomb or after unmorphing. It is possible to kill or jump over the second pirate, but be careful to prevent it from shooting invisible lasers. Without any Power Bombs, this requires precise movement with Spring Ball or very precise movement with just Bombs. Entrance condition: {
"comeInWithGMode": {
"mode": "any",
"morphed": true
}
}Requires: "canDash"
"canTrickyDodgeEnemies"
{
"or": [
{
"ammo": {
"type": "PowerBomb",
"count": 6
}
},
{
"and": [
"h_artificialMorphMovement",
{
"or": [
"canInsaneJump",
"h_artificialMorphPowerBomb"
]
},
{
"or": [
"h_artificialMorphPowerBomb",
"h_hasBeamUpgrade",
{
"enemyKill": {
"enemies": [
[
"Red Space Pirate (standing)"
]
],
"explicitWeapons": [
"Missile",
"Super",
"ScrewAttack"
]
}
},
{
"enemyDamage": {
"enemy": "Red Space Pirate (standing)",
"type": "contact",
"hits": 1
}
}
]
}
]
}
]
}
{
"heatFrames": 0
}Dev note: It is possible to jump over the left bridge pirate, but it is incredibly precise and not expected. |
From: 2
Far Left Door
To: 8
G-Mode, Bottom Right (Started at Left)
Run through the speed blocks then carefully cross the crumble bridge, as it will mostly be air. Alternatively, a speedball will prevent PLMs from overloading and Samus can roll over the bridge. Kill the pirate after the bridge before it places its invisible lasers, preventing Samus from getting through damageless. Samus can simply run to the right and fall through the bridge to safety below the pirate and kill it from below. It is also possible to perform one precise jump to cross most of the bridge and kill the pirate while blue. Entrance condition: {
"comeInWithGMode": {
"mode": "any",
"morphed": false
}
}Requires: "h_getBlueSpeedMaxRunway"
{
"or": [
"canSpeedball",
{
"and": [
"h_blueJump",
"canInsaneJump"
]
},
"h_hasBeamUpgrade",
{
"enemyKill": {
"enemies": [
[
"Red Space Pirate (standing)"
]
],
"explicitWeapons": [
"Missile",
"Super",
"ScrewAttack"
]
}
},
{
"enemyDamage": {
"enemy": "Red Space Pirate (standing)",
"type": "contact",
"hits": 1
}
}
]
}
{
"heatFrames": 0
}Dev note: It is possible to shinecharge before the bridge and spark vertically above it, then move the camera to kill the pirate with speed echoes, but this isn't really easier. |
From: 2
Far Left Door
To: 8
G-Mode, Bottom Right (Started at Left)
Carefully dodge or kill the enemies in the first half of the room. With Morph, go over the first set of Speed Blocks, then kill the first Red Pirate or air ball over it. It is also possible to kill or jump over the second pirate, but be careful to prevent it from shooting invisible lasers. Entrance condition: {
"comeInWithGMode": {
"mode": "any",
"morphed": false
}
}Requires: "canDash"
{
"or": [
"canTrickyDodgeEnemies",
"h_usePowerBomb",
"ScrewAttack",
"h_hasBeamUpgrade",
{
"ammo": {
"type": "Missile",
"count": 2
}
},
{
"ammo": {
"type": "Super",
"count": 2
}
},
{
"enemyDamage": {
"enemy": "Red Space Pirate (standing)",
"type": "contact",
"hits": 1
}
}
]
}
{
"or": [
"canTrickyJump",
{
"enemyDamage": {
"enemy": "Multiviola",
"type": "contact",
"hits": 1
}
}
]
}
"Morph"
{
"or": [
"h_usePowerBomb",
{
"and": [
{
"or": [
"h_useSpringBall",
"h_useMorphBombs"
]
},
{
"or": [
"canLateralMidAirMorph",
"h_hasBeamUpgrade",
{
"enemyKill": {
"enemies": [
[
"Red Space Pirate (standing)"
]
],
"explicitWeapons": [
"Missile",
"Super",
"ScrewAttack"
]
}
},
{
"enemyDamage": {
"enemy": "Red Space Pirate (standing)",
"type": "contact",
"hits": 1
}
}
]
}
]
}
]
}
{
"heatFrames": 0
} |
From: 3
Bottom Door
To: 7
G-Mode, Bottom Right (Started at Right)
Entrance condition: {
"comeInWithGMode": {
"mode": "any",
"morphed": false
},
"comesThroughToilet": "any"
}Requires: {
"heatFrames": 0
} |
From: 3
Bottom Door
To: 10
Direct G-Mode, Bottom Right (Started at Right)
Entrance condition: {
"comeInWithGMode": {
"mode": "direct",
"morphed": false
},
"comesThroughToilet": "any"
}Requires: {
"heatFrames": 0
} |
From: 4
Bottom Right Door
To: 7
G-Mode, Bottom Right (Started at Right)
Entrance condition: {
"comeInWithGMode": {
"mode": "any",
"morphed": false
}
}Requires: {
"heatFrames": 0
} |
From: 4
Bottom Right Door
To: 10
Direct G-Mode, Bottom Right (Started at Right)
Entrance condition: {
"comeInWithGMode": {
"mode": "direct",
"morphed": false
}
}Requires: {
"heatFrames": 0
} |
From: 5
Top Right Door
To: 5
Top Right Door
Entrance condition: {
"comeInWithGMode": {
"mode": "direct",
"morphed": false
}
}Requires: "h_doorImmediatelyClosedFix" Exit condition: {
"leaveWithGMode": {
"morphed": false
}
} |
From: 5
Top Right Door
To: 5
Top Right Door
Entrance condition: {
"comeInWithGMode": {
"mode": "direct",
"morphed": true
}
}Requires: "h_doorImmediatelyClosedFix" Exit condition: {
"leaveWithGMode": {
"morphed": true
}
} |
From: 5
Top Right Door
To: 7
G-Mode, Bottom Right (Started at Right)
Jump over the Cacatacs. Their projectiles remain inside of them and their hitbox is a bit smaller than it appears. Entrance condition: {
"comeInWithGMode": {
"mode": "any",
"morphed": false
}
}Requires: {
"heatFrames": 0
} |
From: 5
Top Right Door
To: 10
Direct G-Mode, Bottom Right (Started at Right)
Jump over the Cacatacs. Their projectiles remain inside of them and their hitbox is a bit smaller than it appears. Entrance condition: {
"comeInWithGMode": {
"mode": "direct",
"morphed": false
}
}Requires: {
"heatFrames": 0
} |
From: 7
G-Mode, Bottom Right (Started at Right)
To: 1
Top of the Shaft Left Door
Jump over the Cacatacs. Their projectiles remain inside of them and their hitbox is a bit smaller than it appears. Requires: {
"or": [
{
"noBlueSuit": {}
},
"canWallJump",
"SpaceJump",
"HiJump",
"canSpringBallJumpMidAir"
]
}
"h_heatedGModeOpenDifferentDoor" |
From: 7
G-Mode, Bottom Right (Started at Right)
To: 2
Far Left Door
Exit G-mode before the crumble bridge, this is when the floor starts sloping up slightly. Run over the bridge and through the pirates without fixing the camera, to safely run through the pirates. Requires: "canComplexGMode"
"h_heatedGMode"
"h_getBlueSpeedMaxRunway"
{
"heatFrames": 375
} |
From: 7
G-Mode, Bottom Right (Started at Right)
To: 2
Far Left Door
The crumble bridge will be air. Either tank a spike hit, carefully Space Jump over it, or with SpeedBooster, use the full runway to run over the pit. Note that there is a slight incline just before the bridge, which can be used as an indicator for where to Space Jump. Requires: {
"or": [
{
"and": [
"canTrickyJump",
"SpaceJump"
]
},
"h_speedJump",
{
"spikeHits": 1
}
]
}
"h_heatedGModeOffCameraDoor"Exit condition: {
"leaveNormally": {}
}Unlocks doors: {"types":["missiles"],"requires":[{"heatFrames":50}]}
{"types":["super"],"requires":[]}
{"types":["powerbomb"],"requires":[{"heatFrames":110}]}Dev note: Requires leaving the room, as Samus is off camera and shouldn't be expected to do more in-room. |
From: 7
G-Mode, Bottom Right (Started at Right)
To: 3
Bottom Door
Requires: "h_heatedGModeOpenDifferentDoor" |
From: 7
G-Mode, Bottom Right (Started at Right)
To: 4
Bottom Right Door
Requires: "h_heatedGModeOpenDifferentDoor" |
From: 7
G-Mode, Bottom Right (Started at Right)
To: 5
Top Right Door
Jump over the Cacatacs. Their projectiles remain inside of them and their hitbox is a bit smaller than it appears. Requires: {
"or": [
{
"noBlueSuit": {}
},
"canWallJump",
"SpaceJump",
"HiJump",
"canSpringBallJumpMidAir"
]
}
"h_heatedGModeOpenDifferentDoor" |
From: 8
G-Mode, Bottom Right (Started at Left)
To: 1
Top of the Shaft Left Door
The speed block platform above the bottom door will not be usable, so Samus must blindly wall jump up the first ledge or use some assist. There is some visibility on the left side of the screen, which is useful in determining which ledge she is on. The Cacatacs will not be able to damage Samus off screen. Requires: "canOffScreenMovement"
{
"or": [
"canWallJump",
"HiJump",
"canSpringBallJumpMidAir",
"SpaceJump"
]
}
"h_heatedGModeOffCameraDoor"Exit condition: {
"leaveNormally": {}
}Unlocks doors: {"types":["missiles"],"requires":[{"heatFrames":50}]}
{"types":["super"],"requires":[]}
{"types":["powerbomb"],"requires":[{"heatFrames":110}]}Dev note: Requires leaving the room, as Samus is off camera and shouldn't be expected to do more in-room. FIXME: It is possible to X-Ray climb from inside the speed blocks. Count shots to determine Samus' position. |
From: 8
G-Mode, Bottom Right (Started at Left)
To: 3
Bottom Door
Walk back and forth until it is obvious Samus is on the doorshell. Use X-Ray, jump, and shoot down at the bottom of the jump, this may take a couple attempts. For a faster exit, place a Bomb on the door, then quickly unmorph and use X-Ray. With Grapple it is faster still; use X-Ray while crouched, then quickly use Grapple while angling down. Requires: "h_heatedGMode"
{
"or": [
{
"heatFrames": 160
},
{
"and": [
"h_useMorphBombs",
{
"heatFrames": 85
}
]
},
{
"and": [
"canUseGrapple",
{
"heatFrames": 50
}
]
}
]
}Exit condition: {
"leaveNormally": {}
}Unlocks doors: {"types":["missiles"],"requires":[{"heatFrames":50}]}
{"types":["super"],"requires":[]}
{"types":["powerbomb"],"requires":[{"heatFrames":110}]}Dev note: Requires leaving the room, as Samus is off camera and shouldn't be expected to do more in-room. It's possible to use a Bomb while still artificially morphed, but that only saves a few heat frames and is ignored. |
From: 8
G-Mode, Bottom Right (Started at Left)
To: 4
Bottom Right Door
Requires: "h_heatedGModeOffCameraDoor" Exit condition: {
"leaveNormally": {}
}Unlocks doors: {"types":["missiles"],"requires":[{"heatFrames":50}]}
{"types":["super"],"requires":[]}
{"types":["powerbomb"],"requires":[{"heatFrames":110}]}Dev note: Requires leaving the room, as Samus is off camera and shouldn't be expected to do more in-room. |
From: 8
G-Mode, Bottom Right (Started at Left)
To: 5
Top Right Door
The speed block platform above the bottom door will not be usable, so Samus must blindly wall jump up the first ledge or use some assist. There is some visibility on the left side of the screen, which is useful in determining which ledge she is on. The Cacatacs will not be able to damage Samus off screen. Requires: "canOffScreenMovement"
{
"or": [
"canWallJump",
"HiJump",
"canSpringBallJumpMidAir",
"SpaceJump"
]
}
"h_heatedGModeOffCameraDoor"Exit condition: {
"leaveNormally": {}
}Unlocks doors: {"types":["missiles"],"requires":[{"heatFrames":50}]}
{"types":["super"],"requires":[]}
{"types":["powerbomb"],"requires":[{"heatFrames":110}]}Dev note: Requires leaving the room, as Samus is off camera and shouldn't be expected to do more in-room. |
From: 8
G-Mode, Bottom Right (Started at Left)
To: 6
Bottom Right Junction
Exit G-Mode and jump back and forth to fix the camera. If Samus exits G-Mode while in the camera scroll block next to the speed blocks, the camera won't fix. Requires: "h_heatedGMode"
{
"heatFrames": 250
} |
|
Climb down using the solid crumble blocks. It is possible to use a Super to knock a Sova off and kill it by the door and pause abuse to grab its Energy drop on G-mode exit with a very precise positioning jump or large Energy drop. With a second Super it is recommended to bring down the other clockwise Sova as well (at the top of the room), and stack their drops. It is also possible to do it without a Super if the Sova drops a large Energy drop. There is a way to do this with two Sova, and if either drops a large Energy, Samus can survive: kill both of the bottom two Sova at the bottom right corner of their platforms, stand on the middle of the platform with the second lowest Sova, and hold right when exiting G-mode. Entrance condition: {
"comeInWithGMode": {
"mode": "any",
"morphed": false
}
}Requires: "h_heatedGMode"
{
"or": [
{
"heatFrames": 45
},
{
"and": [
"h_heatedGModePauseAbuse",
{
"or": [
"canTrickyGMode",
{
"ammo": {
"type": "Super",
"count": 2
}
}
]
}
]
}
]
} |
From: 1
Top Right Door
To: 2
Bottom Right Door
Entrance condition: {
"comeInNormally": {}
}Requires: {
"heatFrames": 405
}Exit condition: {
"leaveWithGModeSetup": {}
}Unlocks doors: {"types":["missiles","super"],"requires":[]}
{"types":["powerbomb"],"requires":["never"]} |
|
Climb the solid crumble blocks. It is possible to use a Super to knock one or two Sova off and follow it to the door and pause abuse to grab its Energy drop on G-mode exit. Entrance condition: {
"comeInWithGMode": {
"mode": "any",
"morphed": false
}
}Requires: {
"or": [
"h_heatedGModeOpenDifferentDoor",
{
"and": [
{
"ammo": {
"type": "Super",
"count": 1
}
},
"h_heatedGModePauseAbuse"
]
}
]
}Dev note: FIXME: It is possible to use grapple to grab the drop from the top Sova from the doorway, but it is fairly precise and requires a large Energy drop. |
From: 2
Bottom Right Door
To: 1
Top Right Door
Lure a Sova from the bottom to top of the room. If wall jumping, it may be easiest to follow behind the Sova and pass it at the top of the room. Requires: {
"heatFrames": 2070
}
{
"or": [
"h_useSpringBall",
{
"and": [
"canTrickyWallJump",
{
"heatFrames": 100
}
]
},
{
"and": [
"SpaceJump",
{
"heatFrames": 100
}
]
},
{
"and": [
"canCrumbleJump",
"canInsaneJump"
]
}
]
}Exit condition: {
"leaveWithGModeSetup": {}
}Unlocks doors: {"types":["missiles","super"],"requires":[]}
{"types":["powerbomb"],"requires":["h_heatProof"]}Dev note: FIXME: This could be doable with an X-Ray climb and then carefully and slowly returning the camera. |
|
Enter with G-mode direct, back up to between 1 and 6 pixels from the door transition, and activate X-ray to get very deep stuck in the door. Climb up 3 screens, and perform a turnaround buffered spin-jump away from the door to trigger the transition, bypassing any lock on the door. Entrance condition: {
"comeInWithGMode": {
"mode": "direct",
"morphed": false
}
}Requires: "canGModeXRayClimb" "h_heatProof" "canLongXRayClimb" "canBePatient" Bypasses door shell: true |
|
Requires: {
"ammo": {
"type": "Super",
"count": 1
}
}
{
"enemyDamage": {
"enemy": "Sova",
"type": "contact",
"hits": 1
}
} |
From: 2
Bottom Right Door
To: 2
Bottom Right Door
Entrance condition: {
"comeInNormally": {}
}Requires: {
"heatFrames": 370
}
{
"or": [
"HiJump",
"SpaceJump",
"canWallJump",
"h_useSpringBall",
"canCrumbleJump",
"canTrickyJump",
{
"ammo": {
"type": "Super",
"count": 1
}
},
{
"and": [
"canJumpIntoIBJ",
{
"heatFrames": 80
}
]
}
]
}Exit condition: {
"leaveWithGModeSetup": {}
}Unlocks doors: {"types":["missiles","super"],"requires":[]}
{"types":["powerbomb"],"requires":["never"]}Dev note: It is possible to jump into the room if it is dry, but these options are easy enough to ignore adding that. Opening the door with missiles will usually not add any heat frames, but will if using IBJ or a doorframe jump. |
|
Requires: "canBePatient"
{
"enemyDamage": {
"enemy": "Sova",
"type": "contact",
"hits": 1
}
} |
From: 1
Top Right Door
To: 1
Top Right Door
Wait for the Sovas to wind around the room and reach the top door. This takes about 1 minute and 15 seconds. Entrance condition: {
"comeInNormally": {}
}Requires: {
"heatFrames": 4600
}
"canBePatient"Exit condition: {
"leaveWithGModeSetup": {}
}Unlocks doors: {"types":["ammo"],"requires":[]} |
From: 1
Top Right Door
To: 1
Top Right Door
Use a Super to knock a Sova off as it exits the morph tunnel, then shoot the shot block in time to let it pass. Use another Super to knock it off the top runway so it can climb the left wall and reach the door. Entrance condition: {
"comeInNormally": {}
}Requires: {
"heatFrames": 2200
}
{
"ammo": {
"type": "Super",
"count": 2
}
}Exit condition: {
"leaveWithGModeSetup": {}
}Unlocks doors: {"types":["missiles","powerbomb"],"requires":[]}
{"types":["super"],"requires":[],"useImplicitRequires":false} |
From: 1
Top Right Door
To: 2
Middle Right Door
Entrance condition: {
"comeInWithGMode": {
"mode": "any",
"morphed": true
}
}Requires: {
"or": [
"h_artificialMorphIBJ",
{
"and": [
"HiJump",
"h_artificialMorphSpringBall"
]
},
{
"and": [
"h_artificialMorphSpringBallBombJump",
"h_additionalBomb"
]
}
]
}
"h_heatedGModeOffCameraDoor"Dev note: It is probably possible to farm the Sovas at this door, but it would be difficult and slow and isn't expected. |
From: 1
Top Right Door
To: 2
Middle Right Door
Entrance condition: {
"comeInWithGMode": {
"mode": "any",
"morphed": false
}
}Requires: "Morph"
{
"or": [
"HiJump",
"canWallJump",
"canSpringBallJumpMidAir",
"SpaceJump",
"canIBJ",
"canTrickyUseFrozenEnemies"
]
}
"h_heatedGModeOffCameraDoor"Dev note: It is probably possible to farm the Sovas at this door, but it would be difficult and slow and isn't expected. |
|
Entrance condition: {
"comeInWithGMode": {
"mode": "any",
"morphed": false
}
}Requires: "h_heatedGModeOpenDifferentDoor" |
From: 1
Top Right Door
To: 3
Bottom Right Door
Avoid the fireballs while waiting for the Sovas. If the fireball is going to be at a bad cycle, it can help to kill the first Sova. Entrance condition: {
"comeInNormally": {}
}Requires: {
"heatFrames": 1200
}Exit condition: {
"leaveWithGModeSetup": {}
}Unlocks doors: {"types":["missiles","super"],"requires":[]}
{"types":["powerbomb"],"requires":["never"]} |
|
Entrance condition: {
"comeInWithGMode": {
"mode": "any",
"morphed": false
}
}Requires: "h_heatedGModePauseAbuse" "canFarmWhileShooting" Dev note: The Sovas will not give drops if there are too many fireballs, but this shouldn't be a problem when leaving through the bottom door. |
From: 2
Middle Right Door
To: 1
Top Right Door
Kill the Sovas or wait at around 25 seconds for them to get out of the way before going down and passing them while climbing to the top door. It is possible to wait 2.5 minutes for the Sovas to return on camera to be sure Samus won't touch them. Entrance condition: {
"comeInWithGMode": {
"mode": "any",
"morphed": true
}
}Requires: "h_artificialMorphMovement" "canOffScreenMovement" "h_heatedGModeOffCameraDoor" Dev note: The single tile ledge at this door doesn't seem to make it any slower to exit. It is probably possible to farm the Sovas at this door, but it would be difficult and isn't expected. |
From: 2
Middle Right Door
To: 1
Top Right Door
Wait for the Sovas to wind around the room and reach the top door. This takes about 1 minute and 15 seconds. Entrance condition: {
"comeInNormally": {}
}Requires: {
"heatFrames": 4600
}
"Morph"
"canBePatient"Exit condition: {
"leaveWithGModeSetup": {}
}Unlocks doors: {"types":["ammo"],"requires":[]} |
From: 2
Middle Right Door
To: 1
Top Right Door
Use a Super to knock a Sova off as it exits the morph tunnel, get to and shoot the shot block in time to let it pass. Use another Super to knock it off the top runway so it can climb the left wall and reach the door. There is enough time to go around the left side of the room if Samus can't climb the right side. Entrance condition: {
"comeInNormally": {}
}Requires: {
"heatFrames": 2200
}
"Morph"
{
"ammo": {
"type": "Super",
"count": 2
}
}Exit condition: {
"leaveWithGModeSetup": {}
}Unlocks doors: {"types":["missiles"],"requires":[]}
{"types":["super"],"requires":[],"useImplicitRequires":false}
{"types":["powerbomb"],"requires":["never"]} |
From: 2
Middle Right Door
To: 2
Middle Right Door
It takes about 2.5 minutes for the Sova to get to this door and hit Samus. Alternatively, use a Super as the third Sova has started going off screen to speed it up to 40 seconds. Requires: {
"or": [
{
"ammo": {
"type": "Super",
"count": 1
}
},
"canBePatient"
]
}
{
"enemyDamage": {
"enemy": "Sova",
"type": "contact",
"hits": 1
}
} |
From: 2
Middle Right Door
To: 2
Middle Right Door
It takes about 2.5 minutes for the Sova to get to this door and hit Samus. With Morph, Samus can shoot the shot block as the Sova is coming down to save some time. Alternatively, use a Super as the third Sova has started going off screen to speed it up to 40 seconds. Entrance condition: {
"comeInNormally": {}
}Requires: {
"or": [
{
"and": [
{
"heatFrames": 2340
},
{
"ammo": {
"type": "Super",
"count": 1
}
}
]
},
{
"and": [
"h_heatProof",
"canBePatient"
]
},
{
"and": [
"Morph",
"canBePatient",
{
"heatFrames": 5925
}
]
}
]
}Exit condition: {
"leaveWithGModeSetup": {}
}Unlocks doors: {"types":["ammo"],"requires":[]} |
From: 2
Middle Right Door
To: 3
Bottom Right Door
Kill the Sovas or wait at least 20 seconds for them to get out of the way before going to the bottom door. It is slightly safer but very slow to wait 2.5 minutes for the Sovas to return on camera to be sure Samus won't touch them. Entrance condition: {
"comeInWithGMode": {
"mode": "any",
"morphed": true
}
}Requires: "h_artificialMorphMovement" "h_heatedGModeOffCameraDoor" Dev note: It is probably possible to farm the Sovas at this door, but it would be difficult and isn't expected. |
From: 2
Middle Right Door
To: 3
Bottom Right Door
Avoid the fireballs while waiting for the Sovas. If the fireball is going to be at a bad cycle, it can help to kill the first Sova. Entrance condition: {
"comeInNormally": {}
}Requires: {
"heatFrames": 1200
}
"Morph"Exit condition: {
"leaveWithGModeSetup": {}
}Unlocks doors: {"types":["missiles","super"],"requires":[]}
{"types":["powerbomb"],"requires":["never"]} |
From: 2
Middle Right Door
To: 4
Junction Below Morph Tunnel
Kill the Sovas or wait at around 25 seconds for them to get out of the way before going down. Exit G-mode on the first ledge on the left, then jump and press against the right wall to touch the camera scroll block and fix the camera. Entrance condition: {
"comeInWithGMode": {
"mode": "any",
"morphed": true
}
}Requires: "h_heatedGMode"
"h_artificialMorphMovement"
{
"heatFrames": 120
} |
|
Entrance condition: {
"comeInWithGMode": {
"mode": "any",
"morphed": false
}
}Requires: "h_heatedGModeOpenDifferentDoor" Dev note: The single tile ledge at this door doesn't seem to make it any slower to exit. |
From: 3
Bottom Right Door
To: 1
Top Right Door
Wait for the Sovas to wind around the room and reach the top door. This takes about 1 minute and 15 seconds. Entrance condition: {
"comeInNormally": {}
}Requires: {
"heatFrames": 4600
}
"canBePatient"Exit condition: {
"leaveWithGModeSetup": {}
}Unlocks doors: {"types":["ammo"],"requires":[]} |
From: 3
Bottom Right Door
To: 1
Top Right Door
Use a Super to knock a Sova off as it exits the morph tunnel, get to and shoot the shot block in time to let it pass. Use another Super to knock it off the top runway so it can climb the left wall and reach the door. Entrance condition: {
"comeInNormally": {}
}Requires: {
"heatFrames": 2200
}
{
"ammo": {
"type": "Super",
"count": 2
}
}Exit condition: {
"leaveWithGModeSetup": {}
}Unlocks doors: {"types":["missiles"],"requires":[]}
{"types":["super"],"requires":[],"useImplicitRequires":false}
{"types":["powerbomb"],"requires":["canTrickyJump"]} |
|
It is possible to kill the Sovas and pick up their drops during a pause abuse, but they will only give drops if there are not too many Fune fireballs. With a ledge grab onto the top platform, it is possible to get all the Funes off camera. Alternatively, it is possible to kill or repeatedly freeze them. Entrance condition: {
"comeInWithGMode": {
"mode": "any",
"morphed": false
}
}Requires: "canBePatient"
"h_heatedGModePauseAbuse"
"canFarmWhileShooting"
{
"or": [
"canTrickyJump",
"canTrickyUseFrozenEnemies",
{
"ammo": {
"type": "Super",
"count": 1
}
},
"h_usePowerBomb"
]
}Dev note: The single tile ledge at this door doesn't seem to make it any slower to exit. The Power Bomb kill could be done with artificial morph, but it's not worth modeling. |
From: 3
Bottom Right Door
To: 2
Middle Right Door
Entrance condition: {
"comeInWithGMode": {
"mode": "any",
"morphed": true
}
}Requires: {
"or": [
"h_artificialMorphIBJ",
{
"and": [
"HiJump",
"h_artificialMorphSpringBall"
]
},
{
"and": [
"h_artificialMorphSpringBallBombJump",
"h_additionalBomb"
]
}
]
}
"h_heatedGModeOffCameraDoor"Dev note: It is probably possible to farm the Sovas at this door, but it would be difficult and slow and isn't expected. |
From: 3
Bottom Right Door
To: 2
Middle Right Door
Entrance condition: {
"comeInWithGMode": {
"mode": "any",
"morphed": false
}
}Requires: "Morph"
{
"or": [
"HiJump",
"canWallJump",
"canSpringBallJumpMidAir",
"SpaceJump",
"canIBJ",
"canTrickyUseFrozenEnemies"
]
}
"h_heatedGModeOffCameraDoor"Dev note: It is probably possible to farm the Sovas at this door, but it would be difficult and slow and isn't expected. |
From: 3
Bottom Right Door
To: 3
Bottom Right Door
Requires: {
"enemyDamage": {
"enemy": "Sova",
"type": "contact",
"hits": 1
}
} |
From: 3
Bottom Right Door
To: 3
Bottom Right Door
Avoid the fireballs while waiting for the Sovas. If the fireball is going to be at a bad cycle, it can help to kill the first Sova. Entrance condition: {
"comeInNormally": {}
}Requires: {
"heatFrames": 1140
}Exit condition: {
"leaveWithGModeSetup": {}
}Unlocks doors: {"types":["ammo"],"requires":[]} |
|
Entrance condition: {
"comeInWithGMode": {
"mode": "any",
"morphed": false
}
}Requires: "h_heatedGModeOpenDifferentDoor" |
|
Entrance condition: {
"comeInWithGMode": {
"mode": "any",
"morphed": false
}
}Requires: "h_heatedGModeOpenDifferentDoor" |
|
Getting across the lava while artificially morphed requires an HBJ or Spring Fling. For the Spring Fling, jump immediately before the pause triggers. With Morph, Samus can air ball across. Entrance condition: {
"comeInWithGMode": {
"mode": "any",
"morphed": true
}
}Requires: {
"or": [
{
"and": [
"Morph",
{
"or": [
"SpaceJump",
"canTrivialUseFrozenEnemies"
]
}
]
},
{
"and": [
"canLateralMidAirMorph",
"canTrickyJump"
]
},
{
"and": [
"h_artificialMorphSpringFling",
"canTrickyJump"
]
},
"h_artificialMorphHBJ",
{
"and": [
"Gravity",
"h_artificialMorphIBJ",
"h_artificialMorphBombHorizontally",
{
"lavaFrames": 160
}
]
},
{
"and": [
"Gravity",
"h_artificialMorphSpringBall",
{
"lavaFrames": 40
}
]
},
{
"and": [
"Gravity",
"Morph",
{
"lavaFrames": 24
}
]
}
]
}
"h_heatedGModeOpenDifferentDoor" |
|
Getting across the lava while artificially morphed requires an HBJ or Bomb boosting out and freezing a Boyon below. Entrance condition: {
"comeInWithGMode": {
"mode": "any",
"morphed": true
}
}Requires: {
"or": [
{
"and": [
"h_artificialMorphMovement",
"h_lavaProof"
]
},
{
"and": [
"Morph",
"canTrickyUseFrozenEnemies"
]
},
{
"and": [
"h_artificialMorphIBJ",
"h_artificialMorphBombHorizontally",
"canTrickyUseFrozenEnemies"
]
},
{
"and": [
"canInsaneJump",
{
"or": [
"h_artificialMorphHBJ",
"h_artificialMorphDiagonalBombJump"
]
}
]
}
]
}
"h_heatedGModeOpenDifferentDoor"Dev note: FIXME: It is also possible with a rolling speed bomb boost down back. |
From: 2
Right Door
To: 1
Left Door
Enter the lava pool as the Ripper touches the left wall. Place a Power Bomb in the corner and boost up into the Ripper to escape. The Power Bomb timing is somewhat lenient, but incorrectly timing it will kill the Ripper and leave Samus in the lava pool. Entrance condition: {
"comeInWithGMode": {
"mode": "any",
"morphed": true
}
}Requires: "canComplexGMode"
"Gravity"
"h_artificialMorphPowerBomb"
"canNeutralDamageBoost"
{
"enemyDamage": {
"enemy": "Ripper 2 (red)",
"type": "contact",
"hits": 1
}
}
"canTrickyJump"
{
"lavaFrames": 140
}
"h_additionalBomb"
{
"or": [
{
"and": [
{
"notable": "Impressive Damage Boost"
},
"canHorizontalDamageBoost",
{
"enemyDamage": {
"enemy": "Boyon",
"type": "contact",
"hits": 1
}
}
]
},
{
"lavaFrames": 25
}
]
}
"h_heatedGModeOpenDifferentDoor" |
|
Spring Fling or IBJ across the right pit and damage boost or lava dive in the second; to Spring Fling, jump immediately before the pause triggers. Entrance condition: {
"comeInWithGMode": {
"mode": "any",
"morphed": true
}
}Requires: {
"or": [
"Morph",
{
"and": [
"h_artificialMorphSpringFling",
"canTrickyJump"
]
},
{
"and": [
"h_artificialMorphIBJ",
"h_artificialMorphBombHorizontally"
]
},
{
"and": [
"Gravity",
"h_artificialMorphSpringBall",
{
"lavaFrames": 20
}
]
},
{
"and": [
"h_artificialMorphSpringBall",
{
"lavaFrames": 50
}
]
}
]
}
{
"or": [
{
"and": [
{
"notable": "Impressive Damage Boost"
},
"canHorizontalDamageBoost",
"canTrickyJump",
{
"enemyDamage": {
"enemy": "Boyon",
"type": "contact",
"hits": 1
}
}
]
},
{
"lavaFrames": 90
},
{
"and": [
"Gravity",
{
"lavaFrames": 35
}
]
}
]
}
"h_heatedGModeOpenDifferentDoor" |
From: 1
Right Door
To: 1
Right Door
Entrance condition: {
"comeInWithGMode": {
"mode": "direct",
"morphed": false
}
}Requires: "canRemoteAcquire" "h_heatedDirectGModeLeaveSameDoor" Collects items: 2 Dev note: An indirect option could be added to just get to the item without heat damage, but that would require very unusual room layouts and isn't worth the effort. |
From: 1
Top Right Door
To: 5
Bottom Junction Right of Morph Tunnel
Enter the room in Direct G-mode, otherwise the acid will still be present. Jump in the vertical shaft to touch the camera scroll block and overload PLMs, then roll through the bomb blocks. Exit G-mode and jump multiple times to fix the camera before crossing the section with the Holtzes. Entrance condition: {
"comeInWithGMode": {
"mode": "direct",
"morphed": true
}
}Requires: "h_heatedGMode"
{
"or": [
"f_UsedAcidChozoStatue",
{
"obstaclesCleared": [
"f_UsedAcidChozoStatue"
]
}
]
}
"h_artificialMorphMovement"
{
"heatFrames": 200
}Dev note: It is possible but not expected to cross the lower section while completely blind. The Holtz still damage Samus, and the middle one is low enough to make it difficult to bomb boost across. Other strats in the room are ignored because Samus needs real Morph and Varia or a lot of Energy to use the statue, and there is no way to overload PLMs to go through the bomb blocks from the bottom of the room. |
From: 2
Bottom Right Door
To: 2
Bottom Right Door
Entrance condition: {
"comeInNormally": {}
}Requires: {
"heatFrames": 440
}Exit condition: {
"leaveWithGModeSetup": {}
}Unlocks doors: {"types":["ammo"],"requires":[]} |
From: 5
Bottom Junction Right of Morph Tunnel
To: 2
Bottom Right Door
Requires: {
"or": [
{
"and": [
"canDash",
"canTrickyJump",
{
"heatFrames": 820
}
]
},
{
"and": [
"canDash",
"ScrewAttack",
{
"heatFrames": 660
}
]
},
{
"and": [
"canDash",
"canHorizontalDamageBoost",
"canUseIFrames",
{
"enemyDamage": {
"enemy": "Magdollite",
"type": "flame",
"hits": 1
}
},
{
"heatFrames": 660
}
]
},
{
"and": [
{
"haveBlueSuit": {}
},
{
"heatFrames": 725
}
]
}
]
}Exit condition: {
"leaveWithGModeSetup": {}
}Unlocks doors: {"types":["ammo"],"requires":[]} |
|
Requires: {
"enemyDamage": {
"enemy": "Ripper 2 (red)",
"type": "contact",
"hits": 1
}
} |
|
Entrance condition: {
"comeInNormally": {}
}Requires: {
"heatFrames": 95
}Exit condition: {
"leaveWithGModeSetup": {}
}Unlocks doors: {"types":["super"],"requires":[]}
{
"types": [
"missiles",
"powerbomb"
],
"requires": [
{
"heatFrames": 385
},
{
"or": [
"Morph",
"canInsaneJump",
{
"enemyDamage": {
"enemy": "Ripper 2 (red)",
"type": "contact",
"hits": 1
}
}
]
}
]
} |
|
Despawn the gate in indirect G-mode then Power Bomb the Rippers and cross the room. It is possible to kill a Ripper near the right door and pause abuse to collect its drop on G-mode exit. Timing the Power Bomb to kill some but not all of the lower three Rippers is necessary if farming on the right side of the room. Entrance condition: {
"comeInWithGMode": {
"mode": "indirect",
"morphed": true
}
}Requires: {
"or": [
"h_artificialMorphPowerBomb",
{
"enemyDamage": {
"enemy": "Ripper 2 (red)",
"type": "contact",
"hits": 1
}
}
]
}
{
"or": [
"h_heatedGModeOpenDifferentDoor",
{
"and": [
"canTrickyJump",
"h_heatedGModePauseAbuse",
{
"ammo": {
"type": "Super",
"count": 1
}
}
]
}
]
} |
From: 1
Left Door
To: 2
Right Door
Despawn the gate in indirect G-mode then Power Bomb the Rippers and exit G-mode while under the gate to open it without a Super. Entrance condition: {
"comeInWithGMode": {
"mode": "indirect",
"morphed": true
}
}Requires: {
"or": [
"h_artificialMorphPowerBomb",
{
"enemyDamage": {
"enemy": "Ripper 2 (red)",
"type": "contact",
"hits": 2
}
}
]
}
{
"heatFrames": 110
}Clears obstacles: A |
|
Despawn the gate in indirect G-mode then cross the room while killing, freezing, dodging, or tanking the Rippers. Dodging the Rippers without Morph, requires crouching under the first two then jumping and aiming down over the next two; it also requires jumping over all three lower Rippers when most of the way across the room. It is possible to kill a Ripper near the right door and pause abuse to collect its drop on G-mode exit. Entrance condition: {
"comeInWithGMode": {
"mode": "indirect",
"morphed": false
}
}Requires: {
"or": [
"canInsaneJump",
{
"haveBlueSuit": {}
},
"ScrewAttack",
"canUseFrozenEnemies",
{
"and": [
"canTrickyDodgeEnemies",
"Morph"
]
},
{
"ammo": {
"type": "Super",
"count": 2
}
},
{
"enemyDamage": {
"enemy": "Ripper 2 (red)",
"type": "contact",
"hits": 2
}
}
]
}
{
"or": [
"h_heatedGModeOpenDifferentDoor",
{
"and": [
"h_heatedGModePauseAbuse",
"ScrewAttack"
]
},
{
"and": [
"h_heatedGModePauseAbuse",
{
"ammo": {
"type": "Super",
"count": 1
}
}
]
}
]
} |
From: 1
Left Door
To: 2
Right Door
Despawn the gate in indirect G-mode then exit G-mode while under it to open the gate without a Super. This requires killing, freezing, dodging, or tanking the Rippers. Dodging the Rippers without Morph, requires crouching under the first two then jumping and aiming down over the next two; it also requires jumping over all three lower Rippers when most of the way across the room. Then exiting G-mode while on the right side of the gate tile as the first Ripper approaches, so it hits the gate while it's opening. Then run towards the door and jump and aim down over the Ripper that makes it through, before quickly using the runway. Entrance condition: {
"comeInWithGMode": {
"mode": "indirect",
"morphed": false
}
}Requires: {
"or": [
"canInsaneJump",
{
"haveBlueSuit": {}
},
"ScrewAttack",
"canUseFrozenEnemies",
{
"and": [
"canTrickyDodgeEnemies",
"Morph"
]
},
{
"enemyDamage": {
"enemy": "Ripper 2 (red)",
"type": "contact",
"hits": 3
}
}
]
}
{
"heatFrames": 110
}Clears obstacles: A |
|
The room is a bit trickier to cross in direct G-mode because the Ripper cycle with the gate. Cross the room while killing, freezing, dodging, or tanking the Rippers. Dodging the Rippers without Morph, requires crouching under the first two then jumping and aiming down over the next two; either way, it also requires a precise jump over all three lower Rippers when most of the way across the room, or a morph under the first and quick jump over the next two. Entrance condition: {
"comeInWithGMode": {
"mode": "direct",
"morphed": false
}
}Requires: "h_heatedGMode"
{
"or": [
"canInsaneJump",
{
"haveBlueSuit": {}
},
"ScrewAttack",
"canUseFrozenEnemies",
{
"ammo": {
"type": "Super",
"count": 2
}
},
{
"enemyDamage": {
"enemy": "Ripper 2 (red)",
"type": "contact",
"hits": 2
}
}
]
}
{
"heatFrames": 0
} |
|
The room is a bit trickier to cross in direct G-mode because the Ripper cycle with the gate. Power Bomb the Rippers on entry then cross the room. Entrance condition: {
"comeInWithGMode": {
"mode": "direct",
"morphed": true
}
}Requires: "h_heatedGMode"
{
"or": [
"h_artificialMorphPowerBomb",
{
"enemyDamage": {
"enemy": "Ripper 2 (red)",
"type": "contact",
"hits": 1
}
}
]
}
{
"heatFrames": 0
} |
From: 1
Left Door
To: 3
Junction Left of Green Gate
This strat just saves one Ripper hit when tanking the Rippers because of the i-frames when taking the hit to regain mobility. Entrance condition: {
"comeInWithGMode": {
"mode": "direct",
"morphed": false,
"mobility": "immobile"
}
}Requires: "h_heatedGMode"
"canDash"
{
"enemyDamage": {
"enemy": "Ripper 2 (red)",
"type": "contact",
"hits": 1
}
}
{
"heatFrames": 0
} |
|
Despawn the gate in indirect G-mode then cross the room by either rolling under the Rippers then unmorphing and dodging them while while crossing the room, or place a Power Bomb to kill all or most of them and cross the room. It is possible to kill a Ripper near the left door and pause abuse to collect its drop on G-mode exit. Entrance condition: {
"comeInWithGMode": {
"mode": "indirect",
"morphed": true
}
}Requires: {
"or": [
{
"and": [
"canDash",
"canInsaneJump"
]
},
"h_artificialMorphPowerBomb"
]
}
{
"or": [
"h_heatedGModeOpenDifferentDoor",
{
"and": [
"h_heatedGModePauseAbuse",
{
"ammo": {
"type": "Super",
"count": 1
}
}
]
}
]
} |
|
Despawn the gate in indirect G-mode then cross the room while killing, freezing, or tanking the Rippers. Without Morph, killing the lowest Ripper with a Super will make it possible but difficult to cross the room damageless. It is possible to kill a Ripper near the left door and pause abuse to collect its drop on G-mode exit. Entrance condition: {
"comeInWithGMode": {
"mode": "indirect",
"morphed": false
}
}Requires: {
"or": [
"ScrewAttack",
{
"haveBlueSuit": {}
},
"canUseFrozenEnemies",
{
"and": [
"canDash",
"canInsaneJump",
{
"ammo": {
"type": "Super",
"count": 1
}
}
]
},
{
"ammo": {
"type": "Super",
"count": 3
}
},
{
"enemyDamage": {
"enemy": "Ripper 2 (red)",
"type": "contact",
"hits": 2
}
}
]
}
{
"or": [
"h_heatedGModeOpenDifferentDoor",
{
"and": [
"h_heatedGModePauseAbuse",
"ScrewAttack"
]
},
{
"and": [
"h_heatedGModePauseAbuse",
{
"ammo": {
"type": "Super",
"count": 1
}
}
]
}
]
} |
From: 2
Right Door
To: 1
Left Door
Despawn the gate in indirect G-mode then cross the room while dodging the Rippers. It is possible to cross the room damageless without any items. Crouch under the first Rippers then jump with a precise timing to go over the next without hitting the highest ones. With two small forward spin jumps, jump over the three Rippers that come from behind. Move to the first platform and jump over them again. Cross the rest of the room while weaving through the Rippers to get to the left side. It is possible to kill a Ripper near the left door and pause abuse to collect its drop on G-mode exit. Entrance condition: {
"comeInWithGMode": {
"mode": "indirect",
"morphed": false
}
}Requires: "canDash"
"canTrickyGMode"
{
"or": [
"h_heatedGModeOpenDifferentDoor",
{
"and": [
"h_heatedGModePauseAbuse",
{
"ammo": {
"type": "Super",
"count": 1
}
}
]
}
]
} |
|
Entrance condition: {
"comeInNormally": {}
}Requires: {
"heatFrames": 470
}
{
"obstaclesCleared": [
"A"
]
}Exit condition: {
"leaveWithGModeSetup": {}
}Unlocks doors: {"types":["ammo"],"requires":[]}Dev note: FIXME: These heatFrames are the worst case scenario, otherwise the entire room would need to be modeled. |
From: 2
Right Door
To: 2
Right Door
Despawn the gate in indirect G-mode then Power Bomb the Rippers and exit G-mode while under the gate to open it without a Super. Entrance condition: {
"comeInWithGMode": {
"mode": "indirect",
"morphed": true
}
}Requires: "h_artificialMorphPowerBomb"
{
"heatFrames": 110
}Clears obstacles: A Dev note: FIXME: It would be possible to enter in direct G-mode and use a power bomb then gate glitch and cross the room without the Rippers. |
From: 2
Right Door
To: 2
Right Door
Despawn the gate in indirect G-mode then exit G-mode while under it to open the gate without a Super. This requires killing, freezing, dodging, or tanking the Rippers. Dodging the Rippers without Morph, requires exiting G-mode while on the right side of the gate tile as the first Ripper approaches, so it hits the gate while it's opening. Then run towards the door and jump and aim down over the Ripper that makes it through, before quickly using the runway. Entrance condition: {
"comeInWithGMode": {
"mode": "indirect",
"morphed": false
}
}Requires: {
"or": [
{
"and": [
"canDash",
"canInsaneJump"
]
},
{
"haveBlueSuit": {}
},
"ScrewAttack",
"canUseFrozenEnemies",
"Morph",
{
"enemyDamage": {
"enemy": "Ripper 2 (red)",
"type": "contact",
"hits": 1
}
}
]
}
{
"heatFrames": 110
}Clears obstacles: A |
|
Entrance condition: {
"comeInWithGMode": {
"mode": "direct",
"morphed": false
}
}Requires: "canRemoteAcquire" "h_heatedDirectGModeLeaveSameDoor" Collects items: 3 |
|
Avoid stepping on all three crumble blocks before moving through the item to overload PLMs, then go through the crumble blocks. After dropping below, move to the door quickly in order to prevent GT falling on Samus. Note that if the item is not there, it is still possible to overload PLMs by using bomb spreads on crumble blocks that have never been stepped on. Entrance condition: {
"comeInWithGMode": {
"mode": "direct",
"morphed": false
}
}Requires: "canRemoteAcquire"
{
"or": [
{
"and": [
{
"itemNotCollectedAtNode": 3
},
"canRiskPermanentLossOfAccess"
]
},
{
"and": [
"Charge",
"h_useMorphBombs"
]
}
]
}
"h_heatedGModeOffCameraDoor"Exit condition: {
"leaveNormally": {}
}Collects items: 3 Unlocks doors: {"types":["missiles"],"requires":[{"heatFrames":50}]}
{"types":["super"],"requires":[]}
{"types":["powerbomb"],"requires":[{"heatFrames":110}]}Dev note: This strat forces Samus to leave the room because the camera is stuck at the top left of the room. FIXME: It is possible to get to the top right item, but its not easy or too useful. It is possible to use the item to break the Bomb blocks and escape. Fighting GT while blind is unreasonable. |
From: 1
Left Door
To: 2
Right Door
Avoid stepping on all three crumble blocks. Use many bomb spreads to place bombs on them and overload PLMs before going through. After dropping below, move to the door quickly in order to prevent GT falling on Samus. Entrance condition: {
"comeInWithGMode": {
"mode": "any",
"morphed": false
}
}Requires: "canComplexGMode" "Charge" "h_useMorphBombs" "h_heatedGModeOffCameraDoor" Exit condition: {
"leaveNormally": {}
}Unlocks doors: {"types":["missiles"],"requires":[{"heatFrames":50}]}
{"types":["super"],"requires":[]}
{"types":["powerbomb"],"requires":[{"heatFrames":110}]}Dev note: This strat forces Samus to leave the room because the camera is stuck at the top left of the room. FIXME: It is possible to get to the top right item, but its not easy or too useful. It is possible to use the item to break the Bomb blocks and escape. Fighting GT while blind is unreasonable. |
|
Entrance condition: {
"comeInWithGMode": {
"mode": "any",
"morphed": false
}
}Requires: "h_heatedGMode"
{
"heatFrames": 0
} |
|
Quickly roll to the left side of the room and IBJ through the crumble blocks before GT gets there, if it is alive. Starting from a jump or with a double bomb jump can help speed this up and make it much easier, but Samus needs to bomb slowly near the top to prevent hitting the crumble blocks before PLMs are overloaded. Otherwise, it can help to IBJ through the left-most crumble block, as GT will often jump away when first reaching Samus. The left-most crumble block is the 4th tile away from the wall. With a failed IBJ start, GT often times won't touch Samus if she is Morphed on the ground, and can jump away, giving another chance to IBJ. Entrance condition: {
"comeInWithGMode": {
"mode": "any",
"morphed": true
}
}Requires: "h_artificialMorphLongIBJ"
{
"or": [
{
"or": [
"f_DefeatedGoldenTorizo",
{
"obstaclesCleared": [
"f_DefeatedGoldenTorizo"
]
}
]
},
{
"and": [
"canTrickyDodgeEnemies",
{
"or": [
"h_artificialMorphJumpIntoIBJ",
"h_artificialMorphDoubleBombJump",
"canInsaneJump"
]
}
]
}
]
}
"h_heatedGModeOpenDifferentDoor"Clears obstacles: door_2 |
From: 2
Right Door
To: 2
Right Door
Start the fight with 31 Missiles or fewer in order to prevent GT from using its laser attack, which will enable Samus to stand next to it. With more than 31 Missiles, Samus will have a 2 pixel window in which she must quickly get into to prevent touching GT or his lasers. Wait long enough for the flag to be set, then Samus can then leave the room without exiting G-mode. Entrance condition: {
"comeInWithGMode": {
"mode": "direct",
"morphed": false
}
}Requires: "h_heatedGMode"
{
"notable": "Safe Spot Kill"
}
{
"or": [
{
"resourceAtMost": [
{
"type": "Missile",
"count": 31
}
]
},
"canComplexGMode"
]
}
{
"or": [
{
"ammo": {
"type": "Super",
"count": 30
}
},
{
"and": [
"Charge",
{
"or": [
"canBeVeryPatient",
{
"and": [
"canBePatient",
"Wave"
]
},
{
"and": [
"canBePatient",
"Spazer"
]
},
"Plasma",
{
"and": [
"canBePatient",
{
"ammo": {
"type": "Super",
"count": 15
}
}
]
}
]
}
]
}
]
}
{
"heatFrames": 0
}Exit condition: {
"leaveWithGMode": {
"morphed": false
}
}Clears obstacles: f_DefeatedGoldenTorizo, door_2 Sets flags: f_DefeatedGoldenTorizo |
|
Requires: {
"not": "f_DefeatedGoldenTorizo"
}
"canRiskPermanentLossOfAccess"
{
"enemyDamage": {
"enemy": "Golden Torizo",
"type": "contact",
"hits": 1
}
} |
From: 2
Right Door
To: 2
Right Door
Start the fight with 31 Missiles or fewer in order to prevent GT from using its laser attack, which will enable Samus to stand next to it. Having GT start with his Chozo Ball attack also will make it so there are drops which can be collected at the end of the fight, otherwise they will have been overloaded. Pause abuse and jump to collect the drops on G-mode exit. Entrance condition: {
"comeInWithGMode": {
"mode": "indirect",
"morphed": false
}
}Requires: {
"notable": "Safe Spot Kill"
}
{
"resourceAtMost": [
{
"type": "Missile",
"count": 31
}
]
}
{
"or": [
{
"ammo": {
"type": "Super",
"count": 30
}
},
{
"and": [
"Charge",
{
"or": [
"canBeVeryPatient",
{
"and": [
"canBePatient",
"Wave"
]
},
{
"and": [
"canBePatient",
"Spazer"
]
},
"Plasma",
{
"and": [
"canBePatient",
{
"ammo": {
"type": "Super",
"count": 15
}
}
]
}
]
}
]
}
]
}
{
"or": [
"h_heatedIndirectGModeOpenSameDoor",
"h_heatedGModePauseAbuse"
]
}Clears obstacles: f_DefeatedGoldenTorizo, door_2 Sets flags: f_DefeatedGoldenTorizo |
From: 2
Right Door
To: 2
Right Door
With more than 31 Missiles, Samus will have a 2 pixel window in which she must quickly get into to prevent touching GT or his lasers. Having GT start with his laser attack will also make it so there are no drops which can be collected at the end of the fight. Entrance condition: {
"comeInWithGMode": {
"mode": "indirect",
"morphed": false
}
}Requires: {
"notable": "Safe Spot Kill"
}
"canComplexGMode"
{
"or": [
{
"ammo": {
"type": "Super",
"count": 30
}
},
{
"and": [
"Charge",
{
"or": [
"canBeVeryPatient",
{
"and": [
"canBePatient",
"Wave"
]
},
{
"and": [
"canBePatient",
"Spazer"
]
},
"Plasma",
{
"and": [
"canBePatient",
{
"ammo": {
"type": "Super",
"count": 15
}
}
]
}
]
}
]
}
]
}
"h_heatedIndirectGModeOpenSameDoor"Clears obstacles: f_DefeatedGoldenTorizo, door_2 Sets flags: f_DefeatedGoldenTorizo |
|
Quickly roll to the left side of the room and IBJ through the crumble blocks before GT gets there, if it is alive. Starting from a jump or with a double bomb jump can help speed this up and make it much easier, but Samus needs to bomb slowly near the top to prevent hitting the crumble blocks before PLMs are overloaded. Otherwise, it can help to IBJ through the left-most crumble block, as GT will often jump away when first reaching Samus. The left-most crumble block is the 4th tile away from the wall. With a failed IBJ start, GT often times won't touch Samus if she is Morphed on the ground, and can jump away, giving another chance to IBJ. Entrance condition: {
"comeInWithGMode": {
"mode": "any",
"morphed": true
}
}Requires: "h_heatedGMode"
"h_artificialMorphLongIBJ"
{
"or": [
{
"or": [
"f_DefeatedGoldenTorizo",
{
"obstaclesCleared": [
"f_DefeatedGoldenTorizo"
]
}
]
},
{
"and": [
"canTrickyDodgeEnemies",
{
"or": [
"h_artificialMorphJumpIntoIBJ",
"h_artificialMorphDoubleBombJump",
"canInsaneJump"
]
}
]
}
]
}
{
"heatFrames": 0
}Clears obstacles: door_2 |
|
Quickly roll to the left side of the room and IBJ through the crumble blocks before GT gets there, if it is alive. Starting from a jump or with a double bomb jump can help speed this up and make it much easier, but Samus needs to bomb slowly near the top to prevent hitting the crumble blocks before PLMs are overloaded. Get GT to jump away then again jump into IBJ and climb to the right item. Note that Samus can roll under GT, but when it attacks, it places stationary invisible projectiles, which may block Samus' path. Place a Power Bomb then quickly exit G-mode to quickly clear all of the bomb blocks, otherwise it is possible to get out with a few Bombs or Screw Attack. Entrance condition: {
"comeInWithGMode": {
"mode": "any",
"morphed": true
}
}Requires: "h_heatedGMode"
"h_artificialMorphLongIBJ"
{
"or": [
{
"or": [
"f_DefeatedGoldenTorizo",
{
"obstaclesCleared": [
"f_DefeatedGoldenTorizo"
]
}
]
},
{
"and": [
"canInsaneJump",
"h_artificialMorphJumpIntoIBJ"
]
},
{
"and": [
"canTrickyGMode",
"h_artificialMorphDoubleBombJump"
]
}
]
}
{
"or": [
{
"and": [
"h_artificialMorphPowerBomb",
{
"heatFrames": 70
}
]
},
{
"and": [
"h_useMorphBombs",
{
"heatFrames": 250
}
]
},
{
"and": [
"ScrewAttack",
{
"heatFrames": 50
}
]
}
]
}Clears obstacles: door_2 |
|
Entrance condition: {
"comeInWithGMode": {
"mode": "any",
"morphed": false
}
}Requires: {
"heatFrames": 0
}Clears obstacles: door_2 |
From: 2
Right Door
To: 7
G-Mode Junction (Bottom of Room)
Start the fight with 31 Missiles or fewer in order to prevent GT from using its laser attack, which will enable Samus to stand next to it. Having GT start with his Chozo Ball attack also will make it so there are drops which can be collected at the end of the fight, otherwise they will have been overloaded. With more than 31 Missiles, Samus will have a 2 pixel window in which she must quickly get into to prevent touching GT or his lasers. If GT starts with his laser attack, be sure to carefully jump over them before doing something else in the room. Entrance condition: {
"comeInWithGMode": {
"mode": "any",
"morphed": false
}
}Requires: {
"notable": "Safe Spot Kill"
}
{
"or": [
{
"resourceAtMost": [
{
"type": "Missile",
"count": 31
}
]
},
"canComplexGMode"
]
}
{
"or": [
{
"ammo": {
"type": "Super",
"count": 30
}
},
{
"and": [
"Charge",
{
"or": [
"canBeVeryPatient",
{
"and": [
"canBePatient",
"Wave"
]
},
{
"and": [
"canBePatient",
"Spazer"
]
},
"Plasma",
{
"and": [
"canBePatient",
{
"ammo": {
"type": "Super",
"count": 15
}
}
]
}
]
}
]
}
]
}
{
"heatFrames": 0
}Clears obstacles: f_DefeatedGoldenTorizo, door_2 Sets flags: f_DefeatedGoldenTorizo Dev note: This exists because Samus can kill GT and stay in G-mode to then do something else in the room. |
From: 7
G-Mode Junction (Bottom of Room)
To: 1
Left Door
Use the camera scroll blocks below the crumble blocks to overload PLMs and go through the crumble blocks. A good jumping through them a single time is enough to overload them for the next jump. This can be done while dodging GT. With a speedy jump, it is possible to overload PLMs and run back to GT before it stands up, get into the safe spot location to get him to jump back, and use the runway again. With shinesparks, diagonally spark into the crumble blocks and hold forward three times, then spark through. Note that when GT attacks, it will place stationary invisible projectiles, so it is much more difficult if not getting up quickly. Requires: "h_heatedGMode"
{
"or": [
{
"or": [
"f_DefeatedGoldenTorizo",
{
"obstaclesCleared": [
"f_DefeatedGoldenTorizo"
]
}
]
},
"canTrickyDodgeEnemies"
]
}
{
"or": [
"SpaceJump",
{
"and": [
"HiJump",
{
"or": [
"canTrickyWallJump",
"canSpringBallJumpMidAir",
"canSpeedyJump"
]
}
]
},
{
"and": [
"canSpringBallJumpMidAir",
"canSpeedyJump",
{
"or": [
{
"or": [
"f_DefeatedGoldenTorizo",
{
"obstaclesCleared": [
"f_DefeatedGoldenTorizo"
]
}
]
},
"canInsaneJump"
]
}
]
},
{
"and": [
{
"or": [
"f_DefeatedGoldenTorizo",
{
"obstaclesCleared": [
"f_DefeatedGoldenTorizo"
]
}
]
},
"canTrickyDashJump",
"canWallJump"
]
},
{
"and": [
{
"or": [
"f_DefeatedGoldenTorizo",
{
"obstaclesCleared": [
"f_DefeatedGoldenTorizo"
]
}
]
},
"canConsecutiveWallJump",
"canInsaneWallJump"
]
},
{
"and": [
{
"or": [
"f_DefeatedGoldenTorizo",
{
"obstaclesCleared": [
"f_DefeatedGoldenTorizo"
]
}
]
},
{
"canShineCharge": {
"usedTiles": 28,
"openEnd": 0
}
},
{
"or": [
{
"and": [
"canWallJump",
{
"shinespark": {
"frames": 9,
"excessFrames": 4
}
}
]
},
{
"and": [
"canSpeedyJump",
{
"shinespark": {
"frames": 9,
"excessFrames": 4
}
}
]
},
{
"shinespark": {
"frames": 32,
"excessFrames": 4
}
}
]
}
]
}
]
}
"h_heatedGModeOpenDifferentDoor" |
From: 7
G-Mode Junction (Bottom of Room)
To: 3
Top Left Item
Use the camera scroll blocks below the crumble blocks to overload PLMs and go through the crumble blocks. A good jumping through them a single time is enough to overload them for the next jump. This can be done while dodging GT. With a speedy jump, it is possible to overload PLMs and run back to GT before it stands up, get into the safe spot location to get him to jump back, and use the runway again. With shinesparks, diagonally spark into the crumble blocks and hold forward three times, then spark through. Note that when GT attacks, it will place stationary invisible projectiles, so it is much more difficult if not getting up quickly. Requires: "h_heatedGMode"
{
"or": [
{
"or": [
"f_DefeatedGoldenTorizo",
{
"obstaclesCleared": [
"f_DefeatedGoldenTorizo"
]
}
]
},
"canTrickyDodgeEnemies"
]
}
{
"or": [
"SpaceJump",
{
"and": [
"HiJump",
{
"or": [
"canTrickyWallJump",
"canSpringBallJumpMidAir",
"canSpeedyJump"
]
}
]
},
{
"and": [
"canSpringBallJumpMidAir",
"canSpeedyJump",
{
"or": [
{
"or": [
"f_DefeatedGoldenTorizo",
{
"obstaclesCleared": [
"f_DefeatedGoldenTorizo"
]
}
]
},
"canInsaneJump"
]
}
]
},
{
"and": [
{
"or": [
"f_DefeatedGoldenTorizo",
{
"obstaclesCleared": [
"f_DefeatedGoldenTorizo"
]
}
]
},
"canTrickyDashJump",
"canWallJump"
]
},
{
"and": [
{
"or": [
"f_DefeatedGoldenTorizo",
{
"obstaclesCleared": [
"f_DefeatedGoldenTorizo"
]
}
]
},
"canConsecutiveWallJump",
"canInsaneWallJump"
]
},
{
"and": [
{
"or": [
"f_DefeatedGoldenTorizo",
{
"obstaclesCleared": [
"f_DefeatedGoldenTorizo"
]
}
]
},
{
"canShineCharge": {
"usedTiles": 28,
"openEnd": 0
}
},
{
"or": [
{
"and": [
"canWallJump",
{
"shinespark": {
"frames": 9,
"excessFrames": 4
}
}
]
},
{
"and": [
"canSpeedyJump",
{
"shinespark": {
"frames": 9,
"excessFrames": 4
}
}
]
},
{
"shinespark": {
"frames": 32,
"excessFrames": 4
}
}
]
}
]
}
]
}
{
"heatFrames": 0
} |
From: 7
G-Mode Junction (Bottom of Room)
To: 4
Hidden Right Item
Use the camera scroll blocks below the crumble blocks to overload PLMs and go through the bomb blocks near the right item. A good jumping through them a single time is enough to overload PLMs. This can be done while dodging GT. With a speedy jump, it is possible to overload PLMs and run back to GT before it stands up, get into the safe spot location to get him to jump back, and use the runway again. With shinesparks, diagonally spark into the crumble blocks and hold forward three times, to overload PLMs as much as possible. Note that when GT attacks, it will place stationary invisible projectiles, so it is much more difficult if not getting up quickly. Place a Power Bomb then quickly exit G-mode to quickly clear all of the bomb blocks, otherwise it is possible to get out with a few Bombs or Screw Attack. Requires: "h_heatedGMode"
{
"or": [
{
"or": [
"f_DefeatedGoldenTorizo",
{
"obstaclesCleared": [
"f_DefeatedGoldenTorizo"
]
}
]
},
"canTrickyDodgeEnemies"
]
}
{
"or": [
"SpaceJump",
{
"and": [
"HiJump",
{
"or": [
"canWallJump",
"canSpringBallJumpMidAir",
"canSpeedyJump"
]
}
]
},
{
"and": [
"canSpringBallJumpMidAir",
"canSpeedyJump",
{
"or": [
{
"or": [
"f_DefeatedGoldenTorizo",
{
"obstaclesCleared": [
"f_DefeatedGoldenTorizo"
]
}
]
},
"canInsaneJump"
]
}
]
},
{
"and": [
{
"or": [
"f_DefeatedGoldenTorizo",
{
"obstaclesCleared": [
"f_DefeatedGoldenTorizo"
]
}
]
},
"canTrickyDashJump",
"canWallJump"
]
},
{
"and": [
{
"or": [
"f_DefeatedGoldenTorizo",
{
"obstaclesCleared": [
"f_DefeatedGoldenTorizo"
]
}
]
},
"canPreciseWallJump"
]
},
{
"and": [
{
"or": [
"f_DefeatedGoldenTorizo",
{
"obstaclesCleared": [
"f_DefeatedGoldenTorizo"
]
}
]
},
{
"canShineCharge": {
"usedTiles": 28,
"openEnd": 0
}
},
{
"or": [
{
"and": [
"canSpeedyJump",
{
"shinespark": {
"frames": 7,
"excessFrames": 4
}
}
]
},
{
"shinespark": {
"frames": 30,
"excessFrames": 4
}
}
]
}
]
}
]
}
{
"or": [
{
"and": [
"h_usePowerBomb",
{
"heatFrames": 70
}
]
},
{
"and": [
"h_useMorphBombs",
{
"heatFrames": 250
}
]
},
{
"and": [
"ScrewAttack",
{
"heatFrames": 50
}
]
}
]
} |
From: 1
Bottom Left Door
To: 3
Top Right Door
Enter the room in Direct G-mode, with the item uncollected. Bomb the Chozo ball to overload PLMs then IBJ to the top. Entrance condition: {
"comeInWithGMode": {
"mode": "direct",
"morphed": true
}
}Requires: {
"itemNotCollectedAtNode": 4
}
"canRiskPermanentLossOfAccess"
"h_artificialMorphLongIBJ"
"h_heatedGModeOpenDifferentDoor" |
From: 1
Bottom Left Door
To: 3
Top Right Door
Enter the room in Direct G-mode, with the item uncollected. Shoot the Chozo ball to overload PLMs then climb the room. Entrance condition: {
"comeInWithGMode": {
"mode": "direct",
"morphed": false
}
}Requires: {
"itemNotCollectedAtNode": 4
}
"canRiskPermanentLossOfAccess"
{
"or": [
"SpaceJump",
"canSpringwall"
]
}
"h_heatedGModeOpenDifferentDoor" |
|
Entrance condition: {
"comeInWithGMode": {
"mode": "any",
"morphed": false
}
}Requires: {
"or": [
"SpaceJump",
"canSpringwall"
]
}
{
"haveBlueSuit": {}
}
"h_heatedGModeOpenDifferentDoor"Clears obstacles: A, B |
From: 1
Bottom Left Door
To: 3
Top Right Door
Use a blue suit to IBJ up through the bomb blocks without needing to overload PLMs. Entrance condition: {
"comeInWithGMode": {
"mode": "any",
"morphed": true
}
}Requires: {
"haveBlueSuit": {}
}
"h_artificialMorphLongIBJ"
"h_heatedGModeOpenDifferentDoor" |
|
Screw Attack through the bomb blocks before exiting G-mode above. Entrance condition: {
"comeInWithGMode": {
"mode": "any",
"morphed": false
}
}Requires: "ScrewAttack" "SpaceJump" "h_heatedGModeOpenDifferentDoor" Clears obstacles: A, B |
From: 1
Bottom Left Door
To: 5
Junction Above Bottom Blocks
Enter the room in Direct G-mode, with the item uncollected. Shoot the Chozo ball to overload PLMs then climb the room. Entrance condition: {
"comeInWithGMode": {
"mode": "direct",
"morphed": false
}
}Requires: "h_heatedGMode"
{
"itemNotCollectedAtNode": 4
}
"canRiskPermanentLossOfAccess"
{
"heatFrames": 0
} |
|
Use Screw Attack or a blue suit to pass through the bomb blocks before exiting G-mode above. Entrance condition: {
"comeInWithGMode": {
"mode": "any",
"morphed": false
}
}Requires: "h_heatedGMode"
{
"or": [
"ScrewAttack",
{
"haveBlueSuit": {}
}
]
}
{
"heatFrames": 0
}Clears obstacles: B |
From: 1
Bottom Left Door
To: 5
Junction Above Bottom Blocks
Bomb the blocks before exiting G-mode and jumping through. Entrance condition: {
"comeInWithGMode": {
"mode": "any",
"morphed": true
}
}Requires: "h_heatedGMode"
{
"or": [
"h_artificialMorphPowerBomb",
{
"and": [
"h_artificialMorphBombs",
"h_artificialMorphMovement"
]
}
]
}
{
"heatFrames": 80
}Clears obstacles: B, C Dev note: FIXME: If Bombs are available (vs. Power Bombs), it's not necessary to break all the bottom blocks. |
|
Use Screw Attack or a blue suit to pass through the bomb blocks before exiting G-mode below. Entrance condition: {
"comeInWithGMode": {
"mode": "any",
"morphed": false
}
}Requires: {
"or": [
"ScrewAttack",
{
"haveBlueSuit": {}
}
]
}
"h_heatedGModeOpenDifferentDoor"Clears obstacles: B |
From: 2
Middle Right Door
To: 2
Middle Right Door
Entrance condition: {
"comeInWithGMode": {
"mode": "direct",
"morphed": false
}
}Requires: {
"or": [
"SpaceJump",
"canWallJump",
"HiJump",
"canSpringBallJumpMidAir",
"canSpeedyJump",
"h_crouchJumpDownGrab",
"canIBJ"
]
}Exit condition: {
"leaveWithGMode": {
"morphed": false
}
} |
From: 2
Middle Right Door
To: 2
Middle Right Door
Entrance condition: {
"comeInWithGMode": {
"mode": "direct",
"morphed": true
}
}Requires: "canArtificialMorph" Exit condition: {
"leaveWithGMode": {
"morphed": true
}
}Dev note: Artificial morph will allow Samus not to fall; real Morph is not sufficient. |
|
Use a blue suit to pass through the bomb blocks and exit G-mode above. Entrance condition: {
"comeInWithGMode": {
"mode": "any",
"morphed": false
}
}Requires: {
"haveBlueSuit": {}
}
{
"or": [
"SpaceJump",
"canSpringwall"
]
}
"h_heatedGModeOpenDifferentDoor"Clears obstacles: A |
From: 2
Middle Right Door
To: 3
Top Right Door
Use a blue suit to IBJ up through the bomb blocks without needing to overload PLMs. Entrance condition: {
"comeInWithGMode": {
"mode": "any",
"morphed": true
}
}Requires: {
"haveBlueSuit": {}
}
"h_artificialMorphLongIBJ"
"h_heatedGModeOpenDifferentDoor" |
|
Use Screw Attack to pass through the bomb blocks and exit G-mode above. Entrance condition: {
"comeInWithGMode": {
"mode": "any",
"morphed": false
}
}Requires: "ScrewAttack" "SpaceJump" "h_heatedGModeOpenDifferentDoor" Clears obstacles: A |
From: 2
Middle Right Door
To: 3
Top Right Door
Enter with G-mode direct, back up to between 1 and 6 pixels from the door transition, and activate X-ray to get very deep stuck in the door. Climb up 1 screen, and perform a turnaround buffered spin-jump away from the door to trigger the transition, bypassing any lock on the door. Entrance condition: {
"comeInWithGMode": {
"mode": "direct",
"morphed": false
}
}Requires: "canGModeXRayClimb"
"h_heatProof"
{
"or": [
"canWallJump",
"h_crouchJumpDownGrab",
"HiJump",
"SpaceJump",
"canIBJ",
"canArtificialMorph"
]
}
"canXRayClimb"Bypasses door shell: true |
|
Entrance condition: {
"comeInWithGMode": {
"mode": "any",
"morphed": false
}
}Requires: "h_heatedGMode"
{
"or": [
"ScrewAttack",
{
"haveBlueSuit": {}
}
]
}
{
"heatFrames": 19
}Clears obstacles: B |
From: 2
Middle Right Door
To: 5
Junction Above Bottom Blocks
Bomb all the blocks before exiting G-mode near the lower bomb blocks. It is possible to fall back onto the door shell with artificial morph, then use Spring Ball to place a Power Bomb high enough. Entrance condition: {
"comeInWithGMode": {
"mode": "direct",
"morphed": true
}
}Requires: "h_heatedGMode"
{
"or": [
{
"and": [
"h_artificialMorphPowerBomb",
"canArtificialMorph",
"h_artificialMorphSpringBall"
]
},
{
"and": [
"h_usePowerBomb",
{
"or": [
"HiJump",
"h_crouchJumpDownGrab",
"canSpringBallJumpMidAir"
]
}
]
}
]
}
"h_additionalBomb"
{
"heatFrames": 0
}Clears obstacles: A, B, C Dev note: FIXME: If Bombs are available (vs. Power Bombs), it's not necessary to break all the bottom blocks. |
From: 2
Middle Right Door
To: 5
Junction Above Bottom Blocks
Bomb the upper blocks before exiting G-mode near the lower bomb blocks. It is possible to fall back onto the door shell with artificial morph, then use Spring Ball to place a Power Bomb high enough. Entrance condition: {
"comeInWithGMode": {
"mode": "direct",
"morphed": true
}
}Requires: "h_heatedGMode"
{
"or": [
{
"and": [
"h_artificialMorphPowerBomb",
"canArtificialMorph",
"h_artificialMorphSpringBall"
]
},
{
"and": [
"h_usePowerBomb",
{
"or": [
"HiJump",
"h_crouchJumpDownGrab",
"canSpringBallJumpMidAir"
]
}
]
}
]
}
{
"heatFrames": 0
}Clears obstacles: A |
From: 2
Middle Right Door
To: 5
Junction Above Bottom Blocks
Bomb all the blocks before exiting G-mode near the lower bomb blocks. Entrance condition: {
"comeInWithGMode": {
"mode": "any",
"morphed": true
}
}Requires: "h_heatedGMode"
{
"or": [
"h_artificialMorphLongIBJ",
{
"and": [
"h_usePowerBomb",
{
"or": [
"canWallJump",
"SpaceJump",
{
"and": [
"HiJump",
"canSpringBallJumpMidAir"
]
}
]
}
]
}
]
}
"h_additionalBomb"
{
"heatFrames": 0
}Clears obstacles: A, B, C Dev note: FIXME: If Bombs are available (vs. Power Bombs), it's not necessary to break all the bottom blocks. |
From: 2
Middle Right Door
To: 5
Junction Above Bottom Blocks
Entrance condition: {
"comeInWithGMode": {
"mode": "any",
"morphed": true
}
}Requires: "h_heatedGMode"
{
"or": [
"h_artificialMorphPowerBomb",
"h_artificialMorphBombs"
]
}
{
"heatFrames": 0
}Clears obstacles: B, C Dev note: FIXME: If Bombs are available (vs. Power Bombs), it's not necessary to break all the bottom blocks. |
From: 2
Middle Right Door
To: 5
Junction Above Bottom Blocks
Bomb the upper blocks before exiting G-mode near the lower bomb blocks. Entrance condition: {
"comeInWithGMode": {
"mode": "any",
"morphed": true
}
}Requires: "h_heatedGMode"
{
"or": [
"h_artificialMorphLongIBJ",
{
"and": [
"h_usePowerBomb",
{
"or": [
"canWallJump",
"SpaceJump",
{
"and": [
"HiJump",
"canSpringBallJumpMidAir"
]
}
]
}
]
}
]
}
{
"heatFrames": 0
}Clears obstacles: A |
|
Screw Attack through the bomb blocks before exiting G-mode below. Entrance condition: {
"comeInWithGMode": {
"mode": "any",
"morphed": false
}
}Requires: {
"or": [
"ScrewAttack",
{
"haveBlueSuit": {}
}
]
}
"h_heatedGModeOpenDifferentDoor"Clears obstacles: A, B |
From: 3
Top Right Door
To: 3
Top Right Door
Entrance condition: {
"comeInWithGMode": {
"mode": "any",
"morphed": true
}
}Requires: "h_heatedGMode"
{
"or": [
"h_artificialMorphPowerBomb",
"h_artificialMorphBombs"
]
}
{
"heatFrames": 0
}Clears obstacles: A |
|
Entrance condition: {
"comeInWithGMode": {
"mode": "any",
"morphed": false
}
}Requires: "h_heatedGMode"
{
"or": [
"ScrewAttack",
{
"haveBlueSuit": {}
}
]
}
{
"heatFrames": 19
}Clears obstacles: A, B |
|
Use Screw Attack or a blue suit to pass through the bomb blocks before exiting G-mode below. Entrance condition: {
"comeInWithGMode": {
"mode": "any",
"morphed": false
}
}Requires: "h_heatedGMode"
{
"or": [
"ScrewAttack",
{
"haveBlueSuit": {}
}
]
}
{
"heatFrames": 0
}Clears obstacles: A |
|
Entrance condition: {
"comeInWithGMode": {
"mode": "direct",
"morphed": false
}
}Requires: {
"or": [
"SpaceJump",
"canConsecutiveWallJump",
{
"and": [
"canJumpIntoIBJ",
"canLongIBJ",
"canDoubleBombJump",
"canInsaneJump"
]
}
]
}Exit condition: {
"leaveWithGMode": {
"morphed": false
}
} |
|
Entrance condition: {
"comeInWithGMode": {
"mode": "direct",
"morphed": true
}
}Requires: "canArtificialMorph" Exit condition: {
"leaveWithGMode": {
"morphed": true
}
}Dev note: Artificial morph will allow Samus not to fall; real Morph is not sufficient. |
|
Cross the room while avoiding the pirate's stationary invisible lasers. On entry, fall to the right to land past the first pirate, then run and jump over the next pirate and continue to the top door. It is possible but precise to cross the room without any items or a wall jump by jumping from the slightly raised platform on the right. Entrance condition: {
"comeInWithGMode": {
"mode": "any",
"morphed": false
}
}Requires: "canDash"
{
"or": [
"canWallJump",
"HiJump",
"SpaceJump",
"canSpringBallJumpMidAir",
"canInsaneJump",
{
"and": [
"Charge",
"canTrickyUseFrozenEnemies",
"Plasma",
"canTrickyJump"
]
}
]
}
"h_heatedGModeOpenDifferentDoor"Dev note: FIXME: Some dashless options can be possible here. |
From: 1
Left Door
To: 2
Right Door
Cross the room while avoiding the pirate's stationary invisible lasers. On entry, fall to the right to land past the first pirate, then run and jump over the next pirate and continue to the top door. It is possible but precise to cross the room without any items or a wall jump by jumping from the slightly raised platform on the right. At the top, wait on the left platform to the pirate's right side - shoot to make it face Samus - and let it spawn invisible lasers to overload them. This will prevent the runway pirate from being able to create any, making it easy to kill while keeping the runway clear. Crystal Flash, drain in the acid if needed, then shinecharge. Stand in the acid, at the shallowest point. Crouch and jump into windup at low energy to interrupt. Buffer X-Ray and hold right during reserve refill and then leave the room. Entrance condition: {
"comeInWithGMode": {
"mode": "direct",
"morphed": false
}
}Requires: "canDash"
{
"or": [
"canWallJump",
"HiJump",
"SpaceJump",
"canTrickySpringBallJump",
"canInsaneJump",
{
"and": [
"Charge",
"canTrickyUseFrozenEnemies",
"Plasma",
"canTrickyJump"
]
}
]
}
{
"disableEquipment": "ETank"
}
"h_CrystalFlashForReserveEnergy"
{
"or": [
{
"enemyKill": {
"enemies": [
[
"Yellow Space Pirate (standing)"
]
]
}
},
{
"getBlueSpeed": {
"usedTiles": 17,
"gentleDownTiles": 6,
"openEnd": 0
}
}
]
}
{
"canShineCharge": {
"usedTiles": 19,
"gentleDownTiles": 6,
"openEnd": 1
}
}
{
"acidFrames": 4
}
{
"or": [
{
"and": [
"canReserveTriggerBufferXRay",
{
"autoReserveTrigger": {
"implicitHeatFrames": "no"
}
}
]
},
{
"autoReserveTrigger": {}
}
]
}
"canRModeSparkInterrupt"
{
"heatFrames": 116
} |
From: 2
Right Door
To: 2
Right Door
Kill the runway pirate and then Crystal Flash. Jump while shooting to prevent any invisible lasers from being created, or use a pause abuse and minimal reserve refill to clear them. Drain in the acid to low energy if needed, then shinecharge: wait for the high peak to descend before running. Windup just before the acid touches Samus to shinespark interrupt using the acid. Buffer X-Ray and hold right during reserve refill and then leave the room. Entrance condition: {
"comeInWithGMode": {
"mode": "direct",
"morphed": false
}
}Requires: {
"disableEquipment": "ETank"
}
"h_CrystalFlashForReserveEnergy"
{
"or": [
{
"enemyKill": {
"enemies": [
[
"Yellow Space Pirate (standing)"
]
],
"excludedWeapons": [
"Bombs"
]
}
},
{
"and": [
{
"getBlueSpeed": {
"usedTiles": 18,
"gentleDownTiles": 6,
"openEnd": 0
}
},
"canComplexGMode"
]
}
]
}
{
"canShineCharge": {
"usedTiles": 20,
"gentleDownTiles": 6,
"openEnd": 1
}
}
{
"acidFrames": 4
}
{
"or": [
{
"and": [
"canReserveTriggerBufferXRay",
{
"autoReserveTrigger": {
"implicitHeatFrames": "no"
}
}
]
},
{
"autoReserveTrigger": {}
}
]
}
"canRModeSparkInterrupt"
{
"heatFrames": 116
} |
|
Requires: {
"enemyDamage": {
"enemy": "Yellow Space Pirate (wall)",
"type": "contact",
"hits": 1
}
} |
|
After climbing the room, it is possible to shoot at the door and then use X-Ray, so the shot hits immediately afterwards. Entrance condition: {
"comeInWithGMode": {
"mode": "any",
"morphed": false
}
}Requires: "h_heatedGMode"
{
"or": [
"SpaceJump",
"canWallJump",
"HiJump",
"canSpringBallJumpMidAir",
{
"and": [
"Charge",
"canUseFrozenEnemies"
]
},
{
"and": [
"canTrickyDodgeEnemies",
"canJumpIntoIBJ"
]
}
]
}
{
"heatFrames": 70
}Dev note: FIXME: It may be possible to kill the upper pirates in a way where Samus can collect their drops on the path to the door. FIXME: It is possible to kill the pirates then IBJ or tricky dash jump, but using the runway will require at least one laser hit. |
From: 1
Top Left Door
To: 4
Top Right Door
IBJ up the room while avoiding any of the invisible, stationary lasers that the pirates have placed; it is possible to manipulate the bottom pirate to place several lasers, in order to overload them, and then IBJ over the pirate and IBJ again from the right corner. Overloading the lasers can prevent the wall pirates from placing one when they jump. Abort the IBJ and fall if necessary to avoid a pirate hit. It is then possible to shoot at the door and then use X-Ray, so the shot hits immediately afterwards. Entrance condition: {
"comeInWithGMode": {
"mode": "any",
"morphed": true
}
}Requires: "h_heatedGMode"
"h_artificialMorphIBJ"
"canTrickyGMode"
{
"heatFrames": 70
} |
From: 1
Top Left Door
To: 4
Top Right Door
Use 3 Power Bombs to kill the pirate. If done quickly, it is possible to also kill one of the wall pirates. IBJ up the room while avoiding any of the invisible, stationary lasers that the pirates have placed; it is also possible to manipulate the bottom pirate to place several lasers before killing it, in order to overload them and prevent the wall pirates from placing one when they jump. Abort the IBJ and fall if necessary to avoid a pirate hit. It is then possible to shoot at the door and then use X-Ray, so the shot hits immediately afterwards. Entrance condition: {
"comeInWithGMode": {
"mode": "any",
"morphed": true
}
}Requires: "h_heatedGMode"
{
"ammo": {
"type": "PowerBomb",
"count": 3
}
}
"h_artificialMorphIBJ"
{
"or": [
"canInsaneJump",
{
"ammo": {
"type": "PowerBomb",
"count": 3
}
}
]
}
{
"heatFrames": 70
}Clears obstacles: A Dev note: FIXME: It may be possible to kill the upper pirates in a way where Samus can collect their drops on the path to the door. |
From: 1
Top Left Door
To: 5
Bottom Junction
Place a Power Bomb then exit G-mode to break the blocks. If entering in indirect, without Morph, quickly place the Power Bomb and unmorph and start shooting the pirate, in order to prevent it from moving forward or placing invisible, stationary lasers over the way down. Entrance condition: {
"comeInWithGMode": {
"mode": "any",
"morphed": true
}
}Requires: "h_heatedGMode"
"h_artificialMorphPowerBomb"
{
"heatFrames": 120
}Clears obstacles: A |
From: 1
Top Left Door
To: 6
R-Mode, Bottom Junction
Enter G-Mode with a full reserve tank. Wait for the wall pirate to jump on Samus to regain mobility and enter artificial morph. Lay a power bomb on top of the second pit from the left, wait for it to explode, then unmorph, activate X-Ray and hold until the beam reaches full width to exit G-Mode and remain in R-Mode. Samus will fall into the pit and avoid getting hit by the pirate lasers. Use jump shots or Screw Attack to kill the pirate safely. Shinecharge at the bottom runway and use heat damage to interrupt. Entrance condition: {
"comeInWithGMode": {
"mode": "direct",
"morphed": true,
"mobility": "immobile"
}
}Requires: "h_heatProof"
{
"disableEquipment": "ETank"
}
{
"resourceAvailable": [
{
"type": "RegularEnergy",
"count": 99
}
]
}
"h_artificialMorphPowerBomb"
{
"enemyKill": {
"enemies": [
[
"Yellow Space Pirate (standing)"
]
],
"excludedWeapons": [
"Bombs"
]
}
}
{
"or": [
{
"resourceMissingAtMost": [
{
"type": "Missile",
"count": 0
}
]
},
"canBeLucky"
]
}
{
"partialRefill": {
"type": "ReserveEnergy",
"limit": 5
}
}Clears obstacles: A |
From: 1
Top Left Door
To: 6
R-Mode, Bottom Junction
Enter G-Mode with a full reserve tank. Wait for the wall pirate to jump on Samus to regain mobility and enter artificial morph. While the pirate is still near the wall, use bomb boosts to trigger the pirate to attempt to shoot and then turn right. Repeat until shots are overloaded, which is after the pirate shoots at least 6 times. Damage the pirate with bombs: between 17 and 23 total bomb hits. If it gets too close to the door, use a bomb boost to force it to walk back to the right. Once enough bombs have hit, use one more bomb boost to force the pirate against the right wall. Get close, lay a power bomb, then unmorph and remain crouched. Immediately activate X-Ray and hold until the beam is at full width to exit G-Mode and remain in R-Mode. The Power Bomb should finish off the pirate - collect the drop. Shinecharge at the bottom runway and use heat damage to interrupt. Entrance condition: {
"comeInWithGMode": {
"mode": "direct",
"morphed": true,
"mobility": "immobile"
}
}Requires: "h_heatProof"
{
"disableEquipment": "ETank"
}
{
"resourceAvailable": [
{
"type": "RegularEnergy",
"count": 99
}
]
}
"h_artificialMorphBombs"
"h_artificialMorphPowerBomb"
"canComplexGMode"
{
"or": [
{
"resourceMissingAtMost": [
{
"type": "Missile",
"count": 0
}
]
},
"canBeLucky"
]
}
{
"partialRefill": {
"type": "ReserveEnergy",
"limit": 5
}
}Clears obstacles: A |
From: 1
Top Left Door
To: 6
R-Mode, Bottom Junction
Enter G-Mode with a full reserve tank. Wait for the wall pirate to jump on Samus to regain mobility and enter artificial morph. Lay three power bombs to kill the standing pirate. Avoid being boosted by the powerbombs to prevent excess shots from the wall pirate. Go all the way to the right and unmorph, then activate and hold X-Ray until the beam is at full width to exit G-Mode and remain in R-Mode. Release X-Ray and Samus will fall into the pit without getting hit by the pirate lasers. Pick up energy drops and drop to the bottom section. Shinecharge at the bottom runway and use heat damage to interrupt. Entrance condition: {
"comeInWithGMode": {
"mode": "direct",
"morphed": true,
"mobility": "immobile"
}
}Requires: "h_heatProof"
{
"disableEquipment": "ETank"
}
{
"resourceAvailable": [
{
"type": "RegularEnergy",
"count": 99
}
]
}
"h_artificialMorphPowerBomb"
{
"ammo": {
"type": "PowerBomb",
"count": 2
}
}
{
"or": [
{
"resourceMissingAtMost": [
{
"type": "Missile",
"count": 0
}
]
},
"canBeLucky"
]
}
{
"partialRefill": {
"type": "ReserveEnergy",
"limit": 5
}
}Clears obstacles: A |
From: 1
Top Left Door
To: 6
R-Mode, Bottom Junction
Enter G-Mode with a full reserve tank. Wait for the wall pirate to jump on Samus to regain mobility and enter artificial morph. From on top of the second pit from the left, perform a simple bomb boost or springball and lay a powerbomb at the top of the jump. After it explodes, activate and hold X-Ray until the beam is at full width to exit G-Mode and remain in R-Mode. Samus will fall into the pit and avoid the lasers. Jump out and down to the bottom where the Violas are still alive. Kill one, collect its power bomb drop, then kill the other for energy. Shinecharge at the bottom runway and use heat damage to interrupt. Entrance condition: {
"comeInWithGMode": {
"mode": "direct",
"morphed": true,
"mobility": "immobile"
}
}Requires: "h_heatProof"
{
"disableEquipment": "ETank"
}
{
"resourceAvailable": [
{
"type": "RegularEnergy",
"count": 99
}
]
}
{
"or": [
"h_artificialMorphSpringBall",
"h_artificialMorphBombs"
]
}
{
"resourceMissingAtMost": [
{
"type": "PowerBomb",
"count": 0
}
]
}
"h_artificialMorphPowerBomb"
{
"refill": [
"PowerBomb"
]
}
{
"partialRefill": {
"type": "ReserveEnergy",
"limit": 5
}
}Clears obstacles: A |
From: 2
Bottom Left Door
To: 1
Top Left Door
Climb up 1 screen. Entrance condition: {
"comeInWithGMode": {
"mode": "direct",
"morphed": false
}
}Requires: "canGModeXRayClimb"
{
"heatFrames": 1600
} |
From: 2
Bottom Left Door
To: 1
Top Left Door
Enter with G-mode direct, back up to between 1 and 6 pixels from the door transition, and activate X-ray to get very deep stuck in the door. Climb up 1 screen, and perform a turnaround buffered spin-jump away from the door to trigger the transition, bypassing any lock on the door. Entrance condition: {
"comeInWithGMode": {
"mode": "direct",
"morphed": false
}
}Requires: "canGModeXRayClimb" "h_heatProof" Bypasses door shell: true |
From: 2
Bottom Left Door
To: 2
Bottom Left Door
Requires: {
"enemyDamage": {
"enemy": "Viola",
"type": "contact",
"hits": 1
}
} |
From: 2
Bottom Left Door
To: 5
Bottom Junction
Entrance condition: {
"comeInWithGMode": {
"mode": "any",
"morphed": true
}
}Requires: "h_heatedGMode"
"h_artificialMorphMovement"
"h_artificialMorphPowerBomb"
{
"heatFrames": 0
}Clears obstacles: A |
From: 3
Bottom Right Door
To: 1
Top Left Door
Climb up 1 screen. Entrance condition: {
"comeInWithGMode": {
"mode": "direct",
"morphed": false
}
}Requires: "canGModeXRayClimb"
{
"heatFrames": 1650
} |
From: 3
Bottom Right Door
To: 3
Bottom Right Door
Requires: {
"enemyDamage": {
"enemy": "Viola",
"type": "contact",
"hits": 1
}
} |
From: 3
Bottom Right Door
To: 4
Top Right Door
Enter with G-mode direct, back up to between 1 and 6 pixels from the door transition, and activate X-ray to get very deep stuck in the door. Climb up 2 screens, and perform a turnaround buffered spin-jump away from the door to trigger the transition, bypassing any lock on the door. Entrance condition: {
"comeInWithGMode": {
"mode": "direct",
"morphed": false
}
}Requires: "canGModeXRayClimb" "h_heatProof" "canLongXRayClimb" Bypasses door shell: true |
From: 3
Bottom Right Door
To: 5
Bottom Junction
Place a Power Bomb at the top of the room, then exit G-mode to have the blocks above break. Entrance condition: {
"comeInWithGMode": {
"mode": "any",
"morphed": true
}
}Requires: "h_heatedGMode"
"h_artificialMorphMovement"
"h_artificialMorphPowerBomb"
{
"heatFrames": 0
}Clears obstacles: A |
|
Avoid getting hit by one of the pirate's stationary, invisible lasers on G-mode exit. Entrance condition: {
"comeInWithGMode": {
"mode": "any",
"morphed": true
}
}Requires: "h_heatedGModeOpenDifferentDoor" |
From: 4
Top Right Door
To: 1
Top Left Door
Fall behind the standing pirate and avoid getting hit by one of its stationary, invisible lasers, or the wall pirate. Kill the pirate while it is by the left door, which requires 3 Power Bombs. Exit G-mode and pause abuse to pick up it's drops before going through the door. Entrance condition: {
"comeInWithGMode": {
"mode": "any",
"morphed": true
}
}Requires: "canTrickyGMode"
{
"ammo": {
"type": "PowerBomb",
"count": 3
}
}
"h_heatedGModePauseAbuse" |
From: 4
Top Right Door
To: 1
Top Left Door
Fall behind the standing pirate and avoid getting hit by one of its stationary, invisible lasers, or the wall pirate. Crouch so that it can walk to the left door and kill it. Exit G-mode and pause abuse to pick up it's drops before going through the door. Entrance condition: {
"comeInWithGMode": {
"mode": "any",
"morphed": true
}
}Requires: "canTrickyGMode"
{
"enemyKill": {
"enemies": [
[
"Yellow Space Pirate (standing)"
]
]
}
}
"h_heatedGModePauseAbuse" |
From: 4
Top Right Door
To: 5
Bottom Junction
Fall behind the standing pirate in order to prevent it from placing invisible, stationary lasers over the way down. If entering in direct G-mode, it is possible to fall through the wall pirate, using the i-frames from the G-mode setup. If entering with Morph or a way to move while morphed, it is possible to land on the floating platform and manipulate the wall pirate into overloading the shots, making it safer to go down below. Place a Power Bomb then exit G-mode to break the blocks. Entrance condition: {
"comeInWithGMode": {
"mode": "any",
"morphed": true
}
}Requires: "h_heatedGMode"
"h_artificialMorphPowerBomb"
{
"heatFrames": 120
}Clears obstacles: A |
From: 5
Bottom Junction
To: 2
Bottom Left Door
Requires: {
"heatFrames": 175
}Exit condition: {
"leaveWithGModeSetup": {}
}Unlocks doors: {"types":["missiles","super"],"requires":[]}
{"types":["powerbomb"],"requires":["never"]} |
From: 5
Bottom Junction
To: 3
Bottom Right Door
Requires: {
"heatFrames": 175
}Exit condition: {
"leaveWithGModeSetup": {}
}Unlocks doors: {"types":["missiles","super"],"requires":[]}
{"types":["powerbomb"],"requires":["never"]} |
|
Requires: {
"ammo": {
"type": "Super",
"count": 1
}
}
{
"enemyDamage": {
"enemy": "Viola",
"type": "contact",
"hits": 1
}
} |
|
Entrance condition: {
"comeInWithGMode": {
"mode": "any",
"morphed": false
}
}Requires: {
"or": [
"h_heatedGModePauseAbuse",
"h_heatedGModeOpenDifferentDoor"
]
} |
|
Entrance condition: {
"comeInWithGMode": {
"mode": "any",
"morphed": false
}
}Requires: {
"or": [
"h_heatedGModePauseAbuse",
"h_heatedGModeOpenDifferentDoor"
]
} |
From: 2
Right Door
To: 2
Right Door
Entrance condition: {
"comeInNormally": {}
}Requires: {
"heatFrames": 150
}
{
"or": [
"canDash",
{
"heatFrames": 40
}
]
}Exit condition: {
"leaveWithGModeSetup": {}
}Unlocks doors: {"types":["super"],"requires":[]}
{"types":["missiles"],"requires":[{"heatFrames":70}]}
{"types":["powerbomb"],"requires":[{"heatFrames":250}]}Dev note: FIXME: Could maybe reduce the heat frames if coming from the farm or the left. |
From: 3
Left Farm Junction
To: 1
Left Door
Requires: {
"heatFrames": 280
}
{
"or": [
"canDash",
"canComplexGMode"
]
}Exit condition: {
"leaveWithGModeSetup": {}
}Unlocks doors: {"types":["super"],"requires":[]}
{"types":["missiles"],"requires":[{"heatFrames":130}]}
{"types":["powerbomb"],"requires":[{"heatFrames":350}]}Dev note: FIXME: Add a dashless setup with Ice. |
From: 1
Left Door
To: 1
Left Door
Wait at least 35 seconds for the Alcoon to jump back down before returning to the door, or kill it with a Power Bomb or SBA. Stand close to the transition and use X-Ray then hold left to leave the room before the door closes. Entrance condition: {
"comeInWithGMode": {
"mode": "direct",
"morphed": false
}
}Requires: "canRemoteAcquire" "h_heatedDirectGModeLeaveSameDoor" Collects items: 4 |
From: 1
Left Door
To: 2
Right Vertical Door
Overload PLMs using the camera scroll blocks just right of the downward passageway by the left door. Blindly traverse the maze until the end, where Samus will be stuck at the far right next to the shot block. Exit G-mode just one tile to the left, Morph, use a Bomb or Power Bomb to destroy the shot block and escape through the door. Entrance condition: {
"comeInWithGMode": {
"mode": "any",
"morphed": false
}
}Requires: "canOffScreenMovement"
"h_bombThings"
"h_heatedGModeOffCameraDoor"
{
"heatFrames": 200
} |
From: 1
Left Door
To: 2
Right Vertical Door
Be careful not to overload PLMs with the camera scroll blocks just right of the downward passageway by the left door; use the item to finish overloading PLMs. Blindly traverse the maze until the end, where Samus will be stuck at the far right next to the shot block. Exit G-mode just one tile to the left, Morph, use a Bomb or Power Bomb to destroy the shot block and escape through the door. Entrance condition: {
"comeInWithGMode": {
"mode": "direct",
"morphed": false
}
}Requires: "canRemoteAcquire"
"canOffScreenMovement"
"h_bombThings"
"h_heatedGModeOffCameraDoor"
{
"heatFrames": 200
}Collects items: 4 |
|
Entrance condition: {
"comeInWithGMode": {
"mode": "any",
"morphed": false
}
}Requires: "h_heatedGModeOpenDifferentDoor" |
|
Entrance condition: {
"comeInWithGMode": {
"mode": "any",
"morphed": false
}
}Requires: "h_heatedGMode"
{
"heatFrames": 0
} |
From: 1
Left Door
To: 7
Junction By Lower Alcoons (Left of Spike Pits)
Crystal Flash near the edge - just before Samus goes off-screen - to clear the runway Alcoon. Shinecharge to the left, then weave down and into the Alcoon to interrupt. Entrance condition: {
"comeInWithGMode": {
"mode": "direct",
"morphed": false
}
}Requires: {
"or": [
"canWallJump",
"HiJump",
"canSpringBallJumpMidAir",
"SpaceJump",
{
"and": [
"canIBJ",
"canBombHorizontally",
"canJumpIntoIBJ"
]
},
{
"and": [
"canUseFrozenEnemies",
"canInsaneJump"
]
}
]
}
"h_CrystalFlashForReserveEnergy"
{
"canShineCharge": {
"usedTiles": 27,
"gentleUpTiles": 2,
"openEnd": 0
}
}
{
"or": [
"canDownBack",
"canTrickyJump"
]
}
{
"or": [
{
"and": [
{
"disableEquipment": "ETank"
},
{
"autoReserveTrigger": {}
},
"canRModeSparkInterrupt",
{
"enemyDamage": {
"enemy": "Alcoon",
"type": "contact",
"hits": 1
}
}
]
},
{
"and": [
"canReserveTriggerBufferXRay",
{
"autoReserveTrigger": {
"implicitHeatFrames": "no"
}
},
"canRModePauseAbuseSparkInterrupt",
{
"heatFrames": 30
}
]
}
]
}Clears obstacles: A |
|
It is possible to climb up with a tricky dash jump and no wall jump. Either kill the Alcoon before it spawns any stationary, invisible fireballs, or let the right alcoons shoot enough to overload projectiles. Entrance condition: {
"comeInWithGMode": {
"mode": "any",
"morphed": false
}
}Requires: {
"or": [
"canWallJump",
"HiJump",
"canSpringBallJumpMidAir",
"SpaceJump",
"canUseFrozenEnemies",
{
"and": [
"canTrickyDashJump",
"canTrickyDodgeEnemies"
]
}
]
}
"h_heatedGModeOpenDifferentDoor" |
From: 3
Bottom Horizontal Door
To: 1
Left Door
Entrance condition: {
"comeInWithGMode": {
"mode": "any",
"morphed": true
}
}Requires: {
"or": [
{
"and": [
"h_artificialMorphSpringBall",
"h_artificialMorphSpringBallBombJump"
]
},
{
"and": [
"h_artificialMorphIBJ",
"h_artificialMorphBombHorizontally"
]
}
]
}
"h_heatedGModeOpenDifferentDoor" |
From: 3
Bottom Horizontal Door
To: 2
Right Vertical Door
PLMs will be overloaded using the camera scroll blocks while climbing the room. Blindly traverse the maze until the end, where Samus will be stuck at the far right next to the shot block. Exit G-mode just one tile to the left, Morph, use a Bomb or Power Bomb to destroy the shot block and escape through the door. Note that it is possible to climb up with a tricky dash jump and no wall jump. Either kill the Alcoon before it spawns and stationary, invisible lasers, or let the right alcoons shoot enough to overload projectiles. Entrance condition: {
"comeInWithGMode": {
"mode": "any",
"morphed": false
}
}Requires: "canOffScreenMovement"
{
"or": [
"canWallJump",
"HiJump",
"canSpringBallJumpMidAir",
"SpaceJump",
"canUseFrozenEnemies",
"canIBJ",
{
"and": [
"canTrickyDashJump",
"canTrickyDodgeEnemies"
]
}
]
}
"h_bombThings"
"h_heatedGModeOffCameraDoor"
{
"heatFrames": 200
} |
From: 3
Bottom Horizontal Door
To: 2
Right Vertical Door
It is tricky to climb the room without fully overloading PLMs. With Ice and either HiJump or Spring Ball, freeze the left Alcoon to the right of where it jumps out of the ground. With HiJump, spin jump off of it and land directly on the middle stair platform. With Spring Ball, morph on top of the Alcoon, jump to barely land on the lowest platform while avoiding the camera scroll blocks one tile above, then use Spring Ball again to jump to the next platform. Alternatively, with Spring Ball and either HiJump, Bombs, or Power Bombs, jump to barely land on the lowest platform while avoiding the camera scroll blocks one tile above, then use Spring Ball again to jump to the next platform. The first jump can be done with HiJump or a bomb boost into Spring Ball jump. Once up above, unmorph and get onto the edge of the runway leading right, then run through the camera scroll blocks to reach the item. This will finish overloading PLMs. Blindly traverse the maze until the end, where Samus will be stuck at the far right next to the shot block. Exit G-mode just one tile to the left, Morph, use a Bomb or Power Bomb to destroy the shot block and escape through the door. There is a row of camera scroll blocks two-tiles above the bottom left platform, and a column two-tiles away from the right of the gap in front of the left door. Entrance condition: {
"comeInWithGMode": {
"mode": "direct",
"morphed": false
}
}Requires: "canRemoteAcquire"
"canOffScreenMovement"
"canTrickyGMode"
{
"or": [
{
"and": [
"canTrickyUseFrozenEnemies",
"HiJump"
]
},
{
"and": [
"canTrickyUseFrozenEnemies",
"h_useSpringBall"
]
},
{
"and": [
"HiJump",
"h_useSpringBall"
]
},
"canSpringBallBombJump"
]
}
"h_bombThings"
"h_heatedGModeOffCameraDoor"
{
"heatFrames": 200
}Collects items: 4 |
From: 3
Bottom Horizontal Door
To: 3
Bottom Horizontal Door
It is tricky to climb the room without fully overloading PLMs. With Spring Ball, jump to barely land on the lowest platform while avoiding the camera scroll blocks one tile above, then use Spring Ball again to jump to the next platform. The first jump can be done with HiJump or a bomb boost into Spring Ball jump. Up above, unmorph and get onto the edge of the runway leading right, then run through the camera scroll blocks to reach the item. Wait at least 35 seconds for the Alcoon to jump back down before returning to the door, or kill it with a Power Bomb or SBA. Stand close to the transition and use X-Ray then hold right to leave the room before the door closes. Note that spending any extra frames in the camera scroll blocks will overload PLMs before reaching the item and prevent remote acquiring it. There is a row of camera scroll blocks two-tiles above the bottom left platform, and a column two-tiles away from the right of the gap in front of the left door. Entrance condition: {
"comeInWithGMode": {
"mode": "direct",
"morphed": true
}
}Requires: "canRemoteAcquire"
"canTrickyGMode"
"h_artificialMorphSpringBall"
{
"or": [
"HiJump",
"h_artificialMorphSpringBallBombJump"
]
}
"h_heatedDirectGModeLeaveSameDoor"Collects items: 4 |
From: 3
Bottom Horizontal Door
To: 3
Bottom Horizontal Door
It is tricky to climb the room without fully overloading PLMs. Freeze the left Alcoon to the right of where it jumps out of the ground. With HiJump, spin jump off of it and land directly on the middle stair platform. With Spring Ball, morph on top of the Alcoon, jump to barely land on the lowest platform while avoiding the camera scroll blocks one tile above, then use Spring Ball again to jump to the next platform. Up above, get onto the edge of the runway leading right, then run through the camera scroll blocks to reach the item. Wait at least 35 seconds for the Alcoon to jump back down before returning to the door, or kill it with a Power Bomb or SBA. Stand close to the transition and use X-Ray then hold right to leave the room before the door closes. Note that spending any extra frames in the camera scroll blocks will overload PLMs before reaching the item and prevent remote acquiring it. There is a row of camera scroll blocks two-tiles above the bottom left platform, and a column two-tiles away from the right of the gap in front of the left door. Entrance condition: {
"comeInWithGMode": {
"mode": "direct",
"morphed": false
}
}Requires: "canRemoteAcquire"
"canTrickyGMode"
"canTrickyUseFrozenEnemies"
{
"or": [
"HiJump",
"h_useSpringBall"
]
}
{
"or": [
"canDash",
"Morph"
]
}
"h_heatedDirectGModeLeaveSameDoor"Collects items: 4 |
|
It is possible to climb up with a tricky dash jump and no wall jump. Either kill the Alcoon before it spawns any stationary, invisible fireballs, or let the right Alcoons shoot enough to overload projectiles. Entrance condition: {
"comeInWithGMode": {
"mode": "any",
"morphed": false
}
}Requires: "h_heatedGMode"
{
"or": [
"canWallJump",
"HiJump",
"canSpringBallJumpMidAir",
"SpaceJump",
"canUseFrozenEnemies",
{
"and": [
"canTrickyDashJump",
"canTrickyDodgeEnemies"
]
}
]
}
{
"heatFrames": 0
} |
|
It is possible to climb up with a tricky dash jump and no wall jump. Either kill the Alcoon before it spawns any stationary, invisible fireballs, or let the right Alcoons shoot enough to overload projectiles. Entrance condition: {
"comeInWithGMode": {
"mode": "any",
"morphed": true
}
}Requires: "h_heatedGMode"
{
"or": [
{
"and": [
"h_artificialMorphSpringBall",
"h_artificialMorphSpringBallBombJump"
]
},
{
"and": [
"h_artificialMorphIBJ",
"h_artificialMorphBombHorizontally"
]
}
]
}
{
"heatFrames": 0
} |
From: 3
Bottom Horizontal Door
To: 7
Junction By Lower Alcoons (Left of Spike Pits)
Kill the spike Alcoons before climbing to the upper runway. Be sure to jump over the invisible fireball projectiles. Crystal Flash at the top right, just before Samus goes off-screen, to clear the runway Alcoon. Shinecharge to the left, then weave down and into the Alcoon to interrupt. Entrance condition: {
"comeInWithGMode": {
"mode": "direct",
"morphed": false
}
}Requires: {
"or": [
"canWallJump",
"HiJump",
"canSpringBallJumpMidAir",
"SpaceJump",
{
"and": [
"canIBJ",
"canBombHorizontally",
"canJumpIntoIBJ"
]
},
{
"and": [
"canUseFrozenEnemies",
"canInsaneJump"
]
}
]
}
"h_CrystalFlashForReserveEnergy"
{
"canShineCharge": {
"usedTiles": 27,
"gentleUpTiles": 2,
"openEnd": 0
}
}
{
"or": [
"canDownBack",
"canTrickyJump"
]
}
{
"or": [
{
"and": [
{
"disableEquipment": "ETank"
},
{
"autoReserveTrigger": {}
},
"canRModeSparkInterrupt",
{
"enemyDamage": {
"enemy": "Alcoon",
"type": "contact",
"hits": 1
}
}
]
},
{
"and": [
"canReserveTriggerBufferXRay",
{
"autoReserveTrigger": {
"implicitHeatFrames": "no"
}
},
"canRModePauseAbuseSparkInterrupt",
{
"heatFrames": 30
}
]
}
]
}Clears obstacles: A |
|
Entrance condition: {
"comeInWithGMode": {
"mode": "any",
"morphed": false
}
}Requires: "h_heatedGModeOpenDifferentDoor" |
|
Cross to the center platform to get to the shinecharge runway. Crystal Flash and then use the acid left of the elevator platform to interrupt. Time the entry so that the acid is low to ensure Samus can escape: if not using pause abuse, this must include the time taken for the reserve trigger. Entrance condition: {
"comeInWithGMode": {
"mode": "direct",
"morphed": false
}
}Requires: "h_CrystalFlashForReserveEnergy"
{
"canShineCharge": {
"usedTiles": 24.5,
"openEnd": 1
}
}
{
"or": [
{
"and": [
"canReserveTriggerBufferXRay",
{
"autoReserveTrigger": {
"implicitHeatFrames": "no"
}
}
]
},
{
"autoReserveTrigger": {}
}
]
}
{
"or": [
"canRModePauseAbuseSparkInterrupt",
{
"and": [
"canRModeSparkInterrupt",
{
"acidFrames": 30
},
{
"heatFrames": 70
}
]
}
]
}
{
"heatFrames": 90
} |
|
Entrance condition: {
"comeInWithGMode": {
"mode": "any",
"morphed": false
}
}Requires: {
"heatFrames": 0
} |
|
Entrance condition: {
"comeInWithGMode": {
"mode": "any",
"morphed": false
}
}Requires: "h_heatedGModeOpenDifferentDoor" |
|
Cross to the center platform to get to the shinecharge runway. Crystal Flash and then use the acid left of the elevator platform to interrupt. Time the entry so that the acid is low to ensure Samus can escape: if not using pause abuse, this must include the time taken for the reserve trigger. Entrance condition: {
"comeInWithGMode": {
"mode": "direct",
"morphed": false
}
}Requires: "h_CrystalFlashForReserveEnergy"
{
"canShineCharge": {
"usedTiles": 24.5,
"openEnd": 1
}
}
{
"or": [
{
"and": [
"canReserveTriggerBufferXRay",
{
"autoReserveTrigger": {
"implicitHeatFrames": "no"
}
}
]
},
{
"autoReserveTrigger": {}
}
]
}
{
"or": [
"canRModePauseAbuseSparkInterrupt",
{
"and": [
"canRModeSparkInterrupt",
{
"acidFrames": 30
},
{
"heatFrames": 70
}
]
}
]
}
{
"heatFrames": 90
} |
|
Entrance condition: {
"comeInWithGMode": {
"mode": "any",
"morphed": false
}
}Requires: {
"heatFrames": 0
} |
|
Shinecharge either right to left or left to right before horizontally sparking across the room. Use the raised step to the left or the lowered step to the right to be able to find the end of the runway. Entrance condition: {
"comeInWithGMode": {
"mode": "any",
"morphed": false
}
}Requires: "canOffScreenMovement"
"canHorizontalMidairShinespark"
{
"canShineCharge": {
"usedTiles": 24.5,
"openEnd": 1
}
}
{
"shinespark": {
"frames": 75,
"excessFrames": 5
}
}
"h_heatedGModeOffCameraDoor" |
|
Space Jump across without falling. The Hibashi (fire pillars) can not hit Samus while off camera. Entrance condition: {
"comeInWithGMode": {
"mode": "any",
"morphed": false
}
}Requires: "canComplexGMode" "SpaceJump" "h_heatedGModeOffCameraDoor" |
|
Entrance condition: {
"comeInWithGMode": {
"mode": "any",
"morphed": false
}
}Requires: "h_heatedGModeOffCameraDoor" |
|
Entrance condition: {
"comeInWithGMode": {
"mode": "any",
"morphed": false
}
}Exit condition: {
"leaveWithGMode": {
"morphed": false
}
} |
|
Entrance condition: {
"comeInWithGMode": {
"mode": "any",
"morphed": false
}
}Requires: {
"heatFrames": 0
}Clears obstacles: door_1 |
|
Entrance condition: {
"comeInWithGMode": {
"mode": "any",
"morphed": false
}
}Requires: {
"heatFrames": 0
}Clears obstacles: door_2 |
|
Be careful to avoid the stationary, invisible projectiles that the pirates spawn from where they jump. It is possible to exit G-mode and quicky pause abuse, to collect the pirates' drops and get to the door. Requires: "h_heatedGMode"
{
"or": [
{
"ammo": {
"type": "Super",
"count": 6
}
},
{
"ammo": {
"type": "Missile",
"count": 36
}
}
]
}
{
"or": [
{
"heatFrames": 45
},
"h_heatedGModePauseAbuse"
]
}Clears obstacles: A Dev note: It is possible to enter the room in direct G-mode, kill the pirates, return to the open door, then exit G-mode and quickly touch the transition to awaken Zebes (but not get the metal pirates kill flag). This is not included, as it is a very niche knowledge check, and at that point, you might as well pause abuse to get the pirate drops and both flags. If Samus enters with 4 energy, it is also possible to collect the drops without pausing. FIXME: include a partialRefill to gain back energy from the drops (more with canDash than without). |
|
Be careful to avoid the stationary, invisible projectiles that the pirates spawn from where they jump. It is possible to exit G-mode and quicky pause abuse, to collect the pirates' drops and get to the door. Requires: "h_heatedGMode"
{
"or": [
"Plasma",
{
"and": [
"Charge",
"Spazer"
]
},
{
"and": [
"Charge",
"Wave"
]
},
{
"and": [
"Spazer",
"Ice",
"Wave"
]
},
{
"and": [
"canBePatient",
{
"or": [
{
"and": [
"Charge",
"Ice"
]
},
{
"and": [
"Spazer",
"Ice"
]
},
{
"and": [
"Spazer",
"Wave"
]
}
]
}
]
},
{
"and": [
"canBeVeryPatient",
{
"or": [
"Charge",
"Spazer"
]
}
]
}
]
}
{
"or": [
{
"heatFrames": 45
},
"h_heatedGModePauseAbuse"
]
}Clears obstacles: A Dev note: It is possible to enter the room in direct G-mode, kill the pirates, return to the open door, then exit G-mode and quickly touch the transition to awaken Zebes (but not get the metal pirates kill flag). This is not included, as it is a very niche knowledge check, and at that point, you might as well pause abuse to get the pirate drops and both flags. If Samus enters with 4 energy, it is also possible to collect the drops without pausing. FIXME: include a partialRefill to gain back energy from the drops (more with canDash than without). |
|
Requires: "h_heatedGMode"
{
"heatFrames": 45
} |
|
The pirates will place stationary, invisible projectiles when they jump or Samus runs through them, making that portion of the runway unusable without taking damage. To prevent this, it is important to shinecharge with only a small portion of the room to prevent the opposite pirate from placing a projectile. After shinecharging through the first pirate, stand between where it jumps, then near the end of the shinecharge timer, spark vertically with low energy to kill the pirate. It is possible to exit G-mode and quicky pause abuse, to collect the pirates' drops and get to the door. Requires: "h_heatedGMode"
"canTrickyGMode"
{
"notable": "Speed Echoes Kill"
}
{
"canShineCharge": {
"usedTiles": 18,
"openEnd": 1
}
}
{
"shinespark": {
"frames": 9,
"excessFrames": 9
}
}
{
"shinespark": {
"frames": 9,
"excessFrames": 9
}
}
"canUseSpeedEchoes"
{
"or": [
{
"heatFrames": 45
},
"h_heatedGModePauseAbuse"
]
}Clears obstacles: A Dev note: It is possible to enter the room in direct G-mode, kill the pirates, return to the open door, then exit G-mode and quickly touch the transition to awaken Zebes (but not get the metal pirates kill flag). This is not included, as it is a very niche knowledge check, and at that point, you might as well pause abuse to get the pirate drops and both flags. If Samus enters with 4 energy, it is also possible to collect the drops without pausing. FIXME: include a partialRefill to gain back energy from the drops (more with canDash than without). |
|
Be careful to avoid the stationary, invisible projectiles that the pirates spawn from where they jump. It is possible to exit G-mode and quicky pause abuse, to collect the pirates' drops and open the door and leave. Otherwise, it requires exiting G-mode at the left side of the room, shooting the door and returning to the right side of the room. Requires: "h_heatedGMode"
{
"or": [
{
"ammo": {
"type": "Super",
"count": 6
}
},
{
"ammo": {
"type": "Missile",
"count": 36
}
}
]
}
{
"or": [
{
"heatFrames": 190
},
"h_heatedGModePauseAbuse"
]
}Clears obstacles: A Dev note: FIXME: These heat frames would be lower if both doors were locked and either could be used to set the metal pirates kill flag. It is possible to enter the room in direct G-mode, kill the pirates, return to the open door, then exit G-mode and quickly touch the transition to awaken Zebes (but not get the metal pirates kill flag). This is not included, as it is a very niche knowledge check, and at that point, you might as well pause abuse to get the pirate drops and both flags. If Samus enters with 4 energy, it is also possible to collect the drops without pausing. FIXME: include a partialRefill to gain back energy from the drops (more with canDash than without). |
|
Be careful to avoid the stationary, invisible projectiles that the pirates spawn from where they jump. It is possible to exit G-mode and quicky pause abuse, to collect the pirates' drops and open the door and leave. Otherwise, it requires exiting G-mode at the left side of the room, shooting the door and returning to the right side of the room. Requires: "h_heatedGMode"
{
"or": [
"Plasma",
{
"and": [
"Charge",
"Spazer"
]
},
{
"and": [
"Charge",
"Wave"
]
},
{
"and": [
"Spazer",
"Ice",
"Wave"
]
},
{
"and": [
"canBePatient",
{
"or": [
{
"and": [
"Charge",
"Ice"
]
},
{
"and": [
"Spazer",
"Ice"
]
},
{
"and": [
"Spazer",
"Wave"
]
}
]
}
]
},
{
"and": [
"canBeVeryPatient",
{
"or": [
"Charge",
"Spazer"
]
}
]
}
]
}
{
"or": [
{
"heatFrames": 190
},
"h_heatedGModePauseAbuse"
]
}Clears obstacles: A Dev note: FIXME: These heat frames would be lower if both doors were locked and either could be used to set the metal pirates kill flag. It is possible to enter the room in direct G-mode, kill the pirates, return to the open door, then exit G-mode and quickly touch the transition to awaken Zebes (but not get the metal pirates kill flag). This is not included, as it is a very niche knowledge check, and at that point, you might as well pause abuse to get the pirate drops and both flags. If Samus enters with 4 energy, it is also possible to collect the drops without pausing. FIXME: include a partialRefill to gain back energy from the drops (more with canDash than without). |
|
Requires: "h_heatedGMode"
{
"heatFrames": 45
} |
|
The pirates will place stationary, invisible projectiles when they jump or Samus runs through them, making that portion of the runway unusable without taking damage. To prevent this, it is important to shinecharge with only a small portion of the room to prevent the opposite pirate from placing a projectile. After shinecharging through the first pirate, stand between where it jumps, then near the end of the shinecharge timer, spark vertically with low energy to kill the pirate. It is possible to exit G-mode and quicky pause abuse, to collect the pirates' drops and open the door and leave. Otherwise, it requires exiting G-mode at the left side of the room, shooting the door and returning to the right side of the room. Requires: "h_heatedGMode"
"canTrickyGMode"
{
"notable": "Speed Echoes Kill"
}
{
"canShineCharge": {
"usedTiles": 18,
"openEnd": 1
}
}
{
"shinespark": {
"frames": 9,
"excessFrames": 9
}
}
{
"shinespark": {
"frames": 9,
"excessFrames": 9
}
}
"canUseSpeedEchoes"
{
"or": [
{
"heatFrames": 190
},
"h_heatedGModePauseAbuse"
]
}Clears obstacles: A Dev note: FIXME: These heat frames would be lower if both doors were locked and either could be used to set the metal pirates kill flag. It is possible to enter the room in direct G-mode, kill the pirates, return to the open door, then exit G-mode and quickly touch the transition to awaken Zebes (but not get the metal pirates kill flag). This is not included, as it is a very niche knowledge check, and at that point, you might as well pause abuse to get the pirate drops and both flags. If Samus enters with 4 energy, it is also possible to collect the drops without pausing. FIXME: include a partialRefill to gain back energy from the drops (more with canDash than without). |
From: 1
Bottom Left Door
To: 1
Bottom Left Door
Samus will not take a hit by the Multiviola, as she still has i-frames when it reaches her. Entrance condition: {
"comeInWithGMode": {
"mode": "direct",
"morphed": false
}
}Exit condition: {
"leaveWithGMode": {
"morphed": false
}
} |
From: 1
Bottom Left Door
To: 1
Bottom Left Door
Samus will not take a hit by the Multiviola, as she still has i-frames when it reaches her. Entrance condition: {
"comeInWithGMode": {
"mode": "direct",
"morphed": true
}
}Exit condition: {
"leaveWithGMode": {
"morphed": true
}
} |
|
If Samus has less than 73 Energy, she will still have i-frames when the Multiviola hits and she will need to wait until the Dessgeega comes. If needed, hold forward when getting hit, to prevent getting knocked out of the room. Requires: {
"or": [
{
"and": [
{
"resourceAvailable": [
{
"type": "RegularEnergy",
"count": 75
}
]
},
{
"enemyDamage": {
"enemy": "Multiviola",
"type": "contact",
"hits": 1
}
}
]
},
{
"and": [
"canTrickyGMode",
{
"resourceAvailable": [
{
"type": "RegularEnergy",
"count": 73
}
]
},
{
"enemyDamage": {
"enemy": "Multiviola",
"type": "contact",
"hits": 1
}
}
]
},
{
"enemyDamage": {
"enemy": "Dessgeega",
"type": "contact",
"hits": 1
}
}
]
}Dev note: This is rounded up to 75 Energy, because gaining artificial morph at 73 Energy would be frame-perfect, because Samus gets hit on the last possible frame. FIXME: This should require canTrickyGMode if high Energy, artificial morphing, and needing to remain in-room, because it's easy to touch the transition, as this is not currently representable, this should be considered when adding in-room G-mode strats where it might apply. |
From: 1
Bottom Left Door
To: 1
Bottom Left Door
Requires: {
"heatFrames": 145
}Exit condition: {
"leaveWithGModeSetup": {}
}Unlocks doors: {"types":["missiles","super"],"requires":[]}
{"types":["powerbomb"],"requires":["canUseIFrames",{"heatFrames":150}]}Dev note: Unlocking the door with a Power Bomb will give Samus i-frames for one or two Dessgeega hits. |
From: 1
Bottom Left Door
To: 6
Bottom Right Corner Junction
Crystal Flash immediately on entry, do so very quickly in order to have the Power Bomb go off before the Dessgeega gets to Samus. Short-charge to run through the second Desgeega and use the third to damage down if needed, then go back and run to full speed again. Follow the Multiviola to the right wall but stop before running through it. Take a hit from the Multiviola if needed, then run left with i-frames to get ahead of it. Windup and get hit by the Multiviola to interrupt, then leave. Note that a mobile G-Mode entry doesn't get hit by the Multiviola due to i-frames. For Immobile, enter with a small enough amount of Energy to where Samus will be at or below 50 after the Multiviola hit and can immediately Crystal Flash. Entrance condition: {
"comeInWithGMode": {
"mode": "direct",
"morphed": false
}
}Requires: {
"disableEquipment": "ETank"
}
"canTrickyDodgeEnemies"
"h_CrystalFlashForReserveEnergy"
{
"getBlueSpeed": {
"usedTiles": 24,
"openEnd": 0
}
}
"h_shinechargeMaxRunway"
{
"or": [
{
"and": [
"canReserveTriggerBufferXRay",
{
"autoReserveTrigger": {
"implicitHeatFrames": "no"
}
},
{
"heatFrames": 76
}
]
},
{
"and": [
{
"autoReserveTrigger": {}
},
{
"heatFrames": 44
}
]
}
]
}
"canRModeSparkInterrupt"Clears obstacles: C, E, F |
From: 9
Junction Below Crumble Blocks, Set Up to Clip
To: 2
Top Right Door
Breaking only the left side bomb blocks makes it easier for the Multiviola to enter a pattern where it will pass through the top shot block. The Multiviola needs to go through the crumble blocks moving to the right, if it goes through moving left it won't clear the shot blocks. If all the bomb blocks are broken, standing on the right side of the crumbles will allow the Multiviola to pass through the top shot block. Requires: {
"notable": "Multiviola Ice Clip"
}
"canBePatient"
"canTrickyGMode"
"h_heatProof"
"canTrickyJump"
{
"enemyDamage": {
"enemy": "Multiviola",
"type": "contact",
"hits": 1
}
}
{
"or": [
{
"and": [
"h_preciseIceClip",
{
"or": [
{
"and": [
"h_useMorphBombs",
{
"or": [
"h_useSpringBall",
"can4HighMidAirMorph"
]
}
]
},
{
"ammo": {
"type": "PowerBomb",
"count": 1
}
},
{
"obstaclesCleared": [
"B"
]
}
]
}
]
},
{
"and": [
"canTrickyCarryFlashSuit",
"h_preciseIceClip",
{
"useFlashSuit": {}
},
{
"shinespark": {
"frames": 11,
"excessFrames": 5
}
}
]
},
{
"and": [
"h_XRayMorphIceClip",
{
"or": [
"Bombs",
"ScrewAttack",
{
"ammo": {
"type": "PowerBomb",
"count": 1
}
},
{
"obstaclesCleared": [
"B"
]
}
]
}
]
}
]
}Exit condition: {
"leaveWithGModeSetup": {}
}Unlocks doors: {"types":["ammo"],"requires":[]} |
|
Entrance condition: {
"comeInWithGMode": {
"mode": "any",
"morphed": false
}
}Requires: {
"or": [
"ScrewAttack",
{
"haveBlueSuit": {}
}
]
}
{
"or": [
"SpaceJump",
"canTrickyJump"
]
}
"h_heatedGModeOpenDifferentDoor"Exit condition: {
"leaveNormally": {}
}Unlocks doors: {"types":["missiles"],"requires":[{"heatFrames":50}]}
{"types":["super"],"requires":[]}
{"types":["powerbomb"],"requires":[{"or":["SpaceJump","canInsaneJump",{"acidFrames":15}]}]} |
|
Entrance condition: {
"comeInWithGMode": {
"mode": "any",
"morphed": false
}
}Requires: {
"haveBlueSuit": {}
}
{
"or": [
"SpaceJump",
{
"and": [
"h_useSpringBall",
{
"acidFrames": 40
}
]
},
{
"and": [
"h_useSpringBall",
"canSpringFling",
"canInsaneJump"
]
},
{
"acidFrames": 80
}
]
}
"h_heatedGModeOpenDifferentDoor"Exit condition: {
"leaveNormally": {}
}Unlocks doors: {"types":["missiles"],"requires":[{"heatFrames":50},{"acidFrames":50}]}
{"types":["super"],"requires":[]}
{"types":["powerbomb"],"requires":[{"heatFrames":110},{"acidFrames":110}]}Dev note: FIXME: Artificial morph Spring Ball could also be an option. |
|
Entrance condition: {
"comeInWithGMode": {
"mode": "any",
"morphed": false
}
}Requires: "canDash"
"ScrewAttack"
{
"or": [
"SpaceJump",
"canTrickyGMode",
{
"and": [
"canTrickyJump",
"canPreciseWallJump",
{
"acidFrames": 10
}
]
},
{
"and": [
"canTrickyJump",
{
"acidFrames": 24
}
]
}
]
}
"h_heatedGModeOpenDifferentDoor"Exit condition: {
"leaveNormally": {}
}Unlocks doors: {"types":["missiles"],"requires":[{"heatFrames":50},{"acidFrames":50}]}
{"types":["super"],"requires":[]}
{"types":["powerbomb"],"requires":[{"heatFrames":110},{"acidFrames":110}]} |
|
Requires: {
"enemyDamage": {
"enemy": "Holtz",
"type": "contact",
"hits": 1
}
} |
|
Entrance condition: {
"comeInNormally": {}
}Requires: {
"heatFrames": 110
}Exit condition: {
"leaveWithGModeSetup": {}
}Unlocks doors: {"types":["missiles","super"],"requires":[]}
{"types":["powerbomb"],"requires":["never"]}Dev note: FIXME: Could maybe reduce the heat frames if coming from the farm or the right. FIXME: A Power Bomb can be used, but it's complex enough to be a separate strat. |
|
Clear the two Holtzes at the door, then Crystal Flash. Avoid killilng all the Zebbos as they don't respawn during G-Mode. Entrance condition: {
"comeInWithGMode": {
"mode": "direct",
"morphed": false
}
}Requires: "Gravity"
{
"or": [
"canTrickyDodgeEnemies",
{
"enemyKill": {
"enemies": [
[
"Holtz",
"Holtz"
]
],
"explicitWeapons": [
"ScrewAttack",
"Plasma",
"Super",
"Ice+Wave+Spazer"
]
}
}
]
}
"h_CrystalFlashForReserveEnergy"
{
"canShineCharge": {
"usedTiles": 38,
"openEnd": 0
}
}
{
"acidFrames": 115
}
{
"autoReserveTrigger": {
"maxReserveEnergy": 95
}
}
"canRModeSparkInterrupt"
{
"heatFrames": 80
} |
|
Kill or dodge the Holtz while crossing the room. With Plasma and Wave or Ice, it is possible to quickly kill the Holtz while at the left door. Otherwise, in direct G-mode, jump immediately on entry while Samus still has i-frames to get to the left of the first Zebbo and kill it, and in indirect G-mode, move to the left then run under the Holtzes. Carefully cross the room while killing the Holtz without luring them, or dodge them. It is possible to kill a Zebbo by the door and pause abuse to grab its Energy drop on G-mode exit, which requires not killing the right Zebbo until it is in location. Entrance condition: {
"comeInWithGMode": {
"mode": "any",
"morphed": false
}
}Requires: {
"or": [
"ScrewAttack",
{
"haveBlueSuit": {}
},
"canInsaneJump",
{
"and": [
"canTrickyDodgeEnemies",
"Plasma"
]
},
{
"enemyDamage": {
"enemy": "Holtz",
"type": "contact",
"hits": 1
}
}
]
}
{
"or": [
"h_heatedGModePauseAbuse",
"h_heatedGModeOpenDifferentDoor"
]
} |
|
Clear the two Holtzes at the door and Crystal Flash. Avoid killing all the Zebbos as they do not respawn in G-Mode. Run across the acid then jump up to a Zebbo pipe for the interrupt. Entrance condition: {
"comeInWithGMode": {
"mode": "direct",
"morphed": false
}
}Requires: {
"disableEquipment": "ETank"
}
"Gravity"
"h_CrystalFlashForReserveEnergy"
{
"canShineCharge": {
"usedTiles": 38,
"openEnd": 0
}
}
{
"acidFrames": 115
}
{
"autoReserveTrigger": {
"maxReserveEnergy": 95
}
}
"canRModeSparkInterrupt"
{
"heatFrames": 80
} |
|
Kill or dodge the Holtz while crossing the room. It's possible to kill the Holtz while staying safe; some of them can also be lured under platforms and out of the way. Entrance condition: {
"comeInWithGMode": {
"mode": "any",
"morphed": false
}
}Requires: {
"or": [
"canTrickyDodgeEnemies",
"ScrewAttack",
{
"haveBlueSuit": {}
},
"Plasma",
{
"enemyDamage": {
"enemy": "Zebbo",
"type": "contact",
"hits": 1
}
}
]
}
"h_heatedGModeOpenDifferentDoor" |
|
Kill or dodge the Holtz while crossing the room. It's possible to kill the Holtz while staying safe; some of them can also be lured under platforms and out of the way. It is possible to kill a Zebbo by the door and pause abuse to grab its Energy drop on G-mode exit, which requires manipulating or killing the Holtz while not killing the left Zebbo until it is in location. Entrance condition: {
"comeInWithGMode": {
"mode": "any",
"morphed": false
}
}Requires: {
"or": [
"ScrewAttack",
{
"haveBlueSuit": {}
},
"canBeVeryPatient",
{
"and": [
"canBePatient",
{
"or": [
"Ice",
"Wave",
"Spazer"
]
}
]
},
"Plasma",
"canInsaneJump",
{
"enemyDamage": {
"enemy": "Zebbo",
"type": "contact",
"hits": 1
}
}
]
}
"h_heatedGModePauseAbuse" |
|
Immeidately jump over both Holtz and get back to the door quickly. Alternatively it is possible to wait by the door then time the lure of the second Holtz to sync the two together. Entrance condition: {
"comeInNormally": {}
}Requires: {
"heatFrames": 150
}
"canTrickyJump"
{
"or": [
"canDash",
{
"and": [
{
"haveBlueSuit": {}
},
{
"heatFrames": 40
}
]
}
]
}Exit condition: {
"leaveWithGModeSetup": {}
}Unlocks doors: {"types":["super"],"requires":[]}
{"types":["missiles"],"requires":[{"heatFrames":225}]}
{"types":["powerbomb"],"requires":[{"heatFrames":650}]}Dev note: FIXME: Could probably reduce the heat frames if coming from the farm or the left. |
|
Overload PLMs by rolling through the camera scroll block just right of the bomb blocks, then roll through the morph tunnel and use a bomb boost or Spring Ball to escape the tunnel and get to the door. Without a way to boost out of the tunnel, exit G-mode and use a two-turn X-Ray climb, then ceiling clip by jumping out of the tunnel. Note that the Kihunter is global, and will hit Samus. Without any way to know where the Kihunter will be, a contact hit is expected without Screw Attack or blue suit. Entrance condition: {
"comeInWithGMode": {
"mode": "any",
"morphed": true
},
"comesThroughToilet": "any"
}Requires: "h_artificialMorphMovement"
"canOffScreenMovement"
{
"or": [
"h_artificialMorphBombThings",
"h_artificialMorphSpringBall",
{
"and": [
"canXRayClimb",
"canCeilingClip",
{
"heatFrames": 450
},
{
"or": [
"canTrickyGMode",
{
"heatFrames": 200
}
]
}
]
}
]
}
{
"or": [
"ScrewAttack",
{
"haveBlueSuit": {}
},
{
"enemyDamage": {
"enemy": "Kihunter (red)",
"type": "contact",
"hits": 1
}
}
]
}
"h_heatedGModeOffCameraDoor"Exit condition: {
"leaveNormally": {}
}Unlocks doors: {"types":["missiles"],"requires":[{"heatFrames":50}]}
{"types":["super"],"requires":[]}
{"types":["powerbomb"],"requires":[{"heatFrames":110}]}Dev note: It is also possible, but not expected, to kill the Kihunter by the door and use its drop to get out of the room. Because this is blind and there doesn't appear to be a way to fix the camera, it is not expected to climb higher in the room. FIXME: These door unlock heat frames could be lowered, but it depends on if the Kihunter is alive, and if Samus had to exit G-mode to get out of the tunnel. FIXME: It is possible to pause abuse a drop from the Kihunter. |
|
Overload PLMs by rolling through the camera scroll block just left of the bomb blocks, then roll through to the door. Jump and shoot down to hit the door, or use Grapple to save a few heat frames. Entrance condition: {
"comeInWithGMode": {
"mode": "any",
"morphed": true
}
}Requires: "h_artificialMorphMovement"
{
"heatFrames": 30
}
"h_heatedGModeOffCameraDoor"Dev note: This door is slightly slower to get through than normal off-camera doors because it's vertical. |
From: 3
Middle Right Door
To: 3
Middle Right Door
Requires: {
"enemyDamage": {
"enemy": "Kihunter (red)",
"type": "contact",
"hits": 1
}
} |
From: 3
Middle Right Door
To: 3
Middle Right Door
Requires: {
"heatFrames": 150
}Exit condition: {
"leaveWithGModeSetup": {}
} |
|
Dodge or kill the Kihunters while climbing the room. It is possible to take it relatively slow, as there is no heat damage. Shoot the first shot block before exiting G-mode to then jump through it immediately after using X-Ray to save a small amount of heat damage. Note that with direct G-mode, it is possible to jump through the first Kihunter immediately on entry, as Samus will have i-frames. Entrance condition: {
"comeInWithGMode": {
"mode": "any",
"morphed": true
}
}Requires: {
"notable": "Kihunter Dodge"
}
"canTrickyDodgeEnemies"
{
"heatFrames": 125
}Dev note: Kill strats could be added, but it's not too hard to avoid them while taking it relatively slow. |
|
Requires: {
"not": "f_DefeatedRidley"
}
"canRiskPermanentLossOfAccess"
{
"enemyDamage": {
"enemy": "Ridley",
"type": "contact",
"hits": 1
}
} |
|
Requires: {
"heatFrames": 500
}
{
"not": "f_DefeatedRidley"
}
"canRiskPermanentLossOfAccess"Exit condition: {
"leaveWithGModeSetup": {}
}Dev note: Not likely to be possible, as it requires canRiskPermanentLossOfAccess and Ridley alive with the door unlocked. |
|
Enter the room in G-mode, perform a Crystal Flash, then lay an additional Power Bomb, preferably at the top of the room. The Power Bomb will not explode but will continually force Ridley into a corner of the room. If the Power Bomb is laid near the top of the room, then Ridley will be forced into the bottom of the room, making it easy to damage Ridley at the highest possible rate; if the Power Bomb is laid lower, Ridley will be forced to the top of room, and Samus will have to jump repeatedly to bring it on camera. in which case Ridley can still be damaged but more slowly and with some caution needed to avoid invisible fireballs. After reducing Ridley's health to zero, take damage from Ridley or an invisible fireball to trigger auto-reserves and exit G-mode. Then get grabbed by Ridley to finish the fight. Entrance condition: {
"comeInWithGMode": {
"mode": "any",
"morphed": false,
"mobility": "mobile"
}
}Requires: {
"notable": "G-Mode Crystal Flash Stuck Ridley"
}
"canComplexGMode"
"h_heatedGMode"
"h_CrystalFlash"
"h_usePowerBomb"
{
"or": [
{
"and": [
{
"or": [
"canWallJump",
"HiJump",
"canSpringBallJumpMidAir",
"SpaceJump"
]
},
{
"ridleyKill": {
"powerBombs": false,
"gMode": true,
"stuck": "bottom"
}
}
]
},
{
"ridleyKill": {
"powerBombs": false,
"gMode": true,
"stuck": "top"
}
}
]
}
{
"autoReserveTrigger": {}
}
{
"heatFrames": 520
}
{
"partialRefill": {
"type": "Energy",
"limit": 100
}
}Clears obstacles: f_DefeatedRidley, door_1 Sets flags: f_DefeatedRidley |
|
Enter the room in G-mode and quickly kill Ridley with 30 Supers. G-mode protects against heat damage but also causes Ridley's fireballs to be invisible and not move. As long as Ridley is swooping, not many fireballs will be placed, so delaying Ridley from pogoing can be helpful. Once Ridley begins pogoing, it generally becomes unsafe for Samus to jump high because of the risk of touching a fireball. By the end of the fight, projectiles will probably be overloaded, causing Ridley's drops not to spawn; they can be collected by exiting G-mode just before drops spawn, and pause abusing if necessary. Entrance condition: {
"comeInWithGMode": {
"mode": "any",
"morphed": false,
"mobility": "mobile"
}
}Requires: {
"notable": "G-Mode Ridley with 30 Supers"
}
"canTrickyGMode"
"h_heatedGMode"
{
"heatFrames": 0
}
{
"ammo": {
"type": "Super",
"count": 30
}
}
{
"or": [
{
"and": [
"h_heatedGModePauseAbuse",
{
"resourceAtMost": [
{
"type": "Energy",
"count": 1
}
]
},
{
"partialRefill": {
"type": "Energy",
"limit": 100
}
}
]
},
"free"
]
}
{
"noFlashSuit": {}
}Clears obstacles: f_DefeatedRidley, door_1 Sets flags: f_DefeatedRidley Dev note: FIXME: Leaving back through the open door while still in G-Mode is also possible, and free to do. |
|
Entrance condition: {
"comeInWithGMode": {
"mode": "direct",
"morphed": false
}
}Requires: {
"or": [
"SpaceJump",
"canWallJump",
{
"and": [
"canJumpIntoIBJ",
"canInsaneJump",
{
"or": [
"HiJump",
{
"and": [
"canLongIBJ",
"canDoubleBombJump"
]
}
]
}
]
},
{
"and": [
{
"or": [
"f_DefeatedRidley",
{
"obstaclesCleared": [
"f_DefeatedRidley"
]
}
]
},
{
"or": [
"canLongIBJ",
{
"and": [
"canJumpIntoIBJ",
"HiJump"
]
}
]
}
]
},
{
"and": [
"HiJump",
"canSpringBallJumpMidAir"
]
},
{
"and": [
"HiJump",
"canSpeedyJump",
"canTrickyJump",
{
"or": [
"canInsaneJump",
{
"or": [
"f_DefeatedRidley",
{
"obstaclesCleared": [
"f_DefeatedRidley"
]
}
]
}
]
}
]
}
]
}Exit condition: {
"leaveWithGMode": {
"morphed": false
}
}Clears obstacles: door_2 |
|
Entrance condition: {
"comeInWithGMode": {
"mode": "direct",
"morphed": true
}
}Requires: "canArtificialMorph" Exit condition: {
"leaveWithGMode": {
"morphed": true
}
}Clears obstacles: door_2 Dev note: Artificial morph will allow Samus not to fall; real Morph is not sufficient. |
|
Requires: {
"not": "f_DefeatedRidley"
}
"canRiskPermanentLossOfAccess"
{
"enemyDamage": {
"enemy": "Ridley",
"type": "contact",
"hits": 1
}
}Dev note: FIXME: Ridley could also be used to set up G-mode, but the chaos of the fight makes this difficult. |
|
It is much more common for Ridley to hit Samus when Ridley is facing left. One way to get Ridley to turn around is when it pogos on the right side of the room, stationary spin jump and break spin. The fireballs can be tricky to deal with in the door frame, but can be done by dropping down and quickly wall jumping back up or by kagoing them. Requires: {
"heatFrames": 900
}
{
"or": [
"canTrickyGMode",
{
"heatFrames": 180
}
]
}
"canComplexGMode"
{
"or": [
"SpaceJump",
"canWallJump",
{
"and": [
"HiJump",
"canSpringBallJumpMidAir"
]
}
]
}
{
"not": "f_DefeatedRidley"
}
"canRiskPermanentLossOfAccess"Exit condition: {
"leaveWithGModeSetup": {}
}Dev note: Not likely to be possible, as it requires canRiskPermanentLossOfAccess and Ridley alive with the door unlocked. The extra heat frames are a leniency to account for randomness. |
|
Enter the room in G-mode, perform a Crystal Flash, then lay an additional Power Bomb, preferably at the top of the room. The Power Bomb will not explode but will continually force Ridley into a corner of the room. If the Power Bomb is laid near the top of the room, then Ridley will be forced into the bottom of the room, making it easy to damage Ridley at the highest possible rate; if the Power Bomb is laid lower, Ridley will be forced to the top of room, and Samus will have to jump repeatedly to bring it on camera. in which case Ridley can still be damaged but more slowly and with some caution needed to avoid invisible fireballs. After reducing Ridley's health to zero, take damage from Ridley or an invisible fireball to trigger auto-reserves and exit G-mode. Then get grabbed by Ridley to finish the fight. Entrance condition: {
"comeInWithGMode": {
"mode": "any",
"morphed": false,
"mobility": "mobile"
}
}Requires: {
"notable": "G-Mode Crystal Flash Stuck Ridley"
}
"canComplexGMode"
"h_heatedGMode"
"h_CrystalFlash"
"h_usePowerBomb"
{
"or": [
{
"and": [
{
"or": [
"canWallJump",
"HiJump",
"canSpringBallJumpMidAir",
"SpaceJump"
]
},
{
"ridleyKill": {
"powerBombs": false,
"gMode": true,
"stuck": "bottom"
}
}
]
},
{
"ridleyKill": {
"powerBombs": false,
"gMode": true,
"stuck": "top"
}
}
]
}
{
"autoReserveTrigger": {}
}
{
"heatFrames": 520
}
"h_RidleyDrops"Clears obstacles: f_DefeatedRidley, door_2 Sets flags: f_DefeatedRidley Dev note: FIXME: artificial morph with direct G-mode is another option for laying a Power Bomb at the top of the room, by landing on the door ledge on entry (the Morph item would still be needed since the Crystal Flash forces Samus out of being morphed). |
|
Enter the room in G-mode and quickly kill Ridley with 30 Supers. G-mode protects against heat damage but also causes Ridley's fireballs to be invisible and not move. As long as Ridley is swooping, not many fireballs will be placed, so delaying Ridley from pogoing can be helpful. Once Ridley begins pogoing, it generally becomes unsafe for Samus to jump high because of the risk of touching a fireball. By the end of the fight, projectiles will probably be overloaded, causing Ridley's drops not to spawn; they can be collected by exiting G-mode just before drops spawn, and pause abusing if necessary. Entrance condition: {
"comeInWithGMode": {
"mode": "any",
"morphed": false,
"mobility": "mobile"
}
}Requires: {
"notable": "G-Mode Ridley with 30 Supers"
}
"canTrickyGMode"
"h_heatedGMode"
{
"heatFrames": 0
}
{
"ammo": {
"type": "Super",
"count": 30
}
}
{
"or": [
{
"and": [
"h_heatedGModePauseAbuse",
{
"resourceAtMost": [
{
"type": "Energy",
"count": 1
}
]
},
{
"partialRefill": {
"type": "Energy",
"limit": 100
}
}
]
},
"free"
]
}Clears obstacles: f_DefeatedRidley, door_2 Sets flags: f_DefeatedRidley Dev note: FIXME: Leaving back through the open door while still in G-Mode is also possible, but difficult to do without touching an invisible fireball. |
|
Use 17 Power Bombs while pressed against the crumble blocks to overload PLMs and go through the crumble blocks. With Morph, exit G-mode near the item then return to the left, without, exit in the middle of the room to break the crumble blocks. Anywhere else in the left section of the room requires one more Power Bomb. Entrance condition: {
"comeInWithGMode": {
"mode": "direct",
"morphed": true
}
}Requires: "canComplexGMode"
"h_heatedGMode"
"canPowerBombItemOverloadPLMs"
{
"ammo": {
"type": "PowerBomb",
"count": 18
}
}
{
  "heatFrames": 240
}Collects items: 3 Dev note: Returning to the left avoids canRiskPermanentLossOfAccess. This might be useful with a crystal flash. |
|
Use 17 Power Bombs while pressed against the crumble blocks to overload PLMs and go through the crumble blocks. Anywhere else in the left section of the room requires one more Power Bomb. Entrance condition: {
"comeInWithGMode": {
"mode": "direct",
"morphed": true
}
}Requires: "h_heatedGMode"
"canPowerBombItemOverloadPLMs"
{
"itemNotCollectedAtNode": 3
}
"canRiskPermanentLossOfAccess"
{
"ammo": {
"type": "PowerBomb",
"count": 17
}
}
{
"heatFrames": 50
}Dev note: It is possible to go to 3, but then it takes extra heat frames to get out, being almost the same as ending at 2 and going to 3. |
|
Entrance condition: {
"comeInWithGMode": {
"mode": "any",
"morphed": true
}
}Requires: "h_heatedGMode"
"h_artificialMorphBombs"
{
"heatFrames": 50
}Dev note: It is possible to go to 3, but then it takes extra heat frames to get out, being almost the same as ending at 2 and going to 3. |
|
Use 9 Power Bombs against the right crumble blocks to overload PLMs and roll through the crumble blocks on the left. Entrance condition: {
"comeInWithGMode": {
"mode": "direct",
"morphed": true
},
"comesThroughToilet": "any"
}Requires: "canComplexGMode"
"h_heatedGMode"
"canPowerBombItemOverloadPLMs"
{
"itemNotCollectedAtNode": 3
}
"canRiskPermanentLossOfAccess"
{
"ammo": {
"type": "PowerBomb",
"count": 9
}
}
"h_heatedGModeOpenDifferentDoor" |
|
Bomb the side of the crumble blocks to overload PLMs and go through to the left door. Entrance condition: {
"comeInWithGMode": {
"mode": "any",
"morphed": true
},
"comesThroughToilet": "any"
}Requires: "h_heatedGMode" "h_artificialMorphBombs" "h_heatedGModeOpenDifferentDoor" Dev note: FIXME: This and a few other variant could go to 3, but then it takes extra heat frames to get out, which is about the same overall, but the item could be Varia, Gravity, or an E-Tank making it possible when entering with less Energy. |
|
Entrance condition: {
"comeInWithGMode": {
"mode": "direct",
"morphed": false
},
"comesThroughToilet": "any"
}Exit condition: {
"leaveWithGMode": {
"morphed": false
}
} |
|
It is possible to get back up with Spring Ball alone with a foosball off of the crumble block. Entrance condition: {
"comeInWithGMode": {
"mode": "direct",
"morphed": true
},
"comesThroughToilet": "any"
}Requires: {
"or": [
"h_artificialMorphIBJ",
"h_artificialMorphSpringBallBombJump",
{
"and": [
"HiJump",
"h_artificialMorphSpringBall"
]
},
{
"and": [
"canTrickyJump",
"h_artificialMorphSpringBall"
]
}
]
}Exit condition: {
"leaveWithGMode": {
"morphed": true
}
}Dev note: This is one of the easier foosballs because it is free to retry, because there is no heat damage in G-Mode. |
|
Hit the shot blocks at the top of the room with a Power Bomb or Wave before exiting G-mode to save some heat damage. Kill the pirate while it's in its head turning phase to prevent it from placing any stationary, invisible lasers. Entrance condition: {
"comeInWithGMode": {
"mode": "any",
"morphed": false
}
}Requires: "h_heatedGMode"
{
"or": [
"ScrewAttack",
{
"haveBlueSuit": {}
}
]
}
{
"or": [
"SpaceJump",
{
"and": [
"Charge",
"Plasma",
"canTrickyUseFrozenEnemies",
"HiJump",
{
"or": [
"canWallJump",
"canTrickyDodgeEnemies"
]
}
]
},
{
"and": [
{
"haveBlueSuit": {}
},
{
"or": [
{
"and": [
"HiJump",
"canPreciseWallJump"
]
},
"canSpringwall",
"canLongIBJ"
]
}
]
}
]
}
{
"or": [
"Wave",
"h_usePowerBomb",
{
"heatFrames": 40
}
]
}
{
"or": [
"HiJump",
"canWallJump",
{
"heatFrames": 20
}
]
}
{
"heatFrames": 120
}Clears obstacles: A |
From: 2
Bottom Left Door
To: 1
Top Left Door
With Screw Attack, break the bomb blocks with either a fully delayed max height jump from the wall, or with an instant turnaround after jumping from the lower layer of bomb blocks. Hit the shot blocks at the top of the room with a Power Bomb or Wave before exiting G-mode to save some heat damage. Entrance condition: {
"comeInWithGMode": {
"mode": "any",
"morphed": false
}
}Requires: "h_heatedGMode"
{
"or": [
{
"and": [
{
"notable": "HiJump and Only Screw"
},
"ScrewAttack",
"HiJump",
"canMidairWiggle"
]
},
{
"haveBlueSuit": {}
}
]
}
"canInsaneWallJump"
"canInsaneJump"
{
"or": [
"Wave",
"h_usePowerBomb",
{
"heatFrames": 40
}
]
}
{
"heatFrames": 120
}Clears obstacles: A |
From: 2
Bottom Left Door
To: 1
Top Left Door
Enter with G-mode direct, back up to between 1 and 6 pixels from the door transition, and activate X-ray to get very deep stuck in the door. Climb up 5 screens, and perform a turnaround buffered spin-jump away from the door to trigger the transition, bypassing any lock on the door. Entrance condition: {
"comeInWithGMode": {
"mode": "direct",
"morphed": false
}
}Requires: "canGModeXRayClimb" "h_heatProof" "canLongXRayClimb" "canBeVeryPatient" Bypasses door shell: true |
|
It is possible to kill the pirate at the top of the room and use a pause abuse on G-mode exit to collect its drops. This requires getting somewhat lucky, as there is approximately a 70% chance that the pirate will give a large energy drop (small is not enough). To do this, climb the room very quickly, before shots are overloaded - HiJump or wall jumps help, but are not required. It is also possible to wait for the shots to be overloaded and then exit G-mode, pause abuse, and kill the pirate before the pause triggers, but this is generally harder. Entrance condition: {
"comeInWithGMode": {
"mode": "any",
"morphed": false
}
}Requires: {
"or": [
"ScrewAttack",
{
"haveBlueSuit": {}
}
]
}
{
"or": [
"SpaceJump",
{
"and": [
"Charge",
"Plasma",
"canTrickyUseFrozenEnemies",
"HiJump",
{
"or": [
"canWallJump",
"canTrickyDodgeEnemies"
]
}
]
},
{
"and": [
{
"haveBlueSuit": {}
},
{
"or": [
{
"and": [
"HiJump",
"canPreciseWallJump"
]
},
"canSpringwall",
"canLongIBJ"
]
}
]
}
]
}
{
"or": [
"h_heatedGModeOpenDifferentDoor",
{
"and": [
"h_heatedGModePauseAbuse",
"canInsaneJump",
"canComplexGMode"
]
}
]
}Clears obstacles: A |
From: 2
Bottom Left Door
To: 3
Top Right Door
Break the bomb blocks with either a fully delayed max height jump from the wall, or with an instant turnaround after jumping from the lower layer of bomb blocks. It is possible to kill the pirate at the top of the room and use a pause abuse on G-mode exit to collect its drops. This requires getting somewhat lucky, as there is approximately a 70% chance that the pirate will give a large energy drop (small is not enough). To do this requires not climbing the room too quickly - one or two failed attempts at breaking the bomb blocks should be plenty, then exit G-mode, pause abuse, and kill the pirate before the pause triggers with a precisely timed spin jump into it. Entrance condition: {
"comeInWithGMode": {
"mode": "any",
"morphed": false
}
}Requires: {
"or": [
{
"and": [
{
"notable": "HiJump and Only Screw"
},
"ScrewAttack",
"HiJump",
"canMidairWiggle"
]
},
{
"haveBlueSuit": {}
}
]
}
"canInsaneWallJump"
"canInsaneJump"
{
"or": [
"h_heatedGModeOpenDifferentDoor",
{
"and": [
"h_heatedGModePauseAbuse",
"canTrickyGMode"
]
}
]
}Clears obstacles: A |
|
Hit the shot blocks at the top of the room with Wave before exiting G-mode to save some heat damage. Stand behind the pirate only while it is looking around to prevent it from turning and placing stationary, invisible lasers. Entrance condition: {
"comeInWithGMode": {
"mode": "any",
"morphed": false
}
}Requires: "h_heatedGMode"
{
"or": [
"Wave",
{
"heatFrames": 40
}
]
}
{
"or": [
"HiJump",
"canWallJump",
{
"heatFrames": 20
}
]
}
{
"heatFrames": 120
} |
From: 3
Top Right Door
To: 1
Top Left Door
Hit the shot blocks at the top of the room with a Power Bomb before exiting G-mode to save some heat damage. Stand behind the pirate only while it is looking around to prevent it from turning and placing stationary, invisible lasers. Entrance condition: {
"comeInWithGMode": {
"mode": "any",
"morphed": true
}
}Requires: "h_heatedGMode"
"h_artificialMorphPowerBomb"
{
"or": [
"HiJump",
"canWallJump",
{
"heatFrames": 20
}
]
}
{
"heatFrames": 120
} |
|
Entrance condition: {
"comeInWithGMode": {
"mode": "any",
"morphed": false
}
}Requires: {
"or": [
"ScrewAttack",
{
"haveBlueSuit": {}
}
]
}
"h_heatedGModeOpenDifferentDoor"Clears obstacles: A |
From: 3
Top Right Door
To: 2
Bottom Left Door
Get to the bomb blocks while morphed, use a Power Bomb, then exit G-mode and drop to the bottom of the room. It is possible to go through the top pirate while it is being hit by a Power Bomb explosion, otherwise it is possible to jump over it with Morph or Spring Ball. With Bombs, it is possible but tricky to IBJ over the pirate or Bomb it many times to kill it without it placing any of its stationary, invisible lasers. Note that the pirate will not turn towards Samus and place a laser if it is moving its head back and forth. Entrance condition: {
"comeInWithGMode": {
"mode": "any",
"morphed": true
}
}Requires: "h_heatedGMode"
"h_artificialMorphPowerBomb"
{
"or": [
{
"and": [
"h_artificialMorphPowerBomb",
"canHitbox"
]
},
"canLateralMidAirMorph",
"h_artificialMorphSpringBall",
{
"and": [
"canTrickyGMode",
"h_artificialMorphIBJ"
]
},
{
"and": [
"Morph",
{
"or": [
"Charge",
{
"ammo": {
"type": "Super",
"count": 3
}
},
{
"ammo": {
"type": "Missile",
"count": 9
}
},
{
"enemyDamage": {
"enemy": "Yellow Space Pirate (standing)",
"type": "contact",
"hits": 1
}
}
]
}
]
},
{
"and": [
"h_artificialMorphBombs",
{
"enemyDamage": {
"enemy": "Yellow Space Pirate (standing)",
"type": "contact",
"hits": 1
}
}
]
}
]
}
{
"heatFrames": 160
}Clears obstacles: A |
From: 2
Right Door
To: 5
G-Mode Morph Junction (Above Bomb Block)
Entrance condition: {
"comeInWithGMode": {
"mode": "any",
"morphed": false
}
}Requires: "Morph"
{
"or": [
"SpaceJump",
"canTrickyWallJump",
{
"and": [
"canDash",
"HiJump"
]
},
{
"and": [
"canDash",
"canInsaneJump",
{
"disableEquipment": "SpeedBooster"
}
]
}
]
}
{
  "heatFrames": 0
} |
From: 2
Right Door
To: 5
G-Mode Morph Junction (Above Bomb Block)
Avoiding the acid completely requires precise movement. With Spring Ball and Bombs, jump into IBJ to delay while waiting for the acid. With just Spring Ball, perform a well-timed pause to trigger immediately after Samus jumps to get enough horizontal momentum to cross the second Hibashi and land in the alcove. A quick pause with a second spring fling on the descent can help a bit. With just Bombs, this is possible with well-timed, first-try double IBJs. Entrance condition: {
"comeInWithGMode": {
"mode": "any",
"morphed": true
}
}Requires: "canInsaneJump"
{
"or": [
"h_artificialMorphJumpIntoIBJ",
{
"and": [
"canTrickyGMode",
"h_artificialMorphSpringFling"
]
},
{
"and": [
"canTrickyGMode",
"h_artificialMorphDoubleBombJump",
"h_artificialMorphBombHorizontally"
]
}
]
}
{
  "heatFrames": 0
}Dev note: FIXME: Could add strats that take acid damage and are more lenient. |
From: 5
G-Mode Morph Junction (Above Bomb Block)
To: 1
Top Left Door
Dodge the Kihunters then shoot the shot blocks and escape. Requires: "h_heatedGMode"
{
"notable": "Dodge Going Up"
}
"h_navigateHeatRooms"
"canInsaneJump"
{
"or": [
{
"and": [
"canWallJumpInstantMorph",
"canPreciseWallJump"
]
},
{
"and": [
"canSpeedyJump",
"HiJump",
"canMidAirMorph"
]
}
]
}
{
"heatFrames": 220
} |
From: 5
G-Mode Morph Junction (Above Bomb Block)
To: 1
Top Left Door
Kill the Kihunters then shoot the shot blocks and escape. Requires: "h_heatedGMode"
{
"obstaclesCleared": [
"A"
]
}
{
"or": [
"h_crouchJumpDownGrab",
"canWallJump",
"HiJump",
"canSpringBallJumpMidAir",
"SpaceJump",
"canIBJ"
]
}
{
"heatFrames": 200
} |
From: 5
G-Mode Morph Junction (Above Bomb Block)
To: 3
Hidden Item
Use Screw Attack or blue suit to break the bomb block and enter the morph tunnel. Roll to the left without falling off into the acid, unmorph and walk back to the right to press against the morph tunnel. Use X-Ray, Morph, then roll a little to the right to barely touch the camera scroll block, then move left towards the item while the camera fixes itself. Requires: "h_heatedGMode"
{
"or": [
"ScrewAttack",
{
"haveBlueSuit": {}
}
]
}
"Morph"
{
"heatFrames": 120
}Dev note: Even with very precise movement, it seems barely not possible to touch the item before PLMs are overloaded. |
From: 5
G-Mode Morph Junction (Above Bomb Block)
To: 4
Junction Above Bomb Block
If going for the item, it is possible to place a Bomb or Power Bomb then exit G-mode to save a small number of heat frames. Requires: "h_heatedGMode"
{
  "heatFrames": 0
} |
From: 5
G-Mode Morph Junction (Above Bomb Block)
To: 5
G-Mode Morph Junction (Above Bomb Block)
Kill the Kihunters then either exit the room at the top or go to the item. Requires: "h_heatedGMode"
{
"or": [
{
"enemyKill": {
"enemies": [
[
"Kihunter (red)",
"Kihunter (red)",
"Kihunter (red)"
]
],
"explicitWeapons": [
"Super",
"Missile",
"Plasma",
"ScrewAttack"
]
}
},
{
"haveBlueSuit": {}
},
{
"and": [
"Ice",
{
"or": [
"Wave",
"Spazer",
"canBeVeryPatient",
{
"and": [
"Charge",
"canBePatient"
]
}
]
}
]
},
{
"and": [
"Charge",
{
"or": [
"Wave",
"Spazer",
"canBeVeryPatient"
]
}
]
},
{
"and": [
"Spazer",
{
"or": [
"Wave",
"canBePatient"
]
}
]
}
]
}
{
"or": [
"h_crouchJumpDownGrab",
"canWallJump",
"HiJump",
"canSpringBallJumpMidAir",
"SpaceJump",
"canIBJ"
]
}
{
  "heatFrames": 0
}Clears obstacles: A |
|
Climb the room and place a Power Bomb near the top before exiting G-mode. Entrance condition: {
"comeInWithGMode": {
"mode": "any",
"morphed": false
}
}Requires: "h_heatedGMode"
"h_usePowerBomb"
{
"heatFrames": 0
}Clears obstacles: A, B Dev note: It is possible to do this with artificial morph, but progressing anywhere else in the room requires Morph. FIXME: It looks like the heat frames going up from 5 don't take into account that the Power Bomb blocks could already be broken. |
|
Entrance condition: {
"comeInWithGMode": {
"mode": "direct",
"morphed": false
},
"comesThroughToilet": "any"
}Exit condition: {
"leaveWithGMode": {
"morphed": false
}
} |
|
Entrance condition: {
"comeInWithGMode": {
"mode": "direct",
"morphed": true
},
"comesThroughToilet": "any"
}Requires: "h_artificialMorphMovement" Exit condition: {
"leaveWithGMode": {
"morphed": true
}
} |
From: 2
Top Right Door
To: 9
G-Mode Morph, Left of Morph Tunnel (Off-Camera)
Get into the cove next to the bomb block and carefully wiggle in that camera scroll block to overload PLMs and move to the item to the left. Entrance condition: {
"comeInWithGMode": {
"mode": "any",
"morphed": true
},
"comesThroughToilet": "any"
}Requires: "h_artificialMorphMovement"
{
"heatFrames": 0
}Dev note: It is possible to damage boost off of the Hibashi instead of requiring artificial morph movement, but there is no known way to get here with Energy and artificial morph (a Power Bomb will solidify the bomb block). |
From: 2
Top Right Door
To: 9
G-Mode Morph, Left of Morph Tunnel (Off-Camera)
Get into the cove next to the bomb block and carefully wiggle in that camera scroll block to overload PLMs and move to the item to the left. Then use a Power Bomb to activate the shutter. Entrance condition: {
"comeInWithGMode": {
"mode": "any",
"morphed": true
},
"comesThroughToilet": "any"
}Requires: "h_artificialMorphMovement"
"h_artificialMorphPowerBomb"
{
"heatFrames": 0
}Clears obstacles: E Dev note: It is possible to damage boost off of the Hibashi instead of requiring artificial morph movement, but there is no known way to get here with Energy and artificial morph (a Power Bomb will solidify the bomb block). |
From: 2
Top Right Door
To: 9
G-Mode Morph, Left of Morph Tunnel (Off-Camera)
Raise the shutter by shooting a missile or upgraded beam at it. Stand on the right side of lowest safe tile and shoot diagonally down while crouched if using missiles, or standing otherwise. A basic beam shot will work if fired vertically down, onto the side of the spike. Then, get into the cove next to the bomb block and carefully wiggle in that camera scroll block to overload PLMs. Entrance condition: {
"comeInWithGMode": {
"mode": "any",
"morphed": false
},
"comesThroughToilet": "any"
}Requires: "Morph"
{
"or": [
"canComplexGMode",
"Wave"
]
}
{
"or": [
"canInsaneJump",
{
"ammo": {
"type": "Super",
"count": 1
}
},
{
"ammo": {
"type": "Missile",
"count": 1
}
},
"Charge",
"Ice",
"Wave",
"Spazer",
"Plasma"
]
}
{
"heatFrames": 0
}Clears obstacles: E |
From: 9
G-Mode Morph, Left of Morph Tunnel (Off-Camera)
To: 1
Bottom Left Door
Exit G-mode while on the item pedestal, while off-camera, then return to the right through the Dessgeega that can't damage Samus off-screen. Use a Power Bomb and fall down the spiky shaft and get to the door. Avoiding a spike hit is possible but tricky. Requires: "h_heatedGMode"
"canOffScreenMovement"
"h_usePowerBomb"
{
"or": [
"canTrickyGMode",
{
"spikeHits": 1
}
]
}
{
"heatFrames": 550
}Collects items: 3 Dev note: FIXME: Strats could be added on remote acquire strats that use the item for the escape, such as Morph, explosives, or an E-Tank. |
From: 9
G-Mode Morph, Left of Morph Tunnel (Off-Camera)
To: 1
Bottom Left Door
With a way to move while morphed, use a Power Bomb while on the Power Bomb blocks and quickly exit G-mode. Otherwise, do so to the right of the Power Bomb blocks, quickly exit G-mode, and jump up and over to fall through the blocks. Fall down the spiky shaft and get to the door. Avoiding a spike hit is possible but tricky. Requires: "h_heatedGMode"
"canOffScreenMovement"
"h_artificialMorphPowerBomb"
{
"or": [
"h_artificialMorphMovement",
{
"heatFrames": 100
}
]
}
{
"or": [
"canTrickyGMode",
{
"spikeHits": 1
}
]
}
{
"heatFrames": 350
} |
From: 9
G-Mode Morph, Left of Morph Tunnel (Off-Camera)
To: 2
Top Right Door
Exit G-mode while on the item pedestal, while off-camera, then return to the right through the Dessgeegas that can't damage Samus off-screen. It is possible to use a Power Bomb and quickly exiting G-mode to have the bomb block broken on exit, but this will also partially break the Power Bomb blocks and could make exit traversal less straightforward. Requires: "h_heatedGMode"
"Morph"
{
"or": [
{
"and": [
"h_useMorphBombs",
{
"heatFrames": 1000
}
]
},
{
"and": [
{
"heatFrames": 850
},
{
"ammo": {
"type": "PowerBomb",
"count": 3
}
}
]
},
{
"and": [
{
"haveBlueSuit": {}
},
{
"heatFrames": 850
}
]
}
]
}
{
"or": [
"canOffScreenMovement",
{
"heatFrames": 200
}
]
}
{
"or": [
{
"and": [
"canInsaneJump",
{
"heatFrames": 60
}
]
},
{
"obstaclesCleared": [
"E"
]
},
"h_useSpringBall",
{
"hibashiHits": 1
},
{
"ammo": {
"type": "PowerBomb",
"count": 1
}
}
]
}Collects items: 3 Dev note: FIXME: The Hibashi doesn't need a 4th PB in the power bomb case. |
From: 9
G-Mode Morph, Left of Morph Tunnel (Off-Camera)
To: 7
Junction Left of Morph Tunnel
Exit G-mode while on the item pedestal, while off-camera, then return to the right through the Dessgeegas that can't damage Samus off-screen. It is possible to use a Power Bomb and quickly exiting G-mode to have the bomb block broken on exit, but this will also partially break the Power Bomb blocks and could make exit traversal less straightforward. Requires: "h_heatedGMode"
"Morph"
{
"or": [
{
"and": [
"h_useMorphBombs",
{
"heatFrames": 800
}
]
},
{
"and": [
{
"heatFrames": 700
},
{
"ammo": {
"type": "PowerBomb",
"count": 2
}
}
]
},
{
"and": [
{
"heatFrames": 700
},
{
"haveBlueSuit": {}
}
]
}
]
}
{
"or": [
"canOffScreenMovement",
{
"heatFrames": 200
}
]
}Collects items: 3 |
