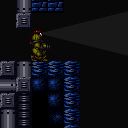
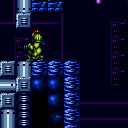
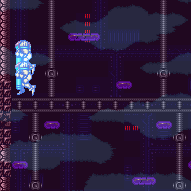
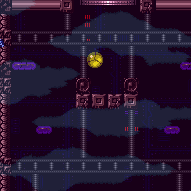
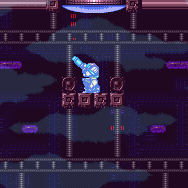
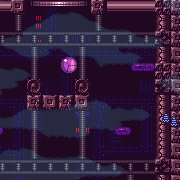
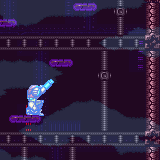
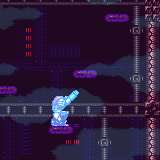
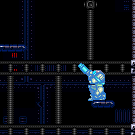
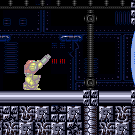
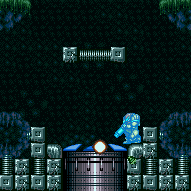
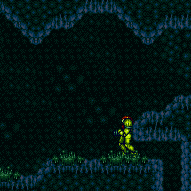
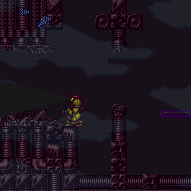
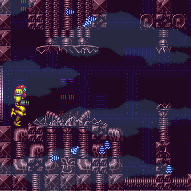
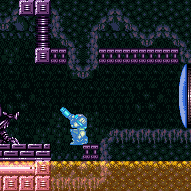
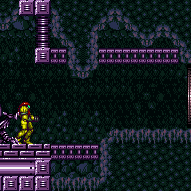
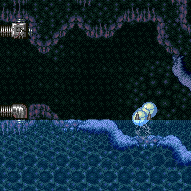
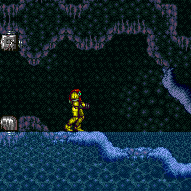
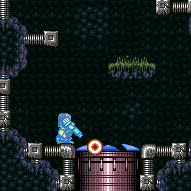
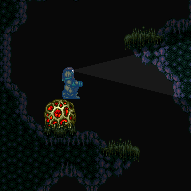
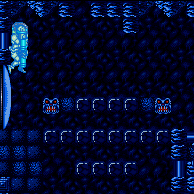
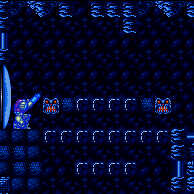
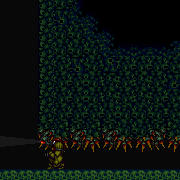
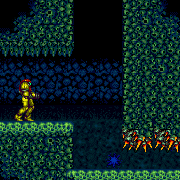
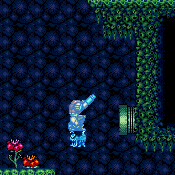
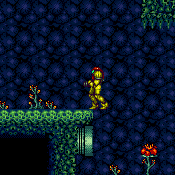
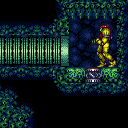
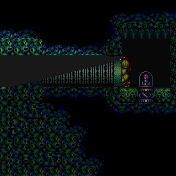
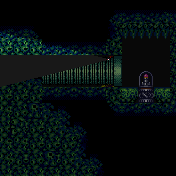
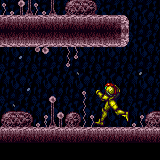
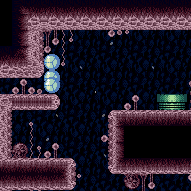
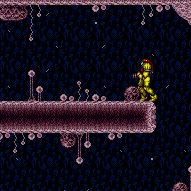
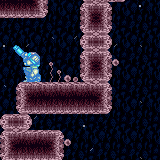
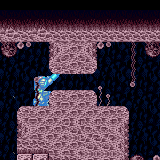
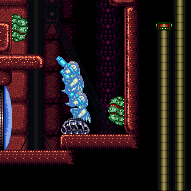
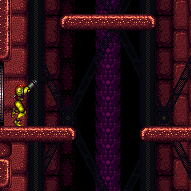
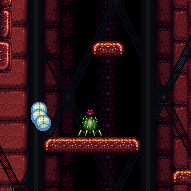
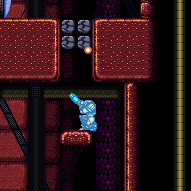
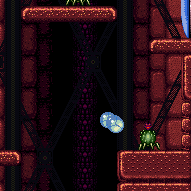
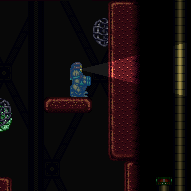
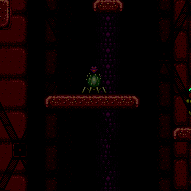
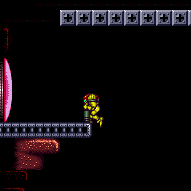
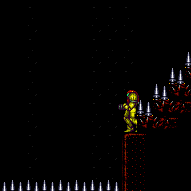
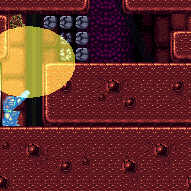
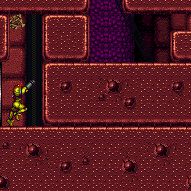
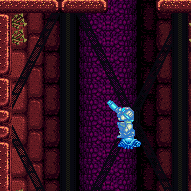
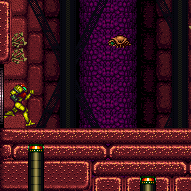
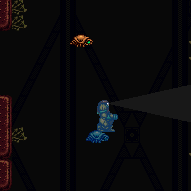
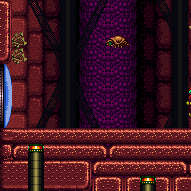
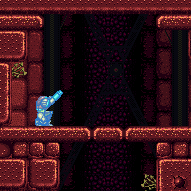
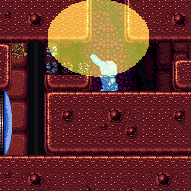
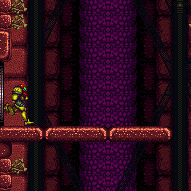
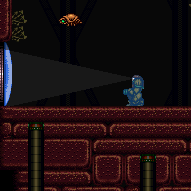
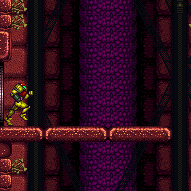
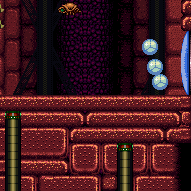
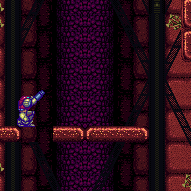
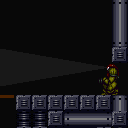
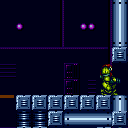
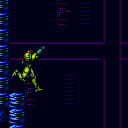
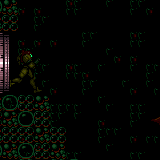
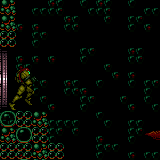
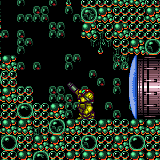
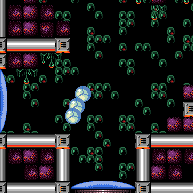
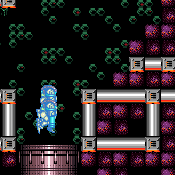
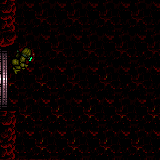
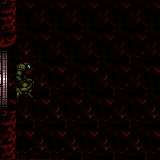
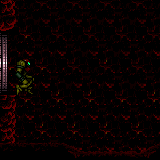
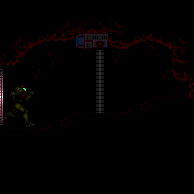
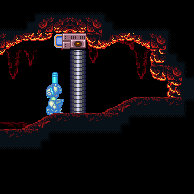
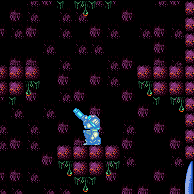
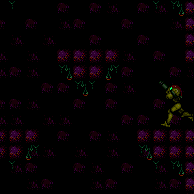
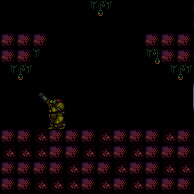
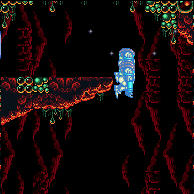
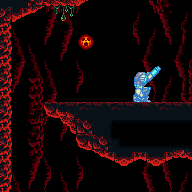
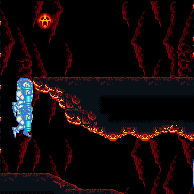
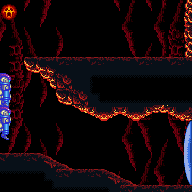
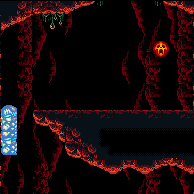
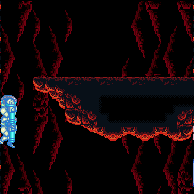
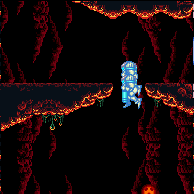
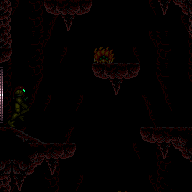
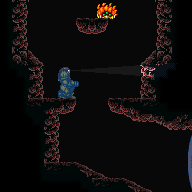
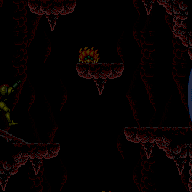
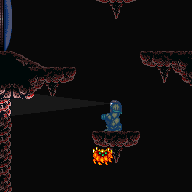
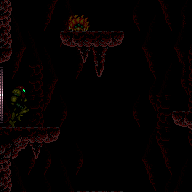
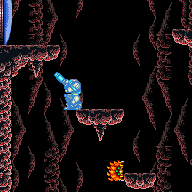
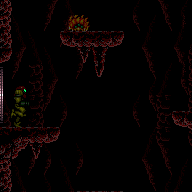
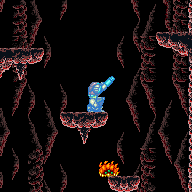
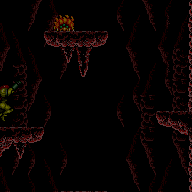
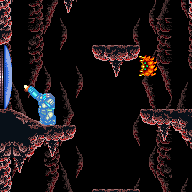
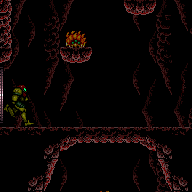
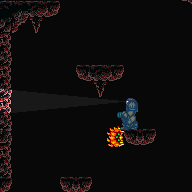
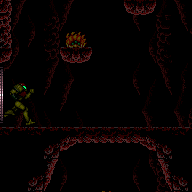
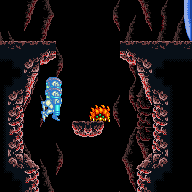
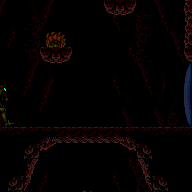
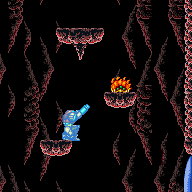
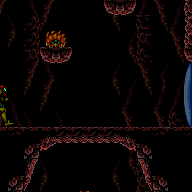
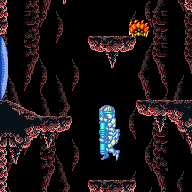
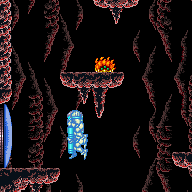
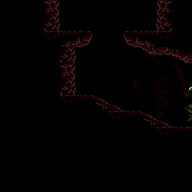
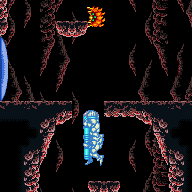
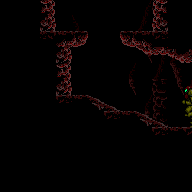
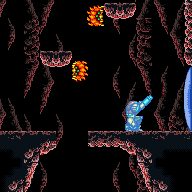
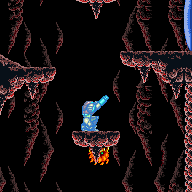
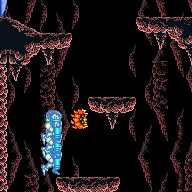
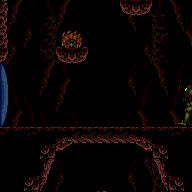
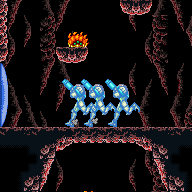
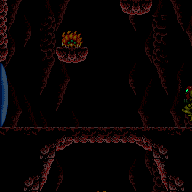
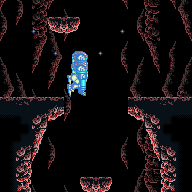
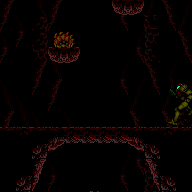
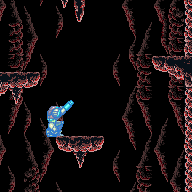
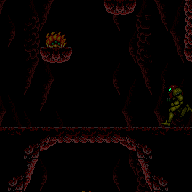
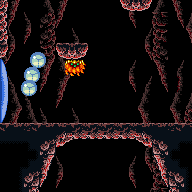
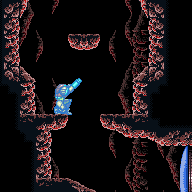
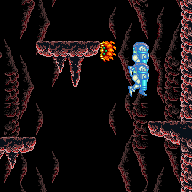
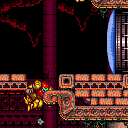
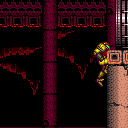
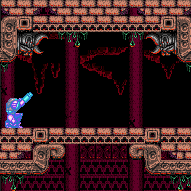
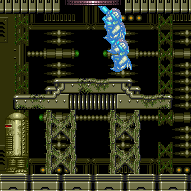
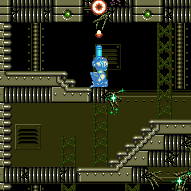
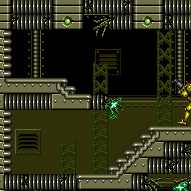
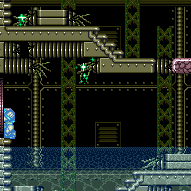
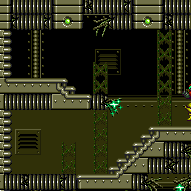
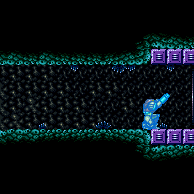
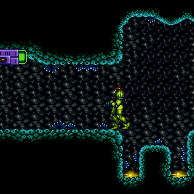
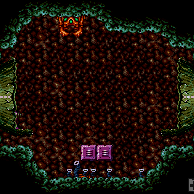
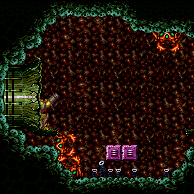
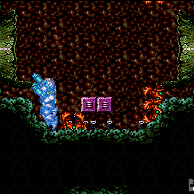
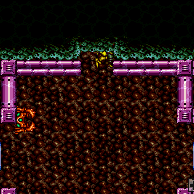
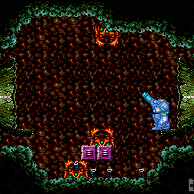
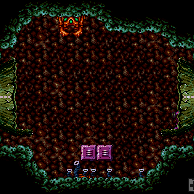
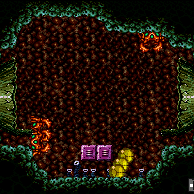
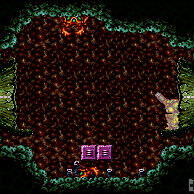
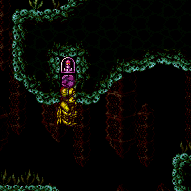
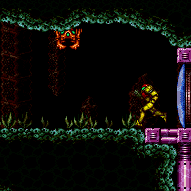
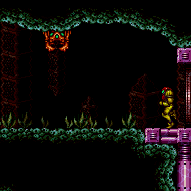
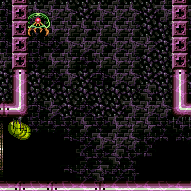
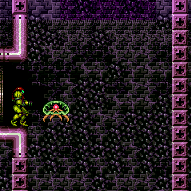
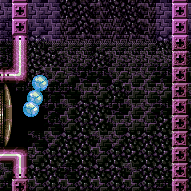
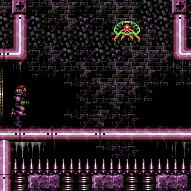
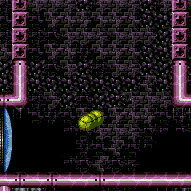
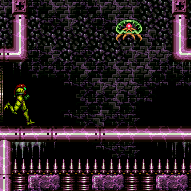
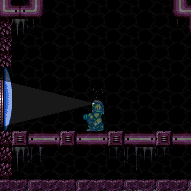
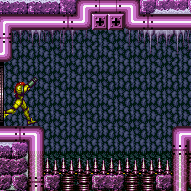
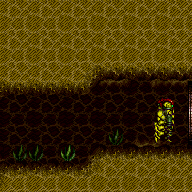
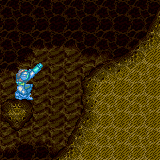
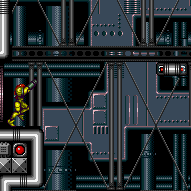
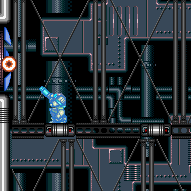
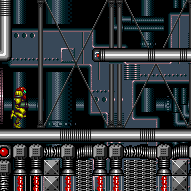
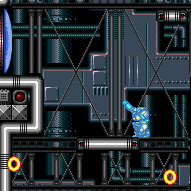
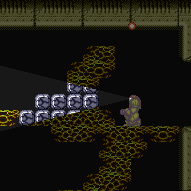
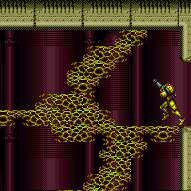
canXRayTurnaround (Very Hard)
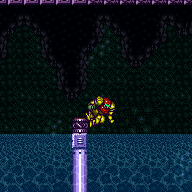
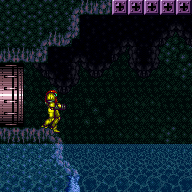
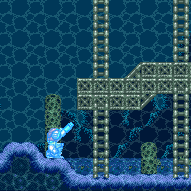
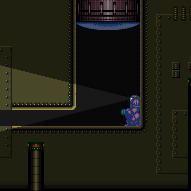
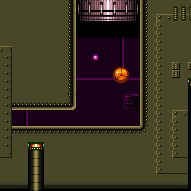
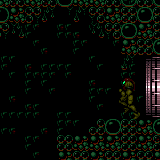
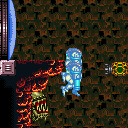
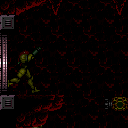
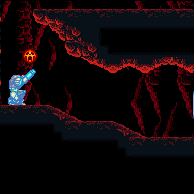
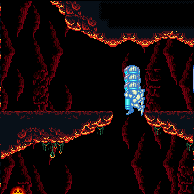
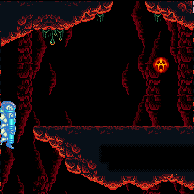
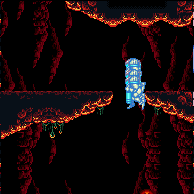
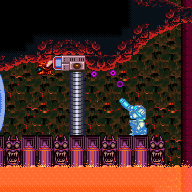
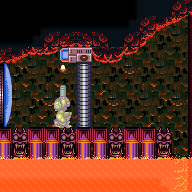
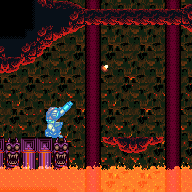
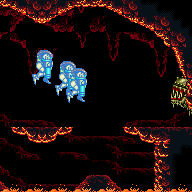
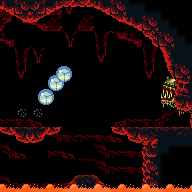
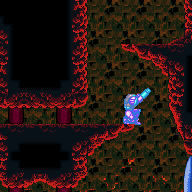
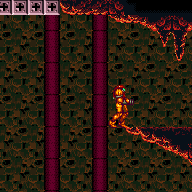
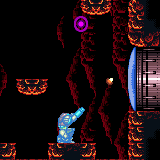
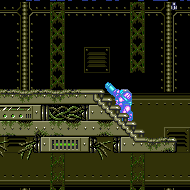
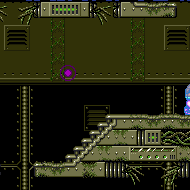
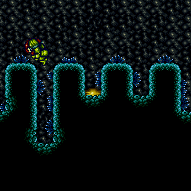
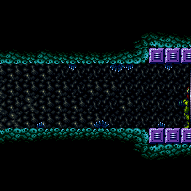
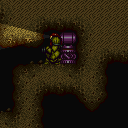
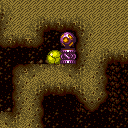
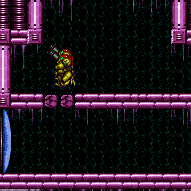
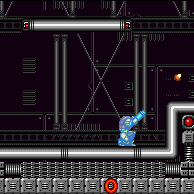
Using X-Ray to turn around in place without changing pixel position. Alternating X-Ray turnarounds with regular turnarounds enables movement in either direction even while crouched. This allows Samus to wiggle through two-tile tall passages, but only if the crouch originated from standing or unmorphing (not spinjumping).
Strats ()
|
Entrance condition: {
"comeInWithTemporaryBlue": {
"direction": "any"
},
"comesThroughToilet": "any"
}Requires: "canLongChainTemporaryBlue" "canXRayTurnaround" Clears obstacles: A |
|
Breaking the bomb blocks is difficult because there is not enough space above them to get a neutral bounce. It is best to break them by jumping from the top platform (inside the 3-tile-high space), as this provides a 2-frame window for the morph; in comparison, jumping from the platform below requires a frame-perfect morph. If Spring Ball is available, it can be used to increase the window by one frame. Entrance condition: {
"comeInWithTemporaryBlue": {
"direction": "left"
},
"comesThroughToilet": "any"
}Requires: "canChainTemporaryBlue" "canXRayTurnaround" "canInsaneJump" |
|
Entrance condition: {
"comeInWithTemporaryBlue": {
"direction": "left"
},
"comesThroughToilet": "any"
}Requires: "canXRayTurnaround" "canChainTemporaryBlue" "canInsaneJump" |
From: 6
Main Junction
To: 3
Top Right Door
This is a long temporary blue chain with X-Ray turnarounds to climb up and destroy the bomb blocks blocking the top morph tunnel. Breaking the bomb blocks is difficult because there is not enough space above them to get a neutral bounce. It is best to break them by jumping from the top platform (inside the 3-tile-high space), as this provides a 2-frame window for the morph; in comparison, jumping from the platform below requires a frame-perfect morph. If Spring Ball is available, it can be used to increase the window by one frame. Requires: {
"notable": "Temporary Blue Chain Through Bomb Blocks"
}
{
"canShineCharge": {
"usedTiles": 27.5,
"openEnd": 0
}
}
"canLongChainTemporaryBlue"
"canXRayTurnaround"
"canTrickyJump"
"canBePatient"
"canInsaneJump"
{
"obstaclesCleared": [
"A"
]
}
{
"or": [
"h_ClimbWithoutLava",
{
"obstaclesNotCleared": [
"B"
]
}
]
}Dev note: The runway was reduced by 0.5 tiles, as you can't maintain Temporary Blue directly against a wall. |
From: 6
Main Junction
To: 4
Middle Right Door
A Temporary Blue Chain with x-ray turnarounds to climb up and destroy the bomb blocks blocking the bottom morph tunnel. Requires: {
"notable": "Temporary Blue Chain Through Bomb Blocks"
}
{
"canShineCharge": {
"usedTiles": 27.5,
"openEnd": 0
}
}
"canChainTemporaryBlue"
"canXRayTurnaround"
"canTrickyJump"
{
"obstaclesCleared": [
"A"
]
}
{
"or": [
"h_ClimbWithoutLava",
{
"obstaclesNotCleared": [
"B"
]
}
]
}Dev note: The runway was reduced by 0.5 tiles, as you can't maintain Temporary Blue directly against a wall. |
From: 6
Right of Morph Tunnel with Temporary Blue
To: 3
Item
Unmorph on the leftmost edge of the Speed blocks and jump across. Landing on the right side Speedblock, and the solid tile, gives enough time to run to the item and fall before the block respawns. Or jump fully over the Speed blocks and turn around using X-Ray after collecting the item. Requires: "h_getBlueSpeedMaxRunway"
"canChainTemporaryBlue"
{
"or": [
"canTrickyJump",
"canXRayTurnaround"
]
}Clears obstacles: B Dev note: FIXME: The h_getBlueSpeedMaxRunway is to satisfy tests for now. We should add a proper way to represent that the blue state carries over from the previous strat. FIXME: With Spring Ball it is possible to preserve a flash suit while both collecting the item and going down. |
From: 8
Central Junction
To: 2
Middle Left Door
Requires: {
"canShineCharge": {
"usedTiles": 25,
"steepUpTiles": 3,
"steepDownTiles": 3,
"openEnd": 1
}
}
"canLongChainTemporaryBlue"
"canXRayTurnaround"
"can4HighMidAirMorph"
"canSpringBallBounce"Exit condition: {
"leaveWithTemporaryBlue": {}
}Unlocks doors: {"types":["ammo"],"requires":[]} |
From: 8
Central Junction
To: 3
Bottom Left Horizontal Door
Requires: {
"canShineCharge": {
"usedTiles": 25,
"steepUpTiles": 3,
"steepDownTiles": 3,
"openEnd": 1
}
}
"canLongChainTemporaryBlue"
"canXRayTurnaround"
"can4HighMidAirMorph"Exit condition: {
"leaveWithTemporaryBlue": {}
}Unlocks doors: {"types":["ammo"],"requires":[]} |
From: 8
Central Junction
To: 6
Bottom Right Door (On the Left Shaft)
Requires: {
"canShineCharge": {
"usedTiles": 25,
"steepUpTiles": 3,
"steepDownTiles": 3,
"openEnd": 1
}
}
"canLongChainTemporaryBlue"
"canXRayTurnaround"
"can4HighMidAirMorph"Exit condition: {
"leaveWithTemporaryBlue": {}
}Unlocks doors: {"types":["ammo"],"requires":[]} |
From: 8
Central Junction
To: 7
Bottom Left Vertical Door
Requires: {
"canShineCharge": {
"usedTiles": 25,
"steepUpTiles": 3,
"steepDownTiles": 3,
"openEnd": 1
}
}
"canLongChainTemporaryBlue"
"canXRayTurnaround"
"can4HighMidAirMorph"Exit condition: {
"leaveWithTemporaryBlue": {
"direction": "any"
}
}Unlocks doors: {"types":["ammo"],"requires":[]} |
|
Entrance condition: {
"comeInShinecharging": {
"length": 7,
"openEnd": 0
}
}Requires: "canChainTemporaryBlue" "canXRayTurnaround" Clears obstacles: A |
From: 2
Right Door
To: 4
Middle Junction (Left of Morph Tunnel)
Entrance condition: {
"comeInShinecharging": {
"length": 9,
"openEnd": 0
}
}Requires: "canXRayTurnaround"
"canChainTemporaryBlue"
{
"acidFrames": 27
}Dev note: There is 1 unusable tile in this runway. |
|
Shinespark from the end of the entry runway, just past the down slope. Samus will crash into the last set of blocks preventing access to the opposite door. Entrance condition: {
"comeInShinecharged": {}
}Requires: {
"shineChargeFrames": 37
}
"canShinechargeMovement"
"canHorizontalShinespark"
{
"shinespark": {
"frames": 70,
"excessFrames": 0
}
}
{
"or": [
"Morph",
"canTunnelCrawl",
"canTurnaroundAimCancel",
{
"and": [
"canTwoTileSqueeze",
"canXRayTurnaround"
]
}
]
} |
|
Requires: "canWaterShineCharge"
{
"canShineCharge": {
"usedTiles": 20,
"openEnd": 1
}
}
"canLongChainTemporaryBlue"
"canXRayTurnaround"
"can4HighMidAirMorph"Exit condition: {
"leaveWithTemporaryBlue": {}
} |
|
Requires: {
"canShineCharge": {
"usedTiles": 33,
"steepUpTiles": 2,
"steepDownTiles": 5,
"openEnd": 0
}
}
"canLongChainTemporaryBlue"
"canXRayTurnaround"Exit condition: {
"leaveWithTemporaryBlue": {
"direction": "any"
}
} |
|
Requires: "Gravity"
"HiJump"
{
"or": [
{
"and": [
{
"canShineCharge": {
"usedTiles": 21,
"steepUpTiles": 3,
"steepDownTiles": 3,
"startingSteepDownTiles": 1,
"openEnd": 0
}
},
"canXRayTurnaround"
]
},
{
"canShineCharge": {
"usedTiles": 18,
"steepUpTiles": 2,
"steepDownTiles": 3,
"startingSteepDownTiles": 1,
"openEnd": 0
}
}
]
}
"canGravityJump"
"canChainTemporaryBlue"Exit condition: {
"leaveWithTemporaryBlue": {}
} |
From: 2
Right Door
To: 2
Right Door
Requires: "Gravity"
"HiJump"
{
"or": [
{
"and": [
{
"canShineCharge": {
"usedTiles": 21,
"steepUpTiles": 3,
"steepDownTiles": 3,
"startingSteepDownTiles": 1,
"openEnd": 0
}
},
"canXRayTurnaround"
]
},
{
"canShineCharge": {
"usedTiles": 15,
"steepUpTiles": 2,
"steepDownTiles": 3,
"startingSteepDownTiles": 1,
"openEnd": 0
}
}
]
}
"canSpringBallJumpMidAir"
"canChainTemporaryBlue"Exit condition: {
"leaveWithTemporaryBlue": {}
} |
From: 1
Top Left Door
To: 2
Bottom Door
Entrance condition: {
"comeInShinecharging": {
"length": 10,
"openEnd": 1,
"steepUpTiles": 2,
"steepDownTiles": 1
}
}Requires: "canLongChainTemporaryBlue" "canXRayTurnaround" Exit condition: {
"leaveWithTemporaryBlue": {
"direction": "any"
}
}Unlocks doors: {"types":["ammo"],"requires":[]} |
|
Stand on the farthest pixel into the door possible using moonwalk, X-Ray, or morphball turn around. Run towards the water and jump on the last possible frame. Perform the CWJ off of the item pedestal to cross to the other side. This requires running and jumping on the last possible frame before Samus would run off into the water. There is either a 1-frame or 2-frame window for the wall jump, depending on Samus' X subpixel position. To get a 2-frame window, Samus must start in the leftmost 75% of the pixel next to the transition. One method to guarantee that Samus gets a good subpixel is to jump and press against the overhang to align with it, then land, turn around, and moonwalk back into position. Requires: {
"or": [
{
"notable": "First-Try CWJ"
},
{
"and": [
"h_bombThings",
"h_additionalBomb",
"h_additionalBomb"
]
}
]
}
"canCWJ"
{
"disableEquipment": "HiJump"
}
{
"disableEquipment": "SpeedBooster"
}
{
"doorUnlockedAtNode": 1
}
"h_backIntoCorner"Collects items: 3 |
From: 4
Lower Section - Top Right Door
To: 4
Lower Section - Top Right Door
Requires: "Gravity"
"HiJump"
{
"or": [
{
"and": [
"h_shinechargeMaxRunway",
"canXRayTurnaround"
]
},
{
"canShineCharge": {
"usedTiles": 18,
"steepUpTiles": 3,
"steepDownTiles": 4,
"openEnd": 2
}
}
]
}
"canSpringBallJumpMidAir"
"canLongChainTemporaryBlue"Exit condition: {
"leaveWithTemporaryBlue": {}
} |
|
It's not necessary to jump through the door, the in-room doorsill gives enough running room to make it up. Requires: "canDash"
"canPreciseWallJump"
"canTrickyJump"
{
"or": [
{
"spikeHits": 1
},
"h_backIntoCorner"
]
} |
From: 1
Top Left Door
To: 3
Bottom Left Door
Entrance condition: {
"comeInShinecharging": {
"length": 1,
"openEnd": 0
}
}Requires: "canLongChainTemporaryBlue" "canSpringBallBounce" "canXRayTurnaround" Exit condition: {
"leaveWithTemporaryBlue": {}
}Unlocks doors: {"types":["ammo"],"requires":[]} |
From: 3
Bottom Left Door
To: 1
Top Left Door
Entrance condition: {
"comeInShinecharging": {
"length": 2,
"openEnd": 0
}
}Requires: "canLongChainTemporaryBlue" "canSpringBallBounce" "canXRayTurnaround" Exit condition: {
"leaveWithTemporaryBlue": {}
}Unlocks doors: {"types":["ammo"],"requires":[]} |
From: 3
Bottom Left Door
To: 2
Right Door
Entrance condition: {
"comeInShinecharging": {
"length": 2,
"openEnd": 0
}
}Requires: "canLongChainTemporaryBlue" "canSpringBallBounce" "canXRayTurnaround" Exit condition: {
"leaveWithTemporaryBlue": {}
}Unlocks doors: {"types":["ammo"],"requires":[]} |
|
Run then do a very small spin jump to clip into the left side of the first gate. While inside the gate, back up to get the maximum run distance using either Moonwalk or X-Ray Turnaround and repeat for the next gate. It is also possible to clip into the gates by aiming down while in the spin jump. A down-back is also possible for clipping into the first gate, but it is generally harder. Requires: {
"obstaclesNotCleared": [
"A"
]
}
"canDash"
"canCrouchGateClip"
{
"or": [
"canXRayTurnaround",
"canMoonwalk"
]
}Clears obstacles: A |
|
The only way the Wavers will get to the door is if the right crumble blocks are all broken. This assumes that Samus comes from the left with Speed, a mockball, or a crouch gate clip. After the crumbles are broken, shoot the ceiling block and wait by the door for the Waver to come. Note that if Samus takes more than 35 seconds after entering the room, before shooting the ceiling, the Waver will not come down. Requires: {
"obstaclesNotCleared": [
"A"
]
}
{
"or": [
"h_speedDash",
"canMockball",
{
"and": [
"canDash",
"canCrouchGateClip",
{
"or": [
"canXRayTurnaround",
"canMoonwalk"
]
}
]
},
{
"and": [
{
"notable": "Crouch Gate Clip Damage Boost"
},
"canHorizontalDamageBoost",
"canCrouchGateClip",
{
"enemyDamage": {
"enemy": "Zeb",
"type": "contact",
"hits": 2
}
},
{
"or": [
"canXRayWaitForIFrames",
{
"haveBlueSuit": {}
}
]
}
]
}
]
}Exit condition: {
"leaveWithGModeSetup": {}
}Unlocks doors: {"types":["ammo"],"requires":[]} |
From: 3
Bottom Left Door
To: 6
Junction (Right of Tunnel)
Maintain i-frames by using X-Ray whenever a thorn would deal damage. Move by alternating between X-Ray turnarounds and normal turnarounds. Simply crouch again following any accidental X-Ray Standups. Requires: {
"notable": "Spikeway X-Ray Wiggle"
}
"canXRayWaitForIFrames"
"canXRayTurnaround"
{
"thornHits": 1
}
"h_trickyToCarryBlueSuit" |
From: 6
Junction (Right of Tunnel)
To: 3
Bottom Left Door
Maintain i-frames by using X-Ray whenever a thorn would deal damage. Move by alternating between X-Ray turnarounds and normal turnarounds. Simply crouch again following any accidental X-Ray Standups. Requires: {
"notable": "Spikeway X-Ray Wiggle"
}
"canXRayWaitForIFrames"
"canXRayTurnaround"
{
"thornHits": 1
}
"h_trickyToCarryBlueSuit" |
From: 2
Above Power Bomb Blocks - Top Left Door
To: 4
Above Power Bomb Blocks - Middle Left Door
Entrance condition: {
"comeInShinecharging": {
"length": 3,
"openEnd": 0
}
}Requires: "canChainTemporaryBlue" "canXRayTurnaround" Exit condition: {
"leaveWithTemporaryBlue": {}
}Unlocks doors: {"types":["ammo"],"requires":[]} |
From: 2
Above Power Bomb Blocks - Top Left Door
To: 6
Above Power Bomb Blocks - Bottom Right Door
Entrance condition: {
"comeInShinecharging": {
"length": 3,
"openEnd": 0
}
}Requires: "canLongChainTemporaryBlue" "canXRayTurnaround" Exit condition: {
"leaveWithTemporaryBlue": {}
}Unlocks doors: {"types":["ammo"],"requires":[]} |
From: 2
Above Power Bomb Blocks - Top Left Door
To: 7
Below Power Bomb Blocks - Top Right Door
Entrance condition: {
"comeInShinecharging": {
"length": 3,
"openEnd": 0
}
}Requires: "canLongChainTemporaryBlue"
"canXRayTurnaround"
{
"ammo": {
"type": "PowerBomb",
"count": 1
}
}Exit condition: {
"leaveWithTemporaryBlue": {}
}Unlocks doors: {"types":["ammo"],"requires":[]} |
From: 2
Above Power Bomb Blocks - Top Left Door
To: 8
Below Power Bomb Blocks - Bottom Left Door
Entrance condition: {
"comeInShinecharging": {
"length": 3,
"openEnd": 0
}
}Requires: "canLongChainTemporaryBlue"
"canXRayTurnaround"
{
"ammo": {
"type": "PowerBomb",
"count": 1
}
}Exit condition: {
"leaveWithTemporaryBlue": {}
}Unlocks doors: {"types":["ammo"],"requires":[]} |
From: 3
Above Power Bomb Blocks - Top Right Door
To: 6
Above Power Bomb Blocks - Bottom Right Door
Entrance condition: {
"comeInShinecharging": {
"length": 4,
"openEnd": 0
}
}Requires: "canLongChainTemporaryBlue" "canXRayTurnaround" Exit condition: {
"leaveWithTemporaryBlue": {}
}Unlocks doors: {"types":["ammo"],"requires":[]} |
From: 3
Above Power Bomb Blocks - Top Right Door
To: 7
Below Power Bomb Blocks - Top Right Door
Entrance condition: {
"comeInShinecharging": {
"length": 4,
"openEnd": 0
}
}Requires: "canLongChainTemporaryBlue"
"canXRayTurnaround"
{
"ammo": {
"type": "PowerBomb",
"count": 1
}
}Exit condition: {
"leaveWithTemporaryBlue": {}
}Unlocks doors: {"types":["ammo"],"requires":[]} |
From: 3
Above Power Bomb Blocks - Top Right Door
To: 8
Below Power Bomb Blocks - Bottom Left Door
Entrance condition: {
"comeInShinecharging": {
"length": 4,
"openEnd": 0
}
}Requires: "canLongChainTemporaryBlue"
"canXRayTurnaround"
{
"ammo": {
"type": "PowerBomb",
"count": 1
}
}Exit condition: {
"leaveWithTemporaryBlue": {}
}Unlocks doors: {"types":["ammo"],"requires":[]} |
From: 4
Above Power Bomb Blocks - Middle Left Door
To: 2
Above Power Bomb Blocks - Top Left Door
Entrance condition: {
"comeInShinecharging": {
"length": 3,
"openEnd": 0
}
}Requires: "canChainTemporaryBlue" "canXRayTurnaround" Exit condition: {
"leaveWithTemporaryBlue": {}
}Unlocks doors: {"types":["ammo"],"requires":[]} |
From: 4
Above Power Bomb Blocks - Middle Left Door
To: 3
Above Power Bomb Blocks - Top Right Door
Entrance condition: {
"comeInShinecharging": {
"length": 3,
"openEnd": 0
}
}Requires: "canChainTemporaryBlue"
{
"or": [
"HiJump",
"canTrickySpringBallJump",
"canXRayTurnaround"
]
}Exit condition: {
"leaveWithTemporaryBlue": {}
}Unlocks doors: {"types":["ammo"],"requires":[]} |
From: 4
Above Power Bomb Blocks - Middle Left Door
To: 5
Above Power Bomb Blocks - Bottom Left Door
Entrance condition: {
"comeInShinecharging": {
"length": 3,
"openEnd": 0
}
}Requires: "canChainTemporaryBlue" "canXRayTurnaround" Exit condition: {
"leaveWithTemporaryBlue": {}
}Unlocks doors: {"types":["ammo"],"requires":[]} |
From: 4
Above Power Bomb Blocks - Middle Left Door
To: 8
Below Power Bomb Blocks - Bottom Left Door
Entrance condition: {
"comeInShinecharging": {
"length": 3,
"openEnd": 0
}
}Requires: "canLongChainTemporaryBlue"
"canXRayTurnaround"
{
"ammo": {
"type": "PowerBomb",
"count": 1
}
}Exit condition: {
"leaveWithTemporaryBlue": {}
}Unlocks doors: {"types":["ammo"],"requires":[]} |
From: 5
Above Power Bomb Blocks - Bottom Left Door
To: 2
Above Power Bomb Blocks - Top Left Door
Entrance condition: {
"comeInShinecharging": {
"length": 12,
"openEnd": 0
}
}Requires: "canLongChainTemporaryBlue" "canXRayTurnaround" Exit condition: {
"leaveWithTemporaryBlue": {}
}Unlocks doors: {"types":["ammo"],"requires":[]} |
From: 5
Above Power Bomb Blocks - Bottom Left Door
To: 3
Above Power Bomb Blocks - Top Right Door
Entrance condition: {
"comeInShinecharging": {
"length": 12,
"openEnd": 0
}
}Requires: "canLongChainTemporaryBlue" "canXRayTurnaround" Exit condition: {
"leaveWithTemporaryBlue": {}
}Unlocks doors: {"types":["ammo"],"requires":[]} |
From: 5
Above Power Bomb Blocks - Bottom Left Door
To: 4
Above Power Bomb Blocks - Middle Left Door
Entrance condition: {
"comeInShinecharging": {
"length": 12,
"openEnd": 0
}
}Requires: "canChainTemporaryBlue" "canXRayTurnaround" Exit condition: {
"leaveWithTemporaryBlue": {}
}Unlocks doors: {"types":["ammo"],"requires":[]} |
From: 5
Above Power Bomb Blocks - Bottom Left Door
To: 7
Below Power Bomb Blocks - Top Right Door
Entrance condition: {
"comeInShinecharging": {
"length": 12,
"openEnd": 0
}
}Requires: "canLongChainTemporaryBlue"
"canXRayTurnaround"
"can4HighMidAirMorph"
{
"ammo": {
"type": "PowerBomb",
"count": 1
}
}Exit condition: {
"leaveWithTemporaryBlue": {}
}Unlocks doors: {"types":["ammo"],"requires":[]} |
From: 5
Above Power Bomb Blocks - Bottom Left Door
To: 8
Below Power Bomb Blocks - Bottom Left Door
Entrance condition: {
"comeInShinecharging": {
"length": 12,
"openEnd": 0
}
}Requires: "canLongChainTemporaryBlue"
"can4HighMidAirMorph"
"canXRayTurnaround"
{
"ammo": {
"type": "PowerBomb",
"count": 1
}
}Exit condition: {
"leaveWithTemporaryBlue": {}
}Unlocks doors: {"types":["ammo"],"requires":[]} |
From: 6
Above Power Bomb Blocks - Bottom Right Door
To: 2
Above Power Bomb Blocks - Top Left Door
Entrance condition: {
"comeInShinecharging": {
"length": 12,
"openEnd": 0
}
}Requires: "canLongChainTemporaryBlue" "canXRayTurnaround" Exit condition: {
"leaveWithTemporaryBlue": {}
}Unlocks doors: {"types":["ammo"],"requires":[]} |
From: 6
Above Power Bomb Blocks - Bottom Right Door
To: 3
Above Power Bomb Blocks - Top Right Door
Entrance condition: {
"comeInShinecharging": {
"length": 12,
"openEnd": 0
}
}Requires: "canLongChainTemporaryBlue" "canXRayTurnaround" Exit condition: {
"leaveWithTemporaryBlue": {}
}Unlocks doors: {"types":["ammo"],"requires":[]} |
From: 6
Above Power Bomb Blocks - Bottom Right Door
To: 4
Above Power Bomb Blocks - Middle Left Door
Entrance condition: {
"comeInShinecharging": {
"length": 12,
"openEnd": 0
}
}Requires: "canChainTemporaryBlue" "canXRayTurnaround" Exit condition: {
"leaveWithTemporaryBlue": {}
}Unlocks doors: {"types":["ammo"],"requires":[]} |
From: 6
Above Power Bomb Blocks - Bottom Right Door
To: 7
Below Power Bomb Blocks - Top Right Door
Entrance condition: {
"comeInShinecharging": {
"length": 12,
"openEnd": 0
}
}Requires: "canLongChainTemporaryBlue"
"canXRayTurnaround"
{
"ammo": {
"type": "PowerBomb",
"count": 1
}
}Exit condition: {
"leaveWithTemporaryBlue": {}
}Unlocks doors: {"types":["ammo"],"requires":[]} |
From: 6
Above Power Bomb Blocks - Bottom Right Door
To: 8
Below Power Bomb Blocks - Bottom Left Door
Entrance condition: {
"comeInShinecharging": {
"length": 12,
"openEnd": 0
}
}Requires: "canLongChainTemporaryBlue"
"canXRayTurnaround"
{
"ammo": {
"type": "PowerBomb",
"count": 1
}
}Exit condition: {
"leaveWithTemporaryBlue": {}
}Unlocks doors: {"types":["ammo"],"requires":[]} |
From: 7
Below Power Bomb Blocks - Top Right Door
To: 2
Above Power Bomb Blocks - Top Left Door
Entrance condition: {
"comeInShinecharging": {
"length": 2,
"openEnd": 0
}
}Requires: "canLongChainTemporaryBlue"
"canXRayTurnaround"
{
"ammo": {
"type": "PowerBomb",
"count": 1
}
}Exit condition: {
"leaveWithTemporaryBlue": {}
}Unlocks doors: {"types":["ammo"],"requires":[]} |
From: 7
Below Power Bomb Blocks - Top Right Door
To: 3
Above Power Bomb Blocks - Top Right Door
Entrance condition: {
"comeInShinecharging": {
"length": 2,
"openEnd": 0
}
}Requires: "canLongChainTemporaryBlue"
"canXRayTurnaround"
{
"ammo": {
"type": "PowerBomb",
"count": 1
}
}Exit condition: {
"leaveWithTemporaryBlue": {}
}Unlocks doors: {"types":["ammo"],"requires":[]} |
From: 7
Below Power Bomb Blocks - Top Right Door
To: 4
Above Power Bomb Blocks - Middle Left Door
Entrance condition: {
"comeInShinecharging": {
"length": 2,
"openEnd": 0
}
}Requires: "canLongChainTemporaryBlue"
"canXRayTurnaround"
{
"ammo": {
"type": "PowerBomb",
"count": 1
}
}Exit condition: {
"leaveWithTemporaryBlue": {}
}Unlocks doors: {"types":["ammo"],"requires":[]} |
From: 7
Below Power Bomb Blocks - Top Right Door
To: 6
Above Power Bomb Blocks - Bottom Right Door
Entrance condition: {
"comeInShinecharging": {
"length": 2,
"openEnd": 0
}
}Requires: "canLongChainTemporaryBlue"
"canXRayTurnaround"
{
"ammo": {
"type": "PowerBomb",
"count": 1
}
}Exit condition: {
"leaveWithTemporaryBlue": {}
}Unlocks doors: {"types":["ammo"],"requires":[]} |
From: 8
Below Power Bomb Blocks - Bottom Left Door
To: 2
Above Power Bomb Blocks - Top Left Door
Entrance condition: {
"comeInShinecharging": {
"length": 2,
"openEnd": 0
}
}Requires: "canLongChainTemporaryBlue"
"canXRayTurnaround"
"canBeVeryPatient"
{
"ammo": {
"type": "PowerBomb",
"count": 1
}
}Exit condition: {
"leaveWithTemporaryBlue": {}
}Unlocks doors: {"types":["ammo"],"requires":[]} |
From: 8
Below Power Bomb Blocks - Bottom Left Door
To: 3
Above Power Bomb Blocks - Top Right Door
Entrance condition: {
"comeInShinecharging": {
"length": 2,
"openEnd": 0
}
}Requires: "canLongChainTemporaryBlue"
"canXRayTurnaround"
"canBeVeryPatient"
{
"ammo": {
"type": "PowerBomb",
"count": 1
}
}Exit condition: {
"leaveWithTemporaryBlue": {}
}Unlocks doors: {"types":["ammo"],"requires":[]} |
From: 8
Below Power Bomb Blocks - Bottom Left Door
To: 4
Above Power Bomb Blocks - Middle Left Door
Entrance condition: {
"comeInShinecharging": {
"length": 2,
"openEnd": 0
}
}Requires: "canLongChainTemporaryBlue"
"canXRayTurnaround"
"canBeVeryPatient"
{
"ammo": {
"type": "PowerBomb",
"count": 1
}
}Exit condition: {
"leaveWithTemporaryBlue": {}
}Unlocks doors: {"types":["ammo"],"requires":[]} |
From: 8
Below Power Bomb Blocks - Bottom Left Door
To: 5
Above Power Bomb Blocks - Bottom Left Door
Entrance condition: {
"comeInShinecharging": {
"length": 2,
"openEnd": 0
}
}Requires: "canLongChainTemporaryBlue"
"canXRayTurnaround"
"canBeVeryPatient"
{
"ammo": {
"type": "PowerBomb",
"count": 1
}
}Exit condition: {
"leaveWithTemporaryBlue": {}
}Unlocks doors: {"types":["ammo"],"requires":[]} |
From: 8
Below Power Bomb Blocks - Bottom Left Door
To: 6
Above Power Bomb Blocks - Bottom Right Door
Entrance condition: {
"comeInShinecharging": {
"length": 2,
"openEnd": 0
}
}Requires: "canLongChainTemporaryBlue"
"canXRayTurnaround"
"canBeVeryPatient"
{
"ammo": {
"type": "PowerBomb",
"count": 1
}
}Exit condition: {
"leaveWithTemporaryBlue": {}
}Unlocks doors: {"types":["ammo"],"requires":[]} |
From: 8
Below Power Bomb Blocks - Bottom Left Door
To: 7
Below Power Bomb Blocks - Top Right Door
Entrance condition: {
"comeInShinecharging": {
"length": 3,
"openEnd": 0
}
}Requires: "canLongChainTemporaryBlue" "canXRayTurnaround" Exit condition: {
"leaveWithTemporaryBlue": {}
}Unlocks doors: {"types":["ammo"],"requires":[]} |
From: 9
Right Etecoon Shaft - Top Left Door
To: 10
Right Etecoon Shaft - Bottom Left Door
Requires: {
"canShineCharge": {
"usedTiles": 17,
"openEnd": 0
}
}
"canLongChainTemporaryBlue"
"canXRayTurnaround"Exit condition: {
"leaveWithTemporaryBlue": {}
}Unlocks doors: {"types":["ammo"],"requires":[]} |
|
Requires: {
"canShineCharge": {
"usedTiles": 17,
"openEnd": 1
}
}
"canChainTemporaryBlue"
"canXRayTurnaround"
{
"or": [
"canSpringBallJumpMidAir",
{
"and": [
"HiJump",
"canTrickyUseFrozenEnemies"
]
}
]
}Exit condition: {
"leaveWithTemporaryBlue": {}
} |
From: 4
Item (Through the Pipe)
To: 5
Junction The Left End of Morph Tube
Requires: {
"notable": "X-Ray Wiggle"
}
"canXRayTurnaround" |
From: 5
Junction The Left End of Morph Tube
To: 4
Item (Through the Pipe)
It's a long Wiggle, but you can see the item before going in too far. Spin jumping directly into the tube will disable X-Ray, so enter aiming down to standup first. Requires: {
"notable": "X-Ray Wiggle"
}
"canTwoTileSqueeze"
"canXRayTurnaround" |
|
Requires: {
"canShineCharge": {
"usedTiles": 24,
"openEnd": 1
}
}
"canChainTemporaryBlue"
"canXRayTurnaround"Clears obstacles: D |
From: 13
Central Junction
To: 1
Left Side - Top Door
Build a ShineCharge on the below platform and bring it up to the morph tunnel by chaining Temporary Blue. Aim to bounce into the tunnel opening and use springball to bounce the rest of the way while blue. Requires: {
"or": [
{
"and": [
{
"canShineCharge": {
"usedTiles": 25,
"openEnd": 0
}
},
"canXRayTurnaround"
]
},
{
"canShineCharge": {
"usedTiles": 21,
"openEnd": 0
}
}
]
}
"canChainTemporaryBlue"
"canSpringBallBounce"Clears obstacles: A |
From: 13
Central Junction
To: 4
Left Side - Door Behind Power Bomb Blocks
Gain a shinecharge running left-to-right to obtain temporary blue. Use X-Ray to turn around, then do a mid-air Spring Ball jump with Hi Jump to pass through the broken Power Bomb blocks. Requires: {
"obstaclesCleared": [
"B"
]
}
{
"canShineCharge": {
"usedTiles": 16,
"openEnd": 0
}
}
"canXRayTurnaround"
"HiJump"
"canSpringBallJumpMidAir"
"canChainTemporaryBlue"Exit condition: {
"leaveWithTemporaryBlue": {}
}Unlocks doors: {"types":["ammo"],"requires":[]} |
From: 13
Central Junction
To: 8
Right Side - Bottom Door
Use Spring Ball to bounce through the morph tunnel. Then continue chaining temporary blue into the next room. Requires: {
"canShineCharge": {
"usedTiles": 24,
"openEnd": 1
}
}
"canXRayTurnaround"
"canTrickySpringBallBounce"
"canLongChainTemporaryBlue"Exit condition: {
"leaveWithTemporaryBlue": {}
}Unlocks doors: {"types":["ammo"],"requires":[]} |
|
Jump straight up and shoot with the correct timing. This strat involves shooting a Super diagonally from the correct height while flush against the left wall. Its acceleration will cause it to clip into the blue gate off-screen. Requires: {
"notable": "Reverse Gate Glitch"
}
{
"obstaclesCleared": [
"A"
]
}
{
"or": [
"canTrickyJump",
"h_backIntoCorner"
]
}
"HiJump"
"canOffScreenSuperShot"
{
"or": [
{
"noFlashSuit": {}
},
"h_useSpringBall"
]
}Clears obstacles: B Dev note: Springball jumps didn't look possible but was close. IBJ didn't look possible. It is possible to do this with a flash suit and no Spring Ball, but is extremely precise. |
From: 1
Left Door
To: 1
Left Door
Use a stationary spinjump, or spinjump against the wall and turn around without moving; and shoot with the same correct timing. This strat involves shooting a Super diagonally from the correct height while flush against the left wall. Its acceleration will cause it to clip into the blue gate off-screen. Requires: {
"notable": "Reverse Gate Glitch"
}
{
"obstaclesCleared": [
"A"
]
}
{
"or": [
"canTrickyJump",
"h_backIntoCorner"
]
}
"canStationarySpinJump"
"SpaceJump"
"canOffScreenSuperShot"Clears obstacles: B |
From: 4
Frozen Hopper Junction
To: 4
Frozen Hopper Junction
Freeze a small hopper to the side and kill the remaining Side Hoppers. Stand against the left wall (damage knockback will align Samus with the wall) and shoot up to freeze the hopper. Jump up to land on it, aligned with the wall. Alternatively, Jump and shoot down to freeze the hopper as a way to avoid damage. Fire a Super just above the door shell to hit the Gate. This strat involves shooting a Super diagonally from the correct height while flush against the left wall. Its acceleration will cause it to clip into the blue gate off-screen. Requires: {
"notable": "Reverse Gate Glitch"
}
{
"obstaclesNotCleared": [
"A"
]
}
"canTrickyUseFrozenEnemies"
"canTrickyJump"
"canOffScreenSuperShot"
{
"or": [
"h_backIntoCorner",
{
"and": [
{
"enemyDamage": {
"enemy": "Sidehopper",
"type": "contact",
"hits": 1
}
},
"canNeutralDamageBoost"
]
}
]
}Clears obstacles: B |
|
This is a long temporary blue chain to make it through all the speed blocks. If possible, destroy the enemies beforehand using Wave or a Power Bomb; otherwise, carefully kill them individually with temporary blue. Requires: {
"canShineCharge": {
"usedTiles": 32,
"openEnd": 1
}
}
"canLongChainTemporaryBlue"
"canXRayTurnaround"
{
"or": [
"Wave",
{
"ammo": {
"type": "PowerBomb",
"count": 1
}
},
"canDodgeWhileShooting"
]
}Clears obstacles: A |
|
Entrance condition: {
"comeInWithTemporaryBlue": {}
}Requires: {
"doorUnlockedAtNode": 1
}
"HiJump"
{
"or": [
"Gravity",
{
"and": [
"canTrickySpringBallJump",
"canDodgeWhileShooting",
"canLongChainTemporaryBlue",
{
"enemyKill": {
"enemies": [
[
"Yapping Maw"
]
],
"explicitWeapons": [
"Super"
]
}
}
]
}
]
}
"canChainTemporaryBlue"
"canXRayTurnaround"Unlocks doors: {"nodeId":1,"types":["ammo"],"requires":[]} |
From: 1
Top Left Door
To: 2
Middle Left Door
Entrance condition: {
"comeInShinecharging": {
"length": 4,
"openEnd": 0
}
}Requires: "canChainTemporaryBlue" "canXRayTurnaround" Exit condition: {
"leaveWithTemporaryBlue": {}
}Unlocks doors: {"types":["ammo"],"requires":[]} |
From: 1
Top Left Door
To: 3
Bottom Left Door
Entrance condition: {
"comeInShinecharging": {
"length": 4,
"openEnd": 0
}
}Requires: "canLongChainTemporaryBlue" "canXRayTurnaround" Exit condition: {
"leaveWithTemporaryBlue": {}
}Unlocks doors: {"types":["ammo"],"requires":[]} |
From: 2
Middle Left Door
To: 1
Top Left Door
Entrance condition: {
"comeInShinecharging": {
"length": 7,
"openEnd": 0
}
}Requires: "canLongChainTemporaryBlue"
"canXRayTurnaround"
{
"or": [
"HiJump",
"canTrickySpringBallJump"
]
}Exit condition: {
"leaveWithTemporaryBlue": {}
}Unlocks doors: {"types":["ammo"],"requires":[]} |
From: 2
Middle Left Door
To: 3
Bottom Left Door
Entrance condition: {
"comeInShinecharging": {
"length": 7,
"openEnd": 0
}
}Requires: "canLongChainTemporaryBlue" "canXRayTurnaround" Exit condition: {
"leaveWithTemporaryBlue": {}
}Unlocks doors: {"types":["ammo"],"requires":[]} |
From: 2
Middle Left Door
To: 4
Bottom Right Door
Entrance condition: {
"comeInShinecharging": {
"length": 7,
"openEnd": 0
}
}Requires: "canChainTemporaryBlue"
{
"or": [
"HiJump",
{
"and": [
"canSpringBallJumpMidAir",
"canXRayTurnaround"
]
}
]
}Exit condition: {
"leaveWithTemporaryBlue": {}
}Unlocks doors: {"types":["ammo"],"requires":[]} |
From: 3
Bottom Left Door
To: 1
Top Left Door
Entrance condition: {
"comeInShinecharging": {
"length": 2,
"openEnd": 0
}
}Requires: "canLongChainTemporaryBlue"
"canXRayTurnaround"
{
"or": [
"HiJump",
"canTrickySpringBallJump"
]
}Exit condition: {
"leaveWithTemporaryBlue": {}
}Unlocks doors: {"types":["ammo"],"requires":[]} |
From: 3
Bottom Left Door
To: 2
Middle Left Door
Entrance condition: {
"comeInShinecharging": {
"length": 2,
"openEnd": 0
}
}Requires: "canLongChainTemporaryBlue" "canXRayTurnaround" Exit condition: {
"leaveWithTemporaryBlue": {}
}Unlocks doors: {"types":["ammo"],"requires":[]} |
From: 3
Bottom Left Door
To: 4
Bottom Right Door
Entrance condition: {
"comeInShinecharging": {
"length": 2,
"openEnd": 0
}
}Requires: "canLongChainTemporaryBlue"
"canXRayTurnaround"
{
"or": [
"HiJump",
"canTrickySpringBallJump"
]
}Exit condition: {
"leaveWithTemporaryBlue": {}
}Unlocks doors: {"types":["ammo"],"requires":[]} |
From: 4
Bottom Right Door
To: 3
Bottom Left Door
Entrance condition: {
"comeInShinecharging": {
"length": 2,
"openEnd": 0
}
}Requires: "canLongChainTemporaryBlue" "canXRayTurnaround" Exit condition: {
"leaveWithTemporaryBlue": {}
}Unlocks doors: {"types":["ammo"],"requires":[]} |
From: 4
Small Ledge Below Left Door
To: 1
Left Door
Run and jump from the safe stair to just reach the door ledge. To avoid walljumping, use a full speed jump or jump from on top of the spikes (stairs or floor). Requires: "HiJump"
"canSpeedyJump"
{
"or": [
{
"and": [
"canWallJump",
{
"or": [
"canTrickyJump",
{
"spikeHits": 1
}
]
}
]
},
{
"and": [
"canTrickyDashJump",
"h_backIntoCorner",
"canInsaneJump"
]
},
{
"and": [
"canTrickyDashJump",
{
"spikeHits": 1
}
]
}
]
} |
From: 4
Small Ledge Below Left Door
To: 1
Left Door
Jump up to the left door either by jumping from spikes or with a very precise jump. Cross the room by Jumping atop the spikes. Taking enemy damage can be used to reduce some spike damage. The final jump can either be made by jumping from the bottommost spike stair or from the safe stair. Setup run speed atop the spike stair by holding forward to be pushed backward. The safe stair jump is much harder, but can be made without every pixel of runway. Requires: {
"notable": "Spike Jumps with HiJump"
}
"HiJump"
"canDash"
"canTrickyJump"
{
"or": [
{
"and": [
"canInsaneWallJump",
"canInsaneJump",
"h_backIntoCorner"
]
},
{
"and": [
{
"spikeHits": 1
},
"canHorizontalDamageBoost",
"canPreciseWallJump",
"canUseIFrames"
]
}
]
} |
From: 1
Top Left Door
To: 10
Temporary Blue Junction (Top Left Door)
Entrance condition: {
"comeInShinecharging": {
"length": 2,
"openEnd": 0
}
}Requires: "canChainTemporaryBlue" "canXRayTurnaround" |
From: 2
Middle Left Door (Behind Power Bomb Blocks)
To: 1
Top Left Door
Lay the Power Bomb during a temporary blue chain immediately after morphing, placing it high enough that it does not boost Samus upward. Entrance condition: {
"comeInShinecharging": {
"length": 0,
"openEnd": 1
}
}Requires: "canLongChainTemporaryBlue"
{
"ammo": {
"type": "PowerBomb",
"count": 1
}
}
"can4HighMidAirMorph"
"canXRayTurnaround"Exit condition: {
"leaveWithTemporaryBlue": {}
}Unlocks doors: {"types":["ammo"],"requires":[]} |
From: 3
Bottom Left Door
To: 10
Temporary Blue Junction (Top Left Door)
Entrance condition: {
"comeInShinecharging": {
"length": 11,
"openEnd": 0
}
}Requires: "HiJump" "canTrickyUseFrozenEnemies" "canLongChainTemporaryBlue" "canXRayTurnaround" "canOffScreenMovement" Dev note: FIXME: This might also be possible with Spring Ball instead of HiJump, but if so it seems really bad. |
From: 4
Bottom Right Door
To: 10
Temporary Blue Junction (Top Left Door)
Entrance condition: {
"comeInShinecharging": {
"length": 11,
"openEnd": 0
}
}Requires: "HiJump" "canTrickyUseFrozenEnemies" "canLongChainTemporaryBlue" "canXRayTurnaround" "canOffScreenMovement" Dev note: FIXME: This might also be possible with Spring Ball instead of HiJump, but if so it seems really bad. |
From: 5
Top Right Door
To: 10
Temporary Blue Junction (Top Left Door)
Entrance condition: {
"comeInShinecharging": {
"length": 11,
"openEnd": 0
}
}Requires: "canChainTemporaryBlue" "canXRayTurnaround" |
From: 10
Temporary Blue Junction (Top Left Door)
To: 2
Middle Left Door (Behind Power Bomb Blocks)
Requires: "h_getBlueSpeedMaxRunway"
"canLongChainTemporaryBlue"
"canXRayTurnaround"
"can4HighMidAirMorph"
{
"ammo": {
"type": "PowerBomb",
"count": 1
}
}Exit condition: {
"leaveWithTemporaryBlue": {}
}Unlocks doors: {"types":["missiles","super"],"requires":[]}
{"types":["powerbomb"],"requires":[],"useImplicitRequires":false}Dev note: FIXME: The h_getBlueSpeedMaxRunway is to satisfy tests for now. We should add a proper way to represent that the blue state carries over from the previous strat. |
From: 10
Temporary Blue Junction (Top Left Door)
To: 3
Bottom Left Door
Requires: "h_getBlueSpeedMaxRunway" "canLongChainTemporaryBlue" "canXRayTurnaround" "canOffScreenMovement" Exit condition: {
"leaveWithTemporaryBlue": {}
}Unlocks doors: {"types":["ammo"],"requires":[]}Dev note: FIXME: The h_getBlueSpeedMaxRunway is to satisfy tests for now. We should add a proper way to represent that the blue state carries over from the previous strat. |
From: 10
Temporary Blue Junction (Top Left Door)
To: 4
Bottom Right Door
Requires: "h_getBlueSpeedMaxRunway" "canLongChainTemporaryBlue" "canXRayTurnaround" "canOffScreenMovement" Exit condition: {
"leaveWithTemporaryBlue": {}
}Unlocks doors: {"types":["ammo"],"requires":[]}Dev note: FIXME: The h_getBlueSpeedMaxRunway is to satisfy tests for now. We should add a proper way to represent that the blue state carries over from the previous strat. |
From: 2
Top Right Door
To: 3
Bottom Right Door
Entrance condition: {
"comeInShinecharging": {
"length": 3,
"openEnd": 0
}
}Requires: "canLongChainTemporaryBlue"
"canXRayTurnaround"
"can4HighMidAirMorph"
{
"thornHits": 1
}
{
"or": [
{
"thornHits": 2
},
"canBeVeryPatient"
]
}Exit condition: {
"leaveWithTemporaryBlue": {}
}Unlocks doors: {"types":["ammo"],"requires":[]}Dev note: Entirely avoiding the thorn hits is technically possible but extremely difficult. |
From: 3
Bottom Right Door
To: 2
Top Right Door
Entrance condition: {
"comeInShinecharging": {
"length": 2,
"openEnd": 0
}
}Requires: "canLongChainTemporaryBlue"
"canXRayTurnaround"
"can4HighMidAirMorph"
{
"thornHits": 1
}
{
"or": [
{
"thornHits": 2
},
"canBeVeryPatient"
]
}Exit condition: {
"leaveWithTemporaryBlue": {}
}Unlocks doors: {"types":["ammo"],"requires":[]}Dev note: Entirely avoiding the thorn hits is technically possible but extremely difficult. Farming in the middle of the strat could also be possible. |
|
Requires: {
"ammo": {
"type": "Super",
"count": 2
}
}
{
"or": [
"canXRayTurnaround",
"canTurnaroundAimCancel"
]
} |
|
Requires: {
"ammo": {
"type": "Super",
"count": 2
}
}
"canXRayTurnaround" |
|
Back up against the wall of the single-tile ledge. Run forward, perform a single arm pump, and jump on the last possible frame. Aim down just before reaching the platform. The arm pump can be performed by pressing shot, or by pressing an angle button (but not releasing it until after the jump). Requires: {
"notable": "Arm Pump Jump"
}
"h_backIntoCorner"
"canDash"
"canInsaneJump"
"canDownGrab" |
From: 3
Right Vertical Door
To: 2
Bottom Left Door
Entrance condition: {
"comeInWithTemporaryBlue": {
"direction": "right"
},
"comesThroughToilet": "any"
}Requires: "canChainTemporaryBlue" "canXRayTurnaround" "canTrickySpringBallBounce" Clears obstacles: A |
From: 1
Left Side - Top Door
To: 2
Left Side - Top Middle Door
Use X-ray to cancel the shinecharge, in order to quickly destroy the Waver before taking a hit. Alternatively, run, jump, or slide off the edge, using a pause buffer to morph. Or if enough runway is available, simply avoid using the last tile to stay out of the way of the Waver. Entrance condition: {
"comeInShinecharging": {
"length": 3,
"openEnd": 1
}
}Requires: "canLongChainTemporaryBlue" "canXRayTurnaround" "canXRayCancelShinecharge" Exit condition: {
"leaveWithTemporaryBlue": {}
}Unlocks doors: {"types":["ammo"],"requires":[]} |
From: 1
Left Side - Top Door
To: 3
Left Side - Bottom Middle Door
Use X-ray to cancel the shinecharge, in order to quickly destroy the Waver before taking a hit. Alternatively, run, jump, or slide off the edge, using a pause buffer to morph. Or if enough runway is available, simply avoid using the last tile to stay out of the way of the Waver. Entrance condition: {
"comeInShinecharging": {
"length": 3,
"openEnd": 1
}
}Requires: "canLongChainTemporaryBlue" "canXRayTurnaround" "canXRayCancelShinecharge" Exit condition: {
"leaveWithTemporaryBlue": {}
}Unlocks doors: {"types":["ammo"],"requires":[]} |
From: 1
Left Side - Top Door
To: 4
Left Side - Bottom Door
Use X-ray to cancel the shinecharge, in order to quickly destroy the Waver before taking a hit. Alternatively, run, jump, or slide off the edge, using a pause buffer to morph. Or if enough runway is available, simply avoid using the last tile to stay out of the way of the Waver. Lay the Power Bomb low enough to kill the Sova. Descend during the Power Bomb explosion, to take advantage of the more lenient timing provided by the lag. Entrance condition: {
"comeInShinecharging": {
"length": 3,
"openEnd": 1
}
}Requires: "canLongChainTemporaryBlue"
"canXRayTurnaround"
"canXRayCancelShinecharge"
{
"ammo": {
"type": "PowerBomb",
"count": 1
}
}Exit condition: {
"leaveWithTemporaryBlue": {}
}Unlocks doors: {"types":["ammo"],"requires":[]} |
From: 1
Left Side - Top Door
To: 5
Bottom Door
Use X-ray to cancel the shinecharge, in order to quickly destroy the Waver before taking a hit. Alternatively, run, jump, or slide off the edge, using a pause buffer to morph. Or if enough runway is available, simply avoid using the last tile to stay out of the way of the Waver. Lay the Power Bomb low enough to kill the Sova. Descend during the Power Bomb explosion, to take advantage of the more lenient timing provided by the lag. Entrance condition: {
"comeInShinecharging": {
"length": 3,
"openEnd": 1
}
}Requires: "canLongChainTemporaryBlue"
"canXRayTurnaround"
"canXRayCancelShinecharge"
{
"ammo": {
"type": "PowerBomb",
"count": 1
}
}Exit condition: {
"leaveWithTemporaryBlue": {
"direction": "any"
}
}Unlocks doors: {"types":["ammo"],"requires":[]} |
From: 2
Left Side - Top Middle Door
To: 3
Left Side - Bottom Middle Door
Entrance condition: {
"comeInGettingBlueSpeed": {
"length": 2,
"openEnd": 1
}
}Requires: "canLongChainTemporaryBlue" "canXRayTurnaround" Exit condition: {
"leaveWithTemporaryBlue": {}
}Unlocks doors: {"types":["ammo"],"requires":[]} |
From: 2
Left Side - Top Middle Door
To: 4
Left Side - Bottom Door
Lay the Power Bomb low enough to kill the Sova. Descend during the Power Bomb explosion, to take advantage of the more lenient timing provided by the lag. Entrance condition: {
"comeInGettingBlueSpeed": {
"length": 2,
"openEnd": 1
}
}Requires: "canLongChainTemporaryBlue"
"canXRayTurnaround"
{
"ammo": {
"type": "PowerBomb",
"count": 1
}
}Exit condition: {
"leaveWithTemporaryBlue": {}
}Unlocks doors: {"types":["ammo"],"requires":[]} |
From: 2
Left Side - Top Middle Door
To: 5
Bottom Door
Lay the Power Bomb low enough to kill the Sova. Descend during the Power Bomb explosion, to take advantage of the more lenient timing provided by the lag. Entrance condition: {
"comeInGettingBlueSpeed": {
"length": 2,
"openEnd": 1
}
}Requires: "canLongChainTemporaryBlue"
"canXRayTurnaround"
{
"ammo": {
"type": "PowerBomb",
"count": 1
}
}Exit condition: {
"leaveWithTemporaryBlue": {
"direction": "any"
}
}Unlocks doors: {"types":["ammo"],"requires":[]} |
From: 3
Left Side - Bottom Middle Door
To: 2
Left Side - Top Middle Door
Entrance condition: {
"comeInShinecharging": {
"length": 4,
"openEnd": 1
}
}Requires: "canLongChainTemporaryBlue" "canXRayTurnaround" Exit condition: {
"leaveWithTemporaryBlue": {}
}Unlocks doors: {"types":["ammo"],"requires":[]} |
From: 3
Left Side - Bottom Middle Door
To: 4
Left Side - Bottom Door
Lay the Power Bomb low enough to kill the Sova. Descend during the Power Bomb explosion, to take advantage of the more lenient timing provided by the lag. Entrance condition: {
"comeInShinecharging": {
"length": 4,
"openEnd": 1
}
}Requires: "canLongChainTemporaryBlue"
"canXRayTurnaround"
{
"ammo": {
"type": "PowerBomb",
"count": 1
}
}Exit condition: {
"leaveWithTemporaryBlue": {}
}Unlocks doors: {"types":["ammo"],"requires":[]} |
From: 3
Left Side - Bottom Middle Door
To: 6
Middle Right Door
Entrance condition: {
"comeInShinecharging": {
"length": 4,
"openEnd": 1
}
}Requires: "canLongChainTemporaryBlue" "canXRayTurnaround" "HiJump" "canSpringBallJumpMidAir" Exit condition: {
"leaveWithTemporaryBlue": {}
}Unlocks doors: {"types":["ammo"],"requires":[]} |
From: 3
Left Side - Bottom Middle Door
To: 7
Top Right Door
Entrance condition: {
"comeInShinecharging": {
"length": 4,
"openEnd": 1
}
}Requires: "canLongChainTemporaryBlue" "canXRayTurnaround" "HiJump" "canSpringBallJumpMidAir" Exit condition: {
"leaveWithTemporaryBlue": {}
}Unlocks doors: {"types":["ammo"],"requires":[]} |
From: 4
Left Side - Bottom Door
To: 2
Left Side - Top Middle Door
Entrance condition: {
"comeInShinecharging": {
"length": 4,
"openEnd": 0
}
}Requires: "canLongChainTemporaryBlue"
"canXRayTurnaround"
{
"ammo": {
"type": "PowerBomb",
"count": 1
}
}
"canBeVeryPatient"Exit condition: {
"leaveWithTemporaryBlue": {}
}Unlocks doors: {"types":["ammo"],"requires":[]}Dev note: The canBeVeryPatient requirement is for difficulty placement |
From: 4
Left Side - Bottom Door
To: 3
Left Side - Bottom Middle Door
Entrance condition: {
"comeInShinecharging": {
"length": 4,
"openEnd": 0
}
}Requires: "canLongChainTemporaryBlue"
"canXRayTurnaround"
{
"ammo": {
"type": "PowerBomb",
"count": 1
}
}
"canBeVeryPatient"Exit condition: {
"leaveWithTemporaryBlue": {}
}Unlocks doors: {"types":["ammo"],"requires":[]}Dev note: The canBeVeryPatient requirement is for difficulty placement |
From: 4
Left Side - Bottom Door
To: 6
Middle Right Door
Entrance condition: {
"comeInShinecharging": {
"length": 4,
"openEnd": 0
}
}Requires: "canLongChainTemporaryBlue"
"canXRayTurnaround"
{
"ammo": {
"type": "PowerBomb",
"count": 1
}
}
"HiJump"
"canSpringBallJumpMidAir"
"canBeVeryPatient"Exit condition: {
"leaveWithTemporaryBlue": {}
}Unlocks doors: {"types":["ammo"],"requires":[]}Dev note: The canBeVeryPatient requirement is for difficulty placement |
From: 4
Left Side - Bottom Door
To: 7
Top Right Door
Entrance condition: {
"comeInShinecharging": {
"length": 4,
"openEnd": 0
}
}Requires: "canLongChainTemporaryBlue"
"canXRayTurnaround"
{
"ammo": {
"type": "PowerBomb",
"count": 1
}
}
"HiJump"
"canSpringBallJumpMidAir"
"canBeVeryPatient"Exit condition: {
"leaveWithTemporaryBlue": {}
}Unlocks doors: {"types":["ammo"],"requires":[]}Dev note: The canBeVeryPatient requirement is for difficulty placement |
From: 6
Middle Right Door
To: 4
Left Side - Bottom Door
Lay the Power Bomb low enough to kill the Sova. Descend during the Power Bomb explosion, to take advantage of the more lenient timing provided by the lag. Entrance condition: {
"comeInShinecharging": {
"length": 3,
"openEnd": 0
}
}Requires: "canLongChainTemporaryBlue"
"canXRayTurnaround"
{
"ammo": {
"type": "PowerBomb",
"count": 1
}
}Exit condition: {
"leaveWithTemporaryBlue": {}
}Unlocks doors: {"types":["ammo"],"requires":[]} |
From: 6
Middle Right Door
To: 5
Bottom Door
Entrance condition: {
"comeInShinecharging": {
"length": 3,
"openEnd": 0
}
}Requires: "canLongChainTemporaryBlue"
"canXRayTurnaround"
{
"ammo": {
"type": "PowerBomb",
"count": 1
}
}Exit condition: {
"leaveWithTemporaryBlue": {
"direction": "any"
}
}Unlocks doors: {"types":["ammo"],"requires":[]} |
From: 6
Middle Right Door
To: 7
Top Right Door
Entrance condition: {
"comeInShinecharging": {
"length": 3,
"openEnd": 0
}
}Requires: "canLongChainTemporaryBlue" "canXRayTurnaround" Exit condition: {
"leaveWithTemporaryBlue": {}
}Unlocks doors: {"types":["ammo"],"requires":[]} |
From: 7
Top Right Door
To: 4
Left Side - Bottom Door
Lay the Power Bomb low enough to kill the Sova. Descend during the Power Bomb explosion, to take advantage of the more lenient timing provided by the lag. Entrance condition: {
"comeInGettingBlueSpeed": {
"length": 2.5,
"openEnd": 1
}
}Requires: "canLongChainTemporaryBlue"
"canXRayTurnaround"
{
"ammo": {
"type": "PowerBomb",
"count": 1
}
}Exit condition: {
"leaveWithTemporaryBlue": {}
}Unlocks doors: {"types":["ammo"],"requires":[]} |
From: 7
Top Right Door
To: 5
Bottom Door
Lay the Power Bomb low enough to kill the Sova. Descend during the Power Bomb explosion, to take advantage of the more lenient timing provided by the lag. Entrance condition: {
"comeInGettingBlueSpeed": {
"length": 2.5,
"openEnd": 1
}
}Requires: "canLongChainTemporaryBlue"
"canXRayTurnaround"
{
"ammo": {
"type": "PowerBomb",
"count": 1
}
}Exit condition: {
"leaveWithTemporaryBlue": {
"direction": "any"
}
}Unlocks doors: {"types":["ammo"],"requires":[]} |
From: 7
Top Right Door
To: 6
Middle Right Door
Entrance condition: {
"comeInShinecharging": {
"length": 2.5,
"openEnd": 0
}
}Requires: "canXRayCancelShinecharge" "canChainTemporaryBlue" "canXRayTurnaround" Exit condition: {
"leaveWithTemporaryBlue": {}
}Unlocks doors: {"types":["ammo"],"requires":[]} |
From: 1
Top Left Door
To: 2
Bottom Left Door
Entrance condition: {
"comeInShinecharging": {
"length": 3,
"openEnd": 0
}
}Requires: "canChainTemporaryBlue"
{
"or": [
"canXRayCancelShinecharge",
{
"heatFrames": 160
}
]
}
"canXRayTurnaround"
{
"heatFrames": 350
}Exit condition: {
"leaveWithTemporaryBlue": {}
}Unlocks doors: {"types":["super","powerbomb"],"requires":[]}
{"types":["missiles"],"requires":[{"heatFrames":50}]} |
Blue Cross-Room Jump, Leave With Temporary Blue (HiJump, Spring Ball Jump)
(Extreme+)
Double Chamber
From: 2
Bottom Left Door
To: 1
Top Left Door
Entrance condition: {
"comeInGettingBlueSpeed": {
"length": 0,
"openEnd": 1
}
}Requires: "HiJump"
"canXRayTurnaround"
"canSpringBallJumpMidAir"
"canPauseRemorphTemporaryBlue"
{
"heatFrames": 380
}Exit condition: {
"leaveWithTemporaryBlue": {}
}Unlocks doors: {"types":["super","powerbomb"],"requires":[]}
{"types":["missiles"],"requires":[{"heatFrames":50}]} |
From: 2
Bottom Left Door
To: 1
Top Left Door
Entrance condition: {
"comeInGettingBlueSpeed": {
"length": 0,
"openEnd": 1,
"minExtraRunSpeed": "$2.0"
}
}Requires: "HiJump"
"canSpeedyJump"
"canLateralMidAirMorph"
"canInsaneJump"
"canPauseRemorphTemporaryBlue"
"canXRayTurnaround"
{
"heatFrames": 360
}Exit condition: {
"leaveWithTemporaryBlue": {}
}Unlocks doors: {"types":["super","powerbomb"],"requires":[]}
{"types":["missiles"],"requires":[{"heatFrames":50}]} |
Blue Cross-Room Jump, Leave With Temporary Blue (Speedy Jump, Spring Ball Jump)
(Extreme+)
Double Chamber
From: 2
Bottom Left Door
To: 1
Top Left Door
Entrance condition: {
"comeInGettingBlueSpeed": {
"length": 0,
"openEnd": 1,
"minExtraRunSpeed": "$2.0"
}
}Requires: "canSpeedyJump"
"canLateralMidAirMorph"
"canTrickySpringBallJump"
"canInsaneJump"
"canPauseRemorphTemporaryBlue"
"canXRayTurnaround"
{
"heatFrames": 440
}Exit condition: {
"leaveWithTemporaryBlue": {}
}Unlocks doors: {"types":["super","powerbomb"],"requires":[]}
{"types":["missiles"],"requires":[{"heatFrames":50}]} |
From: 2
Middle Left Door
To: 1
Top Left Door
Entrance condition: {
"comeInShinecharging": {
"length": 4,
"openEnd": 1,
"gentleUpTiles": 2
}
}Requires: "canLongChainTemporaryBlue"
{
"heatFrames": 900
}
{
"or": [
"canXRayCancelShinecharge",
{
"heatFrames": 160
}
]
}
"canTrickySpringBallBounce"
"canXRayTurnaround"Exit condition: {
"leaveWithTemporaryBlue": {}
}Unlocks doors: {"types":["super","powerbomb"],"requires":[]}
{"types":["missiles"],"requires":[{"heatFrames":50}]} |
From: 2
Middle Left Door
To: 4
Top Right Door
Entrance condition: {
"comeInShinecharging": {
"length": 4,
"openEnd": 1,
"gentleUpTiles": 2
}
}Requires: "canLongChainTemporaryBlue"
{
"heatFrames": 860
}
{
"or": [
"canXRayCancelShinecharge",
{
"heatFrames": 160
}
]
}
"canTrickySpringBallBounce"
"canXRayTurnaround"Exit condition: {
"leaveWithTemporaryBlue": {}
}Unlocks doors: {"types":["super","powerbomb"],"requires":[]}
{"types":["missiles"],"requires":[{"heatFrames":50}]} |
From: 2
Right Door
To: 3
Top Door
Entrance condition: {
"comeInShinecharging": {
"length": 13,
"openEnd": 0
}
}Requires: "canXRayTurnaround"
"canXRayCancelShinecharge"
"canChainTemporaryBlue"
{
"heatFrames": 240
}Exit condition: {
"leaveWithTemporaryBlue": {
"direction": "any"
}
}Unlocks doors: {"types":["super","powerbomb"],"requires":[]}
{"types":["missiles"],"requires":[{"heatFrames":50}]} |
|
Requires: "h_backIntoCorner"
{
"heatFrames": 100
}Exit condition: {
"leaveWithPlatformBelow": {
"height": 9,
"leftPosition": -2,
"rightPosition": 6
}
}Unlocks doors: {"types":["missiles"],"requires":[{"heatFrames":50}]}
{"types":["super"],"requires":[]}
{"types":["powerbomb"],"requires":[{"heatFrames":110}]}Dev note: This includes time to moonwalk back against the right door, without shooting it open. An additional tile could be used by opening the right door but there is not yet any known application. |
From: 2
Top Right Door
To: 1
Top Door
Entrance condition: {
"comeInShinecharging": {
"length": 3,
"openEnd": 0
}
}Requires: "canChainTemporaryBlue"
"canXRayTurnaround"
{
"heatFrames": 360
}
{
"or": [
"canXRayCancelShinecharge",
{
"heatFrames": 160
}
]
}Exit condition: {
"leaveWithTemporaryBlue": {
"direction": "any"
}
}Unlocks doors: {"types":["super","powerbomb"],"requires":[]}
{"types":["missiles"],"requires":[{"heatFrames":50}]} |
From: 2
Top Right Door
To: 3
Bottom Right Door
Entrance condition: {
"comeInShinecharging": {
"length": 3,
"openEnd": 0
}
}Requires: "canChainTemporaryBlue"
"canXRayTurnaround"
{
"heatFrames": 290
}
{
"or": [
"canXRayCancelShinecharge",
{
"heatFrames": 160
}
]
}Exit condition: {
"leaveWithTemporaryBlue": {}
}Unlocks doors: {"types":["super","powerbomb"],"requires":[]}
{"types":["missiles"],"requires":[{"heatFrames":50}]} |
From: 3
Bottom Right Door
To: 1
Top Door
Entrance condition: {
"comeInShinecharging": {
"length": 11,
"openEnd": 1
}
}Requires: "canLongChainTemporaryBlue"
"canXRayTurnaround"
{
"heatFrames": 710
}
{
"or": [
"canXRayCancelShinecharge",
{
"heatFrames": 160
}
]
}Exit condition: {
"leaveWithTemporaryBlue": {
"direction": "any"
}
}Unlocks doors: {"types":["super","powerbomb"],"requires":[]}
{"types":["missiles"],"requires":[{"heatFrames":50}]} |
From: 3
Bottom Right Door
To: 1
Top Door
Entrance condition: {
"comeInShinecharging": {
"length": 8,
"openEnd": 1
}
}Requires: "canLongChainTemporaryBlue"
"canXRayTurnaround"
{
"heatFrames": 590
}
{
"or": [
"canXRayCancelShinecharge",
{
"heatFrames": 160
}
]
}Exit condition: {
"leaveWithTemporaryBlue": {
"direction": "any"
}
}Unlocks doors: {"types":["super","powerbomb"],"requires":[]}
{"types":["missiles"],"requires":[{"heatFrames":50}]} |
From: 3
Bottom Right Door
To: 2
Top Right Door
Entrance condition: {
"comeInShinecharging": {
"length": 11,
"openEnd": 1
}
}Requires: "canChainTemporaryBlue"
"canXRayTurnaround"
{
"heatFrames": 490
}
{
"or": [
"canXRayCancelShinecharge",
{
"heatFrames": 160
}
]
}Exit condition: {
"leaveWithTemporaryBlue": {}
}Unlocks doors: {"types":["super","powerbomb"],"requires":[]}
{"types":["missiles"],"requires":[{"heatFrames":50}]} |
From: 3
Bottom Right Door
To: 2
Top Right Door
Entrance condition: {
"comeInShinecharging": {
"length": 8,
"openEnd": 1
}
}Requires: "canChainTemporaryBlue"
"canXRayTurnaround"
{
"heatFrames": 390
}
{
"or": [
"canXRayCancelShinecharge",
{
"heatFrames": 160
}
]
}Exit condition: {
"leaveWithTemporaryBlue": {}
}Unlocks doors: {"types":["super","powerbomb"],"requires":[]}
{"types":["missiles"],"requires":[{"heatFrames":50}]} |
From: 1
Left Shaft - Top Left Door
To: 2
Left Shaft - Bottom Right Door
Entrance condition: {
"comeInShinecharging": {
"length": 7,
"openEnd": 0
}
}Requires: "canXRayCancelShinecharge"
"canXRayTurnaround"
"canLongChainTemporaryBlue"
{
"heatFrames": 1380
}Exit condition: {
"leaveWithTemporaryBlue": {}
}Unlocks doors: {"types":["super","powerbomb"],"requires":[]}
{"types":["missiles"],"requires":[{"heatFrames":50}]} |
From: 1
Left Shaft - Top Left Door
To: 3
Left Shaft - Middle Right Door
Entrance condition: {
"comeInShinecharging": {
"length": 7,
"openEnd": 0
}
}Requires: "canXRayCancelShinecharge"
"canXRayTurnaround"
"canLongChainTemporaryBlue"
{
"heatFrames": 830
}Exit condition: {
"leaveWithTemporaryBlue": {}
}Unlocks doors: {"types":["super","powerbomb"],"requires":[]}
{"types":["missiles"],"requires":[{"heatFrames":50}]} |
From: 1
Left Shaft - Top Left Door
To: 4
Left Shaft - Top Right Door
Entrance condition: {
"comeInShinecharging": {
"length": 7,
"openEnd": 0
}
}Requires: "canXRayCancelShinecharge"
"canXRayTurnaround"
"canLongChainTemporaryBlue"
{
"heatFrames": 505
}Exit condition: {
"leaveWithTemporaryBlue": {}
}Unlocks doors: {"types":["super","powerbomb"],"requires":[]}
{"types":["missiles"],"requires":[{"heatFrames":50}]} |
From: 2
Left Shaft - Bottom Right Door
To: 1
Left Shaft - Top Left Door
Entrance condition: {
"comeInShinecharging": {
"length": 12,
"openEnd": 0,
"gentleUpTiles": 4
}
}Requires: "canXRayTurnaround"
"canLongChainTemporaryBlue"
{
"or": [
{
"and": [
"HiJump",
{
"heatFrames": 1220
}
]
},
{
"and": [
"canTrickySpringBallJump",
{
"heatFrames": 1440
}
]
}
]
}Exit condition: {
"leaveWithTemporaryBlue": {}
}Unlocks doors: {"types":["super","powerbomb"],"requires":[]}
{"types":["missiles"],"requires":[{"heatFrames":50}]} |
From: 2
Left Shaft - Bottom Right Door
To: 3
Left Shaft - Middle Right Door
Entrance condition: {
"comeInShinecharging": {
"length": 12,
"openEnd": 0,
"gentleUpTiles": 4
}
}Requires: "canXRayTurnaround"
"canLongChainTemporaryBlue"
{
"or": [
{
"and": [
"HiJump",
{
"heatFrames": 365
}
]
},
{
"and": [
"canTrickySpringBallJump",
{
"heatFrames": 380
}
]
}
]
}Exit condition: {
"leaveWithTemporaryBlue": {}
}Unlocks doors: {"types":["super","powerbomb"],"requires":[]}
{"types":["missiles"],"requires":[{"heatFrames":50}]} |
From: 2
Left Shaft - Bottom Right Door
To: 4
Left Shaft - Top Right Door
Entrance condition: {
"comeInShinecharging": {
"length": 12,
"openEnd": 0,
"gentleUpTiles": 4
}
}Requires: "canXRayTurnaround"
"canLongChainTemporaryBlue"
{
"or": [
{
"and": [
"HiJump",
{
"heatFrames": 700
}
]
},
{
"and": [
"canTrickySpringBallJump",
{
"heatFrames": 840
}
]
}
]
}Exit condition: {
"leaveWithTemporaryBlue": {}
}Unlocks doors: {"types":["super","powerbomb"],"requires":[]}
{"types":["missiles"],"requires":[{"heatFrames":50}]} |
From: 3
Left Shaft - Middle Right Door
To: 1
Left Shaft - Top Left Door
Entrance condition: {
"comeInGettingBlueSpeed": {
"length": 3,
"openEnd": 1,
"minExtraRunSpeed": "$2.0"
}
}Requires: "canXRayTurnaround"
"canLongChainTemporaryBlue"
{
"or": [
{
"and": [
"HiJump",
{
"heatFrames": 890
}
]
},
{
"and": [
"canTrickySpringBallJump",
{
"heatFrames": 1020
}
]
}
]
}Exit condition: {
"leaveWithTemporaryBlue": {}
}Unlocks doors: {"types":["super","powerbomb"],"requires":[]}
{"types":["missiles"],"requires":[{"heatFrames":50}]}Dev note: FIXME: This could be done with lower run speed, at the cost of more heat frames. |
From: 3
Left Shaft - Middle Right Door
To: 2
Left Shaft - Bottom Right Door
Entrance condition: {
"comeInShinecharging": {
"length": 3,
"openEnd": 0
}
}Requires: "canXRayCancelShinecharge"
"canXRayTurnaround"
"canLongChainTemporaryBlue"
{
"heatFrames": 610
}Exit condition: {
"leaveWithTemporaryBlue": {}
}Unlocks doors: {"types":["super","powerbomb"],"requires":[]}
{"types":["missiles"],"requires":[{"heatFrames":50}]} |
From: 3
Left Shaft - Middle Right Door
To: 4
Left Shaft - Top Right Door
Entrance condition: {
"comeInGettingBlueSpeed": {
"length": 3,
"openEnd": 1,
"minExtraRunSpeed": "$2.0"
}
}Requires: "canXRayTurnaround"
"canLongChainTemporaryBlue"
{
"or": [
{
"and": [
"HiJump",
{
"heatFrames": 370
}
]
},
{
"and": [
"canTrickySpringBallJump",
{
"heatFrames": 380
}
]
}
]
}Exit condition: {
"leaveWithTemporaryBlue": {}
}Unlocks doors: {"types":["super","powerbomb"],"requires":[]}
{"types":["missiles"],"requires":[{"heatFrames":50}]}Dev note: FIXME: This could be done with lower run speed, at the cost of more heat frames. |
From: 4
Left Shaft - Top Right Door
To: 1
Left Shaft - Top Left Door
Entrance condition: {
"comeInGettingBlueSpeed": {
"length": 3,
"openEnd": 1,
"minExtraRunSpeed": "$2.0"
}
}Requires: "canXRayTurnaround"
"canLongChainTemporaryBlue"
{
"or": [
{
"and": [
"HiJump",
{
"heatFrames": 490
}
]
},
{
"and": [
"canTrickySpringBallJump",
{
"heatFrames": 580
}
]
}
]
}Exit condition: {
"leaveWithTemporaryBlue": {}
}Unlocks doors: {"types":["super","powerbomb"],"requires":[]}
{"types":["missiles"],"requires":[{"heatFrames":50}]}Dev note: FIXME: This could be done with lower run speed, at the cost of more heat frames. |
From: 4
Left Shaft - Top Right Door
To: 2
Left Shaft - Bottom Right Door
Entrance condition: {
"comeInShinecharging": {
"length": 3,
"openEnd": 0
}
}Requires: "canXRayCancelShinecharge"
"canXRayTurnaround"
"canLongChainTemporaryBlue"
{
"heatFrames": 945
}Exit condition: {
"leaveWithTemporaryBlue": {}
}Unlocks doors: {"types":["super","powerbomb"],"requires":[]}
{"types":["missiles"],"requires":[{"heatFrames":50}]} |
From: 4
Left Shaft - Top Right Door
To: 3
Left Shaft - Middle Right Door
Entrance condition: {
"comeInShinecharging": {
"length": 3,
"openEnd": 0
}
}Requires: "canXRayCancelShinecharge"
"canXRayTurnaround"
"canLongChainTemporaryBlue"
{
"heatFrames": 500
}Exit condition: {
"leaveWithTemporaryBlue": {}
}Unlocks doors: {"types":["super","powerbomb"],"requires":[]}
{"types":["missiles"],"requires":[{"heatFrames":50}]} |
From: 1
Top Left Door
To: 2
Bottom Left Door
Entrance condition: {
"comeInShinecharging": {
"length": 11,
"openEnd": 0
}
}Requires: "Wave"
{
"or": [
"canXRayCancelShinecharge",
{
"heatFrames": 160
}
]
}
"canXRayTurnaround"
"canLongChainTemporaryBlue"
{
"heatFrames": 560
}Exit condition: {
"leaveWithTemporaryBlue": {}
}Unlocks doors: {"types":["super","powerbomb"],"requires":[]}
{"types":["missiles"],"requires":[{"heatFrames":50}]} |
From: 2
Bottom Left Door
To: 1
Top Left Door
Entrance condition: {
"comeInShinecharging": {
"length": 4,
"openEnd": 0
}
}Requires: {
"or": [
"canXRayCancelShinecharge",
{
"heatFrames": 160
}
]
}
"canLongChainTemporaryBlue"
"canXRayTurnaround"
{
"or": [
{
"and": [
"HiJump",
{
"heatFrames": 690
}
]
},
{
"and": [
"canTrickySpringBallJump",
{
"heatFrames": 745
}
]
}
]
}Exit condition: {
"leaveWithTemporaryBlue": {}
}Unlocks doors: {"types":["super","powerbomb"],"requires":[]}
{"types":["missiles"],"requires":[{"heatFrames":50}]} |
From: 2
Bottom Left Door
To: 3
Top Right Door
Entrance condition: {
"comeInShinecharging": {
"length": 4,
"openEnd": 0
}
}Requires: {
"or": [
"canXRayCancelShinecharge",
{
"heatFrames": 160
}
]
}
"canLongChainTemporaryBlue"
{
"or": [
{
"and": [
"HiJump",
{
"heatFrames": 680
}
]
},
{
"and": [
"canTrickySpringBallJump",
"canXRayTurnaround",
{
"heatFrames": 775
}
]
}
]
}Exit condition: {
"leaveWithTemporaryBlue": {}
}Unlocks doors: {"types":["super","powerbomb"],"requires":[]}
{"types":["missiles"],"requires":[{"heatFrames":50}]} |
From: 2
Bottom Left Door
To: 1
Top Left Door
Move quickly (when X-Ray is not active) to climb the shaft before the Fune fireballs would reach Samus. Entrance condition: {
"comeInGettingBlueSpeed": {
"length": 4,
"openEnd": 1,
"minExtraRunSpeed": "$4.7"
}
}Requires: "canLongChainTemporaryBlue"
"canXRayTurnaround"
{
"heatFrames": 760
}Exit condition: {
"leaveWithTemporaryBlue": {}
}Unlocks doors: {"types":["super","powerbomb"],"requires":[]}
{"types":["missiles"],"requires":[{"heatFrames":50}]}Dev note: The last runway tile is considered unusable, as Samus is likely to clip down through it. |
From: 2
Bottom Left Door
To: 1
Top Left Door
Move quickly (when X-Ray is not active) to climb the shaft before the Fune fireballs would reach Samus. Entrance condition: {
"comeInGettingBlueSpeed": {
"length": 5,
"openEnd": 1
}
}Requires: "canTrickySpringBallBounce"
"canLongChainTemporaryBlue"
"canXRayTurnaround"
{
"heatFrames": 1020
}Exit condition: {
"leaveWithTemporaryBlue": {}
}Unlocks doors: {"types":["super","powerbomb"],"requires":[]}
{"types":["missiles"],"requires":[{"heatFrames":50}]} |
From: 1
Top Left Door
To: 2
Middle Left Door
Entrance condition: {
"comeInShinecharging": {
"length": 4,
"openEnd": 0,
"gentleDownTiles": 2
}
}Requires: "canChainTemporaryBlue" "canXRayTurnaround" Exit condition: {
"leaveWithTemporaryBlue": {}
}Unlocks doors: {"types":["ammo"],"requires":[]} |
From: 1
Top Left Door
To: 3
Bottom Left Door
Entrance condition: {
"comeInShinecharging": {
"length": 4,
"openEnd": 0,
"gentleDownTiles": 2
}
}Requires: "canLongChainTemporaryBlue" "canXRayTurnaround" Exit condition: {
"leaveWithTemporaryBlue": {}
}Unlocks doors: {"types":["ammo"],"requires":[]} |
From: 1
Top Left Door
To: 4
Bottom Right Door
Entrance condition: {
"comeInShinecharging": {
"length": 4,
"openEnd": 0,
"gentleDownTiles": 2
}
}Requires: "canLongChainTemporaryBlue" "canXRayTurnaround" Exit condition: {
"leaveWithTemporaryBlue": {}
}Unlocks doors: {"types":["ammo"],"requires":[]} |
From: 2
Middle Left Door
To: 1
Top Left Door
Entrance condition: {
"comeInShinecharging": {
"length": 3,
"openEnd": 0
}
}Requires: "canLongChainTemporaryBlue" "canXRayTurnaround" Exit condition: {
"leaveWithTemporaryBlue": {}
}Unlocks doors: {"types":["ammo"],"requires":[]} |
From: 2
Middle Left Door
To: 3
Bottom Left Door
Entrance condition: {
"comeInShinecharging": {
"length": 3,
"openEnd": 0
}
}Requires: "canChainTemporaryBlue" "canXRayTurnaround" Exit condition: {
"leaveWithTemporaryBlue": {}
}Unlocks doors: {"types":["ammo"],"requires":[]} |
From: 2
Middle Left Door
To: 4
Bottom Right Door
Entrance condition: {
"comeInShinecharging": {
"length": 3,
"openEnd": 0
}
}Requires: "canLongChainTemporaryBlue" "canXRayTurnaround" Exit condition: {
"leaveWithTemporaryBlue": {}
}Unlocks doors: {"types":["ammo"],"requires":[]} |
From: 3
Bottom Left Door
To: 1
Top Left Door
Entrance condition: {
"comeInShinecharging": {
"length": 12,
"openEnd": 0
}
}Requires: "canLongChainTemporaryBlue" "canXRayTurnaround" Exit condition: {
"leaveWithTemporaryBlue": {}
}Unlocks doors: {"types":["ammo"],"requires":[]} |
From: 3
Bottom Left Door
To: 2
Middle Left Door
Entrance condition: {
"comeInShinecharging": {
"length": 12,
"openEnd": 0
}
}Requires: "canLongChainTemporaryBlue" "canXRayTurnaround" Exit condition: {
"leaveWithTemporaryBlue": {}
}Unlocks doors: {"types":["ammo"],"requires":[]} |
From: 3
Bottom Left Door
To: 4
Bottom Right Door
Entrance condition: {
"comeInShinecharging": {
"length": 12,
"openEnd": 0
}
}Requires: "canLongChainTemporaryBlue" "canXRayTurnaround" Exit condition: {
"leaveWithTemporaryBlue": {}
}Unlocks doors: {"types":["ammo"],"requires":[]} |
From: 3
Bottom Left Door
To: 6
Top Right Door
Entrance condition: {
"comeInShinecharging": {
"length": 12,
"openEnd": 0
}
}Requires: "canLongChainTemporaryBlue" "canXRayTurnaround" Exit condition: {
"leaveWithTemporaryBlue": {}
}Unlocks doors: {"types":["ammo"],"requires":[]} |
From: 4
Bottom Right Door
To: 1
Top Left Door
Entrance condition: {
"comeInShinecharging": {
"length": 8,
"openEnd": 0,
"gentleUpTiles": 4
}
}Requires: "canLongChainTemporaryBlue" "canXRayTurnaround" Exit condition: {
"leaveWithTemporaryBlue": {}
}Unlocks doors: {"types":["ammo"],"requires":[]} |
From: 4
Bottom Right Door
To: 2
Middle Left Door
Entrance condition: {
"comeInShinecharging": {
"length": 8,
"openEnd": 0,
"gentleUpTiles": 4
}
}Requires: "canLongChainTemporaryBlue" "canXRayTurnaround" Exit condition: {
"leaveWithTemporaryBlue": {}
}Unlocks doors: {"types":["ammo"],"requires":[]} |
From: 4
Bottom Right Door
To: 3
Bottom Left Door
Entrance condition: {
"comeInShinecharging": {
"length": 8,
"openEnd": 0,
"gentleUpTiles": 4
}
}Requires: "canLongChainTemporaryBlue" "canXRayTurnaround" Exit condition: {
"leaveWithTemporaryBlue": {}
}Unlocks doors: {"types":["ammo"],"requires":[]} |
From: 4
Bottom Right Door
To: 5
Middle Right Door
Entrance condition: {
"comeInShinecharging": {
"length": 8,
"openEnd": 0,
"gentleUpTiles": 4
}
}Requires: "canLongChainTemporaryBlue" "canXRayTurnaround" Exit condition: {
"leaveWithTemporaryBlue": {}
}Unlocks doors: {"types":["ammo"],"requires":[]} |
From: 4
Bottom Right Door
To: 6
Top Right Door
Entrance condition: {
"comeInShinecharging": {
"length": 8,
"openEnd": 0,
"gentleUpTiles": 4
}
}Requires: "canLongChainTemporaryBlue" "canXRayTurnaround" Exit condition: {
"leaveWithTemporaryBlue": {}
}Unlocks doors: {"types":["ammo"],"requires":[]} |
From: 5
Middle Right Door
To: 1
Top Left Door
Entrance condition: {
"comeInShinecharging": {
"length": 12,
"openEnd": 0
}
}Requires: "canLongChainTemporaryBlue" "canXRayTurnaround" Exit condition: {
"leaveWithTemporaryBlue": {}
}Unlocks doors: {"types":["ammo"],"requires":[]} |
From: 5
Middle Right Door
To: 2
Middle Left Door
Entrance condition: {
"comeInShinecharging": {
"length": 12,
"openEnd": 0
}
}Requires: "canLongChainTemporaryBlue" "canXRayTurnaround" Exit condition: {
"leaveWithTemporaryBlue": {}
}Unlocks doors: {"types":["ammo"],"requires":[]} |
From: 5
Middle Right Door
To: 4
Bottom Right Door
Entrance condition: {
"comeInShinecharging": {
"length": 12,
"openEnd": 0
}
}Requires: "canLongChainTemporaryBlue" "canXRayTurnaround" Exit condition: {
"leaveWithTemporaryBlue": {}
}Unlocks doors: {"types":["ammo"],"requires":[]} |
From: 5
Middle Right Door
To: 6
Top Right Door
Entrance condition: {
"comeInShinecharging": {
"length": 12,
"openEnd": 0
}
}Requires: "canLongChainTemporaryBlue" "canXRayTurnaround" Exit condition: {
"leaveWithTemporaryBlue": {}
}Unlocks doors: {"types":["ammo"],"requires":[]} |
From: 6
Top Right Door
To: 3
Bottom Left Door
Entrance condition: {
"comeInShinecharging": {
"length": 4,
"openEnd": 0
}
}Requires: "canLongChainTemporaryBlue" "canXRayTurnaround" Exit condition: {
"leaveWithTemporaryBlue": {}
}Unlocks doors: {"types":["ammo"],"requires":[]} |
From: 6
Top Right Door
To: 4
Bottom Right Door
Entrance condition: {
"comeInShinecharging": {
"length": 4,
"openEnd": 0
}
}Requires: "canLongChainTemporaryBlue" "canXRayTurnaround" Exit condition: {
"leaveWithTemporaryBlue": {}
}Unlocks doors: {"types":["ammo"],"requires":[]} |
From: 6
Top Right Door
To: 5
Middle Right Door
Entrance condition: {
"comeInShinecharging": {
"length": 4,
"openEnd": 0
}
}Requires: "canLongChainTemporaryBlue" "canXRayTurnaround" Exit condition: {
"leaveWithTemporaryBlue": {}
}Unlocks doors: {"types":["ammo"],"requires":[]} |
|
Use the platform at the top-right of the room to gain temporary blue, then chain it through the door. Requires: {
"heatFrames": 1180
}
{
"canShineCharge": {
"usedTiles": 15,
"openEnd": 2
}
}
"canLongChainTemporaryBlue"
"canXRayTurnaround"
{
"or": [
"canXRayCancelShinecharge",
{
"heatFrames": 160
}
]
}Exit condition: {
"leaveWithTemporaryBlue": {}
} |
From: 1
Top Right Door
To: 2
Bottom Right Door
Entrance condition: {
"comeInShinecharging": {
"length": 1,
"openEnd": 0
}
}Requires: "canChainTemporaryBlue"
"canXRayTurnaround"
{
"heatFrames": 375
}
{
"or": [
"canXRayCancelShinecharge",
{
"heatFrames": 160
}
]
}Exit condition: {
"leaveWithTemporaryBlue": {}
}Unlocks doors: {"types":["super"],"requires":[]}
{"types":["powerbomb"],"requires":["canInsaneJump"]}
{"types":["missiles"],"requires":[{"heatFrames":50}]} |
|
Entrance condition: {
"comeInWithTemporaryBlue": {}
}Requires: "canLongChainTemporaryBlue" "canXRayTurnaround" "canTrickySpringBallBounce" Clears obstacles: C |
From: 2
Middle Left Door
To: 5
Junction Below Top Crumble Blocks
Use a temporary blue chain to jump through the bomb blocks and land on the center of the ledge above. Break the last block by jumping directly into it, as there is not enough height available to get a bounce. With this method, there is a 2-frame window for when to morph; jumping from the platform below is also possible but requires a frame-perfect morph. If Spring Ball is available, it can be used to increase the window by one frame in either case. Entrance condition: {
"comeInShinecharging": {
"length": 14,
"openEnd": 0
}
}Requires: "canChainTemporaryBlue" "canXRayTurnaround" "can4HighMidAirMorph" "canInsaneJump" Clears obstacles: A, B |
From: 2
Middle Left Door
To: 5
Junction Below Top Crumble Blocks
Use a temporary blue chain to jump through the bomb blocks and land on the center of the ledge above. Break the last block by jumping directly into it, as there is not enough height available to get a bounce. With this method, there is a 2-frame window for when to morph; jumping from the platform below is also possible but requires a frame-perfect morph. If Spring Ball is available, it can be used to increase the window by one frame in either case. Requires: {
"or": [
{
"canShineCharge": {
"usedTiles": 14,
"openEnd": 0
}
},
{
"and": [
{
"canShineCharge": {
"usedTiles": 15,
"openEnd": 0
}
},
{
"doorUnlockedAtNode": 2
}
]
}
]
}
"canChainTemporaryBlue"
"canXRayTurnaround"
"can4HighMidAirMorph"
"canInsaneJump"Clears obstacles: A, B Unlocks doors: {"nodeId":2,"types":["ammo"],"requires":[]} |
From: 4
Central Junction
To: 2
Top Door
Requires: {
"or": [
{
"and": [
{
"or": [
"f_DefeatedCrocomire",
{
"obstaclesCleared": [
"f_DefeatedCrocomire"
]
}
]
},
{
"canShineCharge": {
"usedTiles": 40,
"openEnd": 1
}
}
]
},
{
"and": [
"canXRayTurnaround",
{
"canShineCharge": {
"usedTiles": 31,
"openEnd": 0
}
}
]
}
]
}
{
"or": [
"HiJump",
"canTrickySpringBallJump"
]
}
"canChainTemporaryBlue"Exit condition: {
"leaveWithTemporaryBlue": {
"direction": "left"
}
}Unlocks doors: {"types":["ammo"],"requires":[]} |
From: 4
Central Junction
To: 2
Top Door
Requires: {
"or": [
{
"canShineCharge": {
"usedTiles": 20,
"openEnd": 0
}
},
{
"and": [
{
"or": [
"f_DefeatedCrocomire",
{
"obstaclesCleared": [
"f_DefeatedCrocomire"
]
}
]
},
{
"canShineCharge": {
"usedTiles": 37,
"openEnd": 0
}
}
]
},
{
"and": [
"canXRayTurnaround",
{
"canShineCharge": {
"usedTiles": 31,
"openEnd": 0
}
}
]
}
]
}
{
"or": [
"HiJump",
"canTrickySpringBallJump"
]
}
"canChainTemporaryBlue"Exit condition: {
"leaveWithTemporaryBlue": {
"direction": "right"
}
}Unlocks doors: {"types":["ammo"],"requires":[]} |
From: 2
Right Vertical Door
To: 2
Right Vertical Door
Requires: {
"or": [
{
"and": [
"canXRayTurnaround",
{
"obstaclesCleared": [
"B"
]
},
{
"canShineCharge": {
"usedTiles": 32,
"openEnd": 1
}
}
]
},
{
"and": [
{
"obstaclesCleared": [
"A"
]
},
{
"canShineCharge": {
"usedTiles": 21,
"gentleDownTiles": 6,
"openEnd": 0
}
}
]
}
]
}
"canChainTemporaryBlue"Exit condition: {
"leaveWithTemporaryBlue": {
"direction": "left"
}
} |
|
Requires: {
"obstaclesCleared": [
"A"
]
}
"HiJump"
"canSpeedyJump"
"canPreciseWallJump"
"canCarefulJump"
{
"or": [
"canTrickyJump",
"h_backIntoCorner"
]
}
{
"or": [
"canInsaneJump",
{
"heatFrames": 40
}
]
}
{
"doorUnlockedAtNode": 2
}
{
"heatFrames": 160
}
{
"or": [
"canTrickyJump",
{
"heatFrames": 200
}
]
}Unlocks doors: {"nodeId":2,"types":["missiles"],"requires":[{"heatFrames":50}]}
{"nodeId":2,"types":["super"],"requires":[]}
{"nodeId":2,"types":["powerbomb"],"requires":[{"heatFrames":110}]}Dev note: Without canTrickyJump, this assumes you miss the jump and have to set it up a second time. |
|
This expects the more controlled Temporary Blue to fall though the blocks, not storing a shinecharge on the first breakable block. Entrance condition: {
"comeInShinecharging": {
"length": 11,
"openEnd": 0
}
}Requires: "canTemporaryBlue"
"canXRayTurnaround"
{
"heatFrames": 160
}
{
"or": [
"canXRayCancelShinecharge",
{
"heatFrames": 160
}
]
}Clears obstacles: A, B Dev note: A significant amount of heat frames are implicit in the entrance condition. |
From: 1
Top Left Door
To: 3
Middle Right Door
Entrance condition: {
"comeInShinecharging": {
"length": 4,
"openEnd": 0
}
}Requires: {
"heatFrames": 2400
}
"canLongChainTemporaryBlue"
"canXRayTurnaround"Exit condition: {
"leaveWithTemporaryBlue": {}
}Unlocks doors: {"types":["ammo"],"requires":[]} |
From: 4
Top Right Door
To: 3
Middle Right Door
Entrance condition: {
"comeInShinecharging": {
"length": 4,
"openEnd": 0
}
}Requires: {
"heatFrames": 2400
}
"canLongChainTemporaryBlue"
"canXRayTurnaround"Exit condition: {
"leaveWithTemporaryBlue": {}
}Unlocks doors: {"types":["ammo"],"requires":[]} |
|
Requires: {
"obstaclesCleared": [
"A"
]
}
{
"canShineCharge": {
"usedTiles": 35,
"openEnd": 0
}
}
"canXRayTurnaround"
"canChainTemporaryBlue"Exit condition: {
"leaveWithTemporaryBlue": {
"direction": "any"
}
} |
|
Requires: {
"or": [
{
"and": [
"f_DefeatedPhantoon",
{
"canShineCharge": {
"usedTiles": 16,
"openEnd": 0
}
}
]
},
{
"and": [
{
"canShineCharge": {
"usedTiles": 28,
"openEnd": 0
}
},
"canXRayTurnaround"
]
}
]
}
"canChainTemporaryBlue"Exit condition: {
"leaveWithTemporaryBlue": {
"direction": "left"
}
} |
From: 1
Top Left Door
To: 2
Right Door
Entrance condition: {
"comeInShinecharging": {
"length": 3,
"openEnd": 0
}
}Requires: "canLongChainTemporaryBlue"
"canXRayTurnaround"
{
"electricityHits": 2
}Exit condition: {
"leaveWithTemporaryBlue": {}
}Unlocks doors: {"types":["ammo"],"requires":[]} |
From: 1
Top Left Door
To: 3
Bottom Left Door
Entrance condition: {
"comeInShinecharging": {
"length": 3,
"openEnd": 0
}
}Requires: "canLongChainTemporaryBlue"
"canXRayTurnaround"
{
"electricityHits": 2
}
{
"or": [
"Gravity",
"HiJump",
"canSpringBallJumpMidAir"
]
}
"canBeVeryPatient"Exit condition: {
"leaveWithTemporaryBlue": {}
}Unlocks doors: {"types":["ammo"],"requires":[]} |
From: 2
Right Door
To: 1
Top Left Door
Entrance condition: {
"comeInShinecharging": {
"length": 11,
"openEnd": 0,
"steepDownTiles": 3
}
}Requires: "canLongChainTemporaryBlue" "canXRayTurnaround" Exit condition: {
"leaveWithTemporaryBlue": {}
}Unlocks doors: {"types":["ammo"],"requires":[]} |
From: 2
Right Door
To: 3
Bottom Left Door
Entrance condition: {
"comeInShinecharging": {
"length": 11,
"openEnd": 0,
"steepDownTiles": 3
}
}Requires: "canLongChainTemporaryBlue"
"canXRayTurnaround"
{
"or": [
"Gravity",
"HiJump",
"canSpringBallJumpMidAir"
]
}Exit condition: {
"leaveWithTemporaryBlue": {}
}Unlocks doors: {"types":["ammo"],"requires":[]} |
From: 1
Left Door
To: 1
Left Door
Shortcharge by running right on the conveyor closest to the door, gain blue speed, and jump onto the platform to the right with temporary blue. Then use X-ray to turn and ride the conveyor back to the left and reach the door. Requires: "f_DefeatedPhantoon"
{
"enemyKill": {
"enemies": [
[
"Bull",
"Bull"
]
]
}
}
{
"getBlueSpeed": {
"usedTiles": 20,
"openEnd": 2
}
}
"canChainTemporaryBlue"
"canXRayTurnaround"
Exit condition: {
"leaveWithTemporaryBlue": {}
} |
|
Requires: {
"obstaclesNotCleared": [
"B"
]
}
{
"doorUnlockedAtNode": 3
}
{
"canShineCharge": {
"usedTiles": 13,
"openEnd": 1
}
}
"canLongChainTemporaryBlue"
"canXRayTurnaround"
"can4HighMidAirMorph"Clears obstacles: C Unlocks doors: {"nodeId":3,"types":["missiles","super"],"requires":[]}
{"nodeId":3,"types":["powerbomb"],"requires":["never"]} |
From: 4
Top Right Door
To: 6
Bottom Right Door
Requires: {
"or": [
{
"canShineCharge": {
"usedTiles": 12,
"steepUpTiles": 7,
"openEnd": 1
}
},
{
"and": [
{
"doorUnlockedAtNode": 4
},
{
"canShineCharge": {
"usedTiles": 13,
"steepUpTiles": 7,
"openEnd": 1
}
}
]
}
]
}
"can4HighMidAirMorph"
"canLongChainTemporaryBlue"
"canXRayTurnaround"
"canSpringBallBounce" |
From: 5
Middle Right Door
To: 8
Item
Shinecharging up the stairs gives a longer effective runway than shinecharging down them. Bounce down the stairs to make movement simpler. A frozen Atomic (or Covern) can be used for more runway. Requires: {
"or": [
{
"and": [
"can4HighMidAirMorph",
{
"doorUnlockedAtNode": 5
},
{
"canShineCharge": {
"usedTiles": 11,
"steepUpTiles": 7,
"openEnd": 2
}
}
]
},
{
"and": [
"h_frozenEnemyRunway",
{
"or": [
"f_DefeatedPhantoon",
{
"and": [
"SpaceJump",
"h_trickyFrozenEnemyRunway"
]
}
]
},
"can4HighMidAirMorph",
{
"doorUnlockedAtNode": 5
},
{
"canShineCharge": {
"usedTiles": 13,
"steepUpTiles": 7,
"openEnd": 1
}
}
]
},
{
"canShineCharge": {
"usedTiles": 10,
"steepUpTiles": 7,
"openEnd": 2
}
},
{
"and": [
"h_frozenEnemyRunway",
{
"or": [
"f_DefeatedPhantoon",
{
"and": [
"SpaceJump",
"h_trickyFrozenEnemyRunway"
]
}
]
},
{
"canShineCharge": {
"usedTiles": 12,
"steepUpTiles": 7,
"openEnd": 1
}
}
]
}
]
}
"canChainTemporaryBlue"
"canXRayTurnaround"Clears obstacles: C Dev note: There is 1/2 a unusable tile in this runway. |
From: 8
Item
To: 3
Bottom Left Door
Neutral bounce into the Morph tunnel, and SpringBall bounce to continue all the way through. Requires: "Morph"
{
"canShineCharge": {
"usedTiles": 16,
"steepDownTiles": 4,
"openEnd": 1
}
}
"canChainTemporaryBlue"
"canXRayTurnaround"
"canSpringBallBounce"Clears obstacles: C Dev note: Defeating Phantoon makes this strat easier. |
From: 8
Item
To: 3
Bottom Left Door
Run towards the conveyor to more easily build the ShineCharge, and for an easier bounce into the morph tunnel. Neutral bounce into the Morph tunnel, and SpringBall bounce to continue all the way through. Requires: "f_DefeatedPhantoon"
{
"canShineCharge": {
"usedTiles": 20,
"steepDownTiles": 4,
"openEnd": 1
}
}
"canTemporaryBlue"
"canXRayTurnaround"
"canSpringBallBounce"
{
"or": [
"HiJump",
"canChainTemporaryBlue"
]
}Clears obstacles: C Dev note: 16 tiles plus conveyor pushback. |
|
It is possible to jump up, in-room, by opening the right door and starting close to the door transition. Requires: {
"doorUnlockedAtNode": 2
}
"h_backIntoCorner"
"HiJump"
"canTrickyDashJump"Unlocks doors: {"nodeId":2,"types":["ammo"],"requires":[]} |
From: 4
Farm Junction Left of Gate
To: 2
Bottom Right Door
Requires: {
"obstaclesCleared": [
"A"
]
}
{
"getBlueSpeed": {
"usedTiles": 15,
"openEnd": 1
}
}
"canLongChainTemporaryBlue"
"canXRayTurnaround"
Exit condition: {
"leaveWithTemporaryBlue": {}
}Unlocks doors: {"types":["ammo"],"requires":[]} |
From: 1
Left Door
To: 1
Left Door
Entrance condition: {
"comeInStutterShinecharging": {
"minTiles": 2
}
}Requires: "canPreciseStutterWaterShineCharge" "canXRayTurnaround" "canChainTemporaryBlue" Exit condition: {
"leaveWithTemporaryBlue": {}
}Unlocks doors: {"types":["ammo"],"requires":[]} |
From: 1
Left Door
To: 1
Left Door
With only 1 tile of runway in the other room, Samus should ideally start on the last pixel of runway with X subpixels of $3FFF or less. Run toward the door, releasing forward for exactly 1 frame and pressing it again on the last possible frame before the transition. Starting with X subpixels of $7FFF can also work (e.g., by simply backing against the door ledge, then jumping and turning around mid-air); in this case, Samus must advance 1 or 2 pixels with an arm pump before the transition (e.g., firing a shot or pressing and/or releasing an angle button), Entrance condition: {
"comeInStutterShinecharging": {
"minTiles": 1
}
}Requires: "canPreciseStutterWaterShineCharge" "canInsaneJump" "canXRayTurnaround" "canChainTemporaryBlue" Exit condition: {
"leaveWithTemporaryBlue": {}
}Unlocks doors: {"types":["ammo"],"requires":[]}Dev note: FIXME: The canInsaneJump requirement is for difficulty placement; use a more appropriate tech if possible. |
From: 1
Top Left Doorway
To: 2
Bottom Left Door
Use a neutral bounce to enter the hole, then unmorph to descend. Use a pause buffer to remorph, then chain temporary blue into the next room. Entrance condition: {
"comeInShinecharging": {
"length": 1,
"openEnd": 0
}
}Requires: "Gravity" "Morph" "canPauseRemorphTemporaryBlue" "canXRayTurnaround" Exit condition: {
"leaveWithTemporaryBlue": {}
}Unlocks doors: {"types":["ammo"],"requires":[]}Dev note: FIXME: add a tech for bouncing into the tunnel. |
Come in Shinecharging, Leave With Temporary Blue (Suitless Spring Ball Bounce, Pause Remorph)
(Extreme+)
Crab Hole
From: 1
Top Left Doorway
To: 2
Bottom Left Door
Use Spring Ball to bounce into the hole, then unmorph to descend. Use a pause buffer to remorph, then chain temporary blue into the next room. Entrance condition: {
"comeInShinecharging": {
"length": 1,
"openEnd": 0
}
}Requires: "canSuitlessMaridia" "canTrickySpringBallBounce" "canPauseRemorphTemporaryBlue" "canXRayTurnaround" Exit condition: {
"leaveWithTemporaryBlue": {}
}Unlocks doors: {"types":["ammo"],"requires":[]} |
From: 2
Bottom Left Door
To: 1
Top Left Doorway
Perform a gravity jump and use Spring Ball to bounce through the top of the hole. Use a pause buffer to remorph, also taking the opportunity to equip Gravity again. Then chain temporary blue into the next room. Entrance condition: {
"comeInShinecharging": {
"length": 1,
"openEnd": 0
}
}Requires: "canXRayCancelShinecharge" "canXRayTurnaround" "canGravityJump" "canSpringBallBounce" "canPauseRemorphTemporaryBlue" Exit condition: {
"leaveWithTemporaryBlue": {}
}Unlocks doors: {"types":["ammo"],"requires":[]} |
From: 3
Bottom Right Door
To: 4
Top Right Doorway
Perform a gravity jump and use Spring Ball to bounce through the top of the hole. Use a pause buffer to remorph, also taking the opportunity to equip Gravity again. Then chain temporary blue into the next room. Entrance condition: {
"comeInShinecharging": {
"length": 1,
"openEnd": 0
}
}Requires: "canXRayTurnaround" "canGravityJump" "canSpringBallBounce" "canPauseRemorphTemporaryBlue" Exit condition: {
"leaveWithTemporaryBlue": {}
}Unlocks doors: {"types":["ammo"],"requires":[]} |
From: 4
Top Right Doorway
To: 3
Bottom Right Door
Use a neutral bounce to enter the hole, then unmorph to descend. Use a pause buffer to remorph, then chain temporary blue into the next room. Entrance condition: {
"comeInShinecharging": {
"length": 1,
"openEnd": 0
}
}Requires: "Gravity" "Morph" "canPauseRemorphTemporaryBlue" "canXRayTurnaround" Exit condition: {
"leaveWithTemporaryBlue": {}
}Unlocks doors: {"types":["ammo"],"requires":[]}Dev note: FIXME: add a tech for bouncing into the tunnel. |
Come in Shinecharging, Leave With Temporary Blue (Suitless Spring Ball Bounce, Pause Remorph)
(Extreme+)
Crab Hole
From: 4
Top Right Doorway
To: 3
Bottom Right Door
Use Spring Ball to bounce into the hole, then unmorph to descend. Use a pause buffer to remorph, then chain temporary blue into the next room. Entrance condition: {
"comeInShinecharging": {
"length": 1,
"openEnd": 0
}
}Requires: "canSuitlessMaridia" "canTrickySpringBallBounce" "canPauseRemorphTemporaryBlue" "canXRayTurnaround" Exit condition: {
"leaveWithTemporaryBlue": {}
}Unlocks doors: {"types":["ammo"],"requires":[]} |
From: 2
Bottom Right Door
To: 1
Bottom Left Door
Run into the room to gain temporary blue with a water shinecharge. Use X-ray along with HiJump and/or Spring Ball to chain it through the room. Entrance condition: {
"comeInRunning": {
"speedBooster": "yes",
"minTiles": 0.4375
}
}Requires: "canWaterShineCharge"
"canStationaryLateralMidAirMorph"
{
"or": [
{
"and": [
"HiJump",
"canTrickySpringBallJump"
]
},
{
"and": [
{
"or": [
"HiJump",
"canTrickySpringBallJump"
]
},
"canBeVeryPatient"
]
}
]
}
"canXRayTurnaround"
"canLongChainTemporaryBlue"Exit condition: {
"leaveWithTemporaryBlue": {}
}Unlocks doors: {"types":["ammo"],"requires":[]} |
From: 2
Bottom Right Door
To: 2
Bottom Right Door
Start with low run speed by positioning exactly 2 pixels from the door. Entrance condition: {
"comeInRunning": {
"speedBooster": "yes",
"minTiles": 0.4375
}
}Requires: "canWaterShineCharge" "canXRayTurnaround" "canLongChainTemporaryBlue" Exit condition: {
"leaveWithTemporaryBlue": {}
}Unlocks doors: {"types":["ammo"],"requires":[]}Dev note: This can also be done with a stutter shinecharge, which can shorten the temp blue chain, but not by enough to remove the need for the canLongChainTemporaryBlue requirement. |
From: 2
Bottom Right Door
To: 3
Top Right Door
Run into the room to gain temporary blue with a water shinecharge. Use X-ray along with HiJump to chain it through the room. Entrance condition: {
"comeInRunning": {
"speedBooster": "yes",
"minTiles": 0.4375
}
}Requires: "canWaterShineCharge"
"canStationaryLateralMidAirMorph"
"HiJump"
{
"or": [
"canBeVeryPatient",
"canTrickySpringBallJump"
]
}
"canXRayTurnaround"
"canLongChainTemporaryBlue"Exit condition: {
"leaveWithTemporaryBlue": {
"direction": "any"
}
}Unlocks doors: {"types":["ammo"],"requires":[]}Dev note: FIXME: This could be done with Spring Ball instead of HiJump; but it requires some space on either the left or right of the door in the room above, e.g. it won't work with the vanilla connection, and we would need some way to model that. |
|
Use the runway at the bottom-right side of the room to gain temporary blue. Use Gravity jumps to navigate the room, chaining temporary blue through the door. Requires: {
"getBlueSpeed": {
"usedTiles": 24,
"openEnd": 1
}
}
"canLongChainTemporaryBlue"
"canGravityJump"
"canXRayTurnaround"Exit condition: {
"leaveWithTemporaryBlue": {
"direction": "any"
}
} |
From: 3
Middle Right Door
To: 3
Middle Right Door
Start with low run speed by positioning exactly 2 pixels from the door. Entrance condition: {
"comeInRunning": {
"speedBooster": "yes",
"minTiles": 0.4375
}
}Requires: "canWaterShineCharge" "canXRayTurnaround" "canLongChainTemporaryBlue" Exit condition: {
"leaveWithTemporaryBlue": {}
}Unlocks doors: {"types":["ammo"],"requires":[]}Dev note: This can also be done with a stutter shinecharge, which can shorten the temp blue chain, but not by enough to remove the need for the canLongChainTemporaryBlue requirement. |
From: 4
Top Right Door
To: 4
Top Right Door
Entrance condition: {
"comeInStutterShinecharging": {
"minTiles": 2
}
}Requires: "canPreciseStutterWaterShineCharge" "canXRayTurnaround" "canChainTemporaryBlue" Exit condition: {
"leaveWithTemporaryBlue": {}
}Unlocks doors: {"types":["ammo"],"requires":[]} |
From: 4
Top Right Door
To: 4
Top Right Door
With only 1 tile of runway in the other room, Samus should ideally start on the last pixel of runway with X subpixels of $3FFF or less. Run toward the door, releasing forward for exactly 1 frame and pressing it again on the last possible frame before the transition. Starting with X subpixels of $7FFF can also work (e.g., by simply backing against the door ledge, then jumping and turning around mid-air); in this case, Samus must advance 1 or 2 pixels with an arm pump before the transition (e.g., firing a shot or pressing and/or releasing an angle button), Entrance condition: {
"comeInStutterShinecharging": {
"minTiles": 1
}
}Requires: "canPreciseStutterWaterShineCharge" "canInsaneJump" "canXRayTurnaround" "canChainTemporaryBlue" Exit condition: {
"leaveWithTemporaryBlue": {}
}Unlocks doors: {"types":["ammo"],"requires":[]}Dev note: FIXME: The canInsaneJump requirement is for difficulty placement; use a more appropriate tech if possible. |
|
Bring a Shinecharge from the top door to the speed blocks below the Missile item location. Be especially mindfull of the aquatic life during the descent. Line up directly below the speed blocks when jumping up. Entrance condition: {
"comeInShinecharging": {
"length": 14,
"openEnd": 0,
"steepDownTiles": 2
}
}Requires: "Gravity" "canChainTemporaryBlue" "canXRayTurnaround" Dev note: For other doors, a shinespark is more reasonable than a complex Temporary Blue Chain. And the enemies here are farmable for energy. |
From: 4
Top Right Door
To: 6
Speed Blocked Item
Bring a Shinecharge from the top door to the speed blocks below the Missile item location. Be especially mindfull of the aquatic life during the descent. Line up directly below the speed blocks when jumping up, especially if using a SpringBall jump. Entrance condition: {
"comeInStutterShinecharging": {
"minTiles": 2
}
}Requires: "canPreciseStutterWaterShineCharge"
"canChainTemporaryBlue"
"canXRayTurnaround"
{
"or": [
"Gravity",
"HiJump",
"canSpringBallJumpMidAir"
]
}Dev note: For other doors, a shinespark is more reasonable than a complex Temporary Blue Chain. And the enemies here are farmable for energy. |
|
Bring a Shinecharge from the top door to the speed blocks below the Missile item location. Be especially mindfull of the aquatic life during the descent. Line up directly below the speed blocks when jumping up. Entrance condition: {
"comeInShinecharging": {
"length": 5,
"openEnd": 0
}
}Requires: "canSuitlessMaridia"
"canChainTemporaryBlue"
"canXRayTurnaround"
{
"or": [
"HiJump",
"canSpringBallJumpMidAir"
]
}Dev note: Without a stutter water shinecharge, it is expected that Samus enters the room already at pretty high speed. |
From: 4
Top Right Door
To: 6
Speed Blocked Item
Bring a Shinecharge from the top door to the speed blocks below the Missile item location. Be especially mindfull of the aquatic life during the descent. Line up directly below the speed blocks when jumping up, especially if using a SpringBall jump. With only 1 tile of runway, this requires a single-frame stutter (release forward then repress on the next frame), on the last possible frame. Entrance condition: {
"comeInStutterShinecharging": {
"minTiles": 1
}
}Requires: "canPreciseStutterWaterShineCharge"
"canInsaneJump"
"canChainTemporaryBlue"
"canXRayTurnaround"
{
"or": [
"Gravity",
"HiJump",
"canSpringBallJumpMidAir"
]
} |
From: 1
Left Door
To: 1
Left Door
Entrance condition: {
"comeInStutterShinecharging": {
"minTiles": 2
}
}Requires: "canPreciseStutterWaterShineCharge" "canXRayTurnaround" "canChainTemporaryBlue" Exit condition: {
"leaveWithTemporaryBlue": {}
}Unlocks doors: {"types":["ammo"],"requires":[]} |
From: 1
Left Door
To: 1
Left Door
With only 1 tile of runway in the other room, Samus should ideally start on the last pixel of runway with X subpixels of $3FFF or less. Run toward the door, releasing forward for exactly 1 frame and pressing it again on the last possible frame before the transition. Starting with X subpixels of $7FFF can also work (e.g., by simply backing against the door ledge, then jumping and turning around mid-air); in this case, Samus must advance 1 or 2 pixels with an arm pump before the transition (e.g., firing a shot or pressing and/or releasing an angle button), Entrance condition: {
"comeInStutterShinecharging": {
"minTiles": 1
}
}Requires: "canPreciseStutterWaterShineCharge" "canInsaneJump" "canXRayTurnaround" "canChainTemporaryBlue" Exit condition: {
"leaveWithTemporaryBlue": {}
}Unlocks doors: {"types":["ammo"],"requires":[]}Dev note: FIXME: The canInsaneJump requirement is for difficulty placement; use a more appropriate tech if possible. |
|
Use an in-room runway to gain temporary blue. Then Gravity jump to chain it up to the door. It is easiest to gain a shinecharge at the bottom of the room, though this requires a longer sequence of gravity jumps. Requires: {
"or": [
{
"and": [
{
"canShineCharge": {
"usedTiles": 36,
"gentleUpTiles": 1,
"gentleDownTiles": 2,
"steepUpTiles": 1,
"openEnd": 0
}
},
"canLongChainTemporaryBlue"
]
},
{
"and": [
{
"canShineCharge": {
"usedTiles": 20,
"gentleUpTiles": 3,
"gentleDownTiles": 2,
"steepUpTiles": 1,
"openEnd": 1
}
},
"canXRayTurnaround"
]
},
{
"canShineCharge": {
"usedTiles": 15,
"gentleDownTiles": 2,
"steepDownTiles": 1,
"openEnd": 1
}
}
]
}
"canChainTemporaryBlue"
"canGravityJump"Exit condition: {
"leaveWithTemporaryBlue": {}
} |
|
Use the runway at either the bottom or right side of the room to gain temporary blue. Then Gravity jump two or more times to chain it up to the door. Requires: {
"or": [
{
"and": [
{
"canShineCharge": {
"usedTiles": 30,
"gentleUpTiles": 2,
"gentleDownTiles": 3,
"openEnd": 0
}
},
"canXRayTurnaround",
"canInsaneJump"
]
},
{
"and": [
{
"canShineCharge": {
"usedTiles": 20,
"gentleUpTiles": 3,
"gentleDownTiles": 1,
"steepUpTiles": 1,
"openEnd": 0
}
},
"HiJump"
]
}
]
}
"canGravityJump"
"canLongChainTemporaryBlue"Exit condition: {
"leaveWithTemporaryBlue": {
"direction": "left"
}
} |
From: 2
Bottom Left Door
To: 1
Middle Left Door
Use double spring ball jumps to reach the top-right of the room with temporary blue. To cross the two gaps at the top of the room to the left while chaining temporary blue, use spring ball jumps with HiJump disabled; in each case, perform a stationary lateral mid-air morph or a spring fling (or both); Entrance condition: {
"comeInRunning": {
"speedBooster": "yes",
"minTiles": 0.4375
}
}Requires: "h_waterGetBlueSpeed"
"HiJump"
"canLongChainTemporaryBlue"
"canBeExtremelyPatient"
"canXRayTurnaround"
"canDoubleSpringBallJumpMidAir"
"canTrickySpringBallJump"
{
"or": [
"canStationaryLateralMidAirMorph",
"canSpringFling"
]
}
"can4HighMidAirMorph" |
From: 2
Bottom Left Door
To: 1
Middle Left Door
Use double spring ball jumps to reach the top-right of the room with temporary blue. To cross the two gaps at the top of the room to the left while chaining temporary blue, use spring ball jumps with HiJump disabled; in each case, perform a stationary lateral mid-air morph or a spring fling (or both); Entrance condition: {
"comeInWithTemporaryBlue": {}
}Requires: "HiJump"
"canLongChainTemporaryBlue"
"canBeExtremelyPatient"
"canXRayTurnaround"
"canDoubleSpringBallJumpMidAir"
"canTrickySpringBallJump"
{
"or": [
"canStationaryLateralMidAirMorph",
"canSpringFling"
]
}
"can4HighMidAirMorph" |
From: 2
Bottom Left Door
To: 2
Bottom Left Door
Start with low run speed by positioning exactly 2 pixels from the door. Use X-Ray to cancel the shinecharge early, to avoid getting hit by the angry snail. Entrance condition: {
"comeInRunning": {
"speedBooster": "yes",
"minTiles": 0.4375
}
}Requires: "canWaterShineCharge" "canXRayCancelShinecharge" "canXRayTurnaround" "canLongChainTemporaryBlue" Exit condition: {
"leaveWithTemporaryBlue": {}
}Unlocks doors: {"types":["ammo"],"requires":[]}Dev note: This can also be done with a stutter shinecharge, which can shorten the temp blue chain, but not by enough to remove the need for the canLongChainTemporaryBlue requirement. |
|
Entrance condition: {
"comeInWithTemporaryBlue": {
"direction": "right"
},
"comesThroughToilet": "any"
}Requires: "canChainTemporaryBlue" "canXRayTurnaround" |
From: 6
Top Door
To: 7
Top Right Left Item
Use a double spring ball jump to reach the Speed blocks below the items while chaining temporary blue. Perform a spring ball jump and immediately unmorph and continue holding up, to break some of the Speed blocks while passing up through them. Leave one of the bottom Speed blocks unbroken to use as a platform. The top speed blocks will respawn; clip through them either using a snail clip with X-Ray. Entrance condition: {
"comeInWithTemporaryBlue": {
"direction": "left"
},
"comesThroughToilet": "any"
}Requires: {
"notable": "Suitless Temporary Blue To Items"
}
"canSuitlessMaridia"
"canChainTemporaryBlue"
"canXRayTurnaround"
{
"ammo": {
"type": "PowerBomb",
"count": 1
}
}
"h_doubleSpringBallJumpWithHiJump"
"canXRayCeilingClip" |
From: 7
Right of Sand with Blue Speed
To: 4
Right Door
Use X-Ray to turn around, then chain temporary blue back through the door. Requires: "h_getBlueSpeedMaxRunway" "canXRayTurnaround" "canChainTemporaryBlue" Exit condition: {
"leaveWithTemporaryBlue": {}
}Unlocks doors: {"types":["ammo"],"requires":[]}Dev note: The `h_getBlueSpeedMaxRunway` requirement is to satisfy the tests, since we don't yet have a way to represent that being at node 7 implies already having blue speed. |
From: 1
Bottom Left Door
To: 2
Right Door
Chain temporary blue across the room in order to break the Speed blocks. If available, bouncing using Spring Ball can help speed this up significantly. If two Power Bombs are also available, they can be used to break the shot blocks along the way without needing to stop bouncing. Entrance condition: {
"comeInWithTemporaryBlue": {
"direction": "left"
},
"comesThroughToilet": "any"
}Requires: "canChainTemporaryBlue"
"canXRayTurnaround"
{
"or": [
"HiJump",
"canTrickySpringBallJump",
"canInsaneJump"
]
}
{
"or": [
{
"and": [
"canSpringBallBounce",
{
"or": [
{
"ammo": {
"type": "PowerBomb",
"count": 2
}
},
{
"and": [
"canLongChainTemporaryBlue",
"can4HighMidAirMorph"
]
}
]
}
]
},
{
"and": [
"canLongChainTemporaryBlue",
"canStationaryLateralMidAirMorph",
"can4HighMidAirMorph",
"canBeVeryPatient"
]
}
]
} |
From: 2
Bottom Right Door
To: 3
Top Right Door
Entrance condition: {
"comeInShinecharging": {
"length": 3,
"openEnd": 0
}
}Requires: "canXRayTurnaround" "canGravityJump" "HiJump" "canChainTemporaryBlue" Exit condition: {
"leaveWithTemporaryBlue": {}
}Unlocks doors: {"types":["ammo"],"requires":[]} |
Come in Shinecharging, Leave With Temporary Blue (Gravity Jump, Spring Ball Jump, Pause Remorph)
(Extreme+)
Colosseum
From: 2
Bottom Right Door
To: 3
Top Right Door
Position as far left as possible, hanging over the ledge, and use X-Ray to turn around to the right. Perform a gravity jump into a spring ball jump. Immediately after the spring ball jump, unmorph to avoid bonking the wall and losing blue speed. Use a pause buffer to morph again without losing temporary blue: pause as early as possible, and hold angle and aim-down while the pause hits; during the black screen, hold only the down input, to buffer a morph; coming out of the pause, during the morphing animation roll from down to right, and then hold angle and unmorph to chain temporary blue. Entrance condition: {
"comeInShinecharging": {
"length": 3,
"openEnd": 0
}
}Requires: "canXRayTurnaround" "canGravityJump" "canSpringBallJumpMidAir" "canInsaneJump" "canChainTemporaryBlue" "canPauseRemorphTemporaryBlue" Exit condition: {
"leaveWithTemporaryBlue": {}
}Unlocks doors: {"types":["ammo"],"requires":[]} |
From: 3
Top Right Door
To: 2
Bottom Right Door
Entrance condition: {
"comeInShinecharging": {
"length": 2,
"openEnd": 0
}
}Requires: "canChainTemporaryBlue" "canXRayTurnaround" Exit condition: {
"leaveWithTemporaryBlue": {}
}Unlocks doors: {"types":["ammo"],"requires":[]} |
Come in Getting Blue Speed, Leave With Temporary Blue (Spring Ball Jump, Pause Remorph)
(Insane)
Crab Shaft
From: 2
Right Door
To: 1
Left Door
Face right and perform a mid-air spring ball jump through the single-tile gap. Entrance condition: {
"comeInGettingBlueSpeed": {
"length": 1,
"openEnd": 1
}
}Requires: "canSuitlessMaridia" "HiJump" "canLongChainTemporaryBlue" "canXRayTurnaround" "canTrickySpringBallJump" Exit condition: {
"leaveWithTemporaryBlue": {}
}Unlocks doors: {"types":["ammo"],"requires":[]} |
Come in Getting Blue Speed, Leave With Temporary Blue (Spring Ball Jump, Pause Remorph)
(Insane)
Crab Shaft
From: 2
Right Door
To: 3
Top Door
Perform a long series of tricky spring ball jumps to get up through the room while chaining temporary blue. After each spring ball jump, immediately unmorph to avoid bonking the wall and losing temporary blue. Aim down and use a pause buffer to remorph and continue chaining temporary blue. Entrance condition: {
"comeInGettingBlueSpeed": {
"length": 1,
"openEnd": 1
}
}Requires: "HiJump" "canSuitlessMaridia" "canLongChainTemporaryBlue" "canXRayTurnaround" "canTrickySpringBallJump" "canPauseRemorphTemporaryBlue" "canBeVeryPatient" Exit condition: {
"leaveWithTemporaryBlue": {
"direction": "any"
}
}Unlocks doors: {"types":["ammo"],"requires":[]} |
|
Requires: {
"shineChargeFrames": 0
}
"h_getBlueSpeedMaxRunway"
"canXRayTurnaround"
"canChainTemporaryBlue"Exit condition: {
"leaveWithTemporaryBlue": {}
}Unlocks doors: {"types":["ammo"],"requires":[]}Dev note: The `h_getBlueSpeedMaxRunway` requirement is to satisfy the tests, since we don't have a way to represent that the temporary blue originates from the startsWithShineCharge. |
|
Requires: {
"shineChargeFrames": 0
}
"h_getBlueSpeedMaxRunway"
"canXRayTurnaround"
"canLongChainTemporaryBlue"Exit condition: {
"leaveWithTemporaryBlue": {}
}Unlocks doors: {"types":["ammo"],"requires":[]}Dev note: The `h_getBlueSpeedMaxRunway` requirement is to satisfy the tests, since we don't have a way to represent that the temporary blue originates from the startsWithShineCharge. |
|
Requires: "HiJump"
{
"shineChargeFrames": 0
}
"h_getBlueSpeedMaxRunway"
"canXRayTurnaround"
"canLongChainTemporaryBlue"
"canTrickySpringBallJump"
"canPauseRemorphTemporaryBlue"Exit condition: {
"leaveWithTemporaryBlue": {
"direction": "any"
}
}Unlocks doors: {"types":["ammo"],"requires":[]}Dev note: The `h_getBlueSpeedMaxRunway` requirement is to satisfy the tests, since we don't have a way to represent that the temporary blue originates from the startsWithShineCharge. |
From: 1
Top Left Door
To: 2
Bottom Left Door
Entrance condition: {
"comeInShinecharging": {
"length": 0,
"openEnd": 1
}
}Requires: "canSuitlessMaridia" "canChainTemporaryBlue" "canXRayTurnaround" Exit condition: {
"leaveWithTemporaryBlue": {}
}Unlocks doors: {"types":["ammo"],"requires":[]} |
From: 6
Bottom Shinecharged
To: 1
Top Left Door
Requires: "h_shinechargeMaxRunway"
{
"shineChargeFrames": 0
}
"canXRayTurnaround"
"canChainTemporaryBlue"
{
"or": [
"canGravityJump",
{
"and": [
"HiJump",
"canTrickyUseFrozenEnemies",
"canLongChainTemporaryBlue"
]
}
]
}Exit condition: {
"leaveWithTemporaryBlue": {}
}Unlocks doors: {"types":["ammo"],"requires":[]} |
From: 6
Bottom Shinecharged
To: 2
Bottom Left Door
Requires: "h_shinechargeMaxRunway"
{
"shineChargeFrames": 0
}
"canXRayTurnaround"
"canChainTemporaryBlue"Exit condition: {
"leaveWithTemporaryBlue": {}
}Unlocks doors: {"types":["ammo"],"requires":[]} |
From: 6
Bottom Shinecharged
To: 4
Top Right Door
Requires: "h_shinechargeMaxRunway"
{
"shineChargeFrames": 0
}
"canXRayTurnaround"
"HiJump"
{
"or": [
{
"and": [
"canGravityJump",
"canTrickySpringBallJump",
"canChainTemporaryBlue"
]
},
{
"and": [
"canTrickyUseFrozenEnemies",
"canLongChainTemporaryBlue"
]
}
]
}Exit condition: {
"leaveWithTemporaryBlue": {}
}Unlocks doors: {"types":["ammo"],"requires":[]} |
From: 1
Top Left Door
To: 2
Bottom Left Door
Entrance condition: {
"comeInShinecharging": {
"length": 0,
"openEnd": 1
}
}Requires: "canChainTemporaryBlue" "canXRayTurnaround" Exit condition: {
"leaveWithTemporaryBlue": {}
}Unlocks doors: {"types":["ammo"],"requires":[]} |
From: 2
Bottom Left Door
To: 1
Top Left Door
Gaining blue speed with a precise amount of run speed (extra run speed of $2.0 or $2.1), and bounce through the transition. After the transition, unmorph, hold an angle button, aim down, and pause near the peak of Samus' jump. Buffer a morph out of the pause to continue chaining temporary blue. Use a spring ball jump to escape the water. Entrance condition: {
"comeInWithBlueSpringBallBounce": {
"movementType": "any",
"minExtraRunSpeed": "$2.0",
"maxExtraRunSpeed": "$2.1"
}
}Requires: "canTrickyDashJump" "canCrossRoomJumpIntoWater" "canPauseRemorphTemporaryBlue" "canXRayTurnaround" "canTrickySpringBallJump" Exit condition: {
"leaveWithTemporaryBlue": {}
}Unlocks doors: {"types":["ammo"],"requires":[]} |
From: 4
Bottom Right Shinecharged
To: 1
Top Left Door
To get out of the water at the top, do another gravity jump or spring ball jump, preferably while the water is high. Requires: "h_shinechargeMaxRunway"
{
"shineChargeFrames": 0
}
"canXRayTurnaround"
"canLongChainTemporaryBlue"
{
"or": [
"canGravityJump",
{
"and": [
"HiJump",
"canTrickySpringBallJump"
]
}
]
}Exit condition: {
"leaveWithTemporaryBlue": {}
}Unlocks doors: {"types":["ammo"],"requires":[]} |
From: 4
Bottom Right Shinecharged
To: 2
Bottom Left Door
Requires: "h_shinechargeMaxRunway"
{
"shineChargeFrames": 0
}
"canXRayTurnaround"
"canChainTemporaryBlue"Exit condition: {
"leaveWithTemporaryBlue": {}
}Unlocks doors: {"types":["ammo"],"requires":[]} |
From: 6
Junction Between Items
To: 4
Top Left - Right Item
Facing the item, activate X-Ray and face left, release X-Ray and shortly after press right to collect the item. Requires: {
"notable": "Right Item Turn Around Collection"
}
"canXRayTurnaround" |
|
Requires: {
"obstaclesCleared": [
"C"
]
}
{
"canShineCharge": {
"usedTiles": 20,
"openEnd": 2
}
}
"canChainTemporaryBlue"
"canXRayTurnaround"
"HiJump"
"canTrickySpringBallJump"Exit condition: {
"leaveWithTemporaryBlue": {}
} |
From: 1
Left Vertical Door
To: 1
Left Vertical Door
Requires: "Gravity"
"HiJump"
{
"canShineCharge": {
"usedTiles": 42,
"gentleUpTiles": 2,
"steepUpTiles": 1,
"steepDownTiles": 3,
"openEnd": 1
}
}
"canXRayTurnaround"
"canLongChainTemporaryBlue"Exit condition: {
"leaveWithTemporaryBlue": {
"direction": "any"
}
}Unlocks doors: {"types":["ammo"],"requires":[]}Dev note: FIXME: This is also possible using Spring Ball jumps (with pause remorphs) instead of HiJump. |
From: 2
Bottom Right Door
To: 2
Bottom Right Door
Start with low run speed by positioning exactly 2 pixels from the door. Use X-ray to turn around, and chain temporary blue back to the door. Entrance condition: {
"comeInRunning": {
"speedBooster": "yes",
"minTiles": 0.4375
}
}Requires: "canWaterShineCharge" "canXRayTurnaround" "canLongChainTemporaryBlue" Exit condition: {
"leaveWithTemporaryBlue": {}
}Unlocks doors: {"types":["ammo"],"requires":[]}Dev note: This can also be done with a stutter shinecharge, which can shorten the temp blue chain, but not by enough to remove the need for the canLongChainTemporaryBlue requirement. |
From: 3
Middle Right Door
To: 3
Middle Right Door
Requires: "Gravity"
{
"enemyKill": {
"enemies": [
[
"Owtch",
"Owtch"
]
]
}
}
{
"canShineCharge": {
"usedTiles": 16,
"gentleUpTiles": 2,
"gentleDownTiles": 2,
"steepUpTiles": 1,
"steepDownTiles": 1,
"startingSteepDownTiles": 1,
"startingGentleDownTiles": 2,
"openEnd": 2
}
}
"canChainTemporaryBlue"
"canXRayTurnaround"Exit condition: {
"leaveWithTemporaryBlue": {}
}Unlocks doors: {"types":["ammo"],"requires":[]}Dev note: FIXME: It's technically possible to evade the Owtches without killing them, but it's unclear if this can be done reliably. |
From: 3
Middle Right Door
To: 3
Middle Right Door
Requires: "Gravity"
{
"canShineCharge": {
"usedTiles": 42,
"gentleUpTiles": 2,
"steepUpTiles": 1,
"steepDownTiles": 3,
"openEnd": 1
}
}
"canLongChainTemporaryBlue"
"canXRayTurnaround"
Exit condition: {
"leaveWithTemporaryBlue": {}
}Unlocks doors: {"types":["ammo"],"requires":[]} |
From: 1
Left Door
To: 2
Bottom Door
Entrance condition: {
"comeInShinecharging": {
"length": 5,
"openEnd": 0
}
}Requires: "canChainTemporaryBlue" "canXRayTurnaround" Exit condition: {
"leaveWithTemporaryBlue": {
"direction": "any"
}
}Unlocks doors: {"types":["ammo"],"requires":[]} |
From: 3
Left Door, Shinecharged
To: 2
Right Door
Use X-Ray to cancel the shinecharge, in order to turnaround quickly enough to jump over the crab. Requires: {
"shineChargeFrames": 0
}
"h_getBlueSpeedMaxRunway"
"canXRayCancelShinecharge"
"canXRayTurnaround"
"canChainTemporaryBlue"Exit condition: {
"leaveWithTemporaryBlue": {}
}Unlocks doors: {"types":["ammo"],"requires":[]}Dev note: The `h_getBlueSpeedMaxRunway` requirement is to satisfy the tests, since we don't have a way to represent that the temporary blue originates from the startsWithShineCharge. |
From: 4
Right Door, Shinecharged
To: 1
Left Door
Requires: {
"shineChargeFrames": 0
}
"h_getBlueSpeedMaxRunway"
"canXRayTurnaround"
"canChainTemporaryBlue"Exit condition: {
"leaveWithTemporaryBlue": {}
}Unlocks doors: {"types":["ammo"],"requires":[]}Dev note: The `h_getBlueSpeedMaxRunway` requirement is to satisfy the tests, since we don't have a way to represent that the temporary blue originates from the startsWithShineCharge. |
|
Entrance condition: {
"comeInWithTemporaryBlue": {
"direction": "any"
},
"comesThroughToilet": "any"
}Requires: "canChainTemporaryBlue" "canXRayTurnaround" Clears obstacles: A |
|
Requires: {
"shineChargeFrames": 0
}
"h_getBlueSpeedMaxRunway"
"canXRayTurnaround"
"canChainTemporaryBlue"Exit condition: {
"leaveWithTemporaryBlue": {}
}Unlocks doors: {"types":["ammo"],"requires":[]}Dev note: The `h_getBlueSpeedMaxRunway` requirement is to satisfy the tests, since we don't have a way to represent that the temporary blue originates from the startsWithShineCharge. |
From: 7
Bottom Left Shinecharged
To: 5
Bottom Junction
Requires: {
"shineChargeFrames": 0
}
"h_getBlueSpeedMaxRunway"
"canTemporaryBlue"
"canXRayTurnaround"Clears obstacles: A |
|
Requires: {
"shineChargeFrames": 0
}
"h_getBlueSpeedMaxRunway"
"canXRayTurnaround"
"canChainTemporaryBlue"Exit condition: {
"leaveWithTemporaryBlue": {}
}Unlocks doors: {"types":["ammo"],"requires":[]}Dev note: The `h_getBlueSpeedMaxRunway` requirement is to satisfy the tests, since we don't have a way to represent that the temporary blue originates from the startsWithShineCharge. |
From: 8
Bottom Right Shinecharged
To: 5
Bottom Junction
Requires: {
"shineChargeFrames": 0
}
"h_getBlueSpeedMaxRunway"
"canTemporaryBlue"
"canXRayTurnaround"Clears obstacles: A |
From: 1
Top Right Door
To: 2
Bottom Right Door
Entrance condition: {
"comeInShinecharging": {
"length": 2,
"openEnd": 0
}
}Requires: {
"or": [
"f_KilledMetroidRoom2",
{
"obstaclesCleared": [
"f_KilledMetroidRoom2"
]
}
]
}
"canXRayTurnaround"
"canLongChainTemporaryBlue"Exit condition: {
"leaveWithTemporaryBlue": {}
}Unlocks doors: {"types":["ammo"],"requires":[]}Dev note: Doing this with Metroids alive is technically possible but seems really bad. |
From: 2
Bottom Right Door
To: 1
Top Right Door
Entrance condition: {
"comeInShinecharging": {
"length": 2,
"openEnd": 0
}
}Requires: {
"or": [
"f_KilledMetroidRoom2",
{
"obstaclesCleared": [
"f_KilledMetroidRoom2"
]
}
]
}
"canXRayTurnaround"
"canLongChainTemporaryBlue"Exit condition: {
"leaveWithTemporaryBlue": {}
}Unlocks doors: {"types":["ammo"],"requires":[]} |
From: 1
Top Left Door
To: 2
Bottom Door
Use X-ray immediately after shinecharging, in order to be able to dodge the Rinkas. Use spring ball to bounce through the 3-tile-high portion. Entrance condition: {
"comeInShinecharging": {
"length": 9,
"openEnd": 0
}
}Requires: {
"or": [
"f_KilledMetroidRoom4",
{
"obstaclesCleared": [
"f_KilledMetroidRoom4"
]
}
]
}
"canLongChainTemporaryBlue"
"canXRayTurnaround"
"canSpringBallBounce"Exit condition: {
"leaveWithTemporaryBlue": {
"direction": "any"
}
}Unlocks doors: {"types":["ammo"],"requires":[]}Dev note: It might technically be possible to get through the 3-tile-high part without Spring Ball, but this probably isn't really viable? |
From: 2
Middle Left Door
To: 1
Top Left Door
Entrance condition: {
"comeInShinecharging": {
"length": 2,
"openEnd": 0
}
}Requires: "canLongChainTemporaryBlue" "canXRayTurnaround" "can4HighMidAirMorph" Exit condition: {
"leaveWithTemporaryBlue": {}
}Unlocks doors: {"types":["ammo"],"requires":[]} |
From: 2
Middle Left Door
To: 3
Bottom Left Door
Entrance condition: {
"comeInShinecharging": {
"length": 2,
"openEnd": 0
}
}Requires: "canChainTemporaryBlue" "canXRayTurnaround" Exit condition: {
"leaveWithTemporaryBlue": {}
}Unlocks doors: {"types":["ammo"],"requires":[]} |
From: 3
Bottom Left Door
To: 1
Top Left Door
Entrance condition: {
"comeInShinecharging": {
"length": 11,
"openEnd": 0
}
}Requires: "canLongChainTemporaryBlue" "can4HighMidAirMorph" "canXRayTurnaround" Exit condition: {
"leaveWithTemporaryBlue": {}
}Unlocks doors: {"types":["ammo"],"requires":[]} |
From: 3
Bottom Left Door
To: 2
Middle Left Door
Entrance condition: {
"comeInShinecharging": {
"length": 11,
"openEnd": 0
}
}Requires: "canLongChainTemporaryBlue" "canXRayTurnaround" Exit condition: {
"leaveWithTemporaryBlue": {}
}Unlocks doors: {"types":["ammo"],"requires":[]} |
From: 1
Top Right Doorway
To: 3
Bottom Right Door
Entrance condition: {
"comeInShinecharging": {
"length": 3,
"openEnd": 0
}
}Requires: {
"notable": "Temporary Blue Chain"
}
"canLongChainTemporaryBlue"
"canXRayTurnaround"
Exit condition: {
"leaveWithTemporaryBlue": {}
}Unlocks doors: {"types":["ammo"],"requires":[]} |
