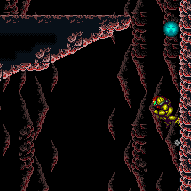
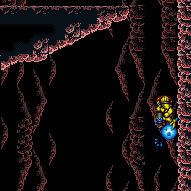
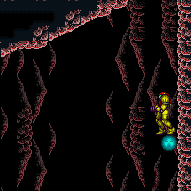
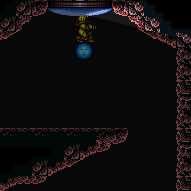
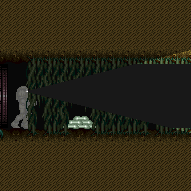
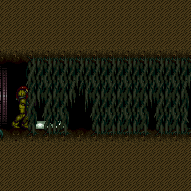
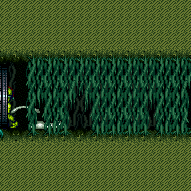
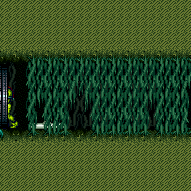
canBePatient (Extreme)
Executing a strat that requires waiting or doing the same thing over and over again for a substantial amount of time, potentially more than 1.5 minutes, even with good execution.
Strats ()
From: 6
Main Junction
To: 3
Top Right Door
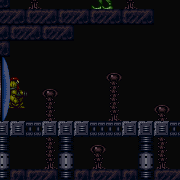
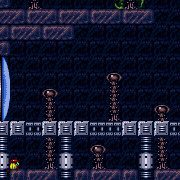
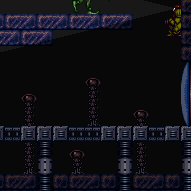
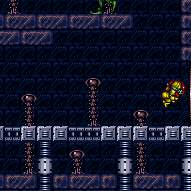
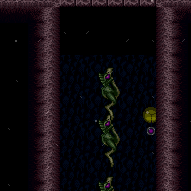
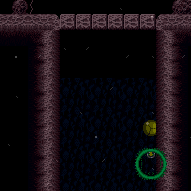
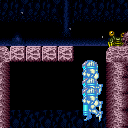
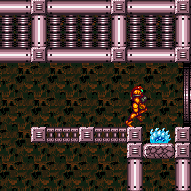
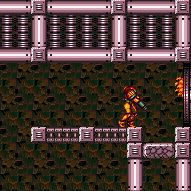
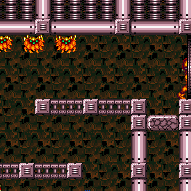
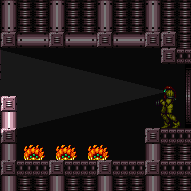
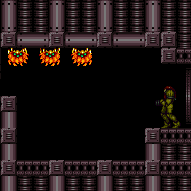
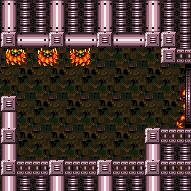
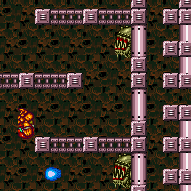
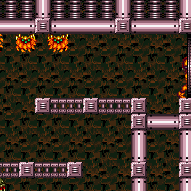
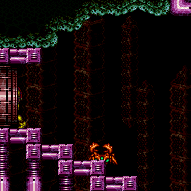
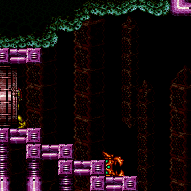
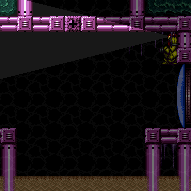
This is a long temporary blue chain with X-Ray turnarounds to climb up and destroy the bomb blocks blocking the top morph tunnel. Breaking the bomb blocks is difficult because there is not enough space above them to get a neutral bounce. It is best to break them by jumping from the top platform (inside the 3-tile-high space), as this provides a 2-frame window for the morph; in comparison, jumping from the platform below requires a frame-perfect morph. If Spring Ball is available, it can be used to increase the window by one frame. Requires: {
"notable": "Temporary Blue Chain Through Bomb Blocks"
}
{
"canShineCharge": {
"usedTiles": 27.5,
"openEnd": 0
}
}
"canLongChainTemporaryBlue"
"canXRayTurnaround"
"canTrickyJump"
"canBePatient"
"canInsaneJump"
{
"obstaclesCleared": [
"A"
]
}
{
"or": [
"h_ClimbWithoutLava",
{
"obstaclesNotCleared": [
"B"
]
}
]
}Dev note: The runway was reduced by 0.5 tiles, as you can't maintain Temporary Blue directly against a wall. |
|
Requires: {
"or": [
{
"enemyKill": {
"enemies": [
[
"Boyon",
"Boyon",
"Boyon",
"Boyon"
]
],
"excludedWeapons": [
"Bombs",
"PseudoScrew"
]
}
},
{
"and": [
"canBePatient",
"h_useMorphBombs"
]
},
{
"and": [
{
"enemyDamage": {
"enemy": "Boyon",
"type": "contact",
"hits": 16
}
},
"canCarefulJump",
"canPseudoScrew"
]
}
]
}Clears obstacles: A |
|
Ascend with a long IBJ, then go through the speed blocks to the item. The Boyons can be killed with bombs or 3 Power Bombs, or Samus can jump through them with Spring Ball, which is easy as long as she doesn't stop jumping. Note that Samus can not bomb boost through the Boyons while blue. Entrance condition: {
"comeInWithGMode": {
"mode": "any",
"morphed": true
}
}Requires: "h_blueSuitGMode"
"h_artificialMorphLongIBJ"
"canBePatient"
{
"or": [
"canBeVeryPatient",
{
"and": [
{
"ammo": {
"type": "PowerBomb",
"count": 3
}
},
"canDoubleBombJump"
]
},
{
"and": [
"h_artificialMorphSpringBall",
"canDoubleBombJump"
]
}
]
} |
|
Wall jump up 5 times, placing a Power Bomb precisely in the top right corner to overload PLMs with as few Power Bombs as possible. This only works in direct G-mode with the item still uncollected. Entrance condition: {
"comeInWithGMode": {
"mode": "direct",
"morphed": false
}
}Requires: "canPowerBombItemOverloadPLMs"
{
"notable": "G-Mode Up with Power Bombs"
}
{
"itemNotCollectedAtNode": 3
}
"canConsecutiveWallJump"
"Morph"
{
"or": [
"canRiskPermanentLossOfAccess",
{
"and": [
"canComplexGMode",
"canLongXRayClimb",
"canBeVeryPatient"
]
}
]
}
{
"ammo": {
"type": "PowerBomb",
"count": 5
}
}
"canBePatient"
{
"or": [
"Ice",
"canTrickyDodgeEnemies",
"ScrewAttack",
{
"and": [
"h_getBlueSpeedMaxRunway",
"h_blueJump"
]
},
{
"enemyKill": {
"enemies": [
[
"Boyon",
"Boyon",
"Boyon",
"Boyon"
]
],
"excludedWeapons": [
"Bombs"
]
}
},
{
"enemyDamage": {
"enemy": "Boyon",
"type": "contact",
"hits": 1
}
},
{
"and": [
"canBeVeryPatient",
"h_useMorphBombs"
]
}
]
}Dev note: Using this strat doesn't have canRiskPermanentLossOfAccess if the player could x-ray climb instead: this requires direct G-mode and Samus can freely doorstuck here, and there is no benefit to going to the item instead of the top left door, unless the item is there. FIXME: Placing the Power Bombs lower, on the magic tile, could overload PLMs with fewer, likely with as low as 2 Power Bombs. |
From: 2
Bottom Left Door
To: 4
Top Junction (Right of Spikes)
Ascend with a long IBJ, then go through the speed blocks to the item. The Boyons can be killed with bombs or 3 Power Bombs, or Samus can jump through them with Spring Ball, which is easy as long as she doesn't stop jumping. Note that Samus can not bomb boost through the Boyons while blue. Entrance condition: {
"comeInWithGMode": {
"mode": "any",
"morphed": true
}
}Requires: "h_blueSuitGMode"
"h_artificialMorphLongIBJ"
"canBePatient"
"canComplexGMode"
"canRemoteAcquire"
{
"or": [
"canBeVeryPatient",
{
"and": [
{
"ammo": {
"type": "PowerBomb",
"count": 3
}
},
"canDoubleBombJump"
]
},
{
"and": [
"h_artificialMorphSpringBall",
"canDoubleBombJump"
]
}
]
}Collects items: 3 Dev note: FIXME: It would be possible to remote acquire to the left after using spring into ceiling bomb jump, but it would require restructuring the room, a long CIBJ, and canBeExtremelyPatient. |
From: 2
Bottom Left Door
To: 4
Top Junction (Right of Spikes)
Ascend with a long IBJ, then go through the speed blocks and through the morph tunnel. The Boyons can be killed with bombs or 3 Power Bombs, or Samus can jump through them with Spring Ball, which is easy as long as she doesn't stop jumping. Note that Samus can not bomb boost through the Boyons while blue. Entrance condition: {
"comeInWithGMode": {
"mode": "any",
"morphed": true
}
}Requires: "h_blueSuitGMode"
"h_artificialMorphLongIBJ"
"canBePatient"
{
"or": [
"canBeVeryPatient",
{
"and": [
{
"ammo": {
"type": "PowerBomb",
"count": 3
}
},
"canDoubleBombJump"
]
},
{
"and": [
"h_artificialMorphSpringBall",
"canDoubleBombJump"
]
}
]
}Dev note: There is not a ceiling bomb jump strat from here, because it would be easier to just have X-Ray climbed the room. |
From: 2
Bottom Left Door
To: 5
Bottom Junction (Right of Boyons)
Requires: {
"or": [
{
"enemyKill": {
"enemies": [
[
"Boyon",
"Boyon",
"Boyon",
"Boyon"
]
],
"excludedWeapons": [
"Bombs",
"PseudoScrew"
]
}
},
{
"and": [
"canBePatient",
"h_useMorphBombs"
]
}
]
}Clears obstacles: A |
From: 5
Bottom Junction (Right of Boyons)
To: 2
Bottom Left Door
Requires: {
"or": [
{
"enemyKill": {
"enemies": [
[
"Boyon",
"Boyon",
"Boyon",
"Boyon"
]
],
"excludedWeapons": [
"Bombs",
"PseudoScrew"
]
}
},
{
"and": [
"canBePatient",
"h_useMorphBombs"
]
}
]
}Clears obstacles: A |
From: 5
Bottom Junction (Right of Boyons)
To: 3
Item
Requires: {
"haveBlueSuit": {}
}
{
"or": [
"canConsecutiveWallJump",
"SpaceJump",
{
"and": [
"canLongIBJ",
"canBePatient"
]
}
]
} |
From: 5
Bottom Junction (Right of Boyons)
To: 3
Item
Requires: {
"useFlashSuit": {}
}
{
"shinespark": {
"frames": 9,
"excessFrames": 7
}
}
{
"or": [
"canConsecutiveWallJump",
"SpaceJump",
{
"and": [
"canLongIBJ",
"canUnmorphBombBoost",
"canBePatient"
]
}
]
} |
From: 1
Left Door
To: 1
Left Door
Entrance condition: {
"comeInShinecharging": {
"length": 3,
"openEnd": 0
},
"comesInHeated": "no"
}Requires: {
"or": [
"h_CrystalSpark",
{
"and": [
"h_enemyDrops",
"canBePatient",
"h_CrystalSparkWithoutLenience"
]
}
]
}Dev note: No lenience, because Power Bombs can be farmed from the Alcoons. |
|
Climb up 3 screens. Entrance condition: {
"comeInWithGMode": {
"mode": "direct",
"morphed": false
}
}Requires: "canGModeXRayClimb" "canLongXRayClimb" "canBePatient" |
From: 4
Bottom Right Door
To: 3
Top Right Door
Refill at the ship then return and X-Ray climb up 3 screens. Entrance condition: {
"comeInWithGMode": {
"mode": "direct",
"morphed": false
}
}Requires: "canComplexGMode"
"canGModeXRayClimb"
{
"or": [
"canWallJump",
"HiJump",
"canSpringBallJumpMidAir",
"h_getBlueSpeedMaxRunway",
"ScrewAttack",
"h_blueSuitGMode"
]
}
{
"refill": [
"Energy",
"Missile",
"Super",
"PowerBomb"
]
}
"canLongXRayClimb"
"canBePatient" |
From: 4
Bottom Right Door
To: 3
Top Right Door
Entrance condition: {
"comeInShinecharged": {}
}Requires: {
"shineChargeFrames": 1
}
{
"shinespark": {
"frames": 1,
"excessFrames": 1
}
}
"canShinesparkDeepStuck"
"canXRayClimb"
"canBePatient" |
|
Enter with G-mode direct, back up to between 1 and 6 pixels from the door transition, and activate X-ray to get very deep stuck in the door. Climb up 3 screens, and perform a turnaround buffered spin-jump away from the door to trigger the transition, bypassing any lock on the door. Entrance condition: {
"comeInWithGMode": {
"mode": "direct",
"morphed": false
}
}Requires: "canGModeXRayClimb" "canLongXRayClimb" "canBePatient" Bypasses door shell: true |
From: 4
Bottom Right Door
To: 3
Top Right Door
Enter with G-mode direct, refill at the ship and return. Back up to between 1 and 6 pixels from the door transition, and activate X-ray to get very deep stuck in the door. Climb up 3 screens, and perform a turnaround buffered spin-jump away from the door to trigger the transition, bypassing any lock on the door. Entrance condition: {
"comeInWithGMode": {
"mode": "direct",
"morphed": false
}
}Requires: "canComplexGMode"
"canGModeXRayClimb"
{
"or": [
"canWallJump",
"HiJump",
"canSpringBallJumpMidAir",
"h_getBlueSpeedMaxRunway",
"ScrewAttack",
"h_blueSuitGMode"
]
}
{
"refill": [
"Energy",
"Missile",
"Super",
"PowerBomb"
]
}
"canLongXRayClimb"
"canBePatient"Bypasses door shell: true |
From: 3
Bottom Left Horizontal Door
To: 1
Top Left Door
Fall into the first Samus Eater in Hellway or Alpha Power Bomb Room. After teleporting and passing through the transition, X-Ray climb 3 screens to reach the space behind the bomb blocks at the top of the room. Samus will be off-camera, but the slopes at the top will push the camera up, indicating when the climb is done. Entrance condition: {
"comeInWithSamusEaterTeleport": {
"floorPositions": [
[
1,
13
],
[
8,
13
]
],
"ceilingPositions": []
}
}Requires: "canLongXRayClimb" "canBePatient" Dev note: FIXME: Other Samus Eaters can also probably work. In particular, in Hellway a ceiling Samus Eater could probably shorten the X-Ray climb. |
From: 3
Bottom Left Horizontal Door
To: 3
Bottom Left Horizontal Door
Requires: {
"enemyDamage": {
"enemy": "Geemer (blue)",
"type": "contact",
"hits": 1
}
}
"h_ZebesIsAwake"
"canBePatient" |
From: 5
Alcatraz Door
To: 8
Central Junction
Wait for a global Geemer to make the long trip along the map, or shoot a Super 20 to 30 seconds after entering the room to knock it off the ceiling and save a lot of time. Freeze it just after it starts climbing the bomb blocks. Spin-jump above it, which will put Samus into a forced crouch where X-Ray cannot be used. Use Grapple to kill a second Geemer, restoring the ability to use X-Ray. Use X-Ray to stand up, then jump up through the ceiling. Requires: {
"notable": "Alcatraz Escape with Grapple X-Ray Ceiling Clip"
}
"h_ZebesIsAwake"
"canBePatient"
{
"or": [
"canBeVeryPatient",
{
"ammo": {
"type": "Super",
"count": 1
}
}
]
}
"h_preciseIceClip"
"canUseGrapple"
"canXRayStandUp"Dev note: Morph could also be used instead of Grapple, but with Morph there is an easier strat that goes up through the tunnel to the left. |
From: 6
Bottom Right Door (On the Left Shaft)
To: 6
Bottom Right Door (On the Left Shaft)
Requires: {
"enemyDamage": {
"enemy": "Geemer (blue)",
"type": "contact",
"hits": 1
}
}
"h_ZebesIsAwake"
{
"or": [
"canBePatient",
{
"ammo": {
"type": "Super",
"count": 1
}
}
]
} |
From: 6
Bottom Right Door (On the Left Shaft)
To: 6
Bottom Right Door (On the Left Shaft)
Requires: "h_ZebesIsAwake"
{
"or": [
"canBePatient",
{
"ammo": {
"type": "Super",
"count": 1
}
}
]
}Exit condition: {
"leaveWithGModeSetup": {}
} |
From: 6
Bottom Right Door (On the Left Shaft)
To: 6
Bottom Right Door (On the Left Shaft)
Requires: "h_frozenEnemyRunway"
"h_ZebesIsAwake"
{
"or": [
"canBePatient",
{
"ammo": {
"type": "Super",
"count": 1
}
}
]
}Exit condition: {
"leaveWithRunway": {
"length": 5,
"openEnd": 1,
"steepUpTiles": 1
}
} |
From: 7
Bottom Left Vertical Door
To: 7
Bottom Left Vertical Door
Line up with the far right or left side of doorframe in the room below, to be able to not fall back through after entry, as the door remains open. Be careful not to fall into the door while being hit by the Geemer. Requires: {
"enemyDamage": {
"enemy": "Geemer (blue)",
"type": "contact",
"hits": 1
}
}
"h_ZebesIsAwake"
{
"or": [
"canBePatient",
{
"ammo": {
"type": "Super",
"count": 1
}
}
]
} |
From: 2
Right Door
To: 1
Left Door
This is harder when crossing the room and easier if the left door can be used to reset the room, but it will cost one extra Power Bomb. Place a Power Bomb near the first and third bomb walls. One Waver will be alive by the fifth wall, which will only move while on camera. Get it to move to the right in order to safely Power Bomb the final set of walls. Follow the Waver around the room a few times in order to get it to the left doorway. Requires: "Morph"
{
"ammo": {
"type": "PowerBomb",
"count": 3
}
}
"canBePatient"Exit condition: {
"leaveWithGModeSetup": {}
}Unlocks doors: {"types":["ammo"],"requires":[]} |
|
X-Ray climb about 2.5 screen lengths, until the camera shows Samus' helmet on the bottom of the screen. Shoot up to clear the shot blocks and resume climbing until you can walk out to the right. Fix the camera by shooting the floor shot block and jumping down. The pirate will attack while climbing past it. Entrance condition: {
"comeInWithDoorStuckSetup": {}
}Requires: "canLongXRayClimb"
{
"or": [
{
"enemyDamage": {
"enemy": "Green Space Pirate (standing)",
"type": "laser",
"hits": 1
}
},
{
"enemyKill": {
"enemies": [
[
"Green Space Pirate (standing)"
]
],
"explicitWeapons": [
"Charge",
"Ice",
"Wave",
"Spazer",
"Plasma",
"Missile",
"Super"
]
}
}
]
}
"canBePatient"Dev note: With a blue suit, Samus' i-frames still last a normal amount of time. |
|
X-Ray climb about 2.5 screen lengths, until the camera shows Samus' helmet on the bottom of the screen. Shoot up to clear the shot blocks and resume climbing until you can walk out to the left. Fix the camera by shooting the floor shot block and jumping down. The bottom pirate will attack while climbing past it. Entrance condition: {
"comeInWithDoorStuckSetup": {}
}Requires: "canLongXRayClimb"
{
"or": [
{
"enemyDamage": {
"enemy": "Green Space Pirate (standing)",
"type": "laser",
"hits": 1
}
},
{
"enemyKill": {
"enemies": [
[
"Green Space Pirate (standing)"
]
],
"explicitWeapons": [
"Charge",
"Ice",
"Wave",
"Spazer",
"Plasma",
"Missile",
"Super"
]
}
}
]
}
"canBePatient" |
From: 10
G-Mode Morph Junction (Middle Right Door)
To: 9
Junction Below Items
Place bombs against the bottom of the crumble blocks to overload PLMs. Requires: "canGMode"
"h_artificialMorphBombs"
{
"or": [
{
"and": [
"h_artificialMorphSpringBall",
{
"or": [
"canBePatient",
"HiJump"
]
}
]
},
"h_artificialMorphCeilingBombJump"
]
} |
|
Wait for the global crab to traverse the room and boost Samus up the ledge. It takes just over a minute for the crab to get there. Entrance condition: {
"comeInWithGMode": {
"mode": "any",
"morphed": true
},
"comesThroughToilet": "any"
}Requires: "Gravity"
"canBePatient"
"h_stationaryNeutralDamageBoost"
{
"enemyDamage": {
"enemy": "Sciser",
"type": "contact",
"hits": 1
}
} |
|
Requires: {
"canShineCharge": {
"usedTiles": 33,
"steepUpTiles": 2,
"steepDownTiles": 5,
"openEnd": 0
}
}
{
  "or": [
    "h_CrystalSpark",
    {
      "and": [
        "h_enemyDrops",
        "canBePatient",
        "h_CrystalSparkWithoutLenience"
      ]
    }
  ]
}
Dev note: No lenience, because Power Bombs can be farmed from the Scisers. |
|
Perform a wall jump off the item pedestal while avoiding the water. Lay a Power Bomb (or Bomb) and use it to boost to the right, with a well-timed unmorph to reset fall speed. The placement of the bomb is more lenient with a CWJ. It is ideal to gain 3 frames of dash speed, the maximum possible, but lower amounts can work. It is even possible to do a regular wall jump instead of a CWJ, but the CWJ makes it significantly more lenient. It is best for the wall jump to be performed as high as possible. If Speed Booster is available, equipping it will generally be helpful, as it will increase the height of Samus' wall jump based on the amount of dash speed. Requires: {
"notable": "Walljump Bomb Boost"
}
{
"or": [
"canCWJ",
"canBePatient"
]
}
"canWallJumpBombBoost"
"canResetFallSpeed"
{
"obstaclesNotCleared": [
"A",
"B",
"C"
]
} |
From: 5
Lower Section - Bottom Right Door
To: 2
Upper Right Section - Top Right Door
Enter with G-mode direct, back up to between 1 and 6 pixels from the door transition, and activate X-ray to get very deep stuck in the door. Climb up 4 screens, and perform a turnaround buffered spin-jump away from the door to trigger the transition, bypassing any lock on the door. Entrance condition: {
"comeInWithGMode": {
"mode": "direct",
"morphed": false
}
}Requires: "canGModeXRayClimb" "canLongXRayClimb" "canBePatient" Clears obstacles: R-Mode Bypasses door shell: true |
From: 5
Lower Section - Bottom Right Door
To: 3
Upper Right Section - Bottom Right Door
Climb up 3 screens. Entrance condition: {
"comeInWithGMode": {
"mode": "direct",
"morphed": false
}
}Requires: "canGModeXRayClimb" "canLongXRayClimb" "canBePatient" Clears obstacles: R-Mode |
From: 5
Lower Section - Bottom Right Door
To: 3
Upper Right Section - Bottom Right Door
Entrance condition: {
"comeInShinecharged": {}
}Requires: {
"shineChargeFrames": 1
}
{
"shinespark": {
"frames": 1,
"excessFrames": 1
}
}
"canShinesparkDeepStuck"
"canLongXRayClimb"
"canBePatient" |
From: 5
Lower Section - Bottom Right Door
To: 3
Upper Right Section - Bottom Right Door
Enter with G-mode direct, back up to between 1 and 6 pixels from the door transition, and activate X-ray to get very deep stuck in the door. Climb up 3 screens, and perform a turnaround buffered spin-jump away from the door to trigger the transition, bypassing any lock on the door. Entrance condition: {
"comeInWithGMode": {
"mode": "direct",
"morphed": false
}
}Requires: "canGModeXRayClimb" "canLongXRayClimb" "canBePatient" Bypasses door shell: true |
|
If you come from the upper section, use the Zeb Farm to fill up. Otherwise you have one Skultera or the Ripper 2 availble for reserve farming, or else Crystal Flash. Run underwater for the shinecharge and jump into the second Skultera's path to interrupt. Requires: {
"obstaclesCleared": [
"R-Mode"
]
}
{
"or": [
{
"resourceMissingAtMost": [
{
"type": "ReserveEnergy",
"count": 0
}
]
},
"h_CrystalFlashForReserveEnergy",
{
"and": [
"h_RModeCanRefillReserves",
{
"resourceMissingAtMost": [
{
"type": "Missile",
"count": 0
}
]
},
{
"or": [
{
"and": [
"canBePatient",
{
"partialRefill": {
"type": "ReserveEnergy",
"limit": 5
}
}
]
},
{
"and": [
{
"or": [
"canBeVeryLucky",
{
"and": [
{
"enemyKill": {
"enemies": [
[
"Ripper 2 (green)"
]
],
"excludedWeapons": [
"Super"
]
}
},
{
"resourceMissingAtMost": [
{
"type": "Super",
"count": 0
}
]
}
]
}
]
},
{
"partialRefill": {
"type": "ReserveEnergy",
"limit": 20
}
}
]
}
]
}
]
}
]
}
"Gravity"
"h_shinechargeMaxRunway"
{
"autoReserveTrigger": {
"maxReserveEnergy": 95
}
}
"canRModeSparkInterrupt"Resets obstacles: R-Mode Dev note: FIXME: Needs to track kill of the Ripper 2 in case this makes door #4 inaccessible. |
From: 4
Right Item
To: 2
Top Left Door
Use both Geemers to climb the tall shaft by repeatedly freezing them. Note that one moves locally when on camera and the other moves globally. Once Samus is close to the top Bomb Block, freeze one Geemer low and jump as high as possible before placing a power bomb. Continue climbing with the Geemer that survives. Requires: "h_ZebesIsAwake"
{
"or": [
"h_usePowerBomb",
{
"and": [
{
"obstaclesCleared": [
"B"
]
},
"Morph"
]
},
{
"obstaclesCleared": [
"C"
]
}
]
}
"h_usePowerBomb"
"canTrivialMidAirMorph"
"canTrickyUseFrozenEnemies"
"canTrickyJump"
"canBePatient"
"canCameraManip"Clears obstacles: A, B |
|
Requires: "h_ZebesIsAwake"
"canPrepareForNextRoom"
{
"resetRoom": {
"nodes": [
1
]
}
}
{
"or": [
{
"and": [
"Plasma",
"Charge",
{
"cycleFrames": 270
}
]
},
{
"and": [
"ScrewAttack",
{
"cycleFrames": 250
}
]
},
{
"and": [
"Plasma",
"Wave",
"canTrickyDodgeEnemies",
{
"cycleFrames": 300
}
]
},
{
"and": [
"h_PlasmaHitbox",
{
"cycleFrames": 360
}
]
},
{
"and": [
{
"haveBlueSuit": {}
},
{
"cycleFrames": 330
}
]
},
{
"and": [
"Morph",
"canTrickyDodgeEnemies",
{
"or": [
{
"and": [
"Wave",
"Spazer",
{
"cycleFrames": 600
}
]
},
{
"and": [
"Wave",
{
"cycleFrames": 840
}
]
},
{
"and": [
"Spazer",
"Ice",
{
"cycleFrames": 840
}
]
},
{
"and": [
"Spazer",
{
"cycleFrames": 960
}
]
},
{
"and": [
"Ice",
{
"cycleFrames": 1560
}
]
},
{
"and": [
"canBePatient",
{
"cycleFrames": 2320
}
]
}
]
}
]
}
]
}Clears obstacles: C Resets obstacles: A, B Farm cycle drops: 3 Sidehopper |
From: 4
Bottom Right Door
To: 5
Top Item
Cross the room while killing the Beetoms, then bomb the bottom of the crumble blocks to overload PLMs and go through. Entrance condition: {
"comeInWithGMode": {
"mode": "any",
"morphed": true
}
}Requires: "h_artificialMorphLongIBJ"
{
"or": [
"canTrickyGMode",
{
"and": [
{
"ammo": {
"type": "PowerBomb",
"count": 3
}
},
{
"or": [
"canComplexGMode",
{
"ammo": {
"type": "PowerBomb",
"count": 1
}
}
]
}
]
},
{
"and": [
"Morph",
{
"or": [
"ScrewAttack",
"Ice",
{
"ammo": {
"type": "Missile",
"count": 5
}
},
{
"ammo": {
"type": "Super",
"count": 5
}
}
]
}
]
}
]
}
{
"or": [
"canBeVeryPatient",
"h_artificialMorphCeilingBombJump",
{
"and": [
"canBePatient",
"h_artificialMorphSpringBall",
"HiJump"
]
},
{
"and": [
"canBePatient",
"Morph",
{
"or": [
"HiJump",
"canWallJump"
]
}
]
}
]
}Clears obstacles: A |
From: 4
Bottom Right Door
To: 5
Top Item
Samus is only able to kill enemies with blue suit while moving and not falling. With bombs as the only movement option, Samus should only touch the enemies while grounded and moving horizontally. After crossing the spikeway, bomb the bottom of the crumble blocks to overload PLMs and go through. Entrance condition: {
"comeInWithGMode": {
"mode": "any",
"morphed": true
}
}Requires: "h_blueSuitGMode"
"h_artificialMorphLongIBJ"
{
"or": [
"canBeVeryPatient",
"h_artificialMorphCeilingBombJump",
{
"and": [
"canBePatient",
"h_artificialMorphSpringBall",
"HiJump"
]
},
{
"and": [
"canBePatient",
"Morph",
{
"or": [
"HiJump",
"canWallJump"
]
}
]
}
]
}Clears obstacles: A |
From: 2
Above Power Bomb Blocks - Top Left Door
To: 2
Above Power Bomb Blocks - Top Left Door
It takes 80 seconds for the global Zeela to make it over here. A Super could speed this up, but it's likely to just get the Zeela stuck. Requires: "canBePatient"
{
"enemyDamage": {
"enemy": "Zeela",
"type": "contact",
"hits": 1
}
} |
From: 2
Above Power Bomb Blocks - Top Left Door
To: 2
Above Power Bomb Blocks - Top Left Door
It is possible to save a lot of time by using a Super to knock the clockwise Zeela off the small platform above. Requires: {
"or": [
"canBePatient",
{
"ammo": {
"type": "Super",
"count": 1
}
}
]
}Exit condition: {
"leaveWithGModeSetup": {}
} |
From: 2
Above Power Bomb Blocks - Top Left Door
To: 2
Above Power Bomb Blocks - Top Left Door
It is possible to save a lot of time by using a Super to knock the clockwise Zeela off the small platform above. Requires: "h_frozenEnemyRunway"
{
  "or": [
    "canBePatient",
    {
      "ammo": {
        "type": "Super",
        "count": 1
      }
    }
  ]
}
Exit condition: {
"leaveWithRunway": {
"length": 5,
"openEnd": 1
}
} |
From: 4
Above Power Bomb Blocks - Middle Left Door
To: 4
Above Power Bomb Blocks - Middle Left Door
It takes 70 seconds for the global Zeela to make it over here. A Super could speed this up, but it's likely to just get the Zeela stuck. Requires: "canBePatient"
{
"enemyDamage": {
"enemy": "Zeela",
"type": "contact",
"hits": 1
}
} |
From: 4
Above Power Bomb Blocks - Middle Left Door
To: 4
Above Power Bomb Blocks - Middle Left Door
It is possible to save a lot of time by using a Super to knock the clockwise Zeela off the small platform above. Requires: {
"or": [
"canBePatient",
{
"ammo": {
"type": "Super",
"count": 1
}
}
]
}Exit condition: {
"leaveWithGModeSetup": {}
} |
From: 4
Above Power Bomb Blocks - Middle Left Door
To: 4
Above Power Bomb Blocks - Middle Left Door
It is possible to save a lot of time by using a Super to knock the clockwise Zeela off the small platform above. Requires: "h_frozenEnemyRunway"
{
  "or": [
    "canBePatient",
    {
      "ammo": {
        "type": "Super",
        "count": 1
      }
    }
  ]
}
Exit condition: {
"leaveWithRunway": {
"length": 4,
"openEnd": 1
}
} |
From: 6
Above Power Bomb Blocks - Bottom Right Door
To: 6
Above Power Bomb Blocks - Bottom Right Door
Requires: "h_frozenEnemyRunway" "canBePatient" Exit condition: {
"leaveWithRunway": {
"length": 5,
"openEnd": 1
}
} |
From: 7
Below Power Bomb Blocks - Top Right Door
To: 3
Above Power Bomb Blocks - Top Right Door
Enter with G-mode direct, back up to between 1 and 6 pixels from the door transition, and activate X-ray to get very deep stuck in the door. Climb up 3 screens, and perform a turnaround buffered spin-jump away from the door to trigger the transition, bypassing any lock on the door. Entrance condition: {
"comeInWithGMode": {
"mode": "direct",
"morphed": false
}
}Requires: "canGModeXRayClimb" "canLongXRayClimb" "canBePatient" Bypasses door shell: true |
From: 8
Below Power Bomb Blocks - Bottom Left Door
To: 5
Above Power Bomb Blocks - Bottom Left Door
Enter with G-mode direct, back up to between 1 and 6 pixels from the door transition, and activate X-ray to get very deep stuck in the door. Climb up 4 screens, and perform a turnaround buffered spin-jump away from the door to trigger the transition, bypassing any lock on the door. Entrance condition: {
"comeInWithGMode": {
"mode": "direct",
"morphed": false
}
}Requires: "canGModeXRayClimb" "canLongXRayClimb" "canBePatient" Bypasses door shell: true |
From: 8
Below Power Bomb Blocks - Bottom Left Door
To: 8
Below Power Bomb Blocks - Bottom Left Door
If coming from above, let the Zeela below the Power Bomb blocks to circle until it is on the bottom right area, then go up and place the bomb on the bottom central platform to break the blocks without killing the Zeela. Then quickly shoot the shot block to direct it down to the lower section. Requires: "h_frozenEnemyRunway" "canBePatient" Exit condition: {
"leaveWithRunway": {
"length": 4,
"openEnd": 1
}
} |
From: 8
Below Power Bomb Blocks - Bottom Left Door
To: 12
Above Power Bomb Blocks - Main Junction
Climb up 4 screens. Entrance condition: {
"comeInWithDoorStuckSetup": {}
}Requires: "canLongXRayClimb" "canBePatient" |
From: 9
Right Etecoon Shaft - Top Left Door
To: 12
Above Power Bomb Blocks - Main Junction
Place bombs against the item Chozo ball to overload PLMs. Then go through the bomb blocks and tunnel. IBJ up the left side, blind, until getting on the top small platform. Place a Power Bomb and exit g-mode before the bomb goes off to break the blocks. Entrance condition: {
"comeInWithGMode": {
"mode": "any",
"morphed": true
}
}Requires: {
"itemNotCollectedAtNode": 11
}
"canRiskPermanentLossOfAccess"
"h_artificialMorphLongIBJ"
"h_artificialMorphPowerBomb"
"canBePatient"
"canOffScreenMovement"
"canTrickyGMode"Clears obstacles: A |
From: 9
Right Etecoon Shaft - Top Left Door
To: 12
Above Power Bomb Blocks - Main Junction
Fall down to the Morph tunnel and roll through the bomb block. Roll through the camera scroll blocks in the tunnel a few times to overload PLMs before continuing and touching the crumble block. Carefully climb the shaft with an IBJ. Note that the camera moves to the left once getting high enough, making this harder. Land on the top block, place a Power Bomb, then quickly exit G-mode before it explodes to break the blocks above. Entrance condition: {
"comeInWithGMode": {
"mode": "any",
"morphed": true
}
}Requires: "h_blueSuitGMode" "h_artificialMorphLongIBJ" "h_artificialMorphPowerBomb" "canBePatient" "canOffScreenMovement" "canTrickyGMode" Clears obstacles: A |
From: 10
Right Etecoon Shaft - Bottom Left Door
To: 12
Above Power Bomb Blocks - Main Junction
IBJ up and place bombs against the item Chozo ball to overload PLMs. Then go through the bomb blocks and tunnel. IBJ up again, blind, until getting on the top small platform. Place a Power Bomb and exit g-mode before the bomb goes off to break the blocks. Entrance condition: {
"comeInWithGMode": {
"mode": "any",
"morphed": true
}
}Requires: {
"itemNotCollectedAtNode": 11
}
"canRiskPermanentLossOfAccess"
"h_artificialMorphLongIBJ"
"h_artificialMorphPowerBomb"
"canBePatient"
"canOffScreenMovement"
"canTrickyGMode"Clears obstacles: A |
From: 10
Right Etecoon Shaft - Bottom Left Door
To: 12
Above Power Bomb Blocks - Main Junction
IBJ up and roll through the bomb block; be sure not to bomb it or it will remain solid. Roll through the camera scroll blocks in the tunnel a few times to overload PLMs before continuing and touching the crumble block. Carefully climb the shaft with an IBJ. Note that the camera moves to the left once getting high enough, making this harder. Land on the top block, place a Power Bomb, then quickly exit G-mode before it explodes to break the blocks above. Entrance condition: {
"comeInWithGMode": {
"mode": "any",
"morphed": true
}
}Requires: "h_blueSuitGMode" "h_artificialMorphLongIBJ" "h_artificialMorphPowerBomb" "canBePatient" "canOffScreenMovement" "canTrickyGMode" Clears obstacles: A |
From: 10
Right Etecoon Shaft - Bottom Left Door
To: 13
Below Power Bomb Blocks - Main Junction
IBJ up and place bombs against the item Chozo ball to overload PLMs. Then go down, through the bomb blocks and tunnel, then exit G-mode. Entrance condition: {
"comeInWithGMode": {
"mode": "any",
"morphed": true
}
}Requires: {
"itemNotCollectedAtNode": 11
}
"canRiskPermanentLossOfAccess"
"h_artificialMorphLongIBJ"
"canBePatient" |
From: 12
Above Power Bomb Blocks - Main Junction
To: 13
Below Power Bomb Blocks - Main Junction
Freeze two Zeelas to perform an 'Enemy Stuck Moonfall' in order to clip through the Power Bomb blocks. Position one Zeela upside down on a ceiling, and another below it on the ground. The global Zeela paired with either the lowest Zeela, or the other perimeter Zeela can be used, but freezing them together is the hardest part. Freezing one and then unequipping Ice Beam to dispel the ice effect or manipulating the camera can be used to synchronize them. If the moonfall is initiated immediately after freezing both enemies, it is possible to gain enough speed to automatically clip through the enemy and the floor; in this case, hold an angle button to buffer a pose change. Alternatively, and more easily, when one of the enemies is about to thaw, hold backward in order to move forward and fall off the enemy with a buffered turnaround, which will clip through the floor without needing as much fall speed. From directly on top of the Power Bomb blocks, no pose change is needed. Two Super Missiles can speed up the Zeela setup greatly by knocking them off of the wall. Requires: "canEnemyStuckMoonfall"
"canTrickyUseFrozenEnemies"
{
"or": [
"canDisableEquipment",
"canCameraManip"
]
}
{
"or": [
"canBePatient",
{
"ammo": {
"type": "Super",
"count": 2
}
}
]
} |
From: 13
Below Power Bomb Blocks - Main Junction
To: 14
Right Etecoon Shaft - Wall Jump Checkpoint
Break the bomb block at the bottom right of the main shaft. Bring a Zeela down to the bottom of the room. Morph inside the tunnel, take a Zeela hit, then jump, aim down, and shoot to freeze the Zeela as it starts to move up and while Samus is close to landing. Jump and aim down to get on top of the Zeela. If the Zeela is precisely positioned exactly 12 pixels above the ground, you can press up to make Samus stand; Otherwise, if you have X-ray, then the Zeela should be frozen lower, and you can morph and unmorph and use X-ray to force Samus to stand up; in this case there is a 6-pixel window over which it works, with the Zeela being between 4 and 9 pixels above the ground. In either case, after standing up on top of the Zeela, jump and aim down to break the crumble block. Then, before the crumble respawns, morph and use Spring Ball (if available) to jump back up and into the tunnel; without Spring Ball, a quick mid-air morph also works but is more difficult. Requires: {
"notable": "Bottom Ice Clip"
}
{
"noBlueSuit": {}
}
"h_bombThings"
"h_additionalBomb"
{
"enemyDamage": {
"enemy": "Zeela",
"type": "contact",
"hits": 1
}
}
"canTrickyJump"
{
"or": [
"h_XRayMorphIceClip",
{
"and": [
"h_highPixelIceClip",
"canInsaneJump",
"canBeVeryPatient"
]
}
]
}
{
"or": [
"h_useSpringBall",
{
"and": [
"can4HighMidAirMorph",
"canInsaneJump"
]
}
]
}
{
"or": [
"canBePatient",
{
"obstaclesNotCleared": [
"A"
]
}
]
}Dev note: The mid-air morph is tighter than a normal can4HighMidAirMorph and you may only get one chance at it before having to reset the room. FIXME: canBeVeryPatient requirement is for difficulty (assumed large number of attempts required); a more specific tech could be used if one existed. FIXME: It might be possible to use two Zeelas to wall ice clip and X-ray climb to the door transition(s) above. FIXME: Or it might be possible to let a Zeela get past the crumble block to where it could be used to ice climb up the Etecoon shaft. FIXME: This might be doable with a blue suit. If nothing else, it could be used to break the first block and then lose the suit, to save a Power Bomb, but that isnt worth modeling. |
|
Requires: {
"enemyDamage": {
"enemy": "Zeela",
"type": "contact",
"hits": 1
}
}
"canBePatient" |
|
Requires: "canBePatient" Exit condition: {
"leaveWithGModeSetup": {}
} |
|
Wait for the slow global Zeelas. They take almost 2 minutes to get there. Requires: "h_frozenEnemyRunway" "canBePatient" Exit condition: {
"leaveWithRunway": {
"length": 4,
"openEnd": 1
}
} |
From: 1
Top Right Door
To: 2
Bottom Door
Use the Plasma Special Beam Attack to kill Spore Spawn from above. Spore Spawn will move out of range after the first hit and it will take 9 cycles to come back into range. Stand on the left side of the lowest part of the upper area, facing left for the first hit. 9 cycles later, shoot again from the same spot while crouching to kill Spore Spawn. Requires: {
"notable": "Plasma SBA Kill from Above"
}
"Plasma"
"canSpecialBeamAttack"
{
"ammo": {
"type": "PowerBomb",
"count": 2
}
}
"canBePatient"Clears obstacles: f_DefeatedSporeSpawn Sets flags: f_DefeatedSporeSpawn Dev note: 2 Power Bombs total. |
|
Requires: "Charge"
{
"or": [
{
"and": [
"Ice",
"Wave"
]
},
{
"and": [
"Ice",
"Spazer"
]
},
{
"and": [
"Spazer",
"Wave"
]
},
{
"and": [
"canBePatient",
{
"or": [
"Ice",
"Wave",
"Spazer"
]
}
]
},
"Plasma",
"canBeVeryPatient"
]
}Clears obstacles: f_DefeatedSporeSpawn Sets flags: f_DefeatedSporeSpawn |
|
Requires: {
"resourceCapacity": [
{
"type": "Missile",
"count": 1
}
]
}
{
"or": [
"canDodgeWhileShooting",
"canBePatient"
]
}Clears obstacles: f_DefeatedSporeSpawn Sets flags: f_DefeatedSporeSpawn Dev note: No ammo count because Missiles are farmable here. |
From: 4
Left Side - Door Behind Power Bomb Blocks
To: 1
Left Side - Top Door
Fall into the first Samus Eater in Hellway or the second Samus Eater of Alpha Power Bomb Room. After teleporting and passing through the transition, X-Ray climb (about 3 screens) to reach the space above, to the left of the morph tunnel and bomb block. Samus will be off-camera, but the slopes at the top will push the camera up, indicating when the climb is done. Entrance condition: {
"comeInWithSamusEaterTeleport": {
"floorPositions": [
[
1,
13
],
[
2,
13
]
],
"ceilingPositions": []
}
}Requires: "canLongXRayClimb" "canBePatient" Dev note: Other Samus Eaters can also probably work. |
From: 5
Left Side - Door Blocked by Crumble Blocks
To: 1
Left Side - Top Door
Fall into the first Samus Eater in Hellway or the second Samus Eater of Alpha Power Bomb Room. After teleporting and passing through the transition, X-Ray climb (about 4 screens) to reach the space above, to the left of the morph tunnel and bomb block. Samus will be off-camera, but the slopes at the top will push the camera up, indicating when the climb is done. Entrance condition: {
"comeInWithSamusEaterTeleport": {
"floorPositions": [
[
1,
13
],
[
2,
13
]
],
"ceilingPositions": []
}
}Requires: "canLongXRayClimb" "canBePatient" Dev note: Other Samus Eaters can also probably work. |
From: 6
Right Side - Top Middle Door
To: 2
Right Side - Top Door
Enter with G-mode direct, back up to between 1 and 6 pixels from the door transition, and activate X-ray to get very deep stuck in the door. Climb up 4 screens, and perform a turnaround buffered spin-jump away from the door to trigger the transition, bypassing any lock on the door. Entrance condition: {
"comeInWithGMode": {
"mode": "direct",
"morphed": false
}
}Requires: "canGModeXRayClimb" "canLongXRayClimb" "canBePatient" Bypasses door shell: true |
From: 9
Left Side - Bottom Door
To: 11
Middle Item
Go into the morph tunnel below the Charge Beam location and Crystal Flash to force a standup and jump through. Samus is now unable to use X-Ray. Without Morph, be careful not to overload PLMs using the camera scroll blocks on the path upward. Then partially floor clip into the left side of the bomb block, and jump to clip through and escape. To exit G-Mode, damage down until the reserves trigger, which can be done most quickly using the Sidehoppers. Entrance condition: {
"comeInWithGMode": {
"mode": "any",
"morphed": true
}
}Requires: "canComplexGMode"
{
"or": [
"h_artificialMorphIBJ",
"Morph",
{
"and": [
"h_artificialMorphSpringBall",
{
"or": [
"HiJump",
{
"and": [
"h_artificialMorphSpringBallBombJump",
"h_additionalBomb",
"h_additionalBomb",
"h_additionalBomb"
]
}
]
}
]
}
]
}
"h_artificialMorphCrystalFlash"
{
"or": [
"Morph",
{
"and": [
"canInsaneJump",
"canTwoTileSqueeze",
"canPartialFloorClip",
"canCeilingClip"
]
}
]
}
"canBePatient"
{
"autoReserveTrigger": {}
}Dev note: This assumes Samus has many Energy Tanks, which will take a while to empty. |
|
There are camera scroll blocks just below the speed blocks, so it is easy to overload PLMs by bouncing into them. A single IBJ is slow enough at the top to overload them before Samus can hit the blocks. Entrance condition: {
"comeInWithGMode": {
"mode": "any",
"morphed": true
}
}Requires: "h_artificialMorphLongIBJ" "canBePatient" |
|
Requires: {
"haveBlueSuit": {}
}
{
"or": [
"canConsecutiveWallJump",
"SpaceJump",
{
"and": [
"canLongIBJ",
"canBePatient"
]
}
]
} |
|
There are camera scroll blocks just below the speed blocks, so it is easy to overload PLMs by bouncing into them. A single IBJ is slow enough at the top to overload them before Samus can hit the blocks. Entrance condition: {
"comeInWithGMode": {
"mode": "any",
"morphed": true
}
}Requires: "h_artificialMorphLongIBJ" "canBePatient" |
|
Requires: {
"useFlashSuit": {}
}
{
"or": [
"canConsecutiveWallJump",
"SpaceJump",
{
"and": [
"canLongIBJ",
"canBePatient",
"canUnmorphBombBoost"
]
}
]
}
{
"shinespark": {
"frames": 9,
"excessFrames": 7
}
}Dev note: There is no point in using a blue suit to spark or sparking at the bottom if Samus can wall jump. |
From: 3
Right Door
To: 2
Bottom Left Door
Using Speed Booster, run through and break the bomb wall to free the global Zeela. Break the speed blocks just before the Zeela gets to them in order for it to go down to the bottom half of the room. The speed blocks respawn very quickly, so this requires very precise timing or temporary blue. Normally, it takes the Zeela a minimum of 2 minutes to setup, but a super can make it fall down the shaft, saving 30 seconds. It may be easiest to knock the Zeela from the ceiling directly into the hole, saving another 30 seconds: Shoot a well-timed Super diagonally at the ground just before breaking the speed blocks. Requires: {
"notable": "G-Mode Setup - Lure the Zeela Down Below"
}
"canComplexGMode"
"canBePatient"
{
"or": [
{
"and": [
"h_getBlueSpeedMaxRunway",
{
"or": [
"canTemporaryBlue",
"canTrickyGMode",
{
"ammo": {
"type": "Super",
"count": 1
}
}
]
}
]
},
"h_blueSuitGMode"
]
}Exit condition: {
"leaveWithGModeSetup": {}
}Unlocks doors: {"types":["ammo"],"requires":[]} |
|
Use a Reo (Bee) and a Zeela to perform an 'Enemy Stuck Moonfall', clipping Samus through the Speed blocks. Break the Bomb blocks to bring enemies over to the Speed blocks. Have a Reo wait off camera while the Zeela walks onto the Speed blocks, then freeze the Bee just above Samus' head. Try to freeze both enemies near the same time and start the moonfall as quickly as possible. Requires: {
"notable": "Reo Zeela Stuck Moonfall"
}
"canTrickyUseFrozenEnemies"
"canEnemyStuckMoonfall"
"canBePatient"
"canCameraManip"
{
"obstaclesCleared": [
"A"
]
} |
|
Gravity Suit can use the main runway, while suitless must use the shelf. The entire setup can be done with just the Zeros if you are patient enough (and/or have Gravity). Gravity (only) can also run through just the first thick portion of the speedway to use the the Skulltera and Puyos. Entrance condition: {
"comeInWithRMode": {}
}Requires: {
"or": [
"h_CrystalFlashForReserveEnergy",
{
"and": [
"h_RModeCanRefillReserves",
{
"resourceMissingAtMost": [
{
"type": "PowerBomb",
"count": 0
}
]
},
{
"partialRefill": {
"type": "ReserveEnergy",
"limit": 5
}
}
]
}
]
}
{
"or": [
{
"and": [
"Gravity",
"h_shinechargeMaxRunway"
]
},
{
"and": [
{
"or": [
"SpaceJump",
{
"and": [
"canSuitlessMaridia",
{
"or": [
"canPreciseWallJump",
"canBombJumpWaterEscape",
{
"and": [
"h_useSpringBall",
"canJumpIntoIBJ"
]
},
{
"and": [
"canBePatient",
"canTrickyUseFrozenEnemies",
{
"ammo": {
"type": "Super",
"count": 1
}
}
]
}
]
}
]
}
]
},
{
"canShineCharge": {
"usedTiles": 32,
"openEnd": 1
}
}
]
}
]
}
{
"autoReserveTrigger": {
"maxReserveEnergy": 95
}
}
"canRModeSparkInterrupt"
{
"partialRefill": {
"type": "Energy",
"limit": 25
}
}Clears obstacles: A |
From: 1
Right Door
To: 3
Dry Platform Junction
Watch a Zero (Caterpillar) climb along the ceiling before knocking it down near the speed blocks. Freeze it and jump on top. Escape the water with a spinjump or crouch jump. Requires: "canSuitlessMaridia"
"canBePatient"
"canTrickyUseFrozenEnemies"
{
"ammo": {
"type": "Super",
"count": 1
}
} |
|
Requires: "canBePatient"
"h_useMorphBombs"
{
"resetRoom": {
"nodes": [
1
]
}
}
{
"cycleFrames": 4930
}Clears obstacles: A Resets obstacles: B Farm cycle drops: 4 Boyon |
From: 1
Right Door
To: 2
Chozo Item
Traverse the room while avoiding or killing the Boyons. If the Chozo item is still there, it is best to exit G-Mode before the final Power Bomb goes off to ensure that PLMs aren't overloaded. If Samus falls into a Samus Eater, she will often be teleported into it when exiting G-Mode. Entrance condition: {
"comeInWithGMode": {
"mode": "any",
"morphed": true
}
}Requires: "h_artificialMorphPowerBomb"
{
"or": [
"h_artificialMorphMovement",
{
"and": [
"h_artificialMorphBombs",
"canBePatient"
]
}
]
}Clears obstacles: B |
|
Requires: {
"or": [
{
"enemyKill": {
"enemies": [
[
"Boyon",
"Boyon",
"Boyon",
"Boyon"
]
],
"excludedWeapons": [
"Bombs",
"PseudoScrew"
]
}
},
{
"and": [
"canBePatient",
"h_useMorphBombs"
]
},
{
"and": [
{
"enemyDamage": {
"enemy": "Boyon",
"type": "contact",
"hits": 16
}
},
"canPseudoScrew",
{
"noBlueSuit": {}
}
]
}
]
}Clears obstacles: A |
From: 1
Top Left Door
To: 1
Top Left Door
Entrance condition: {
"comeInShinecharging": {
"length": 4,
"openEnd": 0
},
"comesInHeated": "no"
}Requires: {
"or": [
"h_CrystalSpark",
{
"and": [
"canBePatient",
{
"or": [
"HiJump",
"canWallJump",
"SpaceJump",
"canIBJ",
"canSpringBallJumpMidAir"
]
},
"h_CrystalSparkWithoutLenience"
]
}
]
}Dev note: Lenience is not included for variants that can kill the Zeros and climb back up quickly. |
From: 2
Middle Left Door
To: 2
Middle Left Door
It takes around 4 minutes to get the Zero to this door with Morph, or 90 seconds with 2 Supers. The Zero only moves on camera and the camera scrolls when exiting the morph tunnel. Let the Zero lead through the morph tunnel or wait for the it to get very close to Samus before touching the scroll block at the exit. To speed this up and avoid the Morph requirement, use a Super when the Zero is at the tip of the platform extending out below the morph tunnel. The Zero will fall onto a lower platform, and another Super can be used to make it fall on the left platform. Requires: {
"or": [
{
"and": [
"Morph",
"canBeVeryPatient"
]
},
{
"and": [
"canBePatient",
{
"ammo": {
"type": "Super",
"count": 2
}
}
]
}
]
}
{
"or": [
"HiJump",
"canWallJump",
"SpaceJump",
"canIBJ",
"canTrickyUseFrozenEnemies",
"canSpringBallJumpMidAir"
]
}Exit condition: {
"leaveWithGModeSetup": {}
} |
From: 4
Bottom Right Door
To: 4
Bottom Right Door
Entrance condition: {
"comeInShinecharging": {
"length": 2,
"openEnd": 0
},
"comesInHeated": "no"
}Requires: {
"or": [
"h_CrystalSpark",
{
"and": [
"h_enemyDrops",
"canBePatient",
{
"or": [
"HiJump",
"canWallJump",
"SpaceJump",
"canIBJ",
"canSpringBallJumpMidAir"
]
},
"h_CrystalSparkWithoutLenience"
]
}
]
}Dev note: Lenience is not included. Only variants that can kill the Zeros and climb back up quickly are included. This room is shorter than the 3 tile limit normally used for these strats; it is only included because it has a good Power Bomb farm. |
From: 5
Top Right Door (Through Morph Tunnel)
To: 5
Top Right Door (Through Morph Tunnel)
Entrance condition: {
"comeInShinecharging": {
"length": 7,
"openEnd": 0
},
"comesInHeated": "no"
}Requires: {
"or": [
"h_CrystalSpark",
{
"and": [
"h_enemyDrops",
"canBePatient",
{
"or": [
"HiJump",
"canWallJump",
"SpaceJump",
"canIBJ",
"canSpringBallJumpMidAir"
]
},
"h_CrystalSparkWithoutLenience"
]
}
]
}Dev note: Lenience is not included for variants that can kill the Zeros and climb back up quickly. |
From: 5
Top Right Door (Through Morph Tunnel)
To: 5
Top Right Door (Through Morph Tunnel)
Requires: {
"obstaclesCleared": [
"A"
]
}
{
"canShineCharge": {
"usedTiles": 17,
"openEnd": 0
}
}
{
"or": [
"h_CrystalSpark",
{
"and": [
"h_enemyDrops",
"canBePatient",
{
"or": [
"HiJump",
"canWallJump",
"SpaceJump",
"canIBJ",
"canSpringBallJumpMidAir"
]
},
"h_CrystalSparkWithoutLenience"
]
}
]
}
{
"resetRoom": {
"nodes": [
5
]
}
}Clears obstacles: A Resets obstacles: B Dev note: Lenience is not included for variants that can kill the Zeros and climb back up quickly. Requires resetting the room at 5, to prevent requiring doing something slow to open the gate. |
From: 5
Top Right Door (Through Morph Tunnel)
To: 5
Top Right Door (Through Morph Tunnel)
Requires: "canBePatient"
{
"or": [
{
"ammo": {
"type": "Super",
"count": 1
}
},
{
"obstaclesCleared": [
"A"
]
}
]
}
"Morph"
{
"or": [
"HiJump",
"canWallJump",
"SpaceJump",
"canIBJ",
"canTrickyUseFrozenEnemies",
"canSpringBallJumpMidAir"
]
}Exit condition: {
"leaveWithGModeSetup": {}
} |
From: 5
Top Right Door (Through Morph Tunnel)
To: 5
Top Right Door (Through Morph Tunnel)
It takes around 2 minutes to get the Zero to this door. Crouch jump to touch a well timed Cacatac spike at the peak of Samus' jump. Use a neutral damage boost to gain some height. At the peak of the boost, down grab the ledge. Requires: "canBePatient"
{
"or": [
{
"ammo": {
"type": "Super",
"count": 1
}
},
{
"obstaclesCleared": [
"A"
]
}
]
}
"Morph"
"canNeutralDamageBoost"
"canTrickyDodgeEnemies"
"h_crouchJumpDownGrab"
{
"enemyDamage": {
"enemy": "Cacatac",
"type": "spike",
"hits": 1
}
}Exit condition: {
"leaveWithGModeSetup": {}
} |
From: 5
Top Right Door (Through Morph Tunnel)
To: 5
Top Right Door (Through Morph Tunnel)
It takes around 2 minutes to get the Zero to this door. Let the Zero climb the right wall and jump on top of it in Morph Ball form to bounce up to the Cacatac platform. One setup is to do regular jumps while aiming down until the camera stops lowering, and then let the Zero move off camera. And then crouch jump and morph directly into it, while holding right. Requires: "canBePatient"
{
"or": [
{
"ammo": {
"type": "Super",
"count": 1
}
},
{
"obstaclesCleared": [
"A"
]
}
]
}
"h_midAirMorphDamageBoost"
"canTrickyJump"
"h_crouchJumpDownGrab"
{
"enemyDamage": {
"enemy": "Zero",
"type": "contact",
"hits": 1
}
}Exit condition: {
"leaveWithGModeSetup": {}
} |
From: 5
Top Right Door (Through Morph Tunnel)
To: 5
Top Right Door (Through Morph Tunnel)
Open the gate, farm the Cacatacs and Zeros, while leading one back up to the Morph tunnel. Shinecharge under the gate, then get hit by the Zero to interrupt. Entrance condition: {
"comeInWithRMode": {}
}Requires: {
"ammo": {
"type": "Super",
"count": 1
}
}
"Morph"
{
"or": [
"h_CrystalFlashForReserveEnergy",
{
"and": [
"h_RModeCanRefillReserves",
{
"or": [
{
"and": [
{
"resourceMissingAtMost": [
{
"type": "Super",
"count": 1
}
]
},
{
"partialRefill": {
"type": "ReserveEnergy",
"limit": 20
}
}
]
},
{
"and": [
{
"resourceMissingAtMost": [
{
"type": "PowerBomb",
"count": 0
}
]
},
{
"partialRefill": {
"type": "ReserveEnergy",
"limit": 15
}
}
]
}
]
}
]
}
]
}
{
"or": [
"HiJump",
"canWallJump",
"SpaceJump",
"canIBJ",
"canSpringBallJumpMidAir",
"canTrickyUseFrozenEnemies",
{
"and": [
"canNeutralDamageBoost",
{
"or": [
{
"and": [
"canTrickyDodgeEnemies",
"h_crouchJumpDownGrab",
{
"enemyDamage": {
"enemy": "Cacatac",
"type": "spike",
"hits": 1
}
}
]
},
{
"and": [
"canMidAirMorph",
"canTrickyJump",
"canCrouchJump",
{
"enemyDamage": {
"enemy": "Zero",
"type": "contact",
"hits": 1
}
}
]
}
]
}
]
}
]
}
"canBePatient"
{
"canShineCharge": {
"usedTiles": 17,
"openEnd": 0
}
}
{
"autoReserveTrigger": {}
}
"canRModeSparkInterrupt"Clears obstacles: A, B |
From: 1
Left Door
To: 1
Left Door
Entrance condition: {
"comeInShinecharging": {
"length": 5,
"openEnd": 0
},
"comesInHeated": "no"
}Requires: {
"or": [
"h_CrystalSpark",
{
"and": [
"h_enemyDrops",
"canBePatient",
"h_CrystalSparkWithoutLenience",
{
"or": [
"Grapple",
"SpaceJump"
]
}
]
}
]
}Dev note: No lenience, for variants that can quickly farm Power Bombs from the Firefleas. |
From: 2
Right Door
To: 2
Right Door
It takes 90 seconds after room entry to get hit by a Waver. It is the second Waver that comes nearby. Requires: "canBePatient" Exit condition: {
"leaveWithGModeSetup": {}
} |
|
Avoid getting blue until the end of the runway. It is possible to farm Power Bombs from the Beetom below. Entrance condition: {
"comeInShinecharging": {
"length": 10,
"openEnd": 0
},
"comesInHeated": "no"
}Requires: {
"or": [
"h_CrystalSpark",
{
"and": [
"h_enemyDrops",
"canBePatient",
"h_CrystalSparkWithoutLenience"
]
}
]
} |
|
Entrance condition: {
"comeInWithDoorStuckSetup": {}
}Requires: "canLongXRayClimb" "canBePatient" |
|
Getting up during Phase 2 can be done by jumping on Kraid's projectile platforms or a well timed crouch jump + down grab. Requires: "Charge"
{
"or": [
"Wave",
"Spazer",
"Plasma",
"canBePatient"
]
}
{
"or": [
"HiJump",
"canWallJump",
"SpaceJump",
"canSpringBallJumpMidAir",
{
"and": [
"canDodgeWhileShooting",
{
"or": [
"canCarefulJump",
"h_crouchJumpDownGrab"
]
}
]
}
]
}
"h_complexToCarryFlashSuit"Clears obstacles: f_DefeatedKraid Sets flags: f_DefeatedKraid |
|
4 supers are required to kill Kraid. Only 1 is needed to get him to stand up, after which they are farmable, even though the drop rate is low. Getting up during Phase 2 can be done by jumping on Kraid's projectile platforms or a well timed crouch jump + down grab. Requires: {
"or": [
{
"ammo": {
"type": "Super",
"count": 5
}
},
{
"and": [
{
"ammo": {
"type": "Super",
"count": 4
}
},
"canDodgeWhileShooting"
]
},
{
"and": [
{
"ammo": {
"type": "Super",
"count": 3
}
},
"canDodgeWhileShooting",
"canBePatient"
]
},
{
"and": [
{
"ammo": {
"type": "Super",
"count": 1
}
},
"canDodgeWhileShooting",
"canBeVeryPatient"
]
}
]
}
{
"or": [
"HiJump",
"canWallJump",
"SpaceJump",
"canSpringBallJumpMidAir",
{
"and": [
"canDodgeWhileShooting",
{
"or": [
"canCarefulJump",
"h_crouchJumpDownGrab"
]
}
]
}
]
}
"h_complexToCarryFlashSuit"Clears obstacles: f_DefeatedKraid Sets flags: f_DefeatedKraid |
From: 4
Left Side - Bottom Door
To: 1
Left Side - Top Door
Enter with G-mode direct, back up to between 1 and 6 pixels from the door transition, and activate X-ray to get very deep stuck in the door. Climb up 3 screens, and perform a turnaround buffered spin-jump away from the door to trigger the transition, bypassing any lock on the door. Entrance condition: {
"comeInWithGMode": {
"mode": "direct",
"morphed": false
}
}Requires: "canGModeXRayClimb" "canLongXRayClimb" "canBePatient" Bypasses door shell: true |
|
Entrance condition: {
"comeInWithDoorStuckSetup": {}
}Requires: "canLongXRayClimb" "canBePatient" |
From: 7
Top Right Door
To: 7
Top Right Door
Place a Power Bomb on the bottom stair attached to the door in order to prevent killing the Sova, or free a Sova from the Morph maze with Bombs. If coming from below, be sure to lure the Sova to the bottom before placing a Power Bomb near the blocks in order to prevent killing it. Use Space Jump to follow the Sova to the top right door. Freeze it just at the bottom of the small stairs, as Samus can run over the half-tile gap that remains. Requires: "h_frozenEnemyRunway"
"SpaceJump"
"canBePatient"
{
"or": [
{
"obstaclesCleared": [
"A"
]
},
"h_bombThings"
]
}Exit condition: {
"leaveWithRunway": {
"length": 5,
"openEnd": 1
}
} |
From: 10
G-Mode Morph, Above the Power Bomb Blocks
To: 1
Left Side - Top Door
Requires: "canGMode"
"h_artificialMorphLongIBJ"
{
"or": [
"h_artificialMorphPowerBomb",
{
"and": [
"canTrickyDodgeEnemies",
{
"or": [
"canBePatient",
"canDoubleBombJump"
]
}
]
}
]
} |
From: 10
G-Mode Morph, Above the Power Bomb Blocks
To: 7
Top Right Door
Carefully dodge the Wavers while being prepared to abort the IBJ and start over if necessary. It may be best to first IBJ to the top left side and kill the top Waver with Bombs; this can be done by placing bombs in a vertical line, then dodging the Waver as it approaches. Requires: "canGMode"
"h_artificialMorphLongIBJ"
{
"or": [
"h_artificialMorphPowerBomb",
{
"and": [
"canTrickyDodgeEnemies",
"canBePatient",
{
"or": [
"canBeVeryPatient",
"canDoubleBombJump"
]
}
]
}
]
} |
|
Unmorph after exiting the morph tunnel and get to the other side of the room. Killing the Dessgeegas can be done with no beam upgrades; Samus can jump over them while shooting the last few hits or retreat to the left. It is possible to kill a Sova on the door and pause abuse to grab its Energy drop on G-mode exit. Samus will likely need to wait at the door for about a minute for the global Sova gets there. Entrance condition: {
"comeInWithGMode": {
"mode": "any",
"morphed": true
}
}Requires: "h_artificialMorphMovement"
{
"or": [
"canTrickyJump",
"h_artificialMorphPowerBomb",
"h_hasBeamUpgrade",
{
"enemyKill": {
"enemies": [
[
"Sm. Dessgeega",
"Sm. Dessgeega"
]
],
"explicitWeapons": [
"Missile",
"Super",
"ScrewAttack"
]
}
},
{
"enemyDamage": {
"enemy": "Sm. Dessgeega",
"type": "contact",
"hits": 1
}
}
]
}
{
"or": [
"HiJump",
"SpaceJump",
"canSpringBallJumpMidAir",
"canIBJ",
"canTrickyDashJump",
{
"and": [
"canTrickyUseFrozenEnemies",
"canWallJump"
]
},
{
"and": [
{
"canShineCharge": {
"usedTiles": 43,
"openEnd": 0
}
},
{
"shinespark": {
"frames": 9,
"excessFrames": 5
}
}
]
},
{
"and": [
"canInsaneWallJump",
"canWallJumpInstantMorph",
"canUnmorphBombBoost",
"canDownGrab"
]
}
]
}
{
"or": [
{
"and": [
"h_heatedGModePauseAbuse",
"canBePatient"
]
},
"h_heatedGModeOpenDifferentDoor"
]
}Dev note: FIXME: Methods that require a Sova damage boost could be added |
|
Carefully roll under the Sm. Desgeegas or kill them with a Power Bomb (while avoiding killing the Sova). It is possible to kill a Sova on the door and pause abuse to grab its Energy drop on G-mode exit. Samus will likely need to wait at the door for about a minute for the global Sova gets there. Entrance condition: {
"comeInWithGMode": {
"mode": "any",
"morphed": true
}
}Requires: "h_artificialMorphIBJ"
{
"or": [
"canTrickyDodgeEnemies",
{
"and": [
"h_artificialMorphPowerBomb",
"h_artificialMorphPowerBomb"
]
},
{
"haveBlueSuit": {}
}
]
}
{
"or": [
{
"and": [
"h_heatedGModePauseAbuse",
"canBePatient"
]
},
"h_heatedGModeOpenDifferentDoor"
]
} |
|
Cross the room and go through the morph tunnel. Without any morph movement items, carefully air ball over the Sova and use it to damage boost into the tunnel or wait for the global Sova. It is possible to kill a Sova on the door and pause abuse to grab its Energy drop on G-mode exit. Entrance condition: {
"comeInWithGMode": {
"mode": "any",
"morphed": false
}
}Requires: "Morph"
{
"or": [
"h_bombThings",
"h_useSpringBall",
{
"and": [
"canNeutralDamageBoost",
{
"enemyDamage": {
"enemy": "Sova",
"type": "contact",
"hits": 1
}
},
{
"or": [
{
"and": [
"canTrickyJump",
"canLateralMidAirMorph"
]
},
"canBePatient",
{
"ammo": {
"type": "Super",
"count": 1
}
}
]
}
]
}
]
}
{
"or": [
"h_heatedGModePauseAbuse",
"h_heatedGModeOpenDifferentDoor"
]
} |
From: 2
Bottom Left Door
To: 1
Top Left Door
Climb up 1 screen. Entrance condition: {
"comeInShinecharged": {}
}Requires: {
"shineChargeFrames": 1
}
{
"shinespark": {
"frames": 1,
"excessFrames": 1
}
}
"canShinesparkDeepStuck"
"canXRayClimb"
"canBePatient"
{
"heatFrames": 1600
} |
From: 1
Right Door
To: 1
Right Door
Very quickly cross the room, collecting both items without falling into the lava. A Power Bomb in the middle of the room sets up the Sova drops and adds lag which makes the block item easier to collect with a Flatley jump. Farming the left sova and middle dragon increases the chances of getting enough health drops, but it may still not be possible with poor drop luck. Pause abuse can be useful for reaching the right side drops if the left side's luck was bad. Entrance condition: {
"comeInRunning": {
"speedBooster": "any",
"minTiles": 2
}
}Requires: "canDash"
{
"or": [
"Wave",
"Plasma",
"Spazer",
"canBeVeryPatient"
]
}
{
"enemyKill": {
"enemies": [
[
"Sova",
"Sova",
"Sova",
"Dragon",
"Dragon"
]
],
"explicitWeapons": [
"PowerBomb"
]
}
}
"canMockball"
"canPreciseWallJump"
"canInsaneJump"
"canPauseAbuse"
"canFarmWhileShooting"
"canBePatient"
{
"resourceMissingAtMost": [
{
"type": "Missile",
"count": 0
},
{
"type": "Super",
"count": 0
}
]
}
{
"heatFrames": 392
}
{
"resourceAtMost": [
{
"type": "RegularEnergy",
"count": 1
}
]
}Collects items: 2, 3 Dev note: Not notable because it is safer to collect the items in separate trips. The first OR block is for farming the left sova for more consistency, or resetting to retry the strat multiple times. canBePatient indicates a chance of failure even if everything is performed correctly. |
From: 5
Bottom Floating Platform Junction
To: 4
Top Floating Platform Junction
Bring up the Gamets to the platform above, in order to delay farming them. If not enough big energy drops spawn, go back down, farm up, and try again. Requires: "canFarmWhileShooting"
"canBePatient"
{
"or": [
"canWallJump",
{
"and": [
"HiJump",
"canCameraManip",
"canInsaneJump"
]
},
"SpaceJump",
"h_crouchJumpDownGrab",
"canTrickySpringBallJump",
{
"and": [
"h_useMorphBombs",
{
"tech": "canUnmorphBombBoost"
}
]
}
]
}
{
"heatFrames": 35
} |
From: 4
Bottom Right Door
To: 6
Top Right Door
Enter with G-mode direct, back up to between 1 and 6 pixels from the door transition, and activate X-ray to get very deep stuck in the door. Climb up 3 screens, and perform a turnaround buffered spin-jump away from the door to trigger the transition, bypassing any lock on the door. Entrance condition: {
"comeInWithGMode": {
"mode": "direct",
"morphed": false
}
}Requires: "canGModeXRayClimb" "canLongXRayClimb" "canBePatient" Bypasses door shell: true |
From: 2
Right Door
To: 1
Left Door
Lure the Geruta to the left door. This may require many jumps to get it to swoop up onto the ledge and not get stuck. Requires: "canComplexGMode"
"h_heatProof"
"canBePatient"
"canCameraManip"
"Morph"
{
"or": [
"canTrickyDodgeEnemies",
"SpaceJump",
"Charge",
"Ice",
"Plasma",
{
"ammo": {
"type": "Missile",
"count": 2
}
},
{
"ammo": {
"type": "Super",
"count": 2
}
},
{
"ammo": {
"type": "PowerBomb",
"count": 2
}
},
{
"enemyDamage": {
"enemy": "Dragon",
"type": "fireball",
"hits": 5
}
},
{
"and": [
"h_lavaProof",
{
"or": [
"ScrewAttack",
"h_bombThings"
]
}
]
}
]
}
{
"or": [
"SpaceJump",
{
"and": [
"HiJump",
"canSpeedyJump",
"canWallJump"
]
},
{
"and": [
{
"noBlueSuit": {}
},
"HiJump",
"canSpringBallJumpMidAir"
]
},
{
"and": [
{
"noBlueSuit": {}
},
"canBeVeryPatient",
{
"or": [
"canLongIBJ",
"canJumpIntoIBJ"
]
}
]
},
{
"and": [
"canBeVeryPatient",
"Grapple",
{
"or": [
"HiJump",
"canSpringBallJumpMidAir"
]
}
]
}
]
}
{
"or": [
{
"ammo": {
"type": "Super",
"count": 1
}
},
{
"obstaclesCleared": [
"A"
]
}
]
}Exit condition: {
"leaveWithGModeSetup": {}
}Collects items: 3 Unlocks doors: {"types":["ammo"],"requires":[]}Dev note: It's possible to avoid the item, but the Geruta will get stuck on it and usually require many swoops to get past it. |
From: 2
Right Door
To: 1
Left Door
Lure the Geruta to the left door. This may require many jumps to get it to swoop up onto the ledge and not get stuck. To safely pass the Geruta without a hit, jump left below it, to get it to swoop left before going up. Requires: "canComplexGMode"
"h_heatProof"
"canBePatient"
"canCameraManip"
{
"or": [
"canInsaneJump",
"Ice",
"h_lavaProof",
{
"enemyDamage": {
"enemy": "Geruta",
"type": "contact",
"hits": 1
}
},
{
"and": [
"canUseIFrames",
{
"enemyDamage": {
"enemy": "Dragon",
"type": "fireball",
"hits": 1
}
},
{
"lavaFrames": 55
}
]
}
]
}
{
"or": [
"canTrickyDodgeEnemies",
"SpaceJump",
"Charge",
"Ice",
"Plasma",
{
"ammo": {
"type": "Missile",
"count": 2
}
},
{
"ammo": {
"type": "Super",
"count": 2
}
},
{
"enemyDamage": {
"enemy": "Dragon",
"type": "fireball",
"hits": 5
}
},
{
"and": [
"h_lavaProof",
"ScrewAttack"
]
}
]
}
{
"or": [
"SpaceJump",
{
"and": [
"HiJump",
"canSpeedyJump",
"canWallJump"
]
},
{
"and": [
"canBeVeryPatient",
"HiJump",
"Grapple"
]
}
]
}
{
"or": [
{
"ammo": {
"type": "Super",
"count": 1
}
},
{
"obstaclesCleared": [
"A"
]
}
]
}Exit condition: {
"leaveWithGModeSetup": {}
}Collects items: 3 Unlocks doors: {"types":["ammo"],"requires":[]}Dev note: It's possible to avoid the item, but the Geruta will get stuck on it and usually require many swoops to get past it. |
|
On room entry, perform a low spin jump onto the first ledge to avoid getting the Geruta to swoop to the right. Jump against the left wall, then move right and the Geruta should come down quickly. Move back and forth until it comes down further. This can be tricky if needing to avoid contact damage. Quickly freezing the Geruta as it starts to come down can be used to avoid taking a hit. Killing the Dragon on room entry can also be helpful. Requires: "canComplexGMode"
"h_heatProof"
"canBePatient"
{
"or": [
{
"and": [
"canInsaneJump",
"canTrickyUseFrozenEnemies"
]
},
{
"enemyDamage": {
"enemy": "Geruta",
"type": "contact",
"hits": 2
}
}
]
}
{
"or": [
"canInsaneJump",
"canTrickyUseFrozenEnemies",
"Charge",
"Plasma",
"h_usePowerBomb",
{
"ammo": {
"type": "Missile",
"count": 3
}
},
{
"ammo": {
"type": "Super",
"count": 1
}
},
{
"and": [
"ScrewAttack",
{
"lavaFrames": 20
}
]
}
]
}Exit condition: {
"leaveWithGModeSetup": {}
} |
From: 2
Far Left Door
To: 4
Bottom Right Door
Use a complex lure to get the right-most Multiviola (which is initially moving to the left) to the bottom right door. Break a specific set of the speed blocks and let the Multiviola bounce off of them before breaking the rest. There are multiple ways to get the Multiviola to the right door, all of which require breaking the speed blocks to the left of the crumble bridge and some to them to the right. Break the speed blocks in one of the following ways: 1. The first 2 columns. 2. The first 8 columns. 3. The entire first chunk (10 columns). 4. The first chunk and all but the last column of the second (leaving an isolated block). 5. The first two chunks and all but the last column of the third (leaving an isolated stack of two blocks). Then let the Multiviola bounce several times until it is in a consistent pattern before breaking the rest. Note that option number 3 puts the Multiviola into an odd pattern where it has two distinct alternating cycles; wait for it to hit the right of the right stalactite, then the wall, then break the remaining blocks. Requires: "canTrickyGMode" "h_heatProof" "canBePatient" "canCameraManip" "h_getBlueSpeedMaxRunway" Exit condition: {
"leaveWithGModeSetup": {}
}Unlocks doors: {"types":["ammo"],"requires":[]}Dev note: It appears that there is no way to get the multiviola to get to one of the upper doors on the shaft; There are two known cycles to get it to start going up, but both get stuck in the same location. The first three Multiviolas aren't able to make it to the right shaft, regardless of how the door and speed blocks are manipulated. The fourth was tested by removing a single column of speed blocks at a time and clearing the rest before and after it gets to its cycle. The bottom door is rarely hit, but opening it during the cycle was not always tested thoroughly. It doesn't appear to be possible to lure it higher, but other things to try include: breaking speed blocks less than a column at a time, breaking some of the blocks then some more (not all of the remaining), or precisely timing the breaking of the crumble blocks. FIXME: This could probably be done with a blue suit. |
From: 4
Bottom Right Door
To: 5
Top Right Door
Entrance condition: {
"comeInShinecharging": {
"length": 1,
"openEnd": 1
}
}Requires: "canShinechargeMovementTricky"
"canInsaneJump"
"canBePatient"
{
"or": [
{
"enemyDamage": {
"enemy": "Cacatac",
"type": "contact",
"hits": 1
}
},
"Plasma",
{
"and": [
"Wave",
"Spazer"
]
}
]
}
{
"shineChargeFrames": 177
}
{
"shinespark": {
"frames": 10,
"excessFrames": 0
}
}
{
"heatFrames": 220
}Exit condition: {
"leaveWithSpark": {}
}Unlocks doors: {"types":["super"],"requires":[]}
{"types":["missiles","powerbomb"],"requires":["never"]}Dev note: The canBePatient requirement represents the possible need to retry in case bad RNG causes a Cac spike hit to mess up the strat. |
|
Either jump over a Cacatac or tank a spike hit. Perform a mid-air spark through the speed blocks. Then run to the right and back to get speed to go through the rest. If performing the spark with low energy, there is a risk of ending the spark above the spikes or in front of the Pirate; to be safe, assuming Samus has heat protection, begin the shinespark with between 73 and 88 energy, or at least 106 energy; with a buffered crumble jump to the right, up to 94 energy can work. Entrance condition: {
"comeInShinecharging": {
"length": 5,
"openEnd": 1
}
}Requires: {
"notable": "Reverse Spark"
}
"canShinechargeMovementTricky"
"canTrickyJump"
{
"or": [
{
"enemyDamage": {
"enemy": "Cacatac",
"type": "spike",
"hits": 1
}
},
"canBePatient"
]
}
{
"or": [
{
"shinespark": {
"frames": 88,
"excessFrames": 11
}
},
{
"and": [
"h_heatProof",
"canControlShinesparkEnd",
{
"shinespark": {
"frames": 88,
"excessFrames": 44
}
}
]
}
]
}
{
"heatFrames": 825
}
{
"or": [
"h_speedDash",
{
"and": [
"h_speedButSlow",
{
"heatFrames": 270
}
]
}
]
}
"h_getBlueSpeedMaxRunway"
{
"or": [
"canSpeedball",
{
"heatFrames": 15
}
]
}Clears obstacles: A Dev note: The canBePatient represents retrying until RNG works out to be able to jump over one of the Cacatacs without taking a hit. There is a possibility of getting a lucky drop from one of the two Pirates; but since it is low probability, we don't model it. The speedball exit is technically not a valid way to leave normally (e.g. in case the next room is heated and Samus needs to jump); but if necessary, it is possible to unmorph near the transition. FIXME: This should be split into 5->9 and 9->2 strats. |
From: 5
Top Right Door
To: 4
Bottom Right Door
Entrance condition: {
"comeInShinecharging": {
"length": 5,
"openEnd": 1
}
}Requires: "canShinechargeMovementTricky"
"canTrickyJump"
{
"or": [
{
"enemyDamage": {
"enemy": "Cacatac",
"type": "spike",
"hits": 1
}
},
"canBePatient"
]
}
{
"shinespark": {
"frames": 10,
"excessFrames": 0
}
}
{
"heatFrames": 210
}Exit condition: {
"leaveWithSpark": {}
}Unlocks doors: {"types":["super"],"requires":[]}
{"types":["missiles","powerbomb"],"requires":["never"]}Dev note: The canBePatient represents retrying until RNG works out to be able to jump over one of the Cacatacs without taking a hit. |
|
Break each of the crumble platforms to group the Sovas at the bottom of the room. Requires: "h_heatProof"
"canDodgeWhileShooting"
{
"or": [
{
"and": [
"canConsecutiveWallJump",
{
"or": [
"canCrumbleJump",
"SpaceJump",
"canPreciseWallJump"
]
},
{
"cycleFrames": 930
}
]
},
{
"and": [
"h_useSpringBall",
{
"cycleFrames": 1200
}
]
},
{
"and": [
"SpaceJump",
{
"cycleFrames": 1320
}
]
},
{
"and": [
"canDoubleBombJump",
"canLongIBJ",
{
"cycleFrames": 2340
}
]
},
{
"and": [
"canJumpIntoIBJ",
"canLongIBJ",
"canBePatient",
{
"cycleFrames": 4640
}
]
}
]
}
{
"or": [
"canCrumbleJump",
{
"cycleFrames": 300
}
]
}
{
"resetRoom": {
"nodes": [
1,
2
]
}
}
{
"or": [
{
"haveBlueSuit": {}
},
"Wave",
"Spazer",
"Plasma",
"Grapple",
{
"cycleFrames": 120
}
]
}
{
"or": [
"canDash",
{
"cycleFrames": 90
}
]
}Resets obstacles: A Farm cycle drops: 6 Sova Dev note: Climb from 2 to 1 if resetting with 2. |
|
Kill the Sova on the bottom-right platform, then IBJ right next to the left of the platform. Samus can align with the left side of the platform by jumping into it. Place bombs to kill the second Sova. Drop to the bottom and restart if necessary. Requires: "h_heatProof" "canLongIBJ" "canBePatient" |
|
Enter with G-mode direct, back up to between 1 and 6 pixels from the door transition, and activate X-ray to get very deep stuck in the door. Climb up 3 screens, and perform a turnaround buffered spin-jump away from the door to trigger the transition, bypassing any lock on the door. Entrance condition: {
"comeInWithGMode": {
"mode": "direct",
"morphed": false
}
}Requires: "canGModeXRayClimb" "h_heatProof" "canLongXRayClimb" "canBePatient" Bypasses door shell: true |
|
Climb up 3 screens. Entrance condition: {
"comeInWithDoorStuckSetup": {}
}Requires: "canLongXRayClimb"
{
"heatFrames": 4000
}
"canBePatient" |
|
IBJ against the left-most wall. Place bombs to kill the Sova. Drop to the bottom and restart if necessary. Requires: "h_heatProof" "canLongIBJ" "canBePatient" |
From: 2
Middle Left Door
To: 2
Middle Left Door
Release the ceiling Sova while being careful not to kill it if using Power Bombs. The Sova takes 90 seconds to get to the door if the Power Bomb blocks are broken and 45 seconds if they are not. Using a Super when the Sova is exiting the ceiling takes only 12 seconds. Requires: {
"obstaclesCleared": [
"A"
]
}
{
"obstaclesCleared": [
"B"
]
}
{
"or": [
"canBePatient",
{
"ammo": {
"type": "Super",
"count": 1
}
},
{
"obstaclesNotCleared": [
"C"
]
}
]
}Exit condition: {
"leaveWithGModeSetup": {}
} |
From: 2
Middle Left Door
To: 2
Middle Left Door
If the Power Bomb blocks are broken and the room cannot be reset, the runway can be extended by waiting for the slow global Sova. Be careful to prevent killing the Sova when breaking the Power Bomb blocks, while still ensuring breaking the ceiling Bomb blocks. Using a Super to knock off the Sova once it is near the gates will save approximately 30 seconds. Requires: "h_frozenEnemyRunway"
{
"obstaclesCleared": [
"A",
"B",
"C"
]
}
{
"or": [
"canBeVeryPatient",
{
"and": [
"canBePatient",
{
"ammo": {
"type": "Super",
"count": 1
}
}
]
}
]
}Exit condition: {
"leaveWithRunway": {
"length": 7,
"openEnd": 1
}
}Dev note: This strat only takes 60-90 seconds, but could be much longer if Samus has to wait for the Sova to move out of the Power Bomb area. |
|
Place Bombs against the crumble block to overload PLMs, then go through it and through the bomb blocks at the left. Entrance condition: {
"comeInWithGMode": {
"mode": "any",
"morphed": true
}
}Requires: "h_artificialMorphIBJ"
{
"or": [
"canBePatient",
"h_artificialMorphSpringBall",
"h_artificialMorphCeilingBombJump"
]
} |
From: 4
Right Door
To: 2
Middle Left Door
Place Bombs against the crumble block to overload PLMs, then go through it and through the bomb blocks at the left. Place a Power Bomb and quickly exit G-Mode before it goes off in order to break the blocks. Entrance condition: {
"comeInWithGMode": {
"mode": "any",
"morphed": true
}
}Requires: "h_artificialMorphIBJ"
{
"or": [
"canBePatient",
"h_artificialMorphSpringBall",
"h_artificialMorphCeilingBombJump"
]
}
"h_artificialMorphPowerBomb"Clears obstacles: A, B, C |
|
Requires: "canBePatient"
{
"enemyDamage": {
"enemy": "Sova",
"type": "contact",
"hits": 1
}
} |
From: 1
Top Right Door
To: 1
Top Right Door
Wait for the Sovas to wind around the room and reach the top door. This takes about 1 minute and 15 seconds. Entrance condition: {
"comeInNormally": {}
}Requires: {
"heatFrames": 4600
}
"canBePatient"Exit condition: {
"leaveWithGModeSetup": {}
}Unlocks doors: {"types":["ammo"],"requires":[]} |
From: 1
Top Right Door
To: 1
Top Right Door
Wait 80 seconds for the Sova to get into position, then freeze it to bridge the gap and significantly extend the runway. The other Sovas can be farmed or used as a backup. Requires: "h_frozenEnemyRunway"
"canBePatient"
{
"heatFrames": 4800
}Exit condition: {
"leaveWithRunway": {
"length": 10,
"openEnd": 1
}
}Dev note: Because the Sovas are global, strats could be added that start from the other doors to tighten the total frame count, but it will typically require heatProof either way. |
From: 2
Middle Right Door
To: 1
Top Right Door
Wait for the Sovas to wind around the room and reach the top door. This takes about 1 minute and 15 seconds. Entrance condition: {
"comeInNormally": {}
}Requires: {
"heatFrames": 4600
}
"Morph"
"canBePatient"Exit condition: {
"leaveWithGModeSetup": {}
}Unlocks doors: {"types":["ammo"],"requires":[]} |
From: 2
Middle Right Door
To: 2
Middle Right Door
It takes about 2.5 minutes for the Sova to get to this door and hit Samus. Alternatively, use a Super as the third Sova has started going off screen to speed it up to 40 seconds. Requires: {
"or": [
{
"ammo": {
"type": "Super",
"count": 1
}
},
"canBePatient"
]
}
{
"enemyDamage": {
"enemy": "Sova",
"type": "contact",
"hits": 1
}
} |
From: 2
Middle Right Door
To: 2
Middle Right Door
It takes about 2.5 minutes for the Sova to get to this door and hit Samus. With Morph, Samus can shoot the shot block as the Sova is coming down to save some time. Alternatively, use a Super as the third Sova has started going off screen to speed it up to 40 seconds. Entrance condition: {
"comeInNormally": {}
}Requires: {
"or": [
{
"and": [
{
"heatFrames": 2340
},
{
"ammo": {
"type": "Super",
"count": 1
}
}
]
},
{
"and": [
"h_heatProof",
"canBePatient"
]
},
{
"and": [
"Morph",
"canBePatient",
{
"heatFrames": 5925
}
]
}
]
}Exit condition: {
"leaveWithGModeSetup": {}
}Unlocks doors: {"types":["ammo"],"requires":[]} |
From: 2
Middle Right Door
To: 2
Middle Right Door
Wait 3 minutes for the Sova to get into position, or 100 seconds with Morph by going ahead of them to break the shot blocks as they get there. This can be further reduced to 45 seconds with a Super by knocking a Sova off after it exits the morph tunnel. The other Sovas can be farmed or used as a backup. Requires: "h_frozenEnemyRunway"
{
"or": [
{
"and": [
"h_heatProof",
"canBeVeryPatient"
]
},
{
"and": [
"h_heatProof",
"canBePatient",
"Morph"
]
},
{
"and": [
{
"ammo": {
"type": "Super",
"count": 1
}
},
{
"heatFrames": 2600
}
]
}
]
}Exit condition: {
"leaveWithRunway": {
"length": 4,
"openEnd": 1
}
}Dev note: Because the Sovas are global, strats could be added that start from the other doors to tighten the total frame count, but it will typically require heatProof either way. |
From: 3
Bottom Right Door
To: 1
Top Right Door
Wait for the Sovas to wind around the room and reach the top door. This takes about 1 minute and 15 seconds. Entrance condition: {
"comeInNormally": {}
}Requires: {
"heatFrames": 4600
}
"canBePatient"Exit condition: {
"leaveWithGModeSetup": {}
}Unlocks doors: {"types":["ammo"],"requires":[]} |
|
It is possible to kill the Sovas and pick up their drops during a pause abuse, but they will only give drops if there are not too many Fune fireballs. With a ledge grab onto the top platform, it is possible to get all the Funes off camera. Alternatively, it is possible to kill or repeatedly freeze them. Entrance condition: {
"comeInWithGMode": {
"mode": "any",
"morphed": false
}
}Requires: "canBePatient"
"h_heatedGModePauseAbuse"
"canFarmWhileShooting"
{
"or": [
"canTrickyJump",
"canTrickyUseFrozenEnemies",
{
"ammo": {
"type": "Super",
"count": 1
}
},
"h_usePowerBomb"
]
}Dev note: The single tile ledge at this door doesn't seem to make it any slower to exit. The Power Bomb kill could be done with artificial morph, but it's not worth modeling. |
|
Requires: {
"resetRoom": {
"nodes": [
1,
2
]
}
}
"h_heatProof"
"h_lavaProof"
"h_useMorphBombs"
"canBePatient"
"canDodgeWhileShooting"
{
"or": [
"Ice",
"canFarmWhileShooting",
{
"cycleFrames": 2700
}
]
}
{
"cycleFrames": 4500
}Farm cycle drops: 3 Boyon |
|
Entrance condition: {
"comeInWithGMode": {
"mode": "any",
"morphed": true
}
}Requires: "h_artificialMorphLongCeilingBombJump"
{
"or": [
"f_DefeatedCrocomire",
{
"obstaclesCleared": [
"f_DefeatedCrocomire"
]
}
]
}
"canBePatient"Clears obstacles: A |
|
Entrance condition: {
"comeInWithGMode": {
"mode": "any",
"morphed": true
},
"comesThroughToilet": "any"
}Requires: "h_artificialMorphLongCeilingBombJump"
{
"or": [
"f_DefeatedCrocomire",
{
"obstaclesCleared": [
"f_DefeatedCrocomire"
]
}
]
}
"canBePatient"Clears obstacles: A, door_2 |
From: 2
Top Door
To: 4
Central Junction
Farm for reserves and to clear enough runway to shinecharge. Interrupt from Crocomire's swipe or fireballs, or kill Crocomire and use the acid. Entrance condition: {
"comeInWithRMode": {},
"comesThroughToilet": "no"
}Requires: {
"not": "f_DefeatedCrocomire"
}
"canRiskPermanentLossOfAccess"
"canDodgeWhileShooting"
"canBePatient"
{
"or": [
{
"ammo": {
"type": "Missile",
"count": 30
}
},
{
"and": [
"canFarmWhileShooting",
{
"ammo": {
"type": "Missile",
"count": 2
}
},
{
"resourceCapacity": [
{
"type": "Missile",
"count": 10
}
]
}
]
},
{
"and": [
"Charge",
{
"disableEquipment": "Plasma"
}
]
}
]
}
{
"refill": [
"Energy"
]
}
"h_shinechargeMaxRunway"
{
"autoReserveTrigger": {
"maxReserveEnergy": 95
}
}
"canRModeSparkInterrupt"Clears obstacles: f_DefeatedCrocomire, door_2 Sets flags: f_DefeatedCrocomire |
|
Requires: "canLongCeilingBombJump" "canBePatient" |
|
Requires: {
"or": [
"f_DefeatedCrocomire",
{
"obstaclesCleared": [
"f_DefeatedCrocomire"
]
}
]
}
"canLongCeilingBombJump"
"canBePatient" |
From: 4
Central Junction
To: 4
Central Junction
This can be a very long fight if Crocomire is stingy with the farming phases. Farming requires careful dodging in order to minimize energy drops. Delay grabbing all of the drops until necessary to reduce the chance of running out of ammo. Requires: {
"notable": "Crocomire with 5 Missiles"
}
"canFarmWhileShooting"
"canBePatient"
{
"or": [
{
"ammo": {
"type": "Missile",
"count": 2
}
},
{
"ammo": {
"type": "Super",
"count": 2
}
}
]
}
{
"resourceCapacity": [
{
"type": "Missile",
"count": 5
}
]
}
"h_complexToCarryFlashSuit"Clears obstacles: f_DefeatedCrocomire Sets flags: f_DefeatedCrocomire Dev note: This strat is notable, not because it's harder than its required tech, but because its tedious, RNG heavy, and players might not want to encounter it. Crocomire does not have a farming phase until he has been hit twice. It is possible to get to the farming phase with 1 PB, but sometimes Croc will just rush Samus into the spikes without ever having farm phases, so it is ignored here. |
From: 1
Left Door
To: 2
Right Door
Slowly kill the Puyos with Bombs or use a Power Bomb. Stand under the gate when exiting G-Mode to open the gate. Entrance condition: {
"comeInWithGMode": {
"mode": "indirect",
"morphed": true
}
}Requires: "Gravity"
{
"or": [
"h_artificialMorphLongIBJ",
{
"and": [
"HiJump",
"h_artificialMorphJumpIntoIBJ"
]
}
]
}
{
"or": [
"h_artificialMorphPowerBomb",
"canBePatient"
]
}Clears obstacles: A Dev note: This is only to avoid a Gravity jump. |
From: 1
Left Door
To: 3
Junction Left of Green Gate
Entrance condition: {
"comeInWithGMode": {
"mode": "any",
"morphed": true
}
}Requires: "Gravity"
{
"or": [
"h_artificialMorphLongIBJ",
{
"and": [
"HiJump",
"h_artificialMorphJumpIntoIBJ"
]
}
]
}
{
"or": [
"h_artificialMorphPowerBomb",
"canBePatient"
]
} |
From: 5
Small Platforms Junction
To: 1
Left Door
Lure a Mella from the right by breaking the speed blocks or using Morph. Then manipulate it to go high enough to be used in the left doorway. Raise the Mella up to just below the door's ledge and then climb up to the door. Reposition the Mella once towards the door, and before it finishes moving, stand in the doorframe so that the next Mella movement will hit Samus. If it drops below the camera it will be necessary to go back down and raise it again. Requires: "canManipulateMellas"
"canCameraManip"
"canBePatient"
"canComplexGMode"
{
"or": [
"SpaceJump",
"canTrickyUseFrozenEnemies",
{
"and": [
"HiJump",
"canSpringBallJumpMidAir"
]
},
{
"and": [
"HiJump",
"canSpeedyJump",
"canTrickyWallJump"
]
}
]
}
{
"or": [
"canTrickyDodgeEnemies",
{
"enemyDamage": {
"enemy": "Mella",
"type": "contact",
"hits": 2
}
}
]
}
{
"or": [
{
"obstaclesCleared": [
"B"
]
},
"Morph"
]
}Exit condition: {
"leaveWithGModeSetup": {}
}Unlocks doors: {"types":["ammo"],"requires":[]} |
|
Lure a Mella from the right by breaking the speed blocks or using Morph. Then manipulate it to go high enough to be used as a stepping stone once frozen. Without movement items it may be necessary to continue manipulating it from above, jumping and aiming down to freeze it. Requires: "canTrickyUseFrozenEnemies"
"canManipulateMellas"
"canBePatient"
{
"or": [
"canWallJump",
"HiJump",
"canSpringBallJumpMidAir",
{
"and": [
"canBeVeryPatient",
{
"noFlashSuit": {}
}
]
}
]
}
{
"or": [
"canTrickyDodgeEnemies",
{
"enemyDamage": {
"enemy": "Mella",
"type": "contact",
"hits": 2
}
}
]
}
{
"or": [
{
"obstaclesCleared": [
"B"
]
},
"Morph"
]
} |
From: 1
Top Left Door
To: 1
Top Left Door
Requires: "h_frozenEnemyRunway"
{
"ammo": {
"type": "Super",
"count": 1
}
}
{
"or": [
"canConsecutiveWallJump",
"SpaceJump",
"canLongIBJ",
"canBePatient"
]
}Exit condition: {
"leaveWithRunway": {
"length": 11,
"openEnd": 1
}
} |
From: 3
Bottom Right Door
To: 1
Top Left Door
Use a Super to knock off a nearby Viola, then lure it to the top. To avoid a wall jump, it is possible to use the Viola as a frozen platform. Requires: {
"ammo": {
"type": "Super",
"count": 1
}
}
{
"or": [
"canConsecutiveWallJump",
"SpaceJump",
"canLongIBJ",
{
"and": [
"canTrickyUseFrozenEnemies",
"canBePatient"
]
}
]
}Exit condition: {
"leaveWithGModeSetup": {}
}Unlocks doors: {"types":["ammo"],"requires":[]} |
|
Knock a Viola off of its platform and keep it on camera as it climbs to the top of the room. Freeze the Viola when it is only partially overhanging the door and midair morph, run jump and aim down directly onto it, or spin jump and down aim just before landing and quickly release inputs. With Morph or a down aim, Samus can jump directly onto the Viola without touching the transition. Requires: "canTrickyUseFrozenEnemies"
{
"ammo": {
"type": "Super",
"count": 1
}
}
"canUpwardGModeSetup"
{
"or": [
"canConsecutiveWallJump",
"SpaceJump",
"canLongIBJ",
"canBePatient"
]
}Exit condition: {
"leaveWithGModeSetup": {}
}Unlocks doors: {"types":["ammo"],"requires":[]} |
From: 3
Bottom Right Door
To: 4
Top Door
Use a Super to knock a Viola off of the middle platforms and ride it up the right wall by freezing it. Once it reaches the top door, use another Super to knock it off again, and freeze it mid-air pixel perfectly. Use a flash suit or blue suit from a crouched position to spark vertically and clip past the door shell. Requires: {
"or": [
"canConsecutiveWallJump",
"SpaceJump",
"canLongIBJ",
"canBePatient"
]
}
{
"ammo": {
"type": "Super",
"count": 2
}
}
"h_storedSparkIceClip"
{
"shinespark": {
"frames": 2,
"excessFrames": 1
}
}Exit condition: {
"leaveWithSpark": {}
}Bypasses door shell: true |
|
Knock a Viola off of the middle platforms and ride it up the right wall by freezing it with Ice Beam. Requires: "canTrickyUseFrozenEnemies"
{
"ammo": {
"type": "Super",
"count": 1
}
}
"canBePatient" |
From: 3
Bottom Right Door
To: 4
Top Door
Use a Super to knock a Viola off of the middle platforms and ride it up the right wall by freezing it. Once it reaches the top door, use another Super to knock it off again, and freeze it mid-air. Use Morph and X-Ray to stand on top of it and clip up through the door shell above. Requires: {
"ammo": {
"type": "Super",
"count": 2
}
}
"h_XRayMorphIceClip"
{
"or": [
"canConsecutiveWallJump",
"SpaceJump",
"canLongIBJ",
"canBePatient"
]
}Bypasses door shell: true |
|
Entrance condition: {
"comeInWithDoorStuckSetup": {}
}Requires: "canBePatient" "canLongXRayClimb" |
From: 2
Right Door
To: 2
Right Door
Start the fight with 31 Missiles or fewer in order to prevent GT from using its laser attack, which will enable Samus to stand next to it. With more than 31 Missiles, Samus will have a 2 pixel window in which she must quickly get into to prevent touching GT or his lasers. Wait long enough for the flag to be set, then Samus can then leave the room without exiting G-mode. Entrance condition: {
"comeInWithGMode": {
"mode": "direct",
"morphed": false
}
}Requires: "h_heatedGMode"
{
"notable": "Safe Spot Kill"
}
{
"or": [
{
"resourceAtMost": [
{
"type": "Missile",
"count": 31
}
]
},
"canComplexGMode"
]
}
{
"or": [
{
"ammo": {
"type": "Super",
"count": 30
}
},
{
"and": [
"Charge",
{
"or": [
"canBeVeryPatient",
{
"and": [
"canBePatient",
"Wave"
]
},
{
"and": [
"canBePatient",
"Spazer"
]
},
"Plasma",
{
"and": [
"canBePatient",
{
"ammo": {
"type": "Super",
"count": 15
}
}
]
}
]
}
]
}
]
}
{
"heatFrames": 0
}Exit condition: {
"leaveWithGMode": {
"morphed": false
}
}Clears obstacles: f_DefeatedGoldenTorizo, door_2 Sets flags: f_DefeatedGoldenTorizo |
From: 2
Right Door
To: 2
Right Door
Start the fight with 31 Missiles or fewer in order to prevent GT from using its laser attack, which will enable Samus to stand next to it. Having GT start with his Chozo Ball attack also will make it so there are drops which can be collected at the end of the fight, otherwise they will have been overloaded. Pause abuse and jump to collect the drops on G-mode exit. Entrance condition: {
"comeInWithGMode": {
"mode": "indirect",
"morphed": false
}
}Requires: {
"notable": "Safe Spot Kill"
}
{
"resourceAtMost": [
{
"type": "Missile",
"count": 31
}
]
}
{
"or": [
{
"ammo": {
"type": "Super",
"count": 30
}
},
{
"and": [
"Charge",
{
"or": [
"canBeVeryPatient",
{
"and": [
"canBePatient",
"Wave"
]
},
{
"and": [
"canBePatient",
"Spazer"
]
},
"Plasma",
{
"and": [
"canBePatient",
{
"ammo": {
"type": "Super",
"count": 15
}
}
]
}
]
}
]
}
]
}
{
"or": [
"h_heatedIndirectGModeOpenSameDoor",
"h_heatedGModePauseAbuse"
]
}Clears obstacles: f_DefeatedGoldenTorizo, door_2 Sets flags: f_DefeatedGoldenTorizo |
From: 2
Right Door
To: 2
Right Door
With more than 31 Missiles, Samus will have a 2 pixel window in which she must quickly get into to prevent touching GT or his lasers. Having GT start with his laser attack will also make it so there are no drops which can be collected at the end of the fight. Entrance condition: {
"comeInWithGMode": {
"mode": "indirect",
"morphed": false
}
}Requires: {
"notable": "Safe Spot Kill"
}
"canComplexGMode"
{
"or": [
{
"ammo": {
"type": "Super",
"count": 30
}
},
{
"and": [
"Charge",
{
"or": [
"canBeVeryPatient",
{
"and": [
"canBePatient",
"Wave"
]
},
{
"and": [
"canBePatient",
"Spazer"
]
},
"Plasma",
{
"and": [
"canBePatient",
{
"ammo": {
"type": "Super",
"count": 15
}
}
]
}
]
}
]
}
]
}
"h_heatedIndirectGModeOpenSameDoor"Clears obstacles: f_DefeatedGoldenTorizo, door_2 Sets flags: f_DefeatedGoldenTorizo |
From: 2
Right Door
To: 2
Right Door
This strat requires much farming. It assumes a capacity of and starting with only 5 supers for five sessions of farming. A safe farming method is to face left while standing in the safe spot. Then fire straight up to shoot the orbs as they appear. Jump up while GT's beak is not open to collect the drops. Plasma allows all of the orbs to be broken at once. Grapple allows for more drops to be collected by shooting diagonally, and collecting the items using Grapple. Keep the number of current Missiles below 31 so that GT will be guaranteed to use the attack which creates drops. Firing Supers requires a very steady fire rate so that for every Super Missile caught by GT, the next 4 Supers do damage. Requires: {
"notable": "Safe Spot Kill"
}
"h_navigateHeatRooms"
"canTrickyJump"
"canBePatient"
{
"ammo": {
"type": "Super",
"count": 5
}
}
{
"or": [
{
"and": [
"Plasma",
{
"heatFrames": 3100
}
]
},
{
"and": [
"canPreciseGrapple",
{
"heatFrames": 3200
}
]
},
{
"heatFrames": 4500
}
]
}Clears obstacles: f_DefeatedGoldenTorizo Sets flags: f_DefeatedGoldenTorizo Dev note: Listed Heat frames have been reduced by accounting for health drops. |
From: 2
Right Door
To: 7
G-Mode Junction (Bottom of Room)
Start the fight with 31 Missiles or fewer in order to prevent GT from using its laser attack, which will enable Samus to stand next to it. Having GT start with his Chozo Ball attack also will make it so there are drops which can be collected at the end of the fight, otherwise they will have been overloaded. With more than 31 Missiles, Samus will have a 2 pixel window in which she must quickly get into to prevent touching GT or his lasers. If GT starts with his laser attack, be sure to carefully jump over them before doing something else in the room. Entrance condition: {
"comeInWithGMode": {
"mode": "any",
"morphed": false
}
}Requires: {
"notable": "Safe Spot Kill"
}
{
"or": [
{
"resourceAtMost": [
{
"type": "Missile",
"count": 31
}
]
},
"canComplexGMode"
]
}
{
"or": [
{
"ammo": {
"type": "Super",
"count": 30
}
},
{
"and": [
"Charge",
{
"or": [
"canBeVeryPatient",
{
"and": [
"canBePatient",
"Wave"
]
},
{
"and": [
"canBePatient",
"Spazer"
]
},
"Plasma",
{
"and": [
"canBePatient",
{
"ammo": {
"type": "Super",
"count": 15
}
}
]
}
]
}
]
}
]
}
{
"heatFrames": 0
}Clears obstacles: f_DefeatedGoldenTorizo, door_2 Sets flags: f_DefeatedGoldenTorizo Dev note: This exists because Samus can kill GT and stay in G-mode to then do something else in the room. |
From: 1
Top Left Door
To: 1
Top Left Door
Kill the bottom standing pirate. Shinecharge over the PB blocks and then jump into a wall pirate shot to interrupt. Entrance condition: {
"comeInWithRMode": {}
}Requires: "h_heatProof"
"h_RModeCanRefillReserves"
"canDodgeWhileShooting"
{
"or": [
{
"enemyKill": {
"enemies": [
[
"Yellow Space Pirate (standing)",
"Yellow Space Pirate (wall)",
"Yellow Space Pirate (wall)"
]
],
"explicitWeapons": [
"ScrewAttack",
"Charge+Plasma",
"Charge+Ice+Wave+Spazer",
"Missile",
"Super"
]
}
},
{
"and": [
{
"enemyKill": {
"enemies": [
[
"Yellow Space Pirate (standing)",
"Yellow Space Pirate (wall)",
"Yellow Space Pirate (wall)"
]
],
"explicitWeapons": [
"Charge"
]
}
},
"canBePatient"
]
}
]
}
{
"or": [
{
"resourceMissingAtMost": [
{
"type": "Missile",
"count": 0
}
]
},
"canBeLucky"
]
}
{
"partialRefill": {
"type": "ReserveEnergy",
"limit": 20
}
}
{
"or": [
{
"canShineCharge": {
"usedTiles": 12,
"openEnd": 0
}
},
{
"and": [
{
"doorUnlockedAtNode": 1
},
{
"canShineCharge": {
"usedTiles": 13,
"openEnd": 0
}
}
]
}
]
}
{
"autoReserveTrigger": {
"maxReserveEnergy": 95
}
}
"canRModeSparkInterrupt"Unlocks doors: {"nodeId":1,"types":["missiles","super"],"requires":[]}
{"nodeId":1,"types":["powerbomb"],"requires":["never"]} |
|
Kill the pirates to get them out of the way before using a Crystal Flash on the floating platform to open the bomb barrier. Alternatively, farm them for energy and use a Power Bomb on the floating platform. Shinecharge at the bottom runway and then jump into a Viola to interrupt. For power bomb pirate kill: interrupt the standing pirate with a shot then jump and place the power bomb low to hit all three pirates. Repeat three times. For slow charge beam: interrupt with a shot, then crouch and fire charged shots. Jump when the wall pirate approaches to make it jump to the other wall. Entrance condition: {
"comeInWithRMode": {}
}Requires: "h_heatProof"
{
"or": [
{
"and": [
{
"or": [
{
"enemyKill": {
"enemies": [
[
"Yellow Space Pirate (standing)",
"Yellow Space Pirate (wall)",
"Yellow Space Pirate (wall)"
]
],
"explicitWeapons": [
"ScrewAttack",
"Charge+Plasma",
"Charge+Ice+Wave+Spazer",
"Missile",
"Super"
]
}
},
{
"and": [
{
"enemyKill": {
"enemies": [
[
"Yellow Space Pirate (standing)",
"Yellow Space Pirate (wall)",
"Yellow Space Pirate (wall)"
]
],
"explicitWeapons": [
"Charge"
]
}
},
"canBePatient"
]
},
"h_usePowerBomb"
]
},
"h_heatedCrystalFlashForReserveEnergy"
]
},
{
"and": [
"h_heatProof",
"h_RModeCanRefillReserves",
"canDodgeWhileShooting",
{
"or": [
{
"enemyKill": {
"enemies": [
[
"Yellow Space Pirate (standing)",
"Yellow Space Pirate (wall)",
"Yellow Space Pirate (wall)"
]
],
"explicitWeapons": [
"ScrewAttack",
"Charge+Plasma",
"Charge+Ice+Wave+Spazer",
"Missile",
"Super"
]
}
},
{
"and": [
{
"enemyKill": {
"enemies": [
[
"Yellow Space Pirate (standing)",
"Yellow Space Pirate (wall)",
"Yellow Space Pirate (wall)"
]
],
"explicitWeapons": [
"Charge"
]
}
},
"canBePatient"
]
},
{
"and": [
{
"enemyKill": {
"enemies": [
[
"Yellow Space Pirate (standing)",
"Yellow Space Pirate (wall)",
"Yellow Space Pirate (wall)"
]
],
"explicitWeapons": [
"PowerBomb"
]
}
},
"canTrickyDodgeEnemies"
]
}
]
},
{
"or": [
{
"resourceMissingAtMost": [
{
"type": "Missile",
"count": 0
}
]
},
"canBeLucky"
]
},
"h_usePowerBomb",
{
"partialRefill": {
"type": "ReserveEnergy",
"limit": 20
}
}
]
}
]
}
{
"or": [
{
"canShineCharge": {
"usedTiles": 12,
"gentleUpTiles": 2,
"gentleDownTiles": 2,
"openEnd": 0
}
},
{
"and": [
{
"or": [
{
"doorUnlockedAtNode": 2
},
{
"doorUnlockedAtNode": 3
}
]
},
{
"canShineCharge": {
"usedTiles": 13,
"gentleUpTiles": 2,
"gentleDownTiles": 2,
"openEnd": 0
}
}
]
},
{
"and": [
{
"doorUnlockedAtNode": 2
},
{
"doorUnlockedAtNode": 3
},
{
"canShineCharge": {
"usedTiles": 14,
"gentleUpTiles": 2,
"gentleDownTiles": 2,
"openEnd": 0
}
}
]
}
]
}
{
"autoReserveTrigger": {}
}
"canRModeSparkInterrupt"Clears obstacles: A Unlocks doors: {"nodeId":2,"types":["ammo"],"requires":[]}
{"nodeId":3,"types":["ammo"],"requires":[]} |
From: 4
Top Right Door
To: 1
Top Left Door
Avoid the wall pirate while falling in. Kill the bottom standing pirate. Shinecharge over the PB blocks and then jump into a wall pirate shot to interrupt. Entrance condition: {
"comeInWithRMode": {}
}Requires: "h_heatProof"
"canCarefulJump"
{
"enemyKill": {
"enemies": [
[
"Yellow Space Pirate (standing)",
"Yellow Space Pirate (wall)",
"Yellow Space Pirate (wall)"
]
],
"excludedWeapons": [
"PowerBomb"
]
}
}
"h_RModeCanRefillReserves"
"canDodgeWhileShooting"
{
"or": [
{
"enemyKill": {
"enemies": [
[
"Yellow Space Pirate (standing)",
"Yellow Space Pirate (wall)",
"Yellow Space Pirate (wall)"
]
],
"explicitWeapons": [
"ScrewAttack",
"Charge+Plasma",
"Charge+Ice+Wave+Spazer",
"Missile",
"Super"
]
}
},
{
"and": [
{
"enemyKill": {
"enemies": [
[
"Yellow Space Pirate (standing)",
"Yellow Space Pirate (wall)",
"Yellow Space Pirate (wall)"
]
],
"explicitWeapons": [
"Charge"
]
}
},
"canBePatient"
]
}
]
}
{
"or": [
{
"resourceMissingAtMost": [
{
"type": "Missile",
"count": 0
}
]
},
"canBeLucky"
]
}
{
"partialRefill": {
"type": "ReserveEnergy",
"limit": 20
}
}
{
"or": [
{
"canShineCharge": {
"usedTiles": 12,
"openEnd": 0
}
},
{
"and": [
{
"doorUnlockedAtNode": 1
},
{
"canShineCharge": {
"usedTiles": 13,
"openEnd": 0
}
}
]
}
]
}
{
"autoReserveTrigger": {
"maxReserveEnergy": 95
}
}
"canRModeSparkInterrupt"Unlocks doors: {"nodeId":1,"types":["missiles","super"],"requires":[]}
{"nodeId":1,"types":["powerbomb"],"requires":["never"]} |
From: 4
Top Right Door
To: 5
Bottom Junction
Kill the pirates to get them out of the way before using a Crystal Flash on the floating platform to open the bomb barrier. Alternatively, farm them for energy and use a Power Bomb on the floating platform. Shinecharge at the bottom runway and then jump into a Viola to interrupt. For power bomb pirate kill: interrupt the standing pirate with a shot then jump and place the power bomb low to hit all three pirates. Repeat three times. For slow charge beam: interrupt with a shot, then crouch and fire charged shots. Jump when the wall pirate approaches to make it jump to the other wall. Entrance condition: {
"comeInWithRMode": {}
}Requires: "h_heatProof"
{
"or": [
{
"and": [
{
"or": [
{
"enemyKill": {
"enemies": [
[
"Yellow Space Pirate (standing)",
"Yellow Space Pirate (wall)",
"Yellow Space Pirate (wall)"
]
],
"explicitWeapons": [
"ScrewAttack",
"Charge+Plasma",
"Charge+Ice+Wave+Spazer",
"Missile",
"Super"
]
}
},
{
"and": [
{
"enemyKill": {
"enemies": [
[
"Yellow Space Pirate (standing)",
"Yellow Space Pirate (wall)",
"Yellow Space Pirate (wall)"
]
],
"explicitWeapons": [
"Charge"
]
}
},
"canBePatient"
]
},
"h_usePowerBomb"
]
},
"h_heatedCrystalFlashForReserveEnergy"
]
},
{
"and": [
"h_heatProof",
"h_RModeCanRefillReserves",
"canDodgeWhileShooting",
{
"or": [
{
"enemyKill": {
"enemies": [
[
"Yellow Space Pirate (standing)",
"Yellow Space Pirate (wall)",
"Yellow Space Pirate (wall)"
]
],
"explicitWeapons": [
"ScrewAttack",
"Charge+Plasma",
"Charge+Ice+Wave+Spazer",
"Super"
]
}
},
{
"and": [
{
"enemyKill": {
"enemies": [
[
"Yellow Space Pirate (standing)",
"Yellow Space Pirate (wall)",
"Yellow Space Pirate (wall)"
]
],
"explicitWeapons": [
"Charge"
]
}
},
"canBePatient"
]
},
{
"and": [
{
"enemyKill": {
"enemies": [
[
"Yellow Space Pirate (standing)",
"Yellow Space Pirate (wall)",
"Yellow Space Pirate (wall)"
]
],
"explicitWeapons": [
"PowerBomb"
]
}
},
"canTrickyDodgeEnemies"
]
}
]
},
{
"or": [
{
"resourceMissingAtMost": [
{
"type": "Missile",
"count": 0
}
]
},
"canBeLucky"
]
},
"h_usePowerBomb",
{
"partialRefill": {
"type": "ReserveEnergy",
"limit": 20
}
}
]
}
]
}
{
"or": [
{
"canShineCharge": {
"usedTiles": 12,
"gentleUpTiles": 2,
"gentleDownTiles": 2,
"openEnd": 0
}
},
{
"and": [
{
"or": [
{
"doorUnlockedAtNode": 2
},
{
"doorUnlockedAtNode": 3
}
]
},
{
"canShineCharge": {
"usedTiles": 13,
"gentleUpTiles": 2,
"gentleDownTiles": 2,
"openEnd": 0
}
}
]
},
{
"and": [
{
"doorUnlockedAtNode": 2
},
{
"doorUnlockedAtNode": 3
},
{
"canShineCharge": {
"usedTiles": 14,
"gentleUpTiles": 2,
"gentleDownTiles": 2,
"openEnd": 0
}
}
]
}
]
}
{
"autoReserveTrigger": {}
}
"canRModeSparkInterrupt"Clears obstacles: A Unlocks doors: {"nodeId":2,"types":["ammo"],"requires":[]}
{"nodeId":3,"types":["ammo"],"requires":[]} |
From: 1
Left Door
To: 3
Metal Pirates Junction
Kill both pirates with ammo or beams. Collect their drops and use heat to interrupt. Or kill and farm one pirate, then hitbox the other and interrupt from it before killing it with ammo or beams. Blue suit doesn't damage the pirates, but keeps Samus invulnerable while moving. Entrance condition: {
"comeInWithRMode": {}
}Requires: {
"heatFrames": 125
}
{
"or": [
{
"and": [
"Charge",
"Plasma",
"canDodgeWhileShooting",
"canTrickyJump",
{
"or": [
{
"and": [
"Ice",
{
"heatFrames": 700
}
]
},
{
"and": [
"Wave",
{
"heatFrames": 700
}
]
},
{
"and": [
"canInsaneJump",
"Ice",
{
"heatFrames": 520
}
]
},
{
"and": [
"canInsaneJump",
"Wave",
{
"heatFrames": 520
}
]
},
{
"and": [
"Ice",
"Wave",
{
"heatFrames": 400
}
]
},
{
"heatFrames": 950
},
{
"and": [
"canInsaneJump",
{
"heatFrames": 700
}
]
},
{
"and": [
"canXRayWaitForIFrames",
{
"heatFrames": 420
}
]
}
]
}
]
},
{
"and": [
"Charge",
"Spazer",
"canDodgeWhileShooting",
{
"or": [
{
"heatFrames": 4400
},
{
"and": [
"Ice",
{
"heatFrames": 3000
}
]
},
{
"and": [
"Wave",
{
"heatFrames": 2650
}
]
},
"Ice",
"Wave",
{
"heatFrames": 1750
}
]
}
]
},
{
"and": [
"Plasma",
"canDodgeWhileShooting",
{
"heatFrames": 2000
}
]
},
{
"and": [
"h_heatProof",
"canDodgeWhileShooting",
{
"or": [
{
"and": [
"Charge",
"Wave"
]
},
{
"and": [
"Charge",
"Ice",
"canBePatient"
]
},
{
"and": [
"canBeVeryPatient",
{
"or": [
"Charge",
"Spazer"
]
}
]
}
]
}
]
},
{
"and": [
"canDodgeWhileShooting",
{
"enemyKill": {
"enemies": [
[
"Space Pirate (fighting)",
"Space Pirate (fighting)"
]
],
"explicitWeapons": [
"Super"
]
}
},
{
"heatFrames": 450
}
]
},
{
"and": [
"canDodgeWhileShooting",
{
"enemyKill": {
"enemies": [
[
"Space Pirate (fighting)",
"Space Pirate (fighting)"
]
],
"explicitWeapons": [
"Missile"
]
}
},
{
"heatFrames": 2700
}
]
}
]
}
{
"or": [
"h_heatedCrystalFlashForReserveEnergy",
{
"and": [
"h_RModeCanRefillReserves",
{
"or": [
{
"and": [
{
"resourceMissingAtMost": [
{
"type": "Super",
"count": 0
}
]
},
{
"partialRefill": {
"type": "ReserveEnergy",
"limit": 240
}
}
]
},
{
"partialRefill": {
"type": "ReserveEnergy",
"limit": 120
}
}
]
}
]
},
{
"and": [
{
"disableEquipment": "ETank"
},
{
"or": [
{
"and": [
{
"resourceMissingAtMost": [
{
"type": "Super",
"count": 0
}
]
},
{
"partialRefill": {
"type": "ReserveEnergy",
"limit": 140
}
}
]
},
{
"partialRefill": {
"type": "ReserveEnergy",
"limit": 20
}
}
]
}
]
}
]
}
"h_shinechargeMaxRunway"
{
"disableEquipment": "Varia"
}
{
"disableEquipment": "Gravity"
}
{
"or": [
{
"and": [
"canHitbox",
{
"autoReserveTrigger": {
"maxReserveEnergy": 95
}
},
"canRModeSparkInterrupt"
]
},
{
"and": [
"canReserveTriggerBufferXRay",
{
"autoReserveTrigger": {
"implicitHeatFrames": "no"
}
},
"canRModeSparkInterrupt",
{
"suitlessHeatFrames": 32
}
]
},
{
"and": [
"h_heatProof",
{
"autoReserveTrigger": {}
},
"canRModePauseAbuseSparkInterrupt"
]
},
{
"and": [
{
"autoReserveTrigger": {
"implicitHeatFrames": "suitless"
}
},
"canRModeSparkInterrupt",
{
"suitlessHeatFrames": 32
}
]
}
]
}Clears obstacles: A, door_1 |
From: 2
Right Door
To: 3
Metal Pirates Junction
Kill both pirates with ammo or beams. Collect their drops and use heat to interrupt. Or kill and farm one pirate, then hitbox the other and interrupt from it before killing it with ammo or beams. Blue suit doesn't damage the pirates, but keeps Samus invulnerable while moving. Entrance condition: {
"comeInWithRMode": {}
}Requires: {
"heatFrames": 125
}
{
"or": [
{
"and": [
"Charge",
"Plasma",
"canDodgeWhileShooting",
{
"or": [
{
"and": [
"Ice",
{
"heatFrames": 700
}
]
},
{
"and": [
"Wave",
{
"heatFrames": 700
}
]
},
{
"and": [
"Ice",
"Wave",
{
"heatFrames": 450
}
]
},
{
"heatFrames": 950
},
{
"and": [
"canXRayWaitForIFrames",
{
"heatFrames": 420
}
]
},
{
"and": [
"Ice",
"Wave",
"canTrickyJump",
{
"heatFrames": 400
}
]
},
{
"and": [
"Ice",
"canInsaneJump",
{
"heatFrames": 520
}
]
},
{
"and": [
"Wave",
"canInsaneJump",
{
"heatFrames": 520
}
]
},
{
"and": [
"canInsaneJump",
{
"heatFrames": 700
}
]
}
]
}
]
},
{
"and": [
"h_heatProof",
"canDodgeWhileShooting",
{
"or": [
"Plasma",
{
"and": [
"Charge",
"Wave"
]
},
{
"and": [
"Charge",
"Spazer",
"Ice",
"Wave"
]
},
{
"and": [
"Charge",
"Spazer",
"canBePatient"
]
},
{
"and": [
"Charge",
"Ice",
"canBePatient"
]
},
{
"and": [
"canBeVeryPatient",
{
"or": [
"Charge",
"Spazer"
]
}
]
},
{
"enemyKill": {
"enemies": [
[
"Space Pirate (fighting)",
"Space Pirate (fighting)"
]
],
"explicitWeapons": [
"Missile"
]
}
}
]
}
]
},
{
"and": [
"canDodgeWhileShooting",
{
"enemyKill": {
"enemies": [
[
"Space Pirate (fighting)",
"Space Pirate (fighting)"
]
],
"explicitWeapons": [
"Super"
]
}
},
{
"heatFrames": 450
}
]
}
]
}
{
"or": [
"h_heatedCrystalFlashForReserveEnergy",
{
"and": [
"h_RModeCanRefillReserves",
{
"or": [
{
"and": [
{
"resourceMissingAtMost": [
{
"type": "Super",
"count": 0
}
]
},
{
"partialRefill": {
"type": "ReserveEnergy",
"limit": 240
}
}
]
},
{
"partialRefill": {
"type": "ReserveEnergy",
"limit": 120
}
}
]
}
]
},
{
"and": [
{
"disableEquipment": "ETank"
},
{
"or": [
{
"and": [
{
"resourceMissingAtMost": [
{
"type": "Super",
"count": 0
}
]
},
{
"partialRefill": {
"type": "ReserveEnergy",
"limit": 140
}
}
]
},
{
"partialRefill": {
"type": "ReserveEnergy",
"limit": 20
}
}
]
}
]
}
]
}
{
"heatFrames": 90
}
"h_shinechargeMaxRunway"
{
"or": [
{
"and": [
"canHitbox",
{
"autoReserveTrigger": {}
},
"canRModeSparkInterrupt"
]
},
"h_heatTriggerRModeSparkInterrupt"
]
}Clears obstacles: A, door_2 |
From: 3
Metal Pirates Junction
To: 3
Metal Pirates Junction
Requires: "canDodgeWhileShooting"
"Charge"
"Spazer"
{
"or": [
{
"and": [
"canBePatient",
{
"heatFramesWithEnergyDrops": {
"frames": 4400,
"drops": [
{
"enemy": "Space Pirate (fighting)",
"count": 12
}
]
}
}
]
},
{
"and": [
"Ice",
{
"heatFramesWithEnergyDrops": {
"frames": 3000,
"drops": [
{
"enemy": "Space Pirate (fighting)",
"count": 12
}
]
}
}
]
},
{
"and": [
"Wave",
{
"heatFramesWithEnergyDrops": {
"frames": 2650,
"drops": [
{
"enemy": "Space Pirate (fighting)",
"count": 12
}
]
}
}
]
},
{
"and": [
"Ice",
"Wave",
{
"heatFramesWithEnergyDrops": {
"frames": 1750,
"drops": [
{
"enemy": "Space Pirate (fighting)",
"count": 12
}
]
}
}
]
}
]
}
{
"partialRefill": {
"type": "Energy",
"limit": 99
}
}
{
"partialRefill": {
"type": "Super",
"limit": 1
}
}Clears obstacles: A |
From: 3
Metal Pirates Junction
To: 3
Metal Pirates Junction
Uncharged Spazer does half damage. Requires: "h_heatProof"
"canDodgeWhileShooting"
{
"or": [
{
"and": [
"Spazer",
"canBeVeryPatient"
]
},
{
"and": [
"Charge",
"canBeVeryPatient"
]
},
{
"and": [
"Charge",
"Ice",
"canBePatient"
]
}
]
}
{
"partialRefill": {
"type": "Energy",
"limit": 99
}
}
{
"partialRefill": {
"type": "Super",
"limit": 1
}
}Clears obstacles: A Dev note: This strat is only for uncharged spazer or charge with or without ice |
|
Be careful to avoid the stationary, invisible projectiles that the pirates spawn from where they jump. It is possible to exit G-mode and quicky pause abuse, to collect the pirates' drops and get to the door. Requires: "h_heatedGMode"
{
"or": [
"Plasma",
{
"and": [
"Charge",
"Spazer"
]
},
{
"and": [
"Charge",
"Wave"
]
},
{
"and": [
"Spazer",
"Ice",
"Wave"
]
},
{
"and": [
"canBePatient",
{
"or": [
{
"and": [
"Charge",
"Ice"
]
},
{
"and": [
"Spazer",
"Ice"
]
},
{
"and": [
"Spazer",
"Wave"
]
}
]
}
]
},
{
"and": [
"canBeVeryPatient",
{
"or": [
"Charge",
"Spazer"
]
}
]
}
]
}
{
"or": [
{
"heatFrames": 45
},
"h_heatedGModePauseAbuse"
]
}Clears obstacles: A Dev note: It is possible to enter the room in direct G-mode, kill the pirates, return to the open door, then exit G-mode and quickly touch the transition to awaken Zebes (but not get the metal pirates kill flag). This is not included, as it is a very niche knowledge check, and at that point, you might as well pause abuse to get the pirate drops and both flags. If Samus enters with 4 energy, it is also possible to collect the drops without pausing. FIXME: include a partialRefill to gain back energy from the drops (more with canDash than without). |
|
Be careful to avoid the stationary, invisible projectiles that the pirates spawn from where they jump. It is possible to exit G-mode and quicky pause abuse, to collect the pirates' drops and open the door and leave. Otherwise, it requires exiting G-mode at the left side of the room, shooting the door and returning to the right side of the room. Requires: "h_heatedGMode"
{
"or": [
"Plasma",
{
"and": [
"Charge",
"Spazer"
]
},
{
"and": [
"Charge",
"Wave"
]
},
{
"and": [
"Spazer",
"Ice",
"Wave"
]
},
{
"and": [
"canBePatient",
{
"or": [
{
"and": [
"Charge",
"Ice"
]
},
{
"and": [
"Spazer",
"Ice"
]
},
{
"and": [
"Spazer",
"Wave"
]
}
]
}
]
},
{
"and": [
"canBeVeryPatient",
{
"or": [
"Charge",
"Spazer"
]
}
]
}
]
}
{
"or": [
{
"heatFrames": 190
},
"h_heatedGModePauseAbuse"
]
}Clears obstacles: A Dev note: FIXME: These heat frames would be lower if both doors were locked and either could be used to set the metal pirates kill flag. It is possible to enter the room in direct G-mode, kill the pirates, return to the open door, then exit G-mode and quickly touch the transition to awaken Zebes (but not get the metal pirates kill flag). This is not included, as it is a very niche knowledge check, and at that point, you might as well pause abuse to get the pirate drops and both flags. If Samus enters with 4 energy, it is also possible to collect the drops without pausing. FIXME: include a partialRefill to gain back energy from the drops (more with canDash than without). |
From: 9
Junction Below Crumble Blocks, Set Up to Clip
To: 2
Top Right Door
Breaking only the left side bomb blocks makes it easier for the Multiviola to enter a pattern where it will pass through the top shot block. The Multiviola needs to go through the crumble blocks moving to the right, if it goes through moving left it won't clear the shot blocks. If all the bomb blocks are broken, standing on the right side of the crumbles will allow the Multiviola to pass through the top shot block. Requires: {
"notable": "Multiviola Ice Clip"
}
"canBePatient"
"canTrickyGMode"
"h_heatProof"
"canTrickyJump"
{
"enemyDamage": {
"enemy": "Multiviola",
"type": "contact",
"hits": 1
}
}
{
"or": [
{
"and": [
"h_preciseIceClip",
{
"or": [
{
"and": [
"h_useMorphBombs",
{
"or": [
"h_useSpringBall",
"can4HighMidAirMorph"
]
}
]
},
{
"ammo": {
"type": "PowerBomb",
"count": 1
}
},
{
"obstaclesCleared": [
"B"
]
}
]
}
]
},
{
"and": [
"canTrickyCarryFlashSuit",
"h_preciseIceClip",
{
"useFlashSuit": {}
},
{
"shinespark": {
"frames": 11,
"excessFrames": 5
}
}
]
},
{
"and": [
"h_XRayMorphIceClip",
{
"or": [
"Bombs",
"ScrewAttack",
{
"ammo": {
"type": "PowerBomb",
"count": 1
}
},
{
"obstaclesCleared": [
"B"
]
}
]
}
]
}
]
}Exit condition: {
"leaveWithGModeSetup": {}
}Unlocks doors: {"types":["ammo"],"requires":[]} |
|
Kill or dodge the Holtz while crossing the room. It's possible to kill the Holtz while staying safe; some of them can also be lured under platforms and out of the way. It is possible to kill a Zebbo by the door and pause abuse to grab its Energy drop on G-mode exit, which requires manipulating or killing the Holtz while not killing the left Zebbo until it is in location. Entrance condition: {
"comeInWithGMode": {
"mode": "any",
"morphed": false
}
}Requires: {
"or": [
"ScrewAttack",
{
"haveBlueSuit": {}
},
"canBeVeryPatient",
{
"and": [
"canBePatient",
{
"or": [
"Ice",
"Wave",
"Spazer"
]
}
]
},
"Plasma",
"canInsaneJump",
{
"enemyDamage": {
"enemy": "Zebbo",
"type": "contact",
"hits": 1
}
}
]
}
"h_heatedGModePauseAbuse" |
|
Clear the two Holtzes that greet you and collect their drops. With heat protection, you can farm up at a Zebbo pipe. Run across the acid then jump up to a Zebbo pipe for the interrupt. Entrance condition: {
"comeInWithRMode": {}
}Requires: "Gravity"
{
"or": [
{
"and": [
"canBePatient",
"canDodgeWhileShooting",
{
"heatFrames": 2400
}
]
},
{
"and": [
{
"or": [
"Wave",
"Spazer"
]
},
{
"heatFrames": 950
}
]
},
{
"and": [
{
"or": [
"Plasma",
{
"and": [
"Ice",
"Wave",
"Spazer"
]
}
]
},
{
"heatFrames": 500
}
]
},
{
"and": [
{
"enemyKill": {
"enemies": [
[
"Holtz",
"Holtz"
]
],
"explicitWeapons": [
"ScrewAttack",
"Ice+Wave+Plasma"
]
}
},
{
"heatFrames": 100
}
]
},
{
"and": [
"canDodgeWhileShooting",
{
"enemyKill": {
"enemies": [
[
"Holtz",
"Holtz"
]
],
"explicitWeapons": [
"Super",
"PowerBomb"
]
}
},
{
"heatFrames": 550
}
]
}
]
}
{
"or": [
"h_heatedCrystalFlashForReserveEnergy",
{
"and": [
"h_RModeCanRefillReserves",
{
"resourceMissingAtMost": [
{
"type": "Missile",
"count": 0
}
]
},
{
"resourceMissingAtMost": [
{
"type": "PowerBomb",
"count": 0
}
]
},
{
"resourceMissingAtMost": [
{
"type": "Super",
"count": 0
}
]
},
{
"or": [
{
"partialRefill": {
"type": "ReserveEnergy",
"limit": 40
}
},
{
"and": [
"h_heatProof",
{
"refill": [
"Energy"
]
}
]
}
]
}
]
}
]
}
{
"canShineCharge": {
"usedTiles": 38,
"openEnd": 0
}
}
{
"heatFrames": 390
}
{
"acidFrames": 133
}
{
"autoReserveTrigger": {
"maxReserveEnergy": 95
}
}
"canRModeSparkInterrupt"
{
"heatFrames": 80
} |
|
Requires: "canDash"
{
"or": [
"canBePatient",
"canDodgeWhileShooting"
]
}
{
"heatFrames": 2400
}Dev note: This strat is below the normal threshold for canBePatient, but it is particularly tedious. |
From: 7
Middle Right Door With Bottom Kihunter Cleared
To: 5
Top Junction Between Doors
Requires: "h_heatProof"
"canBePatient"
{
"enemyKill": {
"enemies": [
[
"Kihunter (red)",
"Kihunter (red)"
]
]
}
}Dev note: Charge, Spazer, Ice on their own is tedious. |
From: 6
Bottom Platform Junction With Pirates Killed
To: 6
Bottom Platform Junction With Pirates Killed
Requires: "canMidAirMorph"
"h_useMorphBombs"
{
"or": [
{
"and": [
"HiJump",
"SpaceJump",
"canConsecutiveWallJump",
{
"heatFrames": 440
}
]
},
{
"and": [
"SpaceJump",
"HiJump",
{
"heatFrames": 540
}
]
},
{
"and": [
"SpaceJump",
"canConsecutiveWallJump",
{
"heatFrames": 520
}
]
},
{
"and": [
"SpaceJump",
{
"heatFrames": 730
}
]
},
{
"and": [
"h_heatedSpringwall",
{
"heatFrames": 480
}
]
},
{
"and": [
"canLongIBJ",
"canBePatient",
{
"heatFrames": 4000
}
]
},
{
"and": [
"canLongIBJ",
"canJumpIntoIBJ",
{
"heatFrames": 2500
}
]
},
{
"and": [
"canJumpIntoIBJ",
"canDoubleBombJump",
{
"heatFrames": 1400
}
]
}
]
}Clears obstacles: A |
From: 1
Top Left Door
To: 4
Junction Above Bomb Block
Requires: "h_heatProof"
"canBePatient"
{
"enemyKill": {
"enemies": [
[
"Kihunter (red)",
"Kihunter (red)",
"Kihunter (red)"
]
]
}
}Clears obstacles: A |
From: 4
Junction Above Bomb Block
To: 1
Top Left Door
Shoot them from below. It is possible for the Kihunters to fall through the gaps in the side, but is unlikely. Jumping may lower the camera position making it harder to shoot the Kihunters. But once it is lowered, jump to make them active and vulnerable to damage. Requires: "h_heatProof"
"canBePatient"
{
"enemyKill": {
"enemies": [
[
"Kihunter (red)",
"Kihunter (red)",
"Kihunter (red)"
]
]
}
}
{
"or": [
"h_crouchJumpDownGrab",
"canWallJump",
"HiJump",
"canSpringBallJumpMidAir",
"SpaceJump",
"canIBJ",
{
"and": [
"canSpringBallBombJump",
"h_additionalBomb",
"h_additionalBomb"
]
}
]
}Clears obstacles: A Dev note: SpringBallBombJump uses 3 powerbombs total. |
From: 5
G-Mode Morph Junction (Above Bomb Block)
To: 5
G-Mode Morph Junction (Above Bomb Block)
Kill the Kihunters then either exit the room at the top or go to the item. Requires: "h_heatedGMode"
{
"or": [
{
"enemyKill": {
"enemies": [
[
"Kihunter (red)",
"Kihunter (red)",
"Kihunter (red)"
]
],
"explicitWeapons": [
"Super",
"Missile",
"Plasma",
"ScrewAttack"
]
}
},
{
"haveBlueSuit": {}
},
{
"and": [
"Ice",
{
"or": [
"Wave",
"Spazer",
"canBeVeryPatient",
{
"and": [
"Charge",
"canBePatient"
]
}
]
}
]
},
{
"and": [
"Charge",
{
"or": [
"Wave",
"Spazer",
"canBeVeryPatient"
]
}
]
},
{
"and": [
"Spazer",
{
"or": [
"Wave",
"canBePatient"
]
}
]
}
]
}
{
"or": [
"h_crouchJumpDownGrab",
"canWallJump",
"HiJump",
"canSpringBallJumpMidAir",
"SpaceJump",
"canIBJ"
]
}
{
"heatFrames": 0
}Clears obstacles: A |
From: 6
Junction Left of Power Bomb Blocks
To: 4
Junction Right of Power Bomb Blocks
Requires: "h_heatProof"
{
"or": [
"Charge",
"Spazer"
]
}
"canBePatient"Clears obstacles: C, D |
From: 7
Junction Left of Morph Tunnel
To: 4
Junction Right of Power Bomb Blocks
Lure the Ground Hoppers to the Morph Tunnel The left ceiling Dessgeega can be safely killed above the Power Bomb statue. Requires: "h_heatProof" "canBePatient" "h_useMorphBombs" Clears obstacles: C, D Dev note: Other Slow kill methods may need to take contact damage. |
|
On room entry, place a Power Bomb to kill the Atomic and land on the Workrobot. Wait for the Workrobot to move across the room until it meets with a second robot. Depending on where the robots place their invisible, stationary lasers, either roll off and quickly roll under the Atomic, stay on for a second to try to lure the Atomic left a bit, or use a Power Bomb to kill it. Be sure to watch and listen for where the robots are placing their lasers; they occupy a 24x24 pixel space and are typically placed with only 1-2 tiles of space between them. Fall off the workrobots without any horizontal movement to decrease the chance of touching a laser. Note that the majority of the lasers that the workrobots place only deal 4 damage and can be tanked with a suit's damage reduction or an immobile entrance. Avoid placing a Power Bombs too close to the right wall or it will hit the bomb block and it will no longer be passable. Quickly use the camera scroll blocks just left of the bomb blocks, in order to overload PLMs and go through them before the Atomic hits Samus. Entrance condition: {
"comeInWithGMode": {
"mode": "any",
"morphed": true
}
}Requires: {
"notable": "G-Mode Morph Workrobot Ride"
}
"canComplexGMode"
"f_DefeatedPhantoon"
"canBePatient"
"h_artificialMorphPowerBomb"
{
"or": [
"canTrickyGMode",
{
"enemyDamage": {
"enemy": "Workrobot",
"type": "ring-side",
"hits": 1
}
}
]
}
{
"or": [
"canTrickyJump",
"h_artificialMorphPowerBomb",
{
"enemyDamage": {
"enemy": "Atomic",
"type": "contact",
"hits": 1
}
}
]
} |
From: 2
Item (Behind the Bomb Wall)
To: 1
Left Door
In R-Mode, kill the Coverns until there is Energy in Samus's Reserves. Get into the Morph tunnel and go to the far left. Wait for Coverns to damage Samus down until Reserves trigger, forcing a stand up and enabling her to escape. Note that it is required to break the bomb block above the Morph tunnel as well, in order to clip out. Requires: {
"notable": "R-Mode Standup Clip"
}
{
"obstaclesCleared": [
"R-Mode"
]
}
"canRModeStandupClip"
"canCeilingClip"
{
"or": [
{
"and": [
{
"disableEquipment": "ETank"
},
{
"or": [
"canBePatient",
{
"resourceAvailable": [
{
"type": "Energy",
"count": 80
}
]
}
]
}
]
},
"canBeExtremelyPatient"
]
}
{
"partialRefill": {
"type": "ReserveEnergy",
"limit": 20
}
}
{
"or": [
"canTrivialMidAirMorph",
"h_useSpringBall",
"h_bombThings"
]
}
{
"autoReserveTrigger": {}
}Resets obstacles: R-Mode Dev note: If Phantoon is alive, 'Base' can be used instead. Note that this strat is useless in vanilla, as the item only spawns if Phantoon has been killed. |
|
Requires: "canLongCeilingBombJump" "canBePatient" |
|
Entrance condition: {
"comeInWithGMode": {
"mode": "any",
"morphed": true
}
}Requires: "h_artificialMorphLongCeilingBombJump" "canBePatient" Clears obstacles: A |
|
Requires: "canLongCeilingBombJump" "canBePatient" |
From: 7
Bottom Door
To: 3
Bottom Left Door
In R-Mode, kill the Coverns until there is Energy in Samus's Reserves. Get into the Morph tunnel and go to the far left. Wait for Coverns to damage Samus down until Reserves trigger, forcing a stand up and enabling her to shoot the shot blocks and escape. Entrance condition: {
"comeInWithRMode": {},
"comesThroughToilet": "any"
}Requires: {
"not": "f_DefeatedPhantoon"
}
"canRiskPermanentLossOfAccess"
{
"or": [
"canBePatient",
"Plasma"
]
}
{
"partialRefill": {
"type": "ReserveEnergy",
"limit": 20
}
}
{
"or": [
{
"and": [
"canCarefulJump",
"canMidAirMorph",
"canDisableEquipment"
]
},
"h_useSpringBall"
]
}
{
"autoReserveTrigger": {}
}Clears obstacles: B Resets obstacles: R-Mode |
From: 9
Junction Below Speed Blocks
To: 4
Top Right Door
Using the slow global crab to ascend the top section of the room requires the speed blocks to not be broken. If they are broken, the local fast crab can be used instead by letting it fall and climb the left wall. The trickiest part is getting to the second ledge. Freeze the crab when it is overhead and spring ball jump up onto it. Follow the crab up while using it as a platform multiple times. Requires: "canSuitlessMaridia"
"canSpringBallJumpMidAir"
"canTrickyUseFrozenEnemies"
"canTrickyJump"
{
"or": [
{
"obstaclesNotCleared": [
"A"
]
},
{
"and": [
"canCrazyCrabClimb",
"canBePatient"
]
}
]
}Dev note: Waiting for global crab takes more than 90 seconds but gives an easier way of climbing the room. |
From: 10
Direct G-Mode Morph, On Ledge Above Speed Blocks
To: 6
Speed Blocked Item
Overloading the PLMs can be done with as few as 2 Power Bombs if they are placed precisely. Place them two ledges above the item - to the left of the morph tunnel item. It is important that they are placed on either of the flat tiles, not the sloped tile on the right. Samus can use the second Power Bomb to Crystal Flash to have enough Energy to take a crab hit or to get some Reserve Energy, but then she will not be able to use X-Ray to exit G-Mode, and will require a Reserve Trigger. If Samus uses the first Power Bomb to Crystal Flash, she is no longer able to place a second. Samus then needs to jump into the speed-locked item and hit the crab to trigger Reserves and exit G-Mode. This can be done with HiJump, Gravity, Spring Ball, or Ice. Turn around while inside the item to collect it. Requires: "canPowerBombItemOverloadPLMs"
{
"notable": "G-Mode Overload Speed Blocks then use Global Crab"
}
"canBePatient"
"h_navigateUnderwater"
"h_artificialMorphCrystalFlash"
{
"or": [
"h_artificialMorphPowerBomb",
{
"and": [
{
"itemNotCollectedAtNode": 7
},
"canRiskPermanentLossOfAccess"
]
}
]
}
{
"or": [
"HiJump",
"Gravity",
"canSpringBallJumpMidAir",
{
"and": [
"h_underwaterCrouchJump",
"canTrickyUseFrozenEnemies"
]
}
]
}
{
"autoReserveTrigger": {}
}Dev note: An item is expected at node 6, otherwise this strat isn't useful. It takes 2 PBs to overload PLMs, or only 1 if both items are uncollected. FIXME: If Samus has a lot of tanks, it could take too much time to damage down. Ice can be used to take multiple hits from a crab before it leaves. |
From: 11
G-Mode, Below Speed Blocks (Overloaded PLMs)
To: 6
Speed Blocked Item
Samus can Crystal Flash to have enough Energy to take a crab hit or to get some Reserve Energy, but then she will not be able to use X-Ray to exit G-Mode, and will require a Reserve Trigger. The Crystal Flash needs to be done before unmorphing, while being careful not to kill the global crab. Samus then needs to jump into the speed-locked item and hit the crab to trigger Reserves and exit G-Mode. This can be done with HiJump, Gravity, Spring Ball, or Ice. Turn around while inside the item to collect it. Wait for the global crab to get into position. Note that if the crab is arriving too early, it may be possible to slow the crab with Ice or lure the crab from above instead. Alternatively, she may have to wait for the global crab to circle the room. Requires: "canComplexGMode"
{
"notable": "G-Mode Overload Speed Blocks then use Global Crab"
}
"canBePatient"
"h_navigateUnderwater"
"h_artificialMorphCrystalFlash"
{
"or": [
"Gravity",
"HiJump",
"canSpringBallJumpMidAir",
{
"and": [
"h_underwaterCrouchJump",
"canTrickyUseFrozenEnemies"
]
}
]
}
{
"autoReserveTrigger": {}
}
{
"obstaclesCleared": [
"B"
]
}Dev note: Samus needs to use Bombs or Power Bombs to overload PLMs, so Morph or artificial Morph is already required. FIXME: If Samus has a lot of tanks, it could take too much time to damage down. Ice can be used to take multiple hits from a crab before it leaves. |
From: 11
G-Mode, Below Speed Blocks (Overloaded PLMs)
To: 6
Speed Blocked Item
Freeze a crab on the edge of the speed blocks, such that Samus can jump inside and stand on the crab. If using Bombs, it is important to freeze the crab with all other beams turned off, so that the crab has 30 remaining Energy or less. Place a Bomb or Power Bomb, then quickly get into the crouch position and use X-Ray to exit G-Mode before it goes off. It is important to be crouched, not standing, and have Gravity off, or the bomb will boost Samus and she will be stuck in the speed blocks. Note that if the crab is arriving too early, it may be possible to slow the crab with Ice or lure the crab from above instead. Alternatively, she may have to wait for the global crab to circle the room. It is possible to kago the bomb boost in order to do this strat with Gravity still equipped. Requires: "canComplexGMode"
{
"notable": "G-Mode Overload Speed Blocks then use Global Crab"
}
"canBePatient"
"h_navigateUnderwater"
"canTrickyUseFrozenEnemies"
{
"or": [
"Gravity",
"HiJump",
"h_underwaterCrouchJump",
"canSpringBallJumpMidAir"
]
}
{
"or": [
{
"disableEquipment": "Gravity"
},
"canKago"
]
}
"h_bombThings" |
From: 11
G-Mode, Below Speed Blocks (Overloaded PLMs)
To: 6
Speed Blocked Item
Freeze a crab on the edge of the speed blocks, such that Samus can jump inside and stand on the crab. Exit G-Mode and rotate to obtain the item. Samus will now be stuck on the crab, and if it thaws and hits her, she will be pushed up and stuck in the speed blocks. Note that if the crab is arriving too early, it may be possible to slow the crab with Ice or lure the crab from above instead. Alternatively, she may have to wait for the global crab to circle the room. Requires: "canComplexGMode"
{
"notable": "G-Mode Overload Speed Blocks then use Global Crab"
}
"canBePatient"
"h_navigateUnderwater"
"canTrickyUseFrozenEnemies"
{
"or": [
"Gravity",
"HiJump",
"h_underwaterCrouchJump",
"canSpringBallJumpMidAir"
]
}Clears obstacles: C |
From: 13
G-Mode Morph Junction By Middle Right Door
To: 4
Top Right Door
Requires: "canGMode"
"h_navigateUnderwater"
{
"or": [
{
"and": [
"h_artificialMorphIBJ",
"Gravity",
{
"or": [
"h_artificialMorphDoubleBombJump",
"h_artificialMorphStaggeredIBJ",
"canBePatient",
"h_artificialMorphPowerBomb"
]
}
]
},
"h_artificialMorphDoubleSpringBallJump"
]
} |
From: 1
Top Left Door
To: 1
Top Left Door
Follow the crab from the bottom right door to the top left door. This takes approximately 90 seconds. It is also possible to knock the crab off of the middle peak with a super and follow it to the left which may save time. Requires: "Gravity"
"canBePatient"
{
"or": [
"SpaceJump",
{
"and": [
{
"ammo": {
"type": "Super",
"count": 1
}
},
{
"or": [
"HiJump",
"canSpringBallJumpMidAir",
"canGravityJump",
"canConsecutiveWallJump",
"canSpeedyJump"
]
}
]
}
]
}Exit condition: {
"leaveWithGModeSetup": {}
} |
From: 1
Top Left Door
To: 1
Top Left Door
Follow the crab from the bottom right door to the top left door. This takes approximately 90 seconds. It is also possible to knock the crab off of the middle peak with a super and follow it to the left which may save time. Requires: "h_frozenEnemyRunway"
"Gravity"
"canBePatient"
{
"or": [
"SpaceJump",
{
"and": [
{
"ammo": {
"type": "Super",
"count": 1
}
},
{
"or": [
"HiJump",
"canSpringBallJumpMidAir",
"canGravityJump",
"canConsecutiveWallJump",
"canSpeedyJump"
]
}
]
}
]
}Exit condition: {
"leaveWithRunway": {
"length": 4,
"openEnd": 0
}
} |
|
Near the bottom left door, there are three pathways upwards: one directly above the door and two to the right. Between the right pathways, is a crab moving to the right. Shooting a Super against the wall will make it fall off and move left. Climb the crab up the left wall. Watch out for the crab above that is heading into the morph tunnel. Jump to the right platform before the upward crab goes into the tunnel. Lure the crab out of the hole by running to the right of the hill then back left or use moonwalk to scroll the camera. Near the end is particularly tricky. When the crab is on the underside of the metal blocks, freeze it and use it as a stepping platform. To do this, crouch jump and while moving upwards, hold left against the crab to get extra vertical movement. Down grabbing at the top is helpful. Requires: "canSuitlessMaridia"
"canTrickyJump"
"canTrickyUseFrozenEnemies"
{
"or": [
{
"and": [
"h_underwaterCrouchJumpDownGrab",
"canBePatient"
]
},
"HiJump",
"canSpringBallJumpMidAir"
]
}
"canCameraManip"
{
"ammo": {
"type": "Super",
"count": 1
}
} |
|
Lure the crab to the top of the room and freeze it close enough to the corner that it will be able to hit Samus after it thaws. Without Morph, this is much trickier, requiring fairly precise freeze positioning and movement to get onto the crab. Aim down before landing on the crab to avoid triggering the transition. Be sure to touch the transition before it thaws or Samus will be in a falling pose, but late enough that it will be able to rotate around the corner and hit Samus in time. Requires: "canBePatient"
{
"or": [
{
"and": [
"Gravity",
"SpaceJump"
]
},
{
"and": [
"Gravity",
"HiJump",
"canPreciseGrapple"
]
},
{
"and": [
"HiJump",
"canPreciseGrapple",
"canSpringBallJumpMidAir",
"canBeVeryPatient"
]
},
{
"and": [
"HiJump",
"canGravityJump",
"canBeVeryPatient"
]
}
]
}
"canUpwardGModeSetup"
"canTrickyUseFrozenEnemies"
{
"or": [
"Morph",
"canTrickyGMode"
]
}Exit condition: {
"leaveWithGModeSetup": {}
}Dev note: Without Morph, this is not difficult enough to require canTrickyGMode, but it is easy to fail and the setup is very slow. The patience requirements for these strats are lenient, but there is a good chance of not getting the setup or entering G-mode first try. |
|
Use two snails to perform an 'Enemy Stuck Moonfall' to bypass the bomb blocks above the middle left door. Position one snail on the above door shell, and the second above the corner of pipe below. Samus will clip through the lower snail, taking damage, then continue through a segment of pipe where the crumble blocks can be reached. Facing both snails during the moonfall while positioning Samus for the clip can be precise. Depending on the exact heights of the snails, it may be necessary to pose change while clipping. Damage from the snail can be avoided by shooting the snail at a precise time: the water cycle or Samus' air bubbles can be used as a cue for the timing. Requires: {
"notable": "Snail Stuck Moonfall"
}
"h_navigateUnderwater"
"canEnemyStuckMoonfall"
"canBePatient"
{
"or": [
{
"enemyDamage": {
"enemy": "Yard",
"type": "contact",
"hits": 1
}
},
"canFreeFallClip",
{
"haveBlueSuit": {}
}
]
} |
From: 1
Left Door
To: 1
Left Door
Entrance condition: {
"comeInWithRMode": {}
}Requires: "Gravity"
{
"or": [
{
"disableEquipment": "ETank"
},
"canBePatient"
]
}
{
"canShineCharge": {
"usedTiles": 32,
"gentleUpTiles": 1,
"steepUpTiles": 1,
"openEnd": 1
}
}
"h_RModeKnockbackSpark" |
From: 4
Right Door
To: 4
Right Door
Entrance condition: {
"comeInWithRMode": {}
}Requires: "Gravity"
{
"or": [
{
"disableEquipment": "ETank"
},
"canBePatient"
]
}
{
"canShineCharge": {
"usedTiles": 23,
"gentleUpTiles": 4,
"openEnd": 1
}
}
"h_RModeKnockbackSpark" |
From: 1
Bottom Left Door
To: 2
Right Door
Lure a Mochtroid, stand below the crumbles, and perform a suitless jump and aim down, timed so that the reserve trigger forced standup happens just before Samus contacts the crumbles and still has upwards momentum. Release down before the refill completes, pressing down again when Samus approaches the peak of her jump. If Morph is available a jump morph can be used for more leniency, giving a 8 frame window compared to 3 frames for the regular jump. If Spring Ball is also available, jumping in Spring Ball increases the window to 9 frames. Entrance condition: {
"comeInWithRMode": {},
"comesThroughToilet": "any"
}Requires: "canRModeStandupClip"
{
"disableEquipment": "ETank"
}
{
"disableEquipment": "Gravity"
}
{
"disableEquipment": "HiJump"
}
{
"resourceAvailable": [
{
"type": "Energy",
"count": 99
}
]
}
{
"or": [
"canBeVeryPatient",
{
"and": [
"canMidAirMorph",
"canBePatient"
]
}
]
}
{
"partialRefill": {
"type": "ReserveEnergy",
"limit": 20
}
}
{
"autoReserveTrigger": {}
} |
From: 2
Right Door
To: 1
Bottom Left Door
Lure a Mochtroid, stand below the crumbles, and perform a suitless jump and aim down, timed so that the reserve trigger forced standup happens just before Samus contacts the crumbles and still has upwards momentum. Release down before the refill completes, pressing down again when Samus approaches the peak of her jump. If Morph is available a jump morph can be used for more leniency, giving an 8-frame window compared to 3 frames for the regular jump. If Spring Ball is also available, jumping in Spring Ball increases the window to 9 frames. Entrance condition: {
"comeInWithRMode": {}
}Requires: "canRModeStandupClip"
{
"disableEquipment": "ETank"
}
{
"disableEquipment": "Gravity"
}
{
"disableEquipment": "HiJump"
}
{
"resourceAvailable": [
{
"type": "Energy",
"count": 99
}
]
}
{
"or": [
"canBeVeryPatient",
{
"and": [
"canMidAirMorph",
"canBePatient"
]
}
]
}
{
"partialRefill": {
"type": "ReserveEnergy",
"limit": 20
}
}
{
"autoReserveTrigger": {}
} |
From: 2
Right Door
To: 2
Right Door
Even when suitless, it's possible to stand far enough that the acid attack doesn't spawn. Botwoon still gets hit. So there's a safe way to take no damage. Requires: {
"notable": "Back-Side Fight with Charge and Wave"
}
"canSuitlessMaridia"
"Charge"
"Wave"
{
"or": [
"Plasma",
"canTrickyDodgeEnemies",
{
"and": [
"canDodgeWhileShooting",
{
"enemyDamage": {
"enemy": "Botwoon 1",
"type": "acid",
"hits": 2
}
}
]
},
{
"and": [
"Spazer",
"Ice",
{
"enemyDamage": {
"enemy": "Botwoon 1",
"type": "acid",
"hits": 1
}
},
{
"or": [
"canDodgeWhileShooting",
{
"enemyDamage": {
"enemy": "Botwoon 1",
"type": "acid",
"hits": 1
}
}
]
}
]
},
{
"and": [
"Spazer",
{
"enemyDamage": {
"enemy": "Botwoon 1",
"type": "acid",
"hits": 4
}
}
]
},
{
"enemyDamage": {
"enemy": "Botwoon 1",
"type": "acid",
"hits": 6
}
},
{
"and": [
"canCameraManip",
"canBePatient"
]
}
]
}Clears obstacles: f_DefeatedBotwoon Sets flags: f_DefeatedBotwoon |
|
Start an IBJ by either bouncing on the sand with Spring Ball, doing a stationary spinjump on the sand, or by crouch jumping in the sand while holding down. Requires: {
"noBlueSuit": {}
}
"Gravity"
"canLongIBJ"
"canJumpIntoIBJ"
{
"or": [
{
"and": [
"canTrickyJump",
"can4HighMidAirMorph",
"canPlayInSand"
]
},
"h_useSpringBall"
]
}
{
"or": [
"canDoubleBombJump",
"canStaggeredIBJ",
"canBePatient"
]
} |
|
The Global crab in the upper section can be knocked off the wall to enter the left side of the above door. Otherwise, there are more crabs in the lower section of the room. Requires: "canUpwardGModeSetup"
"canTrickyUseFrozenEnemies"
{
"or": [
{
"ammo": {
"type": "Super",
"count": 1
}
},
"Gravity",
{
"and": [
"canSuitlessMaridia",
{
"or": [
"HiJump",
"canBePatient"
]
}
]
}
]
}Exit condition: {
"leaveWithGModeSetup": {}
} |
|
Climb up 2.5 screens. Stop when about half of Samus (or less) is visible at the top of the screen. Turn-around a couple times to move to the right, to get close to falling out. Then perform a buffered spin-jump while turning around to the right, to make it onto the platform. The Choot will be safely off-camera and will not hit Samus while passing through it. Entrance condition: {
"comeInWithGMode": {
"mode": "direct",
"morphed": false
}
}Requires: "canComplexGMode" "canGModeXRayClimb" "canLongXRayClimb" "canBePatient" "canOffScreenMovement" |
From: 1
Bottom Left Door
To: 2
Top Right Door
Climb up 2.5 screens. Stop when about half of Samus (or less) is visible at the top of the screen. Turn-around a couple times to move to the right, to get close to falling out. Then perform a buffered spin-jump while turning around to the right, to make it onto the platform. The Choot will be safely off-camera and will not hit Samus while passing through it. Entrance condition: {
"comeInShinecharged": {}
}Requires: {
"shineChargeFrames": 1
}
"canShinesparkDeepStuck"
{
"shinespark": {
"frames": 1,
"excessFrames": 1
}
}
"canLongXRayClimb"
"canBePatient"
"canOffScreenMovement" |
|
Entrance condition: {
"comeInWithDoorStuckSetup": {}
}Requires: "canLongXRayClimb" "canBePatient" |
|
Requires: "canBePatient"
{
"enemyDamage": {
"enemy": "Puyo",
"type": "contact",
"hits": 1
}
} |
|
Requires: "canBePatient" "canTrickyGMode" Exit condition: {
"leaveWithGModeSetup": {}
}Unlocks doors: {"types":["powerbomb"],"requires":[{"or":[{"resetRoom":{"nodes":[1]}},{"resetRoom":{"nodes":[2]}}]}]} |
|
Requires: {
"or": [
"Ice",
"canTrickyJump",
"ScrewAttack",
"canBePatient",
{
"ammo": {
"type": "Missile",
"count": 6
}
}
]
}
{
"or": [
"h_navigateUnderwater",
{
"enemyDamage": {
"enemy": "Puyo",
"type": "contact",
"hits": 1
}
}
]
}
{
"or": [
"canDodgeWhileShooting",
{
"enemyDamage": {
"enemy": "Puyo",
"type": "contact",
"hits": 1
}
}
]
} |
|
Positioning the Puyo requires it to perform a big jump then start falling with a frame perfect freeze. One possible setup stands on the left tile of the right side and lets the puyo jump up taking a contact hit. Then so long as the puyo isn't on the very edge, it will do a big jump. Clip onto the puyo by doing an aim down jump and switching to a forward diagonal at the right time. Requires: {
"notable": "Suitless Puyo Clip"
}
"canSuitlessMaridia"
"h_highPixelIceClip"
{
"noBlueSuit": {}
}
{
"enemyDamage": {
"enemy": "Puyo",
"type": "contact",
"hits": 2
}
}
{
"or": [
{
"enemyDamage": {
"enemy": "Puyo",
"type": "contact",
"hits": 6
}
},
{
"and": [
"canBePatient",
{
"resetRoom": {
"nodes": [
1
]
}
}
]
}
]
}
{
"or": [
{
"enemyDamage": {
"enemy": "Puyo",
"type": "contact",
"hits": 1
}
},
"Wave",
"canPreciseGrapple"
]
}Dev note: 1 hit per attempt, 7 for leniency, which is reduced if Samus can reset the room and farm the Puyos. FIXME: leniencies should be moved to helpers or some central location. FIXME: There is a normalized setup which can be described and most or all of the leniency can be removed. |
From: 4
Junction Below Sand Entrance
To: 5
Right Pillar
Use a Power Bomb to make the right-most Evir rise. Freeze it low and jump onto it. Crouch and continue holding down; when the Evir is about to thaw, jump with a buffered aim-down and refreeze the Evir after it climbs a few pixels. Repeat many times until gaining enough height to spin jump onto the pillar. With each refreeze, it is recommended that Samus switch which side of the Evir to stand on, to avoid a risk of getting shot by the Evir. Requires: {
"notable": "Suitless Bootless Evir Climb"
}
"h_usePowerBomb"
"canBePatient"
"canTrickyUseFrozenEnemies"
"canPlayInSand"
"canTrickyDodgeEnemies" |
|
This climb is from the left side of the left room, the room with the breakable grapple block. Climb up 3 screens. The camera will not move up to Samus while on the left wall. Carefully jump over the pit without falling in. It helps to step down and use the two-tile long runway. Entrance condition: {
"comeInWithDoorStuckSetup": {}
}Requires: "canLongXRayClimb"
"canBePatient"
"canOffScreenMovement"
{
"or": [
"canTrickyJump",
"canWallJump",
"SpaceJump"
]
} |
|
This climb is from the left side of the left room, the room with the breakable grapple block. Climb up 3 screens. Then drop down to fix the camera. Entrance condition: {
"comeInWithDoorStuckSetup": {}
}Requires: "canLongXRayClimb" "canBePatient" |
|
This climb is right side of the left room - the room with the breakable grapple block. Climb up 3 screens. Entrance condition: {
"comeInWithDoorStuckSetup": {}
}Requires: "canLongXRayClimb" "canBePatient" |
From: 1
Left Door
To: 1
Left Door
This requires a precisely timed Crystal Flash, such that Shaktool hits Samus immediately after she gets Reserve Energy, to prevent getting double hit. With a second Reserve Tank and an Energy Tank, or the damage reduction from a suit, Samus is able to survive a second hit. If the wall is already broken, either wait for Shaktool to cross the room or move in front of it. It is possible to enter the room and land on the doorsill, then bomb or Power Bomb boost across when the tide is high. Entrance condition: {
"comeInWithGMode": {
"mode": "direct",
"morphed": true
}
}Requires: "h_artificialMorphRModeCrystalFlashInterrupt"
{
"or": [
{
"and": [
{
"ammo": {
"type": "Missile",
"count": 10
}
},
{
"or": [
"h_partialEnemyDamageReduction",
{
"and": [
{
"resourceCapacity": [
{
"type": "RegularEnergy",
"count": 199
}
]
},
{
"resourceCapacity": [
{
"type": "ReserveEnergy",
"count": 199
}
]
}
]
}
]
}
]
},
{
"and": [
{
"ammo": {
"type": "Missile",
"count": 2
}
},
"h_artificialMorphComplexRModeCrystalFlashInterrupt"
]
}
]
}
{
"or": [
"h_artificialMorphSpringBall",
{
"and": [
{
"or": [
"canInsaneJump",
"Gravity"
]
},
{
"or": [
"h_artificialMorphBombs",
{
"ammo": {
"type": "PowerBomb",
"count": 2
}
}
]
}
]
},
"canBePatient",
{
"and": [
"canRiskPermanentLossOfAccess",
{
"not": "f_ShaktoolDoneDigging"
}
]
}
]
} |
|
Requires: {
"enemyDamage": {
"enemy": "Shaktool",
"type": "contact",
"hits": 1
}
}
{
"or": [
"canBePatient",
{
"and": [
"canRiskPermanentLossOfAccess",
{
"not": "f_ShaktoolDoneDigging"
}
]
}
]
} |
From: 2
Right Door
To: 2
Right Door
Bounce the snails around the room in order to destroy the sand blocks, opening up the runway. Without Gravity, this requires greater caution as the water will slow Samus down and increase the risk of taking damage from a snail. A snail can be made to bounce in 3 ways: shooting it off a wall or ceiling, kicking it on the ground, or touching it while it is already bouncing. Kicking a snail involves running or jumping into it with a non-zero amount of run speed, gained by dashing for at least one frame while in air physics. A snail can be kicked from any direction when in its initial (not angered) state or when it is stunned for a moment after being shot. While a snail is angered and is moving quickly, it can only safely be kicked from a certain side: from behind if on the ground, or head-on if on the ceiling (and not at all while on a wall). If Morph is unavailable, be careful not to let the snails go off-camera, and avoid getting stuck in two-tile-high spaces. If a snail is on the ground and still on camera, it can be forced to move toward Samus again by shooting it; let it wrap around the right side of the room onto the ceiling, where it can be shot to cause it to fall and continue destroying sand blocks. Requires: {
"notable": "Suitless Bounce the Snails Around the Room"
}
"canDodgeWhileShooting"
"canTrickyJump"
{
"or": [
"canBePatient",
"canInsaneJump",
{
"enemyDamage": {
"enemy": "Yard",
"type": "contact",
"hits": 1
}
}
]
}
{
"noBlueSuit": {}
}Clears obstacles: B |
|
Entrance condition: {
"comeInWithGMode": {
"mode": "any",
"morphed": true
}
}Requires: {
"or": [
"f_KilledMetroidRoom1",
{
"obstaclesCleared": [
"f_KilledMetroidRoom1"
]
}
]
}
"h_artificialMorphLongCeilingBombJump"
"canBePatient" |
|
Safely kill the first pirate, then run from or roll under the remaining pirate lasers. The Pirates will also not shoot if they come on screen while Samus is crouched. Requires: {
"or": [
{
"and": [
"canDodgeWhileShooting",
"canCameraManip",
{
"or": [
"Plasma",
{
"and": [
"h_hasBeamUpgrade",
"canBePatient"
]
},
"canBeVeryPatient"
]
}
]
},
{
"and": [
{
"or": [
"canBePatient",
{
"enemyDamage": {
"enemy": "Tourian Space Pirate (all)",
"type": "contact",
"hits": 1
}
}
]
},
"Morph"
]
}
]
}Clears obstacles: A Dev note: These requirements are to kill all of the pirates, but another strat is needed to cross the room to get to the top half. |
|
Run from or Roll under the pirate lasers. The Pirates will also not shoot if they come on screen while Samus is crouched. Requires: {
"or": [
{
"and": [
"canDodgeWhileShooting",
"canCameraManip",
{
"or": [
"Plasma",
{
"and": [
"h_hasBeamUpgrade",
"canDash",
"canBePatient"
]
},
"canBeVeryPatient"
]
}
]
},
{
"and": [
{
"or": [
"canBePatient",
{
"enemyDamage": {
"enemy": "Tourian Space Pirate (all)",
"type": "contact",
"hits": 1
}
}
]
},
"Morph"
]
}
]
}Clears obstacles: A Dev note: Technically it's not possible to kill the bottom Pirates while staying at node 2 (not dropping down); but if we're not going down, then it doesn't matter that the bottom ones aren't killed. |
|
Requires: {
"or": [
"HiJump",
"SpaceJump",
"canWallJump",
"canJumpIntoIBJ",
{
"and": [
"canIBJ",
"canBePatient"
]
},
"canSpringBallJumpMidAir"
]
}
{
"or": [
"canBePatient",
{
"enemyKill": {
"enemies": [
[
"Tourian Space Pirate (all)"
],
[
"Tourian Space Pirate (all)"
],
[
"Tourian Space Pirate (all)"
],
[
"Tourian Space Pirate (all)"
]
],
"explicitWeapons": [
"Missile",
"Super",
"PowerBomb",
"Wave",
"Spazer",
"Plasma",
"ScrewAttack"
]
}
},
{
"haveBlueSuit": {}
}
]
}
"h_complexToCarryFlashSuit" |
From: 1
Left Door
To: 4
Top of Shaft Without Acid Triggered
Freeze the Pirates and use them as platforms to climb the room. Sometimes the Pirates may decide to climb the wrong way; patience may be required to wait for them to come back. If enough energy is available, it can be easier to use i-frames to jump up through a Pirate and freeze it from above, compared to jumping around it. Requires: "canBePatient"
"canTrickyUseFrozenEnemies"
"canTrickyDodgeEnemies"
{
"or": [
"Wave",
"Spazer",
{
"ammo": {
"type": "Missile",
"count": 8
}
},
"canBeVeryPatient"
]
}
{
"or": [
{
"and": [
{
"noBlueSuit": {}
},
{
"enemyDamage": {
"enemy": "Tourian Space Pirate (all)",
"type": "contact",
"hits": 4
}
}
]
},
"canInsaneJump"
]
}
"h_trickyToCarryFlashSuit"Dev note: Plasma is hard to use effectively as it's easy to accidentally kill the Pirates with it. |
