Spore Spawn Room
Room ID: 57
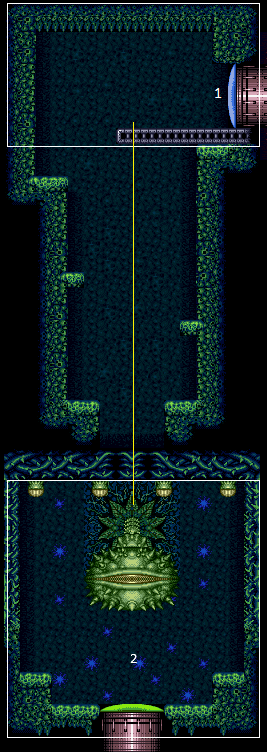
|
Exit condition: "leaveWithRunway": {
"length": 8,
"openEnd": 1
} |
|
Requires: "h_CrystalFlash" |
From: 1
Top Right Door
To: 1
Top Right Door
Entrance condition: "comeInShinecharging": {
"length": 7,
"openEnd": 0
},
"comesInHeated": "no"Requires: "h_CrystalSpark" |
|
Requires: "f_DefeatedSporeSpawn" |
From: 1
Top Right Door
To: 2
Bottom Door


Use the Plasma Special Beam Attack to kill Spore Spawn from above. Spore Spawn will move out of range after the first hit and it will take 9 cycles to come back into range. Stand on the left side of the lowest part of the upper area, facing left for the first hit. 9 cycles later, shoot again from the same spot while crouching to kill Spore Spawn. Requires: {"notable": "Plasma SBA Kill from Above"},
"Plasma",
"canSpecialBeamAttack",
{"ammo": {"type": "PowerBomb", "count": 2}},
"canBePatient"Sets flags: f_DefeatedSporeSpawn Dev note: 2 Power Bombs total. |
From: 1
Top Right Door
To: 2
Bottom Door


Use the Plasma Special Beam Attack to kill Spore Spawn from above. Stand in the middle of the second lowest platform above Spore Spawn, facing left and crouched. Then quickly use X-Ray to kill Spore Spawn in 1 cycle. Jumping against the ledge above then rotating to the left after landing will put Samus into a good position. Requires: {"notable": "Plasma SBA Kill from Above"},
"Plasma",
"canSpecialBeamAttack",
{"ammo": {"type": "PowerBomb", "count": 1}},
"canXRayWaitForIFrames"Sets flags: f_DefeatedSporeSpawn |
|


Stand on the right half of Spore Spawn's pit. When Spore Spawn begins it's third left rotation begin to charge the SBA attack. Perform a full height jump just as the SBA attack is about to fire. Requires: {"notable": "Wave SBA Kill from Above"},
"Wave",
"canSpecialBeamAttack",
{"ammo": {"type": "PowerBomb", "count": 1}}Sets flags: f_DefeatedSporeSpawn Dev note: 1 Power Bomb total. |
|


Prepare an extended Moondance and wait for SporeSpawn to move to a side. In quick succession, Moonfall, turn left, and turn right while holding a spin break button to clip down into the fight arena. Entrance condition: "comeInWithStoredFallSpeed": {
"fallSpeedInTiles": 2
}Requires: {"notable": "Moondance Clip"},
"canFreeFallClip",
{"enemyDamage": {"enemy": "Spore Spawn", "type": "contact", "hits": 1}}Dev note: Even though the fight is active, node 2 can freely enter the fight or leave the room. FIXME: A different exact fall speed value changes the movements needed for the clip. |
|


Enter the room with a super sink, in order to clip down into the fight arena. Entrance condition: "comeInWithSuperSink": {} |
|
Requires: "f_DefeatedSporeSpawn" |
|
Entrance condition: "comeInWithSpark": {},
"comesThroughToilet": "any"Requires: {"shinespark": {"frames": 16, "excessFrames": 16}}Dev note: This strat is not useful in-room, but can satisfy a strat in the room before with an exit shinespark. |
|
Entrance condition: "comeInWithSpark": {},
"comesThroughToilet": "any"Requires: "f_DefeatedSporeSpawn",
{"shinespark": {"frames": 3, "excessFrames": 3}}Dev note: This strat is not useful in-room, but can satisfy a strat in the room before with an exit shinespark. |
|
Requires: "h_CrystalFlash" |
|
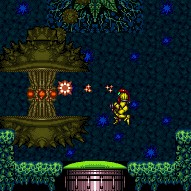

Requires: "Charge",
{"or": [
{"and": [
"Ice",
"Wave"
]},
{"and": [
"Ice",
"Spazer"
]},
{"and": [
"Spazer",
"Wave"
]},
{"and": [
"canBePatient",
{"or": [
"Ice",
"Wave",
"Spazer"
]}
]},
"Plasma",
"canBeVeryPatient"
]}Sets flags: f_DefeatedSporeSpawn |
|
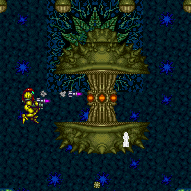

Requires: {"resourceCapacity": [{"type": "Missile", "count": 1}]},
{"or": [
"canDodgeWhileShooting",
"canBePatient"
]}Sets flags: f_DefeatedSporeSpawn Dev note: No ammo count because Missiles are farmable here. |
|
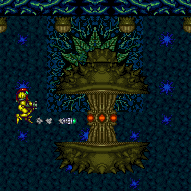

Spore Spawn's pollen does not drop Supers. The fight requires 4 Supers, where many misses could lead to a softlock. Requires: {"or": [
"canDodgeWhileShooting",
{"resourceCapacity": [{"type": "Missile", "count": 1}]},
{"ammo": {"type": "Super", "count": 2}}
]},
{"ammo": {"type": "Super", "count": 4}}Sets flags: f_DefeatedSporeSpawn |
|
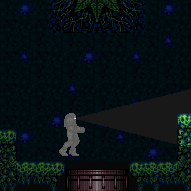

Requires: {"enemyDamage": {"enemy": "Spore Spawn", "type": "contact", "hits": 1}},
{"not": "f_DefeatedSporeSpawn"},
"canRiskPermanentLossOfAccess"Dev note: This would only be useful to leave in g-mode. |
|


Crystal Flash on the left side of the room when Spore Spawn starts moving, or on the right side when it is in the top right of its swoop. Entrance condition: "comeInWithRMode": {},
"comesThroughToilet": "no"Requires: "canRModeCrystalFlashInterrupt", {"ammo": {"type": "Missile", "count": 10}}, {"not": "f_DefeatedSporeSpawn"}, "canRiskPermanentLossOfAccess" |
From: 2
Bottom Door
To: 2
Bottom Door


Crystal Flash on the left side of the room when Spore Spawn starts moving, or on the right side when it is in the top right of its swoop. Entrance condition: "comeInWithGMode": {
"mode": "direct",
"morphed": true
},
"comesThroughToilet": "no"Requires: "h_artificialMorphRModeCrystalFlashInterrupt", {"ammo": {"type": "Missile", "count": 10}}, {"not": "f_DefeatedSporeSpawn"}, "canRiskPermanentLossOfAccess" Dev note: With an immobile entry, the note will be wrong, but the timing is pretty lenient and easy to deduce. |