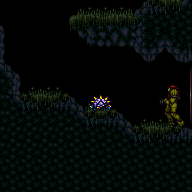
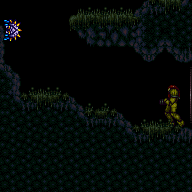
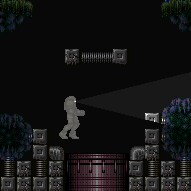
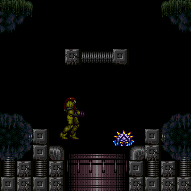
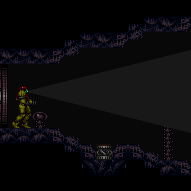
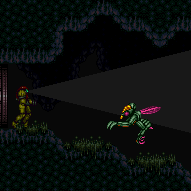
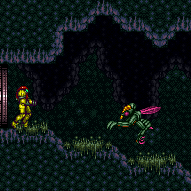
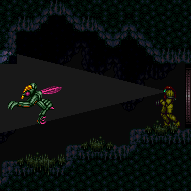
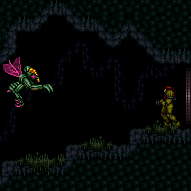
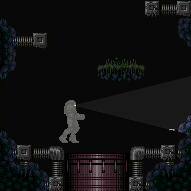
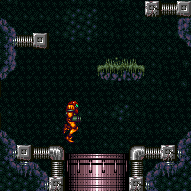
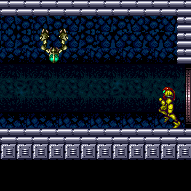
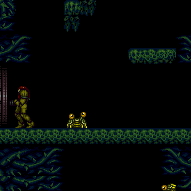
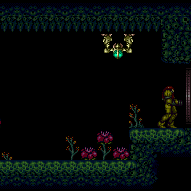
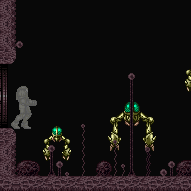
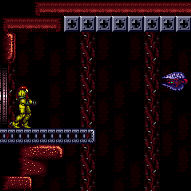
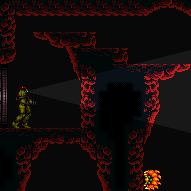
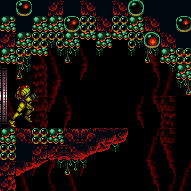
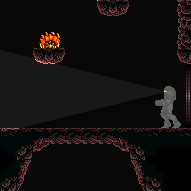
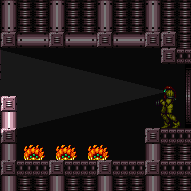
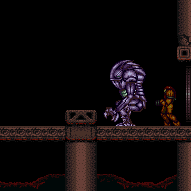
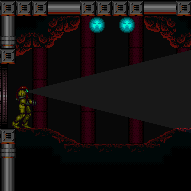
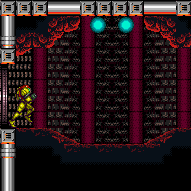
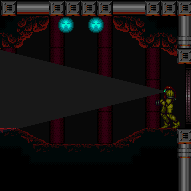
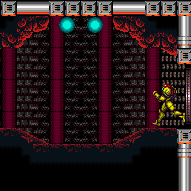
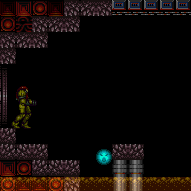
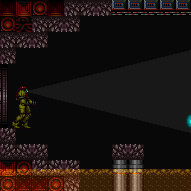
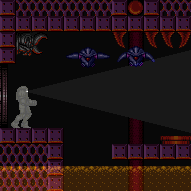
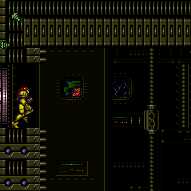
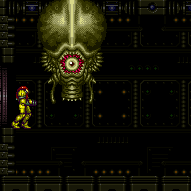
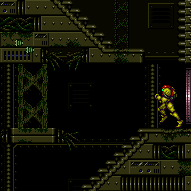
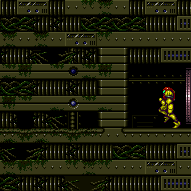
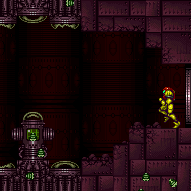
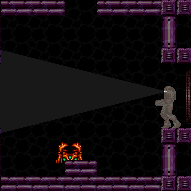
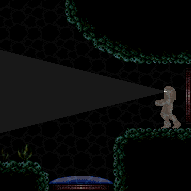
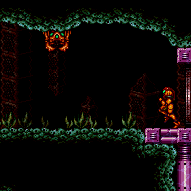
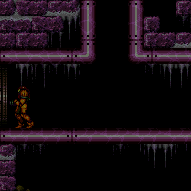
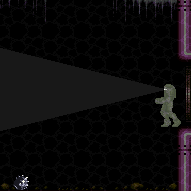
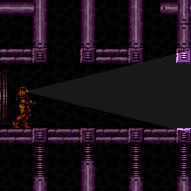
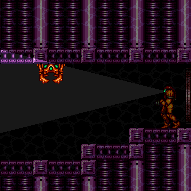
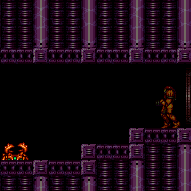
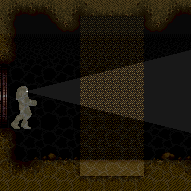
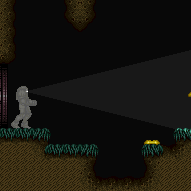
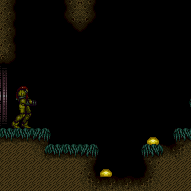
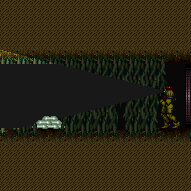
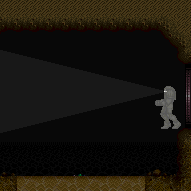
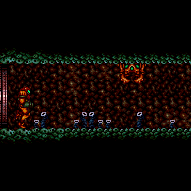
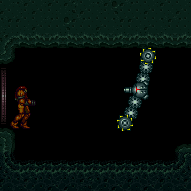
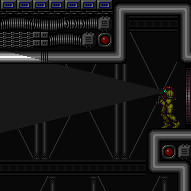
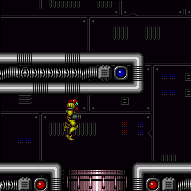
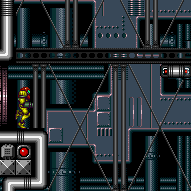
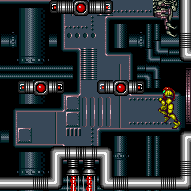
canGModeImmobile (Extreme)
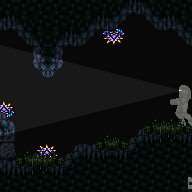
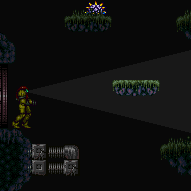
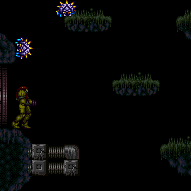
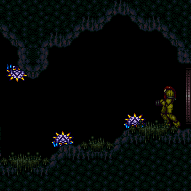
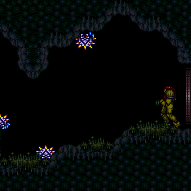
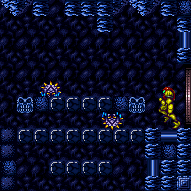
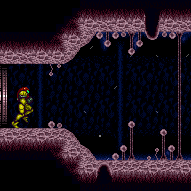
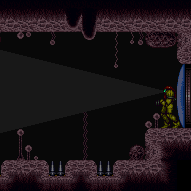
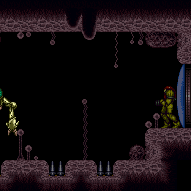
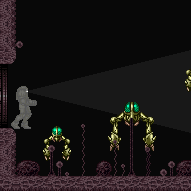
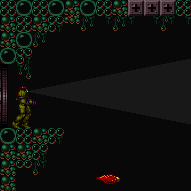
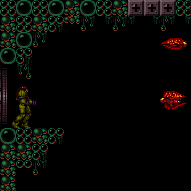
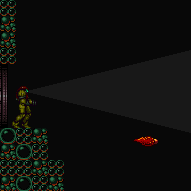
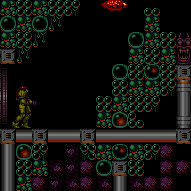
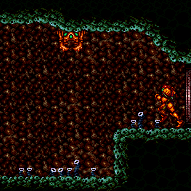
Ability to enter G-mode starting with high reserve energy, resulting in Samus being immobilized. Have 5 or more energy in reserves (set to Auto), take damage while going through a door, use X-Ray while entering the next room, and release X-ray immediately before reserves finish filling (a 3-frame window when starting with 12 or more reserve energy, a much larger frame window if you have between 5 and 11). Samus will be unable to move until getting hit by an enemy (or until canceling G-mode by using X-Ray).
Dependencies: canGMode, canManageReserves, canPreciseReserveRefill, canUseEnemies
Dev note: It does not technically require canPreciseReserveRefill to enter immobile, but it is expected to know how to enter G-Mode before learning this.
Strats ()
From: 2
Middle Left Door
To: 2
Middle Left Door
Wait 75 seconds for a global Geemer. Requires: {
"enemyDamage": {
"enemy": "Geemer (blue)",
"type": "contact",
"hits": 1
}
}
"h_ZebesIsAwake" |
From: 3
Bottom Left Horizontal Door
To: 3
Bottom Left Horizontal Door
Wait 90 seconds for a global Geemer. Requires: {
"enemyDamage": {
"enemy": "Geemer (blue)",
"type": "contact",
"hits": 1
}
}
"h_ZebesIsAwake"
"canBePatient" |
|
Requires: {
"enemyDamage": {
"enemy": "Geemer (blue)",
"type": "contact",
"hits": 1
}
}
"h_ZebesIsAwake" |
|
It takes approximately 3.5 minutes for a global Geemer to reach this location. If using a Super, fire between 19 and 33 seconds after entering the room, then wait approximately 30 more seconds to be hit. Requires: {
"enemyDamage": {
"enemy": "Geemer (blue)",
"type": "contact",
"hits": 1
}
}
"h_ZebesIsAwake"
{
"or": [
"canBeVeryPatient",
{
"and": [
"canComplexGMode",
{
"ammo": {
"type": "Super",
"count": 1
}
}
]
}
]
}Dev note: FIXME: Should manipulating global enemies off screen be a tech? |
From: 6
Bottom Right Door (On the Left Shaft)
To: 6
Bottom Right Door (On the Left Shaft)
Wait 2 minutes for a global Geemer. Requires: {
"enemyDamage": {
"enemy": "Geemer (blue)",
"type": "contact",
"hits": 1
}
}
"h_ZebesIsAwake"
{
"or": [
"canBePatient",
{
"ammo": {
"type": "Super",
"count": 1
}
}
]
} |
From: 7
Bottom Left Vertical Door
To: 7
Bottom Left Vertical Door
Line up with the far right or left side of doorframe in the room below, to be able to not fall back through after entry, as the door remains open. Be careful not to fall into the door while being hit by the Geemer. Requires: {
"enemyDamage": {
"enemy": "Geemer (blue)",
"type": "contact",
"hits": 1
}
}
"h_ZebesIsAwake"
{
"or": [
"canBePatient",
{
"ammo": {
"type": "Super",
"count": 1
}
}
]
} |
|
The enemies do not spawn in this room unless Missiles and Morph are collected (even if Zebes is awake). Requires: {
"enemyDamage": {
"enemy": "Grey Space Pirate (wall)",
"type": "contact",
"hits": 1
}
}
"Missile"
"Morph" |
|
Requires: {
"enemyDamage": {
"enemy": "Waver",
"type": "contact",
"hits": 1
}
} |
|
Requires: {
"enemyDamage": {
"enemy": "Waver",
"type": "contact",
"hits": 1
}
} |
|
Requires: {
"enemyDamage": {
"enemy": "Sciser",
"type": "contact",
"hits": 1
}
} |
|
Requires: {
"enemyDamage": {
"enemy": "Kihunter (green)",
"type": "contact",
"hits": 1
}
} |
|
Requires: {
"enemyDamage": {
"enemy": "Kihunter (green)",
"type": "contact",
"hits": 1
}
} |
|
Shoot a Super at the wall, while the Sciser is directly above Samus. If Samus is on the right side of the door, it will require two Supers, one to knock it down to the platform above her, then another to drop it on her. Requires: {
"enemyDamage": {
"enemy": "Sciser",
"type": "contact",
"hits": 1
}
}
"h_ZebesIsAwake"
{
"ammo": {
"type": "Super",
"count": 2
}
}Dev note: This is just requiring 2 Supers, since the horizontal positioning of Samus is not modeled. |
|

Requires: {
"enemyDamage": {
"enemy": "Waver",
"type": "contact",
"hits": 1
}
} |
|
Requires: {
"enemyDamage": {
"enemy": "Waver",
"type": "contact",
"hits": 1
}
} |
From: 1
Bottom Left Door
To: 1
Bottom Left Door

Requires: {
"enemyDamage": {
"enemy": "Geemer (blue)",
"type": "contact",
"hits": 1
}
}
"h_ZebesIsAwake" |
|

Shoot a Super at the wall, while the Geemer is moving vertically. If it is on the bottom of the shot blocks, it will not fall. Requires: {
"enemyDamage": {
"enemy": "Geemer (blue)",
"type": "contact",
"hits": 1
}
}
"h_ZebesIsAwake"
{
"ammo": {
"type": "Super",
"count": 1
}
} |
|
Shoot a Super at the wall, while the Geemer is moving vertically. If it is on the bottom of the shot blocks, it will not fall. Requires: {
"enemyDamage": {
"enemy": "Geemer (blue)",
"type": "contact",
"hits": 1
}
}
"h_ZebesIsAwake"
{
"ammo": {
"type": "Super",
"count": 1
}
} |
|

Requires: {
"enemyDamage": {
"enemy": "Sidehopper",
"type": "contact",
"hits": 1
}
}
"h_ZebesIsAwake" |
|

Requires: {
"enemyDamage": {
"enemy": "Zeela",
"type": "contact",
"hits": 1
}
} |
|
Requires: {
"enemyDamage": {
"enemy": "Sm. Sidehopper",
"type": "contact",
"hits": 1
}
} |
From: 2
Above Power Bomb Blocks - Top Left Door
To: 2
Above Power Bomb Blocks - Top Left Door
It takes 80 seconds for the global Zeela to make it over here. A Super could speed this up, but it's likely to just get the Zeela stuck. Requires: "canBePatient"
{
"enemyDamage": {
"enemy": "Zeela",
"type": "contact",
"hits": 1
}
} |
From: 3
Above Power Bomb Blocks - Top Right Door
To: 3
Above Power Bomb Blocks - Top Right Door
Wait for the global Zeela. Requires: {
"enemyDamage": {
"enemy": "Zeela",
"type": "contact",
"hits": 1
}
} |
From: 4
Above Power Bomb Blocks - Middle Left Door
To: 4
Above Power Bomb Blocks - Middle Left Door
It takes 70 seconds for the global Zeela to make it over here. A Super could speed this up, but it's likely to just get the Zeela stuck. Requires: "canBePatient"
{
"enemyDamage": {
"enemy": "Zeela",
"type": "contact",
"hits": 1
}
} |
From: 5
Above Power Bomb Blocks - Bottom Left Door
To: 5
Above Power Bomb Blocks - Bottom Left Door
It takes 60 seconds for the global Zeela to make it over here. A Super could speed this up, but it's likely to just get the Zeela stuck. Requires: {
"enemyDamage": {
"enemy": "Zeela",
"type": "contact",
"hits": 1
}
} |
From: 6
Above Power Bomb Blocks - Bottom Right Door
To: 6
Above Power Bomb Blocks - Bottom Right Door
It takes 50 seconds for the global Zeela to make it over here. A Super could speed this up, but it's likely to just get the Zeela stuck. Requires: {
"enemyDamage": {
"enemy": "Zeela",
"type": "contact",
"hits": 1
}
} |
|
Requires: {
"enemyDamage": {
"enemy": "Sm. Sidehopper",
"type": "contact",
"hits": 1
}
} |
|

Wait for the slow global Zeelas. They take almost 4 minutes to get there. Requires: {
"enemyDamage": {
"enemy": "Zeela",
"type": "contact",
"hits": 1
}
}
"canBeVeryPatient" |
|
Wait for the slow global Zeelas. They take almost 2 minutes to get there. Requires: {
"enemyDamage": {
"enemy": "Zeela",
"type": "contact",
"hits": 1
}
}
"canBePatient" |
|

Requires: {
"enemyDamage": {
"enemy": "Kihunter (green)",
"type": "contact",
"hits": 1
}
} |
From: 2
Top Right Door
To: 2
Top Right Door
Requires: {
"enemyDamage": {
"enemy": "Kihunter (green)",
"type": "contact",
"hits": 1
}
} |
|
Requires: {
"enemyDamage": {
"enemy": "Spore Spawn",
"type": "contact",
"hits": 1
}
}
{
"not": "f_DefeatedSporeSpawn"
}
"canRiskPermanentLossOfAccess"Dev note: This would only be useful to leave in g-mode. |
|
Requires: {
"enemyDamage": {
"enemy": "Zeela",
"type": "contact",
"hits": 1
}
} |
From: 1
Top Right Door
To: 1
Top Right Door
Requires: {
"enemyDamage": {
"enemy": "Sidehopper",
"type": "contact",
"hits": 1
}
} |
|
Requires: {
"enemyDamage": {
"enemy": "Sidehopper",
"type": "contact",
"hits": 1
}
} |
|

Requires: {
"enemyDamage": {
"enemy": "Sidehopper",
"type": "contact",
"hits": 1
}
} |
|

Shoot a Super towards the door while the Zeela is on the side of its platform to knock it off. Requires: {
"ammo": {
"type": "Super",
"count": 1
}
}
{
"enemyDamage": {
"enemy": "Zeela",
"type": "contact",
"hits": 1
}
} |
|
Wait 30 seconds for a Waver to come and hit Samus. It is the second Waver that will hit her. Requires: {
"enemyDamage": {
"enemy": "Waver",
"type": "contact",
"hits": 1
}
} |
|
Wait 40 seconds for a Waver to come and hit Samus. Requires: {
"enemyDamage": {
"enemy": "Waver",
"type": "contact",
"hits": 1
}
} |
From: 1
Left Vertical Door
To: 1
Left Vertical Door
Requires: {
"enemyDamage": {
"enemy": "Kihunter (green)",
"type": "contact",
"hits": 1
}
}Dev note: It looks like the only way to remain in the room is by starting on the right side and triggering a turnaround, with or without artificial morph. |
|

Requires: {
"enemyDamage": {
"enemy": "Zeela",
"type": "contact",
"hits": 1
}
} |
From: 2
Bottom Left Door
To: 2
Bottom Left Door
Requires: {
"enemyDamage": {
"enemy": "Zeela",
"type": "contact",
"hits": 1
}
} |
From: 1
Left Side - Top Door
To: 1
Left Side - Top Door
Wait 20 seconds for a Waver to come and hit Samus. Requires: {
"enemyDamage": {
"enemy": "Waver",
"type": "contact",
"hits": 1
}
} |
From: 2
Left Side - Top Middle Door
To: 2
Left Side - Top Middle Door

Requires: {
"enemyDamage": {
"enemy": "Waver",
"type": "contact",
"hits": 1
}
} |
From: 3
Left Side - Bottom Middle Door
To: 3
Left Side - Bottom Middle Door

It takes nearly 6 minutes for a Waver to come and hit Samus. Requires: {
"enemyDamage": {
"enemy": "Waver",
"type": "contact",
"hits": 1
}
}
"canBeExtremelyPatient" |
|
Wait 50 seconds for a Waver to come and hit Samus. Requires: {
"enemyDamage": {
"enemy": "Waver",
"type": "contact",
"hits": 1
}
} |
|
Wait 40 seconds for a Waver to come and hit Samus. Requires: {
"enemyDamage": {
"enemy": "Waver",
"type": "contact",
"hits": 1
}
} |
|

Requires: {
"enemyDamage": {
"enemy": "Sova",
"type": "contact",
"hits": 1
}
} |
|
It takes about 20 seconds for the Sova to reach the door. Requires: {
"enemyDamage": {
"enemy": "Sova",
"type": "contact",
"hits": 1
}
} |
|
Use a Super to knock off the Viola to regain mobility. The Viola on the top right of the screen is the only one that can hit Samus here. Requires: {
"ammo": {
"type": "Super",
"count": 1
}
}
{
"enemyDamage": {
"enemy": "Viola",
"type": "contact",
"hits": 1
}
} |
|


Use a Super to knock off the Sova to regain mobility. Requires: {
"ammo": {
"type": "Super",
"count": 1
}
}
{
"enemyDamage": {
"enemy": "Sova",
"type": "contact",
"hits": 1
}
} |
|
Use a Super to knock off the Geemer when it is directly above Samus to regain mobility. Requires: {
"ammo": {
"type": "Super",
"count": 1
}
}
{
"enemyDamage": {
"enemy": "Geemer (grey)",
"type": "contact",
"hits": 1
}
}Dev note: FIXME: There is likely a downward G-Mode setup using a Geemer. |
From: 1
Left Shaft - Top Left Door
To: 1
Left Shaft - Top Left Door
Requires: {
"enemyDamage": {
"enemy": "Multiviola",
"type": "contact",
"hits": 1
}
} |
From: 2
Left Shaft - Bottom Right Door
To: 2
Left Shaft - Bottom Right Door

Requires: {
"enemyDamage": {
"enemy": "Multiviola",
"type": "contact",
"hits": 1
}
} |
|
Use a Super to knock off the Sova to regain mobility. Requires: {
"ammo": {
"type": "Super",
"count": 1
}
}
{
"enemyDamage": {
"enemy": "Sova",
"type": "contact",
"hits": 1
}
} |
|
Use a Super to knock off the Sova to regain mobility. Requires: {
"ammo": {
"type": "Super",
"count": 1
}
}
{
"enemyDamage": {
"enemy": "Sova",
"type": "contact",
"hits": 1
}
} |
|
Use a Super to knock off the Sova to regain mobility. Requires: {
"ammo": {
"type": "Super",
"count": 1
}
}
{
"enemyDamage": {
"enemy": "Sova",
"type": "contact",
"hits": 1
}
} |
|


Use a Super to knock off the Sova to regain mobility. Requires: {
"ammo": {
"type": "Super",
"count": 1
}
}
{
"enemyDamage": {
"enemy": "Sova",
"type": "contact",
"hits": 1
}
} |
|


It takes the Sova about 25 seconds to hit Samus. Requires: {
"enemyDamage": {
"enemy": "Sova",
"type": "contact",
"hits": 1
}
} |
|
Requires: {
"enemyDamage": {
"enemy": "Sm. Dessgeega",
"type": "contact",
"hits": 1
}
} |
|
It takes about 1.5 minutes for the Sova to get to this door and hit Samus. Requires: "canBePatient"
{
"enemyDamage": {
"enemy": "Sova",
"type": "contact",
"hits": 1
}
} |
From: 2
Middle Right Door
To: 2
Middle Right Door
It takes about 2.5 minutes for the Sova to get to this door and hit Samus. Alternatively, use a Super as the third Sova has started going off screen to speed it up to 40 seconds. Requires: {
"or": [
{
"ammo": {
"type": "Super",
"count": 1
}
},
"canBePatient"
]
}
{
"enemyDamage": {
"enemy": "Sova",
"type": "contact",
"hits": 1
}
} |
From: 3
Bottom Right Door
To: 3
Bottom Right Door
It takes about 20 seconds for the Sova to get to this door and hit Samus. Requires: {
"enemyDamage": {
"enemy": "Sova",
"type": "contact",
"hits": 1
}
} |
|
Use a Super to knock off the Viola to regain mobility. Requires: {
"ammo": {
"type": "Super",
"count": 1
}
}
{
"enemyDamage": {
"enemy": "Viola",
"type": "contact",
"hits": 1
}
} |
|
Requires: {
"enemyDamage": {
"enemy": "Ripper 2 (red)",
"type": "contact",
"hits": 1
}
} |
|
Requires: {
"not": "f_DefeatedGoldenTorizo"
}
"canRiskPermanentLossOfAccess"
{
"enemyDamage": {
"enemy": "Golden Torizo",
"type": "contact",
"hits": 1
}
} |
|
Requires: {
"enemyDamage": {
"enemy": "Yellow Space Pirate (wall)",
"type": "contact",
"hits": 1
}
} |
From: 2
Bottom Left Door
To: 2
Bottom Left Door
Requires: {
"enemyDamage": {
"enemy": "Viola",
"type": "contact",
"hits": 1
}
} |
From: 3
Bottom Right Door
To: 3
Bottom Right Door
Requires: {
"enemyDamage": {
"enemy": "Viola",
"type": "contact",
"hits": 1
}
} |
|
Use a Super to knock off the Viola to regain mobility. Requires: {
"ammo": {
"type": "Super",
"count": 1
}
}
{
"enemyDamage": {
"enemy": "Viola",
"type": "contact",
"hits": 1
}
} |
|
If Samus has less than 73 Energy, she will still have i-frames when the Multiviola hits and she will need to wait until the Dessgeega comes. If needed, hold forward when getting hit, to prevent getting knocked out of the room. Requires: {
"or": [
{
"and": [
{
"resourceAvailable": [
{
"type": "RegularEnergy",
"count": 75
}
]
},
{
"enemyDamage": {
"enemy": "Multiviola",
"type": "contact",
"hits": 1
}
}
]
},
{
"and": [
"canTrickyGMode",
{
"resourceAvailable": [
{
"type": "RegularEnergy",
"count": 73
}
]
},
{
"enemyDamage": {
"enemy": "Multiviola",
"type": "contact",
"hits": 1
}
}
]
},
{
"enemyDamage": {
"enemy": "Dessgeega",
"type": "contact",
"hits": 1
}
}
]
}Dev note: This is rounded up to 75 Energy, because gaining artificial morph at 73 Energy would be frame-perfect, because Samus gets hit on the last possible frame. FIXME: This should require canTrickyGMode if high Energy, artificial morphing, and needing to remain in-room, because it's easy to touch the transition, as this is not currently representable, this should be considered when adding in-room G-mode strats where it might apply. |
|
Requires: {
"enemyDamage": {
"enemy": "Holtz",
"type": "contact",
"hits": 1
}
} |
From: 3
Middle Right Door
To: 3
Middle Right Door
Requires: {
"enemyDamage": {
"enemy": "Kihunter (red)",
"type": "contact",
"hits": 1
}
} |
|
Requires: {
"not": "f_DefeatedRidley"
}
"canRiskPermanentLossOfAccess"
{
"enemyDamage": {
"enemy": "Ridley",
"type": "contact",
"hits": 1
}
} |
|

Requires: {
"not": "f_DefeatedRidley"
}
"canRiskPermanentLossOfAccess"
{
"enemyDamage": {
"enemy": "Ridley",
"type": "contact",
"hits": 1
}
}Dev note: FIXME: Ridley could also be used to set up G-mode, but the chaos of the fight makes this difficult. |
|
Requires: {
"or": [
{
"enemyDamage": {
"enemy": "Covern",
"type": "contact",
"hits": 1
}
},
{
"and": [
{
"enemyDamage": {
"enemy": "Atomic",
"type": "contact",
"hits": 1
}
},
"f_DefeatedPhantoon"
]
}
]
}Dev note: The Covern will do more damage than the Atomic, so there is no canRiskPermanentLossOfAccess. |
|
Use a Covern or Kihunter. A flying Kihunter takes about 25 seconds to get to the door. Requires: {
"or": [
{
"enemyDamage": {
"enemy": "Kihunter (yellow)",
"type": "contact",
"hits": 1
}
},
{
"and": [
{
"enemyDamage": {
"enemy": "Covern",
"type": "contact",
"hits": 1
}
},
{
"not": "f_DefeatedPhantoon"
},
"canRiskPermanentLossOfAccess"
]
}
]
}Dev note: The Kihunter will do more damage than the Covern, so whether Phantoon is dead or not, that strat will be accurate or conservative. |
|
Use a Covern or Kihunter. A flying Kihunter will collide with Samus eventually, which could take up to 30 seconds, based on her positioning. Requires: {
"or": [
{
"enemyDamage": {
"enemy": "Kihunter (yellow)",
"type": "contact",
"hits": 1
}
},
{
"and": [
{
"enemyDamage": {
"enemy": "Covern",
"type": "contact",
"hits": 1
}
},
{
"not": "f_DefeatedPhantoon"
},
"canRiskPermanentLossOfAccess"
]
}
]
}Dev note: The Kihunter will do more damage than the Covern, so whether Phantoon is dead or not, that strat will be accurate or conservative. |
|
Requires: {
"enemyDamage": {
"enemy": "Atomic",
"type": "contact",
"hits": 1
}
}
"f_DefeatedPhantoon" |
|
Requires: {
"enemyDamage": {
"enemy": "Atomic",
"type": "contact",
"hits": 1
}
}
"f_DefeatedPhantoon" |
|
Only works when Phantoon opens his eye while on the far left side. Requires: {
"enemyDamage": {
"enemy": "Phantoon",
"type": "contact",
"hits": 1
}
}
{
"not": "f_DefeatedPhantoon"
}
"canRiskPermanentLossOfAccess"Dev note: This would only be useful to leave in g-mode. |
|


Requires: {
"enemyDamage": {
"enemy": "Bull",
"type": "contact",
"hits": 1
}
}
"f_DefeatedPhantoon" |
|


Requires: {
"enemyDamage": {
"enemy": "Bull",
"type": "contact",
"hits": 1
}
}
"f_DefeatedPhantoon" |
|
Requires: {
"or": [
{
"enemyDamage": {
"enemy": "Covern",
"type": "contact",
"hits": 1
}
},
{
"and": [
{
"enemyDamage": {
"enemy": "Bull",
"type": "contact",
"hits": 1
}
},
"f_DefeatedPhantoon"
]
}
]
}Dev note: The Covern will do more damage than the Bull, so there is no canRiskPermanentLossOfAccess. |
|
Requires: {
"enemyDamage": {
"enemy": "Covern",
"type": "contact",
"hits": 1
}
}
{
"not": "f_DefeatedPhantoon"
}
"canRiskPermanentLossOfAccess" |
|
Requires: {
"enemyDamage": {
"enemy": "Covern",
"type": "contact",
"hits": 1
}
}
{
"not": "f_DefeatedPhantoon"
}
"canRiskPermanentLossOfAccess" |
From: 3
Bottom Left Door
To: 3
Bottom Left Door
Requires: {
"enemyDamage": {
"enemy": "Covern",
"type": "contact",
"hits": 1
}
}
{
"not": "f_DefeatedPhantoon"
}
"canRiskPermanentLossOfAccess" |
From: 4
Top Right Door
To: 4
Top Right Door
Requires: {
"enemyDamage": {
"enemy": "Covern",
"type": "contact",
"hits": 1
}
}
{
"not": "f_DefeatedPhantoon"
}
"canRiskPermanentLossOfAccess" |
From: 5
Middle Right Door
To: 5
Middle Right Door
Requires: {
"enemyDamage": {
"enemy": "Covern",
"type": "contact",
"hits": 1
}
}
{
"not": "f_DefeatedPhantoon"
}
"canRiskPermanentLossOfAccess" |
From: 6
Bottom Right Door
To: 6
Bottom Right Door
Requires: {
"enemyDamage": {
"enemy": "Covern",
"type": "contact",
"hits": 1
}
}
{
"not": "f_DefeatedPhantoon"
}
"canRiskPermanentLossOfAccess" |
|
Line up with the far right or left side of doorframe in the room below, to be able to not fall back through after entry, as the door remains open. Be careful not to fall into the door while being hit by the Covern. Requires: {
"enemyDamage": {
"enemy": "Covern",
"type": "contact",
"hits": 1
}
}
{
"not": "f_DefeatedPhantoon"
}
"canRiskPermanentLossOfAccess" |
|
Requires: {
"enemyDamage": {
"enemy": "Covern",
"type": "contact",
"hits": 1
}
}
{
"not": "f_DefeatedPhantoon"
}
"canRiskPermanentLossOfAccess" |
|
Requires: {
"enemyDamage": {
"enemy": "Covern",
"type": "contact",
"hits": 1
}
}
{
"not": "f_DefeatedPhantoon"
}
"canRiskPermanentLossOfAccess" |
|

Requires: {
"enemyDamage": {
"enemy": "Sciser",
"type": "contact",
"hits": 1
}
} |
|

Requires: {
"enemyDamage": {
"enemy": "Sciser",
"type": "contact",
"hits": 1
}
} |
|
Requires: {
"enemyDamage": {
"enemy": "Sciser",
"type": "contact",
"hits": 1
}
} |
|

Requires: {
"enemyDamage": {
"enemy": "Sciser",
"type": "contact",
"hits": 1
}
} |
|
Requires: {
"enemyDamage": {
"enemy": "Sciser",
"type": "contact",
"hits": 1
}
} |
|
Requires: {
"enemyDamage": {
"enemy": "Sciser",
"type": "contact",
"hits": 1
}
} |
|
Requires: {
"enemyDamage": {
"enemy": "Skultera",
"type": "contact",
"hits": 1
}
} |
|
Start on the far right or left side to get hit by the crab. If on the right side, carefully land on the right edge; if in artificial morph, use Spring Ball or quickly bomb to kill or boost over the crab to avoid a second hit. Requires: {
"enemyDamage": {
"enemy": "Sciser",
"type": "contact",
"hits": 1
}
}Dev note: Using artificial morph in-room will already require some sort of movement, so it is not included here to avoid a second hit. |
|
Requires: {
"enemyDamage": {
"enemy": "Sciser",
"type": "contact",
"hits": 1
}
} |
|
The global crab takes 37 seconds to get to Samus. Requires: {
"enemyDamage": {
"enemy": "Sciser",
"type": "contact",
"hits": 1
}
} |
|

Requires: {
"enemyDamage": {
"enemy": "Sciser",
"type": "contact",
"hits": 1
}
} |
From: 6
Left Morph Passage Doorway
To: 6
Left Morph Passage Doorway

Requires: {
"or": [
"Morph",
"canOffScreenMovement"
]
}
{
  "enemyDamage": {
    "enemy": "Sciser",
    "type": "contact",
    "hits": 1
  }
}Dev note: The tunnel does not need to be expanded for Samus to get into the morph tunnel without getting stuck, regardless of if she has Morph or is artificial morphing. Timing the artificial morph turnaround without being able to see Samus or the crab requires canOffScreenMovement. FIXME: This should not be needed if the tunnel is expanded and Samus is leaving without being morphed, but there currently isnt a way to represent that. |
|

In order to not fall back into the room below, enter on the far left and face and hold left while getting hit, or enter on the far right side while facing left and turn around and hold right white getting hit. Requires: {
"enemyDamage": {
"enemy": "Skultera",
"type": "contact",
"hits": 1
}
} |
|
Requires: {
"enemyDamage": {
"enemy": "Yard",
"type": "contact",
"hits": 1
}
} |
|

Requires: {
"enemyDamage": {
"enemy": "Yard",
"type": "contact",
"hits": 1
}
} |
|
Requires: {
"enemyDamage": {
"enemy": "Yard",
"type": "contact",
"hits": 1
}
}Dev note: Requires entry on either side of the doorway, but not the center. |
From: 1
Top Left Sand Entrance
To: 1
Top Left Sand Entrance


Requires: {
"enemyDamage": {
"enemy": "Bull",
"type": "contact",
"hits": 1
}
} |
From: 3
Top Right Sand Entrance
To: 3
Top Right Sand Entrance


Requires: {
"enemyDamage": {
"enemy": "Bull",
"type": "contact",
"hits": 1
}
} |
|
Requires: {
"ammo": {
"type": "Super",
"count": 1
}
}
{
  "enemyDamage": {
    "enemy": "Sciser",
    "type": "contact",
    "hits": 1
  }
} |
|
Requires: {
"enemyDamage": {
"enemy": "Sciser",
"type": "contact",
"hits": 1
}
} |
|
Requires: {
"ammo": {
"type": "Super",
"count": 1
}
}
{
  "enemyDamage": {
    "enemy": "Sciser",
    "type": "contact",
    "hits": 1
  }
}Dev note: Requires entering on either side of the doorway, but not in the center. |
|
Requires: {
"not": "f_DefeatedDraygon"
}
"canRiskPermanentLossOfAccess"
{
"enemyDamage": {
"enemy": "Draygon",
"type": "contact",
"hits": 1
}
} |
From: 1
Top Sand Entrance
To: 1
Top Sand Entrance


Requires: {
"enemyDamage": {
"enemy": "Bull",
"type": "contact",
"hits": 1
}
} |
From: 1
Top Sand Entrance
To: 1
Top Sand Entrance


Requires: {
"enemyDamage": {
"enemy": "Bull",
"type": "contact",
"hits": 1
}
} |
|
Requires: {
"enemyDamage": {
"enemy": "Zoa",
"type": "contact",
"hits": 1
}
} |
|
Requires: {
"enemyDamage": {
"enemy": "Zoa",
"type": "contact",
"hits": 1
}
} |
|
Requires: {
"enemyDamage": {
"enemy": "Puyo",
"type": "contact",
"hits": 1
}
} |
From: 1
Top Sand Entrance
To: 1
Top Sand Entrance
Requires: {
"enemyDamage": {
"enemy": "Bull",
"type": "contact",
"hits": 1
}
} |
|
It takes between 1-2 minutes for the Puyos to wake up and get to the doorway. Requires: "canBePatient"
{
  "enemyDamage": {
    "enemy": "Puyo",
    "type": "contact",
    "hits": 1
  }
} |
|
It takes approximately 3 minutes for the Puyos to wake up and get to the doorway. Requires: "canBeVeryPatient"
{
  "enemyDamage": {
    "enemy": "Puyo",
    "type": "contact",
    "hits": 1
  }
} |
|
Requires: {
"enemyDamage": {
"enemy": "Puyo",
"type": "contact",
"hits": 1
}
} |
|


Requires: {
"enemyDamage": {
"enemy": "Zoa",
"type": "contact",
"hits": 1
}
} |
|

Requires: {
"enemyDamage": {
"enemy": "Zoa",
"type": "contact",
"hits": 1
}
} |
|
Requires: {
"enemyDamage": {
"enemy": "Puyo",
"type": "contact",
"hits": 1
}
}Dev note: This can only be useful if the door does not connect to the Pants Room. |
|
Requires: {
"enemyDamage": {
"enemy": "Puyo",
"type": "contact",
"hits": 1
}
} |
|
Requires: {
"enemyDamage": {
"enemy": "Sciser",
"type": "contact",
"hits": 1
}
} |
|
Requires: {
"enemyDamage": {
"enemy": "Sciser",
"type": "contact",
"hits": 1
}
} |
|
Requires: {
"enemyDamage": {
"enemy": "Puyo",
"type": "contact",
"hits": 1
}
}Dev note: This is not possible in vanilla, because there is no way to enter through this door. FIXME: There is a strat from here to 5 with IBJ (Spring Ball + HiJump or ceiling bomb jump). |
|
This takes 1 min 40 sec if Shaktool is done digging. Requires: {
"enemyDamage": {
"enemy": "Shaktool",
"type": "contact",
"hits": 1
}
}
{
"or": [
"canBePatient",
{
"and": [
"canRiskPermanentLossOfAccess",
{
"not": "f_ShaktoolDoneDigging"
}
]
}
]
} |
|
Wait for Shaktool. If Shaktool's camera is fixed it is possible without Shaktool, by using a Snail (Yard): a Super or any SBA can trigger a Yard to attack. Requires: {
"enemyDamage": {
"enemy": "Shaktool",
"type": "contact",
"hits": 1
}
}
{
"or": [
"f_ShaktoolDoneDigging",
{
"obstaclesCleared": [
"f_ShaktoolDoneDigging"
]
}
]
} |
From: 2
Right Door
To: 2
Right Door
If Shaktool's camera is fixed it is possible to regain mobility by using a Snail (Yard): a Super or any SBA can trigger a Yard to attack. Requires: {
"enemyDamage": {
"enemy": "Yard",
"type": "contact",
"hits": 1
}
}
"h_ShaktoolCameraFix"
{
"or": [
{
"ammo": {
"type": "Super",
"count": 1
}
},
{
"and": [
"canTrickyGMode",
"canSpecialBeamAttack",
{
"ammo": {
"type": "PowerBomb",
"count": 1
}
}
]
}
]
} |
|

Requires: {
"enemyDamage": {
"enemy": "Rinka",
"type": "contact",
"hits": 1
}
} |
|
Requires: {
"enemyDamage": {
"enemy": "Rinka",
"type": "contact",
"hits": 1
}
} |
|

If alive, the Metroids do 90 damage before the Rinka hits. Requires: {
"enemyDamage": {
"enemy": "Rinka",
"type": "contact",
"hits": 1
}
}
{
"or": [
{
"or": [
"f_KilledMetroidRoom2",
{
"obstaclesCleared": [
"f_KilledMetroidRoom2"
]
}
]
},
{
"metroidFrames": 120
}
]
} |
|

Requires: {
"enemyDamage": {
"enemy": "Rinka",
"type": "contact",
"hits": 1
}
} |
|
Requires: {
"enemyDamage": {
"enemy": "Rinka",
"type": "contact",
"hits": 1
}
} |
|

Requires: {
"enemyDamage": {
"enemy": "Rinka",
"type": "contact",
"hits": 1
}
} |
|
If alive, the Metroids do up to 78 damage before the Rinka hits. Entering through the middle of the door will require less damage. Requires: {
"enemyDamage": {
"enemy": "Rinka",
"type": "contact",
"hits": 1
}
}
{
"or": [
{
"or": [
"f_KilledMetroidRoom4",
{
"obstaclesCleared": [
"f_KilledMetroidRoom4"
]
}
]
},
{
"metroidFrames": 104
}
]
} |
|

Requires: {
"enemyDamage": {
"enemy": "Rinka",
"type": "contact",
"hits": 1
}
} |
|

Requires: {
"enemyDamage": {
"enemy": "Rinka",
"type": "contact",
"hits": 1
}
} |
|
Requires: {
"enemyDamage": {
"enemy": "Rinka",
"type": "contact",
"hits": 1
}
} |
|
Requires: {
"enemyDamage": {
"enemy": "Rinka",
"type": "contact",
"hits": 1
}
} |
|
Requires: {
"enemyDamage": {
"enemy": "Tourian Space Pirate (all)",
"type": "contact",
"hits": 1
}
} |
|
Requires: {
"enemyDamage": {
"enemy": "Tourian Space Pirate (all)",
"type": "contact",
"hits": 1
}
} |
|
Requires: {
"enemyDamage": {
"enemy": "Blue Sidehopper",
"type": "contact",
"hits": 1
}
} |
|
Requires: {
"enemyDamage": {
"enemy": "Blue Sidehopper",
"type": "contact",
"hits": 1
}
} |