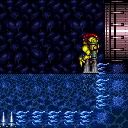
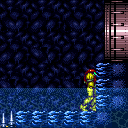
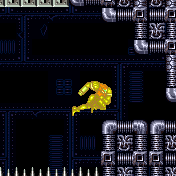
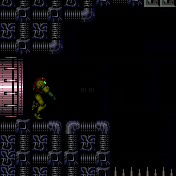
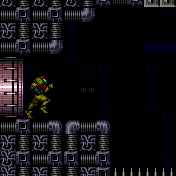
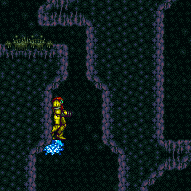
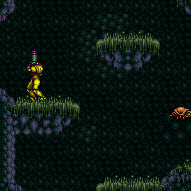
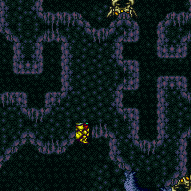
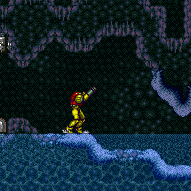
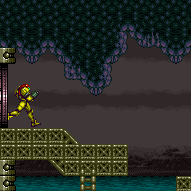
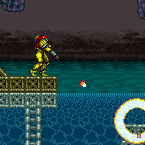
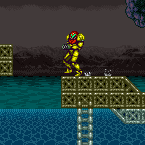
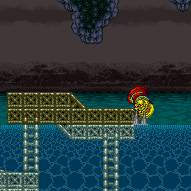
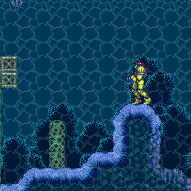
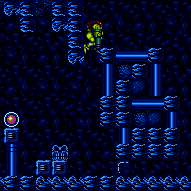
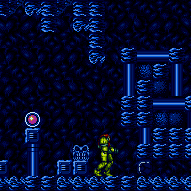
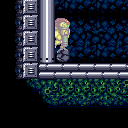
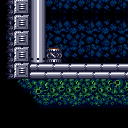
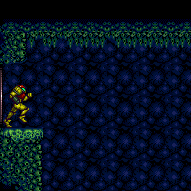
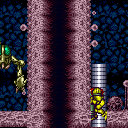
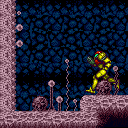
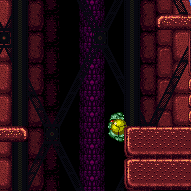
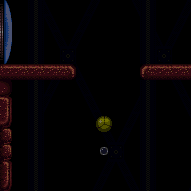
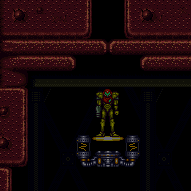
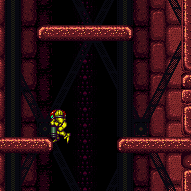
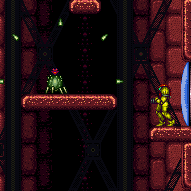
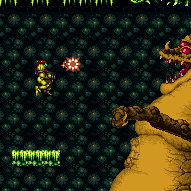
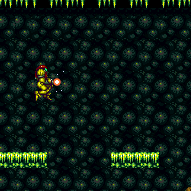
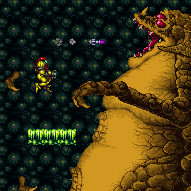
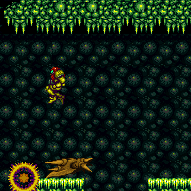
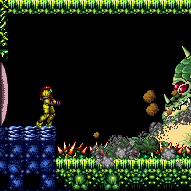
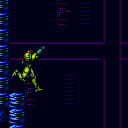
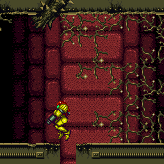
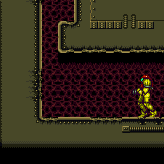
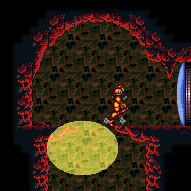
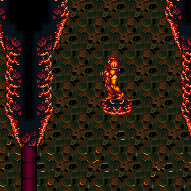
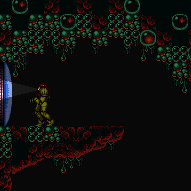
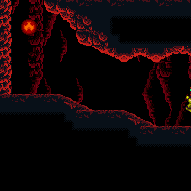
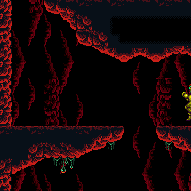
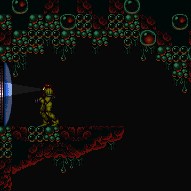
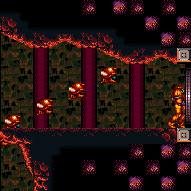
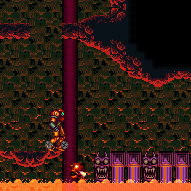
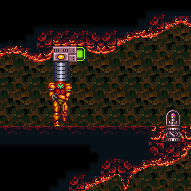
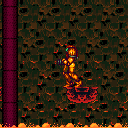
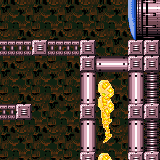
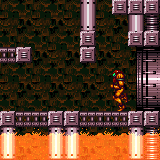
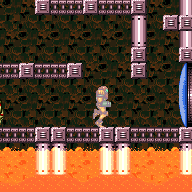
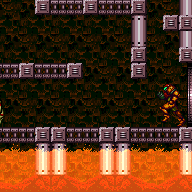
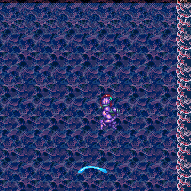
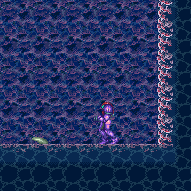
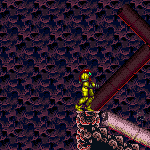
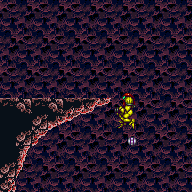
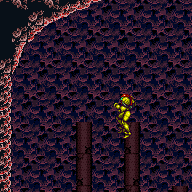
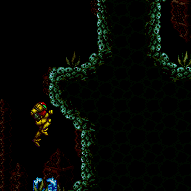
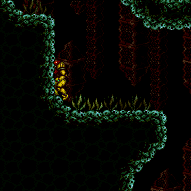
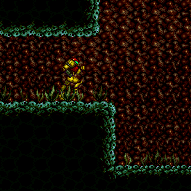
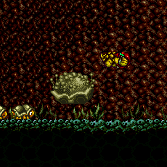
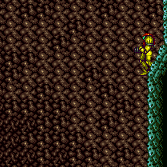
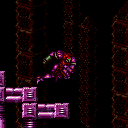
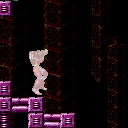
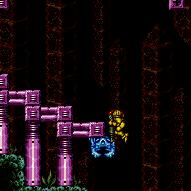
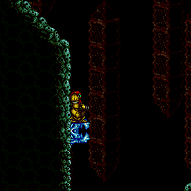
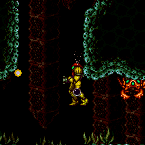
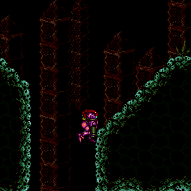
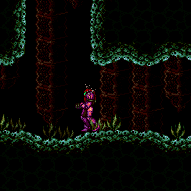
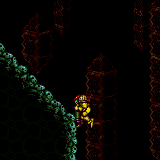
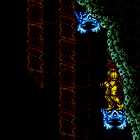
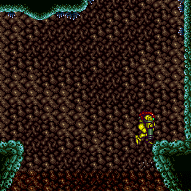
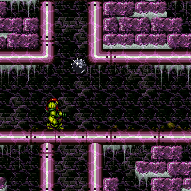
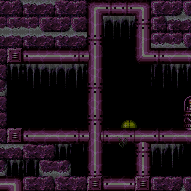
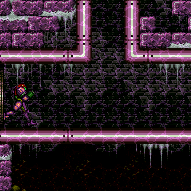
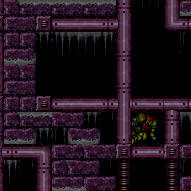
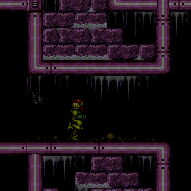
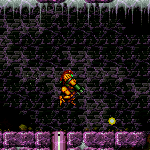
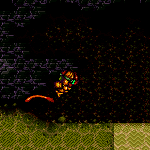
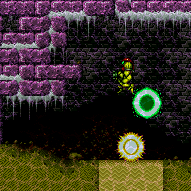
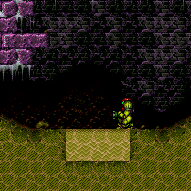
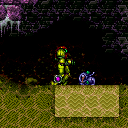
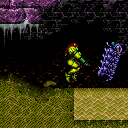
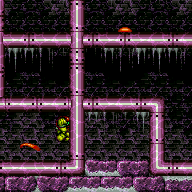
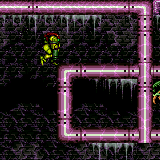
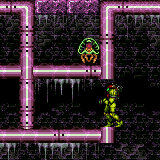
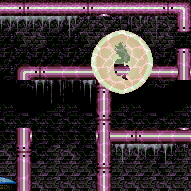
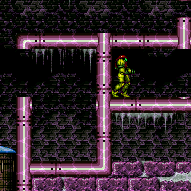
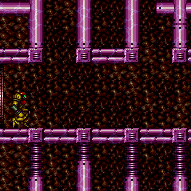
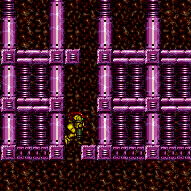
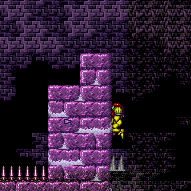
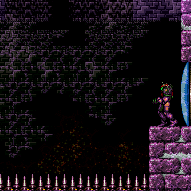
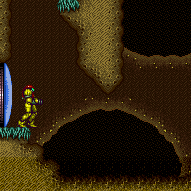
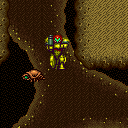
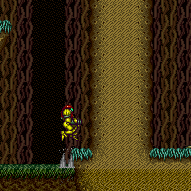
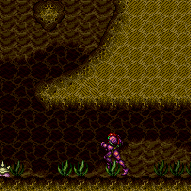
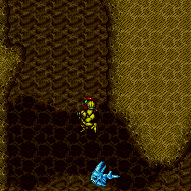
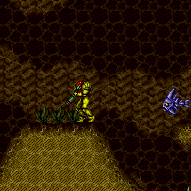
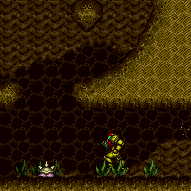
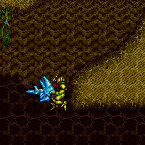
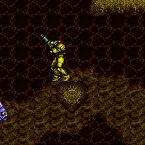
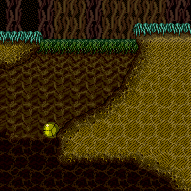
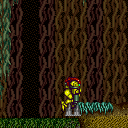
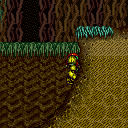
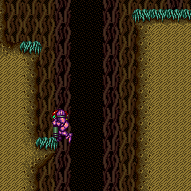
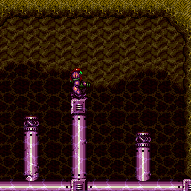
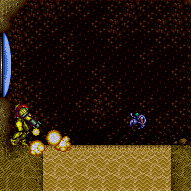
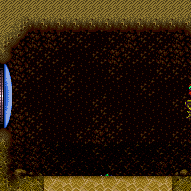
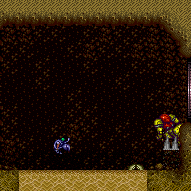
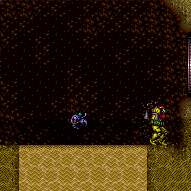
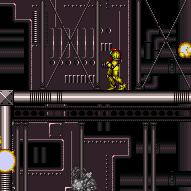
canDownGrab (Medium)
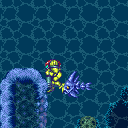
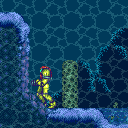
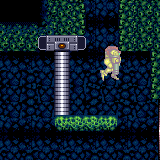
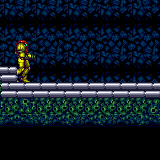
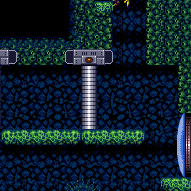
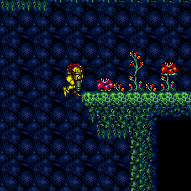
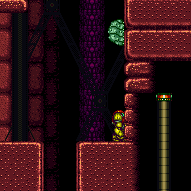
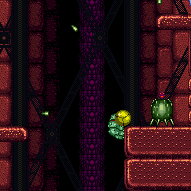
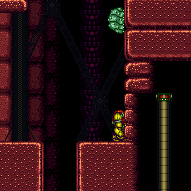
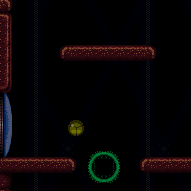
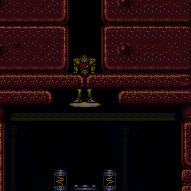
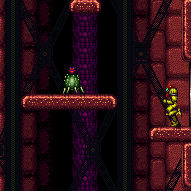
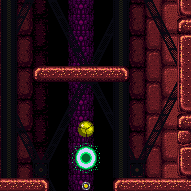
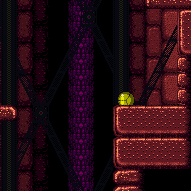
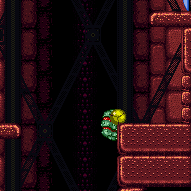
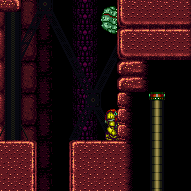
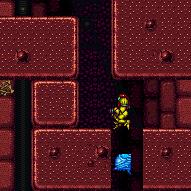
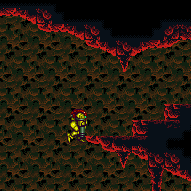
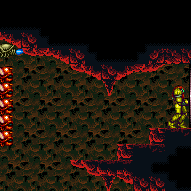
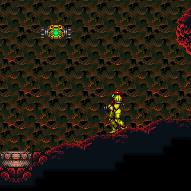
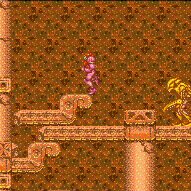
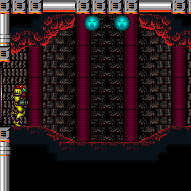
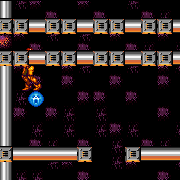
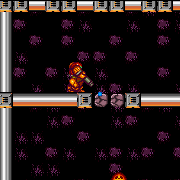
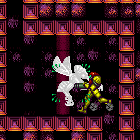
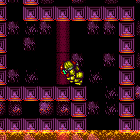
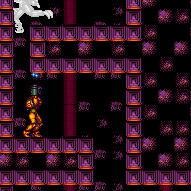
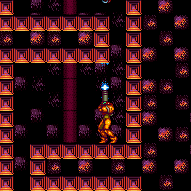
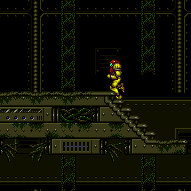
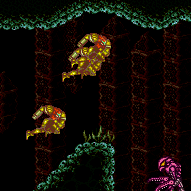
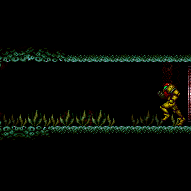
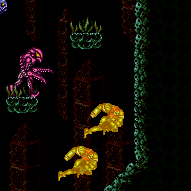
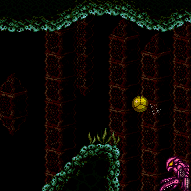
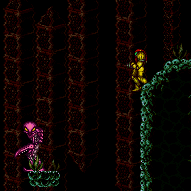
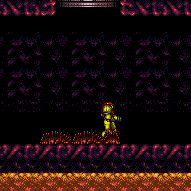
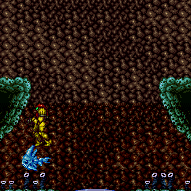
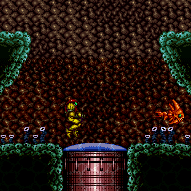
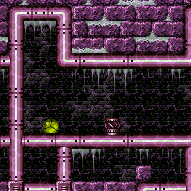
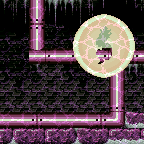
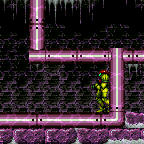
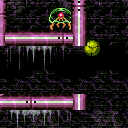
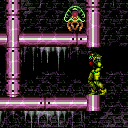
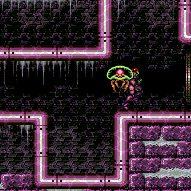
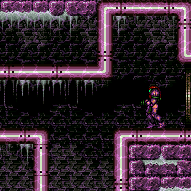
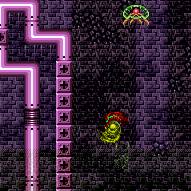
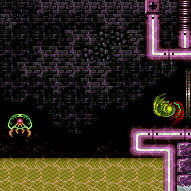
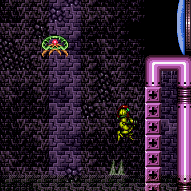
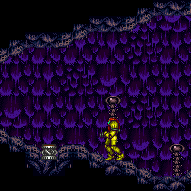
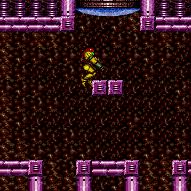
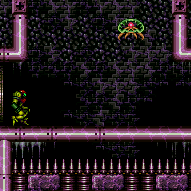
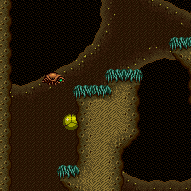
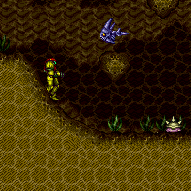
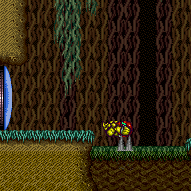
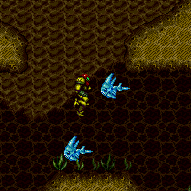
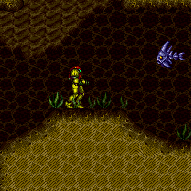
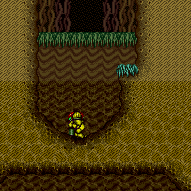
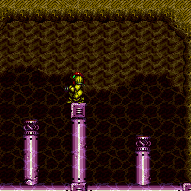
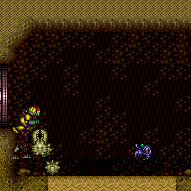
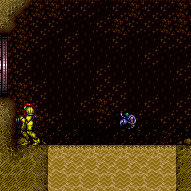
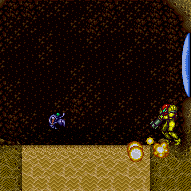
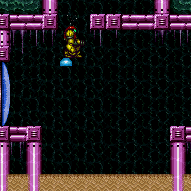
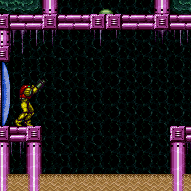
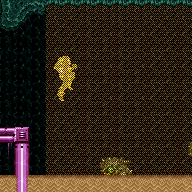
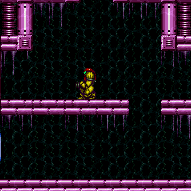
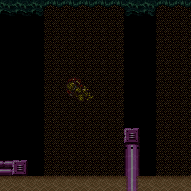
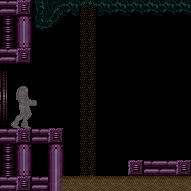
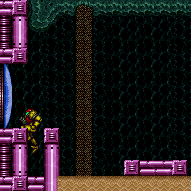
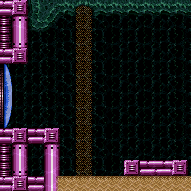
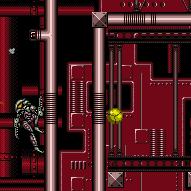
The ability to aim down to reduce Samus' hitbox to reach higher ledges. Commonly paired with a Crouch Jump.
Strats ()
From: 1
Top Left Door
To: 4
Top Junction (Right of Spikes)
Entrance condition: {
"comeInShinecharged": {}
}Requires: {
"shineChargeFrames": 80
}
"canShinechargeMovementTricky"
"canDownGrab"
{
"shinespark": {
"frames": 38,
"excessFrames": 0
}
} |
From: 1
Top Left Door
To: 4
Top Junction (Right of Spikes)
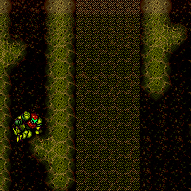
After gaining a shinecharge, run back to the door, then run right, jump, and spark mid-air at a specific height to be able to down-grab onto the ledge. Entrance condition: {
"comeInShinecharging": {
"length": 5,
"openEnd": 0
}
}Requires: "canShinechargeMovementTricky"
"canDownGrab"
{
"shinespark": {
"frames": 35,
"excessFrames": 0
}
} |
From: 5
Alcatraz Door
To: 8
Central Junction
Wait 3 minutes for a global Geemer to waddle over, or shoot a Super 20 to 30 seconds after entering the room to knock it off the ceiling and save a lot of time. Freeze the Geemer as it turns onto the middle slope of the left wall to escape - it helps to freeze the Geemer from below. Alternatively, use a Super to knock it off the wall and freeze it mid-air. Requires: "h_ZebesIsAwake"
"canMidAirMorph"
"canTrickyUseFrozenEnemies"
{
"or": [
"canBeVeryPatient",
{
"ammo": {
"type": "Super",
"count": 1
}
}
]
}
{
"or": [
{
"and": [
"canTrickyDodgeEnemies",
{
"or": [
"canDash",
"h_crouchJumpDownGrab",
"canInsaneJump"
]
}
]
},
{
"and": [
"HiJump",
"canTrickyJump",
{
"ammo": {
"type": "Super",
"count": 1
}
}
]
}
]
} |
|
Requires: {
"or": [
"canCarefulJump",
"canUseFrozenEnemies",
"SpaceJump",
{
"and": [
"Gravity",
{
"or": [
"HiJump",
"canWallJump",
"h_crouchJumpDownGrab",
"canIBJ",
"canSpringBallJumpMidAir"
]
}
]
}
]
} |
|
Enter the room while building a shinespark and use it on the lowest part of the ramp to cross the room and reach a raised ledge on the right side wall. From there, use SpaceJump to escape the water. Carry the shinespark to the bottom of the ramp by delaying the first Choot with two Power Beam shots, killing it, or bounceballing through it. The Choot can be shot diagonally from the middle platform, and again by running off that platform and aiming down to float above it. Entrance condition: {
"comeInShinecharging": {
"length": 6,
"openEnd": 1,
"steepDownTiles": 1
}
}Requires: "canShinechargeMovementComplex"
"canCarefulJump"
{
"or": [
{
"and": [
"canShinechargeMovementTricky",
"canTrickyDodgeEnemies"
]
},
{
"and": [
{
"enemyDamage": {
"enemy": "Choot",
"type": "contact",
"hits": 1
}
},
"canNeutralDamageBoost",
"canBounceBall"
]
},
{
"and": [
"canMockball",
{
"or": [
"canPseudoScrew",
"ScrewAttack",
"Plasma",
"Wave",
{
"ammo": {
"type": "Missile",
"count": 1
}
},
{
"ammo": {
"type": "Super",
"count": 1
}
}
]
}
]
}
]
}
{
"shinespark": {
"frames": 125,
"excessFrames": 5
}
}
"canSpaceJumpWaterBounce"
{
"or": [
{
"and": [
"canTrickyJump",
"canDownGrab"
]
},
"canWallJump"
]
}Dev note: There is 1 unusable tile in this runway. |
From: 1
Left Door
To: 2
Right Door
Build up run speed and then use controlled Spring Ball bounces to cross the ocean to the far right ledge, and then use Space Jump to reach the door. Mockball down the submerged ramp and begin Spring Ball bouncing under water using the platforms. Disable Spring Ball after the final jump once Samus starts falling again as a way to gain extra speed. Requires: {
"notable": "Spring Ball Bounce to the Door with SpaceJump"
}
"canTrickyJump"
"canSpaceJumpWaterBounce"
"canSpringBallBounce"
"canSpringFling"
"canMockball"
{
"or": [
"canDownGrab",
"canWallJump"
]
} |
|
Requires: "canSpaceJumpWaterBounce"
{
"or": [
"canWallJump",
{
"and": [
"canTrickyJump",
"canDownGrab"
]
}
]
} |
|
Use one of the pillars to spin jump to the waterline then bounce on the surface, or crouch jump from a pillar and down grab onto a Kamer platform. Once on the top of the room, Space Jump to the right door. Requires: "canSuitlessMaridia"
"HiJump"
"SpaceJump"
{
"or": [
"canSpaceJumpWaterBounce",
"h_underwaterCrouchJumpDownGrab"
]
} |
From: 4
Junction (Right side Pit)
To: 3
Junction (Left side Pit)
Crouch jump down grab to get over the first two pillars. For the third pillar, crouch jump to time a damage boost on the Skultera. The initial jump is fairly lenient; jump approximately when the fish is over the sloped tile a few tiles away from Samus, Hold down at any time after jumping, then down grab the ledge by also pressing forward 10 to 30 frames after Samus' Energy lowers. With Morph, the jump is much tighter, with a 15 frame window, but the the forward press is no longer necessary, as the fish boosts Samus onto the ledge. Requires: {
"notable": "Suitless Damage Boost Underwater Pillar"
}
"canSuitlessMaridia"
"canTrickyJump"
"canNeutralDamageBoost"
"h_underwaterCrouchJump"
{
"or": [
{
"and": [
"canDownGrab",
{
"noBlueSuit": {}
}
]
},
"canMidAirMorph"
]
}
{
"enemyDamage": {
"enemy": "Skultera",
"type": "contact",
"hits": 1
}
} |
From: 4
Junction (Right side Pit)
To: 3
Junction (Left side Pit)
Crouch jump down grab to get onto the first pillar. This can be done by holding shoot to prevent the use of the flash suit. Jump out then diagonally spark back onto the platform just above the first pillar to use the least amount of Energy. Requires: "canSuitlessMaridia"
"h_underwaterCrouchJumpDownGrab"
"h_storedSpark"
{
"shinespark": {
"frames": 9,
"excessFrames": 4
}
} |
From: 6
Middle Right Door (By Zeb Farm)
To: 12
Top Junction
It is possible to bomb boost from the door runway over the Zeb and onto the first step. Without doing this, the Zeb will likely touch Samus, as it will start moving if Samus goes down a single step. At the left end of the tunnel, roll against the lower left corner, exit G-mode, and X-Ray standup, shoot the block, partial floor clip, then jump and down grab to the ledge. Wiggle to escape. A failed jump will result in a forced crouch, which is likely a soft lock. Entrance condition: {
"comeInWithGMode": {
"mode": "any",
"morphed": true
}
}Requires: "canComplexGMode"
"canXRayStandUp"
"canPartialFloorClip"
"canDownGrab"
{
"or": [
"h_artificialMorphSpringBall",
{
"and": [
"h_artificialMorphBombHorizontally",
"h_additionalBomb"
]
}
]
} |
From: 6
Middle Right Door (By Zeb Farm)
To: 12
Top Junction
Farm up on the Zeb, then lead one, frozen, to the upper portion. Freeze it again get shinecharge, then wait for it to unfreeze (or turn off Ice to force) and get hit by it to interrupt. Requires: {
"obstaclesCleared": [
"R-Mode"
]
}
{
"or": [
"h_bombThings",
"h_useSpringBall",
{
"and": [
"Morph",
"canXRayStandUp",
"canPartialFloorClip",
"canDownGrab"
]
}
]
}
"canTrickyUseFrozenEnemies"
{
"refill": [
"Energy"
]
}
"h_shinechargeMaxRunway"
{
"autoReserveTrigger": {}
}
"canRModeSparkInterrupt"Resets obstacles: R-Mode |
|
Requires: "Morph" "canXRayStandUp" "canPartialFloorClip" "canDownGrab" |
|
It is possible to escape the water with a wall jump when the water is low, or a crouch jump and down grab when it is high. Requires: {
"doorUnlockedAtNode": 2
}
{
"or": [
"canDownGrab",
"canWallJump",
"Gravity",
"HiJump",
"canTrickySpringBallJump"
]
}Unlocks doors: {"types":["ammo"],"requires":[]}Dev note: The crouch jump is not actually necessary but helps slightly. It is also possible to use the crouch jump while maintaining the flash suit. |
|
Requires: "h_crouchJumpDownGrab" |
|
Gain a shinecharge on the long, lower platform in the screen above, then carry it left and down. Use crumble quick drops, land on the floor at the bottom, spin jump left into the doorway, and activate the spark. The required movement here is very precise, as the 180 shinecharge frames is only barely enough. Requires: {
"obstaclesNotCleared": [
"A"
]
}
"h_crouchJumpDownGrab"
{
"canShineCharge": {
"usedTiles": 17,
"openEnd": 0
}
}
"canShinechargeMovementTricky"
"canQuickDrop"
{
"shineChargeFrames": 175
}
{
"shinespark": {
"frames": 1,
"excessFrames": 0
}
}Exit condition: {
"leaveWithSpark": {}
}Dev note: This starts at node 1 to be able to unlock the door first if needed. Getting up to the platform above is possible by running to the right and crouch-jumping up. |
|
Before running across the speedway, use the Zeb spawner to get enough Reserves. Use the runway on the upper screen. There are many enemies up there to clear out of the way, but leave one alive. Entrance condition: {
"comeInWithRMode": {}
}Requires: {
"refill": [
"Energy"
]
}
{
"or": [
"canWallJump",
"HiJump",
"SpaceJump",
"canIBJ",
"canSpringBallJumpMidAir",
"h_crouchJumpDownGrab"
]
}
{
"canShineCharge": {
"usedTiles": 25,
"openEnd": 1
}
}
{
"autoReserveTrigger": {
"maxReserveEnergy": 95
}
}
"canRModeSparkInterrupt"Clears obstacles: A |
|
Requires: {
"or": [
"canWallJump",
"HiJump",
"SpaceJump",
"canIBJ",
"canSpringBallJumpMidAir",
"h_crouchJumpDownGrab"
]
}
{
"canShineCharge": {
"usedTiles": 25,
"openEnd": 1
}
}
"canShinechargeMovement"
{
"shineChargeFrames": 95
}Exit condition: {
"leaveShinecharged": {}
}Unlocks doors: {"types":["ammo"],"requires":[]} |
|
Requires: "h_crouchJumpDownGrab" Clears obstacles: A |
|
Use the runway on the upper screen. There are many enemies up there to clear out of the way and will helpfully provide Reserves. Or else Crystal Flash. Leave one waver or small hopper alive. You can farm the rest for drops. Entrance condition: {
"comeInWithRMode": {}
}Requires: {
"or": [
"canWallJump",
"HiJump",
"SpaceJump",
"canIBJ",
"canSpringBallJumpMidAir",
"h_crouchJumpDownGrab"
]
}
{
"or": [
"h_CrystalFlashForReserveEnergy",
{
"and": [
{
"disableEquipment": "ETank"
},
{
"resourceAvailable": [
{
"type": "Energy",
"count": 80
}
]
},
{
"resourceMissingAtMost": [
{
"type": "Missile",
"count": 0
}
]
},
{
"resourceMissingAtMost": [
{
"type": "Super",
"count": 0
}
]
},
{
"partialRefill": {
"type": "ReserveEnergy",
"limit": 1
}
}
]
}
]
}
{
"canShineCharge": {
"usedTiles": 25,
"openEnd": 1
}
}
{
"autoReserveTrigger": {
"maxReserveEnergy": 95
}
}
"canRModeSparkInterrupt"Clears obstacles: A |
|
Jump after the transition on the last possible frame. Aim down when close to the platform (while continuing to hold jump), in order to reduce Samus' hitbox. Entrance condition: {
"comeInJumping": {
"speedBooster": "yes",
"minTiles": 20
}
}Requires: "canInsaneJump" "canDownGrab" |
From: 1
Top Left Door
To: 4
Item (Through the Pipe)
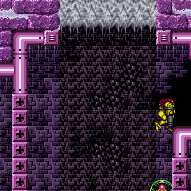
Spark flush against the right wall (diagonal helps) then quickly down grab or down back after to barely get into the pipe. Requires: "Morph"
"canDownGrab"
"canShinechargeMovementComplex"
{
"canShineCharge": {
"usedTiles": 18,
"openEnd": 1
}
}
{
"shinespark": {
"frames": 5,
"excessFrames": 2
}
}Dev note: This only gets one pixel into the pipe, so a wiggle isn't possible without doing the down back. Assumes sparking from the ground, since there is an accessible farm before and after this strat. |
From: 2
Right Door
To: 3
Top Junction
Start the elevator ride by using Screw Attack or Pseudo Screw in the hole, or by jumping in the hole with a blue suit. Kago the elevator to fall back in and hit the elevator again. This is much easier while the elevator is still rising, but can still be done with Morph afterwards. Without HiJump, this will need to be done once more to get high enough to get to the blue gate, and, without Morph, Samus will need to Kago the second elevator section first-try, without jumping out of the first section of elevator. After triggering the third section of elevator, move out, to the right, then jump onto the raised elevator before it is too tall. Requires: {
"notable": "Kago to Ride the Elevator"
}
"canKago"
{
"or": [
"ScrewAttack",
"canPseudoScrew",
{
"haveBlueSuit": {}
}
]
}
{
"or": [
"Morph",
{
"and": [
"HiJump",
"canTrickyJump",
{
"or": [
"canCrouchJump",
"canDownGrab"
]
}
]
},
"canInsaneJump"
]
}Clears obstacles: B |
From: 1
Top Left Door
To: 1
Top Left Door
It takes around 3 minutes to get the Zero to this door. Crouch jump to touch a well timed Cacatac spike at the peak of Samus' jump. Use a neutral damage boost to gain some height. At the peak of the boost, down grab the ledge. The Zero only moves on camera and the camera scrolls when exiting the morph tunnel. Let the Zero lead through the morph tunnel or wait for the it to get very close to Samus before touching the scroll block at the exit. Requires: "canBeVeryPatient"
"Morph"
"canNeutralDamageBoost"
"canTrickyDodgeEnemies"
"h_crouchJumpDownGrab"
{
"enemyDamage": {
"enemy": "Cacatac",
"type": "spike",
"hits": 1
}
}Exit condition: {
"leaveWithGModeSetup": {}
} |
From: 1
Top Left Door
To: 1
Top Left Door
It takes around 3 minutes to get the Zero to this door. Let the Zero climb the right wall and jump on top of it in Morph Ball form to bounce up to the Cacatac platform. The Zero only moves on camera and the camera scrolls when exiting the morph tunnel. Let the Zero lead through the morph tunnel or wait for the it to get very close to Samus before touching the scroll block at the exit. One setup is to do regular jumps while aiming down until the camera stops lowering, and then let the Zero move off camera. And then crouch jump and morph directly into it, while holding right. Requires: "canBeVeryPatient"
"h_midAirMorphDamageBoost"
"canTrickyJump"
"h_crouchJumpDownGrab"
{
"enemyDamage": {
"enemy": "Zero",
"type": "contact",
"hits": 1
}
}Exit condition: {
"leaveWithGModeSetup": {}
} |
From: 2
Middle Left Door
To: 2
Middle Left Door
It takes around 4 minutes to get the Zero to this door. Crouch jump to touch a well timed Cacatac spike at the peak of Samus' jump. Use a neutral damage boost to gain some height. At the peak of the boost, down grab the ledge. The Zero only moves on camera and the camera scrolls when exiting the morph tunnel. Let the Zero lead through the morph tunnel or wait for the it to get very close to Samus before touching the scroll block at the exit. Requires: "canBeVeryPatient"
"Morph"
"canNeutralDamageBoost"
"canTrickyDodgeEnemies"
"h_crouchJumpDownGrab"
{
"enemyDamage": {
"enemy": "Cacatac",
"type": "spike",
"hits": 1
}
}Exit condition: {
"leaveWithGModeSetup": {}
} |
From: 2
Middle Left Door
To: 2
Middle Left Door
It takes around 4 minutes to get the Zero to this door. Let the Zero climb the right wall and jump on top of it in Morph Ball form to bounce up to the Cacatac platform. The Zero only moves on camera and the camera scrolls when exiting the morph tunnel. Let the Zero lead through the morph tunnel or wait for the it to get very close to Samus before touching the scroll block at the exit. One setup is to do regular jumps while aiming down until the camera stops lowering, and then let the Zero move off camera. And then crouch jump and morph directly into it, while holding right. Requires: "canBeVeryPatient"
"h_midAirMorphDamageBoost"
"canTrickyJump"
"h_crouchJumpDownGrab"
{
"enemyDamage": {
"enemy": "Zero",
"type": "contact",
"hits": 1
}
}Exit condition: {
"leaveWithGModeSetup": {}
} |
|
Requires: {
"or": [
{
"and": [
{
"resetRoom": {
"nodes": [
2
]
}
},
{
"cycleFrames": 460
}
]
},
{
"and": [
{
"resetRoom": {
"nodes": [
4
]
}
},
{
"cycleFrames": 660
},
{
"or": [
"canWallJump",
"HiJump",
{
"and": [
"canDoubleBombJump",
{
"cycleFrames": 140
}
]
},
{
"and": [
"canSpringBallJumpMidAir",
{
"cycleFrames": 40
},
"h_doubleEquipmentScreenCycleFrames"
]
}
]
}
]
},
{
"and": [
{
"resetRoom": {
"nodes": [
1
]
}
},
{
"cycleFrames": 840
},
{
"or": [
"canWallJump",
"HiJump",
"SpaceJump",
{
"and": [
"canDoubleBombJump",
{
"cycleFrames": 140
},
{
"or": [
{
"cycleFrames": 140
},
"h_crouchJumpDownGrab"
]
}
]
},
{
"and": [
"canSpringBallJumpMidAir",
{
"cycleFrames": 40
},
"h_doubleEquipmentScreenCycleFrames",
{
"or": [
"h_crouchJumpDownGrab",
{
"and": [
{
"cycleFrames": 40
},
"h_doubleEquipmentScreenCycleFrames"
]
}
]
}
]
}
]
}
]
},
{
"and": [
{
"resetRoom": {
"nodes": [
6
]
}
},
{
"cycleFrames": 1900
},
{
"or": [
"canWallJump",
"HiJump",
"SpaceJump",
{
"and": [
"canDoubleBombJump",
{
"cycleFrames": 140
},
{
"or": [
{
"cycleFrames": 140
},
"h_crouchJumpDownGrab"
]
}
]
},
{
"and": [
"canSpringBallJumpMidAir",
{
"cycleFrames": 40
},
"h_doubleEquipmentScreenCycleFrames",
{
"or": [
"h_crouchJumpDownGrab",
{
"and": [
{
"cycleFrames": 40
},
"h_doubleEquipmentScreenCycleFrames"
]
}
]
}
]
}
]
}
]
}
]
}
{
"or": [
"Wave",
"Plasma",
{
"and": [
"Spazer",
{
"cycleFrames": 60
}
]
},
{
"and": [
"ScrewAttack",
{
"cycleFrames": 70
}
]
},
{
"cycleFrames": 130
}
]
}Clears obstacles: B Resets obstacles: A Farm cycle drops: 3 Zero Dev note: Resetting at the bottom of the room (node 3) is covered in a separate 3->3 strat. FIXME: this should probably be adjusted a bit for blue suit. |
|
Crouch jump to touch a well timed Cacatac spike at the peak of Samus' jump. Use a neutral damage boost to gain some height. At the peak of the boost, down grab the ledge. Requires: "canNeutralDamageBoost"
"canTrickyDodgeEnemies"
"h_crouchJumpDownGrab"
{
"enemyDamage": {
"enemy": "Cacatac",
"type": "spike",
"hits": 1
}
} |
|
Entrance condition: {
"comeInWithGMode": {
"mode": "any",
"morphed": true
}
}Requires: {
"or": [
"h_artificialMorphIBJ",
{
"and": [
"h_artificialMorphSpringBallBombJump",
"h_additionalBomb"
]
},
{
"and": [
"h_artificialMorphSpringBallBombJump",
"h_crouchJumpDownGrab"
]
}
]
}Exit condition: {
"leaveWithGMode": {
"morphed": false
}
} |
|
Entrance condition: {
"comeInWithGMode": {
"mode": "any",
"morphed": false
}
}Requires: {
"or": [
"HiJump",
"canWallJump",
"SpaceJump",
"canSpringBallJumpMidAir",
{
"and": [
"canTrickyDashJump",
"h_crouchJumpDownGrab"
]
}
]
}Exit condition: {
"leaveWithGMode": {
"morphed": false
}
} |
From: 2
Middle Left Door
To: 7
G-Mode Morph Indirect (In Morph Tunnel)
Entrance condition: {
"comeInWithGMode": {
"mode": "indirect",
"morphed": true
}
}Requires: {
"or": [
"h_artificialMorphIBJ",
{
"and": [
"h_artificialMorphSpringBallBombJump",
"h_additionalBomb"
]
},
{
"and": [
"h_artificialMorphSpringBall",
"HiJump"
]
},
{
"and": [
"Morph",
{
"or": [
"HiJump",
"canWallJump",
"SpaceJump",
"canSpringBallJumpMidAir",
{
"and": [
"canTrickyDashJump",
"h_crouchJumpDownGrab"
]
}
]
}
]
}
]
} |
|
Requires: "h_crouchJumpDownGrab" |
From: 4
Bottom Right Door
To: 4
Bottom Right Door
Let the Caterpillar climb the right wall and then use a Cacatac spike to boost up to the same level. Crouch jump to touch a well timed Cacatac spike at the peak of Samus' jump. Use a neutral damage boost to gain some height. At the peak of the boost, down grab the ledge. Requires: "canNeutralDamageBoost"
"canTrickyDodgeEnemies"
"h_crouchJumpDownGrab"
{
"enemyDamage": {
"enemy": "Cacatac",
"type": "spike",
"hits": 1
}
}Exit condition: {
"leaveWithGModeSetup": {}
}Dev note: It takes around 50 seconds to get the Zero to this door. |
|
Entrance condition: {
"comeInWithGMode": {
"mode": "any",
"morphed": false
}
}Requires: {
"or": [
"HiJump",
"canWallJump",
"SpaceJump",
"canIBJ",
"canSpringBallJumpMidAir",
"h_crouchJumpDownGrab"
]
}Exit condition: {
"leaveWithGMode": {
"morphed": false
}
}Dev note: There could be an artificial morph IBJ option, but that would just bypass a crouch jump + down grab requirement. |
From: 4
Bottom Right Door
To: 7
G-Mode Morph Indirect (In Morph Tunnel)
Entrance condition: {
"comeInWithGMode": {
"mode": "indirect",
"morphed": true
}
}Requires: {
"or": [
"h_artificialMorphIBJ",
"h_artificialMorphSpringBallBombJump",
{
"and": [
"h_artificialMorphSpringBall",
"HiJump"
]
},
{
"and": [
"Morph",
{
"or": [
"HiJump",
"canWallJump",
"SpaceJump",
"canSpringBallJumpMidAir",
"h_crouchJumpDownGrab"
]
}
]
}
]
} |
From: 5
Top Right Door (Through Morph Tunnel)
To: 5
Top Right Door (Through Morph Tunnel)
Requires: {
"ammo": {
"type": "Super",
"count": 1
}
}
"Morph"
{
"resetRoom": {
"nodes": [
5
]
}
}
{
"cycleFrames": 1340
}
{
"or": [
"canWallJump",
"HiJump",
"SpaceJump",
{
"and": [
"canDoubleBombJump",
{
"cycleFrames": 140
},
{
"or": [
{
"cycleFrames": 140
},
"h_crouchJumpDownGrab"
]
}
]
},
{
"and": [
"canSpringBallJumpMidAir",
{
"cycleFrames": 40
},
"h_doubleEquipmentScreenCycleFrames",
{
"or": [
"h_crouchJumpDownGrab",
{
"and": [
{
"cycleFrames": 40
},
"h_doubleEquipmentScreenCycleFrames"
]
}
]
}
]
}
]
}
{
"or": [
"Wave",
"Spazer",
"Plasma",
{
"cycleFrames": 250
}
]
}Resets obstacles: A, B Farm cycle drops: 2 Cacatac, 3 Zero Dev note: It is possible to roll off of the platform above to avoid a mid-air morph. FIXME: add a Cac-only farm since it can be done with fewer requirements. |
From: 5
Top Right Door (Through Morph Tunnel)
To: 5
Top Right Door (Through Morph Tunnel)
It takes around 2 minutes to get the Zero to this door. Crouch jump to touch a well timed Cacatac spike at the peak of Samus' jump. Use a neutral damage boost to gain some height. At the peak of the boost, down grab the ledge. Requires: "canBePatient"
{
"or": [
{
"ammo": {
"type": "Super",
"count": 1
}
},
{
"obstaclesCleared": [
"A"
]
}
]
}
"Morph"
"canNeutralDamageBoost"
"canTrickyDodgeEnemies"
"h_crouchJumpDownGrab"
{
"enemyDamage": {
"enemy": "Cacatac",
"type": "spike",
"hits": 1
}
}Exit condition: {
"leaveWithGModeSetup": {}
} |
From: 5
Top Right Door (Through Morph Tunnel)
To: 5
Top Right Door (Through Morph Tunnel)
It takes around 2 minutes to get the Zero to this door. Let the Zero climb the right wall and jump on top of it in Morph Ball form to bounce up to the Cacatac platform. One setup is to do regular jumps while aiming down until the camera stops lowering, and then let the Zero move off camera. And then crouch jump and morph directly into it, while holding right. Requires: "canBePatient"
{
"or": [
{
"ammo": {
"type": "Super",
"count": 1
}
},
{
"obstaclesCleared": [
"A"
]
}
]
}
"h_midAirMorphDamageBoost"
"canTrickyJump"
"h_crouchJumpDownGrab"
{
"enemyDamage": {
"enemy": "Zero",
"type": "contact",
"hits": 1
}
}Exit condition: {
"leaveWithGModeSetup": {}
} |
From: 5
Top Right Door (Through Morph Tunnel)
To: 5
Top Right Door (Through Morph Tunnel)
Open the gate, farm the Cacatacs and Zeros, while leading one back up to the Morph tunnel. Shinecharge under the gate, then get hit by the Zero to interrupt. Entrance condition: {
"comeInWithRMode": {}
}Requires: {
"ammo": {
"type": "Super",
"count": 1
}
}
"Morph"
{
"or": [
"h_CrystalFlashForReserveEnergy",
{
"and": [
"h_RModeCanRefillReserves",
{
"or": [
{
"and": [
{
"resourceMissingAtMost": [
{
"type": "Super",
"count": 1
}
]
},
{
"partialRefill": {
"type": "ReserveEnergy",
"limit": 20
}
}
]
},
{
"and": [
{
"resourceMissingAtMost": [
{
"type": "PowerBomb",
"count": 0
}
]
},
{
"partialRefill": {
"type": "ReserveEnergy",
"limit": 15
}
}
]
}
]
}
]
}
]
}
{
"or": [
"HiJump",
"canWallJump",
"SpaceJump",
"canIBJ",
"canSpringBallJumpMidAir",
"canTrickyUseFrozenEnemies",
{
"and": [
"canNeutralDamageBoost",
{
"or": [
{
"and": [
"canTrickyDodgeEnemies",
"h_crouchJumpDownGrab",
{
"enemyDamage": {
"enemy": "Cacatac",
"type": "spike",
"hits": 1
}
}
]
},
{
"and": [
"canMidAirMorph",
"canTrickyJump",
"canCrouchJump",
{
"enemyDamage": {
"enemy": "Zero",
"type": "contact",
"hits": 1
}
}
]
}
]
}
]
}
]
}
"canBePatient"
{
"canShineCharge": {
"usedTiles": 17,
"openEnd": 0
}
}
{
"autoReserveTrigger": {}
}
"canRModeSparkInterrupt"Clears obstacles: A, B |
|
Shinespark up to the middle portion to farm on Geegas. Time the shinespark to avoid killing the lowest Ripper. Go back down, shinecarge between the doors, and jump into the Ripper to interrupt. Entrance condition: {
"comeInWithRMode": {}
}Requires: {
"canShineCharge": {
"usedTiles": 14,
"openEnd": 0
}
}
{
"shinespark": {
"frames": 45,
"excessFrames": 5
}
}
{
"or": [
"canWallJump",
"HiJump",
"canSpringBallJumpMidAir",
"SpaceJump",
"canIBJ",
{
"and": [
"canTrickyUseFrozenEnemies",
"h_crouchJumpDownGrab"
]
}
]
}
{
"or": [
{
"canShineCharge": {
"usedTiles": 12,
"openEnd": 0
}
},
{
"and": [
{
"or": [
{
"doorUnlockedAtNode": 3
},
{
"doorUnlockedAtNode": 4
}
]
},
{
"canShineCharge": {
"usedTiles": 13,
"openEnd": 0
}
}
]
},
{
"and": [
{
"doorUnlockedAtNode": 3
},
{
"doorUnlockedAtNode": 4
},
{
"canShineCharge": {
"usedTiles": 14,
"openEnd": 0
}
}
]
}
]
}
{
"autoReserveTrigger": {
"maxReserveEnergy": 95
}
}
"canRModeSparkInterrupt"Unlocks doors: {"nodeId":3,"types":["ammo"],"requires":[]}
{"nodeId":4,"types":["ammo"],"requires":[]} |
|
Shinespark up to the middle portion to farm on Geegas. Time the shinespark to avoid killing the lowest Ripper. Go back down, shinecarge between the doors, and jump into the Ripper to interrupt. Entrance condition: {
"comeInWithRMode": {}
}Requires: {
"canShineCharge": {
"usedTiles": 14,
"openEnd": 0
}
}
{
"shinespark": {
"frames": 45,
"excessFrames": 5
}
}
{
"or": [
"canWallJump",
"HiJump",
"canSpringBallJumpMidAir",
"SpaceJump",
"canIBJ",
{
"and": [
"canTrickyUseFrozenEnemies",
"h_crouchJumpDownGrab"
]
}
]
}
{
"refill": [
"Energy"
]
}
{
"or": [
{
"canShineCharge": {
"usedTiles": 12,
"openEnd": 0
}
},
{
"and": [
{
"or": [
{
"doorUnlockedAtNode": 3
},
{
"doorUnlockedAtNode": 4
}
]
},
{
"canShineCharge": {
"usedTiles": 13,
"openEnd": 0
}
}
]
},
{
"and": [
{
"doorUnlockedAtNode": 3
},
{
"doorUnlockedAtNode": 4
},
{
"canShineCharge": {
"usedTiles": 14,
"openEnd": 0
}
}
]
}
]
}
{
"autoReserveTrigger": {
"maxReserveEnergy": 95
}
}
"canRModeSparkInterrupt"Unlocks doors: {"nodeId":3,"types":["ammo"],"requires":[]}
{"nodeId":4,"types":["ammo"],"requires":[]} |
|
Using a crouch jump, get the Beetom attach to Samus. Quickly freeze it before it deals damage, if Samus is at very low energy. Requires: {
"noBlueSuit": {}
}
"canTrickyUseFrozenEnemies"
"h_crouchJumpDownGrab"
{
"obstaclesNotCleared": [
"A"
]
} |
|
Requires: {
"or": [
"canDash",
{
"disableEquipment": "HiJump"
},
{
"and": [
"HiJump",
"h_underwaterCrouchJumpDownGrab"
]
},
"canWallJump",
"Gravity",
"SpaceJump",
{
"and": [
"canSpringBallBombJump",
"canResetFallSpeed"
]
},
"canBombJumpWaterEscape"
]
} |
|
Getting up during Phase 2 can be done by jumping on Kraid's projectile platforms or a well timed crouch jump + down grab. Requires: "Charge"
{
"or": [
"Wave",
"Spazer",
"Plasma",
"canBePatient"
]
}
{
"or": [
"HiJump",
"canWallJump",
"SpaceJump",
"canSpringBallJumpMidAir",
{
"and": [
"canDodgeWhileShooting",
{
"or": [
"canCarefulJump",
"h_crouchJumpDownGrab"
]
}
]
}
]
}
"h_complexToCarryFlashSuit"Clears obstacles: f_DefeatedKraid Sets flags: f_DefeatedKraid |
From: 1
Left Door
To: 1
Left Door
Force Kraid to stand up and farm his nails for energy, then perform a Spike X-Mode on the thorns to get shinecharge. Get interrupted by Kraid for blue suit. You will be forced to defeat Kraid afterward. Entrance condition: {
"comeInWithRMode": {}
}Requires: {
"not": "f_DefeatedKraid"
}
"canRiskPermanentLossOfAccess"
{
"or": [
"canBeVeryPatient",
{
"disableEquipment": "ETank"
}
]
}
{
"refill": [
"Energy"
]
}
{
"or": [
"Charge",
{
"ammo": {
"type": "Missile",
"count": 2
}
},
{
"ammo": {
"type": "Super",
"count": 1
}
}
]
}
{
"or": [
"HiJump",
"canWallJump",
"SpaceJump",
"canSpringBallJumpMidAir",
{
"and": [
"canDodgeWhileShooting",
{
"or": [
"canCarefulJump",
"h_crouchJumpDownGrab"
]
}
]
}
]
}
"h_thornXModeShinecharge"
{
"autoReserveTrigger": {
"maxReserveEnergy": 95
}
}
"canRModeSparkInterrupt"Clears obstacles: f_DefeatedKraid, door_1 Sets flags: f_DefeatedKraid |
|
Only 2 Missiles are needed to get Kraid to stand up, after which they are farmable. Getting up during Phase 2 can be done by jumping on Kraid's projectile platforms or a well timed crouch jump + down grab. Requires: {
"ammo": {
"type": "Missile",
"count": 2
}
}
{
"or": [
"HiJump",
"canWallJump",
"SpaceJump",
"canSpringBallJumpMidAir",
{
"and": [
"canDodgeWhileShooting",
{
"or": [
"canCarefulJump",
"h_crouchJumpDownGrab"
]
}
]
}
]
}
"h_complexToCarryFlashSuit"Clears obstacles: f_DefeatedKraid Sets flags: f_DefeatedKraid |
|
4 supers are required to kill Kraid. Only 1 is needed to get him to stand up, after which they are farmable, even though the drop rate is low. Getting up during Phase 2 can be done by jumping on Kraid's projectile platforms or a well timed crouch jump + down grab. Requires: {
"or": [
{
"ammo": {
"type": "Super",
"count": 5
}
},
{
"and": [
{
"ammo": {
"type": "Super",
"count": 4
}
},
"canDodgeWhileShooting"
]
},
{
"and": [
{
"ammo": {
"type": "Super",
"count": 3
}
},
"canDodgeWhileShooting",
"canBePatient"
]
},
{
"and": [
{
"ammo": {
"type": "Super",
"count": 1
}
},
"canDodgeWhileShooting",
"canBeVeryPatient"
]
}
]
}
{
"or": [
"HiJump",
"canWallJump",
"SpaceJump",
"canSpringBallJumpMidAir",
{
"and": [
"canDodgeWhileShooting",
{
"or": [
"canCarefulJump",
"h_crouchJumpDownGrab"
]
}
]
}
]
}
"h_complexToCarryFlashSuit"Clears obstacles: f_DefeatedKraid Sets flags: f_DefeatedKraid |
From: 2
Right Door
To: 1
Left Door
You can crystal flash for early setup, then bounce between thorns and Kraid to setup. Alternatively, force Kraid to stand up and farm his nails for energy. Then perform a Spike X-Mode on the thorns to get shinecharge. Get interrupted by Kraid for blue suit. After gaining blue suit you can proceed to defeat Kraid. Entrance condition: {
"comeInWithRMode": {}
}Requires: {
"not": "f_DefeatedKraid"
}
"canRiskPermanentLossOfAccess"
{
"or": [
{
"thornHits": 1
},
{
"and": [
{
"or": [
"canPrepareForNextRoom",
"h_KraidCameraFix"
]
},
"SpaceJump"
]
}
]
}
{
"or": [
"h_CrystalFlashForReserveEnergy",
{
"and": [
{
"or": [
"canBeVeryPatient",
{
"disableEquipment": "ETank"
}
]
},
{
"refill": [
"Energy"
]
},
{
"or": [
"Charge",
{
"ammo": {
"type": "Missile",
"count": 2
}
},
{
"ammo": {
"type": "Super",
"count": 1
}
}
]
}
]
}
]
}
{
"or": [
"HiJump",
"canWallJump",
"SpaceJump",
"canSpringBallJumpMidAir",
{
"and": [
"canDodgeWhileShooting",
{
"or": [
"canCarefulJump",
"h_crouchJumpDownGrab"
]
}
]
}
]
}
"canXMode"
"h_XModeThornHit"
"h_shinechargeMaxRunway"
{
"autoReserveTrigger": {
"maxReserveEnergy": 95
}
}
"canRModeSparkInterrupt"Clears obstacles: f_DefeatedKraid, door_2 Sets flags: f_DefeatedKraid |
|
Back up against the wall of the single-tile ledge. Run forward, perform a single arm pump, and jump on the last possible frame. Aim down just before reaching the platform. The arm pump can be performed by pressing shot, or by pressing an angle button (but not releasing it until after the jump). Requires: {
"notable": "Arm Pump Jump"
}
"h_backIntoCorner"
"canDash"
"canInsaneJump"
"canDownGrab" |
|
If Samus runs into the room and quickly destroys the shot block, a Kihunter will immediately fall down. To avoid this, either spin jump into the room, or wait a moment before shooting the block. Requires: {
"resetRoom": {
"nodes": [
2
]
}
}
"canDodgeWhileShooting"
{
"or": [
"HiJump",
"canWallJump",
"h_crouchJumpDownGrab",
"SpaceJump"
]
}
{
"or": [
{
"and": [
"canDash",
{
"or": [
{
"and": [
"Plasma",
{
"cycleFrames": 480
}
]
},
{
"and": [
"ScrewAttack",
{
"cycleFrames": 570
}
]
},
{
"and": [
"Wave",
{
"cycleFrames": 660
}
]
},
{
"and": [
"Spazer",
{
"cycleFrames": 660
}
]
},
{
"and": [
"Charge",
{
"cycleFrames": 780
}
]
},
{
"and": [
"Ice",
{
"cycleFrames": 840
}
]
},
{
"and": [
"canTrickyDodgeEnemies",
{
"cycleFrames": 1200
}
]
}
]
}
]
},
{
"and": [
{
"haveBlueSuit": {}
},
{
"cycleFrames": 600
}
]
}
]
}Clears obstacles: C, D Resets obstacles: A, B Farm cycle drops: 4 Kihunter (green) |
From: 2
Bottom Right Door
To: 5
Kihunter Junction
This crouch jump down grab is a little tighter than most. The Kihunters can be killed from below but there is a chance one will drop down the hole. Watch them before breaking the shot block. Requires: "h_crouchJumpDownGrab" Clears obstacles: C, D |
From: 2
Bottom Right Door
To: 5
Kihunter Junction
Farm Kihunters from below, keeping one alive. Knock its wings off and either freeze it or take a hit and use i-frames to run through it. Run across the left side of the broken shot block, then use the Kihunter to interrupt. Entrance condition: {
"comeInWithRMode": {}
}Requires: "h_crouchJumpDownGrab"
{
"or": [
"canTrickyDodgeEnemies",
{
"enemyDamage": {
"enemy": "Kihunter (green)",
"type": "contact",
"hits": 2
}
}
]
}
{
"or": [
"h_CrystalFlashForReserveEnergy",
{
"and": [
"h_RModeCanRefillReserves",
{
"or": [
{
"partialRefill": {
"type": "ReserveEnergy",
"limit": 5
}
},
{
"and": [
{
"partialRefill": {
"type": "ReserveEnergy",
"limit": 20
}
},
"canBeLucky"
]
}
]
}
]
}
]
}
{
"or": [
"canUseIFrames",
"canUseFrozenEnemies"
]
}
{
"canShineCharge": {
"usedTiles": 13,
"openEnd": 2
}
}
{
"autoReserveTrigger": {
"maxReserveEnergy": 95
}
}
"canRModeSparkInterrupt"Clears obstacles: C, D |
|
Unmorph after exiting the morph tunnel and get to the other side of the room. Killing the Dessgeegas can be done with no beam upgrades; Samus can jump over them while shooting the last few hits or retreat to the left. It is possible to kill a Sova on the door and pause abuse to grab its Energy drop on G-mode exit. Samus will likely need to wait at the door for about a minute for the global Sova gets there. Entrance condition: {
"comeInWithGMode": {
"mode": "any",
"morphed": true
}
}Requires: "h_artificialMorphMovement"
{
"or": [
"canTrickyJump",
"h_artificialMorphPowerBomb",
"h_hasBeamUpgrade",
{
"enemyKill": {
"enemies": [
[
"Sm. Dessgeega",
"Sm. Dessgeega"
]
],
"explicitWeapons": [
"Missile",
"Super",
"ScrewAttack"
]
}
},
{
"enemyDamage": {
"enemy": "Sm. Dessgeega",
"type": "contact",
"hits": 1
}
}
]
}
{
"or": [
"HiJump",
"SpaceJump",
"canSpringBallJumpMidAir",
"canIBJ",
"canTrickyDashJump",
{
"and": [
"canTrickyUseFrozenEnemies",
"canWallJump"
]
},
{
"and": [
{
"canShineCharge": {
"usedTiles": 43,
"openEnd": 0
}
},
{
"shinespark": {
"frames": 9,
"excessFrames": 5
}
}
]
},
{
"and": [
"canInsaneWallJump",
"canWallJumpInstantMorph",
"canUnmorphBombBoost",
"canDownGrab"
]
}
]
}
{
"or": [
{
"and": [
"h_heatedGModePauseAbuse",
"canBePatient"
]
},
"h_heatedGModeOpenDifferentDoor"
]
}Dev note: FIXME: Methods that require a Sova damage boost could be added |
From: 5
Bottom Right Junction
To: 2
Right Door
Use a fully delayed walljump to gain enough horizontal distance to place a bomb past the lip of the overhang. Unmorph to hover in the air above the bomb while it explodes. Ride the explosion into a down-grab to reach the ledge. Requires: "h_heatProof"
"canInsaneWallJump"
"canWallJumpInstantMorph"
"canUnmorphBombBoost"
"canDownGrab"
{
"heatFrames": 215
}Dev note: FIXME: this should probably have extra Power Bomb lenience. |
|
Entrance condition: {
"comeInWithSpark": {
"position": "top"
}
}Requires: "canDownGrab"
{
"shinespark": {
"frames": 39,
"excessFrames": 0
}
}
{
"heatFrames": 142
} |
From: 1
Left Shaft - Top Left Door
To: 1
Left Shaft - Top Left Door
Requires: "h_heatProof"
{
"resetRoom": {
"nodes": [
1
]
}
}
{
"or": [
{
"and": [
"canDash",
{
"cycleFrames": 285
},
{
"or": [
"Plasma",
"ScrewAttack",
{
"and": [
"Wave",
{
"cycleFrames": 90
}
]
},
{
"and": [
"Spazer",
{
"cycleFrames": 205
}
]
},
{
"and": [
"canDodgeWhileShooting",
{
"cycleFrames": 315
}
]
}
]
}
]
},
{
"and": [
{
"haveBlueSuit": {}
},
{
"cycleFrames": 340
}
]
}
]
}
{
"or": [
"canWallJump",
"HiJump",
"h_crouchJumpDownGrab",
{
"and": [
"SpaceJump",
{
"cycleFrames": 20
}
]
}
]
}Resets obstacles: R-Mode Farm cycle drops: 1 Multiviola, 2 Alcoon |
From: 2
Left Shaft - Bottom Right Door
To: 1
Left Shaft - Top Left Door
It is possible to kill a Multiviola by the door and pause abuse to grab its Energy drop on G-mode exit. It is important avoid touching the invisible fireballs the Alcoons place, and to prevent them from shooting too many fireballs, as they will eventually prevent drops from appearing. One easy way to do this without any beam upgrades or ammo is to kill them before they jump. This can be done from below by jumping and shooting horizontally near the floor surface. Stay near the far wall when shooting to prevent getting too close and triggering their jump. Entrance condition: {
"comeInWithGMode": {
"mode": "any",
"morphed": false
}
}Requires: {
"or": [
"h_crouchJumpDownGrab",
"HiJump",
"canWallJump",
"SpaceJump",
"canSpringBallJumpMidAir"
]
}
{
"or": [
"h_heatedGModeOpenDifferentDoor",
{
"and": [
"h_heatedGModePauseAbuse",
"canFarmWhileShooting",
"canTrickyDodgeEnemies"
]
}
]
}Dev note: Frozen Alcoon platforms and Artificial morph IBJ are not included, as Samus can crouch jump and down grab; they can be considered if G-mode + flash suits are added, though they are still likely not useful. Those are also likely not compatible with preventing the Alcoons from overloading drops. |
From: 2
Left Shaft - Bottom Right Door
To: 3
Left Shaft - Middle Right Door
It is important avoid touching the invisible fireballs the Alcoons place. Entrance condition: {
"comeInWithGMode": {
"mode": "any",
"morphed": false
}
}Requires: {
"or": [
"h_crouchJumpDownGrab",
"HiJump",
"canWallJump",
"SpaceJump",
"canSpringBallJumpMidAir",
"canIBJ"
]
}
"h_heatedGModeOpenDifferentDoor"Dev note: Frozen Alcoon platforms and Artificial morph IBJ are not included, as Samus can crouch jump and down grab; they can be considered if G-mode + flash suits are added, though they are still likely not useful. |
From: 2
Left Shaft - Bottom Right Door
To: 4
Left Shaft - Top Right Door
It is important avoid touching the invisible fireballs the Alcoons place. Entrance condition: {
"comeInWithGMode": {
"mode": "any",
"morphed": false
}
}Requires: {
"or": [
"h_crouchJumpDownGrab",
"HiJump",
"canWallJump",
"SpaceJump",
"canSpringBallJumpMidAir",
"canIBJ"
]
}
"h_heatedGModeOpenDifferentDoor"Dev note: Frozen Alcoon platforms and Artificial morph IBJ are not included, as Samus can crouch jump and down grab; they can be considered if G-mode + flash suits are added, though they are still likely not useful. FIXME: It is possible to kill a Multiviola in the gap in the floor, but Samus only gets one attempt, and its very difficult to escape with a small Energy drop. |
From: 2
Left Shaft - Bottom Right Door
To: 5
Far Right Door
It is important avoid touching the invisible fireballs the Alcoons place. It is possible to kill them without any beam upgrades or ammo by jumping and shooting horizontally near the floor surface. Stay near the far wall when shooting to prevent getting too close and triggering their jump. After entering the morph tunnel, roll through the two camera scroll blocks a few times to overload PLMs. They are at the entrance and two tiles in the tunnel. Exit G-mode and go through the room to the far right door. Entrance condition: {
"comeInWithGMode": {
"mode": "any",
"morphed": false
}
}Requires: "Morph"
{
"or": [
"HiJump",
"canWallJump",
"SpaceJump",
"canSpringBallJumpMidAir",
"canIBJ",
{
"and": [
"h_crouchJumpDownGrab",
"canBombHorizontally"
]
},
{
"and": [
"h_crouchJumpDownGrab",
"canTrickyUseFrozenEnemies"
]
}
]
}
"h_heatedGModeOffCameraDoor"Dev note: Frozen Alcoon platforms and Artificial morph IBJ are not included, as Samus can crouch jump and down grab; they can be considered if G-mode + flash suits are added, though they are still likely not useful. |
From: 3
Left Shaft - Middle Right Door
To: 1
Left Shaft - Top Left Door
It is possible to kill a Multiviola by the door and pause abuse to grab its Energy drop on G-mode exit. It is important avoid touching the invisible fireballs the Alcoons place, and to prevent them from shooting too many fireballs, as they will eventually prevent drops from appearing. One easy way to do this without any beam upgrades or ammo is to kill them before they jump. This can be done from below by jumping and shooting horizontally near the floor surface. Stay near the far wall when shooting to prevent getting too close and triggering their jump. Entrance condition: {
"comeInWithGMode": {
"mode": "any",
"morphed": false
}
}Requires: {
"or": [
"h_crouchJumpDownGrab",
"HiJump",
"canWallJump",
"SpaceJump",
"canSpringBallJumpMidAir"
]
}
{
"or": [
"h_heatedGModeOpenDifferentDoor",
{
"and": [
"h_heatedGModePauseAbuse",
"canFarmWhileShooting",
"canTrickyDodgeEnemies"
]
}
]
}Dev note: Frozen Alcoon platforms and Artificial morph IBJ are not included, as Samus can crouch jump and down grab; they can be considered if G-mode + flash suits are added, though they are still likely not useful. Those are also likely not compatible with preventing the Alcoons from overloading drops. |
From: 3
Left Shaft - Middle Right Door
To: 3
Left Shaft - Middle Right Door
Requires: "h_heatProof"
{
"resetRoom": {
"nodes": [
3
]
}
}
{
"or": [
{
"and": [
"canDash",
{
"or": [
"Plasma",
"ScrewAttack",
{
"and": [
"Wave",
{
"cycleFrames": 90
}
]
},
{
"and": [
"Spazer",
{
"cycleFrames": 90
}
]
},
{
"and": [
"canDodgeWhileShooting",
{
"cycleFrames": 285
}
]
}
]
}
]
},
{
"haveBlueSuit": {}
}
]
}
{
"or": [
"canWallJump",
"HiJump",
"h_crouchJumpDownGrab",
"SpaceJump"
]
}
{
"cycleFrames": 210
}Resets obstacles: R-Mode Farm cycle drops: 1 Multiviola, 1 Alcoon |
From: 3
Left Shaft - Middle Right Door
To: 4
Left Shaft - Top Right Door
It is important avoid touching the invisible fireballs the Alcoons place. Entrance condition: {
"comeInWithGMode": {
"mode": "any",
"morphed": false
}
}Requires: {
"or": [
"h_crouchJumpDownGrab",
"HiJump",
"canWallJump",
"SpaceJump",
"canSpringBallJumpMidAir",
"canIBJ"
]
}
"h_heatedGModeOpenDifferentDoor"Dev note: Frozen Alcoon platforms and Artificial morph IBJ are not included, as Samus can crouch jump and down grab; they can be considered if G-mode + flash suits are added, though they are still likely not useful. FIXME: It is possible to kill a Multiviola in the gap in the floor, but Samus only gets one attempt, and its very difficult to escape with a small Energy drop. |
From: 3
Left Shaft - Middle Right Door
To: 5
Far Right Door
It is important avoid touching the invisible fireballs the Alcoons place. It is possible to kill them without any beam upgrades or ammo by jumping and shooting horizontally near the floor surface. Stay near the far wall when shooting to prevent getting too close and triggering their jump. After entering the morph tunnel, roll through the two camera scroll blocks a few times to overload PLMs. They are at the entrance and two tiles in the tunnel. Exit G-mode and go through the room to the far right door. Entrance condition: {
"comeInWithGMode": {
"mode": "any",
"morphed": false
}
}Requires: "Morph"
{
"or": [
"HiJump",
"canWallJump",
"SpaceJump",
"canSpringBallJumpMidAir",
"canIBJ",
{
"and": [
"h_crouchJumpDownGrab",
"canBombHorizontally"
]
},
{
"and": [
"h_crouchJumpDownGrab",
"canTrickyUseFrozenEnemies"
]
}
]
}
"h_heatedGModeOffCameraDoor"Dev note: Frozen Alcoon platforms and Artificial morph IBJ are not included, as Samus can crouch jump and down grab; they can be considered if G-mode + flash suits are added, though they are still likely not useful. |
From: 3
Left Shaft - Middle Right Door
To: 7
Left Shaft - Middle Junction
Requires: {
"or": [
{
"and": [
"canWallJump",
{
"heatFrames": 120
}
]
},
{
"and": [
"HiJump",
{
"heatFrames": 110
}
]
},
{
"and": [
"h_heatedCrouchJumpDownGrab",
{
"heatFrames": 150
}
]
},
{
"and": [
"SpaceJump",
{
"heatFrames": 155
}
]
},
{
"and": [
"canSpringBallJumpMidAir",
{
"heatFrames": 180
}
]
}
]
}
{
"or": [
"canDash",
{
"and": [
{
"haveBlueSuit": {}
},
{
"heatFrames": 45
}
]
}
]
} |
From: 4
Left Shaft - Top Right Door
To: 1
Left Shaft - Top Left Door
It is possible to kill a Multiviola by the door and pause abuse to grab its Energy drop on G-mode exit. It is important avoid touching the invisible fireballs the Alcoons place, and to prevent them from shooting too many fireballs, as they will eventually prevent drops from appearing. One easy way to do this without any beam upgrades or ammo is to kill them before they jump. This can be done from below by jumping and shooting horizontally near the floor surface. Stay near the far wall when shooting to prevent getting too close and triggering their jump. Entrance condition: {
"comeInWithGMode": {
"mode": "any",
"morphed": false
}
}Requires: {
"or": [
"h_crouchJumpDownGrab",
"HiJump",
"canWallJump",
"SpaceJump",
"canSpringBallJumpMidAir"
]
}
{
"or": [
"h_heatedGModeOpenDifferentDoor",
{
"and": [
"h_heatedGModePauseAbuse",
"canFarmWhileShooting",
"canTrickyDodgeEnemies"
]
}
]
}Dev note: Frozen Alcoon platforms and Artificial morph IBJ are not included, as Samus can crouch jump and down grab; they can be considered if G-mode + flash suits are added, though they are still likely not useful. Those are also likely not compatible with preventing the Alcoons from overloading drops. |
From: 4
Left Shaft - Top Right Door
To: 4
Left Shaft - Top Right Door
Requires: "h_heatProof"
{
"resetRoom": {
"nodes": [
4
]
}
}
{
"or": [
{
"and": [
"canDash",
{
"or": [
"Plasma",
"ScrewAttack",
{
"and": [
"Wave",
{
"cycleFrames": 20
}
]
},
{
"and": [
"Spazer",
{
"cycleFrames": 90
}
]
},
{
"and": [
"canDodgeWhileShooting",
{
"cycleFrames": 260
},
{
"or": [
"canFarmWhileShooting",
{
"cycleFrames": 90
}
]
}
]
}
]
}
]
},
{
"and": [
{
"haveBlueSuit": {}
},
{
"cycleFrames": 90
}
]
}
]
}
{
"or": [
"canWallJump",
"HiJump",
"h_crouchJumpDownGrab",
"SpaceJump"
]
}
{
"cycleFrames": 450
}Resets obstacles: R-Mode Farm cycle drops: 1 Multiviola, 2 Alcoon |
From: 4
Left Shaft - Top Right Door
To: 4
Left Shaft - Top Right Door
Requires: "canComplexGMode"
{
"or": [
"canWallJump",
"HiJump",
"SpaceJump",
"h_heatedCrouchJumpDownGrab",
"Wave"
]
}
{
"heatFrames": 950
}
{
"or": [
"canTrickyJump",
"Wave",
"Spazer",
"Plasma",
{
"ammo": {
"type": "Missile",
"count": 1
}
},
{
"ammo": {
"type": "Super",
"count": 1
}
},
{
"enemyDamage": {
"enemy": "Alcoon",
"type": "fireball",
"hits": 1
}
}
]
}Exit condition: {
"leaveWithGModeSetup": {}
} |
From: 4
Left Shaft - Top Right Door
To: 5
Far Right Door
It is important avoid touching the invisible fireballs the Alcoons place. It is possible to kill them without any beam upgrades or ammo by jumping and shooting horizontally near the floor surface. Stay near the far wall when shooting to prevent getting too close and triggering their jump. After entering the morph tunnel, roll through the two camera scroll blocks a few times to overload PLMs. They are at the entrance and two tiles in the tunnel. Exit G-mode and go through the room to the far right door. Entrance condition: {
"comeInWithGMode": {
"mode": "any",
"morphed": false
}
}Requires: "Morph"
{
"or": [
"HiJump",
"canWallJump",
"SpaceJump",
"canSpringBallJumpMidAir",
"canIBJ",
{
"and": [
"h_crouchJumpDownGrab",
"canBombHorizontally"
]
},
{
"and": [
"h_crouchJumpDownGrab",
"canTrickyUseFrozenEnemies"
]
}
]
}
"h_heatedGModeOffCameraDoor"Dev note: Frozen Alcoon platforms and Artificial morph IBJ are not included, as Samus can crouch jump and down grab; they can be considered if G-mode + flash suits are added, though they are still likely not useful. |
|
Requires: {
"or": [
{
"and": [
"canWallJump",
{
"heatFrames": 130
}
]
},
{
"and": [
"HiJump",
{
"heatFrames": 115
}
]
},
{
"and": [
"h_heatedCrouchJumpDownGrab",
{
"heatFrames": 150
}
]
},
{
"and": [
"SpaceJump",
{
"heatFrames": 155
}
]
},
{
"and": [
"canSpringBallJumpMidAir",
{
"heatFrames": 180
}
]
}
]
}
{
"or": [
"canDash",
{
"and": [
{
"haveBlueSuit": {}
},
{
"heatFrames": 40
}
]
}
]
} |
|
Requires: {
"or": [
{
"and": [
"canWallJump",
{
"heatFrames": 100
}
]
},
{
"and": [
"canWallJump",
"ScrewAttack",
{
"heatFrames": 85
}
]
},
{
"and": [
"HiJump",
{
"heatFrames": 95
}
]
},
{
"and": [
"HiJump",
"ScrewAttack",
{
"heatFrames": 75
}
]
},
{
"and": [
"HiJump",
"Plasma",
{
"heatFrames": 70
}
]
},
{
"and": [
"h_heatedCrouchJumpDownGrab",
{
"heatFrames": 100
}
]
},
{
"and": [
"SpaceJump",
{
"heatFrames": 115
}
]
},
{
"and": [
"canSpringBallJumpMidAir",
{
"heatFrames": 120
}
]
}
]
}
{
"or": [
"canDash",
{
"heatFrames": 30
}
]
}Unlocks doors: {"types":["missiles"],"requires":[{"heatFrames":30}]}
{"types":["powerbomb"],"requires":[{"heatFrames":70}]}Dev note: The heat frames account for bad scenarios of where the Multiviola may be (entering from node 4), which is why Screw Attack can be helpful. |
From: 6
Left Shaft - Top Junction
To: 1
Left Shaft - Top Left Door
Requires: "canDash"
{
"or": [
{
"and": [
"canWallJump",
{
"heatFrames": 80
}
]
},
{
"and": [
"canWallJump",
"ScrewAttack",
{
"heatFrames": 60
}
]
},
{
"and": [
"HiJump",
{
"heatFrames": 80
}
]
},
{
"and": [
"HiJump",
"ScrewAttack",
{
"heatFrames": 60
}
]
},
{
"and": [
"h_heatedCrouchJumpDownGrab",
{
"heatFrames": 80
}
]
},
{
"and": [
"SpaceJump",
{
"heatFrames": 80
}
]
},
{
"and": [
"canSpringBallJumpMidAir",
{
"heatFrames": 90
}
]
}
]
}Exit condition: {
"leaveWithRunway": {
"length": 8,
"openEnd": 1
}
}Unlocks doors: {"types":["missiles"],"requires":[{"heatFrames":50}]}
{"types":["super"],"requires":[]}
{"types":["powerbomb"],"requires":[{"heatFrames":70}]} |
|
Requires: {
"or": [
{
"and": [
"canWallJump",
{
"heatFrames": 75
}
]
},
{
"and": [
"HiJump",
{
"heatFrames": 60
}
]
},
{
"and": [
"h_heatedCrouchJumpDownGrab",
{
"heatFrames": 110
}
]
},
{
"and": [
"SpaceJump",
{
"heatFrames": 95
}
]
},
{
"and": [
"canSpringBallJumpMidAir",
{
"heatFrames": 120
}
]
}
]
} |
From: 7
Left Shaft - Middle Junction
To: 4
Left Shaft - Top Right Door
Requires: "canDash"
{
"or": [
{
"and": [
"canWallJump",
{
"heatFrames": 55
}
]
},
{
"and": [
"HiJump",
{
"heatFrames": 40
}
]
},
{
"and": [
"h_heatedCrouchJumpDownGrab",
{
"heatFrames": 90
}
]
},
{
"and": [
"SpaceJump",
{
"heatFrames": 75
}
]
},
{
"and": [
"canSpringBallJumpMidAir",
{
"heatFrames": 100
}
]
}
]
}Exit condition: {
"leaveWithRunway": {
"length": 4,
"openEnd": 1
}
}Unlocks doors: {"types":["missiles"],"requires":[{"heatFrames":50}]}
{"types":["super"],"requires":[]}
{"types":["powerbomb"],"requires":[{"heatFrames":110}]} |
|
Requires: {
"or": [
{
"and": [
"canWallJump",
{
"heatFrames": 150
}
]
},
{
"and": [
"HiJump",
{
"heatFrames": 110
}
]
},
{
"and": [
"h_heatedCrouchJumpDownGrab",
"h_heatedCrouchJumpDownGrab",
{
"heatFrames": 270
}
]
},
{
"and": [
"h_heatedCrouchJumpDownGrab",
"h_heatedCrouchJumpDownGrab",
{
"enemyKill": {
"enemies": [
[
"Multiviola"
]
],
"explicitWeapons": [
"Missile",
"Super",
"Wave",
"Plasma"
]
}
},
{
"heatFrames": 200
}
]
},
{
"and": [
"SpaceJump",
{
"heatFrames": 205
}
]
}
]
}
{
"or": [
"canDash",
{
"and": [
{
"haveBlueSuit": {}
},
{
"heatFrames": 40
}
]
}
]
} |
From: 8
Left Shaft - Bottom Junction
To: 3
Left Shaft - Middle Right Door
Requires: {
"or": [
{
"and": [
"canWallJump",
{
"heatFrames": 85
}
]
},
{
"and": [
"canWallJump",
"ScrewAttack",
{
"heatFrames": 65
}
]
},
{
"and": [
"HiJump",
{
"heatFrames": 75
}
]
},
{
"and": [
"HiJump",
"ScrewAttack",
{
"heatFrames": 55
}
]
},
{
"and": [
"h_heatedCrouchJumpDownGrab",
{
"heatFrames": 80
},
{
"or": [
{
"noBlueSuit": {}
},
"canXRayCancelShinecharge",
"canMidAirMorph",
{
"heatFrames": 60
}
]
}
]
},
{
"and": [
"SpaceJump",
{
"heatFrames": 100
}
]
},
{
"and": [
"canSpringBallJumpMidAir",
{
"heatFrames": 95
}
]
}
]
} |
From: 8
Left Shaft - Bottom Junction
To: 3
Left Shaft - Middle Right Door
Requires: "canDash"
{
"or": [
{
"and": [
"canWallJump",
{
"heatFrames": 65
}
]
},
{
"and": [
"canWallJump",
"ScrewAttack",
{
"heatFrames": 45
}
]
},
{
"and": [
"HiJump",
{
"heatFrames": 55
}
]
},
{
"and": [
"HiJump",
"ScrewAttack",
{
"heatFrames": 35
}
]
},
{
"and": [
"h_heatedCrouchJumpDownGrab",
{
"heatFrames": 60
}
]
},
{
"and": [
"SpaceJump",
{
"heatFrames": 80
}
]
},
{
"and": [
"canSpringBallJumpMidAir",
{
"heatFrames": 75
}
]
}
]
}Exit condition: {
"leaveWithRunway": {
"length": 4,
"openEnd": 1
}
}Unlocks doors: {"types":["missiles"],"requires":[{"heatFrames":50}]}
{"types":["super"],"requires":[]}
{"types":["powerbomb"],"requires":[{"heatFrames":110}]} |
From: 8
Left Shaft - Bottom Junction
To: 3
Left Shaft - Middle Right Door
Requires: {
"heatFrames": 65
}
"h_storedSpark"
{
"or": [
{
"shinespark": {
"frames": 4,
"excessFrames": 3
}
},
{
"and": [
"canDownGrab",
{
"shinespark": {
"frames": 4,
"excessFrames": 4
}
}
]
}
]
}
{
"heatFrames": 105
} |
|
Requires: {
"or": [
{
"and": [
"canWallJump",
{
"heatFrames": 160
}
]
},
{
"and": [
"canWallJump",
"ScrewAttack",
{
"heatFrames": 140
}
]
},
{
"and": [
"HiJump",
{
"heatFrames": 135
}
]
},
{
"and": [
"HiJump",
"ScrewAttack",
{
"heatFrames": 105
}
]
},
{
"and": [
"h_heatedCrouchJumpDownGrab",
"h_heatedCrouchJumpDownGrab",
{
"heatFrames": 195
},
{
"or": [
{
"noBlueSuit": {}
},
"canXRayCancelShinecharge",
"canMidAirMorph",
{
"heatFrames": 60
}
]
}
]
},
{
"and": [
"SpaceJump",
{
"heatFrames": 210
}
]
},
{
"and": [
"canSpringBallJumpMidAir",
{
"heatFrames": 280
}
]
}
]
}
{
"or": [
"canDash",
{
"and": [
{
"haveBlueSuit": {}
},
{
"heatFrames": 40
}
]
}
]
} |
|
Spin-jump across both sets of lava, trying to minimize the time spent in lava. To get onto the first pillar, either use a wall jump off the pillar, or use the Tripper briefly as a platform by crouch jumping or down grabbing onto it. Requires: "canSuitlessLavaDive"
{
"heatFrames": 710
}
{
"lavaFrames": 120
}
{
"or": [
"canWallJump",
{
"and": [
{
"or": [
"h_underwaterCrouchJump",
"canDownGrab"
]
},
{
"heatFrames": 110
},
{
"lavaFrames": 20
}
]
}
]
}
{
"or": [
"canDash",
{
"and": [
{
"heatFrames": 70
},
{
"lavaFrames": 10
}
]
}
]
} |
|
Spin-jump across both sets of lava, trying to minimize the time spent in lava. To get onto the first pillar, either use a wall jump off the pillar, or use the Tripper briefly as a platform by crouch jumping or down grabbing onto it. Requires: "canSuitlessLavaDive"
{
"heatFrames": 710
}
{
"lavaFrames": 120
}
{
"or": [
"canWallJump",
{
"and": [
{
"or": [
"h_underwaterCrouchJump",
"canDownGrab"
]
},
{
"heatFrames": 220
},
{
"lavaFrames": 70
}
]
}
]
}
{
"or": [
"canDash",
{
"and": [
{
"heatFrames": 70
},
{
"lavaFrames": 10
}
]
}
]
} |
From: 5
Bottom Floating Platform Junction
To: 1
Top Left Door
Requires: "canComplexGMode"
{
"heatFrames": 480
}
{
"or": [
"canWallJump",
"HiJump",
"SpaceJump",
"h_crouchJumpDownGrab"
]
}
{
"or": [
"canTrickyUseFrozenEnemies",
"canMoonwalk",
"canInsaneJump"
]
}
{
"or": [
"canDash",
"canTrickyGMode"
]
}Exit condition: {
"leaveWithGModeSetup": {}
}Unlocks doors: {"types":["super"],"requires":[]}
{"types":["missiles","powerbomb"],"requires":["never"]}Dev note: FIXME: the frozen enemy option should use extra heat frames (e.g. with pausing to turn off ice). |
From: 5
Bottom Floating Platform Junction
To: 3
Top Right Door
Requires: {
"or": [
"canWallJump",
"HiJump",
"SpaceJump",
"h_crouchJumpDownGrab"
]
}
{
"heatFrames": 390
}Exit condition: {
"leaveWithGModeSetup": {}
}Unlocks doors: {"types":["super"],"requires":[]}
{"types":["missiles","powerbomb"],"requires":["never"]} |
From: 5
Bottom Floating Platform Junction
To: 4
Top Floating Platform Junction
Requires: "h_crouchJumpDownGrab"
{
"heatFrames": 85
} |
From: 5
Bottom Floating Platform Junction
To: 4
Top Floating Platform Junction
Bring up the Gamets to the platform above, in order to delay farming them. If not enough big energy drops spawn, go back down, farm up, and try again. Requires: "canFarmWhileShooting"
"canBePatient"
{
"or": [
"canWallJump",
{
"and": [
"HiJump",
"canCameraManip",
"canInsaneJump"
]
},
"SpaceJump",
"h_crouchJumpDownGrab",
"canTrickySpringBallJump",
{
"and": [
"h_useMorphBombs",
{
"tech": "canUnmorphBombBoost"
}
]
}
]
}
{
"heatFrames": 35
} |
From: 2
Right Door
To: 1
Left Door
Entrance condition: {
"comeInWithGMode": {
"mode": "indirect",
"morphed": false
}
}Requires: {
"or": [
"SpaceJump",
{
"and": [
"HiJump",
"canSpeedyJump",
"canWallJump"
]
},
{
"and": [
"HiJump",
"canSpringBallJumpMidAir",
{
"or": [
{
"noBlueSuit": {}
},
{
"and": [
"Gravity",
{
"lavaFrames": 25
}
]
}
]
}
]
},
{
"and": [
{
"notable": "Spring Ball Bomb Boost"
},
{
"noBlueSuit": {}
},
"canSpringBallJumpMidAir",
"canUnmorphBombBoost",
"h_crouchJumpDownGrab",
{
"or": [
"canInsaneJump",
"h_additionalBomb"
]
}
]
},
{
"and": [
{
"or": [
{
"canShineCharge": {
"usedTiles": 15,
"openEnd": 2
}
},
"h_storedSpark"
]
},
"canShinechargeMovementComplex",
{
"or": [
{
"shinespark": {
"frames": 12,
"excessFrames": 2
}
},
{
"and": [
"h_speedJump",
{
"shinespark": {
"frames": 9,
"excessFrames": 3
}
}
]
}
]
}
]
},
{
"and": [
{
"notable": "Ceiling Mockball Spring Fling"
},
"h_speedJump",
"canInsaneJump",
"canMomentumConservingMorph",
"canSpringFling"
]
}
]
}
"h_heatedGModeOpenDifferentDoor" |
From: 2
Right Door
To: 2
Right Door
Touch the item as little as possible in order to prevent PLMs from being overloaded, so the platforms below remain solid. Entrance condition: {
"comeInWithGMode": {
"mode": "direct",
"morphed": false
}
}Requires: "canRemoteAcquire"
{
"or": [
"SpaceJump",
{
"and": [
"HiJump",
"canSpeedyJump",
"canWallJump"
]
},
{
"and": [
"HiJump",
"canSpringBallJumpMidAir",
{
"or": [
{
"noBlueSuit": {}
},
{
"and": [
"Gravity",
{
"lavaFrames": 25
}
]
}
]
}
]
},
{
"and": [
{
"notable": "Spring Ball Bomb Boost"
},
{
"noBlueSuit": {}
},
"canSpringBallJumpMidAir",
"canUnmorphBombBoost",
"h_crouchJumpDownGrab",
"canInsaneJump"
]
},
{
"and": [
{
"or": [
{
"canShineCharge": {
"usedTiles": 15,
"openEnd": 2
}
},
"h_storedSpark"
]
},
"canShinechargeMovementComplex",
{
"or": [
{
"shinespark": {
"frames": 12,
"excessFrames": 2
}
},
{
"and": [
"h_speedJump",
{
"shinespark": {
"frames": 9,
"excessFrames": 3
}
}
]
}
]
}
]
},
{
"and": [
{
"notable": "Ceiling Mockball Spring Fling"
},
"h_speedJump",
"canInsaneJump",
"canMomentumConservingMorph",
"canSpringFling"
]
}
]
}
"h_heatedDirectGModeLeaveSameDoor"Collects items: 3 Dev note: There is no leniency option for using an extra Power Bomb, because it will contribute to PLM overload. (2 PBs is technically barely possible) |
|
Entrance condition: {
"comeInWithGMode": {
"mode": "indirect",
"morphed": false
}
}Requires: "h_heatedGMode"
{
"or": [
"SpaceJump",
{
"and": [
"HiJump",
"canSpeedyJump",
"canWallJump"
]
},
{
"and": [
"HiJump",
"canSpringBallJumpMidAir",
{
"or": [
{
"noBlueSuit": {}
},
{
"and": [
"Gravity",
{
"lavaFrames": 25
}
]
}
]
}
]
},
{
"and": [
{
"notable": "Spring Ball Bomb Boost"
},
{
"noBlueSuit": {}
},
"canSpringBallJumpMidAir",
"canUnmorphBombBoost",
"h_crouchJumpDownGrab",
{
"or": [
"canInsaneJump",
"h_additionalBomb"
]
}
]
},
{
"and": [
{
"or": [
{
"canShineCharge": {
"usedTiles": 15,
"openEnd": 2
}
},
"h_storedSpark"
]
},
"canShinechargeMovementComplex",
{
"or": [
{
"shinespark": {
"frames": 12,
"excessFrames": 2
}
},
{
"and": [
"h_speedJump",
{
"shinespark": {
"frames": 9,
"excessFrames": 3
}
}
]
}
]
}
]
},
{
"and": [
{
"notable": "Ceiling Mockball Spring Fling"
},
"h_speedJump",
"canInsaneJump",
"canMomentumConservingMorph",
"canSpringFling"
]
}
]
}
{
"heatFrames": 90
}Clears obstacles: A Dev note: Goes to 3 because opening the gate mostly only makes sense when going back to the right for a longer runway or obtaining the item. FIXME: Variants with shinesparking or Geruta damage boost can be added. (Energy from immobile, CF, or energy free sparks) |
|
Entrance condition: {
"comeInWithGMode": {
"mode": "any",
"morphed": false
}
}Requires: "h_heatedGMode"
{
"or": [
"SpaceJump",
{
"and": [
"HiJump",
"canSpeedyJump",
"canWallJump"
]
},
{
"and": [
"HiJump",
"canSpringBallJumpMidAir",
{
"or": [
"canDash",
{
"and": [
{
"haveBlueSuit": {}
},
"Gravity"
]
}
]
}
]
},
{
"and": [
"canDash",
{
"notable": "Spring Ball Bomb Boost"
},
"canSpringBallJumpMidAir",
"canUnmorphBombBoost",
"h_crouchJumpDownGrab",
{
"or": [
"canInsaneJump",
"h_additionalBomb"
]
}
]
},
{
"and": [
{
"canShineCharge": {
"usedTiles": 15,
"openEnd": 2
}
},
"canShinechargeMovementComplex",
{
"or": [
{
"shinespark": {
"frames": 12,
"excessFrames": 2
}
},
{
"and": [
"h_speedJump",
{
"shinespark": {
"frames": 9,
"excessFrames": 3
}
}
]
}
]
}
]
},
{
"and": [
{
"notable": "Ceiling Mockball Spring Fling"
},
"h_speedJump",
"canInsaneJump",
"canMomentumConservingMorph",
"canSpringFling"
]
}
]
}
{
"heatFrames": 0
}Dev note: FIXME: Variants with Geruta damage boost can be added. (Energy from immobile or CF) |
|
Uses a bomb boost at the end of a mid-air SpringBall jump. Also requires a crouch jump and down-grab to complete the maneuver. Requires: "canDash"
{
"notable": "Spring Ball Bomb Boost"
}
"canSpringBallJumpMidAir"
"canUnmorphBombBoost"
"h_crouchJumpDownGrab"
{
"heatFrames": 800
}
{
"or": [
"canInsaneJump",
{
"and": [
{
"heatFrames": 250
},
"h_additionalBomb"
]
}
]
} |
From: 3
Bottom Right Door
To: 1
Top Right Door
Entrance condition: {
"comeInShinecharged": {}
}Requires: {
"shineChargeFrames": 85
}
{
"doorUnlockedAtNode": 1
}
"canMidAirMorph"
"h_crouchJumpDownGrab"
"canShinechargeMovementTricky"
{
"shinespark": {
"frames": 20,
"excessFrames": 0
}
}
{
"heatFrames": 285
}Unlocks doors: {"types":["ammo"],"requires":["never"]}Dev note: Unlocking the door would be possible but would require more than the default amount of heat frames, which would need testing. |
From: 3
Bottom Right Door
To: 1
Top Right Door
Entrance condition: {
"comeInShinecharging": {
"length": 11,
"openEnd": 0
}
}Requires: {
"doorUnlockedAtNode": 1
}
"canShinechargeMovementTricky"
"canMidAirMorph"
"h_crouchJumpDownGrab"
{
"shinespark": {
"frames": 19,
"excessFrames": 0
}
}
{
"heatFrames": 370
}Unlocks doors: {"types":["ammo"],"requires":["never"]}Dev note: Unlocking the door would be possible but would require more than the default amount of heat frames, which would need testing. |
|
Requires: {
"or": [
{
"and": [
"canWallJump",
{
"heatFrames": 60
}
]
},
{
"and": [
"h_crouchJumpDownGrab",
{
"heatFrames": 70
}
]
}
]
} |
From: 3
Item
To: 4
Central Junction
Jump and spark horizontally across the room at a precise height just above the acid in order to crash into then down grab the floor. Requires: "canInsaneJump"
"canDownGrab"
"h_storedSpark"
"canDash"
{
"shinespark": {
"frames": 32,
"excessFrames": 0
}
} |
|
Requires: {
"or": [
"HiJump",
"canWallJump",
"h_crouchJumpDownGrab",
"canSpringBallJumpMidAir"
]
} |
|
Requires: {
"or": [
"canDash",
"Grapple",
"canWallJump",
"SpaceJump",
"canSpringBallJumpMidAir",
"canBombJumpWaterEscape",
{
"and": [
"HiJump",
"canDownGrab"
]
},
"canSpringBallBombJump"
]
} |
From: 4
Center Platform Junction
To: 3
Junction Left of Green Gate
Either freeze the Puyos immediately on the stairs, or at the highest part of their jump to barely jump up to the ledge with HiJump. Requires: "Gravity"
"HiJump"
"canTrickyUseFrozenEnemies"
{
"or": [
"h_crouchJumpDownGrab",
"Spazer",
"Wave",
"Plasma"
]
}Dev note: The canCrouchJump is not a h_underwaterCrouchJump, because Gravity is required. |
From: 2
Right Vertical Door
To: 1
Left Door
Charge a spark to the right, then come back, run and jump, and do a horizontal spark at the apex. If needed, down-grab onto the ledge. Requires: {
"notable": "Big Jump Shinespark"
}
"h_speedJump"
"canShinechargeMovementComplex"
{
"obstaclesCleared": [
"B"
]
}
{
"canShineCharge": {
"usedTiles": 32,
"gentleDownTiles": 6,
"openEnd": 1
}
}
{
"shinespark": {
"frames": 52
}
}
"canDownGrab" |
From: 5
Small Platforms Junction
To: 1
Left Door
Use an unmorph bomb boost at the end of a mid-air SpringBall jump. Also requires a crouch-jump and down-grab to complete the maneuver. A spring fling can help add some lenience to the bomb placement and unmorph timing; it requires pausing early, before jumping, in order to be able to initiate another pause immediately before placing a Power Bomb. Requires: {
"notable": "Spring Ball Unmorph Bomb Boost"
}
"canSpringBallJumpMidAir"
"canUnmorphBombBoost"
"h_crouchJumpDownGrab" |
From: 3
Bottom Right Door
To: 1
Top Left Door
Use the moving platform (Kamer) to elevate the Gamets, then damage boost off of them to get to the top left. Alternatively, it is possible to wall jump off of the right overhang and damage boost from the ceiling Ripper, but it is likely more difficult. Requires: {
"notable": "Damage Boost"
}
"canTrickyJump"
{
"or": [
"canWallJump",
{
"and": [
"h_crouchJumpDownGrab",
"canTrickyDodgeEnemies"
]
}
]
}
"canHorizontalDamageBoost"
{
"enemyDamage": {
"enemy": "Gamet",
"type": "contact",
"hits": 1
}
} |
From: 3
Bottom Right Door
To: 4
Top Right Door
Crouch jump then down grab starting from the moving platform. A very fast crouch jump is necessary in order to not have lowered the platform too low. Requires: "h_crouchJumpDownGrab"
"canTrickyJump"
{
"or": [
{
"noBlueSuit": {}
},
"canMidAirMorph",
"canXRayCancelShinecharge"
]
} |
From: 4
Top Right Door
To: 4
Top Right Door
Lure the Gamets while using the Kamer, then get up to the doorway with a quick crouch jump + down grab or by other means. Requires: {
"or": [
"HiJump",
"SpaceJump",
"canWallJump",
"canSpringBallJumpMidAir",
"canTrickyUseFrozenEnemies",
{
"and": [
"canTrickyJump",
"h_crouchJumpDownGrab"
]
},
{
"and": [
"canInsaneJump",
"canPreciseGrapple"
]
},
{
"and": [
"canJumpIntoIBJ",
"canDoubleBombJump"
]
}
]
}Exit condition: {
"leaveWithGModeSetup": {}
}Dev note: A crouch jump + down grab should always be usable except when preserving a blue suit. A flash suit is lost when using X-Ray, so it can not be kept through a G-Mode setup. |
From: 2
Middle Right Door
To: 2
Middle Right Door
Entrance condition: {
"comeInWithGMode": {
"mode": "direct",
"morphed": false
}
}Requires: {
"or": [
"SpaceJump",
"canWallJump",
"HiJump",
"canSpringBallJumpMidAir",
"canSpeedyJump",
"h_crouchJumpDownGrab",
"canIBJ"
]
}Exit condition: {
"leaveWithGMode": {
"morphed": false
}
} |
From: 2
Middle Right Door
To: 3
Top Right Door
Enter with G-mode direct, back up to between 1 and 6 pixels from the door transition, and activate X-ray to get very deep stuck in the door. Climb up 1 screen, and perform a turnaround buffered spin-jump away from the door to trigger the transition, bypassing any lock on the door. Entrance condition: {
"comeInWithGMode": {
"mode": "direct",
"morphed": false
}
}Requires: "canGModeXRayClimb"
"h_heatProof"
{
"or": [
"canWallJump",
"h_crouchJumpDownGrab",
"HiJump",
"SpaceJump",
"canIBJ",
"canArtificialMorph"
]
}
"canXRayClimb"Bypasses door shell: true |
From: 2
Middle Right Door
To: 5
Junction Above Bottom Blocks
Bomb all the blocks before exiting G-mode near the lower bomb blocks. It is possible to fall back onto the door shell with artificial morph, then use Spring Ball to place a Power Bomb high enough. Entrance condition: {
"comeInWithGMode": {
"mode": "direct",
"morphed": true
}
}Requires: "h_heatedGMode"
{
"or": [
{
"and": [
"h_artificialMorphPowerBomb",
"canArtificialMorph",
"h_artificialMorphSpringBall"
]
},
{
"and": [
"h_usePowerBomb",
{
"or": [
"HiJump",
"h_crouchJumpDownGrab",
"canSpringBallJumpMidAir"
]
}
]
}
]
}
"h_additionalBomb"
{
"heatFrames": 0
}Clears obstacles: A, B, C Dev note: FIXME: If Bombs are available (vs. Power Bombs), it's not necessary to break all the bottom blocks. |
From: 2
Middle Right Door
To: 5
Junction Above Bottom Blocks
Bomb the upper blocks before exiting G-mode near the lower bomb blocks. It is possible to fall back onto the door shell with artificial morph, then use Spring Ball to place a Power Bomb high enough. Entrance condition: {
"comeInWithGMode": {
"mode": "direct",
"morphed": true
}
}Requires: "h_heatedGMode"
{
"or": [
{
"and": [
"h_artificialMorphPowerBomb",
"canArtificialMorph",
"h_artificialMorphSpringBall"
]
},
{
"and": [
"h_usePowerBomb",
{
"or": [
"HiJump",
"h_crouchJumpDownGrab",
"canSpringBallJumpMidAir"
]
}
]
}
]
}
{
"heatFrames": 0
}Clears obstacles: A |
|
Requires: {
"or": [
{
"and": [
"HiJump",
{
"heatFrames": 45
}
]
},
{
"and": [
"SpaceJump",
{
"heatFrames": 80
}
]
},
{
"and": [
"canWallJump",
{
"heatFrames": 50
}
]
},
{
"and": [
"h_crouchJumpDownGrab",
{
"heatFrames": 65
}
]
},
{
"and": [
"canSpringBallJumpMidAir",
{
"heatFrames": 80
}
]
},
{
"and": [
"canIBJ",
{
"heatFrames": 520
}
]
},
{
"and": [
"canJumpIntoIBJ",
{
"heatFrames": 160
}
]
}
]
} |
From: 5
Below Left Door Junction
To: 1
Left Door
Perform a gravity jump followed by a springball jump to reach the left side door. The gravity jump will only get high enough if it is within the last two frames, and the Spring Ball jump must be delayed and near the peak of the jump. Requires: {
"notable": "Reverse Acid Dive"
}
{
"obstaclesNotCleared": [
"A"
]
}
"HiJump"
"canTrickyJump"
"canGravityJump"
{
"or": [
"h_crouchJumpDownGrab",
{
"and": [
"canTrickyCarryFlashSuit",
"canDownGrab"
]
}
]
}
"canSpringBallJumpMidAir"
{
"heatFrames": 50
}
{
"acidFrames": 50
}
{
"gravitylessHeatFrames": 300
}
{
"gravitylessAcidFrames": 300
}Unlocks doors: {"types":["super"],"requires":[]}
{"types":["missiles","powerbomb"],"requires":["never"]}Dev note: It is possible to do this with a flash suit, and no crouch jump, but it requires a frame perfect jump and then a Spring Ball jump within 3 pixels of its peak. |
|
Requires: "canUseFrozenEnemies"
"h_crouchJumpDownGrab"
{
"heatFrames": 660
}
{
"or": [
{
"and": [
"h_usePowerBomb",
{
"heatFrames": 50
}
]
},
{
"obstaclesCleared": [
"A"
]
}
]
}Clears obstacles: A Unlocks doors: {"types":["missiles"],"requires":[{"heatFrames":30}]}
{"types":["powerbomb"],"requires":[],"useImplicitRequires":false} |
From: 4
Junction Below Bomb Blocks
To: 2
Top Right Door
Requires: {
"obstaclesCleared": [
"B"
]
}
{
"obstaclesNotCleared": [
"A"
]
}
{
"noBlueSuit": {}
}
{
"heatFrames": 160
}
{
"or": [
"h_crouchJumpDownGrab",
"canWallJump",
"canSpringBallJumpMidAir",
"HiJump",
{
"and": [
"SpaceJump",
{
"heatFrames": 20
}
]
},
{
"and": [
"canSpringBallBombJump",
{
"heatFrames": 50
}
]
},
{
"and": [
"canJumpIntoIBJ",
{
"heatFrames": 60
}
]
}
]
} |
From: 9
Junction Below Crumble Blocks, Set Up to Clip
To: 2
Top Right Door
Bring the correct Viola up from the bottom, it can be frozen to avoid damage. After it comes though the uppermost shot blocks, back into the right hand corner and shot buffer on what would be the second hit from the Viola if you were not freezing or avoiding it. Should the shot buffer be missed then the Viola will have to bounce around many more times before being on a cycle where the buffered shot will freeze it in the correct position. Get onto the right side of the Viola, Samus should be standing and partially clipped into the solid tile. Crouch jump and 3 or 4 frames after pressing jump (2 frame window) hold down. Samus will appear to be stuck between the bomb blocks and the solid tile. Press forwards or up to stand up and jump to clip through. If Samus doesn't clip at all down was pressed too soon, if Samus clips the first blocks but appears to be floating while aiming down then down was pressed too late. Requires: {
"notable": "Multiviola Ice Clip"
}
"h_heatProof"
"h_preciseIceClip"
"canPartialFloorClip"
"canTrickyJump"
{
"enemyDamage": {
"enemy": "Multiviola",
"type": "contact",
"hits": 1
}
}
{
"or": [
"h_crouchJumpDownGrab",
"canWallJump",
"canSpringBallJumpMidAir",
"HiJump",
"SpaceJump",
"canJumpIntoIBJ"
]
}Dev note: This may be possible with a high pixel ice clip. FIXME: using a flash suit should also be possible. |
From: 9
Junction Below Crumble Blocks, Set Up to Clip
To: 2
Top Right Door
Freeze the Multiviola on the left side, just below the solid block. XRay standup and jump to clip up, then jump again to get on top of the bomb blocks. Requires: {
"notable": "Multiviola Ice Clip"
}
"h_heatProof"
"h_XRayMorphIceClip"
{
"or": [
"h_crouchJumpDownGrab",
"canWallJump",
"canSpringBallJumpMidAir",
"HiJump",
"SpaceJump",
"canJumpIntoIBJ"
]
} |
|
Requires: "h_heatProof"
{
"resetRoom": {
"nodes": [
1
]
}
}
{
"or": [
"ScrewAttack",
{
"and": [
"Plasma",
"Wave",
"Ice",
{
"cycleFrames": 200
}
]
},
{
"haveBlueSuit": {}
}
]
}
{
"or": [
{
"and": [
"h_crouchJumpDownGrab",
{
"cycleFrames": 60
}
]
},
"canWallJump",
"HiJump",
{
"and": [
"SpaceJump",
{
"cycleFrames": 90
}
]
}
]
}
{
"cycleFrames": 520
}Clears obstacles: A Resets obstacles: B Farm cycle drops: 3 Kihunter (red) Dev note: FIXME: Other beam options for this are possible. |
From: 4
Junction Above Bomb Block
To: 1
Top Left Door
Wait for the Kihunters to move away from where Samus will jump up. This may mean Hitboxing through the middle Kihunter multiple times. Requires: "canDash"
"h_PlasmaHitbox"
"canTrickyDodgeEnemies"
{
"or": [
"canInsaneJump",
{
"enemyDamage": {
"enemy": "Kihunter (red)",
"type": "contact",
"hits": 1
}
}
]
}
{
"or": [
{
"and": [
"canWallJump",
{
"heatFrames": 410
}
]
},
{
"and": [
"h_crouchJumpDownGrab",
{
"heatFrames": 460
}
]
},
{
"and": [
"HiJump",
{
"heatFrames": 360
}
]
},
{
"and": [
"SpaceJump",
"canInsaneJump",
{
"heatFrames": 490
}
]
}
]
}
{
"or": [
"canBeLucky",
{
"heatFrames": 130
}
]
}
{
"or": [
"Wave",
{
"heatFrames": 40
}
]
}Clears obstacles: A, B |
From: 4
Junction Above Bomb Block
To: 1
Top Left Door
Firing upwards has a good chance of hitting multiple Kihunters. And charge shot double hits will instantly kill a Kihunter. Requires: "canDash"
"Ice"
"Wave"
"Plasma"
{
"or": [
"Charge",
{
"heatFrames": 240
}
]
}
{
"or": [
"h_crouchJumpDownGrab",
"canWallJump",
"HiJump",
{
"and": [
"canSpringBallJumpMidAir",
{
"heatFrames": 120
}
]
},
"SpaceJump",
{
"and": [
"canIBJ",
"h_heatProof"
]
},
{
"and": [
"canSpringBallBombJump",
"h_additionalBomb",
"h_additionalBomb",
{
"heatFrames": 250
}
]
}
]
}
{
"heatFrames": 550
}Clears obstacles: A, B |
From: 4
Junction Above Bomb Block
To: 1
Top Left Door
Fire up from below and try not to jump too high as that will out the camera in a bad position. Requires: "canDash"
"Ice"
"Wave"
"Spazer"
{
"or": [
"Charge",
"canCarefulJump",
"h_heatProof"
]
}
{
"or": [
"h_crouchJumpDownGrab",
"canWallJump",
"HiJump",
{
"and": [
"canSpringBallJumpMidAir",
{
"heatFrames": 120
}
]
},
"SpaceJump",
{
"and": [
"canIBJ",
"h_heatProof"
]
},
{
"and": [
"canSpringBallBombJump",
"h_additionalBomb",
"h_additionalBomb",
{
"heatFrames": 250
}
]
}
]
}
{
"heatFrames": 1520
}Clears obstacles: A, B Dev note: FIXME IBJ strats could be added with heat frames. |
From: 4
Junction Above Bomb Block
To: 1
Top Left Door
Requires: {
"or": [
"canDash",
{
"heatFrames": 40
}
]
}
{
"or": [
{
"obstaclesCleared": [
"A"
]
},
{
"and": [
{
"haveBlueSuit": {}
},
{
"heatFrames": 10
},
{
"or": [
"Wave",
{
"heatFrames": 30
}
]
}
]
}
]
}
{
"or": [
{
"and": [
"h_heatedCrouchJumpDownGrab",
{
"heatFrames": 340
}
]
},
{
"and": [
"canWallJump",
{
"heatFrames": 290
}
]
},
{
"and": [
"HiJump",
{
"heatFrames": 240
}
]
},
{
"and": [
"canSpringBallJumpMidAir",
{
"heatFrames": 450
}
]
},
{
"and": [
"SpaceJump",
{
"heatFrames": 380
}
]
},
{
"and": [
"canIBJ",
"h_heatProof"
]
},
{
"and": [
"canJumpIntoIBJ",
{
"heatFrames": 660
},
{
"or": [
{
"obstaclesCleared": [
"A"
]
},
{
"heatFrames": 380
}
]
}
]
},
{
"and": [
"canSpringBallBombJump",
"h_additionalBomb",
"h_additionalBomb",
{
"heatFrames": 560
}
]
}
]
}Clears obstacles: B |
|
Fire up from below and try not to jump too high as that will put the camera in a bad position. Requires: "canDash"
"Plasma"
{
"or": [
"canCarefulJump",
{
"heatFrames": 100
}
]
}
{
"or": [
"h_crouchJumpDownGrab",
"canWallJump",
"HiJump",
{
"and": [
"canSpringBallJumpMidAir",
{
"heatFrames": 120
}
]
},
"SpaceJump",
{
"and": [
"canIBJ",
"h_heatProof"
]
},
{
"and": [
"canSpringBallBombJump",
"h_additionalBomb",
"h_additionalBomb",
{
"heatFrames": 250
}
]
}
]
}
{
"heatFrames": 1360
}Clears obstacles: A, B Dev note: FIXME IBJ strats could be added with heat frames. |
|
Depending on which movement items are available, it is often safest to carefully kill each Kihunter from below before attempting to get onto its platform: lure the Kihunter over to the opening and spin jump directly up into it. If wall jumping up, do so from low enough that Samus bonks the opposite wall before touching the Kihunter: otherwise the wall jumping movement may prevent Screw Attack from taking effect. Requires: "canDash"
"ScrewAttack"
{
"or": [
"HiJump",
"SpaceJump",
"canCarefulJump"
]
}
{
"or": [
{
"and": [
"canWallJump",
{
"heatFrames": 360
}
]
},
{
"and": [
"h_crouchJumpDownGrab",
{
"heatFrames": 520
}
]
},
{
"and": [
"HiJump",
{
"heatFrames": 310
}
]
},
{
"and": [
"canSpringBallJumpMidAir",
{
"heatFrames": 720
}
]
},
{
"and": [
"SpaceJump",
{
"heatFrames": 440
}
]
},
{
"and": [
"canIBJ",
"h_heatProof"
]
},
{
"and": [
"canJumpIntoIBJ",
{
"heatFrames": 1060
}
]
}
]
}
{
"or": [
"Wave",
{
"heatFrames": 40
}
]
}Clears obstacles: A, B |
From: 4
Junction Above Bomb Block
To: 1
Top Left Door
Shoot them from below. It is possible for the Kihunters to fall through the gaps in the side, but is unlikely. Jumping may lower the camera position making it harder to shoot the Kihunters. But once it is lowered, jump to make them active and vulnerable to damage. Requires: "h_heatProof"
"canBePatient"
{
"enemyKill": {
"enemies": [
[
"Kihunter (red)",
"Kihunter (red)",
"Kihunter (red)"
]
]
}
}
{
"or": [
"h_crouchJumpDownGrab",
"canWallJump",
"HiJump",
"canSpringBallJumpMidAir",
"SpaceJump",
"canIBJ",
{
"and": [
"canSpringBallBombJump",
"h_additionalBomb",
"h_additionalBomb"
]
}
]
}Clears obstacles: A Dev note: SpringBallBombJump uses 3 powerbombs total. |
|
Fire up from below and try not to jump too high as that will put the camera in a bad position. Requires: "canDash"
{
"enemyKill": {
"enemies": [
[
"Kihunter (red)",
"Kihunter (red)",
"Kihunter (red)"
]
],
"explicitWeapons": [
"Super"
]
}
}
{
"or": [
"canCarefulJump",
{
"heatFrames": 210
}
]
}
{
"or": [
"h_crouchJumpDownGrab",
"canWallJump",
"HiJump",
{
"and": [
"canSpringBallJumpMidAir",
{
"heatFrames": 120
}
]
},
"SpaceJump",
{
"and": [
"canIBJ",
"h_heatProof"
]
},
{
"and": [
"canSpringBallBombJump",
"h_additionalBomb",
"h_additionalBomb",
{
"heatFrames": 250
}
]
}
]
}
{
"heatFrames": 1300
}Clears obstacles: A, B |
From: 4
Junction Above Bomb Block
To: 1
Top Left Door
Requires: "canDash"
{
"or": [
{
"and": [
"canUseIFrames",
"h_crouchJumpDownGrab"
]
},
{
"and": [
"canUseIFrames",
"canWallJump"
]
},
{
"and": [
"canUseIFrames",
"SpaceJump"
]
},
"HiJump",
{
"and": [
"canSpringBallJumpMidAir",
{
"heatFrames": 300
},
{
"enemyDamage": {
"enemy": "Kihunter (red)",
"type": "contact",
"hits": 1
}
}
]
},
{
"and": [
"canJumpIntoIBJ",
"canTrickyJump",
{
"heatFrames": 300
}
]
}
]
}
{
"or": [
"canTrickyJump",
{
"and": [
{
"enemyDamage": {
"enemy": "Kihunter (red)",
"type": "contact",
"hits": 1
}
},
{
"heatFrames": 60
}
]
}
]
}
{
"heatFrames": 570
}
{
"enemyDamage": {
"enemy": "Kihunter (red)",
"type": "contact",
"hits": 3
}
}Clears obstacles: A, B |
From: 4
Junction Above Bomb Block
To: 1
Top Left Door
Requires: "canDash"
"Wave"
"Plasma"
{
"or": [
"h_crouchJumpDownGrab",
"canWallJump",
"HiJump",
{
"and": [
"canSpringBallJumpMidAir",
{
"heatFrames": 120
}
]
},
"SpaceJump",
{
"and": [
"canIBJ",
"h_heatProof"
]
},
{
"and": [
"canSpringBallBombJump",
"h_additionalBomb",
"h_additionalBomb",
{
"heatFrames": 250
}
]
}
]
}
{
"heatFrames": 940
}Clears obstacles: A, B |
From: 5
G-Mode Morph Junction (Above Bomb Block)
To: 1
Top Left Door
Kill the Kihunters then shoot the shot blocks and escape. Requires: "h_heatedGMode"
{
"obstaclesCleared": [
"A"
]
}
{
"or": [
"h_crouchJumpDownGrab",
"canWallJump",
"HiJump",
"canSpringBallJumpMidAir",
"SpaceJump",
"canIBJ"
]
}
{
"heatFrames": 200
} |
From: 5
G-Mode Morph Junction (Above Bomb Block)
To: 5
G-Mode Morph Junction (Above Bomb Block)
Kill the Kihunters then either exit the room at the top or go to the item. Requires: "h_heatedGMode"
{
"or": [
{
"enemyKill": {
"enemies": [
[
"Kihunter (red)",
"Kihunter (red)",
"Kihunter (red)"
]
],
"explicitWeapons": [
"Super",
"Missile",
"Plasma",
"ScrewAttack"
]
}
},
{
"haveBlueSuit": {}
},
{
"and": [
"Ice",
{
"or": [
"Wave",
"Spazer",
"canBeVeryPatient",
{
"and": [
"Charge",
"canBePatient"
]
}
]
}
]
},
{
"and": [
"Charge",
{
"or": [
"Wave",
"Spazer",
"canBeVeryPatient"
]
}
]
},
{
"and": [
"Spazer",
{
"or": [
"Wave",
"canBePatient"
]
}
]
}
]
}
{
"or": [
"h_crouchJumpDownGrab",
"canWallJump",
"HiJump",
"canSpringBallJumpMidAir",
"SpaceJump",
"canIBJ"
]
}
{
"heatFrames": 0
}Clears obstacles: A |
|
Requires: "canUseEnemies"
{
"or": [
{
"and": [
"canWallJump",
{
"heatFrames": 390
}
]
},
{
"and": [
"canConsecutiveWallJump",
"canCarefulJump",
{
"heatFrames": 330
}
]
},
{
"and": [
"HiJump",
{
"heatFrames": 320
}
]
},
{
"and": [
"h_crouchJumpDownGrab",
{
"heatFrames": 610
}
]
}
]
} |
|
Requires: "canSuitlessMaridia" "canDownGrab" |
|
Requires: {
"or": [
"canWallJump",
"HiJump",
"SpaceJump",
"canIBJ",
"canSpeedyJump",
"h_crouchJumpDownGrab",
"canSpringBallJumpMidAir",
"canSpringBallBombJump",
"canUseFrozenEnemies"
]
}Dev note: FIXME: It is possible to get up with a damage boost, with or without Morph, which could preserve a flash suit. |
|
Requires: "f_DefeatedPhantoon"
{
"or": [
{
"and": [
{
"resetRoom": {
"nodes": [
1
]
}
},
{
"cycleFrames": 1740
}
]
},
{
"and": [
{
"resetRoom": {
"nodes": [
2
]
}
},
{
"cycleFrames": 1200
}
]
},
{
"and": [
{
"resetRoom": {
"nodes": [
3
]
}
},
{
"cycleFrames": 1400
}
]
},
{
"and": [
{
"resetRoom": {
"nodes": [
4
]
}
},
{
"cycleFrames": 1050
}
]
},
{
"and": [
{
"resetRoom": {
"nodes": [
5
]
}
},
{
"cycleFrames": 1050
}
]
},
{
"and": [
{
"resetRoom": {
"nodes": [
6
]
}
},
{
"cycleFrames": 1830
},
"h_useMorphBombs"
]
},
{
"and": [
{
"resetRoom": {
"nodes": [
7
]
}
},
{
"cycleFrames": 2000
},
"Morph",
{
"or": [
"Wave",
"Bombs",
"Spazer"
]
},
{
"or": [
"Bombs",
"SpringBall",
{
"and": [
"canMidAirMorph",
"canCrouchJump"
]
}
]
}
]
}
]
}
{
"or": [
"ScrewAttack",
{
"haveBlueSuit": {}
},
"Plasma",
{
"and": [
"Wave",
{
"cycleFrames": 60
}
]
},
{
"and": [
"Spazer",
{
"cycleFrames": 330
}
]
},
{
"and": [
"canDodgeWhileShooting",
{
"cycleFrames": 900
}
]
}
]
}
{
"or": [
"canDash",
{
"cycleFrames": 200
}
]
}
{
"or": [
"canWallJump",
"h_crouchJumpDownGrabCycleFrames",
"HiJump",
"SpaceJump",
{
"and": [
"canIBJ",
{
"cycleFrames": 750
}
]
},
{
"and": [
"canSpringBallJumpMidAir",
{
"cycleFrames": 30
},
"h_doubleEquipmentScreenCycleFrames"
]
}
]
}Resets obstacles: A, B, C, R-Mode Farm cycle drops: 4 Atomic |
From: 4
Top Right Door
To: 4
Top Right Door
There is additional movement expected to represent reaching the Atomics who appear when the power is on. Requires: {
"not": "f_DefeatedPhantoon"
}
{
"or": [
{
"and": [
{
"resetRoom": {
"nodes": [
1,
2,
3,
4,
5
]
}
},
{
"cycleFrames": 2000
}
]
},
{
"and": [
{
"resetRoom": {
"nodes": [
6
]
}
},
{
"cycleFrames": 2000
},
"h_useMorphBombs"
]
},
{
"and": [
{
"resetRoom": {
"nodes": [
7
]
}
},
{
"cycleFrames": 2000
},
"Morph",
{
"or": [
"Wave",
"Bombs",
"Spazer"
]
},
{
"or": [
"Bombs",
"SpringBall",
{
"and": [
"canMidAirMorph",
"canCrouchJump"
]
}
]
}
]
}
]
}
{
"or": [
"ScrewAttack",
{
"haveBlueSuit": {}
},
"Plasma",
{
"and": [
"Wave",
{
"cycleFrames": 60
}
]
},
{
"and": [
"Spazer",
{
"cycleFrames": 150
}
]
},
{
"and": [
"Ice",
"canDodgeWhileShooting",
{
"cycleFrames": 240
}
]
}
]
}
{
"or": [
"canDash",
{
"cycleFrames": 200
}
]
}
{
"or": [
"canWallJump",
"h_crouchJumpDownGrabCycleFrames",
"HiJump",
"SpaceJump",
{
"and": [
"canIBJ",
{
"cycleFrames": 750
}
]
},
{
"and": [
"canSpringBallJumpMidAir",
{
"cycleFrames": 30
},
"h_doubleEquipmentScreenCycleFrames"
]
}
]
}Resets obstacles: A, B, C, R-Mode Farm cycle drops: 4 Custom Covern (Atomic) Dev note: This is Covern farm with a reduced drop chance so as to be applicable while powered off without breaking the powered on state. Cycle frames represent the slower of killing 4 atomics or killing 4 coverns. These Coverns have reduced Power Bomb and Super drop chance. |
|
Stand on a frozen crab, then freeze a second one on the edge of the hole above. Use a crouch jump and/or down grab to get onto the crab above. Alternatively, freeze a crab on the ceiling, overhanging the hole above, then flatley jump onto the crab. Requires: "canSuitlessMaridia"
"canTrickyUseFrozenEnemies"
"HiJump"
{
"or": [
"canMidAirMorph",
"h_useSpringBall"
]
}
{
"or": [
"h_underwaterCrouchJump",
"canDownGrab",
"canFlatleyJump"
]
} |
|
Entrance condition: {
"comeInWithGMode": {
"mode": "any",
"morphed": false
}
}Requires: "Morph"
"h_navigateUnderwater"
{
"or": [
"canGravityJump",
{
"and": [
"Gravity",
"HiJump",
{
"or": [
"canSpringBallJumpMidAir",
"canWallJump"
]
}
]
},
{
"and": [
"canTrickyUseFrozenEnemies",
"HiJump",
"h_underwaterCrouchJumpDownGrab"
]
},
{
"and": [
{
"ammo": {
"type": "Super",
"count": 1
}
},
"canTrickyUseFrozenEnemies",
"canOffScreenMovement"
]
},
{
"and": [
"canTrickyJump",
"canSpringBallJumpMidAir",
"canTrickyUseFrozenEnemies",
"canOffScreenMovement"
]
}
]
} |
From: 1
Bottom Left Door
To: 5
Platform Junction Near Top Left Door
Double Spring Ball jump while artificially morphed and quickly unmorph and freeze the fish before landing on it. The required positioning of the fish is fairly precise; aim for it to be at the lowest point a few tiles from the right wall, or one tile from the right wall where Samus has more time to press against it. Down grabbing onto the fish makes this significantly easier. The fish should be frozen in one hit, this requires Plasma and Wave or a single Power Bomb hit and Plasma or Wave and Spazer. With Plasma, it is tricky to freeze the fish without killing it; avoid shooting it horizontally. The positioning of a Power Bomb, is fairly lenient, but will always hit the fish once if placed a couple tiles below the peak of a normal Spring Ball + HiJump. Entrance condition: {
"comeInWithGMode": {
"mode": "any",
"morphed": true
}
}Requires: {
"notable": "Artificial Morph, Double Spring Ball Jump onto Frozen Fish"
}
"canComplexGMode"
"h_artificialMorphDoubleSpringBallJump"
"canInsaneJump"
"canTrickyUseFrozenEnemies"
"canDownGrab"
{
"or": [
{
"and": [
"Plasma",
"Wave"
]
},
{
"and": [
"h_artificialMorphPowerBomb",
"Plasma"
]
},
{
"and": [
"h_artificialMorphPowerBomb",
"Wave",
"Spazer"
]
}
]
} |
From: 1
Bottom Left Door
To: 5
Platform Junction Near Top Left Door
Get a tricky dash jump running up the hill, then precisely down grab at the top. It is best to start a few pixels away from the edge of the runway, so that Samus can jump at the correct frame and while being higher up the hill. Requires: "Gravity" "HiJump" "canTrickyDashJump" "canDownGrab" Dev note: A down grab is not strictly necessary, but it makes it much easier. |
From: 2
Bottom Right Door
To: 6
Middle Junction Near Top Left Pirate
Reduce Samus' run speed with a stutter or late dash tap in order to complete the shinecharge in time. With low energy, shinespark diagonally to the middle ledge on the left. Entrance condition: {
"comeInRunning": {
"speedBooster": "yes",
"minTiles": 4.4375
}
}Requires: "canWaterShineCharge"
{
"canShineCharge": {
"usedTiles": 23,
"openEnd": 2
}
}
{
"or": [
{
"shinespark": {
"frames": 43,
"excessFrames": 26
}
},
{
"and": [
"canMidairShinespark",
{
"shinespark": {
"frames": 38,
"excessFrames": 25
}
}
]
}
]
}
{
"or": [
{
"enemyDamage": {
"enemy": "Pink Space Pirate (standing)",
"type": "contact",
"hits": 1
}
},
{
"enemyKill": {
"enemies": [
[
"Pink Space Pirate (standing)"
]
],
"explicitWeapons": [
"Plasma"
]
}
},
"h_pauseAbuseMinimalReserveRefill",
{
"and": [
"canControlShinesparkEnd",
"canUseSpeedEchoes",
{
"resourceAtMost": [
{
"type": "RegularEnergy",
"count": 29
}
]
}
]
},
{
"and": [
"canInsaneJump",
"canTrickyDodgeEnemies"
]
}
]
}
{
"or": [
"h_underwaterCrouchJumpDownGrab",
"canSpringBallJumpMidAir",
{
"and": [
"Ice",
"Plasma"
]
}
]
} |
From: 2
Bottom Right Door
To: 6
Middle Junction Near Top Left Pirate
Start the dash as close to the door transition as possible in order to store the shinespark in time. Stand 2 or 3 pixels from the door for run speed to be low enough going into the next room. With low energy, shinespark diagonally to the middle ledge on the left. Entrance condition: {
"comeInRunning": {
"speedBooster": "yes",
"minTiles": 0.4375
}
}Requires: "canWaterShineCharge"
"canTrickyJump"
"h_shinechargeMaxRunway"
{
"or": [
{
"shinespark": {
"frames": 43,
"excessFrames": 26
}
},
{
"and": [
"canDodgeWhileShooting",
"canMidairShinespark",
{
"shinespark": {
"frames": 38,
"excessFrames": 25
}
}
]
}
]
}
{
"or": [
{
"enemyDamage": {
"enemy": "Pink Space Pirate (standing)",
"type": "contact",
"hits": 1
}
},
{
"enemyKill": {
"enemies": [
[
"Pink Space Pirate (standing)"
]
],
"explicitWeapons": [
"Plasma"
]
}
},
"h_pauseAbuseMinimalReserveRefill",
{
"and": [
"canControlShinesparkEnd",
"canUseSpeedEchoes",
{
"resourceAtMost": [
{
"type": "RegularEnergy",
"count": 29
}
]
}
]
},
{
"and": [
"canInsaneJump",
"canTrickyDodgeEnemies"
]
}
]
}
{
"or": [
"h_underwaterCrouchJumpDownGrab",
"canSpringBallJumpMidAir",
{
"and": [
"Ice",
"Plasma"
]
}
]
} |
|
Entrance condition: {
"comeInWithGMode": {
"mode": "direct",
"morphed": false
},
"comesThroughToilet": "any"
}Requires: {
"or": [
"canGravityJump",
{
"and": [
"Gravity",
{
"or": [
"canConsecutiveWallJump",
"SpaceJump",
"canLongIBJ",
{
"and": [
"HiJump",
"canWallJump"
]
},
{
"and": [
"HiJump",
"canTrickyDashJump",
"canDownGrab"
]
},
"h_maxHeightSpringBallJump",
{
"and": [
"HiJump",
"canSpringBallJumpMidAir"
]
}
]
}
]
},
{
"and": [
"Gravity",
"canUseFrozenEnemies",
{
"or": [
"canWallJump",
{
"and": [
"HiJump",
"canSpeedyJump"
]
},
"canSpringBallJumpMidAir"
]
}
]
},
"h_doubleSpringBallJumpWithHiJump",
{
"and": [
"canSuitlessMaridia",
"canTrickyUseFrozenEnemies",
"HiJump",
"canTrickySpringBallJump"
]
}
]
}Exit condition: {
"leaveWithGMode": {
"morphed": false
}
}Dev note: The h_maxHeightSpringBallJump is not a h_underwaterMaxHeightSpringBallJump, because Gravity is required. |
From: 4
Top Left Door
To: 5
Platform Junction Near Top Left Door
Double Spring Ball jump while artificially morphed and quickly unmorph and freeze the fish before landing on it. The required positioning of the fish is fairly precise; aim for it to be at the lowest point a few tiles from the right wall, or one tile from the right wall where Samus has more time to press against it. Down grabbing onto the fish makes this significantly easier. The fish should be frozen in one hit, this requires Plasma and Wave or a single Power Bomb hit and Plasma or Wave and Spazer. With Plasma, it is tricky to freeze the fish without killing it; avoid shooting it horizontally. The positioning of a Power Bomb, is fairly lenient, but will always hit the fish once if placed a couple tiles below the peak of a normal Spring Ball + HiJump. Entrance condition: {
"comeInWithGMode": {
"mode": "any",
"morphed": true
},
"comesThroughToilet": "any"
}Requires: {
"notable": "Artificial Morph, Double Spring Ball Jump onto Frozen Fish"
}
"canComplexGMode"
"h_artificialMorphDoubleSpringBallJump"
"canInsaneJump"
"canTrickyUseFrozenEnemies"
"canDownGrab"
{
"or": [
{
"and": [
"Plasma",
"Wave"
]
},
{
"and": [
"h_artificialMorphPowerBomb",
"Plasma"
]
},
{
"and": [
"h_artificialMorphPowerBomb",
"Wave",
"Spazer"
]
}
]
} |
From: 7
Platform Below Top Right Door
To: 6
Middle Junction Near Top Left Pirate
Requires: "Gravity"
{
"or": [
"HiJump",
"canWallJump",
"canSpringBallJumpMidAir",
"canDodgeWhileShooting",
"canGravityJump",
"canCrouchJump",
"canDownGrab",
{
"enemyDamage": {
"enemy": "Pink Space Pirate (standing)",
"type": "contact",
"hits": 1
}
},
{
"enemyKill": {
"enemies": [
[
"Pink Space Pirate (standing)"
]
],
"explicitWeapons": [
"Plasma"
]
}
},
{
"haveBlueSuit": {}
}
]
}Dev note: The canCrouchJump is not a h_underwaterCrouchJump, because Gravity is required. |
From: 7
Platform Below Top Right Door
To: 6
Middle Junction Near Top Left Pirate
It is possible to land on the platform with the pirate when it is facing away and shaking its head. Then quickly jump away or continuously shoot the pirate to prevent it from shooting. Requires: "canSuitlessMaridia"
{
"or": [
{
"and": [
"HiJump",
{
"or": [
"h_underwaterCrouchJumpDownGrab",
"canSpringBallJumpMidAir",
"canDodgeWhileShooting"
]
}
]
},
{
"and": [
"canTrickyJump",
"h_underwaterCrouchJumpDownGrab"
]
}
]
} |
From: 7
Platform Below Top Right Door
To: 6
Middle Junction Near Top Left Pirate
Tank the pirate then quickly crouch jump and down grab or use HiJump to get to the ledge. Requires: "canSuitlessMaridia"
"canUseIFrames"
{
"enemyDamage": {
"enemy": "Pink Space Pirate (standing)",
"type": "contact",
"hits": 1
}
}
{
"or": [
"HiJump",
"h_underwaterCrouchJumpDownGrab",
{
"and": [
"canTrickyJump",
"canTrickySpringBallJump"
]
}
]
} |
From: 7
Platform Below Top Right Door
To: 6
Middle Junction Near Top Left Pirate
Kill or freeze the pirate then crouch jump and down grab or use another method to get to the ledge. Requires: "canSuitlessMaridia"
"Plasma"
{
"or": [
"HiJump",
"canSpringBallJumpMidAir",
"h_underwaterCrouchJumpDownGrab",
"canUseFrozenEnemies"
]
} |
From: 1
Bottom Door
To: 3
Middle Right Door
Run and spin jump to the left through the transition with as much horiziontal speed as possible, without bonking the door frame. Hold left through the transition to avoid the fish and land on the platform to the left. With limited runway, this may require a very precise jump. Then reach the platform above either using a crouch-jump down-grab or by freezing the fish. Entrance condition: {
"comeInWithPlatformBelow": {
"maxHeight": 6,
"maxLeftPosition": -0.5,
"minRightPosition": 2.5
},
"comesThroughToilet": "yes"
}Requires: "canDash"
"canCrossRoomJumpIntoWater"
"canInsaneJump"
{
"or": [
"h_underwaterCrouchJumpDownGrab",
"canUseFrozenEnemies"
]
}Dev note: This applies to Crab Maze, Forgotten Highway Elevator, and Red Brinstar Elevator Room. |
|
Spin jump to the left through the transition. Bonking the left side of the door frame works but is not required. Hold left through the transition to avoid the fish and land on the platform to the left. Then reach the platform above either using a crouch-jump down-grab or by freezing the fish. Entrance condition: {
"comeInWithPlatformBelow": {
"maxHeight": 6,
"maxLeftPosition": 2,
"minRightPosition": -2
},
"comesThroughToilet": "no"
}Requires: "canCrossRoomJumpIntoWater"
{
"or": [
"h_underwaterCrouchJumpDownGrab",
"canUseFrozenEnemies"
]
}Dev note: This doesn't work with passing through the Toilet (e.g. from Climb) because you would spawn higher and not be able to avoid the fish, given that no horiziontal speed is carried through the transition here. |
From: 1
Bottom Door
To: 3
Middle Right Door
Run and spin jump to the left through the transition with as much horiziontal speed as possible, without bonking the door frame. Hold left through the transition to avoid the fish and land on the platform to the left. Then reach the platform above either using a crouch-jump down-grab or by freezing the fish. Entrance condition: {
"comeInWithPlatformBelow": {
"maxHeight": 6,
"maxLeftPosition": -0.5,
"minRightPosition": 4.5
},
"comesThroughToilet": "yes"
}Requires: "canDash"
"canCrossRoomJumpIntoWater"
"canTrickyJump"
{
"or": [
"h_underwaterCrouchJumpDownGrab",
"canUseFrozenEnemies"
]
}Dev note: This applies to Basement and Wrecked Ship Main Shaft. |
|
Entrance condition: {
"comeInWithGMode": {
"mode": "direct",
"morphed": false
},
"comesThroughToilet": "no"
}Requires: {
"notable": "G-Mode Overload Speed Blocks then use Global Crab"
}
"canComplexGMode"
"h_navigateUnderwater"
{
"or": [
"canGravityJump",
{
"and": [
"Gravity",
"canWallJump"
]
},
{
"and": [
"Gravity",
"canTrickyUseFrozenEnemies",
"h_underwaterCrouchJumpDownGrab"
]
},
{
"and": [
"HiJump",
{
"or": [
{
"and": [
{
"notable": "Underwater Walljumps"
},
"canUnderwaterWallJump"
]
},
"canSpringBallJumpMidAir",
{
"and": [
"canTrickyUseFrozenEnemies",
"h_underwaterCrouchJump"
]
}
]
}
]
},
{
"and": [
"h_underwaterMaxHeightSpringBallJump",
"canTrickyUseFrozenEnemies",
"canBeVeryPatient",
{
"or": [
"canStationaryLateralMidAirMorph",
{
"ammo": {
"type": "Super",
"count": 1
}
}
]
}
]
}
]
}Clears obstacles: B |
From: 1
Bottom Door
To: 12
G-Mode Junction By Middle Right Door
Entrance condition: {
"comeInWithGMode": {
"mode": "indirect",
"morphed": false
},
"comesThroughToilet": "any"
}Requires: {
"notable": "G-Mode Overload Speed Blocks then use Global Crab"
}
"canComplexGMode"
"h_navigateUnderwater"
{
"or": [
"canGravityJump",
{
"and": [
"Gravity",
"canWallJump"
]
},
{
"and": [
"Gravity",
"canTrickyUseFrozenEnemies",
"h_underwaterCrouchJumpDownGrab"
]
},
{
"and": [
"HiJump",
{
"or": [
{
"and": [
{
"notable": "Underwater Walljumps"
},
"canUnderwaterWallJump"
]
},
"canSpringBallJumpMidAir",
{
"and": [
"canTrickyUseFrozenEnemies",
"h_underwaterCrouchJump"
]
}
]
}
]
},
{
"and": [
"h_underwaterMaxHeightSpringBallJump",
"canTrickyUseFrozenEnemies",
"canBeVeryPatient",
{
"or": [
"canStationaryLateralMidAirMorph",
{
"ammo": {
"type": "Super",
"count": 1
}
}
]
}
]
}
]
} |
From: 2
Bottom Right Door
To: 3
Middle Right Door
Only requires a runway of one tile in the adjacent room. Bomb boost through the doorway, then use spring ball to get to the bottom left ledge. To avoid hitting the Skultera, place the bomb a few pixels from the doorway. One way to setup the positioning of the bomb is to place it, unmorph, rotate, and remorph Entrance condition: {
"comeInWithBombBoost": {}
}Requires: {
"tech": "canSpringBallBombJump"
}
"h_useSpringBall"
"canCrossRoomJumpIntoWater"
{
"or": [
"Gravity",
"HiJump",
"canSpringBallJumpMidAir",
"h_underwaterCrouchJumpDownGrab"
]
} |
|
Run with 7 tiles (no openend) of speed to jump (after the transition) to reach the far left ledge. Either kill or Kago through the Fish enemy. Entrance condition: {
"comeInRunning": {
"speedBooster": "yes",
"minTiles": 6.4375
}
}Requires: "canCrossRoomJumpIntoWater"
"canTrickyDashJump"
"canDodgeWhileShooting"
{
"or": [
{
"and": [
{
"ammo": {
"type": "Super",
"count": 1
}
},
"canDownGrab"
]
},
{
"and": [
"Charge",
"Plasma",
"canDownGrab"
]
},
{
"and": [
"Plasma",
"canHitbox",
"canDownGrab"
]
},
"canTrickyDodgeEnemies"
]
} |
From: 2
Bottom Right Door
To: 12
G-Mode Junction By Middle Right Door
Entrance condition: {
"comeInWithGMode": {
"mode": "direct",
"morphed": false
}
}Requires: {
"notable": "G-Mode Overload Speed Blocks then use Global Crab"
}
"canComplexGMode"
"h_navigateUnderwater"
{
"or": [
"canGravityJump",
{
"and": [
"Gravity",
"canWallJump"
]
},
{
"and": [
"Gravity",
"canTrickyUseFrozenEnemies",
"h_underwaterCrouchJumpDownGrab"
]
},
{
"and": [
"HiJump",
{
"or": [
{
"and": [
{
"notable": "Underwater Walljumps"
},
"canUnderwaterWallJump"
]
},
"canSpringBallJumpMidAir",
{
"and": [
"canTrickyUseFrozenEnemies",
"h_underwaterCrouchJump"
]
}
]
}
]
},
{
"and": [
"h_underwaterMaxHeightSpringBallJump",
"canTrickyUseFrozenEnemies",
"canBeVeryPatient",
{
"or": [
"canStationaryLateralMidAirMorph",
{
"ammo": {
"type": "Super",
"count": 1
}
}
]
}
]
}
]
}Clears obstacles: B |
From: 2
Bottom Right Door
To: 12
G-Mode Junction By Middle Right Door
Entrance condition: {
"comeInWithGMode": {
"mode": "indirect",
"morphed": false
}
}Requires: {
"notable": "G-Mode Overload Speed Blocks then use Global Crab"
}
"canComplexGMode"
"h_navigateUnderwater"
{
"or": [
"canGravityJump",
{
"and": [
"Gravity",
"canWallJump"
]
},
{
"and": [
"Gravity",
"canTrickyUseFrozenEnemies",
"h_underwaterCrouchJumpDownGrab"
]
},
{
"and": [
"HiJump",
{
"or": [
{
"and": [
{
"notable": "Underwater Walljumps"
},
"canUnderwaterWallJump"
]
},
"canSpringBallJumpMidAir",
{
"and": [
"canTrickyUseFrozenEnemies",
"h_underwaterCrouchJump"
]
}
]
}
]
},
{
"and": [
"h_underwaterMaxHeightSpringBallJump",
"canTrickyUseFrozenEnemies",
"canBeVeryPatient",
{
"or": [
"canStationaryLateralMidAirMorph",
{
"ammo": {
"type": "Super",
"count": 1
}
}
]
}
]
}
]
} |
|
Requires: "Gravity"
{
"or": [
"HiJump",
"canWallJump",
"SpaceJump",
"canIBJ",
"canSpringBallJumpMidAir",
"h_crouchJumpDownGrab",
"canGravityJump",
"canTrickyUseFrozenEnemies"
]
} |
From: 9
Junction Below Speed Blocks
To: 4
Top Right Door
The first crab, coming down, is a bit tricky to freeze fast enough without any other beams or a missile. Prevent it from coming on screen until Samus is in position to hit it accurately. The global crab coming up can be used as a backup if the speed blocks are not broken. Requires: "canSuitlessMaridia"
"HiJump"
"canTrickyUseFrozenEnemies"
{
"or": [
"canDownGrab",
{
"obstaclesNotCleared": [
"A"
]
}
]
}Dev note: Using these same items to get up from the lower portions before the global crab gets there should be reasonable. |
From: 12
G-Mode Junction By Middle Right Door
To: 10
Direct G-Mode Morph, On Ledge Above Speed Blocks
Climb to the ledge left of the morph tunnel item. With Ice, carefully and quickly freeze the last crab high enough to use as a platform. With a slow ascent, such as with Spring Ball and Ice, the crab will need to circle the entire room, it is possible to use a Super when it passes the speed blocks to speed this up significantly. Requires: {
"obstaclesCleared": [
"B"
]
}
"Morph"
"h_navigateUnderwater"
{
"or": [
"canGravityJump",
{
"and": [
"Gravity",
"canWallJump"
]
},
{
"and": [
"Gravity",
"canTrickyUseFrozenEnemies"
]
},
{
"and": [
"HiJump",
{
"or": [
"canSpringBallJumpMidAir",
{
"and": [
{
"notable": "Underwater Walljumps"
},
"canUnderwaterWallJump"
]
}
]
}
]
},
{
"and": [
"HiJump",
"canTrickyUseFrozenEnemies",
{
"or": [
"h_underwaterCrouchJump",
"canDownGrab"
]
}
]
},
{
"and": [
"h_underwaterMaxHeightSpringBallJump",
"canTrickyUseFrozenEnemies",
"canBeVeryPatient"
]
}
]
}Dev note: FIXME: HiJump strats may need canBeVeryPatient if they can't be done before the crab is in position |
|
Letting Mama Turtle sleep, climb the right wall using HiJump (with a down-grab) and escape the water with Space Jump . Requires: "HiJump"
"canDownGrab"
{
"or": [
{
"and": [
"canSpaceJumpWaterBounce",
"canWallJump"
]
},
"canSpaceJumpWaterEscape"
]
} |
|
Requires: {
"or": [
"Gravity",
{
"obstaclesNotCleared": [
"A"
]
},
{
"enemyDamage": {
"enemy": "Kame (Tatori)",
"type": "contact",
"hits": 1
}
}
]
}
{
"or": [
"Gravity",
"HiJump",
"canSpringBallJumpMidAir",
"h_underwaterCrouchJumpDownGrab",
"canUseEnemies"
]
} |
|
Jump over or on to Mama Turtle. The easiest method is to jump over her by jumping on her babies, or to Morph under her. Requires: "canSuitlessMaridia"
"canTrickyJump"
{
"or": [
"canSpringBallJumpMidAir",
"h_underwaterCrouchJumpDownGrab",
"canUseEnemies"
]
} |
From: 1
Top Left Door
To: 9
Platform Below Top Door
Crouch on the lowest stair, then shinespark horizontally to bonk at the top corner of the grapple block. Down grab to get onto it. Entrance condition: {
"comeInShinecharged": {}
}Requires: {
"shineChargeFrames": 110
}
{
"notable": "Shinespark Down-Grab to the Grapple Blocks (Left to Top)"
}
"canSuitlessMaridia"
"h_underwaterCrouchJumpDownGrab"
"canHorizontalMidairShinespark"
{
"shinespark": {
"frames": 56,
"excessFrames": 0
}
}Dev note: This is only done suitless, as with Gravity, you can gravity jump up there. A similar strat can be done from the top right door, but it doesn't have a nice setup and has to be done midair. FIXME: Add a variant with canControlShinesparkEnd. |
|
Near the bottom left door, there are three pathways upwards: one directly above the door and two to the right. Between the right pathways, is a crab moving to the right. Shooting a Super against the wall will make it fall off and move left. Climb the crab up the left wall. Watch out for the crab above that is heading into the morph tunnel. Jump to the right platform before the upward crab goes into the tunnel. Lure the crab out of the hole by running to the right of the hill then back left or use moonwalk to scroll the camera. Near the end is particularly tricky. When the crab is on the underside of the metal blocks, freeze it and use it as a stepping platform. To do this, crouch jump and while moving upwards, hold left against the crab to get extra vertical movement. Down grabbing at the top is helpful. Requires: "canSuitlessMaridia"
"canTrickyJump"
"canTrickyUseFrozenEnemies"
{
"or": [
{
"and": [
"h_underwaterCrouchJumpDownGrab",
"canBePatient"
]
},
"HiJump",
"canSpringBallJumpMidAir"
]
}
"canCameraManip"
{
"ammo": {
"type": "Super",
"count": 1
}
} |
From: 2
Bottom Left Door
To: 7
Lower Hills Junction
Position 2 Scisers so that they can each be used for a Bomb-Grapple-Jump, back to back. This gives a total of 3 jumps to climb from the bottom of the room up to one of the lower peaks. In the likely event of failure, the room will need to be reset and the crabs repositioned for the next attempt. Requires: {
"notable": "Double Crab Bomb-Grapple-Jump"
}
"h_navigateUnderwater"
"canBombGrappleJump"
"h_underwaterCrouchJumpDownGrab" |
From: 2
Bottom Left Door
To: 7
Lower Hills Junction
Stand on higher ground on the right side and face left. Crouch jump and immediately press left (almost simultaneously) to avoid bonking the ceiling. Requires: "Gravity" "h_crouchJumpDownGrab" "canTrickyJump" Dev note: The canCrouchJump is not a h_underwaterCrouchJump, because Gravity is required. |
From: 2
Bottom Left Door
To: 11
Upper Left Ledge Junction
Wall jump from a high position on either side of the door frame, pass through the Toilet, and down-grab onto the ledge. The Toilet affects Samus' vertical spawn position, making this jump possible. Entrance condition: {
"comeInWithWallJumpBelow": {
"minHeight": 2
},
"comesThroughToilet": "yes"
}Requires: "canCrossRoomJumpIntoWater" "HiJump" "canPreciseWallJump" "canDownGrab" "canTrickyJump" |
From: 2
Bottom Left Door
To: 11
Upper Left Ledge Junction
Run and jump up through the door using HiJump and Speed Booster in the room below using at least 1 tile of runway. Entrance condition: {
"comeInWithPlatformBelow": {
"maxHeight": 6,
"maxLeftPosition": 2.5,
"minRightPosition": -2.5
},
"comesThroughToilet": "any"
}Requires: "canCrossRoomJumpIntoWater" "HiJump" "canTrickyDashJump" "canDownGrab" |
|
Entrance condition: {
"comeInWithGMode": {
"mode": "any",
"morphed": false
},
"comesThroughToilet": "any"
}Requires: "Morph"
{
"or": [
{
"and": [
"Gravity",
{
"or": [
"HiJump",
"canWallJump",
"canSpeedyJump",
"SpaceJump",
"canSpringBallJumpMidAir",
"canSpringBallBombJump",
"canGravityJump",
{
"and": [
"h_crouchJumpDownGrab",
"canTrickyJump"
]
}
]
}
]
},
{
"and": [
"canSuitlessMaridia",
{
"or": [
"canTrickyUseFrozenEnemies",
{
"and": [
"HiJump",
"canSpringBallJumpMidAir"
]
},
"canUnderwaterWallJump"
]
}
]
}
]
}Dev note: The canCrouchJump is not a h_underwaterCrouchJump, because Gravity is required. |
|
Requires: "Gravity"
{
"or": [
{
"and": [
"SpaceJump",
{
"or": [
{
"and": [
{
"resetRoom": {
"nodes": [
1
]
}
},
{
"cycleFrames": 1280
}
]
},
{
"and": [
{
"resetRoom": {
"nodes": [
2
]
}
},
{
"cycleFrames": 1065
}
]
},
{
"and": [
{
"resetRoom": {
"nodes": [
3
]
}
},
{
"cycleFrames": 1000
}
]
},
{
"and": [
{
"resetRoom": {
"nodes": [
4
]
}
},
{
"cycleFrames": 1240
}
]
},
{
"and": [
{
"resetRoom": {
"nodes": [
5
]
}
},
{
"cycleFrames": 1000
}
]
},
{
"and": [
{
"resetRoom": {
"nodes": [
6
]
}
},
"Morph",
{
"cycleFrames": 1385
}
]
}
]
}
]
},
{
"and": [
"HiJump",
{
"or": [
{
"and": [
{
"resetRoom": {
"nodes": [
1
]
}
},
{
"cycleFrames": 1235
}
]
},
{
"and": [
{
"resetRoom": {
"nodes": [
2
]
}
},
{
"cycleFrames": 1250
}
]
},
{
"and": [
{
"resetRoom": {
"nodes": [
3
]
}
},
{
"cycleFrames": 1170
}
]
},
{
"and": [
{
"resetRoom": {
"nodes": [
4
]
}
},
"canGravityJump",
{
"cycleFrames": 1510
},
"h_doubleEquipmentScreenCycleFrames",
{
"or": [
"canPreciseWallJump",
"h_doubleEquipmentScreenCycleFrames"
]
}
]
},
{
"and": [
{
"resetRoom": {
"nodes": [
5
]
}
},
"canGravityJump",
{
"cycleFrames": 1000
},
"h_doubleEquipmentScreenCycleFrames",
{
"or": [
"canTrickyJump",
"h_doubleEquipmentScreenCycleFrames"
]
}
]
},
{
"and": [
{
"resetRoom": {
"nodes": [
6
]
}
},
"Morph",
{
"cycleFrames": 1410
}
]
}
]
}
]
},
{
"and": [
"Grapple",
{
"or": [
{
"and": [
{
"resetRoom": {
"nodes": [
1
]
}
},
{
"cycleFrames": 1210
}
]
},
{
"and": [
{
"resetRoom": {
"nodes": [
2
]
}
},
{
"cycleFrames": 1125
},
{
"or": [
"canWallJump",
{
"and": [
"canGravityJump",
{
"cycleFrames": 55
},
"h_doubleEquipmentScreenCycleFrames"
]
},
{
"and": [
"h_crouchJumpDownGrab",
"canTrickyJump",
{
"cycleFrames": 50
}
]
}
]
}
]
},
{
"and": [
{
"resetRoom": {
"nodes": [
3
]
}
},
{
"cycleFrames": 1145
},
{
"or": [
"canWallJump",
{
"and": [
"canGravityJump",
{
"cycleFrames": 80
},
"h_doubleEquipmentScreenCycleFrames"
]
}
]
}
]
},
{
"and": [
{
"resetRoom": {
"nodes": [
4
]
}
},
{
"cycleFrames": 1885
}
]
},
{
"and": [
{
"resetRoom": {
"nodes": [
5
]
}
},
{
"cycleFrames": 1570
}
]
},
{
"and": [
{
"resetRoom": {
"nodes": [
6
]
}
},
"Morph",
{
"cycleFrames": 1400
},
{
"or": [
"canWallJump",
{
"and": [
"canGravityJump",
{
"cycleFrames": 55
},
"h_doubleEquipmentScreenCycleFrames"
]
},
{
"and": [
"h_crouchJumpDownGrab",
"canTrickyJump",
{
"cycleFrames": 50
}
]
}
]
}
]
}
]
}
]
}
]
}Resets obstacles: A, B Farm cycle drops: 3 Powamp Dev note: Other movement options are possible, though slower (e.g. Gravity jump everywhere). The canCrouchJump is not a h_underwaterCrouchJump, because Gravity is required. |
From: 7
Lower Hills Junction
To: 10
Upper Right Ledge Junction
Climb the bottom right wall of the room with Ice and HiJump while also luring a crab to the next platform to be used to ascend the next wall. The trickiest part of the climb is getting past the final overhang. This can be done with an underwater wall jump if the crab is low, a precise crouch jump and down grab if it is higher, or a flatley jump off of the crab if it is higher still. Two crabs makes it significantly easier to lure one to the top - simply let one go ahead of Samus. For a faster setup, one crab may be used by perform the final jump as it is unfreezing so it starts moving upward. Then go to the lower ground a bit to the right, jump and aim down to lower the camera to lure the crab. Note: The hardest part of this climb is the pixel precision when jumping around a ledge. Too many pixels: left is a fall, right you clip through the crab, low you miss the jump and fall, high is a bonk or crab clip. Requires: {
"notable": "Right Crab Climb with Only HiJump"
}
"canSuitlessMaridia"
"canCrazyCrabClimb"
"HiJump"
"canTrickyJump"
"canCameraManip"
{
"or": [
"canUnderwaterWallJump",
"h_underwaterCrouchJumpDownGrab",
"canFlatleyJump",
"canInsaneJump"
]
}Clears obstacles: A, B |
From: 8
Higher Hill Junction
To: 11
Upper Left Ledge Junction
Requires: "h_storedSpark"
{
"or": [
{
"shinespark": {
"frames": 28,
"excessFrames": 24
}
},
{
"and": [
"HiJump",
{
"shinespark": {
"frames": 24,
"excessFrames": 23
}
}
]
},
{
"and": [
"HiJump",
"canInsaneJump",
"canDownGrab",
{
"shinespark": {
"frames": 24,
"excessFrames": 24
}
}
]
}
]
} |
From: 2
Bottom Door
To: 3
Bottom Right Ledge
Standing on the platform in the room below, crouch jump up through the door transition, then down-grab onto the platform. Entrance condition: {
"comeInWithPlatformBelow": {
"minHeight": 7,
"maxHeight": 7,
"maxLeftPosition": 1,
"minRightPosition": -1.5
},
"comesThroughToilet": "any"
}Requires: "canCrossRoomJumpIntoWater" "h_crouchJumpDownGrab" |
From: 2
Bottom Door
To: 3
Bottom Right Ledge
Standing on the platform in the room below, jump up through the door. Either a crouch jump or a down grab (or both) must be used to make it onto the ledge. Entrance condition: {
"comeInWithPlatformBelow": {
"minHeight": 10,
"maxHeight": 10,
"maxLeftPosition": 1,
"minRightPosition": 0
},
"comesThroughToilet": "any"
}Requires: "canCrossRoomJumpIntoWater"
"HiJump"
{
"or": [
"canCrouchJump",
"canDownGrab"
]
} |
|
Requires: "canSuitlessMaridia"
"canUseFrozenEnemies"
{
"or": [
"canWallJump",
"canSpringBallJumpMidAir",
{
"and": [
"HiJump",
"canDownGrab"
]
},
"canBombJumpWaterEscape"
]
} |
From: 11
G-Mode Overloaded PLMs (By Bottom Left Door)
To: 7
Top Right Left Item
Requires: "canGMode"
"canSnailClimb"
{
"or": [
"Gravity",
"h_underwaterMaxHeightSpringBallJump",
{
"and": [
"HiJump",
{
"or": [
"h_underwaterCrouchJump",
"canDownGrab"
]
}
]
}
]
} |
From: 13
Direct G-Mode Morph (By Bottom Left Door)
To: 7
Top Right Left Item
PLMs can be overloaded in direct G-Mode with a single Power Bomb if both items are still there and 2 PBs if only one item is. There is a row of tiles that works, just above and to the left of the right door. The row is one tile higher than the horizontal pipe that is part of the door frame, spanning from the left to one tile away from the right wall. Requires: "canPowerBombItemOverloadPLMs"
{
"notable": "G-Mode Overload PLMs - Power Bomb the Items"
}
{
"or": [
{
"itemNotCollectedAtNode": 7
},
{
"itemNotCollectedAtNode": 8
}
]
}
"h_artificialMorphSpringBall"
"h_artificialMorphPowerBomb"
"h_artificialMorphPowerBomb"
"h_navigateUnderwater"
"canSnailClimb"
{
"or": [
"Gravity",
{
"and": [
"HiJump",
{
"or": [
"h_underwaterCrouchJump",
"canDownGrab"
]
}
]
}
]
}Dev note: This does not include canRiskPermanentLossOfAccess, as it is only worth doing this strat if the items are there. |
From: 13
Direct G-Mode Morph (By Bottom Left Door)
To: 7
Top Right Left Item
PLMs can be overloaded in direct G-Mode with a single Power Bomb if both items are still there and 2 PBs if only one item is. There is a row of tiles that works, just above and to the left of the right door. The row is one tile higher than the horizontal pipe that is part of the door frame, spanning from the left to one tile away from the right wall. Requires: "canPowerBombItemOverloadPLMs"
{
"notable": "G-Mode Overload PLMs - Power Bomb the Items"
}
{
"or": [
{
"itemNotCollectedAtNode": 7
},
{
"itemNotCollectedAtNode": 8
}
]
}
"h_usePowerBomb"
"h_usePowerBomb"
"h_navigateUnderwater"
"canSnailClimb"
{
"or": [
"Gravity",
"h_underwaterMaxHeightSpringBallJump",
{
"and": [
"HiJump",
{
"or": [
"h_underwaterCrouchJump",
"canDownGrab"
]
}
]
}
]
}Dev note: This does not include canRiskPermanentLossOfAccess, as it is only worth doing this strat if the items are there. |
|
Lure a Puyo close to the sand to use for a Sand Grapple Boost. As it is close to entering the sand, land on the sand and crouch. Very quickly after crouching shoot the grapple and jump. As soon as the Puyo is killed aim down to escape the sand. If the timings don't work out just right, too much height is lost to the sand. Crouching in sand is also a high softlock risk. Requires: {
"notable": "Sand Grapple Boost (Left to Right)"
}
"h_underwaterCrouchJumpDownGrab"
"canSandGrappleBoost"
"canInsaneJump"
"canMidAirMorph"Collects items: 5 |
From: 4
Right Door
To: 6
Junction Right of Morph Passage
Requires: "canSuitlessMaridia" "h_underwaterCrouchJumpDownGrab" "canBombGrappleJump" |
From: 4
Right Door
To: 6
Junction Right of Morph Passage
Kill all of the enemies and leave drops uncollected so that the Zoas will not be in the way. Stand on the edge of the sand and place a Bomb or Power Bomb and wait briefly before entering the sand. Let the explosion push Samus up for a few frames before simultaneously jumping and aiming down. Then move left to down-grab onto the morph tunnel ledge. Jumping too early can lead to a softlock but jumping too late usually exits the sand safely. If carrying a flash suit, hold angle-down while jumping. Requires: {
"tech": "canSandBombBoost"
}
"h_bombThings"
"canInsaneJump"
"canDownGrab" |
From: 4
Right Door
To: 6
Junction Right of Morph Passage
Use the respawning Zoas as a grapple target to get a sand boost in order to reach the ledge above. Shoot Grapple just after landing on the sand. Jump as soon as the Zoa is hit, and aim down to escape the sand. Avoid getting hit by killing the extra Zoas since falling into the sand is a softlock. If carrying a flash suit, hold angle-down while shooting the Zoa and jumping. Requires: "h_underwaterCrouchJumpDownGrab" "canSandGrappleBoost" |
|
Requires: {
"resetRoom": {
"nodes": [
1
]
}
}
{
"or": [
{
"and": [
"Gravity",
{
"or": [
{
"and": [
{
"or": [
"Plasma",
"Wave",
"Spazer",
{
"haveBlueSuit": {}
}
]
},
{
"cycleFrames": 720
}
]
},
{
"and": [
"Grapple",
{
"cycleFrames": 770
}
]
},
{
"and": [
"ScrewAttack",
{
"cycleFrames": 770
}
]
},
{
"and": [
"canDodgeWhileShooting",
{
"cycleFrames": 1020
}
]
}
]
}
]
},
{
"and": [
"HiJump",
{
"cycleFrames": 1650
}
]
},
{
"and": [
"canTrickyJump",
"h_underwaterCrouchJumpDownGrab",
{
"cycleFrames": 2280
}
]
}
]
}Farm cycle drops: 2 Puyo |
From: 1
Bottom Left Door
To: 2
Right Door
Lure a Puyo close to the crumble blocks and time it so you can kill it and collect its drop without getting hit. Alternativly you can start with more health and time the PowerBomb explosion with a Puyo hit to collect the drop automatically. Requires: "canBeExtremelyPatient"
"canSuitlessMaridia"
{
"tech": "canJumpIntoCrystalFlashClip"
}
"h_underwaterCrouchJumpDownGrab"
"h_10PowerBombCrystalFlash"
{
"resetRoom": {
"nodes": [
1
]
}
} |
From: 1
Bottom Left Door
To: 2
Right Door
Find the crumble blocks and crystal flash mid-air, just below them. They are on the far right of the ceiling of the bottom right pathway. Hold down as the CF ends to break the non-respawning crumble blocks. This is for the much harder version, without Gravity and Bombs. Requires: "h_jumpIntoCrystalFlashClip"
"canSuitlessMaridia"
{
"or": [
"HiJump",
"canSpringBallJumpMidAir",
{
"and": [
"h_underwaterCrouchJumpDownGrab",
"canCarefulJump"
]
},
"canUseFrozenEnemies"
]
} |
|
Requires: {
"or": [
"HiJump",
"canSpringBallJumpMidAir",
"Gravity",
"h_underwaterCrouchJumpDownGrab"
]
}
{
"useFlashSuit": {}
}
{
"or": [
{
"shinespark": {
"frames": 20,
"excessFrames": 11
}
},
{
"and": [
"Gravity",
{
"shinespark": {
"frames": 18,
"excessFrames": 9
}
}
]
}
]
} |
From: 2
Right Door
To: 1
Bottom Left Door
Use the middle section of pipes as a platform to reach the top level, above the Mochtroid. A crouch jump and down grab is enough if the jump begins on the rightmost 75% of the rightmost pixel. Getting into this position can be made easier with a morph turnaround: Spin jump out, turn left then quickly break spin (i.e. with a shot or angle button), morph and press against the upper left wall, then briefly tap left on the descent to land on the edge. Then perform a morph turnaround by pressing right for a very short time to face right without moving. Unmorph and jump to the right by pressing right immediately after jumping (on the same frame or up to 5 frames later), and down grab on the upper right ledge. With the Mochtroid, crouch under the crumble blocks to the left. Holding both angle buttons to aim upward, freeze the Mochtroid while it is on Samus. Jump onto the Mochtroid by quickly pressing down after jumping. When on it, press up to stand then jump through the ceiling. Requires: {
"notable": "Mochtroid Ice Clip"
}
"canCeilingClip"
"canUseFrozenEnemies"
"canMorphTurnaround"
"h_underwaterCrouchJumpDownGrab"
{
"or": [
"canTrickyJump",
{
"enemyDamage": {
"enemy": "Mochtroid",
"type": "contact",
"hits": 1
}
}
]
} |
From: 2
Right Door
To: 1
Bottom Left Door
Use the middle section of pipes as a platform to reach the top level, above the Mochtroid. A crouch jump and down grab is enough if the jump begins on the rightmost 75% of the rightmost pixel. Getting into this position can be done by moonwalking to a certain pixel and then turning around to the right to end on the right-most pixel. With random subpixels, Samus will fall off 25% of the time when turning around to the right. If Samus starts on the correct pixel and does not fall off when turning around, then she is guaranteed to be on subpixels that will work for the jump. Crouch jump, pressing right immediately after jumping (on the same frame or up to 5 frames later), then down grab on the upper right ledge. Alternatively, moonwalking onto the correct pixel one frame at a time, stopping as soon as it is reached, can guarantee that Samus will not fall when turning around. With the Mochtroid, crouch under the crumble blocks. Holding both angle buttons to aim upward, freeze the Mochtroid while it is on Samus. Jump onto the Mochtroid by quickly pressing down after jumping. When on it, press up to stand then jump through the ceiling. Requires: {
"notable": "Mochtroid Ice Clip"
}
"canCeilingClip"
"canUseFrozenEnemies"
"canTrickyJump"
"h_underwaterCrouchJumpDownGrab" |
From: 2
Right Door
To: 1
Bottom Left Door
Find the crumble blocks and crystal flash mid-air, just below them. They are on the far left of the ceiling of the middle left pathway. Hold down as the CF ends to break the non-respawning crumble blocks. This is for the much harder version, without Gravity and Bombs. Requires: "h_jumpIntoCrystalFlashClip"
"canSuitlessMaridia"
{
"or": [
{
"and": [
"h_underwaterCrouchJumpDownGrab",
"canTrickyJump"
]
},
"HiJump",
"Gravity",
"canSpringBallJumpMidAir"
]
} |
|
Requires: "h_navigateUnderwater"
{
"or": [
{
"and": [
"h_underwaterCrouchJumpDownGrab",
"canTrickyJump"
]
},
"HiJump",
"Gravity",
"canSpringBallJumpMidAir"
]
}Exit condition: {
"leaveWithGModeSetup": {
"knockback": false
}
} |
|
Requires: {
"resetRoom": {
"nodes": [
2
]
}
}
{
"or": [
{
"and": [
"Gravity",
{
"or": [
{
"and": [
"Plasma",
{
"cycleFrames": 720
}
]
},
{
"and": [
"Wave",
{
"cycleFrames": 760
}
]
},
{
"and": [
"Spazer",
{
"cycleFrames": 785
}
]
},
{
"and": [
"Grapple",
{
"cycleFrames": 800
}
]
},
{
"and": [
"ScrewAttack",
{
"cycleFrames": 820
}
]
},
{
"and": [
"canDodgeWhileShooting",
{
"cycleFrames": 1060
}
]
}
]
},
{
"or": [
"canWallJump",
"h_underwaterCrouchJumpDownGrab",
{
"cycleFrames": 150
}
]
}
]
},
{
"and": [
{
"or": [
{
"and": [
{
"or": [
"Plasma",
"Wave",
"Spazer",
"Grapple",
{
"haveBlueSuit": {}
}
]
},
{
"cycleFrames": 1710
}
]
},
{
"and": [
"canDodgeWhileShooting",
{
"cycleFrames": 2010
}
]
}
]
},
{
"or": [
"HiJump",
{
"and": [
"canTrickyJump",
"h_underwaterCrouchJumpDownGrab",
{
"cycleFrames": 315
}
]
}
]
}
]
}
]
}Farm cycle drops: 1 Mochtroid, 2 Puyo |
From: 2
Bottom Right Door
To: 3
Top Right Door
Requires running a precise distance of 7 tiles with no open end in the adjacent room, to hit a peak of the speed vs height graph (at extra run speed $2.0 or $2.1). This needs a last-frame Space Jump in the previous room. At the lower of the two possible speeds ($2.0), the jump must be done very low through the door; at the higher speed ($2.1) there is a relatively large window of vertical positions that work. Entrance condition: {
"comeInSpaceJumping": {
"speedBooster": "yes",
"minTiles": 6.4375
}
}Requires: "canTrickyDashJump" "canPreciseSpaceJump" "canInsaneJump" "canCrossRoomJumpIntoWater" "canBufferedMomentumConservingTurnaround" "canDownGrab" |
|
Entrance condition: {
"comeInJumping": {
"speedBooster": "any",
"minTiles": 1
}
}Requires: "HiJump" "canTrickyJump" "canCrossRoomJumpIntoWater" "canMomentumConservingTurnaround" "canDownGrab" |
From: 2
Bottom Right Door
To: 3
Top Right Door
Requires a runway of five tiles in the adjacent room. Entrance condition: {
"comeInJumping": {
"speedBooster": "any",
"minTiles": 5
}
}Requires: "HiJump" "canCrossRoomJumpIntoWater" "canBufferedMomentumConservingTurnaround" "canDownGrab" |
|
Requires running a very precise distance of 7 tiles with no open end in the adjacent room, to hit a peak of the speed vs height graph. Entrance condition: {
"comeInJumping": {
"speedBooster": "yes",
"minTiles": 6.4375
}
}Requires: "canTrickyDashJump" "canCrossRoomJumpIntoWater" "canBufferedMomentumConservingTurnaround" "canDownGrab" |
|
Requires running a very precise distance of 12 tiles in the adjacent room and down grabbing onto the platform (extra run speed exactly $3.1). Entrance condition: {
"comeInJumping": {
"speedBooster": "yes",
"minTiles": 12
}
}Requires: "canCrossRoomJumpIntoWater" "canBufferedMomentumConservingTurnaround" "canTrickyDashJump" "canDownGrab" Dev note: FIXME: With 6.4375 tiles, it is possible to reach the floor below the floating platform; there's currently no node there, but with a flash suit it would be possible to spark up from there. |
|
Requires: "canSuitlessMaridia"
"HiJump"
{
"or": [
"h_underwaterCrouchJumpDownGrab",
"canSpringBallJumpMidAir",
"canUseFrozenEnemies",
{
"and": [
"canTrickyJump",
"canDownGrab"
]
}
]
} |
|
Requires: {
"or": [
{
"resetRoom": {
"nodes": [
2
]
}
},
{
"and": [
{
"resetRoom": {
"nodes": [
1
]
}
},
{
"or": [
{
"and": [
"Gravity",
{
"cycleFrames": 180
}
]
},
{
"and": [
"HiJump",
"h_underwaterCrouchJumpDownGrab",
{
"cycleFrames": 540
}
]
}
]
}
]
},
{
"and": [
{
"resetRoom": {
"nodes": [
3
]
}
},
"Gravity",
{
"or": [
"canWallJump",
"HiJump",
"SpaceJump"
]
},
{
"cycleFrames": 460
}
]
}
]
}
{
"or": [
{
"and": [
"Gravity",
"canDash",
{
"or": [
{
"and": [
"Grapple",
{
"cycleFrames": 300
}
]
},
{
"and": [
"ScrewAttack",
{
"cycleFrames": 360
}
]
},
{
"and": [
"Plasma",
{
"cycleFrames": 370
}
]
},
{
"and": [
"canPseudoScrew",
{
"cycleFrames": 400
}
]
},
{
"and": [
"Wave",
{
"cycleFrames": 430
}
]
},
{
"and": [
"Spazer",
{
"cycleFrames": 460
}
]
},
{
"and": [
"Ice",
{
"cycleFrames": 690
}
]
},
{
"cycleFrames": 800
}
]
}
]
},
{
"and": [
"Gravity",
{
"haveBlueSuit": {}
},
{
"cycleFrames": 570
}
]
},
{
"and": [
"Grapple",
{
"cycleFrames": 640
}
]
},
{
"and": [
"Plasma",
{
"cycleFrames": 670
}
]
},
{
"and": [
"Wave",
{
"cycleFrames": 720
}
]
},
{
"and": [
"Spazer",
{
"cycleFrames": 750
}
]
},
{
"and": [
{
"haveBlueSuit": {}
},
{
"cycleFrames": 1000
}
]
},
{
"and": [
"Ice",
{
"cycleFrames": 1050
}
]
},
{
"cycleFrames": 1120
}
]
}Resets obstacles: R-Mode Farm cycle drops: 3 Sciser Dev note: Other, slower methods are possible for resetting the room using the upper doors. |
From: 2
Right Door
To: 4
Top Right Ledge Junction
Take a spike hit and pause just after getting hit. Quickly crouch and jump just before the fade out ends. With a precise Gravity jump, it is possible to not need a crouch jump or down grab. Requires: "canGravityJump"
"HiJump"
{
"spikeHits": 1
}
"canUseIFrames"
"canTrickyJump"
{
"or": [
"canInsaneJump",
"canCrouchJump",
"canDownGrab"
]
}
{
"or": [
"canInsaneJump",
{
"spikeHits": 1
}
]
}
{
"or": [
{
"noBlueSuit": {}
},
"canBlueSuitSpikeJump"
]
}Dev note: The canCrouchJump is not a h_underwaterCrouchJump, because Gravity is required. |
From: 6
Junction Right of Morph Tunnel
To: 5
Bottom Middle Junction
Requires: "canSuitlessMaridia"
{
"or": [
{
"spikeHits": 1
},
"canTrickySpringBallJump",
{
"and": [
"HiJump",
{
"or": [
"canWallJump",
"canDownGrab",
"canSpaceJumpWaterEscape",
"canSpringBallJumpMidAir"
]
}
]
}
]
}
{
"or": [
{
"spikeHits": 1
},
"HiJump"
]
} |
From: 6
Junction Right of Morph Tunnel
To: 5
Bottom Middle Junction
This can be done by turning off Gravity and HiJump to jump over both spike pits. Requires: "canSuitlessMaridia"
{
"disableEquipment": "HiJump"
}
{
"disableEquipment": "Gravity"
}
"canTrickyJump"
"canDownGrab" |
|
Requires: "canSuitlessMaridia"
"HiJump"
{
"or": [
"canPlayInSand",
{
"and": [
"canPrepareForNextRoom",
"h_useSpringBall"
]
}
]
}
{
"or": [
"canDownGrab",
"canSunkenTileWideWallClimb",
"canSpringBallJumpMidAir"
]
} |
From: 2
Bottom Left Door
To: 4
Top Right Door
Entrance condition: {
"comeInJumping": {
"speedBooster": "yes",
"minTiles": 8
}
}Requires: "HiJump" "canDownGrab" "canTrickyJump" "canCrossRoomJumpIntoWater" |
|
Requires: "Gravity"
{
"or": [
"h_crouchJumpDownGrab",
"canUseFrozenEnemies",
"canGravityJump",
"canWallJump",
"HiJump",
"canSpringBallJumpMidAir",
"SpaceJump",
"canIBJ",
"canSpringBallBombJump"
]
}Dev note: The canCrouchJump is not a h_underwaterCrouchJump, because Gravity is required. |
|
Requires: "Gravity"
{
"resetRoom": {
"nodes": [
1,
2
]
}
}
{
"or": [
{
"enemyDamage": {
"enemy": "Cacatac",
"type": "spike",
"hits": 1
}
},
{
"and": [
"canDodgeWhileShooting",
{
"cycleFrames": 100
}
]
}
]
}
{
"or": [
{
"and": [
"HiJump",
{
"cycleFrames": 360
}
]
},
{
"and": [
"canWallJump",
{
"cycleFrames": 390
}
]
},
{
"and": [
"h_crouchJumpDownGrab",
{
"cycleFrames": 490
}
]
}
]
}
{
"or": [
"Plasma",
{
"and": [
"ScrewAttack",
{
"cycleFrames": 80
}
]
},
{
"and": [
{
"or": [
"Spazer",
"Wave",
{
"haveBlueSuit": {}
}
]
},
{
"cycleFrames": 50
}
]
},
{
"and": [
"Grapple",
{
"cycleFrames": 60
}
]
},
{
"and": [
{
"cycleFrames": 180
},
{
"or": [
{
"enemyDamage": {
"enemy": "Cacatac",
"type": "spike",
"hits": 1
}
},
{
"and": [
"canTrickyDodgeEnemies",
{
"cycleFrames": 100
}
]
}
]
}
]
}
]
}Farm cycle drops: 4 Cacatac Dev note: The canCrouchJump is not a h_underwaterCrouchJump, because Gravity is required. |
From: 1
Top Sand Entrance
To: 7
Below Morph Tunnel Junction
Get to the left side of the room while avoiding the hole in the ground, jump up through the Morph tunnel. Jump up to the ledge with either Gravity, HiJump and a Crouch Jump Down Grab, or a maximum height Spring Ball Jump. Entrance condition: {
"comeInWithGMode": {
"mode": "any",
"morphed": false
},
"comesThroughToilet": "any"
}Requires: "Morph"
"h_navigateUnderwater"
{
"or": [
"Gravity",
{
"and": [
"HiJump",
"h_underwaterCrouchJumpDownGrab"
]
},
"h_underwaterMaxHeightSpringBallJump"
]
} |
|
Requires: {
"or": [
"HiJump",
"SpaceJump",
"canIBJ",
"canWallJump",
"h_crouchJumpDownGrab",
"canSpringBallJumpMidAir"
]
} |
|
Gain speed using between 36 and 42 tiles of runway (extra run speed between $6.4 and $6.F). Unmorph to retain blue speed to pass safely through the Rippers. Entrance condition: {
"comeInWithBlueSpringBallBounce": {
"movementType": "any",
"minExtraRunSpeed": "$6.4"
}
}Requires: "HiJump" "canTrickyDashJump" "canInsaneJump" "canDownGrab" |
|
Gain speed using at least 33 runway tiles in the other room. To avoid the Rippers, break spin and turn around right and then left. Entrance condition: {
"comeInRunning": {
"speedBooster": "yes",
"minTiles": 33
}
}Requires: "HiJump" "canTrickyDashJump" "canInsaneJump" "canDownGrab" |
|
Kill or tank the Menus or spin jump directly from the safety to the right up to the ledge. With a spin jump, Samus can make it to the ledge without a wall jump or other means. Requires: "HiJump"
{
"or": [
"h_usePowerBomb",
"ScrewAttack",
{
"haveBlueSuit": {}
},
"Plasma",
{
"and": [
"Ice",
"Wave",
"Spazer"
]
},
{
"enemyDamage": {
"enemy": "Menu",
"type": "contact",
"hits": 2
}
}
]
}
{
"or": [
"canCarefulJump",
"canCrouchJump",
"canDownGrab",
"canWallJump"
]
}Dev note: The safe direct jump is not expected here and is included in another strat, but it is still worth mentioning here. |
|
Requires: {
"resetRoom": {
"nodes": [
1
]
}
}
{
"or": [
"canDash",
{
"cycleFrames": 100
}
]
}
{
"or": [
{
"and": [
"HiJump",
"SpaceJump",
{
"cycleFrames": 930
}
]
},
{
"and": [
"HiJump",
"canTrickyWallJump",
{
"cycleFrames": 960
}
]
},
{
"and": [
"SpaceJump",
{
"cycleFrames": 1220
}
]
},
{
"and": [
"canSpringwall",
{
"cycleFrames": 1035
},
"h_doubleEquipmentScreenCycleFrames"
]
},
{
"and": [
"HiJump",
"canSpringBallJumpMidAir",
{
"cycleFrames": 910
},
"h_doubleEquipmentScreenCycleFrames"
]
},
{
"and": [
"canDoubleBombJump",
{
"or": [
"canWallJump",
"h_crouchJumpDownGrab"
]
},
{
"cycleFrames": 1410
}
]
},
{
"and": [
"canDoubleBombJump",
{
"cycleFrames": 1560
}
]
}
]
}
{
"or": [
"ScrewAttack",
{
"haveBlueSuit": {}
},
"Plasma"
]
}Resets obstacles: A, B, C Farm cycle drops: 4 Pink Space Pirate (standing), 2 Pink Space Pirate (wall) Dev note: FIXME: Add option to kill the Pirates with speed echoes, and possibly to get back up with a shinespark. |
|
Requires: {
"or": [
"canWallJump",
"h_crouchJumpDownGrab",
"HiJump",
"SpaceJump",
"canSpringBallJumpMidAir",
"canSpringBallBombJump"
]
} |
|
Requires: "canUnmorphBombBoost" "canDownGrab" |
|
Entrance condition: {
"comeInWithGMode": {
"mode": "any",
"morphed": true
}
}Requires: {
"or": [
{
"and": [
"Gravity",
{
"or": [
"h_artificialMorphLongIBJ",
{
"and": [
"h_artificialMorphIBJ",
"h_artificialMorphBombHorizontally"
]
}
]
}
]
},
{
"and": [
"h_artificialMorphDoubleSpringBallJump",
"canDownGrab"
]
},
{
"and": [
"canGravityJump",
"h_artificialMorphSpringBallBombJump"
]
}
]
} |
From: 2
Bottom Right Door
To: 1
Left Vertical Door
Gravity jump out of the water then perform a precise crouch jump + down grab to get onto the next ledge. Requires: {
"notable": "Left Shaft Precise Crouch Jump Down Grab"
}
"canGravityJump"
"h_crouchJumpDownGrab"
"canTrickyJump" |
From: 2
Bottom Right Door
To: 1
Left Vertical Door
Requires: "canSuitlessMaridia" "HiJump" "canTrickyJump" "canTrickyUseFrozenEnemies" "h_underwaterCrouchJumpDownGrab" |
From: 2
Bottom Right Door
To: 1
Left Vertical Door
Start the dash as close to the door transition as possible to help avoid getting hit by the first Owtch. Store the shine charge while high up on the left slope. Spark up while on the right side of the platform. To avoid the Owtch on the platform, it may help to jump on the left side of the platform then jump again and spark midair above the right side. Entrance condition: {
"comeInRunning": {
"speedBooster": "yes",
"minTiles": 0.4375
}
}Requires: "canWaterShineCharge"
"canShinechargeMovementComplex"
{
"or": [
{
"shinespark": {
"frames": 90,
"excessFrames": 50
}
},
{
"and": [
{
"shinespark": {
"frames": 90,
"excessFrames": 59
}
},
{
"or": [
"canWallJump",
"HiJump",
"canSpringBallJumpMidAir",
"SpaceJump",
{
"and": [
"canIBJ",
"canBombHorizontally"
]
},
{
"and": [
"h_crouchJumpDownGrab",
{
"notable": "Left Shaft Precise Crouch Jump Down Grab"
}
]
}
]
}
]
}
]
} |
|
Requires: "canSuitlessMaridia"
"HiJump"
"canSpringBallJumpMidAir"
{
"or": [
"h_underwaterCrouchJumpDownGrab",
"canTrickySpringBallJump",
"canWallJump"
]
} |
|
With HiJump, jump left and spark up right while against the left wall to save Energy. With Ice, wait for the Skultera and use it save a small amount of Energy. With HiJump and Ice, crouch jump from the frozen fish while shooting to prevent activating the spark, then downgrab the ledge above. Requires: "h_storedSpark"
{
"or": [
{
"shinespark": {
"frames": 72,
"excessFrames": 49
}
},
{
"and": [
{
"shinespark": {
"frames": 72,
"excessFrames": 58
}
},
"h_crouchJumpDownGrab",
{
"notable": "Left Shaft Precise Crouch Jump Down Grab"
}
]
},
{
"and": [
"HiJump",
{
"shinespark": {
"frames": 24,
"excessFrames": 13
}
}
]
},
{
"and": [
"canGravityJump",
{
"shinespark": {
"frames": 13,
"excessFrames": 12
}
}
]
},
{
"and": [
"HiJump",
"canTrickyUseFrozenEnemies",
{
"shinespark": {
"frames": 14,
"excessFrames": 13
}
}
]
}
]
} |
|
Use the Skultera to get onto the top right platform. There are two distinct ways to get up using the top Skultera. 1. Freeze it at the bottom of its path to the left. Crouch jump and down grab to get onto it. The positioning is very precise. 2. Freeze it about a half-tile from the right wall and very quickly stationary spin jump and quickly walljump mash to get up before it thaws. This may be easier by jumping away from the wall, towards the fish, to gain height faster. Requires: {
"notable": "Frozen Fish Climb"
}
"canSuitlessMaridia"
"canTrickyUseFrozenEnemies"
{
"or": [
{
"and": [
"canTrickyJump",
"h_underwaterCrouchJumpDownGrab"
]
},
{
"and": [
"canStationarySpinJump",
"canSunkenTileWideWallClimb"
]
}
]
} |
|
Requires: "canSuitlessMaridia"
"canSpringBallJumpMidAir"
{
"or": [
"canWallJump",
"h_underwaterCrouchJumpDownGrab",
"canTrickySpringBallJump"
]
} |
|
Requires: {
"or": [
{
"resetRoom": {
"nodes": [
1
]
}
},
{
"and": [
{
"resetRoom": {
"nodes": [
2
]
}
},
"Gravity",
{
"or": [
"h_crouchJumpDownGrab",
"canWallJump"
]
},
{
"cycleFrames": 130
}
]
}
]
}
{
"or": [
"canDash",
{
"cycleFrames": 200
}
]
}
{
"or": [
{
"and": [
"Plasma",
{
"cycleFrames": 740
}
]
},
{
"and": [
"Wave",
{
"cycleFrames": 800
}
]
},
{
"and": [
"Spazer",
{
"cycleFrames": 860
}
]
},
{
"and": [
"Grapple",
{
"cycleFrames": 890
}
]
},
{
"and": [
"ScrewAttack",
{
"cycleFrames": 960
}
]
},
{
"cycleFrames": 1500
}
]
}Farm cycle drops: 5 Choot Dev note: There is a sixth Choot on the far right but it's not worth going for. FIXME: add other movement options for reaching the top of the room from node 2. The canCrouchJump is not a h_underwaterCrouchJump, because Gravity is required. |
|
Requires: "Gravity"
{
"or": [
"HiJump",
"canWallJump",
"SpaceJump",
"canIBJ",
"canSpeedyJump",
"h_crouchJumpDownGrab",
"canSpringBallJumpMidAir",
"canGravityJump"
]
}Dev note: The canCrouchJump is not a h_underwaterCrouchJump, because Gravity is required. |
|
Requires: "h_navigateUnderwater"
"canUseFrozenEnemies"
{
"or": [
"canTrickyUseFrozenEnemies",
"HiJump",
"canSpringBallJumpMidAir",
"Gravity",
"h_underwaterCrouchJumpDownGrab"
]
} |
|
Crouch jump just before the water reaches its maximum. Wait until Samus reaches the peak of the jump; then in quick succession press down and then forward (or diagonal down-forward). This only works as a way out of the water on the right side. The problem with pressing down pre-maturely is that it shrinks Samus' hitbox vertically, causing Samus to escape the water, which results in a shortened jump height because of the larger vertical acceleration that applies when Samus is in air physics. Requires: "canSuitlessMaridia" "h_underwaterCrouchJumpDownGrab" "canTrickyJump" |
|
Getting out with only Gravity and no wall jump requires a tight crouch jump and down grab while above the water: Position very close to the edge, and press forward immediately after crouch jumping (almost simultaneously). Requires: {
"notable": "Precise Crouch Jump Down Grab"
}
"Gravity"
"canTrickyJump"
"h_crouchJumpDownGrab" |
|
Requires: "canSuitlessMaridia" "HiJump" "canDownGrab" |
|
Requires: "h_storedSpark"
{
"or": [
{
"shinespark": {
"frames": 32,
"excessFrames": 13
}
},
{
"and": [
{
"shinespark": {
"frames": 15,
"excessFrames": 12
}
},
{
"notable": "Precise Crouch Jump Down Grab"
},
"canTrickyJump",
"h_crouchJumpDownGrab"
]
}
]
} |
|
Entrance condition: {
"comeInWithGMode": {
"mode": "direct",
"morphed": false
}
}Requires: "h_navigateUnderwater"
{
"or": [
"Gravity",
"HiJump",
"canWallJump",
"h_underwaterCrouchJumpDownGrab",
"canTrickySpringBallJump",
"canUseFrozenEnemies"
]
}Exit condition: {
"leaveWithGMode": {
"morphed": false
}
} |
|
Kill, freeze, or dodge the Yapping Maws. Kill the Zoa and wait for its drop to disappear. Just before it disappears, move into the sand and crouch. Press forward when near the transition to stand up and touch the transition on the first frame of standing. If the drop is an ammo drop, Samus can collect the drop and not have to wait for it to respawn. To do this, sink slightly into the sand before collecting the drop, then crouch and stand up to touch the transition and get hit by the Zoa. Note that if the Yapping Maw grabs Samus after touching the transition, the G-mode setup can still work. Requires: "h_navigateUnderwater"
"canPlayInSand"
"canDownwardGModeSetup"
{
"or": [
"Ice",
{
"ammo": {
"type": "Super",
"count": 1
}
},
{
"obstaclesCleared": [
"A"
]
},
{
"obstaclesCleared": [
"B"
]
},
"canTrickyGMode",
{
"and": [
"canInsaneJump",
{
"or": [
"Gravity",
"HiJump",
"canWallJump",
{
"and": [
"h_underwaterCrouchJumpDownGrab",
{
"doorUnlockedAtNode": 1
}
]
},
{
"and": [
"h_underwaterCrouchJumpDownGrab",
{
"doorUnlockedAtNode": 3
}
]
}
]
}
]
}
]
}Exit condition: {
"leaveWithGModeSetup": {}
}Unlocks doors: {"nodeId":1,"types":["super"],"requires":["canTrickyJump"]}
{"nodeId":1,"types":["missiles","powerbomb"],"requires":["never"]}
{"nodeId":3,"types":["super"],"requires":["canTrickyJump"]}
{"nodeId":3,"types":["missiles","powerbomb"],"requires":["never"]} |
|
Entrance condition: {
"comeInWithGMode": {
"mode": "direct",
"morphed": false
}
}Requires: "h_navigateUnderwater"
{
"or": [
"Gravity",
"HiJump",
"canWallJump",
"h_underwaterCrouchJumpDownGrab",
"canTrickySpringBallJump",
"canUseFrozenEnemies"
]
}Exit condition: {
"leaveWithGMode": {
"morphed": false
}
} |
|
Requires: "canSuitlessMaridia"
"canCarefulJump"
{
"or": [
"canWallJump",
"h_underwaterCrouchJumpDownGrab",
"canTrickySpringBallJump"
]
}
{
"doorUnlockedAtNode": 1
}Unlocks doors: {"nodeId":1,"types":["missiles"],"requires":["canDodgeWhileShooting"]}
{"nodeId":1,"types":["super"],"requires":[]}
{"nodeId":1,"types":["powerbomb"],"requires":["canTrickyJump"]} |
|
Requires: "canSuitlessMaridia"
{
"obstaclesCleared": [
"A"
]
}
{
"or": [
"canWallJump",
"h_underwaterCrouchJumpDownGrab",
"canTrickySpringBallJump"
]
}
{
"doorUnlockedAtNode": 1
}Unlocks doors: {"nodeId":1,"types":["ammo"],"requires":[]} |
|
Requires: "canSuitlessMaridia"
"canCarefulJump"
{
"or": [
"canWallJump",
"h_underwaterCrouchJumpDownGrab",
"canTrickySpringBallJump"
]
}
{
"doorUnlockedAtNode": 3
}Unlocks doors: {"nodeId":3,"types":["missiles"],"requires":["canDodgeWhileShooting"]}
{"nodeId":3,"types":["super"],"requires":[]}
{"nodeId":3,"types":["powerbomb"],"requires":["canTrickyJump"]} |
|
Requires: "canSuitlessMaridia"
{
"obstaclesCleared": [
"B"
]
}
{
"or": [
"canWallJump",
"h_underwaterCrouchJumpDownGrab",
"canTrickySpringBallJump"
]
}
{
"doorUnlockedAtNode": 3
}Unlocks doors: {"nodeId":3,"types":["ammo"],"requires":[]} |
|
Requires: "canSuitlessMaridia"
"HiJump"
{
"or": [
"canSpringBallJumpMidAir",
"h_underwaterCrouchJumpDownGrab",
"canUseFrozenEnemies"
]
} |
|
Involves breaking the top left Puyo free and then freezing it while it falls. Walk to the end of the door platform and wait for the above puyo to land on the shot block. It will float there until its next jump, where it will slowly descend. Requires: "canSuitlessMaridia"
"canTrickyUseFrozenEnemies"
{
"or": [
"h_underwaterCrouchJumpDownGrab",
"canTwoTileSqueeze",
"Morph"
]
} |
|
Requires: {
"resetRoom": {
"nodes": [
2
]
}
}
{
"or": [
{
"and": [
"Gravity",
{
"or": [
{
"and": [
"Plasma",
{
"cycleFrames": 230
}
]
},
{
"and": [
{
"haveBlueSuit": {}
},
{
"cycleFrames": 240
}
]
},
{
"and": [
"Grapple",
{
"cycleFrames": 270
}
]
},
{
"and": [
"Wave",
{
"cycleFrames": 300
}
]
},
{
"and": [
"Spazer",
{
"cycleFrames": 330
}
]
},
{
"and": [
"canDodgeWhileShooting",
{
"cycleFrames": 650
}
]
}
]
}
]
},
{
"and": [
"canSuitlessMaridia",
"canDodgeWhileShooting",
{
"or": [
"h_underwaterCrouchJumpDownGrab",
"HiJump"
]
},
{
"or": [
{
"and": [
"Grapple",
{
"cycleFrames": 530
}
]
},
{
"cycleFrames": 890
}
]
}
]
}
]
}Farm cycle drops: 3 Puyo Dev note: More Puyos could be farmed at the bottom of the room, but it doesn't seem worth modeling. |
From: 1
Left Door
To: 2
Right Door
Entrance condition: {
"comeInShinecharging": {
"length": 1,
"openEnd": 0
}
}Requires: "canShinechargeMovementComplex"
"canPlayInSand"
{
"or": [
{
"shinespark": {
"frames": 67,
"excessFrames": 13
}
},
{
"and": [
"canInsaneJump",
{
"shinespark": {
"frames": 54,
"excessFrames": 0
}
},
"canDownGrab"
]
}
]
} |
|
The sand does not impede Samus in G-Mode. Carefully jump over the first two Evirs. Crouch against the pillar and wait a brief moment before jumping and down grabbing onto it. Lure the third Evir's projectile by jumping then crouch jump and down grab the second pillar. Getting onto the final pillar is the hardest part, which requires a subpixel precise jump. Carefully lure the Evir projectile while getting into position, one pixel from the right edge. Stand and spinjump to the right. Note that running before jumping doesn't help. Entrance condition: {
"comeInWithGMode": {
"mode": "any",
"morphed": false
}
}Requires: "canSuitlessMaridia" "h_underwaterCrouchJumpDownGrab" "canInsaneJump" |
|
Spark at the peak of the jump, just before or after touching the sand fall, in order to be high enough to get over the last pillar. Requires: "h_storedSpark"
{
"or": [
{
"shinespark": {
"frames": 67,
"excessFrames": 13
}
},
{
"and": [
"canInsaneJump",
{
"shinespark": {
"frames": 54,
"excessFrames": 0
}
},
"canDownGrab"
]
}
]
} |
|
Entrance condition: {
"comeInWithGMode": {
"mode": "any",
"morphed": false
}
}Requires: "h_navigateUnderwater"
{
"or": [
"Gravity",
"HiJump",
"canSpringBallJumpMidAir",
{
"and": [
"h_underwaterCrouchJumpDownGrab",
"h_storedSpark",
{
"shinespark": {
"frames": 6,
"excessFrames": 5
}
}
]
}
]
}Dev note: Only the last jump needs any items. |
|
The sand does not impede Samus in G-Mode. Enter the room on the right half of the transition, where both Evirs will be off camera to avoid their projectiles. Entrance condition: {
"comeInWithGMode": {
"mode": "any",
"morphed": false
},
"comesThroughToilet": "any"
}Requires: "h_navigateUnderwater"
{
"or": [
"canInsaneJump",
{
"enemyDamage": {
"enemy": "Evir",
"type": "particle",
"hits": 1
}
}
]
}
{
"or": [
"Gravity",
"HiJump",
"canSpringBallJumpMidAir",
{
"and": [
"h_underwaterCrouchJumpDownGrab",
"h_storedSpark",
{
"shinespark": {
"frames": 7,
"excessFrames": 6
}
}
]
}
]
}Dev note: Only the last jump needs any items. |
|
The sand does not impede Samus in G-Mode. Enter the room on the right half of the transition, where both Evirs will be off camera to avoid their projectiles. It is possible to jump to the tall pillar with nothing, requiring a subpixel precise jump. Running before jumping doesn't help. Stand one pixel from the right edge and spinjump to the right. Entrance condition: {
"comeInWithGMode": {
"mode": "any",
"morphed": false
},
"comesThroughToilet": "any"
}Requires: "h_navigateUnderwater"
{
"or": [
"canInsaneJump",
{
"enemyDamage": {
"enemy": "Evir",
"type": "particle",
"hits": 1
}
}
]
}
{
"or": [
"Gravity",
"HiJump",
"canSpringBallJumpMidAir",
{
"and": [
"h_underwaterCrouchJumpDownGrab",
"canInsaneJump"
]
}
]
} |
|
Requires: "h_storedSpark"
{
"or": [
{
"shinespark": {
"frames": 27,
"excessFrames": 15
}
},
{
"and": [
"canInsaneJump",
{
"shinespark": {
"frames": 13,
"excessFrames": 0
}
},
"canDownGrab"
]
}
]
} |
|
Requires: "canSuitlessMaridia"
{
"or": [
{
"and": [
"HiJump",
{
"or": [
"canDownGrab",
"canSpringBallJumpMidAir",
"canConsecutiveWallJump"
]
}
]
},
"h_underwaterMaxHeightSpringBallJump"
]
} |
|
Entrance condition: {
"comeInWithGMode": {
"mode": "any",
"morphed": false
}
}Requires: "h_navigateUnderwater"
{
"or": [
"canTrickyDodgeEnemies",
"h_underwaterCrouchJumpDownGrab",
"HiJump",
"Gravity",
"canSpringBallJumpMidAir"
]
}
{
"or": [
"canTrickyDodgeEnemies",
{
"enemyDamage": {
"enemy": "Evir",
"type": "particle",
"hits": 1
}
}
]
} |
From: 2
Right Door
To: 5
Left Pillar Junction
In the other room, gain run speed using at least 36 tiles (extra run speed at least $6.4), and Space Jump low through the door. Land on the block just past the last Evir. Entrance condition: {
"comeInSpaceJumping": {
"speedBooster": "yes",
"minTiles": 36
}
}Requires: {
"notable": "Cross Room Space Jump (Right to Left)"
}
"canPreciseSpaceJump"
"canInsaneJump"
"canDownGrab" |
|
Dodging the Evirs can be tricky. Enter on the far right side, facing left, and hold left on entry to dodge them reliably. Entrance condition: {
"comeInWithGMode": {
"mode": "any",
"morphed": false
},
"comesThroughToilet": "any"
}Requires: "h_navigateUnderwater"
{
"or": [
"h_underwaterCrouchJumpDownGrab",
"HiJump",
"Gravity",
"canSpringBallJumpMidAir"
]
}
{
"or": [
"canInsaneJump",
{
"enemyDamage": {
"enemy": "Evir",
"type": "particle",
"hits": 1
}
}
]
} |
|
Fall into the sand and roll all the way to the left, through an invisible tile and under the door platform. Shoot upwards to break part of the platform, then perform a crouch jump and down grab or a tile-wide wall jump climb to escape. Requires: "canSuitlessMaridia"
"Morph"
{
"or": [
"canSunkenTileWideWallClimb",
"h_underwaterCrouchJumpDownGrab"
]
}
{
"noBlueSuit": {}
} |
|
Requires: {
"or": [
"HiJump",
"SpaceJump",
"canWallJump",
"h_crouchJumpDownGrab",
"canJumpIntoIBJ",
"canSpringBallJumpMidAir"
]
}
{
"or": [
"canCarefulJump",
"ScrewAttack",
{
"enemyDamage": {
"enemy": "Tourian Space Pirate (all)",
"type": "contact",
"hits": 1
}
}
]
}Clears obstacles: A |
