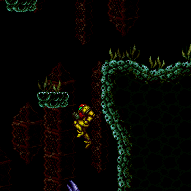
canCrossRoomJumpIntoWater (Hard)

Using the momentum from jumping through a doorway from normal to water physics.
Dependencies: canDash, canSpeedyJump, canSuitlessMaridia
Strats ()
From: 2
Bottom Left Door
To: 1
Top Left Doorway
Requires a runway of at least 6 tiles (with no open end) in the adjacent room. Use a Cross Room Jump into Water followed by a delayed Momentum Conserving Turnaround. Then morph and move right to go through the Morph tunnel above, avoiding damage from the crab. With the minimal runway length, this requires precise timing. Entrance condition: {
"comeInJumping": {
"speedBooster": "any",
"minTiles": 5.4375
}
}Requires: {
"notable": "Cross Room Jump Morph"
}
"canMidAirMorph"
"canCrossRoomJumpIntoWater"
"canMomentumConservingTurnaround"
"canInsaneJump"Dev note: This strat is included for completeness, but it is technically redundant with the airball strat, which may generally be preferable due to not risking a crab hit. |
From: 2
Bottom Left Door
To: 1
Top Left Doorway

Requires a runway of at least 4 tiles (with no open end) in the adjacent room. Use a Cross Room Jump into Water followed by a delayed Momentum Conserving Turnaround. Then morph and move right to go through the Morph tunnel above, avoiding damage from the crab. Entrance condition: {
"comeInJumping": {
"speedBooster": "yes",
"minTiles": 3.4375
}
}Requires: {
"notable": "Cross Room Jump Morph"
}
"canMidAirMorph"
"canCrossRoomJumpIntoWater"
"canMomentumConservingTurnaround" |
From: 2
Bottom Left Door
To: 1
Top Left Doorway

Only requires a runway of 6 tiles (with no open end) in the adjacent room. Perform an air ball while against the ceiling to make it up and through the morph tunnel. If the runway length is minimal, the aim-down input must be delayed a bit (rather than buffered through the transition), so that Samus moves at a slightly higher horizontal speed for longer. Entrance condition: {
"comeInJumping": {
"speedBooster": "no",
"minTiles": 5.4375
}
}Requires: {
"notable": "Cross Room Jump Morph"
}
"canCrossRoomJumpIntoWater"
"canMomentumConservingMorph" |
From: 2
Bottom Left Door
To: 1
Top Left Doorway
Only requires a runway of 5 tiles (with an open end) in the adjacent room. Perform an air ball while against the ceiling to make it up and through the morph tunnel. Entrance condition: {
"comeInJumping": {
"speedBooster": "yes",
"minTiles": 5
}
}Requires: {
"notable": "Cross Room Jump Morph"
}
"canCrossRoomJumpIntoWater"
"canMomentumConservingMorph" |
From: 2
Bottom Left Door
To: 1
Top Left Doorway

Requires a runway of at least 4 tiles (with no open end) in the adjacent room. Use a Cross Room Jump into Water followed by a delayed Momentum Conserving Turnaround to reach the Morph tunnel above. Climbing the Left side of the center hole will run into an unavoidable Sciser that can be passed through by Morphing. Crossing to the right from the left door requires slightly more runway and takes a more precise turnaround. Samus must also stay near a side of the center hole to reach the Morph tunnels. Entrance condition: {
"comeInJumping": {
"speedBooster": "no",
"minTiles": 3.4375
}
}Requires: {
"notable": "Cross Room Jump Morph"
}
"canMidAirMorph"
"canCrossRoomJumpIntoWater"
"canMomentumConservingTurnaround"
"canKago"
{
"or": [
{
"enemyDamage": {
"enemy": "Sciser",
"type": "contact",
"hits": 1
}
},
"h_pauseAbuseMinimalReserveRefill"
]
} |
From: 2
Bottom Left Door
To: 1
Top Left Doorway
Requires a runway of at least 3 tiles (with an open end) in the adjacent room. Use a Cross Room Jump into Water followed by a delayed Momentum Conserving Turnaround to reach the Morph tunnel above. Climbing the Left side of the center hole will run into an unavoidable Scisor that can be passed through by Morphing. Crossing to the right from the left door requires slightly more runway and takes a more precise turnaround. Samus must also stay near a side of the center hole to reach the Morph tunnels. Entrance condition: {
"comeInJumping": {
"speedBooster": "yes",
"minTiles": 3
}
}Requires: {
"notable": "Cross Room Jump Morph"
}
"canMidAirMorph"
"canCrossRoomJumpIntoWater"
"canMomentumConservingTurnaround"
"canKago"
{
"or": [
{
"enemyDamage": {
"enemy": "Sciser",
"type": "contact",
"hits": 1
}
},
"h_pauseAbuseMinimalReserveRefill"
]
}Dev note: Extra run speeds between $1.2 and about $2.5 can work. |
From: 2
Bottom Left Door
To: 1
Top Left Doorway

Turn around to the left just before bonking the ceiling, to retain upward momentum. Then turn back to the right and go through the morph tunnel to the right, avoiding crab damage. Entrance condition: {
"comeInSpaceJumping": {
"speedBooster": "no",
"minTiles": 6
}
}Requires: {
"notable": "Cross Room Jump Morph"
}
"canCrossRoomJumpIntoWater"
"canPreciseSpaceJump"
"canMomentumConservingTurnaround"
"canMidAirMorph"Dev note: Jump low through the door with at least $1.D extra run speed. |
From: 2
Bottom Left Door
To: 1
Top Left Doorway
Turn around to the left just before bonking the ceiling, to retain upward momentum. Then turn back to the right and go through the morph tunnel to the right, avoiding crab damage. Entrance condition: {
"comeInSpaceJumping": {
"speedBooster": "yes",
"minTiles": 3.5625
}
}Requires: {
"notable": "Cross Room Jump Morph"
}
"canCrossRoomJumpIntoWater"
"canPreciseSpaceJump"
"canMomentumConservingTurnaround"
"canMidAirMorph"Dev note: Jump low through the door with at least $1.5 extra run speed. |
From: 2
Bottom Left Door
To: 1
Top Left Doorway

Turn around to the left just before bonking the ceiling, to retain upward momentum. Then morph while passing through the crab and go through the morph tunnel to the left. Entrance condition: {
"comeInSpaceJumping": {
"speedBooster": "no",
"minTiles": 3.5625
}
}Requires: {
"notable": "Cross Room Jump Morph"
}
"canCrossRoomJumpIntoWater"
"canPreciseSpaceJump"
"canMomentumConservingTurnaround"
"canMidAirMorph"
"canKago"
{
"or": [
{
"enemyDamage": {
"enemy": "Sciser",
"type": "contact",
"hits": 1
}
},
"h_pauseAbuseMinimalReserveRefill"
]
}Dev note: Jump low through the door with at least $1.4 extra run speed. |
From: 2
Bottom Left Door
To: 1
Top Left Doorway
Turn around to the left just before bonking the ceiling, to retain upward momentum. Then morph while passing through the crab and go through the morph tunnel to the left. Entrance condition: {
"comeInSpaceJumping": {
"speedBooster": "yes",
"minTiles": 3
}
}Requires: {
"notable": "Cross Room Jump Morph"
}
"canCrossRoomJumpIntoWater"
"canPreciseSpaceJump"
"canMomentumConservingTurnaround"
"canMidAirMorph"
"canKago"
{
"or": [
{
"enemyDamage": {
"enemy": "Sciser",
"type": "contact",
"hits": 1
}
},
"h_pauseAbuseMinimalReserveRefill"
]
}Dev note: Jump low through the door with at least $1.2 extra run speed. |
From: 2
Bottom Left Door
To: 1
Top Left Doorway
Unmorph just before hitting the ceiling, to conserve upward momentum. Continue moving right to avoid a crab hit, then morph again to make it through. Entrance condition: {
"comeInWithSpringBallBounce": {
"speedBooster": "any",
"movementType": "controlled",
"remoteAndLandingMinTiles": [
[
4.5625,
1
]
]
}
}Requires: {
"notable": "Cross Room Jump Morph"
}
"canCrossRoomJumpIntoWater"
"canMomentumConservingMorph"Dev note: Bounce with extra run speed at least $1.8. |
From: 2
Bottom Left Door
To: 1
Top Left Doorway
Unmorph just before hitting the ceiling, to conserve upward momentum. Continue moving right to avoid a crab hit, then morph again to make it through. If the runway is very short and the bounce is not on the last frame before the transition, then it may be necessary to perform a spring ball jump; in this case, pause soon after entering the room in order to unequip spring ball. Entrance condition: {
"comeInWithSpringBallBounce": {
"speedBooster": "yes",
"movementType": "uncontrolled",
"remoteAndLandingMinTiles": [
[
3,
1
]
]
}
}Requires: {
"notable": "Cross Room Jump Morph"
}
"canCrossRoomJumpIntoWater"
"canMomentumConservingMorph"Dev note: Bounce with extra run speed at least $1.2. FIXME: In these strats we probably also need to be able to express maxExtraRunSpeed or a maxTiles; maybe this entrance condition should be changed to have the same structure as comeInWithBlueSpringBallBounce? |
From: 2
Bottom Left Door
To: 1
Top Left Doorway
Unmorph just before hitting the ceiling, to conserve upward momentum. Continue moving right to avoid a crab hit, then morph again to make it through. Entrance condition: {
"comeInWithSpringBallBounce": {
"speedBooster": "any",
"movementType": "uncontrolled",
"remoteAndLandingMinTiles": [
[
3.5625,
1
]
]
}
}Requires: {
"notable": "Cross Room Jump Morph"
}
"canCrossRoomJumpIntoWater"
"canMomentumConservingMorph"Dev note: Bounce with extra run speed at least $1.5. |
From: 2
Bottom Left Door
To: 1
Top Left Doorway

Entrance condition: {
"comeInWithSidePlatform": {
"platforms": [
{
"minHeight": 1,
"maxHeight": 1,
"minTiles": 5.4375,
"speedBooster": "yes",
"obstructions": [
[
1,
0
]
],
"requires": [
"canMomentumConservingMorph",
"canInsaneJump",
"canInsaneMidAirMorph"
],
"note": [
"This applies to Warehouse Energy Tank Room.",
"It is double frame-perfect, requiring a last-frame jump in the other room just before Samus would get caught on the door ledge,",
"and a frame-perfect morph just before Samus would bonk the ceiling.",
"The aim-down must be delayed until at least 4 frames after entering the room."
]
},
{
"minHeight": 1,
"maxHeight": 1,
"minTiles": 8.4375,
"speedBooster": "any",
"obstructions": [
[
1,
0
]
],
"requires": [
"canInsaneJump",
{
"or": [
"canMomentumConservingMorph",
"canMomentumConservingTurnaround"
]
}
],
"note": [
"This applies to Warehouse Entrance.",
"This requires a last-frame jump and specific horizontal alignment in order to avoid bonking the door frame.",
"A way to get a correct starting position is to jump, press against the ceiling overhang near the end of the runway,",
"land, turn around away from the door, then jump and mid-air turnaround toward the door."
],
"devNote": [
"Speed Booster is not required for this."
]
},
{
"minHeight": 1,
"maxHeight": 1,
"minTiles": 17,
"speedBooster": "yes",
"obstructions": [
[
1,
0
]
],
"requires": [
{
"or": [
"canMomentumConservingMorph",
{
"and": [
"canMomentumConservingTurnaround",
"canTrickyJump"
]
}
]
}
],
"note": [
"This applies to Warehouse Entrance.",
"This can be done in three ways:",
"1) Jump on the last possible frame in the previous room, turn around a little before hitting the ceiling, then morph and hold right to pass through the tunnel.",
"2) Perform a ceiling mockball through the transition,",
"unmorph a little before hitting the ceiling,",
"hold right to press against the wall (to avoid hitting the crab), then morph and hold right to pass through the tunnel.",
"3) Jump on the last possible frame in the previous room, then perform a ceiling mockball to go up through the hidden space,",
"briefly releasing right while approaching the ceiling, in order to avoid hitting the crab."
],
"devNote": [
"The turnaround method has about a 9-frame window for the turnaround.",
"The through-door ceiling mockball has about a 4-frame window for the jump, between a 1-frame and a 5-frame window for the morph (with later jumps giving a larger window),",
"and about a 7-frame window for the unmorph.",
"The after-transition ceiling mockball has an 8-frame for the morph.",
"Kagoing the crab is also possible, but it seems more difficult than all three other options, and it takes damage, so is probably pointless."
]
},
{
"minHeight": 2,
"maxHeight": 2,
"minTiles": 8.4375,
"speedBooster": "any",
"obstructions": [
[
1,
0
]
],
"requires": [
"canTrickyJump",
"canMomentumConservingTurnaround"
],
"note": [
"This applies to Ridley Tank Room and Dust Torizo Room.",
"From Ridley Tank Room, avoid backing into the corner.",
"From Dust Torizo Room, it doesn't matter."
],
"devNote": [
"Speed Booster is not required for this."
]
},
{
"minHeight": 3,
"maxHeight": 3,
"minTiles": 8.4375,
"speedBooster": "yes",
"obstructions": [
[
1,
0
],
[
3,
2
]
],
"requires": [
{
"or": [
"canMomentumConservingMorph",
{
"and": [
"canTrickyDashJump",
"canMomentumConservingTurnaround"
]
}
]
}
],
"note": [
"Applies to Big Boy Room, Mickey Mouse Room, and Metal Pirates."
]
},
{
"minHeight": 2,
"maxHeight": 2,
"minTiles": 23,
"speedBooster": "yes",
"obstructions": [
[
3,
0
]
],
"requires": [
"canInsaneJump",
"canMomentumConservingMorph",
"canInsaneMidAirMorph"
],
"note": [
"Applies to Metroid Room 1.",
"Use a few pixels less than the full runway.",
"This is double frame-perfect, requiring a last-frame jump before Samus would catch on the door ledge,",
"and a last-frame morph before Samus would bonk on the ceiling of the door frame.",
"Unmorph a little before Samus would hit the ceiling, to conserve upward momentum again.",
"Then quickly morph again and go through the tunnel to the right."
],
"devNote": [
"The momentum conserving unmorph is lenient, having about a 9-frame window."
]
},
{
"minHeight": 2,
"maxHeight": 2,
"minTiles": 29.4375,
"speedBooster": "yes",
"obstructions": [
[
3,
0
]
],
"requires": [
"canInsaneJump",
"canMomentumConservingMorph"
],
"note": [
"Applies to Statues Hallway.",
"Jump through the door with a ceiling mockball, then unmorph a little before Samus would bonk the ceiling.",
"Morph again to pass through the tunnel to the right.",
"To make the strat more lenient, use less than the full available runway:",
"Ideally, position Samus to gain an extra run speed of $5.2 or slightly more,",
"which corresponds to starting 30 tiles from the end of the runway."
],
"devNote": [
"There is a dropoff in Samus' jump height at an extra run speed of $5.2, which is good here.",
"Starting at a distance of 30 tiles, there is a 3-frame window for the jump (giving extra run speeds between $5.2 and $5.4)",
"and between a 1-frame and 3-frame window for the morph (with later jumps giving a larger window).",
"In any case, the unmorph will be lenient, having about a 9-frame window."
]
},
{
"minHeight": 3,
"maxHeight": 3,
"minTiles": 29.4375,
"speedBooster": "yes",
"obstructions": [
[
3,
0
]
],
"requires": [
"canInsaneJump",
"canMomentumConservingMorph"
],
"note": [
"Applies to Flyway.",
"Jump through the door with a ceiling mockball.",
"After pressing against the wall of the hidden space, release right for a moment until after Samus bonks the ceiling,",
"in order to avoid damage from the crab on the right.",
"To make the strat more lenient, less than the full available runway should be used:",
"Ideally, position Samus to gain an extra run speed of $5.2 or slightly more,",
"which corresponds to starting 30 tiles from the end of the runway (or 8 tiles from the start)."
],
"devNote": [
"There is a dropoff in Samus' jump height at an extra run speed of $5.2, which is good here.",
"Starting at a distance of 30 tiles, there is a 3-frame window for the jump (giving extra run speeds between $5.2 and $5.4)",
"and between a 1-frame and 6-frame window for the morph (with later jumps giving a larger window)."
]
},
{
"minHeight": 2,
"maxHeight": 2,
"minTiles": 45,
"speedBooster": "yes",
"obstructions": [
[
4,
0
]
],
"requires": [
"canInsaneJump",
"canMomentumConservingMorph",
"canInsaneMidAirMorph",
"canKago",
"canBeExtremelyPatient",
{
"enemyDamage": {
"enemy": "Sciser",
"type": "contact",
"hits": 1
}
}
],
"note": [
"Applies to Baby Kraid Room.",
"Jump through the door with a double frame-perfect ceiling mockball, with a last-frame jump and last-frame morph.",
"Unmorph before bonking the ceiling, then quickly morph again, kagoing the crab, and exiting through the tunnel on the right."
]
}
]
}
}Requires: "canCrossRoomJumpIntoWater" "Morph" |
From: 2
Bottom Left Door
To: 1
Top Left Doorway
Entrance condition: {
"comeInWithSidePlatform": {
"platforms": [
{
"minHeight": 1,
"maxHeight": 1,
"minTiles": 4,
"speedBooster": "yes",
"obstructions": [
[
1,
0
]
],
"requires": [
"canMomentumConservingTurnaround"
],
"note": [
"This applies to Skree Boost Room, Grapple Tutorial Room 2, Warehouse Energy Tank Room, and Warehouse Entrance."
]
},
{
"minHeight": 3,
"maxHeight": 3,
"minTiles": 8.4375,
"speedBooster": "any",
"obstructions": [
[
1,
0
],
[
3,
2
]
],
"requires": [
{
"or": [
"canMomentumConservingMorph",
"canMomentumConservingTurnaround"
]
}
],
"note": [
"Applies to Big Boy Room, Mickey Mouse Room, and Metal Pirates."
]
},
{
"minHeight": 2,
"maxHeight": 2,
"minTiles": 9.4375,
"speedBooster": "yes",
"obstructions": [
[
2,
0
]
],
"requires": [
"canMomentumConservingMorph"
],
"note": [
"Applies to Early Supers Room."
]
}
]
}
}Requires: "canCrossRoomJumpIntoWater" "canSpringBallJumpMidAir" |
From: 3
Bottom Right Door
To: 4
Top Right Doorway
Requires a runway of at least 4 tiles (with no open end) in the adjacent room. Use a Cross Room Jump into Water followed by a delayed Momentum Conserving Turnaround to reach the Morph tunnel above. Climbing the Left side of the center hole will run into an unavoidable Sciser. Samus must also stay near a side of the center hole to reach the Morph tunnels. Entrance condition: {
"comeInJumping": {
"speedBooster": "no",
"minTiles": 3.4375
}
}Requires: {
"notable": "Cross Room Jump Morph"
}
"canMidAirMorph"
"canCrossRoomJumpIntoWater"
"canMomentumConservingTurnaround" |
From: 3
Bottom Right Door
To: 4
Top Right Doorway

Requires a runway of at least 3 tiles (with an open end) in the adjacent room. Use a Cross Room Jump into Water followed by a delayed Momentum Conserving Turnaround to reach the Morph tunnel above. Climbing the Left side of the center hole will run into an unavoidable Scisor. Samus must also stay near a side of the center hole to reach the Morph tunnels. Entrance condition: {
"comeInJumping": {
"speedBooster": "yes",
"minTiles": 3
}
}Requires: {
"notable": "Cross Room Jump Morph"
}
"canMidAirMorph"
"canCrossRoomJumpIntoWater"
"canMomentumConservingTurnaround"Dev note: Extra run speeds between $1.2 and about $2.5 can work. |
From: 3
Bottom Right Door
To: 4
Top Right Doorway

Turn around to the right just before bonking the ceiling, to retain upward momentum. Then morph and go through the tunnel to the right. Entrance condition: {
"comeInSpaceJumping": {
"speedBooster": "no",
"minTiles": 3.5625
}
}Requires: {
"notable": "Cross Room Jump Morph"
}
"canCrossRoomJumpIntoWater"
"canPreciseSpaceJump"
"canMomentumConservingTurnaround"
"canMidAirMorph"Dev note: Jump low through the door with at least $1.5 extra run speed. |
From: 3
Bottom Right Door
To: 4
Top Right Doorway


Turn around to the right just before bonking the ceiling, to retain upward momentum. Then morph and go through the tunnel to the right. Entrance condition: {
"comeInSpaceJumping": {
"speedBooster": "yes",
"minTiles": 3
}
}Requires: {
"notable": "Cross Room Jump Morph"
}
"canCrossRoomJumpIntoWater"
"canPreciseSpaceJump"
"canMomentumConservingTurnaround"
"canMidAirMorph"Dev note: Jump low through the door with at least $1.2 extra run speed. |
From: 3
Bottom Right Door
To: 4
Top Right Doorway


Unmorph just before hitting the ceiling, to conserve upward momentum. Then turn around, morph, and move through the tunnel to the right, avoiding crab damage. Entrance condition: {
"comeInWithSpringBallBounce": {
"speedBooster": "any",
"movementType": "controlled",
"remoteAndLandingMinTiles": [
[
4.5625,
1
]
]
}
}Requires: {
"notable": "Cross Room Jump Morph"
}
"canCrossRoomJumpIntoWater"
"canMomentumConservingMorph"Dev note: Bounce with extra run speed at least $1.8. |
From: 3
Bottom Right Door
To: 4
Top Right Doorway
Unmorph just before hitting the ceiling, to conserve upward momentum. Then turn around, morph, and move through the tunnel to the right, avoiding crab damage. If the runway is very short and the bounce is not on the last frame before the transition, then it may be necessary to perform a spring ball jump; in this case, pause soon after entering the room in order to unequip spring ball. Entrance condition: {
"comeInWithSpringBallBounce": {
"speedBooster": "yes",
"movementType": "any",
"remoteAndLandingMinTiles": [
[
3,
1
]
]
}
}Requires: {
"notable": "Cross Room Jump Morph"
}
"canCrossRoomJumpIntoWater"
"canMomentumConservingMorph"Dev note: Bounce with extra run speed at least $1.2. |
From: 3
Bottom Right Door
To: 4
Top Right Doorway
Unmorph just before hitting the ceiling, to conserve upward momentum. Then turn around, morph, and move through the tunnel to the right, avoiding crab damage. Entrance condition: {
"comeInWithSpringBallBounce": {
"speedBooster": "any",
"movementType": "uncontrolled",
"remoteAndLandingMinTiles": [
[
3.5625,
1
]
]
}
}Requires: {
"notable": "Cross Room Jump Morph"
}
"canCrossRoomJumpIntoWater"
"canMomentumConservingMorph"Dev note: Bounce with extra run speed at least $1.5. |
From: 3
Bottom Right Door
To: 4
Top Right Doorway

Entrance condition: {
"comeInWithSidePlatform": {
"platforms": [
{
"minHeight": 1,
"maxHeight": 1,
"minTiles": 9,
"speedBooster": "any",
"obstructions": [
[
1,
0
]
],
"requires": [
"canMomentumConservingTurnaround"
],
"note": [
"This applies to Screw Attack Room and Lava Dive."
],
"detailNote": [
"From Screw Attack Room, this will not work if starting from backed into corner;",
"instead turn around after pressing into the corner."
]
},
{
"minHeight": 2,
"maxHeight": 2,
"minTiles": 9.4375,
"speedBooster": "any",
"obstructions": [
[
1,
0
]
],
"requires": [
"canMomentumConservingTurnaround"
],
"note": [
"This applies to Tourian Hopper Room, Bowling Alley (bottom), Dust Torizo Room, and Noob Bridge."
]
},
{
"minHeight": 3,
"maxHeight": 3,
"minTiles": 9.4375,
"speedBooster": "yes",
"obstructions": [
[
1,
0
]
],
"requires": [
"canMomentumConservingTurnaround"
],
"note": [
"This applies to Bomb Torizo Room, Pink Brinstar Wave Gate Room, Phantoon's Room, Big Boy Room, and Double Chamber."
]
},
{
"minHeight": 3,
"maxHeight": 3,
"minTiles": 14.4375,
"speedBooster": "yes",
"obstructions": [
[
3,
2
]
],
"requires": [
"canMomentumConservingTurnaround"
],
"note": [
"This applies to Metal Pirates Room."
]
}
]
}
}Requires: "canCrossRoomJumpIntoWater" "Morph" Dev note: We don't include any cases where the setup room has a runway of 3 or more tiles connected to the door, since a regular cross room jump could be used in that case (with Speed Booster). |
From: 3
Bottom Right Door
To: 4
Top Right Doorway
Entrance condition: {
"comeInWithSidePlatform": {
"platforms": [
{
"minHeight": 1,
"maxHeight": 1,
"minTiles": 4,
"speedBooster": "yes",
"obstructions": [
[
1,
0
]
],
"requires": [
"canMomentumConservingTurnaround"
],
"note": [
"This applies to Skree Boost Room."
]
},
{
"minHeight": 2,
"maxHeight": 2,
"minTiles": 5.4375,
"speedBooster": "any",
"obstructions": [
[
1,
0
]
],
"requires": [
"canMomentumConservingTurnaround"
],
"note": [
"This applies to Early Super Room."
],
"detailNote": [
"If Speed Booster is equipped, then a momentum-conserving morph should be used instead of a turnaround."
]
},
{
"minHeight": 3,
"maxHeight": 3,
"minTiles": 14.4375,
"speedBooster": "any",
"obstructions": [
[
3,
2
]
],
"requires": [
{
"or": [
"canMomentumConservingTurnaround",
"canMomentumConservingMorph"
]
}
],
"note": [
"This applies to Metal Pirates Room."
]
}
]
}
}Requires: "canCrossRoomJumpIntoWater" "canTrickySpringBallJump" Dev note: A spring ball bounce could be done here instead of a side platform jump, but this strat is still included in cases where it's a reasonable alternative. |
From: 1
Bottom Left Door
To: 4
Top Left Door
Requires a runway of at least 4 tiles in the adjacent room. Entrance condition: {
"comeInJumping": {
"speedBooster": "yes",
"minTiles": 4
}
}Requires: "HiJump" "canCrossRoomJumpIntoWater" "canMomentumConservingTurnaround" "h_midAirShootUp" Exit condition: {
"leaveNormally": {}
}Unlocks doors: {"types":["super"],"requires":[]}
{"types":["missiles","powerbomb"],"requires":["never"]}Dev note: Using more run speed to avoid the momentumConservingTurnaround requirement will bonk the door, requiring a turnaround to get through This would be a way to bring high vertical speed into the room on the other side of 4. |
From: 1
Bottom Left Door
To: 4
Top Left Door
Requires a runway of at least 6 tiles in the adjacent room. Using too much run speed can make it harder to avoid bonking the door: in this case, it can help to fire a hero shot to open the door early, while still facing left, and/or use a momentum-conserving turnaround just before touching the door. Entrance condition: {
"comeInJumping": {
"speedBooster": "yes",
"minTiles": 6
}
}Requires: "HiJump" "canCrossRoomJumpIntoWater" "canBufferedMomentumConservingTurnaround" "h_midAirShootUp" Exit condition: {
"leaveNormally": {}
}Unlocks doors: {"types":["super"],"requires":[]}
{"types":["missiles","powerbomb"],"requires":["never"]} |
From: 1
Bottom Left Door
To: 4
Top Left Door

Requires a runway of at least 18 tiles in the adjacent room. Entrance condition: {
"comeInJumping": {
"speedBooster": "yes",
"minTiles": 18
}
}Requires: "canCrossRoomJumpIntoWater" "canTrickyJump" "h_midAirShootUp" Exit condition: {
"leaveNormally": {}
}Unlocks doors: {"types":["super"],"requires":[]}
{"types":["missiles","powerbomb"],"requires":["never"]} |
From: 1
Bottom Left Door
To: 4
Top Left Door
Requires a runway of at least 22 tiles in the adjacent room. Entrance condition: {
"comeInJumping": {
"speedBooster": "yes",
"minTiles": 22
}
}Requires: "canCrossRoomJumpIntoWater" "h_midAirShootUp" Exit condition: {
"leaveNormally": {}
}Unlocks doors: {"types":["super"],"requires":[]}
{"types":["missiles","powerbomb"],"requires":["never"]} |
|
Entrance condition: {
"comeInWithSpringBallBounce": {
"speedBooster": "yes",
"movementType": "any",
"remoteAndLandingMinTiles": [
[
22,
1
]
]
}
}Requires: "canCrossRoomJumpIntoWater" Exit condition: {
"leaveNormally": {}
}Unlocks doors: {"types":["super"],"requires":[]}
{"types":["missiles","powerbomb"],"requires":["never"]} |
|
Entrance condition: {
"comeInWithSidePlatform": {
"platforms": [
{
"minHeight": 2,
"maxHeight": 2,
"minTiles": 27.4375,
"speedBooster": "yes",
"obstructions": [
[
1,
0
]
],
"requires": [
"canMomentumConservingTurnaround"
],
"note": [
"This applies to Dust Torizo Room."
],
"devNote": [
"The jump could also be done with a shorter runway, with a tricky dash jump using run speed $4.0 or $4.1.",
"But it wouldn't apply to any more rooms in the game."
]
},
{
"minHeight": 3,
"maxHeight": 3,
"minTiles": 39.4375,
"speedBooster": "yes",
"obstructions": [
[
3,
2
]
],
"requires": [
"canTrickyJump"
],
"note": [
"This applies to Metal Pirates Room."
]
},
{
"minHeight": 2,
"maxHeight": 2,
"minTiles": 45,
"speedBooster": "yes",
"obstructions": [
[
3,
0
]
],
"requires": [
"canInsaneJump",
{
"or": [
"canMomentumConservingMorph",
{
"and": [
"canMomentumConservingTurnaround",
"canBeVeryPatient"
]
}
]
}
],
"note": [
"This applies to Statues Hallway.",
"This can be done in two ways:",
"1) If Morph is available, perform a momentum-conserving morph through the transition,",
"then unmorph as soon as possible after the transition.",
"2) Alternatively, do an extremely precise momentum-conserving turnaround through the transition."
],
"devNote": [
"The momentum-conserving turnaround is double frame-perfect,",
"requiring a last-frame jump and frame-perfect turnaround just before Samus would bonk the ceiling."
]
},
{
"minHeight": 3,
"maxHeight": 3,
"minTiles": 37.4375,
"speedBooster": "yes",
"obstructions": [
[
3,
0
]
],
"requires": [
"canMomentumConservingMorph"
],
"note": [
"This applies to Flyway."
]
},
{
"minHeight": 2,
"maxHeight": 2,
"minTiles": 45,
"speedBooster": "yes",
"obstructions": [
[
4,
0
]
],
"requires": [
"canMomentumConservingMorph",
"canInsaneJump",
"canInsaneMidAirMorph"
],
"note": [
"This applies to Baby Kraid Room.",
"In the previous room, there is a 2-frame window for the jump, just before Samus would hit the door ledge,",
"then a 1-frame or 2-frame window (depending on the jump) for the morph, just before Samus would bonk the ceiling.",
"After the transition, unmorph within the first 2 frames, to conserve upward momentum;",
"if Samus got the later frame for the morph (where the animation does not show as fully morphed in the previous room),",
"then there will only be 1 frame to unmorph."
]
}
]
}
}Requires: "canCrossRoomJumpIntoWater" "h_midAirShootUp" Exit condition: {
"leaveNormally": {}
}Unlocks doors: {"types":["super"],"requires":[]}
{"types":["missiles","powerbomb"],"requires":["never"]}Dev note: We don't include strats here that require HiJump or Spring Ball, since with either of those items you could instead go 1 -> 5 -> 4. |
From: 1
Bottom Left Door
To: 4
Top Left Door


Entrance condition: {
"comeInWithSpringBallBounce": {
"speedBooster": "yes",
"movementType": "any",
"remoteAndLandingMinTiles": [
[
18.4375,
1
]
]
}
}Requires: "canCrossRoomJumpIntoWater" "canTrickyDashJump" Exit condition: {
"leaveNormally": {}
}Unlocks doors: {"types":["super"],"requires":[]}
{"types":["missiles","powerbomb"],"requires":["never"]} |
From: 1
Bottom Left Door
To: 5
Platform Junction Near Top Left Door

Requires 2 tiles of run speed to make it past the overhang above the door. SpeedBooster must be turned off in order to get up. Cross Room jump and do not buffer aiming down on entry, because Samus's speed is higher underwater while spinning. Aim down and then turn around just before the overhang. Shooting at it from below can deal damage sooner to get a faster freeze. Hug the frozen fish to gain the extra height needed to climb on top. Note that with a slightly longer runway of 3 tiles with a closed end or more, it is not required to disable Speed Booster. Entrance condition: {
"comeInJumping": {
"speedBooster": "no",
"minTiles": 2
}
}Requires: "HiJump"
"canCrossRoomJumpIntoWater"
"canMomentumConservingTurnaround"
"canTrickyUseFrozenEnemies"
"canInsaneJump"
{
"or": [
"Wave",
"Spazer",
"Plasma"
]
}
"h_trickyToCarryFlashSuit"Dev note: FIXME: It is possible but tricky to freeze the fish with just Ice and 2 Missiles. There is no known benefit to modeling the variant that doesn't disable Speed Booster - especially because it is already not doable with a blue suit. |
From: 1
Bottom Left Door
To: 5
Platform Junction Near Top Left Door
With 3 tiles of run speed it is more lenient to make it past the overhang above the door. Cross Room jump and do not buffer aiming down on entry, because Samus's speed is higher underwater while spinning. Aim down and then turn around just before the overhang. Freeze the fish near the left wall and land on it. Entrance condition: {
"comeInJumping": {
"speedBooster": "any",
"minTiles": 3
}
}Requires: "HiJump"
"canCrossRoomJumpIntoWater"
"canMomentumConservingTurnaround"
"canTrickyUseFrozenEnemies"
"canTrickyDodgeEnemies"
{
"or": [
"Plasma",
{
"and": [
"Wave",
"Spazer"
]
}
]
}
"h_trickyToCarryFlashSuit"Dev note: This can be done with SpeedBooster, but there is no point, as Samus can jump directly to the ledge without using the fish. |
From: 1
Bottom Left Door
To: 5
Platform Junction Near Top Left Door
Requires a runway of at least 4 tiles in the adjacent room. Entrance condition: {
"comeInJumping": {
"speedBooster": "any",
"minTiles": 4
}
}Requires: "HiJump" "canCrossRoomJumpIntoWater" "canMomentumConservingTurnaround" |
From: 1
Bottom Left Door
To: 5
Platform Junction Near Top Left Door

Requires a runway of at least 3 tiles in the adjacent room. Entrance condition: {
"comeInJumping": {
"speedBooster": "yes",
"minTiles": 3
}
}Requires: "HiJump" "canCrossRoomJumpIntoWater" "canMomentumConservingTurnaround" "canTrickyJump" |
From: 1
Bottom Left Door
To: 5
Platform Junction Near Top Left Door
Requires a runway of at least 6 tiles in the adjacent room. Entrance condition: {
"comeInJumping": {
"speedBooster": "yes",
"minTiles": 6
}
}Requires: "HiJump" "canCrossRoomJumpIntoWater" "canBufferedMomentumConservingTurnaround" |
From: 1
Bottom Left Door
To: 5
Platform Junction Near Top Left Door

Requires 3 tiles of run speed (with no open end) to make it past the overhang above the door. Entrance condition: {
"comeInJumping": {
"speedBooster": "yes",
"minTiles": 2.4375
}
}Requires: "HiJump" "canCrossRoomJumpIntoWater" "canMomentumConservingTurnaround" "canTrickySpringBallJump" "canInsaneJump" |
From: 1
Bottom Left Door
To: 5
Platform Junction Near Top Left Door
Requires a runway of at least 18 tiles (with no open end) in the adjacent room. This requires a dash speed of at least $3.F. Entrance condition: {
"comeInJumping": {
"speedBooster": "yes",
"minTiles": 17.4375
}
}Requires: "canCrossRoomJumpIntoWater" |
From: 1
Bottom Left Door
To: 5
Platform Junction Near Top Left Door
Requires a runway of at least 10 tiles in the adjacent room. Entrance condition: {
"comeInJumping": {
"speedBooster": "yes",
"minTiles": 10
}
}Requires: "canCrossRoomJumpIntoWater" "canSpringBallJumpMidAir" "canTrickyJump" |
From: 1
Bottom Left Door
To: 5
Platform Junction Near Top Left Door


Entrance condition: {
"comeInWithSpringBallBounce": {
"speedBooster": "yes",
"movementType": "any",
"remoteAndLandingMinTiles": [
[
19,
1
]
]
}
}Requires: "canCrossRoomJumpIntoWater" |
From: 1
Bottom Left Door
To: 5
Platform Junction Near Top Left Door
Requires running a precise distance of 7 tiles in the adjacent room, to hit a peak of the speed vs height graph. This requires a dash speed of $2.0 or $2.1. If 12 tiles of runway (with closed ends) is available, speeds of $2.F, $3.0, or $3.1 also work and do not require a turnaround. Entrance condition: {
"comeInJumping": {
"speedBooster": "yes",
"minTiles": 6.4375
}
}Requires: "canTrickyDashJump" "canCrossRoomJumpIntoWater" "canMomentumConservingTurnaround" |
From: 1
Bottom Left Door
To: 5
Platform Junction Near Top Left Door
Entrance condition: {
"comeInWithSidePlatform": {
"platforms": [
{
"minHeight": 1,
"maxHeight": 1,
"minTiles": 8.4375,
"speedBooster": "yes",
"obstructions": [
[
1,
0
]
],
"requires": [
"HiJump",
"canMomentumConservingTurnaround"
],
"note": [
"This applies to Warehouse Entrance."
]
},
{
"minHeight": 2,
"maxHeight": 2,
"minTiles": 8,
"speedBooster": "yes",
"obstructions": [
[
1,
0
]
],
"requires": [
"HiJump",
"canMomentumConservingTurnaround"
],
"note": [
"This applies to Ridley Tank Room and Dust Torizo Room."
]
},
{
"minHeight": 3,
"maxHeight": 3,
"minTiles": 9,
"speedBooster": "yes",
"obstructions": [
[
1,
0
]
],
"requires": [
"HiJump",
"canMomentumConservingTurnaround"
],
"note": [
"This applies to Big Boy Room and Mickey Mouse Room."
]
},
{
"minHeight": 2,
"maxHeight": 2,
"minTiles": 27.4375,
"speedBooster": "yes",
"obstructions": [
[
1,
0
]
],
"requires": [
"canMomentumConservingTurnaround"
],
"note": [
"This applies to Dust Torizo Room."
],
"devNote": [
"The jump could also be done with a shorter runway, with a tricky dash jump using run speed $4.0 or $4.1.",
"But it wouldn't apply to any more rooms in the game."
]
},
{
"minHeight": 3,
"maxHeight": 3,
"minTiles": 39.4375,
"speedBooster": "yes",
"obstructions": [
[
3,
2
]
],
"requires": [
"canTrickyJump"
],
"note": [
"This applies to Metal Pirates Room."
]
},
{
"minHeight": 2,
"maxHeight": 2,
"minTiles": 23,
"speedBooster": "yes",
"obstructions": [
[
3,
0
]
],
"requires": [
"HiJump",
"canMomentumConservingMorph",
"canInsaneJump",
"canInsaneMidAirMorph"
],
"note": [
"This applies to Metroid Room 1.",
"In the previous room, perform a last-frame jump,",
"then morph on the last possible frame before bonking the ceiling.",
"After the transition, unmorph within the first 2 frames, to conserve upward momentum."
]
},
{
"minHeight": 2,
"maxHeight": 2,
"minTiles": 45,
"speedBooster": "yes",
"obstructions": [
[
3,
0
]
],
"requires": [
"canInsaneJump",
{
"or": [
"canMomentumConservingMorph",
{
"and": [
"canMomentumConservingTurnaround",
"canBeVeryPatient"
]
}
]
}
],
"note": [
"This applies to Statues Hallway.",
"This can be done in two ways:",
"1) If Morph is available, perform a momentum-conserving morph through the transition,",
"then unmorph as soon as possible after the transition.",
"2) Alternatively, do an extremely precise momentum-conserving turnaround through the transition."
],
"devNote": [
"The momentum-conserving turnaround is double frame-perfect,",
"requiring a last-frame jump and frame-perfect turnaround just before Samus would bonk the ceiling."
]
},
{
"minHeight": 3,
"maxHeight": 3,
"minTiles": 37.4375,
"speedBooster": "yes",
"obstructions": [
[
3,
0
]
],
"requires": [
"canMomentumConservingMorph"
],
"note": [
"This applies to Flyway."
]
},
{
"minHeight": 2,
"maxHeight": 2,
"minTiles": 45,
"speedBooster": "yes",
"obstructions": [
[
4,
0
]
],
"requires": [
"canMomentumConservingMorph",
"canInsaneJump",
"canInsaneMidAirMorph"
],
"note": [
"This applies to Baby Kraid Room.",
"In the previous room, there is a 2-frame window for the jump, just before Samus would hit the door ledge,",
"then a 1-frame or 2-frame window (depending on the jump) for the morph, just before Samus would bonk the ceiling.",
"After the transition, unmorph within the first 2 frames, to conserve upward momentum;",
"if Samus got the later frame for the morph (where the animation does not show as fully morphed in the previous room),",
"then there will only be 1 frame to unmorph."
]
}
]
}
}Requires: "canCrossRoomJumpIntoWater" |
From: 1
Bottom Left Door
To: 5
Platform Junction Near Top Left Door

Requires running a precise distance of 7 tiles in the adjacent room, to hit a peak of the speed vs height graph. Entrance condition: {
"comeInWithSpringBallBounce": {
"speedBooster": "yes",
"movementType": "any",
"remoteAndLandingMinTiles": [
[
6.4375,
1
]
]
}
}Requires: "canTrickyDashJump" "canCrossRoomJumpIntoWater" |
From: 1
Bottom Door
To: 3
Middle Right Door


Crouch jump up through the left side of the door transition. Angle up and shoot the fish twice on the way up, then aim down and shoot three more times as needed until it is frozen. Land on the fish, wait until it is flashing, then jump and freeze it again further to left as needed, until you can spin jump to the left to reach the platforms. Entrance condition: {
"comeInWithPlatformBelow": {
"maxHeight": 7,
"maxLeftPosition": 2,
"minRightPosition": -2
},
"comesThroughToilet": "any"
}Requires: "canCrossRoomJumpIntoWater"
"canCrouchJump"
"canTrickyUseFrozenEnemies"
{
"or": [
"Wave",
"Spazer",
"Plasma"
]
} |
|

Crouch jump up through the door with HiJump equipped, aligning with the left side of the door frame. Stay to the right of the fish as you go up. Entrance condition: {
"comeInWithPlatformBelow": {
"maxHeight": 8.5,
"maxLeftPosition": -1,
"minRightPosition": -1
},
"comesThroughToilet": "any"
}Requires: "canCrossRoomJumpIntoWater" "canCrouchJump" "HiJump" Dev note: A crouch jump is not required if passing through the Toilet. |
From: 1
Bottom Door
To: 3
Middle Right Door
Jump straight up through the door with HiJump equipped, aligning with the left side of the door frame. Stay to the right of the fish as you go up. Entrance condition: {
"comeInWithPlatformBelow": {
"maxHeight": 8,
"maxLeftPosition": -1,
"minRightPosition": -1.5
},
"comesThroughToilet": "any"
}Requires: "canCrossRoomJumpIntoWater" "HiJump" Dev note: Spin jumping does not work (at least not at height 8). |
From: 1
Bottom Door
To: 3
Middle Right Door


Jump straight up through the door with HiJump equipped, passing through the Toilet. Stay to the right of the fish as you go up. Entrance condition: {
"comeInWithPlatformBelow": {
"maxHeight": 8.5,
"maxLeftPosition": -1,
"minRightPosition": -1
},
"comesThroughToilet": "yes"
}Requires: "canCrossRoomJumpIntoWater" "HiJump" |
From: 1
Bottom Door
To: 3
Middle Right Door


Run and spin jump to the left through the transition with as much horiziontal speed as possible, without bonking the door frame. Hold left through the transition to avoid the fish and land on the platform to the left. With limited runway, this may require a very precise jump. Then reach the platform above either using a crouch-jump down-grab or by freezing the fish. Entrance condition: {
"comeInWithPlatformBelow": {
"maxHeight": 6,
"maxLeftPosition": -0.5,
"minRightPosition": 2.5
},
"comesThroughToilet": "yes"
}Requires: "canDash"
"canCrossRoomJumpIntoWater"
"canInsaneJump"
{
"or": [
"h_underwaterCrouchJumpDownGrab",
"canUseFrozenEnemies"
]
}Dev note: This applies to Crab Maze, Forgotten Highway Elevator, and Red Brinstar Elevator Room. |
|
Spin jump against the left side of the door frame, then use Space Jump to jump straight up through the door. Stay to the right of the fish as you go up. Entrance condition: {
"comeInWithSpaceJumpBelow": {},
"comesThroughToilet": "any"
}Requires: "canCrossRoomJumpIntoWater" |
|
Run and jump up through the door using HiJump and SpeedBooster in the room below using at least 1 tile of runway. Stay to the right of the fish as you go up. Entrance condition: {
"comeInWithPlatformBelow": {
"maxHeight": 9,
"maxLeftPosition": 2,
"minRightPosition": -2
},
"comesThroughToilet": "any"
}Requires: "canCrossRoomJumpIntoWater" "canSpeedyJump" "HiJump" |
From: 1
Bottom Door
To: 3
Middle Right Door


Run from left with Speed Booster in the room below and jump up through the door. Perform a snap turnaround to the left to cancel horizontal momentum before passing through the transition. This is done by turning around and then canceling spin, e.g. by shooting. Stay to the right of the fish as you go up. Entrance condition: {
"comeInWithPlatformBelow": {
"minHeight": 9,
"maxHeight": 10,
"maxLeftPosition": -38.5,
"minRightPosition": -7
},
"comesThroughToilet": "any"
}Requires: "canCrossRoomJumpIntoWater" "canSpeedyJump" "canMidairWiggle" Dev note: This strat is applicable with Crocomire's Room and Indiana Jones Room. |
From: 1
Bottom Door
To: 3
Middle Right Door

Run from right with Speed Booster in the room below, and jump against the left side of the door frame to cancel horizontal momentum before passing through the transition. Stay to the right of the fish as you go up. Entrance condition: {
"comeInWithPlatformBelow": {
"minHeight": 9,
"maxHeight": 10,
"maxLeftPosition": 7,
"minRightPosition": 39
},
"comesThroughToilet": "any"
}Requires: "canCrossRoomJumpIntoWater" "canSpeedyJump" Dev note: This strat is applicable only with Crocomire's Room. |
|
Spin jump to the left through the transition. Bonking the left side of the door frame works but is not required. Hold left through the transition to avoid the fish and land on the platform to the left. Then reach the platform above either using a crouch-jump down-grab or by freezing the fish. Entrance condition: {
"comeInWithPlatformBelow": {
"maxHeight": 6,
"maxLeftPosition": 2,
"minRightPosition": -2
},
"comesThroughToilet": "no"
}Requires: "canCrossRoomJumpIntoWater"
{
"or": [
"h_underwaterCrouchJumpDownGrab",
"canUseFrozenEnemies"
]
}Dev note: This doesn't work with passing through the Toilet (e.g. from Climb) because you would spawn higher and not be able to avoid the fish, given that no horiziontal speed is carried through the transition here. |
|

Standing on the platform in the room below, and perform a spring ball jump mid-air just before reaching the transition. Entrance condition: {
"comeInWithPlatformBelow": {
"maxHeight": 10,
"maxLeftPosition": -1,
"minRightPosition": -1
},
"comesThroughToilet": "any"
}Requires: "canCrossRoomJumpIntoWater" "canTrickySpringBallJump" Dev note: Crouch jumping is not required. |
|


Run from right with Speedbooster in the room below, and jump during a spike in the speed-to-jumpHeight chart. Jump against the left side of the door frame to cancel horizontal momentum before passing through the transition. Stay to the right of the fish as you go up. Entrance condition: {
"comeInWithPlatformBelow": {
"minHeight": 9,
"maxHeight": 9,
"maxLeftPosition": 7,
"minRightPosition": 21
},
"comesThroughToilet": "any"
}Requires: "canCrossRoomJumpIntoWater" "canTrickyDashJump" Dev note: This strat is applicable only with Indiana Jones Room (after clearing the Power Bomb blocks). |
From: 1
Bottom Door
To: 3
Middle Right Door


Run and spin jump to the left through the transition with as much horiziontal speed as possible, without bonking the door frame. Hold left through the transition to avoid the fish and land on the platform to the left. Then reach the platform above either using a crouch-jump down-grab or by freezing the fish. Entrance condition: {
"comeInWithPlatformBelow": {
"maxHeight": 6,
"maxLeftPosition": -0.5,
"minRightPosition": 4.5
},
"comesThroughToilet": "yes"
}Requires: "canDash"
"canCrossRoomJumpIntoWater"
"canTrickyJump"
{
"or": [
"h_underwaterCrouchJumpDownGrab",
"canUseFrozenEnemies"
]
}Dev note: This applies to Basement and Wrecked Ship Main Shaft. |
|
It is easiest to wall jump off the left side of the door frame in the room below, hold left through the transition, and fire a shot to break spin soon after entering. Stay to the right of the fish as you go up. Entrance condition: {
"comeInWithWallJumpBelow": {
"minHeight": 2
},
"comesThroughToilet": "any"
}Requires: "canCrossRoomJumpIntoWater" "canMidairWiggle" |
From: 2
Bottom Right Door
To: 3
Middle Right Door
Only requires a runway of one tile in the adjacent room. Bomb boost through the doorway, then use spring ball to get to the bottom left ledge. To avoid hitting the Skultera, place the bomb a few pixels from the doorway. One way to setup the positioning of the bomb is to place it, unmorph, rotate, and remorph Entrance condition: {
"comeInWithBombBoost": {}
}Requires: {
"tech": "canSpringBallBombJump"
}
"h_useSpringBall"
"canCrossRoomJumpIntoWater"
{
"or": [
"Gravity",
"HiJump",
"canSpringBallJumpMidAir",
"h_underwaterCrouchJumpDownGrab"
]
} |
From: 2
Bottom Right Door
To: 3
Middle Right Door

Run with enough speed to jump (after the transition) to reach the far left ledge. Either kill or Kago through the Fish enemy. At slightly higher run speeds, Samus can jump from the bottom of the slope and avoid the fish. Entrance condition: {
"comeInRunning": {
"speedBooster": "yes",
"minTiles": 7
}
}Requires: "HiJump"
"canSpeedyJump"
"canCrossRoomJumpIntoWater"
"canTrickyJump"
"canDodgeWhileShooting"
{
"or": [
{
"ammo": {
"type": "Super",
"count": 1
}
},
{
"and": [
"Charge",
"Plasma"
]
},
{
"and": [
"Plasma",
"canHitbox"
]
},
{
"and": [
"canKago",
"canLateralMidAirMorph",
{
"or": [
{
"enemyDamage": {
"enemy": "Skultera",
"type": "contact",
"hits": 1
}
},
"h_pauseAbuseMinimalReserveRefill"
]
}
]
}
]
} |
From: 2
Bottom Right Door
To: 3
Middle Right Door

Run with enough speed to jump (after the transition) to reach the far left ledge. Entrance condition: {
"comeInRunning": {
"speedBooster": "yes",
"minTiles": 12.4375
}
}Requires: "canSpeedyJump" "canCrossRoomJumpIntoWater" "canCarefulJump" |
|
Run with 7 tiles (no openend) of speed to jump (after the transition) to reach the far left ledge. Either kill or Kago through the Fish enemy. Entrance condition: {
"comeInRunning": {
"speedBooster": "yes",
"minTiles": 6.4375
}
}Requires: "canCrossRoomJumpIntoWater"
"canTrickyDashJump"
"canDodgeWhileShooting"
{
"or": [
{
"and": [
{
"ammo": {
"type": "Super",
"count": 1
}
},
"canDownGrab"
]
},
{
"and": [
"Charge",
"Plasma",
"canDownGrab"
]
},
{
"and": [
"Plasma",
"canHitbox",
"canDownGrab"
]
},
"canTrickyDodgeEnemies"
]
} |
From: 2
Bottom Right Door
To: 3
Middle Right Door

Bring 4 full tiles of run speed from the adjacent room in order to jump (after the transition) up to the far left ledge. Either kill the Fish enemy, or jump from the bottom of the slope to pass underneath it. Entrance condition: {
"comeInRunning": {
"speedBooster": "yes",
"minTiles": 4
}
}Requires: "HiJump" "canCrossRoomJumpIntoWater" "canTrickyDashJump" |
From: 2
Bottom Right Door
To: 3
Middle Right Door
Entrance condition: {
"comeInWithSidePlatform": {
"platforms": [
{
"minHeight": 1,
"maxHeight": 1,
"minTiles": 16,
"speedBooster": "yes",
"obstructions": [
[
1,
0
]
],
"requires": [
"canMomentumConservingMorph",
"canInsaneJump",
"canInsaneMidAirMorph"
],
"note": [
"This applies to Lava Dive Room."
]
},
{
"minHeight": 2,
"maxHeight": 2,
"minTiles": 27.4375,
"speedBooster": "yes",
"obstructions": [
[
1,
0
]
],
"requires": [
"canMomentumConservingMorph",
{
"or": [
{
"enemyDamage": {
"enemy": "Skultera",
"type": "contact",
"hits": 1
}
},
"canInsaneJump"
]
}
],
"note": [
"This applies to Dust Torizo Room and Noob Bridge."
]
},
{
"minHeight": 2,
"maxHeight": 2,
"minTiles": 45,
"speedBooster": "yes",
"obstructions": [
[
1,
0
]
],
"requires": [
"canMomentumConservingTurnaround",
"canInsaneJump"
],
"note": [
"This applies to Noob Bridge."
]
},
{
"minHeight": 3,
"maxHeight": 3,
"minTiles": 28.2472,
"speedBooster": "yes",
"obstructions": [
[
1,
0
]
],
"requires": [
"canMomentumConservingMorph",
{
"or": [
{
"enemyDamage": {
"enemy": "Skultera",
"type": "contact",
"hits": 1
}
},
"canInsaneJump"
]
}
],
"note": [
"This applies to Double Chamber."
]
},
{
"minHeight": 3,
"maxHeight": 3,
"minTiles": 39.4375,
"speedBooster": "yes",
"obstructions": [
[
3,
2
]
],
"requires": [
{
"or": [
{
"and": [
"canMomentumConservingMorph",
{
"or": [
{
"enemyDamage": {
"enemy": "Skultera",
"type": "contact",
"hits": 1
}
},
"canInsaneJump"
]
}
]
},
{
"and": [
"canInsaneJump",
"canMomentumConservingTurnaround"
]
}
]
}
],
"note": "Applies to Metal Pirates Room."
}
]
}
}Requires: "canCrossRoomJumpIntoWater" |
|
Only requires a runway of 7 tiles in the adjacent room, but an extra tile makes for an easier jump. Entrance condition: {
"comeInJumping": {
"speedBooster": "yes",
"minTiles": 7.4375
}
}Requires: {
"or": [
"f_MaridiaTubeBroken",
{
"obstaclesCleared": [
"f_MaridiaTubeBroken"
]
}
]
}
"canCrossRoomJumpIntoWater"
"h_midAirShootUp"Unlocks doors: {"types":["super"],"requires":[]}
{"types":["missiles","powerbomb"],"requires":["never"]} |
|
Only requires a runway of 1 tile in the adjacent room. This strat is slightly easier on the right side at low run speeds, but the same otherwise. Entrance condition: {
"comeInJumping": {
"speedBooster": "no",
"minTiles": 0.4375
}
}Requires: {
"or": [
"f_MaridiaTubeBroken",
{
"obstaclesCleared": [
"f_MaridiaTubeBroken"
]
}
]
}
"canCrossRoomJumpIntoWater"
"canTrickyJump"
"h_midAirShootUp"Unlocks doors: {"types":["super"],"requires":[]}
{"types":["missiles","powerbomb"],"requires":["never"]} |
From: 1
Left Doorway
To: 6
Platform Below Top Door
Jump through the transition with a buffered momentum-conserving turnaround to avoid bonking the overhang. Quickly turn around again to avoid bonking the next overhang. Entrance condition: {
"comeInJumping": {
"speedBooster": "any",
"minTiles": 0
}
}Requires: {
"or": [
"f_MaridiaTubeBroken",
{
"obstaclesCleared": [
"f_MaridiaTubeBroken"
]
}
]
}
"canCrossRoomJumpIntoWater"
"canTrickyJump"
"canMomentumConservingTurnaround" |
|
Assumes a runway of at least 21 tiles in the adjacent room. End Samus' momentum where no platforms are over head. Shoot the door while rising to pass through. Entrance condition: {
"comeInJumping": {
"speedBooster": "yes",
"minTiles": 21
}
}Requires: {
"or": [
"f_MaridiaTubeBroken",
{
"obstaclesCleared": [
"f_MaridiaTubeBroken"
]
}
]
}
"canCrossRoomJumpIntoWater"
"canMidairWiggle"
"canTrickyJump"
"h_midAirShootUp"Unlocks doors: {"types":["super"],"requires":[]}
{"types":["missiles","powerbomb"],"requires":["never"]} |
From: 2
Bottom Right Door
To: 4
Top Door


Requires a runway of at least 18 tiles in the adjacent room. Ride up the right wall just above the doorway, then turnaround before and after hitting the platform following the doorway slope. Continue up the rest of the way to reach the door. Entrance condition: {
"comeInJumping": {
"speedBooster": "yes",
"minTiles": 18
}
}Requires: {
"notable": "Cross Room Platform Stuck Wiggle to Top Door"
}
{
"or": [
"f_MaridiaTubeBroken",
{
"obstaclesCleared": [
"f_MaridiaTubeBroken"
]
}
]
}
"canCrossRoomJumpIntoWater"
"canMomentumConservingTurnaround"
"canTrickyDashJump"
"canInsaneJump"
"h_midAirShootUp"Unlocks doors: {"types":["super"],"requires":[]}
{"types":["missiles","powerbomb"],"requires":["never"]} |
|

Entrance condition: {
"comeInWithSidePlatform": {
"platforms": [
{
"minHeight": 2,
"maxHeight": 2,
"minTiles": 38,
"speedBooster": "yes",
"obstructions": [
[
1,
0
]
],
"requires": [],
"note": "Applies to Noob Bridge.",
"devNote": [
"FIXME: This (and other cases) can leave with enough vertical momentum to make it to the middle door of Main Street,",
"if the top door of Maridia Tube connects to the bottom of Main Street."
]
},
{
"minHeight": 2,
"maxHeight": 2,
"minTiles": 45,
"speedBooster": "yes",
"obstructions": [
[
3,
0
]
],
"requires": [
"canMomentumConservingMorph",
"canInsaneJump",
"canInsaneMidAirMorph"
],
"note": [
"This applies to Statues Hallway and Baby Kraid Room."
]
},
{
"minHeight": 3,
"maxHeight": 3,
"minTiles": 45,
"speedBooster": "yes",
"obstructions": [
[
3,
0
]
],
"requires": [
"canMomentumConservingMorph",
"canInsaneJump",
"canInsaneMidAirMorph"
],
"note": [
"This applies to Bowling Alley (middle, power off) and Basement (power on)."
]
},
{
"minHeight": 3,
"maxHeight": 3,
"minTiles": 39.4375,
"speedBooster": "yes",
"obstructions": [
[
3,
2
]
],
"requires": [],
"note": "Applies to Metal Pirates Room."
}
]
}
}Requires: {
"or": [
"f_MaridiaTubeBroken",
{
"obstaclesCleared": [
"f_MaridiaTubeBroken"
]
}
]
}
"canCrossRoomJumpIntoWater"
"canTrickyJump"
"canMomentumConservingTurnaround"
"h_midAirShootUp"Unlocks doors: {"types":["super"],"requires":[]}
{"types":["missiles","powerbomb"],"requires":["never"]} |
|
Only requires a runway of 7 tiles in the adjacent room, but an extra tile makes for an easier jump. Entrance condition: {
"comeInJumping": {
"speedBooster": "yes",
"minTiles": 7.4375
}
}Requires: {
"or": [
"f_MaridiaTubeBroken",
{
"obstaclesCleared": [
"f_MaridiaTubeBroken"
]
}
]
}
"canCrossRoomJumpIntoWater"
"h_midAirShootUp"Unlocks doors: {"types":["super"],"requires":[]}
{"types":["missiles","powerbomb"],"requires":["never"]} |
|
Only requires a runway of one tile in the adjacent room. This strat is slightly easier on the right side at low run speeds, but the same otherwise. Entrance condition: {
"comeInJumping": {
"speedBooster": "no",
"minTiles": 0.4375
}
}Requires: {
"or": [
"f_MaridiaTubeBroken",
{
"obstaclesCleared": [
"f_MaridiaTubeBroken"
]
}
]
}
"canCrossRoomJumpIntoWater"
"canTrickyJump"
"h_midAirShootUp"Unlocks doors: {"types":["super"],"requires":[]}
{"types":["missiles","powerbomb"],"requires":["never"]} |
From: 3
Top Right Doorway
To: 6
Platform Below Top Door
Jump through the transition with a buffered momentum-conserving turnaround, then quickly turn around two more times to avoid bonking the overhang. Entrance condition: {
"comeInJumping": {
"speedBooster": "any",
"minTiles": 0
}
}Requires: {
"or": [
"f_MaridiaTubeBroken",
{
"obstaclesCleared": [
"f_MaridiaTubeBroken"
]
}
]
}
"canCrossRoomJumpIntoWater"
"canTrickyJump"
"canMomentumConservingTurnaround" |
|
In the other room, use 6 runway tiles to gain an extra run speed of exactly $1.D, with Speed Booster unequipped. Jump into a lateral mid-air morph and touch the door transition while descending close to the ground. Hold jump to do an uncontrolled bounce immediately after the transition. Pause as Samus passes under the first ceiling Grapple block. Equip Speed Booster and unequip Spring Ball, to get a spring fling. Pause again and re-equip Spring Ball to get a second spring fling. Continue holding jump to bounce on both Grapple platforms with uncontrolled bounces; Samus must bounce on the left edge of the first platform in order to just barely make the bounce on the right edge of the second platform. Perform one more spring fling, by unequipping Spring Ball as Samus begins to descend. Samus should make it into the nook below the right door; A Flatley jump into mid-air spring ball jump will get Samus up to the door. Entrance condition: {
"comeInSpinning": {
"speedBooster": "no",
"unusableTiles": 3,
"minExtraRunSpeed": "$1.D",
"maxExtraRunSpeed": "$1.D"
}
}Requires: {
"notable": "Spring Ball Bounce Left to Right"
}
"canTrickyDashJump"
"canInsaneJump"
"canCrossRoomJumpIntoWater"
"canTrickySpringBallBounce"
"canFlatleyJump"
"canTrickySpringBallJump"Dev note: A comeInSpinning entrance condition is used to ensure it is possible to enter in the right position, even though technically Samus should enter morphed rather than spinning. With longer runway, a number of variations of this strat are possible: entering with a mockball (or controlled bounce) with speed at least $4.4, it is possible to bounce immediately on entry and do two spring flings to reach the second Grapple platform directly. with the same type of entry and speeds at least $5.4, it is possible do controlled bounces on both Grapple platforms, with no spring fling needed. |
|
In the other room, use at least 6 runway tiles to gain an extra run speed at least $1.D, with Speed Booster unequipped. Jump into a lateral mid-air morph and touch the door transition while descending close to the ground. Hold jump to do an uncontrolled bounce immediately after the transition. Pause as Samus passes under the first ceiling Grapple block. Equip Speed Booster and unequip Spring Ball, to get a spring fling. Pause again and re-equip Spring Ball to get a second spring fling. Entrance condition: {
"comeInSpinning": {
"speedBooster": "no",
"unusableTiles": 3,
"minExtraRunSpeed": "$1.D"
}
}Requires: {
"notable": "Spring Ball Bounce Left to Right"
}
"canInsaneJump"
"canSpeedyJump"
"canCrossRoomJumpIntoWater"
"canTrickySpringBallBounce"Dev note: A comeInSpinning entrance condition is used to ensure it is possible to enter in the right position, even though technically Samus should enter morphed rather than spinning. |
|

Run and jump up through the door using Speed Booster in the room below. Bonk the door frame as you pass through the transition, to cancel your horizontal momentum. You need a vertical speed of exactly 7.8800 when passing through the transition, which requires the jump to be frame perfect. After the transition, as you reach the wall, begin holding right. Begin holding angle up at any time before approaching the door (and you can continue holding it until the end of the strat). As you approach the door (an 8-frame window), while holding angle up, release right for exactly one frame. This will put Samus into a pose aiming diagonally up and to the right. Immediately fire a shot to open the door (within the same 8-frame window); if successful, you will just barely clear the grapple block and pass through the door. Several things can cause you to bonk the grapple block: 1) entering the room with too much vertical speed, 2) not pressing against the wall as you come up, 3) releasing right for more than one frame, 4) releasing right too early. As an alternative to releasing right for one frame, you can instead press shot for one frame: if successful, Samus' pose will change to aiming diagonally without a shot being fired; if shot is pressed for more than one frame, then a shot will be fired horizontally, and the cooldown will prevent you from firing diagonally in time. Entrance condition: {
"comeInWithPlatformBelow": {
"minHeight": 9,
"maxHeight": 9,
"maxLeftPosition": -38.5,
"minRightPosition": -2
},
"comesThroughToilet": "no"
}Requires: {
"notable": "Cross Room Jump through Top Door"
}
"canCrossRoomJumpIntoWater"
"canTrickyDashJump"
"HiJump"
"canInsaneJump"
{
"noFlashSuit": {}
}Dev note: This strat applies only with Indiana Jones Room below. In Crocomire's Room, the different platform height affects which vertical speeds are obtainable, and apparently none of them work. FIXME: Check if this strat works through Toilet (either from Indiana Jones Room or Crocomire's Room) |
From: 2
Bottom Left Door
To: 8
Higher Hill Junction
Space Jump up through the door of the room below with HiJump equipped. Entrance condition: {
"comeInWithSpaceJumpBelow": {},
"comesThroughToilet": "any"
}Requires: "canCrossRoomJumpIntoWater" "HiJump" |
From: 2
Bottom Left Door
To: 8
Higher Hill Junction
Standing on a platform in the room below, jump straight up through the door with HiJump equipped. Entrance condition: {
"comeInWithPlatformBelow": {
"minHeight": 6,
"maxHeight": 7,
"maxLeftPosition": 2,
"minRightPosition": -2
},
"comesThroughToilet": "any"
}Requires: "canCrossRoomJumpIntoWater" "HiJump" Dev note: A crouch jump can be used but is not required (and is not enough to make it work with height 8). |
From: 2
Bottom Left Door
To: 8
Higher Hill Junction
Run and jump up through the door using HiJump and Speed Booster in the room below using at least 1 tile of runway. Entrance condition: {
"comeInWithPlatformBelow": {
"minHeight": 8,
"maxHeight": 9,
"maxLeftPosition": 2,
"minRightPosition": -2
},
"comesThroughToilet": "any"
}Requires: "canCrossRoomJumpIntoWater" "HiJump" "canSpeedyJump" |
From: 2
Bottom Left Door
To: 8
Higher Hill Junction

Run and jump up through the door using Speed Booster in the room below. Bonk the door frame or turn back left soon enough to cancel rightward momentum before passing through the transition. Entrance condition: {
"comeInWithPlatformBelow": {
"maxHeight": 10,
"maxLeftPosition": -38.5,
"minRightPosition": -7
},
"comesThroughToilet": "any"
}Requires: "canCrossRoomJumpIntoWater" "canSpeedyJump" |
From: 2
Bottom Left Door
To: 8
Higher Hill Junction
Standing on the platform in the room below, perform a spring ball jump mid-air just before reaching the transition. A platform of height 10 (Crocomire's Room) needs either a crouch jump or a second mid-air spring ball jump. Entrance condition: {
"comeInWithPlatformBelow": {
"maxHeight": 10,
"maxLeftPosition": 2,
"minRightPosition": -2
},
"comesThroughToilet": "any"
}Requires: "canCrossRoomJumpIntoWater" "canSpringBallJumpMidAir" |
|
Wall jump relatively high off either side of the door frame in the room below. Entrance condition: {
"comeInWithWallJumpBelow": {
"minHeight": 2
},
"comesThroughToilet": "any"
}Requires: {
"or": [
"canTrickyJump",
"canTrickySpringBallJump",
"HiJump"
]
}
"canCrossRoomJumpIntoWater"Dev note: The walljump is very disconnected from the springball jump, so it is not a springwall. |
|
Run and jump using Speed Booster in the room below, with HiJump equipped. Bonk the door frame before passing through the transition, to cancel your horizontal momentum. After the transition, as you reach the wall, begin holding right. Land on the small platform below the top door. Entrance condition: {
"comeInWithPlatformBelow": {
"minHeight": 9,
"maxHeight": 10,
"maxLeftPosition": -38.5,
"minRightPosition": -2
},
"comesThroughToilet": "any"
}Requires: "canCrossRoomJumpIntoWater" "canSpeedyJump" "HiJump" Dev note: This strat applies with Indiana Jones Room or Crocomire's Room below. |
From: 2
Bottom Left Door
To: 11
Upper Left Ledge Junction
Continuous WallJump as close as possible to the transition after running briefly to gain slightly higher jump height Entrance condition: {
"comeInWithWallJumpBelow": {
"minHeight": 2
},
"comesThroughToilet": "any"
}Requires: "canCrossRoomJumpIntoWater" "HiJump" "canTrickyDashJump" "canCWJ" "canStationarySpinJump" |
From: 2
Bottom Left Door
To: 11
Upper Left Ledge Junction
Wall jump from a high position on either side of the door frame, pass through the Toilet, and down-grab onto the ledge. The Toilet affects Samus' vertical spawn position, making this jump possible. Entrance condition: {
"comeInWithWallJumpBelow": {
"minHeight": 2
},
"comesThroughToilet": "yes"
}Requires: "canCrossRoomJumpIntoWater" "HiJump" "canPreciseWallJump" "canDownGrab" "canTrickyJump" |
From: 2
Bottom Left Door
To: 11
Upper Left Ledge Junction

Run and jump up through the door using Speed Booster in the room below. Turn to the left immediately after jumping, to allow running further and to cancel the rightward momentum before passing through the transition. Entrance condition: {
"comeInWithPlatformBelow": {
"maxHeight": 10,
"maxLeftPosition": -38.5,
"minRightPosition": 0
},
"comesThroughToilet": "any"
}Requires: "canCrossRoomJumpIntoWater" "canSpeedyJump" |
From: 2
Bottom Left Door
To: 11
Upper Left Ledge Junction
Run and jump up through the door using HiJump and Speed Booster in the room below using at least 1 tile of runway. Entrance condition: {
"comeInWithPlatformBelow": {
"maxHeight": 6,
"maxLeftPosition": 2.5,
"minRightPosition": -2.5
},
"comesThroughToilet": "any"
}Requires: "canCrossRoomJumpIntoWater" "HiJump" "canTrickyDashJump" "canDownGrab" |
From: 3
Bottom Right Door
To: 4
Top Right Door
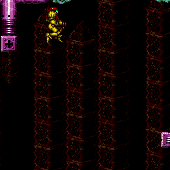
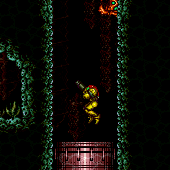
Run and jump up through the door using Speed Booster in the room below, with HiJump equipped. Immediately after jumping, break spin and turn left to avoid hitting the crab (alternatively, you can wiggle after the transition). It helps to use a little less than the full runway. Make it all the way up to the top right door. Entrance condition: {
"comeInWithPlatformBelow": {
"maxHeight": 10,
"maxLeftPosition": -38.5,
"minRightPosition": -2
},
"comesThroughToilet": "any"
}Requires: "canCrossRoomJumpIntoWater" "canSpeedyJump" "HiJump" "canTrickyJump" Dev note: This strat is applicable in Crocomire's Room and the Indiana Jones Room (with Power Bomb blocks broken). |
From: 3
Bottom Right Door
To: 7
Lower Hills Junction
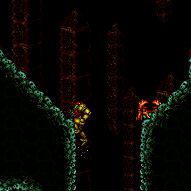
Standing on a platform in the room below, jump straight up through the door, with HiJump equipped. Entrance condition: {
"comeInWithPlatformBelow": {
"maxHeight": 10,
"maxLeftPosition": 2,
"minRightPosition": -2
},
"comesThroughToilet": "any"
}Requires: "canCrossRoomJumpIntoWater" "HiJump" Dev note: A crouch jump can be used but is not needed. |
From: 3
Bottom Right Door
To: 7
Lower Hills Junction
Space Jump up through the door of the room below. Entrance condition: {
"comeInWithSpaceJumpBelow": {},
"comesThroughToilet": "any"
}Requires: "canCrossRoomJumpIntoWater" |
From: 3
Bottom Right Door
To: 7
Lower Hills Junction

Run left-to-right in the room below using Speed Booster, and jump up through the door. Hold left through the transition to avoid hitting the crab. Entrance condition: {
"comeInWithPlatformBelow": {
"minHeight": 9,
"maxHeight": 10,
"maxLeftPosition": -38.5,
"minRightPosition": -7
},
"comesThroughToilet": "any"
}Requires: "canCrossRoomJumpIntoWater" "canSpeedyJump" Dev note: This strat is applicable in Crocomire's Room and the Indiana Jones Room. Sufficient vertical speed could be obtained with fewer tiles, but it would require jumping further to the right (i.e., increasing minRightPosition) which would not work in Indiana Jones Room unless the PB blocks are broken. |
From: 3
Bottom Right Door
To: 7
Lower Hills Junction

Standing on the platform in the room below, perform a spring ball jump mid-air just before reaching the transition. Entrance condition: {
"comeInWithPlatformBelow": {
"maxHeight": 10,
"maxLeftPosition": 2,
"minRightPosition": -2
},
"comesThroughToilet": "any"
}Requires: "canCrossRoomJumpIntoWater" "canSpringBallJumpMidAir" |
From: 3
Bottom Right Door
To: 7
Lower Hills Junction

Standing on a platform in the room below, jump straight up through the door. Entrance condition: {
"comeInWithPlatformBelow": {
"maxHeight": 7,
"maxLeftPosition": 2,
"minRightPosition": -2
},
"comesThroughToilet": "any"
}Requires: "canCrossRoomJumpIntoWater" |
From: 3
Bottom Right Door
To: 7
Lower Hills Junction
Run left-to-right in the room below using Speed Booster over a specific distance, and jump up through the door. Hold left through the transition to avoid hitting the crab. Entrance condition: {
"comeInWithPlatformBelow": {
"minHeight": 9,
"maxHeight": 9,
"maxLeftPosition": -6,
"minRightPosition": 2
},
"comesThroughToilet": "any"
}Requires: "canCrossRoomJumpIntoWater" "canTrickyDashJump" Dev note: This strat is applicable to The Jail with the left pillar broken. It is much easier to do if the right pillar is unbroken. |
From: 3
Bottom Right Door
To: 7
Lower Hills Junction
Run right-to-left in the room below using Speed Booster over a very precise distance, jump, immediately turn back right, and break spin before reaching the transition. Entrance condition: {
"comeInWithPlatformBelow": {
"minHeight": 8,
"maxHeight": 8,
"maxLeftPosition": -2,
"minRightPosition": 6
},
"comesThroughToilet": "any"
}Requires: "canCrossRoomJumpIntoWater" "canTrickyDashJump" Dev note: This strat is applicable to Spore Spawn Kihunter Room. |
|
Wall jump off either side of the door frame in the room below. Entrance condition: {
"comeInWithWallJumpBelow": {
"minHeight": 2
},
"comesThroughToilet": "any"
}Requires: "canCrossRoomJumpIntoWater" |
From: 3
Bottom Right Door
To: 10
Upper Right Ledge Junction
Run and jump up through the door using HiJump and Speed Booster in the room below and Spring Ball jump at the top of the jump. Entrance condition: {
"comeInWithPlatformBelow": {
"maxHeight": 6,
"maxLeftPosition": 2.5,
"minRightPosition": -2.5
},
"comesThroughToilet": "any"
}Requires: "canCrossRoomJumpIntoWater" "HiJump" "canSpeedyJump" "canTrickySpringBallJump" |
From: 3
Bottom Right Door
To: 10
Upper Right Ledge Junction
Run and jump up through the door using HiJump and Speed Booster in the room below and Spring Ball jump at the peak of the jump. Entrance condition: {
"comeInWithPlatformBelow": {
"maxHeight": 7,
"maxLeftPosition": 2.5,
"minRightPosition": -2.5
},
"comesThroughToilet": "any"
}Requires: "canCrossRoomJumpIntoWater" "HiJump" "canSpeedyJump" "canTrickySpringBallJump" "canTrickyJump" |
From: 3
Bottom Right Door
To: 10
Upper Right Ledge Junction
Run and jump up through the door using Speed Booster in the room below, jumping during a spike in the speed-to-jumpHeight chart. Immediately after jumping, break spin and turn left to allow you to run longer and to avoid hitting the crab. Entrance condition: {
"comeInWithPlatformBelow": {
"maxHeight": 10,
"maxLeftPosition": -38.5,
"minRightPosition": -2
},
"comesThroughToilet": "any"
}Requires: "canCrossRoomJumpIntoWater" "canTrickyDashJump" Dev note: This strat is applicable in Crocomire's Room and the Indiana Jones Room (with Power Bomb blocks broken). |
From: 3
Bottom Right Door
To: 10
Upper Right Ledge Junction
Wall jump off either side of the door frame in the room below and Spring Ball jump at the height of the jump. Entrance condition: {
"comeInWithWallJumpBelow": {
"minHeight": 2
},
"comesThroughToilet": "any"
}Requires: "canCrossRoomJumpIntoWater" "HiJump" "canTrickySpringBallJump" "canTrickyJump" |
From: 4
Top Right Door
To: 9
Platform Below Top Door
In the previous room, gain max run speed without Speed Booster equipped, requiring about 7 tiles of runway (obtaining an extra run speed of $2.0). After the transition, jump to slightly less than full height, performing a lateral mid-air morph just early enough to avoid bonking the ceiling Grapple block. Pause to equip Speed Booster before bouncing on the first Grapple platform; this provides a boost in the bounce height to be able to make it to the Grapple platform below the top door. Entrance condition: {
"comeInRunning": {
"speedBooster": "no",
"minTiles": 6.4375
}
}Requires: {
"notable": "Spring Ball Bounce Right to Left"
}
"canSpeedyJump"
"canCrossRoomJumpIntoWater"
"canTrickySpringBallBounce" |
From: 4
Top Right Door
To: 9
Platform Below Top Door

In the previous room, gain max run speed without Speed Booster equipped, requiring about 7 tiles of runway (obtaining an extra run speed of $2.0). Enter the room either in a mockball (or process of mockballing), or descending from a controlled Spring Ball bounce. Just after the transition, jump or bounce to slightly less than full height. Pause to equip Speed Booster before bouncing on the first Grapple platform; this provides a boost in the bounce height to be able to make it to the Grapple platform below the top door. Entrance condition: {
"comeInWithSpringBallBounce": {
"speedBooster": "no",
"movementType": "controlled",
"remoteAndLandingMinTiles": [
[
6.4375,
0
]
]
}
}Requires: {
"notable": "Spring Ball Bounce Right to Left"
}
"canSpeedyJump"
"canCrossRoomJumpIntoWater"
"canTrickySpringBallBounce" |
|

Come in with high speed and jump after the transition to cross the room. Precise timing is needed to jump to the correct height: too high and Samus will bonk the Grapple block, too low and Samus will not make it onto the ledge. A Powamp may be in the path of the jump but can be destroyed with blue speed. Entrance condition: {
"comeInRunning": {
"speedBooster": "yes",
"minTiles": 31
}
}Requires: "h_speedJump" "canCrossRoomJumpIntoWater" "canInsaneJump" |
From: 4
Top Right Door
To: 11
Upper Left Ledge Junction
With Speed Booster equipped, run into the room using at least about 2 tiles of runway (at least $0.C extra run speed). If needed, perform two spring flings by pausing and unequipping Spring Ball, then pausing again and re-equipping it before bouncing on the first Grapple platform. Afterward, perform additional spring flings as needed to make it across the room, taking care to avoid the Powamp. Entrance condition: {
"comeInRunning": {
"speedBooster": "yes",
"minTiles": 1.4375
}
}Requires: {
"notable": "Spring Ball Bounce Right to Left"
}
"canCrossRoomJumpIntoWater"
"canTrickySpringBallBounce"
"canSpringFling"
"h_unpauseKeepMomentum"
"canInsaneJump" |
From: 4
Top Right Door
To: 11
Upper Left Ledge Junction

Enter the room morphed, either in a mockball on the ground or descending from a controlled bounce, with about 1 tile worth of speed (at least $0.9 extra run speed). Use Spring Ball to jump or do a controlled bounce after the transition. While descending and before bouncing on the first Grapple platform, perform two spring flings by pausing and unequipping Spring Ball, then pausing again and re-equipping it. Afterward, perform additional spring flings as needed to make it across the room, taking care to avoid the Powamp. Note that Samus must be fully morphed when entering the room (not in the middle of a morphing animation), or the spring flings will not work, assuming Speed Booster is not equipped. Entrance condition: {
"comeInWithSpringBallBounce": {
"speedBooster": "any",
"movementType": "controlled",
"adjacentMinTiles": 4,
"remoteAndLandingMinTiles": [
[
0.4375,
1
]
]
}
}Requires: {
"notable": "Spring Ball Bounce Right to Left"
}
"canCrossRoomJumpIntoWater"
"canTrickySpringBallBounce"
"canSpringFling"
"canInsaneJump" |
From: 4
Top Right Door
To: 11
Upper Left Ledge Junction
Enter the room morphed, either in a mockball on the ground or descending from a controlled bounce, with about 5 or more runway tiles worth of speed (at least $1.8 extra run speed). Use Spring Ball to jump or do a controlled bounce after the transition. Bounce on the first Grapple platform. Then perform a 'spring fling' by unequipping Spring Ball while descending, to reset Samus' vertical speed and be able to make it across room. Note that Samus must be fully morphed when entering the room (not in the middle of a morphing animation), or the spring fling will not work, assuming Speed Booster is not equipped. Entrance condition: {
"comeInWithSpringBallBounce": {
"speedBooster": "any",
"movementType": "controlled",
"adjacentMinTiles": 8,
"remoteAndLandingMinTiles": [
[
4.4375,
2
]
]
}
}Requires: {
"notable": "Spring Ball Bounce Right to Left"
}
"canCrossRoomJumpIntoWater"
"canTrickySpringBallBounce"
"canSpringFling"Dev note: This can be done with a mockball with only 1 landing tile, but this is more difficult and it's unclear if we can guarantee it works in every possible room; it shouldn't be important to model, because the low-speed variant of this strat already covers the more difficult case. |
From: 2
Bottom Door
To: 3
Bottom Right Ledge


Standing on the platform in the room below, crouch jump up through the door transition, then down-grab onto the platform. Entrance condition: {
"comeInWithPlatformBelow": {
"minHeight": 7,
"maxHeight": 7,
"maxLeftPosition": 1,
"minRightPosition": -1.5
},
"comesThroughToilet": "any"
}Requires: "canCrossRoomJumpIntoWater" "h_crouchJumpDownGrab" |
|
Standing on the platform in the room below, jump up through the door. Entrance condition: {
"comeInWithPlatformBelow": {
"minHeight": 8,
"maxHeight": 9,
"maxLeftPosition": 1,
"minRightPosition": 0
},
"comesThroughToilet": "any"
}Requires: "canCrossRoomJumpIntoWater" "HiJump" |
From: 2
Bottom Door
To: 3
Bottom Right Ledge
Standing on the platform in the room below, jump up through the door. Either a crouch jump or a down grab (or both) must be used to make it onto the ledge. Entrance condition: {
"comeInWithPlatformBelow": {
"minHeight": 10,
"maxHeight": 10,
"maxLeftPosition": 1,
"minRightPosition": 0
},
"comesThroughToilet": "any"
}Requires: "canCrossRoomJumpIntoWater"
"HiJump"
{
"or": [
"canCrouchJump",
"canDownGrab"
]
} |
|
Space Jump up through the door of the room below. Entrance condition: {
"comeInWithSpaceJumpBelow": {},
"comesThroughToilet": "any"
}Requires: "canCrossRoomJumpIntoWater" |
|

Using Speed Booster in the room below, run left-to-right and jump, pressing against the right side of the door frame through the transition. Entrance condition: {
"comeInWithPlatformBelow": {
"minHeight": 9,
"maxHeight": 10,
"maxLeftPosition": -34.5,
"minRightPosition": -7
},
"comesThroughToilet": "any"
}Requires: "canCrossRoomJumpIntoWater" "canSpeedyJump" Dev note: This strat is applicable in Crocomire's Room and the Indiana Jones Room. Sufficient vertical speed could be obtained with fewer tiles, but it would require jumping further to the right (i.e., increasing minRightPosition) which would not work in Indiana Jones Room unless the PB blocks are broken; since there doesn't yet appear to be any application, we don't add a separate case for that. Speed jumps from the right side would also be possible, but again there don't yet appear to be any applications. |
From: 2
Bottom Door
To: 3
Bottom Right Ledge
Standing on the platform in the room below, perform a spring ball jump mid-air just before reaching the transition. Entrance condition: {
"comeInWithPlatformBelow": {
"maxHeight": 10,
"maxLeftPosition": 2,
"minRightPosition": -2
},
"comesThroughToilet": "any"
}Requires: "canCrossRoomJumpIntoWater" "canTrickySpringBallJump" Dev note: Crouch jumping is not needed here. |
|
Standing on the platform in the room below, jump up through the door. Entrance condition: {
"comeInWithPlatformBelow": {
"minHeight": 6,
"maxHeight": 6,
"maxLeftPosition": 1,
"minRightPosition": 0
},
"comesThroughToilet": "any"
}Requires: "canCrossRoomJumpIntoWater" |
From: 2
Bottom Door
To: 3
Bottom Right Ledge
Run left-to-right in the room below using Speed Booster over a specific distance, and jump up through the door. Entrance condition: {
"comeInWithPlatformBelow": {
"minHeight": 8,
"maxHeight": 9,
"maxLeftPosition": -6,
"minRightPosition": 2
},
"comesThroughToilet": "any"
}Requires: "canCrossRoomJumpIntoWater" "canTrickyDashJump" Dev note: This strat is applicable to Lava Farm Tunnel, and to The Jail with the left pillar broken. |
From: 2
Bottom Door
To: 3
Bottom Right Ledge

Run right-to-left in the room below using Speed Booster over a very precise distance, jump, immediately turn back right, and break spin before reaching the transition. Entrance condition: {
"comeInWithPlatformBelow": {
"minHeight": 8,
"maxHeight": 9,
"maxLeftPosition": -2,
"minRightPosition": 6
},
"comesThroughToilet": "any"
}Requires: "canCrossRoomJumpIntoWater" "canTrickyDashJump" Dev note: This strat is applicable to Lava Farm Tunnel and Spore Spawn Kihunter Room. |
|

Wall jump up through the door of the room below, using either side of the door frame. Entrance condition: {
"comeInWithWallJumpBelow": {
"minHeight": 2
},
"comesThroughToilet": "any"
}Requires: "canCrossRoomJumpIntoWater" |
|
Entrance condition: {
"comeInShinechargedJumping": {}
}Requires: {
"shineChargeFrames": 15
}
"canMidAirMorph"
"canCrossRoomJumpIntoWater"
"canHorizontalMidairShinespark"
{
"shinespark": {
"frames": 70,
"excessFrames": 0
}
}Collects items: 5 |
|
Needs near max horizontal speed coming from about 40 runway tiles in the adjacent room. Jump after the transition. Running longer on the short runway is more difficult at maximum speed, but will increase the success of the jump. A crisp momentum conserving morph can also make up for a jump that is buffered through the door. Entrance condition: {
"comeInRunning": {
"speedBooster": "yes",
"minTiles": 40
}
}Requires: "h_speedJump" "canInsaneJump" "canLateralMidAirMorph" "canCrossRoomJumpIntoWater" "canMomentumConservingMorph" Collects items: 5 |
From: 1
Left Door
To: 5
Item
Needs a runway of 7 tiles with no open end in the adjacent room, to get enough height. This is a peak of height with speed booster, no hjb, while underwater. Jump before the transition with SpeedBooster off and then SpeedBooster back on after reaching the ceiling and Morphing. Entrance condition: {
"comeInJumping": {
"speedBooster": "yes",
"minTiles": 6.4375
}
}Requires: "canLateralMidAirMorph"
{
"disableEquipment": "SpeedBooster"
}
"canCrossRoomJumpIntoWater"
"canSpringBallBounce"
{
"or": [
{
"enemyDamage": {
"enemy": "Puyo",
"type": "contact",
"hits": 1
}
},
"canInsaneJump",
{
"and": [
"Plasma",
"canTrickyJump"
]
},
"h_pauseAbuseMinimalReserveRefill"
]
}Collects items: 5 |
From: 4
Right Door
To: 6
Junction Right of Morph Passage
Entrance condition: {
"comeInShinechargedJumping": {}
}Requires: {
"shineChargeFrames": 20
}
"Morph"
"canCrossRoomJumpIntoWater"
"canHorizontalMidairShinespark"
{
"shinespark": {
"frames": 46,
"excessFrames": 3
}
} |
From: 4
Right Door
To: 6
Junction Right of Morph Passage

If using at least 8 tiles of runway, jump before going down the first slope. If using 7 tiles of runway, Samus will get a higher jump; in this case, jump later, after going down the first slope Entrance condition: {
"comeInRunning": {
"speedBooster": "yes",
"minTiles": 6.4375
}
}Requires: "canSpeedyJump" "canCrossRoomJumpIntoWater" Dev note: We don't require 'canTrickyDashJump' here, since any speed of at least $2.0 works; a different jump timing is needed for run speed between $2.0 and $2.3 compared to higher speeds, but there is a very large window in both cases, making it not difficult for the player to find a timing that works. |
From: 2
Bottom Right Door
To: 3
Top Right Door
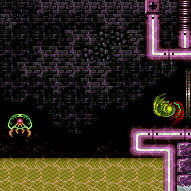
Requires running a precise distance of 7 tiles with no open end in the adjacent room, to hit a peak of the speed vs height graph (at extra run speed $2.0 or $2.1). This needs a last-frame Space Jump in the previous room. At the lower of the two possible speeds ($2.0), the jump must be done very low through the door; at the higher speed ($2.1) there is a relatively large window of vertical positions that work. Entrance condition: {
"comeInSpaceJumping": {
"speedBooster": "yes",
"minTiles": 6.4375
}
}Requires: "canTrickyDashJump" "canPreciseSpaceJump" "canInsaneJump" "canCrossRoomJumpIntoWater" "canBufferedMomentumConservingTurnaround" "canDownGrab" |
|

Requires a runway of one tile in the adjacent room. Entrance condition: {
"comeInJumping": {
"speedBooster": "any",
"minTiles": 1
}
}Requires: "HiJump" "canTrickyJump" "canCrossRoomJumpIntoWater" "canMomentumConservingTurnaround" "canDownGrab" |
From: 2
Bottom Right Door
To: 3
Top Right Door
Requires a runway of five tiles in the adjacent room. Entrance condition: {
"comeInJumping": {
"speedBooster": "any",
"minTiles": 5
}
}Requires: "HiJump" "canCrossRoomJumpIntoWater" "canBufferedMomentumConservingTurnaround" "canDownGrab" |
From: 2
Bottom Right Door
To: 3
Top Right Door
Requires a runway of two tiles in the adjacent room. Entrance condition: {
"comeInJumping": {
"speedBooster": "yes",
"minTiles": 1.4375
}
}Requires: "HiJump" "canCrossRoomJumpIntoWater" "canBufferedMomentumConservingTurnaround" |
|
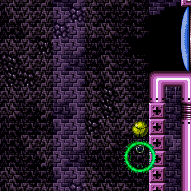

Requires a runway of one tile in the adjacent room. Entrance condition: {
"comeInJumping": {
"speedBooster": "no",
"minTiles": 1
}
}Requires: "canJumpIntoIBJ"
"canTrickyJump"
"canCrossRoomJumpIntoWater"
"canMomentumConservingTurnaround"
{
"enemyDamage": {
"enemy": "Mochtroid",
"type": "contact",
"hits": 2
}
}Dev note: Possible with no openend using a harder jump but a runway that small doesn't exist. |
|
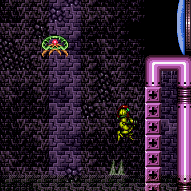
Requires running a very precise distance of 7 tiles with no open end in the adjacent room, to hit a peak of the speed vs height graph. Entrance condition: {
"comeInJumping": {
"speedBooster": "yes",
"minTiles": 6.4375
}
}Requires: "canTrickyDashJump" "canCrossRoomJumpIntoWater" "canBufferedMomentumConservingTurnaround" "canDownGrab" |
From: 2
Bottom Right Door
To: 3
Top Right Door
Requires a runway of one tile in the adjacent room. Entrance condition: {
"comeInJumping": {
"speedBooster": "no",
"minTiles": 1
}
}Requires: "canTrickySpringBallJump" "canCrossRoomJumpIntoWater" "canTrickyJump" "canMomentumConservingTurnaround" Dev note: Possible with no openend using a harder jump but a runway that small doesn't exist. |
From: 2
Bottom Right Door
To: 3
Top Right Door
Uses a runway of two tiles in the adjacent room. Entrance condition: {
"comeInJumping": {
"speedBooster": "no",
"minTiles": 2
}
}Requires: "canTrickySpringBallJump" "canCrossRoomJumpIntoWater" "canMomentumConservingTurnaround" Dev note: FIXME: Can be lowered to canBufferedMomentumConservingTurnaround. |
|
Gain speed using at least 18 tiles of runway, then Space Jump through the door transition. Entrance condition: {
"comeInSpaceJumping": {
"speedBooster": "yes",
"minTiles": 18.4375
}
}Requires: "canPreciseSpaceJump" "canCrossRoomJumpIntoWater" "canBufferedMomentumConservingTurnaround" |
|
Entrance condition: {
"comeInWithSidePlatform": {
"platforms": [
{
"minHeight": 2,
"maxHeight": 2,
"minTiles": 27.4375,
"speedBooster": "yes",
"obstructions": [
[
1,
0
]
],
"requires": [
"canMomentumConservingTurnaround"
],
"note": [
"This applies to Dust Torizo Room and Noob Bridge."
],
"devNote": [
"The jump could also be done with a shorter runway, with a tricky dash jump using run speed $4.0 or $4.1.",
"But it wouldn't apply to any more rooms in the game."
]
},
{
"minHeight": 3,
"maxHeight": 3,
"minTiles": 28.2472,
"speedBooster": "yes",
"obstructions": [
[
1,
0
]
],
"requires": [
"canMomentumConservingTurnaround"
],
"note": [
"This applies to Double Chamber."
],
"devNote": [
"The jump could also be done with a shorter runway, with a tricky dash jump using run speed $4.0 or $4.1.",
"But it wouldn't apply to any more rooms in the game."
]
},
{
"minHeight": 1,
"maxHeight": 1,
"minTiles": 23.8731,
"speedBooster": "yes",
"obstructions": [
[
3,
0
]
],
"environment": "water",
"requires": [
"canTrickyDashJump",
"canGravityJump",
"canMomentumConservingTurnaround"
],
"note": [
"This applies to Below Botwoon Energy Tank and Botwoon Energy Tank Room",
"gain run speed, and time a pause to unequip Gravity after Samus jumps;",
"hold down and back through the unpause to buffer a turnaround."
],
"detailNote": [
"With a momentum conserving turnaround, this has a 3-frame window for the jump,",
"and between a 5-frame and 7-frame window for the pause, depending on the jump timing",
"(with later jumps corresponding to larger windows for the pause to hit).",
"A ceiling mockball is also possible but with greater difficulty."
],
"devNote": [
"FIXME: The `canTrickyDashJump` is for difficulty placement but could probably be replaced by a more fitting tech,",
"since this isn't actually relying on a spike in jump height based on gaining a specific speed."
]
},
{
"minHeight": 2,
"maxHeight": 2,
"minTiles": 45,
"speedBooster": "yes",
"obstructions": [
[
3,
0
]
],
"requires": [
"canInsaneJump",
{
"or": [
"canMomentumConservingMorph",
"canMomentumConservingTurnaround"
]
}
],
"note": [
"This applies to Statues Hallway and Baby Kraid Room."
],
"devNote": [
"With a momentum conserving morph, this has a 2-frame window for the jump,",
"and a 1-frame or 2-frame window for the morph depending on the jump timing",
"(with a last-frame jump giving the larger window for the morph).",
"With a turnaround, this requires a last-frame jump, with a 2-frame window for the turnaround."
]
},
{
"minHeight": 3,
"maxHeight": 3,
"minTiles": 21.4375,
"speedBooster": "yes",
"obstructions": [
[
3,
0
]
],
"environment": "water",
"requires": [
"canTrickyDashJump",
"canInsaneJump",
"canGravityJump",
"canMomentumConservingTurnaround"
],
"note": [
"This applies to Draygon's Room.",
"Start a little less than about a tile away from the wall, gain run speed, and time a pause to unequip Gravity after Samus jumps;",
"hold down and back through the unpause to buffer a turnaround."
],
"detailNote": [
"Gain extra run speed of $4.0 or $4.1.",
"A last-frame jump with a speed of $4.1 gives a 5-frame window for the pause/turnaround,",
"while a second-to-last-frame jump with a speed of $4.0 gives a 2-frame window."
],
"devNote": [
"If Spring Ball is available, the frame window for the turnaround with $4.0 speed can be larger,",
"but it doesn't seem like a big enough difference to justify separate logical requirements."
]
},
{
"minHeight": 3,
"maxHeight": 3,
"minTiles": 41.4375,
"speedBooster": "yes",
"obstructions": [
[
3,
0
]
],
"requires": [
"canInsaneJump",
"canMomentumConservingTurnaround"
],
"note": [
"This applies to Blue Brinstar Energy Tank Room (Power Bomb blocks broken), Bowling Alley (middle), and Basement."
],
"detailNote": [
"With ideal starting position, this has a 2-frame window for the jump,",
"and a 1-frame or 3-frame window for the turnaround based on the jump timing",
"(with a last-frame jump giving the larger window for the turnaround).",
"A ceiling mockball is also possible but more difficult, requiring a last-frame jump and a 2-frame window for the morph."
],
"devNote": [
"The trick is more difficult if using the full runway in the long rooms Bowling Alley or Basement,",
"requiring a last-frame jump and a 2-frame window for the turnaround."
]
},
{
"minHeight": 3,
"maxHeight": 3,
"minTiles": 39.4375,
"speedBooster": "yes",
"obstructions": [
[
3,
2
]
],
"requires": [
"canMomentumConservingTurnaround"
],
"note": [
"This applies to Metal Pirates Room."
],
"detailNote": [
"Starting the turnaround before the transition helps make this easier."
]
},
{
"minHeight": 3,
"maxHeight": 3,
"minTiles": 37.4375,
"speedBooster": "yes",
"obstructions": [
[
5,
2
]
],
"requires": [
{
"or": [
"canMomentumConservingTurnaround",
"canMomentumConservingMorph"
]
}
],
"note": [
"This applies to Flyway"
],
"devNote": [
"This requires a last-frame jump, with a 3-frame window for the turnaround.",
"A ceiling mockball is also possible, with somewhat greater difficulty:",
"it needs a last-frame jump, with a 2-frame window for the morph."
]
}
]
}
}Requires: "canCrossRoomJumpIntoWater" "canTrickyJump" |
From: 2
Bottom Right Door
To: 3
Top Right Door
Entrance condition: {
"comeInWithSidePlatform": {
"platforms": [
{
"minHeight": 1,
"maxHeight": 1,
"minTiles": 4,
"speedBooster": "no",
"obstructions": [
[
1,
0
]
],
"note": "Applies to Skree Boost Room, Screw Attack Room, and Lava Dive"
},
{
"minHeight": 2,
"maxHeight": 2,
"minTiles": 5.4375,
"speedBooster": "no",
"obstructions": [
[
1,
0
]
],
"requires": [
"canTrickySpringBallJump",
"canTrickyJump"
],
"note": "Applies to Early Supers Room, Tourian Hopper Room, Bowling Alley (bottom), Dust Torizo Room, and Noob Bridge"
},
{
"minHeight": 3,
"maxHeight": 3,
"minTiles": 9.4375,
"speedBooster": "no",
"obstructions": [
[
1,
0
]
],
"requires": [
"canTrickySpringBallJump",
"canTrickyJump"
],
"note": "Applies to Bomb Torizo Room, Pink Brinstar Wave Gate Room, Phantoon's Room, Big Boy Room, and Double Chamber."
},
{
"minHeight": 3,
"maxHeight": 3,
"minTiles": 9.4375,
"speedBooster": "no",
"obstructions": [
[
3,
2
]
],
"requires": [
"canTrickySpringBallJump",
"canTrickyJump",
"canJumpIntoIBJ",
{
"enemyDamage": {
"enemy": "Mochtroid",
"type": "contact",
"hits": 1
}
}
],
"note": "Applies to Metal Pirates Room."
},
{
"minHeight": 2,
"maxHeight": 2,
"minTiles": 31,
"speedBooster": "yes",
"obstructions": [
[
3,
0
]
],
"requires": [
"canInsaneJump",
{
"or": [
"canMomentumConservingTurnaround",
"canMomentumConservingMorph"
]
}
],
"note": [
"This applies to Metroid Room 1."
],
"detailNote": [
"With ideal positioning, starting 5 or 6 pixels from the end of the runway,",
"this has a 2-frame window for the jump, and a 1-frame or 3-frame window for the turnaround based on the jump timing",
"(with a last-frame jump giving the larger window for the turnaround).",
"This can also be done with a momentum conserving morph:",
"it has a 2-frame window for the jump, and a 1-frame or 2-frame window for the turnaround based on the jump timing."
]
},
{
"minHeight": 3,
"maxHeight": 3,
"minTiles": 30.4375,
"speedBooster": "yes",
"obstructions": [
[
3,
0
]
],
"requires": [
"canInsaneJump",
"canMomentumConservingTurnaround"
],
"note": [
"This applies to Blue Brinstar Energy Tank Room (Power Bomb blocks intact)."
],
"detailNote": [
"With ideal starting position, this has a 2-frame window for the jump,",
"and a 1-frame or 3-frame window for the turnaround based on the jump timing",
"(with a last-frame jump giving the larger window for the turnaround)."
]
}
]
}
}Requires: "canCrossRoomJumpIntoWater" "canMomentumConservingTurnaround" "canSpringBallJumpMidAir" Dev note: This strat is included for completeness even though it's not really useful; it would be easier to use the runway attached to the door, even if it is only 1 tile long, i.e. with the 'Cross Room Jump with Spring Ball' strat (id: 51). |
|

Only requires a runway of approximately 1 tile in the adjacent room. Entrance condition: {
"comeInJumping": {
"speedBooster": "any",
"minTiles": 1
}
}Requires: "HiJump" "canTrickyJump" "canCrossRoomJumpIntoWater" "canMomentumConservingTurnaround" Dev note: Possible with no openend using a harder jump but a runway that small doesn't exist. |
From: 1
Left Door
To: 4
Platform Below Top Door
Only requires a runway of approximately 2 tile in the adjacent room. Entrance condition: {
"comeInJumping": {
"speedBooster": "any",
"minTiles": 2
}
}Requires: "HiJump" "canCrossRoomJumpIntoWater" "canBufferedMomentumConservingTurnaround" |
|


Requires around 19 tiles in the adjacent room. Entrance condition: {
"comeInJumping": {
"speedBooster": "yes",
"minTiles": 18.4375
}
}Requires: "canCrossRoomJumpIntoWater" "canBufferedMomentumConservingTurnaround" Dev note: This is on a spike in the speed graph, but would work even if it weren't. And higher tile counts work too. It is possible to jump through the door with a precise hero shot and another turnaround (possibly requiring a wide beam), but that is just to avoid a crouch jump. |
From: 1
Left Door
To: 4
Platform Below Top Door
Requires running a very precise distance equivalent to a runway of 7 tiles with no open end in the adjacent room, to hit a peak in the speed / height relationship. The spring ball jump is used after landing near the top, to get to the platform below the door. Entrance condition: {
"comeInJumping": {
"speedBooster": "yes",
"minTiles": 6.4375
}
}Requires: "canTrickyDashJump" "canSpringBallJumpMidAir" "canCrossRoomJumpIntoWater" "canBufferedMomentumConservingTurnaround" |
|
Entrance condition: {
"comeInSpaceJumping": {
"speedBooster": "yes",
"minTiles": 18.4375
}
}Requires: "canCrossRoomJumpIntoWater" "canBufferedMomentumConservingTurnaround" Dev note: This is on a spike in the speed graph, but higher tile counts work too. FIXME: With 7 tiles (extra run speed $2.0 or $2.1) or 11 tiles (extra run speed between $2.C and $3.1), it is possible to make it onto the floor below the floating platform; there's currently no node there, but with a flash suit it would be possible to spark up from there. |
From: 1
Left Door
To: 4
Platform Below Top Door
Unmorphing helps with avoiding the crab. The spring ball jump is used to get through the door after landing near the top. Entrance condition: {
"comeInWithSpringBallBounce": {
"speedBooster": "yes",
"movementType": "any",
"remoteAndLandingMinTiles": [
[
18.4375,
1
]
]
}
}Requires: "canTrickyJump" "canCrossRoomJumpIntoWater" "canSpringBallJumpMidAir" |
|

Requires running a very precise distance of 12 tiles in the adjacent room and down grabbing onto the platform (extra run speed exactly $3.1). Entrance condition: {
"comeInJumping": {
"speedBooster": "yes",
"minTiles": 12
}
}Requires: "canCrossRoomJumpIntoWater" "canBufferedMomentumConservingTurnaround" "canTrickyDashJump" "canDownGrab" Dev note: FIXME: With 6.4375 tiles, it is possible to reach the floor below the floating platform; there's currently no node there, but with a flash suit it would be possible to spark up from there. |
From: 1
Left Door
To: 4
Platform Below Top Door
Use a platform below the door in the other room to jump through the door while aiming down, carrying upward momentum into this room. Hold down and back through the transition, to perform a momentum-conserving turnaround past the corner. In cases where the previous room has an extended door ledge obstructing the exit, the turnaround may need to be initiated before the transition, to avoid bonking the ceiling of the door frame. Entrance condition: {
"comeInWithSidePlatform": {
"platforms": [
{
"minHeight": 2,
"maxHeight": 2,
"minTiles": 27.4375,
"speedBooster": "yes",
"obstructions": [
[
1,
0
]
],
"note": [
"This applies to Dust Torizo Room."
],
"devNote": [
"The jump could also be done with a shorter runway, with a tricky dash jump using run speed $4.0 or $4.1.",
"But it wouldn't apply to any more rooms in the game."
]
},
{
"minHeight": 3,
"maxHeight": 3,
"minTiles": 39.4375,
"speedBooster": "yes",
"obstructions": [
[
3,
2
]
],
"note": [
"This applies to Metal Pirates Room."
]
},
{
"minHeight": 2,
"maxHeight": 2,
"minTiles": 45,
"speedBooster": "yes",
"obstructions": [
[
3,
0
]
],
"requires": [
"canInsaneJump"
],
"note": [
"This applies to Statues Hallway."
],
"devNote": [
"The momentum conserving turnaround requires a last-frame jump and has a 2-frame window for the turnaround."
]
},
{
"minHeight": 3,
"maxHeight": 3,
"minTiles": 37.4375,
"speedBooster": "yes",
"obstructions": [
[
3,
0
]
],
"requires": [
"canInsaneJump",
"canBeVeryPatient"
],
"note": [
"This applies to Flyway."
],
"devNote": [
"The momentum conserving turnaround is double frame-perfect,",
"requiring a last-frame jump before Samus would get caught on the door ledge,",
"and a last-frame turnaround before Samus would bonk on the ceiling of the door frame.",
"After jumping, the aim-down must be delayed at least 6 frames;",
"being pressed at most 5 frames before the turnaround."
]
}
]
}
}Requires: "canCrossRoomJumpIntoWater" "canTrickyJump" "canMomentumConservingTurnaround" |
From: 1
Left Door
To: 4
Platform Below Top Door
Use a platform below the door in the other room to jump through the door while aiming down, carrying upward momentum into this room. Hold down and back through the transition, to perform a momentum-conserving turnaround past the corner. Perform a mid-air Spring Ball jump, timing a pause to hit soon after the mid-air jump. Unequip Spring Ball, lay a Bomb about half a tile below the peak of the jump. Press pause at the peak of the jump, to reequip Spring Ball immediately after Samus is boosted by the bomb. Buffer a jump out of the unpause, to get a second Spring Ball jump and make it up. Entrance condition: {
"comeInWithSidePlatform": {
"platforms": [
{
"minHeight": 1,
"maxHeight": 1,
"minTiles": 7.4375,
"speedBooster": "yes",
"obstructions": [
[
1,
0
]
],
"requires": [],
"note": [
"This applies to Warehouse Entrance."
]
}
]
}
}Requires: "canCrossRoomJumpIntoWater" "canTrickyDashJump" "canMomentumConservingTurnaround" "canUnderwaterBombIntoSpringBallJump" |
From: 1
Left Door
To: 4
Platform Below Top Door

Requires gaining a specific amount of speed by running a distance equivalent to a runway of 7 tiles with no open end in the adjacent room, to hit a peak in the speed / height relationship. Unmorph to maintain momentum while sliding along the ceiling near the entrance. The spring ball jump is used after landing near the top, to get to the platform below the door. Entrance condition: {
"comeInWithSpringBallBounce": {
"speedBooster": "yes",
"movementType": "any",
"remoteAndLandingMinTiles": [
[
6.4375,
1
]
]
}
}Requires: "canTrickyDashJump" "canCrossRoomJumpIntoWater" "canMomentumConservingMorph" "canSpringBallJumpMidAir" |
|

With a 2-tile runway in the other room, this requires a frame-perfect jump immediately before the transition. Entrance condition: {
"comeInJumping": {
"speedBooster": "any",
"minTiles": 2
}
}Requires: "canCrossRoomJumpIntoWater" "canTrickyJump" Clears obstacles: door_1 Dev note: This can be done with a slightly shorter runway (closed end), with a down grab, but that setup doesn't exist. |
|

With a 3-tile runway in the other room, this has a 2-frame window to jump before the transition. Entrance condition: {
"comeInJumping": {
"speedBooster": "any",
"minTiles": 3
}
}Requires: "canCrossRoomJumpIntoWater" Clears obstacles: door_1 |
|


With a 2-tile runway in the other room, this requires a frame-perfect jump immediately before the transition. Entrance condition: {
"comeInJumping": {
"speedBooster": "no",
"minTiles": 1.4375
}
}Requires: "canCrossRoomJumpIntoWater" "canTrickyJump" Clears obstacles: door_1 Dev note: FIXME: Not sure if there is a reason for this strat to exist, if there isn't a 2-tile closed-end runway setup room. |
|
Jump through the door in the previous room, and perform an air ball soon after entering. With a last-frame jump through the door, there is a wide timing window to do the air ball. With an earlier jump through the door, the airball must be done more precisely: in this case buffer aim-down through the transition and morph immediately on entry, in order to conserve momentum while contacting the overhang. Entrance condition: {
"comeInJumping": {
"speedBooster": "any",
"minTiles": 1
}
}Requires: "canCrossRoomJumpIntoWater"
"canLateralMidAirMorph"
{
"or": [
"canTrickyJump",
"canMomentumConservingMorph"
]
}Clears obstacles: door_1 Dev note: There is a 4-frame window for the jump that can work; jumping in the later part of that window is better as it gives a bigger window for the morph. In water physics, an airball has higher base speed ($1.8) than spin jump ($1.6) or aim down ($1.4), which is the other reason why doing it early helps, in addition to how it helps clear the overhang. Doing a ceiling mockball at the top of the room can also work, but it is more difficult, and the frame-perfect jump is required in that case. |
|
With a 1-tile runway in the other room, this has a 2-frame window to jump before the transition. Entrance condition: {
"comeInJumping": {
"speedBooster": "yes",
"minTiles": 0.4375
}
}Requires: "canCrossRoomJumpIntoWater" Clears obstacles: door_1 |
|
Entrance condition: {
"comeInSpaceJumping": {
"speedBooster": "any",
"minTiles": 2
}
}Requires: "canCrossRoomJumpIntoWater" "canTrickyJump" Clears obstacles: door_1 Dev note: FIXME: with this and several other cross-room strats, it would be possible to leave with temporary blue, if we had a way to encode the requirement to come in blue. |
|


Perform an uncontrolled Spring Ball Bounce near the door. This requires touching approximately the bottom third of the transition. Entrance condition: {
"comeInWithSpringBallBounce": {
"speedBooster": "any",
"movementType": "uncontrolled",
"remoteAndLandingMinTiles": [
[
1,
1
]
]
}
}Requires: "canCrossRoomJumpIntoWater" Clears obstacles: door_1 Dev note: With more than a single tile at the door, it is likely easier to use the runway and spin jump instead. |
|
Gain run speed using a platform below the door in the other room. Jump through the door, carrying upward momentum into this room. Entrance condition: {
"comeInWithSidePlatform": {
"platforms": [
{
"minHeight": 1,
"maxHeight": 1,
"minTiles": 7.4375,
"speedBooster": "no",
"obstructions": [
[
1,
0
]
],
"requires": [
"canInsaneJump"
],
"note": [
"This applies to Warehouse Entrance.",
"This requires a last-frame jump and specific horizontal alignment in order to make it past the overhang in the next room.",
"A way to get a correct starting position is to jump, press against the ceiling overhang near the end of the runway,",
"land, turn around away from the door, then jump and mid-air turnaround toward the door."
]
}
]
}
}Requires: "canCrossRoomJumpIntoWater" Clears obstacles: door_1 Dev note: With Morph or Speed Booster, even a 1-tile doorway runway is enough to make it up relatively easily; therefore, we don't consider side platform strats that require either of those items. |
From: 2
Right Door
To: 4
Top Right Ledge Junction
Requires a runway of at least 1 tile in the adjacent room, although it is easier with more. Entrance condition: {
"comeInJumping": {
"speedBooster": "no",
"minTiles": 1
}
}Requires: {
"or": [
"canWallJump",
"canTrickySpringBallJump",
"SpaceJump"
]
}
"canCrossRoomJumpIntoWater" |
From: 2
Right Door
To: 4
Top Right Ledge Junction


Requires a runway of at least 1 tile in the adjacent room, although it is easier with more. Entrance condition: {
"comeInJumping": {
"speedBooster": "any",
"minTiles": 1
}
}Requires: "HiJump"
{
"or": [
"canWallJump",
"canTrickyJump",
"canSpeedyJump"
]
}
"canCrossRoomJumpIntoWater" |
From: 2
Right Door
To: 4
Top Right Ledge Junction
This assumes a runway of at least 2 tiles in the adjacent room, although it is easier with more. Entrance condition: {
"comeInJumping": {
"speedBooster": "any",
"minTiles": 2
}
}Requires: "HiJump" "canCrossRoomJumpIntoWater" |
From: 2
Right Door
To: 4
Top Right Ledge Junction

Requires a runway of at least 1 tiles in the adjacent room, although it is easier with more. Start the IBJ as far left as possible. The furthest right is just right of the waterfall. Turning around, carefully, is one way to lose forward momentum and begin the IBJ. At the top of the IBJ bomb to the left and unmorph to reset fall speed. Entrance condition: {
"comeInJumping": {
"speedBooster": "no",
"minTiles": 1
}
}Requires: {
"notable": "Cross Room Jump with IBJ"
}
"canJumpIntoIBJ"
"canBombHorizontally"
"canResetFallSpeed"
"canCrossRoomJumpIntoWater"
"canTrickyJump" |
From: 2
Right Door
To: 4
Top Right Ledge Junction
Requires a runway of at least 17 tiles in the adjacent room. Entrance condition: {
"comeInJumping": {
"speedBooster": "yes",
"minTiles": 17
}
}Requires: "canCrossRoomJumpIntoWater" "canTrickyJump" |
From: 2
Right Door
To: 4
Top Right Ledge Junction
Assumes a runway of at least 18 tiles in the adjacent room. Entrance condition: {
"comeInJumping": {
"speedBooster": "yes",
"minTiles": 18
}
}Requires: "canCrossRoomJumpIntoWater" |
From: 2
Right Door
To: 4
Top Right Ledge Junction
Use the bomb boost as Samus is going through the doorway, then spring ball after breaking the water, then IBJ or use an unmorph bomb boost. Entrance condition: {
"comeInWithBombBoost": {}
}Requires: "canSpringBallBombJump"
"canCrossRoomJumpIntoWater"
"canInsaneJump"
{
"or": [
"canJumpIntoIBJ",
"canUnmorphBombBoost"
]
}Dev note: This strat requires a minimum of 2 bombs or Power Bombs. This strat requires fairly high precision in order to jump out of the water, particularly if using a Power Bomb and down grab. It is also not particularly useful, as a normal Spring Ball jump is easier and can be done with a single tile runway. It seems like the only real uses of this strat would then be to prevent a pause (maintain a blue suit without speedbooster), or a cross room artificial morph with no doorcap in the previous room (cross room + g-mode strats haven't been added to logic yet). |
From: 2
Right Door
To: 4
Top Right Ledge Junction


Requires a runway of 7 tiles with no open end in the adjacent room, to hit a peak of the speed vs height graph. Entrance condition: {
"comeInJumping": {
"speedBooster": "yes",
"minTiles": 6.4375
}
}Requires: "canCrossRoomJumpIntoWater" "canTrickyDashJump" |
From: 2
Right Door
To: 4
Top Right Ledge Junction
Entrance condition: {
"comeInWithSidePlatform": {
"platforms": [
{
"minHeight": 2,
"maxHeight": 2,
"minTiles": 27.4375,
"speedBooster": "yes",
"obstructions": [
[
1,
0
]
],
"note": [
"This applies to Dust Torizo Room and Noob Bridge."
],
"devNote": [
"The jump could also be done with a shorter runway, with a tricky dash jump using run speed $4.0 or $4.1.",
"But it wouldn't apply to any more rooms in the game."
]
},
{
"minHeight": 3,
"maxHeight": 3,
"minTiles": 28.2472,
"speedBooster": "yes",
"obstructions": [
[
1,
0
]
],
"note": [
"This applies to Double Chamber."
],
"devNote": [
"The jump could also be done with a shorter runway, with a tricky dash jump using run speed $4.0 or $4.1.",
"But it wouldn't apply to any more rooms in the game."
]
},
{
"minHeight": 1,
"maxHeight": 1,
"minTiles": 23.8731,
"speedBooster": "yes",
"obstructions": [
[
3,
0
]
],
"environment": "water",
"requires": [
"canGravityJump",
"canMomentumConservingMorph"
],
"note": [
"This applies to Below Botwoon Energy Tank and Botwoon Energy Tank Room",
"gain run speed, and time a pause to unequip Gravity after Samus jumps and aims down;",
"hold down through the unpause to buffer a morph."
],
"detailNote": [
"With a momentum conserving turnaround, this has a 3-frame window for the jump,",
"and between a 1-frame and 3-frame window for the pause, depending on the jump timing",
"(with later jumps corresponding to larger windows for the pause to hit)."
]
},
{
"minHeight": 2,
"maxHeight": 2,
"minTiles": 45,
"speedBooster": "yes",
"obstructions": [
[
3,
0
]
],
"requires": [
"canInsaneJump",
"canMomentumConservingMorph"
],
"note": [
"This applies to Statues Hallway and Baby Kraid Room."
],
"devNote": [
"This almost works from Metroid Room 1 (with $4.1 run speed) but comes up a few pixels short."
]
},
{
"minHeight": 3,
"maxHeight": 3,
"minTiles": 21.4375,
"speedBooster": "yes",
"obstructions": [
[
3,
0
]
],
"environment": "water",
"requires": [
"canTrickyDashJump",
"canInsaneJump",
"canGravityJump",
"canMomentumConservingMorph"
],
"note": [
"This applies to Draygon's Room.",
"Start a little less than a tile away from the wall, gain run speed, and time a pause to unequip Gravity after Samus jumps and aims down;",
"hold down through the unpause to buffer a morph."
],
"detailNote": [
"Gain extra run speed of $4.0 or $4.1."
]
},
{
"minHeight": 3,
"maxHeight": 3,
"minTiles": 41.4375,
"speedBooster": "yes",
"obstructions": [
[
3,
0
]
],
"requires": [
"canInsaneJump",
"canMomentumConservingMorph"
],
"note": [
"This applies to Blue Brinstar Energy Tank Room (Power Bomb blocks broken), Bowling Alley (middle), and Basement."
]
},
{
"minHeight": 3,
"maxHeight": 3,
"minTiles": 45,
"speedBooster": "yes",
"obstructions": [
[
5,
0
]
],
"requires": [
"canInsaneJump",
"canMomentumConservingMorph",
"canInsaneMidAirMorph"
],
"note": [
"This applies to Basement (power off)."
]
},
{
"minHeight": 3,
"maxHeight": 3,
"minTiles": 39.4375,
"speedBooster": "yes",
"obstructions": [
[
3,
2
]
],
"requires": [],
"note": [
"This applies to Metal Pirates Room."
]
},
{
"minHeight": 3,
"maxHeight": 3,
"minTiles": 39.4375,
"speedBooster": "yes",
"obstructions": [
[
5,
2
]
],
"requires": [
"canMomentumConservingMorph"
],
"note": [
"This applies to Flyway"
]
}
]
}
}Requires: "canCrossRoomJumpIntoWater" |
|
Requires a runway of 1 tile in the adjacent room. Use Space Jump or a wall jump after getting out of the water. Entrance condition: {
"comeInJumping": {
"speedBooster": "any",
"minTiles": 1
}
}Requires: "canCrossRoomJumpIntoWater"
"canTrickyJump"
{
"or": [
"canWallJump",
"SpaceJump"
]
} |
|

Assumes a runway of at least 4 tiles in the adjacent room. Use Space Jump or a wall jump after getting out of the water. Entrance condition: {
"comeInJumping": {
"speedBooster": "any",
"minTiles": 4
}
}Requires: "canCrossRoomJumpIntoWater"
{
"or": [
"canWallJump",
"SpaceJump"
]
} |
|

Only requires a runway of approximately 1 tile in the adjacent room. Take two Mochtroid hits or kill it using a Power Bomb or 5 Bombs. Entrance condition: {
"comeInJumping": {
"speedBooster": "any",
"minTiles": 1
}
}Requires: "canJumpIntoIBJ"
{
"or": [
{
"ammo": {
"type": "PowerBomb",
"count": 1
}
},
{
"and": [
"canCeilingBombJump",
{
"enemyDamage": {
"enemy": "Mochtroid",
"type": "contact",
"hits": 1
}
}
]
},
{
"and": [
"canDoubleBombJump",
{
"enemyDamage": {
"enemy": "Mochtroid",
"type": "contact",
"hits": 2
}
}
]
},
{
"enemyDamage": {
"enemy": "Mochtroid",
"type": "contact",
"hits": 3
}
}
]
}
"canCrossRoomJumpIntoWater"
"canBufferedMomentumConservingTurnaround"
"canTrickyJump"Dev note: The rhythm for placing 4 Bombs quickly is the main component of ceiling bomb jumps. canTrickyJump for the IBJ more than the through-door jump. |
|

Requires a runway of 3 tiles in the adjacent room. Entrance condition: {
"comeInJumping": {
"speedBooster": "yes",
"minTiles": 3
}
}Requires: "canCrossRoomJumpIntoWater" "canTrickyJump" "HiJump" |
From: 1
Top Left Door
To: 4
Top Right Door

Assumes a runway of 7 tiles in the adjacent room. Entrance condition: {
"comeInJumping": {
"speedBooster": "yes",
"minTiles": 7
}
}Requires: "canCrossRoomJumpIntoWater" "HiJump" |
|
Requires a runway of approximately 21 tile in the adjacent room. Entrance condition: {
"comeInJumping": {
"speedBooster": "yes",
"minTiles": 21
}
}Requires: "canCrossRoomJumpIntoWater" |
From: 1
Top Left Door
To: 4
Top Right Door

Requires a runway of 1 tile in the adjacent room. Use a Spring Ball jump after getting out of the water. Entrance condition: {
"comeInJumping": {
"speedBooster": "any",
"minTiles": 1
}
}Requires: "canCrossRoomJumpIntoWater" "canTrickyJump" "canTrickySpringBallJump" |
From: 1
Top Left Door
To: 4
Top Right Door

Entrance condition: {
"comeInWithSidePlatform": {
"platforms": [
{
"minHeight": 1,
"maxHeight": 1,
"minTiles": 13,
"speedBooster": "yes",
"obstructions": [
[
1,
0
]
],
"requires": [
"HiJump",
"canMomentumConservingTurnaround"
],
"note": [
"This applies to Warehouse Entrance.",
"With Hi-Jump equipped, gain extra run speed of at least $3.1, jump, and aim-down before the transition.",
"Then hold down and backward through the transition."
]
},
{
"minHeight": 2,
"maxHeight": 2,
"minTiles": 27.4375,
"speedBooster": "yes",
"obstructions": [
[
1,
0
]
],
"requires": [
"canDownGrab",
"canTrickyJump"
],
"note": [
"This applies to Dust Torizo Room and Halfie Climb Room.",
"Use the full runway, with a last-frame jump (extra run speed $5.0), and a down-grab."
],
"devNote": [
"The jump could also be done with a shorter runway, with a tricky dash jump using run speed $4.0 or $4.1."
]
},
{
"minHeight": 2,
"maxHeight": 2,
"minTiles": 45,
"speedBooster": "yes",
"obstructions": [
[
2,
0
]
],
"requires": [
"canInsaneJump"
],
"note": [
"This applies to Waterway Energy Tank Room."
]
},
{
"minHeight": 3,
"maxHeight": 3,
"minTiles": 39.4375,
"speedBooster": "yes",
"obstructions": [
[
3,
2
]
],
"note": [
"This applies to Metal Pirates Room.",
"Use the full runway, though there is no need to back into the corner;",
"jump on one of the last three possible frames (extra run speed between $6.6 and $6.8)"
]
},
{
"minHeight": 2,
"maxHeight": 2,
"minTiles": 45,
"speedBooster": "yes",
"obstructions": [
[
3,
0
]
],
"requires": [
"canInsaneJump",
{
"or": [
"canMomentumConservingMorph",
{
"and": [
"canMomentumConservingTurnaround",
"canBeVeryPatient"
]
}
]
}
],
"note": [
"This applies to Statues Hallway."
],
"devNote": [
"Using the full runway and single-pixel arm pump, with a momentum-conserving morph",
"this has a 4-frame window for the jump, and a 2-frame to 4-frame window for the morph (with later jumps giving a larger window for the morph).",
"With a momentum-conserving turnaround, it requires a last-frame jump and last-frame turnaround.",
"The arm pump doesn't really help with the turnaround.",
"There are 2 frames for the turnaround that allow Samus to make it past the overhang in the next room,",
"but only the last frame provides the horizontal momentum needed to reach the ledge."
]
},
{
"minHeight": 3,
"maxHeight": 3,
"minTiles": 37.4375,
"speedBooster": "yes",
"obstructions": [
[
3,
0
]
],
"requires": [
"canMomentumConservingMorph",
"canInsaneJump"
],
"note": [
"This applies to Flyway.",
"Avoid backing into the corner of runway (instead press into it and turn around).",
"Using the full runway, this has a 2-frame window for the jump,",
"and either a 1-frame window or 2-frame window for the morph, depending on the jump timing (last-frame jump being better)."
],
"devNote": [
"This involves getting extra dash speed $6.0 or $6.1."
]
},
{
"minHeight": 2,
"maxHeight": 2,
"minTiles": 45,
"speedBooster": "yes",
"obstructions": [
[
4,
0
]
],
"requires": [
"canMomentumConservingMorph",
"canInsaneJump",
"canInsaneMidAirMorph"
],
"note": [
"This applies to Baby Kraid Room.",
"Using the full runway, this is double frame perfect:",
"it requires jumping on the last possible frame before Samus would bonk on the doorway ledge,",
"and morphing on the last possible frame before Samus would bonk the ceiling."
]
}
]
}
}Requires: "canCrossRoomJumpIntoWater" |
|

Requires a gaining a precise amount of run speed using 19 tiles before jumping in the adjacent room (with extra run speed $4.0 or $4.1). Entrance condition: {
"comeInJumping": {
"speedBooster": "yes",
"minTiles": 18.4375
}
}Requires: "canTrickyDashJump" "canCrossRoomJumpIntoWater" |
|

Only requires a runway of 1 tile in the adjacent room. Entrance condition: {
"comeInJumping": {
"speedBooster": "any",
"minTiles": 1
}
}Requires: "canCrossRoomJumpIntoWater" Dev note: This can be done with a shorter runway (closed end) and canMomentumConservingTurnaround, but that type of connection doesn't exist. |
From: 2
Bottom Left Door
To: 4
Top Right Door
Requires a runway of 1 tile in the adjacent room. Use a spring ball jump after breaking the water, then ibj. Take two Mochtroid hits or use a double bomb jump. Entrance condition: {
"comeInJumping": {
"speedBooster": "no",
"minTiles": 1
}
}Requires: "canTrickySpringBallJump"
"canJumpIntoIBJ"
"canTrickyJump"
{
"or": [
"canDoubleBombJump",
{
"enemyDamage": {
"enemy": "Mochtroid",
"type": "contact",
"hits": 2
}
}
]
}
"canCrossRoomJumpIntoWater" |
From: 2
Bottom Left Door
To: 4
Top Right Door
Requires a runway of 1 tile in the adjacent room. Entrance condition: {
"comeInJumping": {
"speedBooster": "any",
"minTiles": 1
}
}Requires: "HiJump" "canBufferedMomentumConservingTurnaround" "canTrickySpringBallJump" "canCrossRoomJumpIntoWater" |
From: 2
Bottom Left Door
To: 4
Top Right Door
Requires a runway of 1 tile in the adjacent room. There is just enough room to wall jump after breaking the water. Entrance condition: {
"comeInJumping": {
"speedBooster": "no",
"minTiles": 1
}
}Requires: "canPreciseWallJump" "canTrickyJump" "canCrossRoomJumpIntoWater" |
|

Entrance condition: {
"comeInSpaceJumping": {
"speedBooster": "yes",
"minTiles": 10
}
}Requires: "canCrossRoomJumpIntoWater" |
From: 2
Bottom Left Door
To: 4
Top Right Door

Requires a runway of 8 tiles in the adjacent room (extra run speed at least $2.5). Entrance condition: {
"comeInJumping": {
"speedBooster": "yes",
"minTiles": 8
}
}Requires: "HiJump" "canDownGrab" "canTrickyJump" "canCrossRoomJumpIntoWater" |
From: 2
Bottom Left Door
To: 4
Top Right Door

Assumes a runway of 9 tiles in the adjacent room. Entrance condition: {
"comeInJumping": {
"speedBooster": "yes",
"minTiles": 9
}
}Requires: "HiJump" "canCrossRoomJumpIntoWater" |
|

Requires a runway of at least 38 tiles in the adjacent room. Entrance condition: {
"comeInJumping": {
"speedBooster": "yes",
"minTiles": 38
}
}Requires: "canTrickyJump" "canCrossRoomJumpIntoWater" |
From: 2
Bottom Left Door
To: 4
Top Right Door
Entrance condition: {
"comeInJumping": {
"speedBooster": "yes",
"minTiles": 10
}
}Requires: "SpaceJump" "canCrossRoomJumpIntoWater" |
From: 2
Bottom Left Door
To: 4
Top Right Door
Entrance condition: {
"comeInJumping": {
"speedBooster": "yes",
"minTiles": 16
}
}Requires: "canTrickySpringBallJump" "canCrossRoomJumpIntoWater" |
From: 2
Bottom Left Door
To: 4
Top Right Door

Entrance condition: {
"comeInWithSpringBallBounce": {
"speedBooster": "yes",
"movementType": "any",
"remoteAndLandingMinTiles": [
[
39,
1
]
]
}
}Requires: "canCrossRoomJumpIntoWater" |
From: 2
Bottom Left Door
To: 4
Top Right Door
Gain run speed using a platform below the door in the other room. Jump through the door, carrying upward momentum into this room; if necessary, use a momentum-conserving morph or momentum-conserving turnaround through the transition. Entrance condition: {
"comeInWithSidePlatform": {
"platforms": [
{
"minHeight": 2,
"maxHeight": 2,
"minTiles": 27.4375,
"speedBooster": "yes",
"obstructions": [
[
1,
0
]
],
"requires": [],
"note": [
"This applies to Dust Torizo Room and Halfie Climb Room."
]
},
{
"minHeight": 3,
"maxHeight": 3,
"minTiles": 39.4375,
"speedBooster": "yes",
"obstructions": [
[
3,
2
]
],
"requires": [
"canTrickyDashJump",
"canMomentumConservingTurnaround"
],
"note": [
"This applies to Metal Pirates Room."
],
"devNote": [
"FIXME: canTrickyDashJump is for difficulty placement; it doesn't really have anything to do with the non-linearity of Speed Booster jump height."
]
},
{
"minHeight": 2,
"maxHeight": 2,
"minTiles": 45,
"speedBooster": "yes",
"obstructions": [
[
3,
0
]
],
"requires": [
"canMomentumConservingMorph",
"canInsaneJump"
],
"note": [
"This applies to Statues Hallway.",
"Using the full runway (backing into the corner, with or without a single-pixel arm jump),",
"this has a 3-frame window for the jump, and a 3-frame window for the morph."
]
},
{
"minHeight": 3,
"maxHeight": 3,
"minTiles": 37.4375,
"speedBooster": "yes",
"obstructions": [
[
3,
0
]
],
"requires": [
"canMomentumConservingMorph",
"canInsaneJump"
],
"note": [
"This applies to Flyway.",
"Using the full runway, this has a 2-frame window for the jump,",
"and either a 1-frame window or 2-frame window for the morph, depending on the jump timing (last-frame jump being better)."
]
}
]
}
}Requires: "HiJump" "canCrossRoomJumpIntoWater" |
From: 2
Bottom Left Door
To: 4
Top Right Door
Entrance condition: {
"comeInWithSidePlatform": {
"platforms": [
{
"minHeight": 2,
"maxHeight": 2,
"minTiles": 27.4375,
"speedBooster": "yes",
"obstructions": [
[
1,
0
]
],
"requires": [],
"note": [
"This applies to Dust Torizo Room and Halfie Climb Room."
]
},
{
"minHeight": 2,
"maxHeight": 2,
"minTiles": 45,
"speedBooster": "yes",
"obstructions": [
[
2,
0
]
],
"requires": [
"canInsaneJump",
"canMomentumConservingMorph"
],
"note": [
"This applies to Waterway Energy Tank Room."
],
"detailNote": [
"Gain run speed, and time a pause to unequip Gravity after Samus jumps and aims down;",
"when the unpause black screen hits, press and hold down (and jump) to buffer a morph."
]
},
{
"minHeight": 3,
"maxHeight": 3,
"minTiles": 39.4375,
"speedBooster": "yes",
"obstructions": [
[
3,
2
]
],
"note": [
"This applies to Metal Pirates Room."
]
},
{
"minHeight": 2,
"maxHeight": 2,
"minTiles": 45,
"speedBooster": "yes",
"obstructions": [
[
3,
0
]
],
"requires": [
"canMomentumConservingMorph",
"canInsaneJump"
],
"note": [
"This applies to Statues Hallway.",
"Using the full runway with a single-pixel arm pump, this has a 4-frame window for the jump,",
"and between a 2-frame and 4-frame window for the morph (with later jumps giving a larger window)."
]
},
{
"minHeight": 3,
"maxHeight": 3,
"minTiles": 37.4375,
"speedBooster": "yes",
"obstructions": [
[
3,
0
]
],
"requires": [
"canMomentumConservingMorph",
"canInsaneJump"
],
"note": [
"This applies to Flyway.",
"Using the full runway, this has a 2-frame window for the jump,",
"and either a 1-frame window and 2-frame window for the morph, depending on the jump timing (last-frame jump being better)."
]
},
{
"minHeight": 2,
"maxHeight": 2,
"minTiles": 45,
"speedBooster": "yes",
"obstructions": [
[
4,
0
]
],
"requires": [
"canMomentumConservingMorph",
"canInsaneJump",
"canInsaneMidAirMorph"
],
"note": [
"This applies to Baby Kraid Room.",
"Using the full runway, this is double frame perfect:",
"it requires jumping on the last possible frame before Samus would bonk on the doorway ledge,",
"and morphing on the last possible frame before Samus would bonk the ceiling."
]
}
]
}
}Requires: "canSpringBallJumpMidAir" "canCrossRoomJumpIntoWater" |
From: 2
Bottom Left Door
To: 4
Top Right Door

This requires gaining speed by running a precise distance of 7 tiles (extra run speed of $2.0 or $2.1). Entrance condition: {
"comeInSpaceJumping": {
"speedBooster": "yes",
"minTiles": 6.4375
}
}Requires: "canTrickyDashJump" "canCrossRoomJumpIntoWater" |
From: 2
Bottom Left Door
To: 4
Top Right Door
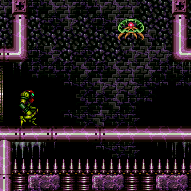
Requires running a precise distance of 34 tiles (extra run speed $6.0 or $6.1). Entrance condition: {
"comeInJumping": {
"speedBooster": "yes",
"minTiles": 34
}
}Requires: "canTrickyDashJump" "canCrossRoomJumpIntoWater" |
From: 2
Bottom Left Door
To: 4
Top Right Door
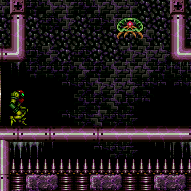
This requires gaining speed by running a precise distance of 7 tiles (extra run speed of $2.0 or $2.1). Entrance condition: {
"comeInJumping": {
"speedBooster": "yes",
"minTiles": 6.4375
}
}Requires: "canTrickyDashJump" "SpaceJump" "canCrossRoomJumpIntoWater" |
From: 2
Bottom Left Door
To: 4
Top Right Door
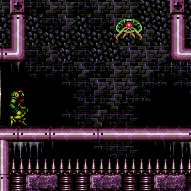
This requires gaining speed by running a precise distance of 7 tiles (extra run speed of $2.0 or $2.1). Entrance condition: {
"comeInJumping": {
"speedBooster": "yes",
"minTiles": 6.4375
}
}Requires: "canTrickyDashJump" "canTrickySpringBallJump" "canCrossRoomJumpIntoWater" |
From: 2
Bottom Left Door
To: 4
Top Right Door
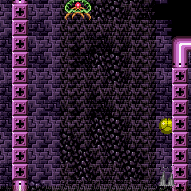
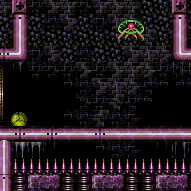
This requires gaining speed by running a precise distance of 34 tiles (extra run speed of $6.0 or $6.1). Entrance condition: {
"comeInWithSpringBallBounce": {
"speedBooster": "yes",
"movementType": "any",
"remoteAndLandingMinTiles": [
[
34,
1
]
]
}
}Requires: "canTrickyDashJump" "canCrossRoomJumpIntoWater" |
From: 2
Bottom Left Door
To: 4
Top Right Door
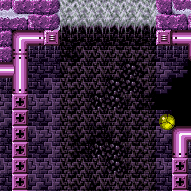

This requires gaining speed by running a precise distance of 7 tiles (extra run speed of $2.0 or $2.1). Immediately pause after the transition to unequip Spring Ball. Then equip Spring Ball again and perform a mid-air spring ball jump. Entrance condition: {
"comeInWithSpringBallBounce": {
"speedBooster": "yes",
"movementType": "any",
"remoteAndLandingMinTiles": [
[
6.4375,
1
]
]
}
}Requires: "canTrickyDashJump" "canDoubleSpringBallJumpMidAir" "canCrossRoomJumpIntoWater" |
Tricky Cross Room Spring Ball Bounce into Spring Ball Jump, Leave With Temporary Blue
(Extreme+)
Halfie Climb Room
From: 2
Bottom Left Door
To: 4
Top Right Door

Gaining blue speed with a precise amount of run speed (extra run speed of $2.0 or $2.1), and bounce through the transition. After the transition, press pause, unmorph, aim down, and unequip Spring Ball. Buffer a morph out of the pause. Pause again to equip Spring Ball and perform a mid-air spring ball jump, chaining temporary blue to the top of the room. Entrance condition: {
"comeInWithBlueSpringBallBounce": {
"movementType": "any",
"minExtraRunSpeed": "$2.0",
"maxExtraRunSpeed": "$2.1"
}
}Requires: "canTrickyDashJump" "canCrossRoomJumpIntoWater" "canPauseRemorphTemporaryBlue" "canDoubleSpringBallJumpMidAir" Exit condition: {
"leaveWithTemporaryBlue": {}
}Unlocks doors: {"types":["ammo"],"requires":[]} |
From: 2
Bottom Left Door
To: 1
Top Left Door


Only requires a runway of approximately 0.5 tiles in the adjacent room. SpringBall jump once on the way up, then use a Bomb to buy just enough time for a second SpringBall jump. Entrance condition: {
"comeInJumping": {
"speedBooster": "no",
"minTiles": 1
}
}Requires: "canCrossRoomJumpIntoWater" "canUnderwaterBombIntoSpringBallJump" "canDoubleSpringBallJumpMidAir" |
From: 2
Bottom Left Door
To: 1
Top Left Door
Requires a runway of 1 tile in the adjacent room. A momentum conserving turnaround is easier than a midair wiggle. Entrance condition: {
"comeInJumping": {
"speedBooster": "any",
"minTiles": 0.4375
}
}Requires: "HiJump"
"canCrossRoomJumpIntoWater"
{
"or": [
"canMomentumConservingTurnaround",
"canMidairWiggle"
]
} |
From: 2
Bottom Left Door
To: 1
Top Left Door
Requires a runway of 2 tiles in the adjacent room. Entrance condition: {
"comeInJumping": {
"speedBooster": "any",
"minTiles": 2
}
}Requires: "HiJump" "canCrossRoomJumpIntoWater" "canBufferedMomentumConservingTurnaround" |
From: 2
Bottom Left Door
To: 1
Top Left Door
Requires a runway of at least 7 tiles (with no open end) in the adjacent room. A momentum conserving turnaround is easier than a midair wiggle. Entrance condition: {
"comeInJumping": {
"speedBooster": "yes",
"minTiles": 6.4375
}
}Requires: "canCrossRoomJumpIntoWater"
"canTrickyDashJump"
{
"or": [
"canMomentumConservingTurnaround",
"canMidairWiggle"
]
} |
From: 2
Bottom Left Door
To: 1
Top Left Door
The lenient version requires a runway of at about 10 tiles in the adjacent room. A momentum conserving turnaround is easier than climbing the right side of the room. Entrance condition: {
"comeInJumping": {
"speedBooster": "yes",
"minTiles": 10
}
}Requires: "canCrossRoomJumpIntoWater"
{
"or": [
"canMomentumConservingTurnaround",
"canMidairWiggle"
]
} |
From: 2
Bottom Left Door
To: 1
Top Left Door
Cross room jump onto the top middle platform before sparking. Requires a runway of 1 tile in the adjacent room. Entrance condition: {
"comeInJumping": {
"speedBooster": "any",
"minTiles": 0.4375
}
}Requires: "canCrossRoomJumpIntoWater"
{
"useFlashSuit": {}
}
{
"shinespark": {
"frames": 16,
"excessFrames": 9
}
}Dev note: Assumes Samus lands, then jumps again before sparking. There is no HiJump variant, as that can jump out of the water. |
|
Entrance condition: {
"comeInSpaceJumping": {
"speedBooster": "yes",
"minTiles": 10
}
}Requires: "canMidairWiggle" "canCrossRoomJumpIntoWater" |
From: 2
Bottom Left Door
To: 1
Top Left Door
Entrance condition: {
"comeInWithSpringBallBounce": {
"speedBooster": "yes",
"movementType": "any",
"remoteAndLandingMinTiles": [
[
9,
1
]
]
}
}Requires: "canTrickyJump" "canCrossRoomJumpIntoWater" |
From: 2
Bottom Left Door
To: 1
Top Left Door
Entrance condition: {
"comeInWithSpringBallBounce": {
"speedBooster": "yes",
"movementType": "any",
"remoteAndLandingMinTiles": [
[
17,
1
]
]
}
}Requires: "canCrossRoomJumpIntoWater" |
From: 2
Bottom Left Door
To: 1
Top Left Door

Gain run speed using a platform below the door in the other room. Jump through the door, carrying upward momentum into this room; if necessary, use a momentum-conserving morph or momentum-conserving turnaround through the transition. Entrance condition: {
"comeInWithSidePlatform": {
"platforms": [
{
"minHeight": 2,
"maxHeight": 2,
"minTiles": 27.4375,
"speedBooster": "yes",
"obstructions": [
[
1,
0
]
],
"note": [
"This applies to Dust Torizo Room."
]
},
{
"minHeight": 3,
"maxHeight": 3,
"minTiles": 39.4375,
"speedBooster": "yes",
"obstructions": [
[
3,
2
]
],
"note": [
"This applies to Metal Pirates Room."
]
},
{
"minHeight": 2,
"maxHeight": 2,
"minTiles": 20.4375,
"speedBooster": "yes",
"obstructions": [
[
3,
0
]
],
"requires": [
"canTrickyDashJump",
"canMomentumConservingMorph"
],
"note": [
"This applies to Metroid Room 1 and Statues Hallway.",
"Jump with an extra run speed of $4.0 or $4.1."
]
},
{
"minHeight": 2,
"maxHeight": 2,
"minTiles": 45,
"speedBooster": "yes",
"obstructions": [
[
3,
0
]
],
"requires": [
{
"or": [
"canMomentumConservingMorph",
{
"and": [
"canInsaneJump",
"canMomentumConservingTurnaround"
]
}
]
}
],
"note": [
"This applies to Statues Hallway."
]
},
{
"minHeight": 3,
"maxHeight": 3,
"minTiles": 37.4375,
"speedBooster": "yes",
"obstructions": [
[
3,
0
]
],
"requires": [
"canMomentumConservingMorph"
],
"note": [
"This applies to Flyway."
]
},
{
"minHeight": 2,
"maxHeight": 2,
"minTiles": 45,
"speedBooster": "yes",
"obstructions": [
[
4,
0
]
],
"requires": [
"canMomentumConservingMorph"
],
"note": [
"This applies to Baby Kraid Room."
]
}
]
}
}Requires: "canCrossRoomJumpIntoWater" Dev note: With HiJump, it is possible to get up relatively easily with only a single tile of doorway runway; so we don't consider side platform strats involving HiJump. |
From: 2
Bottom Left Door
To: 1
Top Left Door

Entrance condition: {
"comeInWithSidePlatform": {
"platforms": [
{
"minHeight": 1,
"maxHeight": 1,
"minTiles": 7.4375,
"speedBooster": "yes",
"obstructions": [
[
1,
0
]
],
"requires": [
"canTrickyDashJump"
],
"note": [
"This applies to Warehouse Entrance.",
"Jump with an extra run speed of $2.0 or $2.1."
]
}
]
}
}Requires: "canCrossRoomJumpIntoWater" "canSpringBallJumpMidAir" |
From: 2
Bottom Left Door
To: 1
Top Left Door
Turn around and break spin to move vertically while near the height of the floating platform. Entrance condition: {
"comeInSpaceJumping": {
"speedBooster": "yes",
"minTiles": 6.4375
}
}Requires: "canMidairWiggle" "canTrickyDashJump" "canCrossRoomJumpIntoWater" |
From: 2
Bottom Left Door
To: 1
Top Left Door
Entrance condition: {
"comeInWithSpringBallBounce": {
"speedBooster": "yes",
"movementType": "any",
"remoteAndLandingMinTiles": [
[
6.4375,
1
]
]
}
}Requires: "canTrickyDashJump" "canCrossRoomJumpIntoWater" |
From: 2
Bottom Left Door
To: 1
Top Left Door

Gaining blue speed with a precise amount of run speed (extra run speed of $2.0 or $2.1), and bounce through the transition. After the transition, unmorph, hold an angle button, aim down, and pause near the peak of Samus' jump. Buffer a morph out of the pause to continue chaining temporary blue. Use a spring ball jump to escape the water. Entrance condition: {
"comeInWithBlueSpringBallBounce": {
"movementType": "any",
"minExtraRunSpeed": "$2.0",
"maxExtraRunSpeed": "$2.1"
}
}Requires: "canTrickyDashJump" "canCrossRoomJumpIntoWater" "canPauseRemorphTemporaryBlue" "canXRayTurnaround" "canTrickySpringBallJump" Exit condition: {
"leaveWithTemporaryBlue": {}
}Unlocks doors: {"types":["ammo"],"requires":[]} |
|
The lenient version requires a runway of at least 5 tiles (with no open end) in the adjacent room. This is easier without Speed Booster and requires disabling HiJump. Entrance condition: {
"comeInJumping": {
"speedBooster": "no",
"minTiles": 4.4375
}
}Requires: "canCrossRoomJumpIntoWater"
{
"disableEquipment": "HiJump"
} |
From: 1
Bottom Left Door
To: 2
Top Right Door
Entrance condition: {
"comeInJumping": {
"speedBooster": "any",
"minTiles": 1
}
}Requires: "canCrossRoomJumpIntoWater"
"h_storedSpark"
{
"shinespark": {
"frames": 10,
"excessFrames": 5
}
}
{
"enemyDamage": {
"enemy": "Cacatac",
"type": "spike",
"hits": 1
}
}Dev note: The spike hit may be avoidable, but it shouldn't matter much. The runway could be reduced to 0.4375 tiles with SpeedBooster. |
|

Gain speed from a remote runway in the previous room, and Space Jump through the bottom of the doorway. Entrance condition: {
"comeInSpaceJumping": {
"speedBooster": "any",
"minTiles": 5
}
}Requires: "canCrossRoomJumpIntoWater" |
From: 1
Bottom Left Door
To: 2
Top Right Door
Entrance condition: {
"comeInWithSpringBallBounce": {
"speedBooster": "any",
"movementType": "controlled",
"remoteAndLandingMinTiles": [
[
3.5625,
1
]
]
}
}Requires: "canCrossRoomJumpIntoWater" |
From: 1
Bottom Left Door
To: 2
Top Right Door
Entrance condition: {
"comeInWithSpringBallBounce": {
"speedBooster": "any",
"movementType": "uncontrolled",
"remoteAndLandingMinTiles": [
[
2.5625,
1
]
]
}
}Requires: "canCrossRoomJumpIntoWater" "canTrickyJump" |
From: 1
Bottom Left Door
To: 2
Top Right Door
Unmorph just before hitting the overhang, to conserve momentum to make it on top. Entrance condition: {
"comeInWithSpringBallBounce": {
"speedBooster": "any",
"movementType": "controlled",
"remoteAndLandingMinTiles": [
[
2.5625,
1
]
]
}
}Requires: "canCrossRoomJumpIntoWater" "canMomentumConservingMorph" |
From: 1
Bottom Left Door
To: 2
Top Right Door
Unmorph just before hitting the overhang, to conserve momentum to make it on top. Entrance condition: {
"comeInWithSpringBallBounce": {
"speedBooster": "no",
"movementType": "uncontrolled",
"remoteAndLandingMinTiles": [
[
1.5625,
1
]
]
}
}Requires: "canCrossRoomJumpIntoWater" "canTrickyJump" "canMomentumConservingMorph" |
From: 1
Bottom Left Door
To: 2
Top Right Door

Entrance condition: {
"comeInWithSidePlatform": {
"platforms": [
{
"minHeight": 1,
"maxHeight": 1,
"minTiles": 2.4375,
"speedBooster": "no",
"obstructions": [
[
1,
0
]
],
"note": [
"This applies to Seaweed Room, Skree Boost Room, Grapple Tutorial Room 2, Warehouse Energy Tank Room, and Warehouse Entrance."
],
"devNote": [
"With Speed Booster and a Spring Ball jump, this can also work with shorter runways, as in Ice Beam Snake Room and Grapple Beam Room,",
"but it wouldn't be very useful, because with those items there are alternative strats using the doorway runway."
]
},
{
"minHeight": 2,
"maxHeight": 2,
"minTiles": 4,
"speedBooster": "no",
"obstructions": [
[
1,
0
]
],
"note": [
"This applies to Ridley Tank Room and Dust Torizo Room."
]
},
{
"minHeight": 3,
"maxHeight": 3,
"minTiles": 7.4375,
"speedBooster": "no",
"obstructions": [
[
1,
0
]
],
"requires": [
"HiJump"
],
"note": [
"This applies to Big Boy Room and Mickey Mouse Room."
],
"devNote": [
"With a momentum-conserving turnaround, this could be done with shorter runway,",
"but there aren't rooms in the game that it would apply to."
]
},
{
"minHeight": 2,
"maxHeight": 2,
"minTiles": 3,
"speedBooster": "no",
"obstructions": [
[
3,
2
]
],
"requires": [
"canSpringBallJumpMidAir"
],
"note": [
"This applies to Crumble Shaft."
]
},
{
"minHeight": 3,
"maxHeight": 3,
"minTiles": 7.4375,
"speedBooster": "no",
"obstructions": [
[
3,
2
]
],
"requires": [
"HiJump",
"canMomentumConservingMorph"
],
"note": [
"This applies to Metal Pirates Room."
],
"devNote": [
"FIXME: assuming the other room is heated based on its geometry is awkward;",
"consider setting up a more proper way of representing it."
]
}
]
}
}Requires: "canCrossRoomJumpIntoWater" Dev note: We don't consider side platforms in rooms where the doorway has a 2-tile runway or more, since in that case getting up using the doorway runway can be done itemless relatively easily, whereas using the side platform would be difficult because of the obstruction. |
From: 1
Bottom Left Door
To: 2
Top Right Door
Requires a runway of at least 2 tiles (with no open end) in the adjacent room. This is typically easier without Speed Booster depending on the exact runway length and requires disabling HiJump. Entrance condition: {
"comeInJumping": {
"speedBooster": "no",
"minTiles": 1.4375
}
}Requires: "canCrossRoomJumpIntoWater"
"canMomentumConservingTurnaround"
"canTrickyJump"
{
"disableEquipment": "HiJump"
} |
From: 1
Bottom Left Door
To: 2
Top Right Door
Gain speed from a remote runway in the previous room, and Space Jump through the bottom of the doorway. Entrance condition: {
"comeInSpaceJumping": {
"speedBooster": "any",
"minTiles": 2
}
}Requires: "canCrossRoomJumpIntoWater" "canMomentumConservingTurnaround" "canTrickyJump" |
From: 1
Bottom Left Door
To: 2
Top Right Door
It is possible to jump to the top door using a runway of just one tile with Speed Booster and no HiJump. Requires a last-frame jump and down press that is late but not immediately before the turnaround. With a second-to-last-frame jump it is still possible but more precise. Entrance condition: {
"comeInJumping": {
"speedBooster": "yes",
"minTiles": 1
}
}Requires: "canCrossRoomJumpIntoWater"
"canMomentumConservingTurnaround"
"canTrickyDashJump"
{
"disableEquipment": "HiJump"
} |
|
Only requires a runway of approximately 0.5 tiles in the adjacent room. Bomb boost through the doorway and hold right. Entrance condition: {
"comeInWithBombBoost": {}
}Requires: "canCrossRoomJumpIntoWater" |
|
Only requires a runway of approximately 0.5 tiles in the adjacent room. Bomb boost through the doorway and hold left. Entrance condition: {
"comeInWithBombBoost": {}
}Requires: "canCrossRoomJumpIntoWater" |
|

Using Speed Booster in the room below and the full length of the runway (starting with Samus hanging over the edge as far as possible), run and jump precisely to make it through without bonking the door frame. Break spin before the transition to expand Samus' hitbox and trigger the transition earlier, retaining more speed and also making it easier to avoid bonking. Hold left through the transition to initiate a turn-around while entering the room. Land on the small platform at the top of the room. Entrance condition: {
"comeInWithPlatformBelow": {
"minHeight": 9,
"maxHeight": 9,
"maxLeftPosition": -38.5,
"minRightPosition": -7
},
"comesThroughToilet": "any"
}Requires: "canCrossRoomJumpIntoWater" "canSpeedyJump" "canTrickyJump" "canInsaneJump" Dev note: This strat is applicable only with the Indiana Jones Room. |
From: 2
Bottom Door
To: 1
Left Door

Using Speed Booster in the room below, start running at a precise position to be able to jump during a spike in the speed-to-jumpHeight chart. Break spin before the transition to expand Samus' hitbox and trigger the transition early, retaining more speed and also making it easier to avoid bonking. Hold left through the transition to initiate a turn-around while entering the room. Land on the small platform at the top of the room. Entrance condition: {
"comeInWithPlatformBelow": {
"minHeight": 9,
"maxHeight": 10,
"maxLeftPosition": -33.5,
"minRightPosition": -7
},
"comesThroughToilet": "any"
}Requires: "canCrossRoomJumpIntoWater" "canTrickyDashJump" "canInsaneJump" Dev note: This strat is applicable with Crocomire's Room and the Indiana Jones Room. |
From: 2
Bottom Door
To: 4
Water Level Junction
Standing on the platform in the room below, crouch jump up and press right against the door frame through the transition. Entrance condition: {
"comeInWithPlatformBelow": {
"minHeight": 10,
"maxHeight": 10,
"maxLeftPosition": 1,
"minRightPosition": 2
},
"comesThroughToilet": "no"
}Requires: "canCrossRoomJumpIntoWater" "HiJump" "canCrouchJump" Dev note: This strat only works for platforms that are 10 tiles below the door transition (Crocomire's Room). It could be done for a platform 9 tiles below the door transition, but this would require a momentum-conserving turn-around; it is easier to just do a standing jump or spin jump in that case instead of crouch jumping. |
From: 2
Bottom Door
To: 4
Water Level Junction
Run and spin jump from the platform in the room below, gaining horizontal speed but without bonking the door frame. Perform a momentum-conserving turn-around to make it around the corner of the ledge above. With limited runway for gaining horizontal speed, the timing of the jump and turn-around may be very precise. Entrance condition: {
"comeInWithPlatformBelow": {
"minHeight": 8.5,
"maxHeight": 9,
"maxLeftPosition": -1.5,
"minRightPosition": 1.5
},
"comesThroughToilet": "yes"
}Requires: "canDash" "canCrossRoomJumpIntoWater" "HiJump" "canMomentumConservingTurnaround" "canInsaneJump" Dev note: This applies to Warehouse Zeela Room and Tourian Hopper Room. |
From: 2
Bottom Door
To: 4
Water Level Junction
Run left-to-right and spin jump from the platform in the room below, passing through the transition without bonking the door. Entrance condition: {
"comeInWithPlatformBelow": {
"minHeight": 7,
"maxHeight": 7,
"maxLeftPosition": -2.5,
"minRightPosition": 0.5
},
"comesThroughToilet": "no"
}Requires: "canDash" "canCrossRoomJumpIntoWater" "HiJump" Dev note: This is applicable using the platform in Tourian Escape Room 2. |
From: 2
Bottom Door
To: 4
Water Level Junction


Run left-to-right and spin jump from the platform in the room below, passing through the transition without bonking the door. Pass through the Toilet, and then perform a momentum conserving turnaround to make it onto the ledge. Entrance condition: {
"comeInWithPlatformBelow": {
"minHeight": 7,
"maxHeight": 7,
"maxLeftPosition": -2.5,
"minRightPosition": 0.5
},
"comesThroughToilet": "yes"
}Requires: "canDash" "canCrossRoomJumpIntoWater" "HiJump" "canMomentumConservingTurnaround" Dev note: This is applicable using the platform in Tourian Escape Room 2. |
From: 2
Bottom Door
To: 4
Water Level Junction


Run left-to-right and spin jump from the platform in the room below, passing through the transition without bonking the door. Entrance condition: {
"comeInWithPlatformBelow": {
"minHeight": 7,
"maxHeight": 7,
"maxLeftPosition": -5.5,
"minRightPosition": -1.5
},
"comesThroughToilet": "any"
}Requires: "canDash" "canCrossRoomJumpIntoWater" "HiJump" Dev note: This is applicable using the Power Bomb block platform in Indiana Jones Room. |
|
Spin jump from the platform in the room below, pressing right against the door frame through the transition. Entrance condition: {
"comeInWithPlatformBelow": {
"minHeight": 8,
"maxHeight": 9,
"maxLeftPosition": 1,
"minRightPosition": 2
},
"comesThroughToilet": "no"
}Requires: "canCrossRoomJumpIntoWater" "HiJump" Dev note: For a platform 9 tiles below the door transition, a standing jump also works (instead of a spin jump). |
From: 2
Bottom Door
To: 4
Water Level Junction
Run and spin jump from the platform in the room below, gaining horizontal speed but without bonking the door frame. Perform a momentum-conserving turn-around to make it around the corner of the ledge above. Entrance condition: {
"comeInWithPlatformBelow": {
"minHeight": 8,
"maxHeight": 9,
"maxLeftPosition": -3,
"minRightPosition": 0
},
"comesThroughToilet": "yes"
}Requires: "canDash" "canCrossRoomJumpIntoWater" "HiJump" "canMomentumConservingTurnaround" |
From: 2
Bottom Door
To: 4
Water Level Junction
Spin jump from the platform in the room below, pressing right against the door frame through the transition. Perform a momentum-conserving turn-around to make it around the corner of the ledge above. Entrance condition: {
"comeInWithPlatformBelow": {
"minHeight": 7,
"maxHeight": 7,
"maxLeftPosition": 1,
"minRightPosition": 2
},
"comesThroughToilet": "no"
}Requires: "canCrossRoomJumpIntoWater" "HiJump" "canMomentumConservingTurnaround" Dev note: This strat is for platforms that are exactly 7 tiles below the door transition. For platforms that are 8 or 9 tiles below, no turn-around is needed. |
|


Do a wall jump from the right side of the door frame, three tiles below the door transition. Turn back around to the right before the transition, while maintaining spin. Entrance condition: {
"comeInWithWallJumpBelow": {
"minHeight": 3
},
"comesThroughToilet": "no"
}Requires: "canCrossRoomJumpIntoWater" "canPreciseWallJump" Dev note: This strat requires a door frame with a three-tile-high surface usable for wall jumping (not including the door transition tiles). Many door frames only have a two-tile-high surface. |
From: 2
Bottom Door
To: 4
Water Level Junction
Do a low spin jump and press against the right side of the door frame. Wall jump as low as possible, jumping as soon as possible after moving away from the wall. Immediately turn back to the right and try to press against the door frame again before the transition, while maintaining spin. After the transition, typically a momentum-conserving turnaround is needed to avoid bonking. Entrance condition: {
"comeInWithWallJumpBelow": {
"minHeight": 2
},
"comesThroughToilet": "no"
}Requires: "canCrossRoomJumpIntoWater"
{
"or": [
"canInsaneWallJump",
{
"and": [
"canPreciseWallJump",
"canMomentumConservingTurnaround"
]
}
]
}Dev note: This strat is for cases where the door frame below has only a two-tile-high surface available for wall-jumping. If a third tile is available, the jump can be done more easily. |
From: 2
Bottom Door
To: 4
Water Level Junction
Gain run speed to the right and jump through the door without bonking the door frame. After the transition, continue holding right while remaining in spin jump. This strat could also be performed without passing through the Toilet, but a precise down-grab would be needed to get onto the ledge at the end; in this case it would be easier to perform a standing jump instead. Entrance condition: {
"comeInWithPlatformBelow": {
"minHeight": 6,
"maxHeight": 6,
"maxLeftPosition": -2.5,
"minRightPosition": -0.5
},
"comesThroughToilet": "yes"
}Requires: "canDash" "canCrossRoomJumpIntoWater" "canTrickyJump" Dev note: This strat only works for platforms that are 6 tiles below the door transition (which is the closest distance that occurs in the vanilla game). |
|


Use Space Jump to enter with rightward momentum and moderate vertical speed. This can be done by using Space Jump at an appropriate height and pressing against the right side of the door frame while entering the transition. Entrance condition: {
"comeInWithSpaceJumpBelow": {},
"comesThroughToilet": "no"
}Requires: "canCrossRoomJumpIntoWater" Dev note: FIXME: Passing through Toilet is possible, but it requires some run speed (possibly from a remote platform), which we don't yet have a way to represent here. |
|

Gain a small amount of speed (<1 tile is enough) and jump through the transition, pressing right against the door frame. Entrance condition: {
"comeInWithPlatformBelow": {
"minHeight": 10,
"maxHeight": 10,
"maxLeftPosition": 2,
"minRightPosition": -2
},
"comesThroughToilet": "no"
}Requires: "canCrossRoomJumpIntoWater" "HiJump" "canSpeedyJump" Dev note: This strat only works for platforms that are 10 tiles below the door transition (Crocomire's Room). It could be done for a platform 9 tiles below the door transition, but this would require a momentum-conserving turn-around (or more horizontal speed); it is easier to just do a standing jump or spin jump in that case. |
From: 2
Bottom Door
To: 4
Water Level Junction
Gain a few tiles of run speed and jump through the transition, without bonking against the door frame. Perform a momentum-conserving turn-around to make it around the corner of the ledge above. Entrance condition: {
"comeInWithPlatformBelow": {
"minHeight": 10,
"maxHeight": 10,
"maxLeftPosition": -4,
"minRightPosition": 0
},
"comesThroughToilet": "yes"
}Requires: "canDash" "canCrossRoomJumpIntoWater" "HiJump" "canSpeedyJump" "canMomentumConservingTurnaround" |
|
Using Speed Booster in the room below, run and jump, pressing against the right side of the door frame through the transition without breaking spin. It may be necessary to use less runway than is available, to avoid getting too much vertical speed. Entrance condition: {
"comeInWithPlatformBelow": {
"minHeight": 9,
"maxHeight": 10,
"maxLeftPosition": -34.5,
"minRightPosition": -7
},
"comesThroughToilet": "no"
}Requires: "canCrossRoomJumpIntoWater" "canSpeedyJump" "canTrickyJump" Dev note: This strat is applicable in Crocomire's Room and the Indiana Jones Room. Sufficient vertical speed could be obtained with fewer tiles, but it would require jumping further to the right (i.e., increasing minRightPosition) which would not work in Indiana Jones Room unless the PB blocks are broken; since there doesn't yet appear to be any application, we don't add a separate case for that. |
From: 2
Bottom Door
To: 4
Water Level Junction
Using Speed Booster in the room below, run and jump through the door without bonking the door frame or breaking spin. Perform a mid-air wiggle to make into onto either ledge. Entrance condition: {
"comeInWithPlatformBelow": {
"minHeight": 9,
"maxHeight": 10,
"maxLeftPosition": -34.5,
"minRightPosition": -7
},
"comesThroughToilet": "yes"
}Requires: "canCrossRoomJumpIntoWater" "canSpeedyJump" "canInsaneJump" "canMidairWiggle" Dev note: This strat is applicable in Crocomire's Room and the Indiana Jones Room. |
From: 2
Bottom Door
To: 4
Water Level Junction


Standing on the platform in the room below, jump up (crouch jump makes it easier) and press right against the door frame through the transition. After the transition, perform a spring ball jump mid-air to reach the ledge. Entrance condition: {
"comeInWithPlatformBelow": {
"minHeight": 7,
"maxHeight": 7,
"maxLeftPosition": 1,
"minRightPosition": 1
},
"comesThroughToilet": "no"
}Requires: "canCrossRoomJumpIntoWater"
"canTrickySpringBallJump"
{
"or": [
"canCrouchJump",
"canTrickyJump"
]
} |
From: 2
Bottom Door
To: 4
Water Level Junction


Standing on the platform in the room below, perform a spring ball jump mid-air a few tiles below the transition. Hold right through the transition, and do not bonk the door frame. Entrance condition: {
"comeInWithPlatformBelow": {
"minHeight": 9,
"maxHeight": 10,
"maxLeftPosition": 1,
"minRightPosition": 1
},
"comesThroughToilet": "no"
}Requires: "canCrossRoomJumpIntoWater" "canTrickySpringBallJump" "can4HighMidAirMorph" |
|


Standing on the platform in the room below, jump up and press right against the door frame through the transition. Entrance condition: {
"comeInWithPlatformBelow": {
"minHeight": 6,
"maxHeight": 6,
"maxLeftPosition": 1,
"minRightPosition": 2
},
"comesThroughToilet": "no"
}Requires: "canCrossRoomJumpIntoWater" Dev note: This strat only works for platforms that are 6 tiles below the door transition (which is the closest distance that occurs in the vanilla game). A crouch jump can be used but is not required. |
From: 2
Bottom Door
To: 4
Water Level Junction


Run left-to-right in the room below using Speed Booster over a specific distance, and jump up through the door. Entrance condition: {
"comeInWithPlatformBelow": {
"minHeight": 9,
"maxHeight": 9,
"maxLeftPosition": -6,
"minRightPosition": 2
},
"comesThroughToilet": "no"
}Requires: "canCrossRoomJumpIntoWater" "canTrickyDashJump" Dev note: This strat is applicable to Lava Farm Tunnel, and to The Jail with the left pillar broken. |
From: 2
Bottom Door
To: 4
Water Level Junction


Standing on the platform in the room below, perform a spring ball jump mid-air a few tiles below the transition. It is necessary to morph very quickly after jumping in order to spring ball jump as low as necessary. Hold right through the transition, and do not bonk the door frame. Entrance condition: {
"comeInWithPlatformBelow": {
"minHeight": 8,
"maxHeight": 8.5,
"maxLeftPosition": 1,
"minRightPosition": 1
},
"comesThroughToilet": "no"
}Requires: "canCrossRoomJumpIntoWater" "can4HighMidAirMorph" "canTrickySpringBallJump" "canInsaneJump" |
From: 1
Left Door
To: 3
Junction Below Right Door
Quickly shoot to break the shot block and then do a momentumConservingTurnaround to ascend into the little region. Another movement item will be needed to get closer to the crumble blocks. Entrance condition: {
"comeInJumping": {
"speedBooster": "any",
"minTiles": 2
}
}Requires: "canTrickyJump"
"canCrossRoomJumpIntoWater"
"canMomentumConservingTurnaround"
{
"or": [
"canUseFrozenEnemies",
"canSpringBallJumpMidAir",
"HiJump"
]
}
{
"noFlashSuit": {}
}Dev note: The transition likely connects to Pants Room making this strat not likely to be useful. In any case, each option (Ice, Spring Ball, Hi-Jump) has an alternative in-room strat that can get up without needing a runway. FIXME: this can be done with 1 tile of runway, but it's a bit more difficult. FIXME: with a momentum-conserving morph, it is possible to reach the platforms below the crumble blocks. |
From: 1
Left Door
To: 2
Right Door
Perform a 1-tap to gain blue speed with a significant amount of momentum. Run through the door, and jump near the end of the platform, crossing the room. If Samus gains enough height from the jump, it is possible unmorph mid-air to discard horizontal speed at the right side of the room, then pause to remorph (`canPauseRemorphTemporaryBlue`). Otherwise, a precisely timed unmorph is needed to avoid bonking the door and losing the blue state; at certain speeds, it may be necessary to briefly release jump in order to control the height for the unmorph. Entrance condition: {
"comeInGettingBlueSpeed": {
"length": 1,
"openEnd": 1,
"minExtraRunSpeed": "$4.4"
}
}Requires: "canPlayInSand" "canCrossRoomJumpIntoWater" "canInsaneJump" "canChainTemporaryBlue" "canBeVeryPatient" Exit condition: {
"leaveWithTemporaryBlue": {}
}Unlocks doors: {"types":["ammo"],"requires":[]}Dev note: This needs an extra run speed of at least $4.4, and ideally not much more than that. |
|
Stand at an effective distance of between about 20 and 21 tiles from the door. Run through the door, and jump any time after the transition, holding jump through the entire room to make it to the other side. Samus will go over the Evirs, so there is no need for blue speed. Entrance condition: {
"comeInRunning": {
"speedBooster": "yes",
"minTiles": 19.3625,
"maxTiles": 21.25
}
}Requires: {
"notable": "Cross-Room Speed Jump over Evirs"
}
"canPlayInSand"
"canCrossRoomJumpIntoWater"
"canTrickyDashJump" |
|
Enter with enough run speed to jump (after the transition) across the full room using one Spring Ball Jump. When exiting the first Sandfall, Samus will be rising still. That is the time to Spring Ball jump. Entrance condition: {
"comeInRunning": {
"speedBooster": "yes",
"minTiles": 10
}
}Requires: {
"notable": "Cross-Room Spring Ball Jump"
}
"canPlayInSand"
"canCrossRoomJumpIntoWater"
"h_speedJump"
"canLateralMidAirMorph"
"canTrickySpringBallJump"
"canTrickyJump" |
From: 1
Left Door
To: 4
Junction Below Sand Entrance

Requires a runway of 7 tiles (with no open end) in the adjacent room. Jump into an air ball on room entry in order to get to the first pillar. Aim down after the transition to avoid hitting the overhang near the door. Entrance condition: {
"comeInJumping": {
"speedBooster": "no",
"minTiles": 6.4375
}
}Requires: "canCrossRoomJumpIntoWater"
"canPlayInSand"
"canLateralMidAirMorph"
{
"or": [
"canTrickyJump",
{
"and": [
"canCarefulJump",
{
"enemyDamage": {
"enemy": "Evir",
"type": "contact",
"hits": 1
}
}
]
}
]
}Dev note: It is assumed that getting to the second pillar is free relative to getting to the right door. |
From: 1
Left Door
To: 4
Junction Below Sand Entrance
Bomb boost through the doorway as close to the door transition as possible in order to get as far as possible. Entrance condition: {
"comeInWithBombBoost": {}
}Requires: "canCrossRoomJumpIntoWater" "canTrickyJump" Dev note: It is assumed that getting to the second pillar is free relative to getting to the right door. |
From: 1
Left Door
To: 4
Junction Below Sand Entrance
Requires a runway of 7 tiles (with no open end) in the adjacent room. Requires two precise inputs of jumping through the doorway and a short aiming down press before hitting the ceiling. Damage boost off of the right Evir in order to land on the first pillar. With Ice, instead freeze the Evir to land on it and avoid the damage. When entering the room with a bad jump, it is possible to perform a midair wiggle to get back to the door platform. Entrance condition: {
"comeInJumping": {
"speedBooster": "no",
"minTiles": 6.4375
}
}Requires: {
"notable": "Cross Room Jump with Ice or Damage Boost"
}
"canCrossRoomJumpIntoWater"
"canPlayInSand"
"canInsaneJump"
{
"or": [
"canTrickyUseFrozenEnemies",
{
"and": [
"canNeutralDamageBoost",
{
"enemyDamage": {
"enemy": "Evir",
"type": "contact",
"hits": 1
}
}
]
},
{
"and": [
"canNeutralDamageBoost",
"h_pauseAbuseMinimalReserveRefill"
]
}
]
} |
|
Gain momentum in the room to the left, then jump at the edge of the runway in this room in order to jump off of the sand and land on the first pillar. Requires a runway of 7 tiles (with no open end) in the adjacent room, and killing the second Evir with a quick super or two plasma hits (note that the particle despawns as the Evir dies). Entrance condition: {
"comeInJumping": {
"speedBooster": "no",
"minTiles": 6.4375
}
}Requires: "canCrossRoomJumpIntoWater"
"canPlayInSand"
"canTrickyJump"
{
"enemyKill": {
"enemies": [
[
"Evir"
]
],
"explicitWeapons": [
"Plasma",
"Super"
]
}
}Dev note: This is not technically a canCrossRoomJumpIntoWater, but it is used here because of the way the momentum changes as Samus enters the water. |
From: 1
Left Door
To: 4
Junction Below Sand Entrance
By entering the room with run speed, it is possible to jump over the pair of Evirs. Entrance condition: {
"comeInRunning": {
"speedBooster": "any",
"minTiles": 3.4375
}
}Requires: "canCrossRoomJumpIntoWater" "HiJump" "canCarefulJump" |
From: 1
Left Door
To: 4
Junction Below Sand Entrance
By entering the room with run speed, it is possible to jump over the pair of Evirs. Entrance condition: {
"comeInRunning": {
"speedBooster": "yes",
"minTiles": 3
}
}Requires: "canCrossRoomJumpIntoWater" "HiJump" |
From: 2
Right Door
To: 1
Left Door
Perform a 1-tap to gain blue speed with a significant amount of momentum. Run through the door, and jump any time after the transition, crossing the room. Entrance condition: {
"comeInGettingBlueSpeed": {
"length": 1,
"openEnd": 1,
"minExtraRunSpeed": "$4.4"
}
}Requires: {
"notable": "Cross-Room Blue Speed Jump (Right to Left)"
}
"h_blueJump"
"canPlayInSand"
"canCrossRoomJumpIntoWater"Dev note: This assumes an extra run speed of at least $4.4, though some lower speeds can also work ($3.B through $3.F). The window between $4.0 and $4.3 must be avoided because it would give too much jump height. |
From: 2
Right Door
To: 1
Left Door
Perform a 1-tap to gain blue speed with a significant amount of momentum. Run through the door, and jump into an airball any time after the transition, crossing the room. At higher speeds, it may be necessary to unmorph at the left side of the room while still high in the air, to discard horizontal speed, then pause to remorph (`canPauseRemorphTemporaryBlue`). Entrance condition: {
"comeInGettingBlueSpeed": {
"length": 1,
"openEnd": 1,
"minExtraRunSpeed": "$4.4"
}
}Requires: {
"notable": "Cross-Room Blue Speed Jump (Right to Left)"
}
"canPlayInSand"
"canCrossRoomJumpIntoWater"
"canInsaneJump"
"canPauseRemorphTemporaryBlue"
"canChainTemporaryBlue"Exit condition: {
"leaveWithTemporaryBlue": {}
}Unlocks doors: {"types":["ammo"],"requires":[]}Dev note: This needs an extra run speed of at least $4.4. For speed $4.5, it helps to jump early and hold an aim-down pose. Speed $4.6 doesn't seem possible, as you end up too high to land without bonking the door, and too low to have time for a pause remorph? For speeds between $4.7 and $4.9, a pause remorph works. Speed $4.A is difficult but can be done with a last-frame jump, a momentum-conserving morph (ceiling mockball) while touching the second overhang, and a pause remorph. Speed $4.B doesn't seem to work as you can't avoid bonking the first overhang? |
|

Stand at an effective distance of about 20 tiles from the door. Run through the door, and jump any time after the transition, holding jump through the entire room to make it to the other side. Samus will go over the Evirs, so there is no need for blue speed. Entrance condition: {
"comeInRunning": {
"speedBooster": "yes",
"minTiles": 19.3625,
"maxTiles": 20.3
}
}Requires: {
"notable": "Cross-Room Speed Jump over Evirs"
}
"canPlayInSand"
"canCrossRoomJumpIntoWater"
"canTrickyDashJump"
Dev note: This needs an extra run speed of at least $4.4, and ideally not much more than that. A little higher run speed can also work but may require releasing jump near the peak to avoid getting caught on the overhang. |
|
Enter with enough run speed to jump (after the transition) across the full room using one Spring Ball Jump. When exiting the first Sandfall, Samus will be rising still. That is the time to Spring Ball jump. Alternatively, an immediate pause can be used to Spring Ball jump during the first narrow gap between Sandfalls. Sometimes Samus will land above the sand on the far left end of the room, where it will be necessary to unmorph and jump out. Entrance condition: {
"comeInRunning": {
"speedBooster": "yes",
"minTiles": 10
}
}Requires: {
"notable": "Cross-Room Spring Ball Jump"
}
"canPlayInSand"
"canCrossRoomJumpIntoWater"
"h_speedJump"
"canLateralMidAirMorph"
"canTrickySpringBallJump"
"canTrickyJump" |
From: 2
Right Door
To: 4
Junction Below Sand Entrance


Bomb boost through the doorway. With a good enough boost, it's possible to go over the first Evir, landing on the second pillar. Entrance condition: {
"comeInWithBombBoost": {}
}Requires: "canCrossRoomJumpIntoWater" |
From: 2
Right Door
To: 4
Junction Below Sand Entrance
Gain momentum in the room to the right (with extra run speed between $2.0 and $2.3), then jump after the transition. Samus should be able to jump over the first Evir and reach the center of the room. Entrance condition: {
"comeInRunning": {
"speedBooster": "yes",
"minTiles": 6.4375,
"maxTiles": 7.4375
}
}Requires: "canCrossRoomJumpIntoWater" "canTrickyDashJump" Dev note: This is not technically a canCrossRoomJumpIntoWater, but it is used here because of the way the momentum changes as Samus enters the water. |
|
Gain momentum in the room to the right, then jump immediately on entry in order to land on the first pillar. Jumping too late will likely put Samus into the pit. Requires a small runway of only one tile or less in the adjacent room. Jumping before the door transition will set Samus straight into an Evir projectile, knocking her into the sand. Entrance condition: {
"comeInRunning": {
"speedBooster": "no",
"minTiles": 0.4375
}
}Requires: "canCrossRoomJumpIntoWater" "canTrickyJump" Dev note: This is not technically a canCrossRoomJumpIntoWater, but it is used here because of the way the momentum changes as Samus enters the water. |
|
Use Screw Attack to break the bomb block by entering from a non-water room with a spin jump. It helps to enter as low as possible and with as much horizontal speed as possible and with HiJump turned off. Even if executed correctly, the trick can fail with 50% probability due to collision oscillation. Entrance condition: {
"comeInJumping": {
"speedBooster": "any",
"minTiles": 4.4375
}
}Requires: {
"notable": "Cross Room Jump with Screw Attack"
}
"canTrickyJump"
"canCrossRoomJumpIntoWater"
"ScrewAttack"Clears obstacles: A |
From: 1
Left Door
To: 1
Left Door
Use Screw Attack to break the bomb block by entering from a non-water room with a spin jump. It helps to enter as low as possible and with as much horizontal speed as possible and with HiJump turned off. Even if executed correctly, the trick can fail with 50% probability due to collision oscillation. Entrance condition: {
"comeInJumping": {
"speedBooster": "yes",
"minTiles": 3
}
}Requires: {
"notable": "Cross Room Jump with Screw Attack"
}
"canTrickyJump"
"canCrossRoomJumpIntoWater"
"ScrewAttack"Clears obstacles: A |
|
Use blue speed to break the bomb block by entering from a non-water room with a spin jump. It generally helps to enter as low as possible and with as much horizontal speed as possible, and with HiJump turned off. Even if executed correctly, the trick can fail with 50% probability due to collision oscillation. Shinesparking is typically an easier alternative to this strat; but using blue speed can be useful to save some energy or if carrying a flash suit. Entrance condition: {
"comeInWithSidePlatform": {
"platforms": [
{
"minHeight": 1,
"maxHeight": 1,
"minTiles": 17,
"speedBooster": "yes",
"obstructions": [
[
1,
0
]
],
"requires": [
{
"getBlueSpeed": {
"usedTiles": 15,
"openEnd": 1
}
},
"canMomentumConservingMorph"
],
"note": [
"Applies to Warehouse Entrance."
]
},
{
"minHeight": 1,
"maxHeight": 1,
"minTiles": 27.4375,
"speedBooster": "yes",
"obstructions": [
[
1,
0
]
],
"requires": [
{
"getBlueSpeed": {
"usedTiles": 24,
"openEnd": 1
}
}
],
"note": [
"Applies to Dust Torizo Room and Halfie Climb Room."
]
},
{
"minHeight": 2,
"maxHeight": 2,
"minTiles": 45,
"speedBooster": "yes",
"obstructions": [
[
2,
0
]
],
"requires": [
"h_getBlueSpeedMaxRunway",
{
"or": [
"canInsaneJump",
"canMomentumConservingMorph"
]
}
],
"note": [
"Applies to Waterway Energy Tank Room."
],
"detailNote": [
"This is easier with a momentum-conserving morph, preferably with a pause to unequip Gravity."
]
},
{
"minHeight": 2,
"maxHeight": 2,
"minTiles": 45,
"speedBooster": "yes",
"obstructions": [
[
3,
0
]
],
"requires": [
"h_getBlueSpeedMaxRunway",
"canMomentumConservingMorph"
],
"note": [
"Applies to Statues Hallway."
]
},
{
"minHeight": 3,
"maxHeight": 3,
"minTiles": 37.4375,
"speedBooster": "yes",
"obstructions": [
[
3,
0
]
],
"requires": [
"h_getBlueSpeedMaxRunway",
"canMomentumConservingMorph"
],
"note": [
"Applies to Flyway."
]
},
{
"minHeight": 3,
"maxHeight": 3,
"minTiles": 39.4375,
"speedBooster": "yes",
"obstructions": [
[
3,
2
]
],
"requires": [
"h_getBlueSpeedMaxRunway",
{
"or": [
"canMomentumConservingMorph",
"canInsaneJump"
]
}
],
"note": [
"Applies to Metal Pirates Room."
]
}
]
}
}Requires: "h_blueJump" "canCrossRoomJumpIntoWater" "canTrickyJump" Clears obstacles: A Dev note: The momentum-conserving morph variants are included for completeness, though generally if Morph is available it would be easier to speedball and do a temporary blue chain. |
|

Use Screw Attack to break the bomb block by entering from a non-water room with a spin jump. It generally helps to enter as low as possible and with as much horizontal speed as possible, and with HiJump turned off except if jumping from a very low platform. Even if executed correctly, in most cases the trick can fail with 50% probability due to collision oscillation. Entrance condition: {
"comeInWithSidePlatform": {
"platforms": [
{
"minHeight": 1,
"maxHeight": 2,
"minTiles": 13.4375,
"speedBooster": "yes",
"obstructions": [
[
1,
0
]
],
"requires": [
"canTrickyDashJump"
],
"note": [
"Applies to Warehouse Entrance and Dust Torizo Room.",
"Gain extra run speed between $3.2 and $3.5, at a position where Samus just barely clears the obstruction."
],
"devNote": [
"It is technically also possible from Ridley Tank Room, using exact run speed $1.8 and subpixels in a narrow range.",
"But without a normalized setup it doesn't seem reasonable."
]
},
{
"minHeight": 3,
"maxHeight": 3,
"minTiles": 8.4375,
"speedBooster": "any",
"obstructions": [
[
1,
0
],
[
3,
2
]
],
"note": [
"Applies to Big Boy Room, Mickey Mouse Room, and Metal Pirates."
]
},
{
"minHeight": 6,
"maxHeight": 6,
"minTiles": 2.5625,
"speedBooster": "yes",
"obstructions": [
[
5,
6
]
],
"requires": [
"canTrickyDashJump"
],
"note": [
"Applies to Fast Pillars Setup Room.",
"Gain extra run speed exactly $1.1."
]
},
{
"minHeight": 8,
"maxHeight": 8,
"minTiles": 6,
"speedBooster": "no",
"obstructions": [
[
1,
0
]
],
"requires": [
"HiJump"
],
"note": [
"Applies to Screw Attack Room.",
"With extra run speed exactly $1.E, it works without collision oscillation.",
"Extra run speed $1.D also works, but with collision oscillation giving a 50% failure rate, as with most other setups."
]
}
]
}
}Requires: {
"notable": "Cross Room Jump with Screw Attack"
}
"ScrewAttack"
"canCrossRoomJumpIntoWater"
"canTrickyJump"Clears obstacles: A |
From: 1
Left Door
To: 3
Top Door
Use a 2-tap shortcharge and jump into the room with a last-frame jump, breaking the bomb block with blue speed, and making it all the way through the top door. Use angle to break spin, and do a momentum conserving turnaround either on the same frame or one frame later; this first turnaround should be done early enough that the turnaround is complete by the time Samus clears the two-tile passage in the middle of the room. Do a second momentum conserving turnaround somewhat late, and by switching from holding left to holding right one frame later (a perfect 'boomerang'). Shoot open the door, and use a third momentum conserving turnaround on it as it opens. Lower run speeds are generally better, as long as the extra run speed is at least $3.4. this gives up to a 7-frame window for the first turnaround, and typically a 4-frame window for the second turnaround if the first turnaround is done early enough. A perfect boomerang is always required for the second turnaround, regardless of where in the window it is done. It is recommended to buffer the spin break, by holding angle (up or down), jump, and forward through the transition, then switching from forward to backward, with at most 1 frame of neutral in between, while still holding jump and angle. Entrance condition: {
"comeInGettingBlueSpeed": {
"length": 0,
"openEnd": 1,
"minExtraRunSpeed": "$3.4",
"maxExtraRunSpeed": "$3.F"
}
}Requires: {
"notable": "Cross Room Jump Boomerang To Top"
}
"h_blueJump"
"canInsaneJump"
"canCrossRoomJumpIntoWater"
"canMomentumConservingTurnaround"
{
"noFlashSuit": {}
}Exit condition: {
"leaveNormally": {}
}Unlocks doors: {"types":["super"],"requires":[]}
{"types":["missiles","powerbomb"],"requires":["never"]} |
From: 1
Left Door
To: 3
Top Door

Use Screw Attack to break the bomb block by entering from a non-water room with a spin jump, and make it all the way through the top door. Ideally, gain speed using between 13 and 13.5 tiles of runway (with an open end). Longer runway lengths can also work, up to 17 tiles, but will make the trick somewhat more precise. Use angle to break spin, and do a momentum conserving turnaround either on the same frame or one frame later; this first turnaround should be done early enough that the turnaround is complete by the time Samus clears the two-tile passage in the middle of the room. Do a second momentum conserving turnaround somewhat late, and by switching from holding left to holding right one frame later (a perfect 'boomerang'). Shoot open the door, and use a third momentum conserving turnaround on it as it opens. The optimal amount of extra run speed is $3.4 or $3.5, by using 13 tiles of runway or about a half tile more; this gives a 7-frame window for the first turnaround, and typically a 4-frame window for the second turnaround if the first turnaround is done early enough. Extra run speeds between $3.6 and $3.F can also work, but with shorter windows. A perfect boomerang is always required for the second turnaround, regardless of where in the window it is done. It is recommended to buffer the spin break, by holding angle (up or down), jump, and forward through the transition, then switching from forward to backward, with at most 1 frame of neutral in between, while still holding jump and angle. Entrance condition: {
"comeInJumping": {
"speedBooster": "yes",
"minTiles": 13
}
}Requires: {
"notable": "Cross Room Jump Boomerang To Top"
}
"canInsaneJump"
"canCrossRoomJumpIntoWater"
"ScrewAttack"
"canMomentumConservingTurnaround"
{
"noFlashSuit": {}
}Exit condition: {
"leaveNormally": {}
}Unlocks doors: {"types":["super"],"requires":[]}
{"types":["missiles","powerbomb"],"requires":["never"]}Dev note: This does not have collision oscillation. |
|
Use a 2-tap shortcharge and jump into the room with a last-frame jump, breaking the bomb block with blue speed, and making it all the way through the top door. Use angle to break spin, and do a momentum conserving turnaround either on the same frame or one frame later; this first turnaround should be done early enough that the turnaround is complete by the time Samus clears the two-tile passage in the middle of the room. Do a second momentum conserving turnaround somewhat late, and by switching from holding left to holding right one frame later (a perfect 'boomerang'). Lower run speeds are generally better, as long as the extra run speed is at least $3.2. this gives up to a 7-frame window for the first turnaround, and typically a 4-frame window for the second turnaround if the first turnaround is done early enough. A perfect boomerang is always required for the second turnaround, regardless of where in the window it is done. It is recommended to buffer the spin break, by holding angle (up or down), jump, and forward through the transition, then switching from forward to backward, with at most 1 frame of neutral in between, while still holding jump and angle. Entrance condition: {
"comeInGettingBlueSpeed": {
"length": 0,
"openEnd": 1,
"minExtraRunSpeed": "$3.2",
"maxExtraRunSpeed": "$3.F"
}
}Requires: {
"notable": "Cross Room Jump Boomerang To Top"
}
"h_blueJump"
"canInsaneJump"
"canCrossRoomJumpIntoWater"
"canMomentumConservingTurnaround"
"h_trickyToCarryFlashSuit" |
|
Use Screw Attack to break the bomb block by entering from a non-water room with a last-frame spin jump, and make it to the platform below the top door. Longer runway lengths can also work, up to 17 tiles, but will make the trick somewhat more precise. Use angle to break spin, and do a momentum conserving turnaround either on the same frame or one frame later; this first turnaround should be done early enough that the turnaround is complete by the time Samus clears the two-tile passage in the middle of the room. Do a second momentum conserving turnaround somewhat late, and by switching from holding left to holding right one frame later (a perfect 'boomerang'). The optimal amount of extra run speed is between $3.2 and $3.5, by using 13 tiles of runway or about a half tile more or less; this gives a 7-frame window for the first turnaround, and typically a 4-frame window for the second turnaround if the first turnaround is done early enough. Extra run speeds between $3.6 and $3.F can also work, but with shorter windows. A perfect boomerang is always required for the second turnaround, regardless of where in the window it is done. It is recommended to buffer the spin break, by holding angle (up or down), jump, and forward through the transition, then switching from forward to backward, with at most 1 frame of neutral in between, while still holding jump and angle. Entrance condition: {
"comeInJumping": {
"speedBooster": "yes",
"minTiles": 12.4375
}
}Requires: {
"notable": "Cross Room Jump Boomerang To Top"
}
"canInsaneJump"
"canCrossRoomJumpIntoWater"
"ScrewAttack"
"canMomentumConservingTurnaround"
"h_trickyToCarryFlashSuit"Dev note: This does not have collision oscillation. |
|


Jump into a momentum-conserving morph with blue speed to break the bomb block and continue up to the top of the room. After pressing down to initiate the momentum-conserving morph, all inputs can be released; do not hold forward while the morph completes as it would give too much speed, causing Samus to bonk horizontally. Tapping (not holding) backward can sometimes help in dodging the platforms while ascending, by reversing Samus' horizontal momentum. Entrance condition: {
"comeInWithSidePlatform": {
"platforms": [
{
"minHeight": 1,
"maxHeight": 1,
"minTiles": 17,
"speedBooster": "yes",
"obstructions": [
[
1,
0
]
],
"requires": [
{
"getBlueSpeed": {
"usedTiles": 15,
"openEnd": 1
}
},
"h_blueJump"
],
"note": [
"Applies to Warehouse Entrance."
],
"detailNote": [
"Jump through the door with an extra run speed of at least $2.2."
]
},
{
"minHeight": 1,
"maxHeight": 1,
"minTiles": 27.4375,
"speedBooster": "yes",
"obstructions": [
[
1,
0
]
],
"requires": [
{
"getBlueSpeed": {
"usedTiles": 24,
"openEnd": 1
}
},
"h_blueJump"
],
"note": [
"Applies to Dust Torizo Room and Halfie Climb Room."
],
"detailNote": [
"Jump through the door with an extra run speed of $3.1 or less."
]
},
{
"minHeight": 2,
"maxHeight": 2,
"minTiles": 45,
"speedBooster": "yes",
"obstructions": [
[
2,
0
]
],
"requires": [
{
"getBlueSpeed": {
"usedTiles": 24,
"openEnd": 1
}
},
"h_blueJump",
"canInsaneMidAirMorph"
],
"note": [
"Applies to Waterway Energy Tank Room."
],
"detailNote": [
"Pause to unequip Gravity before the transition."
]
},
{
"minHeight": 3,
"maxHeight": 3,
"minTiles": 39.4375,
"speedBooster": "yes",
"obstructions": [
[
3,
2
]
],
"requires": [
{
"getBlueSpeed": {
"usedTiles": 24,
"openEnd": 1
}
},
"h_blueJump",
"canInsaneMidAirMorph"
],
"note": [
"Applies to Metal Pirates Room."
]
}
]
}
}Requires: "canCrossRoomJumpIntoWater" "canMomentumConservingMorph" "canInsaneJump" Clears obstacles: A |
|
Use blue speed to break the bomb block by entering from a non-water room with a spin jump, and make it up to the center of the room. It helps to enter as low as possible and with as much horizontal speed as possible and with HiJump turned off. Enter with extra run speed between $3.2 and $3.F, with the lower speeds in this range being better. Entrance condition: {
"comeInGettingBlueSpeed": {
"length": 0,
"openEnd": 1,
"minExtraRunSpeed": "$3.2",
"maxExtraRunSpeed": "$3.F"
}
}Requires: "h_blueJump" "canInsaneJump" "canCrossRoomJumpIntoWater" "canMomentumConservingTurnaround" Dev note: This does not have collision oscillation. |
From: 1
Left Door
To: 9
Center Platforms

Use Screw Attack to break the bomb block by entering from a non-water room with a spin jump, and make it up to the center of the room. It helps to enter as low as possible and with as much horizontal speed as possible and with HiJump turned off. Enter with extra run speed between $3.2 and $3.F, with the lower speeds in this range being better. Entrance condition: {
"comeInJumping": {
"speedBooster": "yes",
"minTiles": 12.4375
}
}Requires: {
"notable": "Cross Room Jump with Screw Attack"
}
"canInsaneJump"
"canCrossRoomJumpIntoWater"
"ScrewAttack"
"canMomentumConservingTurnaround"Dev note: This does not have collision oscillation. |
|
Use Screw Attack to break the bomb block by entering from a non-water room with a spin jump. It helps to enter as low as possible and with as much horizontal speed as possible and with HiJump turned off. Even if executed correctly, the trick can fail with 50% probability due to collision oscillation. Entrance condition: {
"comeInJumping": {
"speedBooster": "any",
"minTiles": 4.4375
}
}Requires: {
"notable": "Cross Room Jump with Screw Attack"
}
"canTrickyJump"
"canCrossRoomJumpIntoWater"
"ScrewAttack"Clears obstacles: A |
From: 2
Right Door
To: 2
Right Door
Use Screw Attack to break the bomb block by entering from a non-water room with a spin jump. It helps to enter as low as possible and with as much horizontal speed as possible and with HiJump turned off. Even if executed correctly, the trick can fail with 50% probability due to collision oscillation. Entrance condition: {
"comeInJumping": {
"speedBooster": "yes",
"minTiles": 3
}
}Requires: {
"notable": "Cross Room Jump with Screw Attack"
}
"canTrickyJump"
"canCrossRoomJumpIntoWater"
"ScrewAttack"Clears obstacles: A |
|
Use blue speed to break the bomb block by entering from a non-water room with a spin jump. It generally helps to enter as low as possible and with as much horizontal speed as possible, and with HiJump turned off. Even if executed correctly, the trick can fail with 50% probability due to collision oscillation. Shinesparking is typically an easier alternative to this strat; but using blue speed can be useful to save some energy or if carrying a flash suit. Entrance condition: {
"comeInWithSidePlatform": {
"platforms": [
{
"minHeight": 1,
"maxHeight": 1,
"minTiles": 16,
"speedBooster": "yes",
"obstructions": [
[
1,
0
]
],
"requires": [
{
"getBlueSpeed": {
"usedTiles": 15,
"openEnd": 0
}
},
"h_blueJump",
"canMomentumConservingMorph"
],
"note": [
"Applies to Lava Dive Room."
]
},
{
"minHeight": 2,
"maxHeight": 2,
"minTiles": 27.4375,
"speedBooster": "yes",
"obstructions": [
[
1,
0
]
],
"requires": [
{
"getBlueSpeed": {
"usedTiles": 24,
"openEnd": 1
}
},
"h_blueJump"
],
"note": [
"Applies to Dust Torizo Room and Noob Bridge."
]
},
{
"minHeight": 3,
"maxHeight": 3,
"minTiles": 28.2472,
"speedBooster": "yes",
"obstructions": [
[
1,
0
]
],
"requires": [
{
"getBlueSpeed": {
"usedTiles": 24,
"openEnd": 1
}
},
"h_blueJump"
],
"note": [
"Applies to Double Chamber."
]
},
{
"minHeight": 1,
"maxHeight": 1,
"minTiles": 36.3703,
"speedBooster": "yes",
"obstructions": [
[
3,
0
]
],
"environment": "water",
"requires": [
"h_getBlueSpeedMaxRunway",
"h_blueJump",
"canGravityJump",
"canMomentumConservingMorph"
],
"note": [
"This applies to Botwoon Energy Tank Room"
],
"detailNote": [
"Use a 1-tap to gain blue speed, and time a pause to hit just after jumping and aiming down,",
"then unequip Gravity and hold down during the unpause black screen to buffer the morph."
]
},
{
"minHeight": 2,
"maxHeight": 2,
"minTiles": 45,
"speedBooster": "yes",
"obstructions": [
[
3,
0
]
],
"requires": [
"h_getBlueSpeedMaxRunway",
"h_blueJump",
"canInsaneJump",
"canMomentumConservingMorph"
],
"note": [
"This applies to Statues Hallway and Baby Kraid Room"
],
"detailNote": [
"Use a 1-tap to gain blue speed, and time a pause to hit just after jumping and aiming down,",
"then unequip Gravity and hold down during the unpause black screen to buffer the morph."
]
},
{
"minHeight": 3,
"maxHeight": 3,
"minTiles": 21.4375,
"speedBooster": "yes",
"obstructions": [
[
3,
0
]
],
"environment": "water",
"requires": [
{
"getBlueSpeed": {
"usedTiles": 18,
"openEnd": 1
}
},
"h_blueJump",
"canInsaneJump",
"canGravityJump",
"canMomentumConservingMorph"
],
"note": [
"This applies to Draygon's Room"
],
"detailNote": [
"Use a 2-tap to gain blue speed, and time a pause to hit just after jumping and aiming down,",
"then unequip Gravity and hold down during the unpause black screen to buffer the morph."
]
},
{
"minHeight": 3,
"maxHeight": 3,
"minTiles": 30.4375,
"speedBooster": "yes",
"obstructions": [
[
3,
0
]
],
"requires": [
{
"getBlueSpeed": {
"usedTiles": 27,
"openEnd": 1
}
},
"h_blueJump",
"canMomentumConservingMorph",
"canInsaneJump"
],
"note": [
"This applies to Blue Brinstar Energy Tank Room, Bowling Alley (middle), and Basement (power on)"
]
},
{
"minHeight": 3,
"maxHeight": 3,
"minTiles": 39.4375,
"speedBooster": "yes",
"obstructions": [
[
3,
2
]
],
"requires": [
"h_getBlueSpeedMaxRunway",
"h_blueJump",
{
"or": [
"canMomentumConservingMorph",
"canInsaneJump"
]
}
],
"note": [
"Applies to Metal Pirates Room."
]
},
{
"minHeight": 3,
"maxHeight": 3,
"minTiles": 37.4375,
"speedBooster": "yes",
"obstructions": [
[
5,
2
]
],
"requires": [
"h_getBlueSpeedMaxRunway",
"h_blueJump",
"canInsaneJump",
"canMomentumConservingMorph"
],
"note": [
"Applies to Flyway."
]
}
]
}
}Requires: {
"notable": "Cross Room Jump with Screw Attack"
}
"canCrossRoomJumpIntoWater"
"canTrickyJump"Clears obstacles: A Dev note: The momentum-conserving morph variants are included for completeness, though generally if Morph is available it would be easier to speedball and do a temporary blue chain. FIXME: some of these setups can make it above the bomb blocks, so they could have a variant going to node 6. |
|
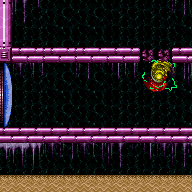
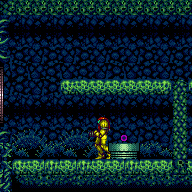
Use Screw Attack to break the bomb block by entering from a non-water room with a spin jump. It generally helps to enter as low as possible and with as much horizontal speed as possible, and with HiJump turned off. Even if executed correctly, the trick can fail with 50% probability due to collision oscillation. Entrance condition: {
"comeInWithSidePlatform": {
"platforms": [
{
"minHeight": 1,
"maxHeight": 1,
"minTiles": 13.4375,
"speedBooster": "yes",
"obstructions": [
[
1,
0
]
],
"requires": [
"canTrickyDashJump"
],
"note": [
"Applies to Lava Dive.",
"Gain extra run speed of $3.5, at a position where Samus just barely clears the obstruction:",
"Starting at a horizontal position of $110 (272) or $111 (273) works at any subpixels;",
"parts of the neighboring pixels on either side also work."
],
"devNote": [
"Run speed $3.2 works, at a pixel position of $F7 (247) with any subpixel, or on parts of the neighboring pixel on either side;",
"run speed $3.8 is possible but does not have an entire pixel that works."
]
},
{
"minHeight": 2,
"maxHeight": 2,
"minTiles": 5.4375,
"speedBooster": "yes",
"obstructions": [
[
1,
0
]
],
"note": [
"Applies to Early Super Room, Bowling Alley (Bottom), Tourian Hopper Room, Dust Torizo Room, and Noob Bridge."
]
},
{
"minHeight": 2,
"maxHeight": 2,
"minTiles": 8.4375,
"speedBooster": "any",
"obstructions": [
[
1,
0
]
],
"requires": [
"canInsaneJump"
],
"note": [
"Applies to Bowling Alley (Bottom), Tourian Hopper Room, Dust Torizo Room, and Noob Bridge.",
"Without Speed Booster, this requires specific positioning to align Samus to just barely clear the door ledge."
]
},
{
"minHeight": 3,
"maxHeight": 3,
"minTiles": 8.4375,
"speedBooster": "any",
"obstructions": [
[
1,
0
]
],
"note": [
"Applies to Bomb Torizo Room, Pink Brinstar Wave Gate Room, Phantoon's Room, Big Boy Room, Double Chamber."
]
},
{
"minHeight": 3,
"maxHeight": 3,
"minTiles": 5,
"speedBooster": "yes",
"obstructions": [
[
1,
0
],
[
3,
2
]
],
"note": [
"Applies to Bomb Torizo Room, Pink Brinstar Wave Gate Room, Phantoon's Room, Big Boy Room, Double Chamber, and Metal Pirates Room.",
"With extra run speed exactly $1.2, this works without collision oscillation.",
"Extra run speed up through $1.8 also work but with collision oscillation giving a 50% failure rate, as with most other setups."
]
},
{
"minHeight": 4,
"maxHeight": 4,
"minTiles": 4.5625,
"speedBooster": "yes",
"obstructions": [
[
5,
4
]
],
"note": [
"Applies to Tourian Escape Room 4."
]
}
]
}
}Requires: {
"notable": "Cross Room Jump with Screw Attack"
}
"ScrewAttack"
"canCrossRoomJumpIntoWater"
"canTrickyJump"Clears obstacles: A |
From: 2
Right Door
To: 3
Top Door
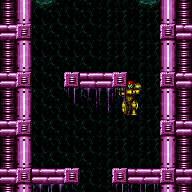
Use a 2-tap shortcharge and jump into the room with a last-frame jump, breaking the bomb block with blue speed, and making it all the way through the top door. Use angle to break spin, and do a momentum conserving turnaround either on the same frame or one frame later; this first turnaround should be done early enough that the turnaround is complete by the time Samus clears the two-tile passage in the middle of the room. The second momentum conserving turnaround must be done somewhat late, and by switching from holding forward to holding backward one frame later (a perfect 'boomerang'). Shoot open the door, and use a third momentum conserving turnaround on it as it opens. Lower run speeds are generally better, as long as the extra run speed is at least $3.4. this gives up to a 7-frame window for the first turnaround, and typically a 4-frame window for the second turnaround if the first turnaround is done early enough. A perfect boomerang is always required for the second turnaround, regardless of where in the window it is done. It is recommended to buffer the spin break, by holding angle (up or down), jump, and forward through the transition, then switching from forward to backward, with at most 1 frame of neutral in between, while still holding jump and angle. Entrance condition: {
"comeInGettingBlueSpeed": {
"length": 0,
"openEnd": 1,
"minExtraRunSpeed": "$3.4",
"maxExtraRunSpeed": "$3.F"
}
}Requires: {
"notable": "Cross Room Jump Boomerang To Top"
}
"h_blueJump"
"canInsaneJump"
"canCrossRoomJumpIntoWater"
"canMomentumConservingTurnaround"
{
"noFlashSuit": {}
}Exit condition: {
"leaveNormally": {}
}Unlocks doors: {"types":["super"],"requires":[]}
{"types":["missiles","powerbomb"],"requires":["never"]} |
From: 2
Right Door
To: 3
Top Door

Use Screw Attack to break the bomb block by entering from a non-water room with a spin jump, and make it all the way through the top door. Ideally, gain speed using between 13 and 13.5 tiles of runway (with an open end). Longer runway lengths can also work, up to 17 tiles, but will make the trick somewhat more precise. Use angle to break spin, and do a momentum conserving turnaround either on the same frame or one frame later; this first turnaround should be done early enough that the turnaround is complete by the time Samus clears the two-tile passage in the middle of the room. The second momentum conserving turnaround must be done somewhat late, and by switching from holding forward to holding backward one frame later (a perfect 'boomerang'). Shoot open the door, and use a third momentum conserving turnaround on it as it opens. The optimal amount of extra run speed is $3.4 or $3.5, by using 13 tiles of runway or about a half tile more; this gives a 7-frame window for the first turnaround, and typically a 4-frame window for the second turnaround if the first turnaround is done early enough. Extra run speeds between $3.6 and $3.F can also work, but with shorter windows. A perfect boomerang is always required for the second turnaround, regardless of where in the window it is done. It is recommended to buffer the spin break, by holding angle (up or down), jump, and forward through the transition, then switching from forward to backward, with at most 1 frame of neutral in between, while still holding jump and angle. Entrance condition: {
"comeInJumping": {
"speedBooster": "yes",
"minTiles": 13
}
}Requires: {
"notable": "Cross Room Jump Boomerang To Top"
}
"canInsaneJump"
"canCrossRoomJumpIntoWater"
"ScrewAttack"
"canMomentumConservingTurnaround"
{
"noFlashSuit": {}
}Exit condition: {
"leaveNormally": {}
}Unlocks doors: {"types":["super"],"requires":[]}
{"types":["missiles","powerbomb"],"requires":["never"]}Dev note: This does not have collision oscillation. |
|
Use a 2-tap shortcharge and jump into the room with a last-frame jump, breaking the bomb block with blue speed, and making it all the way through the top door. Use angle to break spin, and do a momentum conserving turnaround either on the same frame or one frame later; this first turnaround should be done early enough that the turnaround is complete by the time Samus clears the two-tile passage in the middle of the room. Do a second momentum conserving turnaround somewhat late, and by switching from holding forward to holding backward one frame later (a perfect 'boomerang'). Lower run speeds are generally better, as long as the extra run speed is at least $3.2. this gives up to a 7-frame window for the first turnaround, and typically a 4-frame window for the second turnaround if the first turnaround is done early enough. A perfect boomerang is always required for the second turnaround, regardless of where in the window it is done. It is recommended to buffer the spin break, by holding angle (up or down), jump, and forward through the transition, then switching from forward to backward, with at most 1 frame of neutral in between, while still holding jump and angle. Entrance condition: {
"comeInGettingBlueSpeed": {
"length": 0,
"openEnd": 1,
"minExtraRunSpeed": "$3.2",
"maxExtraRunSpeed": "$3.F"
}
}Requires: {
"notable": "Cross Room Jump Boomerang To Top"
}
"h_blueJump"
"canInsaneJump"
"canCrossRoomJumpIntoWater"
"canMomentumConservingTurnaround"
"h_trickyToCarryFlashSuit" |
|
Use Screw Attack to break the bomb block by entering from a non-water room with a last-frame spin jump, and make it to the platform below the top door. Longer runway lengths can also work, up to 17 tiles, but will make the trick somewhat more precise. Use angle to break spin, and do a momentum conserving turnaround either on the same frame or one frame later; this first turnaround should be done early enough that the turnaround is complete by the time Samus clears the two-tile passage in the middle of the room. Do a second momentum conserving turnaround somewhat late, and by switching from holding forward to holding backward one frame later (a perfect 'boomerang'). The optimal amount of extra run speed is between $3.2 and $3.5, by using 13 tiles of runway or about a half tile more or less; this gives a 7-frame window for the first turnaround, and typically a 4-frame window for the second turnaround if the first turnaround is done early enough. Extra run speeds between $3.6 and $3.F can also work, but with shorter windows. A perfect boomerang is always required for the second turnaround, regardless of where in the window it is done. It is recommended to buffer the spin break, by holding angle (up or down), jump, and forward through the transition, then switching from forward to backward, with at most 1 frame of neutral in between, while still holding jump and angle. Entrance condition: {
"comeInJumping": {
"speedBooster": "yes",
"minTiles": 12.4375
}
}Requires: {
"notable": "Cross Room Jump Boomerang To Top"
}
"canInsaneJump"
"canCrossRoomJumpIntoWater"
"ScrewAttack"
"canMomentumConservingTurnaround"
"h_trickyToCarryFlashSuit"Dev note: This does not have collision oscillation. |
|
Jump into a momentum-conserving morph with blue speed to break the bomb block and continue up to the top of the room. In most cases, after pressing down to initiate the momentum-conserving morph, all inputs can be released; holding forward as the morph completes would generally give too much speed, causing Samus to bonk horizontally. Tapping (not holding) backward can sometimes help in dodging the platforms while ascending, by reversing Samus' horizontal momentum. Entrance condition: {
"comeInWithSidePlatform": {
"platforms": [
{
"minHeight": 1,
"maxHeight": 1,
"minTiles": 16,
"speedBooster": "yes",
"obstructions": [
[
1,
0
]
],
"requires": [
{
"getBlueSpeed": {
"usedTiles": 14,
"openEnd": 0
}
},
"h_blueJump",
"canInsaneMidAirMorph",
"canBeExtremelyPatient"
],
"note": [
"Applies to Lava Dive Room."
],
"detailNote": [
"This can be done with extra run speed $2.0 or $2.1 by holding forward while morphing,",
"and releasing soon afterward, after a precise amount of time.",
"Alternatively it can be done extra run speed $2.3 or higher."
]
},
{
"minHeight": 2,
"maxHeight": 2,
"minTiles": 27.4375,
"speedBooster": "yes",
"obstructions": [
[
1,
0
]
],
"requires": [
{
"getBlueSpeed": {
"usedTiles": 24,
"openEnd": 1
}
},
"h_blueJump"
],
"note": [
"Applies to Dust Torizo Room and Noob Bridge."
],
"detailNote": [
"Jump through the door with an extra run speed of $3.1 or less."
]
},
{
"minHeight": 3,
"maxHeight": 3,
"minTiles": 28.2472,
"speedBooster": "yes",
"obstructions": [
[
1,
0
]
],
"requires": [
{
"getBlueSpeed": {
"usedTiles": 24,
"openEnd": 1
}
},
"h_blueJump"
],
"note": [
"Applies to Double Chamber."
]
},
{
"minHeight": 3,
"maxHeight": 3,
"minTiles": 39.4375,
"speedBooster": "yes",
"obstructions": [
[
3,
2
]
],
"requires": [
{
"getBlueSpeed": {
"usedTiles": 24,
"openEnd": 1
}
},
"h_blueJump",
"canInsaneMidAirMorph"
],
"note": [
"Applies to Metal Pirates Room."
]
}
]
}
}Requires: "canCrossRoomJumpIntoWater" "canMomentumConservingMorph" "canInsaneJump" Clears obstacles: A |
|
Use blue speed to break the bomb block by entering from a non-water room with a spin jump, and make it up to the center of the room. It helps to enter as low as possible and with as much horizontal speed as possible and with HiJump turned off. Enter with extra run speed between $3.2 and $3.F, with the lower speeds in this range being better. Entrance condition: {
"comeInGettingBlueSpeed": {
"length": 0,
"openEnd": 1,
"minExtraRunSpeed": "$3.2",
"maxExtraRunSpeed": "$3.F"
}
}Requires: "h_blueJump" "canInsaneJump" "canCrossRoomJumpIntoWater" "canMomentumConservingTurnaround" Dev note: This does not have collision oscillation. |
From: 2
Right Door
To: 9
Center Platforms
Use Screw Attack to break the bomb block by entering from a non-water room with a spin jump, and make it up to the center of the room. It helps to enter as low as possible and with as much horizontal speed as possible and with HiJump turned off. Enter with extra run speed between $3.2 and $3.F, with the lower speeds in this range being better. Entrance condition: {
"comeInJumping": {
"speedBooster": "yes",
"minTiles": 12.4375
}
}Requires: {
"notable": "Cross Room Jump with Screw Attack"
}
"canInsaneJump"
"canCrossRoomJumpIntoWater"
"ScrewAttack"
"canMomentumConservingTurnaround"Dev note: This does not have collision oscillation. |
From: 1
Left Door
To: 5
Left Pillar Junction

Gain momentum in the room to the left, then jump in this room in order to land on the first pillar. Ensure that Speed Booster is disabled. Requires a runway of only approximately 0.5 tiles in the adjacent room. Perform an air ball before hitting the ceiling in order to land on the first pillar. Entrance condition: {
"comeInRunning": {
"speedBooster": "no",
"minTiles": 1
}
}Requires: "canLateralMidAirMorph" "canCrossRoomJumpIntoWater" "HiJump" "canPlayInSand" |
|

Bomb boost through the doorway. Get the bomb boost while as close to the door transition as possible in order to get to the first pillar. Entrance condition: {
"comeInWithBombBoost": {}
}Requires: "canCrossRoomJumpIntoWater" |
|
Gain momentum in the room to the left, then jump at the edge of the runway in order to land on the first pillar. Requires a runway of at least 2 tiles (with no open end) in the adjacent room. Shrinking Samus' hitbox before landing makes the jump a little easier. Entrance condition: {
"comeInRunning": {
"speedBooster": "any",
"minTiles": 1.4375
}
}Requires: "HiJump" "canCrossRoomJumpIntoWater" "canTrickyJump" "canPlayInSand" Dev note: This is not technically a canCrossRoomJumpIntoWater, but it is used here because of the way the momentum changes as Samus enters the water. |
|

Gain momentum in the room to the left, then jump after entering this room in order to land on the first pillar. Ensure that Speed Booster is disabled. Entrance condition: {
"comeInRunning": {
"speedBooster": "no",
"minTiles": 5
}
}Requires: "canCrossRoomJumpIntoWater" "canPlayInSand" "canCarefulJump" Dev note: This is not technically a canCrossRoomJumpIntoWater, but it is used here because of the way the momentum changes as Samus enters the water. |
|
Enter with at least 1 tile of run speed from an air room, with Speed Booster unequipped. Jump from near the end of the runway (though a jump from 1-2 tiles away from the end can still work). Press pause while crossing the narrow first sandfall, then perform a lateral mid-air morph after exiting the sandfall. Equip both Spring Ball and Speed Booster, and perform a mid-air Spring Ball jump at somewhere close to the maximum height. Unequip Spring Ball while descending through the wide second sidefall. Entrance condition: {
"comeInRunning": {
"speedBooster": "no",
"minTiles": 1
}
}Requires: {
"notable": "Spring Fling with Momentum"
}
"canCrossRoomJumpIntoWater"
"canPlayInSand"
"canLateralMidAirMorph"
"canTrickySpringBallJump"
"canSpringFling"
"h_unpauseKeepMomentum" |
|

Gain momentum in the room to the left, then jump in this room in order to land on the first pillar. Ensure that Speed Booster is disabled. With a short runway of 4 tiles (with an open end) in the adjacent room, it is required to jump as late as possible at the edge of the runway in this room. Shrinking Samus' hitbox before landing makes the jump a little easier. Entrance condition: {
"comeInRunning": {
"speedBooster": "no",
"minTiles": 4
}
}Requires: "canCrossRoomJumpIntoWater" "canPlayInSand" "canTrickyJump" Dev note: This is not technically a canCrossRoomJumpIntoWater, but it is used here because of the way the momentum changes as Samus enters the water. |