canComplexCarryFlashSuit (Extreme)


The ability to preserve a flash suit while performing strats that have a moderately high risk of losing the flash suit. For example, jumping into an IBJ without HiJump, which can be done from an angle down jump or a spin jump. This can also sometimes have applications while dodging enemies or while taking damage from them. Damage boosting can be tricky, as it requires holding both backwards and jump until Samus lands; releasing either too early will use the flash suit. It is possible to morph and unmorph midair to switch from a "jumping" to "falling" state, in order to be able to aim up or diagonally up while midair; one common reason to do this is to grapple across a ceiling, which requires a morph and unmorph between each swing.
Other examples include grapple jumping with HiJump, and, using a bomb boost to escape water, which can be made reasonable by holding shot to prevent sparking while in the water. This also includes the ability to gate glitch with either Spring Ball or underwater; with Spring Ball - morph, jump, then unmorph in order to be able to angle up shot; while underwater - hold down while jumping or crouch jumping, then morph and unmorph in order to be able to angle up shot. It is possible to ice clip with a frozen enemy, which requires the enemy to be frozen pixel-perfectly at a location much higher than normal, because Samus is not able to crouch jump or use X-ray. It is also possible to use a flash suit to ceiling clip, which can be useful as it expands the pixel window for clipping, and can be done suitless underwater.
Dependencies: canCarryFlashSuit, canHorizontalShinespark, canHorizontalMidairShinespark, canShinechargeMovementComplex, canMidairShinespark, canShinespark, canShinechargeMovement
Dev note: FIXME: Unusual uses of a flash suit, or flash suit ceiling clips can eventually be separated off into a separate tech.
Strats ()
|
Requires: {
"or": [
{
"and": [
"Grapple",
"h_midAirShootUp"
]
},
"SpaceJump"
]
} |
From: 1
Top Left Door
To: 4
Top Junction (Right of Spikes)
Requires: {
"haveBlueSuit": {}
}
{
"spikeHits": 2
}
{
"or": [
{
"tech": "canHorizontalDamageBoost"
},
"h_complexToCarryFlashSuit",
{
"spikeHits": 1
}
]
} |
From: 1
Top Left Door
To: 4
Top Junction (Right of Spikes)
Requires: "canUseIFrames"
"h_pauseAbuseMinimalReserveRefill"
{
"or": [
"canDash",
{
"and": [
"h_pauseAbuseMinimalReserveRefill",
{
"or": [
{
"and": [
{
"tech": "canHorizontalDamageBoost"
},
"h_complexToCarryFlashSuit"
]
},
"h_pauseAbuseMinimalReserveRefill"
]
}
]
}
]
} |
|
Requires: {
"or": [
{
"and": [
"Grapple",
"h_midAirShootUp"
]
},
"SpaceJump"
]
} |
From: 4
Middle Junction (Left of Morph Tunnel)
To: 1
Left Door

After destroying a single bomb block, Samus can spin jump into its spot to quickly escape the acid. To avoid the acid completely, morph quickly at the right height and place a bomb. Requires: "canDash"
{
"or": [
"canCarefulJump",
{
"acidFrames": 35
}
]
}
"h_useMorphBombs"
{
"or": [
"canTrickyJump",
{
"and": [
"canCarefulJump",
"canBombHorizontally",
{
"acidFrames": 35
}
]
},
{
"acidFrames": 100
}
]
}
{
"or": [
{
"and": [
"canTrickyJump",
"canTrickyWallJump"
]
},
{
"and": [
"canCarefulJump",
{
"acidFrames": 35
}
]
},
{
"acidFrames": 100
}
]
}
"h_complexToCarryFlashSuit"Clears obstacles: A, B |
From: 1
Left Door
To: 2
Right Door
This is a series of precise jumps to fit between the solid walls while clearing a path through the room. Breaking the center blocks opens up a runway that can be used to charge a new spark in room. Entrance condition: {
"comeInBlueSpinning": {
"unusableTiles": 0
}
}Requires: {
"notable": "Blue Space Jump"
}
"canBlueSpaceJump"
"canTrickyJump"
"h_complexToCarryFlashSuit"Clears obstacles: A |
From: 1
Left Door
To: 2
Right Door
This is a series of precise jumps to fit between the solid walls while clearing a path through the room. Breaking the center blocks opens up a runway that can be used to charge a new spark in room. Entrance condition: {
"comeInGettingBlueSpeed": {
"length": 6,
"openEnd": 1,
"steepUpTiles": 1,
"steepDownTiles": 1
}
}Requires: {
"notable": "Blue Space Jump"
}
"canBlueSpaceJump"
"canTrickyJump"
"h_complexToCarryFlashSuit"Clears obstacles: A |
From: 2
Right Door
To: 1
Left Door
This is a series of precise jumps to fit between the solid walls while clearing a path through the room. Breaking the center blocks opens up a runway that can be used to charge a new spark in room. Entrance condition: {
"comeInBlueSpinning": {
"unusableTiles": 0
}
}Requires: {
"notable": "Blue Space Jump"
}
"canBlueSpaceJump"
"canTrickyJump"
"h_complexToCarryFlashSuit"Clears obstacles: A |
From: 2
Right Door
To: 1
Left Door
This is a series of precise jumps to fit between the solid walls while clearing a path through the room. Breaking the center blocks opens up a runway that can be used to charge a new spark in room. Entrance condition: {
"comeInGettingBlueSpeed": {
"length": 6,
"openEnd": 1,
"steepUpTiles": 1,
"steepDownTiles": 1
}
}Requires: {
"notable": "Blue Space Jump"
}
"canBlueSpaceJump"
"canTrickyJump"
"h_complexToCarryFlashSuit"Clears obstacles: A |
|


Jump, aim up, and fire Grapple mid-air to clip the beam through the ceiling. Requires: {
"resetRoom": {
"nodes": [
1,
2
]
}
}
"canUseGrapple"
"canTrickyJump"
{
"cycleFrames": 150
}
{
"or": [
{
"noFlashSuit": {}
},
{
"and": [
"canComplexCarryFlashSuit",
"h_useSpringBall",
{
"cycleFrames": 60
}
]
},
{
"and": [
"canTrickyCarryFlashSuit",
"canInsaneMidAirMorph",
"canBeExtremelyPatient",
{
"cycleFrames": 200
}
]
}
]
}Farm cycle drops: 1 Geemer (orange) |
|
Hold angle-up, jump, bonk the ceiling, and use Grapple just before landing. Moonwalk into the transition on the same frame that the Grapple Beam reaches the Grapple block. Continue holding Grapple through the door transition to initiate a teleport in the next room. Requires: {
"notable": "Leave With Grapple Teleport"
}
"canMoonwalk"
"canInsaneJump"
{
"or": [
{
"noFlashSuit": {}
},
{
"and": [
"h_useSpringBall",
"canComplexCarryFlashSuit"
]
}
]
}Exit condition: {
"leaveWithGrappleTeleport": {
"blockPositions": [
[
7,
2
]
]
}
} |
|
Requires: {
"or": [
"SpaceJump",
{
"and": [
"Grapple",
{
"or": [
{
"noFlashSuit": {}
},
"h_midAirShootUp",
"canInsaneJump"
]
}
]
}
]
}Dev note: This avoids collecting the item. |
|
Requires: "h_blueGateGlitch" Clears obstacles: B |
|


Open the gate (Wave Beam or gate glitch) and clear the Small Sidehoppers for a runway. Use respawning Geegas for energy. Entrance condition: {
"comeInWithRMode": {}
}Requires: {
"or": [
"Wave",
"h_blueGateGlitch",
{
"and": [
{
"notable": "Grapple Gate Glitch"
},
"canPreciseGrapple",
"h_speedJump",
"canTrickyJump"
]
}
]
}
{
"refill": [
"Energy"
]
}
{
"canShineCharge": {
"usedTiles": 30,
"openEnd": 0
}
}
{
"autoReserveTrigger": {}
}
"canRModeSparkInterrupt"Clears obstacles: B |
|


Requires: {
"or": [
{
"obstaclesCleared": [
"A"
]
},
{
"enemyDamage": {
"enemy": "Sm. Sidehopper",
"type": "contact",
"hits": 1
}
}
]
}
{
"or": [
"SpaceJump",
"canWallJump",
{
"and": [
"Grapple",
"h_midAirShootUp",
{
"obstaclesNotCleared": [
"C"
]
}
]
},
{
"and": [
"HiJump",
"canSpringBallJumpMidAir"
]
}
]
}Dev note: The reverse gate glitch may be executed earlier from node 1 -> 1. |
|
Entrance condition: {
"comeInJumping": {
"speedBooster": "any",
"minTiles": 1
}
}Requires: "canPrepareForNextRoom"
{
"or": [
"SpaceJump",
"canWallJump",
{
"and": [
"Grapple",
"h_midAirShootUp",
{
"obstaclesNotCleared": [
"C"
]
}
]
},
{
"and": [
"HiJump",
"canSpringBallJumpMidAir"
]
}
]
} |
|


Requires: {
"or": [
"SpaceJump",
{
"and": [
"Grapple",
"h_midAirShootUp"
]
}
]
} |
From: 1
Left Door
To: 3
Safe Block in the Middle of the Room
Requires: {
"or": [
"SpaceJump",
{
"and": [
"Grapple",
"h_midAirShootUp"
]
}
]
} |
|


Requires: {
"or": [
"SpaceJump",
{
"and": [
"Grapple",
"h_midAirShootUp"
]
}
]
} |
From: 2
Right Door
To: 3
Safe Block in the Middle of the Room
Requires: {
"or": [
"SpaceJump",
{
"and": [
"Grapple",
"h_midAirShootUp"
]
}
]
} |
|
Fill up with the respawning Geegas. Climb to the top of the tower without killing the Rippers. Let the shot block respawn then shinecharge across it. Then quickly jump down into a Ripper to interrupt. Entrance condition: {
"comeInWithRMode": {}
}Requires: {
"refill": [
"Energy"
]
}
{
"or": [
"canTrivialUseFrozenEnemies",
{
"and": [
{
"notable": "Hero Shot"
},
"canHeroShot",
"canTrickyWallJump"
]
},
{
"and": [
"SpaceJump",
"HiJump",
"h_midAirShootUp",
"canTrickyJump"
]
},
{
"and": [
"canPreciseSpaceJump",
"canTrickyDodgeEnemies",
"h_midAirShootUp"
]
}
]
}
{
"or": [
{
"canShineCharge": {
"usedTiles": 12,
"openEnd": 0
}
},
{
"and": [
{
"doorUnlockedAtNode": 5
},
{
"canShineCharge": {
"usedTiles": 13,
"openEnd": 0
}
}
]
}
]
}
{
"autoReserveTrigger": {
"maxReserveEnergy": 95
}
}
"canRModeSparkInterrupt"Clears obstacles: B Unlocks doors: {"nodeId":5,"types":["ammo"],"requires":[]} |
From: 2
Middle Left Door (Behind Power Bomb Blocks)
To: 5
Top Right Door
Fill up with the respawning Geegas. Climb to the top of the tower without killing the Rippers. Let the shot block respawn then shinecharge across it. Then quickly jump down into a Ripper to interrupt. Entrance condition: {
"comeInWithRMode": {}
}Requires: "h_usePowerBomb"
{
"refill": [
"Energy"
]
}
{
"or": [
"canTrivialUseFrozenEnemies",
{
"and": [
{
"notable": "Hero Shot"
},
"canHeroShot",
"canTrickyWallJump"
]
},
{
"and": [
"SpaceJump",
"HiJump",
"h_midAirShootUp",
"canTrickyJump"
]
},
{
"and": [
"canPreciseSpaceJump",
"canTrickyDodgeEnemies",
"h_midAirShootUp"
]
}
]
}
{
"or": [
{
"canShineCharge": {
"usedTiles": 12,
"openEnd": 0
}
},
{
"and": [
{
"doorUnlockedAtNode": 5
},
{
"canShineCharge": {
"usedTiles": 13,
"openEnd": 0
}
}
]
}
]
}
{
"autoReserveTrigger": {
"maxReserveEnergy": 95
}
}
"canRModeSparkInterrupt"Clears obstacles: B Unlocks doors: {"nodeId":5,"types":["ammo"],"requires":[]} |
|
Fill up with the respawning Geegas. Climb back to the top of the tower without killing the Rippers. Let the shot block respawn then shinecharge across it. Then quickly jump down into a Ripper to interrupt. Entrance condition: {
"comeInWithRMode": {}
}Requires: {
"refill": [
"Energy"
]
}
{
"or": [
"canTrivialUseFrozenEnemies",
{
"and": [
{
"notable": "Hero Shot"
},
"canHeroShot",
"canTrickyWallJump"
]
},
{
"and": [
"SpaceJump",
"HiJump",
"h_midAirShootUp",
"canTrickyJump"
]
},
{
"and": [
"canPreciseSpaceJump",
"canTrickyDodgeEnemies",
"h_midAirShootUp"
]
}
]
}
{
"or": [
{
"canShineCharge": {
"usedTiles": 12,
"openEnd": 0
}
},
{
"and": [
{
"doorUnlockedAtNode": 5
},
{
"canShineCharge": {
"usedTiles": 13,
"openEnd": 0
}
}
]
}
]
}
{
"autoReserveTrigger": {
"maxReserveEnergy": 95
}
}
"canRModeSparkInterrupt"Clears obstacles: B Unlocks doors: {"nodeId":5,"types":["ammo"],"requires":[]} |
From: 9
Junction (Top Rippers)
To: 5
Top Right Door


Climb the top of Red Tower with just Space Jump. This can be done by dodging the Rippers and shooting the block as Samus is going upward, so she goes through the block as it breaks. The positioning and timing of the final jump and shot is more precise without HiJump. Requires: "canPreciseSpaceJump" "canTrickyDodgeEnemies" "h_midAirShootUp" "h_trickyToCarryFlashSuit" |
From: 9
Junction (Top Rippers)
To: 5
Top Right Door
Climb the top of Red Tower with just Space Jump. This can be done by shooting the block as Samus is going upward, so she goes through the block as it breaks. Alternatively, this can be done by shooting the block while falling right as it goes off screen, then using well-timed short space jumps to go up as rapidly as possible before the block respawns. Requires: {
"notable": "Fast Climb with Space Jump"
}
"SpaceJump"
"canTrickyJump"
{
"or": [
{
"obstaclesCleared": [
"B"
]
},
{
"haveBlueSuit": {}
}
]
}
{
"or": [
{
"and": [
{
"noBlueSuit": {}
},
"h_midAirShootUp"
]
},
{
"noFlashSuit": {}
}
]
} |
From: 9
Junction (Top Rippers)
To: 5
Top Right Door
Climb the top of Red Tower with just HiJump and Space Jump. This can be done by dodging the Rippers and shooting the block as Samus is going upward, so she goes through the block as it breaks. Requires: "SpaceJump"
"HiJump"
"h_midAirShootUp"
"canTrickyJump"
{
"or": [
{
"noFlashSuit": {}
},
{
"and": [
{
"noBlueSuit": {}
},
{
"enemyDamage": {
"enemy": "Ripper",
"type": "contact",
"hits": 1
}
}
]
}
]
}Dev note: With a flash suit, it is possible to mid-air morph, shoot diagonally, fall while hitting a Ripper, then quickly and precisely climb back up. |
|
This strat is for killing all of the Rippers and then using Space Jump to get up without consecutive wall jumps. Space jump up near the shot block, then shoot it while falling right as it goes off screen, then space jump back up. Requires: {
"noBlueSuit": {}
}
"SpaceJump"
"h_midAirShootUp"
{
"or": [
"HiJump",
{
"and": [
"canCarefulJump",
"canWallJump"
]
}
]
}
{
"obstaclesCleared": [
"B"
]
} |
|
Kill the Rippers then wall jump up. Requires: {
"noBlueSuit": {}
}
"canConsecutiveWallJump"
"canPreciseWallJump"
"h_midAirShootUp"
{
"or": [
"canTrickyWallJump",
"canSpringwall",
"HiJump"
]
}
{
"obstaclesCleared": [
"B"
]
}Dev note: With these tech, it's not hard to get up |
|
Requires: "canDash"
{
"enemyKill": {
"enemies": [
[
"Green Space Pirate (standing)",
"Green Space Pirate (standing)",
"Green Space Pirate (standing)"
]
],
"excludedWeapons": [
"Bombs"
]
}
}
{
"or": [
"canDodgeWhileShooting",
"ScrewAttack",
{
"enemyDamage": {
"enemy": "Mini-Kraid",
"type": "spike",
"hits": 1
}
}
]
}
{
"or": [
{
"enemyKill": {
"enemies": [
[
"Mini-Kraid"
]
],
"excludedWeapons": [
"PowerBeam",
"Bombs",
"Charge",
"Ice",
"Wave",
"Spazer"
]
}
},
{
"enemyDamage": {
"enemy": "Mini-Kraid",
"type": "spike",
"hits": 3
}
},
{
"and": [
{
"enemyKill": {
"enemies": [
[
"Mini-Kraid"
]
],
"explicitWeapons": [
"Wave",
"Spazer"
]
}
},
{
"enemyDamage": {
"enemy": "Mini-Kraid",
"type": "spike",
"hits": 2
}
}
]
},
"canInsaneJump"
]
}
{
"or": [
"h_complexToCarryFlashSuit",
{
"enemyDamage": {
"enemy": "Mini-Kraid",
"type": "spike",
"hits": 3
}
}
]
}Clears obstacles: A Dev note: FIXME: Collecting the drops from the pirates could make the Mini-Kraid spike hits not matter much. |
|
Kill the pirates by placing Bombs next to them without touching them. With low Energy, it is possible to jump over the pirates and kill Mini-Kraid first, but it is difficult to do so damageless. Requires: "canDash"
"canDodgeWhileShooting"
{
"enemyKill": {
"enemies": [
[
"Green Space Pirate (standing)",
"Green Space Pirate (standing)",
"Green Space Pirate (standing)"
]
],
"explicitWeapons": [
"Bombs"
]
}
}
{
"or": [
"canTrickyJump",
{
"enemyDamage": {
"enemy": "Green Space Pirate (standing)",
"type": "contact",
"hits": 1
}
}
]
}
{
"or": [
"canInsaneJump",
{
"enemyDamage": {
"enemy": "Mini-Kraid",
"type": "spike",
"hits": 4
}
}
]
}
{
"or": [
"h_complexToCarryFlashSuit",
{
"enemyDamage": {
"enemy": "Mini-Kraid",
"type": "spike",
"hits": 3
}
}
]
}Clears obstacles: A Dev note: FIXME: Collecting the drops from the pirates could make the Mini-Kraid spike hits not matter much. |
|
Getting up during Phase 2 can be done by jumping on Kraid's projectile platforms or a well timed crouch jump + down grab. Requires: "Charge"
{
"or": [
"Wave",
"Spazer",
"Plasma",
"canBePatient"
]
}
{
"or": [
"HiJump",
"canWallJump",
"SpaceJump",
"canSpringBallJumpMidAir",
{
"and": [
"canDodgeWhileShooting",
{
"or": [
"canCarefulJump",
"h_crouchJumpDownGrab"
]
}
]
}
]
}
"h_complexToCarryFlashSuit"Clears obstacles: f_DefeatedKraid Sets flags: f_DefeatedKraid |
|

Only 2 Missiles are needed to get Kraid to stand up, after which they are farmable. Getting up during Phase 2 can be done by jumping on Kraid's projectile platforms or a well timed crouch jump + down grab. Requires: {
"ammo": {
"type": "Missile",
"count": 2
}
}
{
"or": [
"HiJump",
"canWallJump",
"SpaceJump",
"canSpringBallJumpMidAir",
{
"and": [
"canDodgeWhileShooting",
{
"or": [
"canCarefulJump",
"h_crouchJumpDownGrab"
]
}
]
}
]
}
"h_complexToCarryFlashSuit"Clears obstacles: f_DefeatedKraid Sets flags: f_DefeatedKraid |
|

4 supers are required to kill Kraid. Only 1 is needed to get him to stand up, after which they are farmable, even though the drop rate is low. Getting up during Phase 2 can be done by jumping on Kraid's projectile platforms or a well timed crouch jump + down grab. Requires: {
"or": [
{
"ammo": {
"type": "Super",
"count": 5
}
},
{
"and": [
{
"ammo": {
"type": "Super",
"count": 4
}
},
"canDodgeWhileShooting"
]
},
{
"and": [
{
"ammo": {
"type": "Super",
"count": 3
}
},
"canDodgeWhileShooting",
"canBePatient"
]
},
{
"and": [
{
"ammo": {
"type": "Super",
"count": 1
}
},
"canDodgeWhileShooting",
"canBeVeryPatient"
]
}
]
}
{
"or": [
"HiJump",
"canWallJump",
"SpaceJump",
"canSpringBallJumpMidAir",
{
"and": [
"canDodgeWhileShooting",
{
"or": [
"canCarefulJump",
"h_crouchJumpDownGrab"
]
}
]
}
]
}
"h_complexToCarryFlashSuit"Clears obstacles: f_DefeatedKraid Sets flags: f_DefeatedKraid |
|
Wait by the door briefly before spin jumping over and grabbing the item. It is also possible to do this instead by entering with run speed and quickly grabbing the item. Entrance condition: {
"comeInNormally": {}
}Requires: {
"doorUnlockedAtNode": 1
}
"canDash"
"canTrickyJump"
{
"enemyDamage": {
"enemy": "Beetom",
"type": "contact",
"hits": 1
}
}
"h_complexToCarryFlashSuit"Unlocks doors: {"nodeId":1,"types":["super"],"requires":[]}
{"nodeId":1,"types":["missiles","powerbomb"],"requires":["never"]} |
|
Carefully manipulate the Beetoms to avoid all damage. Entrance condition: {
"comeInNormally": {}
}Requires: {
"doorUnlockedAtNode": 1
}
"canDash"
"canTrickyDodgeEnemies"
"canInsaneJump"
"h_complexToCarryFlashSuit"Unlocks doors: {"nodeId":1,"types":["super"],"requires":[]}
{"nodeId":1,"types":["missiles","powerbomb"],"requires":["never"]} |
|
Carefully manipulate the Beetoms to avoid all damage. Requires: "canDash" "canTrickyDodgeEnemies" "canInsaneJump" "h_complexToCarryFlashSuit" |
|

Freeze the middle Skree mid-air to use it as a platform. Requires: {
"or": [
"canDash",
{
"haveBlueSuit": {}
}
]
}
"canTrickyUseFrozenEnemies"
{
"heatFrames": 260
}
"h_complexToCarryFlashSuit" |
From: 2
Left Side - Top Middle Door
To: 1
Left Side - Top Door

Entrance condition: {
"comeInRunning": {
"speedBooster": "yes",
"minTiles": 25
}
}Requires: "canSpeedyJump" "canPreciseGrapple" "h_midAirShootUp" |
From: 2
Left Side - Top Middle Door
To: 1
Left Side - Top Door
Entrance condition: {
"comeInRunning": {
"speedBooster": "yes",
"minTiles": 18
}
}Requires: "canTrickyDashJump" "canPreciseGrapple" "h_midAirShootUp" |
|
Jump from the Save room door runway and use Grapple to grab onto the Grapple Blocks. Requires: "HiJump" "canSpeedyJump" "canPreciseGrapple" "h_midAirShootUp" |
|
Requires: {
"or": [
{
"and": [
"canPreciseWallJump",
{
"heatFrames": 150
}
]
},
{
"and": [
"SpaceJump",
{
"heatFrames": 210
}
]
},
{
"and": [
"HiJump",
"canWallJump",
{
"heatFrames": 180
}
]
},
{
"and": [
"HiJump",
"canSpeedyJump",
"canCarefulJump",
{
"heatFrames": 100
}
]
}
]
}
{
"or": [
"canHeroShot",
{
"and": [
{
"heatFrames": 100
},
"h_midAirShootUp"
]
}
]
}
{
"or": [
"canDash",
{
"heatFrames": 20
}
]
} |
|
Requires: {
"heatFrames": 220
}
{
"or": [
{
"noFlashSuit": {}
},
"canComplexCarryFlashSuit",
"Ice",
"Wave",
"Spazer",
"Plasma",
{
"heatFrames": 300
}
]
}
{
"or": [
"canDash",
{
"heatFrames": 90
}
]
}Clears obstacles: A |
|
Wall jump up the left wall, perform a delayed wall jump on the Fune. Entrance condition: {
"comeInJumping": {
"speedBooster": "any",
"minTiles": 0
}
}Requires: "canPrepareForNextRoom"
"canTrickyWallJump"
"canConsecutiveWallJump"
"canTrickyJump"
"canUseEnemies"
"canPrepareForNextRoom"
{
"heatFrames": 300
}
{
"or": [
{
"noFlashSuit": {}
},
"canComplexCarryFlashSuit",
"Ice",
"Wave",
"Spazer",
"Plasma",
{
"heatFrames": 300
}
]
}
{
"or": [
"canDash",
{
"heatFrames": 50
}
]
}Dev note: This differs from the canPrepareForNextRoom option of the previous strat only in requiring an air entry. |
|


Entrance condition: {
"comeInJumping": {
"speedBooster": "yes",
"minTiles": 4
}
}Requires: "HiJump"
"canSpeedyJump"
{
"heatFrames": 220
}
{
"or": [
{
"noFlashSuit": {}
},
"canComplexCarryFlashSuit",
"Ice",
"Wave",
"Spazer",
"Plasma",
{
"heatFrames": 300
}
]
}Clears obstacles: A |
|


Jump through the door transition, and wall jump off the second moving platform to get on top. Entrance condition: {
"comeInJumping": {
"speedBooster": "any",
"minTiles": 1
}
}Requires: "canPrepareForNextRoom"
"HiJump"
"canWallJump"
"canTrickyJump"
{
"heatFrames": 260
}
{
"or": [
{
"noFlashSuit": {}
},
"canComplexCarryFlashSuit",
"Ice",
"Wave",
"Spazer",
"Plasma",
{
"heatFrames": 300
}
]
}Clears obstacles: A |
|


Spin jump into the room with at least 2 tiles of run speed. Perform a lateral mid-air morph into a spring ball jump. Land on the second moving platform. Entrance condition: {
"comeInJumping": {
"speedBooster": "any",
"minTiles": 2
}
}Requires: "canPrepareForNextRoom"
"canLateralMidAirMorph"
"canTrickySpringBallJump"
"canTrickyJump"
{
"heatFrames": 280
}
{
"or": [
{
"noFlashSuit": {}
},
"canComplexCarryFlashSuit",
"Ice",
"Wave",
"Spazer",
"Plasma",
{
"heatFrames": 300
}
]
}Clears obstacles: A |
|
Wall jump up the left wall, perform a delayed wall jump on the Fune. Requires: "canTrickyWallJump"
"canConsecutiveWallJump"
"canTrickyJump"
"canUseEnemies"
"canPrepareForNextRoom"
{
"heatFrames": 315
}
{
"or": [
{
"noFlashSuit": {}
},
"canComplexCarryFlashSuit",
"Ice",
"Wave",
"Spazer",
"Plasma",
{
"heatFrames": 300
}
]
}
{
"or": [
"canDash",
{
"heatFrames": 50
}
]
} |
|
Requires: "HiJump"
"SpaceJump"
{
"heatFrames": 250
}
{
"or": [
{
"noFlashSuit": {}
},
{
"and": [
{
"heatFrames": 30
},
{
"or": [
"canComplexCarryFlashSuit",
"Ice",
"Wave",
"Spazer",
"Plasma"
]
}
]
},
{
"heatFrames": 300
}
]
}
{
"or": [
"canDash",
{
"heatFrames": 50
}
]
}Clears obstacles: A |
|


Requires: "HiJump"
"canSpeedyJump"
{
"heatFrames": 220
}
{
"or": [
{
"noFlashSuit": {}
},
{
"and": [
{
"heatFrames": 20
},
{
"or": [
"Wave",
"canTrickyCarryFlashSuit"
]
}
]
},
{
"and": [
{
"heatFrames": 50
},
{
"or": [
"canComplexCarryFlashSuit",
"Ice",
"Spazer",
"Plasma"
]
}
]
},
{
"heatFrames": 300
}
]
}Clears obstacles: A |
|

Run to the right, wait a moment for the platforms to come down, then wall jump off the second platform from the right. Alternatively, wall jump off the wall to the right to reach the platform sooner, to wall jump off of it. Requires: "HiJump"
"canWallJump"
"canTrickyJump"
{
"or": [
{
"and": [
"canHeroShot",
{
"heatFrames": 270
},
"canInsaneWallJump",
"h_trickyToCarryFlashSuit",
"canBeVeryPatient"
]
},
{
"and": [
{
"heatFrames": 360
},
{
"or": [
"h_complexToCarryFlashSuit",
"Ice",
"Wave",
"Spazer",
"Plasma",
{
"heatFrames": 300
}
]
}
]
}
]
}
{
"or": [
"canDash",
{
"heatFrames": 120
}
]
}Clears obstacles: A |
|
Requires: "SpaceJump"
{
"heatFrames": 310
}
{
"or": [
{
"noFlashSuit": {}
},
{
"and": [
{
"heatFrames": 60
},
{
"or": [
"canComplexCarryFlashSuit",
"Ice",
"Wave",
"Spazer",
"Plasma"
]
}
]
},
{
"heatFrames": 300
}
]
}
{
"or": [
"canDash",
{
"heatFrames": 20
}
]
}Clears obstacles: A |
|


Run under the furthest right moving platform to trigger it to move down. Then run back to the left wall, run again to the right, and jump when on the center of the mound just to the left below the platform. Shoot straight up to open the gate on the way up. Requires: "canTrickyDashJump"
{
"heatFrames": 380
}
{
"or": [
{
"noFlashSuit": {}
},
{
"and": [
{
"heatFrames": 70
},
{
"or": [
"canComplexCarryFlashSuit",
"Ice",
"Wave",
"Spazer",
"Plasma"
]
}
]
},
{
"heatFrames": 300
}
]
}Clears obstacles: A |
|


Starting from the left wall, run to the right and jump when on the center of the mound just to the right of the second moving platform from the right. Wall jump off of the platform as it moves down. Requires: "canTrickyDashJump"
"canWallJump"
{
"heatFrames": 300
}
{
"or": [
{
"noFlashSuit": {}
},
{
"and": [
{
"heatFrames": 60
},
{
"or": [
"canComplexCarryFlashSuit",
"Ice",
"Wave",
"Spazer",
"Plasma"
]
}
]
},
{
"heatFrames": 300
}
]
}Clears obstacles: A |
|
Charge a spark along the bottom of the room and use it to spark through the right side door. Requires opening the door and shutter first. Requires: "canShinechargeMovementComplex"
"HiJump"
{
"or": [
"SpaceJump",
"Grapple"
]
}
{
"or": [
{
"obstaclesCleared": [
"A"
]
},
"Wave",
{
"and": [
"h_heatedBlueGateGlitch",
{
"heatFrames": 60
}
]
}
]
}
{
"or": [
{
"and": [
"canTrickyDashJump",
"canWallJump"
]
},
"SpaceJump"
]
}
{
"canShineCharge": {
"usedTiles": 28,
"gentleUpTiles": 3,
"gentleDownTiles": 3,
"openEnd": 0
}
}
{
"heatFrames": 780
}
{
"shinespark": {
"frames": 57,
"excessFrames": 0
}
}Exit condition: {
"leaveWithSpark": {}
}Dev note: A hero shot variation of this strat might be possible, starting from a node to the left; if nothing else it could be done with a shortcharge on the 12-tile platform to the left. |
|
Requires: {
"heatFrames": 250
}
"h_heatedBlueGateGlitch"
{
"or": [
"canDash",
{
"heatFrames": 85
}
]
}Clears obstacles: A |
|


Requires: "Morph"
{
"heatFrames": 260
}
"h_heatedBlueGateGlitch"Clears obstacles: A |
From: 5
Middle Junction (Ledge Right of Morph Tunnel)
To: 2
Middle Left Door
Requires: "Morph"
{
"heatFrames": 150
}
"h_heatedBlueGateGlitch"
{
"or": [
"canDash",
{
"heatFrames": 65
}
]
}Clears obstacles: A |
From: 5
Middle Junction (Ledge Right of Morph Tunnel)
To: 2
Middle Left Door
Requires: "canDash"
"Morph"
{
"heatFrames": 150
}
"h_heatedBlueGateGlitch"Exit condition: {
"leaveWithRunway": {
"length": 11,
"openEnd": 0,
"gentleDownTiles": 4
}
}Unlocks doors: {"types":["missiles"],"requires":[{"heatFrames":90}]}
{"types":["super"],"requires":[]}
{"types":["powerbomb"],"requires":[{"heatFrames":110}]} |
|
With each jump, turn and hold left just before landing on the spikes, to get knocked back and down to the right, without damage boosting. Then turnaround spin jump to the right for the next jump. Jump can be held the entire time, to buffer the jumps. This method can be used while simultaneously carrying a blue suit and flash suit. Requires: {
"haveBlueSuit": {}
}
"canBlueSuitSpikeJump"
"h_complexToCarryFlashSuit"
{
"heatFrames": 740
}
{
"spikeHits": 6
}
{
"lavaFrames": 110
} |
From: 1
Left Door
To: 2
Right Door
While crossing the Spiky Lava, land on frozen Yapping Maws to reduce the number of spike hits needed. Damage boost towards then freeze the Leftmost enemy as it extends. Morph and unmorph while above the middle Yapping Maw to land on it just above the lava line. Ignore the rightmost Yapping Maw. Delay the damage boost from the spikes slightly in order to rise above the lava before moving. Requires: {
"notable": "Frozen Maw Platforms"
}
"canDash"
"canResetFallSpeed"
"canTrickyUseFrozenEnemies"
"canTrickyJump"
{
"or": [
{
"and": [
{
"notable": "Suitless Damage Boosts"
},
"canHorizontalDamageBoost"
]
},
{
"and": [
{
"spikeHits": 2
},
{
"lavaFrames": 30
},
{
"heatFrames": 240
}
]
}
]
}
"canUseIFrames"
{
"spikeHits": 2
}
{
"lavaFrames": 35
}
{
"heatFrames": 520
}
"h_complexToCarryFlashSuit" |
|


To optimize the Grapple swings for minimal heat damage, 1) hold forward and angle-up the entire time, 2) press down to extend Grapple immediately after each Grapple attachment, 3) release Grapple soon after Samus swings past vertical, 4) re-press Grapple as quickly as possible after release. If there is no runway (or only 1 tile) to gain momentum from the neighboring room, it is faster to begin grappling as quickly as possible, rather than doing a big jump. Requires: "Grapple"
{
"heatFrames": 320
}
{
"or": [
{
"noFlashSuit": {}
},
{
"and": [
"canMidAirMorph",
"canComplexCarryFlashSuit",
{
"heatFrames": 130
}
]
}
]
} |
|
With each jump, turn and hold right just before landing on the spikes, to get knocked back and down to the left, without damage boosting. Then turnaround spin jump to the left for the next jump. Jump can be held the entire time, to buffer the jumps. This method can be used while simultaneously carrying a blue suit and flash suit. Requires: {
"haveBlueSuit": {}
}
"canBlueSuitSpikeJump"
"h_complexToCarryFlashSuit"
{
"heatFrames": 740
}
{
"spikeHits": 6
}
{
"lavaFrames": 110
} |
From: 2
Right Door
To: 1
Left Door
While crossing the Spiky Lava, land on frozen Yapping Maws to reduce the number of spike hits needed. Morph and unmorph while above the rightmost Yapping Maw to land on it just above the lava line. Ignore the second Yapping Maw. Freeze the Leftmost enemy as it extends. Delay the damage boost from the spikes slightly in order to rise above the lava before moving. Requires: "canDash"
{
"notable": "Frozen Maw Platforms"
}
"canResetFallSpeed"
"canTrickyUseFrozenEnemies"
"canTrickyJump"
{
"or": [
{
"and": [
{
"notable": "Suitless Damage Boosts"
},
"canHorizontalDamageBoost"
]
},
{
"and": [
{
"spikeHits": 1
},
{
"lavaFrames": 20
},
{
"heatFrames": 240
}
]
}
]
}
"canUseIFrames"
{
"spikeHits": 2
}
{
"lavaFrames": 35
}
{
"heatFrames": 520
}
"h_complexToCarryFlashSuit" |
|


To optimize the Grapple swings for minimal heat damage, 1) hold forward and angle-up the entire time, 2) press down to extend Grapple immediately after each Grapple attachment, 3) release Grapple soon after Samus swings past vertical, 4) re-press Grapple as quickly as possible after release. If there is no runway (or only 1 tile) to gain momentum from the neighboring room, it is faster to begin grappling as quickly as possible, rather than doing a big jump. Requires: "Grapple"
{
"heatFrames": 320
}
{
"or": [
{
"noFlashSuit": {}
},
{
"and": [
"canMidAirMorph",
"canComplexCarryFlashSuit",
{
"heatFrames": 130
}
]
}
]
} |
|

Requires: "h_heatProof"
{
"or": [
{
"and": [
"h_shinechargeMaxRunway",
{
"obstaclesNotCleared": [
"A"
]
}
]
},
{
"canShineCharge": {
"usedTiles": 14,
"openEnd": 1
}
}
]
}
{
"or": [
{
"and": [
"canComplexCarryFlashSuit",
"can4HighMidAirMorph"
]
},
"canWallJumpInstantMorph"
]
}
{
"spikeHits": 1
}
"h_spikeSuitSpikeHitLeniency"
"canSpikeSuit"
{
"shinespark": {
"frames": 1,
"excessFrames": 1
}
}Clears obstacles: A |
|


Shortcharging and stopping between the crumbles should allow for 3 attemps before the room needs to be reset or a shorter shortcharge is the only option. Requires: "h_SpeedBoosterHallNoRisingLava"
"h_heatProof"
{
"obstaclesNotCleared": [
"A"
]
}
{
"canShineCharge": {
"usedTiles": 17,
"openEnd": 1
}
}
{
"or": [
{
"and": [
"canComplexCarryFlashSuit",
"can4HighMidAirMorph"
]
},
"canWallJumpInstantMorph"
]
}
{
"spikeHits": 1
}
"h_spikeSuitSpikeHitLeniency"
"canSpikeSuit"
{
"shinespark": {
"frames": 1,
"excessFrames": 1
}
}Clears obstacles: A |
From: 5
Bottom Floating Platform Junction
To: 5
Bottom Floating Platform Junction


Requires: {
"heatFrames": 135
}
"h_heatedBlueGateGlitch"Clears obstacles: A |
From: 5
Bottom Floating Platform Junction
To: 5
Bottom Floating Platform Junction

Farm before, during, and after the gate glitch in order to open the gate without wasting ammo or Energy. Requires: {
"notable": "Gate Glitch With Farming"
}
{
"heatFrames": 300
}
"h_gateGlitch"
{
"or": [
{
"ammo": {
"type": "Missile",
"count": 1
}
},
{
"ammo": {
"type": "Super",
"count": 1
}
}
]
}
{
"or": [
"h_heatResistant",
"canTrickyJump",
{
"resourceCapacity": [
{
"type": "RegularEnergy",
"count": 199
}
]
}
]
}Clears obstacles: A Dev note: There is still some leniency built in, so that perfect execution is not required, but Samus ends without losing resources. Without leniency, this can be done with about 235 heatFrames. |
|


Build up 34 tiles worth of run speed and jump into the door on the last frame. Hold angle up through the transition but also aim down to duck below the ceiling until Samus is past it. Fire the Super Missile frame perfectly to open the gate. Entrance condition: {
"comeInRunning": {
"speedBooster": "yes",
"minTiles": 34
}
}Requires: {
"notable": "High Speed Gate Glitch"
}
"h_speedJump"
"h_heatedGreenGateGlitch"
{
"ammo": {
"type": "Super",
"count": 1
}
}
"canInsaneJump"
{
"noFlashSuit": {}
}Clears obstacles: A Dev note: 1 extra tile is added so that you can jump into the door, simplifying the inputs a bit. |
|
Either freeze the Geruta and turn off and on Ice to quickly thaw it and save Energy, or carefully jump over it without freezing it or getting hit. Then lure it left by jumping towards it from below. Freeze it when it performs a larger swoop and use it as a platform to get to the item. Requires: "canDash"
"canTrickyUseFrozenEnemies"
"HiJump"
{
"heatFrames": 1050
}
{
"or": [
"canTrickyDodgeEnemies",
{
"heatFrames": 110
}
]
}
{
"or": [
"canInsaneJump",
{
"heatFrames": 500
}
]
}
{
"or": [
"h_midAirShootUp",
{
"heatFrames": 1000
}
]
}Dev note: The canInsaneJump option is to represent the difference between good and bad Geruta RNG. |
|
Requires: {
"or": [
"SpaceJump",
{
"and": [
"Grapple",
"h_midAirShootUp"
]
}
]
} |
|
Requires: {
"or": [
"f_DefeatedCrocomire",
{
"obstaclesCleared": [
"f_DefeatedCrocomire"
]
}
]
}
{
  "or": [
    "SpaceJump",
    {
      "and": [
        "Grapple",
        "h_midAirShootUp"
      ]
    }
  ]
} |
From: 4
Central Junction
To: 4
Central Junction

This can be a very long fight if Crocomire is stingy with the farming phases. Farming requires careful dodging in order to minimize energy drops. Delay grabbing all of the drops until necessary to reduce the chance of running out of ammo. Requires: {
"notable": "Crocomire with 5 Missiles"
}
"canFarmWhileShooting"
"canBePatient"
{
"or": [
{
"ammo": {
"type": "Missile",
"count": 2
}
},
{
"ammo": {
"type": "Super",
"count": 2
}
}
]
}
{
"resourceCapacity": [
{
"type": "Missile",
"count": 5
}
]
}
"h_complexToCarryFlashSuit"Clears obstacles: f_DefeatedCrocomire Sets flags: f_DefeatedCrocomire Dev note: This strat is notable, not because it's harder than its required tech, but because its tedious, RNG heavy, and players might not want to encounter it. Crocomire does not have a farming phase until he has been hit twice. It is possible to get to the farming phase with 1 PB, but sometimes Croc will just rush Samus into the spikes without ever having farm phases, so it is ignored here. |
|
Requires: "Grapple"
{
"or": [
"HiJump",
"canWallJump"
]
}
"h_midAirShootUp" |
|
Requires: {
"or": [
"h_greenGateGlitch",
{
"obstaclesCleared": [
"A"
]
}
]
}Clears obstacles: A |
|

Carefully swing between the Rippers at the top of the room to the item. The last two swings are the hardest Morphing and unmorphing to reset Samus's fall speed can help give a bit more time to position the Rippers. It can help to Grapple the same Ripper again to get it in a better position. Position the third Ripper far to the right then fling to the fourth, which is far to the right and very close to the ceiling. Moving the fourth Ripper to the right a bit can also help in order to make the last fling less precise. Be careful not to fling directly into the ceiling, as it is easy to hit the uneven surface and fall. Requires: {
"notable": "Indiana Jones Grapple (First Try)"
}
"canUseEnemies"
"canPreciseGrapple"
"h_midAirShootUp"
{
"or": [
{
"and": [
"canInsaneJump",
"h_trickyToCarryFlashSuit"
]
},
{
"and": [
"canResetFallSpeed",
{
"enemyDamage": {
"enemy": "Ripper 2 (green)",
"type": "contact",
"hits": 2
}
}
]
}
]
} |
|


Carefully swing between the Rippers at the top of the room to the item. The last two swings are the hardest Morphing and unmorphing to reset Samus's fall speed can help give a bit more time to position the Rippers. It can help to Grapple the same Ripper again to get it in a better position. Position the third Ripper far to the right then fling to the fourth, which is far to the right and very close to the ceiling. Moving the fourth Ripper to the right a bit can also help in order to make the last fling less precise. Be careful not to fling directly into the ceiling, as it is easy to hit the uneven surface and fall. If Samus falls, it may be helpful to reset the room. Requires: {
"notable": "Indiana Jones Grapple (With Retries)"
}
"canUseEnemies"
"canPreciseGrapple"
"h_midAirShootUp"
{
"or": [
{
"and": [
"canInsaneJump",
"h_trickyToCarryFlashSuit"
]
},
{
"enemyDamage": {
"enemy": "Ripper 2 (green)",
"type": "contact",
"hits": 4
}
}
]
}
{
"or": [
{
"and": [
"HiJump",
"canSpringBallJumpMidAir"
]
},
{
"and": [
"canSpeedyJump",
"HiJump",
"canTrickyWallJump"
]
},
"h_trickySpringwall"
]
} |
|

Involves Grappling off several Rippers, where falling may lead to a soft lock. Morphing and unmorphing to reset Samus's fall speed can help give a bit more time to position the Rippers. It can help to Grapple the same Ripper again to get it in a better position. Positioning the first Ripper far to the left until the second is visible can help make this much easier. Requires: {
"notable": "Indiana Jones Grapple (First Try)"
}
"canUseEnemies"
"canPreciseGrapple"
"h_midAirShootUp"
{
"or": [
{
"and": [
"canInsaneJump",
"h_trickyToCarryFlashSuit"
]
},
{
"and": [
"canResetFallSpeed",
{
"enemyDamage": {
"enemy": "Ripper 2 (green)",
"type": "contact",
"hits": 1
}
}
]
}
]
}Dev note: In general, the return route is easier, but is only useful after doing the left to right strat first. |
|
Involves grappling off a Ripper 2. Requires: "canUseEnemies" "Grapple" "h_midAirShootUp" |
|
Involves grappling off a Ripper 2. Requires: "canUseEnemies" "Grapple" "h_midAirShootUp" |
|
Requires: {
"or": [
"h_heatedGreenGateGlitch",
{
"obstaclesCleared": [
"A"
]
}
]
}
{
"enemyDamage": {
"enemy": "Ripper 2 (red)",
"type": "contact",
"hits": 2
}
}Exit condition: {
"leaveWithRunway": {
"length": 29,
"openEnd": 1
}
} |
|

You can Crystal Flash first, then open the gate, dodge the bottom most rippers that come across the platform, and pick up their Super drops when they hit the light orb. Alternatively, open the gate first, farm the bottom two Rippers with Power Bombs or Screw Attack to get your Supers back and Crystal Flash afterwards. The runway is now clear to shinecharge. Alternatively, you can farm with Screw Attack or Power Bombs. Kill the bottom two Rippers first, then the one bouncing between platforms. Keep the third Ripper from the top alive for the best interrupt. With high reserve energy, take the interrupt close to the right door and with the Ripper moving right - it will not come back in time to hit you again. Once you have blue suit, you cannot kill any more Rippers with Screw Attack, but you are still invulnerable to contact hits. Entrance condition: {
"comeInWithRMode": {}
}Requires: "h_heatedGreenGateGlitch"
{
"or": [
{
"and": [
{
"or": [
{
"resourceAvailable": [
{
"type": "Super",
"count": 10
}
]
},
{
"and": [
{
"resourceAvailable": [
{
"type": "Super",
"count": 8
}
]
},
{
"resourceAvailable": [
{
"type": "Energy",
"count": 51
}
]
},
{
"or": [
"ScrewAttack",
{
"enemyKill": {
"enemies": [
[
"Ripper 2 (red)",
"Ripper 2 (red)"
]
],
"explicitWeapons": [
"PowerBomb"
]
}
}
]
},
{
"heatFrames": 600
},
{
"partialRefill": {
"type": "Super",
"limit": 10
}
}
]
}
]
},
"h_heatedCrystalFlashForReserveEnergy"
]
},
{
"and": [
{
"or": [
"ScrewAttack",
{
"enemyKill": {
"enemies": [
[
"Ripper 2 (red)",
"Ripper 2 (red)"
],
[
"Ripper 2 (red)"
]
],
"explicitWeapons": [
"PowerBomb"
]
}
}
]
},
"h_heatProof",
"h_RModeCanRefillReserves",
{
"resourceMissingAtMost": [
{
"type": "Super",
"count": 2
}
]
},
{
"partialRefill": {
"type": "ReserveEnergy",
"limit": 60
}
}
]
},
{
"and": [
{
"or": [
"ScrewAttack",
{
"enemyKill": {
"enemies": [
[
"Ripper 2 (red)"
]
],
"explicitWeapons": [
"PowerBomb"
]
}
}
]
},
"h_heatProof",
"h_RModeCanRefillReserves",
{
"resourceMissingAtMost": [
{
"type": "Super",
"count": 4
}
]
},
{
"partialRefill": {
"type": "ReserveEnergy",
"limit": 20
}
}
]
}
]
}
{
"canShineCharge": {
"usedTiles": 28,
"openEnd": 0
}
}
{
"autoReserveTrigger": {}
}
{
"or": [
{
"and": [
"h_heatProof",
{
"autoReserveTrigger": {}
},
"canRModeSparkInterrupt"
]
},
"h_heatTriggerRModeSparkInterrupt"
]
}Clears obstacles: A, B |
|
Requires: {
"or": [
"h_heatedGreenGateGlitch",
{
"obstaclesCleared": [
"A"
]
}
]
}
{
"heatFrames": 50
}
{
"or": [
"canDash",
{
"heatFrames": 15
}
]
}Clears obstacles: A Dev note: FIXME: A strat could be added that runs into the room and shoots directly at the gate, instead of stopping in front of it. |
From: 4
Junction Below Bomb Blocks
To: 2
Top Right Door
Jump into the respawning shot block. It helps significantly to aim down to get trapped into the block. A normalized method to set this up is to shoot the block then immediately perform 5 full-height jumps. Requires: {
"obstaclesCleared": [
"B"
]
}
{
"obstaclesNotCleared": [
"A"
]
}
{
"noBlueSuit": {}
}
{
"heatFrames": 600
}
"canJumpIntoRespawningBlock"
{
"or": [
{
"heatFrames": 900
},
{
"and": [
"canInsaneJump",
"canComplexCarryFlashSuit"
]
}
]
}Dev note: The 900 heat frame option gives two leniency attempts. This is likely only useful to avoid a crouch jump and preserve a flash suit. This is not needed on strats that go directly from 9 to 2, because they require a crouch jump or X-ray. |
|
Requires: "f_DefeatedPhantoon"
{
"resetRoom": {
"nodes": [
2
]
}
}
{
"or": [
{
"and": [
"canDash",
{
"or": [
{
"and": [
"ScrewAttack",
{
"cycleFrames": 520
}
]
},
{
"and": [
"canDodgeWhileShooting",
"Plasma",
{
"cycleFrames": 800
}
]
},
{
"and": [
"canDodgeWhileShooting",
"Wave",
"Spazer",
"Ice",
{
"cycleFrames": 930
}
]
},
{
"and": [
"canTrickyDodgeEnemies",
{
"or": [
"Wave",
"Spazer",
"Ice"
]
},
"h_complexToCarryFlashSuit",
{
"cycleFrames": 1400
}
]
},
{
"and": [
"canInsaneJump",
"h_trickyToCarryFlashSuit",
{
"cycleFrames": 2600
}
]
}
]
}
]
},
{
"and": [
{
"haveBlueSuit": {}
},
{
"cycleFrames": 520
}
]
}
]
}Clears obstacles: A Farm cycle drops: 3 Kihunter (yellow), 2 Atomic |
|
Requires: "Grapple" "h_midAirShootUp" |
From: 1
Left Door
To: 1
Left Door

Entrance condition: {
"comeInShinecharged": {}
}Requires: {
"shineChargeFrames": 75
}
"f_DefeatedPhantoon"
"h_spikeSuitSpikeHitLeniency"
"canTrickyJump"
"canComplexCarryFlashSuit"
{
"spikeHits": 1
}
"canPatientSpikeSuit"
{
"shinespark": {
"frames": 1,
"excessFrames": 1
}
} |
From: 2
Right Door
To: 2
Right Door
Entrance condition: {
"comeInShinecharged": {}
}Requires: {
"shineChargeFrames": 75
}
"f_DefeatedPhantoon"
"h_spikeSuitSpikeHitLeniency"
"canTrickyJump"
"canComplexCarryFlashSuit"
{
"spikeHits": 1
}
"canPatientSpikeSuit"
{
"shinespark": {
"frames": 1,
"excessFrames": 1
}
} |
|
Use a mid-air horizontal bomb boost to reach the first platform. Jump across to the last platform. Wait until the water is low, let the platform sink slightly, then jump and horizontal bomb boost to the item. If HiJump is available, then it is possible to simply spin jump from the underwater platform to the first moving platform. If HiJump cannot be disabled, then the bomb boost from the last platform is more difficult: in this case Samus must jump, lay the bomb on the way down, then jump again to a precise height and morph to get the boost. Requires: "f_DefeatedPhantoon" "canJumpIntoIBJ" "canBombHorizontally" "canTrickyJump" "h_complexToCarryFlashSuit" |
|
Use a mid-air horizontal Power Bomb boost to reach the first platform. Jump across to the last platform. Wait until the water is low, let the platform sink slightly, then jump and horizontal Power Bomb boost to the item. If HiJump is available, then it is possible to simply spin jump from the underwater platform to the first moving platform, saving a Power Bomb. If HiJump cannot be disabled, then the Power Bomb boost from the last platform is more difficult: in this case Samus must jump, lay the Power Bomb on the way down, then jump again to a precise height and morph to get the boost. Requires: "f_DefeatedPhantoon"
"canMidAirMorph"
{
"tech": "canJumpIntoIBJ"
}
{
"tech": "canBombHorizontally"
}
"canInsaneJump"
{
"or": [
{
"and": [
"HiJump",
{
"ammo": {
"type": "PowerBomb",
"count": 1
}
}
]
},
{
"ammo": {
"type": "PowerBomb",
"count": 2
}
}
]
}
"h_complexToCarryFlashSuit" |
|


Fling Samus from the first set of grapple blocks to the second set without falling. This requires precise timing but is made easier by morphing and unmorphing to reset Samus' fall speed. Requires: "canPreciseGrapple"
"canLateralMidAirMorph"
"canResetFallSpeed"
{
"or": [
"canInsaneJump",
{
"thornHits": 5
}
]
}
"h_complexToCarryFlashSuit"Dev note: The 5 thornHits are for lenience since it is difficult to get this first try. |
|
From the top right platform, jump to the left into the thorns, then climb the left wall. Requires: {
"thornHits": 1
}
{
"or": [
{
"and": [
"canUseIFrames",
"canDash"
]
},
{
"and": [
{
"tech": "canHorizontalDamageBoost"
},
"h_complexToCarryFlashSuit"
]
},
{
"thornHits": 1
}
]
}
"canWallJump"
{
"not": "f_DefeatedPhantoon"
}
{
"or": [
"canRiskPermanentLossOfAccess",
{
"and": [
"canDash",
"canCarefulJump",
{
"disableEquipment": "HiJump"
},
{
"or": [
"canMoonwalk",
"canTrickyJump"
]
}
]
},
{
"and": [
"Gravity",
"canDash"
]
},
{
"and": [
"canJumpIntoIBJ",
"canBombHorizontally",
"canTrickyJump"
]
},
{
"and": [
"Gravity",
"canSpringBallJumpMidAir"
]
},
"canSpringFling",
{
"and": [
"HiJump",
"Gravity",
"canInsaneJump"
]
}
]
}Dev note: The canCarefulJump and Gravity are here, as with either of those, there is access across with or without f_DefeatedPhantoon. |
|
Fling Samus from the first set of grapple blocks to the second set without falling. Requires precise timing. Requires: "canPreciseGrapple" "canTrickyJump" "h_midAirShootUp" |
|


Requires: "Gravity"
{
  "or": [
    "h_greenGateGlitch",
    {
      "obstaclesCleared": [
        "A"
      ]
    }
  ]
}
Clears obstacles: A |
|
Perform the Gate Glitch by moving towards the gate and firing the super on the correct frame for it to pass through and reach the button on the other side. Due to the water physics, many traditional setups for the glitch will not work. Requires: {
"notable": "Suitless Green Gate Glitch"
}
{
"or": [
"h_underwaterGreenGateGlitch",
{
"obstaclesCleared": [
"A"
]
}
]
}Clears obstacles: A |
From: 1
Bottom Left Door
To: 4
Top Left Door
Requires a runway of at least 4 tiles in the adjacent room. Entrance condition: {
"comeInJumping": {
"speedBooster": "yes",
"minTiles": 4
}
}Requires: "HiJump" "canCrossRoomJumpIntoWater" "canMomentumConservingTurnaround" "h_midAirShootUp" Exit condition: {
"leaveNormally": {}
}Unlocks doors: {"types":["super"],"requires":[]}
{"types":["missiles","powerbomb"],"requires":["never"]}Dev note: Using more run speed to avoid the momentumConservingTurnaround requirement will bonk the door, requiring a turnaround to get through This would be a way to bring high vertical speed into the room on the other side of 4. |
From: 1
Bottom Left Door
To: 4
Top Left Door
Requires a runway of at least 6 tiles in the adjacent room. Using too much run speed can make it harder to avoid bonking the door: in this case, it can help to fire a hero shot to open the door early, while still facing left, and/or use a momentum-conserving turnaround just before touching the door. Entrance condition: {
"comeInJumping": {
"speedBooster": "yes",
"minTiles": 6
}
}Requires: "HiJump" "canCrossRoomJumpIntoWater" "canBufferedMomentumConservingTurnaround" "h_midAirShootUp" Exit condition: {
"leaveNormally": {}
}Unlocks doors: {"types":["super"],"requires":[]}
{"types":["missiles","powerbomb"],"requires":["never"]} |
From: 1
Bottom Left Door
To: 4
Top Left Door

Requires a runway of at least 18 tiles in the adjacent room. Entrance condition: {
"comeInJumping": {
"speedBooster": "yes",
"minTiles": 18
}
}Requires: "canCrossRoomJumpIntoWater" "canTrickyJump" "h_midAirShootUp" Exit condition: {
"leaveNormally": {}
}Unlocks doors: {"types":["super"],"requires":[]}
{"types":["missiles","powerbomb"],"requires":["never"]} |
From: 1
Bottom Left Door
To: 4
Top Left Door
Requires a runway of at least 22 tiles in the adjacent room. Entrance condition: {
"comeInJumping": {
"speedBooster": "yes",
"minTiles": 22
}
}Requires: "canCrossRoomJumpIntoWater" "h_midAirShootUp" Exit condition: {
"leaveNormally": {}
}Unlocks doors: {"types":["super"],"requires":[]}
{"types":["missiles","powerbomb"],"requires":["never"]} |
|
Entrance condition: {
"comeInWithSidePlatform": {
"platforms": [
{
"minHeight": 2,
"maxHeight": 2,
"minTiles": 27.4375,
"speedBooster": "yes",
"obstructions": [
[
1,
0
]
],
"requires": [
"canMomentumConservingTurnaround"
],
"note": [
"This applies to Dust Torizo Room."
],
"devNote": [
"The jump could also be done with a shorter runway, with a tricky dash jump using run speed $4.0 or $4.1.",
"But it wouldn't apply to any more rooms in the game."
]
},
{
"minHeight": 3,
"maxHeight": 3,
"minTiles": 39.4375,
"speedBooster": "yes",
"obstructions": [
[
3,
2
]
],
"requires": [
"canTrickyJump"
],
"note": [
"This applies to Metal Pirates Room."
]
},
{
"minHeight": 2,
"maxHeight": 2,
"minTiles": 45,
"speedBooster": "yes",
"obstructions": [
[
3,
0
]
],
"requires": [
"canInsaneJump",
{
"or": [
"canMomentumConservingMorph",
{
"and": [
"canMomentumConservingTurnaround",
"canBeVeryPatient"
]
}
]
}
],
"note": [
"This applies to Statues Hallway.",
"This can be done in two ways:",
"1) If Morph is available, perform a momentum-conserving morph through the transition,",
"then unmorph as soon as possible after the transition.",
"2) Alternatively, do an extremely precise momentum-conserving turnaround through the transition."
],
"devNote": [
"The momentum-conserving turnaround is double frame-perfect,",
"requiring a last-frame jump and frame-perfect turnaround just before Samus would bonk the ceiling."
]
},
{
"minHeight": 3,
"maxHeight": 3,
"minTiles": 37.4375,
"speedBooster": "yes",
"obstructions": [
[
3,
0
]
],
"requires": [
"canMomentumConservingMorph"
],
"note": [
"This applies to Flyway."
]
},
{
"minHeight": 2,
"maxHeight": 2,
"minTiles": 45,
"speedBooster": "yes",
"obstructions": [
[
4,
0
]
],
"requires": [
"canMomentumConservingMorph",
"canInsaneJump",
"canInsaneMidAirMorph"
],
"note": [
"This applies to Baby Kraid Room.",
"In the previous room, there is a 2-frame window for the jump, just before Samus would hit the door ledge,",
"then a 1-frame or 2-frame window (depending on the jump) for the morph, just before Samus would bonk the ceiling.",
"After the transition, unmorph within the first 2 frames, to conserve upward momentum;",
"if Samus got the later frame for the morph (where the animation does not show as fully morphed in the previous room),",
"then there will only be 1 frame to unmorph."
]
}
]
}
}Requires: "canCrossRoomJumpIntoWater" "h_midAirShootUp" Exit condition: {
"leaveNormally": {}
}Unlocks doors: {"types":["super"],"requires":[]}
{"types":["missiles","powerbomb"],"requires":["never"]}Dev note: We don't include strats here that require HiJump or Spring Ball, since with either of those items you could instead go 1 -> 5 -> 4. |
From: 1
Bottom Left Door
To: 5
Platform Junction Near Top Left Door
Requires: "canSuitlessMaridia" "canTrickyUseFrozenEnemies" "HiJump" "canTrickySpringBallJump" "h_midAirShootUp" |
From: 1
Bottom Left Door
To: 5
Platform Junction Near Top Left Door
Back into the right corner to jump high enough to reach the first overhang. In case of carrying a flash suit, it is possible, though difficult, to get up without killing the Skultera, or to kill the Skultera with hero shots, in case Morph is not available. Requires: "canLongUnderwaterWallJump"
{
"or": [
"h_midAirShootUp",
"canBeExtremelyPatient"
]
}Unlocks doors: {"nodeId":1,"types":["ammo"],"requires":[]} |
From: 5
Morph Passage Doorway
To: 7
Morph Tunnel Item

Turn HiJump and Gravity suit off before jumping and morphing into the tunnel. The crab will not come through the whole tunnel. Retreat to the right to avoid taking a hit. Requires: "canSuitlessMaridia"
{
"disableEquipment": "HiJump"
}
{
"disableEquipment": "Gravity"
}
"canMidAirMorph"
"h_complexToCarryFlashSuit" |
|

With a miss of the Grapple, if Samus hasn't moved horizontally, simply fall straight down to land safely back on Mama Turtle. Requires: "canUseGrapple"
{
"or": [
"HiJump",
"canSpringBallJumpMidAir"
]
}
"h_midAirShootUp" |
|
If Mama Turtle is in her starting location, stand on the rightmost side of her to be aligned below the grapple block. With a miss, if Samus hasn't moved horizontally, simply fall straight down to land safely back on to her. Requires: "canPreciseGrapple" "h_midAirShootUp" Clears obstacles: B |
|
Requires: {
"or": [
"canWallJump",
"SpaceJump",
{
"and": [
"HiJump",
"canDash",
"canCarefulJump"
]
},
{
"and": [
"canUseGrapple",
{
"or": [
"HiJump",
"canSpringBallJumpMidAir",
"canPreciseGrapple"
]
},
"h_midAirShootUp"
]
}
]
} |
|
Requires: {
"or": [
"SpaceJump",
{
"and": [
"canPreciseGrapple",
{
"or": [
"h_midAirShootUp",
"HiJump",
"canWallJump"
]
}
]
}
]
}Clears obstacles: B |
|

Grappling the block does not require canPreciseGrapple if Mama Turtle is asleep, as there is no risk of death on a miss. Requires: "canUseGrapple"
"h_midAirShootUp"
{
"obstaclesNotCleared": [
"A"
]
}Clears obstacles: B |
|
Only requires a runway of 7 tiles in the adjacent room, but an extra tile makes for an easier jump. Entrance condition: {
"comeInJumping": {
"speedBooster": "yes",
"minTiles": 7.4375
}
}Requires: {
"or": [
"f_MaridiaTubeBroken",
{
"obstaclesCleared": [
"f_MaridiaTubeBroken"
]
}
]
}
"canCrossRoomJumpIntoWater"
"h_midAirShootUp"Unlocks doors: {"types":["super"],"requires":[]}
{"types":["missiles","powerbomb"],"requires":["never"]} |
|
Only requires a runway of 1 tile in the adjacent room. This strat is slightly easier on the right side at low run speeds, but the same otherwise. Entrance condition: {
"comeInJumping": {
"speedBooster": "no",
"minTiles": 0.4375
}
}Requires: {
"or": [
"f_MaridiaTubeBroken",
{
"obstaclesCleared": [
"f_MaridiaTubeBroken"
]
}
]
}
"canCrossRoomJumpIntoWater"
"canTrickyJump"
"h_midAirShootUp"Unlocks doors: {"types":["super"],"requires":[]}
{"types":["missiles","powerbomb"],"requires":["never"]} |
|
Assumes a runway of at least 21 tiles in the adjacent room. End Samus' momentum where no platforms are over head. Shoot the door while rising to pass through. Entrance condition: {
"comeInJumping": {
"speedBooster": "yes",
"minTiles": 21
}
}Requires: {
"or": [
"f_MaridiaTubeBroken",
{
"obstaclesCleared": [
"f_MaridiaTubeBroken"
]
}
]
}
"canCrossRoomJumpIntoWater"
"canMidairWiggle"
"canTrickyJump"
"h_midAirShootUp"Unlocks doors: {"types":["super"],"requires":[]}
{"types":["missiles","powerbomb"],"requires":["never"]} |
From: 2
Bottom Right Door
To: 4
Top Door


Requires a runway of at least 18 tiles in the adjacent room. Ride up the right wall just above the doorway, then turnaround before and after hitting the platform following the doorway slope. Continue up the rest of the way to reach the door. Entrance condition: {
"comeInJumping": {
"speedBooster": "yes",
"minTiles": 18
}
}Requires: {
"notable": "Cross Room Platform Stuck Wiggle to Top Door"
}
{
"or": [
"f_MaridiaTubeBroken",
{
"obstaclesCleared": [
"f_MaridiaTubeBroken"
]
}
]
}
"canCrossRoomJumpIntoWater"
"canMomentumConservingTurnaround"
"canTrickyDashJump"
"canInsaneJump"
"h_midAirShootUp"Unlocks doors: {"types":["super"],"requires":[]}
{"types":["missiles","powerbomb"],"requires":["never"]} |
|

Entrance condition: {
"comeInWithSidePlatform": {
"platforms": [
{
"minHeight": 2,
"maxHeight": 2,
"minTiles": 38,
"speedBooster": "yes",
"obstructions": [
[
1,
0
]
],
"requires": [],
"note": "Applies to Noob Bridge.",
"devNote": [
"FIXME: This (and other cases) can leave with enough vertical momentum to make it to the middle door of Main Street,",
"if the top door of Maridia Tube connects to the bottom of Main Street."
]
},
{
"minHeight": 2,
"maxHeight": 2,
"minTiles": 45,
"speedBooster": "yes",
"obstructions": [
[
3,
0
]
],
"requires": [
"canMomentumConservingMorph",
"canInsaneJump",
"canInsaneMidAirMorph"
],
"note": [
"This applies to Statues Hallway and Baby Kraid Room."
]
},
{
"minHeight": 3,
"maxHeight": 3,
"minTiles": 45,
"speedBooster": "yes",
"obstructions": [
[
3,
0
]
],
"requires": [
"canMomentumConservingMorph",
"canInsaneJump",
"canInsaneMidAirMorph"
],
"note": [
"This applies to Bowling Alley (middle, power off) and Basement (power on)."
]
},
{
"minHeight": 3,
"maxHeight": 3,
"minTiles": 39.4375,
"speedBooster": "yes",
"obstructions": [
[
3,
2
]
],
"requires": [],
"note": "Applies to Metal Pirates Room."
}
]
}
}Requires: {
"or": [
"f_MaridiaTubeBroken",
{
"obstaclesCleared": [
"f_MaridiaTubeBroken"
]
}
]
}
"canCrossRoomJumpIntoWater"
"canTrickyJump"
"canMomentumConservingTurnaround"
"h_midAirShootUp"Unlocks doors: {"types":["super"],"requires":[]}
{"types":["missiles","powerbomb"],"requires":["never"]} |
|
Only requires a runway of 7 tiles in the adjacent room, but an extra tile makes for an easier jump. Entrance condition: {
"comeInJumping": {
"speedBooster": "yes",
"minTiles": 7.4375
}
}Requires: {
"or": [
"f_MaridiaTubeBroken",
{
"obstaclesCleared": [
"f_MaridiaTubeBroken"
]
}
]
}
"canCrossRoomJumpIntoWater"
"h_midAirShootUp"Unlocks doors: {"types":["super"],"requires":[]}
{"types":["missiles","powerbomb"],"requires":["never"]} |
|
Only requires a runway of one tile in the adjacent room. This strat is slightly easier on the right side at low run speeds, but the same otherwise. Entrance condition: {
"comeInJumping": {
"speedBooster": "no",
"minTiles": 0.4375
}
}Requires: {
"or": [
"f_MaridiaTubeBroken",
{
"obstaclesCleared": [
"f_MaridiaTubeBroken"
]
}
]
}
"canCrossRoomJumpIntoWater"
"canTrickyJump"
"h_midAirShootUp"Unlocks doors: {"types":["super"],"requires":[]}
{"types":["missiles","powerbomb"],"requires":["never"]} |
From: 5
Inside Maridia Tube Junction
To: 4
Top Door

Jump as the first action after breaking the tube to gravity jump to the top of the room. Open the door and go through it during the ascent. This can only be attempted once. Requires: {
"notable": "Breaking the Tube Gravity Jump"
}
{
"not": "f_MaridiaTubeBroken"
}
"canRiskPermanentLossOfAccess"
"h_usePowerBomb"
"canSuitlessMaridia"
"canTrickyJump"
"h_midAirShootUp"Clears obstacles: f_MaridiaTubeBroken Sets flags: f_MaridiaTubeBroken Unlocks doors: {"types":["super"],"requires":[]}
{"types":["missiles","powerbomb"],"requires":["never"]} |
From: 7
Lower Hills Junction
To: 7
Lower Hills Junction
Use Grapple on the Powamps to climb back up the room after farming the crabs. Caution may be needed to avoid falling down to the bottom parts of the room. Requires: "Grapple"
"canTrickyJump"
{
"or": [
{
"and": [
{
"resetRoom": {
"nodes": [
1
]
}
},
{
"cycleFrames": 2615
}
]
},
{
"and": [
{
"resetRoom": {
"nodes": [
5
]
}
},
{
"cycleFrames": 2340
}
]
},
{
"and": [
{
"resetRoom": {
"nodes": [
4
]
}
},
{
"cycleFrames": 2740
}
]
}
]
}
"h_midAirShootUp"Resets obstacles: A, B Farm cycle drops: 3 Sciser |
|
There is a grappleable Powamp directly above each of the 3 peaks. Requires: "canSuitlessMaridia" "canUseEnemies" "Grapple" "h_midAirShootUp" |
|
There is a grappleable Powamp directly above each of the 3 peaks. If carrying a flash suit without Morph, Hi-Jump or Gravity can be used to attach to the center Powamp from the left. Requires: "h_navigateUnderwater"
"canUseEnemies"
"Grapple"
{
"or": [
"h_midAirShootUp",
"HiJump",
"Gravity"
]
} |
|
There is a grappleable Powamp directly above each of the 3 peaks. If carrying a flash suit without Morph, Hi-Jump or Gravity can be used to attach to the center Powamp from the left. Requires: "h_navigateUnderwater"
"canUseEnemies"
"Grapple"
{
"or": [
"h_midAirShootUp",
"HiJump",
"Gravity"
]
}Clears obstacles: B Dev note: This strat is only able to bring one crab up without dropping down to 2. Adding a strat to do that is not worth adding, because with grapple, you can bypass the strats that need A. |
|
There is a grappleable Powamp directly above each of the 3 peaks. If carrying a flash suit without Morph, Hi-Jump or Gravity can be used to attach to the center Powamp from the left. Requires: "h_navigateUnderwater"
"canUseEnemies"
"Grapple"
{
"or": [
"h_midAirShootUp",
"HiJump",
"Gravity"
]
} |
From: 5
Item
To: 6
Junction Right of Morph Passage
Jump and mid-air morph. This is much easier with Gravity and HiJump turned off. Requires: "canSuitlessMaridia" "canMidAirMorph" "canDisableEquipment" "h_complexToCarryFlashSuit" |
From: 6
Junction Right of Morph Passage
To: 5
Item
Jump and mid-air morph. This is much easier with Gravity and HiJump turned off. Requires: "canSuitlessMaridia"
"canMidAirMorph"
{
"disableEquipment": "Gravity"
}
{
"disableEquipment": "HiJump"
}
"h_complexToCarryFlashSuit"Collects items: 5 |
|

Climb a mochtroid with ice using the wall to help guide them. It is very easy to take damage if not preemptive with freezes. Mochtroid movement and freeze timing gets harder at the waterline. Requires: "h_navigateUnderwater"
"canMochtroidIceClimb"
"canPlayInSand"
"canCameraManip"
"canTrickyJump"
{
"or": [
"Gravity",
"HiJump"
]
}
{
"or": [
"canInsaneJump",
{
"enemyDamage": {
"enemy": "Mochtroid",
"type": "contact",
"hits": 3
}
}
]
}
"h_complexToCarryFlashSuit" |
|
Use Grapple Beam to cross the room. The first two room segments can be safely grappled across from in the water. The third room segment grapple is tricky. It is possible to use the spikes as platforms instead. Requires: "canSuitlessMaridia"
"canDodgeWhileShooting"
"canPreciseGrapple"
{
"or": [
"canInsaneJump",
"canPlayInSand"
]
}
{
"or": [
"HiJump",
"canTrickyJump"
]
}
"h_complexToCarryFlashSuit" |
|
Requires: "h_navigateUnderwater"
"Grapple"
{
"or": [
"h_midAirShootUp",
"Gravity"
]
} |
|

Jump out of the sand to lure down mochtroids to freeze. It's recommended to bring a Mochtroid into the middle section of the room. Mochtroid damage is pretty hard to avoid, but can be. Mochtroid movement and freeze timing gets harder at the waterline. Requires: "h_navigateUnderwater"
{
"or": [
"Gravity",
"HiJump"
]
}
"canTrickyJump"
"canPlayInSand"
"canMochtroidIceClimb"
"canCameraManip"
{
"or": [
"canInsaneJump",
{
"enemyDamage": {
"enemy": "Mochtroid",
"type": "contact",
"hits": 3
}
}
]
}
"h_complexToCarryFlashSuit" |
|
Requires: "canSuitlessMaridia"
"canDodgeWhileShooting"
"canPreciseGrapple"
{
"or": [
"canInsaneJump",
"canPlayInSand"
]
}
{
"or": [
"HiJump",
"canTrickyJump"
]
}
"h_complexToCarryFlashSuit" |
|

Kill Draygon by grappling to an exposed turret as you get grabbed. This avoids taking damage from Draygon once grabbed. Requires: {
"notable": "Grapple Quick Kill"
}
"h_navigateUnderwater"
"canPreciseGrapple"
{
"or": [
"Gravity",
"Morph",
"canTrickyDodgeEnemies",
{
"enemyDamage": {
"enemy": "Draygon",
"type": "contact",
"hits": 2
}
}
]
}
{
"or": [
"Gravity",
"canTrickyJump",
{
"enemyDamage": {
"enemy": "Draygon",
"type": "turretProjectile",
"hits": 1
}
}
]
}
{
"or": [
"h_breakThreeDraygonTurrets",
{
"and": [
{
"or": [
"canTrickyDodgeEnemies",
{
"enemyDamage": {
"enemy": "Draygon",
"type": "turretProjectile",
"hits": 2
}
}
]
},
"h_breakOneDraygonTurret"
]
},
{
"and": [
"Gravity",
"canTrickyDodgeEnemies",
{
"or": [
"canBeLucky",
{
"enemyDamage": {
"enemy": "Draygon",
"type": "turretProjectile",
"hits": 1
}
}
]
},
{
"or": [
"canWallJump",
"canGravityJump"
]
}
]
}
]
}
{
"draygonElectricityFrames": 240
}
"h_complexToCarryFlashSuit"Clears obstacles: f_DefeatedDraygon Sets flags: f_DefeatedDraygon Dev note: FIXME: HiJump + canDoubleSpringBallJumpMidAir can work but needs to be looked into more. |
|


Requires: "Gravity"
{
"or": [
"canInsaneJump",
"h_breakOneDraygonTurret"
]
}
{
"enemyKill": {
"enemies": [
[
"Draygon"
]
],
"farmableAmmo": [
"Missile",
"Super"
]
}
}
"h_complexToCarryFlashSuit"Clears obstacles: f_DefeatedDraygon Sets flags: f_DefeatedDraygon |
From: 2
Right Door
To: 4
Top Right Ledge Junction


There is just enough distance for a MidAir Spring Ball jump to reach without HiJump, with either a crouch jump or air ball. To do this, pause and morph early in order to get a spring fling from equipping Spring Ball. Requires: "Gravity"
"canSpringBallJumpMidAir"
{
"or": [
"HiJump",
{
"and": [
"h_maxHeightSpringBallJump",
"canSpringFling"
]
},
{
"and": [
"canTrickyJump",
"canLateralMidAirMorph",
"canTrickySpringBallJump",
"canSpringFling",
"h_complexToCarryFlashSuit"
]
}
]
}Dev note: The h_maxHeightSpringBallJump is not a h_underwaterMaxHeightSpringBallJump, because Gravity is required. |
From: 3
Junction Left of Morph Tunnel
To: 6
Junction Right of Morph Tunnel
This can be done by turning off Gravity and HiJump to do a mid-air morph through the morph tunnel. Requires: "canSuitlessMaridia" "canMidAirMorph" "canDisableEquipment" "h_complexToCarryFlashSuit" |
|


Requires: "h_navigateUnderwater" "Grapple" "h_complexToCarryFlashSuit" |
|

Requires: "h_navigateUnderwater" "canMochtroidIceClimb" "h_complexToCarryFlashSuit" "h_complexToCarryBlueSuit" |
|


Requires: "h_navigateUnderwater" "Grapple" "h_complexToCarryFlashSuit" |
|
Requires: "h_navigateUnderwater"
"canMochtroidIceClimb"
{
"or": [
"Gravity",
"canDodgeWhileShooting",
{
"enemyDamage": {
"enemy": "Mochtroid",
"type": "contact",
"hits": 2
}
},
"Wave",
"Spazer",
"Plasma",
{
"and": [
"canPrepareForNextRoom",
"Charge"
]
}
]
}
"h_complexToCarryFlashSuit"
"h_complexToCarryBlueSuit" |
|

Requires: {
"or": [
{
"and": [
"h_fourTileJumpMorph",
"h_complexToCarryFlashSuit"
]
},
{
"and": [
"canPreciseWallJump",
"canWallJumpInstantMorph"
]
}
]
} |
From: 3
Middle Right Door
To: 4
Top Right Door
Requires: "canTrickyUseFrozenEnemies" "HiJump" "canSpringBallJumpMidAir" "canUnmorphBombBoost" "h_complexToCarryFlashSuit" |
|
Requires: "h_AllMotherBrainBarriersCleared"
"h_openZebetites"
{
"or": [
"canDodgeWhileShooting",
{
"enemyDamage": {
"enemy": "Rinka",
"type": "contact",
"hits": 1
}
}
]
}
"h_complexToCarryFlashSuit"Clears obstacles: f_KilledZebetites1 Sets flags: f_KilledZebetites1 |
|

Glitch through the Mother Brain Zebetites by using a frozen Rinka and i-frames. Freeze the Rinka at its spawn location, then spin jump or down-back onto it after acquiring i-frames to clip inside of the Zebetite, then jump through. I-frames can be acquired from a Rinka hit, a turret shot, or from the Zebetite itself. Note that Zebetites cause i-frames but deal no damage. If Screw Attack is equipped, then a down-back must be used, since spin jumping will cancel i-frames. With Ice+Wave, Samus can freeze the Rinka from above with an angle-down shot; Otherwise Samus must go below, press against the wall, and freeze it with an upward shot. With Ice+Plasma, Samus must be crouched when firing the shot. Requires: "h_AllMotherBrainBarriersCleared"
{
"notable": "Ice Zebetite Skip"
}
{
"noBlueSuit": {}
}
"canUseIFrames"
"canTrickyUseFrozenEnemies"
"Morph"
{
"or": [
{
"and": [
"Wave",
{
"enemyDamage": {
"enemy": "Rinka",
"type": "contact",
"hits": 1
}
}
]
},
"canTrickyJump"
]
}
{
"or": [
{
"disableEquipment": "ScrewAttack"
},
"canDownBack"
]
}
{
"or": [
"canTrickyDodgeEnemies",
{
"enemyDamage": {
"enemy": "Mother Brain 1",
"type": "turret",
"hits": 1
}
}
]
}
"h_complexToCarryFlashSuit"Dev note: This technically requires f_KilledZebetites1 to not be set, but there is minimal risk of loss of access, because there is no reason to kill any Zebs without being able to kill them all. It is also possible to Ice Zeb skip through the second Zeb with a morph/unmorph/remorph on a frozen Rinka; this is known as a Remorph Zebetite Skip or a Spring Ball Zebetite Skip. Technically this strat involves `canWallIceClip` but we don't include that requirement, since the positioning of the Rinka is freely normalized, which makes the trick easier than this tech would normally imply. FIXME: It is possible to Ice Zeb Skip out, but it is much harder and would only be useful if getting here with canRiskPermanentLossOfAccess. |
From: 5
Between First and Second Zebetite
To: 5
Between First and Second Zebetite
Requires: "h_openZebetites"
{
"or": [
{
"and": [
"canDodgeWhileShooting",
"canInsaneJump"
]
},
{
"enemyDamage": {
"enemy": "Rinka",
"type": "contact",
"hits": 1
}
}
]
}
"h_complexToCarryFlashSuit"Clears obstacles: f_KilledZebetites2 Sets flags: f_KilledZebetites2 |
From: 6
Between Second and Third Zebetite
To: 6
Between Second and Third Zebetite
Requires: "h_openZebetites"
{
"or": [
{
"and": [
"canDodgeWhileShooting",
"canTrickyJump"
]
},
{
"enemyDamage": {
"enemy": "Rinka",
"type": "contact",
"hits": 1
}
}
]
}
"h_complexToCarryFlashSuit"Clears obstacles: f_KilledZebetites3 Sets flags: f_KilledZebetites3 |
From: 7
Between Third and Fourth Zebetite
To: 7
Between Third and Fourth Zebetite
Requires: "h_openZebetites"
{
"enemyDamage": {
"enemy": "Rinka",
"type": "contact",
"hits": 1
}
}
"h_complexToCarryFlashSuit"Clears obstacles: f_KilledZebetites4 Sets flags: f_KilledZebetites4 |
|
Go up safely by killing the Pirates. Requires: {
"or": [
"HiJump",
"SpaceJump",
"canWallJump",
"canJumpIntoIBJ",
{
"and": [
"canIBJ",
"canBePatient"
]
},
"canSpringBallJumpMidAir"
]
}
{
"or": [
"canBePatient",
{
"enemyKill": {
"enemies": [
[
"Tourian Space Pirate (all)"
],
[
"Tourian Space Pirate (all)"
],
[
"Tourian Space Pirate (all)"
],
[
"Tourian Space Pirate (all)"
]
],
"explicitWeapons": [
"Missile",
"Super",
"PowerBomb",
"Wave",
"Spazer",
"Plasma",
"ScrewAttack"
]
}
},
{
"haveBlueSuit": {}
}
]
}
"h_complexToCarryFlashSuit" |
|
Requires: "canDash" "canCarefulJump" "h_complexToCarryFlashSuit" |
From: 2
Left Door
To: 1
Top Right Door
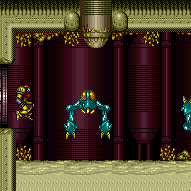
Jump far enough to land on the first floor pillar. Entrance condition: {
"comeInGettingBlueSpeed": {
"length": 0,
"openEnd": 0
}
}Requires: "h_blueJump"
"canPrepareForNextRoom"
{
"or": [
"SpaceJump",
"canCarefulJump"
]
}
"h_complexToCarryFlashSuit"Dev note: This is not the level of precision that would call for canBlueSpaceJump. |
|
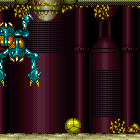
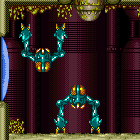
Time Samus' movement carefully to roll underneath a Tourian Hopper and also race it to the far door. Enter the room morphed and let the hoppers jump against the wall a couple of times. After the lower hopper has long enough time between jumps, roll under and run to the door. Entrance condition: {
"comeInNormally": {}
}Requires: {
"notable": "Roll Under Hoppers"
}
"Morph"
"canPrepareForNextRoom"
"canTrickyDodgeEnemies"
"canDash"
"h_complexToCarryFlashSuit" |
|
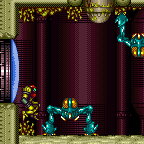
Spin jump into the room with Screw Attack, holding left through the transition to land near the door. Do a turn-around spin jump to the right, bonking the ceiling and overhang and then falling straight down. Then run and spin jump to the right through the Hoppers, to make it to the door without taking damage. Entrance condition: {
"comeInNormally": {}
}Requires: {
"notable": "Screw Attack Jumps"
}
"canDash"
"canPrepareForNextRoom"
"ScrewAttack"
"canTrickyJump"
"h_complexToCarryFlashSuit" |
|

Use at least 4 tiles of runway to gain speed, running through the transition. Hold down during and after the transition in order to aim down and squeeze under the Hopper. Then immediately run to the right to make it to the door without taking damage. Entrance condition: {
"comeInRunning": {
"speedBooster": "any",
"minTiles": 4
}
}Requires: {
"notable": "Squeeze Under Hoppers"
}
"canPrepareForNextRoom"
"canTwoTileSqueeze"
"h_complexToCarryFlashSuit" |
|
Requires: {
"enemyDamage": {
"enemy": "Blue Sidehopper",
"type": "contact",
"hits": 1
}
}
"h_complexToCarryFlashSuit" |