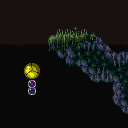
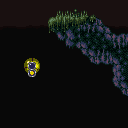
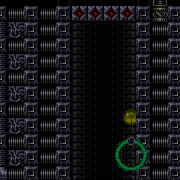
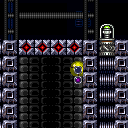
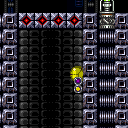
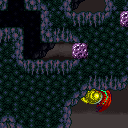
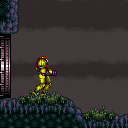
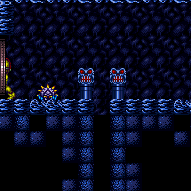
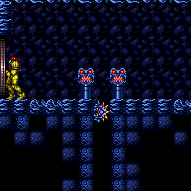
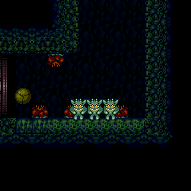
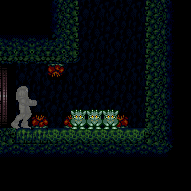
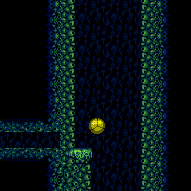
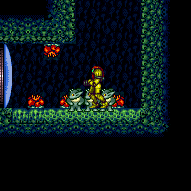
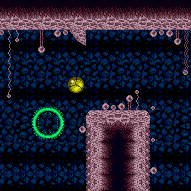
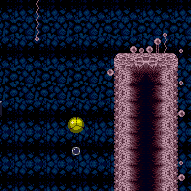
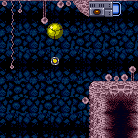
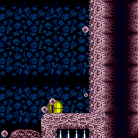
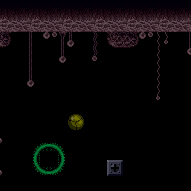
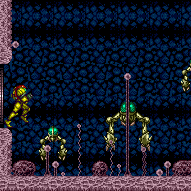
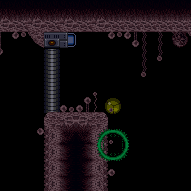
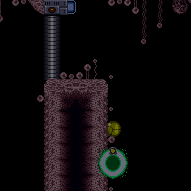
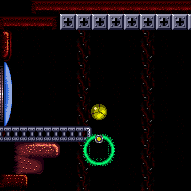
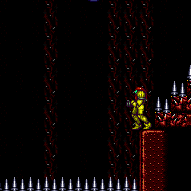
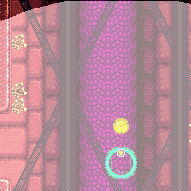
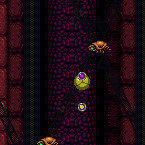
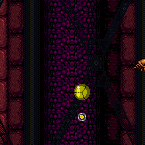
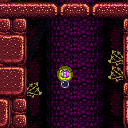
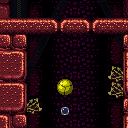
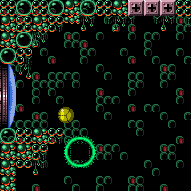
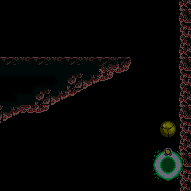
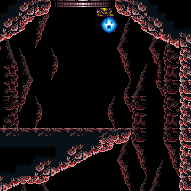
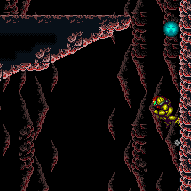
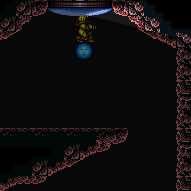
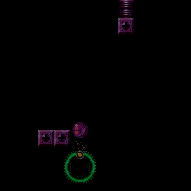
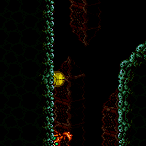
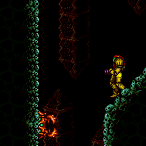
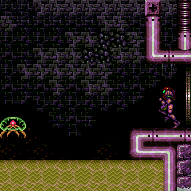
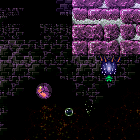
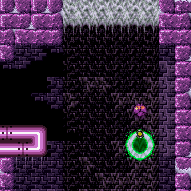
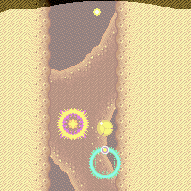
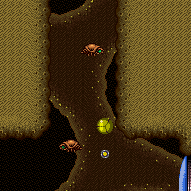
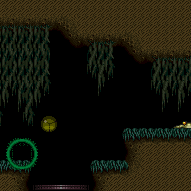
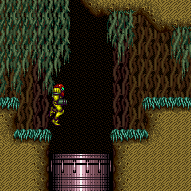
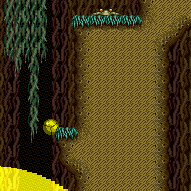
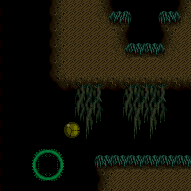
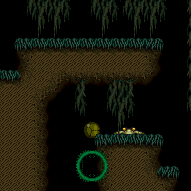
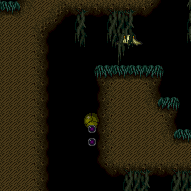
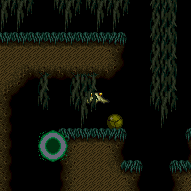
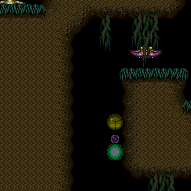
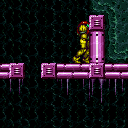
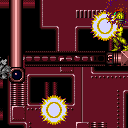
canLongIBJ (Hard)
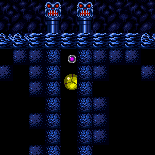
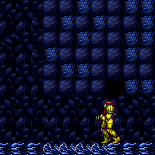
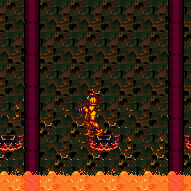
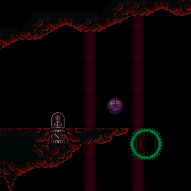
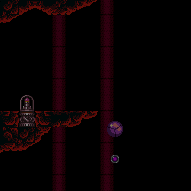
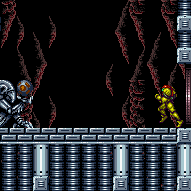
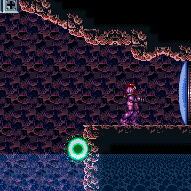
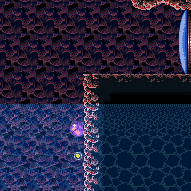
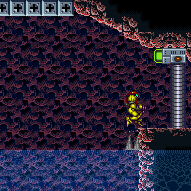
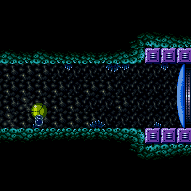
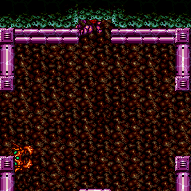
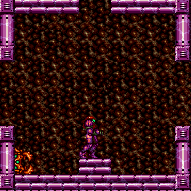
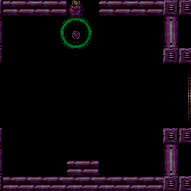
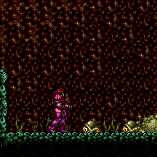
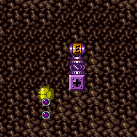
The ability to maintain an IBJ for any distance longer than approximately 11 tiles (the distance that Samus can jump with HiJump). Note that without this tech, Samus may still require doing multiple consecutively short IBJs (i.e. if there is a ledge to land on mid-way).
Dependencies: canIBJ
Dev note: Samus is not expected to bypass canLongIBJ with a jump into an IBJ from a midair spring ball jump.
Strats ()
|
Ascend with a long IBJ, then go through the speed blocks to the item. The Boyons can be killed with bombs or 3 Power Bombs, or Samus can jump through them with Spring Ball, which is easy as long as she doesn't stop jumping. Note that Samus can not bomb boost through the Boyons while blue. Entrance condition: {
"comeInWithGMode": {
"mode": "any",
"morphed": true
}
}Requires: "h_blueSuitGMode"
"h_artificialMorphLongIBJ"
"canBePatient"
{
"or": [
"canBeVeryPatient",
{
"and": [
{
"ammo": {
"type": "PowerBomb",
"count": 3
}
},
"canDoubleBombJump"
]
},
{
"and": [
"h_artificialMorphSpringBall",
"canDoubleBombJump"
]
}
]
} |
|
Ascend with a long IBJ, then ceiling bomb jump against the speed blocks to overload the PLMs. Falling is very unforgiving. Note that the Boyons can be killed with bombs. Entrance condition: {
"comeInWithGMode": {
"mode": "any",
"morphed": true
}
}Requires: {
"notable": "G-Mode Morph Long Ceiling Bomb Jump"
}
"h_artificialMorphLongIBJ"
"h_artificialMorphCeilingBombJump"
"canBeVeryPatient"Dev note: This is technically doable without canBeVeryPatient, but would require double bomb jump, Morph, a way to bypass Boyons, and never falling. |
From: 2
Bottom Left Door
To: 4
Top Junction (Right of Spikes)
Ascend with a long IBJ, then go through the speed blocks to the item. The Boyons can be killed with bombs or 3 Power Bombs, or Samus can jump through them with Spring Ball, which is easy as long as she doesn't stop jumping. Note that Samus can not bomb boost through the Boyons while blue. Entrance condition: {
"comeInWithGMode": {
"mode": "any",
"morphed": true
}
}Requires: "h_blueSuitGMode"
"h_artificialMorphLongIBJ"
"canBePatient"
"canComplexGMode"
"canRemoteAcquire"
{
"or": [
"canBeVeryPatient",
{
"and": [
{
"ammo": {
"type": "PowerBomb",
"count": 3
}
},
"canDoubleBombJump"
]
},
{
"and": [
"h_artificialMorphSpringBall",
"canDoubleBombJump"
]
}
]
}Collects items: 3 Dev note: FIXME: It would be possible to remote acquire to the left after using spring into ceiling bomb jump, but it would require restructuring the room, a long CIBJ, and canBeExtremelyPatient. |
From: 2
Bottom Left Door
To: 4
Top Junction (Right of Spikes)
Ascend with a long IBJ, then go through the speed blocks and through the morph tunnel. The Boyons can be killed with bombs or 3 Power Bombs, or Samus can jump through them with Spring Ball, which is easy as long as she doesn't stop jumping. Note that Samus can not bomb boost through the Boyons while blue. Entrance condition: {
"comeInWithGMode": {
"mode": "any",
"morphed": true
}
}Requires: "h_blueSuitGMode"
"h_artificialMorphLongIBJ"
"canBePatient"
{
"or": [
"canBeVeryPatient",
{
"and": [
{
"ammo": {
"type": "PowerBomb",
"count": 3
}
},
"canDoubleBombJump"
]
},
{
"and": [
"h_artificialMorphSpringBall",
"canDoubleBombJump"
]
}
]
}Dev note: There is not a ceiling bomb jump strat from here, because it would be easier to just have X-Ray climbed the room. |
From: 5
Bottom Junction (Right of Boyons)
To: 3
Item
Requires: {
"haveBlueSuit": {}
}
{
"or": [
"canConsecutiveWallJump",
"SpaceJump",
{
"and": [
"canLongIBJ",
"canBePatient"
]
}
]
} |
From: 5
Bottom Junction (Right of Boyons)
To: 3
Item
Requires: {
"useFlashSuit": {}
}
{
"shinespark": {
"frames": 9,
"excessFrames": 7
}
}
{
"or": [
"canConsecutiveWallJump",
"SpaceJump",
{
"and": [
"canLongIBJ",
"canUnmorphBombBoost",
"canBePatient"
]
}
]
} |
|
Requires: {
"or": [
"SpaceJump",
"canLongIBJ"
]
} |
|
Requires: {
"or": [
"SpaceJump",
"canLongIBJ",
"canSpeedyJump",
{
"and": [
"HiJump",
"canSpringBallJumpMidAir"
]
},
{
"and": [
"HiJump",
"canJumpIntoIBJ"
]
}
]
} |
|
Requires: {
"or": [
"canWallJump",
"SpaceJump",
"canLongIBJ",
"canJumpIntoIBJ"
]
}
{
"or": [
"h_carefullyDestroyBombWalls",
{
"obstaclesCleared": [
"A"
]
}
]
}Clears obstacles: A |
From: 8
G-Mode Morph Junction (Ship)
To: 1
Top Left Door
Using IBJ to reach the Gauntlet entrance bomb blocks, place a Power Bomb and it will hit but not break the blocks. Then IBJ up to the left, unmorph and use X-Ray to cancel G-mode, the blocks will be broken, allowing Samus to pass through. Requires: "canGMode"
{
"or": [
"h_artificialMorphLongIBJ",
{
"and": [
"HiJump",
"h_artificialMorphJumpIntoIBJ"
]
}
]
}
"h_artificialMorphPowerBomb" |
From: 8
G-Mode Morph Junction (Ship)
To: 1
Top Left Door
IBJ up to the top left of the room. Use X-Ray to cancel G-mode, then fall with Screw Attack to break the bomb blocks. Requires: "canGMode" "h_artificialMorphLongIBJ" "ScrewAttack" |
From: 8
G-Mode Morph Junction (Ship)
To: 1
Top Left Door
IBJ up to the top left of the room. Use X-Ray to cancel G-mode, then fall with a blue suit to break the bomb blocks. Requires: "h_blueSuitGMode" "h_artificialMorphLongIBJ" |
|
Requires: "canGMode" "h_artificialMorphLongIBJ" |
|
Entrance condition: {
"comeInWithGMode": {
"mode": "any",
"morphed": true
}
}Requires: "Gravity"
{
"or": [
"h_artificialMorphLongIBJ",
"h_artificialMorphJumpIntoIBJ"
]
} |
|
Requires: "Gravity"
{
"or": [
"canWallJump",
"HiJump",
"SpaceJump",
"canLongIBJ",
"canJumpIntoIBJ",
"canSpringBallJumpMidAir"
]
} |
|
Entrance condition: {
"comeInWithGMode": {
"mode": "any",
"morphed": true
}
}Requires: "Gravity"
{
"or": [
"h_artificialMorphLongIBJ",
{
"and": [
"HiJump",
"h_artificialMorphJumpIntoIBJ"
]
}
]
} |
|
Entrance condition: {
"comeInWithGMode": {
"mode": "direct",
"morphed": true
}
}Requires: "Gravity"
{
"or": [
"h_artificialMorphLongIBJ",
{
"and": [
"HiJump",
"h_artificialMorphJumpIntoIBJ"
]
}
]
}Collects items: 3 |
|
Entrance condition: {
"comeInWithGMode": {
"mode": "any",
"morphed": true
}
}Requires: "Gravity" "h_artificialMorphLongIBJ" Collects items: 3 |
|
Entrance condition: {
"comeInWithGMode": {
"mode": "any",
"morphed": true
}
}Requires: "Gravity"
{
"or": [
"h_artificialMorphLongIBJ",
{
"and": [
"HiJump",
"h_artificialMorphJumpIntoIBJ"
]
}
]
}Collects items: 3 |
|
Requires: "Gravity"
{
"or": [
"canLongIBJ",
{
"and": [
"HiJump",
"canJumpIntoIBJ"
]
}
]
}
{
"obstaclesNotCleared": [
"A",
"B",
"C"
]
} |
From: 4
Lower Section - Top Right Door
To: 4
Lower Section - Top Right Door
Entrance condition: {
"comeInWithGMode": {
"mode": "direct",
"morphed": false
}
}Requires: {
"or": [
"SpaceJump",
"canWallJump",
{
"and": [
"canLongIBJ",
"Gravity"
]
},
{
"and": [
"HiJump",
"canJumpIntoIBJ"
]
},
{
"and": [
"canLongIBJ",
"canBombHorizontally",
"canResetFallSpeed"
]
},
{
"and": [
"canJumpIntoIBJ",
"canLongIBJ",
"canTrickyJump"
]
},
{
"and": [
"HiJump",
{
"or": [
"canSpeedyJump",
"canSpringBallJumpMidAir"
]
}
]
},
{
"and": [
"canTrickyJump",
"canPreciseGrapple"
]
},
{
"and": [
"Gravity",
"canMidairShinespark",
"h_shinechargeMaxRunway",
{
"shinespark": {
"frames": 35,
"excessFrames": 10
}
}
]
}
]
}Exit condition: {
"leaveWithGMode": {
"morphed": false
}
} |
From: 4
Lower Section - Top Right Door
To: 8
Bridge Right Door (Leads to Bottom Right Door)
Climb up 1 screen. Entrance condition: {
"comeInWithGMode": {
"mode": "direct",
"morphed": false
}
}Requires: "canComplexGMode"
"canGModeXRayClimb"
{
"notable": "Get Inside the Bridge"
}
"canSkipDoorLock"
{
"or": [
"canArtificialMorph",
"canWallJump",
"SpaceJump",
{
"and": [
"canLongIBJ",
"Gravity"
]
},
{
"and": [
"HiJump",
"canJumpIntoIBJ"
]
},
{
"and": [
"canLongIBJ",
"canBombHorizontally",
"canResetFallSpeed"
]
},
{
"and": [
"canJumpIntoIBJ",
"canLongIBJ",
"canTrickyJump"
]
},
{
"and": [
"HiJump",
{
"or": [
"canSpeedyJump",
"canSpringBallJumpMidAir"
]
}
]
},
{
"and": [
"canTrickyJump",
"canPreciseGrapple"
]
},
{
"and": [
"Gravity",
"canMidairShinespark",
"h_shinechargeMaxRunway",
{
"shinespark": {
"frames": 35,
"excessFrames": 10
}
}
]
}
]
}
"canXRayClimb" |
From: 4
Lower Section - Top Right Door
To: 8
Bridge Right Door (Leads to Bottom Right Door)
Enter with G-mode direct, back up to between 1 and 6 pixels from the door transition, and activate X-ray to get very deep stuck in the door. Climb up 1 screen, and perform a turnaround buffered spin-jump away from the door to trigger the transition, bypassing any lock on the door. Entrance condition: {
"comeInWithGMode": {
"mode": "direct",
"morphed": false
}
}Requires: "canComplexGMode"
"canGModeXRayClimb"
{
"notable": "Get Inside the Bridge"
}
{
"or": [
"canArtificialMorph",
"canWallJump",
"SpaceJump",
{
"and": [
"canLongIBJ",
"Gravity"
]
},
{
"and": [
"HiJump",
"canJumpIntoIBJ"
]
},
{
"and": [
"canLongIBJ",
"canBombHorizontally",
"canResetFallSpeed"
]
},
{
"and": [
"canJumpIntoIBJ",
"canLongIBJ",
"canTrickyJump"
]
},
{
"and": [
"HiJump",
{
"or": [
"canSpeedyJump",
"canSpringBallJumpMidAir"
]
}
]
},
{
"and": [
"canTrickyJump",
"canPreciseGrapple"
]
},
{
"and": [
"Gravity",
"canMidairShinespark",
"h_shinechargeMaxRunway",
{
"shinespark": {
"frames": 35,
"excessFrames": 10
}
}
]
}
]
}
"canXRayClimb"Bypasses door shell: true |
From: 4
Lower Section - Top Right Door
To: 12
Top Junction
Entrance condition: {
"comeInWithGMode": {
"mode": "direct",
"morphed": false
}
}Requires: "canGModeXRayClimb"
{
"or": [
"canArtificialMorph",
"canWallJump",
"SpaceJump",
{
"and": [
"canLongIBJ",
"Gravity"
]
},
{
"and": [
"HiJump",
"canJumpIntoIBJ"
]
},
{
"and": [
"canLongIBJ",
"canBombHorizontally",
"canResetFallSpeed"
]
},
{
"and": [
"canJumpIntoIBJ",
"canLongIBJ",
"canTrickyJump"
]
},
{
"and": [
"HiJump",
{
"or": [
"canSpeedyJump",
"canSpringBallJumpMidAir"
]
}
]
},
{
"and": [
"canTrickyJump",
"canPreciseGrapple"
]
},
{
"and": [
"Gravity",
"canMidairShinespark",
"h_shinechargeMaxRunway",
{
"shinespark": {
"frames": 35,
"excessFrames": 10
}
}
]
}
]
}
"canLongXRayClimb"Clears obstacles: R-Mode |
From: 5
Lower Section - Bottom Right Door
To: 4
Lower Section - Top Right Door
Jump into an IBJ while avoiding the Ripper, or start an IBJ from the platform to the left and boost horizontally at the top. Requires: {
"or": [
{
"and": [
"HiJump",
"canJumpIntoIBJ"
]
},
{
"and": [
"canLongIBJ",
"canBombHorizontally",
"canResetFallSpeed"
]
},
{
"and": [
"canJumpIntoIBJ",
"canLongIBJ",
"canTrickyJump"
]
}
]
} |
From: 5
Lower Section - Bottom Right Door
To: 4
Lower Section - Top Right Door
Requires: "Gravity" "canLongIBJ" |
|
Requires: {
"or": [
"SpaceJump",
"canLongIBJ"
]
} |
From: 15
G-Mode Morph Junction (By Left Door)
To: 16
G-Mode Morph Overloaded PLMs (By Left Door)
Start the IBJ on the second downward tile from the door. The crumble block is the leftmost flat ceiling tile. Requires: "canGMode" "h_artificialMorphLongIBJ" "h_artificialMorphCeilingBombJump" Dev note: Without canCeilingBombJump, this would take more than 10 minutes. |
From: 16
G-Mode Morph Overloaded PLMs (By Left Door)
To: 14
Morph Maze Junction (Below Super Block)
Requires: "canGMode"
{
"or": [
{
"and": [
"SpaceJump",
"Morph"
]
},
"h_artificialMorphLongIBJ",
{
"and": [
"canTrickyDashJump",
"canSpringBallJumpMidAir",
"HiJump"
]
}
]
} |
From: 17
G-Mode Morph Junction Direct (By Left Door)
To: 1
Lower Section - Bottom Left Door
To overload the PLMs, place a Power Bomb precisely to the right of the bottom of the second overhang above the bottom left door. This is at the max jump height without HiJump. Placing the Power Bomb higher or lower will not overload the PLMs without many Power Bombs. Requires: "canPowerBombItemOverloadPLMs"
"canComplexGMode"
{
"notable": "G-mode Overload PLMs by Power Bombing Morph Maze Item"
}
"h_usePowerBomb"
{
"or": [
"SpaceJump",
"canLongIBJ",
{
"and": [
"canTrickyDashJump",
"canTrickySpringBallJump",
"HiJump"
]
}
]
}Collects items: 10 Dev note: This requires the item to not be collected, but there is no reason to do this without it being there, so there is no canRiskPermanentLossOfAccess. |
From: 17
G-Mode Morph Junction Direct (By Left Door)
To: 16
G-Mode Morph Overloaded PLMs (By Left Door)
To overload the PLMs, place a Power Bomb precisely to the right of the bottom of the second overhang above the bottom left door. This is at the max jump height without HiJump. Placing the Power Bomb higher or lower will not overload the PLMs without many Power Bombs. Requires: "canPowerBombItemOverloadPLMs"
"canComplexGMode"
{
"notable": "G-mode Overload PLMs by Power Bombing Morph Maze Item"
}
{
"itemNotCollectedAtNode": 10
}
"canRiskPermanentLossOfAccess"
{
"or": [
"h_artificialMorphLongIBJ",
"Morph",
{
"and": [
"h_artificialMorphSpringBall",
{
"or": [
"HiJump",
"h_artificialMorphBombThings"
]
}
]
}
]
}
"h_artificialMorphPowerBomb" |
From: 2
Top Left Door
To: 2
Top Left Door
Requires: "h_ZebesIsAwake"
{
"or": [
"h_destroyBombWalls",
{
"obstaclesCleared": [
"A"
]
}
]
}
{
"or": [
"canConsecutiveWallJump",
"SpaceJump",
"canLongIBJ"
]
}Exit condition: {
"leaveWithGModeSetup": {}
} |
|
Requires: {
"or": [
"h_usePowerBomb",
{
"obstaclesCleared": [
"C"
]
}
]
}
{
"or": [
"canConsecutiveWallJump",
"SpaceJump",
"canLongIBJ"
]
}
{
"or": [
{
"and": [
"h_usePowerBomb",
"canTrivialMidAirMorph"
]
},
"ScrewAttack"
]
}Clears obstacles: A, B, C Dev note: canWallJumpInstantMorph is not needed here, as the precision is very low. |
|
Requires: {
"or": [
"h_usePowerBomb",
{
"obstaclesCleared": [
"C"
]
}
]
}
"h_useMorphBombs"
{
"or": [
{
"and": [
"SpaceJump",
"canMidAirMorph"
]
},
"canLongIBJ",
{
"and": [
"canConsecutiveWallJump",
"canWallJumpInstantMorph"
]
}
]
}Clears obstacles: A, B, C |
From: 4
Right Item
To: 2
Top Left Door
The Crumble Block does not respawn, so it's possible to grab the items and go back up without breaking the Power Bomb blocks. Requires: {
"notable": "Return Through Crumble Blocks"
}
"Morph"
{
"or": [
"canConsecutiveWallJump",
"SpaceJump",
"canLongIBJ"
]
}
{
"obstaclesCleared": [
"A",
"B"
]
} |
From: 5
G-Mode Morph Junction (Bottom)
To: 2
Top Left Door
Overload PLMs by repeatidly bombing the Power Bomb blocks or the side of the crumble block, then enter through the crumble block. If Samus is then going to IBJ up the shaft, and she has Morph, it is worth exiting G-mode first to allow the camera to follow her. Requires: "canGMode"
"h_artificialMorphIBJ"
{
"or": [
"canConsecutiveWallJump",
"SpaceJump",
{
"and": [
"h_artificialMorphLongIBJ",
"canOffScreenMovement"
]
},
{
"and": [
{
"blueSuitShinecharge": {}
},
{
"or": [
{
"shinespark": {
"frames": 32,
"excessFrames": 3
}
},
{
"and": [
"HiJump",
{
"shinespark": {
"frames": 29,
"excessFrames": 3
}
}
]
}
]
}
]
}
]
}
{
"or": [
"h_ZebesIsAwake",
{
"notable": "G-Mode Flashing Lights"
}
]
}Dev note: The off screen movement is just during an artificial morphed IBJ - the IBJ is long and Samus is covered for most of it. |
Direct G-Mode Morph, Power Bomb the Item, Collect Item and Return
(Extreme)
Etecoon Energy Tank Room
From: 3
Bottom Left Door
To: 3
Bottom Left Door
Place two precisely positioned Power Bombs to overload PLMs. This is at the same height as the tile above the door. This ends up being the max height Samus can jump and place it while at the very bottom of the room, with a midair morph or artificially morphed Spring Ball jump. Because PLMs are overloaded, Samus needs to exit G-mode at the item to collect it before returning through the crumble blocks. Entrance condition: {
"comeInWithGMode": {
"mode": "direct",
"morphed": true
}
}Requires: "canPowerBombItemOverloadPLMs"
"canComplexGMode"
{
"itemNotCollectedAtNode": 5
}
{
"or": [
"Morph",
"h_artificialMorphSpringBall"
]
}
{
"ammo": {
"type": "PowerBomb",
"count": 2
}
}
{
"or": [
"canWallJump",
"SpaceJump",
{
"and": [
"HiJump",
"canSpringBallJumpMidAir"
]
},
"h_artificialMorphLongIBJ",
{
"and": [
{
"blueSuitShinecharge": {}
},
{
"or": [
{
"shinespark": {
"frames": 13,
"excessFrames": 3
}
},
{
"and": [
"HiJump",
{
"shinespark": {
"frames": 9,
"excessFrames": 3
}
}
]
}
]
}
]
}
]
}Collects items: 5 Dev note: This does not require canRiskPermanentLossOfAccess if Samus returns through the crumble blocks. |
From: 3
Bottom Left Door
To: 5
Top Item
Place two precisely positioned Power Bombs to overload PLMs. This is at the same height as the tile above the door. This ends up being the max height Samus can jump and place it while at the very bottom of the room, with a midair morph or artificially morphed Spring Ball jump. Entrance condition: {
"comeInWithGMode": {
"mode": "direct",
"morphed": true
}
}Requires: "canPowerBombItemOverloadPLMs"
{
"itemNotCollectedAtNode": 5
}
"canRiskPermanentLossOfAccess"
{
"or": [
"Morph",
"h_artificialMorphSpringBall"
]
}
{
"ammo": {
"type": "PowerBomb",
"count": 2
}
}
{
"or": [
"canWallJump",
"SpaceJump",
{
"and": [
"HiJump",
"canSpringBallJumpMidAir"
]
},
"h_artificialMorphLongIBJ",
{
"and": [
{
"blueSuitShinecharge": {}
},
{
"or": [
{
"shinespark": {
"frames": 13,
"excessFrames": 3
}
},
{
"and": [
"HiJump",
{
"shinespark": {
"frames": 9,
"excessFrames": 3
}
}
]
}
]
}
]
}
]
}Dev note: This requires canRiskPermanentLossOfAccess unless Samus returns through the crumble blocks. |
Direct G-Mode Morph Through Spikeway, Power Bomb the Item, Collect Item and Return
(Extreme)
Etecoon Energy Tank Room
From: 4
Bottom Right Door
To: 3
Bottom Left Door
Cross the room while killing the Beetoms, then use two precisely positioned Power Bombs to overload PLMs. Place the Power Bombs at the same height as the tile above the door. This ends up being the max height Samus can jump and place it while at the very bottom of the room, with a midair morph or artificially morphed Spring Ball jump. Because PLMs are overloaded, Samus needs to exit G-mode at the item to collect it before returning through the crumble blocks. Entrance condition: {
"comeInWithGMode": {
"mode": "direct",
"morphed": true
}
}Requires: "canPowerBombItemOverloadPLMs"
"canComplexGMode"
{
"itemNotCollectedAtNode": 5
}
{
"or": [
"Morph",
"h_artificialMorphSpringBall"
]
}
{
"or": [
{
"ammo": {
"type": "PowerBomb",
"count": 3
}
},
{
"and": [
"Morph",
{
"or": [
"ScrewAttack",
"Ice",
{
"ammo": {
"type": "Missile",
"count": 5
}
},
{
"ammo": {
"type": "Super",
"count": 5
}
}
]
}
]
}
]
}
{
"ammo": {
"type": "PowerBomb",
"count": 2
}
}
{
"or": [
"canWallJump",
"SpaceJump",
{
"and": [
"HiJump",
"canSpringBallJumpMidAir"
]
},
"h_artificialMorphLongIBJ"
]
}Clears obstacles: A Collects items: 5 Dev note: This does not require canRiskPermanentLossOfAccess if Samus returns through the crumble blocks. |
Direct G-Mode Morph with Blue Suit, Power Bomb the Item, Collect Item and Return
(Extreme)
Etecoon Energy Tank Room
From: 4
Bottom Right Door
To: 3
Bottom Left Door
Cross the room while killing the Beetoms, then use two precisely positioned Power Bombs to overload PLMs. Place the Power Bombs at the same height as the tile above the door. This ends up being the max height Samus can jump and place it while at the very bottom of the room, with a midair morph or artificially morphed Spring Ball jump. Because PLMs are overloaded, Samus needs to exit G-mode at the item to collect it before returning through the crumble blocks. Entrance condition: {
"comeInWithGMode": {
"mode": "direct",
"morphed": true
}
}Requires: "h_blueSuitGMode"
"canPowerBombItemOverloadPLMs"
"canComplexGMode"
{
"itemNotCollectedAtNode": 5
}
{
"or": [
"Morph",
"h_artificialMorphSpringBall"
]
}
{
"ammo": {
"type": "PowerBomb",
"count": 2
}
}
{
"or": [
"canWallJump",
"SpaceJump",
{
"and": [
"HiJump",
"canSpringBallJumpMidAir"
]
},
"h_artificialMorphLongIBJ",
{
"and": [
{
"blueSuitShinecharge": {}
},
{
"or": [
{
"shinespark": {
"frames": 13,
"excessFrames": 3
}
},
{
"and": [
"HiJump",
{
"shinespark": {
"frames": 9,
"excessFrames": 3
}
}
]
}
]
}
]
}
]
}Clears obstacles: A Collects items: 5 Dev note: This does not require canRiskPermanentLossOfAccess if Samus returns through the crumble blocks. FIXME: This could include a Crystal Flash before shinesparking. |
From: 4
Bottom Right Door
To: 5
Top Item
Cross the room while killing the Beetoms, then use two precisely positioned Power Bombs to overload PLMs. Place the Power Bombs at the same height as the tile above the door. This ends up being the max height Samus can jump and place it while at the very bottom of the room, with a midair morph or artificially morphed Spring Ball jump. Entrance condition: {
"comeInWithGMode": {
"mode": "direct",
"morphed": true
}
}Requires: "canPowerBombItemOverloadPLMs"
{
"itemNotCollectedAtNode": 5
}
"canRiskPermanentLossOfAccess"
"h_artificialMorphMovement"
{
"or": [
{
"and": [
{
"ammo": {
"type": "PowerBomb",
"count": 3
}
},
{
"or": [
"canComplexGMode",
{
"ammo": {
"type": "PowerBomb",
"count": 1
}
}
]
}
]
},
{
"and": [
"Morph",
{
"or": [
"ScrewAttack",
"Ice",
{
"ammo": {
"type": "Missile",
"count": 5
}
},
{
"ammo": {
"type": "Super",
"count": 5
}
}
]
}
]
}
]
}
{
"ammo": {
"type": "PowerBomb",
"count": 2
}
}
{
"or": [
"canWallJump",
"SpaceJump",
{
"and": [
"HiJump",
"canSpringBallJumpMidAir"
]
},
"h_artificialMorphLongIBJ"
]
}Clears obstacles: A Dev note: This requires canRiskPermanentLossOfAccess unless Samus returns through the crumble blocks. |
From: 4
Bottom Right Door
To: 5
Top Item
Samus is only able to kill enemies with blue suit while moving and not falling. With bombs as the only movement option, Samus should only touch the enemies while grounded and moving horizontally. After crossing the spikeway, use two precisely positioned Power Bombs to overload PLMs. Place the Power Bombs at the same height as the tile above the door. This ends up being the max height Samus can jump and place it while at the very bottom of the room, with a midair morph or artificially morphed Spring Ball jump. Entrance condition: {
"comeInWithGMode": {
"mode": "direct",
"morphed": true
}
}Requires: "h_blueSuitGMode"
"canPowerBombItemOverloadPLMs"
{
"itemNotCollectedAtNode": 5
}
"canRiskPermanentLossOfAccess"
{
"or": [
"Morph",
"h_artificialMorphSpringBall",
"h_artificialMorphIBJ"
]
}
{
"ammo": {
"type": "PowerBomb",
"count": 2
}
}
{
"or": [
"canWallJump",
"SpaceJump",
{
"and": [
"HiJump",
"canSpringBallJumpMidAir"
]
},
"h_artificialMorphLongIBJ",
{
"and": [
{
"blueSuitShinecharge": {}
},
{
"or": [
{
"shinespark": {
"frames": 13,
"excessFrames": 3
}
},
{
"and": [
"HiJump",
{
"shinespark": {
"frames": 9,
"excessFrames": 3
}
}
]
}
]
}
]
}
]
}Clears obstacles: A Dev note: This requires canRiskPermanentLossOfAccess unless Samus returns through the crumble blocks. FIXME: This could include a Crystal Flash before shinesparking. |
From: 4
Bottom Right Door
To: 5
Top Item
Cross the room while killing the Beetoms, then bomb the bottom of the crumble blocks to overload PLMs and go through. Entrance condition: {
"comeInWithGMode": {
"mode": "any",
"morphed": true
}
}Requires: "h_artificialMorphLongIBJ"
{
"or": [
"canTrickyGMode",
{
"and": [
{
"ammo": {
"type": "PowerBomb",
"count": 3
}
},
{
"or": [
"canComplexGMode",
{
"ammo": {
"type": "PowerBomb",
"count": 1
}
}
]
}
]
},
{
"and": [
"Morph",
{
"or": [
"ScrewAttack",
"Ice",
{
"ammo": {
"type": "Missile",
"count": 5
}
},
{
"ammo": {
"type": "Super",
"count": 5
}
}
]
}
]
}
]
}
{
"or": [
"canBeVeryPatient",
"h_artificialMorphCeilingBombJump",
{
"and": [
"canBePatient",
"h_artificialMorphSpringBall",
"HiJump"
]
},
{
"and": [
"canBePatient",
"Morph",
{
"or": [
"HiJump",
"canWallJump"
]
}
]
}
]
}Clears obstacles: A |
From: 4
Bottom Right Door
To: 5
Top Item
Samus is only able to kill enemies with blue suit while moving and not falling. With bombs as the only movement option, Samus should only touch the enemies while grounded and moving horizontally. After crossing the spikeway, bomb the bottom of the crumble blocks to overload PLMs and go through. Entrance condition: {
"comeInWithGMode": {
"mode": "any",
"morphed": true
}
}Requires: "h_blueSuitGMode"
"h_artificialMorphLongIBJ"
{
"or": [
"canBeVeryPatient",
"h_artificialMorphCeilingBombJump",
{
"and": [
"canBePatient",
"h_artificialMorphSpringBall",
"HiJump"
]
},
{
"and": [
"canBePatient",
"Morph",
{
"or": [
"HiJump",
"canWallJump"
]
}
]
}
]
}Clears obstacles: A |
From: 7
Below Power Bomb Blocks - Top Right Door
To: 9
Right Etecoon Shaft - Top Left Door
Roll through the camera scroll blocks in front of the bomb block, then go through the morph tunnel and IBJ to the top. Samus can boost to the left when she is high enough. A visual cue is when she is vertically near the top half of the door on the correct screen. Entrance condition: {
"comeInWithGMode": {
"mode": "any",
"morphed": true
}
}Requires: "h_artificialMorphLongIBJ" "canOffScreenMovement" "canBeVeryPatient" |
From: 7
Below Power Bomb Blocks - Top Right Door
To: 11
Right Etecoon Shaft - Item
Roll through the camera scroll blocks in front of the bomb block, then go through the morph tunnel and IBJ to the top. Samus can boost to the right when she is high enough. A visual cue is when she is vertically at the top of the door on the correct screen. Entrance condition: {
"comeInWithGMode": {
"mode": "any",
"morphed": true
}
}Requires: "h_artificialMorphLongIBJ" "canOffScreenMovement" "canBeVeryPatient" Dev note: This is only useful if the item is Morph |
From: 8
Below Power Bomb Blocks - Bottom Left Door
To: 9
Right Etecoon Shaft - Top Left Door
Enter with G-Mode. Jump to the top of the shaft. Place a Power Bomb against the ceiling next to the shot block (do not touch the scroll block). Drop back to the bottom of the shaft, roll against the bomb block until Samus passes through. Jump through the crumble block and through the morph tunnel. Once Samus can stand up, do so and use X-Ray to switch to R-Mode: be sure to hold X-Ray until it fully widens. Bomb the block, roll back through the tunnel and stop next to the crumble block. Use a Power Bomb or Five-Bomb Drop to clear the lower bomb block. Wait next to the crumble block until the global Zeela is visible coming down the right wall. Wait until the last possible moment to touch the crumbe block and allow the Zeela through, and immediately roll away to avoid getting hit by it. Lead it back through the Morph tunnel. Jump up to the box with the item. Wait for the Zeela to leave if needed, then Crystal Flash inside. Damage back down using the Zeela. If this needs multiple laps, use a Super to knock it down off the right wall before it can enter the item box. Lead it back through the Morph tunnel and into the Etecoons shaft. Let the Zeela pass going up the left wall and wait until it has moved far enough up before using a Crystal Flash. Use the Zeela to damage back down, shinecharge on the runway, and jump into the Zeela to interrupt. Entrance condition: {
"comeInWithGMode": {
"mode": "direct",
"morphed": false
}
}Requires: "Morph"
"h_usePowerBomb"
"canMidAirMorph"
"h_bombThings"
{
"or": [
"h_usePowerBomb",
{
"and": [
"Charge",
"h_useMorphBombs"
]
}
]
}
"canBeVeryPatient"
"h_CrystalFlashForReserveEnergy"
{
"or": [
{
"disableEquipment": "ETank"
},
{
"resourceAtMost": [
{
"type": "ReserveEnergy",
"count": 5
}
]
}
]
}
{
"or": [
"canConsecutiveWallJump",
"canLongIBJ",
"SpaceJump"
]
}
{
"or": [
{
"disableEquipment": "ETank"
},
{
"ammo": {
"type": "Super",
"count": 3
}
}
]
}
{
"or": [
{
"canShineCharge": {
"usedTiles": 17,
"openEnd": 1
}
},
{
"and": [
"h_frozenEnemyRunway",
{
"ammo": {
"type": "Super",
"count": 1
}
},
{
"canShineCharge": {
"usedTiles": 18,
"openEnd": 1
}
}
]
}
]
}
{
"autoReserveTrigger": {}
}
"canRModeSparkInterrupt"Clears obstacles: A |
From: 8
Below Power Bomb Blocks - Bottom Left Door
To: 9
Right Etecoon Shaft - Top Left Door
Roll through the camera scroll blocks in front of the bomb block, then go through the morph tunnel and IBJ to the top. Samus can boost to the left when she is high enough. A visual cue is when she is vertically near the top half of the door on the correct screen. Entrance condition: {
"comeInWithGMode": {
"mode": "any",
"morphed": true
}
}Requires: "h_artificialMorphLongIBJ" "canOffScreenMovement" "canBeVeryPatient" |
From: 8
Below Power Bomb Blocks - Bottom Left Door
To: 11
Right Etecoon Shaft - Item
Roll through the camera scroll blocks in front of the bomb block, then go through the morph tunnel and IBJ to the top. Samus can boost to the right when she is high enough. A visual cue is when she is vertically at the top of the door on the correct screen. Entrance condition: {
"comeInWithGMode": {
"mode": "any",
"morphed": true
}
}Requires: "h_artificialMorphLongIBJ" "canOffScreenMovement" "canBeVeryPatient" Dev note: This is only useful if the item is Morph |
From: 9
Right Etecoon Shaft - Top Left Door
To: 12
Above Power Bomb Blocks - Main Junction
Place bombs against the item Chozo ball to overload PLMs. Then go through the bomb blocks and tunnel. IBJ up the left side, blind, until getting on the top small platform. Place a Power Bomb and exit g-mode before the bomb goes off to break the blocks. Entrance condition: {
"comeInWithGMode": {
"mode": "any",
"morphed": true
}
}Requires: {
"itemNotCollectedAtNode": 11
}
"canRiskPermanentLossOfAccess"
"h_artificialMorphLongIBJ"
"h_artificialMorphPowerBomb"
"canBePatient"
"canOffScreenMovement"
"canTrickyGMode"Clears obstacles: A |
From: 9
Right Etecoon Shaft - Top Left Door
To: 12
Above Power Bomb Blocks - Main Junction
Fall down to the Morph tunnel and roll through the bomb block. Roll through the camera scroll blocks in the tunnel a few times to overload PLMs before continuing and touching the crumble block. Carefully climb the shaft with an IBJ. Note that the camera moves to the left once getting high enough, making this harder. Land on the top block, place a Power Bomb, then quickly exit G-mode before it explodes to break the blocks above. Entrance condition: {
"comeInWithGMode": {
"mode": "any",
"morphed": true
}
}Requires: "h_blueSuitGMode" "h_artificialMorphLongIBJ" "h_artificialMorphPowerBomb" "canBePatient" "canOffScreenMovement" "canTrickyGMode" Clears obstacles: A |
From: 10
Right Etecoon Shaft - Bottom Left Door
To: 9
Right Etecoon Shaft - Top Left Door
Entrance condition: {
"comeInWithGMode": {
"mode": "any",
"morphed": true
}
}Requires: "h_artificialMorphLongIBJ" |
From: 10
Right Etecoon Shaft - Bottom Left Door
To: 11
Right Etecoon Shaft - Item
Entrance condition: {
"comeInWithGMode": {
"mode": "any",
"morphed": true
}
}Requires: "h_artificialMorphLongIBJ" |
From: 10
Right Etecoon Shaft - Bottom Left Door
To: 12
Above Power Bomb Blocks - Main Junction
IBJ up and place bombs against the item Chozo ball to overload PLMs. Then go through the bomb blocks and tunnel. IBJ up again, blind, until getting on the top small platform. Place a Power Bomb and exit g-mode before the bomb goes off to break the blocks. Entrance condition: {
"comeInWithGMode": {
"mode": "any",
"morphed": true
}
}Requires: {
"itemNotCollectedAtNode": 11
}
"canRiskPermanentLossOfAccess"
"h_artificialMorphLongIBJ"
"h_artificialMorphPowerBomb"
"canBePatient"
"canOffScreenMovement"
"canTrickyGMode"Clears obstacles: A |
From: 10
Right Etecoon Shaft - Bottom Left Door
To: 12
Above Power Bomb Blocks - Main Junction
IBJ up and roll through the bomb block; be sure not to bomb it or it will remain solid. Roll through the camera scroll blocks in the tunnel a few times to overload PLMs before continuing and touching the crumble block. Carefully climb the shaft with an IBJ. Note that the camera moves to the left once getting high enough, making this harder. Land on the top block, place a Power Bomb, then quickly exit G-mode before it explodes to break the blocks above. Entrance condition: {
"comeInWithGMode": {
"mode": "any",
"morphed": true
}
}Requires: "h_blueSuitGMode" "h_artificialMorphLongIBJ" "h_artificialMorphPowerBomb" "canBePatient" "canOffScreenMovement" "canTrickyGMode" Clears obstacles: A |
From: 10
Right Etecoon Shaft - Bottom Left Door
To: 13
Below Power Bomb Blocks - Main Junction
IBJ up and place bombs against the item Chozo ball to overload PLMs. Then go down, through the bomb blocks and tunnel, then exit G-mode. Entrance condition: {
"comeInWithGMode": {
"mode": "any",
"morphed": true
}
}Requires: {
"itemNotCollectedAtNode": 11
}
"canRiskPermanentLossOfAccess"
"h_artificialMorphLongIBJ"
"canBePatient" |
From: 10
Right Etecoon Shaft - Bottom Left Door
To: 13
Below Power Bomb Blocks - Main Junction
IBJ up and roll through the bomb block; be sure not to bomb it or it will remain solid. Roll through the camera scroll blocks in the tunnel a few times to overload PLMs before continuing and touching the crumble block. Entrance condition: {
"comeInWithGMode": {
"mode": "any",
"morphed": true
}
}Requires: "h_blueSuitGMode" "h_artificialMorphLongIBJ" |
From: 10
Right Etecoon Shaft - Bottom Left Door
To: 14
Right Etecoon Shaft - Wall Jump Checkpoint
Requires: {
"or": [
"canWallJump",
"SpaceJump",
"canLongIBJ",
{
"and": [
"HiJump",
"canSpringBallJumpMidAir"
]
}
]
} |
From: 14
Right Etecoon Shaft - Wall Jump Checkpoint
To: 9
Right Etecoon Shaft - Top Left Door
Requires: "canLongIBJ" |
From: 1
Top Left Door
To: 1
Top Left Door
Fall past the first bug, wait for the second to spawn before rolling off the ledge. Get into the tube with an IBJ, bomb boost Spring Ball jump, or HiJump Spring Fling. Touch the item then roll out of the tube before exiting G-mode to remote acquire the item. Entrance condition: {
"comeInWithGMode": {
"mode": "direct",
"morphed": true
}
}Requires: "canRemoteAcquire"
{
"or": [
"h_artificialMorphLongIBJ",
"h_artificialMorphSpringBallBombJump",
{
"and": [
"HiJump",
"h_artificialMorphSpringFling"
]
}
]
}Collects items: 4 |
|
Roll under the first bug, wait for the second to spawn before rolling off the ledge. IBJ, bomb boost spring ball jump, or HiJump Spring Fling into the pipe. Entrance condition: {
"comeInWithGMode": {
"mode": "any",
"morphed": true
}
}Requires: {
"or": [
"h_artificialMorphLongIBJ",
"h_artificialMorphSpringBallBombJump",
{
"and": [
"HiJump",
"h_artificialMorphSpringFling"
]
}
]
} |
|
Requires: {
"or": [
"HiJump",
"SpaceJump",
"canLongIBJ",
"canJumpIntoIBJ",
"canWallJump",
"canUseFrozenEnemies",
"canSpringBallJumpMidAir"
]
} |
From: 2
Top Right Door
To: 1
Top Left Door
Fall past the first bug, wait for the second to spawn before rolling off the ledge. Get into the tube with an IBJ, bomb boost Spring Ball jump, or HiJump Spring Fling. Touch the item then roll out of the tube before exiting G-mode to remote acquire the item. Entrance condition: {
"comeInWithGMode": {
"mode": "direct",
"morphed": true
}
}Requires: "canRemoteAcquire"
{
"or": [
"h_artificialMorphLongIBJ",
"h_artificialMorphSpringBallBombJump",
{
"and": [
"HiJump",
"h_artificialMorphSpringFling"
]
}
]
}Collects items: 4 |
|
Fall past the first bug, wait for the second to spawn before rolling off the ledge. IBJ, bomb boost spring ball jump, or HiJump Spring Fling into the pipe. Entrance condition: {
"comeInWithGMode": {
"mode": "any",
"morphed": true
}
}Requires: {
"or": [
"h_artificialMorphLongIBJ",
"h_artificialMorphSpringBallBombJump",
{
"and": [
"HiJump",
"h_artificialMorphSpringFling"
]
}
]
} |
From: 1
Left Side - Top Door
To: 16
Direct G-Mode Morph (Top Item, Above Hopper Pit)
Roll directly through the bomb block on entry without rolling much in the morph tunnel to overload PLMs as little as possible. Avoiding the hoppers can be tricky; if possible, Power Bomb them or jump into them with Spring Ball. It is possible to kill the Zebs by placing a bomb next to the tube. IBJ from the lower hopper pit, or with HiJump, perform a Spring Fling from the right pillar by jumping immediately before the pause finishes and turning off Spring Ball, quickly pausing again and turning Spring Ball back on can help as well. Entrance condition: {
"comeInWithGMode": {
"mode": "direct",
"morphed": true
}
}Requires: {
"haveBlueSuit": {}
}
{
"or": [
"Morph",
"canTrickyDodgeEnemies",
"h_artificialMorphSpringBall",
{
"and": [
{
"or": [
"h_artificialMorphPowerBomb",
{
"enemyDamage": {
"enemy": "Sm. Sidehopper",
"type": "contact",
"hits": 1
}
}
]
},
{
"or": [
"h_artificialMorphPowerBomb",
{
"enemyDamage": {
"enemy": "Sm. Sidehopper",
"type": "contact",
"hits": 1
}
}
]
}
]
}
]
}
{
"or": [
"h_artificialMorphLongIBJ",
{
"and": [
"HiJump",
"h_artificialMorphSpringFling"
]
}
]
} |
From: 2
Right Side - Top Door
To: 16
Direct G-Mode Morph (Top Item, Above Hopper Pit)
Avoiding the hoppers can be tricky. Power Bomb them or lure them off-camera to the right while above. It is possible to kill the Zebs by placing a bomb next to the tube. IBJ from the lower hopper pit, or with HiJump, perform a Spring Fling from the right pillar by jumping immediately before the pause finishes and turning off Spring Ball, quickly pausing again and turning Spring Ball back on can help as well. Entrance condition: {
"comeInWithGMode": {
"mode": "direct",
"morphed": true
}
}Requires: {
"or": [
"Morph",
"canTrickyDodgeEnemies",
{
"and": [
"h_artificialMorphSpringBall",
{
"haveBlueSuit": {}
}
]
},
{
"and": [
{
"or": [
"h_artificialMorphPowerBomb",
{
"enemyDamage": {
"enemy": "Sm. Sidehopper",
"type": "contact",
"hits": 1
}
}
]
},
{
"or": [
"h_artificialMorphPowerBomb",
{
"enemyDamage": {
"enemy": "Sm. Sidehopper",
"type": "contact",
"hits": 1
}
}
]
}
]
}
]
}
{
"or": [
"h_artificialMorphLongIBJ",
{
"and": [
"HiJump",
"h_artificialMorphSpringFling"
]
}
]
} |
From: 3
Left Side - Top Middle Door (Main Entrance)
To: 16
Direct G-Mode Morph (Top Item, Above Hopper Pit)
IBJ from the lower hopper pit, or with HiJump, perform a Spring Fling from the right pillar by jumping immediately before the pause finishes and turning off Spring Ball, quickly pausing again and turning Spring Ball back on can help as well. Entrance condition: {
"comeInWithGMode": {
"mode": "direct",
"morphed": true
}
}Requires: {
"or": [
"Morph",
"canTrickyDodgeEnemies",
"h_artificialMorphPowerBomb",
{
"and": [
"h_artificialMorphSpringBall",
{
"haveBlueSuit": {}
}
]
},
{
"enemyDamage": {
"enemy": "Sm. Sidehopper",
"type": "contact",
"hits": 1
}
}
]
}
{
"or": [
"h_artificialMorphLongIBJ",
{
"and": [
"HiJump",
"h_artificialMorphSpringFling"
]
}
]
} |
From: 6
Right Side - Top Middle Door
To: 16
Direct G-Mode Morph (Top Item, Above Hopper Pit)
Avoid the Reo by jumping past it with quick short jumps, or slowly IBJ below it until it escapes above. IBJ from the lower hopper pit, or with HiJump, perform a Spring Fling from the right pillar by jumping immediately before the pause finishes and turning off Spring Ball, quickly pausing again and turning Spring Ball back on can help as well. Entrance condition: {
"comeInWithGMode": {
"mode": "direct",
"morphed": true
}
}Requires: {
"or": [
"Morph",
"canTrickyDodgeEnemies",
"h_artificialMorphPowerBomb",
{
"and": [
"h_artificialMorphSpringBall",
{
"haveBlueSuit": {}
}
]
},
{
"enemyDamage": {
"enemy": "Sm. Sidehopper",
"type": "contact",
"hits": 1
}
}
]
}
{
"or": [
"h_artificialMorphLongIBJ",
{
"and": [
"HiJump",
"h_artificialMorphSpringFling"
]
}
]
} |
From: 8
Right Side - Bottom Door
To: 16
Direct G-Mode Morph (Top Item, Above Hopper Pit)
Climb the room while avoiding the Reo and the camera scroll block against the wall in front of the off-screen Super tunnel. IBJ from the lower hopper pit, or with HiJump, perform a Spring Fling from the right pillar by jumping immediately before the pause finishes and turning off Spring Ball, quickly pausing again and turning Spring Ball back on can help as well. Entrance condition: {
"comeInWithGMode": {
"mode": "direct",
"morphed": true
}
}Requires: {
"or": [
"Morph",
"canTrickyDodgeEnemies",
"h_artificialMorphPowerBomb",
{
"and": [
"h_artificialMorphSpringBall",
{
"haveBlueSuit": {}
}
]
},
{
"enemyDamage": {
"enemy": "Sm. Sidehopper",
"type": "contact",
"hits": 1
}
}
]
}
{
"or": [
"h_artificialMorphLongIBJ",
{
"and": [
"HiJump",
"h_artificialMorphSpringFling"
]
}
]
} |
|
Requires: {
"or": [
"Grapple",
"SpaceJump",
"canWallJump",
"canLongIBJ",
{
"and": [
"HiJump",
"canJumpIntoIBJ"
]
},
{
"and": [
"HiJump",
"canSpringBallJumpMidAir"
]
},
{
"and": [
"HiJump",
"canSpeedyJump"
]
}
]
} |
From: 15
G-Mode Morph Junction (Middle Right)
To: 10
Top Item (Above Hopper Pit)
If there are no Sidehoppers in the bottom right corner of their pen, roll down and carefully place bombs while luring and killing them. Otherwise, go down into the hallway below and carefully kill the two Reos and lure the Sidehoppers to the left. If they don't stay on the left, exit this hallway and enter it again to reset the camera and try again. Then IBJ up to the item above. Requires: "canGMode"
"h_artificialMorphLongIBJ"
{
"or": [
"canTrickyDodgeEnemies",
"h_artificialMorphPowerBomb",
{
"and": [
"h_artificialMorphSpringBall",
{
"haveBlueSuit": {}
}
]
},
{
"enemyDamage": {
"enemy": "Sm. Sidehopper",
"type": "contact",
"hits": 1
}
}
]
} |
|
There are camera scroll blocks just below the speed blocks, so it is easy to overload PLMs by bouncing into them. A single IBJ is slow enough at the top to overload them before Samus can hit the blocks. Entrance condition: {
"comeInWithGMode": {
"mode": "any",
"morphed": true
}
}Requires: "h_artificialMorphLongIBJ" "canBePatient" |
|
Requires: {
"haveBlueSuit": {}
}
{
"or": [
"canConsecutiveWallJump",
"SpaceJump",
{
"and": [
"canLongIBJ",
"canBePatient"
]
}
]
} |
|
There are camera scroll blocks just below the speed blocks, so it is easy to overload PLMs by bouncing into them. A single IBJ is slow enough at the top to overload them before Samus can hit the blocks. Entrance condition: {
"comeInWithGMode": {
"mode": "any",
"morphed": true
}
}Requires: "h_artificialMorphLongIBJ" "canBePatient" |
|
Requires: {
"useFlashSuit": {}
}
{
"or": [
"canConsecutiveWallJump",
"SpaceJump",
{
"and": [
"canLongIBJ",
"canBePatient",
"canUnmorphBombBoost"
]
}
]
}
{
"shinespark": {
"frames": 9,
"excessFrames": 7
}
}Dev note: There is no point in using a blue suit to spark or sparking at the bottom if Samus can wall jump. |
From: 1
Left Door
To: 2
Right Door
Entrance condition: {
"comeInWithGMode": {
"mode": "indirect",
"morphed": true
}
}Requires: "h_artificialMorphLongIBJ"
{
"enemyDamage": {
"enemy": "Sm. Sidehopper",
"type": "contact",
"hits": 1
}
}
{
"or": [
{
"enemyDamage": {
"enemy": "Sidehopper",
"type": "contact",
"hits": 3
}
},
"h_artificialMorphPowerBomb"
]
}Clears obstacles: A, B |
From: 1
Left Door
To: 2
Right Door
Samus will take a hopper hit on entry if she rolls into the room, as she is vulnerable in the falling state. It is possible to enter the room jumping with Spring Ball to avoid the hit. Entrance condition: {
"comeInWithGMode": {
"mode": "indirect",
"morphed": true
}
}Requires: "h_blueSuitGMode"
"h_artificialMorphLongIBJ"
{
"or": [
"h_artificialMorphSpringBall",
{
"enemyDamage": {
"enemy": "Sm. Sidehopper",
"type": "contact",
"hits": 1
}
}
]
}Clears obstacles: A, B |
|
Requires: "canLongIBJ"
{
"obstaclesCleared": [
"A"
]
}
{
"or": [
"Wave",
{
"obstaclesCleared": [
"B"
]
}
]
}Dev note: IBJ requires the enemies to be killed The reverse gate glitch may be executed earlier from node 1 -> 1. |
From: 1
Left Door
To: 3
Top Junction
Samus will have i-frames on entry and can roll around to kill the hoppers. Entrance condition: {
"comeInWithGMode": {
"mode": "direct",
"morphed": true
}
}Requires: "h_blueSuitGMode" "h_artificialMorphLongIBJ" Clears obstacles: A |
|
Kill the Sidehoppers with Bombs or a Power Bomb, then IBJ up onto the Grapple block. Use Wave to get through. Entrance condition: {
"comeInWithGMode": {
"mode": "any",
"morphed": true
}
}Requires: "h_artificialMorphLongIBJ"
{
"enemyDamage": {
"enemy": "Sm. Sidehopper",
"type": "contact",
"hits": 1
}
}
{
"or": [
{
"enemyDamage": {
"enemy": "Sidehopper",
"type": "contact",
"hits": 3
}
},
"h_artificialMorphPowerBomb"
]
}Clears obstacles: A |
From: 1
Left Door
To: 3
Top Junction
Samus will take a hopper hit on entry if she rolls into the room, as she is vulnerable in the falling state. It is possible to enter the room jumping with Spring Ball to avoid the hit. Entrance condition: {
"comeInWithGMode": {
"mode": "indirect",
"morphed": true
}
}Requires: "h_blueSuitGMode"
"h_artificialMorphLongIBJ"
{
"or": [
"h_artificialMorphSpringBall",
{
"enemyDamage": {
"enemy": "Sm. Sidehopper",
"type": "contact",
"hits": 1
}
}
]
}Clears obstacles: A, B, C |
|
Requires: {
"or": [
"canWallJump",
"SpaceJump",
"canLongIBJ",
{
"and": [
"HiJump",
"canSpringBallJumpMidAir"
]
}
]
}Clears obstacles: B |
|
Entrance condition: {
"comeInWithGMode": {
"mode": "any",
"morphed": true
}
}Requires: "h_artificialMorphLongIBJ" Clears obstacles: B |
|
Requires: {
"haveBlueSuit": {}
}
{
"or": [
"canConsecutiveWallJump",
"SpaceJump",
{
"and": [
"Gravity",
"canIBJ"
]
},
{
"and": [
"Gravity",
"canSpringBallJumpMidAir"
]
},
{
"and": [
{
"doorUnlockedAtNode": 1
},
{
"or": [
"HiJump",
"canSpringBallJumpMidAir",
{
"and": [
"canJumpIntoIBJ",
"can4HighMidAirMorph"
]
}
]
}
]
},
{
"and": [
"canBombJumpWaterEscape",
"canLongIBJ"
]
}
]
}Dev note: With a blue suit, the bomb blocks in front of the door cannot be used as a platform. |
|
Requires: "canLongIBJ"
{
"or": [
{
"spikeHits": 2
},
{
"and": [
"canBombHorizontally",
{
"spikeHits": 1
}
]
},
{
"and": [
"canHorizontalDamageBoost",
{
"enemyDamage": {
"enemy": "Fireflea",
"type": "contact",
"hits": 1
}
}
]
}
]
}
{
"or": [
{
"noBlueSuit": {}
},
"canBlueSuitSpikeJump"
]
} |
From: 4
Small Ledge Below Left Door
To: 1
Left Door
Requires: {
"or": [
"canLongIBJ",
"canJumpIntoIBJ"
]
}
"canDiagonalBombJump" |
|
Requires: "h_IBJFromSpikes"
"canLongIBJ"
{
"or": [
{
"noBlueSuit": {}
},
"canBlueSuitSpikeJump"
]
} |
|
With a blue suit, Samus cannot stand on the platforms. Requires: {
"haveBlueSuit": {}
}
{
"or": [
"SpaceJump",
{
"and": [
"canLongIBJ",
"canStaggeredIBJ"
]
},
"canWallJump"
]
} |
From: 3
Bottom Left Door
To: 2
Middle Left Door (Behind Power Bomb Blocks)
Requires switching between single and double IBJs. While Doubles are not techincally necessary, they make the strat more bearable. Exit G-Mode before the Power Bomb explodes in order to break the wall. With an extra Power Bomb, it may be worthwhile to use it to kill some of the Rippers. Entrance condition: {
"comeInWithGMode": {
"mode": "any",
"morphed": true
}
}Requires: {
"notable": "IBJ Between the Bottom Rippers"
}
"h_artificialMorphDoubleBombJump"
"h_artificialMorphStaggeredIBJ"
"h_artificialMorphPowerBomb"
"h_artificialMorphLongIBJ"
{
"or": [
"canWallJump",
"HiJump"
]
}Clears obstacles: A Dev note: This will kill the Beetom, which could prevent using it to get up, so this needs to get all the way to 2. Anything with Morph can exit G-Mode at 6. |
From: 3
Bottom Left Door
To: 2
Middle Left Door (Behind Power Bomb Blocks)
Use two Power Bombs to kill the Rippers, or carefully pass the first two and place a single Power Bomb on the left ledge to kill them all. Exit G-Mode before the Power Bomb explodes in order to break the wall. Entrance condition: {
"comeInWithGMode": {
"mode": "any",
"morphed": true
}
}Requires: "h_artificialMorphLongIBJ"
"h_artificialMorphPowerBomb"
{
"or": [
"h_artificialMorphStaggeredIBJ",
"h_artificialMorphPowerBomb"
]
}
"h_artificialMorphPowerBomb"
{
"or": [
"canWallJump",
"HiJump"
]
}Clears obstacles: A Dev note: This will kill the Beetom, which could prevent using it to get up, so this needs to get all the way to 2. Anything with Morph can exit G-Mode at 6. |
From: 3
Bottom Left Door
To: 6
Junction (Above Bottom Rippers)
Requires switching between single and double IBJs. While Doubles are not techincally necessary, they make the strat more bearable. With a Power Bomb, it can help to kill some of the Rippers. Entrance condition: {
"comeInWithGMode": {
"mode": "any",
"morphed": true
}
}Requires: {
"notable": "IBJ Between the Bottom Rippers"
}
"h_artificialMorphDoubleBombJump"
"h_artificialMorphStaggeredIBJ"
"h_artificialMorphPowerBomb"
"h_artificialMorphLongIBJ" |
From: 3
Bottom Left Door
To: 6
Junction (Above Bottom Rippers)
Use two Power Bombs to kill the Rippers, or carefully pass the first two and place a single Power Bomb on the left ledge to kill them all. Entrance condition: {
"comeInWithGMode": {
"mode": "any",
"morphed": true
}
}Requires: "h_artificialMorphLongIBJ"
"h_artificialMorphPowerBomb"
{
"or": [
"h_artificialMorphStaggeredIBJ",
"h_artificialMorphPowerBomb"
]
} |
From: 4
Bottom Right Door
To: 2
Middle Left Door (Behind Power Bomb Blocks)
Requires switching between single and double IBJs. While Doubles are not techincally necessary, they make the strat more bearable. Exit G-Mode before the Power Bomb explodes in order to break the wall. With an extra Power Bomb, it may be worthwhile to use it to kill some of the Rippers. Entrance condition: {
"comeInWithGMode": {
"mode": "any",
"morphed": true
}
}Requires: {
"notable": "IBJ Between the Bottom Rippers"
}
"h_artificialMorphDoubleBombJump"
"h_artificialMorphStaggeredIBJ"
"h_artificialMorphPowerBomb"
"h_artificialMorphLongIBJ"
{
"or": [
"canWallJump",
"HiJump"
]
}Clears obstacles: A Dev note: This will kill the Beetom, which could prevent using it to get up, so this needs to get all the way to 2. Anything with Morph can exit G-Mode at 6. |
From: 4
Bottom Right Door
To: 2
Middle Left Door (Behind Power Bomb Blocks)
Use two Power Bombs to kill the Rippers, or carefully pass the first two and place a single Power Bomb on the left ledge to kill them all. Exit G-Mode before the Power Bomb explodes in order to break the wall. Entrance condition: {
"comeInWithGMode": {
"mode": "any",
"morphed": true
}
}Requires: "h_artificialMorphLongIBJ"
"h_artificialMorphPowerBomb"
{
"or": [
"h_artificialMorphStaggeredIBJ",
"h_artificialMorphPowerBomb"
]
}
"h_artificialMorphPowerBomb"
{
"or": [
"canWallJump",
"HiJump"
]
}Clears obstacles: A Dev note: This will kill the Beetom, which could prevent using it to get up, so this needs to get all the way to 2. Anything with Morph can exit G-Mode at 6. |
From: 4
Bottom Right Door
To: 6
Junction (Above Bottom Rippers)
Requires switching between single and double IBJs. While Doubles are not techincally necessary, they make the strat more bearable. With a Power Bomb, it can help to kill some of the Rippers. Entrance condition: {
"comeInWithGMode": {
"mode": "any",
"morphed": true
}
}Requires: {
"notable": "IBJ Between the Bottom Rippers"
}
"h_artificialMorphDoubleBombJump"
"h_artificialMorphStaggeredIBJ"
"h_artificialMorphPowerBomb"
"h_artificialMorphLongIBJ" |
From: 4
Bottom Right Door
To: 6
Junction (Above Bottom Rippers)
Use two Power Bombs to kill the Rippers, or carefully pass the first two and place a single Power Bomb on the left ledge to kill them all. Entrance condition: {
"comeInWithGMode": {
"mode": "any",
"morphed": true
}
}Requires: "h_artificialMorphLongIBJ"
"h_artificialMorphPowerBomb"
{
"or": [
"h_artificialMorphStaggeredIBJ",
"h_artificialMorphPowerBomb"
]
} |
|
Requires: "canLongIBJ"
{
"or": [
{
"and": [
"canWallJump",
"ScrewAttack"
]
},
{
"and": [
{
"or": [
"canWallJump",
"canSpringBallJumpMidAir"
]
},
{
"ammo": {
"type": "PowerBomb",
"count": 1
}
}
]
},
{
"enemyKill": {
"enemies": [
[
"Ripper",
"Ripper",
"Ripper"
],
[
"Ripper"
]
],
"explicitWeapons": [
"Super",
"PowerBomb"
]
}
}
]
} |
From: 7
Junction (Bottom of Room)
To: 6
Junction (Above Bottom Rippers)
Requires switching between single and double IBJs. While Doubles are not techincally necessary, they make the strat more bearable. Requires: {
"notable": "IBJ Between the Bottom Rippers"
}
"canDoubleBombJump"
"canStaggeredIBJ"
"canLongIBJ" |
|
Jump into IBJ to avoid breaking the ledges. Place a Power Bomb on the ascent to break the block and continue the IBJ through it. It is possible to do without a Power Bomb with canBombAboveIBJ. Requires: {
"noBlueSuit": {}
}
"canJumpIntoIBJ"
"canLongIBJ"
{
"or": [
"canBombAboveIBJ",
"canPowerBombMidIBJ"
]
}
{
"obstaclesCleared": [
"B"
]
} |
|
With a blue suit or without canJumpIntoIBJ, Samus will need to kill the Rippers while breaking the bomb blocks then start from the platforms below. Place a Power Bomb on the ascent to break the block and continue the IBJ through it. Requires: "canBeVeryPatient"
"canPowerBombMidIBJ"
"canLongIBJ"
{
"or": [
{
"obstaclesCleared": [
"B"
]
},
{
"ammo": {
"type": "PowerBomb",
"count": 2
}
}
]
} |
|
Requires: {
"or": [
"SpaceJump",
"canLongIBJ",
{
"and": [
"HiJump",
"canJumpIntoIBJ"
]
}
]
} |
|
Requires: {
"or": [
"SpaceJump",
"canLongIBJ"
]
} |
From: 10
G-Mode Morph, Above the Power Bomb Blocks
To: 1
Left Side - Top Door
Requires: "canGMode"
"h_artificialMorphLongIBJ"
{
"or": [
"h_artificialMorphPowerBomb",
{
"and": [
"canTrickyDodgeEnemies",
{
"or": [
"canBePatient",
"canDoubleBombJump"
]
}
]
}
]
} |
From: 10
G-Mode Morph, Above the Power Bomb Blocks
To: 7
Top Right Door
Carefully dodge the Wavers while being prepared to abort the IBJ and start over if necessary. It may be best to first IBJ to the top left side and kill the top Waver with Bombs; this can be done by placing bombs in a vertical line, then dodging the Waver as it approaches. Requires: "canGMode"
"h_artificialMorphLongIBJ"
{
"or": [
"h_artificialMorphPowerBomb",
{
"and": [
"canTrickyDodgeEnemies",
"canBePatient",
{
"or": [
"canBeVeryPatient",
"canDoubleBombJump"
]
}
]
}
]
} |
From: 1
Top Left Door
To: 3
Right Door
Overload PLMs by bombing the gate or crumble blocks, then go through the crumble blocks below and get to the door. IBJ past the Ripper or kill it. The Kago bugs will not spawn until Samus exits G-mode, so it is fine to kill it or IBJ from on top of it. Entrance condition: {
"comeInWithGMode": {
"mode": "any",
"morphed": true
}
}Requires: {
"or": [
"h_artificialMorphLongIBJ",
"h_artificialMorphJumpIntoIBJ"
]
}
"h_artificialMorphBombHorizontally"
{
"or": [
"h_artificialMorphPowerBomb",
{
"and": [
"Morph",
{
"ammo": {
"type": "Missile",
"count": 2
}
}
]
},
{
"and": [
"Morph",
{
"ammo": {
"type": "Super",
"count": 1
}
}
]
},
{
"and": [
"h_artificialMorphDoubleBombJump",
"h_artificialMorphStaggeredIBJ"
]
}
]
}
"h_heatedGModeOpenDifferentDoor" |
From: 1
Top Left Door
To: 4
Item
Overload PLMs by bombing the gate or crumble blocks, then go through the crumble blocks below and get to the item. IBJ past the Ripper or kill it. The Kago bugs will not spawn until Samus exits G-mode, so it is fine to kill it or IBJ from on top of it. Entrance condition: {
"comeInWithGMode": {
"mode": "direct",
"morphed": true
}
}Requires: {
"or": [
"h_artificialMorphLongIBJ",
"h_artificialMorphJumpIntoIBJ"
]
}
"h_artificialMorphBombHorizontally"
{
"or": [
"h_artificialMorphPowerBomb",
{
"and": [
"Morph",
{
"ammo": {
"type": "Missile",
"count": 2
}
}
]
},
{
"and": [
"Morph",
{
"ammo": {
"type": "Super",
"count": 1
}
}
]
},
{
"and": [
"h_artificialMorphDoubleBombJump",
"h_artificialMorphStaggeredIBJ"
]
}
]
}
{
"heatFrames": 0
} |
|
Requires: {
"or": [
{
"and": [
"canLongIBJ",
{
"heatFrames": 1450
}
]
},
{
"and": [
"canJumpIntoIBJ",
{
"heatFrames": 960
}
]
},
{
"and": [
"HiJump",
"canJumpIntoIBJ",
{
"heatFrames": 620
}
]
},
{
"and": [
"canDoubleBombJump",
{
"heatFrames": 560
}
]
},
{
"and": [
"HiJump",
"canDoubleBombJump",
{
"heatFrames": 490
}
]
}
]
}
{
"or": [
"canDash",
{
"heatFrames": 30
}
]
} |
From: 2
Bottom Left Door
To: 3
Right Door
Overload PLMs by bombing the gate or crumble blocks, then go through the crumble blocks below and get to the door. IBJ past the Ripper or kill it. The Kago bugs will not spawn until Samus exits G-mode, so it is fine to kill it or IBJ from on top of it. Entrance condition: {
"comeInWithGMode": {
"mode": "any",
"morphed": true
}
}Requires: {
"or": [
"h_artificialMorphLongIBJ",
"h_artificialMorphJumpIntoIBJ"
]
}
"h_artificialMorphBombHorizontally"
{
"or": [
"h_artificialMorphPowerBomb",
{
"and": [
"Morph",
{
"ammo": {
"type": "Missile",
"count": 2
}
}
]
},
{
"and": [
"Morph",
{
"ammo": {
"type": "Super",
"count": 1
}
}
]
},
{
"and": [
"h_artificialMorphDoubleBombJump",
"h_artificialMorphStaggeredIBJ"
]
}
]
}
"h_heatedGModeOpenDifferentDoor" |
From: 2
Bottom Left Door
To: 4
Item
Overload PLMs by bombing the gate or crumble blocks, then go through the crumble blocks below and get to the item. IBJ past the Ripper or kill it. The Kago bugs will not spawn until Samus exits G-mode, so it is fine to kill it or IBJ from on top of it. Entrance condition: {
"comeInWithGMode": {
"mode": "direct",
"morphed": true
}
}Requires: {
"or": [
"h_artificialMorphLongIBJ",
"h_artificialMorphJumpIntoIBJ"
]
}
"h_artificialMorphBombHorizontally"
{
"or": [
"h_artificialMorphPowerBomb",
{
"and": [
"Morph",
{
"ammo": {
"type": "Missile",
"count": 2
}
}
]
},
{
"and": [
"Morph",
{
"ammo": {
"type": "Super",
"count": 1
}
}
]
},
{
"and": [
"h_artificialMorphDoubleBombJump",
"h_artificialMorphStaggeredIBJ"
]
}
]
}
{
"heatFrames": 0
} |
|
The Namihe fireballs don't move while in G-mode, making it safe to IBJ straight up and out of the lava. Entrance condition: {
"comeInWithGMode": {
"mode": "any",
"morphed": true
}
}Requires: "h_lavaProof" "Gravity" "h_artificialMorphLongIBJ" "h_heatedGModeOpenDifferentDoor" |
|
Begin on top of the lower left Namihe Jump into a double IBJ with such timing that Samus passes above the fired flame and such a way that there is no horizontal speed. A forward jump with run not held will work. Begin diagonal bomb jumping once past the start of the 2nd spike group from the top. Requires: {
"notable": "Diagonal Bomb Jump"
}
"h_heatProof"
"Gravity"
{
"or": [
"h_lavaProof",
"canSuitlessLavaDive"
]
}
"canJumpIntoIBJ"
"canLongIBJ"
"canDoubleBombJump"
"canDiagonalBombJump"
"canStaggeredIBJ"
"canInsaneJump"
{
"heatFrames": 1560
}
{
"lavaFrames": 1520
}Dev note: heatProof because each attempt at this strat costs so many heat frames and its hard enough already. |
From: 5
Lava, Center Namihe
To: 3
Above Lava Junction
Align with the above platform and scroll the camera left by walking into the left side of the bottom-most tiles. Freeze both left side Namihes and begin bomb jumping Requires: "Gravity"
{
"or": [
"h_lavaProof",
"canSuitlessLavaDive"
]
}
"canJumpIntoIBJ"
"canLongIBJ"
"canDoubleBombJump"
"Plasma"
"Ice"
"canCameraManip"
{
"heatFrames": 1040
}
{
"lavaFrames": 1020
} |
|
Entrance condition: {
"comeInWithGMode": {
"mode": "indirect",
"morphed": true
}
}Requires: {
"noBlueSuit": {}
}
{
"or": [
"h_artificialMorphLongIBJ",
"h_artificialMorphJumpIntoIBJ"
]
}
"h_heatedGModeOpenDifferentDoor" |
From: 2
Right Door
To: 1
Left Door
Lure the Geruta to the left door. This may require many jumps to get it to swoop up onto the ledge and not get stuck. Requires: "canComplexGMode"
"h_heatProof"
"canBePatient"
"canCameraManip"
"Morph"
{
"or": [
"canTrickyDodgeEnemies",
"SpaceJump",
"Charge",
"Ice",
"Plasma",
{
"ammo": {
"type": "Missile",
"count": 2
}
},
{
"ammo": {
"type": "Super",
"count": 2
}
},
{
"ammo": {
"type": "PowerBomb",
"count": 2
}
},
{
"enemyDamage": {
"enemy": "Dragon",
"type": "fireball",
"hits": 5
}
},
{
"and": [
"h_lavaProof",
{
"or": [
"ScrewAttack",
"h_bombThings"
]
}
]
}
]
}
{
"or": [
"SpaceJump",
{
"and": [
"HiJump",
"canSpeedyJump",
"canWallJump"
]
},
{
"and": [
{
"noBlueSuit": {}
},
"HiJump",
"canSpringBallJumpMidAir"
]
},
{
"and": [
{
"noBlueSuit": {}
},
"canBeVeryPatient",
{
"or": [
"canLongIBJ",
"canJumpIntoIBJ"
]
}
]
},
{
"and": [
"canBeVeryPatient",
"Grapple",
{
"or": [
"HiJump",
"canSpringBallJumpMidAir"
]
}
]
}
]
}
{
"or": [
{
"ammo": {
"type": "Super",
"count": 1
}
},
{
"obstaclesCleared": [
"A"
]
}
]
}Exit condition: {
"leaveWithGModeSetup": {}
}Collects items: 3 Unlocks doors: {"types":["ammo"],"requires":[]}Dev note: It's possible to avoid the item, but the Geruta will get stuck on it and usually require many swoops to get past it. |
|
Entrance condition: {
"comeInWithGMode": {
"mode": "direct",
"morphed": true
}
}Requires: {
"noBlueSuit": {}
}
"canRemoteAcquire"
{
"or": [
"h_artificialMorphLongIBJ",
"h_artificialMorphJumpIntoIBJ"
]
}
"h_heatedDirectGModeLeaveSameDoor"Collects items: 3 |
|
Entrance condition: {
"comeInWithGMode": {
"mode": "any",
"morphed": true
}
}Requires: "h_heatedGMode"
{
"or": [
"h_artificialMorphLongIBJ",
"h_artificialMorphJumpIntoIBJ"
]
}
{
"or": [
{
"noBlueSuit": {}
},
{
"and": [
"h_lavaProof",
"Gravity"
]
}
]
}
{
"heatFrames": 0
} |
|
Entrance condition: {
"comeInWithGMode": {
"mode": "indirect",
"morphed": true
}
}Requires: "h_heatedGMode"
{
"or": [
"h_artificialMorphLongIBJ",
"h_artificialMorphJumpIntoIBJ"
]
}
{
"or": [
{
"noBlueSuit": {}
},
{
"and": [
"h_lavaProof",
"Gravity"
]
}
]
}
{
"heatFrames": 90
}Clears obstacles: A Dev note: Goes to 3 because opening the gate mostly only makes sense when going back to the right for a longer runway or obtaining the item. |
|
Kill the Dragon with bombs, then start the IBJ in the lava. It's an option without canJumpIntoIBJ. Requires: "h_heatProof" "h_lavaProof" "Gravity" "canLongIBJ" Dev note: FIXME: This doesn't need heatproof. |
|
Break each of the crumble platforms to group the Sovas at the bottom of the room. Requires: "h_heatProof"
"canDodgeWhileShooting"
{
"or": [
{
"and": [
"canConsecutiveWallJump",
{
"or": [
"canCrumbleJump",
"SpaceJump",
"canPreciseWallJump"
]
},
{
"cycleFrames": 930
}
]
},
{
"and": [
"h_useSpringBall",
{
"cycleFrames": 1200
}
]
},
{
"and": [
"SpaceJump",
{
"cycleFrames": 1320
}
]
},
{
"and": [
"canDoubleBombJump",
"canLongIBJ",
{
"cycleFrames": 2340
}
]
},
{
"and": [
"canJumpIntoIBJ",
"canLongIBJ",
"canBePatient",
{
"cycleFrames": 4640
}
]
}
]
}
{
"or": [
"canCrumbleJump",
{
"cycleFrames": 300
}
]
}
{
"resetRoom": {
"nodes": [
1,
2
]
}
}
{
"or": [
{
"haveBlueSuit": {}
},
"Wave",
"Spazer",
"Plasma",
"Grapple",
{
"cycleFrames": 120
}
]
}
{
"or": [
"canDash",
{
"cycleFrames": 90
}
]
}Resets obstacles: A Farm cycle drops: 6 Sova Dev note: Climb from 2 to 1 if resetting with 2. |
|
Kill the Sova on the bottom-right platform, then IBJ right next to the left of the platform. Samus can align with the left side of the platform by jumping into it. Place bombs to kill the second Sova. Drop to the bottom and restart if necessary. Requires: "h_heatProof" "canLongIBJ" "canBePatient" |
|
Kill the Sova on the bottom-right platform, then IBJ right next to the left of the platform. Samus can align with the left side of the platform by jumping into it. Changing the IBJ speed may be necessary to get past the second Sova. Requires: "canLongIBJ"
"canStaggeredIBJ"
{
"heatFrames": 4000
} |
|
IBJ against the left-most wall. Place bombs to kill the Sova. Drop to the bottom and restart if necessary. Requires: "h_heatProof" "canLongIBJ" "canBePatient" |
|
IBJ against the left-most wall. Changing the IBJ speed may be necessary to get past the Sova. Requires: "canLongIBJ"
"canStaggeredIBJ"
{
"heatFrames": 4000
} |
|
Requires: {
"or": [
"canLongIBJ",
"canJumpIntoIBJ",
{
"and": [
"canMidAirMorph",
{
"or": [
"canWallJump",
"SpaceJump",
"canUseFrozenEnemies"
]
}
]
},
{
"and": [
"canUseFrozenEnemies",
"h_useSpringBall"
]
},
{
"and": [
"HiJump",
"canSpringBallJumpMidAir"
]
}
]
} |
|
Requires: {
"or": [
"canConsecutiveWallJump",
"SpaceJump",
"canLongIBJ"
]
} |
|
Entrance condition: {
"comeInWithGMode": {
"mode": "any",
"morphed": true
}
}Requires: "h_artificialMorphLongIBJ" |
|
Requires: {
"or": [
"SpaceJump",
"canLongIBJ",
"canJumpIntoIBJ"
]
} |
|
Entrance condition: {
"comeInWithGMode": {
"mode": "any",
"morphed": true
}
}Requires: {
"or": [
"h_artificialMorphLongIBJ",
"h_artificialMorphJumpIntoIBJ"
]
} |
From: 1
Left Door
To: 2
Right Door
Slowly kill the Puyos with Bombs or use a Power Bomb. Stand under the gate when exiting G-Mode to open the gate. Entrance condition: {
"comeInWithGMode": {
"mode": "indirect",
"morphed": true
}
}Requires: "Gravity"
{
"or": [
"h_artificialMorphLongIBJ",
{
"and": [
"HiJump",
"h_artificialMorphJumpIntoIBJ"
]
}
]
}
{
"or": [
"h_artificialMorphPowerBomb",
"canBePatient"
]
}Clears obstacles: A Dev note: This is only to avoid a Gravity jump. |
From: 1
Left Door
To: 3
Junction Left of Green Gate
Entrance condition: {
"comeInWithGMode": {
"mode": "any",
"morphed": true
}
}Requires: "Gravity"
{
"or": [
"h_artificialMorphLongIBJ",
{
"and": [
"HiJump",
"h_artificialMorphJumpIntoIBJ"
]
}
]
}
{
"or": [
"h_artificialMorphPowerBomb",
"canBePatient"
]
} |
From: 4
Center Platform Junction
To: 3
Junction Left of Green Gate
Requires: "Gravity"
{
"or": [
"canWallJump",
"canGravityJump",
"canLongIBJ",
{
"and": [
"HiJump",
"canJumpIntoIBJ"
]
},
{
"and": [
"HiJump",
"canSpeedyJump"
]
}
]
} |
From: 1
Left Door
To: 6
G-Mode Morph Junction (At Speed Blocks)
Perform a long diagonal bomb jump from the left door to the solid platforms above the acid. Entrance condition: {
"comeInWithGMode": {
"mode": "any",
"morphed": true
}
}Requires: {
"notable": "G-Mode Morph Long Diagonal Bomb Jump"
}
"h_artificialMorphDiagonalBombJump"
"h_artificialMorphLongIBJ" |
From: 1
Left Door
To: 7
Direct G-Mode Morph Junction (At Speed Blocks)
Perform a long diagonal bomb jump from the left door to the solid platforms above the acid. Entrance condition: {
"comeInWithGMode": {
"mode": "direct",
"morphed": true
}
}Requires: {
"notable": "G-Mode Morph Long Diagonal Bomb Jump"
}
"h_artificialMorphDiagonalBombJump"
"h_artificialMorphLongIBJ" |
|
Requires: {
"or": [
"SpaceJump",
"canLongIBJ"
]
} |
From: 6
G-Mode Morph Junction (At Speed Blocks)
To: 1
Left Door
Cross the solid platforms then horizontally boost into the acid and begin an IBJ. With more limited Energy, it is possible to IBJ high into the room and boost horizontally to fall into the acid a bit further to the left. Requires: "canGMode"
"Gravity"
"h_artificialMorphLongIBJ"
"h_artificialMorphBombHorizontally"
"canSuitlessLavaDive"
{
"acidFrames": 150
}Dev note: A Direct G-mode variant that collects the item is not included, because there is no way to stay artificially morphed and gain Energy. |
From: 6
G-Mode Morph Junction (At Speed Blocks)
To: 1
Left Door
Cross the room with a long diagonal bomb jump from the solid platforms above the acid. Requires: "canGMode"
{
"notable": "G-Mode Morph Long Diagonal Bomb Jump"
}
"h_artificialMorphDiagonalBombJump"
"h_artificialMorphLongIBJ" |
From: 6
G-Mode Morph Junction (At Speed Blocks)
To: 3
Item
Requires: "canGMode" "h_artificialMorphLongIBJ" |
From: 7
Direct G-Mode Morph Junction (At Speed Blocks)
To: 1
Left Door
Touch the item then cross the room with a long diagonal bomb jump from the solid platforms above the acid. Requires: "canRemoteAcquire"
{
"notable": "G-Mode Morph Long Diagonal Bomb Jump"
}
"h_artificialMorphDiagonalBombJump"
"h_artificialMorphLongIBJ"Collects items: 3 |
From: 7
Direct G-Mode Morph Junction (At Speed Blocks)
To: 1
Left Door
Touch the item then cross the room with a Spring Ball jump into IBJ from the moving platforms above the acid. Requires: "canRemoteAcquire" "h_artificialMorphLongIBJ" "h_artificialMorphJumpIntoIBJ" Collects items: 3 |
From: 7
Direct G-Mode Morph Junction (At Speed Blocks)
To: 2
Right Vertical Door
IBJ to the item, touch it, and drop back down to the right of the speed blocks before exiting G-mode. Requires: "canRemoteAcquire" "h_artificialMorphLongIBJ" Collects items: 3 |
|
Requires: {
"or": [
"SpaceJump",
"canLongIBJ",
"canJumpIntoIBJ"
]
} |
From: 6
G-Mode Morph Junction (Bottom)
To: 1
Top Left Door
Requires: "canGMode"
{
"or": [
"h_artificialMorphLongIBJ",
{
"and": [
"HiJump",
"h_artificialMorphJumpIntoIBJ"
]
}
]
} |
From: 6
G-Mode Morph Junction (Bottom)
To: 4
Top Right Door
Requires: "canGMode"
{
"or": [
"h_artificialMorphLongIBJ",
"h_artificialMorphJumpIntoIBJ"
]
} |
From: 1
Top Left Door
To: 1
Top Left Door
Requires: "h_frozenEnemyRunway"
{
"ammo": {
"type": "Super",
"count": 1
}
}
{
"or": [
"canConsecutiveWallJump",
"SpaceJump",
"canLongIBJ",
"canBePatient"
]
}Exit condition: {
"leaveWithRunway": {
"length": 11,
"openEnd": 1
}
} |
|
Entrance condition: {
"comeInWithGMode": {
"mode": "any",
"morphed": true
},
"comesThroughToilet": "no"
}Requires: "h_artificialMorphLongIBJ" |
From: 3
Bottom Right Door
To: 1
Top Left Door
Use a Super to knock off a nearby Viola, then lure it to the top. To avoid a wall jump, it is possible to use the Viola as a frozen platform. Requires: {
"ammo": {
"type": "Super",
"count": 1
}
}
{
"or": [
"canConsecutiveWallJump",
"SpaceJump",
"canLongIBJ",
{
"and": [
"canTrickyUseFrozenEnemies",
"canBePatient"
]
}
]
}Exit condition: {
"leaveWithGModeSetup": {}
}Unlocks doors: {"types":["ammo"],"requires":[]} |
|
Requires: {
"or": [
"canConsecutiveWallJump",
"SpaceJump",
"canLongIBJ"
]
} |
|
Entrance condition: {
"comeInWithGMode": {
"mode": "any",
"morphed": true
}
}Requires: "h_artificialMorphLongIBJ" |
|
Knock a Viola off of its platform and keep it on camera as it climbs to the top of the room. Freeze the Viola when it is only partially overhanging the door and midair morph, run jump and aim down directly onto it, or spin jump and down aim just before landing and quickly release inputs. With Morph or a down aim, Samus can jump directly onto the Viola without touching the transition. Requires: "canTrickyUseFrozenEnemies"
{
"ammo": {
"type": "Super",
"count": 1
}
}
"canUpwardGModeSetup"
{
"or": [
"canConsecutiveWallJump",
"SpaceJump",
"canLongIBJ",
"canBePatient"
]
}Exit condition: {
"leaveWithGModeSetup": {}
}Unlocks doors: {"types":["ammo"],"requires":[]} |
From: 3
Bottom Right Door
To: 4
Top Door
Use a Super to knock a Viola off of the middle platforms and ride it up the right wall by freezing it. Once it reaches the top door, use another Super to knock it off again, and freeze it mid-air pixel perfectly. Use a flash suit or blue suit from a crouched position to spark vertically and clip past the door shell. Requires: {
"or": [
"canConsecutiveWallJump",
"SpaceJump",
"canLongIBJ",
"canBePatient"
]
}
{
"ammo": {
"type": "Super",
"count": 2
}
}
"h_storedSparkIceClip"
{
"shinespark": {
"frames": 2,
"excessFrames": 1
}
}Exit condition: {
"leaveWithSpark": {}
}Bypasses door shell: true |
From: 3
Bottom Right Door
To: 4
Top Door
Use a Super to knock a Viola off of the middle platforms and ride it up the right wall by freezing it. Once it reaches the top door, use another Super to knock it off again, and freeze it mid-air. Use Morph and X-Ray to stand on top of it and clip up through the door shell above. Requires: {
"ammo": {
"type": "Super",
"count": 2
}
}
"h_XRayMorphIceClip"
{
"or": [
"canConsecutiveWallJump",
"SpaceJump",
"canLongIBJ",
"canBePatient"
]
}Bypasses door shell: true |
|
Requires: {
"or": [
{
"and": [
"canLongIBJ",
{
"heatFrames": 780
}
]
},
{
"and": [
"canJumpIntoIBJ",
{
"heatFrames": 560
}
]
},
{
"and": [
"canJumpIntoIBJ",
"canDoubleBombJump",
{
"heatFrames": 360
}
]
}
]
} |
From: 6
Junction Below Acid Plug
To: 4
Junction Above Acid Plug, Without Acid
Requires: {
"or": [
"f_UsedAcidChozoStatue",
{
"obstaclesCleared": [
"f_UsedAcidChozoStatue"
]
}
]
}
{
"or": [
{
"and": [
"canLongIBJ",
{
"heatFrames": 790
}
]
},
{
"and": [
"canJumpIntoIBJ",
{
"heatFrames": 330
}
]
},
{
"and": [
"canJumpIntoIBJ",
"canDoubleBombJump",
{
"heatFrames": 260
}
]
}
]
} |
|
Quickly roll to the left side of the room and IBJ through the crumble blocks before GT gets there, if it is alive. Starting from a jump or with a double bomb jump can help speed this up and make it much easier, but Samus needs to bomb slowly near the top to prevent hitting the crumble blocks before PLMs are overloaded. Otherwise, it can help to IBJ through the left-most crumble block, as GT will often jump away when first reaching Samus. The left-most crumble block is the 4th tile away from the wall. With a failed IBJ start, GT often times won't touch Samus if she is Morphed on the ground, and can jump away, giving another chance to IBJ. Entrance condition: {
"comeInWithGMode": {
"mode": "any",
"morphed": true
}
}Requires: "h_artificialMorphLongIBJ"
{
"or": [
{
"or": [
"f_DefeatedGoldenTorizo",
{
"obstaclesCleared": [
"f_DefeatedGoldenTorizo"
]
}
]
},
{
"and": [
"canTrickyDodgeEnemies",
{
"or": [
"h_artificialMorphJumpIntoIBJ",
"h_artificialMorphDoubleBombJump",
"canInsaneJump"
]
}
]
}
]
}
"h_heatedGModeOpenDifferentDoor"Clears obstacles: door_2 |
|
Quickly roll to the left side of the room and IBJ through the crumble blocks before GT gets there, if it is alive. Starting from a jump or with a double bomb jump can help speed this up and make it much easier, but Samus needs to bomb slowly near the top to prevent hitting the crumble blocks before PLMs are overloaded. Otherwise, it can help to IBJ through the left-most crumble block, as GT will often jump away when first reaching Samus. The left-most crumble block is the 4th tile away from the wall. With a failed IBJ start, GT often times won't touch Samus if she is Morphed on the ground, and can jump away, giving another chance to IBJ. Entrance condition: {
"comeInWithGMode": {
"mode": "any",
"morphed": true
}
}Requires: "h_heatedGMode"
"h_artificialMorphLongIBJ"
{
"or": [
{
"or": [
"f_DefeatedGoldenTorizo",
{
"obstaclesCleared": [
"f_DefeatedGoldenTorizo"
]
}
]
},
{
"and": [
"canTrickyDodgeEnemies",
{
"or": [
"h_artificialMorphJumpIntoIBJ",
"h_artificialMorphDoubleBombJump",
"canInsaneJump"
]
}
]
}
]
}
{
"heatFrames": 0
}Clears obstacles: door_2 |
|
Quickly roll to the left side of the room and IBJ through the crumble blocks before GT gets there, if it is alive. Starting from a jump or with a double bomb jump can help speed this up and make it much easier, but Samus needs to bomb slowly near the top to prevent hitting the crumble blocks before PLMs are overloaded. Get GT to jump away then again jump into IBJ and climb to the right item. Note that Samus can roll under GT, but when it attacks, it places stationary invisible projectiles, which may block Samus' path. Place a Power Bomb then quickly exit G-mode to quickly clear all of the bomb blocks, otherwise it is possible to get out with a few Bombs or Screw Attack. Entrance condition: {
"comeInWithGMode": {
"mode": "any",
"morphed": true
}
}Requires: "h_heatedGMode"
"h_artificialMorphLongIBJ"
{
"or": [
{
"or": [
"f_DefeatedGoldenTorizo",
{
"obstaclesCleared": [
"f_DefeatedGoldenTorizo"
]
}
]
},
{
"and": [
"canInsaneJump",
"h_artificialMorphJumpIntoIBJ"
]
},
{
"and": [
"canTrickyGMode",
"h_artificialMorphDoubleBombJump"
]
}
]
}
{
"or": [
{
"and": [
"h_artificialMorphPowerBomb",
{
"heatFrames": 70
}
]
},
{
"and": [
"h_useMorphBombs",
{
"heatFrames": 250
}
]
},
{
"and": [
"ScrewAttack",
{
"heatFrames": 50
}
]
}
]
}Clears obstacles: door_2 |
|
Requires: {
"or": [
"f_DefeatedGoldenTorizo",
{
"obstaclesCleared": [
"f_DefeatedGoldenTorizo"
]
}
]
}
{
"or": [
{
"and": [
"canLongIBJ",
{
"heatFrames": 3000
}
]
},
{
"and": [
"canJumpIntoIBJ",
{
"heatFrames": 1860
}
]
},
{
"and": [
"HiJump",
"canJumpIntoIBJ",
{
"heatFrames": 1300
}
]
},
{
"and": [
"canJumpIntoIBJ",
"canDoubleBombJump",
{
"heatFrames": 1180
}
]
},
{
"and": [
"HiJump",
"canJumpIntoIBJ",
"canDoubleBombJump",
{
"heatFrames": 900
}
]
},
{
"and": [
"canJumpIntoIBJ",
"canDoubleBombJump",
"canBombAboveIBJ",
{
"heatFrames": 890
}
]
},
{
"and": [
"HiJump",
"canJumpIntoIBJ",
"canDoubleBombJump",
"canBombAboveIBJ",
{
"heatFrames": 700
}
]
}
]
} |
From: 1
Bottom Left Door
To: 3
Top Right Door
Enter the room in Direct G-mode, with the item uncollected. Bomb the Chozo ball to overload PLMs then IBJ to the top. Entrance condition: {
"comeInWithGMode": {
"mode": "direct",
"morphed": true
}
}Requires: {
"itemNotCollectedAtNode": 4
}
"canRiskPermanentLossOfAccess"
"h_artificialMorphLongIBJ"
"h_heatedGModeOpenDifferentDoor" |
From: 1
Bottom Left Door
To: 3
Top Right Door
Use a blue suit to IBJ up through the bomb blocks without needing to overload PLMs. Entrance condition: {
"comeInWithGMode": {
"mode": "any",
"morphed": true
}
}Requires: {
"haveBlueSuit": {}
}
"h_artificialMorphLongIBJ"
"h_heatedGModeOpenDifferentDoor" |
From: 2
Middle Right Door
To: 5
Junction Above Bottom Blocks
Bomb all the blocks before exiting G-mode near the lower bomb blocks. Entrance condition: {
"comeInWithGMode": {
"mode": "any",
"morphed": true
}
}Requires: "h_heatedGMode"
{
"or": [
"h_artificialMorphLongIBJ",
{
"and": [
"h_usePowerBomb",
{
"or": [
"canWallJump",
"SpaceJump",
{
"and": [
"HiJump",
"canSpringBallJumpMidAir"
]
}
]
}
]
}
]
}
"h_additionalBomb"
{
"heatFrames": 0
}Clears obstacles: A, B, C Dev note: FIXME: If Bombs are available (vs. Power Bombs), it's not necessary to break all the bottom blocks. |
From: 2
Middle Right Door
To: 5
Junction Above Bottom Blocks
Bomb the upper blocks before exiting G-mode near the lower bomb blocks. Entrance condition: {
"comeInWithGMode": {
"mode": "any",
"morphed": true
}
}Requires: "h_heatedGMode"
{
"or": [
"h_artificialMorphLongIBJ",
{
"and": [
"h_usePowerBomb",
{
"or": [
"canWallJump",
"SpaceJump",
{
"and": [
"HiJump",
"canSpringBallJumpMidAir"
]
}
]
}
]
}
]
}
{
"heatFrames": 0
}Clears obstacles: A |
|
Requires: {
"obstaclesCleared": [
"B",
"C"
]
}
"canLongIBJ"
{
"or": [
{
"heatFrames": 2090
},
{
"and": [
"canJumpIntoIBJ",
{
"or": [
{
"heatFrames": 1510
},
{
"and": [
"canDoubleBombJump",
{
"heatFrames": 980
}
]
},
{
"and": [
"HiJump",
"canDoubleBombJump",
{
"heatFrames": 860
}
]
}
]
}
]
}
]
}
{
"or": [
{
"obstaclesCleared": [
"A"
]
},
"canPowerBombMidIBJ",
{
"haveBlueSuit": {}
},
{
"and": [
"canBombAboveIBJ",
{
"heatFrames": 60
}
]
}
]
}Clears obstacles: A Dev note: This assumes the bottom bomb blocks are completely broken, making it necessary to start the IBJ from the bottom of the room. |
|
This expects that Samus falls down afterwards. Requires: {
"obstaclesCleared": [
"B",
"C"
]
}
"canLongIBJ"
{
"or": [
{
"heatFrames": 2120
},
{
"and": [
"canJumpIntoIBJ",
{
"or": [
{
"heatFrames": 1540
},
{
"and": [
"canDoubleBombJump",
{
"heatFrames": 1010
}
]
},
{
"and": [
"HiJump",
"canDoubleBombJump",
{
"heatFrames": 890
}
]
}
]
}
]
}
]
}Clears obstacles: A Dev note: This assumes the bottom bomb blocks are completely broken, making it necessary to start the IBJ from the bottom of the room. |
|
Requires: {
"obstaclesNotCleared": [
"C"
]
}
{
"noBlueSuit": {}
}
"canJumpIntoIBJ"
"canLongIBJ"
{
"or": [
{
"heatFrames": 1300
},
{
"and": [
"canDoubleBombJump",
{
"heatFrames": 690
}
]
},
{
"and": [
"HiJump",
"canDoubleBombJump",
{
"heatFrames": 590
}
]
}
]
}
{
"or": [
{
"obstaclesCleared": [
"A"
]
},
"canPowerBombMidIBJ",
{
"and": [
"canBombAboveIBJ",
{
"heatFrames": 60
}
]
}
]
}Clears obstacles: A |
From: 5
Junction Above Bottom Blocks
To: 5
Junction Above Bottom Blocks
This expects that Samus falls down afterwards. Requires: {
"obstaclesNotCleared": [
"C"
]
}
{
"noBlueSuit": {}
}
"canLongIBJ"
"canJumpIntoIBJ"
{
"or": [
{
"heatFrames": 1150
},
{
"and": [
"canDoubleBombJump",
{
"heatFrames": 660
}
]
},
{
"and": [
"HiJump",
"canDoubleBombJump",
{
"heatFrames": 540
}
]
}
]
}Clears obstacles: A Dev note: This assumes the lower bomb blocks are not completely broken (due to having used a Power Bomb). |
|
Entrance condition: {
"comeInWithGMode": {
"mode": "direct",
"morphed": false
}
}Requires: {
"or": [
"SpaceJump",
"canConsecutiveWallJump",
{
"and": [
"canJumpIntoIBJ",
"canLongIBJ",
"canDoubleBombJump",
"canInsaneJump"
]
}
]
}Exit condition: {
"leaveWithGMode": {
"morphed": false
}
} |
From: 5
Firefleas Bottom Left Platform Junction
To: 7
Fireflea Statue's Claw Junction
Requires: "canLongIBJ" |
From: 7
Fireflea Statue's Claw Junction
To: 6
Junction Behind Fune
Requires: "canLongIBJ" |
|
Entrance condition: {
"comeInWithGMode": {
"mode": "direct",
"morphed": false
}
}Requires: {
"or": [
"SpaceJump",
"canWallJump",
{
"and": [
"canJumpIntoIBJ",
"canInsaneJump",
{
"or": [
"HiJump",
{
"and": [
"canLongIBJ",
"canDoubleBombJump"
]
}
]
}
]
},
{
"and": [
{
"or": [
"f_DefeatedRidley",
{
"obstaclesCleared": [
"f_DefeatedRidley"
]
}
]
},
{
"or": [
"canLongIBJ",
{
"and": [
"canJumpIntoIBJ",
"HiJump"
]
}
]
}
]
},
{
"and": [
"HiJump",
"canSpringBallJumpMidAir"
]
},
{
"and": [
"HiJump",
"canSpeedyJump",
"canTrickyJump",
{
"or": [
"canInsaneJump",
{
"or": [
"f_DefeatedRidley",
{
"obstaclesCleared": [
"f_DefeatedRidley"
]
}
]
}
]
}
]
}
]
}Exit condition: {
"leaveWithGMode": {
"morphed": false
}
}Clears obstacles: door_2 |
|
Requires: {
"heatFrames": 25
}
{
"or": [
"canDash",
{
"heatFrames": 10
}
]
}
{
"or": [
{
"and": [
"canDoubleBombJump",
{
"heatFrames": 560
}
]
},
{
"and": [
"canDoubleBombJump",
"HiJump",
{
"heatFrames": 420
}
]
},
{
"and": [
{
"or": [
"f_DefeatedRidley",
{
"obstaclesCleared": [
"f_DefeatedRidley"
]
}
]
},
"canJumpIntoIBJ",
{
"or": [
"canLongIBJ",
"HiJump"
]
},
{
"heatFrames": 1000
}
]
}
]
} |
|
Hit the shot blocks at the top of the room with a Power Bomb or Wave before exiting G-mode to save some heat damage. Kill the pirate while it's in its head turning phase to prevent it from placing any stationary, invisible lasers. Entrance condition: {
"comeInWithGMode": {
"mode": "any",
"morphed": false
}
}Requires: "h_heatedGMode"
{
"or": [
"ScrewAttack",
{
"haveBlueSuit": {}
}
]
}
{
"or": [
"SpaceJump",
{
"and": [
"Charge",
"Plasma",
"canTrickyUseFrozenEnemies",
"HiJump",
{
"or": [
"canWallJump",
"canTrickyDodgeEnemies"
]
}
]
},
{
"and": [
{
"haveBlueSuit": {}
},
{
"or": [
{
"and": [
"HiJump",
"canPreciseWallJump"
]
},
"canSpringwall",
"canLongIBJ"
]
}
]
}
]
}
{
"or": [
"Wave",
"h_usePowerBomb",
{
"heatFrames": 40
}
]
}
{
"or": [
"HiJump",
"canWallJump",
{
"heatFrames": 20
}
]
}
{
"heatFrames": 120
}Clears obstacles: A |
|
It is possible to kill the pirate at the top of the room and use a pause abuse on G-mode exit to collect its drops. This requires getting somewhat lucky, as there is approximately a 70% chance that the pirate will give a large energy drop (small is not enough). To do this, climb the room very quickly, before shots are overloaded - HiJump or wall jumps help, but are not required. It is also possible to wait for the shots to be overloaded and then exit G-mode, pause abuse, and kill the pirate before the pause triggers, but this is generally harder. Entrance condition: {
"comeInWithGMode": {
"mode": "any",
"morphed": false
}
}Requires: {
"or": [
"ScrewAttack",
{
"haveBlueSuit": {}
}
]
}
{
"or": [
"SpaceJump",
{
"and": [
"Charge",
"Plasma",
"canTrickyUseFrozenEnemies",
"HiJump",
{
"or": [
"canWallJump",
"canTrickyDodgeEnemies"
]
}
]
},
{
"and": [
{
"haveBlueSuit": {}
},
{
"or": [
{
"and": [
"HiJump",
"canPreciseWallJump"
]
},
"canSpringwall",
"canLongIBJ"
]
}
]
}
]
}
{
"or": [
"h_heatedGModeOpenDifferentDoor",
{
"and": [
"h_heatedGModePauseAbuse",
"canInsaneJump",
"canComplexGMode"
]
}
]
}Clears obstacles: A |
From: 6
Bottom Platform Junction With Pirates Killed
To: 4
Junction Above Bomb Blocks
Requires: "canLongIBJ"
{
"or": [
{
"and": [
"canJumpIntoIBJ",
{
"heatFrames": 1250
}
]
},
{
"and": [
"canJumpIntoIBJ",
"canDoubleBombJump",
{
"heatFrames": 700
}
]
},
{
"and": [
"HiJump",
"canJumpIntoIBJ",
"canDoubleBombJump",
{
"heatFrames": 630
}
]
},
{
"heatFrames": 2000
}
]
}
{
"or": [
"canPowerBombMidIBJ",
{
"and": [
"canBombAboveIBJ",
"canStaggeredIBJ",
{
"heatFrames": 220
}
]
},
{
"obstaclesCleared": [
"A"
]
},
{
"haveBlueSuit": {}
}
]
}Clears obstacles: A |
From: 6
Bottom Platform Junction With Pirates Killed
To: 6
Bottom Platform Junction With Pirates Killed
Requires: "canMidAirMorph"
"h_useMorphBombs"
{
"or": [
{
"and": [
"HiJump",
"SpaceJump",
"canConsecutiveWallJump",
{
"heatFrames": 440
}
]
},
{
"and": [
"SpaceJump",
"HiJump",
{
"heatFrames": 540
}
]
},
{
"and": [
"SpaceJump",
"canConsecutiveWallJump",
{
"heatFrames": 520
}
]
},
{
"and": [
"SpaceJump",
{
"heatFrames": 730
}
]
},
{
"and": [
"h_heatedSpringwall",
{
"heatFrames": 480
}
]
},
{
"and": [
"canLongIBJ",
"canBePatient",
{
"heatFrames": 4000
}
]
},
{
"and": [
"canLongIBJ",
"canJumpIntoIBJ",
{
"heatFrames": 2500
}
]
},
{
"and": [
"canJumpIntoIBJ",
"canDoubleBombJump",
{
"heatFrames": 1400
}
]
}
]
}Clears obstacles: A |
From: 6
Bottom Platform Junction With Pirates Killed
To: 6
Bottom Platform Junction With Pirates Killed
First use HiJump and wall jumps to break the leftmost set of bomb blocks on the bottom layer. Then use one of many movement options to break the next bomb blocks above. Requires: "canMidAirMorph"
"h_useMorphBombs"
"HiJump"
"canWallJump"
{
"heatFrames": 200
}
{
"or": [
{
"and": [
"SpaceJump",
{
"heatFrames": 235
}
]
},
{
"and": [
"h_heatedSpringwall",
{
"heatFrames": 210
}
]
},
{
"and": [
"canLongIBJ",
{
"heatFrames": 2000
}
]
},
{
"and": [
"canJumpIntoIBJ",
{
"heatFrames": 1250
}
]
},
{
"and": [
"canJumpIntoIBJ",
"canDoubleBombJump",
{
"heatFrames": 630
}
]
}
]
}Clears obstacles: A |
|
If Phantoon is killed, hold right while wall jumping, jump just before the spikes and after them. Don't release jump while passing the spikes to prevent taking a hit. Requires: {
"or": [
{
"obstaclesCleared": [
"A"
]
},
"h_usePowerBomb"
]
}
{
"haveBlueSuit": {}
}
{
"or": [
"canConsecutiveWallJump",
"SpaceJump",
"canLongIBJ"
]
}Clears obstacles: A |
|
If Phantoon is killed, hold right while wall jumping, jump just before the spikes and after them. Don't release jump while passing the spikes to prevent taking a hit. Requires: {
"or": [
{
"obstaclesCleared": [
"A"
]
},
"h_usePowerBomb"
]
}
{
"useFlashSuit": {}
}
{
"shinespark": {
"frames": 5,
"excessFrames": 3
}
}
{
"or": [
"canConsecutiveWallJump",
"SpaceJump",
{
"and": [
"canLongIBJ",
"canUnmorphBombBoost"
]
}
]
}Clears obstacles: A |
From: 1
Right Door
To: 2
Item
Requires: "h_IBJFromThorns"
"canLongIBJ"
{
"not": "f_DefeatedPhantoon"
}Dev note: The h_IBJFromThorns requires canCarefulJump. There is no loss of access, because with that it is possible to get across with or without f_DefeatedPhantoon. |
From: 1
Bottom Left Door
To: 3
Top Right Door
The gate will not spawn in indirect G-mode and is freely passable. It is possible to exit G-Mode while under the gate to open it without a Super. A normalized method to do this, is to jump into the right-most pit before the gate, Samus will barely be visible behind the bottom right door. Jump and land on the corner and face left, moonwalk to the right with no beams equipped and stop moving immediately as the 11th shot fired is heard. To fix the camera afterwards, go to the left end of the room and fall back to the bottom of the room. Alternatively, get into the left-most pit, jump slightly to the right, move over one tile, then jump. If the camera is not fixed, move to the right a bit more and jump again. Entrance condition: {
"comeInWithGMode": {
"mode": "indirect",
"morphed": false
}
}Requires: {
"or": [
"canWallJump",
"SpaceJump",
"canLongIBJ",
"canJumpIntoIBJ",
{
"and": [
"HiJump",
"canSpringBallJumpMidAir"
]
}
]
}
"canOffScreenMovement"Clears obstacles: A |
From: 1
Bottom Left Door
To: 3
Top Right Door
The gate will not spawn in indirect G-mode and is freely passable. It is possible to exit G-Mode while under the gate to open it without a Super. A normalized method to do this, is to jump into the right-most pit before the gate, Samus will barely be visible behind the bottom right door. Jump and land on the corner and face left, moonwalk to the right with no beams equipped and stop moving immediately as the 11th shot fired is heard. To fix the camera afterwards, go to the left end of the room and fall back to the bottom of the room. Alternatively, get into the left-most pit, jump slightly to the right, move over one tile, then jump. If the camera is not fixed, move to the right a bit more and jump again. Entrance condition: {
"comeInWithGMode": {
"mode": "indirect",
"morphed": true
}
}Requires: "canOffScreenMovement"
{
"or": [
"h_artificialMorphLongIBJ",
"h_artificialMorphJumpIntoIBJ"
]
}Clears obstacles: A |
|
Requires: {
"or": [
"canWallJump",
"SpaceJump",
"canLongIBJ",
"canJumpIntoIBJ",
{
"and": [
"HiJump",
"canSpringBallJumpMidAir"
]
}
]
} |
|
Entrance condition: {
"comeInWithGMode": {
"mode": "any",
"morphed": true
}
}Requires: "canOffScreenMovement"
{
"or": [
"h_artificialMorphLongIBJ",
"h_artificialMorphJumpIntoIBJ"
]
}Dev note: After exiting G-mode, jump just above the vertical shaft in order to fix the camera. |
From: 2
Bottom Right Door
To: 3
Top Right Door
The gate will not spawn in indirect G-mode and is freely passable. It is possible to exit G-Mode while under the gate to open it without a Super. A normalized method to do this, is to jump into the right-most pit before the gate, Samus will barely be visible behind the bottom right door. Jump and land on the corner and face left, moonwalk to the right with no beams equipped and stop moving immediately as the 11th shot fired is heard. To fix the camera afterwards, go to the left end of the room and fall back to the bottom of the room. Alternatively, get into the left-most pit, jump slightly to the right, move over one tile, then jump. If the camera is not fixed, move to the right a bit more and jump again. Entrance condition: {
"comeInWithGMode": {
"mode": "indirect",
"morphed": false
}
}Requires: {
"or": [
"canWallJump",
"SpaceJump",
"canLongIBJ",
"canJumpIntoIBJ",
{
"and": [
"HiJump",
"canSpringBallJumpMidAir"
]
}
]
}
"canOffScreenMovement"Clears obstacles: A |
From: 2
Bottom Right Door
To: 3
Top Right Door
The gate will not spawn in indirect G-mode and is freely passable. It is possible to exit G-Mode while under the gate to open it without a Super. A normalized method to do this, is to jump into the right-most pit before the gate, Samus will barely be visible behind the bottom right door. Jump and land on the corner and face left, moonwalk to the right with no beams equipped and stop moving immediately as the 11th shot fired is heard. To fix the camera afterwards, go to the left end of the room and fall back to the bottom of the room. Alternatively, get into the left-most pit, jump slightly to the right, move over one tile, then jump. If the camera is not fixed, move to the right a bit more and jump again. Entrance condition: {
"comeInWithGMode": {
"mode": "indirect",
"morphed": true
}
}Requires: "canOffScreenMovement"
{
"or": [
"h_artificialMorphLongIBJ",
"h_artificialMorphJumpIntoIBJ"
]
}Clears obstacles: A |
|
Entrance condition: {
"comeInWithGMode": {
"mode": "any",
"morphed": true
}
}Requires: "canOffScreenMovement"
{
"or": [
"h_artificialMorphLongIBJ",
"h_artificialMorphJumpIntoIBJ"
]
}Dev note: After exiting G-mode, jump just above the vertical shaft in order to fix the camera. |
From: 1
Top Left Doorway
To: 4
Top Right Doorway
To save a bomb, it is possible to roll from the doorway onto the platform with movement similar to a Gravity jump - hold forward just before the pause to disable gravity. Entrance condition: {
"comeInWithGMode": {
"mode": "any",
"morphed": true
}
}Requires: {
"or": [
"Morph",
"h_artificialMorphSpringBall",
{
"and": [
"Gravity",
{
"or": [
"h_artificialMorphLongIBJ",
"h_artificialMorphJumpIntoIBJ"
]
}
]
},
{
"and": [
"Gravity",
"h_artificialMorphBombHorizontally",
{
"or": [
"h_additionalBomb",
"canTrickyGMode",
{
"and": [
"canTrickyDodgeEnemies",
"canGravityJump"
]
}
]
}
]
}
]
}Exit condition: {
"leaveWithGMode": {
"morphed": true
}
}Dev note: It is possible to cross with a single Power Bomb, but it requires a last pixel jump with a frame perfect forward press. A crab hit could bounce Samus onto the middle platform, but the gravity jump is better. If Samus has a blue suit and cant pause, then she also cant boost from the crab. |
|
Requires: "Gravity"
{
"or": [
"canLongIBJ",
"canJumpIntoIBJ",
{
"and": [
"SpaceJump",
"canMidAirMorph"
]
},
{
"and": [
"HiJump",
"canWallJump",
"canMidAirMorph"
]
},
{
"and": [
"HiJump",
"canSpringBallJumpMidAir"
]
}
]
} |
From: 2
Bottom Left Door
To: 5
G-Mode Morph Junction (Top Half)
One method to kill the crabs is to wait on the central platform until a crab comes near, then move with it laying bombs in its path. Another is to wait in the doorway and place three bombs to hit it while bouncing over it. The top of the IBJ will be off camera. Starting the IBJ as far to either side as possible and holding forward once off camera will make it easier to get through the morph tunnel. Entrance condition: {
"comeInWithGMode": {
"mode": "any",
"morphed": true
}
}Requires: "Gravity"
{
"or": [
"h_artificialMorphLongIBJ",
"h_artificialMorphJumpIntoIBJ"
]
} |
From: 3
Bottom Right Door
To: 5
G-Mode Morph Junction (Top Half)
One method to kill the crabs is to wait on the central platform until a crab comes near, then move with it laying bombs in its path. Another is to wait in the doorway and place three bombs to hit it while bouncing over it. The top of the IBJ will be off camera. Starting the IBJ as far to either side as possible and holding forward once off camera will make it easier to get through the morph tunnel. Entrance condition: {
"comeInWithGMode": {
"mode": "any",
"morphed": true
}
}Requires: "Gravity"
{
"or": [
"h_artificialMorphLongIBJ",
"h_artificialMorphJumpIntoIBJ"
]
} |
|
Once high enough, it may be necessary to kill the fish and open the door. Requires: "Gravity" "canLongIBJ" |
|
Requires: "Gravity"
{
"or": [
"canWallJump",
"SpaceJump",
"canLongIBJ",
{
"and": [
"canJumpIntoIBJ",
"canBombHorizontally"
]
},
"h_maxHeightSpringBallJump",
{
"and": [
"HiJump",
"canSpringBallJumpMidAir"
]
}
]
}Dev note: The h_maxHeightSpringBallJump is not a h_underwaterMaxHeightSpringBallJump, because Gravity is required. |
From: 1
Bottom Left Door
To: 5
Platform Junction Near Top Left Door
Kill the first fish with bombs then dodge or kill the second one. Entrance condition: {
"comeInWithGMode": {
"mode": "any",
"morphed": true
}
}Requires: "Gravity"
{
"or": [
"h_artificialMorphLongIBJ",
{
"and": [
"h_artificialMorphJumpIntoIBJ",
"h_artificialMorphBombHorizontally"
]
}
]
} |
|
Entrance condition: {
"comeInWithGMode": {
"mode": "direct",
"morphed": false
},
"comesThroughToilet": "any"
}Requires: {
"or": [
"canGravityJump",
{
"and": [
"Gravity",
{
"or": [
"canConsecutiveWallJump",
"SpaceJump",
"canLongIBJ",
{
"and": [
"HiJump",
"canWallJump"
]
},
{
"and": [
"HiJump",
"canTrickyDashJump",
"canDownGrab"
]
},
"h_maxHeightSpringBallJump",
{
"and": [
"HiJump",
"canSpringBallJumpMidAir"
]
}
]
}
]
},
{
"and": [
"Gravity",
"canUseFrozenEnemies",
{
"or": [
"canWallJump",
{
"and": [
"HiJump",
"canSpeedyJump"
]
},
"canSpringBallJumpMidAir"
]
}
]
},
"h_doubleSpringBallJumpWithHiJump",
{
"and": [
"canSuitlessMaridia",
"canTrickyUseFrozenEnemies",
"HiJump",
"canTrickySpringBallJump"
]
}
]
}Exit condition: {
"leaveWithGMode": {
"morphed": false
}
}Dev note: The h_maxHeightSpringBallJump is not a h_underwaterMaxHeightSpringBallJump, because Gravity is required. |
|
Entrance condition: {
"comeInWithGMode": {
"mode": "direct",
"morphed": true
},
"comesThroughToilet": "any"
}Requires: "Gravity"
{
"or": [
"h_artificialMorphLongIBJ",
{
"and": [
"canGravityJump",
"h_artificialMorphSpringBall"
]
}
]
}Exit condition: {
"leaveWithGMode": {
"morphed": true
}
} |
From: 4
Top Left Door
To: 5
Platform Junction Near Top Left Door
Kill or dodge the fish by the top left door. Entrance condition: {
"comeInWithGMode": {
"mode": "any",
"morphed": true
},
"comesThroughToilet": "any"
}Requires: "Gravity"
{
"or": [
"h_artificialMorphLongIBJ",
"h_artificialMorphJumpIntoIBJ"
]
} |
|
Get into position as close to the center of the room as possible while not being too close to any baby turtles. Start an IBJ without hiting any baby turtles otherwhise Mama Turtle will wake up. Entrance condition: {
"comeInWithGMode": {
"mode": "any",
"morphed": true
}
}Requires: "Gravity" "h_artificialMorphLongIBJ" "h_artificialMorphBombHorizontally" Clears obstacles: B |
|
Place a bomb next to one of the baby turtles, then use spring ball to get on Mama Turtle's back. Start an IBJ above the waterline to get to the item. Entrance condition: {
"comeInWithGMode": {
"mode": "any",
"morphed": true
}
}Requires: "canSuitlessMaridia" "h_artificialMorphSpringBall" "h_artificialMorphLongIBJ" Clears obstacles: A, B |
|
Requires: "Gravity"
{
"or": [
"canWallJump",
"SpaceJump",
"canLongIBJ"
]
} |
|
Requires: "Gravity"
{
"or": [
"canConsecutiveWallJump",
{
"and": [
"canWallJump",
"HiJump"
]
},
"SpaceJump",
"canLongIBJ"
]
} |
From: 1
Left Door
To: 6
Top Right Junction
IBJ up a bit, then bomb over Mama Turtle and her babies to prevent her from waking. Then IBJ to the high right ledge before exiting g-mode. Entrance condition: {
"comeInWithGMode": {
"mode": "any",
"morphed": true
}
}Requires: "Gravity" "h_artificialMorphLongIBJ" "h_artificialMorphBombHorizontally" |
|
Requires: "Gravity"
{
"or": [
"canConsecutiveWallJump",
{
"and": [
"canWallJump",
"HiJump"
]
},
"SpaceJump",
"canLongIBJ"
]
} |
|
Once out of the water, jump into an IBJ. With a miss, if Samus hasn't moved horizontally, simply fall straight down to land safely back on Mama Turtle. Requires: "canJumpIntoIBJ"
{
"or": [
"canLongIBJ",
"HiJump"
]
}Clears obstacles: B |
|
Entrance condition: {
"comeInWithGMode": {
"mode": "any",
"morphed": true
}
}Requires: "h_artificialMorphLongIBJ" "Gravity" |
|
Entrance condition: {
"comeInWithGMode": {
"mode": "any",
"morphed": true
}
}Requires: "h_artificialMorphLongIBJ" "Gravity" |
|
It is possible to place a Power Bomb on the ledge above to kill the crab before going down and into the tunnel. Entrance condition: {
"comeInWithGMode": {
"mode": "any",
"morphed": true
}
}Requires: "canCameraManip"
{
"or": [
"Morph",
"h_artificialMorphSpringBall",
{
"and": [
"canComplexGMode",
"h_artificialMorphPowerBomb"
]
},
{
"and": [
"Gravity",
"h_artificialMorphLongIBJ"
]
},
{
"and": [
"Gravity",
"h_artificialMorphBombHorizontally"
]
},
{
"and": [
{
"enemyDamage": {
"enemy": "Sciser",
"type": "contact",
"hits": 1
}
},
{
"or": [
"h_EverestMorphTunnelExpanded",
{
"enemyDamage": {
"enemy": "Sciser",
"type": "contact",
"hits": 1
}
}
]
}
]
}
]
} |
|
Entrance condition: {
"comeInWithGMode": {
"mode": "any",
"morphed": true
},
"comesThroughToilet": "any"
}Requires: "h_artificialMorphLongIBJ" "Gravity" |
|
Entrance condition: {
"comeInWithGMode": {
"mode": "any",
"morphed": true
},
"comesThroughToilet": "any"
}Requires: "h_artificialMorphLongIBJ" "Gravity" |
|
Entrance condition: {
"comeInWithGMode": {
"mode": "any",
"morphed": true
}
}Requires: "h_artificialMorphLongIBJ" "Gravity" |
|
Entrance condition: {
"comeInWithGMode": {
"mode": "any",
"morphed": true
}
}Requires: "Gravity"
{
"or": [
{
"and": [
"h_artificialMorphSpringBall",
{
"or": [
"canGravityJump",
"HiJump"
]
}
]
},
"h_artificialMorphLongIBJ",
{
"and": [
"h_artificialMorphIBJ",
"h_artificialMorphBombHorizontally"
]
},
"h_artificialMorphSpringBallBombJump"
]
} |
|
Entrance condition: {
"comeInWithGMode": {
"mode": "any",
"morphed": true
},
"comesThroughToilet": "any"
}Requires: "h_artificialMorphLongIBJ" "Gravity" |
|
Entrance condition: {
"comeInWithGMode": {
"mode": "any",
"morphed": true
},
"comesThroughToilet": "any"
}Requires: {
"or": [
"Morph",
"h_artificialMorphSpringBall",
{
"and": [
"Gravity",
"h_artificialMorphLongIBJ"
]
},
{
"and": [
"Gravity",
"h_artificialMorphBombHorizontally"
]
}
]
} |
|
After entering the room, quickly leave the morph tunnel in order to prevent getting hit by the crab. Entrance condition: {
"comeInWithGMode": {
"mode": "any",
"morphed": true
}
}Requires: "h_artificialMorphLongIBJ" "Gravity" Dev note: The tunnel does not need to be expanded for Samus to get into the morph tunnel without getting stuck, regardless of if she has Morph or artificial morph, and is in direct or indirect G-mode. |
From: 6
Left Morph Passage Doorway
To: 9
Platform Below Top Door
After entering the room, quickly leave the morph tunnel in order to prevent getting hit by the crab. Entrance condition: {
"comeInWithGMode": {
"mode": "any",
"morphed": true
}
}Requires: "h_artificialMorphLongIBJ" "Gravity" Dev note: The tunnel does not need to be expanded for Samus to get into the morph tunnel without getting stuck, regardless of if she has Morph or artificial morph, and is in direct or indirect G-mode. |
|
Requires: "Gravity"
{
  "or": [
    "SpaceJump",
    "canLongIBJ"
  ]
} |
|
Requires: "Gravity"
{
"or": [
"SpaceJump",
"canLongIBJ"
]
}Clears obstacles: A, B Dev note: It is possible to bring 2 crabs with these requirements, but is relatively pointless. |
|
Requires: "h_navigateUnderwater"
{
"or": [
"h_useSpringBall",
"canMidAirMorph",
{
"and": [
"Gravity",
"canBombHorizontally"
]
},
{
"and": [
"Gravity",
"canLongIBJ",
"canJumpIntoIBJ"
]
},
{
"and": [
"Gravity",
"canTrivialMidAirMorph",
{
"or": [
"SpaceJump",
"canUseFrozenEnemies"
]
}
]
},
{
"and": [
"canTrivialMidAirMorph",
"canDisableEquipment"
]
}
]
}Dev note: It's possible to get in without a mid-air morph by rolling off from above, but that requires disabling Gravity and/or crab hits and the crab not killed. That's a lot of work to avoid something simple and barely reasonable at that level anyways. |
|
Requires: "Gravity"
{
"or": [
"SpaceJump",
"canLongIBJ",
{
"and": [
"HiJump",
"canJumpIntoIBJ"
]
}
]
} |
|
Entrance condition: {
"comeInWithGMode": {
"mode": "any",
"morphed": true
},
"comesThroughToilet": "any"
}Requires: "Gravity"
{
"or": [
"h_artificialMorphLongIBJ",
{
"and": [
"h_artificialMorphIBJ",
"h_artificialMorphBombHorizontally"
]
},
{
"and": [
"h_artificialMorphSpringBall",
"HiJump"
]
}
]
} |
|
Requires: "Gravity" "canLongIBJ" |
From: 1
Middle Left Door
To: 9
Junction Below Top Door
Entrance condition: {
"comeInWithGMode": {
"mode": "any",
"morphed": true
}
}Requires: "h_artificialMorphBombs"
"h_navigateUnderwater"
{
"or": [
{
"and": [
"Gravity",
{
"or": [
"h_artificialMorphLongIBJ",
"h_artificialMorphJumpIntoIBJ"
]
}
]
},
{
"and": [
"canGravityJump",
"h_artificialMorphSpringBall"
]
},
{
"and": [
"HiJump",
"canSpringBallJumpMidAir"
]
},
{
"and": [
"HiJump",
"canConsecutiveWallJump",
"canPreciseWallJump"
]
},
"h_artificialMorphDoubleSpringBallJump",
{
"and": [
"Gravity",
"HiJump",
"h_artificialMorphSpringBallBombJump"
]
}
]
}Dev note: FIXME: Eventually a CF doorlock bypass should be added from this 1 or from 12 with a 1->12 option. |
From: 1
Middle Left Door
To: 10
G-Mode Morph Junction (By Bottom Left Door)
Bomb the Power Bomb blocks below to overload PLMs, then IBJ up through the crumble blocks to escape. Entrance condition: {
"comeInWithGMode": {
"mode": "any",
"morphed": true
}
}Requires: "h_artificialMorphBombs"
{
"or": [
{
"and": [
"Gravity",
{
"or": [
"h_artificialMorphLongIBJ",
"h_artificialMorphJumpIntoIBJ"
]
}
]
},
{
"and": [
"canGravityJump",
"h_artificialMorphSpringBall"
]
},
"h_artificialMorphDoubleSpringBallJump",
{
"and": [
"Gravity",
"HiJump",
"h_artificialMorphSpringBallBombJump"
]
}
]
} |
From: 1
Middle Left Door
To: 11
G-Mode Overloaded PLMs (By Bottom Left Door)
Entrance condition: {
"comeInWithGMode": {
"mode": "any",
"morphed": true
}
}Requires: "h_artificialMorphBombs"
"h_navigateUnderwater"
{
"or": [
"canGravityJump",
{
"and": [
"Gravity",
{
"or": [
"h_artificialMorphLongIBJ",
"h_artificialMorphJumpIntoIBJ"
]
}
]
},
{
"and": [
"HiJump",
"canSpringBallJumpMidAir"
]
},
{
"and": [
"HiJump",
"canConsecutiveWallJump",
"canPreciseWallJump"
]
},
"h_artificialMorphDoubleSpringBallJump",
{
"and": [
"Gravity",
"HiJump",
"h_artificialMorphSpringBallBombJump"
]
}
]
} |
|
Requires: "Gravity"
{
"or": [
"canWallJump",
"SpaceJump",
"canLongIBJ",
"canJumpIntoIBJ",
"canSpeedyJump",
"canSpringBallJumpMidAir",
"canUseEnemies"
]
}
{
"or": [
{
"obstaclesCleared": [
"A"
]
},
"h_usePowerBomb"
]
}Clears obstacles: A |
|
Requires: "Gravity"
{
"or": [
"canWallJump",
"SpaceJump",
"canLongIBJ",
"canJumpIntoIBJ",
"canSpeedyJump",
"Grapple",
{
"and": [
"HiJump",
"canSpringBallJumpMidAir"
]
},
{
"and": [
"HiJump",
"canUseEnemies"
]
}
]
}Dev note: A very precise crouch-jump down-grab, or spring ball jumping to the snail is closer to canSnailClimb. |
From: 10
G-Mode Morph Junction (By Bottom Left Door)
To: 1
Middle Left Door
Requires: "canGMode"
"Gravity"
{
  "or": [
    "h_artificialMorphLongIBJ",
    "h_artificialMorphJumpIntoIBJ"
  ]
} |
From: 10
G-Mode Morph Junction (By Bottom Left Door)
To: 11
G-Mode Overloaded PLMs (By Bottom Left Door)
Requires: "canGMode"
"Gravity"
{
"or": [
"h_artificialMorphLongIBJ",
"h_artificialMorphJumpIntoIBJ"
]
} |
|
Use normalized movement to land on the sand without losing a blue suit. One way is to do the following: from the platforms at the height of the top door, simply walk off the ledge; from the platforms two tiles above the sand, do a full height jump; from the sand itself, do full height spin jumps, ideally without breaking spin; from the high platform in the center of the room, jump up to bonk the ceiling before falling into the sand. This same approach to the normalized movement can work with or without HiJump. Requires: {
"notable": "Blue Suit Sand Traversal"
}
{
"haveBlueSuit": {}
}
"Gravity"
"canLongIBJ"
"canJumpIntoIBJ"
"can4HighMidAirMorph" |
|
Start an IBJ by either bouncing on the sand with Spring Ball, doing a stationary spinjump on the sand, or by crouch jumping in the sand while holding down. Requires: {
"noBlueSuit": {}
}
"Gravity"
"canLongIBJ"
"canJumpIntoIBJ"
{
"or": [
{
"and": [
"canTrickyJump",
"can4HighMidAirMorph",
"canPlayInSand"
]
},
"h_useSpringBall"
]
}
{
"or": [
"canDoubleBombJump",
"canStaggeredIBJ",
"canBePatient"
]
} |
|
Requires: "Gravity"
{
"or": [
"canWallJump",
"SpaceJump",
"canLongIBJ",
"canJumpIntoIBJ",
{
"and": [
"HiJump",
"canSpringBallJumpMidAir"
]
},
{
"and": [
"HiJump",
"canGravityJump"
]
}
]
} |
|
Place bombs without moving horizontally, such that multiple hit the Mochtroid immediately as it attaches without being boosted into the doorway or sand. Entrance condition: {
"comeInWithGMode": {
"mode": "any",
"morphed": true
}
}Requires: "Gravity"
{
"or": [
"h_artificialMorphLongIBJ",
"h_artificialMorphJumpIntoIBJ"
]
} |
|
Use normalized movement to land on the sand without losing a blue suit. One way is to do the following: from the high platform at the right of the room, jump up to bonk the ceiling before falling into the sand; jump up to lure a Mochtroid down, and destroy it with the blue suit; if HiJump is unavailable, perform the first IBJ all the way left against the Grapple block wall to prevent the higher Mochtroid from coming on camera; from the platforms at the height of the top door, simply walk off the ledge; from the platforms two tiles above the sand, do a full height jump; from the sand itself, do full height spin jumps, ideally without breaking spin. The same approach to the normalized movement generally works with or without HiJump: but if performing many jumps in a row from sand to sand with HiJump, it is recommended to alternate between breaking spin and not breaking spin, to keep Samus' vertical subpixels in a good range. In any case, if failing an IBJ, unmorph before landing on the sand, in order to have a chance to keep the blue suit. Requires: {
"notable": "Blue Suit Sand Traversal"
}
{
"haveBlueSuit": {}
}
"Gravity"
"canLongIBJ"
"canJumpIntoIBJ"
"can4HighMidAirMorph"
"canTrickyDodgeEnemies" |
|
Start an IBJ by either bouncing on the sand with Spring Ball, doing a stationary spinjump on the sand, or by crouch jumping in the sand while holding down. Requires: {
"noBlueSuit": {}
}
"Gravity"
"canLongIBJ"
"canJumpIntoIBJ"
{
"or": [
{
"and": [
"canTrickyJump",
"can4HighMidAirMorph",
"canPlayInSand"
]
},
"h_useSpringBall"
]
}
{
"or": [
"canDoubleBombJump",
"canStaggeredIBJ",
"canBePatient"
]
} |
|
Requires: "Gravity"
{
"or": [
"SpaceJump",
"canLongIBJ",
{
"and": [
"HiJump",
"canJumpIntoIBJ"
]
}
]
} |
|
There is enough time to IBJ to the top door before Draygon appears. Entrance condition: {
"comeInWithGMode": {
"mode": "any",
"morphed": true,
"mobility": "mobile"
}
}Requires: "Gravity"
{
"or": [
"h_artificialMorphLongIBJ",
{
"and": [
"HiJump",
"h_artificialMorphJumpIntoIBJ"
]
}
]
}Clears obstacles: door_1 |
|
Entrance condition: {
"comeInWithGMode": {
"mode": "any",
"morphed": true
}
}Requires: {
"or": [
"f_DefeatedDraygon",
{
"obstaclesCleared": [
"f_DefeatedDraygon"
]
}
]
}
"Gravity"
{
  "or": [
    "h_artificialMorphLongIBJ",
    {
      "and": [
        "HiJump",
        "h_artificialMorphJumpIntoIBJ"
      ]
    }
  ]
}Clears obstacles: door_1 |
|
This requires multiple HBJ to get over spike pits. The first one, by the right door, must be started at the top of an IBJ. Entrance condition: {
"comeInWithGMode": {
"mode": "any",
"morphed": true
}
}Requires: {
"notable": "G-Mode Morph, IBJ, HBJ"
}
"Gravity"
{
  "or": [
    "h_artificialMorphLongIBJ",
    "h_artificialMorphJumpIntoIBJ"
  ]
}
"h_artificialMorphDiagonalBombJump"
"h_artificialMorphHBJ" |
|
Perform an HBJ at the top of an IBJ. This is basically a very short diagonal bomb jump. Requires: "Gravity"
"canDiagonalBombJump"
{
"or": [
"canLongIBJ",
"canJumpIntoIBJ"
]
} |
|
Requires: "Gravity"
{
"or": [
"canLongIBJ",
{
"and": [
"HiJump",
"canJumpIntoIBJ"
]
}
]
}
{
"or": [
"canBombHorizontally",
"h_IBJFromSpikes"
]
} |
|
To avoid the Mochtroids, it is possible to place bombs near them while in the Morph Tunnel below to the right. Entrance condition: {
"comeInWithGMode": {
"mode": "any",
"morphed": true
}
}Requires: "Gravity" "h_artificialMorphLongIBJ" Dev note: This strat is not starting from 5, because that would require canOffScreenMovement. |
|
Requires: "Gravity"
{
"or": [
"SpaceJump",
"canLongIBJ",
"canJumpIntoIBJ",
"canWallJump",
"canGravityJump",
{
"and": [
"HiJump",
{
"or": [
"canSpringBallJumpMidAir",
"canSpeedyJump"
]
}
]
}
]
} |
|
To avoid the Mochtroids, it is possible to place bombs near them while in the Morph Tunnel below to the right. Entrance condition: {
"comeInWithGMode": {
"mode": "any",
"morphed": true
}
}Requires: "Gravity" "h_artificialMorphLongIBJ" Dev note: This strat is not starting from 5, because that would require canOffScreenMovement. |
From: 5
G-Mode Morph, In Morph Tunnel
To: 4
Top Right Door
Requires: "canGMode" "Gravity" "h_artificialMorphLongIBJ" "canOffScreenMovement" |
|
Requires: {
"or": [
"canWallJump",
"SpaceJump",
"canLongIBJ",
"canJumpIntoIBJ",
{
"and": [
"HiJump",
{
"or": [
"canSpringBallJumpMidAir",
"canUseFrozenEnemies"
]
}
]
}
]
} |
|
IBJ up the climb. This is a lot easier with PBs or Spring Ball to help kill the enemies. With PBs, use one on entry to deal with the Puyos, then IBJ up the right side and use another to kill the middle Choot. Otherwise, Kill the Puyos then the bottom Choot with Bombs, falling off when necessary, then climb the left side of the room. Entrance condition: {
"comeInWithGMode": {
"mode": "any",
"morphed": true
}
}Requires: {
"or": [
"h_artificialMorphLongIBJ",
"h_artificialMorphJumpIntoIBJ"
]
}
{
"or": [
"h_artificialMorphSpringBall",
{
"and": [
"h_artificialMorphPowerBomb",
"h_artificialMorphPowerBomb"
]
},
{
"and": [
"h_artificialMorphStaggeredIBJ",
"canBeVeryPatient"
]
}
]
} |
From: 1
Bottom Left Door
To: 4
G-Mode Junction (Top by Elevator)
It is possible to kill the Rippers with a single Power Bomb by placing it at least 2 tiles above the lowest Ripper inside the narrow section of the shaft. Entrance condition: {
"comeInWithGMode": {
"mode": "any",
"morphed": false
}
}Requires: {
"or": [
{
"and": [
{
"enemyKill": {
"enemies": [
[
"Ripper",
"Ripper",
"Ripper"
]
]
}
},
{
"or": [
"canWallJump",
"SpaceJump"
]
}
]
},
{
"and": [
"canLongIBJ",
{
"ammo": {
"type": "Super",
"count": 3
}
}
]
},
{
"and": [
"canLongIBJ",
"h_usePowerBomb",
{
"or": [
"h_usePowerBomb",
"canStaggeredIBJ"
]
}
]
}
]
} |
From: 1
Bottom Left Door
To: 4
G-Mode Junction (Top by Elevator)
The Rippers can be killed with three Power Bombs, or one carefully placed Power Bomb, Gravity, and a careful dodge of the top-most Ripper. With a single Power Bomb, IBJ from the water to avoid the first Ripper, then place the Power Bomb at least two tiles above the next. This can be achieved with a Staggered IBJ. Then climb the right side of the shaft and similarly dodge the top Ripper. Entrance condition: {
"comeInWithGMode": {
"mode": "any",
"morphed": true
}
}Requires: "h_artificialMorphLongIBJ"
{
"or": [
"Gravity",
"h_artificialMorphPowerBomb",
{
"enemyDamage": {
"enemy": "Ripper",
"type": "contact",
"hits": 1
}
},
{
"and": [
"canInsaneJump",
"h_artificialMorphDoubleBombJump",
"h_artificialMorphStaggeredIBJ"
]
}
]
}
"h_artificialMorphPowerBomb"
{
"or": [
"h_artificialMorphStaggeredIBJ",
"h_artificialMorphPowerBomb",
{
"enemyDamage": {
"enemy": "Ripper",
"type": "contact",
"hits": 1
}
}
]
} |
From: 1
Bottom Left Door
To: 4
G-Mode Junction (Top by Elevator)
The Rippers can be killed with two Power Bombs, or one carefully placed Power Bomb and a careful dodge of the top-most Ripper. With a single Power Bomb, use Spring Ball to avoid the first Ripper, then place the Power Bomb at least two tiles above the next. This can be achieved with a Staggered IBJ or a Spring Ball Bomb Boost. Then climb the right side of the shaft and dodge the top Ripper. Entrance condition: {
"comeInWithGMode": {
"mode": "any",
"morphed": true
}
}Requires: "h_artificialMorphLongIBJ"
"h_artificialMorphSpringBallBombJump"
"h_artificialMorphPowerBomb"
{
"or": [
"h_artificialMorphStaggeredIBJ",
"h_artificialMorphPowerBomb",
{
"enemyDamage": {
"enemy": "Ripper",
"type": "contact",
"hits": 1
}
}
]
}Dev note: canSpringBallBombJump can be bypassed with SpringBall and other requirements, but that's being assumed with Bombs and SpringBall at this level. |
|
Only the lowest three Rippers that are above the right door need to be killed. The highest of the three can barely be reached with a Super and HiJump. Or a PB placed slightly higher than a standard max jump, done by jumping from the door ledge, from an IBJ while avoiding the Ripper, or using 2 PBs. Requires: "canLongIBJ"
{
"or": [
{
"and": [
{
"enemyKill": {
"enemies": [
[
"Ripper",
"Ripper",
"Ripper"
]
],
"explicitWeapons": [
"PowerBomb"
]
}
},
{
"or": [
"HiJump",
"canCarefulJump"
]
}
]
},
{
"enemyKill": {
"enemies": [
[
"Ripper",
"Ripper"
],
[
"Ripper"
]
],
"explicitWeapons": [
"PowerBomb"
]
}
},
{
"and": [
{
"enemyKill": {
"enemies": [
[
"Ripper",
"Ripper",
"Ripper"
]
],
"explicitWeapons": [
"Super"
]
}
},
"HiJump"
]
}
]
} |
From: 2
Right Door
To: 4
G-Mode Junction (Top by Elevator)
It is possible to kill the Rippers with a single Power Bomb by placing it at least 2 tiles above the lowest Ripper inside the narrow section of the shaft. Entrance condition: {
"comeInWithGMode": {
"mode": "any",
"morphed": false
}
}Requires: {
"or": [
{
"and": [
{
"enemyKill": {
"enemies": [
[
"Ripper",
"Ripper",
"Ripper"
]
]
}
},
{
"or": [
"canWallJump",
"SpaceJump"
]
}
]
},
{
"and": [
"canLongIBJ",
{
"ammo": {
"type": "Super",
"count": 3
}
}
]
},
{
"and": [
"canLongIBJ",
"h_usePowerBomb",
{
"or": [
"h_usePowerBomb",
"canStaggeredIBJ"
]
}
]
}
]
} |
From: 2
Right Door
To: 4
G-Mode Junction (Top by Elevator)
The Rippers can be killed with two Power Bombs, or one carefully placed Power Bomb and a careful dodge of the top-most Ripper. With a single Power Bomb, place it at least two tiles above the first Ripper. This can be achieved with a Staggered IBJ or a Spring Ball Bomb Boost. Then climb the right side of the shaft and dodge the top Ripper. Entrance condition: {
"comeInWithGMode": {
"mode": "any",
"morphed": true
}
}Requires: "h_artificialMorphLongIBJ"
"h_artificialMorphPowerBomb"
{
"or": [
"h_artificialMorphStaggeredIBJ",
"h_artificialMorphPowerBomb",
{
"enemyDamage": {
"enemy": "Ripper",
"type": "contact",
"hits": 1
}
}
]
} |
|
Requires: {
"obstaclesCleared": [
"B"
]
}
{
"or": [
"canLongIBJ",
{
"and": [
"HiJump",
"canJumpIntoIBJ"
]
}
]
} |
|
Let the wall pirate jump to the other side of the room. Shooting the standing pirate (with anything) will prevent it from attacking. Requires: "canDodgeWhileShooting"
"canJumpIntoIBJ"
{
"or": [
"canLongIBJ",
"HiJump"
]
} |
|
Entrance condition: {
"comeInWithGMode": {
"mode": "any",
"morphed": true
},
"comesThroughToilet": "any"
}Requires: "h_artificialMorphLongIBJ"
{
"or": [
"h_artificialMorphSpringBallBombJump",
"h_artificialMorphBombHorizontally",
"Gravity"
]
} |
|
Requires: {
"or": [
"HiJump",
"canWallJump",
"SpaceJump",
"canSpringBallJumpMidAir",
{
"and": [
"canIBJ",
"canBombHorizontally"
]
},
{
"and": [
"canLongIBJ",
"Gravity"
]
},
{
"and": [
"canSpringBallBombJump",
"h_additionalBomb",
"h_additionalBomb"
]
}
]
} |
|
Entrance condition: {
"comeInWithGMode": {
"mode": "any",
"morphed": true
},
"comesThroughToilet": "any"
}Requires: {
"or": [
{
"and": [
"h_artificialMorphIBJ",
"h_artificialMorphBombHorizontally"
]
},
{
"and": [
"h_artificialMorphLongIBJ",
"Gravity"
]
},
{
"and": [
"h_artificialMorphSpringBallBombJump",
"h_additionalBomb",
"h_additionalBomb",
"h_additionalBomb"
]
},
{
"and": [
"h_artificialMorphSpringBallBombJump",
{
"notable": "Left Shaft Precise Crouch Jump Down Grab"
}
]
}
]
} |
|
Requires: "Gravity"
{
"or": [
"canWallJump",
"HiJump",
"canSpringBallJumpMidAir",
"SpaceJump",
"canLongIBJ",
{
"and": [
"canIBJ",
"canBombHorizontally"
]
}
]
} |
|
Entrance condition: {
"comeInWithGMode": {
"mode": "any",
"morphed": true
}
}Requires: {
"or": [
{
"and": [
"Gravity",
{
"or": [
"h_artificialMorphLongIBJ",
{
"and": [
"h_artificialMorphIBJ",
"h_artificialMorphBombHorizontally"
]
}
]
}
]
},
{
"and": [
"h_artificialMorphDoubleSpringBallJump",
"canDownGrab"
]
},
{
"and": [
"canGravityJump",
"h_artificialMorphSpringBallBombJump"
]
}
]
} |
|
Entrance condition: {
"comeInWithGMode": {
"mode": "any",
"morphed": true
}
}Requires: {
"or": [
"Gravity",
{
"and": [
"canSuitlessMaridia",
"HiJump",
"h_artificialMorphSpringBall"
]
}
]
}
"h_artificialMorphLongIBJ" |
|
Entrance condition: {
"comeInWithGMode": {
"mode": "any",
"morphed": true
}
}Requires: {
"or": [
"Gravity",
{
"and": [
"canSuitlessMaridia",
"HiJump",
"h_artificialMorphSpringBall"
]
}
]
}
{
"or": [
"h_artificialMorphLongIBJ",
{
"and": [
"Gravity",
"h_artificialMorphIBJ",
"h_artificialMorphBombHorizontally"
]
},
{
"and": [
"canGravityJump",
"h_artificialMorphSpringBallBombJump",
{
"or": [
"h_additionalBomb",
{
"tech": "canDoubleSpringBallJumpMidAir"
}
]
},
{
"or": [
{
"and": [
"h_additionalBomb",
"h_additionalBomb"
]
},
{
"notable": "Left Shaft Precise Crouch Jump Down Grab"
}
]
}
]
}
]
} |
|
Requires: {
"or": [
"canConsecutiveWallJump",
"SpaceJump",
"canLongIBJ"
]
} |
|
Entrance condition: {
"comeInWithGMode": {
"mode": "any",
"morphed": true
}
}Requires: "h_artificialMorphLongIBJ" |
|
Requires: {
"or": [
"canConsecutiveWallJump",
"SpaceJump",
"canLongIBJ"
]
}
{
"enemyDamage": {
"enemy": "Choot",
"type": "contact",
"hits": 1
}
} |
|
Shoot the Choot either before landing or from the safety of the ledge edge. If bomb jumping, there is a timing for rolling under the Choot. Requires: {
"or": [
"canConsecutiveWallJump",
"SpaceJump",
"canLongIBJ"
]
}
{
"or": [
"canTrickyJump",
{
"and": [
"canCarefulJump",
{
"enemyKill": {
"enemies": [
[
"Choot"
]
],
"explicitWeapons": [
"Missile",
"Super"
]
}
}
]
}
]
} |
|
Entrance condition: {
"comeInWithGMode": {
"mode": "any",
"morphed": true
}
}Requires: {
"or": [
"h_artificialMorphLongIBJ",
{
"and": [
"Gravity",
"h_artificialMorphIBJ",
"h_artificialMorphBombHorizontally"
]
},
{
"and": [
"canGravityJump",
"h_artificialMorphSpringBallBombJump",
{
"or": [
"h_additionalBomb",
{
"tech": "canDoubleSpringBallJumpMidAir"
}
]
},
{
"or": [
{
"and": [
"h_additionalBomb",
"h_additionalBomb"
]
},
{
"notable": "Left Shaft Precise Crouch Jump Down Grab"
}
]
}
]
}
]
} |
|
To avoid damage, the Choot can be killed and then Samus can climb back up again. Requires: {
"or": [
"canConsecutiveWallJump",
"SpaceJump",
"canLongIBJ"
]
}
{
"or": [
{
"enemyKill": {
"enemies": [
[
"Choot"
]
],
"explicitWeapons": [
"Wave",
"Spazer",
"PowerBomb"
]
}
},
{
"and": [
"canBeVeryPatient",
{
"enemyKill": {
"enemies": [
[
"Choot"
]
]
}
}
]
}
]
}Dev note: Missile kill strats could fit here with a reclimb or by landing on the ledge, with the same requirements. |
|
IBJ from below or bomb horizontally, then use Spring Ball with HiJump to jump around the overhang while avoiding the upper Choot. Entrance condition: {
"comeInWithGMode": {
"mode": "any",
"morphed": true
}
}Requires: {
"or": [
"h_artificialMorphLongIBJ",
{
"and": [
"HiJump",
"h_artificialMorphSpringBallBombJump",
{
"tech": "canBombHorizontally"
},
"canTrickyJump"
]
}
]
} |
From: 5
Junction Above Grapple Block
To: 2
East Leg Right Door
Wait the water tide to reach its peak, then crouch jump into a spring ball jump into an IBJ. Perform the spring ball jump near max height. Place the first bomb between about 4 and 6 frames after the spring ball jump; ideally it should be just above the water line. Press pause between about 5 and 10 frames after placing the bomb, to disable Spring Ball (a 'spring fling', to reset fall speed). Place the second bomb soon after regaining control, while the game is fading back in. When close to the top, perform a spring ball jump to reach the ledge; release jump as soon as Samus is high enough to clear the ledge, in order to avoid taking a Menu hit. Requires: {
"notable": "Bomb Jump Water Escape"
}
"HiJump"
"h_underwaterMaxHeightSpringBallJump"
"canSpringFling"
"canBombJumpWaterEscape"
"canJumpIntoIBJ"
"canLongIBJ"
"canDoubleBombJump"Dev note: This trick can technically be done without a 'spring fling' but is extremely precise. |
From: 1
Left Door
To: 2
Right Door
Take the bottom path and place many bombs near the speed blocks to overload PLMs and go through them. Entrance condition: {
"comeInWithGMode": {
"mode": "any",
"morphed": true
}
}Requires: "h_artificialMorphLongIBJ"
{
"or": [
"h_artificialMorphCeilingBombJump",
"canBeVeryPatient"
]
} |
From: 2
Right Door
To: 1
Left Door
The acid does not rise in G-mode. Bomb boost near the first pirate until it places 18 lasers and fully overloads them so that other pirates won't place more. Very carefully IBJ over it or use Spring Ball or Power Bombs to kill it. Climb the shaft with a very long IBJ. At the top of the room, Crystal Flash on one of the ledges, below a wall pirate, to have it walk into Samus and trigger reserves. The pirate will randomly walk up and down and wall, but if it sees Samus and jumps across, it will start climbing up the left wall or down the right wall. Entrance condition: {
"comeInWithGMode": {
"mode": "direct",
"morphed": true
}
}Requires: {
"or": [
"h_artificialMorphSpringBall",
"canComplexGMode",
{
"and": [
"h_artificialMorphPowerBomb",
"h_artificialMorphPowerBomb"
]
}
]
}
"h_artificialMorphLongIBJ"
"h_artificialMorphComplexRModeCrystalFlashInterrupt"
{
"ammo": {
"type": "Missile",
"count": 10
}
} |
|
The acid does not rise in G-mode. Bomb boost near the first pirate until it places 18 lasers and fully overloads them so that other pirates won't place more. Very carefully IBJ over it or use Spring Ball or Power Bombs to kill it. Climb the shaft with a very long IBJ. Entrance condition: {
"comeInWithGMode": {
"mode": "any",
"morphed": true
}
}Requires: {
"or": [
"Morph",
"h_artificialMorphSpringBall",
"canComplexGMode",
{
"and": [
"h_artificialMorphPowerBomb",
"h_artificialMorphPowerBomb"
]
}
]
}
"h_artificialMorphLongIBJ" |
|
Requires: {
"notable": "IBJ and Acid Bath"
}
"canSuitlessLavaDive"
"canJumpIntoIBJ"
"canLongIBJ"
"canDoubleBombJump"
{
"or": [
{
"and": [
"Gravity",
{
"acidFrames": 150
}
]
},
{
"acidFrames": 450
}
]
} |
