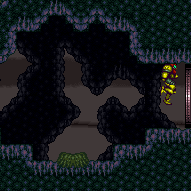
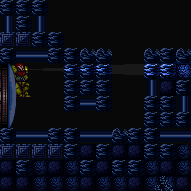
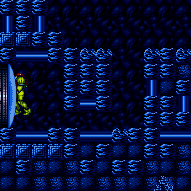
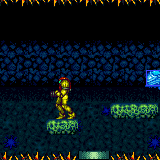
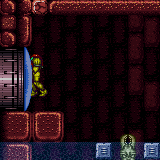
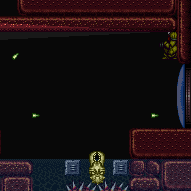
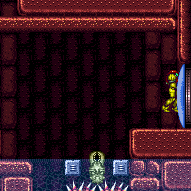
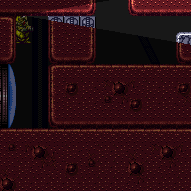
canXRayClimb (Very Hard)
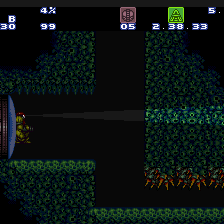
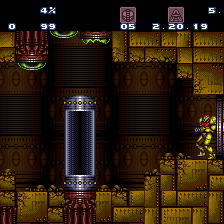
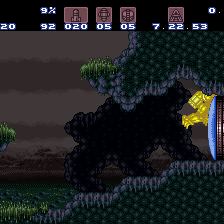
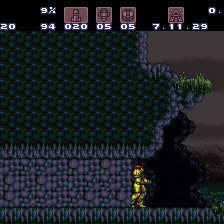
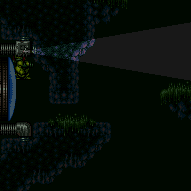
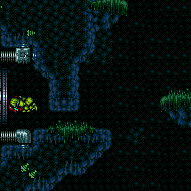
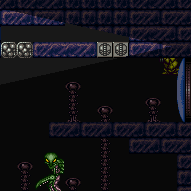
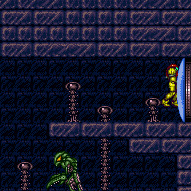
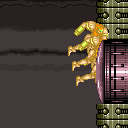
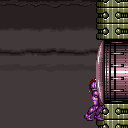
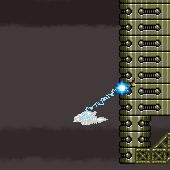
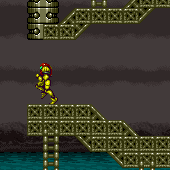
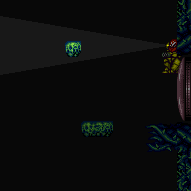
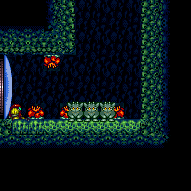
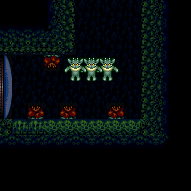
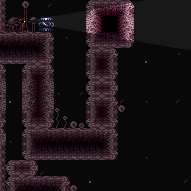
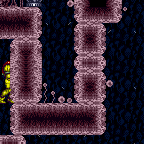
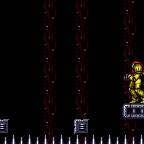
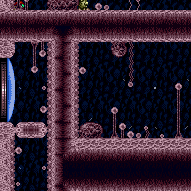
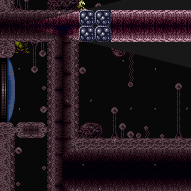
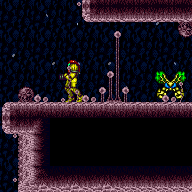
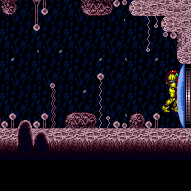
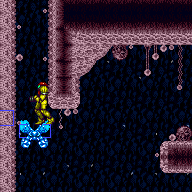
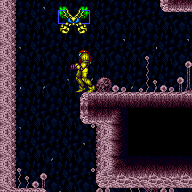
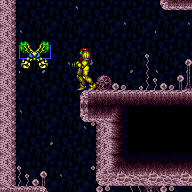
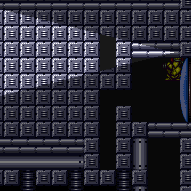
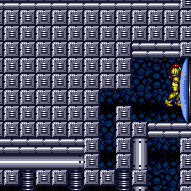
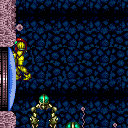
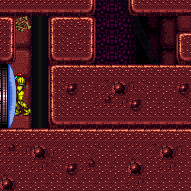
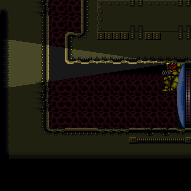
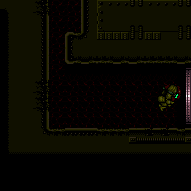
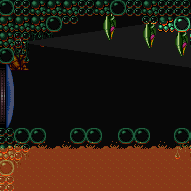
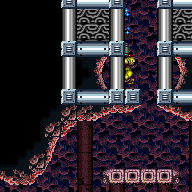
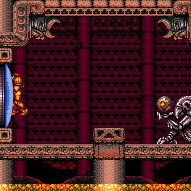
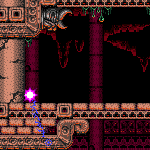
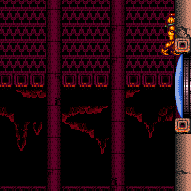
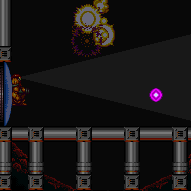
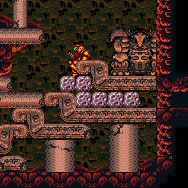
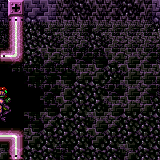
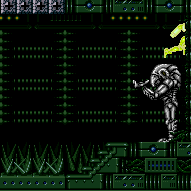
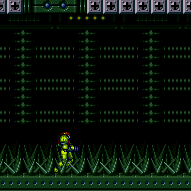
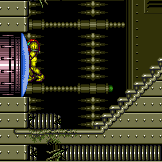
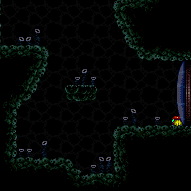
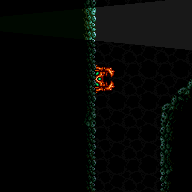
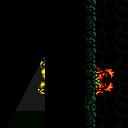
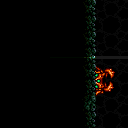
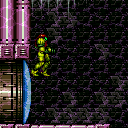
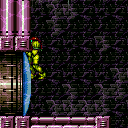
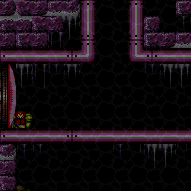
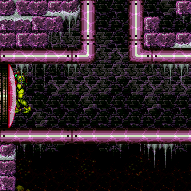
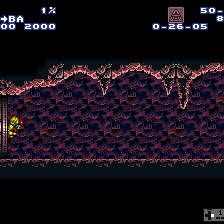
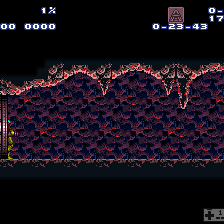
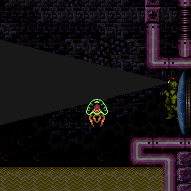
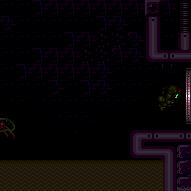
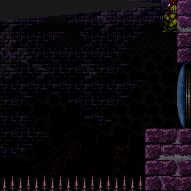
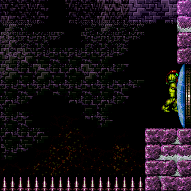
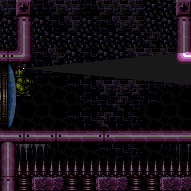
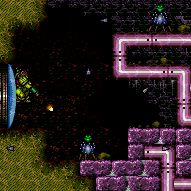
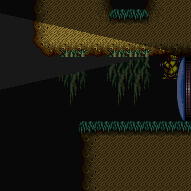
Repeatedly using X-Ray's forced standup trick to climb up through in-bound walls. This requires Samus to be partially clipped into the wall to begin climbing, which is often set up by getting stuck in a closing door. The simplest setup is getting stuck in a right facing door in order to climb the left wall of a room. To do this, enter this room from the room to the left with a stationary spinjump moving away to touch the transition with momentum that will get you stuck in the destination door. X-Ray climbs can also be setup by allowing solid blocks to reform on Samus, or by clipping into a wall by some other means.
Dependencies: canXRayStandUp
Strats ()
From: 5
Bottom Right Door
To: 4
Middle Right Door
Use an X-Ray climb to position Samus to where she can break the Bomb block with Screw Attack. This is a 1 screen climb. Entrance condition: {
"comeInWithDoorStuckSetup": {}
}Requires: "ScrewAttack" "Morph" "canXRayClimb" Dev note: This is an alternative to using Moonfall to break the block with Screw Attack. |
From: 4
Bottom Right Door
To: 3
Top Right Door
Entrance condition: {
"comeInShinecharged": {}
}Requires: {
"shineChargeFrames": 1
}
{
"shinespark": {
"frames": 1,
"excessFrames": 1
}
}
"canShinesparkDeepStuck"
"canXRayClimb"
"canBePatient" |
|
Entrance condition: {
"comeInWithDoorStuckSetup": {}
}Requires: "canXRayClimb" |
From: 4
Top Right Door
To: 1
Top Left Door
Exit the previous room with Samus in a standing pose (while grappled). After teleporting, press right to release Grapple while staying standing (not being forced into a crouch). Then X-ray climb 1 screen to get up to the door transition, without needing to open the door. Samus will not be visible during the climb. Entrance condition: {
"comeInWithGrappleTeleport": {
"blockPositions": [
[
2,
18
],
[
2,
19
],
[
2,
28
],
[
2,
29
]
]
}
}Requires: "canXRayClimb" Bypasses door shell: true |
From: 5
Alcatraz Door
To: 1
Top Left Door
Exit the previous room with Samus in a standing pose (while grappled). After teleporting, press right to release Grapple while staying standing (not being forced into a crouch). Then X-ray climb 1 screeto get up to the door transition, without needing to open the door. Samus will not be visible during the climb. Entrance condition: {
"comeInWithGrappleTeleport": {
"blockPositions": [
[
2,
18
],
[
2,
19
],
[
2,
28
],
[
2,
29
]
]
}
}Requires: "canXRayClimb" Bypasses door shell: true |
From: 6
Bottom Right Door (On the Left Shaft)
To: 1
Top Left Door
Exit the previous room with Samus in a standing pose (while grappled). After teleporting, press right to release Grapple while staying standing (not being forced into a crouch). Then X-ray climb 1 screen to get up to the door transition, without needing to open the door. Samus will not be visible during the climb. Entrance condition: {
"comeInWithGrappleTeleport": {
"blockPositions": [
[
2,
18
],
[
2,
19
],
[
2,
28
],
[
2,
29
]
]
}
}Requires: "canXRayClimb" Bypasses door shell: true |
|
Climb until the camera fully shows Samus on the bottom of the screen. Shoot up to clear the shot blocks and resume climbing until you can walk out to the left. Fix the camera by shooting the floor shot block and jumping down. Entrance condition: {
"comeInWithDoorStuckSetup": {}
}Requires: "canXRayClimb" |
From: 2
Right Door
To: 1
Left Door
Exit the previous room with Samus in a standing pose (while grappled). After teleporting, press right to release Grapple while staying standing (not being forced into a crouch). Then X-ray climb 1 screen to get up to the door transition, without needing to open the door. Entrance condition: {
"comeInWithGrappleTeleport": {
"blockPositions": [
[
2,
18
],
[
2,
19
],
[
2,
28
],
[
2,
29
]
]
}
}Requires: "canXRayClimb" Bypasses door shell: true |
|
Exit the previous room with Samus in a standing pose (while grappled). After teleporting, press right to release Grapple while staying standing (not being forced into a crouch). Then X-ray climb 1 screen to get up to the door transition, without needing to open the door. Samus will not be visible during the climb. Entrance condition: {
"comeInWithGrappleTeleport": {
"blockPositions": [
[
2,
18
],
[
2,
19
],
[
2,
28
],
[
2,
29
]
]
}
}Requires: "canXRayClimb" Bypasses door shell: true |
From: 4
Lower Section - Top Right Door
To: 8
Bridge Right Door (Leads to Bottom Right Door)
Climb up 1 screen. Entrance condition: {
"comeInWithGMode": {
"mode": "direct",
"morphed": false
}
}Requires: "canComplexGMode"
"canGModeXRayClimb"
{
"notable": "Get Inside the Bridge"
}
"canSkipDoorLock"
{
"or": [
"canArtificialMorph",
"canWallJump",
"SpaceJump",
{
"and": [
"canLongIBJ",
"Gravity"
]
},
{
"and": [
"HiJump",
"canJumpIntoIBJ"
]
},
{
"and": [
"canLongIBJ",
"canBombHorizontally",
"canResetFallSpeed"
]
},
{
"and": [
"canJumpIntoIBJ",
"canLongIBJ",
"canTrickyJump"
]
},
{
"and": [
"HiJump",
{
"or": [
"canSpeedyJump",
"canSpringBallJumpMidAir"
]
}
]
},
{
"and": [
"canTrickyJump",
"canPreciseGrapple"
]
},
{
"and": [
"Gravity",
"canMidairShinespark",
"h_shinechargeMaxRunway",
{
"shinespark": {
"frames": 35,
"excessFrames": 10
}
}
]
}
]
}
"canXRayClimb" |
From: 4
Lower Section - Top Right Door
To: 8
Bridge Right Door (Leads to Bottom Right Door)
Entrance condition: {
"comeInShinecharged": {}
}Requires: {
"shineChargeFrames": 1
}
{
"notable": "Get Inside the Bridge"
}
"canSkipDoorLock"
{
"shinespark": {
"frames": 1,
"excessFrames": 1
}
}
"canShinesparkDeepStuck"
"canXRayClimb" |
From: 4
Lower Section - Top Right Door
To: 8
Bridge Right Door (Leads to Bottom Right Door)
Enter with G-mode direct, back up to between 1 and 6 pixels from the door transition, and activate X-ray to get very deep stuck in the door. Climb up 1 screen, and perform a turnaround buffered spin-jump away from the door to trigger the transition, bypassing any lock on the door. Entrance condition: {
"comeInWithGMode": {
"mode": "direct",
"morphed": false
}
}Requires: "canComplexGMode"
"canGModeXRayClimb"
{
"notable": "Get Inside the Bridge"
}
{
"or": [
"canArtificialMorph",
"canWallJump",
"SpaceJump",
{
"and": [
"canLongIBJ",
"Gravity"
]
},
{
"and": [
"HiJump",
"canJumpIntoIBJ"
]
},
{
"and": [
"canLongIBJ",
"canBombHorizontally",
"canResetFallSpeed"
]
},
{
"and": [
"canJumpIntoIBJ",
"canLongIBJ",
"canTrickyJump"
]
},
{
"and": [
"HiJump",
{
"or": [
"canSpeedyJump",
"canSpringBallJumpMidAir"
]
}
]
},
{
"and": [
"canTrickyJump",
"canPreciseGrapple"
]
},
{
"and": [
"Gravity",
"canMidairShinespark",
"h_shinechargeMaxRunway",
{
"shinespark": {
"frames": 35,
"excessFrames": 10
}
}
]
}
]
}
"canXRayClimb"Bypasses door shell: true |
From: 5
Lower Section - Bottom Right Door
To: 4
Lower Section - Top Right Door
Grapple on the Ripper to get inside the wall under the door. Do a Crystal Flash to force a standup. X-Ray climb up to the door transition. Requires: {
"notable": "Grapple Clip Door Lock Skip"
}
{
"obstaclesNotCleared": [
"R-Mode"
]
}
"canUseEnemies"
"canGrappleClip"
"h_CrystalFlash"
"canXRayClimb"Bypasses door shell: true Dev note: TODO: There may be Bob strats to skip the Crystal Flash requirement. |
From: 6
Middle Right Door (By Zeb Farm)
To: 12
Top Junction
Entrance condition: {
"comeInShinecharged": {}
}Requires: {
"shineChargeFrames": 1
}
{
"shinespark": {
"frames": 1,
"excessFrames": 1
}
}
"canShinesparkDeepStuck"
"canXRayClimb" |
|
Exit the previous room with Samus in a standing pose (while grappled) with a horizontal position of 21 (as far right as possible). After teleporting, press right to release Grapple while staying standing (not being forced into a crouch). Then X-ray climb to get to the door transition above, without needing to open the door. At the beginning of the climb, avoid pressing left without X-Ray being held, to prevent triggering the transition of the bottom door. Entrance condition: {
"comeInWithGrappleTeleport": {
"blockPositions": [
[
2,
18
],
[
2,
19
],
[
2,
28
],
[
2,
29
]
]
}
}Requires: "canXRayClimb" Bypasses door shell: true |
|
Entrance condition: {
"comeInWithDoorStuckSetup": {}
}Requires: "canXRayClimb" |
From: 2
Top Right Door
To: 1
Top Left Door
Exit the previous room with Samus in a standing pose (while grappled) with a horizontal position of 21 (as far right as possible). After teleporting, press right to release Grapple while staying standing (not being forced into a crouch). Then X-ray climb to get up to the door transition, without needing to open the door. At the beginning of the climb, avoid pressing left without X-Ray being held, to prevent triggering the transition of the bottom door. Entrance condition: {
"comeInWithGrappleTeleport": {
"blockPositions": [
[
2,
18
],
[
2,
19
],
[
2,
28
],
[
2,
29
]
]
}
}Requires: "canXRayClimb" Bypasses door shell: true |
|
Entrance condition: {
"comeInWithDoorStuckSetup": {}
}Requires: "canXRayClimb" |
From: 4
Bottom Right Door
To: 1
Top Left Door
Exit the previous room with Samus in a standing pose (while grappled) with a horizontal position of 21 (as far right as possible). After teleporting, press right to release Grapple while staying standing (not being forced into a crouch). Then X-ray climb to get up to the door transition, without needing to open the door. At the beginning of the climb, avoid pressing left without X-Ray being held, to prevent triggering the transition of the bottom door. Entrance condition: {
"comeInWithGrappleTeleport": {
"blockPositions": [
[
2,
18
],
[
2,
19
],
[
2,
28
],
[
2,
29
]
]
}
}Requires: "canXRayClimb" Bypasses door shell: true |
From: 4
Bottom Right Door
To: 2
Top Right Door
Freeze a Zebbo inside the wall above the right side of the spikeway, close to the ceiling thorns. Face right, equip X-Ray, move at least a few pixels away from the wall, and jump straight up into the ceiling thorns. If successful, Samus will be knocked back into the wall and end up standing inside it. Use X-Ray immediately to prevent additional thorn hits. If Samus is high enough to be touching the thorns, then i-frames will continue to be refreshed once per second. While X-Ray climbing, be careful to only release X-Ray soon after i-frames are refreshed. Crouch before pressing X-Ray again. Requires: {
"notable": "Wall Ice Clip X-Ray Climb"
}
"canWallIceClip"
{
"thornHits": 1
}
"canXRayClimb"
"canUseIFrames"
"canNeutralDamageBoost"Dev note: Standing at least 3 pixels away from the wall ensures that knockback pushes Samus fully up against the ceiling; there is also no problem with standing further right, even hanging off the ledge: as long as Samus is still in range to take damage from the thorns above, they will be able to knock Samus into the wall. It is possible to freeze the Zeebo lower, but if Samus is too low, it will be necessary to take 3 thorn hits. It is also possible to get stuck inside the wall by taking knockback from a floor thorn, or by using a frozen Beetom as a platform. However those methods are not any easier, more damage will be taken, and the climb will be longer. If Samus begins climbing at a level below the ceiling thorns, then as Samus approaches the thorns, X-Ray will need to only be released while turning to the right, in order to prevent the thorn hits from knocking Samus out of the wall. |
From: 7
Below Power Bomb Blocks - Top Right Door
To: 12
Above Power Bomb Blocks - Main Junction
Entrance condition: {
"comeInWithDoorStuckSetup": {}
}Requires: "canXRayClimb" |
From: 10
Right Etecoon Shaft - Bottom Left Door
To: 13
Below Power Bomb Blocks - Main Junction
Climb up 1 screen. Once Samus appears one tile above the bottom of the door, you will be unable to climb higher, and it is safe to morph at this point. Entrance condition: {
"comeInWithDoorStuckSetup": {}
}Requires: "canXRayClimb"
{
"or": [
"h_bombThings",
{
"haveBlueSuit": {}
}
]
}Dev note: This strat is useful in case wall jumping is not available, or to save a Power Bomb in case going around through the internal door at the top is not possible. |
From: 2
Top Right Door
To: 1
Top Left Door
Exit the previous room with Samus in a standing pose (while grappled). After teleporting, press right to release Grapple while staying standing (not being forced into a crouch). Then X-ray climb 1 screen to get up to the door transition, without needing to open the door. Samus will not be visible during the climb. Entrance condition: {
"comeInWithGrappleTeleport": {
"blockPositions": [
[
2,
18
],
[
2,
19
],
[
2,
28
],
[
2,
29
]
]
}
}Requires: "canXRayClimb" Bypasses door shell: true |
From: 3
Bottom Right Door
To: 1
Top Left Door
Exit the previous room with Samus in a standing pose (while grappled). After teleporting, press right to release Grapple while staying standing (not being forced into a crouch). Then X-ray climb 1 screen to get up to the door transition, without needing to open the door. Samus will not be visible during the climb. Entrance condition: {
"comeInWithGrappleTeleport": {
"blockPositions": [
[
2,
18
],
[
2,
19
],
[
2,
28
],
[
2,
29
]
]
}
}Requires: "canXRayClimb" Bypasses door shell: true |
From: 4
Left Side - Door Behind Power Bomb Blocks
To: 10
Top Item (Above Hopper Pit)
Perform a horizontal shinespark through the door transition, from a horizontal position that triggers a deep transition in the door. Sparking from one or two pixels away from the door is an example position that works (if possible in the neighboring room). In general, about one third of positions will work, with working positions occuring in periodic windows that are each approximately two pixels wide, separated by bad windows that are approximately 4 pixels wide. If successful, Samus will spawn inside the Power Bomb blocks. After the shinespark crash animation ends, Samus should be standing and able to X-Ray climb. Entrance condition: {
"comeInWithSpark": {}
}Requires: "canDeepTransition"
{
"shinespark": {
"frames": 2,
"excessFrames": 2
}
}
"canXRayClimb" |
From: 4
Left Side - Door Behind Power Bomb Blocks
To: 10
Top Item (Above Hopper Pit)
Stand facing the door in the previous room, at a specific distance from the door, approximately a 3-pixel window at an effective distance of a 6-tile closed-end runway (taking into account how slopes can modify the effective distance). Pause, then unpause while holding dash and right. If positioned correctly, the unpause fade-in will finish on the exact frame that the transition would occur, delaying the transition by a frame. Samus will spawn standing inside the Power Bomb blocks and be able to X-Ray climb. Entrance condition: {
"comeInRunning": {
"speedBooster": "any",
"minTiles": 5.3906,
"maxTiles": 5.5859
}
}Requires: "canDeepTransition" "canXRayClimb" |
From: 4
Left Side - Door Behind Power Bomb Blocks
To: 10
Top Item (Above Hopper Pit)
Stand facing away from the door in the previous room, at a specific distance from the door, approximately a 2-pixel window at an effective distance of 3.7 tiles (taking into account how slopes can modify the effective distance). Pause, then unpause while holding dash and right. If positioned correctly, the unpause fade-in will finish on the exact frame that the transition would occur, delaying the transition by a frame. Samus will spawn standing inside the Power Bomb blocks and be able to X-Ray climb. Entrance condition: {
"comeInRunning": {
"speedBooster": "any",
"minTiles": 3.6445,
"maxTiles": 3.7851
}
}Requires: "canDeepTransition" "canXRayClimb" |
From: 5
Left Side - Door Blocked by Crumble Blocks
To: 4
Left Side - Door Behind Power Bomb Blocks
Entrance condition: {
"comeInWithDoorStuckSetup": {}
}Requires: "canXRayClimb" |
From: 8
Right Side - Bottom Door
To: 7
Right Side - Door Behind Super Block
Jump into the second Samus Eater in the ceiling of Hellway. After teleporting and passing through the transition, X-Ray climb 1 screen to reach the space above, to the right of the morph tunnel and Super block. Samus will be off-camera, so it may be hard to tell when the climb is done; moving left and right is a safe way to test, as it will cause the camera to scroll if Samus is at the top. Entrance condition: {
"comeInWithSamusEaterTeleport": {
"floorPositions": [],
"ceilingPositions": [
[
10,
3
]
]
}
}Requires: "canXRayClimb" Dev note: Other Samus Eaters can also probably work. |
|
Entrance condition: {
"comeInWithDoorStuckSetup": {}
}Requires: "canXRayClimb" |
From: 13
Central Junction
To: 4
Left Side - Door Behind Power Bomb Blocks
Freeze a Zeb inside the left wall of the room, below the Power Bomb block wall. Run into the wall to clip into it, then X-Ray climb. Walking into the wall is also possible but is more precise and may require several tries. Requires: {
"notable": "Wall Ice Clip X-Ray Climb"
}
"canWallIceClip"
{
"or": [
"canDash",
"canInsaneJump"
]
}
"canXRayClimb" |
From: 13
Central Junction
To: 5
Left Side - Door Blocked by Crumble Blocks
Freeze a Zeb inside the left wall of the room, and use it to clip into the wall and X-Ray climb. Note that jumping directly against the wall to clip into it will put Samus into a forced crouch, unable to use X-Ray. Samus may either 1) perform a Crystal Flash to stand up, 2) use neutral knockback from a Reo to put Samus standing inside the wall, or 3) use the frozen Reo as a platform to walk or run and clip into the wall. To manipulate the Reo into a suitable position, lure it to the left and crouch at the edge of the platform; jump as needed to bring it back on camera when it goes off; it should perform 4 big swoops down to the left, 2 small swoops (hitting the overhang above), then 5 more big swoops, after which it will enter a slow hover moving directly towards Samus. Freeze the Reo when its left side is approximately flush with the ledge, or up to about a tile to the right. After X-Ray climbing a little over half a screen, it is possible to aim up and shoot the door (if it is blue) and listen for if it opens, to test if you are high enough to safely jump up. Alternatively, the sound of the crumble blocks breaking will indicate when Samus' feet are level with the bottom of the door. Requires: {
"notable": "Wall Ice Clip X-Ray Climb"
}
"canWallIceClip"
{
"or": [
{
"and": [
"canDash",
"h_CrystalFlash"
]
},
{
"and": [
"canNeutralDamageBoost",
{
"enemyDamage": {
"enemy": "Reo",
"type": "contact",
"hits": 1
}
}
]
},
{
"and": [
{
"or": [
"canWallJump",
"SpaceJump",
"canInsaneJump"
]
},
"canTrickyDodgeEnemies",
"canTrickyUseFrozenEnemies"
]
}
]
}
"canXRayClimb"Dev note: The Zeb moves 2 pixels per frame, and there are 3 positions where it can be frozen inside the wall using Ice beam alone, namely 2 pixels, 4 pixels, or 6 pixels deep inside the wall. For the method that uses the frozen Reo as a platform, only the 2-pixel-deep position will work; by moonwalking back inside the 2-tile space, it will work 100% reliably as long as the Zeb is frozen in that exact spot. For the method that jumps directly into the wall (with a Crystal Flash), either 2 or 4 pixels can work, or 6 with SpeedBooster; it will work more reliably the less deeply the Zeb is frozen inside the wall. Likewise, with the Reo knockback method either 2 or 4 pixels can work, though it is more reliable in the 2-pixel position; it helps to take the knockback a few pixels away from the wall, as it takes a few frames for the horizontal speed of the knockback to reach its maximum. The trick can work with Samus facing either toward or away from the wall when taking knockback; facing away makes it easier to quickly kill the Reo afterward to avoid taking a second hit. |
From: 3
Right Door
To: 1
Top Left Door
Exit the previous room with Samus in a standing pose (while grappled). After teleporting, press right to release Grapple while staying standing (not being forced into a crouch). Then X-ray climb 1 screen to get up to the door transition, without needing to open the door. Entrance condition: {
"comeInWithGrappleTeleport": {
"blockPositions": [
[
2,
18
],
[
2,
19
],
[
2,
28
],
[
2,
29
]
]
}
}Requires: "canXRayClimb" Bypasses door shell: true |
|
Entrance condition: {
"comeInWithDoorStuckSetup": {}
}Requires: "canXRayClimb" |
|
To minimize damage from the Hoppers, get stuck in the door relatively high and move quickly. Climb up somewhat less than 1 screen, until Samus' head appears between 1 and 3 tiles below the door. Then perform a turn-around spin jump to the right to get on top of the Grapple block. Entrance condition: {
"comeInWithDoorStuckSetup": {}
}Requires: {
"notable": "Hopper X-Ray Climb"
}
"canXRayClimb"
{
"enemyDamage": {
"enemy": "Sidehopper",
"type": "contact",
"hits": 2
}
}Dev note: It is possible to avoid all Hopper damage, but it is not clear if this can be done reliably. Two hits from the big Sidehopper appears to be a worst-case scenario. FIXME: a blue suit can be used to avoid damage, by turning around right to left as the Hoppers approach. |
From: 2
Right Door
To: 3
Top Junction
Get stuck 3 pixels inside the door, and X-ray climb to a precise height: after just one pixel of Samus' feet are visible while crouching facing left, perform exactly 7 more X-Ray stand-ups. Use X-ray to face left, then run and jump to barely make it onto the ledge. Entrance condition: {
"comeInWithDoorStuckSetup": {}
}Requires: "HiJump" "canXRayClimb" "canOffScreenMovement" "canInsaneJump" Dev note: 3 pixels stuck in the door is X position $1DE. |
From: 2
Right Door
To: 3
Top Junction
X-Ray climb until Samus is a little over halfway off screen; the position is not precise. Face right, then do a turnaround buffer spin jump into a Spring Ball jump to reach the ledge. The pause input can be pressed at the same time as the turnaround. It helps to do an airball to gain horizontal speed. The jump input after pausing should not be buffered, in order to allow a little time for the spring fling horizontal speed to take effect. Entrance condition: {
"comeInWithDoorStuckSetup": {}
}Requires: "canXRayClimb" "canTrickyJump" "canLateralMidAirMorph" "canTrickySpringBallJump" "canSpringFling" |
|
Exit the previous room with Samus in a standing pose (while grappled). After teleporting, hold left while releasing Grapple to stay standing (not being forced into a crouch). Then X-ray climb to get out of the floor. Entrance condition: {
"comeInWithGrappleTeleport": {
"blockPositions": [
[
12,
12
],
[
12,
13
]
]
}
}Requires: "canXRayClimb" Dev note: This can be done with a setup from either of the two possible Grapple blocks in Halfie Climb. The lower block can be used more easily. |
|
Entrance condition: {
"comeInWithDoorStuckSetup": {}
}Requires: "canXRayClimb" |
|
Entrance condition: {
"comeInWithDoorStuckSetup": {}
}Requires: "canXRayClimb" |
|
Entrance condition: {
"comeInWithDoorStuckSetup": {}
}Requires: "canXRayClimb"
{
"or": [
"Wave",
"Spazer",
"canBeLucky",
{
"enemyDamage": {
"enemy": "Cacatac",
"type": "spike",
"hits": 1
}
}
]
} |
From: 2
Right Door
To: 1
Left Door
Exit the previous room with Samus in a standing pose (while grappled). After teleporting, press right to release Grapple while staying standing (not being forced into a crouch). Then X-Ray climb to get up to the door transition, without needing to open the door. Entrance condition: {
"comeInWithGrappleTeleport": {
"blockPositions": [
[
2,
18
],
[
2,
19
],
[
2,
28
],
[
2,
29
]
]
}
}Requires: "canXRayClimb" Bypasses door shell: true |
From: 2
Middle Left Door (Behind Power Bomb Blocks)
To: 1
Top Left Door
Entrance condition: {
"comeInWithDoorStuckSetup": {}
}Requires: "canXRayClimb" |
|
Entrance condition: {
"comeInWithDoorStuckSetup": {}
}Requires: "canXRayClimb"
{
"enemyDamage": {
"enemy": "Kihunter (green)",
"type": "contact",
"hits": 1
}
}Clears obstacles: C |
|
Entrance condition: {
"comeInWithGrappleTeleport": {
"blockPositions": [
[
3,
12
],
[
3,
13
]
]
}
}Requires: {
"or": [
"h_heatedGrappleTeleportWallEscape",
{
"and": [
{
"doorUnlockedAtNode": 2
},
{
"heatFrames": 20
}
]
}
]
}
"canOffScreenMovement"Clears obstacles: A Unlocks doors: {"types":["ammo"],"requires":[]} |
|
Entrance condition: {
"comeInWithDoorStuckSetup": {}
}Requires: "canXRayClimb"
{
"heatFrames": 1600
}Clears obstacles: A |
From: 2
Left Side - Top Middle Door
To: 1
Left Side - Top Door
Entrance condition: {
"comeInWithDoorStuckSetup": {}
}Requires: "canXRayClimb" |
From: 4
Left Side - Bottom Door
To: 3
Left Side - Bottom Middle Door
Entrance condition: {
"comeInWithDoorStuckSetup": {}
}Requires: "canXRayClimb" |
From: 6
Middle Right Door
To: 1
Left Side - Top Door
Exit the previous room with Samus in a standing pose (while grappled) with a horizontal position of 21 (as far right as possible). After teleporting, press right to release Grapple while staying standing (not being forced into a crouch). Then X-ray climb 1 screen to get up to the door transition above, without needing to open the door. At the beginning of the climb, avoid pressing left without X-Ray being held, to prevent triggering the transition of the lower door. Entrance condition: {
"comeInWithGrappleTeleport": {
"blockPositions": [
[
2,
28
],
[
2,
29
]
]
}
}Requires: "canXRayClimb" Bypasses door shell: true |
From: 6
Middle Right Door
To: 2
Left Side - Top Middle Door
Exit the previous room with Samus in a standing pose (while grappled) with a horizontal position of 21 (as far right as possible). After teleporting, press right to release Grapple while staying standing (not being forced into a crouch). Then X-ray climb 1 screen to get up to the door transition above, without needing to open the door. At the beginning of the climb, avoid pressing left without X-Ray being held, to prevent triggering the transition of the lower door. Entrance condition: {
"comeInWithGrappleTeleport": {
"blockPositions": [
[
2,
34
]
]
}
}Requires: "canXRayClimb" Bypasses door shell: true |
From: 7
Top Right Door
To: 1
Left Side - Top Door
Exit the previous room with Samus in a standing pose (while grappled) with a horizontal position of 21 (as far right as possible). After teleporting, press right to release Grapple while staying standing (not being forced into a crouch). Then X-ray climb 1 screen to get up to the door transition above, without needing to open the door. At the beginning of the climb, avoid pressing left without X-Ray being held, to prevent triggering the transition of the lower door. Entrance condition: {
"comeInWithGrappleTeleport": {
"blockPositions": [
[
2,
28
],
[
2,
29
]
]
}
}Requires: "canXRayClimb" Bypasses door shell: true |
From: 7
Top Right Door
To: 2
Left Side - Top Middle Door
Exit the previous room with Samus in a standing pose (while grappled) with a horizontal position of 21 (as far right as possible). After teleporting, press right to release Grapple while staying standing (not being forced into a crouch). Then X-ray climb 1 screen to get up to the door transition above, without needing to open the door. At the beginning of the climb, avoid pressing left without X-Ray being held, to prevent triggering the transition of the lower door. Entrance condition: {
"comeInWithGrappleTeleport": {
"blockPositions": [
[
2,
34
]
]
}
}Requires: "canXRayClimb" Bypasses door shell: true |
|
Exit the previous room with Samus in a standing pose (while grappled). After teleporting, press right to release Grapple while staying standing (not being forced into a crouch). Then X-ray climb 1 screen to get up to the door transition, without needing to open the door. Entrance condition: {
"comeInWithGrappleTeleport": {
"blockPositions": [
[
2,
28
],
[
2,
29
]
]
}
}Requires: "canXRayClimb"
{
"heatFrames": 1600
}Bypasses door shell: true |
From: 2
Bottom Left Door
To: 1
Top Left Door
Climb up 1 screen. Entrance condition: {
"comeInShinecharged": {}
}Requires: {
"shineChargeFrames": 1
}
{
"shinespark": {
"frames": 1,
"excessFrames": 1
}
}
"canShinesparkDeepStuck"
"canXRayClimb"
"canBePatient"
{
"heatFrames": 1600
} |
|
Exit the previous room with Samus in a standing pose (while grappled) with a horizontal position of 21 (as far right as possible). After teleporting, press right to release Grapple while staying standing (not being forced into a crouch). Then X-ray climb 1 screen to get up to the door transition, without needing to open the door. Samus will not be visible during the climb. At the beginning of the climb, avoid pressing left without X-Ray being held, to prevent triggering the transition of the bottom door. Entrance condition: {
"comeInWithGrappleTeleport": {
"blockPositions": [
[
2,
29
]
]
}
}Requires: "canXRayClimb"
{
"heatFrames": 1600
}Bypasses door shell: true |
From: 3
Bottom Left Door
To: 2
Middle Left Door
In Hellway, fall into the rightmost Samus Eater; in Alpha Power Bomb Room, fall into the middle Samus Eater. After teleporting and passing through the transition, X-Ray climb 1 screen to reach the space above, to the left of the blue gate. Samus will be off-camera, but the slopes at the top will push the camera up, indicating when the climb is done. Entrance condition: {
"comeInWithSamusEaterTeleport": {
"floorPositions": [
[
1,
13
],
[
2,
13
]
],
"ceilingPositions": []
}
}Requires: "h_heatProof" "h_lavaProof" "canXRayClimb" Dev note: Other Samus Eaters can also probably work. When entering with a floor Samus Eater as in this strat, lava protection is necessary: there is no way to enter with more than 4 energy, so even a tiny amount of lava damage would be fatal. |
From: 3
Bottom Left Door
To: 2
Middle Left Door
Jump into the first ceiling Samus Eater in Hellway. After teleporting and passing through the transition, X-Ray climb 1 screen to reach the space above, to the right of the blue gate. Samus will be off-camera, but the slopes at the top will push the camera up, indicating when the climb is done. Off-camera the gate can be opened with Wave beam but not with a gate glitch. Entrance condition: {
"comeInWithSamusEaterTeleport": {
"floorPositions": [],
"ceilingPositions": [
[
6,
3
]
]
}
}Requires: "h_heatProof" "canXRayClimb" "Wave" Dev note: Other ceiling Samus Eaters can also probably work. |
From: 4
Top Right Door
To: 2
Middle Left Door
Exit the previous room with Samus in a standing pose (while grappled). After teleporting, press right to release Grapple while staying standing (not being forced into a crouch). Then X-ray climb 1 screen to get up to the door transition, without needing to open the door. Entrance condition: {
"comeInWithGrappleTeleport": {
"blockPositions": [
[
2,
34
]
]
}
}Requires: "canXRayClimb"
{
"heatFrames": 1600
}Bypasses door shell: true |
|
Exit the previous room with Samus in a standing pose (while grappled). After teleporting, press right to release Grapple while staying standing (not being forced into a crouch). Then X-ray climb 1 screen to get up to the door transition, without needing to open the door. Entrance condition: {
"comeInWithGrappleTeleport": {
"blockPositions": [
[
2,
18
],
[
2,
19
],
[
2,
28
],
[
2,
29
]
]
}
}Requires: "canXRayClimb"
{
"heatFrames": 1600
}
{
"lavaFrames": 1300
}Bypasses door shell: true |
From: 2
Left Shaft - Bottom Right Door
To: 1
Left Shaft - Top Left Door
Entrance condition: {
"comeInWithGrappleTeleport": {
"blockPositions": [
[
3,
12
]
]
}
}Requires: {
"or": [
"h_heatedGrappleTeleportWallEscape",
{
"and": [
{
"doorUnlockedAtNode": 1
},
{
"heatFrames": 20
}
]
}
]
}
"canOffScreenMovement"
{
"enemyDamage": {
"enemy": "Multiviola",
"type": "contact",
"hits": 1
}
}Unlocks doors: {"types":["ammo"],"requires":[]} |
From: 2
Left Shaft - Bottom Right Door
To: 1
Left Shaft - Top Left Door
Exit the previous room with Samus in a standing pose (while grappled). After teleporting, press right to release Grapple while staying standing (not being forced into a crouch). Then X-ray climb 1 screen to get up to the door transition, without needing to open the door. Entrance condition: {
"comeInWithGrappleTeleport": {
"blockPositions": [
[
2,
28
]
]
}
}Requires: "canXRayClimb"
{
"heatFrames": 1600
}Bypasses door shell: true |
From: 3
Left Shaft - Middle Right Door
To: 1
Left Shaft - Top Left Door
Entrance condition: {
"comeInWithGrappleTeleport": {
"blockPositions": [
[
3,
12
]
]
}
}Requires: {
"or": [
"h_heatedGrappleTeleportWallEscape",
{
"and": [
{
"doorUnlockedAtNode": 1
},
{
"heatFrames": 20
}
]
}
]
}
"canOffScreenMovement"
{
"enemyDamage": {
"enemy": "Multiviola",
"type": "contact",
"hits": 1
}
}Unlocks doors: {"types":["ammo"],"requires":[]} |
From: 3
Left Shaft - Middle Right Door
To: 1
Left Shaft - Top Left Door
Exit the previous room with Samus in a standing pose (while grappled). After teleporting, press right to release Grapple while staying standing (not being forced into a crouch). Then X-ray climb 1 screen to get up to the door transition, without needing to open the door. Entrance condition: {
"comeInWithGrappleTeleport": {
"blockPositions": [
[
2,
28
]
]
}
}Requires: "canXRayClimb"
{
"heatFrames": 1600
}Bypasses door shell: true |
From: 4
Left Shaft - Top Right Door
To: 1
Left Shaft - Top Left Door
Exit the previous room with Samus in a standing pose (while grappled). After teleporting, press right to release Grapple while staying standing (not being forced into a crouch). Then X-ray climb 1 screen to get up to the door transition, without needing to open the door. Entrance condition: {
"comeInWithGrappleTeleport": {
"blockPositions": [
[
2,
28
]
]
}
}Requires: "canXRayClimb"
{
"heatFrames": 1600
}Bypasses door shell: true |
From: 5
Far Right Door
To: 1
Left Shaft - Top Left Door
Entrance condition: {
"comeInWithGrappleTeleport": {
"blockPositions": [
[
3,
12
]
]
}
}Requires: {
"or": [
"h_heatedGrappleTeleportWallEscape",
{
"and": [
{
"doorUnlockedAtNode": 1
},
{
"heatFrames": 20
}
]
}
]
}
"canOffScreenMovement"
{
"enemyDamage": {
"enemy": "Multiviola",
"type": "contact",
"hits": 1
}
}Unlocks doors: {"types":["ammo"],"requires":[]} |
From: 5
Far Right Door
To: 1
Left Shaft - Top Left Door
Exit the previous room with Samus in a standing pose (while grappled). After teleporting, press right to release Grapple while staying standing (not being forced into a crouch). Then X-ray climb 1 screen to get up to the door transition, without needing to open the door. Entrance condition: {
"comeInWithGrappleTeleport": {
"blockPositions": [
[
2,
28
]
]
}
}Requires: "canXRayClimb"
{
"heatFrames": 1600
}Bypasses door shell: true |
|
Exit the previous room with Samus in a standing pose (while grappled). After teleporting, press right to release Grapple while staying standing (not being forced into a crouch). Then X-ray climb 1 screen to get up to the door transition, without needing to open the door. Entrance condition: {
"comeInWithGrappleTeleport": {
"blockPositions": [
[
2,
18
],
[
2,
19
],
[
2,
28
],
[
2,
29
]
]
}
}Requires: "canXRayClimb"
{
"heatFrames": 1600
}
{
"or": [
"h_SpeedBoosterHallNoRisingLava",
{
"lavaFrames": 1600
}
]
}Bypasses door shell: true |
From: 3
Top Right Door
To: 1
Top Left Door
Exit the previous room with Samus in a standing pose (while grappled) with a horizontal position of 21 (as far right as possible). After teleporting, press right to release Grapple while staying standing (not being forced into a crouch). Then X-ray climb 1 screen to get to the door transition above, without needing to open the door. Samus will not be visible during the climb. At the beginning of the climb, avoid pressing left without X-Ray being held, to prevent triggering the transition of the bottom door. Entrance condition: {
"comeInWithGrappleTeleport": {
"blockPositions": [
[
2,
18
],
[
2,
19
],
[
2,
28
],
[
2,
29
]
]
}
}Requires: "canXRayClimb"
{
"heatFrames": 1600
}Bypasses door shell: true |
|
Exit the previous room with Samus in a standing pose (while grappled). After teleporting, press right to release Grapple while staying standing (not being forced into a crouch). Then X-ray climb 1 screen to get up to the door transition, without needing to open the door. Samus will not be visible during the climb. Entrance condition: {
"comeInWithGrappleTeleport": {
"blockPositions": [
[
2,
18
],
[
2,
19
],
[
2,
28
],
[
2,
29
]
]
}
}Requires: "canXRayClimb"
{
"heatFrames": 1600
}Bypasses door shell: true |
From: 4
Bottom Right Door
To: 2
Far Left Door
Exit the previous room with Samus in a standing pose (while grappled). After teleporting, press right to release Grapple while staying standing (not being forced into a crouch). Then X-ray climb 1 screen to get up to the door transition, without needing to open the door. Entrance condition: {
"comeInWithGrappleTeleport": {
"blockPositions": [
[
2,
18
],
[
2,
19
],
[
2,
28
],
[
2,
29
]
]
}
}Requires: "canXRayClimb"
{
"heatFrames": 1600
}Bypasses door shell: true |
From: 5
Top Right Door
To: 2
Far Left Door
Exit the previous room with Samus in a standing pose (while grappled). After teleporting, press right to release Grapple while staying standing (not being forced into a crouch). Then X-ray climb 1 screen to get up to the door transition, without needing to open the door. Entrance condition: {
"comeInWithGrappleTeleport": {
"blockPositions": [
[
2,
18
],
[
2,
19
],
[
2,
28
],
[
2,
29
]
]
}
}Requires: "canXRayClimb"
{
"heatFrames": 1600
}Bypasses door shell: true |
From: 1
Left Door
To: 3
Top Right Item
After teleporting, hold left and release Grapple to remain in a standing pose (and not be force crouched). X-ray climb a specific distance, performing exactly 15 X-Ray stand-ups. Then morph and roll out to the right. If Bombs, Power Bombs, or Screw Attack are available, this can allow more lenience in how far to climb. Entrance condition: {
"comeInWithGrappleTeleport": {
"blockPositions": [
[
12,
13
]
]
}
}Requires: "canXRayClimb" "Morph" "canOffScreenMovement" |
From: 7
Junction Below Power Bomb Blocks
To: 2
Middle Left Door
Bring a Mella on-camera while moonwalking, to set it up to move upward at the maximum rate (about 4 pixels per swoop). Guide it to a horizontal position inside the left wall below the Power Bomb blocks. When it is high enough, freeze it as it retreats from a near-vertical swoop. Get into position on the ledge below the Power Bomb blocks and wait for the Mella to thaw. Freeze the it inside the wall as it continues its retreat upward, by jumping and firing a downward shot. Run into the wall to clip into it. Crouch and destroy the Mella by shooting up (by holding angle up and angle down) Then X-Ray climb above the Power Bomb blocks. Requires: {
"notable": "Mella Wall Ice Clip X-Ray Climb"
}
"canManipulateMellas"
"canWallIceClip"
"canXRayClimb" |
From: 3
Bottom Right Door
To: 2
Middle Right Door
Jump into the second ceiling Samus Eater in Hellway. After teleporting and passing through the transition, X-Ray climb to reach the space above, to the right of the morph tunnel. Samus will be off-camera, so it may not be easy to tell when the climb is done. Entrance condition: {
"comeInWithSamusEaterTeleport": {
"floorPositions": [],
"ceilingPositions": [
[
10,
3
]
]
}
}Requires: "h_heatProof" "canXRayClimb" "canOffScreenMovement" Dev note: Other Samus Eaters can also probably work. |
|
Exit the previous room with Samus in a standing pose (while grappled). After teleporting, press right to release Grapple while staying standing (not being forced into a crouch). Then X-ray climb 1 screen to get up to the door transition, without needing to open the door. Entrance condition: {
"comeInWithGrappleTeleport": {
"blockPositions": [
[
2,
18
],
[
2,
19
],
[
2,
28
],
[
2,
29
]
]
}
}Requires: "canXRayClimb" Bypasses door shell: true |
From: 3
Bottom Right Door
To: 1
Top Left Door
Exit the previous room with Samus in a standing pose (while grappled). After teleporting, press right to release Grapple while staying standing (not being forced into a crouch). Then X-ray climb 1 screen to get up to the door transition, without needing to open the door. Entrance condition: {
"comeInWithGrappleTeleport": {
"blockPositions": [
[
2,
19
],
[
2,
28
],
[
2,
29
]
]
}
}Requires: "canXRayClimb" Bypasses door shell: true |
From: 3
Bottom Right Door
To: 4
Top Right Door
Climb up 1 screen. Entrance condition: {
"comeInShinecharged": {}
}Requires: {
"shineChargeFrames": 1
}
{
"shinespark": {
"frames": 1,
"excessFrames": 1
}
}
"canShinesparkDeepStuck"
"canXRayClimb" |
From: 4
Top Right Door
To: 1
Top Left Door
Exit the previous room with Samus in a standing pose (while grappled). After teleporting, press right to release Grapple while staying standing (not being forced into a crouch). Then X-ray climb 1 screen to get up to the door transition, without needing to open the door. Samus will not be visible during the climb. Entrance condition: {
"comeInWithGrappleTeleport": {
"blockPositions": [
[
2,
19
],
[
2,
28
],
[
2,
29
]
]
}
}Requires: "canXRayClimb" Bypasses door shell: true |
From: 2
Bottom Right Door
To: 1
Top Right Door
Gain a shinecharge and spark into the wall at the left side of the room to clip into it. From there, X-Ray climb to the top portion of the room (about 0.75 screens). Samus will be visible but off-camera, making the movement tricky. Only certain horizontal positions for the spark will work. There are periodic windows of approximately 4 good pixels followed by 8 bad pixels. Moonwalking back against the ledge below the door will put Samus into a good position. Being centered over this two-tile ledge is another position that works. Entrance condition: {
"comeInShinecharged": {}
}Requires: {
"shineChargeFrames": 35
}
{
"shinespark": {
"frames": 33,
"excessFrames": 0
}
}
"canShinesparkSlopeClip"
"canXRayClimb"
"canOffScreenMovement"
{
"heatFrames": 1020
} |
From: 2
Bottom Right Door
To: 1
Top Right Door
Gain a shinecharge and spark into the wall at the left side of the room to clip into it. From there, X-Ray climb to the top portion of the room (about 0.75 screens). Samus will be visible but off-camera, making the movement tricky. Only certain horizontal positions for the spark will work. There are periodic windows of approximately 4 good pixels followed by 8 bad pixels. Moonwalking back against the ledge below the door will put Samus into a good position. Being centered over this two-tile ledge is another position that works. Entrance condition: {
"comeInShinecharging": {
"length": 3,
"openEnd": 1
}
}Requires: {
"shinespark": {
"frames": 33,
"excessFrames": 0
}
}
"canShinesparkSlopeClip"
"canXRayClimb"
"canOffScreenMovement"
{
"heatFrames": 1020
} |
From: 2
Bottom Right Door
To: 3
Acid Chozo Statue
Gain a shinecharge and spark into the wall at the left side of the room to clip into it. From there, X-Ray climb to the top portion of the room (about 0.75 screens). Samus will be visible but off-camera, making the movement tricky. Only certain horizontal positions for the spark will work. There are periodic windows of approximately 4 good pixels followed by 8 bad pixels. Moonwalking back against the ledge below the door will put Samus into a good position. Being centered over this two-tile ledge is another position that works. Entrance condition: {
"comeInShinecharged": {}
}Requires: {
"shineChargeFrames": 35
}
{
"shinespark": {
"frames": 33,
"excessFrames": 0
}
}
"canShinesparkSlopeClip"
"canXRayClimb"
"canOffScreenMovement"
{
"or": [
"canPreciseWallJump",
"SpaceJump",
"HiJump",
"canTrickySpringBallJump"
]
}
{
"heatFrames": 970
} |
From: 2
Bottom Right Door
To: 3
Acid Chozo Statue
Gain a shinecharge and spark into the wall at the left side of the room to clip into it. From there, X-Ray climb to the top portion of the room (about 0.75 screens). Samus will be visible but off-camera, making the movement tricky. Only certain horizontal positions for the spark will work. There are periodic windows of approximately 4 good pixels followed by 8 bad pixels. Moonwalking back against the ledge below the door will put Samus into a good position. Being centered over this two-tile ledge is another position that works. Entrance condition: {
"comeInShinecharging": {
"length": 3,
"openEnd": 1
}
}Requires: {
"shinespark": {
"frames": 33,
"excessFrames": 0
}
}
"canShinesparkSlopeClip"
"canXRayClimb"
"canOffScreenMovement"
{
"or": [
"canPreciseWallJump",
"SpaceJump",
"HiJump",
"canTrickySpringBallJump"
]
}
{
"heatFrames": 970
} |
From: 5
Bottom Junction Right of Morph Tunnel
To: 1
Top Right Door
Jump, press against the wall, and use a flash suit or blue suit to spark into it, clipping inside of it. From there, X-Ray climb to the top portion of the room (about 0.75 screens). Samus will be visible but off-camera, making the movement tricky. Requires: "h_storedSpark"
{
"shinespark": {
"frames": 1,
"excessFrames": 1
}
}
"canShinesparkSlopeClip"
"canXRayClimb"
"canOffScreenMovement"
{
"heatFrames": 1020
} |
|
Entrance condition: {
"comeInWithGrappleTeleport": {
"blockPositions": [
[
3,
12
]
]
}
}Requires: {
"or": [
"h_heatedGrappleTeleportWallEscape",
{
"and": [
{
"doorUnlockedAtNode": 1
},
{
"heatFrames": 20
}
]
}
]
}
"canOffScreenMovement"Clears obstacles: door_2 Unlocks doors: {"types":["ammo"],"requires":[]} |
|
Exit the previous room with Samus in a standing pose (while grappled). After teleporting, press right to release Grapple while staying standing (not being forced into a crouch). Then X-ray climb to get up to the door transition, without needing to open the door. Samus will not be visible during the climb. If Golden Torizo is alive, the fight will be triggered but does not create any risk of damage. Entrance condition: {
"comeInWithGrappleTeleport": {
"blockPositions": [
[
2,
28
],
[
2,
29
]
]
}
}Requires: "canXRayClimb"
{
"heatFrames": 1600
}Clears obstacles: door_2 Bypasses door shell: true |
From: 1
Bottom Left Door
To: 3
Top Right Door
Entrance condition: {
"comeInWithGrappleTeleport": {
"blockPositions": [
[
12,
12
],
[
12,
13
]
]
}
}Requires: {
"or": [
"h_heatedGrappleTeleportWallEscape",
{
"and": [
{
"doorUnlockedAtNode": 3
},
{
"heatFrames": 20
}
]
}
]
}Unlocks doors: {"types":["ammo"],"requires":[]} |
From: 1
Bottom Left Door
To: 5
Junction Above Bottom Blocks
Entrance condition: {
"comeInWithDoorStuckSetup": {}
}Requires: "canXRayClimb"
{
"heatFrames": 900
} |
From: 2
Middle Right Door
To: 3
Top Right Door
After teleporting, Samus should be standing inside the wall. Retract Grapple by pressing up, which will pull Samus down and right. Hold right, and release Grapple while still holding right. Perform a turn-around spin jump (to the left). Then morph and roll out to the right. Entrance condition: {
"comeInWithGrappleTeleport": {
"blockPositions": [
[
3,
12
]
]
}
}Requires: "h_heatedGrappleTeleportWallEscape"
"canOffScreenMovement"
{
"heatFrames": 60
}
{
"or": [
"canDash",
{
"heatFrames": 30
}
]
} |
From: 2
Middle Right Door
To: 3
Top Right Door
Enter with G-mode direct, back up to between 1 and 6 pixels from the door transition, and activate X-ray to get very deep stuck in the door. Climb up 1 screen, and perform a turnaround buffered spin-jump away from the door to trigger the transition, bypassing any lock on the door. Entrance condition: {
"comeInWithGMode": {
"mode": "direct",
"morphed": false
}
}Requires: "canGModeXRayClimb"
"h_heatProof"
{
"or": [
"canWallJump",
"h_crouchJumpDownGrab",
"HiJump",
"SpaceJump",
"canIBJ",
"canArtificialMorph"
]
}
"canXRayClimb"Bypasses door shell: true |
|
Entrance condition: {
"comeInWithDoorStuckSetup": {}
}Requires: "canXRayClimb"
{
"heatFrames": 1600
}Dev note: Heat frames split into the actual climb and the setup in the adjacent room. |
|
X-Ray climb up the left wall in order to jump to the center platform. Quickly kill the pirates before beginning the X-Ray climb. Climb to just above the door shell and do a turnaround spinjump to reach the platform. Entrance condition: {
"comeInWithDoorStuckSetup": {}
}Requires: "canXRayClimb"
{
"enemyDamage": {
"enemy": "Yellow Space Pirate (standing)",
"type": "laser",
"hits": 1
}
}
{
"or": [
{
"and": [
"canTrickyDodgeEnemies",
{
"enemyKill": {
"enemies": [
[
"Yellow Space Pirate (standing)",
"Yellow Space Pirate (wall)"
]
],
"explicitWeapons": [
"Super",
"Charge+Plasma"
]
}
}
]
},
{
"and": [
{
"enemyDamage": {
"enemy": "Yellow Space Pirate (wall)",
"type": "contact",
"hits": 1
}
},
{
"enemyKill": {
"enemies": [
[
"Yellow Space Pirate (standing)",
"Yellow Space Pirate (wall)"
]
],
"explicitWeapons": [
"Missile",
"Super",
"Charge+Plasma"
]
}
}
]
}
]
}
{
"heatFrames": 1260
}Dev note: FIXME: other weapons could work for killing the Pirates, with more damage taken. |
From: 2
Bottom Left Door
To: 1
Top Left Door
Entrance condition: {
"comeInShinecharged": {}
}Requires: {
"shineChargeFrames": 1
}
"canShinesparkDeepStuck"
{
"shinespark": {
"frames": 1,
"excessFrames": 1
}
}
"canXRayClimb"
{
  "heatFrames": 1600
} |
From: 3
Bottom Right Door
To: 1
Top Left Door
Climb up 1 screen. Entrance condition: {
"comeInShinecharged": {}
}Requires: {
"shineChargeFrames": 1
}
{
"shinespark": {
"frames": 1,
"excessFrames": 1
}
}
"canShinesparkDeepStuck"
"canXRayClimb"
{
"heatFrames": 1650
} |
From: 3
Top Right Door
To: 1
Top Left Door
Exit the previous room with Samus in a standing pose (while grappled). After teleporting, press right to release Grapple while staying standing (not being forced into a crouch). Then X-ray climb 1 screen to get up to the door transition, without needing to open the door. Samus will not be visible during the climb. Entrance condition: {
"comeInWithGrappleTeleport": {
"blockPositions": [
[
2,
18
],
[
2,
19
],
[
2,
28
],
[
2,
29
]
]
}
}Requires: "canXRayClimb" Bypasses door shell: true |
From: 3
Bottom Horizontal Door
To: 1
Left Door
Entrance condition: {
"comeInWithGrappleTeleport": {
"blockPositions": [
[
3,
12
],
[
3,
13
]
]
}
}Requires: {
"or": [
"h_heatedGrappleTeleportWallEscape",
{
"and": [
{
"doorUnlockedAtNode": 1
},
{
"heatFrames": 20
}
]
}
]
}
{
"or": [
"canOffScreenMovement",
{
"heatFrames": 100
}
]
}Unlocks doors: {"types":["ammo"],"requires":[]} |
|
Overload PLMs by rolling through the camera scroll block just right of the bomb blocks, then roll through the morph tunnel and use a bomb boost or Spring Ball to escape the tunnel and get to the door. Without a way to boost out of the tunnel, exit G-mode and use a two-turn X-Ray climb, then ceiling clip by jumping out of the tunnel. Note that the Kihunter is global, and will hit Samus. Without any way to know where the Kihunter will be, a contact hit is expected without Screw Attack or blue suit. Entrance condition: {
"comeInWithGMode": {
"mode": "any",
"morphed": true
},
"comesThroughToilet": "any"
}Requires: "h_artificialMorphMovement"
"canOffScreenMovement"
{
"or": [
"h_artificialMorphBombThings",
"h_artificialMorphSpringBall",
{
"and": [
"canXRayClimb",
"canCeilingClip",
{
"heatFrames": 450
},
{
"or": [
"canTrickyGMode",
{
"heatFrames": 200
}
]
}
]
}
]
}
{
"or": [
"ScrewAttack",
{
"haveBlueSuit": {}
},
{
"enemyDamage": {
"enemy": "Kihunter (red)",
"type": "contact",
"hits": 1
}
}
]
}
"h_heatedGModeOffCameraDoor"Exit condition: {
"leaveNormally": {}
}Unlocks doors: {"types":["missiles"],"requires":[{"heatFrames":50}]}
{"types":["super"],"requires":[]}
{"types":["powerbomb"],"requires":[{"heatFrames":110}]}Dev note: It is also possible, but not expected, to kill the Kihunter by the door and use its drop to get out of the room. Because this is blind and there doesn't appear to be a way to fix the camera, it is not expected to climb higher in the room. FIXME: These door unlock heat frames could be lowered, but it depends on if the Kihunter is alive, and if Samus had to exit G-mode to get out of the tunnel. FIXME: It is possible to pause abuse a drop from the Kihunter. |
From: 3
Middle Right Door
To: 1
Top Left Door
Entrance condition: {
"comeInWithGrappleTeleport": {
"blockPositions": [
[
3,
12
],
[
3,
13
]
]
}
}Requires: {
"or": [
"h_heatedGrappleTeleportWallEscape",
{
"and": [
{
"doorUnlockedAtNode": 1
},
{
"heatFrames": 20
}
]
}
]
}
{
"or": [
"canOffScreenMovement",
{
"heatFrames": 100
}
]
}Unlocks doors: {"types":["ammo"],"requires":[]} |
From: 6
Inside Morph Tunnel (Right of Left Bomb Blocks)
To: 7
Middle Right Door With Bottom Kihunter Cleared
Wait for the bomb blocks to reappear. Two crouches worth of height are needed before jumping through the rest of the blocks. Watch for the Kihunter to move right before jumping up to get a safe predictable swoop. Requires: "h_usePowerBomb"
"canXRayClimb"
"canCeilingClip"
"canDash"
{
"or": [
"ScrewAttack",
{
"and": [
"canTrickyJump",
{
"heatFrames": 90
}
]
},
{
"enemyDamage": {
"enemy": "Kihunter (red)",
"type": "contact",
"hits": 1
}
}
]
}
{
"heatFrames": 810
}Dev note: This requires Power Bombs because it saves neither energy nor ammo using Bombs. |
From: 3
Top Right Door
To: 1
Top Left Door
Exit the previous room with Samus in a standing pose (while grappled). After teleporting, press right to release Grapple while staying standing (not being forced into a crouch). Then X-ray climb to get up to the door transition, without needing to open the door. Kill the Pirate, or climb quickly to minimize damage from it. Entrance condition: {
"comeInWithGrappleTeleport": {
"blockPositions": [
[
2,
18
],
[
2,
19
]
]
}
}Requires: "canXRayClimb"
{
"heatFrames": 1600
}
{
"or": [
{
"enemyDamage": {
"enemy": "Yellow Space Pirate (standing)",
"type": "laser",
"hits": 2
}
},
{
"and": [
"canInsaneJump",
{
"enemyDamage": {
"enemy": "Yellow Space Pirate (standing)",
"type": "laser",
"hits": 1
}
}
]
},
{
"and": [
{
"enemyKill": {
"enemies": [
[
"Yellow Space Pirate (standing)"
]
],
"explicitWeapons": [
"Missile",
"Super",
"Charge+Plasma"
]
}
},
{
"heatFrames": 120
}
]
}
]
}Bypasses door shell: true Dev note: It is possible to avoid all damage from the Pirate, but it's unclear if this can be done reliably or is RNG-dependent. |
From: 2
Middle Left Door
To: 1
Top Left Door
Jump close to ceiling, and activate a shinespark to the right. If successful, Samus will clip into the wall behind the Chozo statue and be able to X-Ray climb up. Only certain horizontal positions will cause Samus to clip into the wall. It will work to activate the spark while Samus is centered under the second Grapple block or slightly to the left. Entrance condition: {
"comeInShinecharged": {}
}Requires: {
"shineChargeFrames": 50
}
"canShinechargeMovementTricky"
{
"shinespark": {
"frames": 88,
"excessFrames": 0
}
}
"canShinesparkSlopeClip"
"canXRayClimb"
{
"or": [
{
"getBlueSpeed": {
"usedTiles": 16,
"steepDownTiles": 4,
"openEnd": 0
}
},
"can4HighMidAirMorph"
]
}Exit condition: {
"leaveNormally": {}
}Unlocks doors: {"types":["ammo"],"requires":[]}Dev note: The leaveNormally is to ensure it won't be required to do the Speed block moondance blind up there. |
From: 2
Middle Left Door
To: 1
Top Left Door
Gain a shinecharge near the Chozo statue, jump on top of it, press against the wall to the right, and activate a horizontal shinespark to the right. Samus will clip into the wall and be able to X-Ray climb to the space above. This trick works because the wall is made of half-tile slopes, rather than regular solid tiles. Requires: {
"not": "f_DefeatedPhantoon"
}
"canRiskPermanentLossOfAccess"
{
"or": [
"h_shinechargeMaxRunway",
"h_storedSpark"
]
}
"canShinechargeMovement"
{
"shinespark": {
"frames": 1,
"excessFrames": 1
}
}
"canShinesparkSlopeClip"
"canXRayClimb"
{
"or": [
{
"getBlueSpeed": {
"usedTiles": 16,
"steepDownTiles": 4,
"openEnd": 0
}
},
"can4HighMidAirMorph"
]
}Exit condition: {
"leaveNormally": {}
}Unlocks doors: {"types":["ammo"],"requires":[]}Dev note: The leaveNormally is to ensure it won't be required to do the Speed block moondance blind up there. |
From: 2
Middle Left Door
To: 1
Top Left Door
Jump close to ceiling, and activate a shinespark to the right. If successful, Samus will clip into the wall behind the Chozo statue and be able to X-Ray climb up. Only certain horizontal positions will cause Samus to clip into the wall. It will work to activate the spark while Samus is centered under the second Grapple block or slightly to the left. Requires: "h_storedSpark"
"canDash"
"canShinechargeMovementTricky"
{
"shinespark": {
"frames": 88,
"excessFrames": 0
}
}
"canShinesparkSlopeClip"
"canXRayClimb"
{
"or": [
{
"getBlueSpeed": {
"usedTiles": 16,
"steepDownTiles": 4,
"openEnd": 0
}
},
"can4HighMidAirMorph"
]
}Exit condition: {
"leaveNormally": {}
}Unlocks doors: {"types":["ammo"],"requires":[]}Dev note: The leaveNormally is to ensure it won't be required to do the Speed block moondance blind up there. |
From: 2
Middle Left Door
To: 1
Top Left Door
Arm pump slowly after the Chozo statue comes on screen, when the camera locks and Samus starts to move again, armpump only 3 or 4 more times to clear the last spike and avoid an extra spike hit. Requires: {
"doorUnlockedAtNode": 2
}
"canXMode"
"h_XModeSpikeHit"
"h_shinechargeMaxRunway"
"canShinechargeMovement"
{
  "shinespark": {
    "frames": 1,
    "excessFrames": 1
  }
}
"canShinesparkSlopeClip"
"canXRayClimb"
{
  "or": [
    {
      "getBlueSpeed": {
        "usedTiles": 16,
        "steepDownTiles": 4,
        "openEnd": 0
      }
    },
    "can4HighMidAirMorph"
  ]
}
Exit condition: {
"leaveNormally": {}
}Unlocks doors: {"types":["ammo"],"requires":[]}Dev note: The leaveNormally is to ensure it won't be required to do the Speed block moondance blind up there. |
|
Climb up about half a screen. If Phantoon is dead, the last part of the climb should be done carefully to avoid triggering collision with the spikes: Do not press forward or turn-around except while X-Ray is active. For each X-ray stand-up, release the turn-around input quickly to make sure that it is not still held after X-Ray deactivates; alternatively, hold both angle up and angle down to prevent Samus from touching the spikes (though this no longer gives protection if climbing so high that the bottom of Samus' hitbox reaches the spikes). Once Samus is high enough, unequip X-Ray, jump up (from either standing or crouch) to clip past the spikes, and land, taking a single spike hit. Then use the i-frames from the spike hit to run and jump to the left to make it to the door. Samus is high enough after the top of her arm cannon first becomes visible at the bottom of the screen; or up to 3 additional climbs can be performed after that point. In case of an accidental spike collision, it is possible to recover: Unless Samus climbed higher than needed, she will still be stuck in the wall, will take a single spike hit, and be able to continue climbing. With Grapple it is possible to swing on the Grapple blocks, avoiding all spike damage. Spike damage can also be avoided with Space Jump, by doing a stationary turn-around spin jump, which is very precise. With a blue suit, Samus will instantly lose i-frames, making the spikes very dangerous. Entrance condition: {
"comeInWithDoorStuckSetup": {}
}Requires: {
"notable": "X-Ray Climb"
}
"canXRayClimb"
{
"or": [
{
"and": [
{
"spikeHits": 3
},
{
"resourceCapacity": [
{
"type": "RegularEnergy",
"count": 199
}
]
}
]
},
{
"and": [
{
"not": "f_DefeatedPhantoon"
},
"canRiskPermanentLossOfAccess"
]
},
{
"and": [
"canOffScreenMovement",
{
"or": [
{
"and": [
"canDash",
{
"spikeHits": 1
},
"canUseIFrames"
]
},
{
"and": [
"canBlueSuitSpikeJump",
{
"spikeHits": 2
}
]
},
{
"and": [
"canBlueSuitSpikeJump",
"canWallJump",
"canBeVeryPatient",
{
"spikeHits": 1
}
]
},
"Grapple",
{
"and": [
"SpaceJump",
"canInsaneJump",
"canBeVeryPatient"
]
}
]
}
]
}
]
}Exit condition: {
"leaveNormally": {}
}Unlocks doors: {"types":["ammo"],"requires":[]}Dev note: FIXME: The canBeVeryPatient is for difficulty placement, as the damageless Space Jump version would likely require many attempts. The resourceCapacity requirement is to ensure that reserve energy management will not be needed for the lower-difficulty version of the strat; this could be refined since suits can affect spike damage, but we don't yet have a good way to represent that cleanly, given that randomizers are likely to modify suit damage protection. The leaveNormally is because the camera will be broken and we don't want to require unreasonable things without being able to reset it. |
From: 6
Bowling Chozo Statue
To: 1
Top Left Door
Jump or Spring Ball jump into a breakable Grapple block. The timing is precise and it can help to break two Grapple blocks to use one as a cue. Crystal Flash then X-ray climb to the region above (less than 1 screen). There is a chance that Samus will not be able to Crystal Flash unless first placing a Bomb or Power Bomb. Requires: {
"notable": "Grapple Block Crystal Flash"
}
"canUseGrapple"
"canJumpIntoRespawningBlock"
"canTrickyJump"
{
"or": [
"HiJump",
"canTrickySpringBallJump",
{
"and": [
"canSpringBallJumpMidAir",
{
"not": "f_DefeatedPhantoon"
},
"canRiskPermanentLossOfAccess"
]
}
]
}
"h_bombThings"
"h_CrystalFlash"
"canXRayClimb"
{
"or": [
"h_fourTileJumpMorph",
"h_useSpringBall",
"canIBJ",
{
"getBlueSpeed": {
"usedTiles": 16,
"steepDownTiles": 4,
"openEnd": 0
}
},
{
"and": [
{
"not": "f_DefeatedPhantoon"
},
"canRiskPermanentLossOfAccess"
]
}
]
}Exit condition: {
"leaveNormally": {}
}Unlocks doors: {"types":["ammo"],"requires":[]}Dev note: FIXME: This may be possible with a spike hit and speedy jump. |
From: 6
Bowling Chozo Statue
To: 1
Top Left Door
Use a Grapple fling to get stuck inside a breakable Grapple block. It can help to break two or more Grapple blocks in a row. Crystal Flash then X-ray climb to the region above (less than 1 screen). There is a chance that Samus will not be able to Crystal Flash unless first placing a Bomb or Power Bomb. Requires: {
"notable": "Grapple Block Crystal Flash"
}
"canPreciseGrapple"
"canJumpIntoRespawningBlock"
"canInsaneJump"
"h_bombThings"
"h_CrystalFlash"
"canXRayClimb"
{
"or": [
"h_fourTileJumpMorph",
"h_useSpringBall",
"canIBJ",
{
"getBlueSpeed": {
"usedTiles": 16,
"steepDownTiles": 4,
"openEnd": 0
}
},
{
"and": [
{
"not": "f_DefeatedPhantoon"
},
"canRiskPermanentLossOfAccess"
]
}
]
}Exit condition: {
"leaveNormally": {}
}Unlocks doors: {"types":["ammo"],"requires":[]} |
From: 6
Bowling Chozo Statue
To: 1
Top Left Door
IBJ into a breakable Grapple block. The timing is very precise and requires a quick morph and ascent with precisely placed double bomb jumps. Crystal Flash then X-ray climb to the region above (less than 1 screen). There is a chance that Samus will not be able to Crystal Flash unless first placing a Bomb or Power Bomb. Requires: {
"notable": "Grapple Block Crystal Flash"
}
"canUseGrapple"
"canJumpIntoRespawningBlock"
"canInsaneJump"
"canJumpIntoIBJ"
"canDoubleBombJump"
{
"or": [
{
"spikeHits": 1
},
{
"and": [
{
"not": "f_DefeatedPhantoon"
},
"canRiskPermanentLossOfAccess"
]
}
]
}
"h_CrystalFlash"
"canXRayClimb"Exit condition: {
"leaveNormally": {}
}Unlocks doors: {"types":["ammo"],"requires":[]}Dev note: FIXME: This may be possible without a spike hit. |
From: 6
Bowling Chozo Statue
To: 1
Top Left Door
Jump onto the Chozo statue, press against the wall, and shinespark into it to clip in, then X-Ray climb up.. Requires: "h_storedSpark"
{
"shinespark": {
"frames": 1,
"excessFrames": 1
}
}
"canShinesparkSlopeClip"
"canXRayClimb"
{
"or": [
{
"getBlueSpeed": {
"usedTiles": 16,
"steepDownTiles": 4,
"openEnd": 0
}
},
"can4HighMidAirMorph"
]
}Exit condition: {
"leaveNormally": {}
}Unlocks doors: {"types":["ammo"],"requires":[]}Dev note: The leaveNormally is to ensure it won't be required to do the Speed block moondance blind up there. |
From: 6
Bowling Chozo Statue
To: 1
Top Left Door
Use X-mode to gain a shinecharge near the Chozo statue. Jump onto the Chozo statue, press against the wall, and shinespark into it to clip in, then X-Ray climb up. A second spike hit can be avoided by holding an angle button to turn around while in X-mode; arm pump to move out of the spikes before activating the shinecharge and exiting X-mode. Requires: "canXMode"
"h_XModeSpikeHit"
"h_shinechargeMaxRunway"
"canShinechargeMovement"
{
"shinespark": {
"frames": 1,
"excessFrames": 1
}
}
"canShinesparkSlopeClip"
"canXRayClimb"
{
"or": [
{
"getBlueSpeed": {
"usedTiles": 16,
"steepDownTiles": 4,
"openEnd": 0
}
},
"can4HighMidAirMorph"
]
}Exit condition: {
"leaveNormally": {}
}Unlocks doors: {"types":["ammo"],"requires":[]}Dev note: The leaveNormally is to ensure it won't be required to do the Speed block moondance blind up there. |
|
Exit the previous room with Samus in a standing pose (while grappled). After teleporting, press right to release Grapple while staying standing (not being forced into a crouch). Then X-ray climb 1 screen to get up to the door transition, without needing to open the door. Entrance condition: {
"comeInWithGrappleTeleport": {
"blockPositions": [
[
2,
18
],
[
2,
19
],
[
2,
29
]
]
}
}Requires: "canXRayClimb" Bypasses door shell: true |
|
Exit the previous room with Samus in a standing pose (while grappled). After teleporting, press right to release Grapple while staying standing (not being forced into a crouch). Then X-ray climb to get on top of the Chozo statue. Entrance condition: {
"comeInWithGrappleTeleport": {
"blockPositions": [
[
2,
18
],
[
2,
19
],
[
2,
28
],
[
2,
29
]
]
}
}Requires: "canXRayClimb" |
From: 3
Bottom Left Door
To: 8
Item
Fall into the first Samus Eater in Hellway or the second Samus Eater of Alpha Power Bomb Room. After teleporting and passing through the transition, X-Ray climb to reach the space above (about 1 screen), to the left of the bomb blocks. Samus will be off-camera, but the slopes at the top will push the camera up, indicating when the climb is done. Equip Morph Ball and touch the scroll PLMs in the morph tunnel, to fix the camera to be able to see the way to the item. Entrance condition: {
"comeInWithSamusEaterTeleport": {
"floorPositions": [
[
1,
13
],
[
2,
13
]
],
"ceilingPositions": []
}
}Requires: "canXRayClimb"
{
"or": [
"Morph",
{
"and": [
{
"not": "f_DefeatedPhantoon"
},
"canRiskPermanentLossOfAccess"
]
}
]
}Dev note: Other Samus Eaters can also probably work. Blind navigation to the item with power on is theoretically possible but seems unreasonable, as a spike hit will cause death. |
|
Climb up 1 screen. The enemies are not active off-camera. Touch the camera scroll block just above the tunnel entrance to fix the camera. This can be done reliably without falling by alternating between inching towards the tunnel and jumping slightly; once the camera scroll block has been touched and Samus jumps, the camera will be fixed. Entrance condition: {
"comeInWithDoorStuckSetup": {}
}Requires: "canXRayClimb" |
|
Entrance condition: {
"comeInWithDoorStuckSetup": {}
}Requires: "canXRayClimb" "canTrickyDodgeEnemies" |
|
Entrance condition: {
"comeInWithDoorStuckSetup": {}
}Requires: "canXRayClimb" |
|
Entrance condition: {
"comeInWithDoorStuckSetup": {}
}Requires: "canXRayClimb" |
|
Exit the previous room with Samus in a standing pose (while grappled). After teleporting, press right to release Grapple while staying standing (not being forced into a crouch). Then X-ray climb to get up to the door transition, without needing to open the door. Entrance condition: {
"comeInWithGrappleTeleport": {
"blockPositions": [
[
2,
34
]
]
}
}Requires: "canXRayClimb" Bypasses door shell: true |
From: 2
Bottom Right Door
To: 3
Top Right Doorway
Entrance condition: {
"comeInShinecharged": {}
}Requires: {
"shineChargeFrames": 1
}
{
"shinespark": {
"frames": 1,
"excessFrames": 1
}
}
"canShinesparkDeepStuck"
"canXRayClimb" |
|
Exit the previous room with Samus in a standing pose (while grappled). After teleporting, press right to release Grapple while staying standing (not being forced into a crouch). Then X-ray climb 1 screen to get up to the door transition, without needing to open the door. Entrance condition: {
"comeInWithGrappleTeleport": {
"blockPositions": [
[
2,
34
]
]
}
}Requires: "canXRayClimb" Bypasses door shell: true Dev note: This strat is only useful if the room were modified to have a door lock on the left. |
|
Exit the previous room with Samus in a standing pose (while grappled). After teleporting, press right to release Grapple while staying standing (not being forced into a crouch). Then X-ray climb 1 screen to get up to the door transition, without needing to open the door. Samus will not be visible during the climb. It is necessary to enter a horizontal position of 20 pixel or less, otherwise the climb will stop in the air pocket below the door. Entrance condition: {
"comeInWithGrappleTeleport": {
"blockPositions": [
[
2,
18
],
[
2,
19
],
[
2,
28
],
[
2,
29
]
]
}
}Requires: "canXRayClimb" Bypasses door shell: true |
From: 6
Left Morph Passage Doorway
To: 11
Upper Left Ledge Junction
Jump into the first Samus Eater in the ceiling of Hellway. After teleporting and passing through the transition, X-Ray climb about 1 screen to reach the ledge above. Samus will be off-camera, but the slopes at the top will push the camera up, indicating when the climb is done. Entrance condition: {
"comeInWithSamusEaterTeleport": {
"floorPositions": [],
"ceilingPositions": [
[
10,
3
]
]
}
}Requires: "canXRayClimb" Dev note: Other ceiling Samus Eaters can also probably work. Floor Samus Eaters (e.g. in Alpha Power Bomb Room) won't work because it's not possible to climb above the Morph tunnel, which extends along the entire screen behind the transition. |
From: 6
Left Morph Passage Doorway
To: 11
Upper Left Ledge Junction
Perform a horizontal shinespark through the top of the door transition, from a horizontal position that triggers a deep door transition. Sparking from one or two pixels away from the door is an example position that works (if possible in the neighboring room). If successful, after the shinespark crash animation ends Samus should be standing inside the wall and be able to X-Ray climb. X-Ray climb up a little less than 1 screen, and the slopes will push Samus up. Entrance condition: {
"comeInWithSpark": {
"position": "top"
}
}Requires: "canDeepTransition"
{
"shinespark": {
"frames": 2,
"excessFrames": 2
}
}
"canXRayClimb"Dev note: If the morph tunnel is not expanded, then a deep transition is not necessary; any horizontal shinespark in top position would work. |
From: 1
Middle Left Door
To: 9
Junction Below Top Door
Climb up 1 screen. Aim to end this XRay climb when Samus is visually near but not above the top of the left side door. Fall out of the wall by turning to the right, from a crouch if possible. This XRay climb has a window of 4 crouches, but with a way to break bomb blocks it can be ended earlier. Entrance condition: {
"comeInWithDoorStuckSetup": {}
}Requires: {
"notable": "Left-Side X-Ray Climb (Upper)"
}
"canXRayClimb" |
|
Entrance condition: {
"comeInWithDoorStuckSetup": {}
}Requires: "canXRayClimb" |
|
Exit the previous room with Samus in a standing pose (while grappled) with a horizontal position of 21 (as far right as possible). After teleporting, press right to release Grapple while staying standing (not being forced into a crouch). Then X-ray climb to get to the door transition above, without needing to open the door. At the beginning of the climb, avoid pressing left without X-Ray being held, to prevent triggering the transition of the bottom door. Entrance condition: {
"comeInWithGrappleTeleport": {
"blockPositions": [
[
2,
34
]
]
}
}Requires: "canXRayClimb" Bypasses door shell: true |
|
Entrance condition: {
"comeInWithDoorStuckSetup": {}
}Requires: "canXRayClimb" |
|
Exit the previous room with Samus in a standing pose (while grappled). After teleporting, press right to release Grapple while staying standing (not being forced into a crouch). Then X-ray climb 1 screen to get up to the door transition, without needing to open the door. Entrance condition: {
"comeInWithGrappleTeleport": {
"blockPositions": [
[
2,
28
],
[
2,
29
]
]
}
}Requires: "canXRayClimb" Bypasses door shell: true |
|
Immediately when entering the room, turn around to the left while using X-ray and kill the Mochtroid, to prevent or minimize damage. Climb up 1 screen. Entrance condition: {
"comeInWithDoorStuckSetup": {}
}Requires: "canXRayClimb"
{
"or": [
"Ice",
"Wave",
"Spazer",
"Plasma",
"Grapple",
{
"ammo": {
"type": "Missile",
"count": 1
}
},
{
"ammo": {
"type": "Super",
"count": 1
}
},
{
"enemyDamage": {
"enemy": "Mochtroid",
"type": "contact",
"hits": 1
}
}
]
} |
|
Exit the previous room with Samus in a standing pose (while grappled). After teleporting, press right to release Grapple while staying standing (not being forced into a crouch). Then X-ray climb 1 screen to get up to the door transition, without needing to open the door. Entrance condition: {
"comeInWithGrappleTeleport": {
"blockPositions": [
[
2,
28
],
[
2,
29
]
]
}
}Requires: "canXRayClimb" Bypasses door shell: true |
|
Exit the previous room with Samus in a standing pose (while grappled). After teleporting, press right to release Grapple while staying standing (not being forced into a crouch). Then X-ray climb 1 screen to get up to the door transition, without needing to open the door. Entrance condition: {
"comeInWithGrappleTeleport": {
"blockPositions": [
[
2,
18
],
[
2,
19
],
[
2,
28
],
[
2,
29
]
]
}
}Requires: "canXRayClimb" Bypasses door shell: true |
|
X-ray climb until Samus is above the water surface. To avoid falling out, be careful not to turn left except while holding X-ray. From a standing position facing left, hold left and immediately jump, then use Space Jump to reach the ledge. Alternatively, from a standing position facing right, do a turn-around spin jump, waiting to jump until part way through the turn-around animation (otherwise Samus will bonk inside the wall) It is also possible to climb lower, with Samus' feet still in the water; in this case, the turn-around animation is slower, providing a larger window to jump, though in this case either a wall jump or a Space Jump water escape may be needed. Entrance condition: {
"comeInWithDoorStuckSetup": {}
}Requires: "canXRayClimb" "SpaceJump" |
|
Enter with G-mode direct, back up to exactly 8 pixels away from the door transition, and activate X-ray to get very deep stuck in the door. Climb up a little less than 1 screen, and perform a turnaround buffered spin-jump away from the door to trigger the transition, bypassing any lock on the door. Perform the spin-jump when Samus' feet are between about 0.5 and 2 tiles below the bottom of the door. Entrance condition: {
"comeInWithGMode": {
"mode": "direct",
"morphed": false
}
}Requires: "canComplexGMode"
"canGModeXRayClimb"
{
"notable": "Very Deep Stuck X-Ray Climb"
}
"canXRayClimb"Bypasses door shell: true Dev note: Standing any closer to the door will cause Samus to no longer be stuck in the wall when reaching the air pocket above. Standing any further from the door will make it impossible to get a wall-jump check from the transition tiles. |
|
Entrance condition: {
"comeInWithDoorStuckSetup": {}
}Requires: "canXRayClimb" |
From: 2
Bottom Left Door
To: 1
Top Left Door
Perform an X-Ray Climb until you are just above the door into Cacatac Alley. Walk left into the gap between pipes, behind the grapple blocks. Walk to the left wall, turn around, crouch, grapple the block and release. Samus will fall into the door transition. The camera does not follow Samus but the pipes are still visually in the same position. And the camera does not break after the transition. Entrance condition: {
"comeInWithDoorStuckSetup": {}
}Requires: "canXRayClimb" "canGrappleClip" Bypasses door shell: true |
|
Once Doorstuck, do 2 turnarounds and and kill the bottom Cacatac with angle shots. Resume the climb until you're at the second Cacatac' height and kill it. Resume the climb until Samus' chest pokes out of the ground and wiggle out to the right. Entrance condition: {
"comeInWithDoorStuckSetup": {}
}Requires: "canXRayClimb" |
|
Exit the previous room with Samus in a standing pose (while grappled). After teleporting, press right to release Grapple while staying standing (not being forced into a crouch). Then X-ray climb 1 screen to get up to the door transition, without needing to open the door. Entrance condition: {
"comeInWithGrappleTeleport": {
"blockPositions": [
[
2,
18
],
[
2,
19
],
[
2,
29
]
]
}
}Requires: "canXRayClimb" Bypasses door shell: true |
|
Entrance condition: {
"comeInWithDoorStuckSetup": {}
}Requires: "canXRayClimb" |
|
Entrance condition: {
"comeInWithDoorStuckSetup": {}
}Requires: "canXRayClimb" |
|
Entrance condition: {
"comeInWithDoorStuckSetup": {}
}Requires: "canXRayClimb" |
From: 2
Bottom Right Door
To: 1
Top Right Door
Enter immobile with G-mode direct, with the Metroids having been killed previously. Take a Rinka hit to regain mobility. Back up to between 1 and 6 pixels from the door transition, and activate X-ray to get very deep stuck in the door. Climb up 1 screen, moving quickly to minimize Rinka damage. Perform a turnaround buffered spin-jump away from the door to trigger the transition, bypassing any lock on the door. Entrance condition: {
"comeInWithGMode": {
"mode": "direct",
"morphed": false,
"mobility": "immobile"
}
}Requires: "canComplexGMode"
"canGModeXRayClimb"
{
"or": [
"f_KilledMetroidRoom2",
{
"obstaclesCleared": [
"f_KilledMetroidRoom2"
]
}
]
}
{
"enemyDamage": {
"enemy": "Rinka",
"type": "contact",
"hits": 1
}
}
"canXRayClimb"Bypasses door shell: true Dev note: The 'immobile' requirement in the entranceCondition is not necessary but is included for clarity. Without coming in immobile, it would not be possible to have enough energy to survive the Rinka hit. The enemyDamage in this strat is for a second Rinka hit while climbing. The first Rinka hit is included in the gModeImmobile requirement. |
