canCameraManip (Hard)
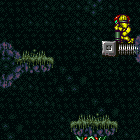
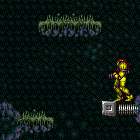
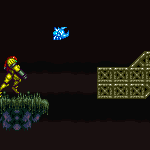
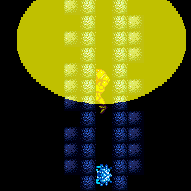
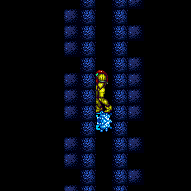
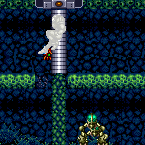
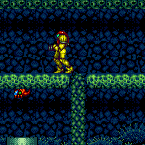
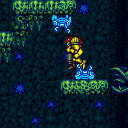
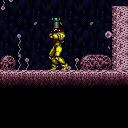
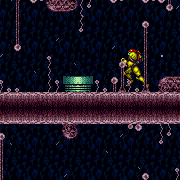
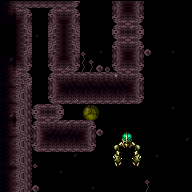
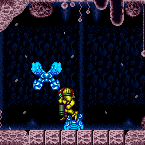
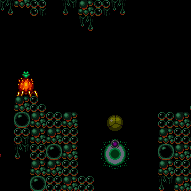
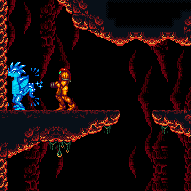
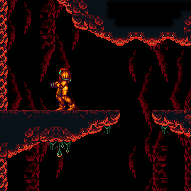
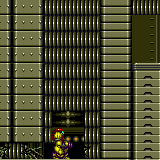
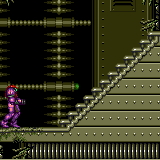
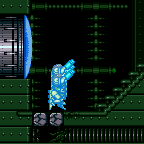
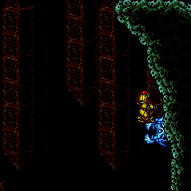
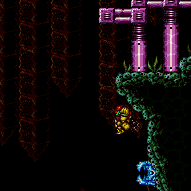
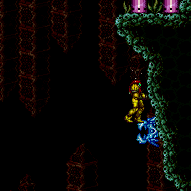
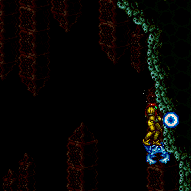
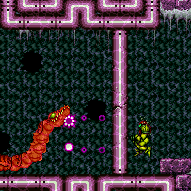
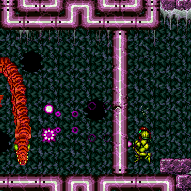
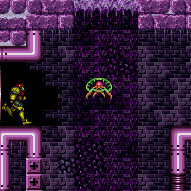
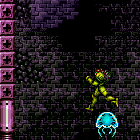
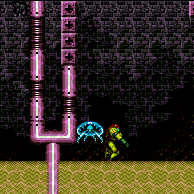
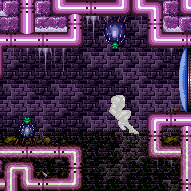
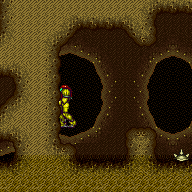
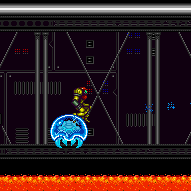
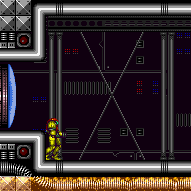
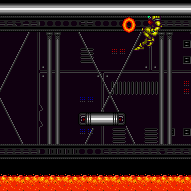
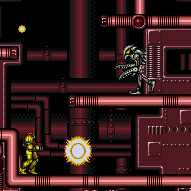
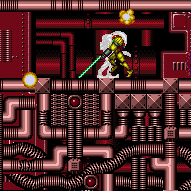
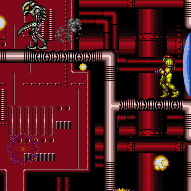
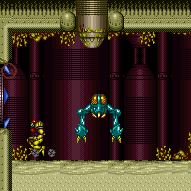
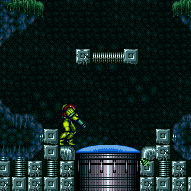
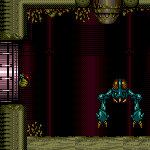
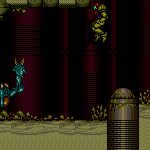
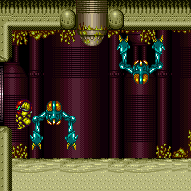
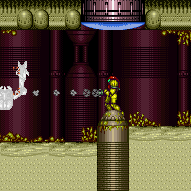
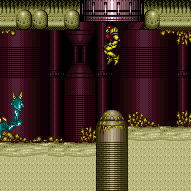
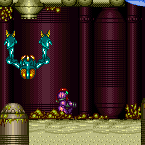
The ability to scroll the camera to bring enemies or projectiles on or off camera. Most enemes become inactive while off camera, and most projectiles cease to exist. This can be done by jumping in place; changing Samus' hitbox with aim down will scroll the camera lower. By running back and forth the camera will scroll horizontally; Moonwalk can be used to camera scroll without travelling as far.
Strats ()
|
Open the Gauntlet Entrance door by shooting a charged Wave shot through the right wall to wrap around to hit the door. Near the top right door, move the right wall a bit off camera. Jump and shoot a charge shot diagonally into the floor just before landing while moving rightwards. Listen for the door opening to ensure it worked. Requires: "canCameraManip"
"canWrapAroundShot"
{
"doorUnlockedAtNode": 1
}Clears obstacles: C Unlocks doors: {"nodeId":1,"types":["ammo"],"requires":["never"]} |
|
Jump towards the Yapping Maw before it is on screen so it moves up. Quickly move it off camera so it will be `frozen` in place. Shortcharge like normal. If the Yapping Maw is returning to its hole, it will usually not grab Samus. Requires: {
"notable": "Shinecharge Under Yapping Maw"
}
{
"obstaclesCleared": [
"A"
]
}
"canCameraManip"
"canTrickyDodgeEnemies"
{
"canShineCharge": {
"usedTiles": 22,
"steepUpTiles": 2,
"steepDownTiles": 3,
"startingSteepDownTiles": 2,
"openEnd": 0
}
}
{
"shinespark": {
"frames": 45,
"excessFrames": 0
}
}Exit condition: {
"leaveWithSpark": {
"position": "top"
}
} |
|
The nearby Global crab can be used to exit on the left side of the door. Exiting on the right will require travelling the Morph maze to find a local crab or two from the far left side of the room. Without Spring Ball, freeze the crab as low as possible to where Samus can still spin jump onto it. land on the edge of it, X-Ray turnaround or crouch, then press forward when it is about to thaw to trigger the transition. Requires: "Morph" "canCameraManip" "canUpwardGModeSetup" "canTrickyUseFrozenEnemies" "canBeVeryPatient" Exit condition: {
"leaveWithGModeSetup": {}
}Dev note: Global Crab (left side) takes 40 seconds, local crab (Right side) is 140. Finding two left side crabs to use together is faster. FIXME: Adding a variant that can only be done on the left side of the door would remove many of these requirements. |
|
Farm two Scisers in the bottom section (manipulate camera to see where they are) and left Kihunter. Shinecharge and get interrupted by the right Kihunter. Entrance condition: {
"comeInWithRMode": {}
}Requires: {
"or": [
"canCameraManip",
{
"enemyDamage": {
"enemy": "Sciser",
"type": "contact",
"hits": 1
}
}
]
}
{
"or": [
"h_CrystalFlashForReserveEnergy",
{
"and": [
"h_RModeCanRefillReserves",
{
"resourceMissingAtMost": [
{
"type": "PowerBomb",
"count": 0
}
]
},
{
"partialRefill": {
"type": "ReserveEnergy",
"limit": 20
}
}
]
}
]
}
{
"canShineCharge": {
"usedTiles": 33,
"steepUpTiles": 2,
"steepDownTiles": 5,
"openEnd": 0
}
}
{
"autoReserveTrigger": {
"maxReserveEnergy": 95
}
}
"canRModeSparkInterrupt" |
|
Requires: {
"or": [
{
"and": [
{
"resetRoom": {
"nodes": [
1,
2
]
}
},
"canCameraManip"
]
},
{
"resetRoom": {
"nodes": [
3
]
}
}
]
}
{
"or": [
{
"and": [
"canDash",
{
"or": [
{
"and": [
"ScrewAttack",
{
"cycleFrames": 720
}
]
},
{
"and": [
"Plasma",
{
"cycleFrames": 770
}
]
},
{
"and": [
"canPseudoScrew",
{
"cycleFrames": 1000
}
]
},
{
"and": [
"canUseGrapple",
{
"cycleFrames": 1020
}
]
},
{
"and": [
"Wave",
{
"cycleFrames": 1050
}
]
},
{
"and": [
"Spazer",
{
"cycleFrames": 1080
}
]
},
{
"and": [
"Ice",
{
"cycleFrames": 1170
}
]
},
{
"and": [
"canDodgeWhileShooting",
{
"cycleFrames": 1440
}
]
}
]
}
]
},
{
"and": [
{
"haveBlueSuit": {}
},
{
"cycleFrames": 1010
}
]
}
]
}Farm cycle drops: 2 Sciser, 2 Kihunter (green) |
|
Jump and aim down to lower the camera to see where the crabs are. Alternatively use a Power Bomb to kill them or risk tanking a hit. Requires: {
"or": [
"canCameraManip",
"h_usePowerBomb",
{
"enemyDamage": {
"enemy": "Sciser",
"type": "contact",
"hits": 1
}
}
]
} |
From: 1
Left Door
To: 3
Junction (Left side Pit)
It is required to avoid double hitting the Skultera with the Power Bomb, and to position the Crystal Flash so that the Skultera can hit Samus from above so it avoids the light orb. To do this, use the bottom-left Skultera, and move it off-camera at the far left end of its cycle. Go to the far right end of it's cycle and on the Crystal Flash on the sloped tile just below where it ends. Once the Skultera gets hit by the Power Bomb explosion, it will start moving, even while off-camera. Entrance condition: {
"comeInWithGMode": {
"mode": "direct",
"morphed": true
}
}Requires: "h_artificialMorphComplexRModeCrystalFlashInterrupt"
"canCameraManip"
{
"ammo": {
"type": "Missile",
"count": 10
}
}
{
"ammo": {
"type": "Super",
"count": 10
}
}
{
"ammo": {
"type": "PowerBomb",
"count": 5
}
}
{
"or": [
"h_partialEnemyDamageReduction",
{
"resourceAtMost": [
{
"type": "RegularEnergy",
"count": 19
}
]
},
{
"and": [
{
"resourceCapacity": [
{
"type": "RegularEnergy",
"count": 199
}
]
},
{
"resourceCapacity": [
{
"type": "ReserveEnergy",
"count": 199
}
]
}
]
}
]
}Dev note: There is no reason to do this at node 4, because the movement items required to get to 4 and then do anything useful with the flash suit would also enable Samus to get the flash suit here and then take it to node 4. |
From: 2
Right Door
To: 3
Junction (Left side Pit)
Perform a double Spring Ball jump using a precisely timed bomb boost to propel Samus upward just long enough to get the mid-air Spring Ball jump. This needs to be done multiple times to cross the room with no other items; using Spring Flings to cross from peak to peak can reduce the required number of bomb into Spring Ball jumps to just one or two. To Crystal Flash interrupt, it is required to avoid double hitting the Skultera with the Power Bomb, and to position the Crystal Flash so that the Skultera can hit Samus from above so it avoids the light orb. To do this, use the bottom-left Skultera, and move it off-camera at the far left end of its cycle. Go to the far right end of it's cycle and on the Crystal Flash on the sloped tile just below where it ends. Once the Skultera gets hit by the Power Bomb explosion, it will start moving, even while off-camera. Entrance condition: {
"comeInWithGMode": {
"mode": "direct",
"morphed": true
}
}Requires: "h_artificialMorphUnderwaterBombIntoSpringBallJump"
{
"or": [
"h_artificialMorphSpringFling",
"canBeVeryPatient"
]
}
"h_artificialMorphComplexRModeCrystalFlashInterrupt"
"canCameraManip"
{
  "ammo": {
    "type": "Missile",
    "count": 10
  }
}
{
  "ammo": {
    "type": "Super",
    "count": 10
  }
}
{
  "ammo": {
    "type": "PowerBomb",
    "count": 5
  }
}
{
  "or": [
    "h_partialEnemyDamageReduction",
    {
      "resourceAtMost": [
        {
          "type": "RegularEnergy",
          "count": 19
        }
      ]
    },
    {
      "and": [
        {
          "resourceCapacity": [
            {
              "type": "RegularEnergy",
              "count": 199
            }
          ]
        },
        {
          "resourceCapacity": [
            {
              "type": "ReserveEnergy",
              "count": 199
            }
          ]
        }
      ]
    }
  ]
}
Dev note: Methods with more flexible movement items will instead be done at node 4, after which, they can be used to get here. FIXME: Add variants that can farm enough Energy to choot damage boost without enemy damage reduction or tanks. |
From: 3
Junction (Left side Pit)
To: 3
Junction (Left side Pit)
It is required to avoid double hitting the Skultera with the Power Bomb, and to position the Crystal Flash so that the Skultera can hit Samus from above so it avoids the light orb. To do this, use the bottom-left Skultera, and move it off-camera at the far left end of its cycle. Go to the far right end of it's cycle and on the Crystal Flash on the sloped tile just below where it ends. Once the Skultera gets hit by the Power Bomb explosion, it will start moving, even while off-camera. Requires: {
"obstaclesCleared": [
"R-Mode"
]
}
"canCameraManip"
"canComplexRModeCrystalFlashInterrupt"
{
"ammo": {
"type": "Missile",
"count": 10
}
}
{
"ammo": {
"type": "Super",
"count": 10
}
}
{
"ammo": {
"type": "PowerBomb",
"count": 5
}
}
{
"or": [
"h_partialEnemyDamageReduction",
{
"resourceAtMost": [
{
"type": "RegularEnergy",
"count": 19
}
]
},
{
"and": [
{
"resourceCapacity": [
{
"type": "RegularEnergy",
"count": 199
}
]
},
{
"resourceCapacity": [
{
"type": "ReserveEnergy",
"count": 199
}
]
}
]
}
]
}Resets obstacles: R-Mode |
From: 5
Lower Section - Bottom Right Door
To: 4
Lower Section - Top Right Door
It is possible to open the door before sparking and then spark diagonally into it to save Energy. Shoot straight up while directly below the door, then jump to raise the camera and hit the door. It is also possible to use a Power Bomb from a midair morph, or to midair morph, unmorph, then shoot a missile or super diagonally from the platform to the left. If it is important to bonk before going through the door, diagonally spark far enough to the left to bonk the ceiling before hitting the transition. Requires: "canCameraManip"
{
"blueSuitShinecharge": {}
}
{
"shinespark": {
"frames": 13,
"excessFrames": 3
}
}Unlocks doors: {"types":["ammo"],"requires":[]} |
From: 5
Lower Section - Bottom Right Door
To: 4
Lower Section - Top Right Door
It is possible to open the door before sparking and then spark diagonally into it to save Energy. Shoot straight up while directly below the door, then jump to raise the camera and hit the door. It is also possible to use a Power Bomb from a midair morph, or to midair morph, unmorph, then shoot a missile or super diagonally from the platform to the left. If it is important to bonk before going through the door, diagonally spark far enough to the left to bonk the ceiling before hitting the transition. Requires: "canCameraManip"
{
"useFlashSuit": {}
}
{
"shinespark": {
"frames": 13,
"excessFrames": 3
}
}Unlocks doors: {"types":["ammo"],"requires":["canMidAirMorph"]} |
From: 6
Middle Right Door (By Zeb Farm)
To: 2
Upper Right Section - Top Right Door
Start from the Middle Right Door next to the Zeb farm. While standing on the right of the Zeb farm, freeze the Zeb while it is still moving up and facing to the right. Quickly go through the morph tunnel with a Bomb, Power Bomb, or Spring Ball, and get onto the small floating platform just above the Zeb farm. After the Zeb is visible, freeze it and jump on top of it. Use the Zeb as a platform to climb high enough to get it to be aligned with the door. Use the background to see how high the Zeb is - Get the Zeb 2-3 tiles higher than the thinner bright line in the background. Note that if the Zeb is unfrozen and off screen horizontally it will despawn, but if it's off screen vertically it will not. Chase the Zeb towards the doorway, refreezing it as needed. Requires: {
"notable": "G-Mode Setup Lure Zeb from Below"
}
"canComplexGMode"
"canTrickyUseFrozenEnemies"
{
"or": [
"h_bombThings",
"h_useSpringBall",
"h_usePowerBomb"
]
}
"canCameraManip"Exit condition: {
"leaveWithGModeSetup": {}
}Unlocks doors: {"types":["ammo"],"requires":[]} |
From: 6
Middle Right Door (By Zeb Farm)
To: 3
Upper Right Section - Bottom Right Door
Start from the Middle Right Door next to the Zeb farm. While standing on the right of the Zeb farm, freeze the Zeb while it is still moving up and facing to the right. Quickly go through the morph tunnel with a Bomb, Power Bomb, or Spring Ball, and get onto the small floating platform just above the Zeb farm. After the Zeb is visible, fall off the platform to make the Zeb move horizontally at the right height to hit Samus in the doorway to the right. Note that if the Zeb is unfrozen and off screen horizontally it will despawn, but if it's off screen vertically it will not. Requires: {
"notable": "G-Mode Setup Lure Zeb from Below"
}
"canComplexGMode"
"canTrickyUseFrozenEnemies"
{
"or": [
"h_bombThings",
"h_useSpringBall",
"h_usePowerBomb"
]
}
"canCameraManip"Exit condition: {
"leaveWithGModeSetup": {}
}Unlocks doors: {"types":["ammo"],"requires":[]} |
From: 6
Middle Right Door (By Zeb Farm)
To: 12
Top Junction
Get a Zeb to move left into the morph passage, and reach the end of the tunnel before it. Freeze the bug at the correct height, such that it will move and be able to hit Samus while in the morph tunnel. While in the first two-tile tall region, shoot and refreeze the bug. Then go to the second two-tile region and shoot the block. Return and lure the bug such that it hits Samus and boosts her up and onto the ledge to escape. Be careful not to despawn the enemy by moving it off camera, except while it is frozen. This strat is a one-shot try and failure is a softlock. Requires: {
"notable": "Bug Boost with Ice"
}
"Morph"
"h_stationaryNeutralDamageBoost"
"canTrickyUseFrozenEnemies"
"canCameraManip"
{
"enemyDamage": {
"enemy": "Zeb",
"type": "contact",
"hits": 1
}
}Dev note: Could use a failure definition? |
|
Crouch and shoot the shot blocks from afar. There is enough time to get past them without Gravity before they respawn. If the shot blocks do not break, roll all the way to the left to reset the camera, then go back. Requires: "Morph" "canCameraManip" |
From: 12
Top Junction
To: 9
Top Hidden Item (Above Trippers)
Jump on the left platforms to get the middle Tripper on screen, luring it to the right. Get on the middle Tripper and use it to jump to the item. This requires a somewhat precise shot and jump, particularly if the top Tripper is in the way. The jump and shot can be easier and done at the apex of a single jump starting with a crouch. Freezing the Trippers can make this much easier. Requires: "canUseEnemies"
{
"or": [
{
"and": [
"canUseFrozenEnemies",
"canPreciseWallJump"
]
},
"canTrickyWallJump",
{
"and": [
"canCameraManip",
"canCarefulJump"
]
}
]
} |
|
Use both Geemers to climb the tall shaft by repeatedly freezing them. Note that one moves locally when on camera and the other moves globally. Requires: "h_ZebesIsAwake"
{
"or": [
"h_usePowerBomb",
{
"and": [
{
"obstaclesCleared": [
"B"
]
},
"Morph"
]
},
{
"obstaclesCleared": [
"C"
]
}
]
}
{
"or": [
{
"obstaclesCleared": [
"A"
]
},
"ScrewAttack",
{
"haveBlueSuit": {}
},
{
"and": [
"h_useMorphBombs",
"canMidAirMorph"
]
}
]
}
"canTrickyUseFrozenEnemies"
"canTrickyJump"
"canCameraManip"Clears obstacles: A, B Dev note: FIXME: It is possible to ceiling ice clip the top block. |
From: 4
Right Item
To: 2
Top Left Door
Use both Geemers to climb the tall shaft by repeatedly freezing them. Note that one moves locally when on camera and the other moves globally. Once Samus is close to the top Bomb Block, freeze one Geemer low and jump as high as possible before placing a power bomb. Continue climbing with the Geemer that survives. Requires: "h_ZebesIsAwake"
{
"or": [
"h_usePowerBomb",
{
"and": [
{
"obstaclesCleared": [
"B"
]
},
"Morph"
]
},
{
"obstaclesCleared": [
"C"
]
}
]
}
"h_usePowerBomb"
"canTrivialMidAirMorph"
"canTrickyUseFrozenEnemies"
"canTrickyJump"
"canBePatient"
"canCameraManip"Clears obstacles: A, B |
G-Mode Morph Touch the Item, Break the Crumble, Geemer Ice Climb
(Expert+)
Blue Brinstar Energy Tank Room
From: 6
G-Mode Morph Junction Direct (Bottom)
To: 2
Top Left Door
Touch the item to overload PLMs then go through the crumble block. Use the global Geemer to climb the tall shaft by repeatedly freezing it. Use a blue suit or Screw Attack at the top to break the block Requires: "canGMode"
"h_ZebesIsAwake"
{
"itemNotCollectedAtNode": 4
}
"h_artificialMorphSpringBall"
{
"or": [
"ScrewAttack",
{
"haveBlueSuit": {}
}
]
}
"canTrickyUseFrozenEnemies"
"canTrickyJump"
"canCameraManip"Clears obstacles: A, B Collects items: 4 Dev note: This will force Samus to pick up the item, so it can only be done once. itemNotCollectedAtNode implicitly includes canRiskPermanentLossOfAccess. Spring Ball is required, because Morph, Bombs, or a Power Bomb will allow other strats to be used instead. This strat requires Zebes to be awake, so there will be no flashing lights. FIXME: It is possible to ceiling ice clip the top block. |
|
Roll into the room, fall off the step and roll into the corner. Roll to the right immediately as the floor hopper is going to take its second jump to get it off camera. Once it is off camera, stop and wait for the next hopper to jump towards Samus, then roll under it as it jumps again. Entrance condition: {
"comeInWithMockball": {
"speedBooster": "any",
"adjacentMinTiles": 0,
"remoteAndLandingMinTiles": [
[
0,
0
]
]
}
}Requires: "canPrepareForNextRoom" "canTrickyDodgeEnemies" "canCameraManip" "h_bombThings" Clears obstacles: A |
|
Roll into the room, fall off the step and roll into the corner. Roll to the right immediately as the floor hopper is going to take its second jump to get it off camera. Once it is off camera, stop and wait for the next hopper to jump towards Samus, then roll under it as it jumps again. Entrance condition: {
"comeInNormally": {}
}Requires: "canPrepareForNextRoom" "canTrickyDodgeEnemies" "canCameraManip" "h_bombThings" Clears obstacles: A |
|
Spawn a Zeb, stand at the edge of the crumbles, and spin jump to the right a moment after it begins moving toward Samus; turn left just before landing, then do a delayed damage boost to make it under the first gate. Face left again, quickly lose i-frames using either X-Ray or a blue suit, then damage boost again to get under the second gate. Both boosts must be performed on the last two frames of knockback, to ensure Samus is high enough to reach the gate. For the first boost, jump can be held the entire time. For the second boost, unless X-Ray is available, there is not much time to set up a buffered jump input, so it may be easier to aim to press jump and right simultaneously after being hit. Requires: {
"notable": "Crouch Gate Clip Damage Boost"
}
{
"obstaclesNotCleared": [
"A"
]
}
"canCrouchGateClip"
"canCameraManip"
{
"tech": "canHorizontalDamageBoost"
}
{
"enemyDamage": {
"enemy": "Zeb",
"type": "contact",
"hits": 2
}
}
{
"or": [
"canXRayWaitForIFrames",
{
"haveBlueSuit": {}
}
]
}Clears obstacles: A Dev note: This strat avoids the need to dash. |
From: 12
Above Power Bomb Blocks - Main Junction
To: 13
Below Power Bomb Blocks - Main Junction
Freeze two Zeelas to perform an 'Enemy Stuck Moonfall' in order to clip through the Power Bomb blocks. Position one Zeela upside down on a ceiling, and another below it on the ground. The global Zeela paired with either the lowest Zeela, or the other perimeter Zeela can be used, but freezing them together is the hardest part. Freezing one and then unequipping Ice Beam to dispel the ice effect or manipulating the camera can be used to synchronize them. If the moonfall is initiated immediately after freezing both enemies, it is possible to gain enough speed to automatically clip through the enemy and the floor; in this case, hold an angle button to buffer a pose change. Alternatively, and more easily, when one of the enemies is about to thaw, hold backward in order to move forward and fall off the enemy with a buffered turnaround, which will clip through the floor without needing as much fall speed. From directly on top of the Power Bomb blocks, no pose change is needed. Two Super Missiles can speed up the Zeela setup greatly by knocking them off of the wall. Requires: "canEnemyStuckMoonfall"
"canTrickyUseFrozenEnemies"
{
"or": [
"canDisableEquipment",
"canCameraManip"
]
}
{
"or": [
"canBePatient",
{
"ammo": {
"type": "Super",
"count": 2
}
}
]
} |
From: 13
Central Junction
To: 5
Left Side - Door Blocked by Crumble Blocks
Raise a Zeb to be just below the crumble blocks and blindly freeze it to set up an ice clip to reach the Power Bomb room exit door. Get a bug from the pipe to spawn facing left and freeze it while moving to the ledge below the Wave Gate Room door. While crouched, a spazer or wave beam shot will shoot through the floor in front of Samus. Shoot then immediately jump so that the bug can be frozen at a pixel perfect height, which is higher than where it would typically be frozen (when not needing to preserve a flash suit). Once frozen, wait for the bug to thaw, then blindly follow it to the left without letting it go off camera, which would cause it to despawn. Refreeze it below the crumble blocks, perform a very precise ledge grab onto it, then jump through the crumble block to reach the door, all while carefully avoiding losing the flash suit. Requires: {
"notable": "Blind Zeb Ice Clip (Preserve Flash Suit)"
}
"canTrickyWallJump"
"canCameraManip"
"canOffScreenMovement"
{
"or": [
"Wave",
"Spazer"
]
}
"canInsaneJump"
"h_highPixelIceClip" |
From: 13
Central Junction
To: 5
Left Side - Door Blocked by Crumble Blocks
Raise a Zeb to be just below the crumble blocks and blindly freeze it to set up an ice clip to reach the Power Bomb room exit door. Get a bug from the pipe to spawn facing left and freeze it while moving to the ledge below the Wave Gate Room door. While crouched, a spazer or wave beam shot will shoot through the floor in front of Samus. The bug must be frozen at a height between where Samus is crouched and where she is standing. Once frozen, somehow track how long until the freeze effect expires, and when the bug will reach the crumble blocks. If the bug is off camera when not frozen, it will despawn. Refreeze the Zeb below the crumble blocks and ice clip up to reach the door. Requires: {
"notable": "Zeb Ice Clip"
}
"canTrickyWallJump"
"canCameraManip"
{
"or": [
"Wave",
"Spazer"
]
}
"h_preciseIceClip" |
From: 13
Central Junction
To: 7
Right Side - Door Behind Super Block
Break the bomb blocks then shoot a Super into the morph tunnel to break the Super block off screen. Requires pixel precision, although there are several pixels that work. The camera must be fully scrolled to the right, which may require going far left and back. One normalized setup that doesn't rely on a visual cue: perform a full-height jump and press against the overhang to the left, while holding angle up and down to lock Samus' position after landing, while continuing to hold left. This works with or without HiJump equipped. Requires: {
"haveBlueSuit": {}
}
"Morph"
{
"notable": "Off Screen Super Block"
}
"canOffScreenSuperShot"
"canCameraManip"Clears obstacles: F |
From: 13
Central Junction
To: 7
Right Side - Door Behind Super Block
Break the bomb blocks then shoot a Super into the morph tunnel to break the Super block off screen. Requires pixel precision, although there are several pixels that work. The camera must be fully scrolled to the right, which may require going far left and back. One normalized setup that doesn't rely on a visual cue: perform a full-height jump and press against the overhang to the left, while holding angle up and angle down to lock Samus' position after landing, while continuing to hold left. This works with or without HiJump equipped. Requires: {
"notable": "Off Screen Super Block"
}
"canOffScreenSuperShot"
"h_bombThings"
"canCameraManip"Clears obstacles: F Dev note: It is possible to avoid a mid-air morph by rolling off the platform above |
From: 13
Central Junction
To: 10
Top Item (Above Hopper Pit)
Lead a Zeb through the room and damage boost off of it to reach the item to the left of the grapple blocks. The respawning Zeb can be used by carfeully luring it while remaining high enough that it does not start moving horizontally. Wait for it to respawn before attempting to guide it. If done properly, the Zeb will continue to move upwards as long as it does not go off screen horizontally. On the floating platform by the grapple blocks, jump and aim down to lower the camera, then run and jump into the Zeb once it is visible. Requires: {
"notable": "Zeb Damage Boost"
}
"canCameraManip"
"canDash"
"canTrickyJump"
"canHorizontalDamageBoost"
{
"enemyDamage": {
"enemy": "Zeb",
"type": "contact",
"hits": 1
}
} |
From: 15
G-Mode Morph Junction (Middle Right)
To: 14
G-Mode Morph, Behind the Power Bomb Blocks
Overload PLMs by moving through the camera scroll blocks in front of the passageway leading to the exit of Spore Spawn Supers. Either carefully jump out of this morph tunnel or use a Power Bomb boost Spring Ball jump to get up to the ledge. Either place a Power Bomb by the Reos to kill both Reos and Sidehoppers above, or climb up and fall into the Sidehopper pit and dodge them. Using the Reo's hallway to lure the Sidehoppers to the left can help. Jump up and into the tunnel at the left side of the Sidehopper pit and go through the crumble block. Requires: "canGMode"
"h_artificialMorphSpringBall"
"canCameraManip"
{
"or": [
"canTrickyDodgeEnemies",
"h_artificialMorphPowerBomb",
{
"haveBlueSuit": {}
},
{
"enemyDamage": {
"enemy": "Sm. Sidehopper",
"type": "contact",
"hits": 1
}
}
]
}
{
"or": [
"HiJump",
"h_artificialMorphSpringBallBombJump",
"canTrickyJump"
]
} |
|
Use a Reo (Bee) and a Zeela to perform an 'Enemy Stuck Moonfall', clipping Samus through the Speed blocks. Break the Bomb blocks to bring enemies over to the Speed blocks. Have a Reo wait off camera while the Zeela walks onto the Speed blocks, then freeze the Bee just above Samus' head. Try to freeze both enemies near the same time and start the moonfall as quickly as possible. Requires: {
"notable": "Reo Zeela Stuck Moonfall"
}
"canTrickyUseFrozenEnemies"
"canEnemyStuckMoonfall"
"canBePatient"
"canCameraManip"
{
"obstaclesCleared": [
"A"
]
} |
From: 1
Right Door
To: 1
Right Door
Kill the Sidehoppers using only morph and beams or Screw Attack. Using morph and dodging it can be done damage-free. Shinecharge on the runway, then take a ceiling thorn hit and pause abuse to spark interrupt. Entrance condition: {
"comeInWithRMode": {}
}Requires: {
"or": [
{
"and": [
"Morph",
"canDodgeWhileShooting",
"canCameraManip",
"canTrickyJump"
]
},
"ScrewAttack"
]
}
"h_RModeCanRefillReserves"
{
"resourceMissingAtMost": [
{
"type": "Missile",
"count": 0
}
]
}
{
"resourceMissingAtMost": [
{
"type": "Super",
"count": 0
}
]
}
{
"or": [
{
"and": [
"canBeLucky",
{
"partialRefill": {
"type": "ReserveEnergy",
"limit": 20
}
}
]
},
{
"partialRefill": {
"type": "ReserveEnergy",
"limit": 5
}
}
]
}
{
"canShineCharge": {
"usedTiles": 29,
"openEnd": 0
}
}
{
"autoReserveTrigger": {}
}
"canHorizontalDamageBoost"
"canRModePauseAbuseSparkInterrupt"Clears obstacles: A |
|
The Sidehoppers can't hit a morphed Samus, making it possible to kill them damage-free. Fight them one at a time on one side of the room while the others are offscreen. Unmorph, shoot, remorph to do damage wihtout taking hits. Place Samus directly under where the Sidehopper will jump from, and aim at where it will jump to. Requires: "Morph"
"canDodgeWhileShooting"
"canCameraManip"
{
"or": [
"canTrickyJump",
{
"enemyDamage": {
"enemy": "Sidehopper",
"type": "contact",
"hits": 2
}
}
]
}Clears obstacles: A |
|
Requires: "canLateralMidAirMorph"
{
"or": [
"canTrickyJump",
{
"doorUnlockedAtNode": 1
}
]
}
{
"or": [
"canCameraManip",
{
"enemyDamage": {
"enemy": "Cacatac",
"type": "contact",
"hits": 1
}
}
]
} |
|
Requires: {
"doorUnlockedAtNode": 1
}
"canDash"
"canTrickyJump"
"canCameraManip" |
|
Requires: "h_speedJump"
"canCarefulJump"
{
"or": [
{
"doorUnlockedAtNode": 1
},
"canTrickyJump"
]
}
{
"or": [
"canCameraManip",
{
"and": [
"canNeutralDamageBoost",
{
"enemyDamage": {
"enemy": "Cacatac",
"type": "contact",
"hits": 1
}
}
]
}
]
} |
|
Kill the Cacatac by shooting, jumping to the right to scroll the camera slightly, and returning. From the right edge, pause then press left and jump just before the pause fully triggers. Disable Spring Ball in order to get a large horizontal boost. Pause again as soon as possible and re-enable Spring to reset fall speed. Requires: "canHeroShot"
"canCameraManip"
"canSpringFling"
"canInsaneJump"
{
"disableEquipment": "HiJump"
} |
|
Requires: "canDash"
"canWallJump"
"canCarefulJump"
{
"or": [
"canCameraManip",
"canTrickyWallJump",
{
"and": [
"canNeutralDamageBoost",
{
"enemyDamage": {
"enemy": "Cacatac",
"type": "contact",
"hits": 1
}
}
]
}
]
} |
From: 6
Middle Right Door
To: 10
G-Mode Morph, Above the Power Bomb Blocks
Lower the camera to watch the Wavers and to help avoid them. With Bombs alone, it may be helpful to kill the top Waver; this can be done by placing Bombs in a vertical line and then moving out of the way as it approaches. Entrance condition: {
"comeInWithGMode": {
"mode": "any",
"morphed": true
}
}Requires: "h_artificialMorphMovement"
{
"or": [
{
"and": [
"canTrickyJump",
"canCameraManip"
]
},
"h_artificialMorphPowerBomb",
{
"enemyDamage": {
"enemy": "Waver",
"type": "contact",
"hits": 1
}
}
]
} |
From: 7
Top Right Door
To: 10
G-Mode Morph, Above the Power Bomb Blocks
Lower the camera to watch the Wavers and to help avoid them. With Bombs alone, it may be helpful to kill the top Waver; this can be done by placing Bombs in a vertical line and then moving out of the way as it approaches. Entrance condition: {
"comeInWithGMode": {
"mode": "any",
"morphed": true
}
}Requires: "h_artificialMorphMovement"
{
"or": [
{
"and": [
"canTrickyJump",
"canCameraManip"
]
},
"h_artificialMorphPowerBomb",
{
"enemyDamage": {
"enemy": "Waver",
"type": "contact",
"hits": 1
}
}
]
} |
From: 3
Bottom Left Junction
To: 1
Left Door
Guide the morph tunnel Sova on top of the shot blocks by keeping it on camera. Move the camera away once it is on top of the shot blocks. It will not move while off camera. Stand directly below the OffCamera Sova and fire up and jump to break the shot blocks. Either lower its health while guiding it, or as it begins to fall, there is time. As it falls, shoot again to freeze it at the right height. As a backup, the same Sova can be frozen on the left wall, dropped from the shot blocks again, or frozen on the right wall. Requires: {
"notable": "Left Door Frozen Sova Step"
}
"canTrickyUseFrozenEnemies"
"canTrickyJump"
"canCameraManip"
{
"heatFrames": 1100
} |
|
Either race the nearby Sova to the morph tunnel or wait for it to come back through the morph tunnel and use a Super to knock it off behind Samus. Alternatively, it is possible to wait for the global Sova to come around. Build speed on the lower platform and jump towards the morph tunnel while performing a Midair Morph to reach the Sova in time. Guiding the local Sova around through the shot block again can be faster, but is not expected. Requires: "canNeutralDamageBoost"
"Morph"
{
"enemyDamage": {
"enemy": "Sova",
"type": "contact",
"hits": 1
}
}
{
"or": [
{
"and": [
"canTrickyJump",
"canLateralMidAirMorph",
"canCameraManip",
{
"heatFrames": 340
}
]
},
{
"and": [
{
"ammo": {
"type": "Super",
"count": 1
}
},
{
"heatFrames": 875
}
]
},
{
"heatFrames": 2700
}
]
}Dev note: The global Sova is moving while the player reaches this node and this heatFrame count reflects that. |
From: 5
Bottom Right Junction
To: 2
Right Door
Wait for the global Sova to begin climbing the wall below the door. Time a crouch jump to touch the Sova as it begins to climb lip of the ledge to the door. Just before the collision, place a Bomb or Power Bomb. Reserves will activate which will suspend Samus in the air on top of the Bomb while it explodes. This will give two height boosts, allowing Samus to reach the door. Requires: {
"notable": "Sova Boost"
}
{
"obstaclesNotCleared": [
"R-Mode"
]
}
"h_bombThings"
"canMidAirMorph"
"canTrickyJump"
"canCrouchJump"
"canManageReserves"
"canCameraManip"
{
"heatFrames": 830
}
{
"autoReserveTrigger": {
"minReserveEnergy": 85
}
}
{
"enemyDamage": {
"enemy": "Sova",
"type": "contact",
"hits": 1
}
}
{
"heatFrames": 90
} |
From: 5
Bottom Right Junction
To: 2
Right Door
Wait for the global Sova to begin climbing the wall below the door. Have Reserves set to manual and couch jump up above the Sova as it turns the lip of the ledge. Before touching the Sova, pause, so that Samus will recieve a small damage boost followed by pause screen appearing. Set Reserves back to auto which will end Samus' i-frames enabling a second damage boost. Without Morphball, this requires a blind damage boost. Requires: {
"notable": "Sova Boost"
}
{
"obstaclesNotCleared": [
"R-Mode"
]
}
"canCrouchJump"
"canInsaneJump"
{
"or": [
"canMidAirMorph",
"canOffScreenMovement"
]
}
"canCameraManip"
"canReserveDoubleDamageBoost"
{
"heatFrames": 830
}
{
"autoReserveTrigger": {
"minReserveEnergy": 85
}
}
{
"enemyDamage": {
"enemy": "Sova",
"type": "contact",
"hits": 1
}
}
{
"heatFrames": 90
} |
|
Wait for the global Sova to begin climbing the wall below the door. Time a walljump into instant morph where Samus boosts off of the Sova with the right timing to bounce up to the door's ledge. The jump must be a fully delayed walljump. Normalizing the camera can help with timing the walljump. The damage boost can be attempted again when the Sova climbs down the left wall, or by knocking it off the wall with a Super Missile. Requires: {
"notable": "Sova Boost"
}
"canInsaneWallJump"
"canWallJumpInstantMorph"
"canNeutralDamageBoost"
"canCameraManip"
{
"heatFrames": 830
}
{
"enemyDamage": {
"enemy": "Sova",
"type": "contact",
"hits": 1
}
}
{
"heatFrames": 90
} |
From: 1
Top Left Door
To: 3
Right Door
Bomb boost onto the crumble blocks in the middle of the spike pit, then on the right side, move the Ripper off camera and IBJ. If the camera gets shifted so that the Ripper stays on camera, shift it back to the right by IBJng up a bit on the left side of the 4 crumbles then move to the right as Samus falls. Entrance condition: {
"comeInWithGMode": {
"mode": "indirect",
"morphed": true
}
}Requires: "h_artificialMorphIBJ" "h_artificialMorphBombHorizontally" "canCameraManip" "canTrickyJump" "h_heatedGModeOpenDifferentDoor" |
From: 2
Bottom Left Door
To: 3
Right Door
Bomb boost onto the crumble blocks in the middle of the spike pit, then on the right side, move the Ripper off camera and IBJ. If the camera gets shifted so that the Ripper stays on camera, shift it back to the right by IBJng up a bit on the left side of the 4 crumbles then move to the right as Samus falls. Entrance condition: {
"comeInWithGMode": {
"mode": "indirect",
"morphed": true
}
}Requires: "h_artificialMorphIBJ" "h_artificialMorphBombHorizontally" "canCameraManip" "canTrickyJump" "h_heatedGModeOpenDifferentDoor" |
|
Entrance condition: {
"comeInWithGMode": {
"mode": "direct",
"morphed": false
}
}Requires: "canRemoteAcquire"
{
"or": [
"SpaceJump",
{
"and": [
"canPreciseGrapple",
"canUseEnemies"
]
},
"canSpringBallJumpMidAir",
"canInsaneWallJump",
{
"and": [
"HiJump",
"canWallJump"
]
},
{
"and": [
"HiJump",
"canSpeedyJump"
]
},
{
"and": [
"canStaggeredIBJ",
"canDoubleBombJump",
"canBombHorizontally"
]
},
{
"and": [
"h_IBJFromSpikes",
"h_IBJFromSpikes"
]
},
{
"and": [
"h_IBJFromSpikes",
"canCameraManip",
"canMoonwalk"
]
}
]
}
"h_heatedDirectGModeLeaveSameDoor"Collects items: 4 |
From: 5
Lava, Center Namihe
To: 3
Above Lava Junction
Align with the above platform and scroll the camera left by walking into the left side of the bottom-most tiles. Freeze both left side Namihes and begin bomb jumping Requires: "Gravity"
{
"or": [
"h_lavaProof",
"canSuitlessLavaDive"
]
}
"canJumpIntoIBJ"
"canLongIBJ"
"canDoubleBombJump"
"Plasma"
"Ice"
"canCameraManip"
{
"heatFrames": 1040
}
{
"lavaFrames": 1020
} |
|
Use the bottom-most right-side Namihe to generate a flame and walk with it to the bottom-most left Namihe head. Use a turnaround animation as Samus is hit by the flame to cancel out knockback frames. While invulnerability frames are active, walljump up the spikes either 2 or 3 times and jump accross to catch the middle wall and climb from there. Requires: {
"notable": "HiJumpless Dive"
}
{
"noBlueSuit": {}
}
"canSuitlessLavaDive"
"canUseIFrames"
"canTrickyWallJump"
"canFastWallJumpClimb"
"canUseEnemies"
"canCameraManip"
{
"heatFrames": 600
}
{
"gravitylessLavaFrames": 500
}
{
"enemyDamage": {
"enemy": "Namihe",
"type": "fireball",
"hits": 1
}
} |
From: 5
Lava, Center Namihe
To: 3
Above Lava Junction
Use the bottom-most right-side Namihe to generate a flame and walk with it to the bottommost left Namihe head. Pause and use a turnaround animation as Samus is hit by the flame to cancel out knockback frames. Manually refill energy from reserves. While invulnerability frames are active, wall jump up the spikes either 2 or 3 times and jump accross to catch the middle wall and climb from there. Requires: {
"notable": "HiJumpless Dive"
}
{
"noBlueSuit": {}
}
"canSuitlessLavaDive"
"canUseIFrames"
"canTrickyWallJump"
"canFastWallJumpClimb"
"canUseEnemies"
"canCameraManip"
{
"heatFrames": 175
}
{
"gravitylessLavaFrames": 175
}
"h_pauseAbuseMinimalReserveRefill"
{
"heatFrames": 375
}
{
"gravitylessLavaFrames": 300
} |
From: 1
Right Door
To: 4
Junction Above Hidden Platform Item
Clear the Sovas while standing in a safe spot from the Dragon Fireballs. Bring each Dragon on screen one at a time so that there are fewer projectiles to avoid. Requires: "canCameraManip"
"canDodgeWhileShooting"
{
"heatFrames": 840
} |
From: 4
Left Shaft - Top Right Door
To: 4
Left Shaft - Top Right Door
Jump and aim down two to three times to activate the Multiviola. Requires: "h_heatProof"
{
"resetRoom": {
"nodes": [
4
]
}
}
{
"cycleFrames": 200
}
"canCameraManip"
{
"or": [
{
"and": [
"canDash",
{
"or": [
"Plasma",
"Wave",
"Spazer",
{
"cycleFrames": 30
}
]
}
]
},
{
"haveBlueSuit": {}
}
]
}Resets obstacles: R-Mode Farm cycle drops: 1 Multiviola |
From: 4
Left Shaft - Top Right Door
To: 6
Left Shaft - Top Junction
Spawn the Alcoon, then run back to the right so it will not stop and fire projectiles. Then wait for it to walk off the ledge. Requires: "canCameraManip"
"canTrickyUseFrozenEnemies"
{
"heatFrames": 750
}
{
"or": [
"canDash",
{
"heatFrames": 40
}
]
} |
From: 4
Left Shaft - Top Right Door
To: 6
Left Shaft - Top Junction
Jump and aim down twice to bring the Multiviola below onto camera. Freeze it and use it as a platform. Entrance condition: {
"comeInNormally": {}
}Requires: "canCameraManip"
"canTrickyUseFrozenEnemies"
{
"heatFrames": 330
} |
From: 5
Bottom Floating Platform Junction
To: 4
Top Floating Platform Junction
Bring up the Gamets to the platform above, in order to delay farming them. If not enough big energy drops spawn, go back down, farm up, and try again. Requires: "canFarmWhileShooting"
"canBePatient"
{
"or": [
"canWallJump",
{
"and": [
"HiJump",
"canCameraManip",
"canInsaneJump"
]
},
"SpaceJump",
"h_crouchJumpDownGrab",
"canTrickySpringBallJump",
{
"and": [
"h_useMorphBombs",
{
"tech": "canUnmorphBombBoost"
}
]
}
]
}
{
"heatFrames": 35
} |
From: 2
Right Door
To: 1
Left Door
Use the Geruta to get up to the top left ledge while also getting it to swoop into the top left region. This requires many jumps from below to get it to swoop up onto the ledge and not get stuck. When the Geruta is heading into the right spot, use it as a platform to get up as well. Requires: {
"noBlueSuit": {}
}
"canComplexGMode"
"h_heatProof"
"canBeVeryPatient"
"canCameraManip"
"canTrickyUseFrozenEnemies"
{
"or": [
"HiJump",
"canSpringBallJumpMidAir"
]
}
{
"or": [
{
"ammo": {
"type": "Super",
"count": 1
}
},
{
"obstaclesCleared": [
"A"
]
}
]
}Exit condition: {
"leaveWithGModeSetup": {}
}Collects items: 3 Unlocks doors: {"types":["ammo"],"requires":[]}Dev note: It's possible to avoid the item, but the Geruta will get stuck on it and usually require many swoops to get past it. |
From: 2
Right Door
To: 1
Left Door
Lure the Geruta to the left door. This may require many jumps to get it to swoop up onto the ledge and not get stuck. Requires: "canComplexGMode"
"h_heatProof"
"canBePatient"
"canCameraManip"
"Morph"
{
"or": [
"canTrickyDodgeEnemies",
"SpaceJump",
"Charge",
"Ice",
"Plasma",
{
"ammo": {
"type": "Missile",
"count": 2
}
},
{
"ammo": {
"type": "Super",
"count": 2
}
},
{
"ammo": {
"type": "PowerBomb",
"count": 2
}
},
{
"enemyDamage": {
"enemy": "Dragon",
"type": "fireball",
"hits": 5
}
},
{
"and": [
"h_lavaProof",
{
"or": [
"ScrewAttack",
"h_bombThings"
]
}
]
}
]
}
{
"or": [
"SpaceJump",
{
"and": [
"HiJump",
"canSpeedyJump",
"canWallJump"
]
},
{
"and": [
{
"noBlueSuit": {}
},
"HiJump",
"canSpringBallJumpMidAir"
]
},
{
"and": [
{
"noBlueSuit": {}
},
"canBeVeryPatient",
{
"or": [
"canLongIBJ",
"canJumpIntoIBJ"
]
}
]
},
{
"and": [
"canBeVeryPatient",
"Grapple",
{
"or": [
"HiJump",
"canSpringBallJumpMidAir"
]
}
]
}
]
}
{
"or": [
{
"ammo": {
"type": "Super",
"count": 1
}
},
{
"obstaclesCleared": [
"A"
]
}
]
}Exit condition: {
"leaveWithGModeSetup": {}
}Collects items: 3 Unlocks doors: {"types":["ammo"],"requires":[]}Dev note: It's possible to avoid the item, but the Geruta will get stuck on it and usually require many swoops to get past it. |
From: 2
Right Door
To: 1
Left Door
Lure the Geruta to the left door. This may require many jumps to get it to swoop up onto the ledge and not get stuck. To safely pass the Geruta without a hit, jump left below it, to get it to swoop left before going up. Requires: "canComplexGMode"
"h_heatProof"
"canBePatient"
"canCameraManip"
{
"or": [
"canInsaneJump",
"Ice",
"h_lavaProof",
{
"enemyDamage": {
"enemy": "Geruta",
"type": "contact",
"hits": 1
}
},
{
"and": [
"canUseIFrames",
{
"enemyDamage": {
"enemy": "Dragon",
"type": "fireball",
"hits": 1
}
},
{
"lavaFrames": 55
}
]
}
]
}
{
"or": [
"canTrickyDodgeEnemies",
"SpaceJump",
"Charge",
"Ice",
"Plasma",
{
"ammo": {
"type": "Missile",
"count": 2
}
},
{
"ammo": {
"type": "Super",
"count": 2
}
},
{
"enemyDamage": {
"enemy": "Dragon",
"type": "fireball",
"hits": 5
}
},
{
"and": [
"h_lavaProof",
"ScrewAttack"
]
}
]
}
{
"or": [
"SpaceJump",
{
"and": [
"HiJump",
"canSpeedyJump",
"canWallJump"
]
},
{
"and": [
"canBeVeryPatient",
"HiJump",
"Grapple"
]
}
]
}
{
"or": [
{
"ammo": {
"type": "Super",
"count": 1
}
},
{
"obstaclesCleared": [
"A"
]
}
]
}Exit condition: {
"leaveWithGModeSetup": {}
}Collects items: 3 Unlocks doors: {"types":["ammo"],"requires":[]}Dev note: It's possible to avoid the item, but the Geruta will get stuck on it and usually require many swoops to get past it. |
|
Jump and aim down to make the Dragons active by bringing them on camera. Requires: {
"noBlueSuit": {}
}
{
"resetRoom": {
"nodes": [
2
]
}
}
"h_heatProof"
{
"or": [
{
"and": [
"Morph",
"Grapple",
"Plasma",
"canCameraManip",
{
"cycleFrames": 1620
}
]
},
{
"and": [
"HiJump",
"canSpeedyJump",
"Grapple",
"Plasma",
"canCameraManip",
{
"cycleFrames": 1920
}
]
},
{
"and": [
"SpaceJump",
"Plasma",
"canCameraManip",
{
"cycleFrames": 1770
}
]
},
{
"and": [
"canPreciseSpaceJump",
"ScrewAttack",
{
"cycleFrames": 1440
}
]
}
]
}Resets obstacles: A Farm cycle drops: 5 Dragon |
From: 2
Far Left Door
To: 4
Bottom Right Door
Use a complex lure to get the right-most Multiviola (which is initially moving to the left) to the bottom right door. Break a specific set of the speed blocks and let the Multiviola bounce off of them before breaking the rest. There are multiple ways to get the Multiviola to the right door, all of which require breaking the speed blocks to the left of the crumble bridge and some to them to the right. Break the speed blocks in one of the following ways: 1. The first 2 columns. 2. The first 8 columns. 3. The entire first chunk (10 columns). 4. The first chunk and all but the last column of the second (leaving an isolated block). 5. The first two chunks and all but the last column of the third (leaving an isolated stack of two blocks). Then let the Multiviola bounce several times until it is in a consistent pattern before breaking the rest. Note that option number 3 puts the Multiviola into an odd pattern where it has two distinct alternating cycles; wait for it to hit the right of the right stalactite, then the wall, then break the remaining blocks. Requires: "canTrickyGMode" "h_heatProof" "canBePatient" "canCameraManip" "h_getBlueSpeedMaxRunway" Exit condition: {
"leaveWithGModeSetup": {}
}Unlocks doors: {"types":["ammo"],"requires":[]}Dev note: It appears that there is no way to get the multiviola to get to one of the upper doors on the shaft; There are two known cycles to get it to start going up, but both get stuck in the same location. The first three Multiviolas aren't able to make it to the right shaft, regardless of how the door and speed blocks are manipulated. The fourth was tested by removing a single column of speed blocks at a time and clearing the rest before and after it gets to its cycle. The bottom door is rarely hit, but opening it during the cycle was not always tested thoroughly. It doesn't appear to be possible to lure it higher, but other things to try include: breaking speed blocks less than a column at a time, breaking some of the blocks then some more (not all of the remaining), or precisely timing the breaking of the crumble blocks. FIXME: This could probably be done with a blue suit. |
|
Jump and aim down to bring the Sova on camera. Farm with Grapple while crouched and touching the crumble platform. Requires: "h_heatProof"
"canUseGrapple"
"canCameraManip"
{
"resetRoom": {
"nodes": [
1
]
}
}
{
"simpleCycleFrames": 105
}
{
"cycleFrames": 25
}Resets obstacles: A Farm cycle drops: 1 Sova |
|
Jump and aim down to lower the camera so the middle platform Sova starts moving. Then freeze it by aiming down, shoot the shot block, and use the Sova as a stable platform. Requires: "canDash"
{
"notable": "Top Item Frozen Sova"
}
"canTrickyUseFrozenEnemies"
"canCarefulJump"
"canCameraManip"
{
"heatFrames": 220
}Clears obstacles: A Dev note: Wall jumping and using the same frozen Sova, or falling onto the Sova just below the item and then jumping to the top Sova could be added, but this would require an obstacle to ensure they haven't fallen or died, and is not really easier than a crumble jump. |
|
Jump and aim down to lower the camera so the middle platform Sova starts moving. Then shoot the shot block and walljump off the left side of the middle platform to reach the item. Requires: "canDash"
"canTrickyWallJump"
"canTrickyJump"
"canCameraManip"
{
"heatFrames": 230
}Clears obstacles: A |
From: 5
Small Platforms Junction
To: 1
Left Door
Lure a Mella from the right by breaking the speed blocks or using Morph. Then manipulate it to go high enough to be used in the left doorway. Raise the Mella up to just below the door's ledge and then climb up to the door. Reposition the Mella once towards the door, and before it finishes moving, stand in the doorframe so that the next Mella movement will hit Samus. If it drops below the camera it will be necessary to go back down and raise it again. Requires: "canManipulateMellas"
"canCameraManip"
"canBePatient"
"canComplexGMode"
{
"or": [
"SpaceJump",
"canTrickyUseFrozenEnemies",
{
"and": [
"HiJump",
"canSpringBallJumpMidAir"
]
},
{
"and": [
"HiJump",
"canSpeedyJump",
"canTrickyWallJump"
]
}
]
}
{
"or": [
"canTrickyDodgeEnemies",
{
"enemyDamage": {
"enemy": "Mella",
"type": "contact",
"hits": 2
}
}
]
}
{
"or": [
{
"obstaclesCleared": [
"B"
]
},
"Morph"
]
}Exit condition: {
"leaveWithGModeSetup": {}
}Unlocks doors: {"types":["ammo"],"requires":[]} |
From: 5
Bottom Junction Right of Morph Tunnel
To: 5
Bottom Junction Right of Morph Tunnel
The Magdollite can be farmed from the left without activating the Holtzes. Or from the right by trapping the Holtz by quickly jumping past them. Requires: "h_heatProof"
{
"cycleFrames": 330
}
{
"or": [
{
"and": [
"canTrickyJump",
"canCameraManip"
]
},
"Plasma",
"ScrewAttack",
{
"and": [
"Wave",
{
"or": [
"Spazer",
"Ice"
]
}
]
}
]
}
{
"or": [
"canTrickyJump",
{
"cycleFrames": 200
}
]
}Farm cycle drops: 3 Magdollite |
From: 5
Firefleas Bottom Left Platform Junction
To: 7
Fireflea Statue's Claw Junction
Set up to Damage boost off the highest Fireflea at the apex of Samus' jump, right next to the statue's claw. The positioning of the Fireflea is very precise, and this can only be attempted once. To position the Fireflea, jump to move it on camera and move it off camera while it is at the top of its circle. Be careful not to touch the Fireflea while setting up its precise positioning. Note that morphing can make the boost a little easier, and a crouch jump can also help, but is not required. Requires: "HiJump"
"canCameraManip"
"canHorizontalDamageBoost"
"canTrickyDodgeEnemies"
{
"or": [
"canCrouchJump",
"canTrickyCarryFlashSuit"
]
}
{
"enemyDamage": {
"enemy": "Fireflea",
"type": "contact",
"hits": 1
}
} |
From: 6
Bottom Right Corner Junction
To: 9
Junction Below Crumble Blocks, Set Up to Clip
Guide the bottom-right Multiviola to the upper section of the room. Lure the Dessgeegas away to avoid killing the Multiviola. Remove all enemies and possibly also the row of bomb blocks with a power bomb before attempting to guide the Multiviola. It will need to bounce each room segment multiple times before lining up to go through each shot block. Ice can be used to more safely get around the Multiviola as it is bouncing. However, opening the left side door will change the bounce locations and make the strat no longer possible. Instead the enemy can be allowed to go off camera and then Samus can prepare to run away as it comes back. Waiting in the next room segment is a safe way to wait for the Multiviola to bounce and still be able to break shot blocks. Requires: {
"notable": "Multiviola Ice Clip"
}
"h_heatProof"
"canTrickyUseFrozenEnemies"
{
"or": [
"canCameraManip",
"canDodgeWhileShooting"
]
}
{
"obstaclesNotCleared": [
"E"
]
}
{
"enemyDamage": {
"enemy": "Multiviola",
"type": "contact",
"hits": 5
}
}
{
"or": [
{
"enemyKill": {
"enemies": [
[
"Dessgeega"
],
[
"Dessgeega"
],
[
"Dessgeega"
]
],
"explicitWeapons": [
"Plasma",
"ScrewAttack",
"Charge+Ice+Wave",
"Ice+Wave+Spazer",
"Missile",
"Super"
]
}
},
{
"obstaclesCleared": [
"C"
]
}
]
}
{
"or": [
{
"enemyKill": {
"enemies": [
[
"Dessgeega",
"Dessgeega"
]
],
"explicitWeapons": [
"Plasma",
"ScrewAttack",
"Charge+Ice+Wave",
"Ice+Wave+Spazer",
"Missile",
"Super"
]
}
},
{
"obstaclesCleared": [
"F"
]
}
]
}Clears obstacles: C, D, F Dev note: This is not just getting up there, but also bringing the correct Multiviola with you. Five hits for leniency because it is hard to avoid damage even while freezing the Multiviola. 2.5 minute strat with Plasma |
From: 7
Junction Left of Morph Tunnel
To: 4
Junction Right of Power Bomb Blocks
Roll under the Dessgeegas until all three move off camera and stop chasing Samus. Roll directly from the Morph tunnel, past the first Dessgeega. Stop and let it jump left of Samus, then move it off camera on the next jump. Back away from the Left ground hopper then roll under it. Lastly, manipulate the ceiling hopper off camera if it has followed Samus this far. Requires: {
"notable": "Avoid Dessgeegas by Rolling"
}
"Morph"
"canCameraManip"
{
"heatFrames": 210
} |
|
Roll most of the way into the morph tunnel to unlock the camera scroll, then roll back left, crouch, fire a shot, and follow it to the right, to clear the shot blocks. Requires: {
"haveBlueSuit": {}
}
"Morph"
"canCameraManip"
"canHeroShot" |
From: 3
Bottom Left Door
To: 4
Bottom Chozo Item
Break the shot blocks with Power Beam by first rolling into the morph tunnel to unlock camera scroll for this room. The blocks can now be cleared from the left side by shooting and quickly scrolling the camera to the right a small amount. A shot from crouch will reach the bottom block by following the shot as a ball, or wave beam works from the stairs. Screw Attack is still needed to clear the bomb blocks. Requires: {
"notable": "Missile Chozo Camera Unlock"
}
"ScrewAttack"
"Morph"
"canCameraManip"
"canHeroShot" |
From: 3
Bottom Left Door
To: 4
Bottom Chozo Item
Get through the Morph tunnel to the robot area. Flush the robots into the spike pits and Crystal Flash to clear the Chozo statue. Shinecharge and then use a speedy jump up to the spikes in the right shaft. Pause, and jump into the spikes. Delay the damage boost so that Samus will not hit the spikes again after interrupt. Alternatively, flush both robots into the left pit and use the right pit to pause abuse and damage boost to gain some height. Quickly morph after the interrupt to avoid taking more than one spike hit. Entrance condition: {
"comeInWithRMode": {}
}Requires: "f_DefeatedPhantoon"
{
"or": [
"h_bombThings",
{
"and": [
"ScrewAttack",
"Morph",
{
"or": [
"Plasma",
{
"and": [
{
"notable": "Missile Chozo Camera Unlock"
},
"canCameraManip",
"canHeroShot"
]
}
]
}
]
}
]
}
"h_CrystalFlashForReserveEnergy"
{
"canShineCharge": {
"usedTiles": 25,
"openEnd": 2
}
}
"canHorizontalDamageBoost"
{
"autoReserveTrigger": {}
}
"canRModePauseAbuseSparkInterrupt"
{
"or": [
"canWallJump",
"HiJump",
"canTrickyDashJump",
{
"spikeHits": 1
}
]
}Clears obstacles: A Collects items: 4 |
From: 3
Bottom Left Door
To: 4
Bottom Chozo Item
Land on the crumble blocks while unmorphing, in order to retain temporary blue while falling, breaking the bomb blocks Roll most of the way into the morph tunnel to unlock the camera scroll, then roll back left, crouch, fire a shot, and follow it to the right, to clear the shot blocks. It is possible to keep a flash suit with this method. Entrance condition: {
"comeInSpeedballing": {
"runway": {
"length": 0,
"openEnd": 1
}
}
}Requires: {
"tech": "canTemporaryBlue"
}
{
"notable": "Missile Chozo Camera Unlock"
}
"canCameraManip"
"canHeroShot"Dev note: If we had a comeInWithSpeedball entrance condition, it should be used instead. |
From: 3
Bottom Left Door
To: 4
Bottom Chozo Item
Land on the crumble blocks while unmorphing, in order to retain temporary blue while falling, breaking the bomb blocks Roll most of the way into the morph tunnel to unlock the camera scroll, then roll back left, crouch, fire a shot, and follow it to the right, to clear the shot blocks. Entrance condition: {
"comeInWithTemporaryBlue": {}
}Requires: "canChainTemporaryBlue"
{
"notable": "Missile Chozo Camera Unlock"
}
"canCameraManip"
"canHeroShot" |
From: 3
Middle Right Door
To: 3
Middle Right Door
Requires: {
"resetRoom": {
"nodes": [
3
]
}
}
{
"or": [
{
"and": [
"Gravity",
"canDash",
{
"or": [
"HiJump",
"canWallJump",
"SpaceJump"
]
},
{
"or": [
{
"and": [
"Plasma",
{
"cycleFrames": 590
}
]
},
{
"and": [
"ScrewAttack",
{
"cycleFrames": 590
}
]
},
{
"and": [
"Wave",
{
"cycleFrames": 615
}
]
},
{
"and": [
"Spazer",
{
"cycleFrames": 640
}
]
},
{
"and": [
"Ice",
{
"cycleFrames": 690
}
]
},
{
"cycleFrames": 920
}
]
}
]
},
{
"and": [
"canCameraManip",
"canFarmWhileShooting",
{
"or": [
{
"and": [
"Gravity",
"canDash",
{
"cycleFrames": 770
}
]
},
{
"cycleFrames": 1155
}
]
}
]
}
]
}Resets obstacles: A, B, C, R-Mode Farm cycle drops: 1 Skultera |
From: 4
Top Right Door
To: 4
Top Right Door
It is required to avoid double hitting the Skultera with the Power Bomb, and to position the Crystal Flash so that the Skultera can hit Samus from above so it avoids the light orb. This is particularly precise because the fish is not global, which makes it so Samus needs to be closer to the fish when laying the Power Bomb. Samus also needs to be able to manipulate the camera, which can be difficult while morphed. Roll up the hill a bit until the Skultera is close to the wall, then move away so that it is a bit off camera. Crystal Flash while Samus is on one of the two lower sloped tiles and the Skultera is just off camera to the right, in order to lure it back to the left. This can be done with no enemy damage reduction and up to 2 E-Tanks or a 50% enemy damage reduction and no E-Tanks; a 75% reduction is not recommended and would require disabling and reenabling suits with a precise pause abuse. Entrance condition: {
"comeInWithGMode": {
"mode": "direct",
"morphed": true
}
}Requires: "canCameraManip"
"h_artificialMorphComplexRModeCrystalFlashInterrupt"
{
"ammo": {
"type": "Missile",
"count": 10
}
}
{
"ammo": {
"type": "Super",
"count": 10
}
}
{
"ammo": {
"type": "PowerBomb",
"count": 3
}
}
{
"or": [
"h_partialEnemyDamageReduction",
{
"resourceAtMost": [
{
"type": "RegularEnergy",
"count": 19
}
]
},
{
"and": [
{
"resourceCapacity": [
{
"type": "RegularEnergy",
"count": 199
}
]
},
{
"resourceCapacity": [
{
"type": "ReserveEnergy",
"count": 199
}
]
}
]
}
]
}
{
"or": [
"Gravity",
"HiJump"
]
}Dev note: FIXME: A 75% damage reduction method needs to be documented for if Samus only has Gravity and it provides 75% reduction. If there were another node near the fish, that could reduce a small amount of duplication. |
|
It is required to avoid double hitting the Skultera with the Power Bomb, and to position the Crystal Flash so that the Skultera can hit Samus from above so it avoids the light orb. This is particularly precise because the fish is not global, which makes it so Samus needs to be closer to the fish when laying the Power Bomb. Moonwalk to move the camera to the right, but not all the way. The Skultera should be able to move back and forth while Samus is on one of the two lower sloped tiles. Crystal Flash and time the Power Bomb so that its first hit is when the Skultera is against the right wall. This can be done with no enemy damage reduction and up to 2 E-Tanks or a 50% enemy damage reduction and no E-Tanks; a 75% reduction is not recommended and would require disabling and reenabling suits with a precise pause abuse. Requires: {
"obstaclesCleared": [
"R-Mode"
]
}
"canCameraManip"
"canMoonwalk"
"canComplexRModeCrystalFlashInterrupt"
{
"ammo": {
"type": "Missile",
"count": 10
}
}
{
"ammo": {
"type": "Super",
"count": 10
}
}
{
"or": [
"h_partialEnemyDamageReduction",
{
"resourceAtMost": [
{
"type": "RegularEnergy",
"count": 19
}
]
},
{
"and": [
{
"resourceCapacity": [
{
"type": "RegularEnergy",
"count": 199
}
]
},
{
"resourceCapacity": [
{
"type": "ReserveEnergy",
"count": 199
}
]
}
]
}
]
}
{
"or": [
"Gravity",
"HiJump",
"canSpringBallJumpMidAir"
]
}Resets obstacles: R-Mode Dev note: FIXME: A 75% damage reduction method needs to be documented for if Samus only has Gravity and it provides 75% reduction. If there were another node near the fish, that could reduce a small amount of duplication. |
From: 4
Top Right Door
To: 9
Junction Below Speed Blocks
It is required to avoid double hitting the Skultera with the Power Bomb, and to position the Crystal Flash so that the Skultera can hit Samus from above so it avoids the light orb. This is particularly precise because the fish is not global, which makes it so Samus needs to be closer to the fish when laying the Power Bomb. Samus also needs to be able to manipulate the camera, which can be difficult while morphed. Roll up the hill a bit until the Skultera is close to the wall, then move away so that it is a bit off camera. Crystal Flash while Samus is on one of the two lower sloped tiles and the Skultera is just off camera to the right, in order to lure it back to the left. This can be done with no enemy damage reduction and up to 2 E-Tanks or a 50% enemy damage reduction and no E-Tanks; a 75% reduction is not recommended and would require disabling and reenabling suits with a precise pause abuse. Entrance condition: {
"comeInWithGMode": {
"mode": "direct",
"morphed": true
}
}Requires: "canCameraManip"
"h_artificialMorphComplexRModeCrystalFlashInterrupt"
{
"ammo": {
"type": "Missile",
"count": 10
}
}
{
"ammo": {
"type": "Super",
"count": 10
}
}
{
"ammo": {
"type": "PowerBomb",
"count": 3
}
}
{
"or": [
"h_partialEnemyDamageReduction",
{
"resourceAtMost": [
{
"type": "RegularEnergy",
"count": 19
}
]
},
{
"and": [
{
"resourceCapacity": [
{
"type": "RegularEnergy",
"count": 199
}
]
},
{
"resourceCapacity": [
{
"type": "ReserveEnergy",
"count": 199
}
]
}
]
}
]
}Dev note: FIXME: A 75% damage reduction method needs to be documented for if Samus only has Gravity and it provides 75% reduction. If there were another node near the fish, that could reduce a small amount of duplication. |
From: 4
Top Right Door
To: 9
Junction Below Speed Blocks
It is required to avoid double hitting the Skultera with the Power Bomb, and to position the Crystal Flash so that the Skultera can hit Samus from above so it avoids the light orb. This is particularly precise because the fish is not global, which makes it so Samus needs to be closer to the fish when laying the Power Bomb. Moonwalk to move the camera to the right, but not all the way. The Skultera should be able to move back and forth while Samus is on one of the two lower sloped tiles. Crystal Flash and time the Power Bomb so that its first hit is when the Skultera is against the right wall. This can be done with no enemy damage reduction and up to 2 E-Tanks or a 50% enemy damage reduction and no E-Tanks; a 75% reduction is not recommended and would require disabling and reenabling suits with a precise pause abuse. Requires: {
"obstaclesCleared": [
"R-Mode"
]
}
"canCameraManip"
"canMoonwalk"
"canComplexRModeCrystalFlashInterrupt"
{
"ammo": {
"type": "Missile",
"count": 10
}
}
{
"ammo": {
"type": "Super",
"count": 10
}
}
{
"or": [
"h_partialEnemyDamageReduction",
{
"resourceAtMost": [
{
"type": "RegularEnergy",
"count": 19
}
]
},
{
"and": [
{
"resourceCapacity": [
{
"type": "RegularEnergy",
"count": 199
}
]
},
{
"resourceCapacity": [
{
"type": "ReserveEnergy",
"count": 199
}
]
}
]
}
]
}Resets obstacles: R-Mode Dev note: FIXME: A 75% damage reduction method needs to be documented for if Samus only has Gravity and it provides 75% reduction. If there were another node near the fish, that could reduce a small amount of duplication. |
From: 10
Direct G-Mode Morph, On Ledge Above Speed Blocks
To: 4
Top Right Door
It is required to avoid double hitting the Skultera with the Power Bomb, and to position the Crystal Flash so that the Skultera can hit Samus from above so it avoids the light orb. This is particularly precise because the fish is not global, which makes it so Samus needs to be closer to the fish when laying the Power Bomb. Samus also needs to be able to manipulate the camera, which can be difficult while morphed. Roll up the hill a bit until the Skultera is close to the wall, then move away so that it is a bit off camera. Crystal Flash while Samus is on one of the two lower sloped tiles and the Skultera is just off camera to the right, in order to lure it back to the left. This can be done with no enemy damage reduction and up to 2 E-Tanks or a 50% enemy damage reduction and no E-Tanks; a 75% reduction is not recommended and would require disabling and reenabling suits with a precise pause abuse. Requires: {
"or": [
{
"and": [
"Gravity",
"h_artificialMorphIBJ"
]
},
{
"and": [
"Gravity",
"HiJump",
"h_artificialMorphSpringBall"
]
},
{
"and": [
"h_artificialMorphSpringBall",
"canGravityJump"
]
},
"h_artificialMorphDoubleSpringBallJump"
]
}
"canCameraManip"
"h_artificialMorphComplexRModeCrystalFlashInterrupt"
{
  "ammo": {
    "type": "Missile",
    "count": 10
  }
}
{
  "ammo": {
    "type": "Super",
    "count": 10
  }
}
{
  "ammo": {
    "type": "PowerBomb",
    "count": 3
  }
}
{
  "or": [
    "h_partialEnemyDamageReduction",
    {
      "resourceAtMost": [
        {
          "type": "RegularEnergy",
          "count": 19
        }
      ]
    },
    {
      "and": [
        {
          "resourceCapacity": [
            {
              "type": "RegularEnergy",
              "count": 199
            }
          ]
        },
        {
          "resourceCapacity": [
            {
              "type": "ReserveEnergy",
              "count": 199
            }
          ]
        }
      ]
    }
  ]
}
Dev note: FIXME: A 75% damage reduction method needs to be documented for if Samus only has Gravity and it provides 75% reduction. |
|
It is possible to place a Power Bomb on the ledge above to kill the crab before going down and into the tunnel. Entrance condition: {
"comeInWithGMode": {
"mode": "any",
"morphed": true
}
}Requires: "canCameraManip"
{
"or": [
"Morph",
"h_artificialMorphSpringBall",
{
"and": [
"canComplexGMode",
"h_artificialMorphPowerBomb"
]
},
{
"and": [
"Gravity",
"h_artificialMorphLongIBJ"
]
},
{
"and": [
"Gravity",
"h_artificialMorphBombHorizontally"
]
},
{
"and": [
{
"enemyDamage": {
"enemy": "Sciser",
"type": "contact",
"hits": 1
}
},
{
"or": [
"h_EverestMorphTunnelExpanded",
{
"enemyDamage": {
"enemy": "Sciser",
"type": "contact",
"hits": 1
}
}
]
}
]
}
]
} |
|
Near the bottom left door, there are three pathways upwards: one directly above the door and two to the right. Between the right pathways, is a crab moving to the right. Shooting a Super against the wall will make it fall off and move left. Climb the crab up the left wall. Watch out for the crab above that is heading into the morph tunnel. Jump to the right platform before the upward crab goes into the tunnel. Lure the crab out of the hole by running to the right of the hill then back left or use moonwalk to scroll the camera. Near the end is particularly tricky. When the crab is on the underside of the metal blocks, freeze it and use it as a stepping platform. To do this, crouch jump and while moving upwards, hold left against the crab to get extra vertical movement. Down grabbing at the top is helpful. Requires: "canSuitlessMaridia"
"canTrickyJump"
"canTrickyUseFrozenEnemies"
{
"or": [
{
"and": [
"h_underwaterCrouchJumpDownGrab",
"canBePatient"
]
},
"HiJump",
"canSpringBallJumpMidAir"
]
}
"canCameraManip"
{
"ammo": {
"type": "Super",
"count": 1
}
} |
From: 7
Lower Hills Junction
To: 10
Upper Right Ledge Junction
Climb the bottom right wall of the room with Ice and HiJump while also luring a crab to the next platform to be used to ascend the next wall. The trickiest part of the climb is getting past the final overhang. This can be done with an underwater wall jump if the crab is low, a precise crouch jump and down grab if it is higher, or a flatley jump off of the crab if it is higher still. Two crabs makes it significantly easier to lure one to the top - simply let one go ahead of Samus. For a faster setup, one crab may be used by perform the final jump as it is unfreezing so it starts moving upward. Then go to the lower ground a bit to the right, jump and aim down to lower the camera to lure the crab. Note: The hardest part of this climb is the pixel precision when jumping around a ledge. Too many pixels: left is a fall, right you clip through the crab, low you miss the jump and fall, high is a bonk or crab clip. Requires: {
"notable": "Right Crab Climb with Only HiJump"
}
"canSuitlessMaridia"
"canCrazyCrabClimb"
"HiJump"
"canTrickyJump"
"canCameraManip"
{
"or": [
"canUnderwaterWallJump",
"h_underwaterCrouchJumpDownGrab",
"canFlatleyJump",
"canInsaneJump"
]
}Clears obstacles: A, B |
From: 7
Lower Hills Junction
To: 10
Upper Right Ledge Junction
Use the crab near the bottom right door. Only one spring ball jump is needed, it is to get up onto the flat platform. After the spring ball jump, if the crab did not follow, go to the lower ground a bit to the right, jump and aim down to lower the camera to lure the crab. Note: The hardest part of this climb is the pixel precision when jumping around a ledge. Too many pixels: left is a fall, right you clip through the crab, low you miss the jump and fall, high is a bonk or crab clip. Requires: {
"notable": "Right Crab Climb with Only Spring Ball"
}
"canSuitlessMaridia"
"canCrazyCrabClimb"
"canTrickySpringBallJump"
"canTrickyJump"
"canCameraManip"Clears obstacles: A, B |
From: 10
Upper Right Ledge Junction
To: 4
Top Right Door
Requires having already lured a crab to this location, likely from above the bottom right door. Freeze the crab very high before going to the ledge on the right, delay jumping so it thaws and moves up a bit while on screen, jump aim down to lower the camera and lure it more. Alternatively, using moonwalk and a flatley jump at the top can prevent needing the crab again. Note: The hardest part of this climb is the pixel precision when jumping around a ledge. Too many pixels: left is a fall, right you clip through the crab, low you miss the jump and fall, high is a bonk or crab clip. Requires: {
"notable": "Right Crab Climb with Only HiJump"
}
"canSuitlessMaridia"
"canCrazyCrabClimb"
"HiJump"
"canTrickyJump"
"canCameraManip"
{
"obstaclesCleared": [
"B"
]
} |
From: 10
Upper Right Ledge Junction
To: 4
Top Right Door
Requires having already lured a crab to this location, likely from above the bottom right door. Freeze the crab high before going to the ledge on the right, delay spring ball jumping so it thaws and moves up while on screen, jump aim down to lower the camera and lure it more. Freeze the crab again to use as a platform, approximately knee high. Jump on it and then jump to the platform above. Note: The hardest part of this climb is the pixel precision when jumping around a ledge. Too many pixels: left is a fall, right you clip through the crab, low you miss the jump and fall, high is a bonk or crab clip. Requires: {
"notable": "Right Crab Climb with Only Spring Ball"
}
"canSuitlessMaridia"
"canCrazyCrabClimb"
"canTrickySpringBallJump"
"canTrickyJump"
"canCameraManip"
{
"obstaclesCleared": [
"B"
]
} |
From: 1
Left Door
To: 2
Left Sand Pit
Reach the sand while luring a Puyo just off camera to where moonwalking on the partially submerged platform can lure the Puyo. Crouch in the sand and press forward when near the transition to stand up and touch the transition on the first frame of standing. Requires: "h_navigateUnderwater"
{
"noBlueSuit": {}
}
"canPlayInSand"
"canMoonwalk"
"canCameraManip"
"canDownwardGModeSetup"
"canOffScreenMovement"
"canTrickyGMode"Exit condition: {
"leaveWithGModeSetup": {}
} |
From: 1
Left Door
To: 3
Right Sand Pit
Reach the sand while luring a Puyo just off camera to where moonwalking on the partially submerged platform can lure the Puyo. Quickly move to the right section before the Puyo hits Samus. Crouch in the sand and press forward when near the transition to stand up and touch the transition on the first frame of standing. Requires: "h_navigateUnderwater"
{
"noBlueSuit": {}
}
"canPlayInSand"
"canMoonwalk"
"canCameraManip"
"canDownwardGModeSetup"
"canOffScreenMovement"
"canTrickyGMode"Exit condition: {
"leaveWithGModeSetup": {}
} |
From: 2
Right Door
To: 2
Right Door
Even when suitless, it's possible to stand far enough that the acid attack doesn't spawn. Botwoon still gets hit. So there's a safe way to take no damage. Requires: {
"notable": "Back-Side Fight with Charge and Wave"
}
"canSuitlessMaridia"
"Charge"
"Wave"
{
"or": [
"Plasma",
"canTrickyDodgeEnemies",
{
"and": [
"canDodgeWhileShooting",
{
"enemyDamage": {
"enemy": "Botwoon 1",
"type": "acid",
"hits": 2
}
}
]
},
{
"and": [
"Spazer",
"Ice",
{
"enemyDamage": {
"enemy": "Botwoon 1",
"type": "acid",
"hits": 1
}
},
{
"or": [
"canDodgeWhileShooting",
{
"enemyDamage": {
"enemy": "Botwoon 1",
"type": "acid",
"hits": 1
}
}
]
}
]
},
{
"and": [
"Spazer",
{
"enemyDamage": {
"enemy": "Botwoon 1",
"type": "acid",
"hits": 4
}
}
]
},
{
"enemyDamage": {
"enemy": "Botwoon 1",
"type": "acid",
"hits": 6
}
},
{
"and": [
"canCameraManip",
"canBePatient"
]
}
]
}Clears obstacles: f_DefeatedBotwoon Sets flags: f_DefeatedBotwoon |
|
Climb a mochtroid with ice using the wall to help guide them. It is very easy to take damage if not preemptive with freezes. Mochtroid movement and freeze timing gets harder at the waterline. Requires: "h_navigateUnderwater"
"canMochtroidIceClimb"
"canPlayInSand"
"canCameraManip"
"canTrickyJump"
{
"or": [
"Gravity",
"HiJump"
]
}
{
"or": [
"canInsaneJump",
{
"enemyDamage": {
"enemy": "Mochtroid",
"type": "contact",
"hits": 3
}
}
]
}
"h_complexToCarryFlashSuit" |
From: 1
Left Door
To: 3
Top Right Door
Climb a mochtroid with ice using the wall to help guide them. Mochtroid damage is pretty hard to avoid, but it is possible. Requires: {
"notable": "Mochtroid Suitless, HiJumpless Ice Climb"
}
"canSuitlessMaridia"
"canMochtroidIceClimb"
"canPlayInSand"
"canCameraManip"
"canTrickyJump"
{
"or": [
"canInsaneJump",
{
"enemyDamage": {
"enemy": "Mochtroid",
"type": "contact",
"hits": 3
}
}
]
}
{
"or": [
"canBePatient",
"canWallJump"
]
}
"h_trickyToCarryFlashSuit" |
|
Jump out of the sand to lure down mochtroids to freeze. It's recommended to bring a Mochtroid into the middle section of the room. Mochtroid damage is pretty hard to avoid, but can be. Mochtroid movement and freeze timing gets harder at the waterline. Requires: "h_navigateUnderwater"
{
"or": [
"Gravity",
"HiJump"
]
}
"canTrickyJump"
"canPlayInSand"
"canMochtroidIceClimb"
"canCameraManip"
{
"or": [
"canInsaneJump",
{
"enemyDamage": {
"enemy": "Mochtroid",
"type": "contact",
"hits": 3
}
}
]
}
"h_complexToCarryFlashSuit" |
From: 3
Top Right Door
To: 1
Left Door
Jump out of the sand to lure down mochtroids to freeze. It's recommended to bring a Mochtroid into the middle section of the room. Mochtroid damage is pretty hard to avoid, but can be. Requires: {
"notable": "Mochtroid Suitless, HiJumpless Ice Climb"
}
"canSuitlessMaridia"
"canTrickyJump"
"canPlayInSand"
"canMochtroidIceClimb"
"canCameraManip"
{
"or": [
"canInsaneJump",
{
"enemyDamage": {
"enemy": "Mochtroid",
"type": "contact",
"hits": 3
}
}
]
}
{
"or": [
"canBePatient",
"canWallJump"
]
}
"h_trickyToCarryFlashSuit" |
|
Damage boost up to the higher ledge using a Cacatac spike. Spikes only exist on camera so follow a vertically fired spike up to the correct height. Requires: "Gravity"
"canHorizontalDamageBoost"
"canCameraManip"
{
"enemyDamage": {
"enemy": "Cacatac",
"type": "spike",
"hits": 1
}
} |
|
If entering the room through the same door, stay on the ground (do not jump) to maintain the camera scroll, preventing the Menu from being lured up. Alternatively, kill or tank the Menu. Requires: {
"or": [
"canCameraManip",
{
"enemyDamage": {
"enemy": "Menu",
"type": "contact",
"hits": 1
}
}
]
}Exit condition: {
"leaveWithRunway": {
"length": 6,
"openEnd": 1
}
} |
|
A Menu can be activated by jumping on the doorway platform to scroll the camera down. A second Menu can be activated with a tricky jump onto the ledge on the right, without needing to fall down to the bottom part of the room. Requires: {
"resetRoom": {
"nodes": [
1
]
}
}
"canCameraManip"
"canDodgeWhileShooting"
"canTrickyJump"
{
"or": [
{
"and": [
"Grapple",
{
"cycleFrames": 220
}
]
},
{
"and": [
"Plasma",
{
"cycleFrames": 280
}
]
},
{
"and": [
"Wave",
{
"cycleFrames": 290
}
]
},
{
"and": [
{
"or": [
"ScrewAttack",
{
"haveBlueSuit": {}
}
]
},
{
"cycleFrames": 290
}
]
},
{
"and": [
"Spazer",
{
"cycleFrames": 330
}
]
},
{
"and": [
"canPseudoScrew",
{
"cycleFrames": 435
}
]
},
{
"and": [
"canTrickyJump",
{
"cycleFrames": 500
}
]
}
]
}
{
"or": [
"canFarmWhileShooting",
{
"cycleFrames": 400
}
]
}Resets obstacles: A Farm cycle drops: 2 Menu Dev note: FIXME: By dropping down, it would be possible to farm 4 or 5 Menus and also Owtches. |
|
Must come in from the right door and jump at the end of the runway to scroll the camera up without bringing the menu's on screen. Requires: "HiJump"
"canCameraManip"
{
"or": [
"h_bombThings",
"h_useSpringBall",
{
"and": [
"canMidAirMorph",
"Gravity",
"canTrickyJump"
]
},
"h_threeTileJumpMorph"
]
}
{
"canShineCharge": {
"usedTiles": 22,
"openEnd": 1
}
}
{
"enemyDamage": {
"enemy": "Menu",
"type": "contact",
"hits": 1
}
}
"canSlopeSpark"
"h_XModeSpikeHitLeniency"
{
"shinespark": {
"frames": 9,
"excessFrames": 9
}
}Dev note: FIXME: implement numeric enemy damage |
|
Either lead the pirate to the left wall or take a hit to gain i-frames to use the full runway to charge a spark To lead a pirate, have it shoot in the direction you want it to go. Then jump overhead and crouch on the other side. Or, jump and aim down while on the sloped tiles just above to lower the camera and wait for the pirate to move to the correct spot. Requires: {
"or": [
"Morph",
"canCarefulJump",
"canCameraManip"
]
}
{
"or": [
{
"getBlueSpeed": {
"usedTiles": 19,
"openEnd": 0
}
},
{
"and": [
{
"enemyDamage": {
"enemy": "Pink Space Pirate (standing)",
"type": "contact",
"hits": 2
}
},
"canUseIFrames",
{
"canShineCharge": {
"usedTiles": 21,
"openEnd": 0
}
},
{
"or": [
{
"and": [
"canMidairShinespark",
"canUseSpeedEchoes",
{
"shinespark": {
"frames": 1,
"excessFrames": 1
}
}
]
},
{
"and": [
"canHorizontalShinespark",
{
"shinespark": {
"frames": 25,
"excessFrames": 20
}
}
]
}
]
}
]
}
]
}Clears obstacles: C Dev note: A leniency laser hit is included for the i-frames method. |
|
It's possible to climb up with just ice by freezing the wall space pirates (who can be frozen and killed without Plasma). Clearing the gray door lock would require killing the frozen pirate after using it to climb. To do this most easily, freeze the Pirate as high as possible on the left wall. Bait the pirate to jump across the room early so that it stays high on the wall, or bring it on camera by jumping below the platform if the wall pirate gets too low. After reaching the top, it can help to reset the camera by moving to the right on the center platform and then back left. Requires: "canTrickyUseFrozenEnemies"
"canDodgeWhileShooting"
"canPreciseWallJump"
{
"or": [
{
"obstaclesCleared": [
"B"
]
},
"canTrickyDodgeEnemies"
]
}
"canCameraManip" |
From: 1
Left Door
To: 4
Junction Below Sand Entrance
When entering the room, immediately shoot straight ahead to freeze the second Evir, then quickly also freeze the first Evir, with a diagonal-down shot. Wait on top of the first Evir for the second Evir to sink far enough to be able to jump onto it, then use it as a platform to jump onto the first pillar (either directly or after a jump on the sand). Requires: {
"notable": "Suitless Bootless Evir Freeze (Left to Center)"
}
"canSuitlessMaridia"
"canTrickyJump"
"canTrickyUseFrozenEnemies"
"canPlayInSand"
"canCameraManip"
{
"noBlueSuit": {}
} |
From: 4
Junction Below Sand Entrance
To: 1
Left Door
If entering from the sandfall above, come in at the far left of the transition, with either a spin-jump or i-frames, to avoid the Evir shot; land on the right side of the pillar to the left, being careful to not bring left Evir on camera. If coming from the right side of the room, then moonwalk on the center pillar to scroll the camera as far right as possible, to avoid getting hit by an Evir shot; alternatively, jump slightly to the left and freeze the Evir, then return back to the center pillar before jumping across the sand. Freeze the right Evir and jump onto it. Quickly move left and fire an angle-down shot to freeze the left Evir before it descends too far. Jump onto the left Evir, back up to the right side of it to maximize space to build momentum, and jump to the left onto the sand and then onto the ledge. If Samus does not quite get enough height to make it onto the ledge, then break spin, turn around to the right, land on the sand again, and do a turnaround spin-jump to the left. If the Evirs descend too far, it is possible to use a Power Bomb to bring them back up again, but caution is needed to avoid killing the first Evir, and it is difficult to avoid getting shot. Requires: {
"notable": "Suitless Bootless Evir Freeze (Center to Left)"
}
"canSuitlessMaridia"
"canTrickyJump"
"canTrickyUseFrozenEnemies"
"canPlayInSand"
"canCameraManip"
{
"or": [
"canTrickyDodgeEnemies",
{
"and": [
{
"ammo": {
"type": "PowerBomb",
"count": 1
}
},
{
"enemyDamage": {
"enemy": "Evir",
"type": "particle",
"hits": 2
}
}
]
},
{
"and": [
{
"ammo": {
"type": "PowerBomb",
"count": 1
}
},
"h_pauseAbuseMinimalReserveRefill",
"h_pauseAbuseMinimalReserveRefill"
]
}
]
}
{
"noBlueSuit": {}
}Dev note: This strat is still possible after falling through the sandpit after being centered by the toilet by landing towards the right, then crossing back left. |
|
Either perform a horizontal shinespark from the second to last platform, or perform a particularly tight dodge to get to the last platform and then spark diagonally across the rest. The horizontal spark can be done relatively low and then jump off of the sand in order to save Energy. Requires: {
"useFlashSuit": {}
}
{
"or": [
{
"shinespark": {
"frames": 34,
"excessFrames": 6
}
},
{
"and": [
"canCameraManip",
"canInsaneJump",
{
"shinespark": {
"frames": 9,
"excessFrames": 2
}
}
]
}
]
}Dev note: The Evir projectile dodge is much more difficult when starting from the right side of the room. |
|
Bomb Jump between the two floating platforms. Requires: "canDash"
{
"or": [
{
"obstaclesCleared": [
"A"
]
},
{
"and": [
"canCameraManip",
"canMetroidAvoid"
]
}
]
}
{
"or": [
{
"and": [
"canHBJ",
"canResetFallSpeed"
]
},
{
"and": [
{
"obstaclesCleared": [
"A"
]
},
"canDiagonalBombJump"
]
},
"canCeilingBombJump"
]
} |
|
Freeze the middle Metroid as soon as it comes on screen to use as a platform to cross over the acid. If no Metroids are alive, the far left Rinka can be used instead, at a high angle. The left Rinka can also just be used to setup an angle with the Rinka near the left edge of the pool. Requires: "canTrickyUseFrozenEnemies"
"canTrickyJump"
"canCameraManip"
{
"or": [
"canInsaneJump",
{
"and": [
{
"not": "f_KilledMetroidRoom1"
},
"canRiskPermanentLossOfAccess"
]
}
]
} |
|
Aim the leftmost Rinka to travel horizontally across the top of the room and use it to damage boost between the two floating platforms. Killing the Rinka will normalize it's respawn timer, which may help in setting up the correct angle. Let the Rinka stay far enough ahead of Samus that she can jump the full distance to the first platform without hitting it. And then once it has reached the right edge of the platform, use it to damage boost. Requires: {
"notable": "Rinka Damage Boost"
}
{
"enemyDamage": {
"enemy": "Rinka",
"type": "contact",
"hits": 1
}
}
"canDash"
"canTrickyJump"
"canHorizontalDamageBoost"
"canCameraManip"
{
"or": [
{
"obstaclesCleared": [
"A",
"B"
]
},
"canMetroidAvoid"
]
} |
|
Walljump into a midair Horizontal Bomb Jump from just above the acid to reach the first platform. HBJ from the ground to reach the second platform. Then simply jump to reach the far runway. Requires: "canInsaneWallJump"
"canWallJumpBombBoost"
"canHBJ"
{
"or": [
{
"obstaclesCleared": [
"B"
]
},
{
"and": [
"canBeLucky",
"canCameraManip",
"canMetroidAvoid"
]
}
]
} |
|
Use the lower Rinka as a platform to setup the angle for the top Rinka. Then use the frozen Rinka to cross the acid. Alternatively, if the Metroids are alive, the second one can be frozen immediately once it is on camera to use as a platform. Requires: "canTrickyUseFrozenEnemies"
"canTrickyJump"
"canCameraManip"
{
"or": [
"canDash",
"canInsaneJump"
]
} |
|
Aim the ceiling Rinka to travel horizontally across the top of the room and use it to damage boost between the two floating platforms. Killing the lower Rinka shortly before killing the higher Rinka will synchronize their respawn timers so that Samus can jump when the lower Rinka reappears in order to get a good angle on the higher Rinka. Jump to the floating platform ahead of the high Rinka, jumping extra high to lead the Metroid out of the way if it is alive. Jump into the Rinka once it reaches the left edge of the platform to reach the next platform. Then use i-frames to pass through the Metroid if it is still alive. Requires: {
"notable": "Rinka Damage Boost"
}
{
"enemyDamage": {
"enemy": "Rinka",
"type": "contact",
"hits": 1
}
}
"canDash"
"canTrickyJump"
"canHorizontalDamageBoost"
"canCameraManip"
{
"or": [
{
"obstaclesCleared": [
"A",
"B"
]
},
{
"and": [
"canMetroidAvoid",
"canUseIFrames"
]
}
]
}
{
"or": [
"canInsaneJump",
{
"enemyDamage": {
"enemy": "Rinka",
"type": "contact",
"hits": 1
}
},
{
"and": [
"canTrickyJump",
"canLateralMidAirMorph"
]
},
{
"and": [
"Gravity",
{
"acidFrames": 16
}
]
},
{
"acidFrames": 27
}
]
} |
|
Jump to the first platform. Walljump low off the platform into a midair horizontal bomb jump. Finally, either jump into a horizontal bomb boost, or use another horizontal bomb jump to reach the far runway. Unmorph to clear the rinka while falling. Requires: "canInsaneWallJump"
"canWallJumpBombBoost"
"canHBJ"
{
"or": [
{
"obstaclesCleared": [
"A",
"B"
]
},
{
"and": [
"canTrickyDodgeEnemies",
"canCameraManip",
"canMetroidAvoid"
]
}
]
} |
|
An easy way is once Samus is on the top platform, jump and aim down to lower the camera, then place 3 PBs. Requires: {
"enemyKill": {
"enemies": [
[
"Metroid",
"Metroid"
]
],
"explicitWeapons": [
"PowerBomb"
]
}
}
{
"or": [
"canMetroidAvoid",
"canCameraManip"
]
}Clears obstacles: f_KilledMetroidRoom2 Sets flags: f_KilledMetroidRoom2 |
|
Safely kill the first pirate, then run from or roll under the remaining pirate lasers. The Pirates will also not shoot if they come on screen while Samus is crouched. Requires: {
"or": [
{
"and": [
"canDodgeWhileShooting",
"canCameraManip",
{
"or": [
"Plasma",
{
"and": [
"h_hasBeamUpgrade",
"canBePatient"
]
},
"canBeVeryPatient"
]
}
]
},
{
"and": [
{
"or": [
"canBePatient",
{
"enemyDamage": {
"enemy": "Tourian Space Pirate (all)",
"type": "contact",
"hits": 1
}
}
]
},
"Morph"
]
}
]
}Clears obstacles: A Dev note: These requirements are to kill all of the pirates, but another strat is needed to cross the room to get to the top half. |
|
Safely kill the first pirate, then walk through the rest while taking damage or by using Plasma Beam. It is possible to get through the lower three pirates with a single hit while using i-frames to prevent a second hit. Either go below the pirates and use the camera to manipulate them to be closer together, or arm-pump or horizontal damage boost to get through them fast enough. Requires: {
"or": [
"HiJump",
"canWallJump",
"SpaceJump",
"canIBJ",
"canSpringBallJumpMidAir"
]
}
{
"or": [
{
"enemyDamage": {
"enemy": "Tourian Space Pirate (all)",
"type": "contact",
"hits": 3
}
},
{
"and": [
"Plasma",
"canHitbox"
]
},
{
"and": [
"canUseIFrames",
{
"enemyDamage": {
"enemy": "Tourian Space Pirate (all)",
"type": "contact",
"hits": 2
}
},
{
"or": [
"canCameraManip",
"canHorizontalDamageBoost"
]
},
"canTrickyJump"
]
}
]
} |
|
Run through the pirates while taking damage or by using Plasma Beam. It is possible to get through the lower three pirates with a single hit while using i-frames to prevent a second hit. Either wait above until the pirates are a bit closer together and then run through, or arm-pump or horizontal damage boost to get through them fast enough. Requires: {
"or": [
{
"enemyDamage": {
"enemy": "Tourian Space Pirate (all)",
"type": "contact",
"hits": 4
}
},
{
"and": [
"Plasma",
"canHitbox"
]
},
{
"and": [
"canUseIFrames",
{
"enemyDamage": {
"enemy": "Tourian Space Pirate (all)",
"type": "contact",
"hits": 3
}
},
{
"or": [
"canCameraManip",
"canHorizontalDamageBoost"
]
}
]
}
]
} |
|
Run from or Roll under the pirate lasers. The Pirates will also not shoot if they come on screen while Samus is crouched. Requires: {
"or": [
{
"and": [
"canDodgeWhileShooting",
"canCameraManip",
{
"or": [
"Plasma",
{
"and": [
"h_hasBeamUpgrade",
"canDash",
"canBePatient"
]
},
"canBeVeryPatient"
]
}
]
},
{
"and": [
{
"or": [
"canBePatient",
{
"enemyDamage": {
"enemy": "Tourian Space Pirate (all)",
"type": "contact",
"hits": 1
}
}
]
},
"Morph"
]
}
]
}Clears obstacles: A Dev note: Technically it's not possible to kill the bottom Pirates while staying at node 2 (not dropping down); but if we're not going down, then it doesn't matter that the bottom ones aren't killed. |
From: 1
Left Door
To: 4
Top of Shaft Without Acid Triggered
Spring Ball bomb jump up to the top, then exit G-mode and fall to the bottom. It is recommended to stay near the right wall with the camera positioned so that the left wall pirates are off camera. Avoid touching any of the pirates' stationary, invisible lasers, which they place when they jump to the opposite wall. Entrance condition: {
"comeInWithGMode": {
"mode": "any",
"morphed": true
}
}Requires: "canCameraManip" "canInsaneJump" "h_artificialMorphSpringBallBombJump" "h_additionalBomb" "h_additionalBomb" "h_additionalBomb" "h_additionalBomb" Dev note: FIXME: This is likely possible with just Bombs, but seems very difficult, a diagonal bomb jump around the overhangs might make it feasible. |
|
Entrance condition: {
"comeInNormally": {},
"comesThroughToilet": "no"
}Requires: {
"or": [
"ScrewAttack",
"canTrickyJump",
{
"and": [
"canDodgeWhileShooting",
"canCameraManip",
{
"enemyKill": {
"enemies": [
[
"Blue Sidehopper"
]
]
}
}
]
}
]
}Exit condition: {
"leaveWithGModeSetup": {}
}Unlocks doors: {"types":["super"],"requires":[]}
{"types":["missiles","powerbomb"],"requires":[{"enemyDamage":{"enemy":"Blue Sidehopper","type":"contact","hits":1}}]}Dev note: FIXME: add a Toilet entry version of this |
|
Enter through the far left side of the door. Wait for the top hopper to move right to start running. Run under the right Hopper and jump over the left Hopper to avoid all damage. Jump when Samus reaches the leftmost lump in the ground to avoid the left hopper. It helps to keep the camera scrolled to the right. Entrance condition: {
"comeInNormally": {},
"comesThroughToilet": "no"
}Requires: {
"notable": "Hopper Dodge"
}
"canDash"
"canTrickyDodgeEnemies"
{
"or": [
"canPrepareForNextRoom",
{
"and": [
"canCameraManip",
"canMoonwalk",
"canInsaneJump"
]
}
]
}Unlocks doors: {"types":["super"],"requires":[]}
{"types":["missiles","powerbomb"],"requires":[{"enemyDamage":{"enemy":"Blue Sidehopper","type":"contact","hits":1}}]} |
|
Try to scroll the camera to the right to keep the left Hopper off-camera for longer. Wait for the top hopper to move right to start running. Run under the right Hopper and jump over the left Hopper to avoid all damage. Jump when Samus reaches the leftmost lump in the ground to avoid the left hopper. Entrance condition: {
"comeInNormally": {},
"comesThroughToilet": "any"
}Requires: {
"notable": "Hopper Dodge"
}
"canDash"
"canCameraManip"
"canMoonwalk"
"canInsaneJump"Unlocks doors: {"types":["super"],"requires":[]}
{"types":["missiles","powerbomb"],"requires":[{"enemyDamage":{"enemy":"Blue Sidehopper","type":"contact","hits":1}}]} |
|
Kill the top hopper quickly; the left hopper is more random. To be safe, plan to retreat right while attacking. It also helps to attempt to move the hopper off camera between attacks. Requires: "canDodgeWhileShooting"
"canTrickyJump"
"canCameraManip"
{
"enemyKill": {
"enemies": [
[
"Blue Sidehopper",
"Blue Sidehopper"
]
]
}
}Clears obstacles: A Unlocks doors: {"types":["ammo"],"requires":[]} |
|
Enter the room from the left door, morph, and wait at the left wall. After 6 hops, the bottom Hopper will do three big hops in a row. Roll under the Hopper while it does the third of those three big hops. Quickly unmorph and run to the right side of the room. If successful, both Hoppers will remain off-camera, so you can safely Crystal Flash. Entrance condition: {
"comeInNormally": {}
}Requires: {
"notable": "Crystal Flash"
}
"canTrickyDodgeEnemies"
"h_CrystalFlash"
"canCameraManip" |
|
Enter the room while morphed and let the hoppers jump against the wall a couple of times. Between hops, unmorph and shoot the lower hopper. Roll under the top hopper until it goes off camera to the left. Entrance condition: {
"comeInNormally": {}
}Requires: "Morph"
"canPrepareForNextRoom"
{
"enemyKill": {
"enemies": [
[
"Blue Sidehopper"
]
]
}
}
"canCameraManip"Unlocks doors: {"nodeId":1,"types":["ammo"],"requires":[]} |
