East Ocean: Direct G-Mode Morph, Bomb Into Spring Ball Jump, Crystal Flash Interrupt
Room ID: 34
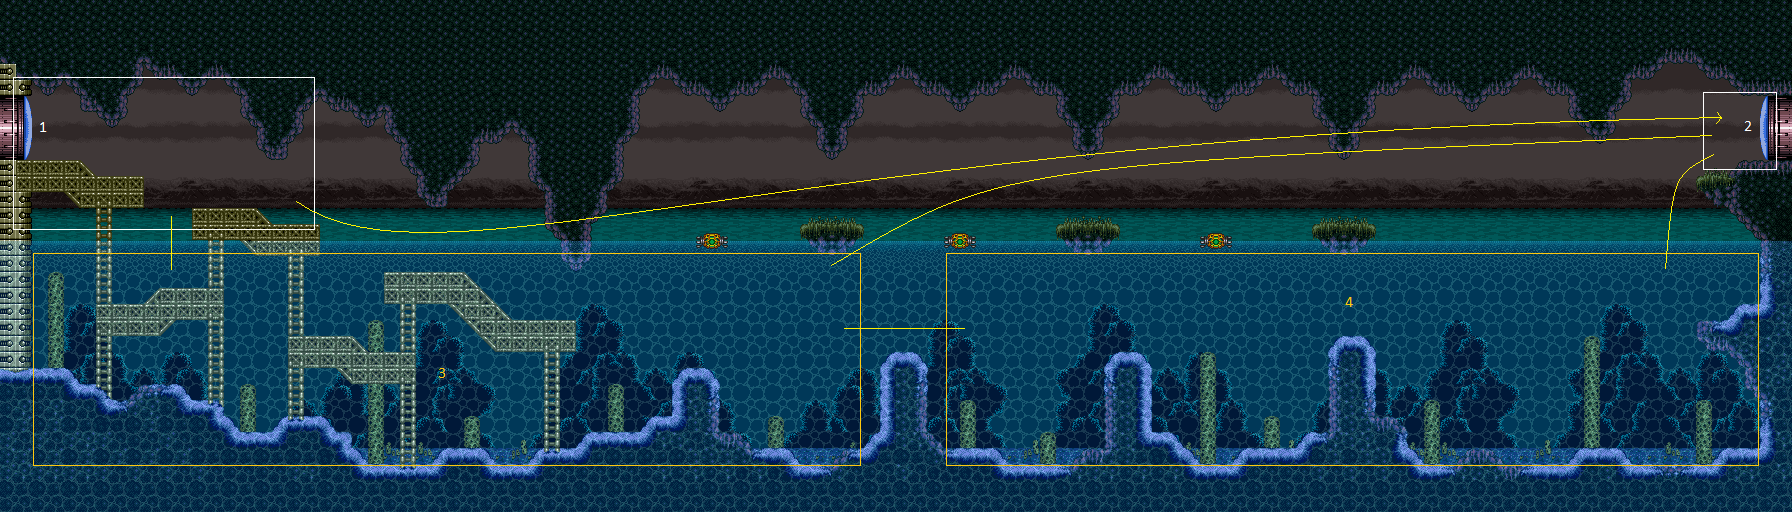
From: 2
Right Door
To: 3
Junction (Left side Pit)
Perform a double Spring Ball jump using a precisely timed bomb boost to propel Samus upward just long enough to get the mid-air Spring Ball jump. This needs to be done multiple times to cross the room with no other items; using Spring Flings to cross from peak to peak can reduce the required number of bomb into Spring Ball jumps to just one or two. To Crystal Flash interrupt, it is required to avoid double hitting the Skultera with the Power Bomb, and to position the Crystal Flash so that the Skultera can hit Samus from above so it avoids the light orb. To do this, use the bottom-left Skultera, and move it off-camera at the far left end of its cycle. Go to the far right end of it's cycle and on the Crystal Flash on the sloped tile just below where it ends. Once the Skultera gets hit by the Power Bomb explosion, it will start moving, even while off-camera. Entrance condition: {
"comeInWithGMode": {
"mode": "direct",
"morphed": true
}
}Requires: "h_artificialMorphUnderwaterBombIntoSpringBallJump"
{
"or": [
"h_artificialMorphSpringFling",
"canBeVeryPatient"
]
}
"h_artificialMorphComplexRModeCrystalFlashInterrupt"
"canCameraManip"
{
"ammo": {
"type": "Missile",
"count": 10
}
}
{
"ammo": {
"type": "Super",
"count": 10
}
}
{
"ammo": {
"type": "PowerBomb",
"count": 5
}
}
{
"or": [
"h_partialEnemyDamageReduction",
{
"resourceAtMost": [
{
"type": "RegularEnergy",
"count": 19
}
]
},
{
"and": [
{
"resourceCapacity": [
{
"type": "RegularEnergy",
"count": 199
}
]
},
{
"resourceCapacity": [
{
"type": "ReserveEnergy",
"count": 199
}
]
}
]
}
]
}Dev note: Methods with more flexible movement items will instead be done at node 4, after which, they can be used to get here. FIXME: Add variants that can farm enough Energy to choot damage boost without enemy damage reduction or tanks. |