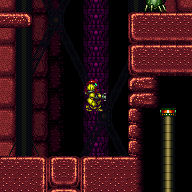
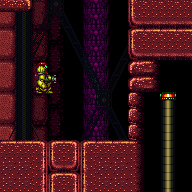
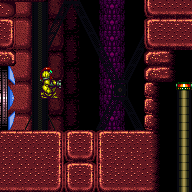
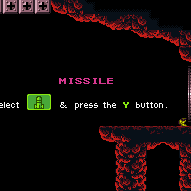
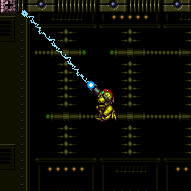
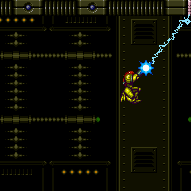
canPreciseGrapple (Hard)
The ability to precisely aim at grapple points while moving quickly, and precise control of Samus' speed and trajectory when releasing from a grapplable object. canPreciseGrapple can also be used to shoot Grapple Beam through single tile ceilings.
Dependencies: canUseGrapple
Strats ()
From: 4
Lower Section - Top Right Door
To: 4
Lower Section - Top Right Door
Entrance condition: {
"comeInWithGMode": {
"mode": "direct",
"morphed": false
}
}Requires: {
"or": [
"SpaceJump",
"canWallJump",
{
"and": [
"canLongIBJ",
"Gravity"
]
},
{
"and": [
"HiJump",
"canJumpIntoIBJ"
]
},
{
"and": [
"canLongIBJ",
"canBombHorizontally",
"canResetFallSpeed"
]
},
{
"and": [
"canJumpIntoIBJ",
"canLongIBJ",
"canTrickyJump"
]
},
{
"and": [
"HiJump",
{
"or": [
"canSpeedyJump",
"canSpringBallJumpMidAir"
]
}
]
},
{
"and": [
"canTrickyJump",
"canPreciseGrapple"
]
},
{
"and": [
"Gravity",
"canMidairShinespark",
"h_shinechargeMaxRunway",
{
"shinespark": {
"frames": 35,
"excessFrames": 10
}
}
]
}
]
}Exit condition: {
"leaveWithGMode": {
"morphed": false
}
} |
From: 4
Lower Section - Top Right Door
To: 8
Bridge Right Door (Leads to Bottom Right Door)
Climb up 1 screen. Entrance condition: {
"comeInWithGMode": {
"mode": "direct",
"morphed": false
}
}Requires: "canComplexGMode"
"canGModeXRayClimb"
{
"notable": "Get Inside the Bridge"
}
"canSkipDoorLock"
{
"or": [
"canArtificialMorph",
"canWallJump",
"SpaceJump",
{
"and": [
"canLongIBJ",
"Gravity"
]
},
{
"and": [
"HiJump",
"canJumpIntoIBJ"
]
},
{
"and": [
"canLongIBJ",
"canBombHorizontally",
"canResetFallSpeed"
]
},
{
"and": [
"canJumpIntoIBJ",
"canLongIBJ",
"canTrickyJump"
]
},
{
"and": [
"HiJump",
{
"or": [
"canSpeedyJump",
"canSpringBallJumpMidAir"
]
}
]
},
{
"and": [
"canTrickyJump",
"canPreciseGrapple"
]
},
{
"and": [
"Gravity",
"canMidairShinespark",
"h_shinechargeMaxRunway",
{
"shinespark": {
"frames": 35,
"excessFrames": 10
}
}
]
}
]
}
"canXRayClimb" |
From: 4
Lower Section - Top Right Door
To: 8
Bridge Right Door (Leads to Bottom Right Door)

Enter with G-mode direct, back up to between 1 and 6 pixels from the door transition, and activate X-ray to get very deep stuck in the door. Climb up 1 screen, and perform a turnaround buffered spin-jump away from the door to trigger the transition, bypassing any lock on the door. Entrance condition: {
"comeInWithGMode": {
"mode": "direct",
"morphed": false
}
}Requires: "canComplexGMode"
"canGModeXRayClimb"
{
"notable": "Get Inside the Bridge"
}
{
"or": [
"canArtificialMorph",
"canWallJump",
"SpaceJump",
{
"and": [
"canLongIBJ",
"Gravity"
]
},
{
"and": [
"HiJump",
"canJumpIntoIBJ"
]
},
{
"and": [
"canLongIBJ",
"canBombHorizontally",
"canResetFallSpeed"
]
},
{
"and": [
"canJumpIntoIBJ",
"canLongIBJ",
"canTrickyJump"
]
},
{
"and": [
"HiJump",
{
"or": [
"canSpeedyJump",
"canSpringBallJumpMidAir"
]
}
]
},
{
"and": [
"canTrickyJump",
"canPreciseGrapple"
]
},
{
"and": [
"Gravity",
"canMidairShinespark",
"h_shinechargeMaxRunway",
{
"shinespark": {
"frames": 35,
"excessFrames": 10
}
}
]
}
]
}
"canXRayClimb"Bypasses door shell: true |
From: 4
Lower Section - Top Right Door
To: 12
Top Junction

Climb up 2 screens. Entrance condition: {
"comeInWithGMode": {
"mode": "direct",
"morphed": false
}
}Requires: "canGModeXRayClimb"
{
"or": [
"canArtificialMorph",
"canWallJump",
"SpaceJump",
{
"and": [
"canLongIBJ",
"Gravity"
]
},
{
"and": [
"HiJump",
"canJumpIntoIBJ"
]
},
{
"and": [
"canLongIBJ",
"canBombHorizontally",
"canResetFallSpeed"
]
},
{
"and": [
"canJumpIntoIBJ",
"canLongIBJ",
"canTrickyJump"
]
},
{
"and": [
"HiJump",
{
"or": [
"canSpeedyJump",
"canSpringBallJumpMidAir"
]
}
]
},
{
"and": [
"canTrickyJump",
"canPreciseGrapple"
]
},
{
"and": [
"Gravity",
"canMidairShinespark",
"h_shinechargeMaxRunway",
{
"shinespark": {
"frames": 35,
"excessFrames": 10
}
}
]
}
]
}
"canLongXRayClimb"Clears obstacles: R-Mode |
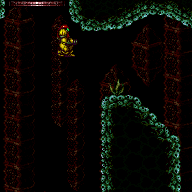
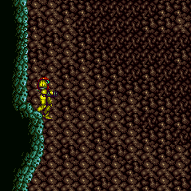
From: 5
Lower Section - Bottom Right Door
To: 4
Lower Section - Top Right Door

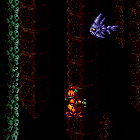
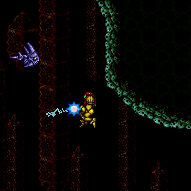
Attach to the ripper when it is all the way left. Build momentum and launch Heavensward. Requires: "canTrickyJump" "canPreciseGrapple" |
|
Entrance condition: {
"comeInWithGrappleSwing": {
"blocks": [
{
"position": [
13,
5
],
"environment": "water",
"note": "Mt. Everest"
}
]
}
}Requires: "canPreciseGrappleJump" Dev note: This can work from other setup rooms, but it would have no purpose coming from an air room, since you could just do a running jump through the door and airball. |
From: 10
Right Etecoon Shaft - Bottom Left Door
To: 9
Right Etecoon Shaft - Top Left Door

Entrance condition: {
"comeInWithGrappleSwing": {
"blocks": [
{
"position": [
8,
3
],
"note": "Grapple Beam Room"
},
{
"position": [
7,
3
],
"note": "Colosseum"
}
]
}
}Requires: "canTrickyGrappleJump" Dev note: Aside from these two, other setup rooms do not appear to work. |
|
Build up some run speed and then extend the Grapple Beam through the Blue Gate, while jumping, to open it from the wrong side. Requires: {
"notable": "Grapple Gate Glitch"
}
"canPreciseGrapple"
"h_speedJump"
"canTrickyJump"Clears obstacles: B |
|


Open the gate (Wave Beam or gate glitch) and clear the Small Sidehoppers for a runway. Use respawning Geegas for energy. Entrance condition: {
"comeInWithRMode": {}
}Requires: {
"or": [
"Wave",
"h_blueGateGlitch",
{
"and": [
{
"notable": "Grapple Gate Glitch"
},
"canPreciseGrapple",
"h_speedJump",
"canTrickyJump"
]
}
]
}
{
"refill": [
"Energy"
]
}
{
"canShineCharge": {
"usedTiles": 30,
"openEnd": 0
}
}
{
"autoReserveTrigger": {}
}
"canRModeSparkInterrupt"Clears obstacles: B |
From: 2
Right Side - Top Door
To: 16
Direct G-Mode Morph (Top Item, Above Hopper Pit)
Entrance condition: {
"comeInWithGMode": {
"mode": "direct",
"morphed": false
}
}Requires: "Morph"
{
"or": [
"SpaceJump",
"canWallJump",
"canPreciseGrapple",
{
"and": [
"HiJump",
"canSpeedyJump"
]
},
{
"and": [
"HiJump",
"canSpringBallJumpMidAir"
]
},
"canTrickyUseFrozenEnemies",
{
"and": [
"canDash",
"canTrickyJump",
"canHorizontalDamageBoost",
{
"enemyDamage": {
"enemy": "Zeb",
"type": "contact",
"hits": 1
}
}
]
},
{
"and": [
{
"or": [
{
"canShineCharge": {
"usedTiles": 24,
"openEnd": 1
}
},
{
"blueSuitShinecharge": {}
}
]
},
{
"shinespark": {
"frames": 9,
"excessFrames": 3
}
}
]
}
]
} |
From: 3
Left Side - Top Middle Door (Main Entrance)
To: 16
Direct G-Mode Morph (Top Item, Above Hopper Pit)
Entrance condition: {
"comeInWithGMode": {
"mode": "direct",
"morphed": false
}
}Requires: "Morph"
{
"or": [
"SpaceJump",
"canWallJump",
"canPreciseGrapple",
{
"and": [
"HiJump",
"canSpeedyJump"
]
},
{
"and": [
"HiJump",
"canSpringBallJumpMidAir"
]
},
"canTrickyUseFrozenEnemies",
{
"and": [
"canDash",
"canTrickyJump",
"canHorizontalDamageBoost",
{
"enemyDamage": {
"enemy": "Zeb",
"type": "contact",
"hits": 1
}
}
]
},
{
"and": [
{
"or": [
{
"canShineCharge": {
"usedTiles": 24,
"openEnd": 1
}
},
{
"blueSuitShinecharge": {}
}
]
},
{
"shinespark": {
"frames": 9,
"excessFrames": 3
}
}
]
}
]
} |
From: 6
Right Side - Top Middle Door
To: 16
Direct G-Mode Morph (Top Item, Above Hopper Pit)
Entrance condition: {
"comeInWithGMode": {
"mode": "direct",
"morphed": false
}
}Requires: "Morph"
{
"or": [
"SpaceJump",
"canWallJump",
"canPreciseGrapple",
{
"and": [
"HiJump",
"canSpeedyJump"
]
},
{
"and": [
"HiJump",
"canSpringBallJumpMidAir"
]
},
"canTrickyUseFrozenEnemies",
{
"and": [
"canDash",
"canTrickyJump",
"canHorizontalDamageBoost",
{
"enemyDamage": {
"enemy": "Zeb",
"type": "contact",
"hits": 1
}
}
]
},
{
"and": [
{
"or": [
{
"canShineCharge": {
"usedTiles": 24,
"openEnd": 1
}
},
{
"blueSuitShinecharge": {}
}
]
},
{
"shinespark": {
"frames": 9,
"excessFrames": 3
}
}
]
}
]
} |
From: 8
Right Side - Bottom Door
To: 16
Direct G-Mode Morph (Top Item, Above Hopper Pit)
Entrance condition: {
"comeInWithGMode": {
"mode": "direct",
"morphed": false
}
}Requires: "Morph"
{
"or": [
"SpaceJump",
"canWallJump",
"canPreciseGrapple",
{
"and": [
"HiJump",
"canSpeedyJump"
]
},
{
"and": [
"HiJump",
"canSpringBallJumpMidAir"
]
},
"canTrickyUseFrozenEnemies",
{
"and": [
"canDash",
"canTrickyJump",
"canHorizontalDamageBoost",
{
"enemyDamage": {
"enemy": "Zeb",
"type": "contact",
"hits": 1
}
}
]
},
{
"and": [
{
"or": [
{
"canShineCharge": {
"usedTiles": 24,
"openEnd": 1
}
},
{
"blueSuitShinecharge": {}
}
]
},
{
"shinespark": {
"frames": 9,
"excessFrames": 3
}
}
]
}
]
} |
|

Entrance condition: {
"comeInWithGrappleSwing": {
"blocks": [
{
"position": [
13,
5
],
"environment": "water",
"note": "Mt. Everest"
},
{
"position": [
7,
3
],
"note": "The Precious Room"
},
{
"position": [
7,
2
],
"note": "The Moat"
}
]
}
}Requires: "canPreciseGrappleJump" |
|

Entrance condition: {
"comeInWithGrappleSwing": {
"blocks": [
{
"position": [
8,
2
],
"note": "Bowling Alley"
},
{
"position": [
7,
3
],
"obstructions": [
[
6,
10
]
],
"note": "Red Brinstar Firefleas Room"
}
]
}
}Requires: "canTrickyGrappleJump" Dev note: This appears not to be possible from Climb Supers Room? |
From: 2
Right Door
To: 3
Top Junction


Entrance condition: {
"comeInWithGrappleSwing": {
"blocks": [
{
"position": [
7,
3
],
"environment": "water",
"note": "Pants Room"
}
]
}
}Requires: "Gravity" "canTrickyGrappleJump" |
|
Entrance condition: {
"comeInWithGrappleSwing": {
"blocks": [
{
"position": [
8,
3
],
"note": "Grapple Beam Room"
},
{
"position": [
7,
3
],
"note": "Colosseum"
}
]
}
}Requires: "canGrappleJump" |
|

Entrance condition: {
"comeInWithGrappleSwing": {
"blocks": [
{
"position": [
-1,
5
],
"environment": "water",
"note": "Mt. Everest"
},
{
"position": [
6,
4
],
"note": "Grapple Tutorial Room 2"
}
]
}
}Requires: "canPreciseGrappleJump" |
|
Entrance condition: {
"comeInWithGrappleSwing": {
"blocks": [
{
"position": [
6,
2
],
"note": "Lava Grapple Tunnel"
},
{
"position": [
5,
2
],
"note": "The Moat, Double Chamber, Wrecked Ship Energy Tank Room"
},
{
"position": [
2.375,
4.5625
],
"note": "Post Crocomire Farming Room"
}
]
}
}Requires: "canTrickyGrappleJump" |
From: 3
Bottom Left Door
To: 6
Junction (Above Bottom Rippers)
Entrance condition: {
"comeInWithGrappleSwing": {
"blocks": [
{
"position": [
7,
3
],
"note": "Colosseum"
},
{
"position": [
6,
4
],
"note": "Grapple Tutorial Room 2"
}
]
}
}Requires: "canTrickyGrappleJump" "canBeExtremelyPatient" Dev note: FIXME: Setups from other rooms, such as Moat, are theoretically possible but appear to be even more difficult. |
From: 3
Bottom Left Door
To: 6
Junction (Above Bottom Rippers)

Entrance condition: {
"comeInWithGrappleSwing": {
"blocks": [
{
"position": [
-1,
5
],
"environment": "water",
"note": "Mt. Everest"
},
{
"position": [
8,
3
],
"note": "Grapple Beam Room"
}
]
}
}Requires: "canTrickyGrappleJump" |
From: 2
Left Side - Top Middle Door
To: 1
Left Side - Top Door

Entrance condition: {
"comeInWithGrappleSwing": {
"blocks": [
{
"position": [
-1,
5
],
"environment": "water",
"note": "Mt. Everest"
},
{
"position": [
8,
3
],
"note": "Grapple Beam Room"
},
{
"position": [
7,
3
],
"note": "Colosseum"
}
]
}
}Requires: "canPreciseGrappleJump" |
From: 2
Left Side - Top Middle Door
To: 1
Left Side - Top Door

Entrance condition: {
"comeInRunning": {
"speedBooster": "yes",
"minTiles": 25
}
}Requires: "canSpeedyJump" "canPreciseGrapple" "h_midAirShootUp" |
From: 2
Left Side - Top Middle Door
To: 1
Left Side - Top Door
Entrance condition: {
"comeInRunning": {
"speedBooster": "yes",
"minTiles": 18
}
}Requires: "canTrickyDashJump" "canPreciseGrapple" "h_midAirShootUp" |
From: 2
Left Side - Top Middle Door
To: 1
Left Side - Top Door
Entrance condition: {
"comeInWithGrappleSwing": {
"blocks": [
{
"position": [
6,
4
],
"note": "Grapple Tutorial Room 2"
},
{
"position": [
6,
2
],
"note": "Lava Grapple Tunnel"
},
{
"position": [
5,
2
],
"note": "The Moat, Double Chamber, Wrecked Ship Energy Tank Room"
},
{
"position": [
2.375,
4.5625
],
"note": "Post Crocomire Farming Room"
}
]
}
}Requires: "canTrickyGrappleJump" |
From: 3
Left Side - Bottom Middle Door
To: 1
Left Side - Top Door

Entrance condition: {
"comeInWithGrappleSwing": {
"blocks": [
{
"position": [
-1,
5
],
"environment": "water",
"note": "Mt. Everest"
},
{
"position": [
8,
3
],
"note": "Grapple Beam Room"
},
{
"position": [
7,
3
],
"note": "Colosseum"
}
]
}
}Requires: "canPreciseGrappleJump" "h_trickyToCarryFlashSuit" |
From: 3
Left Side - Bottom Middle Door
To: 1
Left Side - Top Door
Entrance condition: {
"comeInWithGrappleSwing": {
"blocks": [
{
"position": [
6,
4
],
"note": "Grapple Tutorial Room 2"
},
{
"position": [
6,
2
],
"note": "Lava Grapple Tunnel"
},
{
"position": [
5,
2
],
"note": "The Moat, Double Chamber, Wrecked Ship Energy Tank Room"
},
{
"position": [
2.375,
4.5625
],
"note": "Post Crocomire Farming Room"
}
]
}
}Requires: "canTrickyGrappleJump" |
|
Jump from the Save room door runway and use Grapple to grab onto the Grapple Blocks. Requires: "HiJump" "canSpeedyJump" "canPreciseGrapple" "h_midAirShootUp" |
From: 9
Main Junction
To: 1
Left Side - Top Door

Perform a very tight Spring Ball jump from the Save room door runway, starting from either a crouch or spin jump, then use Grapple to barely reach the ceiling blocks. Requires: {
"notable": "Tricky Spring Ball Jump with Grapple"
}
"canTrickySpringBallJump"
"canPreciseGrapple" |
|
Overload PLMs by shooting the gate, then go through the crumble blocks below and get to the door. Entrance condition: {
"comeInWithGMode": {
"mode": "direct",
"morphed": false
}
}Requires: "Morph"
{
"or": [
"SpaceJump",
{
"and": [
"canPreciseGrapple",
"canUseEnemies"
]
},
{
"and": [
"HiJump",
"canSpringBallJumpMidAir"
]
},
{
"and": [
"canDash",
"HiJump",
"canWallJump",
"canTrickyJump"
]
},
{
"and": [
"canWallJump",
"canUseIFrames",
{
"spikeHits": 1
},
"h_spikeJumpWithActiveEnemies"
]
},
{
"and": [
"h_IBJFromSpikes",
"h_spikeJumpWithActiveEnemies"
]
}
]
}
"h_heatedGModeOpenDifferentDoor" |
|
With Grapple, a running jump then single Grapple swing can be used before PLMs are overloaded, alternatively jump on the crumble blocks and Grapple the Ripper. Entrance condition: {
"comeInWithGMode": {
"mode": "indirect",
"morphed": false
}
}Requires: {
"or": [
"SpaceJump",
"canTrickySpringBallJump",
{
"and": [
"canWallJump",
{
"or": [
"canDash",
"HiJump",
{
"and": [
"canBlueSuitSpikeJump",
{
"spikeHits": 1
}
]
}
]
}
]
},
{
"and": [
"HiJump",
"canSpeedyJump"
]
},
{
"and": [
"canPreciseGrapple",
{
"or": [
"canDash",
"canUseEnemies",
"canInsaneJump"
]
}
]
}
]
}
"h_heatedGModeOpenDifferentDoor" |
|
Overload PLMs by shooting the gate, then go through the crumble blocks below and get to the item. Entrance condition: {
"comeInWithGMode": {
"mode": "direct",
"morphed": false
}
}Requires: "Morph"
{
"or": [
"SpaceJump",
{
"and": [
"canPreciseGrapple",
"canUseEnemies"
]
},
{
"and": [
"HiJump",
"canSpringBallJumpMidAir"
]
},
"canInsaneWallJump",
{
"and": [
"HiJump",
"canUseIFrames",
{
"noBlueSuit": {}
},
{
"enemyDamage": {
"enemy": "Ripper 2 (green)",
"type": "contact",
"hits": 1
}
},
{
"or": [
"canWallJump",
"canSpeedyJump"
]
}
]
},
"h_IBJFromSpikes"
]
}
{
"heatFrames": 0
} |
|

Entrance condition: {
"comeInWithGrappleSwing": {
"blocks": [
{
"position": [
-1,
5
],
"environment": "water",
"note": "Mt. Everest"
},
{
"position": [
8,
3
],
"note": "Grapple Beam Room"
},
{
"position": [
7,
3
],
"note": "Colosseum"
},
{
"position": [
6,
4
],
"note": "Grapple Tutorial Room 2"
},
{
"position": [
6,
2
],
"note": "Lava Grapple Tunnel"
},
{
"position": [
5,
2
],
"note": "The Moat, Double Chamber, Wrecked Ship Energy Tank Room"
},
{
"position": [
2.375,
4.5625
],
"note": "Post Crocomire Farming Room"
}
]
}
}Requires: "canTrickyGrappleJump" "h_heatProof" Dev note: The Kamers make this tricky since it's easy to bonk on them. |
From: 2
Bottom Left Door
To: 3
Right Door
Overload PLMs by shooting the gate, then go through the crumble blocks below and get to the door. The gate can be shot while precisely positioned from below without requiring any items. The positioning is precise and off camera; while facing left, position Samus front foot barely on the flat part after the slope. Entrance condition: {
"comeInWithGMode": {
"mode": "direct",
"morphed": false
}
}Requires: "Morph"
{
"or": [
"SpaceJump",
{
"and": [
"canPreciseGrapple",
{
"or": [
"canDash",
"canUseEnemies",
"canInsaneJump"
]
}
]
},
{
"and": [
"HiJump",
"canSpringBallJumpMidAir"
]
},
{
"and": [
"canDash",
"HiJump",
"canWallJump",
"canTrickyJump"
]
},
{
"and": [
"canWallJump",
"canUseIFrames",
{
"spikeHits": 1
},
"h_spikeJumpWithActiveEnemies"
]
},
{
"and": [
"h_IBJFromSpikes",
"h_spikeJumpWithActiveEnemies"
]
}
]
}
"h_heatedGModeOpenDifferentDoor" |
|
It is possible to climb the left side of the room with SpeedBooster alone, with either a tricky dash jump or a vertical shinespark, then Grapple the Ripper or ceiling blocks. With Grapple, a running jump then single Grapple swing can be used before PLMs are overloaded, alternatively jump on the crumble blocks and Grapple the Ripper. Entrance condition: {
"comeInWithGMode": {
"mode": "indirect",
"morphed": false
}
}Requires: {
"or": [
"SpaceJump",
"canTrickySpringBallJump",
{
"and": [
"canWallJump",
{
"or": [
"canDash",
"HiJump",
{
"and": [
"canBlueSuitSpikeJump",
{
"spikeHits": 1
}
]
}
]
}
]
},
{
"and": [
"HiJump",
"canSpeedyJump"
]
},
{
"and": [
"canTrickyDashJump",
"canPreciseGrapple"
]
},
{
"and": [
"canPreciseGrapple",
{
"canShineCharge": {
"usedTiles": 28,
"gentleUpTiles": 3,
"gentleDownTiles": 3,
"openEnd": 0
}
},
{
"or": [
{
"shinespark": {
"frames": 18,
"excessFrames": 8
}
},
{
"and": [
"canSpeedyJump",
{
"shinespark": {
"frames": 16,
"excessFrames": 10
}
}
]
}
]
}
]
}
]
}
"h_heatedGModeOpenDifferentDoor" |
|
Overload PLMs by shooting the gate, then go through the crumble blocks below and get to the item. The gate can be shot while precisely positioned from below without requiring any items. The positioning is precise and off camera; while facing left, position Samus front foot barely on the flat part after the slope. Entrance condition: {
"comeInWithGMode": {
"mode": "direct",
"morphed": false
}
}Requires: "Morph"
{
"or": [
"SpaceJump",
{
"and": [
"canPreciseGrapple",
"canUseEnemies"
]
},
{
"and": [
"HiJump",
"canSpringBallJumpMidAir"
]
},
"canInsaneWallJump",
{
"and": [
"HiJump",
"canUseIFrames",
{
"noBlueSuit": {}
},
{
"enemyDamage": {
"enemy": "Ripper 2 (green)",
"type": "contact",
"hits": 1
}
},
{
"or": [
"canWallJump",
"canSpeedyJump"
]
}
]
},
"h_IBJFromSpikes"
]
}
{
"heatFrames": 0
} |
|

Jump onto the crumble blocks to make them solid, then use them as a platform to cross the room. With Grapple, a running jump then single Grapple swing can be used before PLMs are overloaded, alternatively jump on the crumble blocks and Grapple the Ripper. Entrance condition: {
"comeInWithGMode": {
"mode": "indirect",
"morphed": false
}
}Requires: {
"or": [
"SpaceJump",
{
"and": [
"canPreciseGrapple",
{
"or": [
"canDash",
"canUseEnemies",
"canInsaneJump"
]
}
]
},
"canInsaneWallJump",
{
"and": [
"HiJump",
"canWallJump"
]
},
{
"and": [
"HiJump",
"canSpeedyJump"
]
}
]
}
"h_heatedGModeOpenDifferentDoor"Dev note: This is only for strats that can't go to 7 - variants without Morph, or without a way to get back up after going down. |
From: 3
Right Door
To: 2
Bottom Left Door
Jump onto the crumble blocks to make them solid, then use them as a platform to cross the room. With Grapple, a running jump then single Grapple swing can be used before PLMs are overloaded, alternatively jump on the crumble blocks and Grapple the Ripper. Entrance condition: {
"comeInWithGMode": {
"mode": "indirect",
"morphed": false
}
}Requires: {
"or": [
"SpaceJump",
{
"and": [
"canPreciseGrapple",
{
"or": [
"canDash",
"canUseEnemies",
"canInsaneJump"
]
}
]
},
"canInsaneWallJump",
{
"and": [
"HiJump",
"canWallJump"
]
},
{
"and": [
"HiJump",
"canSpeedyJump"
]
}
]
}
"h_heatedGModeOpenDifferentDoor"Dev note: This is only for strats that can't go to 7 - variants without Morph. |
|
Jump onto the crumble blocks to make them solid, then use them as a platform to cross the room. Entrance condition: {
"comeInWithGMode": {
"mode": "direct",
"morphed": false
}
}Requires: "canRemoteAcquire"
{
"or": [
"SpaceJump",
{
"and": [
"canPreciseGrapple",
"canUseEnemies"
]
},
"canSpringBallJumpMidAir",
"canInsaneWallJump",
{
"and": [
"HiJump",
"canWallJump"
]
},
{
"and": [
"HiJump",
"canSpeedyJump"
]
},
{
"and": [
"canStaggeredIBJ",
"canDoubleBombJump",
"canBombHorizontally"
]
},
{
"and": [
"h_IBJFromSpikes",
"h_IBJFromSpikes"
]
},
{
"and": [
"h_IBJFromSpikes",
"canCameraManip",
"canMoonwalk"
]
}
]
}
"h_heatedDirectGModeLeaveSameDoor"Collects items: 4 |
|
Jump onto the crumble blocks to make them solid, then use them as a platform to cross the room. With Grapple, a running jump then single Grapple swing can be used before PLMs are overloaded, alternatively jump on the crumble blocks and Grapple the Ripper. Entrance condition: {
"comeInWithGMode": {
"mode": "any",
"morphed": false
}
}Requires: {
"or": [
"SpaceJump",
{
"and": [
"canStaggeredIBJ",
"canDoubleBombJump",
"canBombHorizontally"
]
},
{
"and": [
"canDash",
{
"or": [
"canTrickySpringBallJump",
"canInsaneWallJump",
{
"and": [
"HiJump",
"canWallJump"
]
},
{
"and": [
"HiJump",
"canSpeedyJump"
]
},
"h_IBJFromSpikes"
]
}
]
},
{
"and": [
"canPreciseGrapple",
{
"or": [
"canDash",
"canUseEnemies",
"canInsaneJump"
]
}
]
}
]
}
{
"heatFrames": 0
}Dev note: FIXME: some more of these options may be possible with a blue suit, with greater difficulty. |
|

Jump onto the crumble blocks to make them solid, then use them as a platform to cross the room. With Grapple, a running jump then single Grapple swing can be used before PLMs are overloaded, alternatively jump on the crumble blocks and Grapple the Ripper. In indirect G-mode, stand where the gate will spawn and exit G-mode to open the gate. In direct G-mode, overload PLMs by shooting the gate then position Samus a few pixels away from the gate to where upward diagonal shots go through it. Crouch then shoot diagonally and quickly exit G-mode (3-7 frames later) to open the gate on G-mode exit. Entrance condition: {
"comeInWithGMode": {
"mode": "any",
"morphed": false
}
}Requires: "canComplexGMode"
"h_heatedGMode"
{
"or": [
"SpaceJump",
{
"and": [
"canStaggeredIBJ",
"canDoubleBombJump",
"canBombHorizontally"
]
},
{
"and": [
"canDash",
{
"or": [
"canTrickySpringBallJump",
"canInsaneWallJump",
{
"and": [
"HiJump",
"canWallJump"
]
},
{
"and": [
"HiJump",
"canSpeedyJump"
]
},
"h_IBJFromSpikes"
]
}
]
},
{
"and": [
"canPreciseGrapple",
{
"or": [
"canDash",
"canUseEnemies",
"canInsaneJump"
]
}
]
}
]
}
{
"heatFrames": 35
}Clears obstacles: A Dev note: The canComplexGMode is only used here to describe opening the gate in direct G-mode without gate glitching. However, the indirect variant still requires canHeatedGMode or Varia - with Varia, indirect strats can instead be used to go to the top left door and return. FIXME: some more of these options may be possible with a blue suit, with greater difficulty. |
From: 3
Right Door
To: 6
G-Mode, Remote Acquire Junction (Bottom Right)
Jump onto the crumble blocks to make them solid, then use them as a platform to get to the item. With Grapple, a running jump then single Grapple swing can be used before PLMs are overloaded, alternatively jump on the crumble blocks and Grapple the Ripper. Avoid touching all 6 crumbles, so Samus can use the item to overload PLMs and go through one of the crumbles to get to the left side of the room. If the item has already been obtained, Samus can shoot the gate many times to overload PLMs. Entrance condition: {
"comeInWithGMode": {
"mode": "direct",
"morphed": false
}
}Requires: "canRemoteAcquire"
{
"or": [
"SpaceJump",
"canCeilingBombJump",
{
"and": [
"canBombHorizontally",
"canIBJ",
"h_usePowerBomb"
]
},
{
"and": [
"canStaggeredIBJ",
"canDoubleBombJump",
"canBombHorizontally"
]
},
{
"and": [
"canPreciseGrapple",
"canUseEnemies"
]
},
{
"and": [
"canDash",
{
"or": [
"canTrickySpringBallJump",
"canInsaneWallJump",
{
"and": [
"HiJump",
"canWallJump"
]
},
{
"and": [
"HiJump",
"canSpeedyJump"
]
},
"h_IBJFromSpikes"
]
}
]
}
]
}
{
"heatFrames": 0
} |
From: 3
Right Door
To: 7
G-Mode Junction (Bottom Right)
Jump onto the crumble blocks to make them solid, then use them as a platform to cross the room. With Grapple, a running jump then single Grapple swing can be used before PLMs are overloaded, alternatively jump on the crumble blocks and Grapple the Ripper. Entrance condition: {
"comeInWithGMode": {
"mode": "indirect",
"morphed": false
}
}Requires: "Morph"
{
"or": [
"SpaceJump",
"canCeilingBombJump",
{
"and": [
"canStaggeredIBJ",
"canDoubleBombJump",
"canBombHorizontally"
]
},
{
"and": [
"canBombHorizontally",
"canIBJ",
"h_usePowerBomb"
]
},
{
"and": [
"canDash",
{
"or": [
"canTrickySpringBallJump",
"canInsaneWallJump",
{
"and": [
"HiJump",
"canWallJump"
]
},
{
"and": [
"HiJump",
"canSpeedyJump"
]
},
"h_IBJFromSpikes"
]
}
]
},
{
"and": [
"canPreciseGrapple",
{
"or": [
"canDash",
"canUseEnemies",
"canInsaneJump"
]
}
]
}
]
}
{
"heatFrames": 0
}Dev note: With Grapple, Morph isn't needed, but there's no reason to go there without Morph. |
|
Entrance condition: {
"comeInWithGrappleSwing": {
"blocks": [
{
"position": [
13,
5
],
"environment": "water",
"note": "Mt. Everest"
},
{
"position": [
7,
3
],
"note": "The Precious Room"
}
]
}
}Requires: "canTrickyGrappleJump" Dev note: This is only useful as a way to preserve a flash suit without Hi-Jump or wall jump. FIXME: This can be possible from other rooms, with greater difficulty. |
|
Entrance condition: {
"comeInWithGrappleSwing": {
"blocks": [
{
"position": [
-1,
5
],
"environment": "water",
"note": "Mt. Everest"
},
{
"position": [
8,
3
],
"note": "Grapple Beam Room"
},
{
"position": [
7,
3
],
"note": "Colosseum"
},
{
"position": [
6,
4
],
"note": "Grapple Tutorial Room 2"
}
]
}
}Requires: "canTrickyGrappleJump"
{
"noFlashSuit": {}
}Dev note: FIXME: Other setup rooms such as Moat are theoretically possible but seem unreasonably difficult? FIXME: Carrying a flash suit can be possible in some cases, though very difficult. |
From: 1
Left Door
To: 2
Right Door

Carefully and quickly lure the Gamets to the right door without letting them go off camera. It may help to kill any extra Gamets once they spread apart. With Grapple, it can help to immediately press down after connecting to the block in order to get a quicker swing to the right. Requires: "h_navigateUnderwater"
"canDash"
{
"or": [
{
"resourceCapacity": [
{
"type": "Super",
"count": 1
}
]
},
{
"obstaclesCleared": [
"A"
]
}
]
}
"canTrickyGMode"
{
"or": [
{
"and": [
"Gravity",
"canPreciseGrapple"
]
},
{
"and": [
"Gravity",
"canTrickyWallJump"
]
},
{
"and": [
"HiJump",
"canPreciseGrapple"
]
}
]
}Exit condition: {
"leaveWithGModeSetup": {}
}Unlocks doors: {"types":["ammo"],"requires":[]}Dev note: In theory this could be done dashless with a blue suit, but it seems unreasonable. |
From: 4
Center Platform Junction
To: 3
Junction Left of Green Gate
Requires: {
"or": [
"SpaceJump",
{
"and": [
"Grapple",
{
"obstaclesNotCleared": [
"B"
]
}
]
},
"canPreciseGrapple"
]
} |
|

Carefully swing between the Rippers at the top of the room to the item. The last two swings are the hardest Morphing and unmorphing to reset Samus's fall speed can help give a bit more time to position the Rippers. It can help to Grapple the same Ripper again to get it in a better position. Position the third Ripper far to the right then fling to the fourth, which is far to the right and very close to the ceiling. Moving the fourth Ripper to the right a bit can also help in order to make the last fling less precise. Be careful not to fling directly into the ceiling, as it is easy to hit the uneven surface and fall. Requires: {
"notable": "Indiana Jones Grapple (First Try)"
}
"canUseEnemies"
"canPreciseGrapple"
"h_midAirShootUp"
{
"or": [
{
"and": [
"canInsaneJump",
"h_trickyToCarryFlashSuit"
]
},
{
"and": [
"canResetFallSpeed",
{
"enemyDamage": {
"enemy": "Ripper 2 (green)",
"type": "contact",
"hits": 2
}
}
]
}
]
} |
|


Carefully swing between the Rippers at the top of the room to the item. The last two swings are the hardest Morphing and unmorphing to reset Samus's fall speed can help give a bit more time to position the Rippers. It can help to Grapple the same Ripper again to get it in a better position. Position the third Ripper far to the right then fling to the fourth, which is far to the right and very close to the ceiling. Moving the fourth Ripper to the right a bit can also help in order to make the last fling less precise. Be careful not to fling directly into the ceiling, as it is easy to hit the uneven surface and fall. If Samus falls, it may be helpful to reset the room. Requires: {
"notable": "Indiana Jones Grapple (With Retries)"
}
"canUseEnemies"
"canPreciseGrapple"
"h_midAirShootUp"
{
"or": [
{
"and": [
"canInsaneJump",
"h_trickyToCarryFlashSuit"
]
},
{
"enemyDamage": {
"enemy": "Ripper 2 (green)",
"type": "contact",
"hits": 4
}
}
]
}
{
"or": [
{
"and": [
"HiJump",
"canSpringBallJumpMidAir"
]
},
{
"and": [
"canSpeedyJump",
"HiJump",
"canTrickyWallJump"
]
},
"h_trickySpringwall"
]
} |
|

Involves Grappling off several Rippers, where falling may lead to a soft lock. Morphing and unmorphing to reset Samus's fall speed can help give a bit more time to position the Rippers. It can help to Grapple the same Ripper again to get it in a better position. Positioning the first Ripper far to the left until the second is visible can help make this much easier. Requires: {
"notable": "Indiana Jones Grapple (First Try)"
}
"canUseEnemies"
"canPreciseGrapple"
"h_midAirShootUp"
{
"or": [
{
"and": [
"canInsaneJump",
"h_trickyToCarryFlashSuit"
]
},
{
"and": [
"canResetFallSpeed",
{
"enemyDamage": {
"enemy": "Ripper 2 (green)",
"type": "contact",
"hits": 1
}
}
]
}
]
}Dev note: In general, the return route is easier, but is only useful after doing the left to right strat first. |
From: 4
Top Right Door
To: 4
Top Right Door
Lure the Gamets while using the Kamer, then get up to the doorway with a quick crouch jump + down grab or by other means. Requires: {
"or": [
"HiJump",
"SpaceJump",
"canWallJump",
"canSpringBallJumpMidAir",
"canTrickyUseFrozenEnemies",
{
"and": [
"canTrickyJump",
"h_crouchJumpDownGrab"
]
},
{
"and": [
"canInsaneJump",
"canPreciseGrapple"
]
},
{
"and": [
"canJumpIntoIBJ",
"canDoubleBombJump"
]
}
]
}Exit condition: {
"leaveWithGModeSetup": {}
}Dev note: A crouch jump + down grab should always be usable except when preserving a blue suit. A flash suit is lost when using X-Ray, so it can not be kept through a G-Mode setup. |
|
Entrance condition: {
"comeInWithGrappleSwing": {
"blocks": [
{
"position": [
13,
5
],
"environment": "water",
"note": "Mt. Everest"
},
{
"position": [
7,
3
],
"note": "The Precious Room"
},
{
"position": [
7,
2
],
"note": "The Moat"
}
]
}
}Requires: "canPreciseGrappleJump"
{
"noFlashSuit": {}
} |
|
Entrance condition: {
"comeInWithGrappleSwing": {
"blocks": [
{
"position": [
8,
2
],
"note": "Bowling Alley"
},
{
"position": [
7,
3
],
"obstructions": [
[
6,
10
]
],
"note": "Red Brinstar Firefleas Room"
},
{
"position": [
7,
3
],
"environment": "water",
"note": "Pants Room"
}
]
}
}Requires: "canTrickyGrappleJump"
{
"noFlashSuit": {}
}Dev note: This appears not to be possible from Climb Supers Room? |
|


This strat requires some farming. It assumes starting with 15 supers for one session of farming. A safe farming method is to face left while standing in the safe spot. Then fire straight up to shoot the orbs as they appear. Jump up while GT's beak is not open to collect the drops. Plasma allows all of the orbs to be broken at once. Grapple allows for more drops to be collected by shooting diagonally, and collecting the items using Grapple. Keep the number of current Missiles below 31 so that GT will be guaranteed to use the attack which creates drops. Firing Supers requires a very steady fire rate so that for every Super Missile caught by GT, the next 4 Supers do damage. Requires: {
"notable": "Safe Spot Kill"
}
"h_navigateHeatRooms"
"canTrickyJump"
{
"ammo": {
"type": "Super",
"count": 15
}
}
{
"or": [
{
"and": [
"Plasma",
{
"heatFrames": 2700
}
]
},
{
"and": [
"canPreciseGrapple",
{
"heatFrames": 2700
}
]
},
{
"heatFrames": 3200
}
]
}Clears obstacles: f_DefeatedGoldenTorizo Sets flags: f_DefeatedGoldenTorizo Dev note: Listed Heat frames have been reduced by accounting for health drops. |
From: 2
Right Door
To: 2
Right Door
This strat requires much farming. It assumes a capacity of and starting with only 5 supers for five sessions of farming. A safe farming method is to face left while standing in the safe spot. Then fire straight up to shoot the orbs as they appear. Jump up while GT's beak is not open to collect the drops. Plasma allows all of the orbs to be broken at once. Grapple allows for more drops to be collected by shooting diagonally, and collecting the items using Grapple. Keep the number of current Missiles below 31 so that GT will be guaranteed to use the attack which creates drops. Firing Supers requires a very steady fire rate so that for every Super Missile caught by GT, the next 4 Supers do damage. Requires: {
"notable": "Safe Spot Kill"
}
"h_navigateHeatRooms"
"canTrickyJump"
"canBePatient"
{
"ammo": {
"type": "Super",
"count": 5
}
}
{
"or": [
{
"and": [
"Plasma",
{
"heatFrames": 3100
}
]
},
{
"and": [
"canPreciseGrapple",
{
"heatFrames": 3200
}
]
},
{
"heatFrames": 4500
}
]
}Clears obstacles: f_DefeatedGoldenTorizo Sets flags: f_DefeatedGoldenTorizo Dev note: Listed Heat frames have been reduced by accounting for health drops. |
|

Entrance condition: {
"comeInWithGrappleSwing": {
"blocks": [
{
"position": [
5,
2
],
"note": "The Moat, Double Chamber, Wrecked Ship Energy Tank Room"
},
{
"position": [
2.375,
4.5625
],
"note": "Post Crocomire Farming Room"
}
]
}
}Requires: "h_heatProof" "canTrickyGrappleJump" "canBeExtremelyPatient" |
|
Entrance condition: {
"comeInWithGrappleSwing": {
"blocks": [
{
"position": [
-1,
5
],
"environment": "water",
"note": "Mt. Everest"
},
{
"position": [
8,
3
],
"note": "Grapple Beam Room"
},
{
"position": [
7,
3
],
"note": "Colosseum"
},
{
"position": [
6,
4
],
"note": "Grapple Tutorial Room 2"
},
{
"position": [
6,
2
],
"note": "Lava Grapple Tunnel"
}
]
}
}Requires: "h_heatProof" "canTrickyGrappleJump" |
From: 1
Top Left Door
To: 1
Top Left Door


Enter the room aiming diagonally down and quickly use two grapple shots to break the shot blocks. Requires: "canPrepareForNextRoom" "canPreciseGrapple" Exit condition: {
"leaveWithRunway": {
"length": 13,
"openEnd": 0
}
} |
From: 4
Top Right Door
To: 4
Top Right Door
Enter the room aiming diagonally down and quickly use two grapple shots to break the shot blocks. Requires: "canPrepareForNextRoom" "canPreciseGrapple" Exit condition: {
"leaveWithRunway": {
"length": 13,
"openEnd": 0
}
} |
|

Entrance condition: {
"comeInWithGrappleSwing": {
"blocks": [
{
"position": [
-1,
5
],
"environment": "water",
"note": "Mt. Everest"
},
{
"position": [
8,
3
],
"note": "Grapple Beam Room"
},
{
"position": [
7,
3
],
"note": "Colosseum"
}
]
}
}Requires: "h_heatProof" "canPreciseGrappleJump" Clears obstacles: door_1 |
|

Entrance condition: {
"comeInWithGrappleSwing": {
"blocks": [
{
"position": [
6,
4
],
"note": "Grapple Tutorial Room 2"
},
{
"position": [
6,
2
],
"note": "Lava Grapple Tunnel"
},
{
"position": [
5,
2
],
"note": "The Moat, Double Chamber, Wrecked Ship Energy Tank Room"
},
{
"position": [
2.375,
4.5625
],
"note": "Post Crocomire Farming Room"
}
]
}
}Requires: "h_heatProof" "canTrickyGrappleJump" Clears obstacles: door_1 |
From: 6
Bowling Chozo Statue
To: 1
Top Left Door

Use a Grapple fling to get stuck inside a breakable Grapple block. It can help to break two or more Grapple blocks in a row. Crystal Flash then X-ray climb to the region above (less than 1 screen). There is a chance that Samus will not be able to Crystal Flash unless first placing a Bomb or Power Bomb. Requires: {
"notable": "Grapple Block Crystal Flash"
}
"canPreciseGrapple"
"canJumpIntoRespawningBlock"
"canInsaneJump"
"h_bombThings"
"h_CrystalFlash"
"canXRayClimb"
{
"or": [
"h_fourTileJumpMorph",
"h_useSpringBall",
"canIBJ",
{
"getBlueSpeed": {
"usedTiles": 16,
"steepDownTiles": 4,
"openEnd": 0
}
},
{
"and": [
{
"not": "f_DefeatedPhantoon"
},
"canRiskPermanentLossOfAccess"
]
}
]
}Exit condition: {
"leaveNormally": {}
}Unlocks doors: {"types":["ammo"],"requires":[]} |
|


Fling Samus from the first set of grapple blocks to the second set without falling. This requires precise timing but is made easier by morphing and unmorphing to reset Samus' fall speed. Requires: "canPreciseGrapple"
"canLateralMidAirMorph"
"canResetFallSpeed"
{
"or": [
"canInsaneJump",
{
"thornHits": 5
}
]
}
"h_complexToCarryFlashSuit"Dev note: The 5 thornHits are for lenience since it is difficult to get this first try. |
|
Fling Samus from the first set of grapple blocks to the second set without falling. This requires a frame-perfect release of Grapple and a 2-frame window to fire Grapple again. Requires: "canPreciseGrapple"
"canInsaneJump"
{
"or": [
"canBeVeryPatient",
{
"thornHits": 5
}
]
}
{
"noFlashSuit": {}
}Dev note: The 5 thornHits are for lenience since it is very difficult to get this first try. |
|
Fling Samus from the first set of grapple blocks to the second set without falling. Requires precise timing. Requires: "canPreciseGrapple" "canTrickyJump" "h_midAirShootUp" |
From: 1
Bottom Left Door
To: 4
Farm Junction Left of Gate
Entrance condition: {
"comeInWithGrappleSwing": {
"blocks": [
{
"position": [
-1,
5
],
"environment": "water",
"note": "Mt. Everest"
},
{
"position": [
8,
3
],
"note": "Grapple Beam Room"
},
{
"position": [
7,
3
],
"note": "Colosseum"
},
{
"position": [
6,
4
],
"note": "Grapple Tutorial Room 2"
}
]
}
}Requires: "canTrickyGrappleJump" |
|
Entrance condition: {
"comeInWithGrappleSwing": {
"blocks": [
{
"position": [
6,
2
],
"note": "Lava Grapple Tunnel"
},
{
"position": [
5,
2
],
"note": "The Moat, Double Chamber, Wrecked Ship Energy Tank Room"
},
{
"position": [
2.375,
4.5625
],
"note": "Post Crocomire Farming Room"
}
]
}
}Requires: "canTrickyGrappleJump" "canBeExtremelyPatient" |
|
Entrance condition: {
"comeInWithGrappleSwing": {
"blocks": [
{
"position": [
-1,
5
],
"environment": "water",
"note": "Mt. Everest"
},
{
"position": [
8,
3
],
"note": "Grapple Beam Room"
},
{
"position": [
7,
3
],
"note": "Colosseum"
}
]
}
}Requires: "canPreciseGrappleJump" "h_trickyToCarryFlashSuit" |
|
Entrance condition: {
"comeInWithGrappleSwing": {
"blocks": [
{
"position": [
6,
4
],
"note": "Grapple Tutorial Room 2"
}
]
}
}Requires: "canTrickyGrappleJump"
{
"or": [
{
"noFlashSuit": {}
},
{
"and": [
"canTrickyCarryFlashSuit",
"canBeExtremelyPatient"
]
}
]
} |
|
Entrance condition: {
"comeInWithGrappleSwing": {
"blocks": [
{
"position": [
13,
5
],
"environment": "water",
"note": "Mt. Everest"
},
{
"position": [
7,
3
],
"note": "The Precious Room"
},
{
"position": [
7,
2
],
"note": "The Moat"
}
]
}
}Requires: "canPreciseGrappleJump" "h_trickyToCarryFlashSuit" |
|
Entrance condition: {
"comeInWithGrappleSwing": {
"blocks": [
{
"position": [
8,
2
],
"note": "Bowling Alley"
},
{
"position": [
7,
3
],
"obstructions": [
[
6,
10
]
],
"note": "Red Brinstar Firefleas Room"
},
{
"position": [
9,
2
],
"note": "Climb Supers Room, Bubble Mountain, Lava Grapple Tunnel"
}
]
}
}Requires: "canTrickyGrappleJump" |
From: 1
Bottom Left Door
To: 4
Top Left Door
Entrance condition: {
"comeInWithGrappleSwing": {
"blocks": [
{
"position": [
-1,
5
],
"environment": "water",
"note": "Mt. Everest"
},
{
"position": [
8,
3
],
"note": "Grapple Beam Room"
},
{
"position": [
7,
3
],
"note": "Colosseum"
}
]
}
}Requires: "canPreciseGrappleJump"
{
"or": [
{
"noFlashSuit": {}
},
"HiJump",
{
"and": [
"canTrickyCarryFlashSuit",
"canBeExtremelyPatient"
]
}
]
}Exit condition: {
"leaveWithGrappleJump": {
"position": "right"
}
}Unlocks doors: {"types":["super","powerbomb"],"requires":[]}
{"types":["missiles"],"requires":["canTrickyGrappleJump"]}Dev note: Opening the door while carrying a flash suit is possible without Hi-Jump but very difficult. |
|
Entrance condition: {
"comeInWithGrappleSwing": {
"blocks": [
{
"position": [
-1,
5
],
"environment": "water",
"note": "Mt. Everest"
},
{
"position": [
8,
3
],
"note": "Grapple Beam Room"
},
{
"position": [
7,
3
],
"note": "Colosseum"
},
{
"position": [
6,
4
],
"note": "Grapple Tutorial Room 2"
},
{
"position": [
6,
2
],
"note": "Lava Grapple Tunnel"
},
{
"position": [
5,
2
],
"note": "The Moat, Double Chamber, Wrecked Ship Energy Tank Room"
},
{
"position": [
2.375,
4.5625
],
"note": "Post Crocomire Farming Room"
}
]
}
}Requires: "canTrickyGrappleJump"
{
"or": [
{
"noFlashSuit": {}
},
"HiJump",
{
"and": [
"canTrickyCarryFlashSuit",
"canBeExtremelyPatient"
]
}
]
}Exit condition: {
"leaveWithGrappleJump": {
"position": "any"
}
}Unlocks doors: {"types":["ammo"],"requires":[]} |
|
Entrance condition: {
"comeInWithGrappleSwing": {
"blocks": [
{
"position": [
-1,
5
],
"environment": "water",
"note": "Mt. Everest"
},
{
"position": [
8,
3
],
"note": "Grapple Beam Room"
},
{
"position": [
7,
3
],
"note": "Colosseum"
}
]
}
}Requires: "canGrappleJump" |
From: 1
Bottom Left Door
To: 5
Platform Junction Near Top Left Door
Entrance condition: {
"comeInWithGrappleSwing": {
"blocks": [
{
"position": [
6,
4
],
"note": "Grapple Tutorial Room 2"
}
]
}
}Requires: "canPreciseGrappleJump" |
From: 1
Bottom Left Door
To: 5
Platform Junction Near Top Left Door

Entrance condition: {
"comeInWithGrappleSwing": {
"blocks": [
{
"position": [
6,
2
],
"note": "Lava Grapple Tunnel"
},
{
"position": [
5,
2
],
"note": "The Moat, Double Chamber, Wrecked Ship Energy Tank Room"
},
{
"position": [
2.375,
4.5625
],
"note": "Post Crocomire Farming Room"
}
]
}
}Requires: "canTrickyGrappleJump" |
|
Swing up through the door from a Grapple block in the room below (Mt. Everest). Fire a Grapple shot after entering the room, to allow Samus to move further left, staying to the right of the fish and landing on the ledge above. Entrance condition: {
"comeInWithGrappleSwing": {
"blocks": [
{
"position": [
12,
5
],
"environment": "water",
"note": "Mt. Everest"
}
]
},
"comesThroughToilet": "any"
}Requires: "canTrickyJump" |
From: 1
Bottom Door
To: 9
Junction Below Speed Blocks
Swing up through the door from a Grapple block in the room below (Mt. Everest). Use arm pumps to move two tiles to the left, to avoid the overhang and floating platform. Entrance condition: {
"comeInWithGrappleSwing": {
"blocks": [
{
"position": [
12,
5
],
"environment": "water",
"note": "Mt. Everest"
}
]
},
"comesThroughToilet": "any"
}Requires: "HiJump" "canPreciseGrappleJump" Dev note: FIXME: This is possible without HiJump, but with much greater difficulty. |
|
Entrance condition: {
"comeInWithGrappleSwing": {
"blocks": [
{
"position": [
7,
3
],
"note": "The Precious Room"
},
{
"position": [
7,
2
],
"note": "The Moat"
}
]
}
}Requires: "canPreciseGrappleJump" |
From: 2
Bottom Right Door
To: 3
Middle Right Door
Entrance condition: {
"comeInWithGrappleSwing": {
"blocks": [
{
"position": [
13,
5
],
"environment": "water",
"note": "Mt. Everest"
}
]
}
}Requires: "canPreciseGrappleJump"
"canKago"
{
"enemyDamage": {
"enemy": "Skultera",
"type": "contact",
"hits": 1
}
} |
|

Entrance condition: {
"comeInWithGrappleSwing": {
"blocks": [
{
"position": [
8,
2
],
"note": "Bowling Alley"
},
{
"position": [
7,
3
],
"obstructions": [
[
6,
10
]
],
"note": "Red Brinstar Firefleas Room"
},
{
"position": [
9,
2
],
"note": "Climb Supers Room, Bubble Mountain, Lava Grapple Tunnel"
}
]
}
}Requires: "canTrickyGrappleJump" Dev note: Entering from Pants Room (suitless) apparently doesn't work, due to not being able to get enough horizontal speed. |
From: 2
Bottom Right Door
To: 9
Junction Below Speed Blocks
Arm pump as needed, to avoid bonking a floating platform above. Entrance condition: {
"comeInWithGrappleSwing": {
"blocks": [
{
"position": [
7,
3
],
"note": "The Precious Room"
},
{
"position": [
7,
2
],
"note": "The Moat"
},
{
"position": [
8,
2
],
"note": "Bowling Alley"
},
{
"position": [
7,
3
],
"obstructions": [
[
6,
10
]
],
"note": "Red Brinstar Firefleas Room"
},
{
"position": [
9,
2
],
"note": "Climb Supers Room, Bubble Mountain, Lava Grapple Tunnel"
}
]
}
}Requires: "canPreciseGrappleJump"
{
"or": [
"HiJump",
"canTrickyGrappleJump"
]
}
"h_trickyToCarryFlashSuit" |
From: 2
Bottom Right Door
To: 9
Junction Below Speed Blocks

Morph or unmorph while passing through the Skultera, to avoid taking knockback. Arm pump as needed, to move left a tile past the initial ledge, to avoid bonking a floating platform above. Grapple jump quickly to get past the second Skultera, or kago through it as well. Entrance condition: {
"comeInWithGrappleSwing": {
"blocks": [
{
"position": [
13,
5
],
"environment": "water",
"note": "Mt. Everest"
}
]
}
}Requires: "canPreciseGrappleJump"
{
"or": [
"HiJump",
"canTrickyGrappleJump"
]
}
"canKago"
{
"enemyDamage": {
"enemy": "Skultera",
"type": "contact",
"hits": 1
}
}
{
"or": [
{
"enemyDamage": {
"enemy": "Skultera",
"type": "contact",
"hits": 1
}
},
"h_trickyToCarryFlashSuit"
]
} |
|
If Mama Turtle is in her starting location, stand on the rightmost side of her to be aligned below the grapple block. With a miss, if Samus hasn't moved horizontally, simply fall straight down to land safely back on to her. Requires: "canPreciseGrapple" "h_midAirShootUp" Clears obstacles: B |
|
Requires: {
"or": [
"canWallJump",
"SpaceJump",
{
"and": [
"HiJump",
"canDash",
"canCarefulJump"
]
},
{
"and": [
"canUseGrapple",
{
"or": [
"HiJump",
"canSpringBallJumpMidAir",
"canPreciseGrapple"
]
},
"h_midAirShootUp"
]
}
]
} |
|
Requires: {
"or": [
"SpaceJump",
{
"and": [
"canPreciseGrapple",
{
"or": [
"h_midAirShootUp",
"HiJump",
"canWallJump"
]
}
]
}
]
}Clears obstacles: B |
|
Requires: {
"or": [
"canPreciseGrapple",
"SpaceJump"
]
}Clears obstacles: B |
From: 1
Left Doorway
To: 4
Top Door
Entrance condition: {
"comeInWithGrappleSwing": {
"blocks": [
{
"position": [
-1,
5
],
"environment": "water",
"note": "Mt. Everest"
},
{
"position": [
8,
3
],
"note": "Grapple Beam Room"
},
{
"position": [
7,
3
],
"note": "Colosseum"
}
]
}
}Requires: {
"or": [
"f_MaridiaTubeBroken",
{
"obstaclesCleared": [
"f_MaridiaTubeBroken"
]
}
]
}
"canPreciseGrappleJump"
"HiJump"
"h_trickyToCarryFlashSuit"Exit condition: {
"leaveWithGrappleJump": {
"position": "any"
}
}Unlocks doors: {"types":["super","powerbomb"],"requires":[]}
{"types":["missiles"],"requires":["never"]} |
From: 1
Left Doorway
To: 4
Top Door

Entrance condition: {
"comeInWithGrappleSwing": {
"blocks": [
{
"position": [
-1,
5
],
"environment": "water",
"note": "Mt. Everest"
},
{
"position": [
8,
3
],
"note": "Grapple Beam Room"
},
{
"position": [
7,
3
],
"note": "Colosseum"
},
{
"position": [
6,
4
],
"note": "Grapple Tutorial Room 2"
},
{
"position": [
6,
2
],
"note": "Lava Grapple Tunnel"
},
{
"position": [
5,
2
],
"note": "The Moat, Double Chamber, Wrecked Ship Energy Tank Room"
},
{
"position": [
2.375,
4.5625
],
"note": "Post Crocomire Farming Room"
}
]
}
}Requires: {
"or": [
"f_MaridiaTubeBroken",
{
"obstaclesCleared": [
"f_MaridiaTubeBroken"
]
}
]
}
"canTrickyGrappleJump"Exit condition: {
"leaveWithGrappleJump": {
"position": "any"
}
}Unlocks doors: {"types":["ammo"],"requires":[]} |
|
Entrance condition: {
"comeInWithGrappleSwing": {
"blocks": [
{
"position": [
13,
5
],
"environment": "water",
"note": "Mt. Everest"
},
{
"position": [
7,
3
],
"note": "The Precious Room"
},
{
"position": [
7,
2
],
"note": "The Moat"
},
{
"position": [
8,
2
],
"note": "Bowling Alley"
},
{
"position": [
7,
3
],
"obstructions": [
[
6,
10
]
],
"note": "Red Brinstar Firefleas Room"
}
]
}
}Requires: {
"or": [
"f_MaridiaTubeBroken",
{
"obstaclesCleared": [
"f_MaridiaTubeBroken"
]
}
]
}
"canPreciseGrappleJump"
{
  "or": [
    {
      "noFlashSuit": {}
    },
    "HiJump",
    {
      "and": [
        "canTrickyCarryFlashSuit",
        "canBeExtremelyPatient"
      ]
    }
  ]
}
Exit condition: {
"leaveWithGrappleJump": {
"position": "any"
}
}Unlocks doors: {"types":["super","powerbomb"],"requires":[]}
{"types":["missiles"],"requires":["never"]} |
From: 2
Bottom Right Door
To: 4
Top Door
Entrance condition: {
"comeInWithGrappleSwing": {
"blocks": [
{
"position": [
13,
5
],
"environment": "water",
"note": "Mt. Everest"
},
{
"position": [
7,
3
],
"note": "The Precious Room"
},
{
"position": [
7,
2
],
"note": "The Moat"
},
{
"position": [
8,
2
],
"note": "Bowling Alley"
},
{
"position": [
7,
3
],
"obstructions": [
[
6,
10
]
],
"note": "Red Brinstar Firefleas Room"
},
{
"position": [
9,
2
],
"note": "Climb Supers Room, Bubble Mountain, Lava Grapple Tunnel"
}
]
}
}Requires: {
"or": [
"f_MaridiaTubeBroken",
{
"obstaclesCleared": [
"f_MaridiaTubeBroken"
]
}
]
}
"canTrickyGrappleJump"Exit condition: {
"leaveWithGrappleJump": {
"position": "any"
}
}Unlocks doors: {"types":["ammo"],"requires":[]}Dev note: Opening a Missile door while grapple jumping is tricky but possible. |
From: 2
Bottom Right Door
To: 4
Top Door
Entrance condition: {
"comeInWithGrappleSwing": {
"blocks": [
{
"position": [
7,
3
],
"environment": "water",
"note": "Pants Room"
}
]
}
}Requires: {
"or": [
"f_MaridiaTubeBroken",
{
"obstaclesCleared": [
"f_MaridiaTubeBroken"
]
}
]
}
"canTrickyGrappleJump"Exit condition: {
"leaveWithGrappleJump": {
"position": "right"
}
}Unlocks doors: {"types":["ammo"],"requires":[]} |
From: 3
Top Right Doorway
To: 4
Top Door

Entrance condition: {
"comeInWithGrappleSwing": {
"blocks": [
{
"position": [
13,
5
],
"environment": "water",
"note": "Mt. Everest"
},
{
"position": [
7,
3
],
"note": "The Precious Room"
}
]
}
}Requires: {
"or": [
"f_MaridiaTubeBroken",
{
"obstaclesCleared": [
"f_MaridiaTubeBroken"
]
}
]
}
"canPreciseGrappleJump"Exit condition: {
"leaveWithGrappleJump": {
"position": "right"
}
}Unlocks doors: {"types":["super","powerbomb"],"requires":[]}
{"types":["missiles"],"requires":["never"]} |
From: 3
Top Right Doorway
To: 4
Top Door
Entrance condition: {
"comeInWithGrappleSwing": {
"blocks": [
{
"position": [
13,
5
],
"environment": "water",
"note": "Mt. Everest"
},
{
"position": [
7,
3
],
"note": "The Precious Room"
}
]
}
}Requires: {
"or": [
"f_MaridiaTubeBroken",
{
"obstaclesCleared": [
"f_MaridiaTubeBroken"
]
}
]
}
"canPreciseGrappleJump"
"HiJump"
"h_trickyToCarryFlashSuit"Exit condition: {
"leaveWithGrappleJump": {
"position": "any"
}
}Unlocks doors: {"types":["super","powerbomb"],"requires":[]}
{"types":["missiles"],"requires":["never"]} |
From: 3
Top Right Doorway
To: 4
Top Door
Entrance condition: {
"comeInWithGrappleSwing": {
"blocks": [
{
"position": [
7,
2
],
"note": "The Moat"
},
{
"position": [
8,
2
],
"note": "Bowling Alley"
},
{
"position": [
7,
3
],
"obstructions": [
[
6,
10
]
],
"note": "Red Brinstar Firefleas Room"
}
]
}
}Requires: {
"or": [
"f_MaridiaTubeBroken",
{
"obstaclesCleared": [
"f_MaridiaTubeBroken"
]
}
]
}
"canPreciseGrappleJump"
"HiJump"
"h_trickyToCarryFlashSuit"Exit condition: {
"leaveWithGrappleJump": {
"position": "left"
}
}Unlocks doors: {"types":["super","powerbomb"],"requires":[]}
{"types":["missiles"],"requires":["never"]} |
From: 3
Top Right Doorway
To: 4
Top Door
Entrance condition: {
"comeInWithGrappleSwing": {
"blocks": [
{
"position": [
13,
5
],
"environment": "water",
"note": "Mt. Everest"
},
{
"position": [
7,
3
],
"note": "The Precious Room"
},
{
"position": [
7,
2
],
"note": "The Moat"
},
{
"position": [
8,
2
],
"note": "Bowling Alley"
},
{
"position": [
7,
3
],
"obstructions": [
[
6,
10
]
],
"note": "Red Brinstar Firefleas Room"
}
]
}
}Requires: {
"or": [
"f_MaridiaTubeBroken",
{
"obstaclesCleared": [
"f_MaridiaTubeBroken"
]
}
]
}
"canTrickyGrappleJump"Exit condition: {
"leaveWithGrappleJump": {
"position": "any"
}
}Unlocks doors: {"types":["ammo"],"requires":[]}Dev note: Coming in from Pants Room (suitless, right position) might be possible with enough arm pumping. |
From: 3
Top Right Doorway
To: 4
Top Door

Entrance condition: {
"comeInWithGrappleSwing": {
"blocks": [
{
"position": [
9,
2
],
"note": "Climb Supers Room, Bubble Mountain, Lava Grapple Tunnel"
}
]
}
}Requires: {
"or": [
"f_MaridiaTubeBroken",
{
"obstaclesCleared": [
"f_MaridiaTubeBroken"
]
}
]
}
"canTrickyGrappleJump"Exit condition: {
"leaveWithGrappleJump": {
"position": "left"
}
}Unlocks doors: {"types":["ammo"],"requires":[]} |
From: 3
Top Right Doorway
To: 4
Top Door
Entrance condition: {
"comeInWithGrappleSwing": {
"blocks": [
{
"position": [
7,
3
],
"environment": "water",
"note": "Pants Room"
}
]
}
}Requires: {
"or": [
"f_MaridiaTubeBroken",
{
"obstaclesCleared": [
"f_MaridiaTubeBroken"
]
}
]
}
"canTrickyGrappleJump"Exit condition: {
"leaveWithGrappleJump": {
"position": "right"
}
}Unlocks doors: {"types":["ammo"],"requires":[]} |
From: 1
Top Left Door
To: 1
Top Left Door
Follow the crab from the bottom right door to the top left door with Gravity or Grapple. It is also possible to knock the crab off of the middle peak with a super and follow it to the left with Ice or HiJump and Spring Ball. Requires: "canBeVeryPatient"
{
"or": [
"canGravityJump",
{
"and": [
"canPreciseGrapple",
{
"or": [
"HiJump",
"Gravity"
]
}
]
},
{
"and": [
{
"ammo": {
"type": "Super",
"count": 1
}
},
{
"or": [
"canTrickyUseFrozenEnemies",
{
"and": [
"HiJump",
"canSpringBallJumpMidAir"
]
}
]
}
]
}
]
}Exit condition: {
"leaveWithGModeSetup": {}
}Dev note: These strats take approximately 2 minutes each, but because it is just for a G-Mode Setup, canBeVeryPatient was added. This could be done with many other sets of item combinations, but it would be very tedious for a g-mode setup. |
From: 1
Top Left Door
To: 1
Top Left Door


Follow the crab from the bottom right door to the top left door. It is also possible to knock the crab off of the middle peak with a super and follow it. Requires: "h_frozenEnemyRunway"
"Gravity"
"canBeVeryPatient"
{
"or": [
"canGravityJump",
"canPreciseGrapple",
{
"ammo": {
"type": "Super",
"count": 1
}
}
]
}Exit condition: {
"leaveWithRunway": {
"length": 4,
"openEnd": 0
}
}Dev note: These strats take approximately 2 minutes each, but because it is just for a 1.5 tile runway extension, canBeVeryPatient was added. This could be done with many other sets of item combinations, but it would be very tedious for a runway extension. |
|
Note that it is possible to get up with Grapple alone by using the Powamps. Fling from the Powamp into the side of the top platform to align horizontally. Entrance condition: {
"comeInWithGMode": {
"mode": "direct",
"morphed": false
},
"comesThroughToilet": "any"
}Requires: "h_navigateUnderwater"
{
"or": [
{
"and": [
"Gravity",
{
"or": [
"HiJump",
"canSpringBallJumpMidAir",
"SpaceJump",
"canIBJ",
"canGravityJump"
]
}
]
},
{
"and": [
"canUseEnemies",
"canPreciseGrapple"
]
},
{
"and": [
"HiJump",
"canSpringBallJumpMidAir"
]
}
]
}Exit condition: {
"leaveWithGMode": {
"morphed": false
}
} |
|
Lure the crab to the top of the room and freeze it close enough to the corner that it will be able to hit Samus after it thaws. Without Morph, this is much trickier, requiring fairly precise freeze positioning and movement to get onto the crab. Aim down before landing on the crab to avoid triggering the transition. Be sure to touch the transition before it thaws or Samus will be in a falling pose, but late enough that it will be able to rotate around the corner and hit Samus in time. Requires: "canBePatient"
{
"or": [
{
"and": [
"Gravity",
"SpaceJump"
]
},
{
"and": [
"Gravity",
"HiJump",
"canPreciseGrapple"
]
},
{
"and": [
"HiJump",
"canPreciseGrapple",
"canSpringBallJumpMidAir",
"canBeVeryPatient"
]
},
{
"and": [
"HiJump",
"canGravityJump",
"canBeVeryPatient"
]
}
]
}
"canUpwardGModeSetup"
"canTrickyUseFrozenEnemies"
{
"or": [
"Morph",
"canTrickyGMode"
]
}Exit condition: {
"leaveWithGModeSetup": {}
}Dev note: Without Morph, this is not difficult enough to require canTrickyGMode, but it is easy to fail and the setup is very slow. The patience requirements for these strats are lenient, but there is a good chance of not getting the setup or entering G-mode first try. |
|
Lure a crab to the top door. Use a Super to knock it off and freeze it frame-perfectly below the door. Use a flash suit or blue suit from a crouched position to spark vertically and clip past the door shell. Requires: "canBeVeryPatient"
{
"or": [
{
"and": [
"Gravity",
"SpaceJump"
]
},
{
"and": [
"Gravity",
"HiJump",
"canPreciseGrapple"
]
},
{
"and": [
"HiJump",
"canPreciseGrapple",
"canSpringBallJumpMidAir"
]
},
{
"and": [
"HiJump",
"canGravityJump"
]
}
]
}
{
"ammo": {
"type": "Super",
"count": 1
}
}
"h_storedSparkIceClip"
{
"shinespark": {
"frames": 2,
"excessFrames": 1
}
}Exit condition: {
"leaveWithSpark": {}
}Bypasses door shell: true |
From: 10
Upper Right Ledge Junction
To: 4
Top Right Door
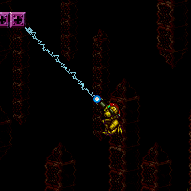

Crouch at the edge of the overhang. Jump and just after the peak of the jump, grapple to the grapple blocks. This strat is finicky, and failure doesn't usually allow a second try (assuming the Powamp is not there). Be sure not to hold angle while crouch jumping, or Samus will not gain the extra height from the crouch jump. Requires: "canSuitlessMaridia"
"canPreciseGrapple"
"h_underwaterCrouchJump"
"canInsaneJump"
{
"noFlashSuit": {}
}Dev note: This is possible to do without a crouch jump, but it is much harder. |
|
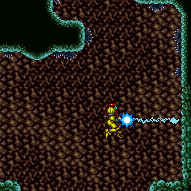
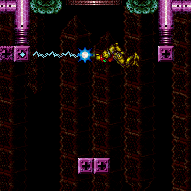
Swing up through the door from a Grapple block in the room below (Mt. Everest). Fire a Grapple shot after entering the room, to allow Samus to move further right and get onto the ledge. Entrance condition: {
"comeInWithGrappleSwing": {
"blocks": [
{
"position": [
-1,
5
],
"environment": "water",
"note": "Mt. Everest"
}
]
},
"comesThroughToilet": "any"
}Requires: "canTrickyJump" |
|


Cross the room with Grapple or wall jumps. Under the sand is spikes. Be sure not to turn around before landing or Samus will fall straight through the sand. Breaking spin while midair, such as by tapping an angle button, will help Samus land less deep in the sand - a quick jump when landing will give her a much higher jump. The last wall jump to get around the corner is tricky but it does not require a delayed wall jump, even without HiJump. Requires: "Gravity"
{
"or": [
{
"and": [
"HiJump",
"canWallJump",
{
"or": [
"canPlayInSand",
"canConsecutiveWallJump"
]
}
]
},
{
"and": [
"canTrickyWallJump",
"canConsecutiveWallJump"
]
},
{
"and": [
"canPreciseGrapple",
"canCarefulJump"
]
}
]
}
{
"or": [
{
"ammo": {
"type": "Missile",
"count": 2
}
},
{
"ammo": {
"type": "Super",
"count": 2
}
},
"canUseGrapple",
"canDodgeWhileShooting",
"Spazer",
"Wave",
"Plasma",
"ScrewAttack",
{
"haveBlueSuit": {}
},
{
"enemyDamage": {
"enemy": "Mochtroid",
"type": "contact",
"hits": 1
}
}
]
}
{
"or": [
"canPlayInSand",
{
"spikeHits": 2
}
]
}
{
"or": [
"Grapple",
{
"noBlueSuit": {}
}
]
} |
|
Use Grapple Beam to cross the room. The first two room segments can be safely grappled across from in the water. The third room segment grapple is tricky. It is possible to use the spikes as platforms instead. Requires: "canSuitlessMaridia"
"canDodgeWhileShooting"
"canPreciseGrapple"
{
"or": [
"canInsaneJump",
"canPlayInSand"
]
}
{
"or": [
"HiJump",
"canTrickyJump"
]
}
"h_complexToCarryFlashSuit" |
|
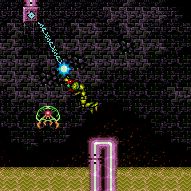
Requires: "canSuitlessMaridia"
"canDodgeWhileShooting"
"canPreciseGrapple"
{
"or": [
"canInsaneJump",
"canPlayInSand"
]
}
{
"or": [
"HiJump",
"canTrickyJump"
]
}
"h_complexToCarryFlashSuit" |
|
Entrance condition: {
"comeInWithGrappleSwing": {
"blocks": [
{
"position": [
-1,
5
],
"environment": "water",
"note": "Mt. Everest"
},
{
"position": [
8,
3
],
"note": "Grapple Beam Room"
},
{
"position": [
7,
3
],
"note": "Colosseum"
}
]
}
}Requires: "canPreciseGrappleJump" |
|
Entrance condition: {
"comeInWithGrappleSwing": {
"blocks": [
{
"position": [
6,
4
],
"note": "Grapple Tutorial Room 2"
},
{
"position": [
6,
2
],
"note": "Lava Grapple Tunnel"
},
{
"position": [
5,
2
],
"note": "The Moat, Double Chamber, Wrecked Ship Energy Tank Room"
},
{
"position": [
2.375,
4.5625
],
"note": "Post Crocomire Farming Room"
}
]
}
}Requires: "canTrickyGrappleJump" |
|

Kill Draygon by grappling to an exposed turret as you get grabbed. This avoids taking damage from Draygon once grabbed. Requires: {
"notable": "Grapple Quick Kill"
}
"h_navigateUnderwater"
"canPreciseGrapple"
{
"or": [
"Gravity",
"Morph",
"canTrickyDodgeEnemies",
{
"enemyDamage": {
"enemy": "Draygon",
"type": "contact",
"hits": 2
}
}
]
}
{
"or": [
"Gravity",
"canTrickyJump",
{
"enemyDamage": {
"enemy": "Draygon",
"type": "turretProjectile",
"hits": 1
}
}
]
}
{
"or": [
"h_breakThreeDraygonTurrets",
{
"and": [
{
"or": [
"canTrickyDodgeEnemies",
{
"enemyDamage": {
"enemy": "Draygon",
"type": "turretProjectile",
"hits": 2
}
}
]
},
"h_breakOneDraygonTurret"
]
},
{
"and": [
"Gravity",
"canTrickyDodgeEnemies",
{
"or": [
"canBeLucky",
{
"enemyDamage": {
"enemy": "Draygon",
"type": "turretProjectile",
"hits": 1
}
}
]
},
{
"or": [
"canWallJump",
"canGravityJump"
]
}
]
}
]
}
{
"draygonElectricityFrames": 240
}
"h_complexToCarryFlashSuit"Clears obstacles: f_DefeatedDraygon Sets flags: f_DefeatedDraygon Dev note: FIXME: HiJump + canDoubleSpringBallJumpMidAir can work but needs to be looked into more. |
|
Entrance condition: {
"comeInWithGrappleSwing": {
"blocks": [
{
"position": [
8,
3
],
"note": "Grapple Beam Room"
},
{
"position": [
7,
3
],
"note": "Colosseum"
}
]
}
}Requires: "canGrappleJump" Clears obstacles: door_1 |
|
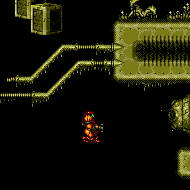

Entrance condition: {
"comeInWithGrappleSwing": {
"blocks": [
{
"position": [
6,
2
],
"note": "Lava Grapple Tunnel"
}
]
}
}Requires: "canPreciseGrappleJump" "h_trickyToCarryFlashSuit" Clears obstacles: door_1 |
|
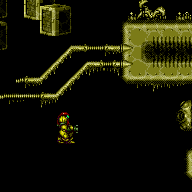
Entrance condition: {
"comeInWithGrappleSwing": {
"blocks": [
{
"position": [
5,
2
],
"note": "The Moat, Double Chamber, Wrecked Ship Energy Tank Room"
},
{
"position": [
2.375,
4.5625
],
"note": "Post Crocomire Farming Room"
}
]
}
}Requires: "canTrickyGrappleJump" Clears obstacles: door_1 Dev note: Coming from Grapple Tutorial Room 2 does not work (with or without HiJump), as it's not possible to gain enough horizontal speed. |
|
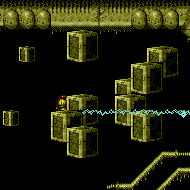

Entrance condition: {
"comeInWithGrappleSwing": {
"blocks": [
{
"position": [
-1,
5
],
"environment": "water",
"note": "Mt. Everest"
}
]
}
}Requires: "HiJump" "canTrickyGrappleJump" Clears obstacles: door_1 |
|
Entrance condition: {
"comeInWithGrappleSwing": {
"blocks": [
{
"position": [
13,
5
],
"environment": "water",
"note": "Mt. Everest"
},
{
"position": [
7,
3
],
"note": "The Precious Room"
},
{
"position": [
7,
2
],
"note": "The Moat"
}
]
}
}Requires: "canPreciseGrappleJump" |
|
Entrance condition: {
"comeInWithGrappleSwing": {
"blocks": [
{
"position": [
8,
2
],
"note": "Bowling Alley"
},
{
"position": [
7,
3
],
"obstructions": [
[
6,
10
]
],
"note": "Red Brinstar Firefleas Room"
},
{
"position": [
9,
2
],
"note": "Climb Supers Room, Bubble Mountain, Lava Grapple Tunnel"
}
]
}
}Requires: "canTrickyGrappleJump" |
From: 2
Right Door
To: 4
Top Right Ledge Junction

Entrance condition: {
"comeInWithGrappleSwing": {
"blocks": [
{
"position": [
7,
3
],
"environment": "water",
"note": "Pants Room"
}
]
}
}Requires: "canTrickyGrappleJump"
{
"or": [
"SpaceJump",
{
"and": [
"canJumpIntoIBJ",
"canBombHorizontally"
]
}
]
} |
|

This is for entering from Mt. Everest. Samus must be carefully positioned in order to make it up to the top of the room. One method is to press against the pipes jutting out on either side of the room, turn around while morphed, then arm pump in between grapple jumps in order to move one tile toward the center of the room. Entrance condition: {
"comeInWithGrappleSwing": {
"blocks": [
{
"position": [
-1,
5
],
"environment": "water",
"note": "Mt. Everest"
}
]
}
}Requires: "HiJump" "canPreciseGrappleJump" Dev note: This can also work well enough with other setup rooms such as Colosseum, but given that this strat assumes having HiJump, it would be easier to just cross-room jump in those cases. |
|
Samus must be carefully positioned in order to make it up to the top of the room. One method is to press against the pipes jutting out on either side of the room, turn around while morphed, then arm pump in between grapple jumps in order to move one tile toward the center of the room. Entrance condition: {
"comeInWithGrappleSwing": {
"blocks": [
{
"position": [
-1,
5
],
"environment": "water",
"note": "Mt. Everest"
},
{
"position": [
8,
3
],
"note": "Grapple Beam Room"
},
{
"position": [
7,
3
],
"note": "Colosseum"
},
{
"position": [
6,
4
],
"note": "Grapple Tutorial Room 2"
},
{
"position": [
6,
2
],
"note": "Lava Grapple Tunnel"
},
{
"position": [
5,
2
],
"note": "The Moat, Double Chamber, Wrecked Ship Energy Tank Room"
},
{
"position": [
2.375,
4.5625
],
"note": "Post Crocomire Farming Room"
}
]
}
}Requires: "canTrickyGrappleJump" |
|
Entrance condition: {
"comeInWithGrappleSwing": {
"blocks": [
{
"position": [
-1,
5
],
"environment": "water",
"note": "Mt. Everest"
},
{
"position": [
8,
3
],
"note": "Grapple Beam Room"
},
{
"position": [
7,
3
],
"note": "Colosseum"
},
{
"position": [
6,
4
],
"note": "Grapple Tutorial Room 2"
}
]
}
}Requires: "canTrickyGrappleJump" |
|
Entrance condition: {
"comeInWithGrappleSwing": {
"blocks": [
{
"position": [
8,
3
],
"note": "Grapple Beam Room"
},
{
"position": [
7,
3
],
"note": "Colosseum"
},
{
"position": [
6,
2
],
"note": "Lava Grapple Tunnel"
},
{
"position": [
5,
2
],
"note": "The Moat, Double Chamber, Wrecked Ship Energy Tank Room"
}
]
}
}Requires: "canTrickyGrappleJump" "canMidairWiggle" "canBeExtremelyPatient" |
From: 1
Bottom Left Door
To: 2
Top Right Door

Entrance condition: {
"comeInWithGrappleSwing": {
"blocks": [
{
"position": [
8,
3
],
"note": "Grapple Beam Room"
},
{
"position": [
7,
3
],
"note": "Colosseum"
}
]
}
}Requires: "canTrickyGrappleJump"
{
"or": [
{
"ammo": {
"type": "Missile",
"count": 1
}
},
{
"ammo": {
"type": "Super",
"count": 1
}
},
"Plasma",
{
"and": [
"canKago",
{
"enemyDamage": {
"enemy": "Choot",
"type": "contact",
"hits": 1
}
}
]
}
]
} |
From: 1
Bottom Left Door
To: 2
Top Right Door
Entrance condition: {
"comeInWithGrappleSwing": {
"blocks": [
{
"position": [
6,
2
],
"note": "Lava Grapple Tunnel"
},
{
"position": [
5,
2
],
"note": "The Moat, Double Chamber, Wrecked Ship Energy Tank Room"
}
]
}
}Requires: "canTrickyGrappleJump"
"HiJump"
{
"or": [
{
"ammo": {
"type": "Missile",
"count": 1
}
},
{
"ammo": {
"type": "Super",
"count": 1
}
},
"Plasma",
{
"and": [
"canKago",
{
"enemyDamage": {
"enemy": "Choot",
"type": "contact",
"hits": 1
}
}
]
}
]
} |
|
Entrance condition: {
"comeInWithGrappleSwing": {
"blocks": [
{
"position": [
-1,
5
],
"environment": "water",
"note": "Mt. Everest"
},
{
"position": [
6,
4
],
"note": "Grapple Tutorial Room 2"
},
{
"position": [
2.375,
4.5625
],
"note": "Post Crocomire Farming Room"
}
]
}
}Requires: "canTrickyGrappleJump" "canMidairWiggle" |
|
Entrance condition: {
"comeInWithGrappleSwing": {
"blocks": [
{
"position": [
-1,
5
],
"environment": "water",
"note": "Mt. Everest"
},
{
"position": [
8,
3
],
"note": "Grapple Beam Room"
},
{
"position": [
7,
3
],
"note": "Colosseum"
},
{
"position": [
6,
4
],
"note": "Grapple Tutorial Room 2"
}
]
}
}Requires: "canPreciseGrappleJump" |
|
Entrance condition: {
"comeInWithGrappleSwing": {
"blocks": [
{
"position": [
6,
2
],
"note": "Lava Grapple Tunnel"
},
{
"position": [
5,
2
],
"note": "The Moat, Double Chamber, Wrecked Ship Energy Tank Room"
},
{
"position": [
2.375,
4.5625
],
"note": "Post Crocomire Farming Room"
}
]
}
}Requires: "canTrickyGrappleJump" |
|
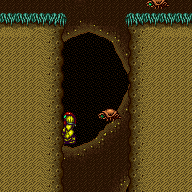
Entrance condition: {
"comeInWithGrappleSwing": {
"blocks": [
{
"position": [
7,
3
],
"note": "The Precious Room"
},
{
"position": [
7,
2
],
"note": "The Moat"
}
]
}
}Requires: "canPreciseGrappleJump" |
|
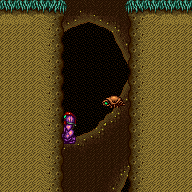

Entrance condition: {
"comeInWithGrappleSwing": {
"blocks": [
{
"position": [
7,
3
],
"environment": "water",
"note": "Pants Room"
}
]
}
}Requires: "Gravity" "canTrickyGrappleJump" "h_extremelyTrickyToCarryFlashSuit" |
|
Swing up through the door from a Grapple block in the room below (Mt. Everest). Fire a Grapple shot after entering the room, to allow Samus to move further right and get onto the ledge. Entrance condition: {
"comeInWithGrappleSwing": {
"blocks": [
{
"position": [
-1,
5
],
"environment": "water",
"note": "Mt. Everest"
}
]
},
"comesThroughToilet": "no"
}Requires: {
"notable": "Tricky Grapple Swing"
} |
From: 3
Junction Below Right Door
To: 2
Right Door


Freeze the Puyo at the start of its jump animation, on the right frame. Requires: {
"notable": "Puyo Clip Precise Freeze"
}
"Gravity"
"h_preciseIceClip"
{
"or": [
"canTrickyDodgeEnemies",
{
"enemyDamage": {
"enemy": "Puyo",
"type": "contact",
"hits": 1
}
},
"Wave",
"canPreciseGrapple"
]
} |
From: 3
Junction Below Right Door
To: 2
Right Door

Freeze the Puyo at standing-shot height and then jump on top of it with a spinjump before morphing, unmorphing, and using X-Ray to standup and clip. Standing on a side of the room and shooting forward will freeze the Puyo at the correct height. Requires: {
"notable": "Puyo Clip"
}
"Gravity"
"h_XRayMorphIceClip"
{
"or": [
"canTrickyJump",
{
"enemyDamage": {
"enemy": "Puyo",
"type": "contact",
"hits": 2
}
}
]
}
{
"or": [
"canTrickyDodgeEnemies",
{
"enemyDamage": {
"enemy": "Puyo",
"type": "contact",
"hits": 1
}
},
"Wave",
"canPreciseGrapple"
]
} |
|
Positioning the Puyo requires it to perform a big jump then start falling with a frame perfect freeze. One possible setup stands on the left tile of the right side and lets the puyo jump up taking a contact hit. Then so long as the puyo isn't on the very edge, it will do a big jump. Clip onto the puyo by doing an aim down jump and switching to a forward diagonal at the right time. Requires: {
"notable": "Suitless Puyo Clip"
}
"canSuitlessMaridia"
"h_highPixelIceClip"
{
"noBlueSuit": {}
}
{
"enemyDamage": {
"enemy": "Puyo",
"type": "contact",
"hits": 2
}
}
{
"or": [
{
"enemyDamage": {
"enemy": "Puyo",
"type": "contact",
"hits": 6
}
},
{
"and": [
"canBePatient",
{
"resetRoom": {
"nodes": [
1
]
}
}
]
}
]
}
{
"or": [
{
"enemyDamage": {
"enemy": "Puyo",
"type": "contact",
"hits": 1
}
},
"Wave",
"canPreciseGrapple"
]
}Dev note: 1 hit per attempt, 7 for leniency, which is reduced if Samus can reset the room and farm the Puyos. FIXME: leniencies should be moved to helpers or some central location. FIXME: There is a normalized setup which can be described and most or all of the leniency can be removed. |
From: 3
Junction Below Right Door
To: 2
Right Door

Freeze the Puyo at standing-shot height and then jump on top of it with a spinjump before morphing, unmorphing, and using X-Ray to standup and clip. Standing on a side of the room and shooting forward will freeze the Puyo at the correct height. Requires: {
"notable": "Puyo Clip"
}
"h_XRayMorphIceClip"
"canTrickyJump"
{
"or": [
"canTrickyDodgeEnemies",
{
"enemyDamage": {
"enemy": "Puyo",
"type": "contact",
"hits": 2
}
}
]
}
{
"or": [
"canTrickyDodgeEnemies",
{
"enemyDamage": {
"enemy": "Puyo",
"type": "contact",
"hits": 1
}
},
"Wave",
"canPreciseGrapple"
]
} |
From: 1
Left Door
To: 4
Top of Shaft Without Acid Triggered
Entrance condition: {
"comeInWithGrappleSwing": {
"blocks": [
{
"position": [
-1,
5
],
"environment": "water",
"note": "Mt. Everest"
},
{
"position": [
8,
3
],
"note": "Grapple Beam Room"
},
{
"position": [
7,
3
],
"note": "Colosseum"
},
{
"position": [
6,
4
],
"note": "Grapple Tutorial Room 2"
}
]
}
}Requires: "canTrickyGrappleJump" Dev note: FIXME: Setups from other rooms are possible but with greater difficulty. Carrying a flash suit might be possible in some cases, with great difficulty. |