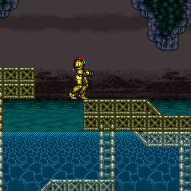
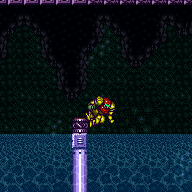
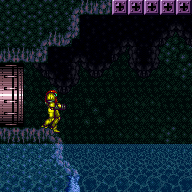
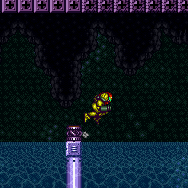
canDisableEquipment (Medium)
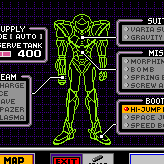
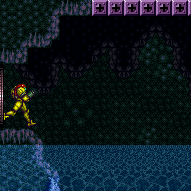
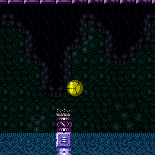
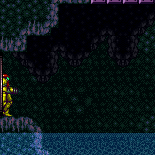
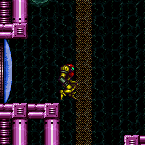
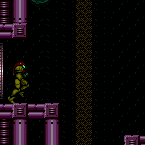
Collecting equipment can make movement more difficult in certain situations. Speedbooster without HiJump will reduce Samus' jump height when running and turning Speedbooster off will enable her to jump normally while running. Disabling HiJump will give more time to perform a mid-air morph. Disabling Gravity will allow Samus to float farther in water, or jump slower for a mid-air morph. Beams may need to be disabled to control how enemies are killed (i.e. Remove plasma for canUseFrozenEnemies, or remove ice to effeciently use heat room farm points).
Dev note: Note that this tech is not applied requiring the item to be not collected with canRiskPermanentLossOfAccess, as this is a low-level tech. Instead, it is just listed with alternate options where more items can execute the strat without disabling equipment. In the logic, this is not applied to switching off beams, as that is usually intuitive enough for players even without this tech. FIXME: It is also not applied to Speedbooster jumps, as that would require a lot of changes to a lot of rooms.
Strats ()
From: 1
Left Door
To: 1
Left Door
Save the animals to unlock the door, and Crystal Flash in the door frame. Stand in the knee-deep acid with suits disabled to bleed off energy quickly, then perform a pause abuse spark windup in the acid and interrupt it with auto-reserve (re-enable suits in the pause menu). Entrance condition: {
"comeInWithRMode": {}
}Requires: "f_ZebesSetAblaze"
"h_CrystalFlashForReserveEnergy"
"Gravity"
{
"acidFrames": 90
}
{
"canShineCharge": {
"usedTiles": 13,
"openEnd": 0
}
}
{
"autoReserveTrigger": {}
}
"canRModePauseAbuseSparkInterrupt"
{
"acidFrames": 30
}Sets flags: f_AnimalsSaved Dev note: Disable E-Tanks required to avoid a patience requirement due to escape timer. |
|
Farm wall pirates while leaving one left. Lead it to the bottom of the shaft, get shine charge, then windup in front of it to get shot and interrupted. Entrance condition: {
"comeInWithRMode": {},
"comesThroughToilet": "no"
}Requires: {
"not": "f_ZebesSetAblaze"
}
"h_ZebesIsAwake"
{
"or": [
"h_CrystalFlashForReserveEnergy",
{
"and": [
"h_RModeCanRefillReserves",
{
"resourceMissingAtMost": [
{
"type": "Missile",
"count": 0
}
]
},
{
"partialRefill": {
"type": "ReserveEnergy",
"limit": 20
}
}
]
}
]
}
{
"or": [
{
"and": [
"h_destroyBombWalls",
{
"canShineCharge": {
"usedTiles": 28,
"openEnd": 0
}
}
]
},
{
"and": [
{
"doorUnlockedAtNode": 5
},
{
"canShineCharge": {
"usedTiles": 13,
"openEnd": 0
}
}
]
},
{
"canShineCharge": {
"usedTiles": 12,
"openEnd": 0
}
}
]
}
{
"autoReserveTrigger": {
"maxReserveEnergy": 95
}
}
"canRModeSparkInterrupt"Clears obstacles: A Unlocks doors: {"nodeId":5,"types":["ammo"],"requires":[]} |
From: 2
Bottom Left Door
To: 5
Bottom Right Door
With Zebes set ablaze, Climb only spawns two pirates that drop nothing, and the bomb wall is automatically cleared. The rising lava is now acid instead, so Speed Booster works normally with Gravity Suit. Jump up the platforms to get high enough above the rising acid to safely Crystal Flash, then dive back into the acid against either bottom door. Wait in the acid until your energy is low enough and shinecharge. Windup right before energy runs out to interrupt then *immediately* leave to limit acid damage. Entrance condition: {
"comeInWithRMode": {}
}Requires: "Gravity"
"f_ZebesSetAblaze"
{
"or": [
{
"enemyDamage": {
"enemy": "Custom Climb Pirate",
"type": "contact",
"hits": 1
}
},
{
"enemyKill": {
"enemies": [
[
"Custom Climb Pirate",
"Custom Climb Pirate"
]
],
"explicitWeapons": [
"Plasma",
"Super",
"PowerBomb"
]
}
}
]
}
"h_CrystalFlashForReserveEnergy"
{
"acidFrames": 320
}
{
"canShineCharge": {
"usedTiles": 28,
"openEnd": 0
}
}
{
"or": [
{
"and": [
{
"disableEquipment": "ETank"
},
{
"refill": [
"ReserveEnergy"
]
},
{
"autoReserveTrigger": {}
}
]
},
{
"autoReserveTrigger": {
"maxReserveEnergy": 50
}
}
]
}
"canRModeSparkInterrupt"
{
"acidFrames": 80
}
{
"resetRoom": {
"nodes": [
2,
5
]
}
}Clears obstacles: A, B Unlocks doors: {"nodeId":2,"types":["ammo"],"requires":[]}
{"nodeId":5,"types":["ammo"],"requires":[]}Dev note: FIXME: Needs to support Hyper Beam kill also. |
|
Farm wall pirates while leaving one of the bottom ones alive. Lead it to the bottom of the shaft, shinecharge, then windup in front of it to get shot and interrupted. Entrance condition: {
"comeInWithRMode": {}
}Requires: "h_ClimbWithoutLava"
{
"or": [
"h_destroyBombWalls",
{
"getBlueSpeed": {
"usedTiles": 14,
"openEnd": 0
}
},
{
"and": [
{
"getBlueSpeed": {
"usedTiles": 15,
"openEnd": 0
}
},
{
"doorUnlockedAtNode": 2
}
]
}
]
}
{
"not": "f_ZebesSetAblaze"
}
"h_ZebesIsAwake"
{
"or": [
"h_CrystalFlashForReserveEnergy",
{
"and": [
"h_RModeCanRefillReserves",
{
"resourceMissingAtMost": [
{
"type": "Missile",
"count": 0
}
]
},
{
"partialRefill": {
"type": "ReserveEnergy",
"limit": 20
}
}
]
}
]
}
{
"canShineCharge": {
"usedTiles": 28,
"openEnd": 0
}
}
{
"autoReserveTrigger": {
"maxReserveEnergy": 95
}
}
"canRModeSparkInterrupt"Clears obstacles: A, B Unlocks doors: {"nodeId":2,"types":["ammo"],"requires":[]}
{"nodeId":5,"types":["ammo"],"requires":[]}Dev note: This door triggers the rising lava, which will prevent gaining a shinecharge. |
|
Farm wall pirates while leaving one left. Lead it to the bottom of the shaft, get shine charge, then windup in front of it to get shot and interrupted. Entrance condition: {
"comeInWithRMode": {}
}Requires: {
"not": "f_ZebesSetAblaze"
}
"h_ZebesIsAwake"
"h_bombThings"
{
"or": [
"h_CrystalFlashForReserveEnergy",
{
"and": [
"h_RModeCanRefillReserves",
{
"resourceMissingAtMost": [
{
"type": "Missile",
"count": 0
}
]
},
{
"partialRefill": {
"type": "ReserveEnergy",
"limit": 20
}
}
]
}
]
}
{
"or": [
{
"and": [
"h_destroyBombWalls",
{
"canShineCharge": {
"usedTiles": 28,
"openEnd": 0
}
}
]
},
{
"and": [
{
"doorUnlockedAtNode": 5
},
{
"canShineCharge": {
"usedTiles": 13,
"openEnd": 0
}
}
]
},
{
"canShineCharge": {
"usedTiles": 12,
"openEnd": 0
}
}
]
}
{
"autoReserveTrigger": {
"maxReserveEnergy": 95
}
}
"canRModeSparkInterrupt"Clears obstacles: A Unlocks doors: {"nodeId":5,"types":["ammo"],"requires":[]} |
|
Farm wall pirates while leaving one left. Lead it to the bottom of the shaft, get shine charge, then windup in front of it to get shot and interrupted. Entrance condition: {
"comeInWithRMode": {}
}Requires: {
"not": "f_ZebesSetAblaze"
}
"h_bombThings"
"h_ZebesIsAwake"
{
"or": [
"h_CrystalFlashForReserveEnergy",
{
"and": [
"h_RModeCanRefillReserves",
{
"resourceMissingAtMost": [
{
"type": "Missile",
"count": 0
}
]
},
{
"partialRefill": {
"type": "ReserveEnergy",
"limit": 20
}
}
]
}
]
}
{
"or": [
{
"and": [
"h_destroyBombWalls",
{
"canShineCharge": {
"usedTiles": 28,
"openEnd": 0
}
}
]
},
{
"and": [
{
"doorUnlockedAtNode": 5
},
{
"canShineCharge": {
"usedTiles": 13,
"openEnd": 0
}
}
]
},
{
"canShineCharge": {
"usedTiles": 12,
"openEnd": 0
}
}
]
}
{
"autoReserveTrigger": {
"maxReserveEnergy": 95
}
}
"canRModeSparkInterrupt"Clears obstacles: A Unlocks doors: {"nodeId":5,"types":["ammo"],"requires":[]} |
From: 5
Bottom Right Door
To: 5
Bottom Right Door
With Zebes set ablaze, Climb only spawns two pirates that drop nothing, and the bomb wall is automatically cleared. The rising lava is now acid instead, so Gravity Suit works normally. Jump up the platforms to get high enough above the rising acid to safely Crystal Flash, then dive back into the acid against either bottom door. Wait in the acid until your energy is low enough and shinecharge. Windup right before energy runs out to interrupt then *immediately* leave to limit acid damage. Entrance condition: {
"comeInWithRMode": {}
}Requires: "Gravity"
"f_ZebesSetAblaze"
"h_CrystalFlashForReserveEnergy"
{
"acidFrames": 320
}
{
"canShineCharge": {
"usedTiles": 28,
"openEnd": 0
}
}
{
"or": [
{
"and": [
{
"disableEquipment": "ETank"
},
{
"refill": [
"ReserveEnergy"
]
},
{
"autoReserveTrigger": {}
}
]
},
{
"autoReserveTrigger": {
"maxReserveEnergy": 50
}
}
]
}
"canRModeSparkInterrupt"
{
"acidFrames": 80
}Clears obstacles: A, B Unlocks doors: {"nodeId":2,"types":["ammo"],"requires":[]}
{"nodeId":5,"types":["ammo"],"requires":[]}Dev note: FIXME: Needs enemyKill requirements for the escape pirates. |
|
Farm wall pirates while leaving one left. Lead it to the bottom of the shaft, get shine charge, then windup in front of it to get shot and interrupted. Entrance condition: {
"comeInWithRMode": {}
}Requires: {
"not": "f_ZebesSetAblaze"
}
"h_ZebesIsAwake"
{
"or": [
"h_CrystalFlashForReserveEnergy",
{
"and": [
"h_RModeCanRefillReserves",
{
"resourceMissingAtMost": [
{
"type": "Missile",
"count": 0
}
]
},
{
"partialRefill": {
"type": "ReserveEnergy",
"limit": 20
}
}
]
}
]
}
{
"or": [
{
"and": [
"h_destroyBombWalls",
{
"canShineCharge": {
"usedTiles": 28,
"openEnd": 0
}
}
]
},
{
"and": [
{
"doorUnlockedAtNode": 5
},
{
"canShineCharge": {
"usedTiles": 13,
"openEnd": 0
}
}
]
},
{
"canShineCharge": {
"usedTiles": 12,
"openEnd": 0
}
}
]
}
{
"autoReserveTrigger": {
"maxReserveEnergy": 95
}
}
"canRModeSparkInterrupt"Clears obstacles: A Unlocks doors: {"nodeId":5,"types":["ammo"],"requires":[]} |
|
Diagonal shinespark to break the bomb blocks to the morph tunnel on the right. Spark from the lowest platform that is only one tile from the right wall (part of the bottom right door will be on screen). From this platform, the shinespark must be done from a crouch; or, to save some energy, angle-down jump and spark at the peak of the jump (with Hi-Jump unequipped). It is possible to set up a frozen pirate on the right wall to stop the shinespark early. If the positioning is ideal, Samus will bonk the platform at the top-right of the room, saving a bit of energy. With Hi-Jump equipped, this is still possible (and with 1 less energy needed): by sparking after bonking the platform and descending a few pixels (a 3-frame window); or, more easily but requiring slightly more energy, by aiming down and sparking at the maximum height (which will result in clipping through the platform at the top-right of the room if the spark is not interrupted by running low on energy before that point). Requires: {
"notable": "Behemoth Shinespark"
}
"Morph"
{
"useFlashSuit": {}
}
{
"or": [
{
"and": [
{
"disableEquipment": "HiJump"
},
{
"shinespark": {
"frames": 127,
"excessFrames": 124
}
}
]
},
{
"and": [
"HiJump",
{
"shinespark": {
"frames": 130,
"excessFrames": 129
}
}
]
},
{
"and": [
"HiJump",
"canInsaneJump",
{
"shinespark": {
"frames": 126,
"excessFrames": 124
}
}
]
},
{
"and": [
{
"shinespark": {
"frames": 1,
"excessFrames": 1
}
},
"canTrickyUseFrozenEnemies",
"h_ZebesIsAwake"
]
}
]
}
{
"or": [
"h_ClimbWithoutLava",
"h_lavaProof",
{
"obstaclesNotCleared": [
"B"
]
}
]
}Dev note: For the frozen pirate strat, it is assumed that Samus can farm the energy after the spark, resulting in no damaging shinespark frames. FIXME: It is still possible to set up a frozen pirate, even when shinecharging on the floor. |
|
Kill all three Boyons for energy, or Crystal Flash. If you need to freeze Boyons for extra runway, disable Ice Beam to force them to unfreeze so you can interrupt spark. If you end up killing all four Boyons, you can also dip in the acid for the spark interrupt. Entrance condition: {
"comeInWithRMode": {}
}Requires: {
"or": [
"h_CrystalFlashForReserveEnergy",
{
"and": [
"h_RModeCanRefillReserves",
{
"resourceMissingAtMost": [
{
"type": "Missile",
"count": 0
}
]
},
{
"enemyKill": {
"enemies": [
[
"Boyon",
"Boyon",
"Boyon"
]
],
"excludedWeapons": [
"PseudoScrew"
]
}
},
{
"or": [
{
"and": [
"canBeLucky",
{
"partialRefill": {
"type": "ReserveEnergy",
"limit": 5
}
}
]
},
{
"and": [
"canBeVeryLucky",
{
"partialRefill": {
"type": "ReserveEnergy",
"limit": 20
}
}
]
}
]
}
]
}
]
}
{
"or": [
{
"canShineCharge": {
"usedTiles": 25,
"openEnd": 0
}
},
{
"and": [
"canTrivialUseFrozenEnemies",
{
"canShineCharge": {
"usedTiles": 31,
"openEnd": 0
}
},
{
"disableEquipment": "Ice"
}
]
}
]
}
{
"autoReserveTrigger": {}
}
"canRModeSparkInterrupt"Clears obstacles: A |
|
There are many mellows for farming. Leave one alive to spark interrupt. If entry energy is poor, damage down to 29 energy before farming to activate health bias, then quickly kill many Mellows with Plasma Beam or Power Bombs before collecting their drops. Entrance condition: {
"comeInWithRMode": {}
}Requires: {
"not": "f_ZebesSetAblaze"
}
{
"or": [
"h_CrystalFlashForReserveEnergy",
{
"and": [
{
"resourceMissingAtMost": [
{
"type": "Missile",
"count": 0
}
]
},
{
"or": [
{
"and": [
{
"resourceAvailable": [
{
"type": "RegularEnergy",
"count": 19
}
]
},
{
"disableEquipment": "ETank"
},
{
"partialRefill": {
"type": "ReserveEnergy",
"limit": 100
}
}
]
},
{
"and": [
{
"resourceMissingAtMost": [
{
"type": "RegularEnergy",
"count": 0
}
]
},
"canRiskPermanentLossOfAccess",
{
"partialRefill": {
"type": "ReserveEnergy",
"limit": 100
}
}
]
}
]
}
]
}
]
}
{
"canShineCharge": {
"usedTiles": 37,
"openEnd": 0
}
}
{
"autoReserveTrigger": {}
}
"canRModeSparkInterrupt"Dev note: FIXME: Other weapon options for fast Mellow farming while abusing healthbomb state. Needs to be fast to not risk drops timing out. |
|
There are many mellows for farming. Leave one alive to spark interrupt. If entry energy is poor, damage down to 29 energy before farming to activate health bias, then quickly kill many Mellows with Plasma Beam or Power Bombs before collecting their drops. Entrance condition: {
"comeInWithRMode": {}
}Requires: {
"not": "f_ZebesSetAblaze"
}
{
"or": [
"h_CrystalFlashForReserveEnergy",
{
"and": [
{
"resourceMissingAtMost": [
{
"type": "Missile",
"count": 0
}
]
},
{
"or": [
{
"and": [
{
"resourceAvailable": [
{
"type": "RegularEnergy",
"count": 99
}
]
},
{
"disableEquipment": "ETank"
},
{
"partialRefill": {
"type": "ReserveEnergy",
"limit": 100
}
}
]
},
{
"and": [
{
"resourceAvailable": [
{
"type": "RegularEnergy",
"count": 19
}
]
},
{
"or": [
"Plasma",
"h_usePowerBomb"
]
},
{
"disableEquipment": "ETank"
},
{
"partialRefill": {
"type": "ReserveEnergy",
"limit": 100
}
}
]
},
{
"and": [
{
"resourceMissingAtMost": [
{
"type": "RegularEnergy",
"count": 0
}
]
},
"canRiskPermanentLossOfAccess",
{
"partialRefill": {
"type": "ReserveEnergy",
"limit": 100
}
}
]
}
]
}
]
}
]
}
{
"canShineCharge": {
"usedTiles": 37,
"openEnd": 0
}
}
{
"autoReserveTrigger": {}
}
"canRModeSparkInterrupt"Dev note: FIXME: Other weapon options for fast Mellow farming while abusing healthbomb state. Needs to be fast to not risk drops timing out. |
From: 1
Top Left Door
To: 8
Central Junction
There are scroll PLMs one tile to the left of the bomb blocks which can be used to overload PLMs. The bomb blocks then become air and can be passed through. After doing so, use X-Ray until the beam fully widens to exit G-Mode and remain in R-Mode. Kill the Skree while in health-bomb range, then the Geemers until Samus has Reserve Energy. Shinecharge and interrupt on a remaining Geemer or the Ripper on the left. Entrance condition: {
"comeInWithGMode": {
"mode": "direct",
"morphed": false
}
}Requires: "h_ZebesIsAwake"
{
"not": "f_ZebesSetAblaze"
}
{
"or": [
"canRiskPermanentLossOfAccess",
{
"disableEquipment": "ETank"
}
]
}
{
"partialRefill": {
"type": "ReserveEnergy",
"limit": 20
}
}
{
"canShineCharge": {
"usedTiles": 25,
"steepUpTiles": 3,
"steepDownTiles": 3,
"openEnd": 0
}
}
{
"autoReserveTrigger": {}
}
"canRModeSparkInterrupt" |
From: 5
Alcatraz Door
To: 8
Central Junction
There are scroll PLMs next to the bomb blocks and on the ledge below the Alcatraz exit, which will overload PLMs when going through them. Samus will need to briefly navigate off-screen while to the right of Alcatraz before coming back left. With a fast ascent, the global Geemers may still be in the top right section and can hit Samus off-screen. Use X-Ray until the beam reaches full width to exit G-mode and remain in R-mode. Kill the Skree while in health-bomb range, then the Geemers until Samus has Reserve Energy. Shinecharge and interrupt on a Geemer or the Ripper on the left. With unlucky drops, it is possible to not get Reserve Energy. It is possible to farm the top right off-screen Geemer to help reduce the chance. With Morph, partially enter the Alcatraz morph tunnel in order to fix the camera. Without Morph, kill the Geemer with a Power Bomb once in this section after overloading PLMs and before unmorphing and exiting G-mode. Entrance condition: {
"comeInWithGMode": {
"mode": "direct",
"morphed": true
}
}Requires: "h_ZebesIsAwake"
{
"not": "f_ZebesSetAblaze"
}
"h_artificialMorphMovement"
{
"or": [
{
"and": [
{
"or": [
"canRiskPermanentLossOfAccess",
{
"disableEquipment": "ETank"
}
]
},
{
"or": [
{
"partialRefill": {
"type": "ReserveEnergy",
"limit": 5
}
},
{
"and": [
{
"or": [
"Morph",
"canBeLucky",
"h_artificialMorphPowerBomb"
]
},
{
"partialRefill": {
"type": "ReserveEnergy",
"limit": 20
}
}
]
}
]
}
]
},
{
"and": [
"canRiskPermanentLossOfAccess",
{
"resourceMissingAtMost": [
{
"type": "RegularEnergy",
"count": 5
}
]
},
{
"partialRefill": {
"type": "ReserveEnergy",
"limit": 50
}
}
]
},
{
"and": [
{
"disableEquipment": "ETank"
},
{
"resourceAvailable": [
{
"type": "RegularEnergy",
"count": 94
}
]
},
{
"partialRefill": {
"type": "ReserveEnergy",
"limit": 50
}
}
]
}
]
}
{
"canShineCharge": {
"usedTiles": 25,
"steepUpTiles": 3,
"steepDownTiles": 3,
"openEnd": 0
}
}
{
"autoReserveTrigger": {}
}
"canRModeSparkInterrupt" |
From: 8
Central Junction
To: 8
Central Junction
Farm Geemers and Skree for energy or else Crystal Flash. The bomb wall respawns so Crystal Flash can't be used to clear it. Shinecharge and get interrupted by the Ripper by the save room door, or leave a Geemer alive. Requires: "h_ZebesIsAwake"
{
"not": "f_ZebesSetAblaze"
}
{
"obstaclesCleared": [
"R-Mode"
]
}
{
"or": [
"h_CrystalFlashForReserveEnergy",
{
"and": [
"h_RModeCanRefillReserves",
{
"resourceMissingAtMost": [
{
"type": "Missile",
"count": 0
}
]
},
{
"partialRefill": {
"type": "ReserveEnergy",
"limit": 100
}
}
]
}
]
}
{
"canShineCharge": {
"usedTiles": 25,
"steepUpTiles": 3,
"steepDownTiles": 3,
"openEnd": 0
}
}
{
"autoReserveTrigger": {}
}
"canRModeSparkInterrupt"Resets obstacles: R-Mode |
|
Clear the bomb barriers and farm two Wavers. The two side wavers are local and easier to position for the R-Mode Spark Interrupt. It can help to pause abuse in the acid either to damage down or as part of the R-Mode Spark Interrupt. If grabbed by a Yapping Maw during a Shinespark, keep at least any button held to prevent a crash. Entrance condition: {
"comeInWithRMode": {}
}Requires: "canTrickyJump"
"canDodgeWhileShooting"
{
"or": [
"ScrewAttack",
"h_useMorphBombs",
{
"and": [
"Morph",
{
"or": [
{
"ammo": {
"type": "PowerBomb",
"count": 3
}
},
{
"and": [
"h_CrystalFlashForReserveEnergy",
{
"ammo": {
"type": "PowerBomb",
"count": 2
}
}
]
}
]
}
]
}
]
}
{
"or": [
{
"resourceAvailable": [
{
"type": "ReserveEnergy",
"count": 1
}
]
},
{
"and": [
"h_RModeCanRefillReserves",
{
"resourceMissingAtMost": [
{
"type": "Missile",
"count": 0
}
]
},
{
"resourceMissingAtMost": [
{
"type": "Super",
"count": 0
}
]
},
{
"partialRefill": {
"type": "ReserveEnergy",
"limit": 20
}
}
]
}
]
}
{
"or": [
{
"canShineCharge": {
"usedTiles": 18,
"steepUpTiles": 2,
"steepDownTiles": 1,
"openEnd": 1
}
},
{
"and": [
{
"or": [
"canUseFrozenEnemies",
{
"ammo": {
"type": "Super",
"count": 1
}
}
]
},
{
"canShineCharge": {
"usedTiles": 21,
"steepUpTiles": 2,
"steepDownTiles": 2,
"startingSteepDownTiles": 1,
"openEnd": 0
}
}
]
}
]
}
{
"autoReserveTrigger": {
"maxReserveEnergy": 95
}
}
{
"or": [
{
"and": [
"canInsaneJump",
"canRModeSparkInterrupt"
]
},
"canRModePauseAbuseSparkInterrupt"
]
}Clears obstacles: A |
|
Farm four of the pirates for drops. If you have full power bombs and can do so without using one you can also kill two Beetoms for guaranteed two small energy drops. Keep the bottom pirate alive: stun it with a Power Beam shot or i-frame past it. Once you have the reserves, perform a 1-screen shortcharge between the bottom doors, then hop back up to the bottom pirate's ledge and get shot at. Entrance condition: {
"comeInWithRMode": {}
}Requires: "Morph"
"canUseIFrames"
{
"or": [
"h_CrystalFlashForReserveEnergy",
{
"and": [
"h_RModeCanRefillReserves",
{
"or": [
{
"and": [
{
"enemyKill": {
"enemies": [
[
"Green Space Pirate (standing)",
"Green Space Pirate (standing)"
],
[
"Green Space Pirate (standing)",
"Green Space Pirate (standing)"
]
],
"excludedWeapons": [
"Missile"
]
}
},
{
"resourceMissingAtMost": [
{
"type": "Missile",
"count": 0
}
]
},
{
"partialRefill": {
"type": "ReserveEnergy",
"limit": 20
}
}
]
},
{
"and": [
{
"enemyKill": {
"enemies": [
[
"Beetom",
"Beetom"
]
],
"excludedWeapons": [
"PowerBomb"
]
}
},
{
"resourceMissingAtMost": [
{
"type": "PowerBomb",
"count": 0
}
]
},
{
"partialRefill": {
"type": "ReserveEnergy",
"limit": 10
}
}
]
}
]
}
]
}
]
}
{
"or": [
{
"canShineCharge": {
"usedTiles": 12,
"openEnd": 0
}
},
{
"and": [
{
"or": [
{
"doorUnlockedAtNode": 3
},
{
"doorUnlockedAtNode": 4
}
]
},
{
"canShineCharge": {
"usedTiles": 13,
"openEnd": 0
}
}
]
},
{
"and": [
{
"doorUnlockedAtNode": 3
},
{
"doorUnlockedAtNode": 4
},
{
"canShineCharge": {
"usedTiles": 14,
"openEnd": 0
}
}
]
}
]
}
{
"autoReserveTrigger": {
"maxReserveEnergy": 95
}
}
"canRModeSparkInterrupt"Unlocks doors: {"nodeId":3,"types":["ammo"],"requires":[]}
{"nodeId":4,"types":["ammo"],"requires":[]} |
From: 2
Middle Right Door
To: 4
Bottom Right Door
Farm four of the pirates for drops, leaving the bottom pirate alive. Stun it with a Power Beam shot or i-frame past it. Perform a 1-screen shortcharge between the bottom doors, then hop back up to the bottom pirate's ledge and get shot at. Entrance condition: {
"comeInWithRMode": {}
}Requires: "canUseIFrames"
{
"or": [
"h_CrystalFlashForReserveEnergy",
{
"and": [
"h_RModeCanRefillReserves",
{
"enemyKill": {
"enemies": [
[
"Green Space Pirate (standing)",
"Green Space Pirate (standing)"
],
[
"Green Space Pirate (standing)",
"Green Space Pirate (standing)"
]
],
"excludedWeapons": [
"Missile"
]
}
},
{
"resourceMissingAtMost": [
{
"type": "Missile",
"count": 0
}
]
},
{
"partialRefill": {
"type": "ReserveEnergy",
"limit": 20
}
}
]
}
]
}
{
"or": [
{
"canShineCharge": {
"usedTiles": 12,
"openEnd": 0
}
},
{
"and": [
{
"or": [
{
"doorUnlockedAtNode": 3
},
{
"doorUnlockedAtNode": 4
}
]
},
{
"canShineCharge": {
"usedTiles": 13,
"openEnd": 0
}
}
]
},
{
"and": [
{
"doorUnlockedAtNode": 3
},
{
"doorUnlockedAtNode": 4
},
{
"canShineCharge": {
"usedTiles": 14,
"openEnd": 0
}
}
]
}
]
}
{
"autoReserveTrigger": {
"maxReserveEnergy": 95
}
}
"canRModeSparkInterrupt"Unlocks doors: {"nodeId":3,"types":["ammo"],"requires":[]}
{"nodeId":4,"types":["ammo"],"requires":[]} |
From: 3
Bottom Left Door
To: 4
Bottom Right Door
Stun the bottom pirate with a Power Beam shot, or i-frame past it. Farm the four pirates above for drops, then get back through the bottom pirate. Stun it with a Power Beam shot or i-frame past it a second time. Perform a 1-screen shortcharge between the bottom doors, then hop back up to the bottom pirate's ledge and get shot at. Entrance condition: {
"comeInWithRMode": {}
}Requires: "canUseIFrames"
{
"or": [
"h_CrystalFlashForReserveEnergy",
{
"and": [
{
"enemyDamage": {
"enemy": "Green Space Pirate (standing)",
"type": "contact",
"hits": 1
}
},
"h_RModeCanRefillReserves",
{
"enemyKill": {
"enemies": [
[
"Green Space Pirate (standing)",
"Green Space Pirate (standing)"
],
[
"Green Space Pirate (standing)",
"Green Space Pirate (standing)"
]
],
"excludedWeapons": [
"Missile"
]
}
},
{
"resourceMissingAtMost": [
{
"type": "Missile",
"count": 0
}
]
},
{
"partialRefill": {
"type": "ReserveEnergy",
"limit": 20
}
}
]
}
]
}
{
"or": [
{
"canShineCharge": {
"usedTiles": 12,
"openEnd": 0
}
},
{
"and": [
{
"or": [
{
"doorUnlockedAtNode": 3
},
{
"doorUnlockedAtNode": 4
}
]
},
{
"canShineCharge": {
"usedTiles": 13,
"openEnd": 0
}
}
]
},
{
"and": [
{
"doorUnlockedAtNode": 3
},
{
"doorUnlockedAtNode": 4
},
{
"canShineCharge": {
"usedTiles": 14,
"openEnd": 0
}
}
]
}
]
}
{
"autoReserveTrigger": {
"maxReserveEnergy": 95
}
}
"canRModeSparkInterrupt"Unlocks doors: {"nodeId":3,"types":["ammo"],"requires":[]}
{"nodeId":4,"types":["ammo"],"requires":[]} |
From: 4
Bottom Right Door
To: 4
Bottom Right Door
Stun the bottom pirate with a Power Beam shot, or i-frame past it. Farm the four pirates above for drops, then get back through the bottom pirate. Stun it with a Power Beam shot or i-frame past it a second time. Perform a 1-screen shortcharge between the bottom doors, then hop back up to the bottom pirate's ledge and get shot at. Entrance condition: {
"comeInWithRMode": {}
}Requires: "canUseIFrames"
{
"or": [
"h_CrystalFlashForReserveEnergy",
{
"and": [
{
"enemyDamage": {
"enemy": "Green Space Pirate (standing)",
"type": "contact",
"hits": 1
}
},
"h_RModeCanRefillReserves",
{
"enemyKill": {
"enemies": [
[
"Green Space Pirate (standing)",
"Green Space Pirate (standing)"
],
[
"Green Space Pirate (standing)",
"Green Space Pirate (standing)"
]
],
"excludedWeapons": [
"Missile"
]
}
},
{
"resourceMissingAtMost": [
{
"type": "Missile",
"count": 0
}
]
},
{
"partialRefill": {
"type": "ReserveEnergy",
"limit": 20
}
}
]
}
]
}
{
"or": [
{
"canShineCharge": {
"usedTiles": 12,
"openEnd": 0
}
},
{
"and": [
{
"or": [
{
"doorUnlockedAtNode": 3
},
{
"doorUnlockedAtNode": 4
}
]
},
{
"canShineCharge": {
"usedTiles": 13,
"openEnd": 0
}
}
]
},
{
"and": [
{
"doorUnlockedAtNode": 3
},
{
"doorUnlockedAtNode": 4
},
{
"canShineCharge": {
"usedTiles": 14,
"openEnd": 0
}
}
]
}
]
}
{
"autoReserveTrigger": {
"maxReserveEnergy": 95
}
}
"canRModeSparkInterrupt"Unlocks doors: {"nodeId":3,"types":["ammo"],"requires":[]}
{"nodeId":4,"types":["ammo"],"requires":[]} |
From: 1
Left Door
To: 1
Left Door
Entrance condition: {
"comeInWithRMode": {}
}Requires: {
"or": [
{
"and": [
"h_CrystalFlash",
"canBeVeryPatient"
]
},
{
"disableEquipment": "ETank"
}
]
}
"h_shinechargeMaxRunway"
"h_RModeKnockbackSpark" |
|
The Kagos can provide a lot of energy. Run across the room and then jump into the Gray Geemer's path to interrupt. Entrance condition: {
"comeInWithRMode": {}
}Requires: {
"or": [
"h_CrystalFlashForReserveEnergy",
{
"and": [
{
"or": [
{
"and": [
{
"resourceAvailable": [
{
"type": "RegularEnergy",
"count": 4
}
]
},
{
"disableEquipment": "ETank"
},
{
"partialRefill": {
"type": "ReserveEnergy",
"limit": 200
}
}
]
},
{
"and": [
{
"resourceMissingAtMost": [
{
"type": "RegularEnergy",
"count": 0
}
]
},
"canRiskPermanentLossOfAccess",
{
"partialRefill": {
"type": "ReserveEnergy",
"limit": 200
}
}
]
}
]
},
{
"resourceMissingAtMost": [
{
"type": "Missile",
"count": 0
}
]
}
]
}
]
}
"h_shinechargeMaxRunway"
{
"autoReserveTrigger": {}
}
"canRModeSparkInterrupt" |
From: 2
Right Door
To: 2
Right Door
Entrance condition: {
"comeInWithRMode": {}
}Requires: {
"or": [
{
"and": [
"h_CrystalFlash",
"canBeVeryPatient"
]
},
{
"disableEquipment": "ETank"
}
]
}
"h_shinechargeMaxRunway"
"h_RModeKnockbackSpark" |
|
In order to align and place a Power Bomb at the correct pixel, perform a suitless stationary spin jump and hit the ceiling before starting to morph. Requires: {
"or": [
"canInsaneJump",
{
"and": [
"canDisableEquipment",
"canStationarySpinJump"
]
}
]
}
"h_elevatorCrystalFlash"Exit condition: {
"leaveNormally": {}
} |
|
Farm the geemers, then use a Waver to interrupt. Entrance condition: {
"comeInWithRMode": {}
}Requires: {
"or": [
"h_CrystalFlashForReserveEnergy",
{
"and": [
"h_RModeCanRefillReserves",
{
"resourceMissingAtMost": [
{
"type": "Missile",
"count": 10
}
]
},
{
"partialRefill": {
"type": "ReserveEnergy",
"limit": 20
}
}
]
}
]
}
"h_shinechargeMaxRunway"
{
"autoReserveTrigger": {
"maxReserveEnergy": 95
}
}
"canRModeSparkInterrupt" |
|
Entrance condition: {
"comeInWithRMode": {}
}Requires: {
"or": [
"h_CrystalFlashForReserveEnergy",
{
"and": [
"h_RModeCanRefillReserves",
{
"resourceMissingAtMost": [
{
"type": "Missile",
"count": 10
}
]
},
{
"partialRefill": {
"type": "ReserveEnergy",
"limit": 20
}
}
]
}
]
}
"h_shinechargeMaxRunway"
{
"autoReserveTrigger": {
"maxReserveEnergy": 95
}
}
"canRModeSparkInterrupt" |
From: 1
Top Door
To: 2
Left Door
Without Springball or Gravity, it is possible to overload PLMs with the crumble blocks with bombs. Take the first left above the waterline. Place bombs in the single tile nook on the left. The Sciser that starts inside the Morph maze area will move off-screen: wait for it to come back out. Once outside of the Morph tunnel area, use X-Ray until the beam reaches full width to exit G-Mode and remain in R-Mode, then collect drops. Farm the rest of the Scisers, keeping the slower local Sciser at the bottom left corner to use for the interrupt. Position it in the ceiling cubby hole to safely perform the Shinecharge and jump into the Sciser as it walks back down. Entrance condition: {
"comeInWithGMode": {
"mode": "direct",
"morphed": true
},
"comesThroughToilet": "no"
}Requires: {
"or": [
"h_artificialMorphSpringBall",
{
"and": [
"h_artificialMorphBombThings",
"Gravity"
]
},
"h_artificialMorphIBJ"
]
}
{
"resourceMissingAtMost": [
{
"type": "PowerBomb",
"count": 0
}
]
}
{
"or": [
{
"and": [
{
"disableEquipment": "ETank"
},
{
"partialRefill": {
"type": "ReserveEnergy",
"limit": 40
}
}
]
},
{
"and": [
"canRiskPermanentLossOfAccess",
{
"resourceMissingAtMost": [
{
"type": "RegularEnergy",
"count": 120
}
]
},
{
"partialRefill": {
"type": "ReserveEnergy",
"limit": 20
}
}
]
},
{
"and": [
"canRiskPermanentLossOfAccess",
{
"resourceMissingAtMost": [
{
"type": "RegularEnergy",
"count": 0
}
]
},
{
"partialRefill": {
"type": "ReserveEnergy",
"limit": 100
}
}
]
}
]
}
{
"or": [
"canWaterShineCharge",
"Gravity"
]
}
{
"canShineCharge": {
"usedTiles": 20,
"openEnd": 0
}
}
{
"autoReserveTrigger": {}
}
"canRModeSparkInterrupt" |
|
Seven Scisers can be farmed. Use the 8th (a bottom left one) to interrupt spark. Leave the slower, local Sciser alive to use for the Shinespark interrupt. Position it in the ceiling cubby hole to safely perform the Shinecharge and jump into the Sciser as it walks back down. Entrance condition: {
"comeInWithRMode": {},
"comesThroughToilet": "no"
}Requires: "Morph"
{
  "or": [
    "h_CrystalFlashForReserveEnergy",
    {
      "and": [
        "h_RModeCanRefillReserves",
        {
          "or": [
            {
              "and": [
                {
                  "resourceMissingAtMost": [
                    {
                      "type": "PowerBomb",
                      "count": 0
                    }
                  ]
                },
                {
                  "partialRefill": {
                    "type": "ReserveEnergy",
                    "limit": 100
                  }
                }
              ]
            },
            {
              "and": [
                {
                  "resourceMissingAtMost": [
                    {
                      "type": "PowerBomb",
                      "count": 6
                    }
                  ]
                },
                {
                  "partialRefill": {
                    "type": "ReserveEnergy",
                    "limit": 20
                  }
                }
              ]
            }
          ]
        }
      ]
    }
  ]
}
"canWaterShineCharge"
{
  "canShineCharge": {
    "usedTiles": 20,
    "openEnd": 0
  }
}
{
  "autoReserveTrigger": {}
}
"canRModeSparkInterrupt" |
|
Six Scisers can be farmed from the left side without needing Morph. Leave the slower, local Sciser alive to use for the Shinespark interrupt. Position it in the ceiling cubby hole to safely perform the Shinecharge and jump into the Sciser as it walks back down. Entrance condition: {
"comeInWithRMode": {}
}Requires: {
"or": [
"h_CrystalFlashForReserveEnergy",
{
"and": [
"h_RModeCanRefillReserves",
{
"or": [
{
"and": [
{
"resourceMissingAtMost": [
{
"type": "PowerBomb",
"count": 0
}
]
},
{
"partialRefill": {
"type": "ReserveEnergy",
"limit": 100
}
}
]
},
{
"and": [
{
"resourceMissingAtMost": [
{
"type": "PowerBomb",
"count": 6
}
]
},
{
"partialRefill": {
"type": "ReserveEnergy",
"limit": 20
}
}
]
}
]
}
]
}
]
}
"canWaterShineCharge"
{
"canShineCharge": {
"usedTiles": 20,
"openEnd": 0
}
}
{
"autoReserveTrigger": {}
}
"canRModeSparkInterrupt" |
|
Farm two Scisers in the bottom section (manipulate camera to see where they are) and left Kihunter. Shinecharge and get interrupted by the right Kihunter. Entrance condition: {
"comeInWithRMode": {}
}Requires: {
"or": [
"canCameraManip",
{
"enemyDamage": {
"enemy": "Sciser",
"type": "contact",
"hits": 1
}
}
]
}
{
  "or": [
    "h_CrystalFlashForReserveEnergy",
    {
      "and": [
        "h_RModeCanRefillReserves",
        {
          "resourceMissingAtMost": [
            {
              "type": "PowerBomb",
              "count": 0
            }
          ]
        },
        {
          "partialRefill": {
            "type": "ReserveEnergy",
            "limit": 20
          }
        }
      ]
    }
  ]
}
{
  "canShineCharge": {
    "usedTiles": 33,
    "steepUpTiles": 2,
    "steepDownTiles": 5,
    "openEnd": 0
  }
}
{
  "autoReserveTrigger": {
    "maxReserveEnergy": 95
  }
}
"canRModeSparkInterrupt" |
|
Farm two Scisers in the bottom section and left Kihunter. Shinecharge and get interrupted by the right Kihunter. Entrance condition: {
"comeInWithRMode": {},
"comesThroughToilet": "no"
}Requires: {
"or": [
"h_CrystalFlashForReserveEnergy",
{
"and": [
"h_RModeCanRefillReserves",
{
"resourceMissingAtMost": [
{
"type": "PowerBomb",
"count": 0
}
]
},
{
"partialRefill": {
"type": "ReserveEnergy",
"limit": 20
}
}
]
}
]
}
{
"canShineCharge": {
"usedTiles": 33,
"steepUpTiles": 2,
"steepDownTiles": 5,
"openEnd": 0
}
}
{
"autoReserveTrigger": {
"maxReserveEnergy": 95
}
}
"canRModeSparkInterrupt" |
|
Entrance condition: {
"comeInWithRMode": {}
}Requires: "Gravity"
"canDodgeWhileShooting"
{
"or": [
"h_CrystalFlashForReserveEnergy",
{
"and": [
"h_RModeCanRefillReserves",
{
"resourceMissingAtMost": [
{
"type": "Missile",
"count": 0
}
]
},
{
"partialRefill": {
"type": "ReserveEnergy",
"limit": 20
}
}
]
}
]
}
{
"canShineCharge": {
"usedTiles": 20,
"steepUpTiles": 4,
"steepDownTiles": 2,
"startingSteepDownTiles": 1,
"openEnd": 0
}
}
{
"autoReserveTrigger": {
"maxReserveEnergy": 95
}
}
"canRModeSparkInterrupt" |
|
Run for 7 tiles for enough speed to Spring Ball from the submerged platform up to the platform enemy, above the water. Turning on Speed Booster midjump, after running 7+ tiles, will automatically hit the run speed requirement. It is not necessary to enter the water to clear the rightmost Choot. Requires: "canTrickyJump"
{
"or": [
{
"disableEquipment": "SpeedBooster"
},
"canTrickyDashJump"
]
}
"canSpeedyJump"
"canSpringBallBounce"
"canMockball"
"SpaceJump" |
From: 1
Left Door
To: 3
Junction (Left side Pit)
It is required to avoid double hitting the Skultera with the Power Bomb, and to position the Crystal Flash so that the Skultera can hit Samus from above so it avoids the light orb. To do this, use the bottom-left Skultera, and move it off-camera at the far left end of its cycle. Go to the far right end of it's cycle and on the Crystal Flash on the sloped tile just below where it ends. Once the Skultera gets hit by the Power Bomb explosion, it will start moving, even while off-camera. Entrance condition: {
"comeInWithGMode": {
"mode": "direct",
"morphed": true
}
}Requires: "h_artificialMorphComplexRModeCrystalFlashInterrupt"
"canCameraManip"
{
"ammo": {
"type": "Missile",
"count": 10
}
}
{
"ammo": {
"type": "Super",
"count": 10
}
}
{
"ammo": {
"type": "PowerBomb",
"count": 5
}
}
{
"or": [
"h_partialEnemyDamageReduction",
{
"resourceAtMost": [
{
"type": "RegularEnergy",
"count": 19
}
]
},
{
"and": [
{
"resourceCapacity": [
{
"type": "RegularEnergy",
"count": 199
}
]
},
{
"resourceCapacity": [
{
"type": "ReserveEnergy",
"count": 199
}
]
}
]
}
]
}Dev note: There is no reason to do this at node 4, because the movement items required to get to 4 and then do anything useful with the flash suit would also enable Samus to get the flash suit here and then take it to node 4. |
|
Entrance condition: {
"comeInWithRMode": {}
}Requires: "Gravity"
{
"or": [
"h_CrystalFlashForReserveEnergy",
{
"and": [
"h_RModeCanRefillReserves",
{
"resourceMissingAtMost": [
{
"type": "Missile",
"count": 0
}
]
},
{
"partialRefill": {
"type": "ReserveEnergy",
"limit": 20
}
}
]
}
]
}
{
"canShineCharge": {
"usedTiles": 20,
"steepUpTiles": 4,
"steepDownTiles": 2,
"startingSteepDownTiles": 1,
"openEnd": 0
}
}
{
"autoReserveTrigger": {
"maxReserveEnergy": 95
}
}
"canRModeSparkInterrupt" |
From: 2
Right Door
To: 3
Junction (Left side Pit)
Perform a double Spring Ball jump using a precisely timed bomb boost to propel Samus upward just long enough to get the mid-air Spring Ball jump. This needs to be done multiple times to cross the room with no other items; using Spring Flings to cross from peak to peak can reduce the required number of bomb into Spring Ball jumps to just one or two. To Crystal Flash interrupt, it is required to avoid double hitting the Skultera with the Power Bomb, and to position the Crystal Flash so that the Skultera can hit Samus from above so it avoids the light orb. To do this, use the bottom-left Skultera, and move it off-camera at the far left end of its cycle. Go to the far right end of it's cycle and on the Crystal Flash on the sloped tile just below where it ends. Once the Skultera gets hit by the Power Bomb explosion, it will start moving, even while off-camera. Entrance condition: {
"comeInWithGMode": {
"mode": "direct",
"morphed": true
}
}Requires: "h_artificialMorphUnderwaterBombIntoSpringBallJump"
{
"or": [
"h_artificialMorphSpringFling",
"canBeVeryPatient"
]
}
"h_artificialMorphComplexRModeCrystalFlashInterrupt"
"canCameraManip"
{
  "ammo": {
    "type": "Missile",
    "count": 10
  }
}
{
  "ammo": {
    "type": "Super",
    "count": 10
  }
}
{
  "ammo": {
    "type": "PowerBomb",
    "count": 5
  }
}
{
  "or": [
    "h_partialEnemyDamageReduction",
    {
      "resourceAtMost": [
        {
          "type": "RegularEnergy",
          "count": 19
        }
      ]
    },
    {
      "and": [
        {
          "resourceCapacity": [
            {
              "type": "RegularEnergy",
              "count": 199
            }
          ]
        },
        {
          "resourceCapacity": [
            {
              "type": "ReserveEnergy",
              "count": 199
            }
          ]
        }
      ]
    }
  ]
}
Dev note: Methods with more flexible movement items will instead be done at node 4, after which, they can be used to get here. FIXME: Add variants that can farm enough Energy to choot damage boost without enemy damage reduction or tanks. |
From: 2
Right Door
To: 4
Junction (Right side Pit)
It is required to avoid double hitting the Skultera with the Power Bomb, and to position the Crystal Flash so that the Skultera can hit Samus from above so it avoids the light orb. To do this, use the bottom-right Skultera, and position Samus against the right pillar, or on the slope in front of the pillar. Place the Power Bomb to hit the fish as it reaches the left wall. If Samus has 75% enemy damage reduction, it is required to Crystal Flash on the sloped tile, otherwise she can use either tile. Entrance condition: {
"comeInWithGMode": {
"mode": "direct",
"morphed": true
}
}Requires: {
"or": [
{
"and": [
"Gravity",
"h_artificialMorphIBJ"
]
},
{
"and": [
"Gravity",
"h_artificialMorphSpringBall"
]
},
{
"and": [
"HiJump",
"h_artificialMorphSpringBall"
]
}
]
}
"h_artificialMorphComplexRModeCrystalFlashInterrupt"
{
"ammo": {
"type": "Missile",
"count": 10
}
}
{
"ammo": {
"type": "Super",
"count": 5
}
}
{
"or": [
"h_partialEnemyDamageReduction",
{
"resourceAtMost": [
{
"type": "RegularEnergy",
"count": 19
}
]
},
{
"and": [
{
"resourceCapacity": [
{
"type": "RegularEnergy",
"count": 199
}
]
},
{
"resourceCapacity": [
{
"type": "ReserveEnergy",
"count": 199
}
]
}
]
}
]
} |
|
Stand on the farthest pixel into the door possible using moonwalk, X-Ray, or morphball turn around. Run towards the water and jump on the last possible frame. Perform the CWJ off of the item pedestal to cross to the other side. This requires running and jumping on the last possible frame before Samus would run off into the water. There is either a 1-frame or 2-frame window for the wall jump, depending on Samus' X subpixel position. To get a 2-frame window, Samus must start in the leftmost 75% of the pixel next to the transition. One method to guarantee that Samus gets a good subpixel is to jump and press against the overhang to align with it, then land, turn around, and moonwalk back into position. Requires: {
"or": [
{
"notable": "First-Try CWJ"
},
{
"and": [
"h_bombThings",
"h_additionalBomb",
"h_additionalBomb"
]
}
]
}
"canCWJ"
{
"disableEquipment": "HiJump"
}
{
"disableEquipment": "SpeedBooster"
}
{
"doorUnlockedAtNode": 1
}
"h_backIntoCorner"Collects items: 3 |
|
Align against the closed door shell on the other side of the transition. Run towards the water and jump on the last possible frame. Perform the CWJ off of the item pedestal to cross to the other side. This requires running and jumping on the last possible frame before Samus would run off into the water. If the setup is done correctly, there will then be a 2-frame window for the wall jump. Entrance condition: {
"comeInRunning": {
"speedBooster": "no",
"minTiles": 1.4
}
}Requires: {
"or": [
{
"notable": "First-Try CWJ"
},
{
"and": [
"h_bombThings",
"h_additionalBomb",
"h_additionalBomb"
]
}
]
}
"canCWJ"
{
"disableEquipment": "HiJump"
}
{
"disableEquipment": "SpeedBooster"
}Collects items: 3 |
|
With Spring Ball, pause then press right and jump just before the pause fully triggers. Disable Spring Ball in order to get a large horizontal boost. Pause again as soon as possible and re-enable Spring to reset fall speed. Entrance condition: {
"comeInWithGMode": {
"mode": "indirect",
"morphed": true
}
}Requires: "h_artificialMorphSpringFling"
"canInsaneJump"
{
"disableEquipment": "HiJump"
} |
|
With Spring Ball, pause then press right and jump just before the pause fully triggers. Disable Spring Ball in order to get a large horizontal boost. Pause again as soon as possible and re-enable Spring to reset fall speed. Entrance condition: {
"comeInWithGMode": {
"mode": "direct",
"morphed": true
}
}Requires: "h_artificialMorphSpringFling"
"canInsaneJump"
{
"disableEquipment": "HiJump"
}Collects items: 3 |
|
Open the door and step as close to the transition as possible. Run, jump, lateral midair morph on the way down, then bounce off the pedestal to get to the other side. Requires: "canSpringBallBounce"
"canDisableEquipment"
{
"doorUnlockedAtNode": 1
}
{
"or": [
"canTrickyJump",
"h_useMorphBombs"
]
}Collects items: 3 |
|
Run, jump, lateral midair morph on the way down, then bounce off the pedestal to get to the other side. Entrance condition: {
"comeInRunning": {
"speedBooster": "any",
"minTiles": 1
}
}Requires: "canSpringBallBounce"
"canDisableEquipment"
{
"or": [
"canTrickyJump",
"h_useMorphBombs"
]
}Collects items: 3 |
|
Requires: "canDash" "canDisableEquipment" Collects items: 3 |
|
With Spring Ball, pause then press right and jump just before the pause fully triggers. Disable Spring Ball in order to get a large horizontal boost. Pause again as soon as possible and re-enable Spring to reset fall speed. Entrance condition: {
"comeInWithGMode": {
"mode": "any",
"morphed": true
}
}Requires: "h_artificialMorphSpringFling"
{
"disableEquipment": "HiJump"
}Collects items: 3 |
|
Entrance condition: {
"comeInWithGMode": {
"mode": "any",
"morphed": true
}
}Requires: {
"haveBlueSuit": {}
}
{
"or": [
{
"disableEquipment": "Gravity"
},
"h_artificialMorphBombHorizontally",
"h_artificialMorphSpringBall"
]
} |
From: 2
Right Door
To: 2
Right Door
With Spring Ball, pause then press forward and jump just before the pause fully triggers. Disable Spring Ball in order to get a large horizontal boost. Pause again as soon as possible and re-enable Spring to reset fall speed. Entrance condition: {
"comeInWithGMode": {
"mode": "direct",
"morphed": true
}
}Requires: "canRemoteAcquire"
"h_artificialMorphSpringFling"
"canInsaneJump"
{
  "disableEquipment": "HiJump"
}Collects items: 3 |
|
With Spring Ball, pause then press right and jump just before the pause fully triggers. Disable Spring Ball in order to get a large horizontal boost. Pause again as soon as possible and re-enable Spring to reset fall speed. Entrance condition: {
"comeInWithGMode": {
"mode": "any",
"morphed": true
}
}Requires: "h_artificialMorphSpringFling"
{
"disableEquipment": "HiJump"
}Collects items: 3 |
|
Execution of this strat is non-trivial, and failing will lead to falling into the pit. Depending on item loadout, that could be a softlock. Requires: "canDash"
"canDisableEquipment"
"canCarefulJump"
{
"or": [
{
"doorUnlockedAtNode": 2
},
"canTrickyJump",
"canLateralMidAirMorph",
"h_speedJump"
]
}Collects items: 3 Dev note: Could use a failure definition? |
|
Execution of this strat is non-trivial, and failing will lead to falling into the pit. Depending on item loadout, that could be a softlock. Entrance condition: {
"comeInRunning": {
"speedBooster": "any",
"minTiles": 2
}
}Requires: "canDisableEquipment" "canCarefulJump" Collects items: 3 |
|
With Spring Ball, pause then press right and jump just before the pause fully triggers. Disable Spring Ball in order to get a large horizontal boost. Pause again as soon as possible and re-enable Spring to reset fall speed. Requires: "canSpringFling"
"canInsaneJump"
{
"disableEquipment": "HiJump"
}
{
"obstaclesNotCleared": [
"A",
"B",
"C"
]
}Collects items: 3 |
From: 13
Bottom Junction
To: 5
Lower Section - Bottom Right Door
Requires: "canDash"
{
"or": [
"canCarefulJump",
"canConsecutiveWallJump"
]
}
{
"or": [
"canDisableEquipment",
"canTrickyJump"
]
} |
|
If you come from the upper section, use the Zeb Farm to fill up. Otherwise you have one Skultera or the Ripper 2 availble for reserve farming, or else Crystal Flash. Run underwater for the shinecharge and jump into the second Skultera's path to interrupt. Requires: {
"obstaclesCleared": [
"R-Mode"
]
}
{
"or": [
{
"resourceMissingAtMost": [
{
"type": "ReserveEnergy",
"count": 0
}
]
},
"h_CrystalFlashForReserveEnergy",
{
"and": [
"h_RModeCanRefillReserves",
{
"resourceMissingAtMost": [
{
"type": "Missile",
"count": 0
}
]
},
{
"or": [
{
"and": [
"canBePatient",
{
"partialRefill": {
"type": "ReserveEnergy",
"limit": 5
}
}
]
},
{
"and": [
{
"or": [
"canBeVeryLucky",
{
"and": [
{
"enemyKill": {
"enemies": [
[
"Ripper 2 (green)"
]
],
"excludedWeapons": [
"Super"
]
}
},
{
"resourceMissingAtMost": [
{
"type": "Super",
"count": 0
}
]
}
]
}
]
},
{
"partialRefill": {
"type": "ReserveEnergy",
"limit": 20
}
}
]
}
]
}
]
}
]
}
"Gravity"
"h_shinechargeMaxRunway"
{
"autoReserveTrigger": {
"maxReserveEnergy": 95
}
}
"canRModeSparkInterrupt"Resets obstacles: R-Mode Dev note: FIXME: Needs to track kill of the Ripper 2 in case this makes door #4 inaccessible. |
|
Crystal Flash required. Must have no E-Tanks (disable or don't collect). Disable suits and use two boulders to damage down. Shinecharge and spark quickly under the rightmost boulder to get the interrupt. Entrance condition: {
"comeInWithRMode": {}
}Requires: {
"disableEquipment": "ETank"
}
"h_CrystalFlashForReserveEnergy"
{
"disableEquipment": "Varia"
}
{
"disableEquipment": "Gravity"
}
{
"canShineCharge": {
"usedTiles": 16,
"openEnd": 1
}
}
{
"autoReserveTrigger": {}
}
"canRModeSparkInterrupt" |
From: 1
Left Door
To: 1
Left Door
Crystal Flash required. Damage down using spikes or the first two boulders. Shinecharge and spark quickly under the leftmost boulder to get the interrupt. Requires: {
"obstaclesCleared": [
"R-Mode"
]
}
"h_CrystalFlashForReserveEnergy"
"canTrickyJump"
{
"canShineCharge": {
"usedTiles": 14,
"openEnd": 1
}
}
{
"autoReserveTrigger": {}
}
"canRModeSparkInterrupt"Resets obstacles: R-Mode |
From: 2
Right Door
To: 1
Left Door
Artificial morph on entry to land on the doorsill. From the left edge, pause then press left and jump just before the pause fully triggers. Disable Spring Ball in order to get a large horizontal boost. Entrance condition: {
"comeInWithGMode": {
"mode": "direct",
"morphed": false
}
}Requires: "canArtificialMorph"
"h_artificialMorphSpringFling"
{
"disableEquipment": "HiJump"
} |
From: 1
Bottom Left Door
To: 1
Bottom Left Door
Entrance condition: {
"comeInWithRMode": {}
}Requires: "h_ZebesIsAwake"
{
"or": [
"h_CrystalFlashForReserveEnergy",
{
"and": [
"h_RModeCanRefillReserves",
{
"resourceMissingAtMost": [
{
"type": "Missile",
"count": 0
}
]
},
{
"partialRefill": {
"type": "ReserveEnergy",
"limit": 20
}
}
]
}
]
}
{
"canShineCharge": {
"usedTiles": 30,
"openEnd": 0
}
}
{
"autoReserveTrigger": {
"maxReserveEnergy": 95
}
}
"canRModeSparkInterrupt"Dev note: Kill the Geemers for Reserves, or else Crystal Flash. Damage down and use the Reo to interrupt a shinespark wind-up. |
From: 2
Top Left Door
To: 1
Bottom Left Door
Entrance condition: {
"comeInWithRMode": {}
}Requires: "h_ZebesIsAwake"
{
"or": [
"h_CrystalFlashForReserveEnergy",
{
"and": [
"Morph",
"h_destroyBombWalls",
"h_RModeCanRefillReserves",
{
"resourceMissingAtMost": [
{
"type": "Missile",
"count": 0
}
]
},
{
"partialRefill": {
"type": "ReserveEnergy",
"limit": 20
}
}
]
}
]
}
{
"canShineCharge": {
"usedTiles": 30,
"openEnd": 0
}
}
{
"autoReserveTrigger": {
"maxReserveEnergy": 95
}
}
"canRModeSparkInterrupt"Clears obstacles: A, B Dev note: Kill the Geemers for Reserves, or else Crystal Flash. Damage down and use the Reo to interrupt a shinespark wind-up. |
From: 1
Left Door
To: 1
Left Door
On entry, quickly roll to the right next to the stair, while Samus is protected with i-frames. It is required to avoid double hitting the Sidehopper with the Power Bomb or it will die. It can help to place a Power Bomb and roll to the right to reduce the chance that the ceiling hopper gets double hit, and to lure the third hopper. Quickly getting back into position and Crystal Flashing will usually get Samus hit by either the ceiling or right hopper. Entrance condition: {
"comeInWithGMode": {
"mode": "direct",
"morphed": true
}
}Requires: "h_ZebesIsAwake"
"h_artificialMorphComplexRModeCrystalFlashInterrupt"
{
"ammo": {
"type": "Missile",
"count": 10
}
}
{
"or": [
"h_partialEnemyDamageReduction",
{
"resourceAtMost": [
{
"type": "RegularEnergy",
"count": 19
}
]
},
{
"and": [
{
"resourceCapacity": [
{
"type": "RegularEnergy",
"count": 199
}
]
},
{
"resourceCapacity": [
{
"type": "ReserveEnergy",
"count": 199
}
]
}
]
}
]
}
{
"obstaclesCleared": [
"C"
]
}Dev note: Killing the hoppers after this is easy, as Samus will have i-frames, the Sidehoppers will be injured, and Samus will have some extra ammo just in case. A different setup could also break A, but Samus will end with at least 10 Power Bombs, so this is ignored for simplicity. |
|
Due to R-Mode Entry, getting hit by the Sidehopper can only be avoided by a quick Screw Attack after releasing the X-Ray Scope. You can attempt to farm the two ground Sidehoppers for Reserve Energy. Otherwise, you must use a Crystal Flash. Leave the ceiling Sidehopper alive to clear the runway for a shortcharge. Initiate the shinespark in midair so that Samus is in the path to be hit. Entrance condition: {
"comeInWithRMode": {}
}Requires: "h_ZebesIsAwake"
{
"or": [
"ScrewAttack",
{
"and": [
{
"enemyDamage": {
"enemy": "Sidehopper",
"type": "contact",
"hits": 1
}
},
{
"enemyKill": {
"enemies": [
[
"Sidehopper",
"Sidehopper"
]
],
"explicitWeapons": [
"Missile",
"Super",
"PowerBomb",
"Plasma"
]
}
}
]
}
]
}
{
"or": [
"h_CrystalFlashForReserveEnergy",
{
"and": [
"h_RModeCanRefillReserves",
{
"or": [
{
"and": [
{
"resourceMissingAtMost": [
{
"type": "Missile",
"count": 0
}
]
},
{
"resourceMissingAtMost": [
{
"type": "Super",
"count": 0
}
]
}
]
},
"canBeVeryLucky"
]
},
"canBeLucky",
{
"partialRefill": {
"type": "ReserveEnergy",
"limit": 20
}
}
]
}
]
}
"canTrickyDodgeEnemies"
{
"canShineCharge": {
"usedTiles": 25,
"openEnd": 0
}
}
{
"autoReserveTrigger": {
"maxReserveEnergy": 95
}
}
"canRModeSparkInterrupt"Clears obstacles: C Dev note: FIXME: More equipment combinations can work. |
|
The hoppers have a poor energy drop rate. The rightmost two can be killed easily for two chances at a drop, otherwise a Crystal Flash must be used to get reserves. Entrance condition: {
"comeInWithRMode": {}
}Requires: "h_ZebesIsAwake"
{
"or": [
"h_CrystalFlashForReserveEnergy",
{
"and": [
"h_usePowerBomb",
"h_RModeCanRefillReserves",
{
"or": [
{
"and": [
{
"resourceMissingAtMost": [
{
"type": "Missile",
"count": 0
}
]
},
{
"resourceMissingAtMost": [
{
"type": "Super",
"count": 0
}
]
}
]
},
"canBeVeryLucky"
]
},
"canBeLucky",
{
"partialRefill": {
"type": "ReserveEnergy",
"limit": 20
}
}
]
}
]
}
{
"or": [
{
"and": [
{
"getBlueSpeed": {
"usedTiles": 21,
"openEnd": 1
}
},
"canSpeedball"
]
},
"h_bombThings"
]
}
{
"canShineCharge": {
"usedTiles": 21,
"openEnd": 1
}
}
{
"autoReserveTrigger": {
"maxReserveEnergy": 95
}
}
"canRModeSparkInterrupt"Clears obstacles: A, B, C |
|
Kill Zeela for reserves or Crystal Flash. Lead one Zeela above the runway and perform Spark Interrupt. Crystal Flash can be used to clear the bomb blocks for access to the runway. Entrance condition: {
"comeInWithRMode": {}
}Requires: "Morph"
{
"or": [
"h_CrystalFlashForReserveEnergy",
{
"and": [
"h_bombThings",
"h_RModeCanRefillReserves",
{
"resourceMissingAtMost": [
{
"type": "Missile",
"count": 0
}
]
},
{
"resourceMissingAtMost": [
{
"type": "Super",
"count": 0
}
]
},
{
"partialRefill": {
"type": "ReserveEnergy",
"limit": 20
}
}
]
}
]
}
{
"canShineCharge": {
"usedTiles": 17,
"openEnd": 0
}
}
{
"autoReserveTrigger": {}
}
"canRModeSparkInterrupt"Clears obstacles: A |
|
Kill Zeela for reserves or Crystal Flash. Lead one Zeela above the runway and perform Spark Interrupt. Entrance condition: {
"comeInWithRMode": {}
}Requires: {
"or": [
"h_CrystalFlashForReserveEnergy",
{
"and": [
"h_RModeCanRefillReserves",
{
"resourceMissingAtMost": [
{
"type": "Missile",
"count": 0
}
]
},
{
"resourceMissingAtMost": [
{
"type": "Super",
"count": 0
}
]
},
{
"partialRefill": {
"type": "ReserveEnergy",
"limit": 20
}
}
]
}
]
}
{
"canShineCharge": {
"usedTiles": 17,
"openEnd": 0
}
}
{
"autoReserveTrigger": {}
}
"canRModeSparkInterrupt" |
From: 2
Right Door
To: 2
Right Door
Jump into the room and aim down to get under the first shutter, then break the crumble blocks to the left. This is the only way for the Wavers to reach the door. After the crumbles are broken, shoot the ceiling block and wait by the door for the Waver to come. Entrance condition: {
"comeInJumping": {
"speedBooster": "no",
"minTiles": 4
}
}Requires: "canCrouchGateClip" "canComplexGMode" Exit condition: {
"leaveWithGModeSetup": {}
}Unlocks doors: {"types":["ammo"],"requires":[]} |
From: 2
Right Door
To: 2
Right Door
Space Jump into the room and aim down to get under the first shutter, then break the crumble blocks to the left. This is the only way for the Wavers to reach the door. After the crumbles are broken, shoot the ceiling block and wait by the door for the Waver to come. Entrance condition: {
"comeInSpaceJumping": {
"speedBooster": "no",
"minTiles": 4
}
}Requires: "canCrouchGateClip" "canComplexGMode" Exit condition: {
"leaveWithGModeSetup": {}
}Unlocks doors: {"types":["ammo"],"requires":[]} |
|
Use the runway on the upper screen. There are many enemies up there to clear out of the way and will helpfully provide Reserves. Or else Crystal Flash. Leave one waver or small hopper alive. You can farm the rest for drops. Entrance condition: {
"comeInWithRMode": {}
}Requires: {
"or": [
"canWallJump",
"HiJump",
"SpaceJump",
"canIBJ",
"canSpringBallJumpMidAir",
"h_crouchJumpDownGrab"
]
}
{
"or": [
"h_CrystalFlashForReserveEnergy",
{
"and": [
{
"disableEquipment": "ETank"
},
{
"resourceAvailable": [
{
"type": "Energy",
"count": 80
}
]
},
{
"resourceMissingAtMost": [
{
"type": "Missile",
"count": 0
}
]
},
{
"resourceMissingAtMost": [
{
"type": "Super",
"count": 0
}
]
},
{
"partialRefill": {
"type": "ReserveEnergy",
"limit": 1
}
}
]
}
]
}
{
"canShineCharge": {
"usedTiles": 25,
"openEnd": 1
}
}
{
"autoReserveTrigger": {
"maxReserveEnergy": 95
}
}
"canRModeSparkInterrupt"Clears obstacles: A |
|
Farm Firefleas for Reserves or else Crystal Flash. Damage down on the thorns (6 hits suitless). Get shinecharge on the top-right ledge and use the last fireflea to interrupt. Entrance condition: {
"comeInWithRMode": {}
}Requires: {
"or": [
"h_CrystalFlashForReserveEnergy",
{
"and": [
"h_RModeCanRefillReserves",
{
"resourceMissingAtMost": [
{
"type": "PowerBomb",
"count": 0
}
]
},
{
"partialRefill": {
"type": "ReserveEnergy",
"limit": 20
}
}
]
}
]
}
{
"or": [
{
"canShineCharge": {
"usedTiles": 16,
"openEnd": 0
}
},
{
"and": [
{
"doorUnlockedAtNode": 2
},
{
"canShineCharge": {
"usedTiles": 17,
"openEnd": 0
}
}
]
}
]
}
{
"autoReserveTrigger": {}
}
{
"partialRefill": {
"type": "RegularEnergy",
"limit": 21
}
}
"canRModeSparkInterrupt"Unlocks doors: {"nodeId":2,"types":["ammo"],"requires":[]}Dev note: FIXME: The last fireflea self-destructs and will drop a Large Energy right on top of Samus if full on PBs. |
From: 8
Below Power Bomb Blocks - Bottom Left Door
To: 9
Right Etecoon Shaft - Top Left Door
Enter with G-Mode. Jump to the top of the shaft. Place a Power Bomb against the ceiling next to the shot block (do not touch the scroll block). Drop back to the bottom of the shaft, roll against the bomb block until Samus passes through. Jump through the crumble block and through the morph tunnel. Once Samus can stand up, do so and use X-Ray to switch to R-Mode: be sure to hold X-Ray until it fully widens. Bomb the block, roll back through the tunnel and stop next to the crumble block. Use a Power Bomb or Five-Bomb Drop to clear the lower bomb block. Wait next to the crumble block until the global Zeela is visible coming down the right wall. Wait until the last possible moment to touch the crumbe block and allow the Zeela through, and immediately roll away to avoid getting hit by it. Lead it back through the Morph tunnel. Jump up to the box with the item. Wait for the Zeela to leave if needed, then Crystal Flash inside. Damage back down using the Zeela. If this needs multiple laps, use a Super to knock it down off the right wall before it can enter the item box. Lead it back through the Morph tunnel and into the Etecoons shaft. Let the Zeela pass going up the left wall and wait until it has moved far enough up before using a Crystal Flash. Use the Zeela to damage back down, shinecharge on the runway, and jump into the Zeela to interrupt. Entrance condition: {
"comeInWithGMode": {
"mode": "direct",
"morphed": false
}
}Requires: "Morph"
"h_usePowerBomb"
"canMidAirMorph"
"h_bombThings"
{
"or": [
"h_usePowerBomb",
{
"and": [
"Charge",
"h_useMorphBombs"
]
}
]
}
"canBeVeryPatient"
"h_CrystalFlashForReserveEnergy"
{
"or": [
{
"disableEquipment": "ETank"
},
{
"resourceAtMost": [
{
"type": "ReserveEnergy",
"count": 5
}
]
}
]
}
{
"or": [
"canConsecutiveWallJump",
"canLongIBJ",
"SpaceJump"
]
}
{
"or": [
{
"disableEquipment": "ETank"
},
{
"ammo": {
"type": "Super",
"count": 3
}
}
]
}
{
"or": [
{
"canShineCharge": {
"usedTiles": 17,
"openEnd": 1
}
},
{
"and": [
"h_frozenEnemyRunway",
{
"ammo": {
"type": "Super",
"count": 1
}
},
{
"canShineCharge": {
"usedTiles": 18,
"openEnd": 1
}
}
]
}
]
}
{
"autoReserveTrigger": {}
}
"canRModeSparkInterrupt"Clears obstacles: A |
From: 12
Above Power Bomb Blocks - Main Junction
To: 12
Above Power Bomb Blocks - Main Junction
Enter R-Mode using any door. Crystal Flash (away from the Power Bomb blocks!) or farm the upper section enemies, except for one. Tight 1-screen shortcharge between the bottom doors. Both shells need to be opened. If R-Mode is entered below the Power Bomb blocks, you'll need to use a clip to get to the upper section without destroying the barrier. Requires: {
"obstaclesCleared": [
"R-Mode"
]
}
{
"obstaclesNotCleared": [
"A"
]
}
{
"or": [
"h_CrystalFlashForReserveEnergy",
{
"and": [
{
"disableEquipment": "ETank"
},
{
"or": [
{
"resourceAvailable": [
{
"type": "Energy",
"count": 85
}
]
},
{
"and": [
{
"enemyKill": {
"enemies": [
[
"Ripper 2 (red)"
],
[
"Ripper 2 (red)"
]
],
"excludedWeapons": [
"Super"
]
}
},
{
"resourceAvailable": [
{
"type": "Energy",
"count": 40
}
]
}
]
}
]
},
{
"resourceMissingAtMost": [
{
"type": "Missile",
"count": 0
}
]
},
{
"resourceMissingAtMost": [
{
"type": "Super",
"count": 0
}
]
},
{
"partialRefill": {
"type": "ReserveEnergy",
"limit": 1
}
}
]
}
]
}
{
"or": [
{
"canShineCharge": {
"usedTiles": 12,
"openEnd": 0
}
},
{
"and": [
{
"doorUnlockedAtNode": 5
},
{
"canShineCharge": {
"usedTiles": 13,
"openEnd": 0
}
}
]
},
{
"and": [
{
"doorUnlockedAtNode": 6
},
{
"canShineCharge": {
"usedTiles": 13,
"openEnd": 0
}
}
]
},
{
"and": [
{
"doorUnlockedAtNode": 5
},
{
"doorUnlockedAtNode": 6
},
{
"canShineCharge": {
"usedTiles": 14,
"openEnd": 0
}
}
]
}
]
}
{
"autoReserveTrigger": {}
}
"canRModeSparkInterrupt"Resets obstacles: R-Mode Unlocks doors: {"nodeId":5,"types":["ammo"],"requires":[]}
{"nodeId":6,"types":["ammo"],"requires":[]} |
From: 12
Above Power Bomb Blocks - Main Junction
To: 13
Below Power Bomb Blocks - Main Junction
Freeze two Zeelas to perform an 'Enemy Stuck Moonfall' in order to clip through the Power Bomb blocks. Position one Zeela upside down on a ceiling, and another below it on the ground. The global Zeela paired with either the lowest Zeela, or the other perimeter Zeela can be used, but freezing them together is the hardest part. Freezing one and then unequipping Ice Beam to dispel the ice effect or manipulating the camera can be used to synchronize them. If the moonfall is initiated immediately after freezing both enemies, it is possible to gain enough speed to automatically clip through the enemy and the floor; in this case, hold an angle button to buffer a pose change. Alternatively, and more easily, when one of the enemies is about to thaw, hold backward in order to move forward and fall off the enemy with a buffered turnaround, which will clip through the floor without needing as much fall speed. From directly on top of the Power Bomb blocks, no pose change is needed. Two Super Missiles can speed up the Zeela setup greatly by knocking them off of the wall. Requires: "canEnemyStuckMoonfall"
"canTrickyUseFrozenEnemies"
{
"or": [
"canDisableEquipment",
"canCameraManip"
]
}
{
"or": [
"canBePatient",
{
"ammo": {
"type": "Super",
"count": 2
}
}
]
} |
From: 13
Below Power Bomb Blocks - Main Junction
To: 9
Right Etecoon Shaft - Top Left Door
Enter R-Mode using any door. Crystal Flash or farm the upper section enemies. Use 'Bottom Ice Clip' strat to regain access to the Etecoons Shaft, then wait on top of the crumble block to get the Zeela to follow you in. Shinecharge on top of the Etecoon Shaft and get hit by the Zeela to interrupt. Requires: {
"obstaclesCleared": [
"R-Mode"
]
}
{
"notable": "Bottom Ice Clip"
}
{
"or": [
"h_CrystalFlashForReserveEnergy",
{
"and": [
{
"obstaclesCleared": [
"A"
]
},
"h_RModeCanRefillReserves",
{
"resourceMissingAtMost": [
{
"type": "Missile",
"count": 0
}
]
},
{
"resourceMissingAtMost": [
{
"type": "Super",
"count": 0
}
]
},
{
"partialRefill": {
"type": "ReserveEnergy",
"limit": 20
}
}
]
}
]
}
"h_bombThings"
"h_additionalBomb"
"canTrickyJump"
"h_XRayMorphIceClip"
{
"or": [
"h_useSpringBall",
{
"and": [
"can4HighMidAirMorph",
"canInsaneJump"
]
}
]
}
"canBeVeryPatient"
{
"or": [
{
"canShineCharge": {
"usedTiles": 17,
"openEnd": 1
}
},
{
"and": [
"h_frozenEnemyRunway",
{
"canShineCharge": {
"usedTiles": 18,
"openEnd": 1
}
}
]
}
]
}
{
"autoReserveTrigger": {}
}
"canRModeSparkInterrupt"Resets obstacles: R-Mode |
|
Requires: "h_blueGateGlitch" Clears obstacles: B |
|
Open the gate (Wave Beam or gate glitch) and clear the Small Sidehoppers for a runway. Use respawning Geegas for energy. Entrance condition: {
"comeInWithRMode": {}
}Requires: {
"or": [
"Wave",
"h_blueGateGlitch",
{
"and": [
{
"notable": "Grapple Gate Glitch"
},
"canPreciseGrapple",
"h_speedJump",
"canTrickyJump"
]
}
]
}
{
"refill": [
"Energy"
]
}
{
"canShineCharge": {
"usedTiles": 30,
"openEnd": 0
}
}
{
"autoReserveTrigger": {}
}
"canRModeSparkInterrupt"Clears obstacles: B |
|
Farm Zeelas and two Cacatacs or else Crystal Flash for Reserves. Cacatac projectile can provide spark interrupt. Entrance condition: {
"comeInWithRMode": {}
}Requires: {
"or": [
"h_CrystalFlashForReserveEnergy",
{
"and": [
"h_RModeCanRefillReserves",
{
"resourceMissingAtMost": [
{
"type": "Super",
"count": 1
}
]
},
{
"partialRefill": {
"type": "ReserveEnergy",
"limit": 20
}
}
]
}
]
}
"h_shinechargeMaxRunway"
{
"autoReserveTrigger": {}
}
"canRModeSparkInterrupt" |
|
Perform a long sequence of quick drops to make it past the crumbles without dashing. It is possible to hold jump the entire time, doing buffered turnaround spin jumps to the right. With each quick drop, it is recommended to center Samus over the edge between two crumble blocks, to break both of them at once. Requires: {
"notable": "Dashless Quick Drops"
}
{
"disableEquipment": "HiJump"
}
"canQuickDrop" |
|
Farm Zeelas and two Cacatacs or else Crystal Flash for Reserves. Cacatac projectile can provide spark interrupt. Entrance condition: {
"comeInWithRMode": {}
}Requires: {
"or": [
"h_CrystalFlashForReserveEnergy",
{
"and": [
"h_RModeCanRefillReserves",
{
"resourceMissingAtMost": [
{
"type": "Super",
"count": 1
}
]
},
{
"partialRefill": {
"type": "ReserveEnergy",
"limit": 20
}
}
]
}
]
}
"h_shinechargeMaxRunway"
{
"autoReserveTrigger": {}
}
"canRModeSparkInterrupt" |
|
Maximum two Kihunters can be killed for energy, and their drop rate is poor. Otherwise, Crystal Flash. Turn off extra beams and shoot off the remaining Kihunter's wings to help trap it against the side, giving free access to the runway. Entrance condition: {
"comeInWithRMode": {}
}Requires: {
"or": [
"h_CrystalFlashForReserveEnergy",
{
"and": [
"canTrickyDodgeEnemies",
"h_RModeCanRefillReserves",
{
"resourceMissingAtMost": [
{
"type": "Missile",
"count": 0
}
]
},
{
"or": [
{
"and": [
{
"partialRefill": {
"type": "ReserveEnergy",
"limit": 20
}
},
"canBeLucky"
]
},
{
"partialRefill": {
"type": "ReserveEnergy",
"limit": 5
}
}
]
}
]
}
]
}
{
"canShineCharge": {
"usedTiles": 32,
"openEnd": 0
}
}
{
"autoReserveTrigger": {
"maxReserveEnergy": 95
}
}
"canRModeSparkInterrupt" |
From: 2
Top Right Door
To: 2
Top Right Door
Maximum two Kihunters can be killed for energy, and their drop rate is poor. Otherwise, Crystal Flash. Turn off extra beams and shoot off the remaining Kihunter's wings to help trap it against the side, giving free access to the runway. Entrance condition: {
"comeInWithRMode": {},
"comesThroughToilet": "no"
}Requires: {
"or": [
"h_CrystalFlashForReserveEnergy",
{
"and": [
"h_RModeCanRefillReserves",
{
"resourceMissingAtMost": [
{
"type": "Missile",
"count": 0
}
]
},
{
"or": [
{
"and": [
{
"partialRefill": {
"type": "ReserveEnergy",
"limit": 20
}
},
"canBeLucky"
]
},
{
"partialRefill": {
"type": "ReserveEnergy",
"limit": 5
}
}
]
}
]
}
]
}
{
"canShineCharge": {
"usedTiles": 32,
"openEnd": 0
}
}
{
"autoReserveTrigger": {
"maxReserveEnergy": 95
}
}
"canRModeSparkInterrupt" |
From: 2
Bottom Door
To: 2
Bottom Door
Crystal Flash on the left side of the room when Spore Spawn starts moving, or on the right side when it is in the top right of its swoop. Entrance condition: {
"comeInWithGMode": {
"mode": "direct",
"morphed": true
},
"comesThroughToilet": "no"
}Requires: "h_artificialMorphRModeCrystalFlashInterrupt"
{
"ammo": {
"type": "Missile",
"count": 10
}
}
{
"not": "f_DefeatedSporeSpawn"
}
"canRiskPermanentLossOfAccess"Clears obstacles: door_2 Dev note: With an immobile entry, the note will be wrong, but the timing is pretty lenient and easy to deduce. |
From: 13
Central Junction
To: 5
Left Side - Door Blocked by Crumble Blocks
Freeze the Zeb low in the pipe. Crouch and shoot works for that, or shooting as Samus is approaching it. Jump on the left side of the pipe and walk right until you get blocked by the frozen Zeb. Start the ice SBA facing right. The bottom particle will instantly kill the Zeb. Turn around towards the left. At the right moment, jump to prevent the tail particle of the clockwise rotation to freeze the Zeb inside the pipe. As Samus starts falling down again, push left to freeze the rising Zeb with the leading particle of the rotation. While preserving the remaining 2 particles, spinjump over the frozen Zeb to quickly get to the floor above Samus. Run left until Samus hits the wall. While in the standing pose and holding jump, press right to do a buffered turnaround spinjump. Holding L+R during the jump can help to stop at the correct position after landing. Wait until one of the remaining particles flies off and freezes the Zeb at the correct height. Move towards the right side of the floor below the Zeb pipe. While running left, un- and then re-equip ice to synchronize with the Zeb. At the left side, jump up and shoot up to freeze the Zeb one last time, then walljump up and do the clip. Note: If the Zeb drops something, the frozen position at the end will be 1 pixel lower. This doesn't matter, both pixels work. Requires: {
"notable": "Zeb Ice Clip"
}
"canSpecialBeamAttack"
{
"ammo": {
"type": "PowerBomb",
"count": 1
}
}
"canTrickyWallJump"
"h_preciseIceClip"
{
"disableEquipment": "Ice"
}Dev note: Disabling Ice is not a hard requirement, some other timing method could be used. |
|
Farm the Zeelas and Reos or else Crystal Flash. Carry the charge to the Metarees, or leave 1 Reo or Zeela alive, for the interrupt. Entrance condition: {
"comeInWithRMode": {}
}Requires: {
"or": [
"h_CrystalFlashForReserveEnergy",
{
"and": [
"h_RModeCanRefillReserves",
{
"resourceMissingAtMost": [
{
"type": "Missile",
"count": 0
}
]
},
{
"partialRefill": {
"type": "ReserveEnergy",
"limit": 20
}
}
]
}
]
}
"h_shinechargeMaxRunway"
{
"autoReserveTrigger": {}
}
"canRModeSparkInterrupt"Clears obstacles: A |
From: 1
Top Left Door
To: 2
Bottom Left Door
Break exactly the lower-middle-right and top-right Bomb Blocks, leaving the upper-middle-right and bottommost Blocks intact. Clear all enemies before starting. Unmorph while on the top block to begin the Moondance. Exactly 145 moonfalls after clipping into the bottom block (321 total), wiggle out to the left. The next moonfall will clip Samus down two tiles. Re-enable Screw Attack and moonfall to break the right side blocks, then use Grapple again to become unstuck. Finally, moonfall through the Speed Blocks to clip down to the Dachora. Requires: {
"notable": "Blockade Extended Moondance"
}
{
"obstaclesNotCleared": [
"A"
]
}
{
"noBlueSuit": {}
}
"h_useMorphBombs"
"ScrewAttack"
"canExtendedMoondance"
"canDisableEquipment" |
From: 1
Top Left Door
To: 3
Right Door
Break exactly the lower-middle-right and top-right Bomb Blocks, leaving the upper-middle-right and bottommost Blocks intact. Clear all enemies before starting. Unmorph while on the top block to begin the Moondance. Exactly 145 moonfalls after clipping into the bottom block (321 total), wiggle out to the left. The next moonfall will clip Samus down two tiles. Finally use Screw Attack or SpeedBooster to break the Bomb blocks and reach the right side door. Requires: {
"notable": "Blockade Extended Moondance"
}
{
"obstaclesNotCleared": [
"A"
]
}
{
"noBlueSuit": {}
}
"h_useMorphBombs"
{
"or": [
"h_getBlueSpeedMaxRunway",
{
"and": [
"ScrewAttack",
"canDisableEquipment"
]
}
]
}
"canExtendedMoondance"Exit condition: {
"leaveWithStoredFallSpeed": {
"fallSpeedInTiles": 2
}
}Unlocks doors: {"types":["ammo"],"requires":[]} |
|
Shinespark to the upper section, then quick run through the bomb blocks to get to the Zeelas and Reos. Farm for reserves or Crystal Flash, then get the shinecharge and use any remaining enemy to interrupt. Te Metarees are still available if you don't go too far right during the setup. Entrance condition: {
"comeInWithRMode": {}
}Requires: {
"or": [
"h_CrystalFlashForReserveEnergy",
"free"
]
}
"h_shinechargeMaxRunway"
{
"or": [
{
"and": [
"HiJump",
"canMidairShinespark",
"canSpeedyJump",
{
"shinespark": {
"frames": 85,
"excessFrames": 3
}
}
]
},
{
"and": [
"canFastWallJumpClimb",
"canMidairShinespark",
{
"or": [
{
"and": [
"HiJump",
{
"shinespark": {
"frames": 67,
"excessFrames": 3
}
}
]
},
{
"shinespark": {
"frames": 73,
"excessFrames": 3
}
}
]
}
]
},
{
"shinespark": {
"frames": 110,
"excessFrames": 3
}
}
]
}
{
"or": [
{
"resourceAvailable": [
{
"type": "ReserveEnergy",
"count": 1
}
]
},
{
"and": [
"h_RModeCanRefillReserves",
{
"resourceMissingAtMost": [
{
"type": "Missile",
"count": 0
}
]
},
{
"partialRefill": {
"type": "ReserveEnergy",
"limit": 20
}
}
]
}
]
}
"h_shinechargeMaxRunway"
{
"autoReserveTrigger": {}
}
"canRModeSparkInterrupt"Clears obstacles: A Dev note: With Disable E-Tanks or Energy-Free Shinesparks, the Reo/Zeela farm remains viable. Without either QoL option, however, the Crystal Flash will be expected (not enough enemies with good drops to guarantee a full e-tank's worth). When using disable E-Tanks the player must be able to disable to 99 *after* the shinespark. |
|
Crystal Flash after getting past the Metarees, or else run through the bomb wall and farm Reos and Zeelas. Leave one Reo or Zeela alive. Build a Shinespark then get hit by the remaining enemy to interrupt. Entrance condition: {
"comeInWithRMode": {}
}Requires: {
"or": [
"h_CrystalFlashForReserveEnergy",
{
"and": [
"h_RModeCanRefillReserves",
{
"resourceMissingAtMost": [
{
"type": "Missile",
"count": 0
}
]
},
{
"partialRefill": {
"type": "ReserveEnergy",
"limit": 20
}
}
]
}
]
}
"h_shinechargeMaxRunway"
{
"autoReserveTrigger": {}
}
"canRModeSparkInterrupt"Clears obstacles: A |
From: 1
Top Right Door
To: 1
Top Right Door
Place a Power Bomb on entry to kill the first Sidehopper, then cross to the left side of the room. It is required to avoid double hitting the ceiling Sidehopper with the Power Bomb, so lure it to the right, place a Power Bomb in the corner, roll over to lure the hopper and quickly roll back to Crystal Flash. In unlucky situations it is possible that the hopper only does small jumps and never hits Samus. It is possible to cross all the spikes and avoid damaging the ceiling hopper with just Power Bombs. Place a Power Bomb at the edge of the runway then hold forward with precise timing to get a boost to skip the first two then have a small bounce over the third spike. The optimal starting position is on the second-to-last pixel of the ledge and press forward on the 1st, 3rd, or 5th frame which gives Samus a large horizontal boost. (On the last pixel, only the 1st and 3rd frames work, and further to the right only has at most one usable frame. Rolling into the bomb with momentum is not recommended and gives only a 1-frame window.) Entrance condition: {
"comeInWithGMode": {
"mode": "direct",
"morphed": true
}
}Requires: "h_artificialMorphPowerBomb"
{
"or": [
"h_artificialMorphMovement",
{
"and": [
"h_artificialMorphPowerBomb",
"canTrickyGMode"
]
},
{
"spikeHits": 3
},
{
"and": [
"h_artificialMorphPowerBomb",
{
"spikeHits": 1
}
]
}
]
}
"h_artificialMorphComplexRModeCrystalFlashInterrupt"
{
"ammo": {
"type": "Missile",
"count": 10
}
}
{
"ammo": {
"type": "Super",
"count": 10
}
}
{
"ammo": {
"type": "PowerBomb",
"count": 5
}
}
{
"or": [
"h_partialEnemyDamageReduction",
{
"resourceAtMost": [
{
"type": "RegularEnergy",
"count": 19
}
]
},
{
"and": [
{
"resourceCapacity": [
{
"type": "RegularEnergy",
"count": 199
}
]
},
{
"resourceCapacity": [
{
"type": "ReserveEnergy",
"count": 199
}
]
}
]
}
]
}Dev note: It is possible to kill the first Sidehopper with just Bombs and a lot of luck, but that is ignored. |
From: 4
Top Left Junction
To: 4
Top Left Junction
Kill both Sidehoppers for energy, or else Crystal Flash (kill both Sidehoppers anyway so you have the runway free). Use the spikes for pause-abuse interrupt. Requires: {
"obstaclesCleared": [
"R-Mode"
]
}
{
"obstaclesCleared": [
"A"
]
}
{
"or": [
"h_CrystalFlashForReserveEnergy",
{
"and": [
"h_RModeCanRefillReserves",
{
"resourceMissingAtMost": [
{
"type": "Missile",
"count": 0
}
]
},
{
"resourceMissingAtMost": [
{
"type": "Super",
"count": 0
}
]
},
{
"or": [
{
"and": [
"canBeLucky",
{
"partialRefill": {
"type": "ReserveEnergy",
"limit": 5
}
}
]
},
{
"and": [
"canBeVeryLucky",
{
"partialRefill": {
"type": "ReserveEnergy",
"limit": 20
}
}
]
}
]
}
]
}
]
}
{
"or": [
{
"canShineCharge": {
"usedTiles": 16,
"openEnd": 0
}
},
{
"and": [
{
"spikeHits": 1
},
"canUseIFrames",
{
"canShineCharge": {
"usedTiles": 23,
"openEnd": 0
}
}
]
}
]
}
{
"autoReserveTrigger": {}
}
"canRModePauseAbuseSparkInterrupt"Resets obstacles: R-Mode |
From: 1
Left Door
To: 1
Left Door
Kill the hoppers. Use Spike X-Mode to gain shine charge, then use manual reserve and pause abuse on the spikes to interrupt the shinespark. Requires: {
"obstaclesCleared": [
"R-Mode"
]
}
{
"obstaclesCleared": [
"A"
]
}
{
"or": [
{
"and": [
"h_CrystalFlashForReserveEnergy",
"h_usePowerBomb",
"canOffScreenMovement"
]
},
{
"and": [
"h_RModeCanRefillReserves",
{
"resourceMissingAtMost": [
{
"type": "Missile",
"count": 0
}
]
},
{
"resourceMissingAtMost": [
{
"type": "Super",
"count": 0
}
]
},
{
"or": [
{
"and": [
"canBeLucky",
{
"partialRefill": {
"type": "ReserveEnergy",
"limit": 5
}
}
]
},
{
"and": [
"canBeVeryLucky",
{
"partialRefill": {
"type": "ReserveEnergy",
"limit": 20
}
}
]
}
]
}
]
}
]
}
"h_destroyBombWalls"
"h_spikeXModeShinecharge"
"canBeVeryPatient"
"canPauseAbuse"
{
"autoReserveTrigger": {}
}
"canRModeSparkInterrupt"Resets obstacles: R-Mode, C |
From: 1
Left Door
To: 3
Top Junction
Perform a very precise Spring Ball jump through the transition and onto the Grapple block. A running spin jump or crouch jump can be used. Entrance condition: {
"comeInJumping": {
"speedBooster": "no",
"minTiles": 0.4375
}
}Requires: "canPrepareForNextRoom" "canTrickySpringBallJump" "canTrickyJump" |
|
Requires: {
"obstaclesCleared": [
"B"
]
}
{
"or": [
"canWallJump",
"SpaceJump",
"Grapple",
{
"and": [
"canDash",
"canCarefulJump",
{
"disableEquipment": "HiJump"
}
]
},
{
"and": [
"canDash",
"canTrickyJump"
]
}
]
}Dev note: FIXME: There are other ways to avoid turning off HiJump, such as starting below with a Spring Ball jump or IBJ. |
|
Gravity Suit can use the main runway, while suitless must use the shelf. The entire setup can be done with just the Zeros if you are patient enough (and/or have Gravity). Gravity (only) can also run through just the first thick portion of the speedway to use the the Skulltera and Puyos. Entrance condition: {
"comeInWithRMode": {}
}Requires: {
"or": [
"h_CrystalFlashForReserveEnergy",
{
"and": [
"h_RModeCanRefillReserves",
{
"resourceMissingAtMost": [
{
"type": "PowerBomb",
"count": 0
}
]
},
{
"partialRefill": {
"type": "ReserveEnergy",
"limit": 5
}
}
]
}
]
}
{
"or": [
{
"and": [
"Gravity",
"h_shinechargeMaxRunway"
]
},
{
"and": [
{
"or": [
"SpaceJump",
{
"and": [
"canSuitlessMaridia",
{
"or": [
"canPreciseWallJump",
"canBombJumpWaterEscape",
{
"and": [
"h_useSpringBall",
"canJumpIntoIBJ"
]
},
{
"and": [
"canBePatient",
"canTrickyUseFrozenEnemies",
{
"ammo": {
"type": "Super",
"count": 1
}
}
]
}
]
}
]
}
]
},
{
"canShineCharge": {
"usedTiles": 32,
"openEnd": 1
}
}
]
}
]
}
{
"autoReserveTrigger": {
"maxReserveEnergy": 95
}
}
"canRModeSparkInterrupt"
{
"partialRefill": {
"type": "Energy",
"limit": 25
}
}Clears obstacles: A |
From: 1
Right Door
To: 3
Dry Platform Junction
Requires a precise shinespark end or Gravity to destroy the speedblocks without killing the Skultera Entrance condition: {
"comeInWithRMode": {}
}Requires: "h_RModeCanRefillReserves"
{
"resourceMissingAtMost": [
{
"type": "PowerBomb",
"count": 0
}
]
}
{
"or": [
"Gravity",
{
"and": [
{
"or": [
"canPreciseWallJump",
"SpaceJump",
{
"and": [
"Ice",
{
"ammo": {
"type": "Super",
"count": 1
}
}
]
}
]
},
"canControlShinesparkEnd",
{
"canShineCharge": {
"usedTiles": 31,
"openEnd": 1
}
},
{
"shinespark": {
"frames": 30
}
}
]
}
]
}
{
"canShineCharge": {
"usedTiles": 31,
"openEnd": 1
}
}
"h_RModeKnockbackSpark" |
|
Four Boyons to farm have a poor chance of providing reserve energy. Once you have it, damage down to 20/10/5 energy and jump into the plant with forward moement for shinecharge. Jump high above a Boyon and interrupt, or use the thorns and pause abuse. Entrance condition: {
"comeInWithRMode": {}
}Requires: {
"or": [
"h_CrystalFlashForReserveEnergy",
{
"and": [
{
"enemyKill": {
"enemies": [
[
"Boyon",
"Boyon",
"Boyon"
]
]
}
},
"h_RModeCanRefillReserves",
{
"resourceMissingAtMost": [
{
"type": "Missile",
"count": 0
}
]
},
{
"or": [
{
"and": [
"canBeLucky",
{
"partialRefill": {
"type": "ReserveEnergy",
"limit": 5
}
}
]
},
{
"and": [
"canBeVeryLucky",
{
"partialRefill": {
"type": "ReserveEnergy",
"limit": 20
}
}
]
}
]
}
]
}
]
}
"canSamusEaterStandUp"
{
"samusEaterCycles": 1
}
"h_shinechargeMaxRunway"
{
"autoReserveTrigger": {
"maxReserveEnergy": 95
}
}
"canRModeSparkInterrupt" |
From: 1
Right Door
To: 1
Right Door
Avoiding a double hit on the Sidehoppers can be pretty tricky. One somewhat reliable way it to lure the Sidehoppers just off-camera, then place a Power Bomb to Crystal Flash, which will hit and lure them to Samus. Be sure to also position Samus over a safe spot, as she will fall through the Power Bomb blocks as she exits G-mode. It can be helpful to think about where the Sidehoppers are and where there hops will be as they are lured on camera; If they hit Samus before she gains Reserve Energy, she will die. If the hoppers hit the side of her light orb, they will die before hitting Samus; this not reliable to account for, because the hoppers' trajectory varies if they have large or small hops. An alternate approach is to Crystal Flash in the left corner, while luring them to the right after placing the Power Bomb. This is relatively difficult to get them to survive, and they are more likely to hit the light orb if they do. Entrance condition: {
"comeInWithGMode": {
"mode": "direct",
"morphed": true
}
}Requires: "h_artificialMorphTrickyRModeCrystalFlashInterrupt"
{
"ammo": {
"type": "Missile",
"count": 10
}
}
{
"or": [
"h_partialEnemyDamageReduction",
{
"resourceAtMost": [
{
"type": "RegularEnergy",
"count": 19
}
]
},
{
"and": [
{
"resourceCapacity": [
{
"type": "RegularEnergy",
"count": 199
}
]
},
{
"resourceCapacity": [
{
"type": "ReserveEnergy",
"count": 199
}
]
}
]
}
]
} |
From: 1
Right Door
To: 1
Right Door
Kill the Sidehoppers using only morph and beams or Screw Attack. Using morph and dodging it can be done damage-free. Shinecharge on the runway, then take a ceiling thorn hit and pause abuse to spark interrupt. Entrance condition: {
"comeInWithRMode": {}
}Requires: {
"or": [
{
"and": [
"Morph",
"canDodgeWhileShooting",
"canCameraManip",
"canTrickyJump"
]
},
"ScrewAttack"
]
}
"h_RModeCanRefillReserves"
{
"resourceMissingAtMost": [
{
"type": "Missile",
"count": 0
}
]
}
{
"resourceMissingAtMost": [
{
"type": "Super",
"count": 0
}
]
}
{
"or": [
{
"and": [
"canBeLucky",
{
"partialRefill": {
"type": "ReserveEnergy",
"limit": 20
}
}
]
},
{
"partialRefill": {
"type": "ReserveEnergy",
"limit": 5
}
}
]
}
{
"canShineCharge": {
"usedTiles": 29,
"openEnd": 0
}
}
{
"autoReserveTrigger": {}
}
"canHorizontalDamageBoost"
"canRModePauseAbuseSparkInterrupt"Clears obstacles: A |
From: 1
Right Door
To: 1
Right Door
While morphed the sidehoppers cannot hit you. Crystal Flash to add Energy into Reserve Tanks, avoiding the bomb bounce. Damage down to between 17-32 Energy. Jump into the center plant with forward momentum to gain shinecharge. Jump into the thorns with a pause abuse and hold a damage boost into the pause to interrupt the windup. Entrance condition: {
"comeInWithRMode": {}
}Requires: "h_CrystalFlashForReserveEnergy"
"canSamusEaterStandUp"
{
"samusEaterCycles": 1
}
"h_shinechargeMaxRunway"
{
"autoReserveTrigger": {}
}
"canHorizontalDamageBoost"
"canRModePauseAbuseSparkInterrupt"Clears obstacles: A, B |
From: 5
Top Right Door (Through Morph Tunnel)
To: 5
Top Right Door (Through Morph Tunnel)
Open the gate, farm the Cacatacs and Zeros, while leading one back up to the Morph tunnel. Shinecharge under the gate, then get hit by the Zero to interrupt. Entrance condition: {
"comeInWithRMode": {}
}Requires: {
"ammo": {
"type": "Super",
"count": 1
}
}
"Morph"
{
"or": [
"h_CrystalFlashForReserveEnergy",
{
"and": [
"h_RModeCanRefillReserves",
{
"or": [
{
"and": [
{
"resourceMissingAtMost": [
{
"type": "Super",
"count": 1
}
]
},
{
"partialRefill": {
"type": "ReserveEnergy",
"limit": 20
}
}
]
},
{
"and": [
{
"resourceMissingAtMost": [
{
"type": "PowerBomb",
"count": 0
}
]
},
{
"partialRefill": {
"type": "ReserveEnergy",
"limit": 15
}
}
]
}
]
}
]
}
]
}
{
"or": [
"HiJump",
"canWallJump",
"SpaceJump",
"canIBJ",
"canSpringBallJumpMidAir",
"canTrickyUseFrozenEnemies",
{
"and": [
"canNeutralDamageBoost",
{
"or": [
{
"and": [
"canTrickyDodgeEnemies",
"h_crouchJumpDownGrab",
{
"enemyDamage": {
"enemy": "Cacatac",
"type": "spike",
"hits": 1
}
}
]
},
{
"and": [
"canMidAirMorph",
"canTrickyJump",
"canCrouchJump",
{
"enemyDamage": {
"enemy": "Zero",
"type": "contact",
"hits": 1
}
}
]
}
]
}
]
}
]
}
"canBePatient"
{
"canShineCharge": {
"usedTiles": 17,
"openEnd": 0
}
}
{
"autoReserveTrigger": {}
}
"canRModeSparkInterrupt"Clears obstacles: A, B |
From: 1
Left Door
To: 4
Small Ledge Below Left Door
Requires: "canTrickyJump"
{
"or": [
"canDash",
"canWallJump",
{
"and": [
"canFlatleyJump",
{
"disableEquipment": "HiJump"
}
]
},
{
"and": [
"h_useSpringBall",
"canResetFallSpeed"
]
}
]
} |
From: 2
Right Door
To: 2
Right Door
Farm no more than one fireflea: Samus sprite and spike tiles are darkened by the Fireflea effect during R-Mode. Shinecharge in the right pit next to the spikes, then use the spikes to pause abuse and interrupt. Requires: {
"obstaclesCleared": [
"R-Mode"
]
}
{
"or": [
"h_CrystalFlashForReserveEnergy",
{
"and": [
"h_RModeCanRefillReserves",
{
"resourceMissingAtMost": [
{
"type": "PowerBomb",
"count": 0
}
]
},
{
"partialRefill": {
"type": "ReserveEnergy",
"limit": 40
}
}
]
}
]
}
{
"canShineCharge": {
"usedTiles": 13,
"openEnd": 0
}
}
{
"autoReserveTrigger": {}
}
"canRModePauseAbuseSparkInterrupt"Resets obstacles: R-Mode |
From: 2
Right Door
To: 2
Right Door
Farm no more than one fireflea: Samus sprite and spike tiles are darkened by the Fireflea effect during R-Mode. Enter Spike X-Mode in the spike pit and shinecharge, then jump into another fireflea to interrupt. Entrance condition: {
"comeInWithRMode": {}
}Requires: {
"obstaclesCleared": [
"R-Mode"
]
}
{
"or": [
"h_CrystalFlashForReserveEnergy",
{
"and": [
"h_RModeCanRefillReserves",
{
"resourceMissingAtMost": [
{
"type": "PowerBomb",
"count": 0
}
]
},
{
"partialRefill": {
"type": "ReserveEnergy",
"limit": 40
}
}
]
}
]
}
"canBeVeryPatient"
"canXMode"
"h_XModeSpikeHit"
"h_shinechargeMaxRunway"
"canShinechargeMovement"
{
"autoReserveTrigger": {}
}
"canRModeSparkInterrupt"Resets obstacles: R-Mode |
|
Requires: {
"or": [
"canDash",
{
"disableEquipment": "HiJump"
},
{
"and": [
"HiJump",
"h_underwaterCrouchJumpDownGrab"
]
},
"canWallJump",
"Gravity",
"SpaceJump",
{
"and": [
"canSpringBallBombJump",
"canResetFallSpeed"
]
},
"canBombJumpWaterEscape"
]
} |
|
Shoot the pirates with Power Beam to prevent their lasers and jump over them. Build up to blue speed to skip past Mini-Kraid's spikes and destroy Mini Kraid which will drop multiple Large Energy. If you're missing some Supers, quickly grab the four supers that drop so that the 5th drop can be Large Energy. Ceiling thorns, lingering Mini-Kraid Spikes, or Pirates can be used at-will to damage down. Go back to the right side, full-speed into a shinecharge, then got shot by a pirate for Spark Interrupt. Entrance condition: {
"comeInWithRMode": {}
}Requires: {
"or": [
"canTrickyJump",
{
"and": [
"canCarefulJump",
{
"enemyKill": {
"enemies": [
[
"Green Space Pirate (standing)",
"Green Space Pirate (standing)"
]
],
"explicitWeapons": [
"Missile",
"Super",
"Plasma"
]
}
}
]
},
{
"and": [
"canDodgeWhileShooting",
{
"enemyKill": {
"enemies": [
[
"Green Space Pirate (standing)",
"Green Space Pirate (standing)"
]
],
"excludedWeapons": [
"Bombs",
"PowerBomb"
]
}
}
]
},
"ScrewAttack"
]
}
{
"or": [
{
"getBlueSpeed": {
"usedTiles": 29,
"openEnd": 2
}
},
"ScrewAttack",
{
"and": [
{
"or": [
"canDodgeWhileShooting",
{
"enemyDamage": {
"enemy": "Mini-Kraid",
"type": "spike",
"hits": 1
}
}
]
},
{
"or": [
{
"enemyKill": {
"enemies": [
[
"Mini-Kraid"
]
],
"excludedWeapons": [
"PowerBeam",
"Ice",
"Wave",
"Spazer",
"Bombs",
"Charge"
]
}
},
{
"and": [
{
"enemyKill": {
"enemies": [
[
"Mini-Kraid"
]
]
}
},
{
"enemyDamage": {
"enemy": "Mini-Kraid",
"type": "spike",
"hits": 3
}
}
]
}
]
}
]
}
]
}
{
"or": [
"h_CrystalFlashForReserveEnergy",
{
"and": [
"h_RModeCanRefillReserves",
{
"or": [
{
"and": [
{
"resourceMissingAtMost": [
{
"type": "Super",
"count": 0
}
]
},
{
"partialRefill": {
"type": "ReserveEnergy",
"limit": 100
}
}
]
},
{
"and": [
{
"resourceMissingAtMost": [
{
"type": "Super",
"count": 4
}
]
},
{
"partialRefill": {
"type": "ReserveEnergy",
"limit": 20
}
}
]
}
]
}
]
}
]
}
"h_shinechargeMaxRunway"
{
"autoReserveTrigger": {
"maxReserveEnergy": 95
}
}
"canRModeSparkInterrupt"Clears obstacles: A, door_1 |
From: 1
Left Door
To: 2
Right Door
Wait for the pirates to move as far right as possible in order to kill them all with a single Power Bomb. Jump over Baby Kraid by pausing and holding jump and forward just before the pause fully triggers, then remove Spring Ball. After it starts moving to the left, move in to where it was, then Crystal Flash so that it will walk back into Samus and trigger reserves. Entrance condition: {
"comeInWithGMode": {
"mode": "direct",
"morphed": true
}
}Requires: "h_artificialMorphBombThings"
"h_artificialMorphSpringFling"
"h_artificialMorphTrickyRModeCrystalFlashInterrupt"
{
"ammo": {
"type": "Missile",
"count": 10
}
}
{
"ammo": {
"type": "Super",
"count": 5
}
}
{
"or": [
"h_fullEnemyDamageReduction",
{
"and": [
"h_partialEnemyDamageReduction",
{
"resourceAtMost": [
{
"type": "RegularEnergy",
"count": 49
}
]
}
]
},
{
"and": [
{
"resourceCapacity": [
{
"type": "RegularEnergy",
"count": 199
}
]
},
{
"resourceCapacity": [
{
"type": "ReserveEnergy",
"count": 199
}
]
}
]
}
]
}Clears obstacles: door_1 |
|
Kill Mini-Kraid after entry which will drop multiple Large Energy. If you're missing some Supers, quickly grab the four supers that drop so that the 5th drop can be Large Energy. Ceiling thorns, lingering Mini-Kraid Spikes, or Pirates can be used at-will to damage down. Go back to the right side, full-speed into a shinecharge, then got shot by a pirate for Spark Interrupt. Entrance condition: {
"comeInWithRMode": {}
}Requires: {
"or": [
{
"enemyKill": {
"enemies": [
[
"Mini-Kraid"
]
],
"excludedWeapons": [
"PowerBeam",
"Ice",
"Wave",
"Spazer",
"Bombs",
"Charge"
]
}
},
{
"and": [
{
"enemyKill": {
"enemies": [
[
"Mini-Kraid"
]
]
}
},
{
"or": [
"canDodgeWhileShooting",
{
"enemyDamage": {
"enemy": "Mini-Kraid",
"type": "stone",
"hits": 1
}
}
]
}
]
}
]
}
{
"or": [
"h_CrystalFlashForReserveEnergy",
{
"and": [
"h_RModeCanRefillReserves",
{
"or": [
{
"and": [
{
"resourceMissingAtMost": [
{
"type": "Super",
"count": 0
}
]
},
{
"partialRefill": {
"type": "ReserveEnergy",
"limit": 100
}
}
]
},
{
"and": [
{
"resourceMissingAtMost": [
{
"type": "Super",
"count": 4
}
]
},
{
"partialRefill": {
"type": "ReserveEnergy",
"limit": 20
}
}
]
}
]
}
]
}
]
}
"h_shinechargeMaxRunway"
{
"autoReserveTrigger": {
"maxReserveEnergy": 95
}
}
"canRModeSparkInterrupt"Clears obstacles: A, door_2 |
From: 2
Right Door
To: 2
Right Door
Wait on the right side of Baby Kraid for about 10 seconds so that he shoots the maximum amount of projectiles. Jump over Baby Kraid by pausing and holding jump and forward just before the pause fully triggers, then remove Spring Ball. After it starts moving to the right, move in to where it was, then Crystal Flash so that it will walk back into Samus and trigger reserves. Entrance condition: {
"comeInWithGMode": {
"mode": "direct",
"morphed": true
}
}Requires: "h_artificialMorphSpringFling"
"h_artificialMorphTrickyRModeCrystalFlashInterrupt"
{
"ammo": {
"type": "Missile",
"count": 10
}
}
{
"ammo": {
"type": "Super",
"count": 5
}
}
{
"or": [
"h_fullEnemyDamageReduction",
{
"and": [
"h_partialEnemyDamageReduction",
{
"resourceAtMost": [
{
"type": "RegularEnergy",
"count": 49
}
]
}
]
},
{
"and": [
{
"resourceCapacity": [
{
"type": "RegularEnergy",
"count": 199
}
]
},
{
"resourceCapacity": [
{
"type": "ReserveEnergy",
"count": 199
}
]
}
]
}
]
}Clears obstacles: door_2 |
From: 1
Left Door
To: 1
Left Door
Crystal Flash upon entering the room, then use the thorns to damage down and perform Spike X-Mode. Once shinecharge is gained, get Kraid to charge or spit at Samus and use that for R-Mode interrupt. Entrance condition: {
"comeInWithRMode": {}
}Requires: {
"not": "f_DefeatedKraid"
}
"canRiskPermanentLossOfAccess"
"h_CrystalFlashForReserveEnergy"
"h_thornXModeShinecharge"
{
"autoReserveTrigger": {
"maxReserveEnergy": 95
}
}
"canRModeSparkInterrupt"Clears obstacles: door_1 Dev note: In randomizers that do not initially lock the boss door, the player can escape once blue suit is gained. |
|
Crystal Flash and then get poked by Kraid's hand. Entrance condition: {
"comeInWithGMode": {
"mode": "direct",
"morphed": true
}
}Requires: {
"not": "f_DefeatedKraid"
}
"canRiskPermanentLossOfAccess"
"h_artificialMorphRModeCrystalFlashInterrupt"
{
"ammo": {
"type": "Missile",
"count": 10
}
}
{
"ammo": {
"type": "Super",
"count": 10
}
}Clears obstacles: door_1 |
From: 1
Left Door
To: 1
Left Door
Force Kraid to stand up and farm his nails for energy, then perform a Spike X-Mode on the thorns to get shinecharge. Get interrupted by Kraid for blue suit. You will be forced to defeat Kraid afterward. Entrance condition: {
"comeInWithRMode": {}
}Requires: {
"not": "f_DefeatedKraid"
}
"canRiskPermanentLossOfAccess"
{
"or": [
"canBeVeryPatient",
{
"disableEquipment": "ETank"
}
]
}
{
"refill": [
"Energy"
]
}
{
"or": [
"Charge",
{
"ammo": {
"type": "Missile",
"count": 2
}
},
{
"ammo": {
"type": "Super",
"count": 1
}
}
]
}
{
"or": [
"HiJump",
"canWallJump",
"SpaceJump",
"canSpringBallJumpMidAir",
{
"and": [
"canDodgeWhileShooting",
{
"or": [
"canCarefulJump",
"h_crouchJumpDownGrab"
]
}
]
}
]
}
"h_thornXModeShinecharge"
{
"autoReserveTrigger": {
"maxReserveEnergy": 95
}
}
"canRModeSparkInterrupt"Clears obstacles: f_DefeatedKraid, door_1 Sets flags: f_DefeatedKraid |
From: 2
Right Door
To: 1
Left Door
You can crystal flash for early setup, then bounce between thorns and Kraid to setup. Alternatively, force Kraid to stand up and farm his nails for energy. Then perform a Spike X-Mode on the thorns to get shinecharge. Get interrupted by Kraid for blue suit. After gaining blue suit you can proceed to defeat Kraid. Entrance condition: {
"comeInWithRMode": {}
}Requires: {
"not": "f_DefeatedKraid"
}
"canRiskPermanentLossOfAccess"
{
"or": [
{
"thornHits": 1
},
{
"and": [
{
"or": [
"canPrepareForNextRoom",
"h_KraidCameraFix"
]
},
"SpaceJump"
]
}
]
}
{
"or": [
"h_CrystalFlashForReserveEnergy",
{
"and": [
{
"or": [
"canBeVeryPatient",
{
"disableEquipment": "ETank"
}
]
},
{
"refill": [
"Energy"
]
},
{
"or": [
"Charge",
{
"ammo": {
"type": "Missile",
"count": 2
}
},
{
"ammo": {
"type": "Super",
"count": 1
}
}
]
}
]
}
]
}
{
"or": [
"HiJump",
"canWallJump",
"SpaceJump",
"canSpringBallJumpMidAir",
{
"and": [
"canDodgeWhileShooting",
{
"or": [
"canCarefulJump",
"h_crouchJumpDownGrab"
]
}
]
}
]
}
"canXMode"
"h_XModeThornHit"
"h_shinechargeMaxRunway"
{
"autoReserveTrigger": {
"maxReserveEnergy": 95
}
}
"canRModeSparkInterrupt"Clears obstacles: f_DefeatedKraid, door_2 Sets flags: f_DefeatedKraid |
|
Requires: "canDash"
"canPreciseWallJump"
{
"disableEquipment": "SpeedBooster"
}Dev note: With Speed Booster and without canDisableEquipment, the player would use the canTrickyDashJump strat. |
From: 1
Left Vertical Door
To: 5
Kihunter Junction
Farm Kihunters, keeping one alive. Knock its wings off and freeze it on one end of the room, or use i-frames to run through it. Run across to shinecharge, then use the Kihunter to interrupt. Entrance condition: {
"comeInWithRMode": {},
"comesThroughToilet": "no"
}Requires: "canTrickyJump"
"canDodgeWhileShooting"
{
"or": [
"h_CrystalFlashForReserveEnergy",
{
"and": [
"h_RModeCanRefillReserves",
{
"or": [
{
"partialRefill": {
"type": "ReserveEnergy",
"limit": 5
}
},
{
"and": [
{
"partialRefill": {
"type": "ReserveEnergy",
"limit": 20
}
},
"canBeLucky"
]
}
]
}
]
}
]
}
{
"or": [
"canUseIFrames",
"canUseFrozenEnemies"
]
}
{
"canShineCharge": {
"usedTiles": 27,
"openEnd": 2
}
}
{
"autoReserveTrigger": {
"maxReserveEnergy": 95
}
}
"canRModeSparkInterrupt"Clears obstacles: C |
From: 2
Bottom Right Door
To: 5
Kihunter Junction
Farm Kihunters from below, keeping one alive. Knock its wings off and either freeze it or take a hit and use i-frames to run through it. Run across the left side of the broken shot block, then use the Kihunter to interrupt. Entrance condition: {
"comeInWithRMode": {}
}Requires: "h_crouchJumpDownGrab"
{
"or": [
"canTrickyDodgeEnemies",
{
"enemyDamage": {
"enemy": "Kihunter (green)",
"type": "contact",
"hits": 2
}
}
]
}
{
"or": [
"h_CrystalFlashForReserveEnergy",
{
"and": [
"h_RModeCanRefillReserves",
{
"or": [
{
"partialRefill": {
"type": "ReserveEnergy",
"limit": 5
}
},
{
"and": [
{
"partialRefill": {
"type": "ReserveEnergy",
"limit": 20
}
},
"canBeLucky"
]
}
]
}
]
}
]
}
{
"or": [
"canUseIFrames",
"canUseFrozenEnemies"
]
}
{
"canShineCharge": {
"usedTiles": 13,
"openEnd": 2
}
}
{
"autoReserveTrigger": {
"maxReserveEnergy": 95
}
}
"canRModeSparkInterrupt"Clears obstacles: C, D |
From: 3
Top Right Door
To: 5
Kihunter Junction
Bomb the block: if using a Power Bomb, place it no further left than under the item to avoid breaking the shot block. Farm Kihunters using the morph tunnel as needed, keeping one alive. Knock its wings off and freeze it on one end of the room, or use i-frames to run through it. Run across to shinecharge, then use the Kihunter to interrupt. Entrance condition: {
"comeInWithRMode": {}
}Requires: "h_bombThings"
{
"or": [
"h_CrystalFlashForReserveEnergy",
{
"and": [
"h_RModeCanRefillReserves",
{
"or": [
{
"partialRefill": {
"type": "ReserveEnergy",
"limit": 5
}
},
{
"and": [
{
"partialRefill": {
"type": "ReserveEnergy",
"limit": 20
}
},
"canBeLucky"
]
}
]
}
]
}
]
}
{
"or": [
"canUseIFrames",
"canUseFrozenEnemies"
]
}
{
"canShineCharge": {
"usedTiles": 27,
"openEnd": 2
}
}
{
"autoReserveTrigger": {
"maxReserveEnergy": 95
}
}
"canRModeSparkInterrupt"Clears obstacles: B, C |
From: 1
Left Side - Top Door
To: 7
Top Right Door
Place a Power Bomb at the right edge of the runway to kill the Cacatac. It helps to delay placing it to also kill the Wavers. From the right edge, pause then press right and jump just before the pause fully triggers. Disable Spring Ball in order to get a large horizontal boost. Pause again as soon as possible and re-enable Spring to reset fall speed. Entrance condition: {
"comeInWithGMode": {
"mode": "any",
"morphed": true
}
}Requires: "h_artificialMorphPowerBomb"
"h_artificialMorphSpringFling"
"canInsaneJump"
{
  "disableEquipment": "HiJump"
} |
|
Kill the Cacatac by shooting, jumping to the right to scroll the camera slightly, and returning. From the right edge, pause then press left and jump just before the pause fully triggers. Disable Spring Ball in order to get a large horizontal boost. Pause again as soon as possible and re-enable Spring to reset fall speed. Requires: "canHeroShot"
"canCameraManip"
"canSpringFling"
"canInsaneJump"
{
"disableEquipment": "HiJump"
} |
From: 2
Left Side - Top Middle Door
To: 7
Top Right Door
Entrance condition: {
"comeInRunning": {
"speedBooster": "no",
"minTiles": 2.4375
}
}Requires: "canTrickyJump"
"canConsecutiveWallJump"
"canPreciseWallJump"
{
"or": [
"canTrickyWallJump",
"ScrewAttack",
"canWallJumpWithCharge",
{
"and": [
"canWallJumpInstantMorph",
{
"enemyDamage": {
"enemy": "Cacatac",
"type": "spike",
"hits": 1
}
}
]
}
]
} |
From: 2
Left Side - Top Middle Door
To: 7
Top Right Door
Entrance condition: {
"comeInRunning": {
"speedBooster": "no",
"minTiles": 4
}
}Requires: "canCarefulJump"
"canConsecutiveWallJump"
{
"or": [
"canTrickyWallJump",
"ScrewAttack",
"canWallJumpWithCharge",
{
"and": [
"canWallJumpInstantMorph",
{
"enemyDamage": {
"enemy": "Cacatac",
"type": "spike",
"hits": 1
}
}
]
}
]
} |
From: 6
Middle Right Door
To: 1
Left Side - Top Door
On entry, place a Power Bomb at the peak of a jump to kill the Cacatac without letting it place any projectiles. Without Power Bombs, either kill it with Bombs then jump over the projectiles it has spawned, or jump over it and land on one of the last pixels of the corner without touching it. From the left edge where the Cacatac was, pause then press left and jump just before the pause fully triggers. Disable Spring Ball in order to get a large horizontal boost. Pause again as soon as possible and re-enable Spring to reset fall speed. With the Cacatac alive, Samus can only use the last 4 pixels of the ledge; with the projectiles alone, she has 10 pixels available. Entrance condition: {
"comeInWithGMode": {
"mode": "any",
"morphed": true
}
}Requires: {
"or": [
"h_artificialMorphPowerBomb",
{
"and": [
"h_artificialMorphBombs",
"canComplexGMode"
]
},
"canTrickyGMode"
]
}
"h_artificialMorphSpringFling"
"canInsaneJump"
{
"disableEquipment": "HiJump"
} |
From: 7
Top Right Door
To: 1
Left Side - Top Door
Kill the Cacatac with a Power Bomb or Bombs, then jump over the projectiles it has spawned. Without a way to kill the Cacatac jump over it and land on one of the last pixels of the corner without touching it. From the left edge where the Cacatac was, pause then press left and jump just before the pause fully triggers. Disable Spring Ball in order to get a large horizontal boost. Pause again as soon as possible and re-enable Spring to reset fall speed. With the Cacatac alive, Samus can only use the last 4 pixels of the ledge; with the projectiles alone, she has 10 pixels available. Entrance condition: {
"comeInWithGMode": {
"mode": "any",
"morphed": true
}
}Requires: "canComplexGMode"
{
"or": [
"h_artificialMorphBombThings",
"canTrickyGMode"
]
}
"h_artificialMorphSpringFling"
"canInsaneJump"
{
"disableEquipment": "HiJump"
} |
|
From the left edge of the Cacatac's platform, pause then press left and jump just before the pause fully triggers. Disable Spring Ball in order to get a large horizontal boost. Pause again as soon as possible and re-enable Spring to reset fall speed. Requires: "canSpringFling"
"canInsaneJump"
{
"disableEquipment": "HiJump"
} |
From: 1
Left Door
To: 5
Bottom Right Junction
Normalized movement through the room can be used to manipulate the Sm. Dessgeegas and do this strat reliably without heat protection. The following is one way to do this; other approaches may also be possible. Before entering the room, damage down to between 127 and 159 energy, and unequip Speed Booster if it is collected. Position one pixel away from the door in the previous room. Hold angle-down (and optionally dash), enter the door transition, then hold shot while continuing to hold forward, angle-down, and dash. The shot block will be destroyed by the buffered shot. Continue holding right and dash to run under both Sm. Dessgeegas. After running under the second one, stop for a moment to prevent it from scrolling off camera. Morph, roll all the way against the right wall and quickly lay a Power Bomb. Move slightly to the left to avoid being bounced by the Power Bomb explosion. As the Sm. Dessgeega approaches, roll under it to the left to avoid being hit. Roll back to the right to collect its Power Bomb drop (which should be a ground level) and return to where the Power Bomb was laid, in time to perform the Crystal Flash inputs. Entrance condition: {
"comeInRunning": {
"speedBooster": "no",
"minTiles": 0,
"maxTiles": 0.0625
}
}Requires: {
"notable": "10 Power Bomb Crystal Flash"
}
"canPrepareForNextRoom"
{
"heatFrames": 570
}
"h_heated10PowerBombCrystalFlash"Dev note: The heat frames include about a half second of leniency to position in the previous room in case it is also heated. FIXME: Find some way to properly express being above health bomb range, though it shouldn't be a serious problem here. Without heat protection, this is already accounted for by the heatFrames (though this is a bit hacky). With heat protection, it should be possible to farm a bit to get out of health bomb range. |
From: 4
Bottom Junction (Cleared Runway)
To: 1
Left Door
Kill the enemies, break the shotblock, and shinecharge. Quickly climb up before the block respawns. Heat interrupt just before leaving the door. Requires: {
"obstaclesCleared": [
"R-Mode"
]
}
"HiJump"
{
"or": [
"h_heatedCrystalFlashForReserveEnergy",
{
"and": [
"h_heatProof",
"h_RModeCanRefillReserves",
{
"partialRefill": {
"type": "ReserveEnergy",
"limit": 20
}
}
]
}
]
}
{
"canShineCharge": {
"usedTiles": 43,
"openEnd": 0
}
}
{
"or": [
"canPreciseWallJump",
"canInsaneJump",
"SpaceJump"
]
}
{
"or": [
{
"heatFrames": 540
},
{
"and": [
{
"heatFrames": 310
},
"canHeroShot"
]
}
]
}
"h_heatTriggerRModeSparkInterrupt"
{
"heatFrames": 10
}Resets obstacles: R-Mode |
From: 4
Bottom Junction (Cleared Runway)
To: 2
Right Door
Kill the enemies and shinecharge. Quickly climb up, and heat interrupt just before leaving the door. Requires: {
"obstaclesCleared": [
"R-Mode"
]
}
"HiJump"
{
"or": [
"h_heatedCrystalFlashForReserveEnergy",
{
"and": [
"h_heatProof",
"h_RModeCanRefillReserves",
{
"partialRefill": {
"type": "ReserveEnergy",
"limit": 20
}
}
]
}
]
}
{
"canShineCharge": {
"usedTiles": 43,
"openEnd": 0
}
}
{
"heatFrames": 320
}
"h_heatTriggerRModeSparkInterrupt"
{
"heatFrames": 10
}Resets obstacles: R-Mode |
From: 4
Bottom Junction (Cleared Runway)
To: 4
Bottom Junction (Cleared Runway)
Farm the Sovas and Sm. Dessgeegas to clear the bottom runway in order to shinecharge. Leave one Sova to use for interrupt. Requires: {
"obstaclesCleared": [
"R-Mode"
]
}
{
"or": [
"h_heatedCrystalFlashForReserveEnergy",
{
"and": [
"h_heatProof",
"h_RModeCanRefillReserves",
{
"partialRefill": {
"type": "ReserveEnergy",
"limit": 20
}
}
]
}
]
}
{
"heatFrames": 200
}
{
"canShineCharge": {
"usedTiles": 43,
"openEnd": 0
}
}
{
"autoReserveTrigger": {}
}
"canRModeSparkInterrupt"Resets obstacles: R-Mode |
|
Speedy jump to farm a Fune or Morph over to the Kago. Shinecharge at the bottom left, then jump back up and heat interrupt at the top left door before leaving. Requires: {
"obstaclesCleared": [
"R-Mode"
]
}
"HiJump"
{
"or": [
"SpaceJump",
{
"and": [
"canPreciseWallJump",
"canTrickyJump"
]
}
]
}
{
"or": [
"h_heatedCrystalFlashForReserveEnergy",
{
"and": [
"h_RModeCanRefillReserves",
{
"or": [
{
"and": [
"h_heatProof",
{
"enemyKill": {
"enemies": [
[
"Fune"
],
[
"Fune"
]
]
}
},
{
"resourceMissingAtMost": [
{
"type": "Missile",
"count": 0
}
]
},
{
"partialRefill": {
"type": "ReserveEnergy",
"limit": 20
}
}
]
},
{
"and": [
"Morph",
{
"heatFrames": 560
},
{
"or": [
{
"disableEquipment": "ETank"
},
"h_heatProof"
]
},
{
"partialRefill": {
"type": "ReserveEnergy",
"limit": 100
}
},
{
"heatFrames": 160
}
]
}
]
}
]
}
]
}
{
"heatFrames": 400
}
{
"canShineCharge": {
"usedTiles": 28,
"gentleUpTiles": 3,
"gentleDownTiles": 3,
"openEnd": 0
}
}
"h_heatTriggerRModeSparkInterrupt"
{
"heatFrames": 10
}Resets obstacles: R-Mode |
|
Speedy jump to farm a Fune or Morph over to the Kago. Shinecharge at the bottom left, then heat interrupt in the door and quickly leave. Requires: {
"obstaclesCleared": [
"R-Mode"
]
}
{
"or": [
"h_heatedCrystalFlashForReserveEnergy",
{
"and": [
"h_RModeCanRefillReserves",
{
"or": [
{
"and": [
"h_heatProof",
{
"enemyKill": {
"enemies": [
[
"Fune"
],
[
"Fune"
]
]
}
},
{
"resourceMissingAtMost": [
{
"type": "Missile",
"count": 0
}
]
},
{
"partialRefill": {
"type": "ReserveEnergy",
"limit": 20
}
}
]
},
{
"and": [
"Morph",
{
"heatFrames": 560
},
{
"or": [
{
"disableEquipment": "ETank"
},
"h_heatProof"
]
},
{
"partialRefill": {
"type": "ReserveEnergy",
"limit": 100
}
},
{
"heatFrames": 160
}
]
}
]
}
]
}
]
}
{
"heatFrames": 300
}
{
"canShineCharge": {
"usedTiles": 28,
"gentleUpTiles": 3,
"gentleDownTiles": 3,
"openEnd": 0
}
}
"h_heatTriggerRModeSparkInterrupt"
{
"heatFrames": 10
}Resets obstacles: R-Mode |
From: 2
Bottom Left Door
To: 3
Right Door
Come in with G-Mode Morph, after passing through the morph tunnel unmorph and exit G-Mode. Disable any E-Tanks and farm the Kago to put Energy into reserves. Get into postion under the top blocks and disable Varia. Time a down jump to reach the apex as reserves trigger. Release down during the reserve refil. Entrance condition: {
"comeInWithGMode": {
"mode": "direct",
"morphed": true
}
}Requires: "canArtificialMorph"
"h_heatProof"
"canRModeStandupClip"
"canBeVeryPatient"
"h_RModeCanRefillReserves"
{
"partialRefill": {
"type": "ReserveEnergy",
"limit": 100
}
}
{
"disableEquipment": "Varia"
}
{
"autoReserveTrigger": {
"implicitHeatFrames": "suitless"
}
}
{
"suitlessHeatFrames": 30
}Dev note: FIXME: Add suitless version. |
|
Enter with R-Mode, disable any E-Tanks and farm the Kago to put Energy into reserves. Get into postion under the top blocks and disable Varia. Time a down jump to reach the apex as reserves trigger. Release down during the reserve refill. A mid air morph increases the frame window Samus can clip through the blocks. Entrance condition: {
"comeInWithRMode": {}
}Requires: "h_heatProof"
"canMidAirMorph"
"canRModeStandupClip"
"h_RModeCanRefillReserves"
{
"partialRefill": {
"type": "ReserveEnergy",
"limit": 100
}
}
{
"disableEquipment": "Varia"
}
{
"autoReserveTrigger": {
"implicitHeatFrames": "suitless"
}
}
{
"suitlessHeatFrames": 30
}Dev note: FIXME: Add suitless version. |
|
Charge a spark along the bottom of the room and use it to spark through the right side door. Requires opening the door and shutter first. Requires: "canShinechargeMovementComplex"
"HiJump"
{
"or": [
"SpaceJump",
"Grapple"
]
}
{
"or": [
{
"obstaclesCleared": [
"A"
]
},
"Wave",
{
"and": [
"h_heatedBlueGateGlitch",
{
"heatFrames": 60
}
]
}
]
}
{
"or": [
{
"and": [
"canTrickyDashJump",
"canWallJump"
]
},
"SpaceJump"
]
}
{
"canShineCharge": {
"usedTiles": 28,
"gentleUpTiles": 3,
"gentleDownTiles": 3,
"openEnd": 0
}
}
{
"heatFrames": 780
}
{
"shinespark": {
"frames": 57,
"excessFrames": 0
}
}Exit condition: {
"leaveWithSpark": {}
}Dev note: A hero shot variation of this strat might be possible, starting from a node to the left; if nothing else it could be done with a shortcharge on the 12-tile platform to the left. |
|
Requires: {
"heatFrames": 180
}
{
"or": [
"canDash",
{
"heatFrames": 100
}
]
}
{
"or": [
{
"spikeHits": 1
},
{
"and": [
"canTrickyJump",
{
"or": [
"canDash",
{
"disableEquipment": "HiJump"
}
]
}
]
},
"canInsaneJump"
]
} |
|
Requires: {
"heatFrames": 250
}
"h_heatedBlueGateGlitch"
{
"or": [
"canDash",
{
"heatFrames": 85
}
]
}Clears obstacles: A |
|
Use Speed Booster break all of the blocks and farm all but one Beetom. Carefully use the last Beetom to damage down, and then use it to interrupt. Entrance condition: {
"comeInWithRMode": {}
}Requires: {
"or": [
"h_CrystalFlashForReserveEnergy",
{
"and": [
"h_RModeCanRefillReserves",
{
"resourceMissingAtMost": [
{
"type": "PowerBomb",
"count": 0
}
]
},
{
"partialRefill": {
"type": "ReserveEnergy",
"limit": 30
}
}
]
}
]
}
"canStopOnADime"
"canEscapeEnemyGrab"
"h_shinechargeMaxRunway"
{
"autoReserveTrigger": {
"maxReserveEnergy": 63
}
}
"canRModeSparkInterrupt" |
|
Requires: "Morph"
{
"heatFrames": 260
}
"h_heatedBlueGateGlitch"Clears obstacles: A |
|
Requires: {
"obstaclesCleared": [
"R-Mode"
]
}
{
"or": [
"h_heatedCrystalFlashForReserveEnergy",
{
"and": [
"h_heatProof",
"h_RModeCanRefillReserves",
{
"resourceMissingAtMost": [
{
"type": "PowerBomb",
"count": 0
}
]
},
{
"partialRefill": {
"type": "ReserveEnergy",
"limit": 20
}
}
]
}
]
}
{
"or": [
{
"canShineCharge": {
"usedTiles": 13,
"openEnd": 0
}
},
{
"and": [
{
"doorUnlockedAtNode": 3
},
{
"canShineCharge": {
"usedTiles": 14,
"openEnd": 0
}
}
]
}
]
}
{
"or": [
{
"autoReserveTrigger": {}
},
{
"and": [
"canReserveTriggerBufferXRay",
{
"autoReserveTrigger": {
"implicitHeatFrames": "no"
}
}
]
}
]
}
"canRModeSparkInterrupt"
{
"heatFrames": 30
}Resets obstacles: R-Mode |
From: 5
Middle Junction (Ledge Right of Morph Tunnel)
To: 2
Middle Left Door
Requires: "Morph"
{
"heatFrames": 150
}
"h_heatedBlueGateGlitch"
{
"or": [
"canDash",
{
"heatFrames": 65
}
]
}Clears obstacles: A |
From: 5
Middle Junction (Ledge Right of Morph Tunnel)
To: 2
Middle Left Door
Requires: "canDash"
"Morph"
{
"heatFrames": 150
}
"h_heatedBlueGateGlitch"Exit condition: {
"leaveWithRunway": {
"length": 11,
"openEnd": 0,
"gentleDownTiles": 4
}
}Unlocks doors: {"types":["missiles"],"requires":[{"heatFrames":90}]}
{"types":["super"],"requires":[]}
{"types":["powerbomb"],"requires":[{"heatFrames":110}]} |
|
Entrance condition: {
"comeInWithGMode": {
"mode": "any",
"morphed": false
}
}Requires: "Gravity"
{
"or": [
{
"lavaFrames": 280
},
{
"and": [
"SpaceJump",
{
"lavaFrames": 240
}
]
}
]
}
{
"or": [
{
"and": [
"canDash",
{
"disableEquipment": "SpeedBooster"
},
{
"or": [
{
"notable": "Thread the Needle Entry"
},
{
"heatFrames": 20
}
]
}
]
},
{
"lavaFrames": 100
}
]
}
"h_heatedGModeOpenDifferentDoor" |
|
Perform a Crystal Flash in order to refill reserves. Position Samus below the 2-tile space of the ceiling Morph tunnel. Jump as Samus reaches 4 Energy, and mid-air morph, timed so that reserves trigger while Samus still has upward momentum just before Samus would hit the ceiling. If done properly, the R-mode standup will cause Samus to clip into the ceiling Morph tunnel. If successful, Samus will end up crouched in the tunnel; press down to morph, then roll out to the right to exit the room. With a mid-air morph, this has a 4-frame window for the jump. It is also an option to pause abuse: instead of jumping at a precise Energy value, set reserves to manual, wait until Samus is close to zero Energy, then press pause and wait a moment before jumping (firing a shot when pausing may help create a visual cue), so that Samus is at 0 Energy and in position just below the ceiling when the pause hits. Then set reserves to auto (and re-equip Varia if available) and unpause. Entrance condition: {
"comeInWithRMode": {}
}Requires: "h_heatedCrystalFlash"
"canRModeStandupClip"
"canInsaneJump"
{
"heatFrames": 140
}
{
"disableEquipment": "Varia"
}
{
"autoReserveTrigger": {}
}
{
"heatFrames": 275
}
{
"or": [
"canDash",
{
"heatFrames": 15
}
]
}Dev note: Jumping using Spring Ball is also possible, which simplifies the movement by avoiding the need for a mid-air morph; it still has a 4-frame window for the jump timing. Jumping and aiming down is also possible but only gives a 2-frame window for the jump. |
|
Entrance condition: {
"comeInWithGMode": {
"mode": "any",
"morphed": false
}
}Requires: {
"lavaFrames": 210
}
{
"or": [
{
"and": [
"canDash",
{
"disableEquipment": "SpeedBooster"
}
]
},
{
"lavaFrames": 60
}
]
}
"canSuitlessLavaDive"
"canGravityJump"
{
"or": [
{
"and": [
"HiJump",
{
"gravitylessLavaFrames": 115
}
]
},
{
"and": [
"canTrickyWallJump",
"canTrickyJump",
{
"gravitylessLavaFrames": 175
}
]
}
]
}
"h_heatedGModeOpenDifferentDoor"Dev note: FIXME: Many strats without Gravity have been skipped for now. |
|
Entrance condition: {
"comeInWithGMode": {
"mode": "any",
"morphed": false
}
}Requires: "Gravity"
"SpaceJump"
{
"lavaFrames": 280
}
{
"or": [
{
"and": [
{
"disableEquipment": "SpeedBooster"
},
"canDash"
]
},
{
"lavaFrames": 80
}
]
}
"h_heatedGModeOpenDifferentDoor"Dev note: FIXME: GT Max Suitless climb could be added, but is likely not reasonable. |
|
Wall jump off of the Upper-Left Namihe and then Spring Ball jump up and out of the Lava. Pausing early in order to get more horizontal distance by equiping Spring Ball may help. Entrance condition: {
"comeInWithGMode": {
"mode": "any",
"morphed": false
}
}Requires: {
"notable": "HiJump"
}
"Gravity"
"canSpringwall"
"HiJump"
"canUseEnemies"
{
"lavaFrames": 390
}
{
"or": [
{
"and": [
"canDash",
{
"disableEquipment": "SpeedBooster"
}
]
},
{
"lavaFrames": 150
}
]
}
"h_heatedGModeOpenDifferentDoor"Dev note: This strat is not useful unless Samus has lava proof but not heat proof. Otherwise, the non-G-mode variant can be used. FIXME: These lava frames are lenient, they are what it would take without Gravity (the non-G-mode variant also doesnt account for Gravity). |
|
Samus will be slowed by lava if Speed Booster is equipped, even with Gravity. Requires: {
"or": [
"h_lavaProof",
"canSuitlessLavaDive"
]
}
"Gravity"
"SpaceJump"
{
"heatFrames": 340
}
{
"lavaFrames": 280
}
{
"or": [
{
"and": [
{
"disableEquipment": "SpeedBooster"
},
"canDash"
]
},
{
"and": [
{
"heatFrames": 120
},
{
"lavaFrames": 120
}
]
}
]
} |
|
Requires: "Gravity"
{
"or": [
"h_lavaProof",
"canSuitlessLavaDive"
]
}
"canDash"
{
"disableEquipment": "SpeedBooster"
}
{
"useFlashSuit": {}
}
{
"shinespark": {
"frames": 23
}
}
{
"heatFrames": 425
}
{
"lavaFrames": 275
}Dev note: FIXME: a version with SpeedBooster equipped is possible, with more energy usage. |
From: 2
Right Door
To: 3
Above Lava Junction
Use a flash suit to shinespark out of the lava. A diagonal spark is slightly better though Samus will barely move horizontally. Requires: "canSuitlessLavaDive"
"canDash"
{
"disableEquipment": "SpeedBooster"
}
{
"useFlashSuit": {}
}
{
"or": [
{
"and": [
"canBounceBall",
{
"lavaFrames": 270
},
{
"shinespark": {
"frames": 32
}
},
{
"heatFrames": 420
}
]
},
{
"and": [
{
"lavaFrames": 375
},
{
"shinespark": {
"frames": 27
}
},
{
"heatFrames": 525
}
]
}
]
} |
From: 2
Right Door
To: 4
Lava, Left Wall
Jump into the door frame so that Samus is falling when entering this room. Morph before reaching the lava and Bounce down to the bottom. Entrance condition: {
"comeInJumping": {
"speedBooster": "no",
"minTiles": 4
}
}Requires: {
"or": [
"h_lavaProof",
"canSuitlessLavaDive"
]
}
"canCarefulJump"
"canBounceBall"
{
"heatFrames": 330
}
{
"lavaFrames": 290
}Dev note: 4 Tile jump entry is the Normalized Kronic Boost room setup. |
|
Samus will be slowed by lava if Speed Booster is equipped, even with Gravity. Requires: {
"or": [
"h_lavaProof",
"canSuitlessLavaDive"
]
}
"Gravity"
{
"heatFrames": 250
}
{
"lavaFrames": 190
}
{
"or": [
{
"and": [
{
"disableEquipment": "SpeedBooster"
},
"canDash"
]
},
{
"and": [
{
"heatFrames": 50
},
{
"lavaFrames": 50
}
]
}
]
} |
From: 2
Right Door
To: 5
Lava, Center Namihe
Jump into the door frame so that Samus is falling when entering this room. Morph before reaching the lava, Bounce, and Unmorph shortly after sink slightly before floating down to the stairs. Entrance condition: {
"comeInJumping": {
"speedBooster": "no",
"minTiles": 4
}
}Requires: {
"or": [
"h_lavaProof",
"canSuitlessLavaDive"
]
}
"canCarefulJump"
"canBounceBall"
{
"heatFrames": 230
}
{
"lavaFrames": 190
}Dev note: 4 Tile jump entry is the Normalized Kronic Boost room setup. |
|
Samus will be slowed by lava if SpeedBooster is equipped, even with Gravity. Requires: {
"or": [
{
"and": [
"Gravity",
{
"heatFrames": 180
},
{
"lavaFrames": 180
}
]
},
{
"and": [
"Gravity",
{
"disableEquipment": "SpeedBooster"
},
"canDash",
{
"heatFrames": 140
},
{
"lavaFrames": 140
}
]
},
{
"and": [
{
"heatFrames": 210
},
{
"lavaFrames": 210
}
]
}
]
} |
|
Requires: "Gravity"
{
"or": [
"h_lavaProof",
"canSuitlessLavaDive"
]
}
{
"or": [
{
"and": [
"canDash",
{
"disableEquipment": "SpeedBooster"
},
{
"heatFrames": 270
},
{
"lavaFrames": 220
}
]
},
{
"and": [
"canDash",
{
"disableEquipment": "SpeedBooster"
},
"SpaceJump",
"canCarefulJump",
{
"heatFrames": 225
},
{
"lavaFrames": 180
}
]
},
{
"and": [
{
"heatFrames": 330
},
{
"lavaFrames": 300
}
]
}
]
} |
|
Samus will be slowed by lava if SpeedBooster is equipped, even with Gravity. Requires: {
"or": [
{
"and": [
"Gravity",
{
"heatFrames": 195
},
{
"lavaFrames": 195
}
]
},
{
"and": [
"Gravity",
"canDash",
{
"disableEquipment": "SpeedBooster"
},
{
"heatFrames": 150
},
{
"lavaFrames": 150
}
]
},
{
"and": [
{
"heatFrames": 200
},
{
"lavaFrames": 200
}
]
}
]
} |
From: 4
Gamet Farm Junction
To: 3
Top Door
Position below the door, jump when Samus reaches 7 Energy, and mid-air morph, timed so that reserves trigger while Samus still has upward momentum just before Samus would hit the door. If done properly, the R-mode standup will cause Samus to clip past the door shell. With a mid-air morph, this has a 5-frame window for the jump. Otherwise, with a jump aim-down it has a 3-frame window. If Spring Ball is available, jumping in Spring Ball increases the window to 6 frames. In any case, it may help to pause abuse: instead of jumping at a precise Energy value, set reserves to manual, wait until Samus is close to zero Energy, and press pause a moment before jumping, so that Samus is at 0 energy and in position just below the door when the pause hits. Then set reserves to auto (and re-equip Varia if available), and unpause. Requires: {
"obstaclesCleared": [
"R-Mode"
]
}
"canDash"
"canRModeStandupClip"
"canInsaneJump"
{
"or": [
"canMidAirMorph",
"canBeVeryPatient"
]
}
{
"heatFrames": 210
}
{
"disableEquipment": "Varia"
}
{
"autoReserveTrigger": {}
}
{
"heatFrames": 5
}Bypasses door shell: true |
|
Entrance condition: {
"comeInWithGMode": {
"mode": "any",
"morphed": false
}
}Requires: "canDash"
{
"or": [
{
"and": [
{
"lavaFrames": 150
},
{
"spikeHits": 7
}
]
},
{
"and": [
{
"notable": "Suitless Damage Boosts"
},
{
"lavaFrames": 80
},
{
"spikeHits": 3
},
"canUseIFrames",
"canHorizontalDamageBoost"
]
},
{
"and": [
"Gravity",
{
"disableEquipment": "SpeedBooster"
},
{
"lavaFrames": 100
},
{
"spikeHits": 2
},
{
"or": [
"canUseIFrames",
"canHorizontalDamageBoost"
]
}
]
},
{
"and": [
{
"notable": "Frozen Maw Platforms"
},
"canResetFallSpeed",
"canTrickyUseFrozenEnemies",
"canTrickyJump",
"canHorizontalDamageBoost",
"canUseIFrames",
{
"spikeHits": 2
},
{
"lavaFrames": 15
}
]
}
]
}
"h_heatedGModeOpenDifferentDoor"Dev note: FIXME: Grapple could maybe be used to skip some damage by partially swinging across the room. Blue suit damage boost options could also be added. |
From: 1
Left Door
To: 2
Right Door
Entrance condition: {
"comeInRunning": {
"speedBooster": "no",
"minTiles": 4
}
}Requires: "Gravity"
"canCarefulJump"
"canSpringBallBounce"
{
"spikeHits": 2
}
{
"heatFrames": 350
}
{
"lavaFrames": 20
} |
From: 1
Left Door
To: 2
Right Door
Uses a runway of at least 14 tiles in the adjacent room. Disable SpeedBooster after jumping so that the lava will not take away all of Samus' momentum. Entrance condition: {
"comeInRunning": {
"speedBooster": "yes",
"minTiles": 14
}
}Requires: "Gravity"
"h_speedJump"
{
"disableEquipment": "SpeedBooster"
}
"canSpringBallBounce"
"canTrickyJump"
{
"spikeHits": 1
}
{
"heatFrames": 240
}
{
"lavaFrames": 10
} |
|
Pause abuse the spike and lava damage to cross the room while losing minimal Energy. Requires: "canDash"
{
"noFlashSuit": {}
}
{
"notable": "Pause Abuse Damage Boosts"
}
{
"or": [
{
"and": [
{
"disableEquipment": "SpeedBooster"
},
"Gravity"
]
},
{
"and": [
"canInsaneJump",
{
"notable": "Suitless Damage Boosts"
}
]
}
]
}
"canHorizontalDamageBoost"
"canPauseAbuse"
{
"resourceAvailable": [
{
"type": "RegularEnergy",
"count": 99
},
{
"type": "ReserveEnergy",
"count": 100
}
]
}
{
"resourceAtMost": [
{
"type": "RegularEnergy",
"count": 1
}
]
}
{
"lavaFrames": 30
}
{
"heatFrames": 340
}Dev note: Energy ineffeciency is necessary and is represented by extra heatFrames. |
From: 1
Left Door
To: 2
Right Door
Uses a runway of at least 21 tiles in the adjacent room. It will help to perform the first jump with HiJump disabled. Disable SpeedBooster before Samus reaches the lava. Entrance condition: {
"comeInRunning": {
"speedBooster": "yes",
"minTiles": 21
}
}Requires: "h_speedJump"
"HiJump"
{
"disableEquipment": "HiJump"
}
{
"disableEquipment": "SpeedBooster"
}
"canSpringBallBounce"
"canTrickyJump"
{
"spikeHits": 1
}
{
"heatFrames": 200
}
{
"lavaFrames": 11
}Dev note: SpringFling can be used to extend the last SpringBall bounce so that runway can be shortened, but it mostly inflates the number of strats. |
From: 1
Left Door
To: 2
Right Door
It may help to perform the first jump with HiJump disabled. Entrance condition: {
"comeInRunning": {
"speedBooster": "no",
"minTiles": 4
}
}Requires: "canCarefulJump"
"HiJump"
{
"disableEquipment": "HiJump"
}
"canSpringBallBounce"
{
"spikeHits": 3
}
{
"heatFrames": 350
}
{
"lavaFrames": 32
} |
From: 1
Left Door
To: 2
Right Door
Uses a runway of at least 8 tiles in the adjacent room. It will help to perform the first jump with HiJump disabled. Disable SpeedBooster before Samus reaches the lava. Entrance condition: {
"comeInRunning": {
"speedBooster": "yes",
"minTiles": 8
}
}Requires: "canTrickyJump"
"h_speedJump"
"HiJump"
{
"disableEquipment": "HiJump"
}
{
"disableEquipment": "SpeedBooster"
}
"canSpringBallBounce"
{
"spikeHits": 2
}
{
"heatFrames": 311
}
{
"lavaFrames": 22
} |
|
Requires: "canDash"
"Gravity"
{
"disableEquipment": "SpeedBooster"
}
{
"heatFrames": 330
}
{
"lavaFrames": 90
}
{
"spikeHits": 2
}
{
"or": [
"canUseIFrames",
{
"and": [
{
"spikeHits": 2
},
{
"heatFrames": 50
}
]
}
]
}
{
"or": [
"canHorizontalDamageBoost",
{
"and": [
{
"heatFrames": 20
},
{
"lavaFrames": 20
}
]
}
]
} |
|
Entrance condition: {
"comeInWithGMode": {
"mode": "any",
"morphed": false
}
}Requires: "canDash"
{
"or": [
{
"and": [
{
"lavaFrames": 150
},
{
"spikeHits": 7
}
]
},
{
"and": [
{
"notable": "Suitless Damage Boosts"
},
{
"lavaFrames": 80
},
{
"spikeHits": 3
},
"canUseIFrames",
"canHorizontalDamageBoost"
]
},
{
"and": [
"Gravity",
{
"disableEquipment": "SpeedBooster"
},
{
"lavaFrames": 100
},
{
"spikeHits": 2
},
{
"or": [
"canUseIFrames",
"canHorizontalDamageBoost"
]
}
]
},
{
"and": [
{
"notable": "Frozen Maw Platforms"
},
"canResetFallSpeed",
"canTrickyUseFrozenEnemies",
"canTrickyJump",
"canHorizontalDamageBoost",
"canUseIFrames",
{
"spikeHits": 2
},
{
"lavaFrames": 15
}
]
}
]
}
"h_heatedGModeOpenDifferentDoor"Dev note: FIXME: Grapple could maybe be used to skip some damage by partially swinging across the room. |
From: 2
Right Door
To: 1
Left Door
Entrance condition: {
"comeInRunning": {
"speedBooster": "no",
"minTiles": 4
}
}Requires: "Gravity"
"canSpringBallBounce"
{
"spikeHits": 2
}
{
"heatFrames": 350
}
{
"lavaFrames": 20
} |
From: 2
Right Door
To: 1
Left Door
Uses a runway of at least 14 tiles in the adjacent room. Disable SpeedBooster after jumping so that the lava will not take away all of Samus' momentum. Entrance condition: {
"comeInRunning": {
"speedBooster": "yes",
"minTiles": 14
}
}Requires: "Gravity"
"h_speedJump"
{
"disableEquipment": "SpeedBooster"
}
"canSpringBallBounce"
"canTrickyJump"
{
"spikeHits": 1
}
{
"heatFrames": 240
}
{
"lavaFrames": 10
} |
|
Pause abuse the spike and lava damage to cross the room while losing minimal Energy. Requires: "canDash"
{
"noFlashSuit": {}
}
{
"notable": "Pause Abuse Damage Boosts"
}
{
"or": [
{
"and": [
{
"disableEquipment": "SpeedBooster"
},
"Gravity"
]
},
{
"and": [
"canInsaneJump",
{
"notable": "Suitless Damage Boosts"
}
]
}
]
}
"canHorizontalDamageBoost"
"canPauseAbuse"
{
"resourceAvailable": [
{
"type": "RegularEnergy",
"count": 99
},
{
"type": "ReserveEnergy",
"count": 100
}
]
}
{
"resourceAtMost": [
{
"type": "RegularEnergy",
"count": 1
}
]
}
{
"lavaFrames": 30
}
{
"heatFrames": 340
}Dev note: Energy ineffeciency is necessary and is represented by extra heatFrames. |
From: 2
Right Door
To: 1
Left Door
Uses a runway of at least 21 tiles in the adjacent room. It will help to perform the first jump with HiJump disabled. Disable SpeedBooster before Samus reaches the lava. Entrance condition: {
"comeInRunning": {
"speedBooster": "yes",
"minTiles": 21
}
}Requires: "h_speedJump"
"HiJump"
{
"disableEquipment": "HiJump"
}
{
"disableEquipment": "SpeedBooster"
}
"canSpringBallBounce"
"canTrickyJump"
{
"spikeHits": 1
}
{
"heatFrames": 200
}
{
"lavaFrames": 11
}Dev note: SpringFling can be used to extend the last SpringBall bounce so that runway can be shortened, but it mostly inflates the number of strats. |
From: 2
Right Door
To: 1
Left Door
It may help to perform the first jump with HiJump disabled. Entrance condition: {
"comeInRunning": {
"speedBooster": "no",
"minTiles": 4
}
}Requires: "canCarefulJump"
"HiJump"
{
"disableEquipment": "HiJump"
}
"canSpringBallBounce"
{
"spikeHits": 3
}
{
"heatFrames": 350
}
{
"lavaFrames": 32
} |
From: 2
Right Door
To: 1
Left Door
Uses a runway of at least 8 tiles in the adjacent room. It will help to perform the first jump with HiJump disabled. Disable SpeedBooster before Samus reaches the lava. Entrance condition: {
"comeInRunning": {
"speedBooster": "yes",
"minTiles": 8
}
}Requires: "h_speedJump"
"canTrickyJump"
"HiJump"
{
"disableEquipment": "HiJump"
}
{
"disableEquipment": "SpeedBooster"
}
"canSpringBallBounce"
{
"spikeHits": 2
}
{
"heatFrames": 311
}
{
"lavaFrames": 22
} |
|
Requires: "canDash"
"Gravity"
{
"disableEquipment": "SpeedBooster"
}
{
"heatFrames": 330
}
{
"lavaFrames": 90
}
{
"spikeHits": 2
}
{
"or": [
"canUseIFrames",
{
"and": [
{
"spikeHits": 2
},
{
"heatFrames": 50
}
]
}
]
}
{
"or": [
"canHorizontalDamageBoost",
{
"and": [
{
"heatFrames": 20
},
{
"lavaFrames": 20
}
]
}
]
} |
|
Crystal Flash and shinecharge between the doors. Use heat damage to interrupt. Entrance condition: {
"comeInWithRMode": {}
}Requires: "h_heatedCrystalFlashForReserveEnergy"
{
"or": [
{
"canShineCharge": {
"usedTiles": 12,
"openEnd": 0
}
},
{
"and": [
{
"or": [
{
"doorUnlockedAtNode": 1
},
{
"doorUnlockedAtNode": 2
}
]
},
{
"canShineCharge": {
"usedTiles": 13,
"openEnd": 0
}
}
]
},
{
"and": [
{
"doorUnlockedAtNode": 1
},
{
"doorUnlockedAtNode": 2
},
{
"canShineCharge": {
"usedTiles": 14,
"openEnd": 0
}
}
]
}
]
}
"h_heatTriggerRModeSparkInterrupt"Unlocks doors: {"nodeId":1,"types":["ammo"],"requires":[]}
{"nodeId":2,"types":["ammo"],"requires":[]} |
|
Requires: "h_lavaProof"
{
"or": [
"h_heatProof",
{
"and": [
{
"obstaclesCleared": [
"A"
]
},
{
"heatFrames": 130
},
"canDash",
{
"disableEquipment": "SpeedBooster"
}
]
},
{
"and": [
{
"or": [
{
"haveBlueSuit": {}
},
{
"obstaclesCleared": [
"A"
]
}
]
},
{
"heatFrames": 180
}
]
}
]
} |
|
Crystal Flash, then shinecharge at the bottom. Use heat damage to interrupt. Entrance condition: {
"comeInWithRMode": {},
"comesThroughToilet": "no"
}Requires: "h_heatedCrystalFlashForReserveEnergy"
{
"heatFrames": 280
}
{
"or": [
{
"canShineCharge": {
"usedTiles": 12,
"openEnd": 0
}
},
{
"and": [
{
"doorUnlockedAtNode": 3
},
{
"canShineCharge": {
"usedTiles": 13,
"openEnd": 0
}
}
]
}
]
}
"h_heatTriggerRModeSparkInterrupt"Unlocks doors: {"nodeId":3,"types":["ammo"],"requires":[]} |
|
Perform a Crystal Flash in order to put energy into reserves. Position below the door, jump when Samus reaches 7 Energy, and mid-air morph. If done properly, Samus will clip past the door shell. With a mid-air morph, this has a 5-frame window for the jump. If Spring Ball is available, jumping in Spring Ball increases the window to 6 frames. In either case it may help to pause abuse: instead of jumping at a precise Energy value, set reserves to manual, wait until Samus is close to zero Energy, and press pause a moment before jumping, so that Samus is at 0 energy and in position just below the door when the pause hits. Then set reserves to auto (and re-equip Varia if available) and unpause. Entrance condition: {
"comeInWithRMode": {}
}Requires: "h_heatedCrystalFlash"
"canRModeStandupClip"
"canInsaneJump"
{
"heatFrames": 170
}
{
"disableEquipment": "Varia"
}
{
"autoReserveTrigger": {}
}Bypasses door shell: true |
|
Crystal Flash, then shinecharge at the bottom. Use heat damage to interrupt. Entrance condition: {
"comeInWithRMode": {}
}Requires: "h_heatedCrystalFlashForReserveEnergy"
{
"heatFrames": 280
}
{
"or": [
{
"canShineCharge": {
"usedTiles": 12,
"openEnd": 0
}
},
{
"and": [
{
"doorUnlockedAtNode": 3
},
{
"canShineCharge": {
"usedTiles": 13,
"openEnd": 0
}
}
]
}
]
}
"h_heatTriggerRModeSparkInterrupt"Unlocks doors: {"nodeId":3,"types":["ammo"],"requires":[]} |
From: 3
Bottom Right Door
To: 1
Top Door
Perform a Crystal Flash in order to put energy into reserves. Position below the door, jump when Samus reaches 7 Energy, and mid-air morph, timed so that reserves trigger while Samus still has upward momentum just before Samus would hit the door. If done properly, the R-mode standup will cause Samus to clip past the door shell. With a mid-air morph, this has a 5-frame window for the jump. If Spring Ball is available, jumping in Spring Ball increases the window to 6 frames. In either case it may help to pause abuse: instead of jumping at a precise Energy value, set reserves to manual, wait until Samus is close to zero Energy, and press pause a moment before jumping, so that Samus is at 0 energy and in position just below the door when the pause hits. Then set reserves to auto (and re-equip Varia if available) and unpause. Entrance condition: {
"comeInWithRMode": {}
}Requires: "h_heatedCrystalFlash"
"canRModeStandupClip"
"canInsaneJump"
{
"heatFrames": 280
}
{
"disableEquipment": "Varia"
}
{
"autoReserveTrigger": {}
}
{
"heatFrames": 5
}Bypasses door shell: true |
|
Crystal Flash, then shinecharge at the bottom. Use heat damage to interrupt. Entrance condition: {
"comeInWithRMode": {}
}Requires: "h_heatedCrystalFlashForReserveEnergy"
{
"heatFrames": 280
}
{
"or": [
{
"canShineCharge": {
"usedTiles": 12,
"openEnd": 0
}
},
{
"and": [
{
"doorUnlockedAtNode": 3
},
{
"canShineCharge": {
"usedTiles": 13,
"openEnd": 0
}
}
]
}
]
}
"h_heatTriggerRModeSparkInterrupt"Unlocks doors: {"nodeId":3,"types":["ammo"],"requires":[]} |
|
Use controlled Spring Ball bounces to cross the whole room while avoiding all enemy damage. There is a significant chance of failure due to bad Squeept RNG. Entrance condition: {
"comeInRunning": {
"speedBooster": "no",
"minTiles": 4
}
}Requires: "canTrickySpringBallBounce"
"canInsaneJump"
"canBeVeryPatient"
{
"heatFrames": 390
} |
|
Use controlled Spring Ball bounces to cross the whole room while avoiding all enemy damage. There is a significant chance of failure due to bad Squeept RNG. Entrance condition: {
"comeInRunning": {
"speedBooster": "no",
"minTiles": 4
}
}Requires: "canTrickySpringBallBounce"
"canInsaneJump"
"canBeVeryPatient"
{
"heatFrames": 390
} |
From: 2
Left Shaft - Bottom Right Door
To: 2
Left Shaft - Bottom Right Door
Farm the enemies, and leave the bottom Alcoon alive to interrupt after shinecharging at the bottom door. Requires: {
"obstaclesCleared": [
"R-Mode"
]
}
{
"or": [
"h_heatedCrystalFlashForReserveEnergy",
{
"and": [
"h_heatProof",
"h_RModeCanRefillReserves",
{
"resourceMissingAtMost": [
{
"type": "PowerBomb",
"count": 0
}
]
},
{
"partialRefill": {
"type": "ReserveEnergy",
"limit": 20
}
}
]
}
]
}
{
"or": [
{
"canShineCharge": {
"usedTiles": 12,
"gentleUpTiles": 4,
"openEnd": 0
}
},
{
"and": [
{
"doorUnlockedAtNode": 2
},
{
"canShineCharge": {
"usedTiles": 13,
"gentleUpTiles": 4,
"openEnd": 0
}
}
]
}
]
}
{
"autoReserveTrigger": {
"maxReserveEnergy": 95
}
}
"canRModeSparkInterrupt"Resets obstacles: R-Mode |
|
Farm the Metarees if able. Farm the Geruta while they are trapped. After the third Geruta, run toward the right door to shinecharge and use heat damage to interrupt. Entrance condition: {
"comeInWithRMode": {}
}Requires: {
"or": [
"h_heatedCrystalFlashForReserveEnergy",
{
"and": [
"h_RModeCanRefillReserves",
"h_heatProof",
{
"or": [
{
"enemyKill": {
"enemies": [
[
"Metaree",
"Metaree"
]
]
}
},
{
"resourceMissingAtMost": [
{
"type": "Missile",
"count": 0
}
]
}
]
},
{
"or": [
{
"resourceMissingAtMost": [
{
"type": "Missile",
"count": 0
}
]
},
{
"resourceMissingAtMost": [
{
"type": "Super",
"count": 0
}
]
}
]
},
{
"partialRefill": {
"type": "ReserveEnergy",
"limit": 20
}
}
]
}
]
}
{
"or": [
{
"and": [
"h_speedButSlow",
{
"simpleHeatFrames": 560
},
{
"heatFrames": 60
}
]
},
{
"and": [
"h_speedDash",
{
"simpleHeatFrames": 310
},
{
"heatFrames": 40
}
]
}
]
}
"h_shinechargeMaxRunway"
"h_heatTriggerRModeSparkInterrupt"Clears obstacles: A |
|
The three Gerutas can be farmed while trapped. Run the rest of the way to the left door and use heat damage to interrupt. Entrance condition: {
"comeInWithRMode": {}
}Requires: "f_ClearedSpeedBoosterLavaTrap"
{
"or": [
"h_CrystalFlashForReserveEnergy",
{
"and": [
"h_heatProof",
"h_RModeCanRefillReserves",
{
"resourceMissingAtMost": [
{
"type": "Missile",
"count": 0
}
]
},
{
"partialRefill": {
"type": "ReserveEnergy",
"limit": 20
}
}
]
}
]
}
{
"or": [
{
"and": [
"h_speedButSlow",
{
"simpleHeatFrames": 560
},
{
"heatFrames": 60
}
]
},
{
"and": [
"h_speedDash",
{
"simpleHeatFrames": 310
},
{
"heatFrames": 40
}
]
}
]
}
"h_shinechargeMaxRunway"
"h_heatTriggerRModeSparkInterrupt"Clears obstacles: A |
From: 2
Right Door
To: 2
Right Door
Crystal Flash at the right door, then shinecharge across two sets of crumble blocks. Use heat damage to interrupt, then jump back across to the door. Entrance condition: {
"comeInWithRMode": {}
}Requires: "f_ClearedSpeedBoosterLavaTrap"
"h_heatedCrystalFlashForReserveEnergy"
{
"heatFrames": 100
}
{
"canShineCharge": {
"usedTiles": 27,
"openEnd": 0
}
}
"h_heatTriggerRModeSparkInterrupt"
{
"heatFrames": 240
}
{
"lavaFrames": 20
} |
From: 2
Right Door
To: 2
Right Door
Outrun the rising lava up to the highest ledge and shinecharge before touching the crumble blocks. Shinespark across to the door. Crystal Flash, then run back across the crumble blocks and shinecharge before entering the lava. Windup and interrupt using the heat damage. Then run back through the lava to the right door. Entrance condition: {
"comeInWithRMode": {}
}Requires: {
"simpleHeatFrames": 310
}
{
"heatFrames": 40
}
"h_shinechargeMaxRunway"
{
"shinespark": {
"frames": 49,
"excessFrames": 10
}
}
"h_heatedCrystalFlashForReserveEnergy"
{
"heatFrames": 100
}
"h_shinechargeMaxRunway"
"h_heatTriggerRModeSparkInterrupt"
{
"or": [
{
"and": [
"f_ClearedSpeedBoosterLavaTrap",
{
"heatFrames": 1250
},
{
"lavaFrames": 40
}
]
},
{
"and": [
"h_heatedCrystalFlash",
{
"heatFrames": 2060
},
{
"lavaFrames": 2060
}
]
},
{
"and": [
"Gravity",
"h_heatedCrystalFlash",
{
"heatFrames": 1250
},
{
"lavaFrames": 1250
}
]
},
{
"and": [
"Gravity",
"h_heatProof",
"h_lavaProof"
]
}
]
}Exit condition: {
"leaveNormally": {}
}Unlocks doors: {"nodeId":2,"types":["ammo"],"requires":[]} |
From: 1
Left Door
To: 1
Left Door
Ride the Tripper across to the center platform. Farm the right-side Tripper. Enter X-Mode on the spike and shinecharge, then use heat damage to interrupt. Ride the Tripper back to the left door before farming it on the way out. Entrance condition: {
"comeInWithRMode": {}
}Requires: "h_heatProof"
"Morph"
"h_RModeCanRefillReserves"
{
"enemyKill": {
"enemies": [
[
"Tripper"
]
]
}
}
{
"resourceMissingAtMost": [
{
"type": "Missile",
"count": 0
}
]
}
{
"or": [
{
"partialRefill": {
"type": "ReserveEnergy",
"limit": 5
}
},
{
"and": [
{
"or": [
"h_lavaProof",
"Grapple",
{
"and": [
"canWallJump",
{
"or": [
"Super",
"Ice"
]
}
]
},
"SpaceJump"
]
},
{
"partialRefill": {
"type": "ReserveEnergy",
"limit": 20
}
},
{
"or": [
{
"enemyKill": {
"enemies": [
[
"Tripper"
]
]
}
},
"canBeLucky"
]
}
]
}
]
}
"canBeVeryPatient"
"canXMode"
"h_XModeSpikeHit"
"h_shinechargeMaxRunway"
{
"disableEquipment": "Varia"
}
{
"disableEquipment": "Gravity"
}
{
"autoReserveTrigger": {}
}
"canRModePauseAbuseSparkInterrupt" |
From: 1
Left Door
To: 2
Right Door
Perform a bounceball to minimize lava damage. Move quickly to reach the second Tripper on its first cycle. Ride it, morph to avoid spike damage, shoot open the door, and run off of the Tripper (rather than jumping off). Entrance condition: {
"comeInRunning": {
"speedBooster": "no",
"minTiles": 1
}
}Requires: "canBounceBall"
"canWallJump"
{
"heatFrames": 600
}
{
"lavaFrames": 70
} |
From: 1
Left Door
To: 2
Right Door
Perform a bounceball to minimize lava damage. Move quickly to reach the second Tripper on its first cycle. Ride it, morph to avoid spike damage, shoot open the door, and run off of the Tripper (rather than jumping off). Entrance condition: {
"comeInRunning": {
"speedBooster": "no",
"minTiles": 3
}
}Requires: "canBounceBall"
"canWallJump"
{
"heatFrames": 600
}
{
"lavaFrames": 60
} |
|
Requires: "Gravity"
{
"heatFrames": 360
}
{
"lavaFrames": 130
}
{
"or": [
"canCarefulJump",
{
"heatFrames": 40
}
]
}
{
"or": [
{
"and": [
"canDash",
{
"disableEquipment": "SpeedBooster"
}
]
},
{
"and": [
{
"heatFrames": 170
},
{
"lavaFrames": 60
}
]
}
]
} |
From: 1
Left Door
To: 2
Right Door
Ride the Tripper across to the center platform, then farm it for energy. Enter X-Mode on the spike and shinecharge, then use heat damage to interrupt. Ride the second tripper to the opposite door - farm it on the way out if needed. Entrance condition: {
"comeInWithRMode": {}
}Requires: "h_heatProof"
"Morph"
"h_RModeCanRefillReserves"
{
"enemyKill": {
"enemies": [
[
"Tripper"
]
]
}
}
{
"resourceMissingAtMost": [
{
"type": "Missile",
"count": 0
}
]
}
{
"or": [
{
"partialRefill": {
"type": "ReserveEnergy",
"limit": 5
}
},
{
"and": [
{
"or": [
"h_lavaProof",
"Grapple",
{
"and": [
"canWallJump",
{
"or": [
"Super",
"Ice"
]
}
]
},
"SpaceJump"
]
},
{
"partialRefill": {
"type": "ReserveEnergy",
"limit": 20
}
},
{
"or": [
{
"enemyKill": {
"enemies": [
[
"Tripper"
]
]
}
},
"canBeLucky"
]
}
]
}
]
}
"canBeVeryPatient"
"canXMode"
"h_XModeSpikeHit"
"h_shinechargeMaxRunway"
{
"disableEquipment": "Varia"
}
{
"disableEquipment": "Gravity"
}
{
"autoReserveTrigger": {}
}
"canRModePauseAbuseSparkInterrupt"Exit condition: {
"leaveNormally": {}
}Unlocks doors: {"nodeId":2,"types":["ammo"],"requires":[]} |
From: 2
Right Door
To: 1
Left Door
Entrance condition: {
"comeInRunning": {
"speedBooster": "no",
"minTiles": 1
}
}Requires: "canBounceBall"
"canWallJump"
{
"heatFrames": 590
}
{
"lavaFrames": 70
} |
From: 2
Right Door
To: 1
Left Door
Entrance condition: {
"comeInRunning": {
"speedBooster": "no",
"minTiles": 3
}
}Requires: "canBounceBall"
"canWallJump"
{
"heatFrames": 590
}
{
"lavaFrames": 60
} |
|
Requires: "Gravity"
{
"heatFrames": 360
}
{
"lavaFrames": 130
}
{
"or": [
"canCarefulJump",
{
"heatFrames": 40
}
]
}
{
"or": [
{
"and": [
"canDash",
{
"disableEquipment": "SpeedBooster"
}
]
},
{
"and": [
{
"heatFrames": 170
},
{
"lavaFrames": 60
}
]
}
]
} |
From: 2
Right Door
To: 1
Left Door
Ride the Tripper across to the center platform, then farm it for energy. Enter X-Mode on the spike and shinecharge, then use heat damage to interrupt. Ride the second tripper to the opposite door - farm it on the way out if needed. Entrance condition: {
"comeInWithRMode": {}
}Requires: "h_heatProof"
"Morph"
"h_RModeCanRefillReserves"
{
"enemyKill": {
"enemies": [
[
"Tripper"
]
]
}
}
{
"resourceMissingAtMost": [
{
"type": "Missile",
"count": 0
}
]
}
{
"or": [
{
"partialRefill": {
"type": "ReserveEnergy",
"limit": 5
}
},
{
"and": [
{
"or": [
"h_lavaProof",
"Grapple",
{
"and": [
"canWallJump",
{
"or": [
"Super",
"Ice"
]
}
]
},
"SpaceJump"
]
},
{
"partialRefill": {
"type": "ReserveEnergy",
"limit": 20
}
},
{
"or": [
{
"enemyKill": {
"enemies": [
[
"Tripper"
]
]
}
},
"canBeLucky"
]
}
]
}
]
}
"canBeVeryPatient"
"canXMode"
"h_XModeSpikeHit"
"h_shinechargeMaxRunway"
{
"disableEquipment": "Varia"
}
{
"disableEquipment": "Gravity"
}
{
"autoReserveTrigger": {}
}
"canRModePauseAbuseSparkInterrupt"Exit condition: {
"leaveNormally": {}
}Unlocks doors: {"nodeId":1,"types":["ammo"],"requires":[]} |
From: 2
Right Door
To: 2
Right Door
Ride the Tripper across to the center platform. Farm the left Tripper for energy. Enter X-Mode on the spike and shinecharge, then use heat damage to interrupt. Ride the Tripper back to the right door before farming it on the way out. Entrance condition: {
"comeInWithRMode": {}
}Requires: "h_heatProof"
"Morph"
"h_RModeCanRefillReserves"
{
"enemyKill": {
"enemies": [
[
"Tripper"
]
]
}
}
{
"resourceMissingAtMost": [
{
"type": "Missile",
"count": 0
}
]
}
{
"or": [
{
"partialRefill": {
"type": "ReserveEnergy",
"limit": 5
}
},
{
"and": [
{
"or": [
"h_lavaProof",
"Grapple",
{
"and": [
"canWallJump",
{
"or": [
"Super",
"Ice"
]
}
]
},
"SpaceJump"
]
},
{
"partialRefill": {
"type": "ReserveEnergy",
"limit": 20
}
},
{
"enemyKill": {
"enemies": [
[
"Tripper"
]
]
}
}
]
}
]
}
"canBeVeryPatient"
"canXMode"
"h_XModeSpikeHit"
"h_shinechargeMaxRunway"
{
"disableEquipment": "Varia"
}
{
"disableEquipment": "Gravity"
}
{
"autoReserveTrigger": {}
}
"canRModePauseAbuseSparkInterrupt" |
From: 5
Bottom Floating Platform Junction
To: 5
Bottom Floating Platform Junction
Requires: {
"heatFrames": 135
}
"h_heatedBlueGateGlitch"Clears obstacles: A |
From: 5
Bottom Floating Platform Junction
To: 5
Bottom Floating Platform Junction
Farm before, during, and after the gate glitch in order to open the gate without wasting ammo or Energy. Requires: {
"notable": "Gate Glitch With Farming"
}
{
"heatFrames": 300
}
"h_gateGlitch"
{
"or": [
{
"ammo": {
"type": "Missile",
"count": 1
}
},
{
"ammo": {
"type": "Super",
"count": 1
}
}
]
}
{
"or": [
"h_heatResistant",
"canTrickyJump",
{
"resourceCapacity": [
{
"type": "RegularEnergy",
"count": 199
}
]
}
]
}Clears obstacles: A Dev note: There is still some leniency built in, so that perfect execution is not required, but Samus ends without losing resources. Without leniency, this can be done with about 235 heatFrames. |
|
Requires: "Gravity"
"Morph"
{
"or": [
{
"and": [
"canMockball",
{
"disableEquipment": "SpeedBooster"
},
"canTrickyJump",
{
"lavaFrames": 80
}
]
},
{
"lavaFrames": 100
}
]
}
{
"or": [
{
"lavaFrames": 140
},
{
"and": [
"canDash",
{
"disableEquipment": "SpeedBooster"
},
{
"lavaFrames": 110
}
]
},
{
"and": [
"SpaceJump",
{
"lavaFrames": 40
}
]
}
]
}Exit condition: {
"leaveNormally": {}
}Unlocks doors: {"types":["missiles"],"requires":[{"lavaFrames":80}]}
{"types":["super"],"requires":[]}
{"types":["powerbomb"],"requires":[{"lavaFrames":60}]}Dev note: FIXME: A leaveWithRunway variation could be added, but it would require Speed Booster to be disabled, which would need new schema support in order to properly match entrance conditions in the next room. |
From: 1
Top Left Door
To: 2
Bottom Left Door
Requires: "canSuitlessLavaDive"
"canFarmWhileShooting"
{
"enemyKill": {
"enemies": [
[
"Fune",
"Fune"
]
],
"explicitWeapons": [
"PowerBomb"
]
}
}
{
"or": [
{
"and": [
"canTrickyJump",
{
"disableEquipment": "SpeedBooster"
},
"canMockball",
{
"lavaFramesWithEnergyDrops": {
"frames": 120,
"drops": [
{
"enemy": "Fune",
"count": 1
}
]
}
}
]
},
{
"lavaFramesWithEnergyDrops": {
"frames": 165,
"drops": [
{
"enemy": "Fune",
"count": 1
}
]
}
}
]
}
{
"lavaFrames": 35
}
{
"or": [
{
"and": [
"canSpaceJumpWaterBounce",
{
"or": [
{
"and": [
"canPreciseSpaceJump",
{
"lavaFrames": 35
}
]
},
{
"lavaFrames": 60
}
]
}
]
},
{
"lavaFrames": 150
}
]
}Exit condition: {
"leaveNormally": {}
}Unlocks doors: {"types":["missiles"],"requires":[{"lavaFrames":80}]}
{"types":["super"],"requires":[]}
{"types":["powerbomb"],"requires":[{"lavaFrames":150}]}Dev note: FIXME: a Gravity version of this could be added. |
|
Requires: "canSuitlessLavaDive"
"Morph"
{
"or": [
{
"and": [
"canTrickyJump",
{
"disableEquipment": "SpeedBooster"
},
"canMockball",
{
"lavaFrames": 155
}
]
},
{
"lavaFrames": 200
}
]
}
{
"or": [
{
"and": [
"canSpaceJumpWaterBounce",
{
"or": [
{
"and": [
"canPreciseSpaceJump",
{
"lavaFrames": 35
}
]
},
{
"lavaFrames": 60
}
]
}
]
},
{
"lavaFrames": 150
}
]
}Exit condition: {
"leaveNormally": {}
}Unlocks doors: {"types":["missiles"],"requires":[{"lavaFrames":80}]}
{"types":["super"],"requires":[]}
{"types":["powerbomb"],"requires":[{"lavaFrames":150}]} |
|
Farm using Sovas. Interrupt with the Sova circling the platform above the runway between the bottom doors. Entrance condition: {
"comeInWithRMode": {}
}Requires: {
"or": [
"h_CrystalFlashForReserveEnergy",
{
"and": [
"h_RModeCanRefillReserves",
{
"partialRefill": {
"type": "ReserveEnergy",
"limit": 40
}
}
]
}
]
}
{
"or": [
{
"canShineCharge": {
"usedTiles": 12,
"openEnd": 0
}
},
{
"and": [
{
"or": [
{
"doorUnlockedAtNode": 3
},
{
"doorUnlockedAtNode": 5
}
]
},
{
"canShineCharge": {
"usedTiles": 13,
"openEnd": 0
}
}
]
},
{
"and": [
{
"doorUnlockedAtNode": 3
},
{
"doorUnlockedAtNode": 5
},
{
"canShineCharge": {
"usedTiles": 14,
"openEnd": 0
}
}
]
}
]
}
{
"autoReserveTrigger": {}
}
"canRModeSparkInterrupt"Unlocks doors: {"nodeId":3,"types":["ammo"],"requires":[]}
{"nodeId":5,"types":["ammo"],"requires":[]} |
|
Build up 34 tiles worth of run speed and jump into the door on the last frame. Hold angle up through the transition but also aim down to duck below the ceiling until Samus is past it. Fire the Super Missile frame perfectly to open the gate. Entrance condition: {
"comeInRunning": {
"speedBooster": "yes",
"minTiles": 34
}
}Requires: {
"notable": "High Speed Gate Glitch"
}
"h_speedJump"
"h_heatedGreenGateGlitch"
{
"ammo": {
"type": "Super",
"count": 1
}
}
"canInsaneJump"
{
"noFlashSuit": {}
}Clears obstacles: A Dev note: 1 extra tile is added so that you can jump into the door, simplifying the inputs a bit. |
|
Farm the Dragons and Geruta. Shinecharge on the upper platform with the Geruta, then weave back down to the Dragon by the door to interrupt. Entrance condition: {
"comeInWithRMode": {}
}Requires: "h_heatProof"
{
"or": [
"h_heatedCrystalFlashForReserveEnergy",
{
"and": [
"h_RModeCanRefillReserves",
{
"or": [
{
"and": [
{
"enemyKill": {
"enemies": [
[
"Dragon"
],
[
"Dragon"
],
[
"Dragon"
],
[
"Dragon"
],
[
"Dragon"
]
],
"explicitWeapons": [
"Missile",
"Super",
"Charge",
"Plasma"
]
}
},
"Grapple"
]
},
{
"and": [
{
"enemyKill": {
"enemies": [
[
"Dragon"
],
[
"Dragon"
],
[
"Dragon"
],
[
"Dragon"
],
[
"Dragon"
]
]
}
},
"h_lavaProof"
]
}
]
},
{
"partialRefill": {
"type": "ReserveEnergy",
"limit": 20
}
}
]
}
]
}
"canTrickyJump"
{
"or": [
{
"canShineCharge": {
"usedTiles": 15,
"openEnd": 2
}
},
{
"and": [
{
"notable": "Frozen Geruta Shinecharge"
},
"h_trickyFrozenEnemyRunway",
{
"canShineCharge": {
"usedTiles": 17,
"openEnd": 1
}
},
"canShinechargeMovementTricky"
]
}
]
}
{
"autoReserveTrigger": {
"maxReserveEnergy": 95
}
}
"canRModeSparkInterrupt" |
|
Run through all the Pirates and all but the first Multiviola. Run back to the door and use the Multiviola to interrupt. Entrance condition: {
"comeInWithRMode": {}
}Requires: {
"or": [
{
"and": [
"h_heatedCrystalFlashForReserveEnergy",
{
"simpleHeatFrames": 600
},
{
"heatFrames": 180
}
]
},
{
"and": [
"h_heatProof",
"h_RModeCanRefillReserves",
{
"resourceMissingAtMost": [
{
"type": "Missile",
"count": 0
}
]
},
{
"partialRefill": {
"type": "ReserveEnergy",
"limit": 20
}
}
]
}
]
}
"h_shinechargeMaxRunway"
{
"autoReserveTrigger": {}
}
"canRModeSparkInterrupt"
{
"heatFrames": 30
} |
|
Run through Pirates and Multiviolas to farm. Then run through to the end and shinecharge at the speed blocks. Use heat damage to interrupt. Entrance condition: {
"comeInWithRMode": {}
}Requires: {
"or": [
{
"and": [
"h_heatedCrystalFlashForReserveEnergy",
{
"simpleHeatFrames": 300
},
{
"heatFrames": 90
},
{
"or": [
"h_speedDash",
{
"and": [
"h_speedButSlow",
{
"simpleHeatFrames": 325
}
]
}
]
}
]
},
{
"and": [
"h_heatProof",
"h_RModeCanRefillReserves",
{
"resourceMissingAtMost": [
{
"type": "Missile",
"count": 0
}
]
},
{
"partialRefill": {
"type": "ReserveEnergy",
"limit": 20
}
}
]
}
]
}
"h_shinechargeMaxRunway"
"h_heatTriggerRModeSparkInterrupt"Clears obstacles: A |
From: 10
Direct G-Mode, Bottom Right (Started at Right)
To: 2
Far Left Door
Stop before the crumble bridge, this is when the floor starts sloping up slightly. Activate X-Ray and hold until full width to exit G-Mode and remain in R-Mode. Bring the first pirate on screen, then Crystal Flash to kill it. Back up against the speed barrier and run left over the crumble blocks and then through the remaining pirates. Stop at the end, and leave the leftmost Multviola near the door, running right to trap it off-screen in that area. Use the other two Multviola - or the spikes - to damage down. Run back to the door, shinecharge, and get hit by the Multiviola to interrupt. Requires: "canComplexGMode"
"h_heatProof"
{
"disableEquipment": "ETank"
}
"h_CrystalFlashForReserveEnergy"
{
"canShineCharge": {
"usedTiles": 28,
"gentleUpTiles": 2,
"openEnd": 0
}
}
{
"autoReserveTrigger": {}
}
"canRModeSparkInterrupt" |
From: 1
Top Left Door
To: 7
Junction Below Power Bomb Blocks
Farm the enemies on the bottom - the first Sm. Dessgeega will give back the Power Bomb used to get down. Shinecharge and use any enemy at the bottom to interrupt. Entrance condition: {
"comeInWithRMode": {}
}Requires: {
"or": [
"h_CrystalFlashForReserveEnergy",
{
"and": [
"h_usePowerBomb",
"h_RModeCanRefillReserves",
{
"or": [
{
"resourceMissingAtMost": [
{
"type": "Missile",
"count": 0
}
]
},
{
"resourceMissingAtMost": [
{
"type": "PowerBomb",
"count": 1
}
]
}
]
},
{
"partialRefill": {
"type": "ReserveEnergy",
"limit": 20
}
}
]
}
]
}
"h_shinechargeMaxRunway"
{
"autoReserveTrigger": {
"maxReserveEnergy": 95
}
}
"canRModeSparkInterrupt"Clears obstacles: A, B, C, D |
From: 2
Middle Left Door
To: 7
Junction Below Power Bomb Blocks
Farm the enemies on the bottom - the first Sm. Dessgeega will give back the Power Bomb used to get down. Shinecharge and use any enemy at the bottom to interrupt. Entrance condition: {
"comeInWithRMode": {}
}Requires: {
"or": [
"h_CrystalFlashForReserveEnergy",
{
"and": [
"h_usePowerBomb",
"h_RModeCanRefillReserves",
{
"or": [
{
"resourceMissingAtMost": [
{
"type": "Missile",
"count": 0
}
]
},
{
"resourceMissingAtMost": [
{
"type": "PowerBomb",
"count": 1
}
]
}
]
},
{
"partialRefill": {
"type": "ReserveEnergy",
"limit": 20
}
}
]
}
]
}
"h_shinechargeMaxRunway"
{
"autoReserveTrigger": {
"maxReserveEnergy": 95
}
}
"canRModeSparkInterrupt"Clears obstacles: C, D |
From: 3
Bottom Left Door
To: 7
Junction Below Power Bomb Blocks
Kill or run past an enemy before attempting to Crystal Flash, or farm the Sm. Dessgeegas and Mellas. Shinecharge and use any enemy at the bottom to interrupt. Entrance condition: {
"comeInWithRMode": {}
}Requires: {
"or": [
{
"enemyDamage": {
"enemy": "Sm. Dessgeega",
"type": "contact",
"hits": 1
}
},
{
"enemyKill": {
"enemies": [
[
"Sm. Dessgeega"
]
],
"explicitWeapons": [
"Missile",
"Super"
]
}
}
]
}
{
"or": [
"h_CrystalFlashForReserveEnergy",
{
"and": [
"h_RModeCanRefillReserves",
{
"or": [
{
"resourceMissingAtMost": [
{
"type": "Missile",
"count": 0
}
]
},
{
"resourceMissingAtMost": [
{
"type": "PowerBomb",
"count": 1
}
]
}
]
},
{
"partialRefill": {
"type": "ReserveEnergy",
"limit": 20
}
}
]
}
]
}
"h_shinechargeMaxRunway"
{
"autoReserveTrigger": {
"maxReserveEnergy": 95
}
}
"canRModeSparkInterrupt"Clears obstacles: D |
From: 4
Right Door
To: 7
Junction Below Power Bomb Blocks
Farm the enemies on the bottom - the first Sm. Dessgeega will give back the Power Bomb used to get down. Shinecharge and use any enemy at the bottom to interrupt. Entrance condition: {
"comeInWithRMode": {}
}Requires: "h_speedDash"
{
"or": [
"h_CrystalFlashForReserveEnergy",
{
"and": [
"h_usePowerBomb",
"h_RModeCanRefillReserves",
{
"or": [
{
"resourceMissingAtMost": [
{
"type": "Missile",
"count": 0
}
]
},
{
"resourceMissingAtMost": [
{
"type": "PowerBomb",
"count": 1
}
]
}
]
},
{
"partialRefill": {
"type": "ReserveEnergy",
"limit": 20
}
}
]
}
]
}
"h_shinechargeMaxRunway"
{
"autoReserveTrigger": {
"maxReserveEnergy": 95
}
}
"canRModeSparkInterrupt"Clears obstacles: C, D |
|
Kill the Funes first, then the Sovas. Shinecharge at the bottom and use heat damage to interrupt. Entrance condition: {
"comeInWithRMode": {}
}Requires: {
"or": [
{
"and": [
{
"heatFrames": 30
},
"h_heatedCrystalFlashForReserveEnergy",
{
"heatFrames": 170
}
]
},
{
"and": [
"h_heatProof",
"h_RModeCanRefillReserves",
{
"enemyKill": {
"enemies": [
[
"Fune",
"Fune"
],
[
"Fune"
]
]
}
},
{
"partialRefill": {
"type": "ReserveEnergy",
"limit": 40
}
}
]
}
]
}
{
"enemyKill": {
"enemies": [
[
"Fune"
]
]
}
}
{
"or": [
{
"canShineCharge": {
"usedTiles": 12,
"openEnd": 0
}
},
{
"and": [
{
"doorUnlockedAtNode": 3
},
{
"canShineCharge": {
"usedTiles": 13,
"openEnd": 0
}
}
]
}
]
}
"h_heatTriggerRModeSparkInterrupt"
{
"heatFrames": 10
}Unlocks doors: {"nodeId":3,"types":["ammo"],"requires":[]} |
From: 2
Middle Right Door
To: 3
Bottom Right Door
Kill the Funes first, then the Sovas. Shinecharge at the bottom and use heat damage to interrupt. Entrance condition: {
"comeInWithRMode": {}
}Requires: {
"enemyKill": {
"enemies": [
[
"Fune"
]
]
}
}
{
"or": [
{
"and": [
"h_heatedCrystalFlashForReserveEnergy",
{
"heatFrames": 280
}
]
},
{
"and": [
"Morph",
"h_heatProof",
"h_RModeCanRefillReserves",
{
"enemyKill": {
"enemies": [
[
"Fune",
"Fune"
],
[
"Fune"
]
]
}
},
{
"partialRefill": {
"type": "ReserveEnergy",
"limit": 40
}
}
]
}
]
}
{
"or": [
{
"canShineCharge": {
"usedTiles": 12,
"openEnd": 0
}
},
{
"and": [
{
"doorUnlockedAtNode": 3
},
{
"canShineCharge": {
"usedTiles": 13,
"openEnd": 0
}
}
]
}
]
}
"h_heatTriggerRModeSparkInterrupt"
{
"heatFrames": 10
}Unlocks doors: {"nodeId":3,"types":["ammo"],"requires":[]} |
From: 3
Bottom Right Door
To: 3
Bottom Right Door
Kill the Funes first, then the Sovas. Shinecharge at the bottom and use heat damage to interrupt. Entrance condition: {
"comeInWithRMode": {}
}Requires: {
"enemyKill": {
"enemies": [
[
"Fune"
]
]
}
}
{
"or": [
"h_heatedCrystalFlashForReserveEnergy",
{
"and": [
"h_heatProof",
"h_RModeCanRefillReserves",
{
"enemyKill": {
"enemies": [
[
"Fune",
"Fune"
],
[
"Fune"
]
]
}
},
{
"partialRefill": {
"type": "ReserveEnergy",
"limit": 40
}
}
]
}
]
}
{
"or": [
{
"canShineCharge": {
"usedTiles": 12,
"openEnd": 0
}
},
{
"and": [
{
"doorUnlockedAtNode": 3
},
{
"canShineCharge": {
"usedTiles": 13,
"openEnd": 0
}
}
]
}
]
}
"h_heatTriggerRModeSparkInterrupt"
{
"heatFrames": 10
}Unlocks doors: {"nodeId":3,"types":["ammo"],"requires":[]} |
|
Requires: {
"or": [
"canTrivialMidAirMorph",
"h_useSpringBall",
{
"and": [
"h_bombThings",
{
"heatFrames": 80
}
]
}
]
}
{
"heatFrames": 270
}
{
"or": [
{
"lavaFrames": 70
},
{
"and": [
"Gravity",
"canDash",
{
"disableEquipment": "SpeedBooster"
},
{
"lavaFrames": 25
}
]
}
]
}
{
"or": [
{
"haveBlueSuit": {}
},
{
"enemyDamage": {
"enemy": "Boyon",
"type": "contact",
"hits": 1
}
},
{
"heatFrames": 30
}
]
}
{
"or": [
"canDash",
{
"heatFrames": 70
}
]
} |
From: 1
Left Door
To: 4
Central Junction
Crystal Flash, shinecharge, then use the acid to interrupt. Entrance condition: {
"comeInWithRMode": {}
}Requires: {
"or": [
"f_DefeatedCrocomire",
{
"obstaclesCleared": [
"f_DefeatedCrocomire"
]
}
]
}
"h_CrystalFlashForReserveEnergy"
"h_shinechargeMaxRunway"
{
"autoReserveTrigger": {}
}
"canRModeSparkInterrupt"
{
"acidFrames": 30
} |
From: 2
Top Door
To: 4
Central Junction
Crystal Flash after entering. If Crocomire is alive, run to the left to avoid hitting him with the Power Bomb. Use the acid or Crocmomire's swipe to interrupt. Crocomire will always swipe the first time it is brought on camera. Entrance condition: {
"comeInWithRMode": {},
"comesThroughToilet": "no"
}Requires: "h_CrystalFlashForReserveEnergy"
{
"or": [
{
"canShineCharge": {
"usedTiles": 31,
"openEnd": 0
}
},
{
"and": [
{
"or": [
"f_DefeatedCrocomire",
{
"obstaclesCleared": [
"f_DefeatedCrocomire"
]
}
]
},
"h_shinechargeMaxRunway"
]
}
]
}
{
"or": [
{
"autoReserveTrigger": {
"maxReserveEnergy": 65
}
},
{
"and": [
{
"or": [
"f_DefeatedCrocomire",
{
"obstaclesCleared": [
"f_DefeatedCrocomire"
]
}
]
},
{
"autoReserveTrigger": {}
},
{
"acidFrames": 30
}
]
}
]
}
"canRModeSparkInterrupt"Clears obstacles: door_2 |
From: 2
Top Door
To: 4
Central Junction
Farm for reserves and to clear enough runway to shinecharge. Interrupt from Crocomire's swipe or fireballs, or kill Crocomire and use the acid. Entrance condition: {
"comeInWithRMode": {},
"comesThroughToilet": "no"
}Requires: {
"not": "f_DefeatedCrocomire"
}
"canRiskPermanentLossOfAccess"
"canDodgeWhileShooting"
"canBePatient"
{
"or": [
{
"ammo": {
"type": "Missile",
"count": 30
}
},
{
"and": [
"canFarmWhileShooting",
{
"ammo": {
"type": "Missile",
"count": 2
}
},
{
"resourceCapacity": [
{
"type": "Missile",
"count": 10
}
]
}
]
},
{
"and": [
"Charge",
{
"disableEquipment": "Plasma"
}
]
}
]
}
{
"refill": [
"Energy"
]
}
"h_shinechargeMaxRunway"
{
"autoReserveTrigger": {
"maxReserveEnergy": 95
}
}
"canRModeSparkInterrupt"Clears obstacles: f_DefeatedCrocomire, door_2 Sets flags: f_DefeatedCrocomire |
From: 1
Left Door
To: 4
Center Platform Junction
From the right edge of the top stair, pause then press right and jump just before the pause fully triggers and when the water is low. Disable Spring Ball in order to get a large horizontal boost. Entrance condition: {
"comeInWithGMode": {
"mode": "any",
"morphed": true
}
}Requires: "h_artificialMorphSpringFling"
"canTrickyJump"
{
"disableEquipment": "HiJump"
} |
From: 1
Left Door
To: 4
Center Platform Junction
Cross the room while in indirect G-Mode and the gate will not be there. From the right edge of the top stair, pause then press right and jump just before the pause fully triggers and when the water is low. Disable Spring Ball in order to get a large horizontal boost. Entrance condition: {
"comeInWithGMode": {
"mode": "indirect",
"morphed": true
}
}Requires: "h_artificialMorphSpringFling"
"canTrickyJump"
{
"disableEquipment": "HiJump"
}Clears obstacles: B Dev note: FIXME: It is possible but difficult to cross either of the moats with Grapple before PLMs are overloaded, but not both of them. |
|
Morph at the right edge of the top stair, pause then press right and jump just before the pause fully triggers and when the water is low. Disable Spring Ball in order to get a large horizontal boost. Requires: "canSpringFling"
"canTrickyJump"
{
"disableEquipment": "HiJump"
} |
|
Requires: {
"or": [
"h_greenGateGlitch",
{
"obstaclesCleared": [
"A"
]
}
]
}Clears obstacles: A |
From: 1
Left Door
To: 5
Small Platforms Junction
Crystal Flash, or farm Mellas and use a Power Bomb. Run through the speed blocks and use a Mella or the acid to interrupt. Entrance condition: {
"comeInWithRMode": {}
}Requires: {
"or": [
"h_CrystalFlashForReserveEnergy",
{
"and": [
"h_RModeCanRefillReserves",
{
"resourceMissingAtMost": [
{
"type": "Missile",
"count": 0
}
]
},
{
"partialRefill": {
"type": "ReserveEnergy",
"limit": 20
}
},
"h_usePowerBomb"
]
}
]
}
"h_shinechargeMaxRunway"
{
"or": [
{
"autoReserveTrigger": {
"maxReserveEnergy": 95
}
},
{
"and": [
{
"autoReserveTrigger": {}
},
{
"acidFrames": 20
}
]
}
]
}
"canRModeSparkInterrupt"Clears obstacles: A, B |
From: 1
Left Door
To: 5
Small Platforms Junction
Get past the speed blocks and farm the Mellas. Shinecharge while running back and use a Mella to interrupt. Getting past the blocks without Morph requires either an Insane Short Charge or an Acid Shinespark. Entrance condition: {
"comeInWithRMode": {}
}Requires: {
"or": [
"Morph",
{
"getBlueSpeed": {
"usedTiles": 12,
"gentleDownTiles": 6,
"openEnd": 1
}
},
{
"and": [
{
"notable": "Acid Shinespark"
},
"Gravity",
"canSuitlessLavaDive",
"h_shinechargeMaxRunway",
{
"acidFrames": 120
},
{
"shinespark": {
"frames": 35
}
}
]
}
]
}
"h_RModeCanRefillReserves"
{
"resourceMissingAtMost": [
{
"type": "Missile",
"count": 0
}
]
}
{
"partialRefill": {
"type": "ReserveEnergy",
"limit": 20
}
}
{
"canShineCharge": {
"usedTiles": 17,
"openEnd": 0
}
}
{
"autoReserveTrigger": {
"maxReserveEnergy": 95
}
}
"canRModeSparkInterrupt"Clears obstacles: B Dev note: FIXME: The acid spark could benefit from farming a Ripper first instead of needing to end with 99 E and disableable tanks. It could also maybe be done with both suits and some farming luck. |
From: 2
Right Vertical Door
To: 5
Small Platforms Junction
Crystal Flash, or farm Mellas and use a Power Bomb. Run through the speed blocks and use a Mella or the acid to interrupt. Entrance condition: {
"comeInWithRMode": {},
"comesThroughToilet": "no"
}Requires: {
"or": [
"h_CrystalFlashForReserveEnergy",
{
"and": [
"h_RModeCanRefillReserves",
{
"resourceMissingAtMost": [
{
"type": "Missile",
"count": 0
}
]
},
{
"partialRefill": {
"type": "ReserveEnergy",
"limit": 20
}
},
"h_usePowerBomb"
]
}
]
}
"h_shinechargeMaxRunway"
{
"or": [
{
"autoReserveTrigger": {
"maxReserveEnergy": 95
}
},
{
"and": [
{
"autoReserveTrigger": {}
},
{
"acidFrames": 20
}
]
}
]
}
"canRModeSparkInterrupt"Clears obstacles: A, B |
From: 2
Right Vertical Door
To: 5
Small Platforms Junction
Farm the Mellas for energy, then run through the speed blocks, shinecharge, and use a Mella to interrupt. Entrance condition: {
"comeInWithRMode": {},
"comesThroughToilet": "no"
}Requires: "h_RModeCanRefillReserves"
{
"resourceMissingAtMost": [
{
"type": "Missile",
"count": 0
}
]
}
{
"partialRefill": {
"type": "ReserveEnergy",
"limit": 20
}
}
{
"canShineCharge": {
"usedTiles": 17,
"openEnd": 0
}
}
{
"autoReserveTrigger": {
"maxReserveEnergy": 95
}
}
"canRModeSparkInterrupt"Clears obstacles: B |
|
Requires: "canSuitlessLavaDive"
"Gravity"
{
"or": [
"canDash",
{
"and": [
{
"acidFrames": 70
},
{
"heatFrames": 100
}
]
}
]
}
{
"or": [
{
"and": [
{
"disableEquipment": "HiJump"
},
"HiJump",
{
"acidFrames": 75
},
{
"heatFrames": 230
}
]
},
{
"and": [
"canWallJump",
{
"acidFrames": 90
},
{
"heatFrames": 245
}
]
},
{
"and": [
"canSpringBallJumpMidAir",
{
"acidFrames": 75
},
{
"heatFrames": 230
}
]
},
{
"and": [
"canGravityJump",
{
"heatFrames": 190
},
{
"acidFrames": 40
},
{
"gravitylessAcidFrames": 35
},
{
"gravitylessHeatFrames": 45
}
]
}
]
}Dev note: FIXME: An IBJ option can be added back here. |
|
Beginning with Speed Booster unequipped, run and jump over the acid into an airball. Once Samus begins falling, equip Spring Ball and Speed Booster to safely land on the other side near the statue. Requires: "canSpringFling"
"canDisableEquipment"
"canSpeedyJump"
"canTrickyJump"
"canLateralMidAirMorph"
{
"heatFrames": 210
} |
From: 2
Bottom Right Door
To: 4
Junction Above Acid Plug, Without Acid
Entrance condition: {
"comeInWithRMode": {}
}Requires: "canRModeStandupClip"
"h_RModeCanRefillReserves"
"h_heatProof"
"Morph"
{
"or": [
"h_bombThings",
{
"haveBlueSuit": {}
}
]
}
{
"or": [
"HiJump",
"canWallJump",
"canSpringBallJumpMidAir",
"canDoubleBombJump"
]
}
{
"partialRefill": {
"type": "ReserveEnergy",
"limit": 100
}
}
{
"disableEquipment": "Varia"
}
{
"autoReserveTrigger": {
"implicitHeatFrames": "suitless"
}
}
{
"suitlessHeatFrames": 30
} |
From: 1
Left Door
To: 1
Left Door
Requires about 150-180 Reserve at R-Mode entry to be able to correctly time the Crystal Flash. The correct timing to place the power bomb is on taking 97 (53-83 energy left) energy worth of heat. The Power Bomb explosion kills all six Rippers near the door, placing their energy drops in easy reach to grab them and fill Reserve Energy. Run to the green gate and wait until 69 energy is left and start running. Shinecharge at the end of the runway, then use quick, speedy jumps back across the platforms towards the left door. You should be able to make it to the left high platform (2nd from the door) before you need to windup and interrupt. Shoot the door open and you can make it out. Entrance condition: {
"comeInWithRMode": {}
}Requires: {
"resourceAvailable": [
{
"type": "RegularEnergy",
"count": 150
}
]
}
{
"resourceAtMost": [
{
"type": "RegularEnergy",
"count": 180
}
]
}
{
"resourceMissingAtMost": [
{
"type": "Super",
"count": 0
}
]
}
{
"disableEquipment": "HiJump"
}
{
"heatFrames": 388
}
"h_heatedCrystalFlash"
{
"partialRefill": {
"type": "ReserveEnergy",
"limit": 30
}
}
{
"canShineCharge": {
"usedTiles": 18,
"openEnd": 0
}
}
"h_heatTriggerRModeSparkInterrupt"
"canTrickyJump"
{
"heatFrames": 92
}Clears obstacles: B Dev note: This strat makes a suitless CF with max E-Tanks viable without needing disable E-Tanks. |
|
With Crystal Flash the best option is to wait for the rippers to start going off screen. Then the two bottom ones will be destroyed by the light orb and drop Supers for opening the gate. With Screw Attack, you'll want to tag the top Ripper of the first pair to appear, then the three that come in behind them, and grab the second Ripper of the first pair on the way down from the jump. Then jump into the last Ripper on the way across to the platform, pausing to get its energy. You can also lay an immediate Power Bomb. Roll off of it (or time a morph/unmorph to avoid a bomb jump) and then collect the drops from the five supers that get hit. Jump past the last ripper on the way to the platform. The drops give a lot of Reserve if collected quickly - manually draw some of it to have enough energy to shinecharge. Open the gate and go back to the left side to start running right. If you have Varia, you can afford to spare a Ripper of choice and use it to interrupt. Do so close to the right door and the Ripper won't make it back in time to hit you again even with a 400-point Reserve fill. Otherwise, you will use a heat interrupt: shoot the door as you approach during the run and shinecharge before you reach it. With Varia you can afford to go back and use Power Bombs or Supers to farm any remaining Rippers, but Screw Attack will no longer destroy them while you have blue suit. Entrance condition: {
"comeInWithRMode": {}
}Requires: {
"or": [
{
"and": [
{
"heatFrames": 150
},
"h_heatedCrystalFlashForReserveEnergy",
{
"partialRefill": {
"type": "Super",
"limit": 1
}
}
]
},
{
"and": [
"h_RModeCanRefillReserves",
"ScrewAttack",
{
"heatFramesWithEnergyDrops": {
"frames": 350,
"drops": [
{
"enemy": "Ripper 2 (red)",
"count": 4
}
]
}
},
{
"or": [
{
"and": [
"h_heatProof",
{
"resourceMissingAtMost": [
{
"type": "Super",
"count": 4
}
]
}
]
},
{
"resourceMissingAtMost": [
{
"type": "Super",
"count": 0
}
]
}
]
},
{
"partialRefill": {
"type": "ReserveEnergy",
"limit": 20
}
}
]
},
{
"and": [
"h_RModeCanRefillReserves",
{
"enemyKill": {
"enemies": [
[
"Ripper 2 (red)",
"Ripper 2 (red)"
]
],
"explicitWeapons": [
"PowerBomb"
]
}
},
{
"heatFrames": 236
},
{
"or": [
{
"and": [
"h_heatProof",
{
"resourceMissingAtMost": [
{
"type": "Super",
"count": 4
}
]
}
]
},
{
"resourceMissingAtMost": [
{
"type": "Super",
"count": 0
}
]
}
]
},
{
"partialRefill": {
"type": "ReserveEnergy",
"limit": 50
}
}
]
}
]
}
{
"ammo": {
"type": "Super",
"count": 1
}
}
{
"heatFrames": 144
}
{
"canShineCharge": {
"usedTiles": 28,
"openEnd": 0
}
}
{
"or": [
{
"and": [
"h_heatProof",
{
"autoReserveTrigger": {}
},
"canRModeSparkInterrupt"
]
},
"h_heatTriggerRModeSparkInterrupt"
]
}
{
"heatFrames": 10
}Clears obstacles: A, B |
From: 1
Left Door
To: 3
Junction Left of Green Gate
With Crystal Flash the best option is to wait for the rippers to start going off screen. Then the two bottom ones will be destroyed by the light orb and drop Supers for opening the gate. With Screw Attack, you'll want to tag the top Ripper of the first pair to appear, then the three that come in behind them, and grab the second Ripper of the first pair on the way down from the jump. Then jump into the last Ripper on the way across to the platform, pausing to get its energy. You can also lay an immediate Power Bomb. Roll off of it (or time a morph/unmorph to avoid a bomb jump) and then collect the drops from the five supers that get hit. Jump past the last ripper on the way to the platform. The drops give a lot of Reserve if collected quickly - manually draw some of it to have enough energy to shinecharge. With Varia, you can spare one Ripper of your choice. For high reserve after Crystal Flash, the best is any of the bottom three as they have the longest cycle. Run left to right and shinecharge near the gate, and take the interrupt hit with the Ripper moving right. Otherwise, use a heat interrupt, and run right to left so that you're closer to the left door for less energy used to escape. If any rippers remain, you can farm them with Power Bombs (or Supers at low health) but Screw Attack will no longer destroy them while you have blue suit. Entrance condition: {
"comeInWithRMode": {}
}Requires: {
"or": [
{
"and": [
{
"heatFrames": 150
},
"h_heatedCrystalFlashForReserveEnergy",
{
"partialRefill": {
"type": "Super",
"limit": 1
}
}
]
},
{
"and": [
"h_RModeCanRefillReserves",
"ScrewAttack",
{
"heatFramesWithEnergyDrops": {
"frames": 350,
"drops": [
{
"enemy": "Ripper 2 (red)",
"count": 4
}
]
}
},
{
"or": [
{
"and": [
"h_heatProof",
{
"resourceMissingAtMost": [
{
"type": "Super",
"count": 4
}
]
}
]
},
{
"resourceMissingAtMost": [
{
"type": "Super",
"count": 0
}
]
}
]
},
{
"partialRefill": {
"type": "ReserveEnergy",
"limit": 20
}
}
]
},
{
"and": [
"h_RModeCanRefillReserves",
{
"enemyKill": {
"enemies": [
[
"Ripper 2 (red)",
"Ripper 2 (red)"
]
],
"explicitWeapons": [
"PowerBomb"
]
}
},
{
"heatFrames": 236
},
{
"or": [
{
"and": [
"h_heatProof",
{
"resourceMissingAtMost": [
{
"type": "Super",
"count": 4
}
]
}
]
},
{
"resourceMissingAtMost": [
{
"type": "Super",
"count": 0
}
]
}
]
},
{
"partialRefill": {
"type": "ReserveEnergy",
"limit": 50
}
}
]
}
]
}
{
"heatFrames": 64
}
{
"canShineCharge": {
"usedTiles": 18,
"openEnd": 0
}
}
{
"or": [
{
"autoReserveTrigger": {
"maxReserveEnergy": 300
}
},
{
"and": [
{
"autoReserveTrigger": {}
},
{
"enemyDamage": {
"enemy": "Ripper 2 (red)",
"type": "contact",
"hits": 1
}
}
]
}
]
}
{
"or": [
{
"and": [
"h_heatProof",
{
"or": [
{
"autoReserveTrigger": {
"maxReserveEnergy": 300
}
},
{
"and": [
{
"autoReserveTrigger": {}
},
{
"enemyDamage": {
"enemy": "Ripper 2 (red)",
"type": "contact",
"hits": 1
}
}
]
}
]
},
"canRModeSparkInterrupt"
]
},
"h_heatTriggerRModeSparkInterrupt"
]
}Clears obstacles: B |
|
Requires: {
"or": [
"h_heatedGreenGateGlitch",
{
"obstaclesCleared": [
"A"
]
}
]
}
{
"enemyDamage": {
"enemy": "Ripper 2 (red)",
"type": "contact",
"hits": 2
}
}Exit condition: {
"leaveWithRunway": {
"length": 29,
"openEnd": 1
}
} |
|
You can Crystal Flash first, then open the gate, dodge the bottom most rippers that come across the platform, and pick up their Super drops when they hit the light orb. Alternatively, open the gate first, farm the bottom two Rippers with Power Bombs or Screw Attack to get your Supers back and Crystal Flash afterwards. The runway is now clear to shinecharge. Alternatively, you can farm with Screw Attack or Power Bombs. Kill the bottom two Rippers first, then the one bouncing between platforms. Keep the third Ripper from the top alive for the best interrupt. With high reserve energy, take the interrupt close to the right door and with the Ripper moving right - it will not come back in time to hit you again. Once you have blue suit, you cannot kill any more Rippers with Screw Attack, but you are still invulnerable to contact hits. Entrance condition: {
"comeInWithRMode": {}
}Requires: "h_heatedGreenGateGlitch"
{
"or": [
{
"and": [
{
"or": [
{
"resourceAvailable": [
{
"type": "Super",
"count": 10
}
]
},
{
"and": [
{
"resourceAvailable": [
{
"type": "Super",
"count": 8
}
]
},
{
"resourceAvailable": [
{
"type": "Energy",
"count": 51
}
]
},
{
"or": [
"ScrewAttack",
{
"enemyKill": {
"enemies": [
[
"Ripper 2 (red)",
"Ripper 2 (red)"
]
],
"explicitWeapons": [
"PowerBomb"
]
}
}
]
},
{
"heatFrames": 600
},
{
"partialRefill": {
"type": "Super",
"limit": 10
}
}
]
}
]
},
"h_heatedCrystalFlashForReserveEnergy"
]
},
{
"and": [
{
"or": [
"ScrewAttack",
{
"enemyKill": {
"enemies": [
[
"Ripper 2 (red)",
"Ripper 2 (red)"
],
[
"Ripper 2 (red)"
]
],
"explicitWeapons": [
"PowerBomb"
]
}
}
]
},
"h_heatProof",
"h_RModeCanRefillReserves",
{
"resourceMissingAtMost": [
{
"type": "Super",
"count": 2
}
]
},
{
"partialRefill": {
"type": "ReserveEnergy",
"limit": 60
}
}
]
},
{
"and": [
{
"or": [
"ScrewAttack",
{
"enemyKill": {
"enemies": [
[
"Ripper 2 (red)"
]
],
"explicitWeapons": [
"PowerBomb"
]
}
}
]
},
"h_heatProof",
"h_RModeCanRefillReserves",
{
"resourceMissingAtMost": [
{
"type": "Super",
"count": 4
}
]
},
{
"partialRefill": {
"type": "ReserveEnergy",
"limit": 20
}
}
]
}
]
}
{
"canShineCharge": {
"usedTiles": 28,
"openEnd": 0
}
}
{
"autoReserveTrigger": {}
}
{
"or": [
{
"and": [
"h_heatProof",
{
"autoReserveTrigger": {}
},
"canRModeSparkInterrupt"
]
},
"h_heatTriggerRModeSparkInterrupt"
]
}Clears obstacles: A, B |
|
Requires: {
"or": [
"h_heatedGreenGateGlitch",
{
"obstaclesCleared": [
"A"
]
}
]
}
{
"heatFrames": 50
}
{
"or": [
"canDash",
{
"heatFrames": 15
}
]
}Clears obstacles: A Dev note: FIXME: A strat could be added that runs into the room and shoots directly at the gate, instead of stopping in front of it. |
From: 1
Left Door
To: 2
Right Door
At any point during the fight, use a Crystal Flash. Then damage down enough to survive one hit. Run into and through GT, turn around, and start down the runway. Get shinecharged, come back and interrupt using whatever attack pattern is ongoing. Then finish the fight. Blue suit will give invulnerability but otherwise does not help to defeat Golden Torizo. Entrance condition: {
"comeInWithRMode": {}
}Requires: "h_heatProof"
{
"not": "f_DefeatedGoldenTorizo"
}
"canRiskPermanentLossOfAccess"
{
"notable": "Crystal Flash During Fight"
}
"h_heatedCrystalFlashForReserveEnergy"
{
"enemyDamage": {
"enemy": "Golden Torizo",
"type": "contact",
"hits": 1
}
}
"canUseIFrames"
{
"canShineCharge": {
"usedTiles": 28,
"openEnd": 0
}
}
{
"autoReserveTrigger": {
"maxReserveEnergy": 95
}
}
"canRModeSparkInterrupt"Clears obstacles: f_DefeatedGoldenTorizo Sets flags: f_DefeatedGoldenTorizo |
|
Crystal Flash, then drop into GT's arena for the runway. With no enemies to take damage from, you must interrupt using heat damage. Entrance condition: {
"comeInWithRMode": {}
}Requires: {
"or": [
"f_DefeatedGoldenTorizo",
{
"obstaclesCleared": [
"f_DefeatedGoldenTorizo"
]
}
]
}
"h_heatedCrystalFlashForReserveEnergy"
{
"heatFrames": 300
}
{
"canShineCharge": {
"usedTiles": 28,
"openEnd": 0
}
}
"h_heatTriggerRModeSparkInterrupt" |
From: 2
Right Door
To: 2
Right Door
At any point during the fight, use a Crystal Flash. Then damage down enough to survive one hit. Run into and through GT, turn around, and start down the runway. Get shinecharged, come back and interrupt using whatever attack pattern is ongoing. Then finish the fight. Blue suit will give invulnerability but otherwise does not help to defeat Golden Torizo. Entrance condition: {
"comeInWithRMode": {}
}Requires: "h_heatProof"
{
"not": "f_DefeatedGoldenTorizo"
}
"canRiskPermanentLossOfAccess"
{
"notable": "Crystal Flash During Fight"
}
"h_heatedCrystalFlashForReserveEnergy"
{
"enemyDamage": {
"enemy": "Golden Torizo",
"type": "contact",
"hits": 1
}
}
"canUseIFrames"
{
"canShineCharge": {
"usedTiles": 28,
"openEnd": 0
}
}
{
"autoReserveTrigger": {
"maxReserveEnergy": 95
}
}
"canRModeSparkInterrupt"Clears obstacles: f_DefeatedGoldenTorizo, door_2 Sets flags: f_DefeatedGoldenTorizo Dev note: FIXME: Evaluate heated fight options. |
|
Crystal Flash and use the runway. With no enemies to take damage from, you must interrupt using heat damage. Entrance condition: {
"comeInWithRMode": {}
}Requires: {
"or": [
"f_DefeatedGoldenTorizo",
{
"obstaclesCleared": [
"f_DefeatedGoldenTorizo"
]
}
]
}
"h_heatedCrystalFlashForReserveEnergy"
{
"heatFrames": 300
}
{
"canShineCharge": {
"usedTiles": 28,
"openEnd": 0
}
}
"h_heatTriggerRModeSparkInterrupt"Clears obstacles: door_2 |
From: 1
Left Door
To: 2
Right Door
Cross the room while avoiding the pirate's stationary invisible lasers. On entry, fall to the right to land past the first pirate, then run and jump over the next pirate and continue to the top door. It is possible but precise to cross the room without any items or a wall jump by jumping from the slightly raised platform on the right. At the top, wait on the left platform to the pirate's right side - shoot to make it face Samus - and let it spawn invisible lasers to overload them. This will prevent the runway pirate from being able to create any, making it easy to kill while keeping the runway clear. Crystal Flash, drain in the acid if needed, then shinecharge. Stand in the acid, at the shallowest point. Crouch and jump into windup at low energy to interrupt. Buffer X-Ray and hold right during reserve refill and then leave the room. Entrance condition: {
"comeInWithGMode": {
"mode": "direct",
"morphed": false
}
}Requires: "canDash"
{
"or": [
"canWallJump",
"HiJump",
"SpaceJump",
"canTrickySpringBallJump",
"canInsaneJump",
{
"and": [
"Charge",
"canTrickyUseFrozenEnemies",
"Plasma",
"canTrickyJump"
]
}
]
}
{
"disableEquipment": "ETank"
}
"h_CrystalFlashForReserveEnergy"
{
"or": [
{
"enemyKill": {
"enemies": [
[
"Yellow Space Pirate (standing)"
]
]
}
},
{
"getBlueSpeed": {
"usedTiles": 17,
"gentleDownTiles": 6,
"openEnd": 0
}
}
]
}
{
"canShineCharge": {
"usedTiles": 19,
"gentleDownTiles": 6,
"openEnd": 1
}
}
{
"acidFrames": 4
}
{
"or": [
{
"and": [
"canReserveTriggerBufferXRay",
{
"autoReserveTrigger": {
"implicitHeatFrames": "no"
}
}
]
},
{
"autoReserveTrigger": {}
}
]
}
"canRModeSparkInterrupt"
{
"heatFrames": 116
} |
From: 2
Right Door
To: 2
Right Door
If you're fast, you can find enough time to kill a Yellow Pirate on the way up: Supers, Screw Attack, or charged Microwave are fast enough to do this. Either way, kill the pirate at the top, Crystal Flash if you need it, and get the shinecharge. If you're heat-proof, wait for the acid to finish rising and you can interrupt in the small bit that reaches the runway. Otherwise, use heat to interrupt. Requires: {
"obstaclesCleared": [
"R-Mode"
]
}
{
"obstaclesCleared": [
"A"
]
}
{
"or": [
"h_heatedCrystalFlashForReserveEnergy",
{
"and": [
{
"or": [
"ScrewAttack",
{
"and": [
"Charge",
"Plasma",
"canXRayWaitForIFrames"
]
},
{
"enemyKill": {
"enemies": [
[
"Yellow Space Pirate (standing)"
]
],
"explicitWeapons": [
"Super"
]
}
}
]
},
"h_RModeCanRefillReserves",
{
"resourceMissingAtMost": [
{
"type": "Missile",
"count": 0
}
]
},
{
"partialRefill": {
"type": "ReserveEnergy",
"limit": 20
}
}
]
}
]
}
{
"enemyKill": {
"enemies": [
[
"Yellow Space Pirate (standing)"
]
]
}
}
{
"canShineCharge": {
"usedTiles": 20,
"gentleDownTiles": 6,
"openEnd": 1
}
}
{
"or": [
"h_heatTriggerRModeSparkInterrupt",
{
"and": [
"h_heatProof",
{
"autoReserveTrigger": {}
},
"canRModeSparkInterrupt",
{
"acidFrames": 32
}
]
}
]
}Resets obstacles: R-Mode, A |
From: 2
Right Door
To: 2
Right Door
Kill the runway pirate and then Crystal Flash. Jump while shooting to prevent any invisible lasers from being created, or use a pause abuse and minimal reserve refill to clear them. Drain in the acid to low energy if needed, then shinecharge: wait for the high peak to descend before running. Windup just before the acid touches Samus to shinespark interrupt using the acid. Buffer X-Ray and hold right during reserve refill and then leave the room. Entrance condition: {
"comeInWithGMode": {
"mode": "direct",
"morphed": false
}
}Requires: {
"disableEquipment": "ETank"
}
"h_CrystalFlashForReserveEnergy"
{
"or": [
{
"enemyKill": {
"enemies": [
[
"Yellow Space Pirate (standing)"
]
],
"excludedWeapons": [
"Bombs"
]
}
},
{
"and": [
{
"getBlueSpeed": {
"usedTiles": 18,
"gentleDownTiles": 6,
"openEnd": 0
}
},
"canComplexGMode"
]
}
]
}
{
"canShineCharge": {
"usedTiles": 20,
"gentleDownTiles": 6,
"openEnd": 1
}
}
{
"acidFrames": 4
}
{
"or": [
{
"and": [
"canReserveTriggerBufferXRay",
{
"autoReserveTrigger": {
"implicitHeatFrames": "no"
}
}
]
},
{
"autoReserveTrigger": {}
}
]
}
"canRModeSparkInterrupt"
{
"heatFrames": 116
} |
From: 2
Right Door
To: 2
Right Door
Kill the runway pirate for a drop and Crystal Flash if needed. To interrupt, you can either use heat, or stand in the acid at the very end of the runway. Acid damage does not accumulate during reserve trigger as heat does, so escape quickly to minimize exposure. Entrance condition: {
"comeInWithRMode": {}
}Requires: {
"or": [
"h_heatedCrystalFlashForReserveEnergy",
{
"and": [
"h_RModeCanRefillReserves",
{
"enemyKill": {
"enemies": [
[
"Yellow Space Pirate (standing)"
]
]
}
},
{
"resourceMissingAtMost": [
{
"type": "Missile",
"count": 0
}
]
},
{
"partialRefill": {
"type": "ReserveEnergy",
"limit": 20
}
}
]
}
]
}
{
"canShineCharge": {
"usedTiles": 20,
"gentleDownTiles": 6,
"openEnd": 1
}
}
{
"or": [
"h_heatTriggerRModeSparkInterrupt",
{
"and": [
{
"autoReserveTrigger": {}
},
"canRModeSparkInterrupt",
{
"acidFrames": 32
},
{
"heatFrames": 32
}
]
}
]
} |
From: 1
Top Left Door
To: 1
Top Left Door
Kill the bottom standing pirate. Shinecharge over the PB blocks and then jump into a wall pirate shot to interrupt. Entrance condition: {
"comeInWithRMode": {}
}Requires: "h_heatProof"
"h_RModeCanRefillReserves"
"canDodgeWhileShooting"
{
"or": [
{
"enemyKill": {
"enemies": [
[
"Yellow Space Pirate (standing)",
"Yellow Space Pirate (wall)",
"Yellow Space Pirate (wall)"
]
],
"explicitWeapons": [
"ScrewAttack",
"Charge+Plasma",
"Charge+Ice+Wave+Spazer",
"Missile",
"Super"
]
}
},
{
"and": [
{
"enemyKill": {
"enemies": [
[
"Yellow Space Pirate (standing)",
"Yellow Space Pirate (wall)",
"Yellow Space Pirate (wall)"
]
],
"explicitWeapons": [
"Charge"
]
}
},
"canBePatient"
]
}
]
}
{
"or": [
{
"resourceMissingAtMost": [
{
"type": "Missile",
"count": 0
}
]
},
"canBeLucky"
]
}
{
"partialRefill": {
"type": "ReserveEnergy",
"limit": 20
}
}
{
"or": [
{
"canShineCharge": {
"usedTiles": 12,
"openEnd": 0
}
},
{
"and": [
{
"doorUnlockedAtNode": 1
},
{
"canShineCharge": {
"usedTiles": 13,
"openEnd": 0
}
}
]
}
]
}
{
"autoReserveTrigger": {
"maxReserveEnergy": 95
}
}
"canRModeSparkInterrupt"Unlocks doors: {"nodeId":1,"types":["missiles","super"],"requires":[]}
{"nodeId":1,"types":["powerbomb"],"requires":["never"]} |
|
Kill the pirates to get them out of the way before using a Crystal Flash on the floating platform to open the bomb barrier. Alternatively, farm them for energy and use a Power Bomb on the floating platform. Shinecharge at the bottom runway and then jump into a Viola to interrupt. For power bomb pirate kill: interrupt the standing pirate with a shot then jump and place the power bomb low to hit all three pirates. Repeat three times. For slow charge beam: interrupt with a shot, then crouch and fire charged shots. Jump when the wall pirate approaches to make it jump to the other wall. Entrance condition: {
"comeInWithRMode": {}
}Requires: "h_heatProof"
{
"or": [
{
"and": [
{
"or": [
{
"enemyKill": {
"enemies": [
[
"Yellow Space Pirate (standing)",
"Yellow Space Pirate (wall)",
"Yellow Space Pirate (wall)"
]
],
"explicitWeapons": [
"ScrewAttack",
"Charge+Plasma",
"Charge+Ice+Wave+Spazer",
"Missile",
"Super"
]
}
},
{
"and": [
{
"enemyKill": {
"enemies": [
[
"Yellow Space Pirate (standing)",
"Yellow Space Pirate (wall)",
"Yellow Space Pirate (wall)"
]
],
"explicitWeapons": [
"Charge"
]
}
},
"canBePatient"
]
},
"h_usePowerBomb"
]
},
"h_heatedCrystalFlashForReserveEnergy"
]
},
{
"and": [
"h_heatProof",
"h_RModeCanRefillReserves",
"canDodgeWhileShooting",
{
"or": [
{
"enemyKill": {
"enemies": [
[
"Yellow Space Pirate (standing)",
"Yellow Space Pirate (wall)",
"Yellow Space Pirate (wall)"
]
],
"explicitWeapons": [
"ScrewAttack",
"Charge+Plasma",
"Charge+Ice+Wave+Spazer",
"Missile",
"Super"
]
}
},
{
"and": [
{
"enemyKill": {
"enemies": [
[
"Yellow Space Pirate (standing)",
"Yellow Space Pirate (wall)",
"Yellow Space Pirate (wall)"
]
],
"explicitWeapons": [
"Charge"
]
}
},
"canBePatient"
]
},
{
"and": [
{
"enemyKill": {
"enemies": [
[
"Yellow Space Pirate (standing)",
"Yellow Space Pirate (wall)",
"Yellow Space Pirate (wall)"
]
],
"explicitWeapons": [
"PowerBomb"
]
}
},
"canTrickyDodgeEnemies"
]
}
]
},
{
"or": [
{
"resourceMissingAtMost": [
{
"type": "Missile",
"count": 0
}
]
},
"canBeLucky"
]
},
"h_usePowerBomb",
{
"partialRefill": {
"type": "ReserveEnergy",
"limit": 20
}
}
]
}
]
}
{
"or": [
{
"canShineCharge": {
"usedTiles": 12,
"gentleUpTiles": 2,
"gentleDownTiles": 2,
"openEnd": 0
}
},
{
"and": [
{
"or": [
{
"doorUnlockedAtNode": 2
},
{
"doorUnlockedAtNode": 3
}
]
},
{
"canShineCharge": {
"usedTiles": 13,
"gentleUpTiles": 2,
"gentleDownTiles": 2,
"openEnd": 0
}
}
]
},
{
"and": [
{
"doorUnlockedAtNode": 2
},
{
"doorUnlockedAtNode": 3
},
{
"canShineCharge": {
"usedTiles": 14,
"gentleUpTiles": 2,
"gentleDownTiles": 2,
"openEnd": 0
}
}
]
}
]
}
{
"autoReserveTrigger": {}
}
"canRModeSparkInterrupt"Clears obstacles: A Unlocks doors: {"nodeId":2,"types":["ammo"],"requires":[]}
{"nodeId":3,"types":["ammo"],"requires":[]} |
From: 1
Top Left Door
To: 6
R-Mode, Bottom Junction
Enter G-Mode with a full reserve tank. Wait for the wall pirate to jump on Samus to regain mobility and enter artificial morph. Lay a power bomb on top of the second pit from the left, wait for it to explode, then unmorph, activate X-Ray and hold until the beam reaches full width to exit G-Mode and remain in R-Mode. Samus will fall into the pit and avoid getting hit by the pirate lasers. Use jump shots or Screw Attack to kill the pirate safely. Shinecharge at the bottom runway and use heat damage to interrupt. Entrance condition: {
"comeInWithGMode": {
"mode": "direct",
"morphed": true,
"mobility": "immobile"
}
}Requires: "h_heatProof"
{
"disableEquipment": "ETank"
}
{
"resourceAvailable": [
{
"type": "RegularEnergy",
"count": 99
}
]
}
"h_artificialMorphPowerBomb"
{
"enemyKill": {
"enemies": [
[
"Yellow Space Pirate (standing)"
]
],
"excludedWeapons": [
"Bombs"
]
}
}
{
"or": [
{
"resourceMissingAtMost": [
{
"type": "Missile",
"count": 0
}
]
},
"canBeLucky"
]
}
{
"partialRefill": {
"type": "ReserveEnergy",
"limit": 5
}
}Clears obstacles: A |
From: 1
Top Left Door
To: 6
R-Mode, Bottom Junction
Enter G-Mode with a full reserve tank. Wait for the wall pirate to jump on Samus to regain mobility and enter artificial morph. While the pirate is still near the wall, use bomb boosts to trigger the pirate to attempt to shoot and then turn right. Repeat until shots are overloaded, which is after the pirate shoots at least 6 times. Damage the pirate with bombs: between 17 and 23 total bomb hits. If it gets too close to the door, use a bomb boost to force it to walk back to the right. Once enough bombs have hit, use one more bomb boost to force the pirate against the right wall. Get close, lay a power bomb, then unmorph and remain crouched. Immediately activate X-Ray and hold until the beam is at full width to exit G-Mode and remain in R-Mode. The Power Bomb should finish off the pirate - collect the drop. Shinecharge at the bottom runway and use heat damage to interrupt. Entrance condition: {
"comeInWithGMode": {
"mode": "direct",
"morphed": true,
"mobility": "immobile"
}
}Requires: "h_heatProof"
{
"disableEquipment": "ETank"
}
{
"resourceAvailable": [
{
"type": "RegularEnergy",
"count": 99
}
]
}
"h_artificialMorphBombs"
"h_artificialMorphPowerBomb"
"canComplexGMode"
{
"or": [
{
"resourceMissingAtMost": [
{
"type": "Missile",
"count": 0
}
]
},
"canBeLucky"
]
}
{
"partialRefill": {
"type": "ReserveEnergy",
"limit": 5
}
}Clears obstacles: A |
From: 1
Top Left Door
To: 6
R-Mode, Bottom Junction
Enter G-Mode with a full reserve tank. Wait for the wall pirate to jump on Samus to regain mobility and enter artificial morph. Lay three power bombs to kill the standing pirate. Avoid being boosted by the powerbombs to prevent excess shots from the wall pirate. Go all the way to the right and unmorph, then activate and hold X-Ray until the beam is at full width to exit G-Mode and remain in R-Mode. Release X-Ray and Samus will fall into the pit without getting hit by the pirate lasers. Pick up energy drops and drop to the bottom section. Shinecharge at the bottom runway and use heat damage to interrupt. Entrance condition: {
"comeInWithGMode": {
"mode": "direct",
"morphed": true,
"mobility": "immobile"
}
}Requires: "h_heatProof"
{
"disableEquipment": "ETank"
}
{
"resourceAvailable": [
{
"type": "RegularEnergy",
"count": 99
}
]
}
"h_artificialMorphPowerBomb"
{
"ammo": {
"type": "PowerBomb",
"count": 2
}
}
{
"or": [
{
"resourceMissingAtMost": [
{
"type": "Missile",
"count": 0
}
]
},
"canBeLucky"
]
}
{
"partialRefill": {
"type": "ReserveEnergy",
"limit": 5
}
}Clears obstacles: A |
From: 1
Top Left Door
To: 6
R-Mode, Bottom Junction
Enter G-Mode with a full reserve tank. Wait for the wall pirate to jump on Samus to regain mobility and enter artificial morph. From on top of the second pit from the left, perform a simple bomb boost or springball and lay a powerbomb at the top of the jump. After it explodes, activate and hold X-Ray until the beam is at full width to exit G-Mode and remain in R-Mode. Samus will fall into the pit and avoid the lasers. Jump out and down to the bottom where the Violas are still alive. Kill one, collect its power bomb drop, then kill the other for energy. Shinecharge at the bottom runway and use heat damage to interrupt. Entrance condition: {
"comeInWithGMode": {
"mode": "direct",
"morphed": true,
"mobility": "immobile"
}
}Requires: "h_heatProof"
{
"disableEquipment": "ETank"
}
{
"resourceAvailable": [
{
"type": "RegularEnergy",
"count": 99
}
]
}
{
"or": [
"h_artificialMorphSpringBall",
"h_artificialMorphBombs"
]
}
{
"resourceMissingAtMost": [
{
"type": "PowerBomb",
"count": 0
}
]
}
"h_artificialMorphPowerBomb"
{
"refill": [
"PowerBomb"
]
}
{
"partialRefill": {
"type": "ReserveEnergy",
"limit": 5
}
}Clears obstacles: A |
From: 2
Bottom Left Door
To: 5
Bottom Junction
Crystal Flash upon entry. Shinecharge along the bottom and use heat damage to interrupt. Entrance condition: {
"comeInWithRMode": {}
}Requires: "h_heatProof"
"h_heatedCrystalFlashForReserveEnergy"
{
"or": [
{
"canShineCharge": {
"usedTiles": 12,
"gentleUpTiles": 2,
"gentleDownTiles": 2,
"openEnd": 0
}
},
{
"and": [
{
"or": [
{
"doorUnlockedAtNode": 2
},
{
"doorUnlockedAtNode": 3
}
]
},
{
"canShineCharge": {
"usedTiles": 13,
"gentleUpTiles": 2,
"gentleDownTiles": 2,
"openEnd": 0
}
}
]
},
{
"and": [
{
"doorUnlockedAtNode": 2
},
{
"doorUnlockedAtNode": 3
},
{
"canShineCharge": {
"usedTiles": 14,
"gentleUpTiles": 2,
"gentleDownTiles": 2,
"openEnd": 0
}
}
]
}
]
}
"h_heatTriggerRModeSparkInterrupt"Unlocks doors: {"nodeId":2,"types":["ammo"],"requires":[]}
{"nodeId":3,"types":["ammo"],"requires":[]} |
From: 2
Bottom Left Door
To: 5
Bottom Junction
Entrance condition: {
"comeInWithRMode": {}
}Requires: "h_heatProof"
"h_RModeCanRefillReserves"
{
"resourceMissingAtMost": [
{
"type": "PowerBomb",
"count": 0
}
]
}
{
"partialRefill": {
"type": "ReserveEnergy",
"limit": 10
}
}
{
"or": [
{
"canShineCharge": {
"usedTiles": 12,
"gentleUpTiles": 2,
"gentleDownTiles": 2,
"openEnd": 0
}
},
{
"and": [
{
"or": [
{
"doorUnlockedAtNode": 2
},
{
"doorUnlockedAtNode": 3
}
]
},
{
"canShineCharge": {
"usedTiles": 13,
"gentleUpTiles": 2,
"gentleDownTiles": 2,
"openEnd": 0
}
}
]
},
{
"and": [
{
"doorUnlockedAtNode": 2
},
{
"doorUnlockedAtNode": 3
},
{
"canShineCharge": {
"usedTiles": 14,
"gentleUpTiles": 2,
"gentleDownTiles": 2,
"openEnd": 0
}
}
]
}
]
}
{
"autoReserveTrigger": {}
}
"canRModeSparkInterrupt"Unlocks doors: {"nodeId":2,"types":["ammo"],"requires":[]}
{"nodeId":3,"types":["ammo"],"requires":[]} |
From: 3
Bottom Right Door
To: 5
Bottom Junction
Crystal Flash upon entry. Shinecharge along the bottom and use heat damage to interrupt. Entrance condition: {
"comeInWithRMode": {}
}Requires: "h_heatProof"
"h_heatedCrystalFlashForReserveEnergy"
{
"or": [
{
"canShineCharge": {
"usedTiles": 12,
"gentleUpTiles": 2,
"gentleDownTiles": 2,
"openEnd": 0
}
},
{
"and": [
{
"or": [
{
"doorUnlockedAtNode": 2
},
{
"doorUnlockedAtNode": 3
}
]
},
{
"canShineCharge": {
"usedTiles": 13,
"gentleUpTiles": 2,
"gentleDownTiles": 2,
"openEnd": 0
}
}
]
},
{
"and": [
{
"doorUnlockedAtNode": 2
},
{
"doorUnlockedAtNode": 3
},
{
"canShineCharge": {
"usedTiles": 14,
"gentleUpTiles": 2,
"gentleDownTiles": 2,
"openEnd": 0
}
}
]
}
]
}
"h_heatTriggerRModeSparkInterrupt"Unlocks doors: {"nodeId":2,"types":["ammo"],"requires":[]}
{"nodeId":3,"types":["ammo"],"requires":[]} |
From: 3
Bottom Right Door
To: 5
Bottom Junction
Farm one Viola and shinecharge. Use the other to interrupt. Entrance condition: {
"comeInWithRMode": {}
}Requires: "h_heatProof"
"h_RModeCanRefillReserves"
{
"resourceMissingAtMost": [
{
"type": "PowerBomb",
"count": 0
}
]
}
{
"partialRefill": {
"type": "ReserveEnergy",
"limit": 10
}
}
{
"or": [
{
"canShineCharge": {
"usedTiles": 12,
"gentleUpTiles": 2,
"gentleDownTiles": 2,
"openEnd": 0
}
},
{
"and": [
{
"or": [
{
"doorUnlockedAtNode": 2
},
{
"doorUnlockedAtNode": 3
}
]
},
{
"canShineCharge": {
"usedTiles": 13,
"gentleUpTiles": 2,
"gentleDownTiles": 2,
"openEnd": 0
}
}
]
},
{
"and": [
{
"doorUnlockedAtNode": 2
},
{
"doorUnlockedAtNode": 3
},
{
"canShineCharge": {
"usedTiles": 14,
"gentleUpTiles": 2,
"gentleDownTiles": 2,
"openEnd": 0
}
}
]
}
]
}
{
"autoReserveTrigger": {}
}
"canRModeSparkInterrupt"Unlocks doors: {"nodeId":2,"types":["ammo"],"requires":[]}
{"nodeId":3,"types":["ammo"],"requires":[]} |
From: 4
Top Right Door
To: 1
Top Left Door
Avoid the wall pirate while falling in. Kill the bottom standing pirate. Shinecharge over the PB blocks and then jump into a wall pirate shot to interrupt. Entrance condition: {
"comeInWithRMode": {}
}Requires: "h_heatProof"
"canCarefulJump"
{
"enemyKill": {
"enemies": [
[
"Yellow Space Pirate (standing)",
"Yellow Space Pirate (wall)",
"Yellow Space Pirate (wall)"
]
],
"excludedWeapons": [
"PowerBomb"
]
}
}
"h_RModeCanRefillReserves"
"canDodgeWhileShooting"
{
"or": [
{
"enemyKill": {
"enemies": [
[
"Yellow Space Pirate (standing)",
"Yellow Space Pirate (wall)",
"Yellow Space Pirate (wall)"
]
],
"explicitWeapons": [
"ScrewAttack",
"Charge+Plasma",
"Charge+Ice+Wave+Spazer",
"Missile",
"Super"
]
}
},
{
"and": [
{
"enemyKill": {
"enemies": [
[
"Yellow Space Pirate (standing)",
"Yellow Space Pirate (wall)",
"Yellow Space Pirate (wall)"
]
],
"explicitWeapons": [
"Charge"
]
}
},
"canBePatient"
]
}
]
}
{
"or": [
{
"resourceMissingAtMost": [
{
"type": "Missile",
"count": 0
}
]
},
"canBeLucky"
]
}
{
"partialRefill": {
"type": "ReserveEnergy",
"limit": 20
}
}
{
"or": [
{
"canShineCharge": {
"usedTiles": 12,
"openEnd": 0
}
},
{
"and": [
{
"doorUnlockedAtNode": 1
},
{
"canShineCharge": {
"usedTiles": 13,
"openEnd": 0
}
}
]
}
]
}
{
"autoReserveTrigger": {
"maxReserveEnergy": 95
}
}
"canRModeSparkInterrupt"Unlocks doors: {"nodeId":1,"types":["missiles","super"],"requires":[]}
{"nodeId":1,"types":["powerbomb"],"requires":["never"]} |
From: 4
Top Right Door
To: 5
Bottom Junction
Kill the pirates to get them out of the way before using a Crystal Flash on the floating platform to open the bomb barrier. Alternatively, farm them for energy and use a Power Bomb on the floating platform. Shinecharge at the bottom runway and then jump into a Viola to interrupt. For power bomb pirate kill: interrupt the standing pirate with a shot then jump and place the power bomb low to hit all three pirates. Repeat three times. For slow charge beam: interrupt with a shot, then crouch and fire charged shots. Jump when the wall pirate approaches to make it jump to the other wall. Entrance condition: {
"comeInWithRMode": {}
}Requires: "h_heatProof"
{
"or": [
{
"and": [
{
"or": [
{
"enemyKill": {
"enemies": [
[
"Yellow Space Pirate (standing)",
"Yellow Space Pirate (wall)",
"Yellow Space Pirate (wall)"
]
],
"explicitWeapons": [
"ScrewAttack",
"Charge+Plasma",
"Charge+Ice+Wave+Spazer",
"Missile",
"Super"
]
}
},
{
"and": [
{
"enemyKill": {
"enemies": [
[
"Yellow Space Pirate (standing)",
"Yellow Space Pirate (wall)",
"Yellow Space Pirate (wall)"
]
],
"explicitWeapons": [
"Charge"
]
}
},
"canBePatient"
]
},
"h_usePowerBomb"
]
},
"h_heatedCrystalFlashForReserveEnergy"
]
},
{
"and": [
"h_heatProof",
"h_RModeCanRefillReserves",
"canDodgeWhileShooting",
{
"or": [
{
"enemyKill": {
"enemies": [
[
"Yellow Space Pirate (standing)",
"Yellow Space Pirate (wall)",
"Yellow Space Pirate (wall)"
]
],
"explicitWeapons": [
"ScrewAttack",
"Charge+Plasma",
"Charge+Ice+Wave+Spazer",
"Super"
]
}
},
{
"and": [
{
"enemyKill": {
"enemies": [
[
"Yellow Space Pirate (standing)",
"Yellow Space Pirate (wall)",
"Yellow Space Pirate (wall)"
]
],
"explicitWeapons": [
"Charge"
]
}
},
"canBePatient"
]
},
{
"and": [
{
"enemyKill": {
"enemies": [
[
"Yellow Space Pirate (standing)",
"Yellow Space Pirate (wall)",
"Yellow Space Pirate (wall)"
]
],
"explicitWeapons": [
"PowerBomb"
]
}
},
"canTrickyDodgeEnemies"
]
}
]
},
{
"or": [
{
"resourceMissingAtMost": [
{
"type": "Missile",
"count": 0
}
]
},
"canBeLucky"
]
},
"h_usePowerBomb",
{
"partialRefill": {
"type": "ReserveEnergy",
"limit": 20
}
}
]
}
]
}
{
"or": [
{
"canShineCharge": {
"usedTiles": 12,
"gentleUpTiles": 2,
"gentleDownTiles": 2,
"openEnd": 0
}
},
{
"and": [
{
"or": [
{
"doorUnlockedAtNode": 2
},
{
"doorUnlockedAtNode": 3
}
]
},
{
"canShineCharge": {
"usedTiles": 13,
"gentleUpTiles": 2,
"gentleDownTiles": 2,
"openEnd": 0
}
}
]
},
{
"and": [
{
"doorUnlockedAtNode": 2
},
{
"doorUnlockedAtNode": 3
},
{
"canShineCharge": {
"usedTiles": 14,
"gentleUpTiles": 2,
"gentleDownTiles": 2,
"openEnd": 0
}
}
]
}
]
}
{
"autoReserveTrigger": {}
}
"canRModeSparkInterrupt"Clears obstacles: A Unlocks doors: {"nodeId":2,"types":["ammo"],"requires":[]}
{"nodeId":3,"types":["ammo"],"requires":[]} |
From: 6
R-Mode, Bottom Junction
To: 5
Bottom Junction
Requires: "canRMode"
{
"resourceAvailable": [
{
"type": "ReserveEnergy",
"count": 1
}
]
}
{
"or": [
{
"canShineCharge": {
"usedTiles": 12,
"gentleUpTiles": 2,
"gentleDownTiles": 2,
"openEnd": 0
}
},
{
"and": [
{
"or": [
{
"doorUnlockedAtNode": 2
},
{
"doorUnlockedAtNode": 3
}
]
},
{
"canShineCharge": {
"usedTiles": 13,
"gentleUpTiles": 2,
"gentleDownTiles": 2,
"openEnd": 0
}
}
]
},
{
"and": [
{
"doorUnlockedAtNode": 2
},
{
"doorUnlockedAtNode": 3
},
{
"canShineCharge": {
"usedTiles": 14,
"gentleUpTiles": 2,
"gentleDownTiles": 2,
"openEnd": 0
}
}
]
}
]
}
"h_heatTriggerRModeSparkInterrupt"Unlocks doors: {"nodeId":2,"types":["ammo"],"requires":[]}
{"nodeId":3,"types":["ammo"],"requires":[]} |
From: 1
Left Door
To: 2
Right Door
Entrance condition: {
"comeInJumping": {
"speedBooster": "no",
"minTiles": 3
}
}Requires: "canTrickySpringBallBounce"
{
"heatFrames": 315
} |
From: 1
Left Door
To: 2
Right Door
Entrance condition: {
"comeInJumping": {
"speedBooster": "no",
"minTiles": 4
}
}Requires: "canTrickySpringBallBounce"
{
"heatFrames": 285
} |
From: 1
Left Door
To: 2
Right Door
Entrance condition: {
"comeInJumping": {
"speedBooster": "no",
"minTiles": 5
}
}Requires: "canTrickySpringBallBounce"
{
"heatFrames": 265
} |
From: 2
Right Door
To: 1
Left Door
Entrance condition: {
"comeInRunning": {
"speedBooster": "no",
"minTiles": 3
}
}Requires: "canTrickySpringBallBounce"
{
"heatFrames": 260
} |
From: 2
Right Door
To: 1
Left Door
Entrance condition: {
"comeInRunning": {
"speedBooster": "no",
"minTiles": 3
}
}Requires: "canTrickySpringBallBounce"
{
"heatFrames": 235
} |
From: 1
Top Left Door
To: 3
Top Right Door
Crystal Flash, then pick up a shinecharge. Drop into the top Fune's fireball path for the interupt. Entrance condition: {
"comeInWithRMode": {}
}Requires: "h_CrystalFlashForReserveEnergy"
{
"canShineCharge": {
"usedTiles": 21,
"gentleUpTiles": 3,
"gentleDownTiles": 3,
"openEnd": 1
}
}
{
"autoReserveTrigger": {
"maxReserveEnergy": 95
}
}
"canRModeSparkInterrupt" |
From: 1
Top Left Door
To: 3
Top Right Door
With Supers or PBs, kill Funes except for the topmost. If you have neither, use Morph and bombs or springball to get over the secret Fune and farm a fireflea. Shinespark can get you back out of the fireflea pit if you can't jump out. Entrance condition: {
"comeInWithRMode": {}
}Requires: "canTrickyJump"
{
"or": [
"Morph",
{
"enemyKill": {
"enemies": [
[
"Boulder"
]
]
}
},
{
"and": [
{
"disableEquipment": "ScrewAttack"
},
"canPseudoScrew"
]
}
]
}
{
"or": [
{
"and": [
{
"enemyKill": {
"enemies": [
[
"Fune"
]
]
}
},
"h_RModeCanRefillReserves",
{
"partialRefill": {
"type": "ReserveEnergy",
"limit": 20
}
},
{
"resourceMissingAtMost": [
{
"type": "Missile",
"count": 0
}
]
}
]
},
{
"and": [
"Morph",
{
"or": [
"h_useSpringBall",
{
"and": [
"h_useMorphBombs",
"canBombHorizontally"
]
}
]
},
"h_RModeCanRefillReserves",
{
"partialRefill": {
"type": "ReserveEnergy",
"limit": 20
}
},
{
"resourceMissingAtMost": [
{
"type": "PowerBomb",
"count": 0
}
]
},
{
"canShineCharge": {
"usedTiles": 17,
"gentleUpTiles": 6,
"steepUpTiles": 1,
"openEnd": 1
}
},
{
"shinespark": {
"frames": 9,
"excessFrames": 4
}
}
]
}
]
}
{
"canShineCharge": {
"usedTiles": 21,
"gentleUpTiles": 3,
"gentleDownTiles": 3,
"openEnd": 1
}
}
{
"autoReserveTrigger": {
"maxReserveEnergy": 95
}
}
"canRModeSparkInterrupt"Dev note: FIXME: Notable strat 'Morph Over The Fune' for getting over the secret fune (and then R-Jump to get out) isn't included. |
From: 2
Bottom Left Door
To: 2
Bottom Left Door
Kill the Fune. Crystal Flash or farm the top fireflea. After the shine charge, jump up to the first fune and take a fireball to interrupt. Note: farming more than the top fireflea while still in R-Mode will cause Samus to become difficult to see. Entrance condition: {
"comeInWithRMode": {}
}Requires: {
"enemyKill": {
"enemies": [
[
"Fune"
]
]
}
}
{
"or": [
"h_CrystalFlashForReserveEnergy",
{
"and": [
"h_RModeCanRefillReserves",
{
"partialRefill": {
"type": "ReserveEnergy",
"limit": 20
}
},
{
"or": [
{
"resourceMissingAtMost": [
{
"type": "PowerBomb",
"count": 0
}
]
},
{
"resourceMissingAtMost": [
{
"type": "Missile",
"count": 0
}
]
}
]
}
]
}
]
}
{
"canShineCharge": {
"usedTiles": 20,
"gentleDownTiles": 2,
"openEnd": 1
}
}
{
"autoReserveTrigger": {
"maxReserveEnergy": 95
}
}
"canRModeSparkInterrupt"Clears obstacles: A |
|
Requires: {
"or": [
{
"ammo": {
"type": "Super",
"count": 2
}
},
{
"and": [
{
"ammo": {
"type": "Super",
"count": 1
}
},
{
"enemyDamage": {
"enemy": "Boulder",
"type": "contact",
"hits": 1
}
}
]
},
{
"and": [
"canDisableEquipment",
"canPseudoScrew"
]
}
]
}
{
"or": [
"Ice",
"canCarefulJump"
]
} |
|
Requires: "ScrewAttack"
{
"or": [
"canCarefulJump",
"h_usePowerBomb",
{
"ammo": {
"type": "Super",
"count": 1
}
},
{
"and": [
"canDisableEquipment",
"canPseudoScrew"
]
},
{
"enemyDamage": {
"enemy": "Fune",
"type": "fireball",
"hits": 1
}
}
]
} |
|
Use Space Jump to reset Samus' fall speed, by jumping, to avoid the topmost boulder. Requires: "SpaceJump"
"canCarefulJump"
{
"or": [
{
"ammo": {
"type": "Super",
"count": 1
}
},
{
"and": [
"canDisableEquipment",
"canPseudoScrew"
]
},
"Ice",
"canTrickyJump",
{
"enemyDamage": {
"enemy": "Boulder",
"type": "contact",
"hits": 1
}
}
]
} |
From: 3
Top Right Door
To: 3
Top Right Door
Crystal Flash, then pick up a shinecharge. Drop into the top Fune's fireball path for the interupt. Entrance condition: {
"comeInWithRMode": {}
}Requires: "h_CrystalFlashForReserveEnergy"
{
"canShineCharge": {
"usedTiles": 21,
"gentleUpTiles": 3,
"gentleDownTiles": 3,
"openEnd": 1
}
}
{
"autoReserveTrigger": {
"maxReserveEnergy": 95
}
}
"canRModeSparkInterrupt" |
From: 3
Top Right Door
To: 3
Top Right Door
With Supers or PBs, kill Funes except for the topmost. If you have neither, use Morph and bombs or springball to get over the secret Fune and farm a fireflea. Shinespark can get you back out of the fireflea pit if you can't jump out. Entrance condition: {
"comeInWithRMode": {}
}Requires: "canTrickyJump"
{
"or": [
"Morph",
{
"enemyKill": {
"enemies": [
[
"Boulder"
]
]
}
},
{
"and": [
{
"disableEquipment": "ScrewAttack"
},
"canPseudoScrew"
]
}
]
}
{
"or": [
{
"and": [
{
"enemyKill": {
"enemies": [
[
"Fune"
]
]
}
},
"h_RModeCanRefillReserves",
{
"partialRefill": {
"type": "ReserveEnergy",
"limit": 20
}
},
{
"resourceMissingAtMost": [
{
"type": "Missile",
"count": 0
}
]
}
]
},
{
"and": [
"Morph",
{
"or": [
"h_useSpringBall",
{
"and": [
"h_useMorphBombs",
"canBombHorizontally"
]
}
]
},
"h_RModeCanRefillReserves",
{
"partialRefill": {
"type": "ReserveEnergy",
"limit": 20
}
},
{
"resourceMissingAtMost": [
{
"type": "PowerBomb",
"count": 0
}
]
},
{
"canShineCharge": {
"usedTiles": 17,
"gentleUpTiles": 6,
"steepUpTiles": 1,
"openEnd": 1
}
},
{
"shinespark": {
"frames": 9,
"excessFrames": 4
}
}
]
}
]
}
{
"canShineCharge": {
"usedTiles": 21,
"gentleUpTiles": 3,
"gentleDownTiles": 3,
"openEnd": 1
}
}
{
"autoReserveTrigger": {
"maxReserveEnergy": 95
}
}
"canRModeSparkInterrupt"Dev note: FIXME: Notable strat 'Morph Over The Fune' for getting over the secret fune (and then R-Jump to get out) isn't included. |
From: 1
Left Door
To: 7
Junction By Lower Alcoons (Left of Spike Pits)
Crystal Flash near the edge - just before Samus goes off-screen - to clear the runway Alcoon. Shinecharge to the left, then weave down and into the Alcoon to interrupt. Entrance condition: {
"comeInWithGMode": {
"mode": "direct",
"morphed": false
}
}Requires: {
"or": [
"canWallJump",
"HiJump",
"canSpringBallJumpMidAir",
"SpaceJump",
{
"and": [
"canIBJ",
"canBombHorizontally",
"canJumpIntoIBJ"
]
},
{
"and": [
"canUseFrozenEnemies",
"canInsaneJump"
]
}
]
}
"h_CrystalFlashForReserveEnergy"
{
"canShineCharge": {
"usedTiles": 27,
"gentleUpTiles": 2,
"openEnd": 0
}
}
{
"or": [
"canDownBack",
"canTrickyJump"
]
}
{
"or": [
{
"and": [
{
"disableEquipment": "ETank"
},
{
"autoReserveTrigger": {}
},
"canRModeSparkInterrupt",
{
"enemyDamage": {
"enemy": "Alcoon",
"type": "contact",
"hits": 1
}
}
]
},
{
"and": [
"canReserveTriggerBufferXRay",
{
"autoReserveTrigger": {
"implicitHeatFrames": "no"
}
},
"canRModePauseAbuseSparkInterrupt",
{
"heatFrames": 30
}
]
}
]
}Clears obstacles: A |
From: 1
Left Door
To: 7
Junction By Lower Alcoons (Left of Spike Pits)
Clear the Alcoon in the runway, then shinecharge and jump down to be interrupted by the lower left Alcoon. Entrance condition: {
"comeInWithRMode": {}
}Requires: {
"heatFrames": 60
}
{
"or": [
{
"and": [
"canDodgeWhileShooting",
{
"enemyKill": {
"enemies": [
[
"Alcoon"
]
],
"explicitWeapons": [
"Missile",
"Super",
"Charge+Plasma"
]
}
},
{
"heatFrames": 120
}
]
},
{
"and": [
{
"enemyKill": {
"enemies": [
[
"Alcoon"
]
],
"explicitWeapons": [
"Missile",
"Super",
"Wave",
"Ice+Spazer",
"Plasma",
"ScrewAttack",
"PseudoScrew",
"PowerBomb"
]
}
},
{
"heatFrames": 180
}
]
},
{
"and": [
{
"heatFrames": 200
},
{
"or": [
"canDodgeWhileShooting",
"Morph"
]
}
]
},
{
"and": [
{
"heatFrames": 160
},
{
"enemyDamage": {
"enemy": "Alcoon",
"type": "fireball",
"hits": 1
}
}
]
}
]
}
{
"or": [
"h_heatedCrystalFlashForReserveEnergy",
{
"and": [
"h_heatProof",
"h_RModeCanRefillReserves",
{
"or": [
{
"and": [
{
"resourceMissingAtMost": [
{
"type": "PowerBomb",
"count": 0
}
]
},
{
"partialRefill": {
"type": "ReserveEnergy",
"limit": 20
}
}
]
},
{
"and": [
{
"resourceMissingAtMost": [
{
"type": "PowerBomb",
"count": 3
}
]
},
{
"partialRefill": {
"type": "ReserveEnergy",
"limit": 5
}
}
]
}
]
}
]
}
]
}
{
"canShineCharge": {
"usedTiles": 27,
"gentleUpTiles": 2,
"openEnd": 0
}
}
{
"or": [
"canDownBack",
"canTrickyJump"
]
}
{
"heatFrames": 120
}
{
"autoReserveTrigger": {
"maxReserveEnergy": 95
}
}
"canRModeSparkInterrupt"Clears obstacles: A |
From: 2
Right Vertical Door
To: 7
Junction By Lower Alcoons (Left of Spike Pits)
Crystal Flash against the left edge of the tunnel, then jump through the ceiling. You cannot use Power Bombs or X-Ray after the Crystal Flash clip. Kill the Alcoon to clear the runway then drop into the lower left Alcoon to interrupt. Entrance condition: {
"comeInWithRMode": {},
"comesThroughToilet": "no"
}Requires: {
"notable": "Crystal Flash Clip"
}
{
"heatFrames": 100
}
"h_heatedCrystalFlashForReserveEnergy"
"canCeilingClip"
"canTrivialMidAirMorph"
{
"heatFrames": 240
}
{
"or": [
{
"enemyKill": {
"enemies": [
[
"Alcoon"
]
],
"explicitWeapons": [
"Missile",
"Super",
"Charge+Plasma",
"Wave+Plasma"
]
}
},
{
"heatFrames": 200
}
]
}
{
"canShineCharge": {
"usedTiles": 27,
"gentleUpTiles": 2,
"openEnd": 0
}
}
{
"or": [
"canDownBack",
"canTrickyJump"
]
}
{
"heatFrames": 120
}
{
"autoReserveTrigger": {
"maxReserveEnergy": 95
}
}
"canRModeSparkInterrupt"Clears obstacles: A, B |
From: 3
Bottom Horizontal Door
To: 7
Junction By Lower Alcoons (Left of Spike Pits)
Kill the spike Alcoons before climbing to the upper runway. Be sure to jump over the invisible fireball projectiles. Crystal Flash at the top right, just before Samus goes off-screen, to clear the runway Alcoon. Shinecharge to the left, then weave down and into the Alcoon to interrupt. Entrance condition: {
"comeInWithGMode": {
"mode": "direct",
"morphed": false
}
}Requires: {
"or": [
"canWallJump",
"HiJump",
"canSpringBallJumpMidAir",
"SpaceJump",
{
"and": [
"canIBJ",
"canBombHorizontally",
"canJumpIntoIBJ"
]
},
{
"and": [
"canUseFrozenEnemies",
"canInsaneJump"
]
}
]
}
"h_CrystalFlashForReserveEnergy"
{
"canShineCharge": {
"usedTiles": 27,
"gentleUpTiles": 2,
"openEnd": 0
}
}
{
"or": [
"canDownBack",
"canTrickyJump"
]
}
{
"or": [
{
"and": [
{
"disableEquipment": "ETank"
},
{
"autoReserveTrigger": {}
},
"canRModeSparkInterrupt",
{
"enemyDamage": {
"enemy": "Alcoon",
"type": "contact",
"hits": 1
}
}
]
},
{
"and": [
"canReserveTriggerBufferXRay",
{
"autoReserveTrigger": {
"implicitHeatFrames": "no"
}
},
"canRModePauseAbuseSparkInterrupt",
{
"heatFrames": 30
}
]
}
]
}Clears obstacles: A |
From: 3
Bottom Horizontal Door
To: 7
Junction By Lower Alcoons (Left of Spike Pits)
Get past the spike Alcoons, and climb up - leave the lower left Alcoon alive to use for later. Clear the runway Alcoon and get the shinecharge, then drop into the lower left Alcoon to interrupt. If you Crystal Flash early, stay near the door to ensure you kill only the two spike Alcoons. Entrance condition: {
"comeInWithRMode": {}
}Requires: {
"or": [
{
"and": [
"h_heatedCrystalFlashForReserveEnergy",
{
"heatFrames": 100
}
]
},
{
"and": [
"ScrewAttack",
"canCarefulJump",
{
"heatFrames": 100
}
]
},
{
"and": [
"canDodgeWhileShooting",
{
"or": [
"h_heatProof",
{
"enemyKill": {
"enemies": [
[
"Alcoon"
]
],
"explicitWeapons": [
"Missile",
"Super",
"Wave+Plasma"
]
}
},
{
"and": [
"canPseudoScrew",
{
"heatFrames": 30
}
]
}
]
},
"canCarefulJump",
{
"heatFrames": 100
}
]
},
{
"and": [
{
"enemyKill": {
"enemies": [
[
"Alcoon",
"Alcoon"
]
],
"explicitWeapons": [
"Missile",
"Super",
"Plasma",
"Wave+Spazer"
]
}
},
{
"heatFrames": 200
}
]
},
{
"and": [
"canCarefulJump",
{
"heatFrames": 199
}
]
},
{
"and": [
{
"enemyDamage": {
"enemy": "Alcoon",
"type": "contact",
"hits": 1
}
},
{
"heatFrames": 180
}
]
}
]
}
{
"heatFrames": 160
}
{
"or": [
"canWallJump",
"HiJump",
"canSpringBallJumpMidAir",
"SpaceJump",
{
"and": [
"canSpringBallBombJump",
{
"heatFrames": 60
}
]
},
{
"and": [
"canIBJ",
"canBombHorizontally",
"canJumpIntoIBJ",
{
"heatFrames": 110
},
{
"or": [
"canDoubleBombJump",
{
"heatFrames": 190
}
]
}
]
},
{
"and": [
"canTrickyDashJump",
"canInsaneJump",
{
"heatFrames": 20
}
]
},
{
"and": [
"canUseFrozenEnemies",
"canInsaneJump",
{
"heatFrames": 150
}
]
}
]
}
{
"or": [
{
"and": [
"canDodgeWhileShooting",
{
"enemyKill": {
"enemies": [
[
"Alcoon"
]
],
"explicitWeapons": [
"Missile",
"Super",
"Charge+Plasma"
]
}
},
{
"heatFrames": 120
}
]
},
{
"and": [
{
"enemyKill": {
"enemies": [
[
"Alcoon"
]
],
"explicitWeapons": [
"Wave",
"Ice+Spazer",
"Plasma",
"ScrewAttack",
"PseudoScrew",
"PowerBomb"
]
}
},
{
"heatFrames": 180
}
]
},
{
"heatFrames": 200
}
]
}
{
"or": [
{
"resourceAvailable": [
{
"type": "ReserveEnergy",
"count": 1
}
]
},
{
"and": [
"h_heatProof",
"h_RModeCanRefillReserves",
{
"or": [
{
"and": [
{
"resourceMissingAtMost": [
{
"type": "PowerBomb",
"count": 0
}
]
},
{
"partialRefill": {
"type": "ReserveEnergy",
"limit": 20
}
}
]
},
{
"and": [
{
"resourceMissingAtMost": [
{
"type": "PowerBomb",
"count": 3
}
]
},
{
"partialRefill": {
"type": "ReserveEnergy",
"limit": 5
}
}
]
}
]
}
]
}
]
}
{
"canShineCharge": {
"usedTiles": 27,
"gentleUpTiles": 2,
"openEnd": 0
}
}
{
"or": [
"canDownBack",
"canTrickyJump"
]
}
{
"heatFrames": 120
}
{
"autoReserveTrigger": {
"maxReserveEnergy": 95
}
}
"canRModeSparkInterrupt"Clears obstacles: A |
|
Cross to the center platform to get to the shinecharge runway. Crystal Flash and then use the acid left of the elevator platform to interrupt. Time the entry so that the acid is low to ensure Samus can escape: if not using pause abuse, this must include the time taken for the reserve trigger. Entrance condition: {
"comeInWithGMode": {
"mode": "direct",
"morphed": false
}
}Requires: "h_CrystalFlashForReserveEnergy"
{
"canShineCharge": {
"usedTiles": 24.5,
"openEnd": 1
}
}
{
"or": [
{
"and": [
"canReserveTriggerBufferXRay",
{
"autoReserveTrigger": {
"implicitHeatFrames": "no"
}
}
]
},
{
"autoReserveTrigger": {}
}
]
}
{
"or": [
"canRModePauseAbuseSparkInterrupt",
{
"and": [
"canRModeSparkInterrupt",
{
"acidFrames": 30
},
{
"heatFrames": 70
}
]
}
]
}
{
"heatFrames": 90
} |
|
Cross to the center platform to get to the shinecharge runway. Any Dragons you kill along the way, you can try to collect their drops with Grapple Beam instead of risking the acid. Keep one Dragon to the left of the elevator to use their fireball for interrupt. Or you can also use a heat interrupt. Entrance condition: {
"comeInWithRMode": {}
}Requires: {
"or": [
{
"and": [
"canTrickyJump",
{
"heatFrames": 570
}
]
},
{
"and": [
"SpaceJump",
{
"heatFrames": 510
}
]
},
{
"and": [
"h_heatProof",
"Morph",
{
"enemyKill": {
"enemies": [
[
"Dragon"
]
],
"explicitWeapons": [
"PowerBombPeriphery"
]
}
},
{
"enemyKill": {
"enemies": [
[
"Dragon",
"Dragon"
]
],
"explicitWeapons": [
"PowerBomb"
]
}
}
]
}
]
}
{
"or": [
"h_heatedCrystalFlashForReserveEnergy",
{
"and": [
{
"or": [
"Grapple",
"SpaceJump"
]
},
"canTrickyJump",
"h_heatProof",
"h_RModeCanRefillReserves",
{
"enemyKill": {
"enemies": [
[
"Dragon"
]
],
"excludedWeapons": [
"Missile",
"PowerBomb"
]
}
},
{
"resourceMissingAtMost": [
{
"type": "Missile",
"count": 0
}
]
},
{
"or": [
{
"partialRefill": {
"type": "ReserveEnergy",
"limit": 5
}
},
{
"and": [
"canBeLucky",
{
"partialRefill": {
"type": "ReserveEnergy",
"limit": 20
}
}
]
}
]
}
]
}
]
}
{
"heatFrames": 300
}
{
"canShineCharge": {
"usedTiles": 24.5,
"openEnd": 1
}
}
{
"autoReserveTrigger": {
"maxReserveEnergy": 95
}
}
"canRModeSparkInterrupt"
{
"heatFrames": 80
} |
|
Cross to the center platform to get to the shinecharge runway. Crystal Flash and then use the acid left of the elevator platform to interrupt. Time the entry so that the acid is low to ensure Samus can escape: if not using pause abuse, this must include the time taken for the reserve trigger. Entrance condition: {
"comeInWithGMode": {
"mode": "direct",
"morphed": false
}
}Requires: "h_CrystalFlashForReserveEnergy"
{
"canShineCharge": {
"usedTiles": 24.5,
"openEnd": 1
}
}
{
"or": [
{
"and": [
"canReserveTriggerBufferXRay",
{
"autoReserveTrigger": {
"implicitHeatFrames": "no"
}
}
]
},
{
"autoReserveTrigger": {}
}
]
}
{
"or": [
"canRModePauseAbuseSparkInterrupt",
{
"and": [
"canRModeSparkInterrupt",
{
"acidFrames": 30
},
{
"heatFrames": 70
}
]
}
]
}
{
"heatFrames": 90
} |
|
Cross to the center platform to get to the shinecharge runway. Of the two Dragons left of the elevator, farm the left one and to use the right one's fireball to interrupt while at the leftmost side of the of the center runway. Or you can also use a heat interrupt. Entrance condition: {
"comeInWithRMode": {}
}Requires: {
"heatFrames": 360
}
{
"or": [
"h_heatedCrystalFlashForReserveEnergy",
{
"and": [
{
"or": [
"Grapple",
"SpaceJump"
]
},
"canTrickyJump",
"h_heatProof",
{
"enemyKill": {
"enemies": [
[
"Dragon"
]
],
"excludedWeapons": [
"Missile",
"PowerBomb"
]
}
},
{
"resourceMissingAtMost": [
{
"type": "Missile",
"count": 0
}
]
},
{
"or": [
{
"partialRefill": {
"type": "ReserveEnergy",
"limit": 5
}
},
{
"and": [
"canBeLucky",
{
"partialRefill": {
"type": "ReserveEnergy",
"limit": 20
}
}
]
}
]
}
]
}
]
}
{
"heatFrames": 300
}
{
"canShineCharge": {
"usedTiles": 24.5,
"openEnd": 1
}
}
{
"autoReserveTrigger": {
"maxReserveEnergy": 95
}
}
"canRModeSparkInterrupt"
{
"heatFrames": 80
} |
|
Gain max run speed, without Speed Booster equipped, and perform precise, controlled bounces to cross the room. Bounce on each of the Hibashi platforms, avoiding damage by going underneath the flames: the bottom of the flame disappears before the top. Requires: {
"disableEquipment": "SpeedBooster"
}
"canTrickySpringBallBounce"
"canInsaneJump"
{
"heatFrames": 375
} |
|
Gain max run speed, without Speed Booster equipped, and bounce onto the second 2-tile-wide platform. Continue uncontrolled bouncing all the way across the room, taking a boost from a Hibashi hit. Perform a neutral bounce on the final single-tile platform. If Samus is positioned relatively far left, she may miss the last platform and fall into the acid; this can be avoided by unequipping Spring Ball (a 'spring fling') to reset Samus' vertical speed, bypassing the final platform. Requires: {
"disableEquipment": "SpeedBooster"
}
"canTrickySpringBallBounce"
{
"hibashiHits": 1
}
{
"or": [
"canSpringFling",
"canInsaneJump"
]
}
{
"heatFrames": 375
} |
From: 1
Left Door
To: 3
Metal Pirates Junction
Kill both pirates with ammo or beams. Collect their drops and use heat to interrupt. Or kill and farm one pirate, then hitbox the other and interrupt from it before killing it with ammo or beams. Blue suit doesn't damage the pirates, but keeps Samus invulnerable while moving. Entrance condition: {
"comeInWithRMode": {}
}Requires: {
"heatFrames": 125
}
{
"or": [
{
"and": [
"Charge",
"Plasma",
"canDodgeWhileShooting",
"canTrickyJump",
{
"or": [
{
"and": [
"Ice",
{
"heatFrames": 700
}
]
},
{
"and": [
"Wave",
{
"heatFrames": 700
}
]
},
{
"and": [
"canInsaneJump",
"Ice",
{
"heatFrames": 520
}
]
},
{
"and": [
"canInsaneJump",
"Wave",
{
"heatFrames": 520
}
]
},
{
"and": [
"Ice",
"Wave",
{
"heatFrames": 400
}
]
},
{
"heatFrames": 950
},
{
"and": [
"canInsaneJump",
{
"heatFrames": 700
}
]
},
{
"and": [
"canXRayWaitForIFrames",
{
"heatFrames": 420
}
]
}
]
}
]
},
{
"and": [
"Charge",
"Spazer",
"canDodgeWhileShooting",
{
"or": [
{
"heatFrames": 4400
},
{
"and": [
"Ice",
{
"heatFrames": 3000
}
]
},
{
"and": [
"Wave",
{
"heatFrames": 2650
}
]
},
"Ice",
"Wave",
{
"heatFrames": 1750
}
]
}
]
},
{
"and": [
"Plasma",
"canDodgeWhileShooting",
{
"heatFrames": 2000
}
]
},
{
"and": [
"h_heatProof",
"canDodgeWhileShooting",
{
"or": [
{
"and": [
"Charge",
"Wave"
]
},
{
"and": [
"Charge",
"Ice",
"canBePatient"
]
},
{
"and": [
"canBeVeryPatient",
{
"or": [
"Charge",
"Spazer"
]
}
]
}
]
}
]
},
{
"and": [
"canDodgeWhileShooting",
{
"enemyKill": {
"enemies": [
[
"Space Pirate (fighting)",
"Space Pirate (fighting)"
]
],
"explicitWeapons": [
"Super"
]
}
},
{
"heatFrames": 450
}
]
},
{
"and": [
"canDodgeWhileShooting",
{
"enemyKill": {
"enemies": [
[
"Space Pirate (fighting)",
"Space Pirate (fighting)"
]
],
"explicitWeapons": [
"Missile"
]
}
},
{
"heatFrames": 2700
}
]
}
]
}
{
"or": [
"h_heatedCrystalFlashForReserveEnergy",
{
"and": [
"h_RModeCanRefillReserves",
{
"or": [
{
"and": [
{
"resourceMissingAtMost": [
{
"type": "Super",
"count": 0
}
]
},
{
"partialRefill": {
"type": "ReserveEnergy",
"limit": 240
}
}
]
},
{
"partialRefill": {
"type": "ReserveEnergy",
"limit": 120
}
}
]
}
]
},
{
"and": [
{
"disableEquipment": "ETank"
},
{
"or": [
{
"and": [
{
"resourceMissingAtMost": [
{
"type": "Super",
"count": 0
}
]
},
{
"partialRefill": {
"type": "ReserveEnergy",
"limit": 140
}
}
]
},
{
"partialRefill": {
"type": "ReserveEnergy",
"limit": 20
}
}
]
}
]
}
]
}
"h_shinechargeMaxRunway"
{
"disableEquipment": "Varia"
}
{
"disableEquipment": "Gravity"
}
{
"or": [
{
"and": [
"canHitbox",
{
"autoReserveTrigger": {
"maxReserveEnergy": 95
}
},
"canRModeSparkInterrupt"
]
},
{
"and": [
"canReserveTriggerBufferXRay",
{
"autoReserveTrigger": {
"implicitHeatFrames": "no"
}
},
"canRModeSparkInterrupt",
{
"suitlessHeatFrames": 32
}
]
},
{
"and": [
"h_heatProof",
{
"autoReserveTrigger": {}
},
"canRModePauseAbuseSparkInterrupt"
]
},
{
"and": [
{
"autoReserveTrigger": {
"implicitHeatFrames": "suitless"
}
},
"canRModeSparkInterrupt",
{
"suitlessHeatFrames": 32
}
]
}
]
}Clears obstacles: A, door_1 |
From: 1
Left Door
To: 3
Metal Pirates Junction
If you can't kill the pirates, you can Crystal Flash, then run through with timed shots to get the shinecharge. Once shinecharged, let a pirate jump at you to interrupt. After spark interrupt, you'll need a way to leave the room. Entrance condition: {
"comeInWithRMode": {}
}Requires: "h_heatedCrystalFlashForReserveEnergy"
"canHitbox"
{
"heatFrames": 180
}
"h_shinechargeMaxRunway"
{
"autoReserveTrigger": {
"maxReserveEnergy": 95
}
}
"canRModeSparkInterrupt"Clears obstacles: door_1 |
From: 1
Left Door
To: 3
Metal Pirates Junction
Entrance condition: {
"comeInWithRMode": {}
}Requires: {
"notable": "Speed Echoes Kill"
}
"canUseSpeedEchoes"
"canHitbox"
{
"canShineCharge": {
"usedTiles": 38,
"openEnd": 2
}
}
{
"or": [
{
"canShineCharge": {
"usedTiles": 23,
"openEnd": 2
}
},
{
"heatFrames": 60
}
]
}
{
"or": [
{
"and": [
"HiJump",
{
"shinespark": {
"frames": 1
}
}
]
},
{
"shinespark": {
"frames": 9
}
}
]
}
{
"heatFrames": 630
}
{
"or": [
"h_heatedCrystalFlashForReserveEnergy",
{
"and": [
"h_RModeCanRefillReserves",
{
"or": [
{
"and": [
{
"resourceMissingAtMost": [
{
"type": "Super",
"count": 0
}
]
},
{
"partialRefill": {
"type": "ReserveEnergy",
"limit": 240
}
}
]
},
{
"partialRefill": {
"type": "ReserveEnergy",
"limit": 120
}
}
]
}
]
},
{
"and": [
{
"disableEquipment": "ETank"
},
{
"or": [
{
"and": [
{
"resourceMissingAtMost": [
{
"type": "Super",
"count": 0
}
]
},
{
"partialRefill": {
"type": "ReserveEnergy",
"limit": 140
}
}
]
},
{
"partialRefill": {
"type": "ReserveEnergy",
"limit": 20
}
}
]
}
]
}
]
}
"h_shinechargeMaxRunway"
{
"disableEquipment": "Varia"
}
{
"disableEquipment": "Gravity"
}
{
"or": [
{
"and": [
"canReserveTriggerBufferXRay",
{
"autoReserveTrigger": {
"implicitHeatFrames": "no"
}
},
"canRModeSparkInterrupt",
{
"suitlessHeatFrames": 32
}
]
},
{
"and": [
"h_heatProof",
{
"autoReserveTrigger": {}
},
"canRModePauseAbuseSparkInterrupt"
]
},
{
"and": [
{
"autoReserveTrigger": {
"implicitHeatFrames": "suitless"
}
},
"canRModeSparkInterrupt",
{
"suitlessHeatFrames": 32
}
]
}
]
}Clears obstacles: A, door_1 |
From: 2
Right Door
To: 3
Metal Pirates Junction
Kill both pirates with ammo or beams. Collect their drops and use heat to interrupt. Or kill and farm one pirate, then hitbox the other and interrupt from it before killing it with ammo or beams. Blue suit doesn't damage the pirates, but keeps Samus invulnerable while moving. Entrance condition: {
"comeInWithRMode": {}
}Requires: {
"heatFrames": 125
}
{
"or": [
{
"and": [
"Charge",
"Plasma",
"canDodgeWhileShooting",
{
"or": [
{
"and": [
"Ice",
{
"heatFrames": 700
}
]
},
{
"and": [
"Wave",
{
"heatFrames": 700
}
]
},
{
"and": [
"Ice",
"Wave",
{
"heatFrames": 450
}
]
},
{
"heatFrames": 950
},
{
"and": [
"canXRayWaitForIFrames",
{
"heatFrames": 420
}
]
},
{
"and": [
"Ice",
"Wave",
"canTrickyJump",
{
"heatFrames": 400
}
]
},
{
"and": [
"Ice",
"canInsaneJump",
{
"heatFrames": 520
}
]
},
{
"and": [
"Wave",
"canInsaneJump",
{
"heatFrames": 520
}
]
},
{
"and": [
"canInsaneJump",
{
"heatFrames": 700
}
]
}
]
}
]
},
{
"and": [
"h_heatProof",
"canDodgeWhileShooting",
{
"or": [
"Plasma",
{
"and": [
"Charge",
"Wave"
]
},
{
"and": [
"Charge",
"Spazer",
"Ice",
"Wave"
]
},
{
"and": [
"Charge",
"Spazer",
"canBePatient"
]
},
{
"and": [
"Charge",
"Ice",
"canBePatient"
]
},
{
"and": [
"canBeVeryPatient",
{
"or": [
"Charge",
"Spazer"
]
}
]
},
{
"enemyKill": {
"enemies": [
[
"Space Pirate (fighting)",
"Space Pirate (fighting)"
]
],
"explicitWeapons": [
"Missile"
]
}
}
]
}
]
},
{
"and": [
"canDodgeWhileShooting",
{
"enemyKill": {
"enemies": [
[
"Space Pirate (fighting)",
"Space Pirate (fighting)"
]
],
"explicitWeapons": [
"Super"
]
}
},
{
"heatFrames": 450
}
]
}
]
}
{
"or": [
"h_heatedCrystalFlashForReserveEnergy",
{
"and": [
"h_RModeCanRefillReserves",
{
"or": [
{
"and": [
{
"resourceMissingAtMost": [
{
"type": "Super",
"count": 0
}
]
},
{
"partialRefill": {
"type": "ReserveEnergy",
"limit": 240
}
}
]
},
{
"partialRefill": {
"type": "ReserveEnergy",
"limit": 120
}
}
]
}
]
},
{
"and": [
{
"disableEquipment": "ETank"
},
{
"or": [
{
"and": [
{
"resourceMissingAtMost": [
{
"type": "Super",
"count": 0
}
]
},
{
"partialRefill": {
"type": "ReserveEnergy",
"limit": 140
}
}
]
},
{
"partialRefill": {
"type": "ReserveEnergy",
"limit": 20
}
}
]
}
]
}
]
}
{
"heatFrames": 90
}
"h_shinechargeMaxRunway"
{
"or": [
{
"and": [
"canHitbox",
{
"autoReserveTrigger": {}
},
"canRModeSparkInterrupt"
]
},
"h_heatTriggerRModeSparkInterrupt"
]
}Clears obstacles: A, door_2 |
From: 2
Right Door
To: 3
Metal Pirates Junction
If you can't kill the pirates, you can Crystal Flash, then run through with timed shots to get the shinecharge. Once shinecharged, let a pirate jump at you to interrupt. After spark interrupt, you'll need a way to leave the room. Entrance condition: {
"comeInWithRMode": {}
}Requires: "h_heatedCrystalFlashForReserveEnergy"
"canHitbox"
{
"heatFrames": 180
}
"h_shinechargeMaxRunway"
{
"autoReserveTrigger": {}
}
"canRModeSparkInterrupt"Clears obstacles: door_2 |
From: 2
Right Door
To: 3
Metal Pirates Junction
Entrance condition: {
"comeInWithRMode": {}
}Requires: {
"notable": "Speed Echoes Kill"
}
"canUseSpeedEchoes"
"canHitbox"
{
"canShineCharge": {
"usedTiles": 38,
"openEnd": 2
}
}
{
"or": [
{
"canShineCharge": {
"usedTiles": 23,
"openEnd": 2
}
},
{
"heatFrames": 60
}
]
}
{
"or": [
{
"and": [
"HiJump",
{
"shinespark": {
"frames": 1
}
}
]
},
{
"shinespark": {
"frames": 9
}
}
]
}
{
"heatFrames": 630
}
{
"or": [
"h_heatedCrystalFlashForReserveEnergy",
{
"and": [
"h_RModeCanRefillReserves",
{
"or": [
{
"and": [
{
"resourceMissingAtMost": [
{
"type": "Super",
"count": 0
}
]
},
{
"partialRefill": {
"type": "ReserveEnergy",
"limit": 240
}
}
]
},
{
"partialRefill": {
"type": "ReserveEnergy",
"limit": 120
}
}
]
}
]
},
{
"and": [
{
"disableEquipment": "ETank"
},
{
"or": [
{
"and": [
{
"resourceMissingAtMost": [
{
"type": "Super",
"count": 0
}
]
},
{
"partialRefill": {
"type": "ReserveEnergy",
"limit": 140
}
}
]
},
{
"partialRefill": {
"type": "ReserveEnergy",
"limit": 20
}
}
]
}
]
}
]
}
"h_shinechargeMaxRunway"
"h_heatTriggerRModeSparkInterrupt"Clears obstacles: A, door_2 |
From: 1
Bottom Left Door
To: 2
Top Right Door
Entrance condition: {
"comeInWithRMode": {}
}Requires: "canRModeStandupClip"
"h_RModeCanRefillReserves"
"h_heatProof"
{
"or": [
"Plasma",
"ScrewAttack"
]
}
{
"or": [
"canMidAirMorph",
"canBeVeryPatient"
]
}
{
"partialRefill": {
"type": "ReserveEnergy",
"limit": 40
}
}
{
"disableEquipment": "Varia"
}
{
"autoReserveTrigger": {
"implicitHeatFrames": "suitless"
}
}
{
"suitlessHeatFrames": 30
} |
From: 1
Bottom Left Door
To: 6
Bottom Right Corner Junction
Crystal Flash immediately on entry, do so very quickly in order to have the Power Bomb go off before the Dessgeega gets to Samus. Short-charge to run through the second Desgeega and use the third to damage down if needed, then go back and run to full speed again. Follow the Multiviola to the right wall but stop before running through it. Take a hit from the Multiviola if needed, then run left with i-frames to get ahead of it. Windup and get hit by the Multiviola to interrupt, then leave. Note that a mobile G-Mode entry doesn't get hit by the Multiviola due to i-frames. For Immobile, enter with a small enough amount of Energy to where Samus will be at or below 50 after the Multiviola hit and can immediately Crystal Flash. Entrance condition: {
"comeInWithGMode": {
"mode": "direct",
"morphed": false
}
}Requires: {
"disableEquipment": "ETank"
}
"canTrickyDodgeEnemies"
"h_CrystalFlashForReserveEnergy"
{
"getBlueSpeed": {
"usedTiles": 24,
"openEnd": 0
}
}
"h_shinechargeMaxRunway"
{
"or": [
{
"and": [
"canReserveTriggerBufferXRay",
{
"autoReserveTrigger": {
"implicitHeatFrames": "no"
}
},
{
"heatFrames": 76
}
]
},
{
"and": [
{
"autoReserveTrigger": {}
},
{
"heatFrames": 44
}
]
}
]
}
"canRModeSparkInterrupt"Clears obstacles: C, E, F |
From: 1
Bottom Left Door
To: 6
Bottom Right Corner Junction
Due to X-Ray beam cooldown, Screw Attack is the only way to avoid a Multiviola hit on entry. Clear the runway. If that was enough to get reserve energy, you can use the final Dessgeega to interrupt, otherwise carry the shinecharge into the first Multiviola box, or use a heat interrupt. Entrance condition: {
"comeInWithRMode": {}
}Requires: {
"or": [
{
"and": [
{
"enemyDamage": {
"enemy": "Multiviola",
"type": "contact",
"hits": 1
}
},
{
"heatFrames": 40
}
]
},
{
"and": [
{
"enemyKill": {
"enemies": [
[
"Multiviola"
]
],
"explicitWeapons": [
"ScrewAttack"
]
}
},
{
"heatFrames": 30
}
]
}
]
}
{
"or": [
{
"and": [
"canDodgeWhileShooting",
"Plasma",
"canHitbox",
"h_getBlueSpeedMaxRunway"
]
},
{
"and": [
"canDodgeWhileShooting",
"Charge",
"Ice",
"Wave",
"Spazer",
{
"heatFrames": 1080
}
]
},
{
"and": [
{
"enemyKill": {
"enemies": [
[
"Dessgeega",
"Dessgeega",
"Dessgeega",
"Multiviola",
"Multiviola"
]
],
"explicitWeapons": [
"Missile"
]
}
},
{
"heatFrames": 480
}
]
},
{
"and": [
{
"enemyKill": {
"enemies": [
[
"Dessgeega",
"Dessgeega",
"Dessgeega",
"Multiviola",
"Multiviola"
]
],
"explicitWeapons": [
"Super"
]
}
},
{
"heatFrames": 380
}
]
},
{
"and": [
"ScrewAttack",
{
"heatFrames": 230
}
]
}
]
}
{
"or": [
"h_heatedCrystalFlashForReserveEnergy",
{
"and": [
"h_heatProof",
"h_RModeCanRefillReserves",
{
"resourceMissingAtMost": [
{
"type": "Missile",
"count": 0
}
]
},
{
"partialRefill": {
"type": "ReserveEnergy",
"limit": 20
}
}
]
}
]
}
"h_shinechargeMaxRunway"
{
"autoReserveTrigger": {
"maxReserveEnergy": 95
}
}
"canRModeSparkInterrupt"Clears obstacles: C, E, F Dev note: FIXME: Room needs movement/heatframe counts to enter the Multiviola boxes from below and return. |
From: 2
Top Right Door
To: 1
Bottom Left Door
Use normal bombs or a Power Bomb to open the bomb blocks. Use one Power Bomb before a Crystal Flash to navigate the Multiviola boxes. Samus cannot use Power Bombs or X-Ray after the Crystal Flash until R-Mode ends. Kill the two right Dessgeegas from the safety of the Multiviola box, then clear the rest of the runway. The Multiviola at the end to interrupt, or use a heat interrupt. Entrance condition: {
"comeInWithRMode": {}
}Requires: {
"or": [
{
"and": [
"h_usePowerBomb",
{
"heatFrames": 180
}
]
},
{
"and": [
{
"heatFrames": 160
},
{
"or": [
"ScrewAttack",
{
"and": [
"h_useMorphBombs",
{
"heatFrames": 60
}
]
}
]
}
]
}
]
}
"h_usePowerBomb"
{
"heatFrames": 260
}
"h_heatedCrystalFlashForReserveEnergy"
{
"heatFrames": 120
}
{
"or": [
{
"and": [
{
"enemyKill": {
"enemies": [
[
"Dessgeega",
"Dessgeega"
]
],
"excludedWeapons": [
"Bombs",
"PseudoScrew",
"PowerBomb"
]
}
},
{
"heatFrames": 3000
}
]
},
{
"and": [
"Plasma",
{
"heatFrames": 400
}
]
},
{
"and": [
"Ice",
"Wave",
"Spazer",
{
"heatFrames": 750
}
]
},
{
"and": [
"ScrewAttack",
{
"heatFrames": 200
}
]
},
{
"and": [
{
"enemyKill": {
"enemies": [
[
"Dessgeega",
"Dessgeega"
]
],
"explicitWeapons": [
"Missile"
]
}
},
{
"heatFrames": 670
}
]
},
{
"and": [
{
"enemyKill": {
"enemies": [
[
"Dessgeega",
"Dessgeega"
]
],
"explicitWeapons": [
"Super"
]
}
},
{
"heatFrames": 400
}
]
}
]
}
{
"or": [
{
"and": [
{
"getBlueSpeed": {
"usedTiles": 23,
"openEnd": 2
}
},
{
"heatFrames": 200
}
]
},
{
"and": [
"h_heatProof",
"canDodgeWhileShooting",
{
"enemyKill": {
"enemies": [
[
"Dessgeega"
],
[
"Dessgeega"
],
[
"Dessgeega"
],
[
"Multiviola"
],
[
"Multiviola"
]
],
"excludedWeapons": [
"Bombs",
"PseudoScrew",
"PowerBomb",
"PowerBeam"
]
}
}
]
},
{
"and": [
{
"heatFrames": 400
},
"Plasma",
{
"or": [
"Wave",
{
"heatFrames": 100
}
]
}
]
},
{
"and": [
{
"enemyKill": {
"enemies": [
[
"Dessgeega"
],
[
"Dessgeega"
],
[
"Dessgeega"
],
[
"Multiviola"
],
[
"Multiviola"
]
],
"explicitWeapons": [
"Missile"
]
}
},
{
"heatFrames": 500
}
]
},
{
"and": [
{
"enemyKill": {
"enemies": [
[
"Dessgeega"
],
[
"Dessgeega"
],
[
"Dessgeega"
],
[
"Multiviola"
],
[
"Multiviola"
]
],
"explicitWeapons": [
"Super"
]
}
},
{
"heatFrames": 400
}
]
},
{
"and": [
"ScrewAttack",
{
"heatFrames": 320
}
]
}
]
}
"h_shinechargeMaxRunway"
{
"autoReserveTrigger": {
"maxReserveEnergy": 95
}
}
"canRModeSparkInterrupt"
{
"heatFrames": 30
}Clears obstacles: A, B, C, D, E, F |
From: 2
Top Right Door
To: 1
Bottom Left Door
Crystal Flash on the topmost ledge to open the bomb blocks and navigate the Multiviola boxes. Samus cannot use Power Bombs or X-Ray after the Crystal Flash until R-Mode ends. Kill the two right Dessgeegas from the safety of the Multiviola box, then clear the rest of the runway. Use the Multiviola at the end to interrupt, or use a heat interrupt. Entrance condition: {
"comeInWithRMode": {}
}Requires: {
"heatFrames": 15
}
"h_heatedCrystalFlashForReserveEnergy"
{
"or": [
{
"and": [
"ScrewAttack",
{
"heatFrames": 650
}
]
},
{
"and": [
"Plasma",
{
"heatFrames": 850
},
{
"or": [
"Wave",
{
"heatFrames": 300
}
]
}
]
},
{
"and": [
"Ice",
"Wave",
"Spazer",
{
"heatFrames": 750
},
{
"or": [
{
"heatFrames": 750
},
{
"and": [
{
"enemyKill": {
"enemies": [
[
"Dessgeega",
"Dessgeega"
]
],
"explicitWeapons": [
"Missile"
]
}
},
{
"heatFrames": 670
}
]
},
{
"and": [
{
"enemyKill": {
"enemies": [
[
"Dessgeega",
"Dessgeega"
]
],
"explicitWeapons": [
"Super"
]
}
},
{
"heatFrames": 400
}
]
}
]
}
]
},
{
"and": [
"Wave",
{
"heatFrames": 1350
},
{
"or": [
{
"and": [
{
"enemyKill": {
"enemies": [
[
"Dessgeega",
"Dessgeega"
]
],
"excludedWeapons": [
"Bombs",
"PseudoScrew",
"PowerBomb"
]
}
},
{
"heatFrames": 3000
}
]
},
{
"and": [
{
"enemyKill": {
"enemies": [
[
"Dessgeega",
"Dessgeega"
]
],
"explicitWeapons": [
"Missile"
]
}
},
{
"heatFrames": 670
}
]
},
{
"and": [
{
"enemyKill": {
"enemies": [
[
"Dessgeega",
"Dessgeega"
]
],
"explicitWeapons": [
"Super"
]
}
},
{
"heatFrames": 400
}
]
}
]
}
]
},
{
"and": [
{
"heatFrames": 400
},
{
"enemyDamage": {
"enemy": "Multiviola",
"type": "contact",
"hits": 3
}
},
{
"or": [
{
"and": [
{
"enemyKill": {
"enemies": [
[
"Dessgeega",
"Dessgeega"
]
],
"excludedWeapons": [
"Bombs",
"PseudoScrew",
"PowerBomb"
]
}
},
{
"heatFrames": 3000
}
]
},
{
"and": [
{
"enemyKill": {
"enemies": [
[
"Dessgeega",
"Dessgeega"
]
],
"explicitWeapons": [
"Missile"
]
}
},
{
"heatFrames": 670
}
]
},
{
"and": [
{
"enemyKill": {
"enemies": [
[
"Dessgeega",
"Dessgeega"
]
],
"explicitWeapons": [
"Super"
]
}
},
{
"heatFrames": 400
}
]
}
]
}
]
},
{
"and": [
"h_heatProof",
{
"enemyKill": {
"enemies": [
[
"Dessgeega",
"Dessgeega"
]
],
"excludedWeapons": [
"Bombs",
"PseudoScrew",
"PowerBomb"
]
}
}
]
}
]
}
{
"or": [
{
"and": [
{
"getBlueSpeed": {
"usedTiles": 23,
"openEnd": 2
}
},
{
"heatFrames": 200
}
]
},
{
"and": [
"h_heatProof",
"canDodgeWhileShooting",
{
"enemyKill": {
"enemies": [
[
"Dessgeega"
],
[
"Dessgeega"
],
[
"Dessgeega"
],
[
"Multiviola"
],
[
"Multiviola"
]
],
"excludedWeapons": [
"Bombs",
"PseudoScrew",
"PowerBomb",
"PowerBeam"
]
}
}
]
},
{
"and": [
{
"heatFrames": 400
},
"Plasma",
{
"or": [
"Wave",
{
"heatFrames": 100
}
]
}
]
},
{
"and": [
{
"enemyKill": {
"enemies": [
[
"Dessgeega"
],
[
"Dessgeega"
],
[
"Dessgeega"
],
[
"Multiviola"
],
[
"Multiviola"
]
],
"explicitWeapons": [
"Missile"
]
}
},
{
"heatFrames": 500
}
]
},
{
"and": [
{
"enemyKill": {
"enemies": [
[
"Dessgeega"
],
[
"Dessgeega"
],
[
"Dessgeega"
],
[
"Multiviola"
],
[
"Multiviola"
]
],
"explicitWeapons": [
"Super"
]
}
},
{
"heatFrames": 400
}
]
},
{
"and": [
"ScrewAttack",
{
"heatFrames": 320
}
]
}
]
}
"h_shinechargeMaxRunway"
{
"autoReserveTrigger": {
"maxReserveEnergy": 95
}
}
"canRModeSparkInterrupt"
{
"heatFrames": 30
}Clears obstacles: A, B, C, D, E, F |
From: 2
Top Right Door
To: 1
Bottom Left Door
Use normal bombs or a Power Bomb to open the bomb blocks, then navigate the Multiviola boxes. Kill the two right Dessgeegas, then Crystal Flash. Samus cannot use Power Bombs or X-Ray after the Crystal Flash until R-Mode ends. Clear the rest of the runway. Use the Multiviola at the end to interrupt, or use a heat interrupt. Entrance condition: {
"comeInWithRMode": {}
}Requires: {
"or": [
{
"and": [
"h_usePowerBomb",
{
"heatFrames": 180
}
]
},
{
"and": [
{
"heatFrames": 160
},
{
"or": [
"ScrewAttack",
{
"and": [
"h_useMorphBombs",
{
"heatFrames": 60
}
]
}
]
}
]
}
]
}
{
"or": [
{
"and": [
"ScrewAttack",
{
"heatFrames": 650
}
]
},
{
"and": [
"Plasma",
{
"heatFrames": 850
},
{
"or": [
"Wave",
{
"heatFrames": 300
}
]
}
]
},
{
"and": [
{
"or": [
{
"and": [
{
"enemyKill": {
"enemies": [
[
"Multiviola",
"Multiviola"
],
[
"Multiviola",
"Multiviola",
"Multiviola"
]
],
"explicitWeapons": [
"PowerBomb"
]
}
},
{
"heatFrames": 500
}
]
},
{
"and": [
"Ice",
"Wave",
"Spazer",
{
"heatFrames": 750
}
]
},
{
"and": [
"Wave",
{
"heatFrames": 1350
}
]
},
{
"and": [
{
"heatFrames": 400
},
{
"enemyDamage": {
"enemy": "Multiviola",
"type": "contact",
"hits": 3
}
}
]
}
]
},
{
"or": [
{
"and": [
{
"enemyKill": {
"enemies": [
[
"Dessgeega",
"Dessgeega"
]
],
"explicitWeapons": [
"Missile"
]
}
},
{
"heatFrames": 670
}
]
},
{
"and": [
{
"enemyKill": {
"enemies": [
[
"Dessgeega",
"Dessgeega"
]
],
"explicitWeapons": [
"Super"
]
}
},
{
"heatFrames": 400
}
]
},
{
"and": [
{
"enemyKill": {
"enemies": [
[
"Dessgeega",
"Dessgeega"
]
],
"explicitWeapons": [
"PowerBomb"
]
}
},
{
"heatFrames": 500
}
]
},
{
"and": [
"Ice",
"Wave",
"Spazer",
{
"heatFrames": 750
}
]
}
]
}
]
},
{
"and": [
"h_heatProof",
{
"enemyKill": {
"enemies": [
[
"Dessgeega",
"Dessgeega"
]
],
"excludedWeapons": [
"Bombs",
"PseudoScrew"
]
}
}
]
}
]
}
"h_heatedCrystalFlashForReserveEnergy"
{
"or": [
{
"and": [
{
"getBlueSpeed": {
"usedTiles": 23,
"openEnd": 2
}
},
{
"heatFrames": 200
}
]
},
{
"and": [
"h_heatProof",
"canDodgeWhileShooting",
{
"enemyKill": {
"enemies": [
[
"Dessgeega"
],
[
"Dessgeega"
],
[
"Dessgeega"
],
[
"Multiviola"
],
[
"Multiviola"
]
],
"excludedWeapons": [
"Bombs",
"PseudoScrew",
"PowerBomb",
"PowerBeam"
]
}
}
]
},
{
"and": [
{
"heatFrames": 400
},
"Plasma",
{
"or": [
"Wave",
{
"heatFrames": 100
}
]
}
]
},
{
"and": [
{
"enemyKill": {
"enemies": [
[
"Dessgeega"
],
[
"Dessgeega"
],
[
"Dessgeega"
],
[
"Multiviola"
],
[
"Multiviola"
]
],
"explicitWeapons": [
"Missile"
]
}
},
{
"heatFrames": 500
}
]
},
{
"and": [
{
"enemyKill": {
"enemies": [
[
"Dessgeega"
],
[
"Dessgeega"
],
[
"Dessgeega"
],
[
"Multiviola"
],
[
"Multiviola"
]
],
"explicitWeapons": [
"Super"
]
}
},
{
"heatFrames": 400
}
]
},
{
"and": [
"ScrewAttack",
{
"heatFrames": 320
}
]
}
]
}
"h_shinechargeMaxRunway"
{
"autoReserveTrigger": {
"maxReserveEnergy": 95
}
}
"canRModeSparkInterrupt"
{
"heatFrames": 30
}Clears obstacles: A, B, C, D, E, F |
|
Use normal bombs or a Power Bomb to open the bomb blocks, then navigate the Multiviola boxes. Kill the two right Dessgeegas, then clear the rest of the runway. Use the Multiviola at the end to interrupt, or use a heat interrupt. If Samus ends up needing to Crystal Flash at any point, remember that Samus cannot use Power Bombs or X-Ray afterwards until R-Mode ends. Entrance condition: {
"comeInWithRMode": {}
}Requires: "canBeLucky"
{
"or": [
{
"and": [
"h_usePowerBomb",
{
"heatFrames": 180
}
]
},
{
"and": [
{
"heatFrames": 160
},
{
"or": [
"ScrewAttack",
{
"and": [
"h_useMorphBombs",
{
"heatFrames": 60
}
]
}
]
}
]
}
]
}
{
"or": [
{
"and": [
"ScrewAttack",
{
"heatFrames": 650
}
]
},
{
"and": [
"Plasma",
{
"heatFrames": 850
},
{
"or": [
"Wave",
{
"heatFrames": 300
}
]
}
]
},
{
"and": [
{
"or": [
{
"and": [
{
"enemyKill": {
"enemies": [
[
"Multiviola",
"Multiviola"
],
[
"Multiviola",
"Multiviola",
"Multiviola"
]
],
"explicitWeapons": [
"PowerBomb"
]
}
},
{
"heatFrames": 500
}
]
},
{
"and": [
"Ice",
"Wave",
"Spazer",
{
"heatFrames": 750
}
]
},
{
"and": [
"Wave",
{
"heatFrames": 1350
}
]
},
{
"and": [
{
"heatFrames": 400
},
{
"enemyDamage": {
"enemy": "Multiviola",
"type": "contact",
"hits": 3
}
}
]
}
]
},
{
"or": [
{
"and": [
{
"enemyKill": {
"enemies": [
[
"Dessgeega",
"Dessgeega"
]
],
"explicitWeapons": [
"Missile"
]
}
},
{
"heatFrames": 670
}
]
},
{
"and": [
{
"enemyKill": {
"enemies": [
[
"Dessgeega",
"Dessgeega"
]
],
"explicitWeapons": [
"Super"
]
}
},
{
"heatFrames": 400
}
]
},
{
"and": [
{
"enemyKill": {
"enemies": [
[
"Dessgeega",
"Dessgeega"
]
],
"explicitWeapons": [
"PowerBomb"
]
}
},
{
"heatFrames": 500
}
]
},
{
"and": [
"Ice",
"Wave",
"Spazer",
{
"heatFrames": 750
}
]
}
]
}
]
},
{
"and": [
"h_heatProof",
{
"enemyKill": {
"enemies": [
[
"Dessgeega",
"Dessgeega"
]
],
"excludedWeapons": [
"Bombs",
"PseudoScrew",
"PowerBomb"
]
}
}
]
}
]
}
{
"or": [
{
"and": [
{
"getBlueSpeed": {
"usedTiles": 23,
"openEnd": 2
}
},
{
"heatFrames": 200
}
]
},
{
"and": [
"h_heatProof",
"canDodgeWhileShooting",
{
"enemyKill": {
"enemies": [
[
"Dessgeega"
],
[
"Dessgeega"
],
[
"Dessgeega"
],
[
"Multiviola"
],
[
"Multiviola"
]
],
"excludedWeapons": [
"Bombs",
"PseudoScrew",
"PowerBomb",
"PowerBeam"
]
}
}
]
},
{
"and": [
{
"heatFrames": 400
},
"Plasma",
{
"or": [
"Wave",
{
"heatFrames": 100
}
]
}
]
},
{
"and": [
{
"enemyKill": {
"enemies": [
[
"Dessgeega"
],
[
"Dessgeega"
],
[
"Dessgeega"
],
[
"Multiviola"
],
[
"Multiviola"
]
],
"explicitWeapons": [
"Missile"
]
}
},
{
"heatFrames": 500
}
]
},
{
"and": [
{
"enemyKill": {
"enemies": [
[
"Dessgeega"
],
[
"Dessgeega"
],
[
"Dessgeega"
],
[
"Multiviola"
],
[
"Multiviola"
]
],
"explicitWeapons": [
"Super"
]
}
},
{
"heatFrames": 400
}
]
},
{
"and": [
"ScrewAttack",
{
"heatFrames": 320
}
]
}
]
}
"h_RModeCanRefillReserves"
{
"partialRefill": {
"type": "ReserveEnergy",
"limit": 20
}
}
"h_shinechargeMaxRunway"
{
"autoReserveTrigger": {
"maxReserveEnergy": 95
}
}
"canRModeSparkInterrupt"
{
"heatFrames": 30
}Clears obstacles: A, B, C, D, E, F |
|
Clear the two Holtzes at the door, then Crystal Flash. Avoid killilng all the Zebbos as they don't respawn during G-Mode. Entrance condition: {
"comeInWithGMode": {
"mode": "direct",
"morphed": false
}
}Requires: "Gravity"
{
"or": [
"canTrickyDodgeEnemies",
{
"enemyKill": {
"enemies": [
[
"Holtz",
"Holtz"
]
],
"explicitWeapons": [
"ScrewAttack",
"Plasma",
"Super",
"Ice+Wave+Spazer"
]
}
}
]
}
"h_CrystalFlashForReserveEnergy"
{
"canShineCharge": {
"usedTiles": 38,
"openEnd": 0
}
}
{
"acidFrames": 115
}
{
"autoReserveTrigger": {
"maxReserveEnergy": 95
}
}
"canRModeSparkInterrupt"
{
"heatFrames": 80
} |
|
Clear the two Holtzes that greet you and collect their drops. With heat protection, you can farm up at a Zebbo pipe. Run across the acid then jump up to a Zebbo pipe for the interrupt. Entrance condition: {
"comeInWithRMode": {}
}Requires: "Gravity"
{
"or": [
{
"and": [
"canDodgeWhileShooting",
{
"or": [
"Plasma",
{
"and": [
"Ice",
"Wave",
"Spazer"
]
}
]
},
{
"heatFrames": 550
}
]
},
{
"and": [
{
"enemyKill": {
"enemies": [
[
"Holtz",
"Holtz"
]
],
"explicitWeapons": [
"ScrewAttack",
"Ice+Wave+Plasma"
]
}
},
{
"heatFrames": 100
}
]
},
{
"and": [
"canDodgeWhileShooting",
{
"enemyKill": {
"enemies": [
[
"Holtz",
"Holtz"
]
],
"explicitWeapons": [
"Super"
]
}
},
{
"heatFrames": 300
}
]
},
{
"and": [
"canTrickyJump",
{
"enemyKill": {
"enemies": [
[
"Holtz",
"Holtz"
]
],
"explicitWeapons": [
"PowerBomb"
]
}
},
{
"heatFrames": 600
}
]
}
]
}
{
"or": [
"h_heatedCrystalFlashForReserveEnergy",
{
"and": [
"h_heatProof",
"h_RModeCanRefillReserves",
{
"resourceMissingAtMost": [
{
"type": "Missile",
"count": 0
}
]
},
{
"resourceMissingAtMost": [
{
"type": "PowerBomb",
"count": 0
}
]
},
{
"resourceMissingAtMost": [
{
"type": "Super",
"count": 0
}
]
},
{
"refill": [
"Energy"
]
}
]
}
]
}
{
"canShineCharge": {
"usedTiles": 38,
"openEnd": 0
}
}
{
"heatFrames": 390
}
{
"acidFrames": 133
}
{
"autoReserveTrigger": {
"maxReserveEnergy": 95
}
}
"canRModeSparkInterrupt"
{
"heatFrames": 80
} |
|
Clear the two Holtzes at the door and Crystal Flash. Avoid killing all the Zebbos as they do not respawn in G-Mode. Run across the acid then jump up to a Zebbo pipe for the interrupt. Entrance condition: {
"comeInWithGMode": {
"mode": "direct",
"morphed": false
}
}Requires: {
"disableEquipment": "ETank"
}
"Gravity"
"h_CrystalFlashForReserveEnergy"
{
"canShineCharge": {
"usedTiles": 38,
"openEnd": 0
}
}
{
"acidFrames": 115
}
{
"autoReserveTrigger": {
"maxReserveEnergy": 95
}
}
"canRModeSparkInterrupt"
{
"heatFrames": 80
} |
|
Clear the two Holtzes that greet you and collect their drops. With heat protection, you can farm up at a Zebbo pipe. Run across the acid then jump up to a Zebbo pipe for the interrupt. Entrance condition: {
"comeInWithRMode": {}
}Requires: "Gravity"
{
"or": [
{
"and": [
"canBePatient",
"canDodgeWhileShooting",
{
"heatFrames": 2400
}
]
},
{
"and": [
{
"or": [
"Wave",
"Spazer"
]
},
{
"heatFrames": 950
}
]
},
{
"and": [
{
"or": [
"Plasma",
{
"and": [
"Ice",
"Wave",
"Spazer"
]
}
]
},
{
"heatFrames": 500
}
]
},
{
"and": [
{
"enemyKill": {
"enemies": [
[
"Holtz",
"Holtz"
]
],
"explicitWeapons": [
"ScrewAttack",
"Ice+Wave+Plasma"
]
}
},
{
"heatFrames": 100
}
]
},
{
"and": [
"canDodgeWhileShooting",
{
"enemyKill": {
"enemies": [
[
"Holtz",
"Holtz"
]
],
"explicitWeapons": [
"Super",
"PowerBomb"
]
}
},
{
"heatFrames": 550
}
]
}
]
}
{
"or": [
"h_heatedCrystalFlashForReserveEnergy",
{
"and": [
"h_RModeCanRefillReserves",
{
"resourceMissingAtMost": [
{
"type": "Missile",
"count": 0
}
]
},
{
"resourceMissingAtMost": [
{
"type": "PowerBomb",
"count": 0
}
]
},
{
"resourceMissingAtMost": [
{
"type": "Super",
"count": 0
}
]
},
{
"or": [
{
"partialRefill": {
"type": "ReserveEnergy",
"limit": 40
}
},
{
"and": [
"h_heatProof",
{
"refill": [
"Energy"
]
}
]
}
]
}
]
}
]
}
{
"canShineCharge": {
"usedTiles": 38,
"openEnd": 0
}
}
{
"heatFrames": 390
}
{
"acidFrames": 133
}
{
"autoReserveTrigger": {
"maxReserveEnergy": 95
}
}
"canRModeSparkInterrupt"
{
"heatFrames": 80
} |
From: 1
Top Left Door
To: 4
Top Right Door
Entrance condition: {
"comeInWithStoredFallSpeed": {
"fallSpeedInTiles": 1
}
}Requires: "canDisableEquipment"
{
"heatFrames": 70
}
{
"or": [
"canDash",
{
"heatFrames": 20
}
]
}Exit condition: {
"leaveWithStoredFallSpeed": {
"fallSpeedInTiles": 1
}
}Unlocks doors: {"types":["missiles","super"],"requires":[]}
{"types":["powerbomb"],"requires":["never"]} |
From: 1
Top Left Door
To: 4
Top Right Door
Entrance condition: {
"comeInWithStoredFallSpeed": {
"fallSpeedInTiles": 2
}
}Requires: "canDisableEquipment"
{
"heatFrames": 70
}
{
"or": [
"canDash",
{
"heatFrames": 20
}
]
}Exit condition: {
"leaveWithStoredFallSpeed": {
"fallSpeedInTiles": 2
}
}Unlocks doors: {"types":["missiles","super"],"requires":[]}
{"types":["powerbomb"],"requires":["never"]} |
From: 4
Top Right Door
To: 1
Top Left Door
Entrance condition: {
"comeInWithStoredFallSpeed": {
"fallSpeedInTiles": 1
}
}Requires: "canDisableEquipment"
{
"heatFrames": 70
}
{
"or": [
"canDash",
{
"heatFrames": 20
}
]
}Exit condition: {
"leaveWithStoredFallSpeed": {
"fallSpeedInTiles": 1
}
}Unlocks doors: {"types":["missiles","super"],"requires":[]}
{"types":["powerbomb"],"requires":["never"]} |
From: 4
Top Right Door
To: 1
Top Left Door
Entrance condition: {
"comeInWithStoredFallSpeed": {
"fallSpeedInTiles": 2
}
}Requires: "canDisableEquipment"
{
"heatFrames": 70
}
{
"or": [
"canDash",
{
"heatFrames": 20
}
]
}Exit condition: {
"leaveWithStoredFallSpeed": {
"fallSpeedInTiles": 2
}
}Unlocks doors: {"types":["missiles","super"],"requires":[]}
{"types":["powerbomb"],"requires":["never"]} |
|
This room has no enemies, so the only damage source is by turning off (or not having) heat protection This is a very short shinecharge runway. Entrance condition: {
"comeInWithRMode": {}
}Requires: "h_heatProof"
"h_heatedCrystalFlashForReserveEnergy"
{
"disableEquipment": "Varia"
}
{
"disableEquipment": "Gravity"
}
{
"canShineCharge": {
"usedTiles": 12,
"openEnd": 0
}
}
"h_heatTriggerRModeSparkInterrupt" |
From: 2
Right Door
To: 5
G-Mode Morph Junction (Above Bomb Block)
Entrance condition: {
"comeInWithGMode": {
"mode": "any",
"morphed": false
}
}Requires: "Morph"
{
"or": [
"SpaceJump",
"canTrickyWallJump",
{
"and": [
"canDash",
"HiJump"
]
},
{
"and": [
"canDash",
"canInsaneJump",
{
"disableEquipment": "SpeedBooster"
}
]
}
]
}
{
"heatFrames": 0
} |
From: 4
Junction Right of Power Bomb Blocks
To: 4
Junction Right of Power Bomb Blocks
Farm the Dessgeegas, their energy rate is poor. Keep one Dessgeega alive to use for interrupt. Or kill all four and use heat with pause abuse to interrupt. Requires: {
"obstaclesCleared": [
"R-Mode"
]
}
{
"obstaclesCleared": [
"C",
"D"
]
}
{
"or": [
"h_heatedCrystalFlashForReserveEnergy",
{
"and": [
"h_RModeCanRefillReserves",
{
"or": [
{
"partialRefill": {
"type": "ReserveEnergy",
"limit": 5
}
},
{
"and": [
"canBeLucky",
{
"partialRefill": {
"type": "ReserveEnergy",
"limit": 20
}
}
]
}
]
}
]
}
]
}
{
"heatFrames": 90
}
{
"canShineCharge": {
"usedTiles": 30,
"openEnd": 0
}
}
{
"autoReserveTrigger": {
"maxReserveEnergy": 95
}
}
"canRModeSparkInterrupt"Resets obstacles: R-Mode Dev note: FIXME: Evaluate unprotected heat option with disable E-Tank + CF for full reserves, once heated bluesuit movement is implemented. |
|
Power Off: fill up reserves using the trapped Atomics and the respawning Coverns. Shinecharge across the bottom door and use the next Covern spawn to interrupt. Power On: farm the Kihunters and 3 Atomics. Shinecharge across the door and use the remaining Atomic to interrupt. Entrance condition: {
"comeInWithRMode": {}
}Requires: {
"or": [
"h_CrystalFlashForReserveEnergy",
{
"and": [
{
"or": [
"ScrewAttack",
"Plasma",
"canTrickyDodgeEnemies",
{
"enemyKill": {
"enemies": [
[
"Kihunter (yellow)"
],
[
"Kihunter (yellow)"
],
[
"Kihunter (yellow)",
"Kihunter (yellow)"
]
],
"explicitWeapons": [
"Missile",
"Super"
]
}
}
]
},
"h_RModeCanRefillReserves",
{
"partialRefill": {
"type": "ReserveEnergy",
"limit": 40
}
}
]
}
]
}
{
"canShineCharge": {
"usedTiles": 35,
"openEnd": 0
}
}
{
"autoReserveTrigger": {
"maxReserveEnergy": 95
}
}
"canRModeSparkInterrupt"Clears obstacles: A |
|
Power Off: fill up reserves using the trapped Atomics and the respawning Coverns. Shinecharge across the bottom door and use the next Covern spawn to interrupt. Power On: farm the Kihunters and 3 Atomics. Shinecharge across the door and use the remaining Atomic to interrupt. Entrance condition: {
"comeInWithRMode": {},
"comesThroughToilet": "no"
}Requires: {
"or": [
"h_CrystalFlashForReserveEnergy",
{
"and": [
{
"or": [
"ScrewAttack",
"Plasma",
"canTrickyDodgeEnemies",
{
"enemyKill": {
"enemies": [
[
"Kihunter (yellow)"
],
[
"Kihunter (yellow)"
],
[
"Kihunter (yellow)",
"Kihunter (yellow)"
]
],
"explicitWeapons": [
"Missile",
"Super"
]
}
}
]
},
"h_RModeCanRefillReserves",
{
"partialRefill": {
"type": "ReserveEnergy",
"limit": 40
}
}
]
}
]
}
{
"canShineCharge": {
"usedTiles": 35,
"openEnd": 0
}
}
{
"autoReserveTrigger": {
"maxReserveEnergy": 95
}
}
"canRModeSparkInterrupt"Clears obstacles: A |
|
Power Off: fill up reserves using the trapped Atomics and the respawning Coverns. Shinecharge across the bottom door and use the next Covern spawn to interrupt. Power On: farm the Kihunters and 3 Atomics. Shinecharge across the door and use the remaining Atomic to interrupt. Entrance condition: {
"comeInWithRMode": {}
}Requires: {
"or": [
"h_CrystalFlashForReserveEnergy",
{
"and": [
{
"or": [
"ScrewAttack",
"Plasma",
"canTrickyDodgeEnemies",
{
"enemyKill": {
"enemies": [
[
"Kihunter (yellow)"
],
[
"Kihunter (yellow)"
],
[
"Kihunter (yellow)",
"Kihunter (yellow)"
]
],
"explicitWeapons": [
"Missile",
"Super"
]
}
}
]
},
"h_RModeCanRefillReserves",
{
"partialRefill": {
"type": "ReserveEnergy",
"limit": 40
}
}
]
}
]
}
{
"canShineCharge": {
"usedTiles": 35,
"openEnd": 0
}
}
{
"autoReserveTrigger": {
"maxReserveEnergy": 95
}
}
"canRModeSparkInterrupt"Clears obstacles: A |
From: 1
Left Door
To: 1
Left Door
Entrance condition: {
"comeInWithRMode": {}
}Requires: "f_DefeatedPhantoon"
{
"or": [
{
"and": [
{
"disableEquipment": "ETank"
},
{
"resourceAvailable": [
{
"type": "Energy",
"count": 80
}
]
}
]
},
"h_CrystalFlash"
]
}
{
"canShineCharge": {
"usedTiles": 38,
"openEnd": 1
}
}
"h_RModeKnockbackSpark" |
|
Entrance condition: {
"comeInWithRMode": {}
}Requires: "f_DefeatedPhantoon"
{
"or": [
"h_CrystalFlashForReserveEnergy",
{
"and": [
"h_RModeCanRefillReserves",
{
"partialRefill": {
"type": "ReserveEnergy",
"limit": 20
}
}
]
}
]
}
"h_shinechargeMaxRunway"
{
"autoReserveTrigger": {
"maxReserveEnergy": 95
}
}
"canRModeSparkInterrupt" |
|
Entrance condition: {
"comeInWithRMode": {},
"comesThroughToilet": "any"
}Requires: "f_DefeatedPhantoon"
{
"or": [
{
"and": [
{
"disableEquipment": "ETank"
},
{
"resourceAvailable": [
{
"type": "Energy",
"count": 80
}
]
}
]
},
"h_CrystalFlash"
]
}
{
"canShineCharge": {
"usedTiles": 38,
"openEnd": 1
}
}
"h_RModeKnockbackSpark" |
|
Entrance condition: {
"comeInWithRMode": {},
"comesThroughToilet": "no"
}Requires: "f_DefeatedPhantoon"
{
"or": [
"h_CrystalFlashForReserveEnergy",
{
"and": [
"h_RModeCanRefillReserves",
{
"partialRefill": {
"type": "ReserveEnergy",
"limit": 20
}
}
]
}
]
}
"h_shinechargeMaxRunway"
{
"autoReserveTrigger": {
"maxReserveEnergy": 95
}
}
"canRModeSparkInterrupt" |
|
Farm atomics and push the robots apart to open up the runway. Use an Atomic to interrupt. Entrance condition: {
"comeInWithRMode": {}
}Requires: "f_DefeatedPhantoon"
{
"or": [
"h_CrystalFlashForReserveEnergy",
{
"and": [
"h_bombThings",
"h_RModeCanRefillReserves",
{
"partialRefill": {
"type": "ReserveEnergy",
"limit": 20
}
}
]
}
]
}
"h_shinechargeMaxRunway"
{
"autoReserveTrigger": {
"maxReserveEnergy": 95
}
}
"canRModeSparkInterrupt"Clears obstacles: A |
From: 3
Right Door
To: 3
Right Door
Entrance condition: {
"comeInWithRMode": {}
}Requires: "f_DefeatedPhantoon"
{
"or": [
{
"and": [
{
"disableEquipment": "ETank"
},
{
"resourceAvailable": [
{
"type": "Energy",
"count": 80
}
]
}
]
},
"h_CrystalFlash"
]
}
"h_bombThings"
{
"canShineCharge": {
"usedTiles": 38,
"openEnd": 1
}
}
"h_RModeKnockbackSpark" |
From: 2
Middle Left Door
To: 2
Middle Left Door
Crystal Flash, enter X-Mode on the spikes and shinecharge. Use the spikes to pause abuse and interrupt shinespark. Entrance condition: {
"comeInWithRMode": {}
}Requires: "f_DefeatedPhantoon"
"canBeVeryLucky"
"h_CrystalFlashForReserveEnergy"
"h_usePowerBomb"
"canOffScreenMovement"
"canXMode"
{
"spikeHits": 1
}
"h_XModeSpikeHit"
"h_shinechargeMaxRunway"
{
"autoReserveTrigger": {}
}
{
"spikeHits": 2
}
"canRModePauseAbuseSparkInterrupt"Dev note: canBeVeryLucky added for difficulty placement. |
From: 2
Middle Left Door
To: 6
Bowling Chozo Statue
Crystal Flash and use another Power Bomb, then enter X-Mode on the spikes. Arm pump towards the statue and shinecharge once Samus appears to move into the border between the second and third spike Exit X-Mode, then jump back toward the spikes to pause abuse and interrupt shinespark, using a damage boost back toward the statue to get off of them. Entrance condition: {
"comeInWithRMode": {}
}Requires: "f_DefeatedPhantoon"
"canBeVeryLucky"
"h_CrystalFlashForReserveEnergy"
"h_usePowerBomb"
"canOffScreenMovement"
"canXMode"
"h_XModeSpikeHit"
"h_shinechargeMaxRunway"
{
"autoReserveTrigger": {}
}
"canHorizontalDamageBoost"
"canRModePauseAbuseSparkInterrupt"Dev note: canBeVeryLucky added for difficulty placement. |
From: 3
Bottom Left Door
To: 4
Bottom Chozo Item
Get through the Morph tunnel to the robot area. Flush the robots into the spike pits and Crystal Flash to clear the Chozo statue. Shinecharge and then use a speedy jump up to the spikes in the right shaft. Pause, and jump into the spikes. Delay the damage boost so that Samus will not hit the spikes again after interrupt. Alternatively, flush both robots into the left pit and use the right pit to pause abuse and damage boost to gain some height. Quickly morph after the interrupt to avoid taking more than one spike hit. Entrance condition: {
"comeInWithRMode": {}
}Requires: "f_DefeatedPhantoon"
{
"or": [
"h_bombThings",
{
"and": [
"ScrewAttack",
"Morph",
{
"or": [
"Plasma",
{
"and": [
{
"notable": "Missile Chozo Camera Unlock"
},
"canCameraManip",
"canHeroShot"
]
}
]
}
]
}
]
}
"h_CrystalFlashForReserveEnergy"
{
"canShineCharge": {
"usedTiles": 25,
"openEnd": 2
}
}
"canHorizontalDamageBoost"
{
"autoReserveTrigger": {}
}
"canRModePauseAbuseSparkInterrupt"
{
"or": [
"canWallJump",
"HiJump",
"canTrickyDashJump",
{
"spikeHits": 1
}
]
}Clears obstacles: A Collects items: 4 |
From: 1
Top Left Door
To: 2
Right Door
Crystal Flash, wait for the shot blocks to respawn, shinecharge, and jump into the exposed sparks to pause abuse and interrupt. Entrance condition: {
"comeInWithRMode": {}
}Requires: "f_DefeatedPhantoon"
"h_CrystalFlashForReserveEnergy"
{
"or": [
{
"canShineCharge": {
"usedTiles": 12,
"steepUpTiles": 3,
"openEnd": 0
}
},
{
"and": [
{
"doorUnlockedAtNode": 2
},
{
"canShineCharge": {
"usedTiles": 13,
"steepUpTiles": 3,
"openEnd": 0
}
}
]
}
]
}
{
"autoReserveTrigger": {}
}
"canRModePauseAbuseSparkInterrupt"Unlocks doors: {"nodeId":2,"types":["ammo"],"requires":[]} |
|
Crystal Flash, wait for the shot blocks to respawn, shinecharge, and jump into the exposed sparks to pause abuse and interrupt. Entrance condition: {
"comeInWithRMode": {}
}Requires: "f_DefeatedPhantoon"
"h_CrystalFlashForReserveEnergy"
{
"or": [
{
"canShineCharge": {
"usedTiles": 12,
"steepUpTiles": 3,
"openEnd": 0
}
},
{
"and": [
{
"doorUnlockedAtNode": 2
},
{
"canShineCharge": {
"usedTiles": 13,
"steepUpTiles": 3,
"openEnd": 0
}
}
]
}
]
}
{
"autoReserveTrigger": {}
}
"canRModePauseAbuseSparkInterrupt"Unlocks doors: {"nodeId":2,"types":["ammo"],"requires":[]} |
From: 3
Bottom Left Door
To: 2
Right Door
Crystal Flash, wait for the shot blocks to respawn, shinecharge, and jump into the exposed sparks to pause abuse and interrupt. Entrance condition: {
"comeInWithRMode": {}
}Requires: "f_DefeatedPhantoon"
"h_CrystalFlashForReserveEnergy"
{
"or": [
{
"canShineCharge": {
"usedTiles": 12,
"steepUpTiles": 3,
"openEnd": 0
}
},
{
"and": [
{
"doorUnlockedAtNode": 2
},
{
"canShineCharge": {
"usedTiles": 13,
"steepUpTiles": 3,
"openEnd": 0
}
}
]
}
]
}
{
"autoReserveTrigger": {}
}
"canRModePauseAbuseSparkInterrupt"Unlocks doors: {"nodeId":2,"types":["ammo"],"requires":[]} |
From: 1
Left Door
To: 1
Left Door
Phantoon will place stationary, invisible flames, which need to be avoided while starting to Crystal Flash. Crystal Flash and have Phantoon spawn on top of Samus to trigger reserves. Requires a lot of luck. Entrance condition: {
"comeInWithGMode": {
"mode": "direct",
"morphed": true
}
}Requires: {
"not": "f_DefeatedPhantoon"
}
"canRiskPermanentLossOfAccess"
"canBeVeryLucky"
"h_artificialMorphComplexRModeCrystalFlashInterrupt"
{
"ammo": {
"type": "Missile",
"count": 10
}
}
{
"ammo": {
"type": "Super",
"count": 10
}
}
{
"ammo": {
"type": "PowerBomb",
"count": 10
}
}Clears obstacles: door_1 |
|
Crystal Flash at the door. Run against the treadmill to shinecharge, then windup under the broken circuit as it drops a spark to interrupt. Entrance condition: {
"comeInWithRMode": {}
}Requires: "f_DefeatedPhantoon"
"h_CrystalFlashForReserveEnergy"
{
"canShineCharge": {
"usedTiles": 15,
"openEnd": 1
}
}
{
"autoReserveTrigger": {}
}
"canRModeSparkInterrupt" |
From: 1
Left Door
To: 1
Left Door
With no Energy Tanks, roll against the Kzan. Once it starts moving up, roll a small number of pixels under it and quickly Crystal Flash. This is significantly easier with a smaller starting Energy. With a larger starting Energy, or on a particularly quick Power Bomb placement, Samus may have 50 or more in reserves; In this case, it is important to quickly land before turning around and jumping out of the Kzan. Turning around before touching the ground will move Samus several more pixels inside of the Kzan, likely resulting in death. Entrance condition: {
"comeInWithGMode": {
"mode": "direct",
"morphed": true
}
}Requires: "h_artificialMorphComplexRModeCrystalFlashInterrupt"
{
"ammo": {
"type": "Missile",
"count": 2
}
} |
From: 1
Left Door
To: 1
Left Door
Crystal Flash and enter X-Mode using the spikes. Shinecharge, then windup under a Kzan to interrupt. Entrance condition: {
"comeInWithRMode": {}
}Requires: "f_DefeatedPhantoon"
"Gravity"
"canBeVeryPatient"
"h_CrystalFlashForReserveEnergy"
"h_spikeXModeShinecharge"
{
"autoReserveTrigger": {}
}
"canRModeSparkInterrupt" |
From: 2
Right Door
To: 2
Right Door
With no Energy Tanks, roll against the Kzan. Once it starts moving up, roll a small number of pixels under it and quickly Crystal Flash. This is significantly easier with a smaller starting Energy. With a larger starting Energy, or on a particularly quick Power Bomb placement, Samus may have 50 or more in reserves; In this case, it is important to quickly land before turning around and jumping out of the Kzan. Turning around before touching the ground will move Samus several more pixels inside of the Kzan, likely resulting in death. Entrance condition: {
"comeInWithGMode": {
"mode": "direct",
"morphed": true
}
}Requires: "h_artificialMorphComplexRModeCrystalFlashInterrupt"
{
"ammo": {
"type": "Missile",
"count": 2
}
} |
From: 2
Right Door
To: 2
Right Door
Crystal Flash and enter X-Mode using the spikes. Shinecharge, then windup under a Kzan to interrupt. Entrance condition: {
"comeInWithRMode": {}
}Requires: "f_DefeatedPhantoon"
"Gravity"
"canBeVeryPatient"
"h_CrystalFlashForReserveEnergy"
"h_spikeXModeShinecharge"
{
"autoReserveTrigger": {}
}
"canRModeSparkInterrupt" |
From: 1
Left Door
To: 1
Left Door
Power Off: Farm using Coverns or trapped Atomics. Use any conveyor belt to shinecharge and then use the next Covern spawn to interrupt. Power On: Kill the Bulls for energy. Run against a conveyor belt direction to shinecharge, and then use the spikes to pause abuse and interrupt. Requires: {
"obstaclesCleared": [
"R-Mode"
]
}
{
"or": [
"h_CrystalFlashForReserveEnergy",
{
"and": [
"h_RModeCanRefillReserves",
{
"enemyKill": {
"enemies": [
[
"Bull",
"Bull"
]
],
"excludedWeapons": [
"PowerBomb"
]
}
},
{
"resourceMissingAtMost": [
{
"type": "PowerBomb",
"count": 0
}
]
},
{
"partialRefill": {
"type": "ReserveEnergy",
"limit": 40
}
}
]
}
]
}
{
"or": [
{
"canShineCharge": {
"usedTiles": 14,
"openEnd": 0
}
},
{
"and": [
"f_DefeatedPhantoon",
{
"canShineCharge": {
"usedTiles": 20,
"openEnd": 2
}
}
]
}
]
}
{
"autoReserveTrigger": {
"maxReserveEnergy": 95
}
}
"canRModePauseAbuseSparkInterrupt"Resets obstacles: R-Mode |
From: 2
Item (Behind the Bomb Wall)
To: 1
Left Door
In R-Mode, kill the Coverns until there is Energy in Samus's Reserves. Get into the Morph tunnel and go to the far left. Wait for Coverns to damage Samus down until Reserves trigger, forcing a stand up and enabling her to escape. Note that it is required to break the bomb block above the Morph tunnel as well, in order to clip out. Requires: {
"notable": "R-Mode Standup Clip"
}
{
"obstaclesCleared": [
"R-Mode"
]
}
"canRModeStandupClip"
"canCeilingClip"
{
"or": [
{
"and": [
{
"disableEquipment": "ETank"
},
{
"or": [
"canBePatient",
{
"resourceAvailable": [
{
"type": "Energy",
"count": 80
}
]
}
]
}
]
},
"canBeExtremelyPatient"
]
}
{
"partialRefill": {
"type": "ReserveEnergy",
"limit": 20
}
}
{
"or": [
"canTrivialMidAirMorph",
"h_useSpringBall",
"h_bombThings"
]
}
{
"autoReserveTrigger": {}
}Resets obstacles: R-Mode Dev note: If Phantoon is alive, 'Base' can be used instead. Note that this strat is useless in vanilla, as the item only spawns if Phantoon has been killed. |
From: 1
Right Door
To: 1
Right Door
Power Off: Crystal Flash, enter X-Mode using the bottom spikes and shinecharge, then pause abuse from the spikes to interrupt. Power On: Crystal Flash or farm Skultera. Enter X-Mode using the bottom spikes and shinecharge, then pause abuse from the spikes to interrupt. Entrance condition: {
"comeInWithRMode": {}
}Requires: {
"or": [
"Gravity",
{
"and": [
{
"not": "f_DefeatedPhantoon"
},
"canRiskPermanentLossOfAccess"
]
}
]
}
{
"or": [
"h_CrystalFlashForReserveEnergy",
{
"and": [
"f_DefeatedPhantoon",
"h_RModeCanRefillReserves",
"canBeLucky",
{
"resourceMissingAtMost": [
{
"type": "Missile",
"count": 0
}
]
},
{
"or": [
{
"partialRefill": {
"type": "ReserveEnergy",
"limit": 5
}
},
{
"and": [
{
"partialRefill": {
"type": "ReserveEnergy",
"limit": 20
}
},
"canBeVeryLucky"
]
}
]
}
]
}
]
}
"canBeVeryPatient"
"h_thornXModeShinecharge"
"h_thornXModeFramePerfectExtraLeniency"
{
"autoReserveTrigger": {}
}
"canRModePauseAbuseSparkInterrupt" |
From: 1
Right Door
To: 2
Item
Jump as far as possible before activating the spark, while sparking high enough to crash into the Chozo statue's hand. Entrance condition: {
"comeInShinecharged": {}
}Requires: {
"shineChargeFrames": 100
}
"canShinechargeMovementComplex"
{
"shinespark": {
"frames": 33,
"excessFrames": 7
}
}
{
"or": [
{
"and": [
{
"not": "f_DefeatedPhantoon"
},
"canRiskPermanentLossOfAccess"
]
},
"Gravity",
{
"disableEquipment": "HiJump"
},
"canTrickyJump"
]
}Dev note: If power is on, then this strat may not quite work because the water can interfere with the runway for the jump. But in that case, platforming is possible as a relatively free alternative. |
From: 1
Right Door
To: 2
Item
Gain a shinecharge while entering the room. Run back to the door, and then run left and jump as far as possible before activating the spark, while sparking high enough to crash into the Chozo statue's hand. Entrance condition: {
"comeInShinecharging": {
"length": 7,
"openEnd": 0,
"steepDownTiles": 2
}
}Requires: "canShinechargeMovementComplex"
{
"shinespark": {
"frames": 33,
"excessFrames": 7
}
}
{
"or": [
{
"and": [
{
"not": "f_DefeatedPhantoon"
},
"canRiskPermanentLossOfAccess"
]
},
"Gravity",
{
"disableEquipment": "HiJump"
},
"canTrickyJump"
]
}Dev note: If power is on, then this strat may not quite work because the water can interfere with the runway. But in that case, platforming is possible as a relatively free alternative. |
From: 1
Right Door
To: 2
Item
Requires: {
"thornHits": 1
}
"HiJump"
"canSpringBallJumpMidAir"
{
"not": "f_DefeatedPhantoon"
}
{
"or": [
"canRiskPermanentLossOfAccess",
{
"and": [
"canDash",
"canCarefulJump",
{
"disableEquipment": "HiJump"
}
]
},
{
"and": [
"canJumpIntoIBJ",
"canBombHorizontally",
"canTrickyJump"
]
},
"Gravity",
"canSpringFling"
]
} |
|
Jump onto the first platform, which is easiest when the water is low. Continue jumping on the platforms to prevent them from going into the water. Get a bit of run speed on the final platform, which is easiest while the water is low, then jump to the solid ground. Requires: "canDash"
"canCarefulJump"
{
"disableEquipment": "HiJump"
}
"f_DefeatedPhantoon" |
From: 1
Right Door
To: 2
Item
Run from the adjacent room and jump at the end of the platform. From the top right platform, jump to the left and wall jump just above the spikes and climb the left wall. Entrance condition: {
"comeInRunning": {
"speedBooster": "yes",
"minTiles": 5
}
}Requires: "h_speedJump"
"canCarefulJump"
"canConsecutiveWallJump"
{
"not": "f_DefeatedPhantoon"
}
{
"or": [
{
"disableEquipment": "HiJump"
},
"canRiskPermanentLossOfAccess",
"canTrickyJump"
]
}Dev note: This variant of the strat includes an extra couple of tiles of runway for lenience. |
|
Requires: {
"thornHits": 1
}
{
"or": [
{
"and": [
"canUseIFrames",
"canDash"
]
},
{
"and": [
{
"tech": "canHorizontalDamageBoost"
},
"h_complexToCarryFlashSuit"
]
},
{
"thornHits": 1
}
]
}
"canWallJump"
{
"not": "f_DefeatedPhantoon"
}
{
"or": [
"canRiskPermanentLossOfAccess",
{
"and": [
"canDash",
"canCarefulJump",
{
"disableEquipment": "HiJump"
}
]
},
{
"and": [
"Gravity",
"canDash"
]
},
{
"and": [
"canJumpIntoIBJ",
"canBombHorizontally",
"canTrickyJump"
]
},
{
"and": [
"Gravity",
"canSpringBallJumpMidAir"
]
},
"canSpringFling",
{
"and": [
"HiJump",
"Gravity",
"canInsaneJump"
]
}
]
}Dev note: The canCarefulJump and Gravity are here, as with either of those, there is access across with or without f_DefeatedPhantoon. |
|
When the power is on, the floor has spikes (not thorns), and Samus will quickly lose i-frames. Requires: {
"haveBlueSuit": {}
}
"canBlueSuitSpikeJump"
{
"or": [
{
"and": [
"canGravityJump",
{
"spikeHits": 1
}
]
},
{
"and": [
{
"disableEquipment": "Gravity"
},
{
"spikeHits": 2
}
]
},
{
"and": [
"Gravity",
"HiJump",
{
"spikeHits": 2
}
]
},
{
"and": [
"Gravity",
{
"tech": "canHorizontalDamageBoost"
},
{
"noFlashSuit": {}
},
{
"spikeHits": 2
}
]
},
{
"spikeHits": 3
}
]
} |
From: 1
Top Door
To: 1
Top Door
It is required to avoid double hitting the Atomic with the Power Bomb, and to position the Crystal Flash so that the Atomic can hit Samus from below so it avoids the light orb. This is possible with no movement items. Roll down to the shot blocks and Crystal Flash in the middle of the screen. This can be done with up to 2 E-Tanks while suitless, or no E-Tanks and up to 50% damage reduction. Entrance condition: {
"comeInWithGMode": {
"mode": "direct",
"morphed": true
},
"comesThroughToilet": "no"
}Requires: "f_DefeatedPhantoon"
"h_artificialMorphComplexRModeCrystalFlashInterrupt"
{
"ammo": {
"type": "Missile",
"count": 10
}
}
{
"ammo": {
"type": "Super",
"count": 10
}
}
{
"ammo": {
"type": "PowerBomb",
"count": 10
}
} |
From: 2
Top Left Door
To: 2
Top Left Door
It is required to avoid double hitting the Atomic with the Power Bomb, and to position the Crystal Flash so that the Atomic can hit Samus from above or below so it avoids the light orb. With Bombs, IBJ a small distance to where the top bomb is placed near the top of the doorframe to the right, to barely lure the Atomic a bit off-screen, then fall to the ground and Crystal Flash. With Spring Ball, perform three full-height jumps in front of the door to the right, then Crystal Flash. With no movement items this will use more ammo; roll down to the next platform attached to the left wall, then Crystal Flash at the right edge of it. This can be done with up to 2 E-Tanks while suitless, or no E-Tanks and up to 50% damage reduction. Entrance condition: {
"comeInWithGMode": {
"mode": "direct",
"morphed": true
}
}Requires: "f_DefeatedPhantoon"
"h_artificialMorphComplexRModeCrystalFlashInterrupt"
{
"ammo": {
"type": "Missile",
"count": 10
}
}
{
"or": [
"h_artificialMorphSpringBall",
{
"and": [
"h_artificialMorphIBJ",
{
"ammo": {
"type": "Super",
"count": 10
}
}
]
},
{
"and": [
{
"ammo": {
"type": "Super",
"count": 10
}
},
{
"ammo": {
"type": "PowerBomb",
"count": 10
}
}
]
}
]
} |
From: 3
Bottom Left Door
To: 3
Bottom Left Door
It is required to avoid double hitting the Atomic with the Power Bomb, and to position the Crystal Flash so that the Atomic can hit Samus from above so it avoids the light orb. With Bombs, IBJ a small distance to where the top bomb is placed near the center of the doorframe, to barely lure the Atomic a bit off-screen, then fall to the ground and Crystal Flash. With Spring Ball, perform one full-height jump then place a Power Bomb to Crystal Flash; it is possible to do this with fewer Power Bombs by then performing one more full-height jump and landing in the Power Bomb explosion just in time to Crystal Flash. This can be done with up to 2 E-Tanks while suitless, or no E-Tanks and up to 50% damage reduction. Entrance condition: {
"comeInWithGMode": {
"mode": "direct",
"morphed": true
}
}Requires: "f_DefeatedPhantoon"
"h_artificialMorphComplexRModeCrystalFlashInterrupt"
{
"ammo": {
"type": "Missile",
"count": 10
}
}
{
"ammo": {
"type": "Super",
"count": 10
}
}
{
"or": [
"h_artificialMorphSpringBall",
{
"and": [
"h_artificialMorphIBJ",
{
"ammo": {
"type": "PowerBomb",
"count": 10
}
}
]
}
]
} |
From: 4
Top Right Door
To: 4
Top Right Door
It is required to avoid double hitting the Atomic with the Power Bomb, and to position the Crystal Flash so that the Atomic can hit Samus from above or below so it avoids the light orb. With Bombs, IBJ a small distance to where the top bomb is placed near the top of the doorframe, to barely lure the Atomic a bit off-screen, then fall to the ground and Crystal Flash. With Spring Ball, perform three full-height jumps in front of the door, then Crystal Flash. With no movement items this will use more ammo; roll down to the next platform attached to the left wall, then Crystal Flash at the right edge of it. This can be done with up to 2 E-Tanks while suitless, or no E-Tanks and up to 50% damage reduction. Entrance condition: {
"comeInWithGMode": {
"mode": "direct",
"morphed": true
}
}Requires: "f_DefeatedPhantoon"
"h_artificialMorphComplexRModeCrystalFlashInterrupt"
{
"ammo": {
"type": "Missile",
"count": 10
}
}
{
"or": [
"h_artificialMorphSpringBall",
{
"and": [
"h_artificialMorphIBJ",
{
"ammo": {
"type": "Super",
"count": 10
}
}
]
},
{
"and": [
{
"ammo": {
"type": "Super",
"count": 10
}
},
{
"ammo": {
"type": "PowerBomb",
"count": 10
}
}
]
}
]
} |
From: 4
Top Right Door
To: 4
Top Right Door
Power Off: Farm Coverns and use either the ramp to the upper right door or the ramp by the inactive treadmills to shinecharge. Interrupt using the next Covern spawn. Power On: Farm Atomics and shinecharge using the ramp to the upper right door, using an Atomic to interrupt. Or open the path to the treadmills, shinecharge there, and jump under a Kzan to interrupt. Requires: {
"obstaclesCleared": [
"R-Mode"
]
}
{
"or": [
"h_CrystalFlashForReserveEnergy",
{
"and": [
"h_RModeCanRefillReserves",
{
"partialRefill": {
"type": "ReserveEnergy",
"limit": 40
}
}
]
}
]
}
{
"or": [
{
"canShineCharge": {
"usedTiles": 12,
"steepUpTiles": 7,
"openEnd": 1
}
},
{
"and": [
{
"obstaclesCleared": [
"C"
]
},
"Morph",
{
"or": [
{
"canShineCharge": {
"usedTiles": 16,
"steepUpTiles": 6,
"openEnd": 0
}
},
{
"and": [
"f_DefeatedPhantoon",
{
"canShineCharge": {
"usedTiles": 19,
"steepDownTiles": 6,
"openEnd": 1
}
}
]
}
]
}
]
}
]
}
{
"autoReserveTrigger": {
"maxReserveEnergy": 95
}
}
"canRModeSparkInterrupt"Resets obstacles: R-Mode |
From: 5
Middle Right Door
To: 5
Middle Right Door
It is required to avoid double hitting the Atomic with the Power Bomb, and to position the Crystal Flash so that the Atomic can hit Samus from above or below so it avoids the light orb. Crystal Flashing on entry before moving will lure an Atomic from below which will work nicely. This can be done with up to 2 E-Tanks while suitless, or no E-Tanks and up to 50% damage reduction. Entrance condition: {
"comeInWithGMode": {
"mode": "direct",
"morphed": true
}
}Requires: "f_DefeatedPhantoon"
"h_artificialMorphComplexRModeCrystalFlashInterrupt"
{
"ammo": {
"type": "Missile",
"count": 10
}
}
{
"ammo": {
"type": "Super",
"count": 10
}
} |
|
If Spring Ball is unavailable, then either crouch jump and morph from the stairs, or run and jump into morph from the right of the stairs. If you have HiJump, it must be disabled. Requires: {
"obstaclesCleared": [
"B"
]
}
{
"or": [
{
"and": [
"canCarefulJump",
"canMidAirMorph",
"canDisableEquipment"
]
},
"h_useSpringBall"
]
} |
From: 7
Bottom Door
To: 3
Bottom Left Door
Use the Covern to partial ceiling clip so your beam can reach the shot block of the ceiling at the end of the Morph tunnel to the left. It is possible to mid-air morph to get into the morph tunnel with nothing, from the Covern, the ground, or the stairs below. Requires: {
"notable": "Partial Covern Ice Clip"
}
"canTrickyUseFrozenEnemies"
"canCeilingClip"
{
"not": "f_DefeatedPhantoon"
}
"canRiskPermanentLossOfAccess"
{
"or": [
{
"and": [
"canCarefulJump",
"canMidAirMorph",
"canDisableEquipment"
]
},
"h_useSpringBall"
]
}Clears obstacles: B |
From: 7
Bottom Door
To: 3
Bottom Left Door
In R-Mode, kill the Coverns until there is Energy in Samus's Reserves. Get into the Morph tunnel and go to the far left. Wait for Coverns to damage Samus down until Reserves trigger, forcing a stand up and enabling her to shoot the shot blocks and escape. Entrance condition: {
"comeInWithRMode": {},
"comesThroughToilet": "any"
}Requires: {
"not": "f_DefeatedPhantoon"
}
"canRiskPermanentLossOfAccess"
{
"or": [
"canBePatient",
"Plasma"
]
}
{
"partialRefill": {
"type": "ReserveEnergy",
"limit": 20
}
}
{
"or": [
{
"and": [
"canCarefulJump",
"canMidAirMorph",
"canDisableEquipment"
]
},
"h_useSpringBall"
]
}
{
"autoReserveTrigger": {}
}Clears obstacles: B Resets obstacles: R-Mode |
|
If Spring Ball is unavailable, then either crouch jump and morph from the stairs, or run and jump into morph from the right of the stairs. If you have HiJump, it must be disabled. Requires: {
"or": [
"Wave",
"Spazer"
]
}
{
"or": [
{
"and": [
"canCarefulJump",
"canMidAirMorph",
"canDisableEquipment"
]
},
"h_useSpringBall"
]
}Clears obstacles: B |
|
Open the gate to farm the Scisers. Shinecharge then use a remaining Sciser to interrupt. Entrance condition: {
"comeInWithRMode": {}
}Requires: "Gravity"
{
"ammo": {
"type": "Super",
"count": 1
}
}
{
"or": [
"h_CrystalFlashForReserveEnergy",
{
"and": [
"h_RModeCanRefillReserves",
{
"or": [
{
"and": [
{
"resourceMissingAtMost": [
{
"type": "PowerBomb",
"count": 0
}
]
},
{
"partialRefill": {
"type": "ReserveEnergy",
"limit": 120
}
}
]
},
{
"and": [
{
"resourceMissingAtMost": [
{
"type": "PowerBomb",
"count": 4
}
]
},
{
"partialRefill": {
"type": "ReserveEnergy",
"limit": 40
}
}
]
}
]
}
]
}
]
}
"h_shinechargeMaxRunway"
{
"autoReserveTrigger": {}
}
"canRModeSparkInterrupt"Clears obstacles: A |
|
Requires: "Gravity"
{
"or": [
"h_greenGateGlitch",
{
"obstaclesCleared": [
"A"
]
}
]
}Clears obstacles: A |
|
Perform the Gate Glitch by moving towards the gate and firing the super on the correct frame for it to pass through and reach the button on the other side. Due to the water physics, many traditional setups for the glitch will not work. Requires: {
"notable": "Suitless Green Gate Glitch"
}
{
"or": [
"h_underwaterGreenGateGlitch",
{
"obstaclesCleared": [
"A"
]
}
]
}Clears obstacles: A |
|
Entrance condition: {
"comeInWithRMode": {}
}Requires: "Gravity"
{
"or": [
"h_CrystalFlashForReserveEnergy",
{
"and": [
"h_RModeCanRefillReserves",
{
"or": [
{
"and": [
{
"resourceMissingAtMost": [
{
"type": "PowerBomb",
"count": 0
}
]
},
{
"partialRefill": {
"type": "ReserveEnergy",
"limit": 100
}
}
]
},
{
"and": [
{
"resourceMissingAtMost": [
{
"type": "PowerBomb",
"count": 3
}
]
},
{
"partialRefill": {
"type": "ReserveEnergy",
"limit": 40
}
}
]
}
]
}
]
}
]
}
"h_shinechargeMaxRunway"
{
"autoReserveTrigger": {}
}
"canRModeSparkInterrupt" |
From: 1
Top Left Doorway
To: 1
Top Left Doorway
Crystal Flash on the right edge of the floating blocks. Place the Power Bomb shortly after the slow crab leaves the screen; there should be a single slow crab on the ceiling, just to the left of center. This will avoid killing the fast crab and give it just enough time to come hit Samus from below. Entrance condition: {
"comeInWithGMode": {
"mode": "direct",
"morphed": true,
"mobility": "mobile"
}
}Requires: {
"or": [
"h_artificialMorphSpringBall",
{
"and": [
"Gravity",
"h_artificialMorphIBJ"
]
}
]
}
"h_artificialMorphComplexRModeCrystalFlashInterrupt"
{
"ammo": {
"type": "Missile",
"count": 10
}
}
{
"ammo": {
"type": "Super",
"count": 10
}
}
{
"ammo": {
"type": "PowerBomb",
"count": 5
}
}
{
"or": [
"h_fullEnemyDamageReduction",
{
"and": [
"h_partialEnemyDamageReduction",
{
"resourceAtMost": [
{
"type": "RegularEnergy",
"count": 39
}
]
}
]
},
{
"and": [
{
"resourceCapacity": [
{
"type": "RegularEnergy",
"count": 199
}
]
},
{
"resourceCapacity": [
{
"type": "ReserveEnergy",
"count": 199
}
]
}
]
}
]
}Dev note: This could be done with more tanks in order to end with more Energy, but this is already a good farming room. |
From: 1
Top Left Doorway
To: 1
Top Left Doorway
Crystal Flash on the right edge of the floating blocks. Place the Power Bomb shortly after the slow crab leaves the screen; there should be a single slow crab on the ceiling, just to the left of center. This will avoid killing the fast crab and give it just enough time to come hit Samus from below. Entrance condition: {
"comeInWithGMode": {
"mode": "direct",
"morphed": true,
"mobility": "immobile"
}
}Requires: {
"or": [
"h_artificialMorphSpringBall",
{
"and": [
"Gravity",
"h_artificialMorphIBJ"
]
}
]
}
"h_artificialMorphComplexRModeCrystalFlashInterrupt"
{
"ammo": {
"type": "Missile",
"count": 10
}
}
{
"ammo": {
"type": "Super",
"count": 10
}
}
{
"ammo": {
"type": "PowerBomb",
"count": 5
}
}
{
"or": [
"h_fullEnemyDamageReduction",
{
"and": [
"h_partialEnemyDamageReduction",
{
"resourceAtMost": [
{
"type": "RegularEnergy",
"count": 39
}
]
}
]
},
{
"and": [
{
"resourceCapacity": [
{
"type": "RegularEnergy",
"count": 199
}
]
},
{
"resourceCapacity": [
{
"type": "ReserveEnergy",
"count": 199
}
]
}
]
}
]
}Dev note: This could be done with more tanks in order to end with more Energy, but this is already a good farming room. |
From: 2
Bottom Left Door
To: 1
Top Left Doorway
Only requires a runway of 6 tiles (with no open end) in the adjacent room. Perform an air ball while against the ceiling to make it up and through the morph tunnel. If the runway length is minimal, the aim-down input must be delayed a bit (rather than buffered through the transition), so that Samus moves at a slightly higher horizontal speed for longer. Entrance condition: {
"comeInJumping": {
"speedBooster": "no",
"minTiles": 5.4375
}
}Requires: {
"notable": "Cross Room Jump Morph"
}
"canCrossRoomJumpIntoWater"
"canMomentumConservingMorph" |
From: 2
Bottom Left Door
To: 1
Top Left Doorway
Requires a runway of at least 4 tiles (with no open end) in the adjacent room. Use a Cross Room Jump into Water followed by a delayed Momentum Conserving Turnaround to reach the Morph tunnel above. Climbing the Left side of the center hole will run into an unavoidable Sciser that can be passed through by Morphing. Crossing to the right from the left door requires slightly more runway and takes a more precise turnaround. Samus must also stay near a side of the center hole to reach the Morph tunnels. Entrance condition: {
"comeInJumping": {
"speedBooster": "no",
"minTiles": 3.4375
}
}Requires: {
"notable": "Cross Room Jump Morph"
}
"canMidAirMorph"
"canCrossRoomJumpIntoWater"
"canMomentumConservingTurnaround"
"canKago"
{
"or": [
{
"enemyDamage": {
"enemy": "Sciser",
"type": "contact",
"hits": 1
}
},
"h_pauseAbuseMinimalReserveRefill"
]
} |
From: 2
Bottom Left Door
To: 1
Top Left Doorway
Turn around to the left just before bonking the ceiling, to retain upward momentum. Then turn back to the right and go through the morph tunnel to the right, avoiding crab damage. Entrance condition: {
"comeInSpaceJumping": {
"speedBooster": "no",
"minTiles": 6
}
}Requires: {
"notable": "Cross Room Jump Morph"
}
"canCrossRoomJumpIntoWater"
"canPreciseSpaceJump"
"canMomentumConservingTurnaround"
"canMidAirMorph"Dev note: Jump low through the door with at least $1.D extra run speed. |
From: 2
Bottom Left Door
To: 1
Top Left Doorway
Turn around to the left just before bonking the ceiling, to retain upward momentum. Then morph while passing through the crab and go through the morph tunnel to the left. Entrance condition: {
"comeInSpaceJumping": {
"speedBooster": "no",
"minTiles": 3.5625
}
}Requires: {
"notable": "Cross Room Jump Morph"
}
"canCrossRoomJumpIntoWater"
"canPreciseSpaceJump"
"canMomentumConservingTurnaround"
"canMidAirMorph"
"canKago"
{
"or": [
{
"enemyDamage": {
"enemy": "Sciser",
"type": "contact",
"hits": 1
}
},
"h_pauseAbuseMinimalReserveRefill"
]
}Dev note: Jump low through the door with at least $1.4 extra run speed. |
From: 2
Bottom Left Door
To: 2
Bottom Left Door
Crystal Flash in front of the lower-right door. Place the Power Bomb just as the slow crab turns the corner to go up the the top of the room. This will avoid killing the fast crab and give it just enough time to come hit Samus from above. If Samus only has Power Bombs to cross the room, place them quickly then wait about one extra second before Crystal Flashing. Entrance condition: {
"comeInWithGMode": {
"mode": "direct",
"morphed": true,
"mobility": "mobile"
}
}Requires: {
"or": [
"h_artificialMorphSpringBall",
{
"and": [
"Gravity",
"h_artificialMorphBombThings"
]
}
]
}
"h_artificialMorphComplexRModeCrystalFlashInterrupt"
{
"ammo": {
"type": "Missile",
"count": 10
}
}
{
"ammo": {
"type": "Super",
"count": 10
}
}
{
"ammo": {
"type": "PowerBomb",
"count": 5
}
}
{
"or": [
"h_fullEnemyDamageReduction",
{
"and": [
"h_partialEnemyDamageReduction",
{
"resourceAtMost": [
{
"type": "RegularEnergy",
"count": 39
}
]
}
]
},
{
"and": [
{
"resourceCapacity": [
{
"type": "RegularEnergy",
"count": 199
}
]
},
{
"resourceCapacity": [
{
"type": "ReserveEnergy",
"count": 199
}
]
}
]
}
]
}Dev note: This could be done with more tanks in order to end with more Energy, but this is already a good farming room. |
From: 2
Bottom Left Door
To: 2
Bottom Left Door
Crystal Flash in front of the lower-right door. Place the Power Bomb just as the slow crab turns the corner to go up the the top of the room. This will avoid killing the fast crab and give it just enough time to come hit Samus from above. Entrance condition: {
"comeInWithGMode": {
"mode": "direct",
"morphed": true,
"mobility": "immobile"
}
}Requires: {
"or": [
"h_artificialMorphSpringBall",
{
"and": [
"Gravity",
"h_artificialMorphBombs"
]
}
]
}
"h_artificialMorphComplexRModeCrystalFlashInterrupt"
{
"ammo": {
"type": "Missile",
"count": 10
}
}
{
"ammo": {
"type": "Super",
"count": 10
}
}
{
"ammo": {
"type": "PowerBomb",
"count": 5
}
}
{
"or": [
"h_fullEnemyDamageReduction",
{
"and": [
"h_partialEnemyDamageReduction",
{
"resourceAtMost": [
{
"type": "RegularEnergy",
"count": 39
}
]
}
]
},
{
"and": [
{
"resourceCapacity": [
{
"type": "RegularEnergy",
"count": 199
}
]
},
{
"resourceCapacity": [
{
"type": "ReserveEnergy",
"count": 199
}
]
}
]
}
]
}Dev note: With an immobile setup, the timing is a bit tighter but not too bad, and the Power Bomb movement option won't work. This could be done with more tanks in order to end with more Energy, but this is already a good farming room. |
From: 3
Bottom Right Door
To: 3
Bottom Right Door
Crystal Flash in front of the lower-right door. Place the Power Bomb just as the slow crab turns the corner to go up the the top of the room. This will avoid killing the fast crab and give it just enough time to come hit Samus from above. Entrance condition: {
"comeInWithGMode": {
"mode": "direct",
"morphed": true,
"mobility": "mobile"
}
}Requires: "h_artificialMorphComplexRModeCrystalFlashInterrupt"
{
"ammo": {
"type": "Missile",
"count": 10
}
}
{
"ammo": {
"type": "Super",
"count": 10
}
}
{
"ammo": {
"type": "PowerBomb",
"count": 5
}
}
{
"or": [
"h_fullEnemyDamageReduction",
{
"and": [
"h_partialEnemyDamageReduction",
{
"resourceAtMost": [
{
"type": "RegularEnergy",
"count": 39
}
]
}
]
},
{
"and": [
{
"resourceCapacity": [
{
"type": "RegularEnergy",
"count": 199
}
]
},
{
"resourceCapacity": [
{
"type": "ReserveEnergy",
"count": 199
}
]
}
]
}
]
}Dev note: This could be done with more tanks in order to end with more Energy, but this is already a good farming room. FIXME: This could use an immobile variant. |
From: 3
Bottom Right Door
To: 3
Bottom Right Door
Crystal Flash in front of the lower-right door. Wait for the fast crab to cycle the lower half of the room twice, then place the Power Bomb to Crystal Flash just after a slow crab enters the room and is on the middle of the right ceiling. This will avoid killing the fast crab and give it just enough time to come hit Samus from above. Entrance condition: {
"comeInWithGMode": {
"mode": "direct",
"morphed": true,
"mobility": "immobile"
}
}Requires: {
"or": [
"h_artificialMorphSpringBall",
{
"and": [
"Gravity",
"h_artificialMorphIBJ"
]
}
]
}
"h_artificialMorphComplexRModeCrystalFlashInterrupt"
{
"ammo": {
"type": "Missile",
"count": 10
}
}
{
"ammo": {
"type": "Super",
"count": 10
}
}
{
"ammo": {
"type": "PowerBomb",
"count": 5
}
}
{
"or": [
"h_fullEnemyDamageReduction",
{
"and": [
"h_partialEnemyDamageReduction",
{
"resourceAtMost": [
{
"type": "RegularEnergy",
"count": 39
}
]
}
]
},
{
"and": [
{
"resourceCapacity": [
{
"type": "RegularEnergy",
"count": 199
}
]
},
{
"resourceCapacity": [
{
"type": "ReserveEnergy",
"count": 199
}
]
}
]
}
]
}Dev note: This could be done with more tanks in order to end with more Energy, but this is already a good farming room. |
From: 3
Bottom Right Door
To: 4
Top Right Doorway
Requires a runway of at least 4 tiles (with no open end) in the adjacent room. Use a Cross Room Jump into Water followed by a delayed Momentum Conserving Turnaround to reach the Morph tunnel above. Climbing the Left side of the center hole will run into an unavoidable Sciser. Samus must also stay near a side of the center hole to reach the Morph tunnels. Entrance condition: {
"comeInJumping": {
"speedBooster": "no",
"minTiles": 3.4375
}
}Requires: {
"notable": "Cross Room Jump Morph"
}
"canMidAirMorph"
"canCrossRoomJumpIntoWater"
"canMomentumConservingTurnaround" |
From: 3
Bottom Right Door
To: 4
Top Right Doorway
Turn around to the right just before bonking the ceiling, to retain upward momentum. Then morph and go through the tunnel to the right. Entrance condition: {
"comeInSpaceJumping": {
"speedBooster": "no",
"minTiles": 3.5625
}
}Requires: {
"notable": "Cross Room Jump Morph"
}
"canCrossRoomJumpIntoWater"
"canPreciseSpaceJump"
"canMomentumConservingTurnaround"
"canMidAirMorph"Dev note: Jump low through the door with at least $1.5 extra run speed. |
From: 4
Top Right Doorway
To: 4
Top Right Doorway
Crystal Flash on the right edge of the floating blocks. Place the Power Bomb shortly after the slow crab leaves the screen; there should be a single slow crab on the ceiling, just to the left of center. This will avoid killing the fast crab and give it just enough time to come hit Samus from below. Entrance condition: {
"comeInWithGMode": {
"mode": "direct",
"morphed": true,
"mobility": "mobile"
}
}Requires: {
"or": [
"h_artificialMorphSpringBall",
{
"and": [
"Gravity",
"h_artificialMorphBombs"
]
}
]
}
"h_artificialMorphComplexRModeCrystalFlashInterrupt"
{
"ammo": {
"type": "Missile",
"count": 10
}
}
{
"ammo": {
"type": "Super",
"count": 10
}
}
{
"ammo": {
"type": "PowerBomb",
"count": 5
}
}
{
"or": [
"h_fullEnemyDamageReduction",
{
"and": [
"h_partialEnemyDamageReduction",
{
"resourceAtMost": [
{
"type": "RegularEnergy",
"count": 39
}
]
}
]
},
{
"and": [
{
"resourceCapacity": [
{
"type": "RegularEnergy",
"count": 199
}
]
},
{
"resourceCapacity": [
{
"type": "ReserveEnergy",
"count": 199
}
]
}
]
}
]
}Dev note: This could be done with more tanks in order to end with more Energy, but this is already a good farming room. |
From: 4
Top Right Doorway
To: 4
Top Right Doorway
Crystal Flash on the right edge of the floating blocks. Place the Power Bomb shortly after the slow crab leaves the screen; there should be a single slow crab on the ceiling, just to the left of center. This will avoid killing the fast crab and give it just enough time to come hit Samus from below. Getting into position with just Gravity and Bombs requires fairly precise movement; it is recommended to immediately place a Bomb once morphed and move slightly to boost horizontally. Entrance condition: {
"comeInWithGMode": {
"mode": "direct",
"morphed": true,
"mobility": "immobile"
}
}Requires: {
"or": [
"h_artificialMorphSpringBall",
{
"and": [
"Gravity",
"h_artificialMorphBombs",
"canInsaneJump"
]
}
]
}
"h_artificialMorphComplexRModeCrystalFlashInterrupt"
{
"ammo": {
"type": "Missile",
"count": 10
}
}
{
"ammo": {
"type": "Super",
"count": 10
}
}
{
"ammo": {
"type": "PowerBomb",
"count": 5
}
}
{
"or": [
"h_fullEnemyDamageReduction",
{
"and": [
"h_partialEnemyDamageReduction",
{
"resourceAtMost": [
{
"type": "RegularEnergy",
"count": 39
}
]
}
]
},
{
"and": [
{
"resourceCapacity": [
{
"type": "RegularEnergy",
"count": 199
}
]
},
{
"resourceCapacity": [
{
"type": "ReserveEnergy",
"count": 199
}
]
}
]
}
]
}Dev note: This could be done with more tanks in order to end with more Energy, but this is already a good farming room. |
From: 1
Bottom Left Door
To: 1
Bottom Left Door
It is required to avoid double hitting the Skultera with the Power Bomb, and to position the Crystal Flash so that the Skultera can hit Samus from above so it avoids the light orb. To do this, Crystal Flash on the left-most flat tile just in front of the door and time the Power Bomb so that its first hit is when the Skultera is near the right wall. This can be done with no enemy damage reduction and up to 2 E-Tanks or a 50% enemy damage reduction and no E-Tanks; a 75% reduction is not recommended and would require disabling and reenabling suits with a precise pause abuse. Entrance condition: {
"comeInWithGMode": {
"mode": "direct",
"morphed": true
}
}Requires: "h_artificialMorphComplexRModeCrystalFlashInterrupt"
{
"ammo": {
"type": "Missile",
"count": 10
}
}
{
"ammo": {
"type": "Super",
"count": 10
}
}
{
"or": [
"h_partialEnemyDamageReduction",
{
"resourceAtMost": [
{
"type": "RegularEnergy",
"count": 19
}
]
},
{
"and": [
{
"resourceCapacity": [
{
"type": "RegularEnergy",
"count": 199
}
]
},
{
"resourceCapacity": [
{
"type": "ReserveEnergy",
"count": 199
}
]
}
]
}
]
}Dev note: FIXME: A 75% damage reduction method needs to be documented for if Samus only has Gravity and it provides 75% reduction. |
From: 1
Bottom Left Door
To: 2
Bottom Right Door
Reach the bottom middle of the room with an IBJ or gravity jump and avoid letting the pirate shoot any stationary, invisible lasers. The pirate will not touch Samus if she is high enough on the sloped tiles, but move too high and it will see Samus. Time the Power Bomb to go off so that Samus starts Crystal Flashing during or before the pirate turns around, and while ensuring that Samus will get hit by the lasers that will not move from their spawned location. With Gravity equipped, Samus will need to be boosted by the Power Bomb only while the pirate is moving its head. Samus will need to be able to survive a second hit after the Reserve trigger. This can be done with a 50% enemy damage reduction and no E-Tanks; a 75% reduction is not recommended and would require disabling and reenabling suits with a precise pause abuse. Without suits, this is possible with an E-Tank and two R-Tanks; it is sometimes possible to jump away after the Reserve trigger, but can require some luck. Entrance condition: {
"comeInWithGMode": {
"mode": "direct",
"morphed": true
}
}Requires: "Gravity"
{
"or": [
"h_artificialMorphIBJ",
{
"and": [
"h_artificialMorphSpringBall",
"canGravityJump"
]
}
]
}
"h_artificialMorphRModeCrystalFlashInterrupt"
{
"ammo": {
"type": "Missile",
"count": 10
}
}
{
"or": [
{
"and": [
"h_partialEnemyDamageReduction",
{
"resourceAtMost": [
{
"type": "RegularEnergy",
"count": 19
}
]
}
]
},
{
"and": [
"canTrickyCarryFlashSuit",
{
"resourceCapacity": [
{
"type": "RegularEnergy",
"count": 199
}
]
},
{
"resourceCapacity": [
{
"type": "ReserveEnergy",
"count": 199
}
]
}
]
}
]
}Dev note: FIXME: A 75% damage reduction method needs to be documented for if Samus only has Gravity and it provides 75% reduction. |
From: 1
Bottom Left Door
To: 5
Platform Junction Near Top Left Door
Requires 2 tiles of run speed to make it past the overhang above the door. SpeedBooster must be turned off in order to get up. Cross Room jump and do not buffer aiming down on entry, because Samus's speed is higher underwater while spinning. Aim down and then turn around just before the overhang. Shooting at it from below can deal damage sooner to get a faster freeze. Hug the frozen fish to gain the extra height needed to climb on top. Note that with a slightly longer runway of 3 tiles with a closed end or more, it is not required to disable Speed Booster. Entrance condition: {
"comeInJumping": {
"speedBooster": "no",
"minTiles": 2
}
}Requires: "HiJump"
"canCrossRoomJumpIntoWater"
"canMomentumConservingTurnaround"
"canTrickyUseFrozenEnemies"
"canInsaneJump"
{
"or": [
"Wave",
"Spazer",
"Plasma"
]
}
"h_trickyToCarryFlashSuit"Dev note: FIXME: It is possible but tricky to freeze the fish with just Ice and 2 Missiles. There is no known benefit to modeling the variant that doesn't disable Speed Booster - especially because it is already not doable with a blue suit. |
From: 1
Bottom Left Door
To: 5
Platform Junction Near Top Left Door
Entrance condition: {
"comeInJumping": {
"speedBooster": "no",
"minTiles": 1.4375
}
}Requires: "canMomentumConservingTurnaround"
"h_storedSpark"
{
"or": [
{
"shinespark": {
"frames": 15,
"excessFrames": 3
}
},
{
"and": [
"HiJump",
{
"shinespark": {
"frames": 12,
"excessFrames": 3
}
}
]
}
]
} |
|
Farm the Skulteras, then shinecharge using the bottom runway and use the pirate's lasers to interrupt. Requires: "Gravity"
{
"obstaclesCleared": [
"R-Mode"
]
}
{
"or": [
"h_CrystalFlashForReserveEnergy",
{
"and": [
"h_RModeCanRefillReserves",
{
"resourceMissingAtMost": [
{
"type": "Missile",
"count": 0
}
]
},
{
"partialRefill": {
"type": "ReserveEnergy",
"limit": 20
}
}
]
}
]
}
{
"canShineCharge": {
"usedTiles": 32,
"openEnd": 1
}
}
{
"autoReserveTrigger": {
"maxReserveEnergy": 95
}
}
"canRModeSparkInterrupt"Resets obstacles: R-Mode |
From: 3
Top Right Door
To: 1
Bottom Left Door
It is required to avoid double hitting the Skultera with the Power Bomb, and to position the Crystal Flash so that the Skultera can hit Samus from above so it avoids the light orb. To do this, Crystal Flash on the left-most flat tile just in front of the door and time the Power Bomb so that its first hit is when the Skultera is near the right wall. This can be done with no enemy damage reduction and up to 2 E-Tanks or a 50% enemy damage reduction and no E-Tanks; a 75% reduction is not recommended and would require disabling and reenabling suits with a precise pause abuse. Entrance condition: {
"comeInWithGMode": {
"mode": "direct",
"morphed": true
},
"comesThroughToilet": "no"
}Requires: {
"or": [
{
"and": [
"Gravity",
"h_artificialMorphIBJ"
]
},
{
"and": [
"h_artificialMorphSpringBall",
{
"or": [
"Gravity",
"HiJump"
]
}
]
}
]
}
"h_artificialMorphComplexRModeCrystalFlashInterrupt"
{
"ammo": {
"type": "Missile",
"count": 10
}
}
{
"ammo": {
"type": "Super",
"count": 10
}
}
{
"or": [
"h_partialEnemyDamageReduction",
{
"resourceAtMost": [
{
"type": "RegularEnergy",
"count": 19
}
]
},
{
"and": [
{
"resourceCapacity": [
{
"type": "RegularEnergy",
"count": 199
}
]
},
{
"resourceCapacity": [
{
"type": "ReserveEnergy",
"count": 199
}
]
}
]
}
]
}Dev note: FIXME: A 75% damage reduction method needs to be documented for if Samus only has Gravity and it provides 75% reduction. |
From: 3
Top Right Door
To: 2
Bottom Right Door
Reach the bottom middle of the room and avoid letting the pirate shoot any stationary, invisible lasers. The pirate will not touch Samus if she is high enough on the sloped tiles, but move too high and it will see Samus. Time the Power Bomb to go off so that Samus starts Crystal Flashing during or before the pirate turns around, and while ensuring that Samus will get hit by the lasers that will not move from their spawned location. With Gravity equipped, Samus will need to be boosted by the Power Bomb only while the pirate is moving its head. Samus will need to be able to survive a second hit after the Reserve trigger. This can be done with a 50% enemy damage reduction and no E-Tanks; a 75% reduction is not recommended and would require disabling and reenabling suits with a precise pause abuse. Without suits, this is possible with an E-Tank and two R-Tanks; it is sometimes possible to jump away after the Reserve trigger, but can require some luck. Entrance condition: {
"comeInWithGMode": {
"mode": "direct",
"morphed": true
},
"comesThroughToilet": "no"
}Requires: {
"or": [
{
"and": [
"Gravity",
"h_artificialMorphIBJ"
]
},
{
"and": [
"h_artificialMorphSpringBall",
{
"or": [
"Gravity",
"HiJump",
"canInsaneJump",
"h_artificialMorphSpringFling"
]
}
]
}
]
}
"h_artificialMorphRModeCrystalFlashInterrupt"
{
"ammo": {
"type": "Missile",
"count": 10
}
}
{
"or": [
{
"and": [
"h_partialEnemyDamageReduction",
{
"resourceAtMost": [
{
"type": "RegularEnergy",
"count": 19
}
]
}
]
},
{
"and": [
"canTrickyCarryFlashSuit",
{
"resourceCapacity": [
{
"type": "RegularEnergy",
"count": 199
}
]
},
{
"resourceCapacity": [
{
"type": "ReserveEnergy",
"count": 199
}
]
}
]
}
]
}Dev note: It is possible but extremely difficult to use one of the other pirates instead, but with these items, Samus can get back up from this location. FIXME: A 75% damage reduction method needs to be documented for if Samus only has Gravity and it provides 75% reduction. |
From: 3
Top Right Door
To: 7
Platform Below Top Right Door
Fall straight down to the bottom of the room, staying on the left or right side to avoid the pirate's stationary, invisible lasers. The pirate will not touch Samus if she is high enough on the sloped tiles, but move too high and it will see Samus. Time the Power Bomb to go off so that Samus starts Crystal Flashing during or before the pirate turns around, and while ensuring that Samus will get hit by the lasers that will not move from their spawned location. With Gravity equipped, Samus will need to be boosted by the Power Bomb only while the pirate is moving its head. Samus will need to be able to survive a second hit after the Reserve trigger. This can be done with a 50% enemy damage reduction and no E-Tanks; a 75% reduction is not recommended and would require disabling and reenabling suits with a precise pause abuse. Without suits, this is possible with an E-Tank and two R-Tanks; it is sometimes possible to jump away after the Reserve trigger, but can require some luck. Entrance condition: {
"comeInWithGMode": {
"mode": "direct",
"morphed": true
},
"comesThroughToilet": "no"
}Requires: {
"or": [
"Gravity",
"HiJump"
]
}
"h_artificialMorphRModeCrystalFlashInterrupt"
{
"ammo": {
"type": "Missile",
"count": 10
}
}
{
"or": [
{
"and": [
"h_partialEnemyDamageReduction",
{
"resourceAtMost": [
{
"type": "RegularEnergy",
"count": 19
}
]
}
]
},
{
"and": [
"canTrickyCarryFlashSuit",
{
"resourceCapacity": [
{
"type": "RegularEnergy",
"count": 199
}
]
},
{
"resourceCapacity": [
{
"type": "ReserveEnergy",
"count": 199
}
]
}
]
}
]
}Dev note: It is possible but extremely difficult to use one of the other pirates instead, but with these items, Samus can get back up from this location. With any fewer items, such as Spring Ball alone, it doesn't seem quite possible to use the top right pirate. FIXME: A 75% damage reduction method needs to be documented for if Samus only has Gravity and it provides 75% reduction. |
From: 4
Top Left Door
To: 1
Bottom Left Door
It is required to avoid double hitting the Skultera with the Power Bomb, and to position the Crystal Flash so that the Skultera can hit Samus from above so it avoids the light orb. To do this, Crystal Flash on the left-most flat tile just in front of the door and time the Power Bomb so that its first hit is when the Skultera is near the right wall. This can be done with no enemy damage reduction and up to 2 E-Tanks or a 50% enemy damage reduction and no E-Tanks; a 75% reduction is not recommended and would require disabling and reenabling suits with a precise pause abuse. Entrance condition: {
"comeInWithGMode": {
"mode": "direct",
"morphed": true
},
"comesThroughToilet": "no"
}Requires: "h_artificialMorphComplexRModeCrystalFlashInterrupt"
{
"ammo": {
"type": "Missile",
"count": 10
}
}
{
"ammo": {
"type": "Super",
"count": 10
}
}
{
"or": [
"h_partialEnemyDamageReduction",
{
"resourceAtMost": [
{
"type": "RegularEnergy",
"count": 19
}
]
},
{
"and": [
{
"resourceCapacity": [
{
"type": "RegularEnergy",
"count": 199
}
]
},
{
"resourceCapacity": [
{
"type": "ReserveEnergy",
"count": 199
}
]
}
]
}
]
}Dev note: FIXME: A 75% damage reduction method needs to be documented for if Samus only has Gravity and it provides 75% reduction. |
From: 4
Top Left Door
To: 2
Bottom Right Door
Reach the bottom middle of the room with an IBJ or gravity jump and avoid letting the pirate shoot any stationary, invisible lasers. The pirate will not touch Samus if she is high enough on the sloped tiles, but move too high and it will see Samus. Time the Power Bomb to go off so that Samus starts Crystal Flashing during or before the pirate turns around, and while ensuring that Samus will get hit by the lasers that will not move from their spawned location. With Gravity equipped, Samus will need to be boosted by the Power Bomb only while the pirate is moving its head. Samus will need to be able to survive a second hit after the Reserve trigger. This can be done with a 50% enemy damage reduction and no E-Tanks; a 75% reduction is not recommended and would require disabling and reenabling suits with a precise pause abuse. Without suits, this is possible with an E-Tank and two R-Tanks; it is sometimes possible to jump away after the Reserve trigger, but can require some luck. Entrance condition: {
"comeInWithGMode": {
"mode": "direct",
"morphed": true
},
"comesThroughToilet": "no"
}Requires: "Gravity"
{
"or": [
"h_artificialMorphIBJ",
{
"and": [
"h_artificialMorphSpringBall",
"canGravityJump"
]
}
]
}
"h_artificialMorphRModeCrystalFlashInterrupt"
{
"ammo": {
"type": "Missile",
"count": 10
}
}
{
"or": [
{
"and": [
"h_partialEnemyDamageReduction",
{
"resourceAtMost": [
{
"type": "RegularEnergy",
"count": 19
}
]
}
]
},
{
"and": [
"canTrickyCarryFlashSuit",
{
"resourceCapacity": [
{
"type": "RegularEnergy",
"count": 199
}
]
},
{
"resourceCapacity": [
{
"type": "ReserveEnergy",
"count": 199
}
]
}
]
}
]
}Dev note: FIXME: A 75% damage reduction method needs to be documented for if Samus only has Gravity and it provides 75% reduction. |
From: 7
Platform Below Top Right Door
To: 6
Middle Junction Near Top Left Pirate
Carefully jump over the pirate and onto the next ledge. The jump requires both Gravity and HiJump to be unequipped. Requires: "canSuitlessMaridia"
"canCarefulJump"
{
"disableEquipment": "HiJump"
}
{
"disableEquipment": "Gravity"
} |
|
Requires: {
"obstaclesCleared": [
"R-Mode"
]
}
"Gravity"
{
"or": [
"h_CrystalFlashForReserveEnergy",
{
"and": [
"h_RModeCanRefillReserves",
{
"partialRefill": {
"type": "ReserveEnergy",
"limit": 20
}
}
]
}
]
}
{
"or": [
{
"canShineCharge": {
"usedTiles": 24,
"gentleUpTiles": 3,
"gentleDownTiles": 3,
"openEnd": 1
}
},
{
"and": [
{
"doorUnlockedAtNode": 3
},
{
"canShineCharge": {
"usedTiles": 25,
"gentleUpTiles": 3,
"gentleDownTiles": 3,
"openEnd": 1
}
}
]
}
]
}
{
"autoReserveTrigger": {
"maxReserveEnergy": 95
}
}
"canRModeSparkInterrupt"Resets obstacles: R-Mode |
From: 4
Top Right Door
To: 4
Top Right Door
It is required to avoid double hitting the Skultera with the Power Bomb, and to position the Crystal Flash so that the Skultera can hit Samus from above so it avoids the light orb. This is particularly precise because the fish is not global, which makes it so Samus needs to be closer to the fish when laying the Power Bomb. Samus also needs to be able to manipulate the camera, which can be difficult while morphed. Roll up the hill a bit until the Skultera is close to the wall, then move away so that it is a bit off camera. Crystal Flash while Samus is on one of the two lower sloped tiles and the Skultera is just off camera to the right, in order to lure it back to the left. This can be done with no enemy damage reduction and up to 2 E-Tanks or a 50% enemy damage reduction and no E-Tanks; a 75% reduction is not recommended and would require disabling and reenabling suits with a precise pause abuse. Entrance condition: {
"comeInWithGMode": {
"mode": "direct",
"morphed": true
}
}Requires: "canCameraManip"
"h_artificialMorphComplexRModeCrystalFlashInterrupt"
{
"ammo": {
"type": "Missile",
"count": 10
}
}
{
"ammo": {
"type": "Super",
"count": 10
}
}
{
"ammo": {
"type": "PowerBomb",
"count": 3
}
}
{
"or": [
"h_partialEnemyDamageReduction",
{
"resourceAtMost": [
{
"type": "RegularEnergy",
"count": 19
}
]
},
{
"and": [
{
"resourceCapacity": [
{
"type": "RegularEnergy",
"count": 199
}
]
},
{
"resourceCapacity": [
{
"type": "ReserveEnergy",
"count": 199
}
]
}
]
}
]
}
{
"or": [
"Gravity",
"HiJump"
]
}Dev note: FIXME: A 75% damage reduction method needs to be documented for if Samus only has Gravity and it provides 75% reduction. If there were another node near the fish, that could reduce a small amount of duplication. |
From: 4
Top Right Door
To: 9
Junction Below Speed Blocks
It is required to avoid double hitting the Skultera with the Power Bomb, and to position the Crystal Flash so that the Skultera can hit Samus from above so it avoids the light orb. This is particularly precise because the fish is not global, which makes it so Samus needs to be closer to the fish when laying the Power Bomb. Samus also needs to be able to manipulate the camera, which can be difficult while morphed. Roll up the hill a bit until the Skultera is close to the wall, then move away so that it is a bit off camera. Crystal Flash while Samus is on one of the two lower sloped tiles and the Skultera is just off camera to the right, in order to lure it back to the left. This can be done with no enemy damage reduction and up to 2 E-Tanks or a 50% enemy damage reduction and no E-Tanks; a 75% reduction is not recommended and would require disabling and reenabling suits with a precise pause abuse. Entrance condition: {
"comeInWithGMode": {
"mode": "direct",
"morphed": true
}
}Requires: "canCameraManip"
"h_artificialMorphComplexRModeCrystalFlashInterrupt"
{
"ammo": {
"type": "Missile",
"count": 10
}
}
{
"ammo": {
"type": "Super",
"count": 10
}
}
{
"ammo": {
"type": "PowerBomb",
"count": 3
}
}
{
"or": [
"h_partialEnemyDamageReduction",
{
"resourceAtMost": [
{
"type": "RegularEnergy",
"count": 19
}
]
},
{
"and": [
{
"resourceCapacity": [
{
"type": "RegularEnergy",
"count": 199
}
]
},
{
"resourceCapacity": [
{
"type": "ReserveEnergy",
"count": 199
}
]
}
]
}
]
}Dev note: FIXME: A 75% damage reduction method needs to be documented for if Samus only has Gravity and it provides 75% reduction. If there were another node near the fish, that could reduce a small amount of duplication. |
From: 5
Morph Passage Doorway
To: 7
Morph Tunnel Item
Turn HiJump and Gravity suit off before jumping and morphing into the tunnel. The crab will not come through the whole tunnel. Retreat to the right to avoid taking a hit. Requires: "canSuitlessMaridia"
{
"disableEquipment": "HiJump"
}
{
"disableEquipment": "Gravity"
}
"canMidAirMorph"
"h_complexToCarryFlashSuit" |
From: 7
Morph Tunnel Item
To: 5
Morph Passage Doorway
Turn HiJump and Gravity suit off before jumping and morphing into the tunnel. Requires: "canSuitlessMaridia"
{
"disableEquipment": "HiJump"
}
{
"disableEquipment": "Gravity"
}
"canMidAirMorph" |
From: 10
Direct G-Mode Morph, On Ledge Above Speed Blocks
To: 4
Top Right Door
It is required to avoid double hitting the Skultera with the Power Bomb, and to position the Crystal Flash so that the Skultera can hit Samus from above so it avoids the light orb. This is particularly precise because the fish is not global, which makes it so Samus needs to be closer to the fish when laying the Power Bomb. Samus also needs to be able to manipulate the camera, which can be difficult while morphed. Roll up the hill a bit until the Skultera is close to the wall, then move away so that it is a bit off camera. Crystal Flash while Samus is on one of the two lower sloped tiles and the Skultera is just off camera to the right, in order to lure it back to the left. This can be done with no enemy damage reduction and up to 2 E-Tanks or a 50% enemy damage reduction and no E-Tanks; a 75% reduction is not recommended and would require disabling and reenabling suits with a precise pause abuse. Requires: {
"or": [
{
"and": [
"Gravity",
"h_artificialMorphIBJ"
]
},
{
"and": [
"Gravity",
"HiJump",
"h_artificialMorphSpringBall"
]
},
{
"and": [
"h_artificialMorphSpringBall",
"canGravityJump"
]
},
"h_artificialMorphDoubleSpringBallJump"
]
}
"canCameraManip"
"h_artificialMorphComplexRModeCrystalFlashInterrupt"
{
"ammo": {
"type": "Missile",
"count": 10
}
}
{
"ammo": {
"type": "Super",
"count": 10
}
}
{
"ammo": {
"type": "PowerBomb",
"count": 3
}
}
{
"or": [
"h_partialEnemyDamageReduction",
{
"resourceAtMost": [
{
"type": "RegularEnergy",
"count": 19
}
]
},
{
"and": [
{
"resourceCapacity": [
{
"type": "RegularEnergy",
"count": 199
}
]
},
{
"resourceCapacity": [
{
"type": "ReserveEnergy",
"count": 199
}
]
}
]
}
]
}Dev note: FIXME: A 75% damage reduction method needs to be documented for if Samus only has Gravity and it provides 75% reduction. |
From: 11
G-Mode, Below Speed Blocks (Overloaded PLMs)
To: 6
Speed Blocked Item
Freeze a crab on the edge of the speed blocks, such that Samus can jump inside and stand on the crab. If using Bombs, it is important to freeze the crab with all other beams turned off, so that the crab has 30 remaining Energy or less. Place a Bomb or Power Bomb, then quickly get into the crouch position and use X-Ray to exit G-Mode before it goes off. It is important to be crouched, not standing, and have Gravity off, or the bomb will boost Samus and she will be stuck in the speed blocks. Note that if the crab is arriving too early, it may be possible to slow the crab with Ice or lure the crab from above instead. Alternatively, she may have to wait for the global crab to circle the room. It is possible to kago the bomb boost in order to do this strat with Gravity still equipped. Requires: "canComplexGMode"
{
"notable": "G-Mode Overload Speed Blocks then use Global Crab"
}
"canBePatient"
"h_navigateUnderwater"
"canTrickyUseFrozenEnemies"
{
"or": [
"Gravity",
"HiJump",
"h_underwaterCrouchJump",
"canSpringBallJumpMidAir"
]
}
{
"or": [
{
"disableEquipment": "Gravity"
},
"canKago"
]
}
"h_bombThings" |
From: 1
Left Door
To: 1
Left Door
On room entry, roll into one of the baby turtles in order to get Mama Turtle to wake up. This then requires a precisely timed Crystal Flash, such that Mama Turtle hits Samus immediately after she gets Reserve Energy, to prevent getting double hit. The precise timing is not required with the ability to survive another hit after the Reserve trigger. Samus will sometimes be forced onto Mama Turtle's back, which can force a third hit; this can be prevented by holding forward as she hits Samus. Entrance condition: {
"comeInWithGMode": {
"mode": "direct",
"morphed": true
}
}Requires: "h_artificialMorphRModeCrystalFlashInterrupt"
{
"or": [
{
"and": [
{
"ammo": {
"type": "Missile",
"count": 10
}
},
{
"or": [
"h_fullEnemyDamageReduction",
{
"and": [
"h_partialEnemyDamageReduction",
{
"resourceCapacity": [
{
"type": "RegularEnergy",
"count": 149
}
]
},
{
"resourceCapacity": [
{
"type": "ReserveEnergy",
"count": 149
}
]
}
]
},
{
"and": [
{
"resourceCapacity": [
{
"type": "RegularEnergy",
"count": 249
}
]
},
{
"resourceCapacity": [
{
"type": "ReserveEnergy",
"count": 249
}
]
}
]
}
]
}
]
},
{
"and": [
{
"ammo": {
"type": "Missile",
"count": 2
}
},
"canComplexRModeCrystalFlashInterrupt"
]
}
]
} |
|
Crystal Flash upon entering. Wake Mama Turtle, shinecharge, then use Mama Turtle to interrupt. With ~200 Reserve Energy and at least 1 Energy tank, Samus will still be refilling reserves and Mama Turtle will return and hit again. It is possible to midair spark as Mama Turtle is approaching, where she will hit Samus on the first pass, but not after. This is frame perfect with Gravity, and when Samus is forced into a standup, her feet will be slightly less than a full tile below the ledge. Entrance condition: {
"comeInWithRMode": {}
}Requires: "Gravity"
"h_CrystalFlashForReserveEnergy"
{
"canShineCharge": {
"usedTiles": 18,
"gentleUpTiles": 2,
"openEnd": 1
}
}
{
"autoReserveTrigger": {}
}
"canRModeSparkInterrupt"
{
"or": [
"canInsaneJump",
{
"enemyDamage": {
"enemy": "Kame (Tatori)",
"type": "contact",
"hits": 1
}
},
{
"resourceAtMost": [
{
"type": "RegularEnergy",
"count": 150
}
]
}
]
} |
|
Get a bit of run speed on the block and jump to the right ledge. If Samus misses the ledge, try to shoot the block to still collect the item. Requires: {
"or": [
{
"and": [
"canDash",
"canCarefulJump",
"canDisableEquipment"
]
},
"canUseGrapple",
"canWallJump",
"SpaceJump"
]
}
{
"obstaclesCleared": [
"B"
]
}Resets obstacles: B Collects items: 2 |
|
Only requires a runway of 1 tile in the adjacent room. This strat is slightly easier on the right side at low run speeds, but the same otherwise. Entrance condition: {
"comeInJumping": {
"speedBooster": "no",
"minTiles": 0.4375
}
}Requires: {
"or": [
"f_MaridiaTubeBroken",
{
"obstaclesCleared": [
"f_MaridiaTubeBroken"
]
}
]
}
"canCrossRoomJumpIntoWater"
"canTrickyJump"
"h_midAirShootUp"Unlocks doors: {"types":["super"],"requires":[]}
{"types":["missiles","powerbomb"],"requires":["never"]} |
|
Only requires a runway of one tile in the adjacent room. This strat is slightly easier on the right side at low run speeds, but the same otherwise. Entrance condition: {
"comeInJumping": {
"speedBooster": "no",
"minTiles": 0.4375
}
}Requires: {
"or": [
"f_MaridiaTubeBroken",
{
"obstaclesCleared": [
"f_MaridiaTubeBroken"
]
}
]
}
"canCrossRoomJumpIntoWater"
"canTrickyJump"
"h_midAirShootUp"Unlocks doors: {"types":["super"],"requires":[]}
{"types":["missiles","powerbomb"],"requires":["never"]} |
|
Requires: {
"disableEquipment": "Gravity"
}Exit condition: {
"leaveWithGrappleSwing": {
"blocks": [
{
"position": [
13,
5
],
"note": "Closest Grapple block to the left door"
}
]
}
} |
From: 1
Top Left Door
To: 2
Bottom Left Door
Entrance condition: {
"comeInWithRMode": {}
}Requires: "Gravity"
{
"or": [
{
"and": [
{
"disableEquipment": "ETank"
},
{
"resourceAvailable": [
{
"type": "Energy",
"count": 80
}
]
}
]
},
"h_CrystalFlash"
]
}
{
"canShineCharge": {
"usedTiles": 32,
"steepUpTiles": 2,
"steepDownTiles": 1,
"openEnd": 1
}
}
"h_RModeKnockbackSpark" |
|
Farm the Sciser in the bottom runway, then shinecharge. Interrupt using the Sciser on the center mountain. Entrance condition: {
"comeInWithRMode": {}
}Requires: "Gravity"
{
"or": [
"h_CrystalFlashForReserveEnergy",
{
"and": [
"h_RModeCanRefillReserves",
{
"partialRefill": {
"type": "ReserveEnergy",
"limit": 20
}
}
]
}
]
}
"h_shinechargeMaxRunway"
{
"autoReserveTrigger": {}
}
"canRModeSparkInterrupt" |
From: 2
Bottom Left Door
To: 2
Bottom Left Door
Entrance condition: {
"comeInWithRMode": {},
"comesThroughToilet": "any"
}Requires: "Gravity"
{
"or": [
{
"and": [
{
"disableEquipment": "ETank"
},
{
"resourceAvailable": [
{
"type": "Energy",
"count": 80
}
]
}
]
},
"h_CrystalFlash"
]
}
{
"canShineCharge": {
"usedTiles": 32,
"steepUpTiles": 2,
"steepDownTiles": 1,
"openEnd": 1
}
}
"h_RModeKnockbackSpark" |
|
Farm the Sciser in the bottom runway, then shinecharge. Interrupt using the Sciser on the center mountain. Entrance condition: {
"comeInWithRMode": {},
"comesThroughToilet": "no"
}Requires: "Gravity"
{
"or": [
"h_CrystalFlashForReserveEnergy",
{
"and": [
"h_RModeCanRefillReserves",
{
"partialRefill": {
"type": "ReserveEnergy",
"limit": 20
}
}
]
}
]
}
"h_shinechargeMaxRunway"
{
"autoReserveTrigger": {}
}
"canRModeSparkInterrupt" |
From: 3
Bottom Right Door
To: 2
Bottom Left Door
Entrance condition: {
"comeInWithRMode": {},
"comesThroughToilet": "any"
}Requires: "Gravity"
{
"or": [
{
"and": [
{
"disableEquipment": "ETank"
},
{
"resourceAvailable": [
{
"type": "Energy",
"count": 80
}
]
}
]
},
"h_CrystalFlash"
]
}
{
"canShineCharge": {
"usedTiles": 32,
"steepUpTiles": 2,
"steepDownTiles": 1,
"openEnd": 1
}
}
"h_RModeKnockbackSpark" |
|
Farm the Sciser in the bottom runway, then shinecharge. Interrupt using the Sciser on the center mountain. Entrance condition: {
"comeInWithRMode": {},
"comesThroughToilet": "no"
}Requires: "Gravity"
{
"or": [
"canGravityJump",
"HiJump",
"canWallJump",
"SpaceJump",
"canJumpIntoIBJ",
"canSpringBallJumpMidAir"
]
}
{
"or": [
"h_CrystalFlashForReserveEnergy",
{
"and": [
"h_RModeCanRefillReserves",
{
"partialRefill": {
"type": "ReserveEnergy",
"limit": 20
}
}
]
}
]
}
"h_shinechargeMaxRunway"
{
"autoReserveTrigger": {}
}
"canRModeSparkInterrupt" |
From: 4
Top Right Door
To: 2
Bottom Left Door
Entrance condition: {
"comeInWithRMode": {}
}Requires: "Gravity"
{
"or": [
{
"and": [
{
"disableEquipment": "ETank"
},
{
"resourceAvailable": [
{
"type": "Energy",
"count": 80
}
]
}
]
},
"h_CrystalFlash"
]
}
{
"canShineCharge": {
"usedTiles": 32,
"steepUpTiles": 2,
"steepDownTiles": 1,
"openEnd": 1
}
}
"h_RModeKnockbackSpark" |
|
Farm the Sciser in the bottom runway, then shinecharge. Interrupt using the Sciser on the center mountain. Entrance condition: {
"comeInWithRMode": {}
}Requires: "Gravity"
{
"or": [
"h_CrystalFlashForReserveEnergy",
{
"and": [
"h_RModeCanRefillReserves",
{
"partialRefill": {
"type": "ReserveEnergy",
"limit": 20
}
}
]
}
]
}
"h_shinechargeMaxRunway"
{
"autoReserveTrigger": {}
}
"canRModeSparkInterrupt" |
|
Requires: {
"disableEquipment": "Gravity"
}Exit condition: {
"leaveWithGrappleSwing": {
"blocks": [
{
"position": [
-1,
5
],
"environment": "water",
"note": "Closest Grapple block to the right door"
}
]
}
} |
From: 4
Top Right Door
To: 9
Platform Below Top Door
In the previous room, gain max run speed without Speed Booster equipped, requiring about 7 tiles of runway (obtaining an extra run speed of $2.0). After the transition, jump to slightly less than full height, performing a lateral mid-air morph just early enough to avoid bonking the ceiling Grapple block. Pause to equip Speed Booster before bouncing on the first Grapple platform; this provides a boost in the bounce height to be able to make it to the Grapple platform below the top door. Entrance condition: {
"comeInRunning": {
"speedBooster": "no",
"minTiles": 6.4375
}
}Requires: {
"notable": "Spring Ball Bounce Right to Left"
}
"canSpeedyJump"
"canCrossRoomJumpIntoWater"
"canTrickySpringBallBounce" |
From: 5
Top Door
To: 2
Bottom Left Door
Entrance condition: {
"comeInWithRMode": {},
"comesThroughToilet": "any"
}Requires: "Gravity"
{
"or": [
{
"and": [
{
"disableEquipment": "ETank"
},
{
"resourceAvailable": [
{
"type": "Energy",
"count": 80
}
]
}
]
},
"h_CrystalFlash"
]
}
{
"canShineCharge": {
"usedTiles": 32,
"steepUpTiles": 2,
"steepDownTiles": 1,
"openEnd": 1
}
}
"h_RModeKnockbackSpark" |
|
Farm the Sciser in the bottom runway, then shinecharge. Interrupt using the Sciser on the center mountain. Entrance condition: {
"comeInWithRMode": {},
"comesThroughToilet": "no"
}Requires: "Gravity"
{
"or": [
"h_CrystalFlashForReserveEnergy",
{
"and": [
"h_RModeCanRefillReserves",
{
"partialRefill": {
"type": "ReserveEnergy",
"limit": 20
}
}
]
}
]
}
"h_shinechargeMaxRunway"
{
"autoReserveTrigger": {}
}
"canRModeSparkInterrupt" |
From: 6
Left Morph Passage Doorway
To: 2
Bottom Left Door
Crystal Flash after exiting the Morph tunnel, or else exit activate X-Ray and hold until the beam is at full width to exit G-Mode and remain in R-Mode to farm enemies. For farming from Mobile entry, disable all E-Tanks and farm all Scisers. Shinecharge and jump on top of the right side mountain. Shoot up and windup underneath the Powamp when it explodes. For farming from Immobile entry, disable to the nearest full E-Tank and farm until you have reserve energy. Entrance condition: {
"comeInWithGMode": {
"mode": "direct",
"morphed": true
}
}Requires: "Gravity"
{
"disableEquipment": "ETank"
}
{
"or": [
{
"and": [
"h_artificialMorphCrystalFlash",
{
"refill": [
"ReserveEnergy"
]
}
]
},
{
"and": [
{
"resourceMissingAtMost": [
{
"type": "PowerBomb",
"count": 0
}
]
},
"canGravityJump",
{
"partialRefill": {
"type": "ReserveEnergy",
"limit": 20
}
}
]
},
{
"and": [
{
"resourceAvailable": [
{
"type": "RegularEnergy",
"count": 99
}
]
},
{
"partialRefill": {
"type": "ReserveEnergy",
"limit": 20
}
}
]
}
]
}
"h_shinechargeMaxRunway"
{
"autoReserveTrigger": {}
}
"canRModeSparkInterrupt"Dev note: Samus is able to enter this door with Morph or artificial morph, even if the tunnel is not expanded. When morphing, she will 'fall' into the tunnel. |
From: 6
Left Morph Passage Doorway
To: 2
Bottom Left Door
Farm the Sciser in the bottom runway, then shinecharge. Interrupt using the Sciser on the center mountain. Entrance condition: {
"comeInWithRMode": {}
}Requires: "Gravity"
"Morph"
{
"or": [
"h_CrystalFlashForReserveEnergy",
{
"and": [
"h_RModeCanRefillReserves",
{
"partialRefill": {
"type": "ReserveEnergy",
"limit": 20
}
}
]
}
]
}
"h_shinechargeMaxRunway"
{
"autoReserveTrigger": {}
}
"canRModeSparkInterrupt"Dev note: Samus is able to enter this door in R-mode, even if the tunnel is not expanded. She can then morph and 'fall' into the tunnel. |
|
Requires: "h_navigateUnderwater"
{
"or": [
"h_useSpringBall",
"canMidAirMorph",
{
"and": [
"Gravity",
"canBombHorizontally"
]
},
{
"and": [
"Gravity",
"canLongIBJ",
"canJumpIntoIBJ"
]
},
{
"and": [
"Gravity",
"canTrivialMidAirMorph",
{
"or": [
"SpaceJump",
"canUseFrozenEnemies"
]
}
]
},
{
"and": [
"canTrivialMidAirMorph",
"canDisableEquipment"
]
}
]
}Dev note: It's possible to get in without a mid-air morph by rolling off from above, but that requires disabling Gravity and/or crab hits and the crab not killed. That's a lot of work to avoid something simple and barely reasonable at that level anyways. |
|
Requires: "canSuitlessMaridia"
{
"disableEquipment": "Gravity"
}
{
"or": [
{
"disableEquipment": "HiJump"
},
"canFlatleyJump"
]
}Dev note: Gravity can follow 8->11 with no equipment. |
|
Farm four Yards for energy, or else Crystal Flash. Free the Yard from the bottom pit, then run across the bottom runway. Poke the Yard with a beam shot to anger it and have it interrupt the. shinespark windup. To kill a Yard with Speed, tap it with a beam shot to knock it down to the runway, run away from it, then run back towards it. (Morph Bombs also work and are safer.) Entrance condition: {
"comeInWithRMode": {}
}Requires: "Gravity"
{
"or": [
"h_CrystalFlashForReserveEnergy",
{
"and": [
"h_RModeCanRefillReserves",
{
"enemyKill": {
"enemies": [
[
"Yard"
],
[
"Yard"
],
[
"Yard"
],
[
"Yard"
]
],
"explicitWeapons": [
"BlueSuit",
"Bombs"
]
}
},
{
"partialRefill": {
"type": "ReserveEnergy",
"limit": 20
}
}
]
}
]
}
"h_shinechargeMaxRunway"
{
"autoReserveTrigger": {}
}
"canRModeSparkInterrupt" |
|
Gain blue speed by running right-to-left on the 20-tile runway below the items. Then use Space Jump to carry it across the top of the room to break the bomb blocks. To cross the room most easily, blue speed can be gained with low momentum by pressing pause, running a few tiles, stuttering just before the pause hits, disabling Gravity suit, continuing to run left, then re-enabling Gravity suit before jumping. Alternatively, a regular shortcharge can be used in combination with either HiJump or a precise amount of extra run speed ($2.0 or $2.1), to cross the room at higher speed. Requires: {
"notable": "Blue Space Jump"
}
"Gravity"
"canPreciseSpaceJump"
{
"or": [
{
"and": [
"canDisableEquipment",
"h_stutterWaterGetBlueSpeed"
]
},
{
"and": [
{
"getBlueSpeed": {
"usedTiles": 20,
"openEnd": 2
}
},
{
"or": [
"HiJump",
"canTrickyDashJump"
]
}
]
}
]
}
"canBlueSpaceJump" |
|
Farm four Yards for energy, or else Crystal Flash. Free the Yard from the bottom pit, then run across the bottom runway. Poke the Yard with a beam shot to anger it and have it interrupt the. shinespark windup. To kill a Yard with Speed, tap it with a beam shot to knock it down to the runway, run away from it, then run back towards it. (Morph Bombs also work and are safer.) Entrance condition: {
"comeInWithRMode": {}
}Requires: "Gravity"
{
"or": [
"h_CrystalFlashForReserveEnergy",
{
"and": [
"h_RModeCanRefillReserves",
{
"enemyKill": {
"enemies": [
[
"Yard"
],
[
"Yard"
],
[
"Yard"
],
[
"Yard"
]
],
"explicitWeapons": [
"BlueSuit",
"Bombs"
]
}
},
{
"partialRefill": {
"type": "ReserveEnergy",
"limit": 20
}
}
]
}
]
}
"h_shinechargeMaxRunway"
{
"autoReserveTrigger": {}
}
"canRModeSparkInterrupt" |
|
Farm four Yards for energy, or else Crystal Flash. Free the Yard from the bottom pit, then run across the bottom runway. Poke the Yard with a beam shot to anger it and have it interrupt the. shinespark windup. To kill a Yard with Speed, tap it with a beam shot to knock it down to the runway, run away from it, then run back towards it. (Morph Bombs also work and are safer.) Entrance condition: {
"comeInWithRMode": {},
"comesThroughToilet": "no"
}Requires: "Gravity"
{
"or": [
"h_CrystalFlashForReserveEnergy",
{
"and": [
"h_RModeCanRefillReserves",
{
"enemyKill": {
"enemies": [
[
"Yard"
],
[
"Yard"
],
[
"Yard"
],
[
"Yard"
]
],
"explicitWeapons": [
"BlueSuit",
"Bombs"
]
}
},
{
"partialRefill": {
"type": "ReserveEnergy",
"limit": 20
}
}
]
}
]
}
"h_shinechargeMaxRunway"
{
"autoReserveTrigger": {}
}
"canRModeSparkInterrupt" |
From: 1
Left Door
To: 1
Left Door
Entrance condition: {
"comeInWithRMode": {}
}Requires: "Gravity"
{
"or": [
{
"disableEquipment": "ETank"
},
"canBePatient"
]
}
{
"canShineCharge": {
"usedTiles": 32,
"gentleUpTiles": 1,
"steepUpTiles": 1,
"openEnd": 1
}
}
"h_RModeKnockbackSpark" |
From: 1
Left Door
To: 5
Item
Needs a runway of 7 tiles with no open end in the adjacent room, to get enough height. This is a peak of height with speed booster, no hjb, while underwater. Jump before the transition with SpeedBooster off and then SpeedBooster back on after reaching the ceiling and Morphing. Entrance condition: {
"comeInJumping": {
"speedBooster": "yes",
"minTiles": 6.4375
}
}Requires: "canLateralMidAirMorph"
{
"disableEquipment": "SpeedBooster"
}
"canCrossRoomJumpIntoWater"
"canSpringBallBounce"
{
"or": [
{
"enemyDamage": {
"enemy": "Puyo",
"type": "contact",
"hits": 1
}
},
"canInsaneJump",
{
"and": [
"Plasma",
"canTrickyJump"
]
},
"h_pauseAbuseMinimalReserveRefill"
]
}Collects items: 5 |
From: 4
Right Door
To: 4
Right Door
Entrance condition: {
"comeInWithRMode": {}
}Requires: "Gravity"
{
"or": [
{
"disableEquipment": "ETank"
},
"canBePatient"
]
}
{
"canShineCharge": {
"usedTiles": 23,
"gentleUpTiles": 4,
"openEnd": 1
}
}
"h_RModeKnockbackSpark" |
From: 4
Right Door
To: 4
Right Door
Fill up with the Zoas. Shinecharge near the Zoa pit - or cross the Morph tunnel and use the full-length runway there, then get interrupted by a Zoa. Entrance condition: {
"comeInWithRMode": {}
}Requires: "Gravity"
{
"refill": [
"Energy"
]
}
{
"or": [
{
"and": [
"canSuitlessMaridia",
"canMidAirMorph",
{
"disableEquipment": "Gravity"
}
]
},
{
"canShineCharge": {
"usedTiles": 23,
"gentleUpTiles": 4,
"openEnd": 1
}
}
]
}
"h_shinechargeMaxRunway"
{
"autoReserveTrigger": {}
}
"canRModeSparkInterrupt"Clears obstacles: A |
From: 5
Item
To: 6
Junction Right of Morph Passage
Requires: "canSuitlessMaridia" "canMidAirMorph" "canDisableEquipment" "h_complexToCarryFlashSuit" |
From: 6
Junction Right of Morph Passage
To: 5
Item
Requires: "canSuitlessMaridia"
"canMidAirMorph"
{
"disableEquipment": "Gravity"
}
{
"disableEquipment": "HiJump"
}
"h_complexToCarryFlashSuit"Collects items: 5 |
|
Leave the Mochtroid trapped in the box just above the runway. Open up the runway, then damage down on the far right Puyo. Run right to left to shinecharge, open the box, and use the Mochtroid to interrupt. Entrance condition: {
"comeInWithRMode": {},
"comesThroughToilet": "no"
}Requires: "Gravity"
{
"or": [
"h_CrystalFlashForReserveEnergy",
{
"and": [
"h_RModeCanRefillReserves",
{
"or": [
{
"and": [
{
"resourceMissingAtMost": [
{
"type": "Missile",
"count": 0
}
]
},
{
"partialRefill": {
"type": "ReserveEnergy",
"limit": 40
}
}
]
},
{
"partialRefill": {
"type": "ReserveEnergy",
"limit": 20
}
}
]
}
]
}
]
}
"h_shinechargeMaxRunway"
{
"autoReserveTrigger": {
"maxReserveEnergy": 95
}
}
"canRModeSparkInterrupt" |
From: 1
Bottom Left Door
To: 2
Right Door
Crouch under the crumble blocks. Holding both angle buttons to aim upward, freeze the Mochtroid while it is on Samus. Jump onto the Mochtroid by quickly pressing down after jumping. When on it, press up to stand then jump through the ceiling. With no jump assists, use a frozen Mochtroid as a platform to get to the ledge above the door. Requires: {
"notable": "Mochtroid Ice Clip"
}
"h_navigateUnderwater"
"canUseFrozenEnemies"
{
"disableEquipment": "Gravity"
}
{
"or": [
"Gravity",
"HiJump",
"canTrickyUseFrozenEnemies"
]
}
"h_underwaterCrouchJump"
{
"or": [
"canTrickyJump",
{
"and": [
"canDodgeWhileShooting",
{
"enemyDamage": {
"enemy": "Mochtroid",
"type": "contact",
"hits": 1
}
}
]
},
{
"enemyDamage": {
"enemy": "Mochtroid",
"type": "contact",
"hits": 2
}
}
]
}Dev note: The canCeilingClip was left out, because this is easier than all other clips, and can instead be a notable in a lower difficulty. |
From: 1
Bottom Left Door
To: 2
Right Door
Lure a Mochtroid, stand below the crumbles, and perform a suitless jump and aim down, timed so that the reserve trigger forced standup happens just before Samus contacts the crumbles and still has upwards momentum. Release down before the refill completes, pressing down again when Samus approaches the peak of her jump. If Morph is available a jump morph can be used for more leniency, giving a 8 frame window compared to 3 frames for the regular jump. If Spring Ball is also available, jumping in Spring Ball increases the window to 9 frames. Entrance condition: {
"comeInWithRMode": {},
"comesThroughToilet": "any"
}Requires: "canRModeStandupClip"
{
"disableEquipment": "ETank"
}
{
"disableEquipment": "Gravity"
}
{
"disableEquipment": "HiJump"
}
{
"resourceAvailable": [
{
"type": "Energy",
"count": 99
}
]
}
{
"or": [
"canBeVeryPatient",
{
"and": [
"canMidAirMorph",
"canBePatient"
]
}
]
}
{
"partialRefill": {
"type": "ReserveEnergy",
"limit": 20
}
}
{
"autoReserveTrigger": {}
} |
From: 2
Right Door
To: 1
Bottom Left Door
Crouch under the crumble blocks. Holding both angle buttons to aim upward, freeze the Mochtroid while it is on Samus. Jump onto the Mochtroid by quickly pressing down after jumping. When on it, press up to stand then jump through the ceiling. Use the middle section of pipes as a platform to reach the top level, above the Mochtroid. Requires: {
"notable": "Mochtroid Ice Clip"
}
"h_navigateUnderwater"
"canUseFrozenEnemies"
{
"or": [
"HiJump",
"Gravity",
"canTrickySpringBallJump"
]
}
{
"disableEquipment": "Gravity"
}
{
"or": [
"canTrickyJump",
{
"and": [
"canDodgeWhileShooting",
{
"enemyDamage": {
"enemy": "Mochtroid",
"type": "contact",
"hits": 1
}
}
]
},
{
"enemyDamage": {
"enemy": "Mochtroid",
"type": "contact",
"hits": 2
}
}
]
}Dev note: The canCeilingClip was left out, because this is easier than all other clips, and can instead be a notable in a lower difficulty. |
From: 2
Right Door
To: 1
Bottom Left Door
Lure a Mochtroid, stand below the crumbles, and perform a suitless jump and aim down, timed so that the reserve trigger forced standup happens just before Samus contacts the crumbles and still has upwards momentum. Release down before the refill completes, pressing down again when Samus approaches the peak of her jump. If Morph is available a jump morph can be used for more leniency, giving an 8-frame window compared to 3 frames for the regular jump. If Spring Ball is also available, jumping in Spring Ball increases the window to 9 frames. Entrance condition: {
"comeInWithRMode": {}
}Requires: "canRModeStandupClip"
{
"disableEquipment": "ETank"
}
{
"disableEquipment": "Gravity"
}
{
"disableEquipment": "HiJump"
}
{
"resourceAvailable": [
{
"type": "Energy",
"count": 99
}
]
}
{
"or": [
"canBeVeryPatient",
{
"and": [
"canMidAirMorph",
"canBePatient"
]
}
]
}
{
"partialRefill": {
"type": "ReserveEnergy",
"limit": 20
}
}
{
"autoReserveTrigger": {}
} |
From: 2
Right Door
To: 2
Right Door
Entrance condition: {
"comeInWithRMode": {}
}Requires: "Gravity"
{
"or": [
{
"and": [
{
"disableEquipment": "ETank"
},
{
"resourceAvailable": [
{
"type": "Energy",
"count": 99
}
]
}
]
},
"h_CrystalFlash"
]
}
{
"canShineCharge": {
"usedTiles": 17,
"openEnd": 1
}
}
"h_RModeKnockbackSpark" |
|
Leave the Mochtroid trapped in the box just above the runway. Open up the runway, then damage down on the far right Puyo. Run right to left to shinecharge, open the box, and use the Mochtroid to interrupt. Entrance condition: {
"comeInWithRMode": {}
}Requires: "Gravity"
{
"or": [
"h_CrystalFlashForReserveEnergy",
{
"and": [
"h_RModeCanRefillReserves",
{
"or": [
{
"and": [
{
"resourceMissingAtMost": [
{
"type": "Missile",
"count": 0
}
]
},
{
"partialRefill": {
"type": "ReserveEnergy",
"limit": 40
}
}
]
},
{
"partialRefill": {
"type": "ReserveEnergy",
"limit": 20
}
}
]
}
]
}
]
}
"h_shinechargeMaxRunway"
{
"autoReserveTrigger": {
"maxReserveEnergy": 95
}
}
"canRModeSparkInterrupt" |
|
Crystal Flash immediately on room entry to gain Reserve Energy. Shinecharge, then jump into Botwoon's movement path for the interrupt. Entrance condition: {
"comeInWithRMode": {}
}Requires: {
"not": "f_DefeatedBotwoon"
}
"canRiskPermanentLossOfAccess"
"Gravity"
"h_CrystalFlashForReserveEnergy"
{
"canShineCharge": {
"usedTiles": 13,
"openEnd": 0
}
}
{
"autoReserveTrigger": {
"maxReserveEnergy": 95
}
}
"canRModeSparkInterrupt"Clears obstacles: door_1 |
From: 1
Left Door
To: 1
Left Door
Farm the door Mochtroid and the one in the water. Jump over the sand pit and freeze the third Mochtroid. Climb using this Mochtroid up to the spike, then bounce off the Mochtroid and enter X-Mode. Arm-pump to move Samus off the spike tile (watch the Mochtroid). Shinecharge, release X-Ray, and start moving left as Samus falls back toward the sand. While falling, disable Ice Beam to force the Mochtroid to unfreeze and get grabbed by it while jumping out of the sand. Shinespark windup just before the Mochtroid drain hits to interrurpt. If Samus must land back in the sand, be sure to be moving horizontally to land on top of the sand rather than sinking into it. Entrance condition: {
"comeInWithRMode": {}
}Requires: "canTrickyUseFrozenEnemies"
{
"or": [
{
"enemyKill": {
"enemies": [
[
"Mochtroid",
"Mochtroid"
]
],
"excludedWeapons": [
"PowerBeam",
"Ice",
"Bombs"
]
}
},
"canInsaneJump"
]
}
"canPlayInSand"
{
"or": [
{
"and": [
"h_CrystalFlashForReserveEnergy",
"h_usePowerBomb",
"canOffScreenMovement"
]
},
{
"and": [
"h_RModeCanRefillReserves",
{
"partialRefill": {
"type": "ReserveEnergy",
"limit": 40
}
}
]
}
]
}
"canBeVeryPatient"
"canXMode"
"h_XModeSpikeHit"
"h_shinechargeMaxRunway"
{
"disableEquipment": "Ice"
}
{
"autoReserveTrigger": {
"maxReserveEnergy": 63
}
}
"canRModeSparkInterrupt"
{
"or": [
"Grapple",
{
"and": [
"Gravity",
"canWallJump"
]
}
]
} |
From: 2
Bottom Right Door
To: 2
Bottom Right Door
Farm the door Mochtroid and the one in the water. Lure one of the next pair of Mochtroids toward the spike and freeze it. Climb using this Mochtroid up to the spike, then bounce off the Mochtroid and enter X-Mode. Arm-pump to move Samus off the spike tile (watch the Mochtroid). Shinecharge, release X-Ray, and start moving toward the Mochtroid as Samus falls back toward the sand. While falling, disable Ice Beam to force the Mochtroid to unfreeze and get grabbed by it while jumping out of the sand. Shinespark windup just before the Mochtroid drain hits to interrurpt. If Samus must land back in the sand, be sure to be moving horizontally to land on top of the sand rather than sinking into it. Entrance condition: {
"comeInWithRMode": {}
}Requires: "canTrickyUseFrozenEnemies"
"canPlayInSand"
{
"or": [
{
"and": [
"h_CrystalFlashForReserveEnergy",
"h_usePowerBomb",
"canOffScreenMovement"
]
},
{
"and": [
"h_RModeCanRefillReserves",
{
"partialRefill": {
"type": "ReserveEnergy",
"limit": 40
}
}
]
}
]
}
"canBeVeryPatient"
"canXMode"
"h_XModeSpikeHit"
"h_shinechargeMaxRunway"
{
"disableEquipment": "Ice"
}
{
"autoReserveTrigger": {
"maxReserveEnergy": 63
}
}
"canRModeSparkInterrupt"
{
"or": [
"Grapple",
{
"and": [
"Gravity",
"canWallJump"
]
}
]
} |
|
Entrance condition: {
"comeInJumping": {
"speedBooster": "no",
"minTiles": 1
}
}Requires: "canJumpIntoIBJ"
"canTrickyJump"
"canCrossRoomJumpIntoWater"
"canMomentumConservingTurnaround"
{
"enemyDamage": {
"enemy": "Mochtroid",
"type": "contact",
"hits": 2
}
}Dev note: Possible with no openend using a harder jump but a runway that small doesn't exist. |
From: 2
Bottom Right Door
To: 3
Top Right Door
Entrance condition: {
"comeInJumping": {
"speedBooster": "no",
"minTiles": 1
}
}Requires: "canTrickySpringBallJump" "canCrossRoomJumpIntoWater" "canTrickyJump" "canMomentumConservingTurnaround" Dev note: Possible with no openend using a harder jump but a runway that small doesn't exist. |
From: 2
Bottom Right Door
To: 3
Top Right Door
Entrance condition: {
"comeInJumping": {
"speedBooster": "no",
"minTiles": 2
}
}Requires: "canTrickySpringBallJump" "canCrossRoomJumpIntoWater" "canMomentumConservingTurnaround" Dev note: FIXME: Can be lowered to canBufferedMomentumConservingTurnaround. |
From: 3
Top Right Door
To: 3
Top Right Door
Farm the door Mochtroid and the one in the water. Lure one of the next pair of Mochtroids toward the spike and freeze it. Climb using this Mochtroid up to the spike, then bounce off the Mochtroid and enter X-Mode. Arm-pump to move Samus off the spike tile (watch the Mochtroid). Shinecharge, release X-Ray, and start moving toward the Mochtroid as Samus falls back toward the sand. While falling, disable Ice Beam to force the Mochtroid to unfreeze and get grabbed by it while jumping out of the sand. Shinespark windup just before the Mochtroid drain hits to interrurpt. If Samus must land back in the sand, be sure to be moving horizontally to land on top of the sand rather than sinking into it. Entrance condition: {
"comeInWithRMode": {}
}Requires: "canTrickyUseFrozenEnemies"
"canPlayInSand"
{
"or": [
{
"and": [
"h_CrystalFlashForReserveEnergy",
"h_usePowerBomb",
"canOffScreenMovement"
]
},
{
"and": [
"h_RModeCanRefillReserves",
{
"partialRefill": {
"type": "ReserveEnergy",
"limit": 40
}
}
]
}
]
}
"canBeVeryPatient"
"canXMode"
"h_XModeSpikeHit"
"h_shinechargeMaxRunway"
{
"disableEquipment": "Ice"
}
{
"autoReserveTrigger": {
"maxReserveEnergy": 63
}
}
"canRModeSparkInterrupt"
{
"or": [
"Grapple",
{
"and": [
"Gravity",
"canWallJump"
]
}
]
} |
From: 1
Left Door
To: 1
Left Door
Crystal Flash to where the ceiling crab will hit Samus from above. Samus needs to be positioned under the left edge of the large central structure and time the Power Bomb to avoid killing the crab. The crab only briefly intersects Samus while it is turning the corner, so it won't double hit Samus. Entrance condition: {
"comeInWithGMode": {
"mode": "direct",
"morphed": true
}
}Requires: "h_artificialMorphComplexRModeCrystalFlashInterrupt"
{
"ammo": {
"type": "Missile",
"count": 10
}
}
{
"ammo": {
"type": "Super",
"count": 10
}
}
{
"refill": [
"ReserveEnergy"
]
}
{
"autoReserveTrigger": {}
} |
|
Farm three Scisers for energy or Crystal Flash. Run across the bottom, then use the last Sciser to interrupt. Requires: {
"obstaclesCleared": [
"R-Mode"
]
}
"Gravity"
{
"or": [
"h_CrystalFlashForReserveEnergy",
{
"and": [
"h_RModeCanRefillReserves",
{
"or": [
{
"and": [
{
"resourceMissingAtMost": [
{
"type": "PowerBomb",
"count": 2
}
]
},
{
"partialRefill": {
"type": "ReserveEnergy",
"limit": 40
}
}
]
},
{
"and": [
{
"resourceMissingAtMost": [
{
"type": "PowerBomb",
"count": 0
}
]
},
{
"partialRefill": {
"type": "ReserveEnergy",
"limit": 80
}
}
]
}
]
}
]
}
]
}
{
"canShineCharge": {
"usedTiles": 23,
"openEnd": 0
}
}
{
"autoReserveTrigger": {}
}
"canRModeSparkInterrupt"Resets obstacles: R-Mode |
From: 3
Top Door
To: 1
Left Door
Fall down the shaft then Crystal Flash to where the ceiling crab will hit Samus from above. Samus needs to be positioned under the left edge of the large central structure and time the Power Bomb to avoid killing the crab. The crab only briefly intersects Samus while it is turning the corner, so it won't double hit Samus. Entrance condition: {
"comeInWithGMode": {
"mode": "direct",
"morphed": true
},
"comesThroughToilet": "no"
}Requires: "h_artificialMorphComplexRModeCrystalFlashInterrupt"
{
"ammo": {
"type": "Missile",
"count": 10
}
}
{
"ammo": {
"type": "Super",
"count": 10
}
}
{
"refill": [
"ReserveEnergy"
]
}
{
"autoReserveTrigger": {}
} |
From: 3
Top Door
To: 3
Top Door
Crystal Flash on the top right corner of the central structure to where the crab will hit Samus from below. Time the Power Bomb to avoid killing the crab. Entrance condition: {
"comeInWithGMode": {
"mode": "direct",
"morphed": true
},
"comesThroughToilet": "no"
}Requires: "h_artificialMorphComplexRModeCrystalFlashInterrupt"
{
"ammo": {
"type": "Missile",
"count": 10
}
}
{
"ammo": {
"type": "Super",
"count": 10
}
}
{
"or": [
"h_fullEnemyDamageReduction",
{
"and": [
"h_partialEnemyDamageReduction",
{
"resourceAtMost": [
{
"type": "RegularEnergy",
"count": 39
}
]
}
]
},
{
"and": [
{
"resourceCapacity": [
{
"type": "RegularEnergy",
"count": 199
}
]
},
{
"resourceCapacity": [
{
"type": "ReserveEnergy",
"count": 199
}
]
}
]
}
]
}
{
"useFlashSuit": {}
}
{
"shinespark": {
"frames": 7,
"excessFrames": 0
}
}Exit condition: {
"leaveWithSpark": {}
}Unlocks doors: {"types":["ammo"],"requires":[]} |
From: 3
Top Door
To: 4
Platform Below Top Door
Crystal Flash on the top right corner of the central structure to where the crab will hit Samus from below. Time the Power Bomb to avoid killing the crab. Entrance condition: {
"comeInWithGMode": {
"mode": "direct",
"morphed": true
},
"comesThroughToilet": "no"
}Requires: "h_artificialMorphComplexRModeCrystalFlashInterrupt"
{
"ammo": {
"type": "Missile",
"count": 10
}
}
{
"ammo": {
"type": "Super",
"count": 10
}
}
{
"or": [
"h_fullEnemyDamageReduction",
{
"and": [
"h_partialEnemyDamageReduction",
{
"resourceAtMost": [
{
"type": "RegularEnergy",
"count": 39
}
]
}
]
},
{
"and": [
{
"resourceCapacity": [
{
"type": "RegularEnergy",
"count": 199
}
]
},
{
"resourceCapacity": [
{
"type": "ReserveEnergy",
"count": 199
}
]
}
]
}
]
}
{
"or": [
"Gravity",
"HiJump",
"canSpringBallJumpMidAir"
]
}Dev note: A node below the platform might help, but without the extra movement, Samus can always do this at 1 instead. With Ice, Samus would want to do this at 1 and then climb back up. |
From: 1
Left Door
To: 1
Left Door
Crystal Flash after entering. Shinecharge on the ground and jump to the top left broken turret and gain a flash suit. Continue to damage down ready to interrupt. Wall/Space jump into the corner above the turret. Pause and set reserves to manual. At this point, visibility will be completely obscured. Hold left, and re-pause as soon as able. When the energy counter hits 0, immediately press Right+Jump to damage boost, then release jump early to begin shinespark windup. Set reserves to auto then pause and unpause again - visibility will return to normal. If Draygon is alive, the Shinespark windup may be interrupt by the goop phase grab instead of through triggering Reserves. Entrance condition: {
"comeInWithRMode": {}
}Requires: {
"or": [
{
"and": [
{
"or": [
"f_DefeatedDraygon",
{
"obstaclesCleared": [
"f_DefeatedDraygon"
]
}
]
},
{
"or": [
"canWallJump",
"SpaceJump",
"h_breakOneDraygonTurret"
]
}
]
},
"h_breakThreeDraygonTurrets"
]
}
"Gravity"
"h_CrystalFlashForReserveEnergy"
{
"canShineCharge": {
"usedTiles": 22,
"openEnd": 0
}
}
"canOffScreenMovement"
"canHorizontalDamageBoost"
{
"autoReserveTrigger": {}
}
"canRModePauseAbuseSparkInterrupt"Clears obstacles: door_1 |
|
With a 2-tile runway in the other room, this requires a frame-perfect jump immediately before the transition. Entrance condition: {
"comeInJumping": {
"speedBooster": "no",
"minTiles": 1.4375
}
}Requires: "canCrossRoomJumpIntoWater" "canTrickyJump" Clears obstacles: door_1 Dev note: FIXME: Not sure if there is a reason for this strat to exist, if there isn't a 2-tile closed-end runway setup room. |
From: 2
Right Door
To: 1
Left Door
Crystal Flash after entering. Damage down until ready to interrupt. Shinecharge, and start jumping toward the turret. As you jump, pause and set reserves to manual. At this point, visibility will be completely obscured. Re pause as soon as possible while jumping up into the turret. When the energy counter changes to 00, immediately press Right+Jump to damage boost, then release jump early to begin shinespark windup. Set reserves to auto, then as soon as possible, pause and unpause again - visibility will return to normal. Using the turret to gain a flash suit (spikesuit) can help reduce the amount of blind execution, or when using the top turret. If Draygon is alive, the Shinespark windup may be interrupt by the goop phase grab instead of through triggering Reserves. Entrance condition: {
"comeInWithRMode": {}
}Requires: {
"or": [
{
"and": [
{
"or": [
"f_DefeatedDraygon",
{
"obstaclesCleared": [
"f_DefeatedDraygon"
]
}
]
},
{
"or": [
"canWallJump",
"SpaceJump",
"h_breakOneDraygonTurret"
]
}
]
},
"h_breakThreeDraygonTurrets"
]
}
"Gravity"
"h_CrystalFlashForReserveEnergy"
{
"canShineCharge": {
"usedTiles": 22,
"openEnd": 0
}
}
"canOffScreenMovement"
"canHorizontalDamageBoost"
{
"autoReserveTrigger": {}
}
"canRModePauseAbuseSparkInterrupt"Clears obstacles: door_2 |
From: 2
Right Door
To: 2
Right Door
Crystal Flash at the door, and enter X-Mode on the spikes and shinecharge. Pause abuse on the spikes to interrupt. Let the damage push Samus into the wall to avoid multiple spike hits after gaining blue suit. Requires: {
"obstaclesCleared": [
"R-Mode"
]
}
"Gravity"
"h_CrystalFlashForReserveEnergy"
"h_usePowerBomb"
"canOffScreenMovement"
"canBeVeryPatient"
"canXMode"
"h_XModeSpikeHit"
"h_shinechargeMaxRunway"
{
"autoReserveTrigger": {}
}
"canRModePauseAbuseSparkInterrupt"
{
"spikeHits": 1
}Resets obstacles: R-Mode |
From: 2
Right Door
To: 4
Top Right Ledge Junction
Requires a runway of at least 1 tile in the adjacent room, although it is easier with more. Entrance condition: {
"comeInJumping": {
"speedBooster": "no",
"minTiles": 1
}
}Requires: {
"or": [
"canWallJump",
"canTrickySpringBallJump",
"SpaceJump"
]
}
"canCrossRoomJumpIntoWater" |
From: 2
Right Door
To: 4
Top Right Ledge Junction
Requires a runway of at least 1 tiles in the adjacent room, although it is easier with more. Start the IBJ as far left as possible. The furthest right is just right of the waterfall. Turning around, carefully, is one way to lose forward momentum and begin the IBJ. At the top of the IBJ bomb to the left and unmorph to reset fall speed. Entrance condition: {
"comeInJumping": {
"speedBooster": "no",
"minTiles": 1
}
}Requires: {
"notable": "Cross Room Jump with IBJ"
}
"canJumpIntoIBJ"
"canBombHorizontally"
"canResetFallSpeed"
"canCrossRoomJumpIntoWater"
"canTrickyJump" |
From: 3
Junction Left of Morph Tunnel
To: 6
Junction Right of Morph Tunnel
Requires: "canSuitlessMaridia" "canMidAirMorph" "canDisableEquipment" "h_complexToCarryFlashSuit" |
From: 4
Top Right Ledge Junction
To: 4
Top Right Ledge Junction
Farm the Cacatac, jump to the left dry platform, and jump into the spike pit to enter X-Mode and shinecharge. Use the other Cacatac to interrupt. Requires: {
"obstaclesCleared": [
"R-Mode"
]
}
{
"or": [
{
"and": [
"h_CrystalFlashForReserveEnergy",
"h_usePowerBomb",
"canOffScreenMovement"
]
},
{
"and": [
"h_RModeCanRefillReserves",
{
"or": [
{
"resourceMissingAtMost": [
{
"type": "Super",
"count": 0
}
]
},
{
"and": [
{
"resourceMissingAtMost": [
{
"type": "Super",
"count": 4
}
]
},
"Gravity"
]
}
]
},
{
"partialRefill": {
"type": "ReserveEnergy",
"limit": 40
}
}
]
}
]
}
"canBeVeryPatient"
"canXMode"
"h_XModeSpikeHit"
"h_shinechargeMaxRunway"
{
"autoReserveTrigger": {}
}
"canRModeSparkInterrupt"Resets obstacles: R-Mode |
From: 5
Bottom Middle Junction
To: 6
Junction Right of Morph Tunnel
Requires: "canSuitlessMaridia"
{
"disableEquipment": "HiJump"
}
{
"disableEquipment": "Gravity"
}
"canTrickyJump"
{
"or": [
"Gravity",
"HiJump",
"canSpringBallJumpMidAir"
]
} |
From: 6
Junction Right of Morph Tunnel
To: 5
Bottom Middle Junction
This can be done by turning off Gravity and HiJump to jump over both spike pits. Requires: "canSuitlessMaridia"
{
"disableEquipment": "HiJump"
}
{
"disableEquipment": "Gravity"
}
"canTrickyJump"
"canDownGrab" |
|
Enter and farm all three Mochtroids, or Crystal Flash. Run right to left underneath the Ohms, then lead them to roll off the right side. Shinecharge and use the Ohm lick attack to interrupt. Requires: {
"obstaclesCleared": [
"R-Mode"
]
}
"Gravity"
"Morph"
"h_RModeCanRefillReserves"
{
"or": [
{
"resourceMissingAtMost": [
{
"type": "Missile",
"count": 2
}
]
},
{
"resourceMissingAtMost": [
{
"type": "Super",
"count": 1
}
]
}
]
}
{
"partialRefill": {
"type": "ReserveEnergy",
"limit": 20
}
}
"h_shinechargeMaxRunway"
{
"autoReserveTrigger": {
"maxReserveEnergy": 95
}
}
"canRModeSparkInterrupt"Resets obstacles: R-Mode |
|
Enter and farm all three Mochtroids, or Crystal Flash. Run right to left underneath the Ohms, then lead them to roll off the right side. Shinecharge and use the Ohm lick attack to interrupt. Requires: {
"obstaclesCleared": [
"R-Mode"
]
}
"Gravity"
"Morph"
{
"or": [
"h_CrystalFlashForReserveEnergy",
{
"and": [
"h_RModeCanRefillReserves",
{
"resourceMissingAtMost": [
{
"type": "Missile",
"count": 0
}
]
},
{
"resourceMissingAtMost": [
{
"type": "Super",
"count": 0
}
]
},
{
"partialRefill": {
"type": "ReserveEnergy",
"limit": 20
}
}
]
}
]
}
"h_shinechargeMaxRunway"
{
"autoReserveTrigger": {
"maxReserveEnergy": 95
}
}
"canRModeSparkInterrupt"Resets obstacles: R-Mode |
From: 2
Bottom Left Door
To: 4
Top Right Door
Requires a runway of 1 tile in the adjacent room. Use a spring ball jump after breaking the water, then ibj. Take two Mochtroid hits or use a double bomb jump. Entrance condition: {
"comeInJumping": {
"speedBooster": "no",
"minTiles": 1
}
}Requires: "canTrickySpringBallJump"
"canJumpIntoIBJ"
"canTrickyJump"
{
"or": [
"canDoubleBombJump",
{
"enemyDamage": {
"enemy": "Mochtroid",
"type": "contact",
"hits": 2
}
}
]
}
"canCrossRoomJumpIntoWater" |
From: 2
Bottom Left Door
To: 4
Top Right Door
Requires a runway of 1 tile in the adjacent room. There is just enough room to wall jump after breaking the water. Entrance condition: {
"comeInJumping": {
"speedBooster": "no",
"minTiles": 1
}
}Requires: "canPreciseWallJump" "canTrickyJump" "canCrossRoomJumpIntoWater" |
From: 3
Bottom Right Door
To: 3
Bottom Right Door
Climb up and lure and Oum to the right pit, then time the Crystal Flash so that the Oum can hit Samus. This is fairly lenient, but one method is to Crystal Flash near the shot block pillar while the Oum is to the right of Samus moving right. With some testing, it seemed like the Oum was more likely to hit Samus when it is moving to the left. This is possible with a Bomb into Spring Ball jump using a precisely timed bomb boost to propel Samus upward just long enough to get the mid-air Spring Ball jump. Entrance condition: {
"comeInWithGMode": {
"mode": "direct",
"morphed": true
}
}Requires: {
"or": [
{
"and": [
"HiJump",
"h_artificialMorphSpringBall"
]
},
{
"and": [
"Gravity",
"h_artificialMorphIBJ"
]
},
"h_artificialMorphUnderwaterBombIntoSpringBallJump"
]
}
"h_artificialMorphRModeCrystalFlashInterrupt"
{
"ammo": {
"type": "Missile",
"count": 10
}
}
{
"or": [
{
"tech": "canComplexRModeCrystalFlashInterrupt"
},
{
"ammo": {
"type": "Super",
"count": 10
}
}
]
}
{
"or": [
"h_fullEnemyDamageReduction",
{
"and": [
"h_partialEnemyDamageReduction",
{
"resourceAtMost": [
{
"type": "RegularEnergy",
"count": 49
}
]
}
]
},
{
"and": [
{
"resourceCapacity": [
{
"type": "RegularEnergy",
"count": 199
}
]
},
{
"resourceCapacity": [
{
"type": "ReserveEnergy",
"count": 199
}
]
}
]
}
]
}Dev note: It is possible to enter with G-mode for the left side of the room and do this off-camera, but it is unreasonably difficult. |
From: 2
Bottom Left Door
To: 1
Top Left Door
Only requires a runway of approximately 0.5 tiles in the adjacent room. SpringBall jump once on the way up, then use a Bomb to buy just enough time for a second SpringBall jump. Entrance condition: {
"comeInJumping": {
"speedBooster": "no",
"minTiles": 1
}
}Requires: "canCrossRoomJumpIntoWater" "canUnderwaterBombIntoSpringBallJump" "canDoubleSpringBallJumpMidAir" |
|
The lenient version requires a runway of at least 5 tiles (with no open end) in the adjacent room. This is easier without Speed Booster and requires disabling HiJump. Entrance condition: {
"comeInJumping": {
"speedBooster": "no",
"minTiles": 4.4375
}
}Requires: "canCrossRoomJumpIntoWater"
{
"disableEquipment": "HiJump"
} |
From: 1
Bottom Left Door
To: 2
Top Right Door
Requires a runway of at least 2 tiles (with no open end) in the adjacent room. This is typically easier without Speed Booster depending on the exact runway length and requires disabling HiJump. Entrance condition: {
"comeInJumping": {
"speedBooster": "no",
"minTiles": 1.4375
}
}Requires: "canCrossRoomJumpIntoWater"
"canMomentumConservingTurnaround"
"canTrickyJump"
{
"disableEquipment": "HiJump"
} |
From: 1
Bottom Left Door
To: 2
Top Right Door
It is possible to jump to the top door using a runway of just one tile with Speed Booster and no HiJump. Requires a last-frame jump and down press that is late but not immediately before the turnaround. With a second-to-last-frame jump it is still possible but more precise. Entrance condition: {
"comeInJumping": {
"speedBooster": "yes",
"minTiles": 1
}
}Requires: "canCrossRoomJumpIntoWater"
"canMomentumConservingTurnaround"
"canTrickyDashJump"
{
"disableEquipment": "HiJump"
} |
From: 1
Left Door
To: 3
Junction Left of Morph Tunnel
Farm the two Owtches for energy and clear away all but one Menu from the left. Shinecharge through the tunnel and use the last Menu to interrupt. If you had to kill it with a Power Bomb, there are more to the right. Entrance condition: {
"comeInWithRMode": {}
}Requires: {
"or": [
"h_CrystalFlashForReserveEnergy",
{
"and": [
"h_RModeCanRefillReserves",
{
"or": [
{
"and": [
{
"enemyKill": {
"enemies": [
[
"Owtch",
"Owtch"
]
],
"excludedWeapons": [
"PowerBomb"
]
}
},
{
"enemyKill": {
"enemies": [
[
"Menu",
"Menu"
]
],
"explicitWeapons": [
"Missile",
"Plasma",
"Ice+Wave+Spazer"
]
}
}
]
},
"h_usePowerBomb"
]
},
{
"partialRefill": {
"type": "ReserveEnergy",
"limit": 20
}
}
]
}
]
}
{
"canShineCharge": {
"usedTiles": 22,
"openEnd": 2
}
}
{
"autoReserveTrigger": {
"maxReserveEnergy": 95
}
}
"canRModeSparkInterrupt" |
From: 2
Right Door
To: 3
Junction Left of Morph Tunnel
Farm the two Owtches for energy and clear away all but one Menu from the left. Shinecharge through the tunnel and use the Menus from the left to interrupt. Entrance condition: {
"comeInWithRMode": {}
}Requires: {
"or": [
"h_bombThings",
"h_useSpringBall",
{
"and": [
"canMidAirMorph",
"Gravity",
"canTrickyJump"
]
},
"h_threeTileJumpMorph"
]
}
{
"or": [
"h_CrystalFlashForReserveEnergy",
{
"and": [
"h_RModeCanRefillReserves",
{
"or": [
{
"and": [
{
"enemyKill": {
"enemies": [
[
"Owtch",
"Owtch"
]
],
"excludedWeapons": [
"PowerBomb"
]
}
},
{
"enemyKill": {
"enemies": [
[
"Menu",
"Menu"
]
],
"explicitWeapons": [
"Missile",
"Plasma",
"Ice+Wave+Spazer"
]
}
}
]
},
"h_usePowerBomb"
]
},
{
"partialRefill": {
"type": "ReserveEnergy",
"limit": 20
}
}
]
}
]
}
{
"canShineCharge": {
"usedTiles": 22,
"openEnd": 2
}
}
{
"autoReserveTrigger": {
"maxReserveEnergy": 95
}
}
"canRModeSparkInterrupt" |
From: 1
Top Left Door
To: 1
Top Left Door
On entry, the pirate will place a stationary, invisible laser. Cross the chasm while trying to avoid allowing it to place more lasers, with a bomb boost or spring fling. Move to the top of the platform only while the pirate is turning its head. Just before it is about to rotate its head again, Crystal Flash in a spot that is free of lasers in order to be able to gain some Reserve Energy before getting hit. Entrance condition: {
"comeInWithGMode": {
"mode": "direct",
"morphed": true
}
}Requires: "h_artificialMorphRModeCrystalFlashInterrupt"
"canComplexGMode"
{
"ammo": {
"type": "Missile",
"count": 10
}
}
{
"or": [
"h_artificialMorphSpringFling",
{
"and": [
"h_artificialMorphBombHorizontally",
"h_additionalBomb"
]
}
]
}Clears obstacles: door_1 |
|
Kill most of the pirates: leave the standing pirate on the ledge above the runway. Shinecharge and jump into its beam path to interrupt. Entrance condition: {
"comeInWithRMode": {}
}Requires: {
"or": [
{
"and": [
"h_CrystalFlashForReserveEnergy",
{
"or": [
{
"and": [
"canUseIFrames",
{
"or": [
{
"enemyDamage": {
"enemy": "Pink Space Pirate (standing)",
"type": "laser",
"hits": 2
}
},
"h_pauseAbuseMinimalReserveRefill"
]
}
]
},
"ScrewAttack",
"Plasma",
{
"getBlueSpeed": {
"usedTiles": 19,
"openEnd": 0
}
}
]
}
]
},
{
"and": [
{
"or": [
"ScrewAttack",
"Plasma",
{
"and": [
"canUseSpeedEchoes",
{
"getBlueSpeed": {
"usedTiles": 19,
"openEnd": 0
}
}
]
}
]
},
"h_RModeCanRefillReserves",
{
"partialRefill": {
"type": "ReserveEnergy",
"limit": 20
}
}
]
}
]
}
{
"canShineCharge": {
"usedTiles": 21,
"openEnd": 0
}
}
{
"or": [
"HiJump",
"canWallJump",
"canSpeedyJump",
"canSpringBallJumpMidAir"
]
}
{
"autoReserveTrigger": {
"maxReserveEnergy": 95
}
}
"canRModeSparkInterrupt"Clears obstacles: A, C, door_1 |
From: 1
Left Vertical Door
To: 2
Bottom Right Door
It is required to avoid double hitting the Skultera with the Power Bomb, and to position the Crystal Flash so that the Skultera can hit Samus from above so it avoids the light orb. To do this, Crystal Flash just left of the top left corner of the raised floor and time the Power Bomb so that its first hit is when the Skultera is far to the left. This can be done with no enemy damage reduction and up to 2 E-Tanks or a 50% enemy damage reduction and no E-Tanks; a 75% reduction is not recommended and would require disabling and reenabling suits with a precise pause abuse. Entrance condition: {
"comeInWithGMode": {
"mode": "direct",
"morphed": true
},
"comesThroughToilet": "no"
}Requires: {
"or": [
"h_artificialMorphBombThings",
"h_artificialMorphSpringBall"
]
}
"h_artificialMorphComplexRModeCrystalFlashInterrupt"
{
"ammo": {
"type": "Missile",
"count": 10
}
}
{
"ammo": {
"type": "Super",
"count": 10
}
}
{
"or": [
"h_partialEnemyDamageReduction",
{
"resourceAtMost": [
{
"type": "RegularEnergy",
"count": 19
}
]
},
{
"and": [
{
"resourceCapacity": [
{
"type": "RegularEnergy",
"count": 199
}
]
},
{
"resourceCapacity": [
{
"type": "ReserveEnergy",
"count": 199
}
]
}
]
}
]
}Dev note: FIXME: A 75% damage reduction method needs to be documented for if Samus only has Gravity and it provides 75% reduction. |
From: 2
Bottom Right Door
To: 2
Bottom Right Door
It is required to avoid double hitting the Skultera with the Power Bomb, and to position the Crystal Flash so that the Skultera can hit Samus from above so it avoids the light orb. To do this, Crystal Flash just left of the top left corner of the raised floor and time the Power Bomb so that its first hit is when the Skultera is far to the left. This can be done with no enemy damage reduction and up to 2 E-Tanks or a 50% enemy damage reduction and no E-Tanks; a 75% reduction is not recommended and would require disabling and reenabling suits with a precise pause abuse. Entrance condition: {
"comeInWithGMode": {
"mode": "direct",
"morphed": true
}
}Requires: {
"or": [
{
"and": [
"Gravity",
"h_artificialMorphIBJ"
]
},
"h_artificialMorphSpringBall"
]
}
"h_artificialMorphComplexRModeCrystalFlashInterrupt"
{
"ammo": {
"type": "Missile",
"count": 10
}
}
{
"ammo": {
"type": "Super",
"count": 10
}
}
{
"or": [
"h_partialEnemyDamageReduction",
{
"resourceAtMost": [
{
"type": "RegularEnergy",
"count": 19
}
]
},
{
"and": [
{
"resourceCapacity": [
{
"type": "RegularEnergy",
"count": 199
}
]
},
{
"resourceCapacity": [
{
"type": "ReserveEnergy",
"count": 199
}
]
}
]
}
]
}Dev note: FIXME: A 75% damage reduction method needs to be documented for if Samus only has Gravity and it provides 75% reduction. |
From: 2
Bottom Right Door
To: 2
Bottom Right Door
Farm the lower Choots, Skultera, and the bottom Owtch by running through it. Shinecharge at the bottom, then use the Owtch on the small platform to interrupt. This can be done with pause abuse or by freezing it while it is moving left. Requires: {
"obstaclesCleared": [
"R-Mode"
]
}
"Gravity"
{
"or": [
"h_CrystalFlashForReserveEnergy",
{
"and": [
"h_RModeCanRefillReserves",
{
"partialRefill": {
"type": "ReserveEnergy",
"limit": 20
}
}
]
}
]
}
"h_shinechargeMaxRunway"
{
"autoReserveTrigger": {
"maxReserveEnergy": 95
}
}
{
"or": [
"canRModePauseAbuseSparkInterrupt",
{
"and": [
{
"or": [
"Charge",
"Plasma"
]
},
"canUseFrozenEnemies",
"canRModeSparkInterrupt"
]
}
]
}Resets obstacles: R-Mode |
From: 3
Middle Right Door
To: 2
Bottom Right Door
It is required to avoid double hitting the Skultera with the Power Bomb, and to position the Crystal Flash so that the Skultera can hit Samus from above so it avoids the light orb. To do this, Crystal Flash just left of the top left corner of the raised floor and time the Power Bomb so that its first hit is when the Skultera is far to the left. This can be done with no enemy damage reduction and up to 2 E-Tanks or a 50% enemy damage reduction and no E-Tanks; a 75% reduction is not recommended and would require disabling and reenabling suits with a precise pause abuse. Entrance condition: {
"comeInWithGMode": {
"mode": "direct",
"morphed": true
}
}Requires: "h_artificialMorphComplexRModeCrystalFlashInterrupt"
{
"ammo": {
"type": "Missile",
"count": 10
}
}
{
"ammo": {
"type": "Super",
"count": 10
}
}
{
"or": [
"h_partialEnemyDamageReduction",
{
"resourceAtMost": [
{
"type": "RegularEnergy",
"count": 19
}
]
},
{
"and": [
{
"resourceCapacity": [
{
"type": "RegularEnergy",
"count": 199
}
]
},
{
"resourceCapacity": [
{
"type": "ReserveEnergy",
"count": 199
}
]
}
]
}
]
}Dev note: FIXME: A 75% damage reduction method needs to be documented for if Samus only has Gravity and it provides 75% reduction. |
From: 4
Top Right Door
To: 2
Bottom Right Door
It is required to avoid double hitting the Skultera with the Power Bomb, and to position the Crystal Flash so that the Skultera can hit Samus from above so it avoids the light orb. To do this, Crystal Flash just left of the top left corner of the raised floor and time the Power Bomb so that its first hit is when the Skultera is far to the left. This can be done with no enemy damage reduction and up to 2 E-Tanks or a 50% enemy damage reduction and no E-Tanks; a 75% reduction is not recommended and would require disabling and reenabling suits with a precise pause abuse. Entrance condition: {
"comeInWithGMode": {
"mode": "direct",
"morphed": true
}
}Requires: "h_artificialMorphComplexRModeCrystalFlashInterrupt"
{
"ammo": {
"type": "Missile",
"count": 10
}
}
{
"ammo": {
"type": "Super",
"count": 10
}
}
{
"or": [
"h_partialEnemyDamageReduction",
{
"resourceAtMost": [
{
"type": "RegularEnergy",
"count": 19
}
]
},
{
"and": [
{
"resourceCapacity": [
{
"type": "RegularEnergy",
"count": 199
}
]
},
{
"resourceCapacity": [
{
"type": "ReserveEnergy",
"count": 199
}
]
}
]
}
]
}Dev note: FIXME: A 75% damage reduction method needs to be documented for if Samus only has Gravity and it provides 75% reduction. |
From: 1
Left Door
To: 2
Bottom Door
It is required to avoid double hitting the Skultera with the Power Bomb, and to position the Crystal Flash so that the Skultera can hit Samus from above so it avoids the light orb. To do this, Crystal Flash one tile left of the door and time the Power Bomb so that its first hit is when the Skultera is just a bit off-screen to the right. This can be done with no enemy damage reduction and up to 2 E-Tanks or a 50% enemy damage reduction and no E-Tanks; a 75% reduction is not recommended and would require disabling and reenabling suits with a precise pause abuse. Entrance condition: {
"comeInWithGMode": {
"mode": "direct",
"morphed": true
}
}Requires: "h_artificialMorphComplexRModeCrystalFlashInterrupt"
{
"ammo": {
"type": "Missile",
"count": 10
}
}
{
"ammo": {
"type": "Super",
"count": 10
}
}
{
"or": [
"h_partialEnemyDamageReduction",
{
"resourceAtMost": [
{
"type": "RegularEnergy",
"count": 19
}
]
},
{
"and": [
{
"resourceCapacity": [
{
"type": "RegularEnergy",
"count": 199
}
]
},
{
"resourceCapacity": [
{
"type": "ReserveEnergy",
"count": 199
}
]
}
]
}
]
}Dev note: FIXME: A 75% damage reduction method needs to be documented for if Samus only has Gravity and it provides 75% reduction. |
|
Farm the Choots, then shinecharge along the bottom and use a Skultera to interrupt. Entrance condition: {
"comeInWithRMode": {}
}Requires: "Gravity"
{
"or": [
"h_CrystalFlashForReserveEnergy",
{
"and": [
"h_RModeCanRefillReserves",
{
"partialRefill": {
"type": "ReserveEnergy",
"limit": 20
}
}
]
}
]
}
"h_shinechargeMaxRunway"
{
"autoReserveTrigger": {}
}
"canRModeSparkInterrupt" |
From: 2
Bottom Door
To: 2
Bottom Door
It is required to avoid double hitting the Skultera with the Power Bomb, and to position the Crystal Flash so that the Skultera can hit Samus from above so it avoids the light orb. To do this, Crystal Flash one tile left of the door and time the Power Bomb so that its first hit is when the Skultera is just a bit off-screen to the right. If Samus does not have a way to get to the left side of the door, instead Crystal Flash on the left-most flat tile to the right of the raised floor in the middle of the room. This can be done with no enemy damage reduction and up to 2 E-Tanks or a 50% enemy damage reduction and no E-Tanks; a 75% reduction is not recommended and would require disabling and reenabling suits with a precise pause abuse. Entrance condition: {
"comeInWithGMode": {
"mode": "direct",
"morphed": true
},
"comesThroughToilet": "no"
}Requires: "h_artificialMorphComplexRModeCrystalFlashInterrupt"
{
"ammo": {
"type": "Missile",
"count": 10
}
}
{
"ammo": {
"type": "Super",
"count": 10
}
}
{
"or": [
"h_partialEnemyDamageReduction",
{
"resourceAtMost": [
{
"type": "RegularEnergy",
"count": 19
}
]
},
{
"and": [
{
"resourceCapacity": [
{
"type": "RegularEnergy",
"count": 199
}
]
},
{
"resourceCapacity": [
{
"type": "ReserveEnergy",
"count": 199
}
]
}
]
}
]
}Dev note: FIXME: A 75% damage reduction method needs to be documented for if Samus only has Gravity and it provides 75% reduction. |
|
Entrance condition: {
"comeInWithRMode": {},
"comesThroughToilet": "no"
}Requires: "Gravity"
{
"or": [
"h_CrystalFlashForReserveEnergy",
{
"and": [
"h_RModeCanRefillReserves",
{
"partialRefill": {
"type": "ReserveEnergy",
"limit": 20
}
}
]
}
]
}
"h_shinechargeMaxRunway"
{
"autoReserveTrigger": {}
}
"canRModeSparkInterrupt" |
|
Clear all the Puyos, and any Choots except for the one on the high platform to the left of the hill. Shinecharge in the space under this platform, then jump into the Choot to interrupt. Entrance condition: {
"comeInWithRMode": {}
}Requires: "Gravity"
"canDodgeWhileShooting"
{
"or": [
"h_CrystalFlashForReserveEnergy",
{
"and": [
"h_RModeCanRefillReserves",
{
"partialRefill": {
"type": "ReserveEnergy",
"limit": 60
}
}
]
}
]
}
{
"canShineCharge": {
"usedTiles": 16,
"openEnd": 0
}
}
{
"autoReserveTrigger": {
"maxReserveEnergy": 95
}
}
"canRModeSparkInterrupt" |
From: 1
Left Door
To: 4
Junction Below Sand Entrance
Requires a runway of 7 tiles (with no open end) in the adjacent room. Jump into an air ball on room entry in order to get to the first pillar. Aim down after the transition to avoid hitting the overhang near the door. Entrance condition: {
"comeInJumping": {
"speedBooster": "no",
"minTiles": 6.4375
}
}Requires: "canCrossRoomJumpIntoWater"
"canPlayInSand"
"canLateralMidAirMorph"
{
"or": [
"canTrickyJump",
{
"and": [
"canCarefulJump",
{
"enemyDamage": {
"enemy": "Evir",
"type": "contact",
"hits": 1
}
}
]
}
]
}Dev note: It is assumed that getting to the second pillar is free relative to getting to the right door. |
From: 1
Left Door
To: 4
Junction Below Sand Entrance
Requires a runway of 7 tiles (with no open end) in the adjacent room. Requires two precise inputs of jumping through the doorway and a short aiming down press before hitting the ceiling. Damage boost off of the right Evir in order to land on the first pillar. With Ice, instead freeze the Evir to land on it and avoid the damage. When entering the room with a bad jump, it is possible to perform a midair wiggle to get back to the door platform. Entrance condition: {
"comeInJumping": {
"speedBooster": "no",
"minTiles": 6.4375
}
}Requires: {
"notable": "Cross Room Jump with Ice or Damage Boost"
}
"canCrossRoomJumpIntoWater"
"canPlayInSand"
"canInsaneJump"
{
"or": [
"canTrickyUseFrozenEnemies",
{
"and": [
"canNeutralDamageBoost",
{
"enemyDamage": {
"enemy": "Evir",
"type": "contact",
"hits": 1
}
}
]
},
{
"and": [
"canNeutralDamageBoost",
"h_pauseAbuseMinimalReserveRefill"
]
}
]
} |
|
Space Jump into the room with full run speed without Speed Booster, jumping as low as possible through the doorway. Aim down when close to bonking the ceiling. Samus should land on the first pillar. Entrance condition: {
"comeInSpaceJumping": {
"speedBooster": "no",
"minTiles": 6.4375
}
}Requires: "canPreciseSpaceJump" "canInsaneJump" "canTrickyDodgeEnemies" |
From: 1
Left Door
To: 4
Junction Below Sand Entrance
Space Jump into the room relatively low through the doorway. Do a momentum-conserving morph to avoid bonking on the corner at the edge of the sandfall. The morph should happen relatively early, in order to avoid an Evir projectile hit. Jump into the room with extra run speed of at least $1.B At low speed, Samus may not make it onto the pillar and will not have time to unmorph until close to the sand; in this case, crouch jumping can be the safest way to escape. Entrance condition: {
"comeInSpaceJumping": {
"speedBooster": "no",
"minTiles": 5.4375
}
}Requires: "canPreciseSpaceJump" "canMomentumConservingMorph" "canTrickyDodgeEnemies" "canPlayInSand" Dev note: Lower speeds can also work (as low as $1.4), with damage from an Evir projectile. |
From: 1
Left Door
To: 4
Junction Below Sand Entrance
After entering, avoid the Evir projectiles and Crystal Flash, then kill the second Evir with beam shots. Jump into the sandfall and land back on the door ledge to overload PLMs. Jump into the sandpit which should now be air. Shinecharge, then jump to the right Evir and use a projectile to interrupt. Be sure to not stop moving if Samus must land on the sand once bluesuit is obtained. Entrance condition: {
"comeInWithGMode": {
"mode": "direct",
"morphed": false
}
}Requires: "Gravity"
"canPlayInSand"
"canComplexGMode"
{
"enemyKill": {
"enemies": [
[
"Evir",
"Evir"
]
]
}
}
"h_CrystalFlashForReserveEnergy"
{
"canShineCharge": {
"usedTiles": 14,
"openEnd": 0
}
}
{
"autoReserveTrigger": {}
}
"canRModeSparkInterrupt"
{
"notable": "Blue Suit Sand Walk"
} |
|
Gain momentum in the room to the left, then jump at the edge of the runway in this room in order to jump off of the sand and land on the first pillar. Requires a runway of 7 tiles (with no open end) in the adjacent room, and killing the second Evir with a quick super or two plasma hits (note that the particle despawns as the Evir dies). Entrance condition: {
"comeInJumping": {
"speedBooster": "no",
"minTiles": 6.4375
}
}Requires: "canCrossRoomJumpIntoWater"
"canPlayInSand"
"canTrickyJump"
{
"enemyKill": {
"enemies": [
[
"Evir"
]
],
"explicitWeapons": [
"Plasma",
"Super"
]
}
}Dev note: This is not technically a canCrossRoomJumpIntoWater, but it is used here because of the way the momentum changes as Samus enters the water. |
|
The Evirs must be killed quickly before they descend too far. It can help to fire at the Evirs from a safe distance so they will not be triggered to attack Samus. Requires: {
"resetRoom": {
"nodes": [
2
]
}
}
"Gravity"
"canDodgeWhileShooting"
"canPlayInSand"
{
"or": [
{
"and": [
"Plasma",
"Wave"
]
},
"canTrickyJump"
]
}
{
"or": [
{
"and": [
"Plasma",
{
"cycleFrames": 900
}
]
},
{
"and": [
{
"haveBlueSuit": {}
},
{
"cycleFrames": 900
}
]
},
{
"and": [
"Wave",
{
"disableEquipment": "Ice"
},
{
"cycleFrames": 1320
}
]
},
{
"and": [
"ScrewAttack",
"canFarmWhileShooting",
{
"cycleFrames": 980
}
]
},
{
"and": [
"Spazer",
{
"disableEquipment": "Ice"
},
"canFarmWhileShooting",
{
"cycleFrames": 1360
}
]
}
]
}
{
"or": [
"canWallJump",
"HiJump",
{
"and": [
"canGravityJump",
"h_doubleEquipmentScreenCycleFrames"
]
}
]
}
{
"or": [
{
"noBlueSuit": {}
},
{
"notable": "Blue Suit Sand Walk"
}
]
}Resets obstacles: A Farm cycle drops: 3 Evir Dev note: Technically it could make sense to clear obstacle A, but with Gravity it is irrelevant. FIXME: HiJump + Spring fling can be an alternative to Gravity. |
|
If Plasma is available, quickly fire two shots when entering to kill the Evir; it can help to crouch for the second shot. If only Wave is available, quickly fire three shots, then jump out exactly one tile away from the ledge and fire three more shots angled-down to kill the Evir. In any case, use Grapple to collect the drop from the pillar without needing to drop down. Requires: {
"resetRoom": {
"nodes": [
2
]
}
}
"canDodgeWhileShooting"
"canSuitlessMaridia"
"HiJump"
"Grapple"
{
"or": [
{
"and": [
"Plasma",
{
"cycleFrames": 240
}
]
},
{
"and": [
"Wave",
{
"disableEquipment": "Ice"
},
"canFarmWhileShooting",
{
"cycleFrames": 420
}
]
}
]
}
{
"or": [
{
"noBlueSuit": {}
},
{
"notable": "Blue Suit Sand Walk"
}
]
}Resets obstacles: A Farm cycle drops: 1 Evir Dev note: If Gravity is available, then other farm strats can be used instead. |
From: 2
Right Door
To: 4
Junction Below Sand Entrance
Space Jump into the room with full run speed without Speed Booster, jumping as low as possible through the doorway. To avoid getting caught on the overhang, release jump slightly before bonking, and aim down to clear the Evir. Entrance condition: {
"comeInSpaceJumping": {
"speedBooster": "no",
"minTiles": 6.4375
}
}Requires: "canPreciseSpaceJump" "canInsaneJump" "canTrickyDodgeEnemies" "canPlayInSand" |
From: 2
Right Door
To: 4
Junction Below Sand Entrance
Overload PLMs by jumping into the sandfall and landing back on the door ledge. Jump over the Evirs to get the left door. Crystal Flash, then kill the second Evir with beam shots. Jump into the sandpit which should now be air. Shinecharge, then jump to the right Evir and use a projectile to interrupt. Be sure to not stop moving if Samus must land on the sand once bluesuit is obtained. Entrance condition: {
"comeInWithGMode": {
"mode": "direct",
"morphed": false
}
}Requires: "Gravity"
"canPlayInSand"
"canComplexGMode"
{
"enemyKill": {
"enemies": [
[
"Evir",
"Evir"
]
]
}
}
"h_CrystalFlashForReserveEnergy"
{
"canShineCharge": {
"usedTiles": 14,
"openEnd": 0
}
}
{
"autoReserveTrigger": {}
}
"canRModeSparkInterrupt" |
|
Gain momentum in the room to the right, then jump immediately on entry in order to land on the first pillar. Jumping too late will likely put Samus into the pit. Requires a small runway of only one tile or less in the adjacent room. Jumping before the door transition will set Samus straight into an Evir projectile, knocking her into the sand. Entrance condition: {
"comeInRunning": {
"speedBooster": "no",
"minTiles": 0.4375
}
}Requires: "canCrossRoomJumpIntoWater" "canTrickyJump" Dev note: This is not technically a canCrossRoomJumpIntoWater, but it is used here because of the way the momentum changes as Samus enters the water. |
From: 3
Top Sand Entrance
To: 4
Junction Below Sand Entrance
PLM Overload will occur immediately open entering due to the sandfall. Jump over the two Evir in the left pit. Avoid a projectile and Crystal Flash, then kill the remaining Evir with beam shots. Jump into the sandpit which should now be air. Shinecharge, then jump to the right Evir and use a projectile to interrupt. Be sure to not stop moving if Samus must land on the sand once bluesuit is obtained. Entrance condition: {
"comeInWithGMode": {
"mode": "direct",
"morphed": false
},
"comesThroughToilet": "no"
}Requires: "Gravity"
"canPlayInSand"
"canComplexGMode"
{
"enemyKill": {
"enemies": [
[
"Evir",
"Evir"
]
]
}
}
"h_CrystalFlashForReserveEnergy"
{
"canShineCharge": {
"usedTiles": 14,
"openEnd": 0
}
}
{
"autoReserveTrigger": {}
}
"canRModeSparkInterrupt"
{
"notable": "Blue Suit Sand Walk"
} |
|
Break the bomb block on the opposite side of the room. With extra run speeds between $1.2 and $1.D, it's not possible to break the bomb block directly with a bounce; but it is always possible to break them by chaining temporary blue (even if carrying a flash suit). Entrance condition: {
"comeInWithBlueSpringBallBounce": {
"movementType": "controlled"
}
}Requires: "h_underwaterChainTemporaryBlue" Clears obstacles: A |
From: 1
Left Door
To: 1
Left Door
Gain blue speed running into the room, then jump, morph, and unmorph while holding angle to obtain temporary blue. This method allows retaining a flash suit. Entrance condition: {
"comeInGettingBlueSpeed": {
"length": 1,
"openEnd": 1
}
}Requires: "h_underwaterChainTemporaryBlue" Clears obstacles: A |
|
Entrance condition: {
"comeInSpeedballing": {
"runway": {
"length": 0,
"openEnd": 1
}
}
}Requires: "h_underwaterChainTemporaryBlue" Clears obstacles: A |
|
Break the bomb block on the opposite side of the room. With extra run speeds between $1.2 and $1.D, it's not possible to break the bomb block directly with a bounce; but it is always possible to break them by chaining temporary blue (even if carrying a flash suit). Entrance condition: {
"comeInWithBlueSpringBallBounce": {
"movementType": "controlled"
}
}Requires: "h_underwaterChainTemporaryBlue" Clears obstacles: A |
From: 2
Right Door
To: 2
Right Door
Gain blue speed running into the room, then jump, morph, and unmorph while holding angle to obtain temporary blue. This method allows retaining a flash suit. Entrance condition: {
"comeInGettingBlueSpeed": {
"length": 1,
"openEnd": 1
}
}Requires: "h_underwaterChainTemporaryBlue" Clears obstacles: A |
|
Entrance condition: {
"comeInSpeedballing": {
"runway": {
"length": 0,
"openEnd": 1
}
}
}Requires: "h_underwaterChainTemporaryBlue" Clears obstacles: A |
|
Requires: {
"or": [
"h_usePowerBomb",
{
"and": [
"Gravity",
"ScrewAttack"
]
},
{
"and": [
"Gravity",
"canIBJ"
]
},
{
"and": [
"h_useMorphBombs",
"h_useSpringBall"
]
},
{
"and": [
"h_useMorphBombs",
"canTrivialMidAirMorph",
"canDisableEquipment"
]
}
]
}Clears obstacles: A |
|
Jump from door platform to door platform while avoiding the sand. Requires: {
"or": [
{
"and": [
"Gravity",
{
"or": [
"SpaceJump",
"Grapple",
{
"noBlueSuit": {}
}
]
}
]
},
{
"and": [
{
"disableEquipment": "Gravity"
},
"canSuitlessMaridia"
]
}
]
} |
|
Jump from door platform to door platform while avoiding the sand. Requires: {
"or": [
{
"and": [
"Gravity",
{
"or": [
"SpaceJump",
"Grapple",
{
"noBlueSuit": {}
}
]
}
]
},
{
"and": [
{
"disableEquipment": "Gravity"
},
"canSuitlessMaridia"
]
}
]
} |
|
Using movement tricks to reduce fall speed even slightly can avoid touching the sand. A Flatley style turnaround over the grapple block hole reduces fall speed some, but also needs a down back or a tiny jump. Requires: "canSuitlessMaridia"
{
"disableEquipment": "Gravity"
}
"canTrickyJump"
{
"or": [
{
"and": [
"canFlatleyJump",
{
"or": [
"canInsaneJump",
"canDownBack"
]
}
]
},
"canWallJump",
"canResetFallSpeed"
]
}Dev note: The or following canFlatleyJump has no logical relevance but indicates there are two distinct ways of using the flatley jump. |
From: 1
Left Door
To: 1
Left Door
This requires a precisely timed Crystal Flash, such that Shaktool hits Samus immediately after she gets Reserve Energy, to prevent getting double hit. With a second Reserve Tank and an Energy Tank, or the damage reduction from a suit, Samus is able to survive a second hit. If the wall is already broken, either wait for Shaktool to cross the room or move in front of it. It is possible to enter the room and land on the doorsill, then bomb or Power Bomb boost across when the tide is high. Entrance condition: {
"comeInWithGMode": {
"mode": "direct",
"morphed": true
}
}Requires: "h_artificialMorphRModeCrystalFlashInterrupt"
{
"or": [
{
"and": [
{
"ammo": {
"type": "Missile",
"count": 10
}
},
{
"or": [
"h_partialEnemyDamageReduction",
{
"and": [
{
"resourceCapacity": [
{
"type": "RegularEnergy",
"count": 199
}
]
},
{
"resourceCapacity": [
{
"type": "ReserveEnergy",
"count": 199
}
]
}
]
}
]
}
]
},
{
"and": [
{
"ammo": {
"type": "Missile",
"count": 2
}
},
"h_artificialMorphComplexRModeCrystalFlashInterrupt"
]
}
]
}
{
"or": [
"h_artificialMorphSpringBall",
{
"and": [
{
"or": [
"canInsaneJump",
"Gravity"
]
},
{
"or": [
"h_artificialMorphBombs",
{
"ammo": {
"type": "PowerBomb",
"count": 2
}
}
]
}
]
},
"canBePatient",
{
"and": [
"canRiskPermanentLossOfAccess",
{
"not": "f_ShaktoolDoneDigging"
}
]
}
]
} |
From: 2
Right Door
To: 2
Right Door
This requires a precisely timed Crystal Flash, such that Shaktool hits Samus immediately after she gets Reserve Energy, to prevent getting double hit. With a second Reserve Tank and an Energy Tank, or the damage reduction from a suit, Samus is able to survive a second hit. Entrance condition: {
"comeInWithGMode": {
"mode": "direct",
"morphed": true
}
}Requires: {
"or": [
"f_ShaktoolDoneDigging",
{
"obstaclesCleared": [
"f_ShaktoolDoneDigging"
]
}
]
}
"h_artificialMorphRModeCrystalFlashInterrupt"
{
"or": [
{
"and": [
{
"ammo": {
"type": "Missile",
"count": 10
}
},
{
"or": [
"h_partialEnemyDamageReduction",
{
"and": [
{
"resourceCapacity": [
{
"type": "RegularEnergy",
"count": 199
}
]
},
{
"resourceCapacity": [
{
"type": "ReserveEnergy",
"count": 199
}
]
}
]
}
]
}
]
},
{
"and": [
{
"ammo": {
"type": "Missile",
"count": 2
}
},
"h_artificialMorphComplexRModeCrystalFlashInterrupt"
]
}
]
} |
|
From left side, Wait for Shaktool to loop around to the ceiling. Crystal Flash, shinecharge, and jump into the path of Shaktool's rear wheel to interrupt. Or, farm Shaktool with a timed Shinespark: start a diagonal spark from the ground just as Shaktool's back wheel leaves the ceiling, and Shaktool will spawn five drops. Shinecharge again, and use a Yard to interrupt. If Samus came in from the right and can't free Shaktool, there are only the two Yards to work with. Kill a Yard by angering with a shot and then running through it with speed. Requires: {
"obstaclesCleared": [
"R-Mode",
"B"
]
}
{
"or": [
"h_CrystalFlashForReserveEnergy",
{
"and": [
"h_RModeCanRefillReserves",
{
"or": [
{
"and": [
{
"obstaclesCleared": [
"A"
]
},
"h_shinechargeMaxRunway",
{
"shinespark": {
"frames": 4,
"excessFrames": 0
}
},
{
"or": [
{
"and": [
{
"resourceMissingAtMost": [
{
"type": "Missile",
"count": 0
}
]
},
{
"partialRefill": {
"type": "ReserveEnergy",
"limit": 60
}
}
]
},
{
"partialRefill": {
"type": "ReserveEnergy",
"limit": 20
}
}
]
}
]
},
{
"partialRefill": {
"type": "ReserveEnergy",
"limit": 10
}
},
{
"and": [
"canBeLucky",
{
"partialRefill": {
"type": "ReserveEnergy",
"limit": 25
}
}
]
}
]
}
]
}
]
}
"h_shinechargeMaxRunway"
{
"or": [
"canWaterShineCharge",
"Gravity"
]
}
{
"autoReserveTrigger": {}
}
"canRModeSparkInterrupt"Resets obstacles: R-Mode |
From: 1
Left Door
To: 5
Left Pillar Junction
Gain momentum in the room to the left, then jump in this room in order to land on the first pillar. Ensure that Speed Booster is disabled. Requires a runway of only approximately 0.5 tiles in the adjacent room. Perform an air ball before hitting the ceiling in order to land on the first pillar. Entrance condition: {
"comeInRunning": {
"speedBooster": "no",
"minTiles": 1
}
}Requires: "canLateralMidAirMorph" "canCrossRoomJumpIntoWater" "HiJump" "canPlayInSand" |
From: 1
Left Door
To: 5
Left Pillar Junction
Space Jump into the room with max run speed without Speed Booster, then quickly airball after the transition. Entrance condition: {
"comeInSpaceJumping": {
"speedBooster": "no",
"minTiles": 6.4375
}
}Requires: "canLateralMidAirMorph" "canTrickyJump" |
|
Gain momentum in the room to the left, then jump after entering this room in order to land on the first pillar. Ensure that Speed Booster is disabled. Entrance condition: {
"comeInRunning": {
"speedBooster": "no",
"minTiles": 5
}
}Requires: "canCrossRoomJumpIntoWater" "canPlayInSand" "canCarefulJump" Dev note: This is not technically a canCrossRoomJumpIntoWater, but it is used here because of the way the momentum changes as Samus enters the water. |
|
Enter with at least 1 tile of run speed from an air room, with Speed Booster unequipped. Jump from near the end of the runway (though a jump from 1-2 tiles away from the end can still work). Press pause while crossing the narrow first sandfall, then perform a lateral mid-air morph after exiting the sandfall. Equip both Spring Ball and Speed Booster, and perform a mid-air Spring Ball jump at somewhere close to the maximum height. Unequip Spring Ball while descending through the wide second sidefall. Entrance condition: {
"comeInRunning": {
"speedBooster": "no",
"minTiles": 1
}
}Requires: {
"notable": "Spring Fling with Momentum"
}
"canCrossRoomJumpIntoWater"
"canPlayInSand"
"canLateralMidAirMorph"
"canTrickySpringBallJump"
"canSpringFling"
"h_unpauseKeepMomentum" |
|
Gain momentum in the room to the left, then jump in this room in order to land on the first pillar. Ensure that Speed Booster is disabled. With a short runway of 4 tiles (with an open end) in the adjacent room, it is required to jump as late as possible at the edge of the runway in this room. Shrinking Samus' hitbox before landing makes the jump a little easier. Entrance condition: {
"comeInRunning": {
"speedBooster": "no",
"minTiles": 4
}
}Requires: "canCrossRoomJumpIntoWater" "canPlayInSand" "canTrickyJump" Dev note: This is not technically a canCrossRoomJumpIntoWater, but it is used here because of the way the momentum changes as Samus enters the water. |
|
The Evirs must be killed quickly before they descend too far. With only Spazer available for damage, this is particularly tight. One of the first two Evirs will need to be skipped. Requires: {
"or": [
{
"resetRoom": {
"nodes": [
2
]
}
},
{
"and": [
{
"resetRoom": {
"nodes": [
1
]
}
},
"Gravity",
{
"cycleFrames": 300
}
]
}
]
}
{
"or": [
"Gravity",
{
"and": [
"canSuitlessMaridia",
"HiJump",
{
"cycleFrames": 645
}
]
}
]
}
"canPlayInSand"
"canTrickyDodgeEnemies"
"canInsaneJump"
"Spazer"
{
"disableEquipment": "Ice"
}
{
"cycleFrames": 1440
}
{
"noBlueSuit": {}
}Farm cycle drops: 2 Evir Dev note: FIXME: Slower methods are possible for resetting at the left door. |
|
The Evirs must be killed quickly before they descend too far. It can help to fire at the Evirs from a safe distance so they will not be triggered to attack Samus. Requires: "canPlayInSand"
{
"or": [
"canFarmWhileShooting",
{
"and": [
"Plasma",
"Wave"
]
}
]
}
{
"or": [
{
"resetRoom": {
"nodes": [
2
]
}
},
{
"and": [
{
"resetRoom": {
"nodes": [
1
]
}
},
"Gravity",
{
"cycleFrames": 300
}
]
}
]
}
{
"or": [
"Gravity",
{
"and": [
"canSuitlessMaridia",
"HiJump",
{
"cycleFrames": 100
}
]
}
]
}
{
"or": [
{
"and": [
"Plasma",
{
"cycleFrames": 880
}
]
},
{
"and": [
"ScrewAttack",
{
"cycleFrames": 880
}
]
},
{
"and": [
"Wave",
{
"disableEquipment": "Ice"
},
{
"cycleFrames": 1200
}
]
}
]
}
{
"noBlueSuit": {}
}Farm cycle drops: 3 Evir Dev note: FIXME: Slower methods are possible for resetting at the left door. FIXME: This can be possible with a blue suit. |
From: 2
Right Door
To: 2
Right Door
Jump out 1 tile from the ledge and fire angle-down shots at the closest Evir, to quickly kill it before it descends too far. Use Grapple to collect the drop. If only Wave is used, the drop will spawn low, and in this case use Grapple while falling right of the pillar in order to reach the drop. If Plasma is available, then killing the second Evir (instead of the first) is also an option. Requires: {
"resetRoom": {
"nodes": [
2
]
}
}
"canSuitlessMaridia"
"canPlayInSand"
"canFarmWhileShooting"
"Grapple"
{
"or": [
{
"and": [
"Plasma",
{
"cycleFrames": 340
}
]
},
{
"and": [
"Wave",
{
"disableEquipment": "Ice"
},
"canInsaneJump",
"canBeVeryPatient",
{
"cycleFrames": 680
}
]
}
]
}Farm cycle drops: 1 Evir |
From: 1
Left Door
To: 2
Right Door
Requires: {
"haveBlueSuit": {}
}
"canSpringBallBombJump"
"canInsaneJump"
{
"or": [
{
"and": [
"Gravity",
{
"acidFrames": 15
}
]
},
{
"and": [
"canWallJump",
{
"acidFrames": 20
}
]
},
{
"and": [
"HiJump",
{
"disableEquipment": "HiJump"
},
{
"acidFrames": 20
}
]
},
{
"acidFrames": 75
}
]
} |
|
Requires: {
"haveBlueSuit": {}
}
"canSpringFling"
{
"or": [
{
"and": [
"Gravity",
{
"acidFrames": 15
}
]
},
{
"and": [
"canWallJump",
{
"acidFrames": 20
}
]
},
{
"and": [
"HiJump",
{
"disableEquipment": "HiJump"
},
{
"acidFrames": 20
}
]
},
{
"acidFrames": 75
}
]
} |
|
Do not kill all four Metroids, or else they cannot be farmed again, leaving only Crystal Flash as an option. Shinecharge at the left door, and then use a Rinka or the acid to interrupt. Requires: {
"obstaclesCleared": [
"R-Mode"
]
}
{
"or": [
{
"and": [
"h_CrystalFlashForReserveEnergy",
{
"or": [
"canInsaneJump",
{
"obstaclesCleared": [
"B"
]
}
]
}
]
},
{
"and": [
"canRiskPermanentLossOfAccess",
{
"not": "f_KilledMetroidRoom1"
},
"h_RModeCanRefillReserves",
"Ice",
{
"enemyKill": {
"enemies": [
[
"Metroid"
],
[
"Metroid"
],
[
"Metroid"
]
],
"explicitWeapons": [
"Missile",
"Super"
]
}
},
{
"partialRefill": {
"type": "ReserveEnergy",
"limit": 40
}
}
]
}
]
}
{
"or": [
{
"obstaclesCleared": [
"B"
]
},
"canMetroidAvoid",
"Ice"
]
}
{
"canShineCharge": {
"usedTiles": 29,
"openEnd": 1
}
}
{
"autoReserveTrigger": {
"maxReserveEnergy": 95
}
}
"canRModeSparkInterrupt"Resets obstacles: R-Mode |
|
Do not kill all three Metroids, or else they cannot be farmed again, leaving only Crystal Flash as an option. Shinecharge at the long tunnel near the left door, then use a Rinka or the acid to interrupt. Requires: {
"obstaclesCleared": [
"R-Mode"
]
}
{
"or": [
"h_CrystalFlashForReserveEnergy",
{
"and": [
"canRiskPermanentLossOfAccess",
{
"not": "f_KilledMetroidRoom3"
},
"h_RModeCanRefillReserves",
"Ice",
{
"enemyKill": {
"enemies": [
[
"Metroid"
],
[
"Metroid"
]
],
"explicitWeapons": [
"Missile",
"Super"
]
}
},
{
"partialRefill": {
"type": "ReserveEnergy",
"limit": 20
}
}
]
}
]
}
{
"or": [
{
"or": [
"f_KilledMetroidRoom3",
{
"obstaclesCleared": [
"f_KilledMetroidRoom3"
]
}
]
},
"Ice",
"canMetroidAvoid"
]
}
{
"canShineCharge": {
"usedTiles": 29,
"openEnd": 2
}
}
{
"autoReserveTrigger": {
"maxReserveEnergy": 95
}
}
"canRModeSparkInterrupt"Resets obstacles: R-Mode |
|
Requires: {
"or": [
"canDash",
"canWallJump",
"SpaceJump",
"canSpringFling",
{
"and": [
"canMidAirMorph",
"h_useSpringBall",
"canResetFallSpeed",
{
"or": [
{
"disableEquipment": "HiJump"
},
"canInsaneJump"
]
}
]
},
"canBombHorizontally",
"canTrickyUseFrozenEnemies",
{
"acidFrames": 20
}
]
} |
|
Requires: {
"or": [
"canDash",
{
"and": [
"canCarefulJump",
{
"disableEquipment": "HiJump"
}
]
},
{
"and": [
{
"or": [
"canIBJ",
{
"tech": "canJumpIntoIBJ"
}
]
},
"canBombHorizontally"
]
},
"canSpringFling",
{
"and": [
"canMidAirMorph",
"h_useSpringBall",
"canInsaneJump",
"canResetFallSpeed"
]
},
"SpaceJump",
{
"and": [
"HiJump",
{
"acidFrames": 20
}
]
}
]
} |
|
Do not kill all three Metroids, or else they cannot be farmed again, leaving only Crystal Flash as an option. Kill two and lure the remaining Metroid to the top of the room. Shinecharge in the narrow space at the bottom door and use a Rinka to interrupt. Entrance condition: {
"comeInWithRMode": {}
}Requires: "Ice"
{
"or": [
{
"and": [
"h_CrystalFlashForReserveEnergy",
{
"or": [
"f_KilledMetroidRoom4",
{
"obstaclesCleared": [
"f_KilledMetroidRoom4"
]
}
]
}
]
},
{
"and": [
{
"not": "f_KilledMetroidRoom4"
},
"canRiskPermanentLossOfAccess",
"h_RModeCanRefillReserves",
{
"enemyKill": {
"enemies": [
[
"Metroid"
],
[
"Metroid"
]
],
"explicitWeapons": [
"Missile",
"Super"
]
}
},
{
"partialRefill": {
"type": "ReserveEnergy",
"limit": 20
}
},
{
"or": [
"Morph",
"canMetroidAvoid"
]
}
]
}
]
}
{
"canShineCharge": {
"usedTiles": 12,
"openEnd": 0
}
}
{
"autoReserveTrigger": {
"maxReserveEnergy": 95
}
}
"canRModeSparkInterrupt" |
|
Do not kill all three Metroids, or else they cannot be farmed again, leaving only Crystal Flash as an option. Kill two and lure the remaining Metroid to the top of the room. Shinecharge in the narrow space at the bottom door and use a Rinka to interrupt. Entrance condition: {
"comeInWithRMode": {},
"comesThroughToilet": "no"
}Requires: "Ice"
{
"or": [
{
"and": [
{
"or": [
"f_KilledMetroidRoom4",
{
"obstaclesCleared": [
"f_KilledMetroidRoom4"
]
}
]
},
"h_CrystalFlashForReserveEnergy"
]
},
{
"and": [
{
"not": "f_KilledMetroidRoom4"
},
"canRiskPermanentLossOfAccess",
"h_RModeCanRefillReserves",
{
"enemyKill": {
"enemies": [
[
"Metroid"
],
[
"Metroid"
]
],
"explicitWeapons": [
"Missile",
"Super"
]
}
},
{
"partialRefill": {
"type": "ReserveEnergy",
"limit": 20
}
},
"canCarefulJump"
]
}
]
}
{
"canShineCharge": {
"usedTiles": 12,
"openEnd": 0
}
}
{
"autoReserveTrigger": {
"maxReserveEnergy": 95
}
}
"canRModeSparkInterrupt" |
|
Glitch through the Mother Brain Zebetites by using a frozen Rinka and i-frames. Freeze the Rinka at its spawn location, then spin jump or down-back onto it after acquiring i-frames to clip inside of the Zebetite, then jump through. I-frames can be acquired from a Rinka hit, a turret shot, or from the Zebetite itself. Note that Zebetites cause i-frames but deal no damage. If Screw Attack is equipped, then a down-back must be used, since spin jumping will cancel i-frames. With Ice+Wave, Samus can freeze the Rinka from above with an angle-down shot; Otherwise Samus must go below, press against the wall, and freeze it with an upward shot. With Ice+Plasma, Samus must be crouched when firing the shot. Requires: "h_AllMotherBrainBarriersCleared"
{
"notable": "Ice Zebetite Skip"
}
{
"noBlueSuit": {}
}
"canUseIFrames"
"canTrickyUseFrozenEnemies"
"Morph"
{
"or": [
{
"and": [
"Wave",
{
"enemyDamage": {
"enemy": "Rinka",
"type": "contact",
"hits": 1
}
}
]
},
"canTrickyJump"
]
}
{
"or": [
{
"disableEquipment": "ScrewAttack"
},
"canDownBack"
]
}
{
"or": [
"canTrickyDodgeEnemies",
{
"enemyDamage": {
"enemy": "Mother Brain 1",
"type": "turret",
"hits": 1
}
}
]
}
"h_complexToCarryFlashSuit"Dev note: This technically requires f_KilledZebetites1 to not be set, but there is minimal risk of loss of access, because there is no reason to kill any Zebs without being able to kill them all. It is also possible to Ice Zeb skip through the second Zeb with a morph/unmorph/remorph on a frozen Rinka; this is known as a Remorph Zebetite Skip or a Spring Ball Zebetite Skip. Technically this strat involves `canWallIceClip` but we don't include that requirement, since the positioning of the Rinka is freely normalized, which makes the trick easier than this tech would normally imply. FIXME: It is possible to Ice Zeb Skip out, but it is much harder and would only be useful if getting here with canRiskPermanentLossOfAccess. |
From: 2
Right Door
To: 3
Mother Brain
Upon entering, freeze all the Rinkas and Crystal Flash away from turret paths. Bounce off of a frozen Rinka and onto the corner of Mother Brain's pedestal (which acts as a spike) to enter Spike X-Mode. Gain shinecharge, then use any Rinka to interrupt. Entrance condition: {
"comeInWithRMode": {}
}Requires: "h_AllMotherBrainBarriersCleared"
"h_CrystalFlashForReserveEnergy"
{
"or": [
"f_KilledZebetites1",
{
"obstaclesCleared": [
"f_KilledZebetites1"
]
}
]
}
{
"or": [
"f_KilledZebetites2",
{
"obstaclesCleared": [
"f_KilledZebetites2"
]
}
]
}
{
"or": [
"f_KilledZebetites3",
{
"obstaclesCleared": [
"f_KilledZebetites3"
]
}
]
}
{
"or": [
"f_KilledZebetites4",
{
"obstaclesCleared": [
"f_KilledZebetites4"
]
}
]
}
"Morph"
"canTrickyUseFrozenEnemies"
{
"notable": "Mother Brain Pedestal XMode"
}
"canXMode"
{
"spikeHits": 1
}
"h_shinechargeMaxRunway"
{
"autoReserveTrigger": {
"maxReserveEnergy": 95
}
}
"canRModeSparkInterrupt" |
|
Crystal Flash, shinecharge at the bottom, and use any Rinka to interurpt. Entrance condition: {
"comeInWithRMode": {}
}Requires: "h_CrystalFlashForReserveEnergy"
{
"or": [
{
"canShineCharge": {
"usedTiles": 12,
"openEnd": 0
}
},
{
"and": [
{
"doorUnlockedAtNode": 3
},
{
"canShineCharge": {
"usedTiles": 13,
"openEnd": 0
}
}
]
}
]
}
{
"autoReserveTrigger": {
"maxReserveEnergy": 95
}
}
"canRModeSparkInterrupt"Unlocks doors: {"nodeId":3,"types":["ammo"],"requires":[]} |
From: 1
Top Door
To: 2
Right Door
At the bottom of the room, Crystal Flash below a wall pirate to have it walk into Samus. The pirate will randomly walk up and down and wall, but if it sees Samus and jumps across, it will start climbing up the left wall or down the right wall. With a lot of luck, the pirate will sometimes climb down and hit Samus before it goes off camera. Be sure to avoid any stationary, invisible lasers that they might place. Entrance condition: {
"comeInWithGMode": {
"mode": "direct",
"morphed": true
},
"comesThroughToilet": "no"
}Requires: {
"or": [
"h_artificialMorphMovement",
"canBeVeryLucky"
]
}
"h_artificialMorphComplexRModeCrystalFlashInterrupt"
{
"ammo": {
"type": "Missile",
"count": 10
}
} |
From: 2
Right Door
To: 2
Right Door
At the bottom of the room, Crystal Flash below a wall pirate to have it walk into Samus. The pirate will randomly walk up and down and wall, but if it sees Samus and jumps across, it will start climbing up the left wall or down the right wall. With some luck, the pirate will sometimes climb down and hit Samus before it goes off camera. Entrance condition: {
"comeInWithGMode": {
"mode": "direct",
"morphed": true
}
}Requires: {
"or": [
"h_artificialMorphMovement",
"canBeLucky"
]
}
"h_artificialMorphComplexRModeCrystalFlashInterrupt"
{
"ammo": {
"type": "Missile",
"count": 10
}
} |
|
Crystal Flash at the bottom right corner, then run to the left to shinecharge. Use Pirate laser to interrupt. Entrance condition: {
"comeInWithRMode": {}
}Requires: "h_CrystalFlashForReserveEnergy"
"h_shinechargeMaxRunway"
{
"autoReserveTrigger": {
"maxReserveEnergy": 95
}
}
"canRModeSparkInterrupt" |
|
Crystal Flash on top of the speed blocks. Kill the upper tier of pirates, using the chance to damage down. Shinecharge on the level below, then drop down to interrupt using the Pirate laser. Entrance condition: {
"comeInWithRMode": {}
}Requires: "h_CrystalFlashForReserveEnergy"
"h_shinechargeMaxRunway"
{
"autoReserveTrigger": {
"maxReserveEnergy": 95
}
}
"canRModeSparkInterrupt" |
From: 1
Left Door
To: 1
Left Door
At the bottom of the room, Crystal Flash below a wall pirate to have it walk into Samus. The pirate will randomly walk up and down and wall, but if it sees Samus and jumps across, it will start climbing up the left wall or down the right wall. With a bit of luck, the pirate will sometimes climb down and hit Samus before it goes off camera. Try to delay as much as possible if it is going down, then fall in a way to make it hop to the right wall and continue down. Be sure to avoid any stationary, invisible lasers that they might place. Without any movement options, it is recommended to land in the doorframe as Samus morphs, then Crystal Flash on the ledge, as the pirate above will be moving down. Entrance condition: {
"comeInWithGMode": {
"mode": "direct",
"morphed": true
}
}Requires: "h_artificialMorphComplexRModeCrystalFlashInterrupt"
{
"ammo": {
"type": "Missile",
"count": 10
}
} |
From: 2
Right Door
To: 1
Left Door
The acid does not rise in G-mode. Bomb boost near the first pirate until it places 18 lasers and fully overloads them so that other pirates won't place more. Very carefully IBJ over it or use Spring Ball or Power Bombs to kill it. Climb the shaft with a very long IBJ. At the top of the room, Crystal Flash on one of the ledges, below a wall pirate, to have it walk into Samus and trigger reserves. The pirate will randomly walk up and down and wall, but if it sees Samus and jumps across, it will start climbing up the left wall or down the right wall. Entrance condition: {
"comeInWithGMode": {
"mode": "direct",
"morphed": true
}
}Requires: {
"or": [
"h_artificialMorphSpringBall",
"canComplexGMode",
{
"and": [
"h_artificialMorphPowerBomb",
"h_artificialMorphPowerBomb"
]
}
]
}
"h_artificialMorphLongIBJ"
"h_artificialMorphComplexRModeCrystalFlashInterrupt"
{
"ammo": {
"type": "Missile",
"count": 10
}
} |
|
Crystal Flash then get to the right door runway. Clear one pirate for a short runway and use the other to interrupt. Or clear both then drop to the ledge below and interrupt with that Pirate. Requires: {
"obstaclesCleared": [
"R-Mode"
]
}
"h_CrystalFlashForReserveEnergy"
{
"or": [
{
"and": [
{
"obstaclesNotCleared": [
"A"
]
},
{
"canShineCharge": {
"usedTiles": 25,
"openEnd": 1
}
}
]
},
{
"and": [
{
"enemyKill": {
"enemies": [
[
"Tourian Space Pirate (all)"
],
[
"Tourian Space Pirate (all)"
]
],
"explicitWeapons": [
"Plasma",
"ScrewAttack",
"Missile",
"Super"
]
}
},
{
"canShineCharge": {
"usedTiles": 25,
"openEnd": 1
}
}
]
},
{
"canShineCharge": {
"usedTiles": 16,
"openEnd": 0
}
}
]
}
{
"autoReserveTrigger": {
"maxReserveEnergy": 95
}
}
"canRModeSparkInterrupt"Resets obstacles: R-Mode |

