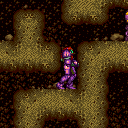
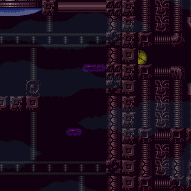
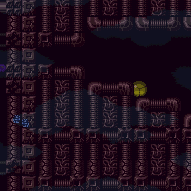
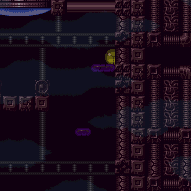
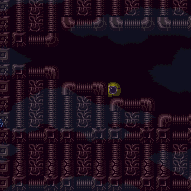
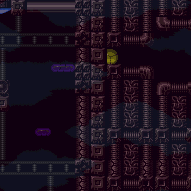
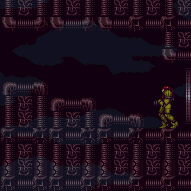
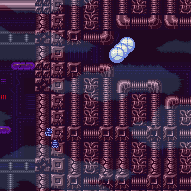
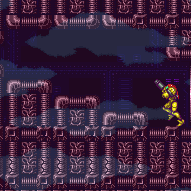
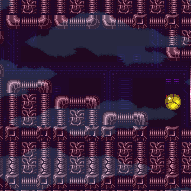
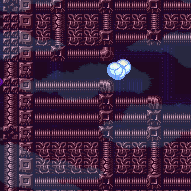
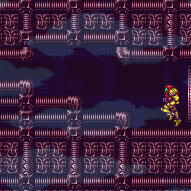
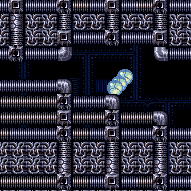
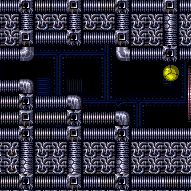
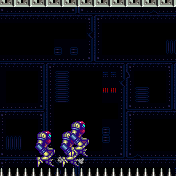
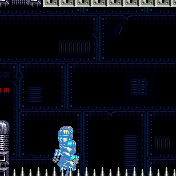
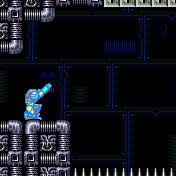
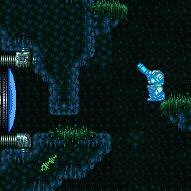
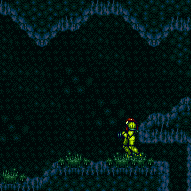
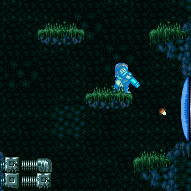
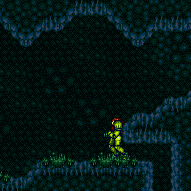
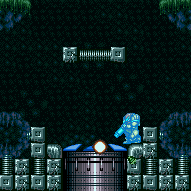
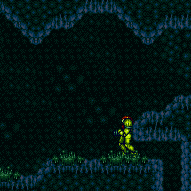
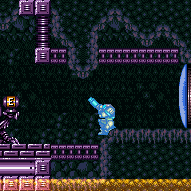
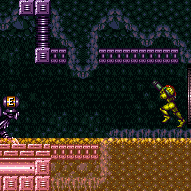
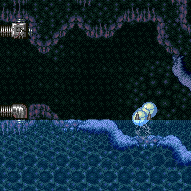
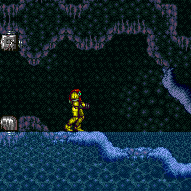
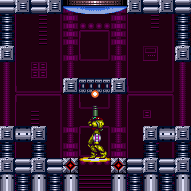
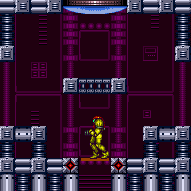
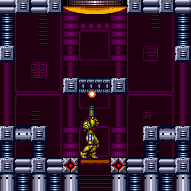
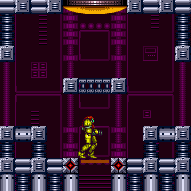
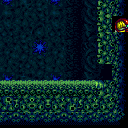
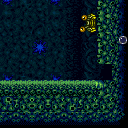
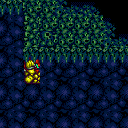
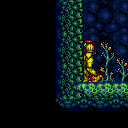
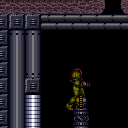
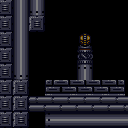
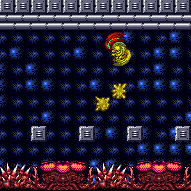
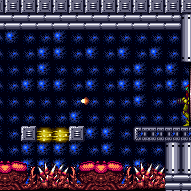
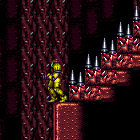
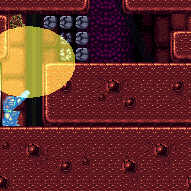
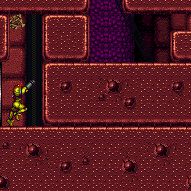
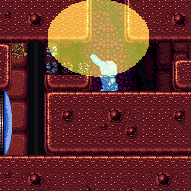
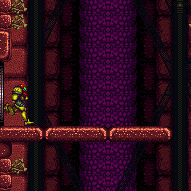
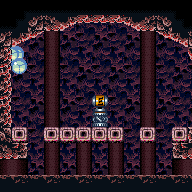
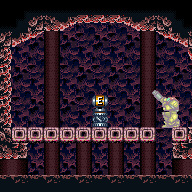
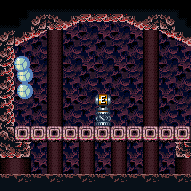
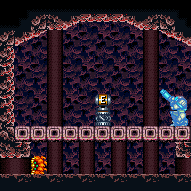
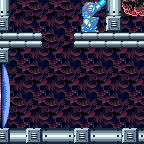
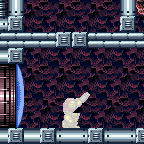
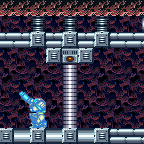
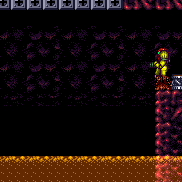
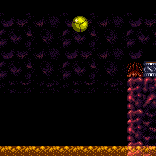
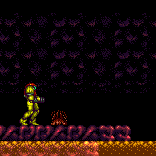
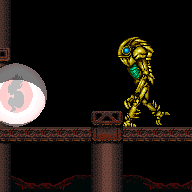
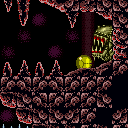
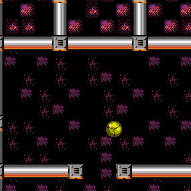
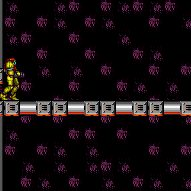
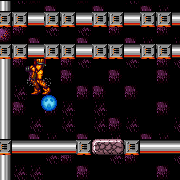
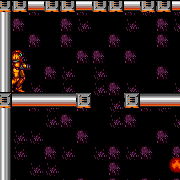
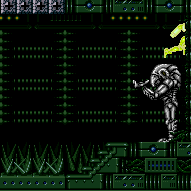
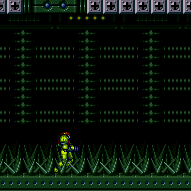
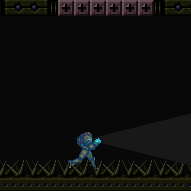
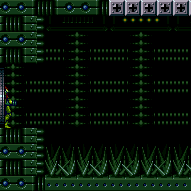
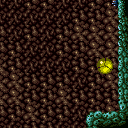
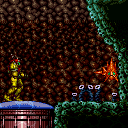
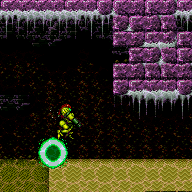
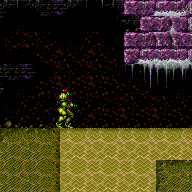
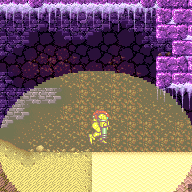
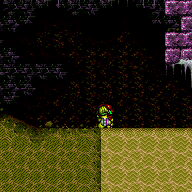
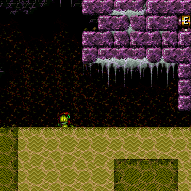
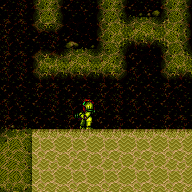
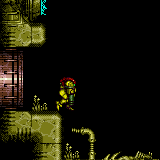
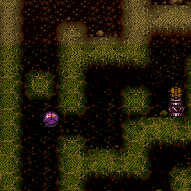
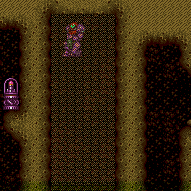
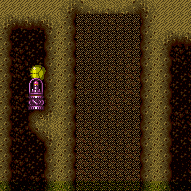
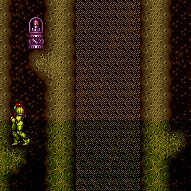
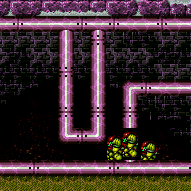
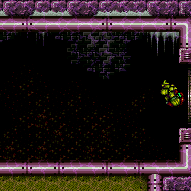
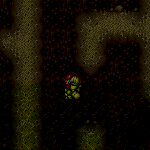
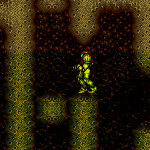
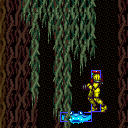
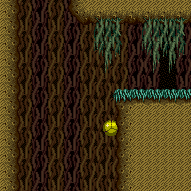
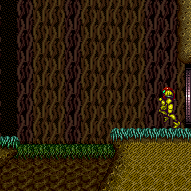
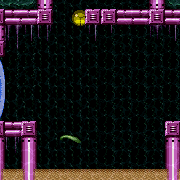
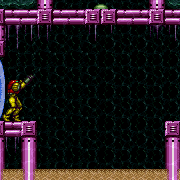
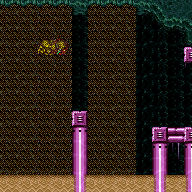
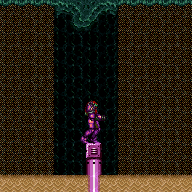
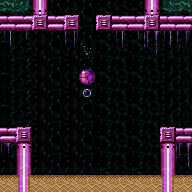
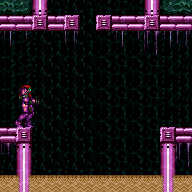
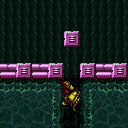
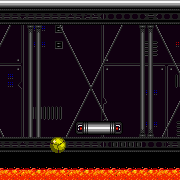
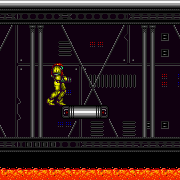
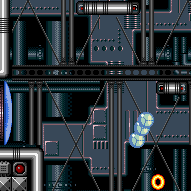
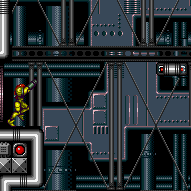
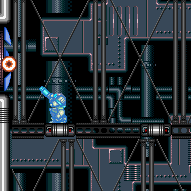
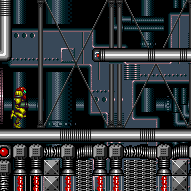
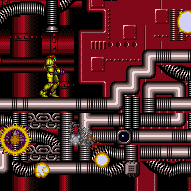
can4HighMidAirMorph (Very Hard)
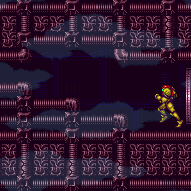
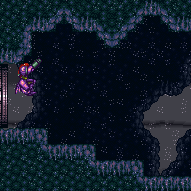
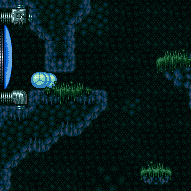
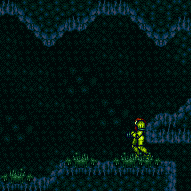
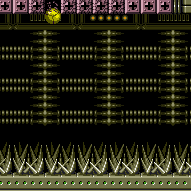
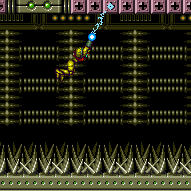
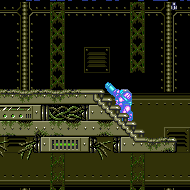
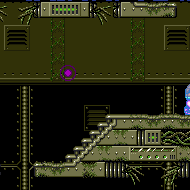
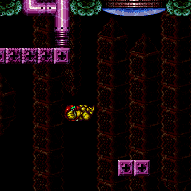
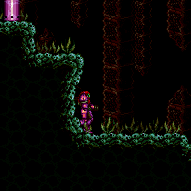
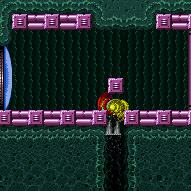
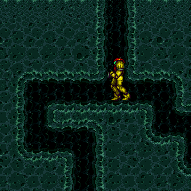
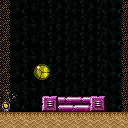
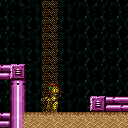
A mid-air morph that has to be done in a 4-tile-high space, into a morph tunnel at the top of the space. It's a lot more precise than with more room. Turn off HiJump before attempting this. Most applications of this tech are in places where wall jump instant morphing is not possible.
Dependencies: canTrivialMidAirMorph, canMidAirMorph, canDisableEquipment
Strats ()
|
Overload PLMs using the scroll block at the top of the stairs immediately in front of the bomb blocks. Reach the bottom and pass through the bomb blocks while still in G-mode. Entrance condition: {
"comeInWithGMode": {
"mode": "any",
"morphed": true
}
}Requires: {
"or": [
"h_artificialMorphSpringBall",
"h_artificialMorphBombs",
{
"and": [
"Morph",
"h_fourTileJumpMorph"
]
}
]
}Dev note: PBs cannot be used, as they will solidify the bomb blocks. |
|
Overload PLMs using the scroll block at the top of the stairs immediately in front of the bomb blocks. Fall down to the lower bomb blocks while still in G-mode Morph. Entrance condition: {
"comeInWithGMode": {
"mode": "any",
"morphed": true
}
}Requires: {
"or": [
"h_artificialMorphSpringBall",
"h_artificialMorphBombs",
{
"and": [
"Morph",
"h_fourTileJumpMorph"
]
}
]
}Dev note: PBs cannot be used, as they will solidify the bomb blocks. |
|
Overload PLMs using the scroll block at the top of the stairs next to the bomb blocks. With PLMs still overloaded, Samus can simply Crystal Flash and run through the bomb wall at the bottom to shinecharge. When damaging down, note that Pirates will place invisible, stationary lasers that will damage Samus: these can help with wasting energy, but remaining unused lasers must be kept in mind. Lead a wall pirate to the bottom of the shaft, shinecharge, and windup in front of it to get interrupted by a shot. Entrance condition: {
"comeInWithGMode": {
"mode": "direct",
"morphed": true
}
}Requires: {
"not": "f_ZebesSetAblaze"
}
"h_ZebesIsAwake"
{
  "or": [
    "h_artificialMorphSpringBall",
    "h_artificialMorphBombs",
    {
      "and": [
        "Morph",
        "h_fourTileJumpMorph"
      ]
    }
  ]
}
"h_artificialMorphCrystalFlash"
{
"canShineCharge": {
"usedTiles": 28,
"openEnd": 0
}
}
{
"autoReserveTrigger": {
"maxReserveEnergy": 95
}
}
"canRModeSparkInterrupt"
{
"partialRefill": {
"type": "Energy",
"limit": 50
}
} |
|
Entrance condition: {
"comeInWithGMode": {
"mode": "any",
"morphed": true
}
}Requires: {
"or": [
"h_artificialMorphSpringBall",
"h_artificialMorphBombs",
{
"and": [
"Morph",
"h_fourTileJumpMorph"
]
}
]
}Dev note: PBs cannot be used, as they will solidify the bomb blocks. |
From: 3
Top Right Door
To: 6
Main Junction
Entrance condition: {
"comeInShinecharging": {
"length": 1,
"openEnd": 0
}
}Requires: "canInsaneJump" "canLongChainTemporaryBlue" "can4HighMidAirMorph" "canSpringBallBounce" Dev note: There is 1 unusable tile in this runway. |
From: 3
Top Right Door
To: 6
Main Junction
Entrance condition: {
"comeInWithTemporaryBlue": {}
}Requires: "canInsaneJump" "canLongChainTemporaryBlue" "can4HighMidAirMorph" "canSpringBallBounce" |
|
Overload PLMs using the scroll block at the top of the stairs next to the bomb blocks. Fall down and pass through bomb wall at the bottom while still in G-mode. Entrance condition: {
"comeInWithGMode": {
"mode": "any",
"morphed": true
}
}Requires: {
"or": [
"h_artificialMorphSpringBall",
"h_artificialMorphBombs",
{
"and": [
"Morph",
"h_fourTileJumpMorph"
]
}
]
}Dev note: PBs cannot be used, as they will solidify the bomb blocks. |
|
Overload PLMs using the scroll block at the top of the stairs next to the bomb blocks. If Morph is not available, careful movement is needed with SpringBall to reach the top without taking a hit from a pirate or its stationary, invisible lasers. Entrance condition: {
"comeInWithGMode": {
"mode": "any",
"morphed": true
}
}Requires: {
"or": [
"h_artificialMorphSpringBall",
"h_artificialMorphBombs",
"h_fourTileJumpMorph"
]
}
{
"or": [
"Morph",
"h_ZebesNotAwake",
{
"and": [
"h_artificialMorphSpringBall",
{
"or": [
"HiJump",
"canTrickyDodgeEnemies"
]
}
]
}
]
} |
|
Overload PLMs using the scroll block at the top of the stairs next to the bomb blocks. With PLMs still overloaded, Samus can simply Crystal Flash and run through the bomb wall at the bottom to shinecharge. When damaging down, note that Pirates will place invisible, stationary lasers that will damage Samus: these can help with wasting energy, but remaining unused lasers must be kept in mind. Lead a wall pirate to the bottom of the shaft, shinecharge, and windup in front of it to get interrupted by a shot. Entrance condition: {
"comeInWithGMode": {
"mode": "direct",
"morphed": true
}
}Requires: {
"not": "f_ZebesSetAblaze"
}
"h_ZebesIsAwake"
{
  "or": [
    "h_artificialMorphSpringBall",
    "h_artificialMorphBombs",
    {
      "and": [
        "Morph",
        "h_fourTileJumpMorph"
      ]
    }
  ]
}
"h_artificialMorphCrystalFlash"
{
"canShineCharge": {
"usedTiles": 28,
"openEnd": 0
}
}
{
"autoReserveTrigger": {
"maxReserveEnergy": 95
}
}
"canRModeSparkInterrupt"
{
"partialRefill": {
"type": "Energy",
"limit": 50
}
} |
|
Entrance condition: {
"comeInWithGMode": {
"mode": "any",
"morphed": true
}
}Requires: {
"or": [
"h_artificialMorphSpringBall",
"h_artificialMorphBombs",
"h_fourTileJumpMorph"
]
}Dev note: A Power Bomb cannot be used, as it will solidify the bomb block. |
From: 4
Middle Right Door
To: 6
Main Junction
Entrance condition: {
"comeInShinecharging": {
"length": 2,
"openEnd": 0
}
}Requires: "canInsaneJump" "canLongChainTemporaryBlue" "canSpringBallBounce" "can4HighMidAirMorph" Dev note: There is 1 unusable tile in this runway. |
From: 4
Middle Right Door
To: 6
Main Junction
Entrance condition: {
"comeInWithTemporaryBlue": {}
}Requires: "canInsaneJump" "canLongChainTemporaryBlue" "canSpringBallBounce" "can4HighMidAirMorph" |
From: 1
Top Left Door
To: 6
Right of Morph Tunnel with Temporary Blue
Bounce into the spikes and use a speedkeep to run on spikes to setup for a speedball towards the item. Bouncing on the platform near the door saves a spike hit. Or a damage boost speedkeep could be used instead of a spike speedkeep with enough runspeed. Entrance condition: {
"comeInRunning": {
"speedBooster": "yes",
"minTiles": 12
}
}Requires: "canSpeedKeep"
"canCarefulJump"
"canSlowShortCharge"
"can4HighMidAirMorph"
{
"spikeHits": "n_speedKeepAttempts"
}
"canSpeedball" |
From: 1
Top Left Door
To: 6
Right of Morph Tunnel with Temporary Blue
Bounce into the spikes and use a speedkeep to run on spikes to setup for a speedball towards the item. Bouncing on the platform near the door saves a spike hit. Entrance condition: {
"comeInWithTemporaryBlue": {}
}Requires: "canChainTemporaryBlue"
"can4HighMidAirMorph"
"canSpeedKeep"
{
"spikeHits": {
"add": [
"n_speedKeepAttempts",
"n_speedKeepLenience"
]
}
}
"canSpeedball"Dev note: The extra lenience is because of the need to either to perform a very precise jump off the spikes or to start with a bounce on the spikes, taking an extra hit. |
From: 1
Top Left Door
To: 7
Junction (Left Ledge Below Bomb Blocks)
Entrance condition: {
"comeInWithTemporaryBlue": {}
}Requires: "canLongChainTemporaryBlue" "can4HighMidAirMorph" Clears obstacles: A |
From: 8
Central Junction
To: 2
Middle Left Door
Requires: {
"canShineCharge": {
"usedTiles": 25,
"steepUpTiles": 3,
"steepDownTiles": 3,
"openEnd": 1
}
}
"canLongChainTemporaryBlue"
"canXRayTurnaround"
"can4HighMidAirMorph"
"canSpringBallBounce"Exit condition: {
"leaveWithTemporaryBlue": {}
}Unlocks doors: {"types":["ammo"],"requires":[]} |
From: 8
Central Junction
To: 3
Bottom Left Horizontal Door
Requires: {
"canShineCharge": {
"usedTiles": 25,
"steepUpTiles": 3,
"steepDownTiles": 3,
"openEnd": 1
}
}
"canLongChainTemporaryBlue"
"canXRayTurnaround"
"can4HighMidAirMorph"Exit condition: {
"leaveWithTemporaryBlue": {}
}Unlocks doors: {"types":["ammo"],"requires":[]} |
From: 8
Central Junction
To: 6
Bottom Right Door (On the Left Shaft)
Requires: {
"canShineCharge": {
"usedTiles": 25,
"steepUpTiles": 3,
"steepDownTiles": 3,
"openEnd": 1
}
}
"canLongChainTemporaryBlue"
"canXRayTurnaround"
"can4HighMidAirMorph"Exit condition: {
"leaveWithTemporaryBlue": {}
}Unlocks doors: {"types":["ammo"],"requires":[]} |
From: 8
Central Junction
To: 7
Bottom Left Vertical Door
Requires: {
"canShineCharge": {
"usedTiles": 25,
"steepUpTiles": 3,
"steepDownTiles": 3,
"openEnd": 1
}
}
"canLongChainTemporaryBlue"
"canXRayTurnaround"
"can4HighMidAirMorph"Exit condition: {
"leaveWithTemporaryBlue": {
"direction": "any"
}
}Unlocks doors: {"types":["ammo"],"requires":[]} |
From: 2
Right Door
To: 4
Middle Junction (Left of Morph Tunnel)
Entrance condition: {
"comeInShinecharging": {
"length": 4,
"openEnd": 0
}
}Requires: "canTemporaryBlue"
"canLateralMidAirMorph"
{
"or": [
"canChainTemporaryBlue",
"can4HighMidAirMorph"
]
}Dev note: There are 6 unusable tiles in this runway. |
|
Requires: "canWaterShineCharge"
{
"canShineCharge": {
"usedTiles": 20,
"openEnd": 1
}
}
"canLongChainTemporaryBlue"
"canXRayTurnaround"
"can4HighMidAirMorph"Exit condition: {
"leaveWithTemporaryBlue": {}
} |
|
Gain temporary blue using the runway on the left side of the room, using HiJump or a Gravity jump where needed to get onto the ocean platforms. Requires: "Gravity"
{
"canShineCharge": {
"usedTiles": 20,
"steepUpTiles": 4,
"steepDownTiles": 2,
"startingSteepDownTiles": 1,
"openEnd": 0
}
}
"canLongChainTemporaryBlue"
"can4HighMidAirMorph"
{
"or": [
"HiJump",
"canGravityJump"
]
}Exit condition: {
"leaveWithTemporaryBlue": {}
}Dev note: With very precise mid-air morphs/unmorphs, it is possible to get onto the first or second ocean platform directly without HiJump or canGravityJump, by using the runway on the right side of the room. |
From: 2
Elevator
To: 2
Elevator
In order to align and place a Power Bomb at the correct pixel, perform a stationary spin jump and hit the ceiling before starting to morph. Requires: {
"or": [
"canInsaneJump",
{
"and": [
"h_fourTileJumpMorph",
"canStationarySpinJump"
]
}
]
}
"h_elevatorCrystalFlash"Exit condition: {
"leaveNormally": {}
} |
|
Jump and Morph very quickly to place a bomb to boost Samus to the right. The bomb should be as far right as possible, and just above door height. Requires: "h_bombThings"
{
"or": [
"canBeLucky",
"Bombs",
{
"ammo": {
"type": "PowerBomb",
"count": 4
}
}
]
}
{
"tech": "canUnmorphBombBoost"
}
"canResetFallSpeed"
"can4HighMidAirMorph"Collects items: 3 Dev note: canBeLucky added for difficulty placement. |
From: 16
G-Mode Morph Overloaded PLMs (By Left Door)
To: 14
Morph Maze Junction (Below Super Block)
Shinespark vertically through the crumble block and quickly morph and move left into the bomb block just below. Align Samus on the second downward slope in front of the door before sparking. Requires: "canComplexGMode"
{
"or": [
{
"canShineCharge": {
"usedTiles": 23,
"steepUpTiles": 6,
"steepDownTiles": 1,
"openEnd": 1
}
},
{
"blueSuitShinecharge": {}
}
]
}
{
"shinespark": {
"frames": 23,
"excessFrames": 0
}
}
"can4HighMidAirMorph"
{
"or": [
"h_artificialMorphBombThings",
"h_artificialMorphSpringBall",
"can3HighWallMidAirMorph"
]
}Dev note: FIXME: This can't be used if going 17->16 and Power Bombing the item with canRiskPermanentLossOfAccess, because the block will remain solid. |
From: 2
Right Door
To: 2
Right Door
Jump into the room and mockball to get under the first shutter, to break the crumble blocks to the left. Stop before passing under the second shutter. Breaking these crumble blocks is the only way for the Wavers to reach the door. After the crumbles are broken, shoot the ceiling block and wait by the door for the Waver to come. Entrance condition: {
"comeInJumping": {
"speedBooster": "any",
"minTiles": 1
}
}Requires: "can4HighMidAirMorph" "canMockball" "canComplexGMode" Exit condition: {
"leaveWithGModeSetup": {}
}Unlocks doors: {"types":["ammo"],"requires":[]} |
From: 5
Above Power Bomb Blocks - Bottom Left Door
To: 7
Below Power Bomb Blocks - Top Right Door
Entrance condition: {
"comeInShinecharging": {
"length": 12,
"openEnd": 0
}
}Requires: "canLongChainTemporaryBlue"
"canXRayTurnaround"
"can4HighMidAirMorph"
{
"ammo": {
"type": "PowerBomb",
"count": 1
}
}Exit condition: {
"leaveWithTemporaryBlue": {}
}Unlocks doors: {"types":["ammo"],"requires":[]} |
From: 5
Above Power Bomb Blocks - Bottom Left Door
To: 8
Below Power Bomb Blocks - Bottom Left Door
Entrance condition: {
"comeInShinecharging": {
"length": 12,
"openEnd": 0
}
}Requires: "canLongChainTemporaryBlue"
"can4HighMidAirMorph"
"canXRayTurnaround"
{
"ammo": {
"type": "PowerBomb",
"count": 1
}
}Exit condition: {
"leaveWithTemporaryBlue": {}
}Unlocks doors: {"types":["ammo"],"requires":[]} |
From: 13
Below Power Bomb Blocks - Main Junction
To: 9
Right Etecoon Shaft - Top Left Door
Enter R-Mode using any door. Crystal Flash or farm the upper section enemies. Use 'Bottom Ice Clip' strat to regain access to the Etecoons Shaft, then wait on top of the crumble block to get the Zeela to follow you in. Shinecharge on top of the Etecoon Shaft and get hit by the Zeela to interrupt. Requires: {
"obstaclesCleared": [
"R-Mode"
]
}
{
"notable": "Bottom Ice Clip"
}
{
"or": [
"h_CrystalFlashForReserveEnergy",
{
"and": [
{
"obstaclesCleared": [
"A"
]
},
"h_RModeCanRefillReserves",
{
"resourceMissingAtMost": [
{
"type": "Missile",
"count": 0
}
]
},
{
"resourceMissingAtMost": [
{
"type": "Super",
"count": 0
}
]
},
{
"partialRefill": {
"type": "ReserveEnergy",
"limit": 20
}
}
]
}
]
}
"h_bombThings"
"h_additionalBomb"
"canTrickyJump"
"h_XRayMorphIceClip"
{
"or": [
"h_useSpringBall",
{
"and": [
"can4HighMidAirMorph",
"canInsaneJump"
]
}
]
}
"canBeVeryPatient"
{
"or": [
{
"canShineCharge": {
"usedTiles": 17,
"openEnd": 1
}
},
{
"and": [
"h_frozenEnemyRunway",
{
"canShineCharge": {
"usedTiles": 18,
"openEnd": 1
}
}
]
}
]
}
{
"autoReserveTrigger": {}
}
"canRModeSparkInterrupt"Resets obstacles: R-Mode |
From: 13
Below Power Bomb Blocks - Main Junction
To: 14
Right Etecoon Shaft - Wall Jump Checkpoint
Break the bomb block at the bottom right of the main shaft. Bring a Zeela down to the bottom of the room. Morph inside the tunnel, take a Zeela hit, then jump, aim down, and shoot to freeze the Zeela as it starts to move up and while Samus is close to landing. Jump and aim down to get on top of the Zeela. If the Zeela is precisely positioned exactly 12 pixels above the ground, you can press up to make Samus stand; Otherwise, if you have X-ray, then the Zeela should be frozen lower, and you can morph and unmorph and use X-ray to force Samus to stand up; in this case there is a 6-pixel window over which it works, with the Zeela being between 4 and 9 pixels above the ground. In either case, after standing up on top of the Zeela, jump and aim down to break the crumble block. Then, before the crumble respawns, morph and use Spring Ball (if available) to jump back up and into the tunnel; without Spring Ball, a quick mid-air morph also works but is more difficult. Requires: {
"notable": "Bottom Ice Clip"
}
{
"noBlueSuit": {}
}
"h_bombThings"
"h_additionalBomb"
{
"enemyDamage": {
"enemy": "Zeela",
"type": "contact",
"hits": 1
}
}
"canTrickyJump"
{
"or": [
"h_XRayMorphIceClip",
{
"and": [
"h_highPixelIceClip",
"canInsaneJump",
"canBeVeryPatient"
]
}
]
}
{
"or": [
"h_useSpringBall",
{
"and": [
"can4HighMidAirMorph",
"canInsaneJump"
]
}
]
}
{
"or": [
"canBePatient",
{
"obstaclesNotCleared": [
"A"
]
}
]
}Dev note: The mid-air morph is tighter than a normal can4HighMidAirMorph and you may only get one chance at it before having to reset the room. FIXME: canBeVeryPatient requirement is for difficulty (assumed large number of attempts required); a more specific tech could be used if one existed. FIXME: It might be possible to use two Zeelas to wall ice clip and X-ray climb to the door transition(s) above. FIXME: Or it might be possible to let a Zeela get past the crumble block to where it could be used to ice climb up the Etecoon shaft. FIXME: This might be doable with a blue suit. If nothing else, it could be used to break the first block and then lose the suit, to save a Power Bomb, but that isnt worth modeling. |
|
Requires: "h_speedJump" "canTrickyJump" "canLateralMidAirMorph" "can4HighMidAirMorph" |
|
Requires: {
"or": [
{
"canShineCharge": {
"usedTiles": 20,
"openEnd": 0
}
},
{
"and": [
"h_shinechargeMaxRunway",
"can4HighMidAirMorph",
"canInsaneJump"
]
}
]
}
"h_CrystalSpark" |
From: 2
Bottom Right Door
To: 3
Item
Place two Power Bombs, precisely on the fourth tile in the morph tunnel to overload PLMs. Samus should be barely visible in the tunnel, if not, use the right edge of the screen to track her moved distance. Entrance condition: {
"comeInWithGMode": {
"mode": "direct",
"morphed": true
}
}Requires: "canPowerBombItemOverloadPLMs"
{
"itemNotCollectedAtNode": 3
}
"h_artificialMorphPowerBomb"
"h_artificialMorphPowerBomb"
{
"or": [
"h_artificialMorphSpringBall",
{
"ammo": {
"type": "PowerBomb",
"count": 4
}
},
{
"and": [
"Morph",
{
"or": [
"can4HighMidAirMorph",
{
"ammo": {
"type": "PowerBomb",
"count": 2
}
}
]
}
]
}
]
}Dev note: Because of the gates, it costs 2 Power Bombs to get into the tunnel and 2 to get out the other side. There is no canRiskPermanentLossOfAccess, because there is no reason to go here except to get the item and leave. This is only useful if Samus has Morph, or the item is Morph. |
|
Dodge the Boyons with a well-timed jump, a running Space Jump, Spring Ball, or a quick mid-air morph. Requires: {
"or": [
"canTrickyJump",
{
"and": [
"canDodgeWhileShooting",
"SpaceJump"
]
},
{
"and": [
"canCarefulJump",
"h_useSpringBall"
]
},
"can4HighMidAirMorph"
]
} |
|
Dodge the Boyons with a well-timed jump, a running Space Jump, Spring Ball, or a quick mid-air morph. Requires: {
"or": [
"canTrickyJump",
{
"and": [
"canDodgeWhileShooting",
"SpaceJump"
]
},
{
"and": [
"canCarefulJump",
"h_useSpringBall"
]
},
"can4HighMidAirMorph"
]
} |
|
Requires: {
"haveBlueSuit": {}
}
{
"or": [
"canConsecutiveWallJump",
"SpaceJump",
{
"and": [
"Gravity",
"canIBJ"
]
},
{
"and": [
"Gravity",
"canSpringBallJumpMidAir"
]
},
{
"and": [
{
"doorUnlockedAtNode": 1
},
{
"or": [
"HiJump",
"canSpringBallJumpMidAir",
{
"and": [
"canJumpIntoIBJ",
"can4HighMidAirMorph"
]
}
]
}
]
},
{
"and": [
"canBombJumpWaterEscape",
"canLongIBJ"
]
}
]
}Dev note: With a blue suit, the bomb blocks in front of the door cannot be used as a platform. |
From: 4
Small Ledge Below Left Door
To: 1
Left Door
Spring Ball jump from the safe spot on the spikey stairs. Moving over far enough left before the peak of the jump is the trickiest part of the jump. There are multiple things which can help get further left: Perform a lateral morph to maintain Samus' horizontal momentum. Morphing and pausing quickly, then delay the Spring Ball jump until after getting a horizontal boost from equipping Spring Ball. Start with a short run and spin jump to move over more before morphing. It is possible to unequip Spring Ball to get a small Spring Fling, but it can be tricky to get any use out of it and it only helps a small amount. Requires: {
"notable": "Tricky Spring Ball Jump"
}
"canTrickyJump"
"canTrickySpringBallJump"
{
"or": [
"canLateralMidAirMorph",
"can4HighMidAirMorph"
]
} |
From: 2
Middle Left Door (Behind Power Bomb Blocks)
To: 1
Top Left Door
Lay the Power Bomb during a temporary blue chain immediately after morphing, placing it high enough that it does not boost Samus upward. Entrance condition: {
"comeInShinecharging": {
"length": 0,
"openEnd": 1
}
}Requires: "canLongChainTemporaryBlue"
{
"ammo": {
"type": "PowerBomb",
"count": 1
}
}
"can4HighMidAirMorph"
"canXRayTurnaround"Exit condition: {
"leaveWithTemporaryBlue": {}
}Unlocks doors: {"types":["ammo"],"requires":[]} |
From: 10
Temporary Blue Junction (Top Left Door)
To: 2
Middle Left Door (Behind Power Bomb Blocks)
Requires: "h_getBlueSpeedMaxRunway"
"canLongChainTemporaryBlue"
"canXRayTurnaround"
"can4HighMidAirMorph"
{
  "ammo": {
    "type": "PowerBomb",
    "count": 1
  }
}
Exit condition: {
"leaveWithTemporaryBlue": {}
}Unlocks doors: {"types":["missiles","super"],"requires":[]}
{"types":["powerbomb"],"requires":[],"useImplicitRequires":false}Dev note: FIXME: The h_getBlueSpeedMaxRunway is to satisfy tests for now. We should add a proper way to represent that the blue state carries over from the previous strat. |
From: 1
Left Door
To: 3
Bottom Right Door
Entrance condition: {
"comeInShinecharging": {
"length": 4,
"openEnd": 0
}
}Requires: "canLongChainTemporaryBlue"
"can4HighMidAirMorph"
{
"thornHits": 1
}
{
"or": [
{
"thornHits": 2
},
"canBeVeryPatient"
]
}Exit condition: {
"leaveWithTemporaryBlue": {}
}Unlocks doors: {"types":["ammo"],"requires":[]}Dev note: Entirely avoiding the thorn hits is technically possible but extremely difficult. |
From: 2
Top Right Door
To: 3
Bottom Right Door
Entrance condition: {
"comeInShinecharging": {
"length": 3,
"openEnd": 0
}
}Requires: "canLongChainTemporaryBlue"
"canXRayTurnaround"
"can4HighMidAirMorph"
{
"thornHits": 1
}
{
"or": [
{
"thornHits": 2
},
"canBeVeryPatient"
]
}Exit condition: {
"leaveWithTemporaryBlue": {}
}Unlocks doors: {"types":["ammo"],"requires":[]}Dev note: Entirely avoiding the thorn hits is technically possible but extremely difficult. |
From: 3
Bottom Right Door
To: 1
Left Door
Entrance condition: {
"comeInShinecharging": {
"length": 2,
"openEnd": 0
}
}Requires: "canLongChainTemporaryBlue"
"can4HighMidAirMorph"
{
"thornHits": 1
}
{
"or": [
{
"thornHits": 2
},
"canBeVeryPatient"
]
}Exit condition: {
"leaveWithTemporaryBlue": {}
}Unlocks doors: {"types":["ammo"],"requires":[]}Dev note: Entirely avoiding the thorn hits is technically possible but extremely difficult. Farming in the middle of the strat could also be possible. |
From: 3
Bottom Right Door
To: 2
Top Right Door
Entrance condition: {
"comeInShinecharging": {
"length": 2,
"openEnd": 0
}
}Requires: "canLongChainTemporaryBlue"
"canXRayTurnaround"
"can4HighMidAirMorph"
{
"thornHits": 1
}
{
"or": [
{
"thornHits": 2
},
"canBeVeryPatient"
]
}Exit condition: {
"leaveWithTemporaryBlue": {}
}Unlocks doors: {"types":["ammo"],"requires":[]}Dev note: Entirely avoiding the thorn hits is technically possible but extremely difficult. Farming in the middle of the strat could also be possible. |
|
Requires: "h_heatProof"
{
"or": [
{
"and": [
"h_shinechargeMaxRunway",
{
"obstaclesNotCleared": [
"A"
]
}
]
},
{
"canShineCharge": {
"usedTiles": 14,
"openEnd": 1
}
}
]
}
{
"or": [
{
"and": [
"canComplexCarryFlashSuit",
"can4HighMidAirMorph"
]
},
"canWallJumpInstantMorph"
]
}
{
"spikeHits": 1
}
"h_spikeSuitSpikeHitLeniency"
"canSpikeSuit"
{
"shinespark": {
"frames": 1,
"excessFrames": 1
}
}Clears obstacles: A |
|
Shortcharging and stopping between the crumbles should allow for 3 attemps before the room needs to be reset or a shorter shortcharge is the only option. Requires: "h_SpeedBoosterHallNoRisingLava"
"h_heatProof"
{
"obstaclesNotCleared": [
"A"
]
}
{
"canShineCharge": {
"usedTiles": 17,
"openEnd": 1
}
}
{
"or": [
{
"and": [
"canComplexCarryFlashSuit",
"can4HighMidAirMorph"
]
},
"canWallJumpInstantMorph"
]
}
{
"spikeHits": 1
}
"h_spikeSuitSpikeHitLeniency"
"canSpikeSuit"
{
"shinespark": {
"frames": 1,
"excessFrames": 1
}
}Clears obstacles: A |
From: 2
Right Door
To: 4
Top Left Item
Entrance condition: {
"comeInShinecharging": {
"length": 2,
"openEnd": 0
}
}Requires: "canChainTemporaryBlue" "can4HighMidAirMorph" "canSpringBallBounce" Clears obstacles: B, C |
From: 2
Right Door
To: 4
Top Left Item
Entrance condition: {
"comeInWithTemporaryBlue": {}
}Requires: "canChainTemporaryBlue" "can4HighMidAirMorph" "canSpringBallBounce" Clears obstacles: C |
From: 2
Middle Left Door
To: 5
Junction Below Top Crumble Blocks
Use a temporary blue chain to jump through the bomb blocks and land on the center of the ledge above. Break the last block by jumping directly into it, as there is not enough height available to get a bounce. With this method, there is a 2-frame window for when to morph; jumping from the platform below is also possible but requires a frame-perfect morph. If Spring Ball is available, it can be used to increase the window by one frame in either case. Entrance condition: {
"comeInShinecharging": {
"length": 4,
"openEnd": 0
}
}Requires: "canChainTemporaryBlue" "can4HighMidAirMorph" "canInsaneJump" Clears obstacles: A, B |
From: 2
Middle Left Door
To: 5
Junction Below Top Crumble Blocks
Use a temporary blue chain to jump through the bomb blocks and land on the center of the ledge above. Break the last block by jumping directly into it, as there is not enough height available to get a bounce. With this method, there is a 2-frame window for when to morph; jumping from the platform below is also possible but requires a frame-perfect morph. If Spring Ball is available, it can be used to increase the window by one frame in either case. Entrance condition: {
"comeInShinecharging": {
"length": 14,
"openEnd": 0
}
}Requires: "canChainTemporaryBlue" "canXRayTurnaround" "can4HighMidAirMorph" "canInsaneJump" Clears obstacles: A, B |
From: 2
Middle Left Door
To: 5
Junction Below Top Crumble Blocks
Use a temporary blue chain to jump through the bomb blocks and land on the center of the ledge above. Break the last block by jumping directly into it, as there is not enough height available to get a bounce. With this method, there is a 2-frame window for when to morph; jumping from the platform below is also possible but requires a frame-perfect morph. If Spring Ball is available, it can be used to increase the window by one frame in either case. Requires: {
"or": [
{
"canShineCharge": {
"usedTiles": 14,
"openEnd": 0
}
},
{
"and": [
{
"canShineCharge": {
"usedTiles": 15,
"openEnd": 0
}
},
{
"doorUnlockedAtNode": 2
}
]
}
]
}
"canChainTemporaryBlue"
"canXRayTurnaround"
"can4HighMidAirMorph"
"canInsaneJump"
Clears obstacles: A, B Unlocks doors: {"nodeId":2,"types":["ammo"],"requires":[]} |
|
Requires: "canTrickySpringBallJump"
"canTrickyJump"
"can4HighMidAirMorph"
{
"acidFrames": 55
} |
|
Requires: {
"or": [
"f_DefeatedCrocomire",
{
"obstaclesCleared": [
"f_DefeatedCrocomire"
]
}
]
}
"canLateralMidAirMorph"
"can4HighMidAirMorph"
"canTrickySpringBallJump"
{
"acidFrames": 25
} |
|
Requires: {
"or": [
"f_DefeatedCrocomire",
{
"obstaclesCleared": [
"f_DefeatedCrocomire"
]
}
]
}
"can4HighMidAirMorph"
"canTrickySpringBallJump"
"canSpringFling"
{
"acidFrames": 50
} |
|
Use a Crystal Flash to refill reserve energy. If Golden Torizo is alive, perform the Crystal Flash in the left corner of the room; otherwise it can be done near the door. Then use heat damage to trigger an R-mode forced standup near the crumble blocks with upward momentum, in order to clip up through them. Several different combinations of items and techniques can make this possible: 1) Space Jump, with a mid-air morph (not required but makes it easier), 2) HiJump and a mid-air Spring Ball jump, most easily by equipping both HiJump and SpringBall during the pause, 3) A walljump into Spring Ball jump, equipping Spring Ball soon after the wall jump into order to gain horizontal speed before the mid-air jump. 4) HiJump and Speedbooster, running and jumping into a mid-air morph, In every case, precise timing is needed to be in the correct location when reserves trigger, just below the crumbles but without bonking them. Having less upward momentum can provide more lenience for timing the forced standup clip, though if Samus' momentum is not enough to make it onto the ledge then a crumble jump may also be required. Entrance condition: {
"comeInWithRMode": {}
}Requires: {
"notable": "R-Mode Forced Standup Clip"
}
"canRModeStandupClip"
{
"or": [
{
"or": [
"f_DefeatedGoldenTorizo",
{
"obstaclesCleared": [
"f_DefeatedGoldenTorizo"
]
}
]
},
{
"heatFrames": 100
}
]
}
"h_heatedCrystalFlash"
{
"or": [
{
"and": [
"SpaceJump",
"can4HighMidAirMorph"
]
},
{
"and": [
"HiJump",
"canSpringBallJumpMidAir"
]
},
{
"and": [
"HiJump",
"canSpeedyJump",
"canMidAirMorph",
"canCrumbleJump"
]
},
{
"and": [
"h_trickySpringwall",
"canCrumbleJump"
]
}
]
}
{
"resourceCapacity": [
{
"type": "RegularEnergy",
"count": 99
}
]
}
{
"autoReserveTrigger": {}
}
{
"heatFrames": 100
}Clears obstacles: door_2 Dev note: FIXME: A variant of this strat could go to the item node instead of the door, possibly with slightly different heat frames at the end. FIXME: As an alternative to doing a Crystal Flash, Golden Torizo could be used as a farm, with canRiskPermanentLossOfAccess. |
From: 2
Bottom Left Door
To: 6
Junction Behind Fune
A paricularly precise mid-air morph can get up and over the Fune without damage. Stand a half tile away from the Fune when jump morphing for a higher ceiling. It's a 2.5 tile high mid air morph. It can be performed similar to how a 2 or 3 tile high morph is performed. Requires: {
"notable": "Morph Over the Fune"
}
{
"noFlashSuit": {}
}
"h_fourTileJumpMorph"
"canTrickyJump"
{
"or": [
"canInsaneJump",
{
"enemyDamage": {
"enemy": "Fune",
"type": "fireball",
"hits": 1
}
}
]
}Dev note: It is possible but very hard to jump morph over the fune with a flash suit. R jumping helps. |
From: 4
Junction Below Bomb Blocks
To: 2
Top Right Door
This is possible by jumping on the crumble blocks into a mid-air spring ball jump, or by avoiding them. The crumbles can be avoided by starting with either an air ball, a 3 tile high mid-air morph, or a low spring wall. These are generally safer, as bouncing on the crumble blocks with Spring Ball is trivial. Requires: {
"obstaclesCleared": [
"B"
]
}
"canDash"
"canTrickySpringBallJump"
{
"heatFrames": 250
}
{
"or": [
{
"and": [
"can4HighMidAirMorph",
"canSpringFling"
]
},
{
"and": [
"canLateralMidAirMorph",
"canTrickyJump"
]
},
"canCrumbleJump",
{
"and": [
"h_trickySpringwall",
"canPreciseWallJump"
]
}
]
} |
From: 9
Junction Below Crumble Blocks, Set Up to Clip
To: 2
Top Right Door
Breaking only the left side bomb blocks makes it easier for the Multiviola to enter a pattern where it will pass through the top shot block. The Multiviola needs to go through the crumble blocks moving to the right, if it goes through moving left it won't clear the shot blocks. If all the bomb blocks are broken, standing on the right side of the crumbles will allow the Multiviola to pass through the top shot block. Requires: {
"notable": "Multiviola Ice Clip"
}
"canBePatient"
"canTrickyGMode"
"h_heatProof"
"canTrickyJump"
{
"enemyDamage": {
"enemy": "Multiviola",
"type": "contact",
"hits": 1
}
}
{
"or": [
{
"and": [
"h_preciseIceClip",
{
"or": [
{
"and": [
"h_useMorphBombs",
{
"or": [
"h_useSpringBall",
"can4HighMidAirMorph"
]
}
]
},
{
"ammo": {
"type": "PowerBomb",
"count": 1
}
},
{
"obstaclesCleared": [
"B"
]
}
]
}
]
},
{
"and": [
"canTrickyCarryFlashSuit",
"h_preciseIceClip",
{
"useFlashSuit": {}
},
{
"shinespark": {
"frames": 11,
"excessFrames": 5
}
}
]
},
{
"and": [
"h_XRayMorphIceClip",
{
"or": [
"Bombs",
"ScrewAttack",
{
"ammo": {
"type": "PowerBomb",
"count": 1
}
},
{
"obstaclesCleared": [
"B"
]
}
]
}
]
}
]
}Exit condition: {
"leaveWithGModeSetup": {}
}Unlocks doors: {"types":["ammo"],"requires":[]} |
From: 9
Junction Below Crumble Blocks, Set Up to Clip
To: 4
Junction Below Bomb Blocks
Ice Clip through the crumble blocks using a Multiviola from the bottom of the room and then Crumble Jump to clip through the bomb blocks. The ice clip can be setup by standing in a corner and firing forward when the Multiviola hits Samus, if it is moving downwards towards Samus. Very quickly jump and morph to place a bomb against the bomb blocks. Or break the crumble blocks and use Spring Ball to jump again to place the bomb. Then jump again while the Multiviola is still frozen to clip through. Requires: {
"notable": "Multiviola Ice Clip"
}
"h_heatProof"
"h_preciseIceClip"
{
"enemyDamage": {
"enemy": "Multiviola",
"type": "contact",
"hits": 1
}
}
{
"obstaclesNotCleared": [
"A"
]
}
"h_useMorphBombs"
{
"or": [
"h_useSpringBall",
"can4HighMidAirMorph"
]
}Clears obstacles: B |
From: 2
Middle Left Door
To: 1
Top Left Door
Jump close to ceiling, and activate a shinespark to the right. If successful, Samus will clip into the wall behind the Chozo statue and be able to X-Ray climb up. Only certain horizontal positions will cause Samus to clip into the wall. It will work to activate the spark while Samus is centered under the second Grapple block or slightly to the left. Entrance condition: {
"comeInShinecharged": {}
}Requires: {
"shineChargeFrames": 50
}
"canShinechargeMovementTricky"
{
"shinespark": {
"frames": 88,
"excessFrames": 0
}
}
"canShinesparkSlopeClip"
"canXRayClimb"
{
"or": [
{
"getBlueSpeed": {
"usedTiles": 16,
"steepDownTiles": 4,
"openEnd": 0
}
},
"can4HighMidAirMorph"
]
}Exit condition: {
"leaveNormally": {}
}Unlocks doors: {"types":["ammo"],"requires":[]}Dev note: The leaveNormally is to ensure it won't be required to do the Speed block moondance blind up there. |
From: 2
Middle Left Door
To: 1
Top Left Door
Gain a shinecharge near the Chozo statue, jump on top of it, press against the wall to the right, and activate a horizontal shinespark to the right. Samus will clip into the wall and be able to X-Ray climb to the space above. This trick works because the wall is made of half-tile slopes, rather than regular solid tiles. Requires: {
"not": "f_DefeatedPhantoon"
}
"canRiskPermanentLossOfAccess"
{
"or": [
"h_shinechargeMaxRunway",
"h_storedSpark"
]
}
"canShinechargeMovement"
{
"shinespark": {
"frames": 1,
"excessFrames": 1
}
}
"canShinesparkSlopeClip"
"canXRayClimb"
{
"or": [
{
"getBlueSpeed": {
"usedTiles": 16,
"steepDownTiles": 4,
"openEnd": 0
}
},
"can4HighMidAirMorph"
]
}Exit condition: {
"leaveNormally": {}
}Unlocks doors: {"types":["ammo"],"requires":[]}Dev note: The leaveNormally is to ensure it won't be required to do the Speed block moondance blind up there. |
From: 2
Middle Left Door
To: 1
Top Left Door
Jump close to ceiling, and activate a shinespark to the right. If successful, Samus will clip into the wall behind the Chozo statue and be able to X-Ray climb up. Only certain horizontal positions will cause Samus to clip into the wall. It will work to activate the spark while Samus is centered under the second Grapple block or slightly to the left. Requires: "h_storedSpark"
"canDash"
"canShinechargeMovementTricky"
{
"shinespark": {
"frames": 88,
"excessFrames": 0
}
}
"canShinesparkSlopeClip"
"canXRayClimb"
{
"or": [
{
"getBlueSpeed": {
"usedTiles": 16,
"steepDownTiles": 4,
"openEnd": 0
}
},
"can4HighMidAirMorph"
]
}Exit condition: {
"leaveNormally": {}
}Unlocks doors: {"types":["ammo"],"requires":[]}Dev note: The leaveNormally is to ensure it won't be required to do the Speed block moondance blind up there. |
From: 2
Middle Left Door
To: 1
Top Left Door
Arm pump slowly after the Chozo statue comes on screen, when the camera locks and Samus starts to move again, armpump only 3 or 4 more times to clear the last spike and avoid an extra spike hit. Requires: {
"doorUnlockedAtNode": 2
}
"canXMode"
"h_XModeSpikeHit"
"h_shinechargeMaxRunway"
"canShinechargeMovement"
{
  "shinespark": {
    "frames": 1,
    "excessFrames": 1
  }
}
"canShinesparkSlopeClip"
"canXRayClimb"
{
  "or": [
    {
      "getBlueSpeed": {
        "usedTiles": 16,
        "steepDownTiles": 4,
        "openEnd": 0
      }
    },
    "can4HighMidAirMorph"
  ]
}
Exit condition: {
"leaveNormally": {}
}Unlocks doors: {"types":["ammo"],"requires":[]}Dev note: The leaveNormally is to ensure it won't be required to do the Speed block moondance blind up there. |
From: 2
Middle Left Door
To: 2
Middle Left Door
Requires: "h_spikeXModeShinecharge"
{
"or": [
"can4HighMidAirMorph",
"h_XModeSpikeHit"
]
}
"canUseIFrames"
{
"shineChargeFrames": 65
}Exit condition: {
"leaveShinecharged": {}
}Dev note: At least two spike hits are expected per attempt (with any additional leniency hits being multiplied by this amount). |
From: 6
Bowling Chozo Statue
To: 1
Top Left Door
Jump or Spring Ball jump into a breakable Grapple block. The timing is precise and it can help to break two Grapple blocks to use one as a cue. Crystal Flash then X-ray climb to the region above (less than 1 screen). There is a chance that Samus will not be able to Crystal Flash unless first placing a Bomb or Power Bomb. Requires: {
"notable": "Grapple Block Crystal Flash"
}
"canUseGrapple"
"canJumpIntoRespawningBlock"
"canTrickyJump"
{
"or": [
"HiJump",
"canTrickySpringBallJump",
{
"and": [
"canSpringBallJumpMidAir",
{
"not": "f_DefeatedPhantoon"
},
"canRiskPermanentLossOfAccess"
]
}
]
}
"h_bombThings"
"h_CrystalFlash"
"canXRayClimb"
{
"or": [
"h_fourTileJumpMorph",
"h_useSpringBall",
"canIBJ",
{
"getBlueSpeed": {
"usedTiles": 16,
"steepDownTiles": 4,
"openEnd": 0
}
},
{
"and": [
{
"not": "f_DefeatedPhantoon"
},
"canRiskPermanentLossOfAccess"
]
}
]
}Exit condition: {
"leaveNormally": {}
}Unlocks doors: {"types":["ammo"],"requires":[]}Dev note: FIXME: This may be possible with a spike hit and speedy jump. |
From: 6
Bowling Chozo Statue
To: 1
Top Left Door
Use a Grapple fling to get stuck inside a breakable Grapple block. It can help to break two or more Grapple blocks in a row. Crystal Flash then X-ray climb to the region above (less than 1 screen). There is a chance that Samus will not be able to Crystal Flash unless first placing a Bomb or Power Bomb. Requires: {
"notable": "Grapple Block Crystal Flash"
}
"canPreciseGrapple"
"canJumpIntoRespawningBlock"
"canInsaneJump"
"h_bombThings"
"h_CrystalFlash"
"canXRayClimb"
{
"or": [
"h_fourTileJumpMorph",
"h_useSpringBall",
"canIBJ",
{
"getBlueSpeed": {
"usedTiles": 16,
"steepDownTiles": 4,
"openEnd": 0
}
},
{
"and": [
{
"not": "f_DefeatedPhantoon"
},
"canRiskPermanentLossOfAccess"
]
}
]
}Exit condition: {
"leaveNormally": {}
}Unlocks doors: {"types":["ammo"],"requires":[]} |
From: 6
Bowling Chozo Statue
To: 1
Top Left Door
Jump onto the Chozo statue, press against the wall, and shinespark into it to clip in, then X-Ray climb up.. Requires: "h_storedSpark"
{
"shinespark": {
"frames": 1,
"excessFrames": 1
}
}
"canShinesparkSlopeClip"
"canXRayClimb"
{
"or": [
{
"getBlueSpeed": {
"usedTiles": 16,
"steepDownTiles": 4,
"openEnd": 0
}
},
"can4HighMidAirMorph"
]
}Exit condition: {
"leaveNormally": {}
}Unlocks doors: {"types":["ammo"],"requires":[]}Dev note: The leaveNormally is to ensure it won't be required to do the Speed block moondance blind up there. |
From: 6
Bowling Chozo Statue
To: 1
Top Left Door
Use X-mode to gain a shinecharge near the Chozo statue. Jump onto the Chozo statue, press against the wall, and shinespark into it to clip in, then X-Ray climb up. A second spike hit can be avoided by holding an angle button to turn around while in X-mode; arm pump to move out of the spikes before activating the shinecharge and exiting X-mode. Requires: "canXMode"
"h_XModeSpikeHit"
"h_shinechargeMaxRunway"
"canShinechargeMovement"
{
"shinespark": {
"frames": 1,
"excessFrames": 1
}
}
"canShinesparkSlopeClip"
"canXRayClimb"
{
"or": [
{
"getBlueSpeed": {
"usedTiles": 16,
"steepDownTiles": 4,
"openEnd": 0
}
},
"can4HighMidAirMorph"
]
}Exit condition: {
"leaveNormally": {}
}Unlocks doors: {"types":["ammo"],"requires":[]}Dev note: The leaveNormally is to ensure it won't be required to do the Speed block moondance blind up there. |
|
Requires: {
"obstaclesNotCleared": [
"B"
]
}
{
"doorUnlockedAtNode": 3
}
{
"canShineCharge": {
"usedTiles": 13,
"openEnd": 1
}
}
"canLongChainTemporaryBlue"
"canXRayTurnaround"
"can4HighMidAirMorph"Clears obstacles: C Unlocks doors: {"nodeId":3,"types":["missiles","super"],"requires":[]}
{"nodeId":3,"types":["powerbomb"],"requires":["never"]} |
From: 4
Top Right Door
To: 6
Bottom Right Door
Requires: {
"or": [
{
"canShineCharge": {
"usedTiles": 12,
"steepUpTiles": 7,
"openEnd": 1
}
},
{
"and": [
{
"doorUnlockedAtNode": 4
},
{
"canShineCharge": {
"usedTiles": 13,
"steepUpTiles": 7,
"openEnd": 1
}
}
]
}
]
}
"can4HighMidAirMorph"
"canLongChainTemporaryBlue"
"canXRayTurnaround"
"canSpringBallBounce" |
From: 5
Middle Right Door
To: 8
Item
Shinecharging up the stairs gives a longer effective runway than shinecharging down them. Bounce down the stairs to make movement simpler. A frozen Atomic (or Covern) can be used for more runway. Requires: {
"or": [
{
"and": [
"can4HighMidAirMorph",
{
"doorUnlockedAtNode": 5
},
{
"canShineCharge": {
"usedTiles": 11,
"steepUpTiles": 7,
"openEnd": 2
}
}
]
},
{
"and": [
"h_frozenEnemyRunway",
{
"or": [
"f_DefeatedPhantoon",
{
"and": [
"SpaceJump",
"h_trickyFrozenEnemyRunway"
]
}
]
},
"can4HighMidAirMorph",
{
"doorUnlockedAtNode": 5
},
{
"canShineCharge": {
"usedTiles": 13,
"steepUpTiles": 7,
"openEnd": 1
}
}
]
},
{
"canShineCharge": {
"usedTiles": 10,
"steepUpTiles": 7,
"openEnd": 2
}
},
{
"and": [
"h_frozenEnemyRunway",
{
"or": [
"f_DefeatedPhantoon",
{
"and": [
"SpaceJump",
"h_trickyFrozenEnemyRunway"
]
}
]
},
{
"canShineCharge": {
"usedTiles": 12,
"steepUpTiles": 7,
"openEnd": 1
}
}
]
}
]
}
"canChainTemporaryBlue"
"canXRayTurnaround"Clears obstacles: C Dev note: There is 1/2 a unusable tile in this runway. |
From: 8
Item
To: 3
Bottom Left Door
Requires: {
"not": "f_DefeatedPhantoon"
}
"canRiskPermanentLossOfAccess"
{
"canShineCharge": {
"usedTiles": 16,
"steepUpTiles": 4,
"openEnd": 0
}
}
"canTemporaryBlue"
"can4HighMidAirMorph"
"canSpringBallBounce"Clears obstacles: C |
From: 11
Upper Left Ledge Junction
To: 9
Platform Below Top Door
This is most easily done with a late jump at the bottom of the slope. It is a bit less precise with an air ball or turning gravity suit back on and wall jumping on the platform at the end. An alternate method is to airball simultaneously with the gravity jump pause. Requires: "canGravityJump"
{
"or": [
"canTrickyJump",
{
"and": [
"can4HighMidAirMorph",
"canCarefulJump",
"canLateralMidAirMorph"
]
}
]
} |
|
Use a Space Jump water bounce followed by a tight mid-air morph, to get a mid-air Spring Ball jump out of the water. Requires: {
"notable": "Space Jump Spring Ball Jump"
}
"canSpaceJumpWaterBounce"
"canTrickySpringBallJump"
"can4HighMidAirMorph" |
From: 2
Bottom Left Door
To: 1
Middle Left Door
Use double spring ball jumps to reach the top-right of the room with temporary blue. To cross the two gaps at the top of the room to the left while chaining temporary blue, use spring ball jumps with HiJump disabled; in each case, perform a stationary lateral mid-air morph or a spring fling (or both); Entrance condition: {
"comeInRunning": {
"speedBooster": "yes",
"minTiles": 0.4375
}
}Requires: "h_waterGetBlueSpeed"
"HiJump"
"canLongChainTemporaryBlue"
"canBeExtremelyPatient"
"canXRayTurnaround"
"canDoubleSpringBallJumpMidAir"
"canTrickySpringBallJump"
{
  "or": [
    "canStationaryLateralMidAirMorph",
    "canSpringFling"
  ]
}
"can4HighMidAirMorph" |
From: 2
Bottom Left Door
To: 1
Middle Left Door
Use double spring ball jumps to reach the top-right of the room with temporary blue. To cross the two gaps at the top of the room to the left while chaining temporary blue, use spring ball jumps with HiJump disabled; in each case, perform a stationary lateral mid-air morph or a spring fling (or both); Entrance condition: {
"comeInWithTemporaryBlue": {}
}Requires: "HiJump"
"canLongChainTemporaryBlue"
"canBeExtremelyPatient"
"canXRayTurnaround"
"canDoubleSpringBallJumpMidAir"
"canTrickySpringBallJump"
{
"or": [
"canStationaryLateralMidAirMorph",
"canSpringFling"
]
}
"can4HighMidAirMorph" |
|
Stand on the edge of the sand and place a Bomb; unmorph (leaving Samus crouched), then press forward to enter the sand when the bomb flashes yellow for the second time. Once the Bomb puts Samus into a jumping pose where Samus is suspended mid-air slightly above the sand, press jump; then aim down precisely when the bomb begins to propel Samus upward. Move right to press against the wall before mid-air morphing (alternatively, a stationary lateral morph can work). There is a 2-frame window for when to enter the sand: if Samus enters the sand too early, she will sink slightly too far, resulting in not quite enough height to reach the tunnel; if Samus enters the sand too late, she will not get properly boosted by the Bomb explosion and will end up stuck in the sand. There is an 8-frame window for when to press jump, as it can be buffered during the period that the bomb begins interacting with Samus: if Samus jumps too early or late, she will get stuck in the sand. The timing for the aim-down press is frame-perfect: it must be pressed on the first frame that Samus begins being propelled upward by the bomb. if Samus aims down too early, she will get stuck in the sand; if Samus aims down too late, she will not get enough height to reach the tunnel. The timing for the jump is between 6 frames before or 1 frame after the down press. The amount of time that Samus holds forward after entering the sand is unimportant, as long as it is released before the aim-down. Requires: {
"notable": "Sand Bomb Boost (Left to Right)"
}
"canSandBombBoost"
"canInsaneJump"
{
"or": [
"can4HighMidAirMorph",
"canStationaryLateralMidAirMorph"
]
}Collects items: 5 Dev note: The timing window for when to press jump and when to aim-down is relative to the bomb explosion, independent of each other and independent of when Samus enters the sand. The timing for pressing forward (from a crouch) is 38 or 39 frames after laying the Bomb. The timing for the jump is between 51 and 58 frames after laying the Bomb. The timing for the aim-down press is 57 frames after laying the Bomb. It is also possible to stand by pressing up before entering the sand (in which case forward would be pressed 37 or 38 frames after laying the Bomb); this does not affect the size of the timing windows but introduces some more possibility for error, e.g. by the up input being eaten if Samus is still in the unmorphing animation, or by the forward input being not immediately processed if Samus is still in the standing animation. |
|
Stand on the edge of the sand and place a Power Bomb; unmorph (leaving Samus crouched), then wait a moment before pressing forward to enter the sand. On the exact frame when the Power Bomb begins to propel Samus upward, press down, and press jump on the same frame or one frame later. Move right to press against the wall before mid-air morphing (alternatively, a stationary lateral morph can work). There is a 13-frame window for when to enter the sand: if Samus enters the sand too early, she will sink slightly too far, resulting in not quite enough height to reach the tunnel; if Samus enters the sand too late, she will not get properly boosted by the Power Bomb explosion and will end up stuck in the sand. The timing for the aim-down press is frame-perfect: it must be pressed on the first frame that Samus begins being propelled upward by the Power Bomb. if Samus aims down too early, she will get stuck in the sand; if Samus aims down too late, she will not get enough height to reach the tunnel. if Samus jumps too early or late, she will get stuck in the sand. The amount of time that Samus holds forward when entering the sand should be between 2 and 11 frames. Requires: {
"notable": "Sand Bomb Boost (Left to Right)"
}
{
"tech": "canSandBombBoost"
}
"h_usePowerBomb"
"canInsaneJump"
{
"or": [
"can4HighMidAirMorph",
"canStationaryLateralMidAirMorph"
]
}Collects items: 5 Dev note: The timing window for when to press jump and when to aim-down is relative to the Power Bomb explosion, independent of each other and independent of when Samus enters the sand. The timing for pressing forward (from a crouch) is between 27 and 39 frames after laying the Power Bomb. The timing for the jump is between 56 and 57 frames after laying the Power Bomb. The timing for the aim-down press is 56 frames after laying the Power Bomb. It is also possible to stand by pressing up before entering the sand (in which case forward would be pressed 28 or 40 frames after laying the Power Bomb); this does not affect the size of the timing windows but introduces some more possibility for error, e.g. by the up input being eaten if Samus is still in the unmorphing animation, or by the forward input being not immediately processed if Samus is still in the standing animation. |
|
Chain temporary blue across the room in order to break the Speed blocks. If available, bouncing using Spring Ball can help speed this up significantly. If two Power Bombs are also available, they can be used to break the shot blocks along the way without needing to stop bouncing. Entrance condition: {
"comeInWithTemporaryBlue": {
"direction": "right"
},
"comesThroughToilet": "any"
}Requires: "canChainTemporaryBlue"
{
"or": [
"HiJump",
"canTrickySpringBallJump",
"canInsaneJump"
]
}
{
"or": [
{
"and": [
"canSpringBallBounce",
{
"or": [
{
"ammo": {
"type": "PowerBomb",
"count": 2
}
},
{
"and": [
"canLongChainTemporaryBlue",
"can4HighMidAirMorph"
]
}
]
}
]
},
{
"and": [
"canLongChainTemporaryBlue",
"canStationaryLateralMidAirMorph",
"can4HighMidAirMorph",
"canBeVeryPatient"
]
}
]
} |
From: 1
Bottom Left Door
To: 2
Right Door
Chain temporary blue across the room in order to break the Speed blocks. If available, bouncing using Spring Ball can help speed this up significantly. If two Power Bombs are also available, they can be used to break the shot blocks along the way without needing to stop bouncing. Entrance condition: {
"comeInWithTemporaryBlue": {
"direction": "left"
},
"comesThroughToilet": "any"
}Requires: "canChainTemporaryBlue"
"canXRayTurnaround"
{
"or": [
"HiJump",
"canTrickySpringBallJump",
"canInsaneJump"
]
}
{
"or": [
{
"and": [
"canSpringBallBounce",
{
"or": [
{
"ammo": {
"type": "PowerBomb",
"count": 2
}
},
{
"and": [
"canLongChainTemporaryBlue",
"can4HighMidAirMorph"
]
}
]
}
]
},
{
"and": [
"canLongChainTemporaryBlue",
"canStationaryLateralMidAirMorph",
"can4HighMidAirMorph",
"canBeVeryPatient"
]
}
]
} |
|
Chain temporary blue across the room in order to break the Speed blocks. If available, bouncing using Spring Ball can help speed this up significantly. If two Power Bombs are also available, they can be used to break the shot blocks along the way without needing to stop bouncing; the first Power Bomb must be placed at a specific time, about 1 tile to the left of the first set of Speed blocks; the second Power Bomb should be placed as early as possible after coming off cooldown. Entrance condition: {
"comeInWithTemporaryBlue": {}
}Requires: "canChainTemporaryBlue"
"canStationaryLateralMidAirMorph"
{
"or": [
{
"and": [
"canSpringBallBounce",
{
"or": [
{
"ammo": {
"type": "PowerBomb",
"count": 2
}
},
{
"and": [
"canLongChainTemporaryBlue",
"can4HighMidAirMorph"
]
}
]
}
]
},
{
"and": [
"canLongChainTemporaryBlue",
"can4HighMidAirMorph",
"canBeVeryPatient"
]
}
]
} |
From: 2
Right Door
To: 1
Bottom Left Door
Chain temporary blue across the room in order to break the Speed blocks, using Spring Ball to speed up the process. If two Power Bombs are also available, they can be used to break the shot blocks along the way without needing to stop bouncing; the first Power Bomb must be placed at a specific time, about 1 tile to the left of the first set of Speed blocks; the second Power Bomb should be placed as early as possible after coming off cooldown. Entrance condition: {
"comeInShinecharging": {
"length": 1,
"openEnd": 1
}
}Requires: "canLongChainTemporaryBlue" "canStationaryLateralMidAirMorph" "canSpringBallBounce" "canSpringBallJumpMidAir" "can4HighMidAirMorph" Exit condition: {
"leaveWithTemporaryBlue": {
"direction": "left"
}
}Unlocks doors: {"types":["ammo"],"requires":[]}Dev note: The slower version of this strat (with HiJump instead of Spring Ball) is not included; it could require too much patience, considering that the chain continues into the next room. |
From: 1
Top Left Sand Entrance
To: 5
Hidden Morph Tunnel Junction
If the room above has a narrow sand exit, then spin jump through the transition pressing against the wall, continue holding right to reach the wall above the tunnel, then perform a tight mid-air morph and hold right to pass through the tunnel. If Samus falls below the tunnel, even to the ledge just below, it will no longer be possible to reach. Entrance condition: {
"comeInNormally": {},
"comesThroughToilet": "no"
}Requires: {
"notable": "Pass Through Hidden Tunnel"
}
"canPrepareForNextRoom"
"can4HighMidAirMorph"
{
"enemyDamage": {
"enemy": "Bull",
"type": "contact",
"hits": 1
}
}
{
"or": [
{
"enemyDamage": {
"enemy": "Bull",
"type": "contact",
"hits": 1
}
},
"h_usePowerBomb"
]
}Dev note: FIXME: Depending on the room above, the 'can4HighMidAirMorph' requirement might be unnecessary. FIXME: Entering through the Toilet can be possible with a lateral mid-air and enough run speed from an air room above. |
From: 3
Top Right Sand Entrance
To: 5
Hidden Morph Tunnel Junction
If the room above has a narrow sand exit, then spin jump through the transition pressing against the wall, continue holding left to reach the wall above the tunnel, then perform a tight mid-air morph and hold left to pass through the tunnel. If Samus falls below the tunnel, even to the ledge just below, it will no longer be possible to reach. Entrance condition: {
"comeInNormally": {},
"comesThroughToilet": "no"
}Requires: {
"notable": "Pass Through Hidden Tunnel"
}
"canPrepareForNextRoom"
"can4HighMidAirMorph"
{
"enemyDamage": {
"enemy": "Bull",
"type": "contact",
"hits": 1
}
}
{
"or": [
{
"enemyDamage": {
"enemy": "Bull",
"type": "contact",
"hits": 1
}
},
"h_usePowerBomb"
]
}Dev note: FIXME: Depending on the room above, the 'can4HighMidAirMorph' requirement might be unnecessary. FIXME: Entering through the Toilet can be possible with a lateral mid-air and enough run speed from an air room above. |
|
Use normalized movement to land on the sand without losing a blue suit. One way is to do the following: from the platforms at the height of the top door, simply walk off the ledge; from the platforms two tiles above the sand, do a full height jump; from the sand itself, do full height spin jumps, ideally without breaking spin; from the high platform in the center of the room, jump up to bonk the ceiling before falling into the sand. This same approach to the normalized movement can work with or without HiJump. Requires: {
"notable": "Blue Suit Sand Traversal"
}
{
"haveBlueSuit": {}
}
"Gravity"
"canLongIBJ"
"canJumpIntoIBJ"
"can4HighMidAirMorph" |
|
Start an IBJ by either bouncing on the sand with Spring Ball, doing a stationary spinjump on the sand, or by crouch jumping in the sand while holding down. Requires: {
"noBlueSuit": {}
}
"Gravity"
"canLongIBJ"
"canJumpIntoIBJ"
{
"or": [
{
"and": [
"canTrickyJump",
"can4HighMidAirMorph",
"canPlayInSand"
]
},
"h_useSpringBall"
]
}
{
"or": [
"canDoubleBombJump",
"canStaggeredIBJ",
"canBePatient"
]
} |
|
Use normalized movement to land on the sand without losing a blue suit. One way is to do the following: from the high platform at the right of the room, jump up to bonk the ceiling before falling into the sand; jump up to lure a Mochtroid down, and destroy it with the blue suit; if HiJump is unavailable, perform the first IBJ all the way left against the Grapple block wall to prevent the higher Mochtroid from coming on camera; from the platforms at the height of the top door, simply walk off the ledge; from the platforms two tiles above the sand, do a full height jump; from the sand itself, do full height spin jumps, ideally without breaking spin. The same approach to the normalized movement generally works with or without HiJump: but if performing many jumps in a row from sand to sand with HiJump, it is recommended to alternate between breaking spin and not breaking spin, to keep Samus' vertical subpixels in a good range. In any case, if failing an IBJ, unmorph before landing on the sand, in order to have a chance to keep the blue suit. Requires: {
"notable": "Blue Suit Sand Traversal"
}
{
"haveBlueSuit": {}
}
"Gravity"
"canLongIBJ"
"canJumpIntoIBJ"
"can4HighMidAirMorph"
"canTrickyDodgeEnemies" |
|
Start an IBJ by either bouncing on the sand with Spring Ball, doing a stationary spinjump on the sand, or by crouch jumping in the sand while holding down. Requires: {
"noBlueSuit": {}
}
"Gravity"
"canLongIBJ"
"canJumpIntoIBJ"
{
"or": [
{
"and": [
"canTrickyJump",
"can4HighMidAirMorph",
"canPlayInSand"
]
},
"h_useSpringBall"
]
}
{
"or": [
"canDoubleBombJump",
"canStaggeredIBJ",
"canBePatient"
]
} |
From: 1
Left Door
To: 1
Left Door
Get a boost from a Bomb or Power Bomb while grappled to the top half of the turret above the door. Without HiJump, this is most easy to do by positioning as far right as possible on the ledge and performing a stationary lateral morph. Lay the Power Bomb relatively low and continue moving right for about another half a tile. turn around left while morphed, then unmorph after Samus begins to descend, to reset Samus' fall speed; hold angle-up, and wait a moment after Samus is unmorphed before using Grapple (to wait until the bomb or Power Bomb is about to explode). Press and hold down soon after the Grapple attaches. Samus will enter a 'glitched grapple hanging' state where Samus' graphics will appear corrupted while swinging with Grapple. Swing down, and hold left while approaching the door to trigger the transition. Continue holding Grapple through the door transition to initiate a teleport in the next room. Samus should be able to stand in the next room (e.g. in case this is needed for an X-Ray climb). Samus can reach the transition at horizontal position $14, or at positions $13 or $15 by pressing up at a specific time just before reaching the transition. Requires: "h_breakOneDraygonTurret"
"can4HighMidAirMorph"
"canGrappleBombHang"
"h_bombThings"
"canStationaryLateralMidAirMorph"
{
"draygonElectricityFrames": 50
}
{
"or": [
"canInsaneJump",
{
"draygonElectricityFrames": 50
}
]
}Exit condition: {
"leaveWithGrappleTeleport": {
"blockPositions": [
[
2,
18
]
]
}
}Dev note: This is technically possible to do without a stationary lateral morph, but with much greater difficulty. |
|
Requires: "Gravity"
"Morph"
"canPlayInSand"
{
"or": [
{
"and": [
{
"or": [
"canWallJump",
"canGravityJump",
"HiJump"
]
},
{
"or": [
"canMidAirMorph",
"canDodgeWhileShooting",
{
"enemyDamage": {
"enemy": "Boulder",
"type": "contact",
"hits": 1
}
}
]
}
]
},
{
"and": [
"canSpringBallJumpMidAir",
"canTrickyJump"
]
},
{
"and": [
"h_useSpringBall",
"canJumpIntoIBJ"
]
},
{
"and": [
"canTrickyJump",
"can4HighMidAirMorph",
"canJumpIntoIBJ"
]
}
]
}Dev note: FIXME: WallJump + canMidAirMorph is actually a canWallJumpInstantMorph. |
|
Requires: "canSuitlessMaridia"
"canTrickySpringBallJump"
{
"or": [
"HiJump",
"can4HighMidAirMorph"
]
} |
From: 3
Bottom Right Door
To: 2
Bottom Left Door
Use temporary blue to break the speed blocks. Use stationary lateral mid-air morphs to move quickly while chaining temporary blue, in order to reach the last speed blocks before the Oums. Climb on the Oums to reach the left side of the room. Do not stand on the Oums when they begin to attack. Entrance condition: {
"comeInBlueSpinning": {
"maxExtraRunSpeed": "$3.0",
"unusableTiles": 0
}
}Requires: "canLongChainTemporaryBlue" "canStationaryLateralMidAirMorph" "can4HighMidAirMorph" "canUseEnemies" Dev note: FIXME: This strat name is not accurate since it doesn't involve a shinespark; it's only this way because it shares the reusable notable. FIXME: Carrying a flash suit can be possible while chaining temporary blue underwater here; a speedball could also be possible to avoid the need for such a long chain. |
From: 3
Bottom Right Door
To: 2
Bottom Left Door
Use temporary blue to break the speed blocks. Use stationary lateral mid-air morphs to move quickly while chaining temporary blue, in order to reach the last speed blocks before the Oums. Climb on the Oums to reach the left side of the room. Do not stand on the Oums when they begin to attack. Entrance condition: {
"comeInWithTemporaryBlue": {}
}Requires: "canLongChainTemporaryBlue" "canStationaryLateralMidAirMorph" "can4HighMidAirMorph" "canUseEnemies" |
|
Requires: {
"or": [
{
"and": [
"h_fourTileJumpMorph",
"h_complexToCarryFlashSuit"
]
},
{
"and": [
"canPreciseWallJump",
"canWallJumpInstantMorph"
]
}
]
} |
From: 7
Below Morph Tunnel Junction
To: 5
Morph Tunnel Junction
Requires: "canSuitlessMaridia" "canTrickySpringBallJump" "can4HighMidAirMorph" "canCarefulJump" |
From: 3
Middle Right Door
To: 4
Top Right Door
Freeze the island Choot when it is at the far left of its second-highest swoop. Run right-to-left on it and perform a last-frame jump into a max-height spring ball jump. Getting the highest possible run speed requires starting from the right-most 87.5% of the last pixel (subpixel position at least $2000). Press pause at the same time as starting to run, or slightly earlier, and perform the mid-air morph quickly; timing the pause to hit as early as possible after morphing will maximize the time that Spring Ball is equipped, boosting Samus' horizontal speed and making it possible to clear the corner of the ceiling. Requires: {
"notable": "Insane Frozen Choot Spring Ball Jump"
}
"canDash"
"canTrickyUseFrozenEnemies"
"HiJump"
"can4HighMidAirMorph"
"canTrickySpringBallJump"
"canInsaneJump"Dev note: There is at least a 3-frame window for freezing the Choot that works: two frames with the Choot in position ($2DE, $2F7), and one frame in position ($2E1, $2F9) It is possible to make the jump with one less frame of run speed; in this case Samus should start running from a few pixels further left, and a tighter mid-air morph may be required. |
From: 3
Middle Right Door
To: 4
Top Right Door
Run into the room, pressing pause immediately when entering. Jump into a mid-air spring ball jump to reach the ledge above. Perform the spring ball jump while still moving forward, in order to get a boost in jump height. Entrance condition: {
"comeInRunning": {
"speedBooster": "yes",
"minTiles": 5.4375
}
}Requires: "HiJump"
"canSpeedyJump"
"canTrickyJump"
"canLateralMidAirMorph"
"canTrickySpringBallJump"
{
"or": [
"canSpringFling",
"canInsaneJump",
"can4HighMidAirMorph"
]
}Dev note: This assumes extra run speed of $1.B entering the room, at least $2.6 when jumping (a 2-frame window in the worst case). |
From: 2
Bottom Door
To: 4
Water Level Junction
Standing on the platform in the room below, perform a spring ball jump mid-air a few tiles below the transition. Hold right through the transition, and do not bonk the door frame. Entrance condition: {
"comeInWithPlatformBelow": {
"minHeight": 9,
"maxHeight": 10,
"maxLeftPosition": 1,
"minRightPosition": 1
},
"comesThroughToilet": "no"
}Requires: "canCrossRoomJumpIntoWater" "canTrickySpringBallJump" "can4HighMidAirMorph" |
From: 2
Bottom Door
To: 4
Water Level Junction
Standing on the platform in the room below, perform a spring ball jump mid-air a few tiles below the transition. It is necessary to morph very quickly after jumping in order to spring ball jump as low as necessary. Hold right through the transition, and do not bonk the door frame. Entrance condition: {
"comeInWithPlatformBelow": {
"minHeight": 8,
"maxHeight": 8.5,
"maxLeftPosition": 1,
"minRightPosition": 1
},
"comesThroughToilet": "no"
}Requires: "canCrossRoomJumpIntoWater" "can4HighMidAirMorph" "canTrickySpringBallJump" "canInsaneJump" |
From: 1
Left Door
To: 3
Junction Below Right Door
It is recommended to shoot the ceiling block immediately upon room entry to bring one of the Puyos down so that it will not be a problem later. Requires: "canSuitlessMaridia"
"h_underwaterMaxHeightSpringBallJump"
{
"or": [
"can4HighMidAirMorph",
"canStationaryLateralMidAirMorph",
{
"and": [
"canNeutralDamageBoost",
{
"enemyDamage": {
"enemy": "Puyo",
"type": "contact",
"hits": 2
}
}
]
}
]
} |
From: 1
Left Door
To: 3
Junction Below Right Door
It is recommended to shoot the ceiling block immediately upon room entry to bring one of the Puyos down so that it will not be a problem later. Requires: "canSuitlessMaridia"
"canTrickySpringBallJump"
"canTrickyJump"
"canJumpIntoRespawningBlock"
{
"or": [
"can4HighMidAirMorph",
"canStationaryLateralMidAirMorph"
]
} |
|
Requires: "Gravity"
{
"or": [
"canTrickyJump",
"Ice",
"ScrewAttack",
{
"haveBlueSuit": {}
},
{
"enemyKill": {
"enemies": [
[
"Evir"
]
],
"explicitWeapons": [
"Plasma",
"Super",
"PowerBombPeriphery"
]
}
},
{
"enemyDamage": {
"enemy": "Evir",
"type": "particle",
"hits": 1
}
}
]
}
"canPlayInSand"
{
"or": [
"canWallJump",
"HiJump",
"canUseFrozenEnemies",
"canGravityJump",
{
"and": [
"canTrickyJump",
"can4HighMidAirMorph",
"canTrickySpringBallJump"
]
}
]
}
{
"or": [
{
"noBlueSuit": {}
},
{
"notable": "Blue Suit Sand Walk"
}
]
}Dev note: Technically it could make sense to clear obstacle A if the Evirs are killed, but with Gravity it is irrelevant. |
|
Requires: "Gravity" "Grapple" "canPlayInSand" "canJumpIntoIBJ" "canTrickyJump" "can4HighMidAirMorph" "canStationarySpinJump" |
|
Perform a canSunkenTileWideWallClimb to get to the water surface, then use space jump at the water surface. Then either use space jump when the water is low then a spring ball jump to escape, or space jump when the water is high into a tight midair morph. Requires: {
"notable": "Escape - Suitless, Bootless, Space Jump"
}
"canSpringBallJumpMidAir"
"canSunkenTileWideWallClimb"
"canTrickyJump"
"can4HighMidAirMorph"
"canSpaceJumpWaterBounce"Dev note: The canSpringBallJumpMidAir is for the bottom left part of the room. The can4HighMidAirMorph is to represent the quick morph during the escape. |
|
Requires: "HiJump" "canSpaceJumpWaterBounce" "can4HighMidAirMorph" |
|
Time a bomb to hit Samus when she is morphed, 1 pixel into the sand, inside a sandfall, and moving horizontally. There is a setup using a Sand IBJ to rise up the sandfall from the floor and Sandfall Bounce with the correct timing. An alternate setup places the bomb before entering the sand and jumps into it with a very fast jump morph, using HiJump. Requires: {
"notable": "Insane Bomb Jump"
}
"canTrickyJump"
"canSandfallBounce"
"h_useMorphBombs"
{
"or": [
"canIBJ",
{
"and": [
"HiJump",
"can4HighMidAirMorph"
]
}
]
}
{
"noBlueSuit": {}
}Dev note: FIXME: A Power Bomb can be used with the jump morph. Bombs are only listed for leniency in that case. |
|
Jump from the left platform and mid air morph to bounce through the lava quickly. This is only useful when morphing before reaching the ceiling. Requires: {
"acidFrames": 45
}
"canBounceBall"
"canLateralMidAirMorph"
"can4HighMidAirMorph"
{
"or": [
{
"obstaclesCleared": [
"A",
"B"
]
},
{
"and": [
"canTrickyDodgeEnemies",
"canMetroidAvoid",
{
"acidFrames": 5
}
]
}
]
}Dev note: Freezing a Metroid while exiting the acid is difficult but manageable. |
From: 2
Bottom Door
To: 1
Top Left Door
Move to the left side of the lowest section and jump morph before placing the Power Bomb to kill all three Metroids. Then Kill all three Metroids with Power Bombs while avoiding damage. Requires: {
"notable": "Bottom Metroid Avoid"
}
{
"enemyKill": {
"enemies": [
[
"Metroid",
"Metroid",
"Metroid"
]
],
"explicitWeapons": [
"PowerBomb"
]
}
}
"canMetroidAvoid"
"canHitbox"
{
"or": [
"can4HighMidAirMorph",
"canInsaneJump"
]
}Clears obstacles: f_KilledMetroidRoom4 Sets flags: f_KilledMetroidRoom4 |
|
Climb to the middle section and kill all three Metroids while taking damage. Or use a tricky jump morph into the bottom left corner of room to kill all three Metroids from the bottom section. Requires: {
"enemyKill": {
"enemies": [
[
"Metroid",
"Metroid",
"Metroid"
]
],
"explicitWeapons": [
"PowerBomb"
]
}
}
{
"or": [
{
"and": [
"can4HighMidAirMorph",
"canTrickyJump",
{
"metroidFrames": 330
}
]
},
{
"metroidFrames": 530
}
]
}Clears obstacles: f_KilledMetroidRoom4 Sets flags: f_KilledMetroidRoom4 |
From: 2
Middle Left Door
To: 1
Top Left Door
Entrance condition: {
"comeInShinecharging": {
"length": 2,
"openEnd": 0
}
}Requires: "canLongChainTemporaryBlue" "canXRayTurnaround" "can4HighMidAirMorph" Exit condition: {
"leaveWithTemporaryBlue": {}
}Unlocks doors: {"types":["ammo"],"requires":[]} |
From: 3
Bottom Left Door
To: 1
Top Left Door
Entrance condition: {
"comeInShinecharging": {
"length": 11,
"openEnd": 0
}
}Requires: "canLongChainTemporaryBlue" "can4HighMidAirMorph" "canXRayTurnaround" Exit condition: {
"leaveWithTemporaryBlue": {}
}Unlocks doors: {"types":["ammo"],"requires":[]} |
|
Gain temporary blue with a shinecharge; then do a tight lateral mid-air morph to jump past the speed blocks. Alernatively, start the temporary blue chain by doing a running jump over them rather than doing a shinecharge. Requires: {
"obstaclesCleared": [
"A"
]
}
"h_shinechargeMaxRunway"
"can4HighMidAirMorph"
"canChainTemporaryBlue"
Exit condition: {
"leaveWithTemporaryBlue": {}
} |
From: 2
Left Door
To: 3
Right Door
Entrance condition: {
"comeInShinecharging": {
"length": 2,
"openEnd": 0
}
}Requires: "can4HighMidAirMorph" "canChainTemporaryBlue" Exit condition: {
"leaveWithTemporaryBlue": {}
}Unlocks doors: {"types":["ammo"],"requires":[]} |
From: 3
Right Door
To: 2
Left Door
Entrance condition: {
"comeInShinecharging": {
"length": 2,
"openEnd": 0
}
}Requires: "can4HighMidAirMorph" "canChainTemporaryBlue" Exit condition: {
"leaveWithTemporaryBlue": {}
}Unlocks doors: {"types":["ammo"],"requires":[]} |

