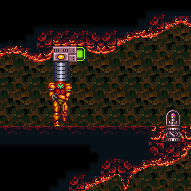
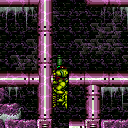
canMomentumConservingMorph (Expert)

Uses the uninteruptable frames of morphing or unmorphing in order to continue moving up after hitting a solid object above. This can be used to make it barely just past a ledge. The same technique can also be used to temporarily glide along a ceiling to extend a jump horizontally.
Dependencies: canMidAirMorph, canTrivialMidAirMorph, canDash, canLateralMidAirMorph
Strats ()
From: 1
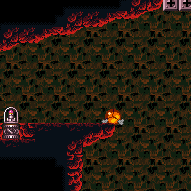
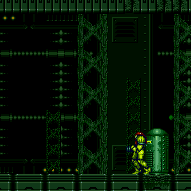
Top Left Door
To: 6
Right of Morph Tunnel with Temporary Blue
Run and jump into an airball, pressing pause just as Samus hits the ceiling, in order to unequip Spring Ball to reset fall speed. Entrance condition: {
"comeInGettingBlueSpeed": {
"length": 5,
"openEnd": 1,
"minExtraRunSpeed": "$5.8"
}
}Requires: "canTrickyJump" "canMomentumConservingMorph" "canSpringFling" "canTemporaryBlue" |
|

Leaving with upward momentum is possible in three ways: 1) Most easily, with a momentum-conserving morph against the ceiling through the transition, 2) With a momentum-conserving turnaround through the transition, or 3) Jumping specifically with a extra run speed $5.2 or $5.3 and aiming down through the transition. For the first two methods, back into the corner at the start of runway. Requires: "h_speedJump"
{
"or": [
"canMomentumConservingMorph",
"canInsaneJump"
]
}Exit condition: {
"leaveWithSidePlatform": {
"height": 3,
"runway": {
"length": 38,
"openEnd": 0
},
"obstruction": [
5,
2
]
}
}Dev note: Max extra run speed $6.5. Using the full runway, the momentum-conserving morph has a 4-frame window for the jump, and between a 2-frame and 5-frame window for the morph depending on the jump timing (with later jumps giving a bigger window for the morph); these windows can be more narrow depending on what is required in the next room. The momentum-conserving turnaround has a 2-frame window for the jump, and either a 3-frame or 5-frame for the turnaround (with the last-frame jump giving the larger window for the turnaround); again the windows can be more narrow depending on what is required in the next room. The aim-down method requires specific positioning to ensure Samus barely clears the door ledge with a frame-perfect jump. |
|

Leaving with upward momentum is possible in three ways: 1) Most easily, with a momentum-conserving morph against the ceiling through the transition, 2) With a momentum-conserving turnaround through the transition, or 3) Jumping specifically with a extra run speed $5.2 or $5.3 and aiming down through the transition. For the first two methods, avoid backing into the corner at the start of runway; instead press against it and turn around, to put Samus into a better position. An even better position is obtained by backing up an additional 8 to 12 pixels from the runway start (again, pressing forward into the corner, not backing into it), or equivalently, pressing and releasing an angle button 4 to 6 times to arm pump while running. Requires: "h_speedJump"
{
"or": [
"canMomentumConservingMorph",
"canInsaneJump"
]
}Exit condition: {
"leaveWithSidePlatform": {
"height": 3,
"runway": {
"length": 38,
"openEnd": 0
},
"obstruction": [
3,
0
]
}
}Dev note: Max extra run speed $6.1. Using the full runway (either backing into the corner or turning around from it), the momentum-conserving morph has a 5-frame window for the jump, and either a 2-frame window or 3-frame window for the morph depending on the jump timing; these windows can be more narrow depending on what is required in the next room. The momentum-conserving turnaround requires a frame-perfect (last-frame) jump and a frame-perfect turnaround. The aim-down method requires specific positioning to ensure Samus barely clears the door ledge with a frame-perfect jump. |
|

Leaving with upward momentum is possible in three ways: 1) Most easily, with a momentum-conserving morph against the ceiling through the transition, 2) With a momentum-conserving turnaround through the transition, or 3) Jumping specifically with a extra run speed $5.2 or $5.3 and aiming down through the transition. For the first two methods, back into the corner to use the full runway; it helps to use an arm pump to advance a single pixel while running. This can be done by holding an angle button before starting to move forward, then releasing angle while running. Requires: "h_speedJump"
{
"or": [
"canMomentumConservingMorph",
"canInsaneJump"
]
}Exit condition: {
"leaveWithSidePlatform": {
"height": 2,
"runway": {
"length": 45,
"openEnd": 1
},
"obstruction": [
3,
0
]
}
}Dev note: Max extra run speed $7.0. Using the full runway with a single-pixel arm pump, the momentum-conserving morph has a 4-frame window for the jump, and between a 3-frame and 5-frame window for the morph depending on the jump timing (with later jumps giving a bigger window for the morph); these windows will be more narrow if the ceiling in the next room extends past the door shell. The momentum-conserving turnaround requires a frame-perfect jump, with a 4-frame window for the turnaround, again possibly less depending on what is required in the next room. The aim-down method requires specific positioning to ensure Samus barely clears the door ledge with a frame-perfect jump. |
|
Leaving with upward momentum is possible in three ways: 1) Most easily, with a momentum-conserving morph against the ceiling through the transition, 2) With a momentum-conserving turnaround through the transition, or 3) Jumping specifically with a extra run speed $5.2 or $5.3 and aiming down through the transition. For the first two methods, back into the corner to use the full runway. Requires: "h_speedJump"
{
"or": [
"canMomentumConservingMorph",
"canInsaneJump"
]
}Exit condition: {
"leaveWithSidePlatform": {
"height": 2,
"runway": {
"length": 45,
"openEnd": 1
},
"obstruction": [
3,
0
]
}
}Dev note: Max extra run speed $7.0. The momentum-conserving morph has a 4-frame window for the jump, and between a 2-frame and 5-frame window for the morph depending on the jump timing (with later jumps giving a bigger window for the morph); these windows will be more narrow if the ceiling in the next room extends past the door shell. The momentum-conserving turnaround requires a frame-perfect jump, with a 4-frame window for the turnaround, again possibly less depending on what is required in the next room. The aim-down method requires specific positioning to ensure Samus barely clears the door ledge with a frame-perfect jump. |
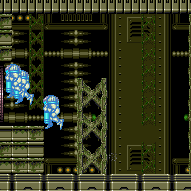
From: 1
Left Door
To: 2
Right Door

Enter with enough speed to jump over all the water, morphing mid-air and then unmorphing into temporary blue. Morph just before hitting the ceiling, in order to extend the jump horizontally. Entrance condition: {
"comeInGettingBlueSpeed": {
"length": 2,
"openEnd": 0,
"steepDownTiles": 1,
"minExtraRunSpeed": "$3.2"
}
}Requires: "canInsaneJump" "canMomentumConservingMorph" "canChainTemporaryBlue" Exit condition: {
"leaveWithTemporaryBlue": {}
}Unlocks doors: {"types":["ammo"],"requires":[]} |
|
Entrance condition: {
"comeInRunning": {
"speedBooster": "yes",
"minTiles": 11
}
}Requires: "h_speedJump" "canInsaneJump" "canLateralMidAirMorph" "canMomentumConservingMorph" |
From: 1
Bottom Left Door
To: 1
Bottom Left Door
Leaving with upward momentum is possible in three ways: 1) Most easily, with a momentum-conserving morph against the ceiling through the transition, 2) With a momentum-conserving turnaround through the transition, or 3) Jumping specifically with a extra run speed between $5.2 and $5.4 and aiming down through the transition. For the first two methods, avoid backing into the corner; instead press against it and turn around, to put Samus into a better position. For the third method, use only the part of the runway in front of the Power Bomb blocks, or about a tile less. Requires: {
"obstaclesCleared": [
"C"
]
}
"h_speedJump"
{
  "or": [
    "canMomentumConservingMorph",
    "canInsaneJump"
  ]
}
Exit condition: {
"leaveWithSidePlatform": {
"height": 3,
"runway": {
"length": 42,
"openEnd": 0
},
"obstruction": [
3,
0
]
}
}Dev note: Max extra run speed $6.8. Using the full runway, the momentum-conserving morph has a 4-frame window for the jump, and between a 3-frame and 6-frame window for the morph depending on the jump timing (with later jumps giving a bigger window for the morph); The momentum-conserving turnaround has a 2-frame window for the jump, and either a 1-frame or 5-frame window for the turnaround depending on the jump (with the last-frame jump giving the larger window for the turnaround). |
From: 1
Bottom Left Door
To: 1
Bottom Left Door
Leaving with upward momentum is possible in three ways: 1) Most easily, with a momentum-conserving morph against the ceiling through the transition, 2) With a momentum-conserving turnaround through the transition, or 3) Jumping and aiming down through the transition. To maximize the lenience for the jump, back into the Power Bomb block corner, and while running perform a single-pixel arm pump (e.g. by firing a shot); this only matters in certain situations, but in all cases it won't hurt. Requires: "h_speedJump"
{
"or": [
"canMomentumConservingMorph",
"canInsaneJump"
]
}Exit condition: {
"leaveWithSidePlatform": {
"height": 3,
"runway": {
"length": 31,
"openEnd": 0
},
"obstruction": [
3,
0
]
}
}Dev note: Max extra run speed $5.4. The momentum-conserving morph has a 3-frame window for the jump, and between a 3-frame and 8-frame window for the morph depending on the jump timing (with later jumps giving a bigger window for the morph); these windows can be more narrow depending on what is required in the next room. The momentum-conserving turnaround has a 2-frame window for the jump: if jumping on the second-to-last possible frame, then there is a 4-frame window for the turnaround, while if jumping on the last frame, there is a 5-frame window for turning around before the transition or it can be buffered through the transition (or the turnaround could not be performed at all, to maintain forward and upward momentum by simply aiming down). |
|
Requires: {
"obstaclesCleared": [
"C"
]
}
"h_speedJump"
"canInsaneJump"
"canMomentumConservingMorph"Exit condition: {
"leaveWithSidePlatform": {
"height": 2,
"runway": {
"length": 25,
"openEnd": 0
},
"obstruction": [
4,
0
]
}
}Dev note: Max extra run speed $4.A. Using the full runway, this requires a last-frame jump, followed by a 2-frame window for the morph. |
From: 10
Right Etecoon Shaft - Bottom Left Door
To: 14
Right Etecoon Shaft - Wall Jump Checkpoint
Entrance condition: {
"comeInWithSidePlatform": {
"platforms": [
{
"minHeight": 2,
"maxHeight": 2,
"minTiles": 45,
"speedBooster": "yes",
"obstructions": [
[
1,
0
]
],
"requires": [],
"note": "Applies to Halfie Climb Room."
},
{
"minHeight": 3,
"maxHeight": 3,
"minTiles": 39.4375,
"speedBooster": "yes",
"obstructions": [
[
3,
2
]
],
"requires": [],
"note": "Applies to Metal Pirates Room.",
"detailNote": [
"This has a 2-frame window for the jump,",
"then a 1-frame or 2-frame window for the morph (after the transition), depending on the jump,",
"with a last-frame jump giving a 2-frame morph window."
]
}
]
}
}Requires: "canInsaneJump" "canMomentumConservingMorph" "canTrickySpringBallJump" Dev note: This strat is not very useful, since the in-room tricky dash jump into spring ball jump is easier. |
|

Entrance condition: {
"comeInRunning": {
"speedBooster": "yes",
"minTiles": 15
}
}Requires: "h_speedJump" "canInsaneJump" "canMomentumConservingMorph" Dev note: This is technically possible with 14 tiles but it might require too much precision. |
|
Requires: "h_speedJump" "canMomentumConservingMorph" Exit condition: {
"leaveWithSidePlatform": {
"height": 2,
"runway": {
"length": 20,
"openEnd": 0
},
"obstruction": [
3,
0
]
}
}Dev note: Max extra run speed $3.F. |
|


Leaving with upward momentum is possible in three ways: 1) Most easily, with a momentum-conserving morph against the ceiling through the transition, 2) With a momentum-conserving turnaround through the transition, or 3) Jumping specifically with a extra run speed $5.2 or $5.3 and aiming down through the transition. For the first two methods, avoid backing into the corner at the start of runway; instead press against it and turn around, to put Samus into a better position. Requires: {
"obstaclesCleared": [
"A"
]
}
"h_speedJump"
{
  "or": [
    "canMomentumConservingMorph",
    "canInsaneJump"
  ]
}
Exit condition: {
"leaveWithSidePlatform": {
"height": 2,
"runway": {
"length": 45,
"openEnd": 1
},
"obstruction": [
3,
0
]
}
}Dev note: Max extra run speed $7.0. Using the full runway, there is a 4-frame window for the jump, then between a 1-frame and 4-frame window for the morph depending on the jump (with later jumps giving more frames for the morph). If there is a solid tile on the ceiling in the next room past the door frame, then the windows for the jump and morph are tighter. The momentum-conserving turnaround has a 3-frame window for the jump, and between a 1-frame or 4-frame for the turnaround (with later jumps giving a larger window for the turnaround); again the windows can be more narrow depending on what is required in the next room. |
|


Requires: {
"obstaclesCleared": [
"A"
]
}
"h_speedJump"
"canInsaneJump"
"canMomentumConservingMorph"Exit condition: {
"leaveWithSidePlatform": {
"height": 2,
"runway": {
"length": 45,
"openEnd": 1
},
"obstruction": [
4,
0
]
}
}Dev note: Max extra run speed $7.0. Press against the overhang left of the ceiling spikes, then perform 4 arm pumps to advance 8 pixels while running. There is a 2-frame window for the jump and a 2-frame window for the morph. These windows can be more narrow depending on what is required in the next room. |
|


Requires: {
"or": [
"f_DefeatedKraid",
{
"obstaclesCleared": [
"f_DefeatedKraid"
]
}
]
}
"h_speedJump"
"canInsaneJump"
"canMomentumConservingMorph"Exit condition: {
"leaveWithSidePlatform": {
"height": 2,
"runway": {
"length": 24,
"openEnd": 0
},
"obstruction": [
4,
0
]
}
}Dev note: Max extra run speed $4.4. Using the full runway, there is a 2-frame window for the jump, then a 1-frame or 2-frame window for the morph depending on the jump (with a last-frame jump giving a 2-frame morph window). |
|

Entrance condition: {
"comeInRunning": {
"speedBooster": "yes",
"minTiles": 3
}
}Requires: "h_speedJump"
"canMomentumConservingMorph"
"canSpringFling"
"h_unpauseKeepMomentum"
{
"heatFrames": 140
}Dev note: The momentum-conserving morph is not strictly required (particularly with longer runways) but makes it easier. |
|


Requires: "h_speedJump"
"canMomentumConservingMorph"
"canSpringFling"
{
"heatFrames": 190
} |
From: 2
Right Door
To: 1
Left Door

Entrance condition: {
"comeInWithGMode": {
"mode": "indirect",
"morphed": false
}
}Requires: {
"or": [
"SpaceJump",
{
"and": [
"HiJump",
"canSpeedyJump",
"canWallJump"
]
},
{
"and": [
"HiJump",
"canSpringBallJumpMidAir",
{
"or": [
{
"noBlueSuit": {}
},
{
"and": [
"Gravity",
{
"lavaFrames": 25
}
]
}
]
}
]
},
{
"and": [
{
"notable": "Spring Ball Bomb Boost"
},
{
"noBlueSuit": {}
},
"canSpringBallJumpMidAir",
"canUnmorphBombBoost",
"h_crouchJumpDownGrab",
{
"or": [
"canInsaneJump",
"h_additionalBomb"
]
}
]
},
{
"and": [
{
"or": [
{
"canShineCharge": {
"usedTiles": 15,
"openEnd": 2
}
},
"h_storedSpark"
]
},
"canShinechargeMovementComplex",
{
"or": [
{
"shinespark": {
"frames": 12,
"excessFrames": 2
}
},
{
"and": [
"h_speedJump",
{
"shinespark": {
"frames": 9,
"excessFrames": 3
}
}
]
}
]
}
]
},
{
"and": [
{
"notable": "Ceiling Mockball Spring Fling"
},
"h_speedJump",
"canInsaneJump",
"canMomentumConservingMorph",
"canSpringFling"
]
}
]
}
"h_heatedGModeOpenDifferentDoor" |
From: 2
Right Door
To: 2
Right Door


Touch the item as little as possible in order to prevent PLMs from being overloaded, so the platforms below remain solid. Entrance condition: {
"comeInWithGMode": {
"mode": "direct",
"morphed": false
}
}Requires: "canRemoteAcquire"
{
"or": [
"SpaceJump",
{
"and": [
"HiJump",
"canSpeedyJump",
"canWallJump"
]
},
{
"and": [
"HiJump",
"canSpringBallJumpMidAir",
{
"or": [
{
"noBlueSuit": {}
},
{
"and": [
"Gravity",
{
"lavaFrames": 25
}
]
}
]
}
]
},
{
"and": [
{
"notable": "Spring Ball Bomb Boost"
},
{
"noBlueSuit": {}
},
"canSpringBallJumpMidAir",
"canUnmorphBombBoost",
"h_crouchJumpDownGrab",
"canInsaneJump"
]
},
{
"and": [
{
"or": [
{
"canShineCharge": {
"usedTiles": 15,
"openEnd": 2
}
},
"h_storedSpark"
]
},
"canShinechargeMovementComplex",
{
"or": [
{
"shinespark": {
"frames": 12,
"excessFrames": 2
}
},
{
"and": [
"h_speedJump",
{
"shinespark": {
"frames": 9,
"excessFrames": 3
}
}
]
}
]
}
]
},
{
"and": [
{
"notable": "Ceiling Mockball Spring Fling"
},
"h_speedJump",
"canInsaneJump",
"canMomentumConservingMorph",
"canSpringFling"
]
}
]
}
"h_heatedDirectGModeLeaveSameDoor"Collects items: 3 Dev note: There is no leniency option for using an extra Power Bomb, because it will contribute to PLM overload. (2 PBs is technically barely possible) |
|
Position at the end of the runway (or up to 4 pixels away) at the top-right of the room, gain run speed, perform a last-frame jump and ceiling mockball, then equip or unequip Spring Ball in order to reset Samus' vertical speed and just barely make it onto the ledge with the item. Requires: {
"notable": "Ceiling Mockball Spring Fling"
}
"h_speedJump"
"canInsaneJump"
{
"heatFrames": 500
}
"canMomentumConservingMorph"
"canSpringFling"
{
"or": [
"h_heatProof",
"canBeVeryPatient"
]
} |
|
Entrance condition: {
"comeInWithGMode": {
"mode": "indirect",
"morphed": false
}
}Requires: "h_heatedGMode"
{
"or": [
"SpaceJump",
{
"and": [
"HiJump",
"canSpeedyJump",
"canWallJump"
]
},
{
"and": [
"HiJump",
"canSpringBallJumpMidAir",
{
"or": [
{
"noBlueSuit": {}
},
{
"and": [
"Gravity",
{
"lavaFrames": 25
}
]
}
]
}
]
},
{
"and": [
{
"notable": "Spring Ball Bomb Boost"
},
{
"noBlueSuit": {}
},
"canSpringBallJumpMidAir",
"canUnmorphBombBoost",
"h_crouchJumpDownGrab",
{
"or": [
"canInsaneJump",
"h_additionalBomb"
]
}
]
},
{
"and": [
{
"or": [
{
"canShineCharge": {
"usedTiles": 15,
"openEnd": 2
}
},
"h_storedSpark"
]
},
"canShinechargeMovementComplex",
{
"or": [
{
"shinespark": {
"frames": 12,
"excessFrames": 2
}
},
{
"and": [
"h_speedJump",
{
"shinespark": {
"frames": 9,
"excessFrames": 3
}
}
]
}
]
}
]
},
{
"and": [
{
"notable": "Ceiling Mockball Spring Fling"
},
"h_speedJump",
"canInsaneJump",
"canMomentumConservingMorph",
"canSpringFling"
]
}
]
}
{
"heatFrames": 90
}Clears obstacles: A Dev note: Goes to 3 because opening the gate mostly only makes sense when going back to the right for a longer runway or obtaining the item. FIXME: Variants with shinesparking or Geruta damage boost can be added. (Energy from immobile, CF, or energy free sparks) |
|
Entrance condition: {
"comeInWithGMode": {
"mode": "any",
"morphed": false
}
}Requires: "h_heatedGMode"
{
"or": [
"SpaceJump",
{
"and": [
"HiJump",
"canSpeedyJump",
"canWallJump"
]
},
{
"and": [
"HiJump",
"canSpringBallJumpMidAir",
{
"or": [
"canDash",
{
"and": [
{
"haveBlueSuit": {}
},
"Gravity"
]
}
]
}
]
},
{
"and": [
"canDash",
{
"notable": "Spring Ball Bomb Boost"
},
"canSpringBallJumpMidAir",
"canUnmorphBombBoost",
"h_crouchJumpDownGrab",
{
"or": [
"canInsaneJump",
"h_additionalBomb"
]
}
]
},
{
"and": [
{
"canShineCharge": {
"usedTiles": 15,
"openEnd": 2
}
},
"canShinechargeMovementComplex",
{
"or": [
{
"shinespark": {
"frames": 12,
"excessFrames": 2
}
},
{
"and": [
"h_speedJump",
{
"shinespark": {
"frames": 9,
"excessFrames": 3
}
}
]
}
]
}
]
},
{
"and": [
{
"notable": "Ceiling Mockball Spring Fling"
},
"h_speedJump",
"canInsaneJump",
"canMomentumConservingMorph",
"canSpringFling"
]
}
]
}
{
"heatFrames": 0
}Dev note: FIXME: Variants with Geruta damage boost can be added. (Energy from immobile or CF) |
|


Entrance condition: {
"comeInJumping": {
"speedBooster": "yes",
"minTiles": 19
}
}Requires: "canMomentumConservingMorph"
{
"heatFrames": 70
} |
From: 2
Right Door
To: 4
Hidden Right Item


Perform a momentum conserving morph through the transition. After the transition, quickly unmorph and continue holding up to retain temporary blue and break the bomb blocks. It may help (but is not required) to pause buffer the morph input. Entrance condition: {
"comeInWithSidePlatform": {
"platforms": [
{
"minHeight": 2,
"maxHeight": 2,
"minTiles": 27.4375,
"speedBooster": "yes",
"obstructions": [
[
1,
0
]
],
"note": [
"This applies to Dust Torizo Room and Noob Bridge."
]
},
{
"minHeight": 3,
"maxHeight": 3,
"minTiles": 28.2472,
"speedBooster": "yes",
"obstructions": [
[
1,
0
]
],
"note": [
"This applies to Double Chamber."
]
},
{
"minHeight": 1,
"maxHeight": 1,
"minTiles": 28.2472,
"speedBooster": "yes",
"obstructions": [
[
3,
0
]
],
"environment": "water",
"requires": [
"canGravityJump"
],
"note": [
"This applies to Below Botwoon Energy Tank and Botwoon Energy Tank Room."
]
},
{
"minHeight": 2,
"maxHeight": 2,
"minTiles": 31,
"speedBooster": "yes",
"obstructions": [
[
3,
0
]
],
"requires": [
"canInsaneMidAirMorph"
],
"note": [
"This applies to Metroid Room 1, Statues Hallway, and Baby Kraid Room."
]
},
{
"minHeight": 3,
"maxHeight": 3,
"minTiles": 41.4375,
"speedBooster": "yes",
"obstructions": [
[
3,
0
]
],
"requires": [
"canInsaneMidAirMorph"
],
"note": [
"This applies to Blue Brinstar Energy Tank Room (Power Bomb blocks broken), Bowling Alley (middle, power off), and Basement (power on)."
]
},
{
"minHeight": 3,
"maxHeight": 3,
"minTiles": 39.4375,
"speedBooster": "yes",
"obstructions": [
[
3,
2
]
],
"note": [
"This applies to Metal Pirates Room."
]
},
{
"minHeight": 3,
"maxHeight": 3,
"minTiles": 37.4375,
"speedBooster": "yes",
"obstructions": [
[
5,
2
]
],
"requires": [
"canInsaneMidAirMorph"
],
"note": [
"This applies to Flyway."
]
}
]
}
}Requires: {
"or": [
"f_DefeatedGoldenTorizo",
{
"obstaclesCleared": [
"f_DefeatedGoldenTorizo"
]
}
]
}
"HiJump"
{
"getBlueSpeed": {
"usedTiles": 24,
"openEnd": 1
}
}
"h_blueJump"
"canMomentumConservingMorph"
"canInsaneJump"
{
"heatFrames": 120
}Clears obstacles: door_2 Dev note: FIXME: This could maybe be possible without HiJump? If so, it would be significantly more difficult. The getBlueSpeed requirement could be refined to vary by platform geometry. |
From: 2
Middle Right Door
To: 3
Top Right Door
Jump into the room morphing with blue speed, then unmorph and continue holding up to retain blue speed and break the bomb blocks. A momentum-conserving morph through the transition is not always required but usually makes the strat easier. In many cases, pause buffering the morph can also be helpful. Entrance condition: {
"comeInWithSidePlatform": {
"platforms": [
{
"minHeight": 2,
"maxHeight": 2,
"minTiles": 27.4375,
"speedBooster": "yes",
"obstructions": [
[
1,
0
]
],
"requires": [
"HiJump",
{
"heatFrames": 110
}
],
"note": [
"This applies to Dust Torizo Room and Noob Bridge."
]
},
{
"minHeight": 2,
"maxHeight": 2,
"minTiles": 45,
"speedBooster": "yes",
"obstructions": [
[
1,
0
]
],
"requires": [
"canTrickyDashJump",
"canInsaneJump",
{
"heatFrames": 150
}
],
"note": [
"This applies to Noob Bridge."
]
},
{
"minHeight": 3,
"maxHeight": 3,
"minTiles": 28.2472,
"speedBooster": "yes",
"obstructions": [
[
1,
0
]
],
"requires": [
"HiJump",
{
"heatFrames": 110
}
],
"note": [
"This applies to Double Chamber."
]
},
{
"minHeight": 1,
"maxHeight": 1,
"minTiles": 23.8731,
"speedBooster": "yes",
"obstructions": [
[
3,
0
]
],
"environment": "water",
"requires": [
"HiJump",
"canGravityJump",
{
"heatFrames": 110
}
],
"note": [
"This applies to Below Botwoon Energy Tank and Botwoon Energy Tank Room."
],
"detailNote": [
"Gain run speed, and time a pause to hit after Samus jumps and aims down;",
"then unequip Gravity and buffer the morph while unpausing."
]
},
{
"minHeight": 1,
"maxHeight": 1,
"minTiles": 36.3703,
"speedBooster": "yes",
"obstructions": [
[
3,
0
]
],
"environment": "water",
"requires": [
"canTrickyDashJump",
"canInsaneJump",
"canGravityJump",
{
"heatFrames": 110
}
],
"note": [
"This applies to Botwoon Energy Tank Room."
],
"detailNote": [
"Gain run speed, and time a pause to hit after Samus jumps and aims down;",
"then unequip Gravity and buffer the morph while unpausing."
]
},
{
"minHeight": 2,
"maxHeight": 2,
"minTiles": 31,
"speedBooster": "yes",
"obstructions": [
[
3,
0
]
],
"requires": [
"HiJump",
"canInsaneJump",
{
"heatFrames": 110
}
],
"note": [
"This applies to Metroid Room 1, Statues Hallway, and Baby Kraid Room."
]
},
{
"minHeight": 3,
"maxHeight": 3,
"minTiles": 30.4375,
"speedBooster": "yes",
"obstructions": [
[
3,
0
]
],
"requires": [
"HiJump",
"canInsaneJump",
{
"heatFrames": 110
}
],
"note": [
"This applies to Blue Brinstar Energy Tank Room, Bowling Alley (middle, power off), and Basement (power on)."
]
},
{
"minHeight": 3,
"maxHeight": 3,
"minTiles": 32.4375,
"speedBooster": "yes",
"obstructions": [
[
3,
2
]
],
"requires": [
"HiJump",
{
"heatFrames": 110
}
],
"note": [
"This applies to Metal Pirates Room."
]
},
{
"minHeight": 3,
"maxHeight": 3,
"minTiles": 31.4375,
"speedBooster": "yes",
"obstructions": [
[
5,
2
]
],
"requires": [
"HiJump",
"canInsaneJump",
{
"heatFrames": 110
}
],
"note": [
"This applies to Flyway."
]
}
]
}
}Requires: {
"getBlueSpeed": {
"usedTiles": 20,
"openEnd": 1
}
}
"h_blueJump"
"canMomentumConservingMorph"Clears obstacles: A Dev note: FIXME: Add side platform Screw Attack jumps (without blue speed); also add blue speed strats (side platform and otherwise) that break both sets of bomb blocks, falling down to the item. FIXME: The getBlueSpeed requirement could be refined for each platform. |
From: 2
Middle Right Door
To: 5
Junction Above Bottom Blocks
Jump into the room with blue speed, morphing and unmorphing to clear Samus' horizontal momentum while retaining blue. Use the blue to break the right-most bomb blocks above, then fall down. A momentum-conserving morph through the transition is not always required but usually makes the strat easier. In many cases, pause buffering the morph can also be helpful. Entrance condition: {
"comeInWithSidePlatform": {
"platforms": [
{
"minHeight": 1,
"maxHeight": 1,
"minTiles": 16,
"speedBooster": "yes",
"obstructions": [
[
1,
0
]
],
"requires": [
"HiJump",
{
"getBlueSpeed": {
"usedTiles": 14,
"openEnd": 1
}
},
"h_blueJump",
"canInsaneJump",
{
"heatFrames": 155
}
],
"note": [
"This applies to Lava Dive Room."
],
"detailNote": [
"To get enough height, it is suggested to do a double-stutter 3-tap with an early third tap."
]
},
{
"minHeight": 3,
"maxHeight": 3,
"minTiles": 21.4375,
"speedBooster": "yes",
"obstructions": [
[
3,
0
]
],
"environment": "water",
"requires": [
"HiJump",
{
"getBlueSpeed": {
"usedTiles": 15,
"openEnd": 1
}
},
"h_blueJump",
"canInsaneJump",
"canGravityJump",
{
"heatFrames": 155
}
],
"note": [
"This applies to Draygon's Room."
]
}
]
}
}Requires: "canMomentumConservingMorph" Clears obstacles: A |
From: 1
Left Door
To: 5
Spring Ball Maze Junction (Past the Bomb Blocks)


Spacejump through the room and break the bomb blocks in the Morph tunnel with Speedbooster. It is very helpful for the final jump to be close to the missile platform, to be as close to the tunnel as possible when Morphing. Entrance condition: {
"comeInBlueSpinning": {
"minExtraRunSpeed": "$6.E",
"unusableTiles": 0
}
}Requires: {
"notable": "Air Speedball"
}
"canPreciseSpaceJump"
"canInsaneJump"
"canLateralMidAirMorph"
"canSpeedball"
"canMomentumConservingMorph"
{
"heatFrames": 110
}Dev note: This is possible with less extra speed but where you jump changes with your speed and room entry. |
Come In Getting Blue Speed, Space Jump Through Morph Tunnel
(Extreme)
Lower Norfair Spring Ball Maze
From: 1
Left Door
To: 5
Spring Ball Maze Junction (Past the Bomb Blocks)
Spacejump through the room and break the bomb blocks in the Morph tunnel with Speedbooster. It is very helpful for the final jump to be close to the missile platform, to be as close to the tunnel as possible when Morphing. Entrance condition: {
"comeInGettingBlueSpeed": {
"length": 5,
"openEnd": 1,
"minExtraRunSpeed": "$5.B"
}
}Requires: {
"notable": "Air Speedball"
}
"canPreciseSpaceJump"
"canInsaneJump"
"canLateralMidAirMorph"
"canSpeedball"
"canMomentumConservingMorph"
{
"heatFrames": 110
} |
|


Requires: {
"heatFrames": 210
}
"canMomentumConservingMorph"
"canInsaneJump"Exit condition: {
"leaveWithSidePlatform": {
"height": 1,
"runway": {
"length": 9,
"openEnd": 2
},
"obstruction": [
2,
1
]
}
}Dev note: Max extra run speed $2.9 This strat is included for completeness, though it apparently doesn't have any applications. |
|

Requires: {
"not": "f_DefeatedPhantoon"
}
"h_speedJump"
"canInsaneJump"
"canMomentumConservingMorph"
"canInsaneMidAirMorph"Exit condition: {
"leaveWithSidePlatform": {
"height": 3,
"runway": {
"length": 45,
"openEnd": 1
},
"obstruction": [
5,
0
]
}
}Dev note: Max extra run speed $7.0. The obstruction (from the Workrobot) actually extends between 4 and 5 tiles. |
|
Requires: "f_DefeatedPhantoon"
"h_speedJump"
{
"or": [
"canMomentumConservingMorph",
{
"and": [
"canMomentumConservingTurnaround",
"canInsaneJump"
]
}
]
}Exit condition: {
"leaveWithSidePlatform": {
"height": 3,
"runway": {
"length": 45,
"openEnd": 1
},
"obstruction": [
3,
0
]
}
}Dev note: Max extra run speed $7.0. |
From: 2
Middle Left Door
To: 2
Middle Left Door
If using the full runway, back into the corner against the Chozo statue. Requires: {
"not": "f_DefeatedPhantoon"
}
"canRiskPermanentLossOfAccess"
{
"or": [
"canMomentumConservingMorph",
{
"and": [
"canMomentumConservingTurnaround",
"canInsaneJump"
]
}
]
}Exit condition: {
"leaveWithSidePlatform": {
"height": 3,
"runway": {
"length": 45,
"openEnd": 1
},
"obstruction": [
3,
0
]
}
}Dev note: Max extra run speed $7.0. |
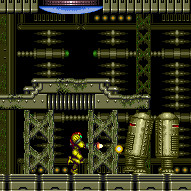
From: 2
Middle Left Door
To: 6
Bowling Chozo Statue


Jump into the room and morph along the ceiling to maximize distance. Unmorph while entering the spikes to minimize knockback Then build up speed and airball again to cross the spikes. Entrance condition: {
"comeInRunning": {
"speedBooster": "yes",
"minTiles": 28
}
}Requires: "h_speedJump"
"canInsaneJump"
"canMomentumConservingMorph"
"canUseIFrames"
{
"spikeHits": 1
} |
From: 2
Middle Left Door
To: 6
Bowling Chozo Statue


Jump into the room and morph along the ceiling to maximize distance. Unmorph while entering the spikes to minimize knockback Then build up speed and airball again to cross the spikes. With only a short runway available, high precision is required. Entrance condition: {
"comeInRunning": {
"speedBooster": "yes",
"minTiles": 25
}
}Requires: "h_speedJump"
"canInsaneJump"
"canMomentumConservingMorph"
"canInsaneMidAirMorph"
"canUseIFrames"
{
"spikeHits": 1
} |
From: 1
Right Door
To: 2
Item

Using speed from the adjacent room, perform a ceiling mockball to make it across the gap. Entrance condition: {
"comeInRunning": {
"speedBooster": "yes",
"minTiles": 23
}
}Requires: "h_speedJump"
"canTrickyJump"
"canMomentumConservingMorph"
{
"or": [
"canInsaneJump",
{
"thornHits": 5
}
]
}
{
"not": "f_DefeatedPhantoon"
}Dev note: The 5 thornHits are for lenience since it is very difficult to get this first try. |
From: 1
Right Door
To: 2
Item
Using speed from the adjacent room, perform a ceiling mockball and equip or unequip Spring Ball to make it across the gap. Entrance condition: {
"comeInRunning": {
"speedBooster": "yes",
"minTiles": 12
}
}Requires: "h_speedJump"
"canTrickyJump"
"canMomentumConservingMorph"
"canSpringFling"
"h_unpauseKeepMomentum"
{
"or": [
"canInsaneJump",
{
"thornHits": 5
}
]
}
{
"not": "f_DefeatedPhantoon"
}Dev note: The 5 thornHits are for lenience since it is very difficult to get this first try. |
From: 2
Bottom Left Door
To: 1
Top Left Doorway
Only requires a runway of 6 tiles (with no open end) in the adjacent room. Perform an air ball while against the ceiling to make it up and through the morph tunnel. If the runway length is minimal, the aim-down input must be delayed a bit (rather than buffered through the transition), so that Samus moves at a slightly higher horizontal speed for longer. Entrance condition: {
"comeInJumping": {
"speedBooster": "no",
"minTiles": 5.4375
}
}Requires: {
"notable": "Cross Room Jump Morph"
}
"canCrossRoomJumpIntoWater"
"canMomentumConservingMorph" |
From: 2
Bottom Left Door
To: 1
Top Left Doorway
Only requires a runway of 5 tiles (with an open end) in the adjacent room. Perform an air ball while against the ceiling to make it up and through the morph tunnel. Entrance condition: {
"comeInJumping": {
"speedBooster": "yes",
"minTiles": 5
}
}Requires: {
"notable": "Cross Room Jump Morph"
}
"canCrossRoomJumpIntoWater"
"canMomentumConservingMorph" |
From: 2
Bottom Left Door
To: 1
Top Left Doorway
Unmorph just before hitting the ceiling, to conserve upward momentum. Continue moving right to avoid a crab hit, then morph again to make it through. Entrance condition: {
"comeInWithSpringBallBounce": {
"speedBooster": "any",
"movementType": "controlled",
"remoteAndLandingMinTiles": [
[
4.5625,
1
]
]
}
}Requires: {
"notable": "Cross Room Jump Morph"
}
"canCrossRoomJumpIntoWater"
"canMomentumConservingMorph"Dev note: Bounce with extra run speed at least $1.8. |
From: 2
Bottom Left Door
To: 1
Top Left Doorway
Unmorph just before hitting the ceiling, to conserve upward momentum. Continue moving right to avoid a crab hit, then morph again to make it through. If the runway is very short and the bounce is not on the last frame before the transition, then it may be necessary to perform a spring ball jump; in this case, pause soon after entering the room in order to unequip spring ball. Entrance condition: {
"comeInWithSpringBallBounce": {
"speedBooster": "yes",
"movementType": "uncontrolled",
"remoteAndLandingMinTiles": [
[
3,
1
]
]
}
}Requires: {
"notable": "Cross Room Jump Morph"
}
"canCrossRoomJumpIntoWater"
"canMomentumConservingMorph"Dev note: Bounce with extra run speed at least $1.2. FIXME: In these strats we probably also need to be able to express maxExtraRunSpeed or a maxTiles; maybe this entrance condition should be changed to have the same structure as comeInWithBlueSpringBallBounce? |
From: 2
Bottom Left Door
To: 1
Top Left Doorway
Unmorph just before hitting the ceiling, to conserve upward momentum. Continue moving right to avoid a crab hit, then morph again to make it through. Entrance condition: {
"comeInWithSpringBallBounce": {
"speedBooster": "any",
"movementType": "uncontrolled",
"remoteAndLandingMinTiles": [
[
3.5625,
1
]
]
}
}Requires: {
"notable": "Cross Room Jump Morph"
}
"canCrossRoomJumpIntoWater"
"canMomentumConservingMorph"Dev note: Bounce with extra run speed at least $1.5. |
From: 3
Bottom Right Door
To: 4
Top Right Doorway


Unmorph just before hitting the ceiling, to conserve upward momentum. Then turn around, morph, and move through the tunnel to the right, avoiding crab damage. Entrance condition: {
"comeInWithSpringBallBounce": {
"speedBooster": "any",
"movementType": "controlled",
"remoteAndLandingMinTiles": [
[
4.5625,
1
]
]
}
}Requires: {
"notable": "Cross Room Jump Morph"
}
"canCrossRoomJumpIntoWater"
"canMomentumConservingMorph"Dev note: Bounce with extra run speed at least $1.8. |
From: 3
Bottom Right Door
To: 4
Top Right Doorway
Unmorph just before hitting the ceiling, to conserve upward momentum. Then turn around, morph, and move through the tunnel to the right, avoiding crab damage. If the runway is very short and the bounce is not on the last frame before the transition, then it may be necessary to perform a spring ball jump; in this case, pause soon after entering the room in order to unequip spring ball. Entrance condition: {
"comeInWithSpringBallBounce": {
"speedBooster": "yes",
"movementType": "any",
"remoteAndLandingMinTiles": [
[
3,
1
]
]
}
}Requires: {
"notable": "Cross Room Jump Morph"
}
"canCrossRoomJumpIntoWater"
"canMomentumConservingMorph"Dev note: Bounce with extra run speed at least $1.2. |
From: 3
Bottom Right Door
To: 4
Top Right Doorway
Unmorph just before hitting the ceiling, to conserve upward momentum. Then turn around, morph, and move through the tunnel to the right, avoiding crab damage. Entrance condition: {
"comeInWithSpringBallBounce": {
"speedBooster": "any",
"movementType": "uncontrolled",
"remoteAndLandingMinTiles": [
[
3.5625,
1
]
]
}
}Requires: {
"notable": "Cross Room Jump Morph"
}
"canCrossRoomJumpIntoWater"
"canMomentumConservingMorph"Dev note: Bounce with extra run speed at least $1.5. |
|


Requires: "Gravity" "h_speedJump" "canInsaneJump" "canMomentumConservingMorph" "canInsaneMidAirMorph" Exit condition: {
"leaveWithSidePlatform": {
"height": 3,
"runway": {
"length": 17,
"openEnd": 0,
"steepDownTiles": 2,
"startingSteepDownTiles": 1
},
"obstruction": [
4,
0
]
}
}Dev note: Max extra run speed $3.9. This strat is included for completeness, though it apparently doesn't have any applications. |
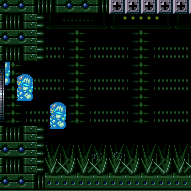
From: 5
Right Door
To: 7
Top Right Left Item

Depending on Samus' speed and position, either perform a speedball or an uncontrolled bounce onto the platform below the Speed blocks. Unmorph and continue holding up in order to break the Speed blocks while passing up through them. The top Speed blocks will respawn; to get on top of them, it can help to press against the wall (to discard blue speed) and then aim down to reduce Samus' hitbox. If available, using Grapple while aiming down can also help. Alternatively, if Samus breaks only the right column of Speed blocks, Samus can use the center left Speed block as a stepping stone. Be careful not to fall through the Speed blocks below as it will result in a softlock. Entrance condition: {
"comeInBlueSpinning": {
"minExtraRunSpeed": "$3.4",
"maxExtraRunSpeed": "$4.C",
"unusableTiles": 1
}
}Requires: {
"notable": "Suitless Blue Bomber"
}
"canSuitlessMaridia"
"HiJump"
"canSpeedball"
"canTrickySpringBallBounce"
"canMomentumConservingMorph"Dev note: Slightly lower or higher speeds could work but with greater difficulty. |
From: 5
Right Door
To: 7
Top Right Left Item
Bounce onto the platform below the Speed blocks. Unmorph and continue holding up in order to break the Speed blocks while passing up through them. The top Speed blocks will respawn; to get on top of them, it can help to press against the wall (to discard blue speed) and then aim down to reduce Samus' hitbox. If available, using Grapple while aiming down can also help. Alternatively, if Samus breaks only the right column of Speed blocks, Samus can use the center left Speed block as a stepping stone. Be careful not to fall through the Speed blocks below as it will result in a softlock. Entrance condition: {
"comeInWithBlueSpringBallBounce": {
"movementType": "controlled",
"minExtraRunSpeed": "$3.4",
"maxExtraRunSpeed": "$4.C"
}
}Requires: {
"notable": "Suitless Blue Bomber"
}
"canSuitlessMaridia"
"HiJump"
"canTrickySpringBallBounce"
"canInsaneJump"
"canMomentumConservingMorph"Dev note: Lower or higher speeds could work but with greater difficulty. |
From: 5
Right Door
To: 7
Top Right Left Item


In the previous room, perform a relatively precise 1-tap in order to gain blue speed with momentum in a specific range, then spin jump through the door transition. Depending on Samus' speed and position, either perform a speedball or an uncontrolled bounce onto the platform below the Speed blocks. Unmorph and continue holding up in order to break the Speed blocks while passing up through them. The top Speed blocks will respawn; to get on top of them, it can help to press against the wall (to discard blue speed) and then aim down to reduce Samus' hitbox. If available, using Grapple while aiming down can also help. Alternatively, if Samus breaks only the right column of Speed blocks, Samus can use the center left Speed block as a stepping stone. Be careful not to fall through the Speed blocks below as it will result in a softlock. Entrance condition: {
"comeInBlueSpinning": {
"minExtraRunSpeed": "$4.0",
"maxExtraRunSpeed": "$4.3",
"unusableTiles": 1
}
}Requires: {
"notable": "Suitless Blue Bomber"
}
"canSuitlessMaridia"
"canTrickyDashJump"
"canSpeedball"
"canTrickySpringBallBounce"
"canMomentumConservingMorph" |
From: 5
Right Door
To: 7
Top Right Left Item
In the previous room, perform a relatively precise 1-tap in order to gain blue speed with momentum in a specific range, then use spring ball to bounce through the door transition. Bounce onto the platform below the Speed blocks. Unmorph and continue holding up in order to break the Speed blocks while passing up through them. The top Speed blocks will respawn; to get on top of them, it can help to press against the wall (to discard blue speed) and then aim down to reduce Samus' hitbox. If available, using Grapple while aiming down can also help. Alternatively, if Samus breaks only the right column of Speed blocks, Samus can use the center left Speed block as a stepping stone. Be careful not to fall through the Speed blocks below as it will result in a softlock. Entrance condition: {
"comeInWithBlueSpringBallBounce": {
"movementType": "controlled",
"minExtraRunSpeed": "$4.0",
"maxExtraRunSpeed": "$4.3"
}
}Requires: {
"notable": "Suitless Blue Bomber"
}
"canSuitlessMaridia"
"canTrickyDashJump"
"canInsaneJump"
"canTrickySpringBallBounce"
"canMomentumConservingMorph" |
|


Requires: {
"obstaclesCleared": [
"A"
]
}
"Gravity"
"canTrickyDashJump"
{
"or": [
"canMomentumConservingMorph",
"canMomentumConservingTurnaround"
]
}Exit condition: {
"leaveWithSidePlatform": {
"height": 1,
"runway": {
"length": 23,
"openEnd": 1,
"gentleUpTiles": 2,
"gentleDownTiles": 2,
"steepUpTiles": 1
},
"obstruction": [
3,
0
]
}
}Dev note: Max extra run speed $4.B. FIXME: The canTrickyDashJump is for difficulty placement but could probably be replaced by a more fitting tech, since this isn't actually relying on a spike in jump height based on gaining a specific speed. |
|
Requires: {
"obstaclesCleared": [
"A"
]
}
"Gravity"
"h_speedJump"
"canInsaneJump"
{
"or": [
{
"and": [
"canMomentumConservingMorph",
"canInsaneMidAirMorph"
]
},
"canMomentumConservingTurnaround"
]
}Exit condition: {
"leaveWithSidePlatform": {
"height": 1,
"runway": {
"length": 36,
"openEnd": 1,
"gentleUpTiles": 2
},
"obstruction": [
3,
0
]
}
}Dev note: Max extra run speed $6.3. |
|
Needs near max horizontal speed coming from about 40 runway tiles in the adjacent room. Jump after the transition. Running longer on the short runway is more difficult at maximum speed, but will increase the success of the jump. A crisp momentum conserving morph can also make up for a jump that is buffered through the door. Entrance condition: {
"comeInRunning": {
"speedBooster": "yes",
"minTiles": 40
}
}Requires: "h_speedJump" "canInsaneJump" "canLateralMidAirMorph" "canCrossRoomJumpIntoWater" "canMomentumConservingMorph" Collects items: 5 |
From: 4
Right Door
To: 6
Junction Right of Morph Passage
Entrance condition: {
"comeInSpaceJumping": {
"speedBooster": "yes",
"minTiles": 22
}
}Requires: "canMomentumConservingMorph" Dev note: With high enough speed this could be done without morphing, but it would be more difficult, and Morph is needed to get through the maze anyway. |
From: 1
Left Door
To: 4
Platform Below Top Door
Requires gaining a specific amount of speed by running a distance equivalent to a runway of 7 tiles with no open end in the adjacent room, to hit a peak in the speed / height relationship. Unmorph to maintain momentum while sliding along the ceiling near the entrance. The spring ball jump is used after landing near the top, to get to the platform below the door. Entrance condition: {
"comeInWithSpringBallBounce": {
"speedBooster": "yes",
"movementType": "any",
"remoteAndLandingMinTiles": [
[
6.4375,
1
]
]
}
}Requires: "canTrickyDashJump" "canCrossRoomJumpIntoWater" "canMomentumConservingMorph" "canSpringBallJumpMidAir" |
|


Requires: "Gravity" "canInsaneJump" "canMomentumConservingMorph" Exit condition: {
"leaveWithSidePlatform": {
"height": 3,
"runway": {
"length": 22,
"openEnd": 0
},
"obstruction": [
3,
0
]
}
}Dev note: Max extra run speed $4.2 |
|
Jump through the door in the previous room, and perform an air ball soon after entering. With a last-frame jump through the door, there is a wide timing window to do the air ball. With an earlier jump through the door, the airball must be done more precisely: in this case buffer aim-down through the transition and morph immediately on entry, in order to conserve momentum while contacting the overhang. Entrance condition: {
"comeInJumping": {
"speedBooster": "any",
"minTiles": 1
}
}Requires: "canCrossRoomJumpIntoWater"
"canLateralMidAirMorph"
{
"or": [
"canTrickyJump",
"canMomentumConservingMorph"
]
}Clears obstacles: door_1 Dev note: There is a 4-frame window for the jump that can work; jumping in the later part of that window is better as it gives a bigger window for the morph. In water physics, an airball has higher base speed ($1.8) than spin jump ($1.6) or aim down ($1.4), which is the other reason why doing it early helps, in addition to how it helps clear the overhang. Doing a ceiling mockball at the top of the room can also work, but it is more difficult, and the frame-perfect jump is required in that case. |
From: 1
Bottom Left Door
To: 2
Top Right Door
Unmorph just before hitting the overhang, to conserve momentum to make it on top. Entrance condition: {
"comeInWithSpringBallBounce": {
"speedBooster": "any",
"movementType": "controlled",
"remoteAndLandingMinTiles": [
[
2.5625,
1
]
]
}
}Requires: "canCrossRoomJumpIntoWater" "canMomentumConservingMorph" |
From: 1
Bottom Left Door
To: 2
Top Right Door
Unmorph just before hitting the overhang, to conserve momentum to make it on top. Entrance condition: {
"comeInWithSpringBallBounce": {
"speedBooster": "no",
"movementType": "uncontrolled",
"remoteAndLandingMinTiles": [
[
1.5625,
1
]
]
}
}Requires: "canCrossRoomJumpIntoWater" "canTrickyJump" "canMomentumConservingMorph" |
From: 2
Right Door
To: 3
Elevator
This strat is included for completeness, though generally it would be easier to do a spring ball bounce instead. Entrance condition: {
"comeInWithSidePlatform": {
"platforms": [
{
"minHeight": 2,
"maxHeight": 2,
"minTiles": 45,
"speedBooster": "yes",
"obstructions": [
[
1,
0
]
],
"note": [
"This applies to Noob Bridge."
]
},
{
"minHeight": 2,
"maxHeight": 2,
"minTiles": 45,
"speedBooster": "yes",
"obstructions": [
[
3,
0
]
],
"note": [
"This applies to Statues Hallway and Baby Kraid Room."
]
},
{
"minHeight": 3,
"maxHeight": 3,
"minTiles": 45,
"speedBooster": "yes",
"obstructions": [
[
3,
0
]
],
"note": [
"This applies to Bowling Alley (middle, power off) and Basement (power on)."
]
},
{
"minHeight": 3,
"maxHeight": 3,
"minTiles": 39.4375,
"speedBooster": "yes",
"obstructions": [
[
3,
2
]
],
"note": [
"This applies to Metal Pirates Room."
]
}
]
}
}Requires: "HiJump" "canInsaneJump" "canMomentumConservingMorph" "canInsaneMidAirMorph" "canTrickySpringBallJump" |
From: 1
Left Door
To: 4
Junction Below Sand Entrance


Space Jump into the room relatively low through the doorway. Do a momentum-conserving morph to avoid bonking on the corner at the edge of the sandfall. The morph should happen relatively early, in order to avoid an Evir projectile hit. Jump into the room with extra run speed of at least $1.B At low speed, Samus may not make it onto the pillar and will not have time to unmorph until close to the sand; in this case, crouch jumping can be the safest way to escape. Entrance condition: {
"comeInSpaceJumping": {
"speedBooster": "no",
"minTiles": 5.4375
}
}Requires: "canPreciseSpaceJump" "canMomentumConservingMorph" "canTrickyDodgeEnemies" "canPlayInSand" Dev note: Lower speeds can also work (as low as $1.4), with damage from an Evir projectile. |
From: 1
Left Door
To: 4
Junction Below Sand Entrance
With Speed Booster equipped, Space Jump into the room relatively low through the doorway. Do a momentum-conserving morph on the ceiling. Jump into the room with extra run speed of at least $1.3. Entrance condition: {
"comeInSpaceJumping": {
"speedBooster": "yes",
"minTiles": 3.4375
}
}Requires: "canPreciseSpaceJump" "canMomentumConservingMorph" "canTrickyDodgeEnemies" |
|


Jump into a momentum-conserving morph with blue speed to break the bomb block and continue up to the top of the room. After pressing down to initiate the momentum-conserving morph, all inputs can be released; do not hold forward while the morph completes as it would give too much speed, causing Samus to bonk horizontally. Tapping (not holding) backward can sometimes help in dodging the platforms while ascending, by reversing Samus' horizontal momentum. Entrance condition: {
"comeInWithSidePlatform": {
"platforms": [
{
"minHeight": 1,
"maxHeight": 1,
"minTiles": 17,
"speedBooster": "yes",
"obstructions": [
[
1,
0
]
],
"requires": [
{
"getBlueSpeed": {
"usedTiles": 15,
"openEnd": 1
}
},
"h_blueJump"
],
"note": [
"Applies to Warehouse Entrance."
],
"detailNote": [
"Jump through the door with an extra run speed of at least $2.2."
]
},
{
"minHeight": 1,
"maxHeight": 1,
"minTiles": 27.4375,
"speedBooster": "yes",
"obstructions": [
[
1,
0
]
],
"requires": [
{
"getBlueSpeed": {
"usedTiles": 24,
"openEnd": 1
}
},
"h_blueJump"
],
"note": [
"Applies to Dust Torizo Room and Halfie Climb Room."
],
"detailNote": [
"Jump through the door with an extra run speed of $3.1 or less."
]
},
{
"minHeight": 2,
"maxHeight": 2,
"minTiles": 45,
"speedBooster": "yes",
"obstructions": [
[
2,
0
]
],
"requires": [
{
"getBlueSpeed": {
"usedTiles": 24,
"openEnd": 1
}
},
"h_blueJump",
"canInsaneMidAirMorph"
],
"note": [
"Applies to Waterway Energy Tank Room."
],
"detailNote": [
"Pause to unequip Gravity before the transition."
]
},
{
"minHeight": 3,
"maxHeight": 3,
"minTiles": 39.4375,
"speedBooster": "yes",
"obstructions": [
[
3,
2
]
],
"requires": [
{
"getBlueSpeed": {
"usedTiles": 24,
"openEnd": 1
}
},
"h_blueJump",
"canInsaneMidAirMorph"
],
"note": [
"Applies to Metal Pirates Room."
]
}
]
}
}Requires: "canCrossRoomJumpIntoWater" "canMomentumConservingMorph" "canInsaneJump" Clears obstacles: A |
|
Jump into a momentum-conserving morph with blue speed to break the bomb block and continue up to the top of the room. In most cases, after pressing down to initiate the momentum-conserving morph, all inputs can be released; holding forward as the morph completes would generally give too much speed, causing Samus to bonk horizontally. Tapping (not holding) backward can sometimes help in dodging the platforms while ascending, by reversing Samus' horizontal momentum. Entrance condition: {
"comeInWithSidePlatform": {
"platforms": [
{
"minHeight": 1,
"maxHeight": 1,
"minTiles": 16,
"speedBooster": "yes",
"obstructions": [
[
1,
0
]
],
"requires": [
{
"getBlueSpeed": {
"usedTiles": 14,
"openEnd": 0
}
},
"h_blueJump",
"canInsaneMidAirMorph",
"canBeExtremelyPatient"
],
"note": [
"Applies to Lava Dive Room."
],
"detailNote": [
"This can be done with extra run speed $2.0 or $2.1 by holding forward while morphing,",
"and releasing soon afterward, after a precise amount of time.",
"Alternatively it can be done extra run speed $2.3 or higher."
]
},
{
"minHeight": 2,
"maxHeight": 2,
"minTiles": 27.4375,
"speedBooster": "yes",
"obstructions": [
[
1,
0
]
],
"requires": [
{
"getBlueSpeed": {
"usedTiles": 24,
"openEnd": 1
}
},
"h_blueJump"
],
"note": [
"Applies to Dust Torizo Room and Noob Bridge."
],
"detailNote": [
"Jump through the door with an extra run speed of $3.1 or less."
]
},
{
"minHeight": 3,
"maxHeight": 3,
"minTiles": 28.2472,
"speedBooster": "yes",
"obstructions": [
[
1,
0
]
],
"requires": [
{
"getBlueSpeed": {
"usedTiles": 24,
"openEnd": 1
}
},
"h_blueJump"
],
"note": [
"Applies to Double Chamber."
]
},
{
"minHeight": 3,
"maxHeight": 3,
"minTiles": 39.4375,
"speedBooster": "yes",
"obstructions": [
[
3,
2
]
],
"requires": [
{
"getBlueSpeed": {
"usedTiles": 24,
"openEnd": 1
}
},
"h_blueJump",
"canInsaneMidAirMorph"
],
"note": [
"Applies to Metal Pirates Room."
]
}
]
}
}Requires: "canCrossRoomJumpIntoWater" "canMomentumConservingMorph" "canInsaneJump" Clears obstacles: A |
|


It is best to start 4 or 5 pixels from the end of the runway; equivalently, start at the end of the runway and use arm pumps to advance 4 or 5 pixels while running. Requires: "h_speedJump"
{
"or": [
"canMetroidAvoid",
"Ice",
{
"obstaclesCleared": [
"A"
]
}
]
}
{
"or": [
"canMomentumConservingMorph",
{
"and": [
"canMomentumConservingTurnaround",
"canInsaneJump"
]
}
]
}Exit condition: {
"leaveWithSidePlatform": {
"height": 2,
"runway": {
"length": 31,
"openEnd": 1
},
"obstruction": [
3,
0
]
}
}Dev note: Max extra run speed $5.7. |
|


Requires: "h_speedJump"
{
"or": [
"canMetroidAvoid",
{
"obstaclesCleared": [
"B"
]
}
]
}
{
"or": [
"canMomentumConservingMorph",
{
"and": [
"canMomentumConservingTurnaround",
"canInsaneJump"
]
}
]
}Exit condition: {
"leaveWithSidePlatform": {
"height": 2,
"runway": {
"length": 23,
"openEnd": 1
},
"obstruction": [
3,
0
]
}
}Dev note: Max extra run speed $4.7. Using almost the full runway (between 3 and 6 pixels from the edge), the momentum conserving turnaround has a 2-frame window for the jump, and a 1-frame or 3-frame window for the turnaround, depending on the jump (with a last-frame jump giving the larger window). |
|
Requires: "h_speedJump"
{
"or": [
"canMetroidAvoid",
{
"or": [
"f_KilledMetroidRoom2",
{
"obstaclesCleared": [
"f_KilledMetroidRoom2"
]
}
]
}
]
}
"canInsaneJump"
"canMomentumConservingMorph"Exit condition: {
"leaveWithSidePlatform": {
"height": 3,
"runway": {
"length": 11,
"openEnd": 0
},
"obstruction": [
3,
0
]
}
}Dev note: Max extra run speed $2.6 This strat is included for completeness, though it apparently doesn't have any applications. |
|


Requires: "canMomentumConservingMorph" "canInsaneJump" Exit condition: {
"leaveWithSidePlatform": {
"height": 2,
"runway": {
"length": 2,
"openEnd": 2
},
"obstruction": [
2,
2
]
}
}Dev note: Max extra run speed $1.1. This strat is included for completeness, though it apparently doesn't have any applications. |