canRiskPermanentLossOfAccess (Ignored)
The acceptance that changes to game state can result in a strat becoming impossible. If that strat needed to be executed before the game state change, the game becomes incompletable. And that the "mistake" may not become visible until much later.
Strats ()
From: 1
Left Door
To: 1
Left Door
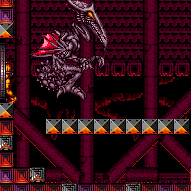
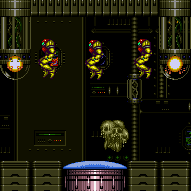
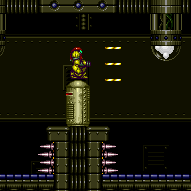
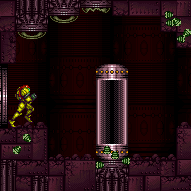
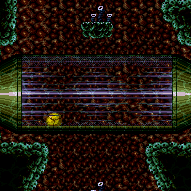
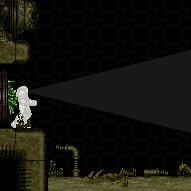
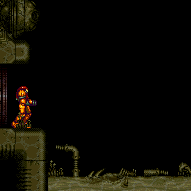
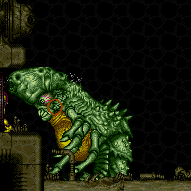
Activate Bomb Torizo, and farm his eggs for energy. They can be farmed freely. Waste all but 5 Missiles to prevent the laser attack. Standing in the correct position will ensure he will be trapped against the wall. Quickly use a jump to perform a very narrow shinecharge, then get interrupted by any Bomb Torizo attack. Entrance condition: {
"comeInWithRMode": {}
}Requires: {
"not": "f_DefeatedBombTorizo"
}
{
"not": "f_ZebesSetAblaze"
}
"canRiskPermanentLossOfAccess"
"h_activateBombTorizo"
"canUseIFrames"
{
"or": [
"canDodgeWhileShooting",
{
"resourceAtMost": [
{
"type": "Missile",
"count": 5
}
]
}
]
}
{
"refill": [
"Energy"
]
}
{
"canShineCharge": {
"usedTiles": 13,
"openEnd": 0
}
}
{
"autoReserveTrigger": {
"maxReserveEnergy": 95
}
}
"canRModeSparkInterrupt"Collects items: 2 Dev note: May need an alternative helper in place of h_activateBombTorizo, due to R-Mode entrance condition. |
|
Entrance condition: {
"comeInWithRMode": {}
}Requires: {
"not": "f_DefeatedBombTorizo"
}
{
"not": "f_ZebesSetAblaze"
}
"canRiskPermanentLossOfAccess"
"h_activateBombTorizo"
"canRModeCrystalFlashInterrupt"
{
"ammo": {
"type": "Missile",
"count": 10
}
}Dev note: FIXME: If h_activateBombTorizo is changed to require collecting the item in-room, this strat would need a collectsItems. Otherwise, it is possible to avoid picking up the item while doing this. FIXME: This could be done with G-mode, but not if h_activateBombTorizo is changed to require collecting the item in-room (unless somehow the item was collected earlier without killing BT). FIXME: It is possible to farm during the fight before Crystal Flashing, but it requires Samus to be low on Missiles and it is much more difficult to find a safe time to CF. |
|
Farm wall pirates while leaving one left. Lead it to the bottom of the shaft, get shine charge, then windup in front of it to get shot and interrupted. Entrance condition: {
"comeInWithRMode": {},
"comesThroughToilet": "no"
}Requires: {
"not": "f_ZebesSetAblaze"
}
"h_ZebesIsAwake"
{
"or": [
"h_CrystalFlashForReserveEnergy",
{
"and": [
"h_RModeCanRefillReserves",
{
"resourceMissingAtMost": [
{
"type": "Missile",
"count": 0
}
]
},
{
"partialRefill": {
"type": "ReserveEnergy",
"limit": 20
}
}
]
}
]
}
{
"or": [
{
"and": [
"h_destroyBombWalls",
{
"canShineCharge": {
"usedTiles": 28,
"openEnd": 0
}
}
]
},
{
"and": [
{
"doorUnlockedAtNode": 5
},
{
"canShineCharge": {
"usedTiles": 13,
"openEnd": 0
}
}
]
},
{
"canShineCharge": {
"usedTiles": 12,
"openEnd": 0
}
}
]
}
{
"autoReserveTrigger": {
"maxReserveEnergy": 95
}
}
"canRModeSparkInterrupt"Clears obstacles: A Unlocks doors: {"nodeId":5,"types":["ammo"],"requires":[]} |
|
Farm wall pirates while leaving one of the bottom ones alive. Lead it to the bottom of the shaft, shinecharge, then windup in front of it to get shot and interrupted. Entrance condition: {
"comeInWithRMode": {}
}Requires: "h_ClimbWithoutLava"
{
"or": [
"h_destroyBombWalls",
{
"getBlueSpeed": {
"usedTiles": 14,
"openEnd": 0
}
},
{
"and": [
{
"getBlueSpeed": {
"usedTiles": 15,
"openEnd": 0
}
},
{
"doorUnlockedAtNode": 2
}
]
}
]
}
{
"not": "f_ZebesSetAblaze"
}
"h_ZebesIsAwake"
{
"or": [
"h_CrystalFlashForReserveEnergy",
{
"and": [
"h_RModeCanRefillReserves",
{
"resourceMissingAtMost": [
{
"type": "Missile",
"count": 0
}
]
},
{
"partialRefill": {
"type": "ReserveEnergy",
"limit": 20
}
}
]
}
]
}
{
"canShineCharge": {
"usedTiles": 28,
"openEnd": 0
}
}
{
"autoReserveTrigger": {
"maxReserveEnergy": 95
}
}
"canRModeSparkInterrupt"Clears obstacles: A, B Unlocks doors: {"nodeId":2,"types":["ammo"],"requires":[]}
{"nodeId":5,"types":["ammo"],"requires":[]}Dev note: This door triggers the rising lava, which will prevent gaining a shinecharge. |
|
Farm wall pirates while leaving one left. Lead it to the bottom of the shaft, get shine charge, then windup in front of it to get shot and interrupted. Entrance condition: {
"comeInWithRMode": {}
}Requires: {
"not": "f_ZebesSetAblaze"
}
"h_ZebesIsAwake"
"h_bombThings"
{
"or": [
"h_CrystalFlashForReserveEnergy",
{
"and": [
"h_RModeCanRefillReserves",
{
"resourceMissingAtMost": [
{
"type": "Missile",
"count": 0
}
]
},
{
"partialRefill": {
"type": "ReserveEnergy",
"limit": 20
}
}
]
}
]
}
{
"or": [
{
"and": [
"h_destroyBombWalls",
{
"canShineCharge": {
"usedTiles": 28,
"openEnd": 0
}
}
]
},
{
"and": [
{
"doorUnlockedAtNode": 5
},
{
"canShineCharge": {
"usedTiles": 13,
"openEnd": 0
}
}
]
},
{
"canShineCharge": {
"usedTiles": 12,
"openEnd": 0
}
}
]
}
{
"autoReserveTrigger": {
"maxReserveEnergy": 95
}
}
"canRModeSparkInterrupt"Clears obstacles: A Unlocks doors: {"nodeId":5,"types":["ammo"],"requires":[]} |
|
Overload PLMs using the scroll block at the top of the stairs next to the bomb blocks. If Morph is not available, careful movement is needed with SpringBall to reach the top without taking a hit from a pirate or its stationary, invisible lasers. Entrance condition: {
"comeInWithGMode": {
"mode": "any",
"morphed": true
}
}Requires: {
"or": [
"h_artificialMorphSpringBall",
"h_artificialMorphBombs",
"h_fourTileJumpMorph"
]
}
{
"or": [
"Morph",
"h_ZebesNotAwake",
{
"and": [
"h_artificialMorphSpringBall",
{
"or": [
"HiJump",
"canTrickyDodgeEnemies"
]
}
]
}
]
} |
|
Farm wall pirates while leaving one left. Lead it to the bottom of the shaft, get shine charge, then windup in front of it to get shot and interrupted. Entrance condition: {
"comeInWithRMode": {}
}Requires: {
"not": "f_ZebesSetAblaze"
}
"h_bombThings"
"h_ZebesIsAwake"
{
"or": [
"h_CrystalFlashForReserveEnergy",
{
"and": [
"h_RModeCanRefillReserves",
{
"resourceMissingAtMost": [
{
"type": "Missile",
"count": 0
}
]
},
{
"partialRefill": {
"type": "ReserveEnergy",
"limit": 20
}
}
]
}
]
}
{
"or": [
{
"and": [
"h_destroyBombWalls",
{
"canShineCharge": {
"usedTiles": 28,
"openEnd": 0
}
}
]
},
{
"and": [
{
"doorUnlockedAtNode": 5
},
{
"canShineCharge": {
"usedTiles": 13,
"openEnd": 0
}
}
]
},
{
"canShineCharge": {
"usedTiles": 12,
"openEnd": 0
}
}
]
}
{
"autoReserveTrigger": {
"maxReserveEnergy": 95
}
}
"canRModeSparkInterrupt"Clears obstacles: A Unlocks doors: {"nodeId":5,"types":["ammo"],"requires":[]} |
|
Overload PLMs using the scroll block next to any of the bomb blocks in the room, allowing passage through the bomb blocks at the top by making them become air. If Morph is not available, careful movement is needed with SpringBall to reach the top without taking a hit from the pirates or their stationary, invisible lasers. Entrance condition: {
"comeInWithGMode": {
"mode": "any",
"morphed": true
}
}Requires: {
"or": [
"Morph",
{
"and": [
"h_artificialMorphSpringBall",
{
"or": [
"HiJump",
"canTrickyDodgeEnemies"
]
}
]
},
{
"and": [
"h_ZebesNotAwake",
"h_artificialMorphMovement"
]
}
]
} |
|
Overload PLMs using the scroll block next to the bottom right bomb blocks, allowing passage through them by making them become air. If Morph is unavailable, then careful movement will be required to get past the Pirates without taking a hit from them or their stationary, invisible lasers. If using a PB to kill the pirates, overload the PLMs at the bottom. If the top bomb block is hit with a PB before PLMs are overloaded, they will remain solid. Entrance condition: {
"comeInWithGMode": {
"mode": "any",
"morphed": true
}
}Requires: {
"or": [
"Morph",
{
"and": [
"h_artificialMorphSpringBall",
{
"or": [
"HiJump",
"canTrickyDodgeEnemies"
]
}
]
},
{
"and": [
"h_artificialMorphIBJ",
"canTrickyGMode"
]
},
{
"and": [
"h_artificialMorphMovement",
"h_artificialMorphPowerBomb"
]
},
{
"and": [
"h_ZebesNotAwake",
"h_artificialMorphMovement"
]
}
]
} |
|
Farm wall pirates while leaving one left. Lead it to the bottom of the shaft, get shine charge, then windup in front of it to get shot and interrupted. Entrance condition: {
"comeInWithRMode": {}
}Requires: {
"not": "f_ZebesSetAblaze"
}
"h_ZebesIsAwake"
{
"or": [
"h_CrystalFlashForReserveEnergy",
{
"and": [
"h_RModeCanRefillReserves",
{
"resourceMissingAtMost": [
{
"type": "Missile",
"count": 0
}
]
},
{
"partialRefill": {
"type": "ReserveEnergy",
"limit": 20
}
}
]
}
]
}
{
"or": [
{
"and": [
"h_destroyBombWalls",
{
"canShineCharge": {
"usedTiles": 28,
"openEnd": 0
}
}
]
},
{
"and": [
{
"doorUnlockedAtNode": 5
},
{
"canShineCharge": {
"usedTiles": 13,
"openEnd": 0
}
}
]
},
{
"canShineCharge": {
"usedTiles": 12,
"openEnd": 0
}
}
]
}
{
"autoReserveTrigger": {
"maxReserveEnergy": 95
}
}
"canRModeSparkInterrupt"Clears obstacles: A Unlocks doors: {"nodeId":5,"types":["ammo"],"requires":[]} |
From: 1
Top Left Door
To: 5
Bottom Junction (Right of Boyons)
Roll through the item to overload PLMs, then go down through the speed blocks and exit G-mode to collect the item. Note that if the item has already been collected, Samus can overload PLMs with Grapple. With Morph and Grapple, quickly grapple to then release grapple on the grapple blocks a few times until they stop working. Be careful not to fall into the spikes. Entrance condition: {
"comeInWithGMode": {
"mode": "direct",
"morphed": true
}
}Requires: "canRemoteAcquire"
{
"or": [
{
"and": [
{
"itemNotCollectedAtNode": 3
},
"canRiskPermanentLossOfAccess"
]
},
{
"and": [
"Morph",
"Grapple",
{
"or": [
"canTrickyJump",
{
"spikeHits": 1
}
]
}
]
}
]
}
{
"or": [
{
"and": [
"h_artificialMorphSpringBall",
{
"spikeHits": 4
}
]
},
{
"and": [
"h_artificialMorphSpringBall",
"h_artificialMorphBombHorizontally",
{
"spikeHits": 3
}
]
},
{
"and": [
"h_artificialMorphSpringFling",
"canTrickyJump",
{
"spikeHits": 2
}
]
},
{
"and": [
"Morph",
{
"or": [
"SpaceJump",
{
"and": [
{
"spikeHits": 1
},
{
"or": [
"canUseIFrames",
{
"spikeHits": 1
}
]
}
]
}
]
}
]
}
]
}Collects items: 3 Dev note: FIXME: It is possible to cross with spike hits, but it would require a CF and reserve trigger below. |
From: 1
Top Left Door
To: 5
Bottom Junction (Right of Boyons)
Place the PBs exactly two tiles left of the Morph tunnel. Be sure not to touch the item if this strat will be needed again in the future. It is possible to cross the spike pit with spring flings and two spike hits. Pause then jump just before the fade out ends and turn Spring Ball off in order to get more horizontal distance at the start and avoid one spike hit. Turn Spring Ball off and on again while jumping on the spikes to get across to avoid another. Entrance condition: {
"comeInWithGMode": {
"mode": "direct",
"morphed": true
}
}Requires: "canPowerBombItemOverloadPLMs"
{
"itemNotCollectedAtNode": 3
}
"canRiskPermanentLossOfAccess"
"h_artificialMorphPowerBomb"
"h_artificialMorphPowerBomb"
{
"or": [
{
"and": [
"h_artificialMorphSpringBall",
{
"spikeHits": 4
}
]
},
{
"and": [
"h_artificialMorphSpringBall",
"h_artificialMorphBombHorizontally",
{
"spikeHits": 3
}
]
},
{
"and": [
"h_artificialMorphSpringFling",
"canTrickyJump",
{
"spikeHits": 2
}
]
},
{
"and": [
"Morph",
{
"or": [
"SpaceJump",
{
"and": [
{
"spikeHits": 1
},
{
"or": [
"canUseIFrames",
{
"spikeHits": 1
}
]
}
]
}
]
}
]
}
]
} |
|
Kill all three Boyons for energy, or Crystal Flash. If you need to freeze Boyons for extra runway, disable Ice Beam to force them to unfreeze so you can interrupt spark. If you end up killing all four Boyons, you can also dip in the acid for the spark interrupt. Entrance condition: {
"comeInWithRMode": {}
}Requires: {
"or": [
"h_CrystalFlashForReserveEnergy",
{
"and": [
"h_RModeCanRefillReserves",
{
"resourceMissingAtMost": [
{
"type": "Missile",
"count": 0
}
]
},
{
"enemyKill": {
"enemies": [
[
"Boyon",
"Boyon",
"Boyon"
]
],
"excludedWeapons": [
"PseudoScrew"
]
}
},
{
"or": [
{
"and": [
"canBeLucky",
{
"partialRefill": {
"type": "ReserveEnergy",
"limit": 5
}
}
]
},
{
"and": [
"canBeVeryLucky",
{
"partialRefill": {
"type": "ReserveEnergy",
"limit": 20
}
}
]
}
]
}
]
}
]
}
{
"or": [
{
"canShineCharge": {
"usedTiles": 25,
"openEnd": 0
}
},
{
"and": [
"canTrivialUseFrozenEnemies",
{
"canShineCharge": {
"usedTiles": 31,
"openEnd": 0
}
},
{
"disableEquipment": "Ice"
}
]
}
]
}
{
"autoReserveTrigger": {}
}
"canRModeSparkInterrupt"Clears obstacles: A |
|
Wall jump up 5 times, placing a Power Bomb precisely in the top right corner to overload PLMs with as few Power Bombs as possible. This only works in direct G-mode with the item still uncollected. Entrance condition: {
"comeInWithGMode": {
"mode": "direct",
"morphed": false
}
}Requires: "canPowerBombItemOverloadPLMs"
{
"notable": "G-Mode Up with Power Bombs"
}
{
"itemNotCollectedAtNode": 3
}
"canConsecutiveWallJump"
"Morph"
{
"or": [
"canRiskPermanentLossOfAccess",
{
"and": [
"canComplexGMode",
"canLongXRayClimb",
"canBeVeryPatient"
]
}
]
}
{
"ammo": {
"type": "PowerBomb",
"count": 5
}
}
"canBePatient"
{
"or": [
"Ice",
"canTrickyDodgeEnemies",
"ScrewAttack",
{
"and": [
"h_getBlueSpeedMaxRunway",
"h_blueJump"
]
},
{
"enemyKill": {
"enemies": [
[
"Boyon",
"Boyon",
"Boyon",
"Boyon"
]
],
"excludedWeapons": [
"Bombs"
]
}
},
{
"enemyDamage": {
"enemy": "Boyon",
"type": "contact",
"hits": 1
}
},
{
"and": [
"canBeVeryPatient",
"h_useMorphBombs"
]
}
]
}Dev note: Using this strat doesn't have canRiskPermanentLossOfAccess if the player could x-ray climb instead: this requires direct G-mode and Samus can freely doorstuck here, and there is no benefit to going to the item instead of the top left door, unless the item is there. FIXME: Placing the Power Bombs lower, on the magic tile, could overload PLMs with fewer, likely with as low as 2 Power Bombs. |
|
There are many mellows for farming. Leave one alive to spark interrupt. If entry energy is poor, damage down to 29 energy before farming to activate health bias, then quickly kill many Mellows with Plasma Beam or Power Bombs before collecting their drops. Entrance condition: {
"comeInWithRMode": {}
}Requires: {
"not": "f_ZebesSetAblaze"
}
{
"or": [
"h_CrystalFlashForReserveEnergy",
{
"and": [
{
"resourceMissingAtMost": [
{
"type": "Missile",
"count": 0
}
]
},
{
"or": [
{
"and": [
{
"resourceAvailable": [
{
"type": "RegularEnergy",
"count": 19
}
]
},
{
"disableEquipment": "ETank"
},
{
"partialRefill": {
"type": "ReserveEnergy",
"limit": 100
}
}
]
},
{
"and": [
{
"resourceMissingAtMost": [
{
"type": "RegularEnergy",
"count": 0
}
]
},
"canRiskPermanentLossOfAccess",
{
"partialRefill": {
"type": "ReserveEnergy",
"limit": 100
}
}
]
}
]
}
]
}
]
}
{
"canShineCharge": {
"usedTiles": 37,
"openEnd": 0
}
}
{
"autoReserveTrigger": {}
}
"canRModeSparkInterrupt"Dev note: FIXME: Other weapon options for fast Mellow farming while abusing healthbomb state. Needs to be fast to not risk drops timing out. |
|
There are many mellows for farming. Leave one alive to spark interrupt. If entry energy is poor, damage down to 29 energy before farming to activate health bias, then quickly kill many Mellows with Plasma Beam or Power Bombs before collecting their drops. Entrance condition: {
"comeInWithRMode": {}
}Requires: {
"not": "f_ZebesSetAblaze"
}
{
"or": [
"h_CrystalFlashForReserveEnergy",
{
"and": [
{
"resourceMissingAtMost": [
{
"type": "Missile",
"count": 0
}
]
},
{
"or": [
{
"and": [
{
"resourceAvailable": [
{
"type": "RegularEnergy",
"count": 99
}
]
},
{
"disableEquipment": "ETank"
},
{
"partialRefill": {
"type": "ReserveEnergy",
"limit": 100
}
}
]
},
{
"and": [
{
"resourceAvailable": [
{
"type": "RegularEnergy",
"count": 19
}
]
},
{
"or": [
"Plasma",
"h_usePowerBomb"
]
},
{
"disableEquipment": "ETank"
},
{
"partialRefill": {
"type": "ReserveEnergy",
"limit": 100
}
}
]
},
{
"and": [
{
"resourceMissingAtMost": [
{
"type": "RegularEnergy",
"count": 0
}
]
},
"canRiskPermanentLossOfAccess",
{
"partialRefill": {
"type": "ReserveEnergy",
"limit": 100
}
}
]
}
]
}
]
}
]
}
{
"canShineCharge": {
"usedTiles": 37,
"openEnd": 0
}
}
{
"autoReserveTrigger": {}
}
"canRModeSparkInterrupt"Dev note: FIXME: Other weapon options for fast Mellow farming while abusing healthbomb state. Needs to be fast to not risk drops timing out. |
From: 1
Top Left Door
To: 8
Central Junction
There are scroll PLMs one tile to the left of the bomb blocks which can be used to overload PLMs. The bomb blocks then become air and can be passed through. After doing so, use X-Ray until the beam fully widens to exit G-Mode and remain in R-Mode. Kill the Skree while in health-bomb range, then the Geemers until Samus has Reserve Energy. Shinecharge and interrupt on a remaining Geemer or the Ripper on the left. Entrance condition: {
"comeInWithGMode": {
"mode": "direct",
"morphed": false
}
}Requires: "h_ZebesIsAwake"
{
"not": "f_ZebesSetAblaze"
}
{
"or": [
"canRiskPermanentLossOfAccess",
{
"disableEquipment": "ETank"
}
]
}
{
"partialRefill": {
"type": "ReserveEnergy",
"limit": 20
}
}
{
"canShineCharge": {
"usedTiles": 25,
"steepUpTiles": 3,
"steepDownTiles": 3,
"openEnd": 0
}
}
{
"autoReserveTrigger": {}
}
"canRModeSparkInterrupt" |
|
There are scroll PLMs one tile to the right of the bomb blocks which can be used to overload PLMs, turning the bomb blocks to air. However, if Zebes is awake, two Geemers block the way. The Geemer hits can be avoided with Bombs or Spring Ball. Alternatively, use a Power Bombs, to kill the Geemers and another to boost over to the left Alcatraz entrance, as the Power Bomb blast will render the bomb blocks solid, unable to be turned to air. This is possible but tricky to do with a single Power Bomb: In direct G-mode, use Samus' i-frames to roll through the first Geemer and horizontally bomb boost onto the ledge. In indirect G-mode, roll immediately and place the Power Bomb just after the first downward slope to jump over both Geemers. Entrance condition: {
"comeInWithGMode": {
"mode": "any",
"morphed": true
}
}Requires: {
"or": [
"h_artificialMorphMovement",
{
"and": [
"h_artificialMorphPowerBomb",
{
"or": [
"h_additionalBomb",
"canTrickyGMode"
]
}
]
},
{
"enemyDamage": {
"enemy": "Geemer (blue)",
"type": "contact",
"hits": 1
}
},
"h_ZebesNotAwake"
]
} |
From: 5
Alcatraz Door
To: 1
Top Left Door
There are scroll PLMs next to the bomb blocks and on the ledge below the Alcatraz exit, which will overload PLMs when going through them. Samus will need to briefly navigate off-screen while to the right of Alcatraz before coming back left. Note that the global Geemer may still be in this area if traversing the room quickly, and can hit Samus off-screen. Entrance condition: {
"comeInWithGMode": {
"mode": "any",
"morphed": true
}
}Requires: "h_artificialMorphMovement"
{
"or": [
"canTrickyDodgeEnemies",
"canOffScreenMovement",
{
"and": [
"h_artificialMorphSpringBall",
{
"haveBlueSuit": {}
}
]
},
{
"enemyDamage": {
"enemy": "Geemer (blue)",
"type": "contact",
"hits": 1
}
},
"h_ZebesNotAwake"
]
} |
From: 5
Alcatraz Door
To: 8
Central Junction
There are scroll PLMs next to the bomb blocks and on the ledge below the Alcatraz exit, which will overload PLMs when going through them. Samus will need to briefly navigate off-screen while to the right of Alcatraz before coming back left. With a fast ascent, the global Geemers may still be in the top right section and can hit Samus off-screen. Use X-Ray until the beam reaches full width to exit G-mode and remain in R-mode. Kill the Skree while in health-bomb range, then the Geemers until Samus has Reserve Energy. Shinecharge and interrupt on a Geemer or the Ripper on the left. With unlucky drops, it is possible to not get Reserve Energy. It is possible to farm the top right off-screen Geemer to help reduce the chance. With Morph, partially enter the Alcatraz morph tunnel in order to fix the camera. Without Morph, kill the Geemer with a Power Bomb once in this section after overloading PLMs and before unmorphing and exiting G-mode. Entrance condition: {
"comeInWithGMode": {
"mode": "direct",
"morphed": true
}
}Requires: "h_ZebesIsAwake"
{
"not": "f_ZebesSetAblaze"
}
"h_artificialMorphMovement"
{
"or": [
{
"and": [
{
"or": [
"canRiskPermanentLossOfAccess",
{
"disableEquipment": "ETank"
}
]
},
{
"or": [
{
"partialRefill": {
"type": "ReserveEnergy",
"limit": 5
}
},
{
"and": [
{
"or": [
"Morph",
"canBeLucky",
"h_artificialMorphPowerBomb"
]
},
{
"partialRefill": {
"type": "ReserveEnergy",
"limit": 20
}
}
]
}
]
}
]
},
{
"and": [
"canRiskPermanentLossOfAccess",
{
"resourceMissingAtMost": [
{
"type": "RegularEnergy",
"count": 5
}
]
},
{
"partialRefill": {
"type": "ReserveEnergy",
"limit": 50
}
}
]
},
{
"and": [
{
"disableEquipment": "ETank"
},
{
"resourceAvailable": [
{
"type": "RegularEnergy",
"count": 94
}
]
},
{
"partialRefill": {
"type": "ReserveEnergy",
"limit": 50
}
}
]
}
]
}
{
"canShineCharge": {
"usedTiles": 25,
"steepUpTiles": 3,
"steepDownTiles": 3,
"openEnd": 0
}
}
{
"autoReserveTrigger": {}
}
"canRModeSparkInterrupt" |
From: 5
Alcatraz Door
To: 8
Central Junction
There are scroll PLMs next to the bomb blocks and on the ledge below the Alcatraz exit, which will overload PLMs when going through them. Samus will need to briefly navigate off-screen while to the right of Alcatraz before coming back left. Note that the global Geemer may still be in this area if traversing the room quickly, and can hit Samus off-screen. Entrance condition: {
"comeInWithGMode": {
"mode": "any",
"morphed": true
}
}Requires: "h_artificialMorphMovement"
{
"or": [
"canTrickyDodgeEnemies",
"canOffScreenMovement",
{
"and": [
"h_artificialMorphSpringBall",
{
"haveBlueSuit": {}
}
]
},
{
"enemyDamage": {
"enemy": "Geemer (blue)",
"type": "contact",
"hits": 1
}
},
"h_ZebesNotAwake"
]
} |
From: 8
Central Junction
To: 8
Central Junction
Farm Geemers and Skree for energy or else Crystal Flash. The bomb wall respawns so Crystal Flash can't be used to clear it. Shinecharge and get interrupted by the Ripper by the save room door, or leave a Geemer alive. Requires: "h_ZebesIsAwake"
{
"not": "f_ZebesSetAblaze"
}
{
"obstaclesCleared": [
"R-Mode"
]
}
{
"or": [
"h_CrystalFlashForReserveEnergy",
{
"and": [
"h_RModeCanRefillReserves",
{
"resourceMissingAtMost": [
{
"type": "Missile",
"count": 0
}
]
},
{
"partialRefill": {
"type": "ReserveEnergy",
"limit": 100
}
}
]
}
]
}
{
"canShineCharge": {
"usedTiles": 25,
"steepUpTiles": 3,
"steepDownTiles": 3,
"openEnd": 0
}
}
{
"autoReserveTrigger": {}
}
"canRModeSparkInterrupt"Resets obstacles: R-Mode |
From: 2
Right Door
To: 1
Left Door
Roll through the item to overload PLMs then quickly fall into the morph tunnel, unmorph at the correct spot and jump out before the acid touches Samus. With a careful, blind, Space Jump with Screw Attack, move through the bomb walls while avoiding the spikes. Entrance condition: {
"comeInWithGMode": {
"mode": "direct",
"morphed": true
}
}Requires: "canComplexGMode"
"canRemoteAcquire"
{
"itemNotCollectedAtNode": 3
}
"canRiskPermanentLossOfAccess"
"h_artificialMorphMovement"
"canInsaneJump"
"canOffScreenMovement"
"SpaceJump"
"ScrewAttack"Exit condition: {
"leaveNormally": {}
}Collects items: 3 Unlocks doors: {"types":["ammo"],"requires":[]}Dev note: This strat leaves the room, as it would be unreasonable and may not be possible to do anything at 1 with the broken camera movement. With a blue suit, there is no need to overload PLMs, so the camera will not be broken and the requirements could be relaxed; but it is covered by a 2->4 strat. |
From: 2
Right Door
To: 4
Middle Junction (Left of Morph Tunnel)
Roll through the item to overload PLMs then fall into the morph tunnel, unmorph at the correct spot and quickly jump out before the acid touches Samus. Exit G-mode and roll back into the tunnel to fix the camera and return avoiding the acid again. Entrance condition: {
"comeInWithGMode": {
"mode": "direct",
"morphed": true
}
}Requires: "canComplexGMode"
"canRemoteAcquire"
{
"itemNotCollectedAtNode": 3
}
"canRiskPermanentLossOfAccess"
"Morph"
"canInsaneJump"
"canOffScreenMovement"Collects items: 3 Dev note: Acid damage wasn't considered, as Samus needs to be in direct G-mode FIXME: This could be done with a CF after overloading PLMs with the item. |
|
Clear the bomb barriers and farm two Wavers. The two side wavers are local and easier to position for the R-Mode Spark Interrupt. It can help to pause abuse in the acid either to damage down or as part of the R-Mode Spark Interrupt. If grabbed by a Yapping Maw during a Shinespark, keep at least any button held to prevent a crash. Entrance condition: {
"comeInWithRMode": {}
}Requires: "canTrickyJump"
"canDodgeWhileShooting"
{
"or": [
"ScrewAttack",
"h_useMorphBombs",
{
"and": [
"Morph",
{
"or": [
{
"ammo": {
"type": "PowerBomb",
"count": 3
}
},
{
"and": [
"h_CrystalFlashForReserveEnergy",
{
"ammo": {
"type": "PowerBomb",
"count": 2
}
}
]
}
]
}
]
}
]
}
{
"or": [
{
"resourceAvailable": [
{
"type": "ReserveEnergy",
"count": 1
}
]
},
{
"and": [
"h_RModeCanRefillReserves",
{
"resourceMissingAtMost": [
{
"type": "Missile",
"count": 0
}
]
},
{
"resourceMissingAtMost": [
{
"type": "Super",
"count": 0
}
]
},
{
"partialRefill": {
"type": "ReserveEnergy",
"limit": 20
}
}
]
}
]
}
{
"or": [
{
"canShineCharge": {
"usedTiles": 18,
"steepUpTiles": 2,
"steepDownTiles": 1,
"openEnd": 1
}
},
{
"and": [
{
"or": [
"canUseFrozenEnemies",
{
"ammo": {
"type": "Super",
"count": 1
}
}
]
},
{
"canShineCharge": {
"usedTiles": 21,
"steepUpTiles": 2,
"steepDownTiles": 2,
"startingSteepDownTiles": 1,
"openEnd": 0
}
}
]
}
]
}
{
"autoReserveTrigger": {
"maxReserveEnergy": 95
}
}
{
"or": [
{
"and": [
"canInsaneJump",
"canRModeSparkInterrupt"
]
},
"canRModePauseAbuseSparkInterrupt"
]
}Clears obstacles: A |
|
Farm four of the pirates for drops. If you have full power bombs and can do so without using one you can also kill two Beetoms for guaranteed two small energy drops. Keep the bottom pirate alive: stun it with a Power Beam shot or i-frame past it. Once you have the reserves, perform a 1-screen shortcharge between the bottom doors, then hop back up to the bottom pirate's ledge and get shot at. Entrance condition: {
"comeInWithRMode": {}
}Requires: "Morph"
"canUseIFrames"
{
"or": [
"h_CrystalFlashForReserveEnergy",
{
"and": [
"h_RModeCanRefillReserves",
{
"or": [
{
"and": [
{
"enemyKill": {
"enemies": [
[
"Green Space Pirate (standing)",
"Green Space Pirate (standing)"
],
[
"Green Space Pirate (standing)",
"Green Space Pirate (standing)"
]
],
"excludedWeapons": [
"Missile"
]
}
},
{
"resourceMissingAtMost": [
{
"type": "Missile",
"count": 0
}
]
},
{
"partialRefill": {
"type": "ReserveEnergy",
"limit": 20
}
}
]
},
{
"and": [
{
"enemyKill": {
"enemies": [
[
"Beetom",
"Beetom"
]
],
"excludedWeapons": [
"PowerBomb"
]
}
},
{
"resourceMissingAtMost": [
{
"type": "PowerBomb",
"count": 0
}
]
},
{
"partialRefill": {
"type": "ReserveEnergy",
"limit": 10
}
}
]
}
]
}
]
}
]
}
{
"or": [
{
"canShineCharge": {
"usedTiles": 12,
"openEnd": 0
}
},
{
"and": [
{
"or": [
{
"doorUnlockedAtNode": 3
},
{
"doorUnlockedAtNode": 4
}
]
},
{
"canShineCharge": {
"usedTiles": 13,
"openEnd": 0
}
}
]
},
{
"and": [
{
"doorUnlockedAtNode": 3
},
{
"doorUnlockedAtNode": 4
},
{
"canShineCharge": {
"usedTiles": 14,
"openEnd": 0
}
}
]
}
]
}
{
"autoReserveTrigger": {
"maxReserveEnergy": 95
}
}
"canRModeSparkInterrupt"Unlocks doors: {"nodeId":3,"types":["ammo"],"requires":[]}
{"nodeId":4,"types":["ammo"],"requires":[]} |
From: 2
Middle Right Door
To: 4
Bottom Right Door
Farm four of the pirates for drops, leaving the bottom pirate alive. Stun it with a Power Beam shot or i-frame past it. Perform a 1-screen shortcharge between the bottom doors, then hop back up to the bottom pirate's ledge and get shot at. Entrance condition: {
"comeInWithRMode": {}
}Requires: "canUseIFrames"
{
"or": [
"h_CrystalFlashForReserveEnergy",
{
"and": [
"h_RModeCanRefillReserves",
{
"enemyKill": {
"enemies": [
[
"Green Space Pirate (standing)",
"Green Space Pirate (standing)"
],
[
"Green Space Pirate (standing)",
"Green Space Pirate (standing)"
]
],
"excludedWeapons": [
"Missile"
]
}
},
{
"resourceMissingAtMost": [
{
"type": "Missile",
"count": 0
}
]
},
{
"partialRefill": {
"type": "ReserveEnergy",
"limit": 20
}
}
]
}
]
}
{
"or": [
{
"canShineCharge": {
"usedTiles": 12,
"openEnd": 0
}
},
{
"and": [
{
"or": [
{
"doorUnlockedAtNode": 3
},
{
"doorUnlockedAtNode": 4
}
]
},
{
"canShineCharge": {
"usedTiles": 13,
"openEnd": 0
}
}
]
},
{
"and": [
{
"doorUnlockedAtNode": 3
},
{
"doorUnlockedAtNode": 4
},
{
"canShineCharge": {
"usedTiles": 14,
"openEnd": 0
}
}
]
}
]
}
{
"autoReserveTrigger": {
"maxReserveEnergy": 95
}
}
"canRModeSparkInterrupt"Unlocks doors: {"nodeId":3,"types":["ammo"],"requires":[]}
{"nodeId":4,"types":["ammo"],"requires":[]} |
From: 3
Bottom Left Door
To: 4
Bottom Right Door
Stun the bottom pirate with a Power Beam shot, or i-frame past it. Farm the four pirates above for drops, then get back through the bottom pirate. Stun it with a Power Beam shot or i-frame past it a second time. Perform a 1-screen shortcharge between the bottom doors, then hop back up to the bottom pirate's ledge and get shot at. Entrance condition: {
"comeInWithRMode": {}
}Requires: "canUseIFrames"
{
"or": [
"h_CrystalFlashForReserveEnergy",
{
"and": [
{
"enemyDamage": {
"enemy": "Green Space Pirate (standing)",
"type": "contact",
"hits": 1
}
},
"h_RModeCanRefillReserves",
{
"enemyKill": {
"enemies": [
[
"Green Space Pirate (standing)",
"Green Space Pirate (standing)"
],
[
"Green Space Pirate (standing)",
"Green Space Pirate (standing)"
]
],
"excludedWeapons": [
"Missile"
]
}
},
{
"resourceMissingAtMost": [
{
"type": "Missile",
"count": 0
}
]
},
{
"partialRefill": {
"type": "ReserveEnergy",
"limit": 20
}
}
]
}
]
}
{
"or": [
{
"canShineCharge": {
"usedTiles": 12,
"openEnd": 0
}
},
{
"and": [
{
"or": [
{
"doorUnlockedAtNode": 3
},
{
"doorUnlockedAtNode": 4
}
]
},
{
"canShineCharge": {
"usedTiles": 13,
"openEnd": 0
}
}
]
},
{
"and": [
{
"doorUnlockedAtNode": 3
},
{
"doorUnlockedAtNode": 4
},
{
"canShineCharge": {
"usedTiles": 14,
"openEnd": 0
}
}
]
}
]
}
{
"autoReserveTrigger": {
"maxReserveEnergy": 95
}
}
"canRModeSparkInterrupt"Unlocks doors: {"nodeId":3,"types":["ammo"],"requires":[]}
{"nodeId":4,"types":["ammo"],"requires":[]} |
From: 4
Bottom Right Door
To: 4
Bottom Right Door
Stun the bottom pirate with a Power Beam shot, or i-frame past it. Farm the four pirates above for drops, then get back through the bottom pirate. Stun it with a Power Beam shot or i-frame past it a second time. Perform a 1-screen shortcharge between the bottom doors, then hop back up to the bottom pirate's ledge and get shot at. Entrance condition: {
"comeInWithRMode": {}
}Requires: "canUseIFrames"
{
"or": [
"h_CrystalFlashForReserveEnergy",
{
"and": [
{
"enemyDamage": {
"enemy": "Green Space Pirate (standing)",
"type": "contact",
"hits": 1
}
},
"h_RModeCanRefillReserves",
{
"enemyKill": {
"enemies": [
[
"Green Space Pirate (standing)",
"Green Space Pirate (standing)"
],
[
"Green Space Pirate (standing)",
"Green Space Pirate (standing)"
]
],
"excludedWeapons": [
"Missile"
]
}
},
{
"resourceMissingAtMost": [
{
"type": "Missile",
"count": 0
}
]
},
{
"partialRefill": {
"type": "ReserveEnergy",
"limit": 20
}
}
]
}
]
}
{
"or": [
{
"canShineCharge": {
"usedTiles": 12,
"openEnd": 0
}
},
{
"and": [
{
"or": [
{
"doorUnlockedAtNode": 3
},
{
"doorUnlockedAtNode": 4
}
]
},
{
"canShineCharge": {
"usedTiles": 13,
"openEnd": 0
}
}
]
},
{
"and": [
{
"doorUnlockedAtNode": 3
},
{
"doorUnlockedAtNode": 4
},
{
"canShineCharge": {
"usedTiles": 14,
"openEnd": 0
}
}
]
}
]
}
{
"autoReserveTrigger": {
"maxReserveEnergy": 95
}
}
"canRModeSparkInterrupt"Unlocks doors: {"nodeId":3,"types":["ammo"],"requires":[]}
{"nodeId":4,"types":["ammo"],"requires":[]} |
|
The Kagos can provide a lot of energy. Run across the room and then jump into the Gray Geemer's path to interrupt. Entrance condition: {
"comeInWithRMode": {}
}Requires: {
"or": [
"h_CrystalFlashForReserveEnergy",
{
"and": [
{
"or": [
{
"and": [
{
"resourceAvailable": [
{
"type": "RegularEnergy",
"count": 4
}
]
},
{
"disableEquipment": "ETank"
},
{
"partialRefill": {
"type": "ReserveEnergy",
"limit": 200
}
}
]
},
{
"and": [
{
"resourceMissingAtMost": [
{
"type": "RegularEnergy",
"count": 0
}
]
},
"canRiskPermanentLossOfAccess",
{
"partialRefill": {
"type": "ReserveEnergy",
"limit": 200
}
}
]
}
]
},
{
"resourceMissingAtMost": [
{
"type": "Missile",
"count": 0
}
]
}
]
}
]
}
"h_shinechargeMaxRunway"
{
"autoReserveTrigger": {}
}
"canRModeSparkInterrupt" |
|
Farm the geemers, then use a Waver to interrupt. Entrance condition: {
"comeInWithRMode": {}
}Requires: {
"or": [
"h_CrystalFlashForReserveEnergy",
{
"and": [
"h_RModeCanRefillReserves",
{
"resourceMissingAtMost": [
{
"type": "Missile",
"count": 10
}
]
},
{
"partialRefill": {
"type": "ReserveEnergy",
"limit": 20
}
}
]
}
]
}
"h_shinechargeMaxRunway"
{
"autoReserveTrigger": {
"maxReserveEnergy": 95
}
}
"canRModeSparkInterrupt" |
|
Entrance condition: {
"comeInWithRMode": {}
}Requires: {
"or": [
"h_CrystalFlashForReserveEnergy",
{
"and": [
"h_RModeCanRefillReserves",
{
"resourceMissingAtMost": [
{
"type": "Missile",
"count": 10
}
]
},
{
"partialRefill": {
"type": "ReserveEnergy",
"limit": 20
}
}
]
}
]
}
"h_shinechargeMaxRunway"
{
"autoReserveTrigger": {
"maxReserveEnergy": 95
}
}
"canRModeSparkInterrupt" |
From: 1
Top Door
To: 2
Left Door
Without Springball or Gravity, it is possible to overload PLMs with the crumble blocks with bombs. Take the first left above the waterline. Place bombs in the single tile nook on the left. The Sciser that starts inside the Morph maze area will move off-screen: wait for it to come back out. Once outside of the Morph tunnel area, use X-Ray until the beam reaches full width to exit G-Mode and remain in R-Mode, then collect drops. Farm the rest of the Scisers, keeping the slower local Sciser at the bottom left corner to use for the interrupt. Position it in the ceiling cubby hole to safely perform the Shinecharge and jump into the Sciser as it walks back down. Entrance condition: {
"comeInWithGMode": {
"mode": "direct",
"morphed": true
},
"comesThroughToilet": "no"
}Requires: {
"or": [
"h_artificialMorphSpringBall",
{
"and": [
"h_artificialMorphBombThings",
"Gravity"
]
},
"h_artificialMorphIBJ"
]
}
{
"resourceMissingAtMost": [
{
"type": "PowerBomb",
"count": 0
}
]
}
{
"or": [
{
"and": [
{
"disableEquipment": "ETank"
},
{
"partialRefill": {
"type": "ReserveEnergy",
"limit": 40
}
}
]
},
{
"and": [
"canRiskPermanentLossOfAccess",
{
"resourceMissingAtMost": [
{
"type": "RegularEnergy",
"count": 120
}
]
},
{
"partialRefill": {
"type": "ReserveEnergy",
"limit": 20
}
}
]
},
{
"and": [
"canRiskPermanentLossOfAccess",
{
"resourceMissingAtMost": [
{
"type": "RegularEnergy",
"count": 0
}
]
},
{
"partialRefill": {
"type": "ReserveEnergy",
"limit": 100
}
}
]
}
]
}
{
"or": [
"canWaterShineCharge",
"Gravity"
]
}
{
"canShineCharge": {
"usedTiles": 20,
"openEnd": 0
}
}
{
"autoReserveTrigger": {}
}
"canRModeSparkInterrupt" |
|
Seven Scisers can be farmed. Use the 8th (a bottom left one) to interrupt spark. Leave the slower, local Sciser alive to use for the Shinespark interrupt. Position it in the ceiling cubby hole to safely perform the Shinecharge and jump into the Sciser as it walks back down. Entrance condition: {
"comeInWithRMode": {},
"comesThroughToilet": "no"
}Requires: "Morph"
{
  "or": [
    "h_CrystalFlashForReserveEnergy",
    {
      "and": [
        "h_RModeCanRefillReserves",
        {
          "or": [
            {
              "and": [
                {
                  "resourceMissingAtMost": [
                    {
                      "type": "PowerBomb",
                      "count": 0
                    }
                  ]
                },
                {
                  "partialRefill": {
                    "type": "ReserveEnergy",
                    "limit": 100
                  }
                }
              ]
            },
            {
              "and": [
                {
                  "resourceMissingAtMost": [
                    {
                      "type": "PowerBomb",
                      "count": 6
                    }
                  ]
                },
                {
                  "partialRefill": {
                    "type": "ReserveEnergy",
                    "limit": 20
                  }
                }
              ]
            }
          ]
        }
      ]
    }
  ]
}
"canWaterShineCharge"
{
  "canShineCharge": {
    "usedTiles": 20,
    "openEnd": 0
  }
}
{
  "autoReserveTrigger": {}
}
"canRModeSparkInterrupt" |
|
Six Scisers can be farmed from the left side without needing Morph. Leave the slower, local Sciser alive to use for the Shinespark interrupt. Position it in the ceiling cubby hole to safely perform the Shinecharge and jump into the Sciser as it walks back down. Entrance condition: {
"comeInWithRMode": {}
}Requires: {
"or": [
"h_CrystalFlashForReserveEnergy",
{
"and": [
"h_RModeCanRefillReserves",
{
"or": [
{
"and": [
{
"resourceMissingAtMost": [
{
"type": "PowerBomb",
"count": 0
}
]
},
{
"partialRefill": {
"type": "ReserveEnergy",
"limit": 100
}
}
]
},
{
"and": [
{
"resourceMissingAtMost": [
{
"type": "PowerBomb",
"count": 6
}
]
},
{
"partialRefill": {
"type": "ReserveEnergy",
"limit": 20
}
}
]
}
]
}
]
}
]
}
"canWaterShineCharge"
{
"canShineCharge": {
"usedTiles": 20,
"openEnd": 0
}
}
{
"autoReserveTrigger": {}
}
"canRModeSparkInterrupt" |
|
Farm two Scisers in the bottom section (manipulate camera to see where they are) and left Kihunter. Shinecharge and get interrupted by the right Kihunter. Entrance condition: {
"comeInWithRMode": {}
}Requires: {
"or": [
"canCameraManip",
{
"enemyDamage": {
"enemy": "Sciser",
"type": "contact",
"hits": 1
}
}
]
}
{
  "or": [
    "h_CrystalFlashForReserveEnergy",
    {
      "and": [
        "h_RModeCanRefillReserves",
        {
          "resourceMissingAtMost": [
            {
              "type": "PowerBomb",
              "count": 0
            }
          ]
        },
        {
          "partialRefill": {
            "type": "ReserveEnergy",
            "limit": 20
          }
        }
      ]
    }
  ]
}
{
  "canShineCharge": {
    "usedTiles": 33,
    "steepUpTiles": 2,
    "steepDownTiles": 5,
    "openEnd": 0
  }
}
{
  "autoReserveTrigger": {
    "maxReserveEnergy": 95
  }
}
"canRModeSparkInterrupt" |
|
Farm two Scisers in the bottom section and left Kihunter. Shinecharge and get interrupted by the right Kihunter. Entrance condition: {
"comeInWithRMode": {},
"comesThroughToilet": "no"
}Requires: {
"or": [
"h_CrystalFlashForReserveEnergy",
{
"and": [
"h_RModeCanRefillReserves",
{
"resourceMissingAtMost": [
{
"type": "PowerBomb",
"count": 0
}
]
},
{
"partialRefill": {
"type": "ReserveEnergy",
"limit": 20
}
}
]
}
]
}
{
"canShineCharge": {
"usedTiles": 33,
"steepUpTiles": 2,
"steepDownTiles": 5,
"openEnd": 0
}
}
{
"autoReserveTrigger": {
"maxReserveEnergy": 95
}
}
"canRModeSparkInterrupt" |
|
Entrance condition: {
"comeInWithRMode": {}
}Requires: "Gravity"
"canDodgeWhileShooting"
{
"or": [
"h_CrystalFlashForReserveEnergy",
{
"and": [
"h_RModeCanRefillReserves",
{
"resourceMissingAtMost": [
{
"type": "Missile",
"count": 0
}
]
},
{
"partialRefill": {
"type": "ReserveEnergy",
"limit": 20
}
}
]
}
]
}
{
"canShineCharge": {
"usedTiles": 20,
"steepUpTiles": 4,
"steepDownTiles": 2,
"startingSteepDownTiles": 1,
"openEnd": 0
}
}
{
"autoReserveTrigger": {
"maxReserveEnergy": 95
}
}
"canRModeSparkInterrupt" |
|
Entrance condition: {
"comeInWithRMode": {}
}Requires: "Gravity"
{
"or": [
"h_CrystalFlashForReserveEnergy",
{
"and": [
"h_RModeCanRefillReserves",
{
"resourceMissingAtMost": [
{
"type": "Missile",
"count": 0
}
]
},
{
"partialRefill": {
"type": "ReserveEnergy",
"limit": 20
}
}
]
}
]
}
{
"canShineCharge": {
"usedTiles": 20,
"steepUpTiles": 4,
"steepDownTiles": 2,
"startingSteepDownTiles": 1,
"openEnd": 0
}
}
{
"autoReserveTrigger": {
"maxReserveEnergy": 95
}
}
"canRModeSparkInterrupt" |
From: 10
Left Morph Maze Item
To: 14
Morph Maze Junction (Below Super Block)
Requires: {
"or": [
"canTrivialMidAirMorph",
"h_useSpringBall",
"canIBJ"
]
}
{
"or": [
{
"obstaclesNotCleared": [
"B"
]
},
"canRiskPermanentLossOfAccess"
]
} |
|
If you come from the upper section, use the Zeb Farm to fill up. Otherwise you have one Skultera or the Ripper 2 availble for reserve farming, or else Crystal Flash. Run underwater for the shinecharge and jump into the second Skultera's path to interrupt. Requires: {
"obstaclesCleared": [
"R-Mode"
]
}
{
"or": [
{
"resourceMissingAtMost": [
{
"type": "ReserveEnergy",
"count": 0
}
]
},
"h_CrystalFlashForReserveEnergy",
{
"and": [
"h_RModeCanRefillReserves",
{
"resourceMissingAtMost": [
{
"type": "Missile",
"count": 0
}
]
},
{
"or": [
{
"and": [
"canBePatient",
{
"partialRefill": {
"type": "ReserveEnergy",
"limit": 5
}
}
]
},
{
"and": [
{
"or": [
"canBeVeryLucky",
{
"and": [
{
"enemyKill": {
"enemies": [
[
"Ripper 2 (green)"
]
],
"excludedWeapons": [
"Super"
]
}
},
{
"resourceMissingAtMost": [
{
"type": "Super",
"count": 0
}
]
}
]
}
]
},
{
"partialRefill": {
"type": "ReserveEnergy",
"limit": 20
}
}
]
}
]
}
]
}
]
}
"Gravity"
"h_shinechargeMaxRunway"
{
"autoReserveTrigger": {
"maxReserveEnergy": 95
}
}
"canRModeSparkInterrupt"Resets obstacles: R-Mode Dev note: FIXME: Needs to track kill of the Ripper 2 in case this makes door #4 inaccessible. |
From: 17
G-Mode Morph Junction Direct (By Left Door)
To: 16
G-Mode Morph Overloaded PLMs (By Left Door)
To overload the PLMs, place a Power Bomb precisely to the right of the bottom of the second overhang above the bottom left door. This is at the max jump height without HiJump. Placing the Power Bomb higher or lower will not overload the PLMs without many Power Bombs. Requires: "canPowerBombItemOverloadPLMs"
"canComplexGMode"
{
"notable": "G-mode Overload PLMs by Power Bombing Morph Maze Item"
}
{
"itemNotCollectedAtNode": 10
}
"canRiskPermanentLossOfAccess"
{
"or": [
"h_artificialMorphLongIBJ",
"Morph",
{
"and": [
"h_artificialMorphSpringBall",
{
"or": [
"HiJump",
"h_artificialMorphBombThings"
]
}
]
}
]
}
"h_artificialMorphPowerBomb" |
From: 1
Bottom Left Door
To: 1
Bottom Left Door
Entrance condition: {
"comeInWithRMode": {}
}Requires: "h_ZebesIsAwake"
{
"or": [
"h_CrystalFlashForReserveEnergy",
{
"and": [
"h_RModeCanRefillReserves",
{
"resourceMissingAtMost": [
{
"type": "Missile",
"count": 0
}
]
},
{
"partialRefill": {
"type": "ReserveEnergy",
"limit": 20
}
}
]
}
]
}
{
"canShineCharge": {
"usedTiles": 30,
"openEnd": 0
}
}
{
"autoReserveTrigger": {
"maxReserveEnergy": 95
}
}
"canRModeSparkInterrupt"Dev note: Kill the Geemers for Reserves, or else Crystal Flash. Damage down and use the Reo to interrupt a shinespark wind-up. |
From: 1
Bottom Left Door
To: 5
G-Mode Morph Junction (Bottom)
It is possible to roll off of the ledge and avoid the Geemers, but it is somewhat tight and the timing is likely earlier than expected. Entrance condition: {
"comeInWithGMode": {
"mode": "indirect",
"morphed": true
}
}Requires: {
"or": [
"h_ZebesNotAwake",
"Morph",
"h_artificialMorphSpringBall",
"h_artificialMorphBombThings",
"canTrickyDodgeEnemies",
"h_blueSuitGMode",
{
"enemyDamage": {
"enemy": "Geemer (blue)",
"type": "contact",
"hits": 1
}
}
]
}Dev note: It may be possible to come in indirect and still have enough i-frames to get through the Geemers, but Samus may be coming from a doorless room like Crateria Tube. This is not easy to model and isn't worth doing, because the player will almost certainly canTrickyDodgeEnemies enabled before enabling canArtificialMorph. |
From: 1
Bottom Left Door
To: 6
G-Mode Morph Junction Direct (Bottom)
It is possible to roll off of the ledge over the Geemers, but it is somewhat tight and the timing is likely earlier than expected.. Alternatively, it is possible to roll of the ledge go through the Geemers before Samus' i-frames expire. Entrance condition: {
"comeInWithGMode": {
"mode": "direct",
"morphed": true
}
}Requires: {
"or": [
"h_ZebesNotAwake",
"Morph",
"h_artificialMorphSpringBall",
"h_artificialMorphBombThings",
"canTrickyDodgeEnemies",
"h_blueSuitGMode",
{
"enemyDamage": {
"enemy": "Geemer (blue)",
"type": "contact",
"hits": 1
}
}
]
} |
From: 2
Top Left Door
To: 1
Bottom Left Door
Entrance condition: {
"comeInWithRMode": {}
}Requires: "h_ZebesIsAwake"
{
"or": [
"h_CrystalFlashForReserveEnergy",
{
"and": [
"Morph",
"h_destroyBombWalls",
"h_RModeCanRefillReserves",
{
"resourceMissingAtMost": [
{
"type": "Missile",
"count": 0
}
]
},
{
"partialRefill": {
"type": "ReserveEnergy",
"limit": 20
}
}
]
}
]
}
{
"canShineCharge": {
"usedTiles": 30,
"openEnd": 0
}
}
{
"autoReserveTrigger": {
"maxReserveEnergy": 95
}
}
"canRModeSparkInterrupt"Clears obstacles: A, B Dev note: Kill the Geemers for Reserves, or else Crystal Flash. Damage down and use the Reo to interrupt a shinespark wind-up. |
|
Entrance condition: {
"comeInShinecharging": {
"length": 3,
"openEnd": 0
},
"comesInHeated": "no"
}Requires: "h_ZebesNotAwake" "h_CrystalSpark" |
|
Entrance condition: {
"comeInNormally": {}
}Requires: "h_ZebesNotAwake" Clears obstacles: C Dev note: The obstacle isn't really cleared, but should enable all strats that require it to be. |
|
Due to R-Mode Entry, getting hit by the Sidehopper can only be avoided by a quick Screw Attack after releasing the X-Ray Scope. You can attempt to farm the two ground Sidehoppers for Reserve Energy. Otherwise, you must use a Crystal Flash. Leave the ceiling Sidehopper alive to clear the runway for a shortcharge. Initiate the shinespark in midair so that Samus is in the path to be hit. Entrance condition: {
"comeInWithRMode": {}
}Requires: "h_ZebesIsAwake"
{
"or": [
"ScrewAttack",
{
"and": [
{
"enemyDamage": {
"enemy": "Sidehopper",
"type": "contact",
"hits": 1
}
},
{
"enemyKill": {
"enemies": [
[
"Sidehopper",
"Sidehopper"
]
],
"explicitWeapons": [
"Missile",
"Super",
"PowerBomb",
"Plasma"
]
}
}
]
}
]
}
{
"or": [
"h_CrystalFlashForReserveEnergy",
{
"and": [
"h_RModeCanRefillReserves",
{
"or": [
{
"and": [
{
"resourceMissingAtMost": [
{
"type": "Missile",
"count": 0
}
]
},
{
"resourceMissingAtMost": [
{
"type": "Super",
"count": 0
}
]
}
]
},
"canBeVeryLucky"
]
},
"canBeLucky",
{
"partialRefill": {
"type": "ReserveEnergy",
"limit": 20
}
}
]
}
]
}
"canTrickyDodgeEnemies"
{
"canShineCharge": {
"usedTiles": 25,
"openEnd": 0
}
}
{
"autoReserveTrigger": {
"maxReserveEnergy": 95
}
}
"canRModeSparkInterrupt"Clears obstacles: C Dev note: FIXME: More equipment combinations can work. |
|
Overload the PLMs by rolling through the camera scroll blocks which are 4 tiles to the right of the stair by the door. Entrance condition: {
"comeInWithGMode": {
"mode": "any",
"morphed": true
}
}Requires: "h_ZebesNotAwake" |
From: 1
Left Door
To: 5
Left Item
Overload the PLMs by rolling through the camera scroll blocks which are 4 tiles to the right of the stair by the door. Place a Power Bomb next to the right wall then quickly exit G-mode before it explodes to destroy the blocks. Entrance condition: {
"comeInWithGMode": {
"mode": "any",
"morphed": true
}
}Requires: "h_ZebesNotAwake"
"h_artificialMorphPowerBomb"
{
"or": [
"h_artificialMorphMovement",
"h_additionalBomb"
]
}Clears obstacles: B |
|
The hoppers have a poor energy drop rate. The rightmost two can be killed easily for two chances at a drop, otherwise a Crystal Flash must be used to get reserves. Entrance condition: {
"comeInWithRMode": {}
}Requires: "h_ZebesIsAwake"
{
"or": [
"h_CrystalFlashForReserveEnergy",
{
"and": [
"h_usePowerBomb",
"h_RModeCanRefillReserves",
{
"or": [
{
"and": [
{
"resourceMissingAtMost": [
{
"type": "Missile",
"count": 0
}
]
},
{
"resourceMissingAtMost": [
{
"type": "Super",
"count": 0
}
]
}
]
},
"canBeVeryLucky"
]
},
"canBeLucky",
{
"partialRefill": {
"type": "ReserveEnergy",
"limit": 20
}
}
]
}
]
}
{
"or": [
{
"and": [
{
"getBlueSpeed": {
"usedTiles": 21,
"openEnd": 1
}
},
"canSpeedball"
]
},
"h_bombThings"
]
}
{
"canShineCharge": {
"usedTiles": 21,
"openEnd": 1
}
}
{
"autoReserveTrigger": {
"maxReserveEnergy": 95
}
}
"canRModeSparkInterrupt"Clears obstacles: A, B, C |
|
Kill Zeela for reserves or Crystal Flash. Lead one Zeela above the runway and perform Spark Interrupt. Crystal Flash can be used to clear the bomb blocks for access to the runway. Entrance condition: {
"comeInWithRMode": {}
}Requires: "Morph"
{
"or": [
"h_CrystalFlashForReserveEnergy",
{
"and": [
"h_bombThings",
"h_RModeCanRefillReserves",
{
"resourceMissingAtMost": [
{
"type": "Missile",
"count": 0
}
]
},
{
"resourceMissingAtMost": [
{
"type": "Super",
"count": 0
}
]
},
{
"partialRefill": {
"type": "ReserveEnergy",
"limit": 20
}
}
]
}
]
}
{
"canShineCharge": {
"usedTiles": 17,
"openEnd": 0
}
}
{
"autoReserveTrigger": {}
}
"canRModeSparkInterrupt"Clears obstacles: A |
|
Kill Zeela for reserves or Crystal Flash. Lead one Zeela above the runway and perform Spark Interrupt. Entrance condition: {
"comeInWithRMode": {}
}Requires: {
"or": [
"h_CrystalFlashForReserveEnergy",
{
"and": [
"h_RModeCanRefillReserves",
{
"resourceMissingAtMost": [
{
"type": "Missile",
"count": 0
}
]
},
{
"resourceMissingAtMost": [
{
"type": "Super",
"count": 0
}
]
},
{
"partialRefill": {
"type": "ReserveEnergy",
"limit": 20
}
}
]
}
]
}
{
"canShineCharge": {
"usedTiles": 17,
"openEnd": 0
}
}
{
"autoReserveTrigger": {}
}
"canRModeSparkInterrupt" |
From: 1
Top Left Door
To: 7
Junction (Zebbo Farms)
Roll through the item to mostly overload PLMs before falling into the pit and fully overloading them with the camera scroll blocks. Fully overloading the PLMs before touching the camera scroll blocks will prevent the camera from following Samus after exiting G-mode. While falling, carefully avoid touching the thorns on the right, then roll through the spikeway. After the camera stops scrolling, move another 2-3 tiles then exit G-Mode. Make small jumps to reset the camera then quickly kill the Beetom as it jumps at Samus, or precisely jump underneath it. Entrance condition: {
"comeInWithGMode": {
"mode": "direct",
"morphed": true
}
}Requires: {
"itemNotCollectedAtNode": 5
}
"canRiskPermanentLossOfAccess"
"canOffScreenMovement"
"canComplexGMode"
{
"or": [
"canTrickyGMode",
"h_artificialMorphPowerBomb",
"ScrewAttack",
"Ice",
{
"ammo": {
"type": "Missile",
"count": 1
}
},
{
"ammo": {
"type": "Super",
"count": 1
}
},
{
"enemyDamage": {
"enemy": "Beetom",
"type": "contact",
"hits": 3
}
}
]
}Clears obstacles: B Collects items: 5 |
From: 2
Top Right Door
To: 7
Junction (Zebbo Farms)
Carefully Bomb boost across the pit and roll through the item to mostly overload PLMs before falling into the pit and fully overloading them with the camera scroll blocks. Fully overloading the PLMs before touching the camera scroll blocks will prevent the camera from following Samus after exiting G-mode. While falling, carefully avoid touching the thorns on the right, then roll through the spikeway. After the camera stops scrolling, move another 2-3 tiles then exit G-Mode. Make small jumps to reset the camera then quickly kill the Beetom as it jumps at Samus, or precisely jump underneath it. Entrance condition: {
"comeInWithGMode": {
"mode": "direct",
"morphed": true
}
}Requires: {
"itemNotCollectedAtNode": 5
}
"canRiskPermanentLossOfAccess"
"canOffScreenMovement"
"h_artificialMorphPowerBomb"
"canComplexGMode"
{
"or": [
"canTrickyGMode",
"h_artificialMorphPowerBomb",
"ScrewAttack",
"Ice",
{
"ammo": {
"type": "Missile",
"count": 1
}
},
{
"ammo": {
"type": "Super",
"count": 1
}
},
{
"enemyDamage": {
"enemy": "Beetom",
"type": "contact",
"hits": 3
}
}
]
}Clears obstacles: B Collects items: 5 Dev note: With more movement items, Samus can use the camera scroll blocks above the crumble blocks to overload PLMs. |
From: 3
Bottom Left Door
To: 5
Top Item
Place two precisely positioned Power Bombs to overload PLMs. This is at the same height as the tile above the door. This ends up being the max height Samus can jump and place it while at the very bottom of the room, with a midair morph or artificially morphed Spring Ball jump. Entrance condition: {
"comeInWithGMode": {
"mode": "direct",
"morphed": true
}
}Requires: "canPowerBombItemOverloadPLMs"
{
"itemNotCollectedAtNode": 5
}
"canRiskPermanentLossOfAccess"
{
"or": [
"Morph",
"h_artificialMorphSpringBall"
]
}
{
"ammo": {
"type": "PowerBomb",
"count": 2
}
}
{
"or": [
"canWallJump",
"SpaceJump",
{
"and": [
"HiJump",
"canSpringBallJumpMidAir"
]
},
"h_artificialMorphLongIBJ",
{
"and": [
{
"blueSuitShinecharge": {}
},
{
"or": [
{
"shinespark": {
"frames": 13,
"excessFrames": 3
}
},
{
"and": [
"HiJump",
{
"shinespark": {
"frames": 9,
"excessFrames": 3
}
}
]
}
]
}
]
}
]
}Dev note: This requires canRiskPermanentLossOfAccess unless Samus returns through the crumble blocks. |
From: 4
Bottom Right Door
To: 5
Top Item
Cross the room while killing the Beetoms, then use two precisely positioned Power Bombs to overload PLMs. Place the Power Bombs at the same height as the tile above the door. This ends up being the max height Samus can jump and place it while at the very bottom of the room, with a midair morph or artificially morphed Spring Ball jump. Entrance condition: {
"comeInWithGMode": {
"mode": "direct",
"morphed": true
}
}Requires: "canPowerBombItemOverloadPLMs"
{
"itemNotCollectedAtNode": 5
}
"canRiskPermanentLossOfAccess"
"h_artificialMorphMovement"
{
"or": [
{
"and": [
{
"ammo": {
"type": "PowerBomb",
"count": 3
}
},
{
"or": [
"canComplexGMode",
{
"ammo": {
"type": "PowerBomb",
"count": 1
}
}
]
}
]
},
{
"and": [
"Morph",
{
"or": [
"ScrewAttack",
"Ice",
{
"ammo": {
"type": "Missile",
"count": 5
}
},
{
"ammo": {
"type": "Super",
"count": 5
}
}
]
}
]
}
]
}
{
"ammo": {
"type": "PowerBomb",
"count": 2
}
}
{
"or": [
"canWallJump",
"SpaceJump",
{
"and": [
"HiJump",
"canSpringBallJumpMidAir"
]
},
"h_artificialMorphLongIBJ"
]
}Clears obstacles: A Dev note: This requires canRiskPermanentLossOfAccess unless Samus returns through the crumble blocks. |
From: 4
Bottom Right Door
To: 5
Top Item
Samus is only able to kill enemies with blue suit while moving and not falling. With bombs as the only movement option, Samus should only touch the enemies while grounded and moving horizontally. After crossing the spikeway, use two precisely positioned Power Bombs to overload PLMs. Place the Power Bombs at the same height as the tile above the door. This ends up being the max height Samus can jump and place it while at the very bottom of the room, with a midair morph or artificially morphed Spring Ball jump. Entrance condition: {
"comeInWithGMode": {
"mode": "direct",
"morphed": true
}
}Requires: "h_blueSuitGMode"
"canPowerBombItemOverloadPLMs"
{
"itemNotCollectedAtNode": 5
}
"canRiskPermanentLossOfAccess"
{
"or": [
"Morph",
"h_artificialMorphSpringBall",
"h_artificialMorphIBJ"
]
}
{
"ammo": {
"type": "PowerBomb",
"count": 2
}
}
{
"or": [
"canWallJump",
"SpaceJump",
{
"and": [
"HiJump",
"canSpringBallJumpMidAir"
]
},
"h_artificialMorphLongIBJ",
{
"and": [
{
"blueSuitShinecharge": {}
},
{
"or": [
{
"shinespark": {
"frames": 13,
"excessFrames": 3
}
},
{
"and": [
"HiJump",
{
"shinespark": {
"frames": 9,
"excessFrames": 3
}
}
]
}
]
}
]
}
]
}Clears obstacles: A Dev note: This requires canRiskPermanentLossOfAccess unless Samus returns through the crumble blocks. FIXME: This could include a Crystal Flash before shinesparking. |
|
Farm Firefleas for Reserves or else Crystal Flash. Damage down on the thorns (6 hits suitless). Get shinecharge on the top-right ledge and use the last fireflea to interrupt. Entrance condition: {
"comeInWithRMode": {}
}Requires: {
"or": [
"h_CrystalFlashForReserveEnergy",
{
"and": [
"h_RModeCanRefillReserves",
{
"resourceMissingAtMost": [
{
"type": "PowerBomb",
"count": 0
}
]
},
{
"partialRefill": {
"type": "ReserveEnergy",
"limit": 20
}
}
]
}
]
}
{
"or": [
{
"canShineCharge": {
"usedTiles": 16,
"openEnd": 0
}
},
{
"and": [
{
"doorUnlockedAtNode": 2
},
{
"canShineCharge": {
"usedTiles": 17,
"openEnd": 0
}
}
]
}
]
}
{
"autoReserveTrigger": {}
}
{
"partialRefill": {
"type": "RegularEnergy",
"limit": 21
}
}
"canRModeSparkInterrupt"Unlocks doors: {"nodeId":2,"types":["ammo"],"requires":[]}Dev note: FIXME: The last fireflea self-destructs and will drop a Large Energy right on top of Samus if full on PBs. |
From: 9
Right Etecoon Shaft - Top Left Door
To: 12
Above Power Bomb Blocks - Main Junction
Place bombs against the item Chozo ball to overload PLMs. Then go through the bomb blocks and tunnel. IBJ up the left side, blind, until getting on the top small platform. Place a Power Bomb and exit g-mode before the bomb goes off to break the blocks. Entrance condition: {
"comeInWithGMode": {
"mode": "any",
"morphed": true
}
}Requires: {
"itemNotCollectedAtNode": 11
}
"canRiskPermanentLossOfAccess"
"h_artificialMorphLongIBJ"
"h_artificialMorphPowerBomb"
"canBePatient"
"canOffScreenMovement"
"canTrickyGMode"Clears obstacles: A |
From: 9
Right Etecoon Shaft - Top Left Door
To: 13
Below Power Bomb Blocks - Main Junction
Place bombs against the item Chozo ball to overload PLMs. Then go through the bomb blocks and tunnel, then exit G-mode. Alternatively, with Spring Ball and a Power Bomb, place a Power Bomb 3 tiles in from the left opening to overload PLMs all at once. Entrance condition: {
"comeInWithGMode": {
"mode": "any",
"morphed": true
}
}Requires: {
"itemNotCollectedAtNode": 11
}
"canRiskPermanentLossOfAccess"
{
"or": [
"h_artificialMorphIBJ",
{
"and": [
"canPowerBombItemOverloadPLMs",
"h_artificialMorphSpringBall",
"h_artificialMorphPowerBomb"
]
}
]
} |
From: 10
Right Etecoon Shaft - Bottom Left Door
To: 12
Above Power Bomb Blocks - Main Junction
IBJ up and place bombs against the item Chozo ball to overload PLMs. Then go through the bomb blocks and tunnel. IBJ up again, blind, until getting on the top small platform. Place a Power Bomb and exit g-mode before the bomb goes off to break the blocks. Entrance condition: {
"comeInWithGMode": {
"mode": "any",
"morphed": true
}
}Requires: {
"itemNotCollectedAtNode": 11
}
"canRiskPermanentLossOfAccess"
"h_artificialMorphLongIBJ"
"h_artificialMorphPowerBomb"
"canBePatient"
"canOffScreenMovement"
"canTrickyGMode"Clears obstacles: A |
From: 10
Right Etecoon Shaft - Bottom Left Door
To: 13
Below Power Bomb Blocks - Main Junction
IBJ up and place bombs against the item Chozo ball to overload PLMs. Then go down, through the bomb blocks and tunnel, then exit G-mode. Entrance condition: {
"comeInWithGMode": {
"mode": "any",
"morphed": true
}
}Requires: {
"itemNotCollectedAtNode": 11
}
"canRiskPermanentLossOfAccess"
"h_artificialMorphLongIBJ"
"canBePatient" |
From: 13
Below Power Bomb Blocks - Main Junction
To: 9
Right Etecoon Shaft - Top Left Door
Enter R-Mode using any door. Crystal Flash or farm the upper section enemies. Use 'Bottom Ice Clip' strat to regain access to the Etecoons Shaft, then wait on top of the crumble block to get the Zeela to follow you in. Shinecharge on top of the Etecoon Shaft and get hit by the Zeela to interrupt. Requires: {
"obstaclesCleared": [
"R-Mode"
]
}
{
"notable": "Bottom Ice Clip"
}
{
"or": [
"h_CrystalFlashForReserveEnergy",
{
"and": [
{
"obstaclesCleared": [
"A"
]
},
"h_RModeCanRefillReserves",
{
"resourceMissingAtMost": [
{
"type": "Missile",
"count": 0
}
]
},
{
"resourceMissingAtMost": [
{
"type": "Super",
"count": 0
}
]
},
{
"partialRefill": {
"type": "ReserveEnergy",
"limit": 20
}
}
]
}
]
}
"h_bombThings"
"h_additionalBomb"
"canTrickyJump"
"h_XRayMorphIceClip"
{
"or": [
"h_useSpringBall",
{
"and": [
"can4HighMidAirMorph",
"canInsaneJump"
]
}
]
}
"canBeVeryPatient"
{
"or": [
{
"canShineCharge": {
"usedTiles": 17,
"openEnd": 1
}
},
{
"and": [
"h_frozenEnemyRunway",
{
"canShineCharge": {
"usedTiles": 18,
"openEnd": 1
}
}
]
}
]
}
{
"autoReserveTrigger": {}
}
"canRModeSparkInterrupt"Resets obstacles: R-Mode |
|
Farm Zeelas and two Cacatacs or else Crystal Flash for Reserves. Cacatac projectile can provide spark interrupt. Entrance condition: {
"comeInWithRMode": {}
}Requires: {
"or": [
"h_CrystalFlashForReserveEnergy",
{
"and": [
"h_RModeCanRefillReserves",
{
"resourceMissingAtMost": [
{
"type": "Super",
"count": 1
}
]
},
{
"partialRefill": {
"type": "ReserveEnergy",
"limit": 20
}
}
]
}
]
}
"h_shinechargeMaxRunway"
{
"autoReserveTrigger": {}
}
"canRModeSparkInterrupt" |
|
Maximum two Kihunters can be killed for energy, and their drop rate is poor. Otherwise, Crystal Flash. Turn off extra beams and shoot off the remaining Kihunter's wings to help trap it against the side, giving free access to the runway. Entrance condition: {
"comeInWithRMode": {}
}Requires: {
"or": [
"h_CrystalFlashForReserveEnergy",
{
"and": [
"canTrickyDodgeEnemies",
"h_RModeCanRefillReserves",
{
"resourceMissingAtMost": [
{
"type": "Missile",
"count": 0
}
]
},
{
"or": [
{
"and": [
{
"partialRefill": {
"type": "ReserveEnergy",
"limit": 20
}
},
"canBeLucky"
]
},
{
"partialRefill": {
"type": "ReserveEnergy",
"limit": 5
}
}
]
}
]
}
]
}
{
"canShineCharge": {
"usedTiles": 32,
"openEnd": 0
}
}
{
"autoReserveTrigger": {
"maxReserveEnergy": 95
}
}
"canRModeSparkInterrupt" |
From: 2
Top Right Door
To: 2
Top Right Door
Maximum two Kihunters can be killed for energy, and their drop rate is poor. Otherwise, Crystal Flash. Turn off extra beams and shoot off the remaining Kihunter's wings to help trap it against the side, giving free access to the runway. Entrance condition: {
"comeInWithRMode": {},
"comesThroughToilet": "no"
}Requires: {
"or": [
"h_CrystalFlashForReserveEnergy",
{
"and": [
"h_RModeCanRefillReserves",
{
"resourceMissingAtMost": [
{
"type": "Missile",
"count": 0
}
]
},
{
"or": [
{
"and": [
{
"partialRefill": {
"type": "ReserveEnergy",
"limit": 20
}
},
"canBeLucky"
]
},
{
"partialRefill": {
"type": "ReserveEnergy",
"limit": 5
}
}
]
}
]
}
]
}
{
"canShineCharge": {
"usedTiles": 32,
"openEnd": 0
}
}
{
"autoReserveTrigger": {
"maxReserveEnergy": 95
}
}
"canRModeSparkInterrupt" |
From: 2
Bottom Door
To: 2
Bottom Door
Crystal Flash on the left side of the room when Spore Spawn starts moving, or on the right side when it is in the top right of its swoop. Entrance condition: {
"comeInWithGMode": {
"mode": "direct",
"morphed": true
},
"comesThroughToilet": "no"
}Requires: "h_artificialMorphRModeCrystalFlashInterrupt"
{
"ammo": {
"type": "Missile",
"count": 10
}
}
{
"not": "f_DefeatedSporeSpawn"
}
"canRiskPermanentLossOfAccess"Clears obstacles: door_2 Dev note: With an immobile entry, the note will be wrong, but the timing is pretty lenient and easy to deduce. |
|
Requires: {
"enemyDamage": {
"enemy": "Spore Spawn",
"type": "contact",
"hits": 1
}
}
{
"not": "f_DefeatedSporeSpawn"
}
"canRiskPermanentLossOfAccess"Dev note: This would only be useful to leave in g-mode. |
|
Crystal Flash on the left side of the room when Spore Spawn starts moving, or on the right side when it is in the top right of its swoop. Entrance condition: {
"comeInWithRMode": {},
"comesThroughToilet": "no"
}Requires: "canRModeCrystalFlashInterrupt"
{
"ammo": {
"type": "Missile",
"count": 10
}
}
{
"not": "f_DefeatedSporeSpawn"
}
"canRiskPermanentLossOfAccess"Clears obstacles: door_2 |
From: 3
Left Side - Top Middle Door (Main Entrance)
To: 14
G-Mode Morph, Behind the Power Bomb Blocks
As long as the Sidehoppers haven't been lured to the right, fall into the pit and use a Power Bomb to kill them or dodge them. Place a Power Bomb one tile below the Morph tunnel to the left to overload PLMs using the item. Entrance condition: {
"comeInWithGMode": {
"mode": "direct",
"morphed": true
}
}Requires: "canPowerBombItemOverloadPLMs"
{
"itemNotCollectedAtNode": 10
}
"canRiskPermanentLossOfAccess"
"h_artificialMorphSpringBall"
{
"or": [
"canInsaneJump",
"h_artificialMorphPowerBomb",
{
"haveBlueSuit": {}
},
{
"enemyDamage": {
"enemy": "Sm. Sidehopper",
"type": "contact",
"hits": 1
}
}
]
}
"h_artificialMorphPowerBomb"Clears obstacles: B, C Dev note: Techincally, obstacles B and C are not cleared until exiting G-mode, but those obstacles are not used by G-mode strats. Only this door and the one just below the hopper pit on the right will benefit from this, and only without Morph or Bombs, otherwise PLMs could be overloaded simpler ways. |
From: 4
Left Side - Door Behind Power Bomb Blocks
To: 12
Bottom Chozo Item
On entry, artificial morph and land on the doorsill without touching the crumble blocks below. Place 8 Power Bombs to hit the item just above and overload PLMs while killing the Sidehoppers. It is possible to save one Power Bomb by placing 6 of them up against the ceiling, then the 7th low to kill the Sidehoppers. Entrance condition: {
"comeInWithGMode": {
"mode": "direct",
"morphed": true
}
}Requires: "canPowerBombItemOverloadPLMs"
"canComplexGMode"
{
"itemNotCollectedAtNode": 10
}
"canRiskPermanentLossOfAccess"
"canArtificialMorph"
{
"ammo": {
"type": "PowerBomb",
"count": 7
}
}
{
"or": [
"h_artificialMorphMovement",
"h_artificialMorphPowerBomb"
]
} |
From: 4
Left Side - Door Behind Power Bomb Blocks
To: 15
G-Mode Morph Junction (Middle Right)
On entry, artificial morph and land on the doorsill without touching the crumble blocks below. Place 8 Power Bombs to hit the item just above and overload PLMs while killing the Sidehoppers. It is possible to save one Power Bomb by placing 6 of them up against the ceiling, then the 7th low to kill the Sidehoppers. Entrance condition: {
"comeInWithGMode": {
"mode": "direct",
"morphed": true
}
}Requires: "canPowerBombItemOverloadPLMs"
"canComplexGMode"
{
"itemNotCollectedAtNode": 10
}
"canRiskPermanentLossOfAccess"
"canArtificialMorph"
"h_artificialMorphMovement"
{
"ammo": {
"type": "PowerBomb",
"count": 7
}
} |
From: 6
Right Side - Top Middle Door
To: 12
Bottom Chozo Item
Carefully roll off of the edge and land on the platform holding the item. Roll through it until PLMs are overloaded, then roll through the bomb blocks and down below. Entrance condition: {
"comeInWithGMode": {
"mode": "direct",
"morphed": true
}
}Requires: {
"itemNotCollectedAtNode": 11
}
"canRiskPermanentLossOfAccess"Collects items: 11 |
From: 6
Right Side - Top Middle Door
To: 14
G-Mode Morph, Behind the Power Bomb Blocks
As long as the Sidehoppers haven't been lured to the right, fall into the pit and use a Power Bomb to kill them or dodge them. Place a Power Bomb one tile below the Morph tunnel to the left to overload PLMs using the item. Entrance condition: {
"comeInWithGMode": {
"mode": "direct",
"morphed": true
}
}Requires: "canPowerBombItemOverloadPLMs"
{
"itemNotCollectedAtNode": 10
}
"canRiskPermanentLossOfAccess"
"h_artificialMorphSpringBall"
{
"or": [
"canInsaneJump",
"h_artificialMorphPowerBomb",
{
"haveBlueSuit": {}
},
{
"enemyDamage": {
"enemy": "Sm. Sidehopper",
"type": "contact",
"hits": 1
}
}
]
}
"h_artificialMorphPowerBomb"Clears obstacles: B, C Dev note: Techincally, obstacles B and C are not cleared until exiting G-mode, but those obstacles are not used by G-mode strats. Only this door and the one just above the hopper pit on the left will benefit from this, and only without Morph or Bombs, otherwise PLMs could be overloaded simpler ways. |
From: 8
Right Side - Bottom Door
To: 12
Bottom Chozo Item
Entrance condition: {
"comeInWithGMode": {
"mode": "direct",
"morphed": true
}
}Requires: {
"itemNotCollectedAtNode": 11
}
"canRiskPermanentLossOfAccess"
"h_artificialMorphSpringBall"Collects items: 11 Dev note: With more items, the strat with camera scroll blocks will be used. |
From: 17
Direct G-Mode Morph Junction (Middle Item)
To: 12
Bottom Chozo Item
Requires: "canRemoteAcquire"
{
  "itemNotCollectedAtNode": 11
}
"canRiskPermanentLossOfAccess"
Collects items: 11 Dev note: If the item is not there, then another strat will be used to overload PLMs another way. |
|
Farm the Zeelas and Reos or else Crystal Flash. Carry the charge to the Metarees, or leave 1 Reo or Zeela alive, for the interrupt. Entrance condition: {
"comeInWithRMode": {}
}Requires: {
"or": [
"h_CrystalFlashForReserveEnergy",
{
"and": [
"h_RModeCanRefillReserves",
{
"resourceMissingAtMost": [
{
"type": "Missile",
"count": 0
}
]
},
{
"partialRefill": {
"type": "ReserveEnergy",
"limit": 20
}
}
]
}
]
}
"h_shinechargeMaxRunway"
{
"autoReserveTrigger": {}
}
"canRModeSparkInterrupt"Clears obstacles: A |
|
Shinespark to the upper section, then quick run through the bomb blocks to get to the Zeelas and Reos. Farm for reserves or Crystal Flash, then get the shinecharge and use any remaining enemy to interrupt. Te Metarees are still available if you don't go too far right during the setup. Entrance condition: {
"comeInWithRMode": {}
}Requires: {
"or": [
"h_CrystalFlashForReserveEnergy",
"free"
]
}
"h_shinechargeMaxRunway"
{
"or": [
{
"and": [
"HiJump",
"canMidairShinespark",
"canSpeedyJump",
{
"shinespark": {
"frames": 85,
"excessFrames": 3
}
}
]
},
{
"and": [
"canFastWallJumpClimb",
"canMidairShinespark",
{
"or": [
{
"and": [
"HiJump",
{
"shinespark": {
"frames": 67,
"excessFrames": 3
}
}
]
},
{
"shinespark": {
"frames": 73,
"excessFrames": 3
}
}
]
}
]
},
{
"shinespark": {
"frames": 110,
"excessFrames": 3
}
}
]
}
{
"or": [
{
"resourceAvailable": [
{
"type": "ReserveEnergy",
"count": 1
}
]
},
{
"and": [
"h_RModeCanRefillReserves",
{
"resourceMissingAtMost": [
{
"type": "Missile",
"count": 0
}
]
},
{
"partialRefill": {
"type": "ReserveEnergy",
"limit": 20
}
}
]
}
]
}
"h_shinechargeMaxRunway"
{
"autoReserveTrigger": {}
}
"canRModeSparkInterrupt"Clears obstacles: A Dev note: With Disable E-Tanks or Energy-Free Shinesparks, the Reo/Zeela farm remains viable. Without either QoL option, however, the Crystal Flash will be expected (not enough enemies with good drops to guarantee a full e-tank's worth). When using disable E-Tanks the player must be able to disable to 99 *after* the shinespark. |
|
Crystal Flash after getting past the Metarees, or else run through the bomb wall and farm Reos and Zeelas. Leave one Reo or Zeela alive. Build a Shinespark then get hit by the remaining enemy to interrupt. Entrance condition: {
"comeInWithRMode": {}
}Requires: {
"or": [
"h_CrystalFlashForReserveEnergy",
{
"and": [
"h_RModeCanRefillReserves",
{
"resourceMissingAtMost": [
{
"type": "Missile",
"count": 0
}
]
},
{
"partialRefill": {
"type": "ReserveEnergy",
"limit": 20
}
}
]
}
]
}
"h_shinechargeMaxRunway"
{
"autoReserveTrigger": {}
}
"canRModeSparkInterrupt"Clears obstacles: A |
From: 4
Top Left Junction
To: 4
Top Left Junction
Kill both Sidehoppers for energy, or else Crystal Flash (kill both Sidehoppers anyway so you have the runway free). Use the spikes for pause-abuse interrupt. Requires: {
"obstaclesCleared": [
"R-Mode"
]
}
{
"obstaclesCleared": [
"A"
]
}
{
"or": [
"h_CrystalFlashForReserveEnergy",
{
"and": [
"h_RModeCanRefillReserves",
{
"resourceMissingAtMost": [
{
"type": "Missile",
"count": 0
}
]
},
{
"resourceMissingAtMost": [
{
"type": "Super",
"count": 0
}
]
},
{
"or": [
{
"and": [
"canBeLucky",
{
"partialRefill": {
"type": "ReserveEnergy",
"limit": 5
}
}
]
},
{
"and": [
"canBeVeryLucky",
{
"partialRefill": {
"type": "ReserveEnergy",
"limit": 20
}
}
]
}
]
}
]
}
]
}
{
"or": [
{
"canShineCharge": {
"usedTiles": 16,
"openEnd": 0
}
},
{
"and": [
{
"spikeHits": 1
},
"canUseIFrames",
{
"canShineCharge": {
"usedTiles": 23,
"openEnd": 0
}
}
]
}
]
}
{
"autoReserveTrigger": {}
}
"canRModePauseAbuseSparkInterrupt"Resets obstacles: R-Mode |
From: 1
Left Door
To: 1
Left Door
Kill the hoppers. Use Spike X-Mode to gain shine charge, then use manual reserve and pause abuse on the spikes to interrupt the shinespark. Requires: {
"obstaclesCleared": [
"R-Mode"
]
}
{
"obstaclesCleared": [
"A"
]
}
{
"or": [
{
"and": [
"h_CrystalFlashForReserveEnergy",
"h_usePowerBomb",
"canOffScreenMovement"
]
},
{
"and": [
"h_RModeCanRefillReserves",
{
"resourceMissingAtMost": [
{
"type": "Missile",
"count": 0
}
]
},
{
"resourceMissingAtMost": [
{
"type": "Super",
"count": 0
}
]
},
{
"or": [
{
"and": [
"canBeLucky",
{
"partialRefill": {
"type": "ReserveEnergy",
"limit": 5
}
}
]
},
{
"and": [
"canBeVeryLucky",
{
"partialRefill": {
"type": "ReserveEnergy",
"limit": 20
}
}
]
}
]
}
]
}
]
}
"h_destroyBombWalls"
"h_spikeXModeShinecharge"
"canBeVeryPatient"
"canPauseAbuse"
{
"autoReserveTrigger": {}
}
"canRModeSparkInterrupt"Resets obstacles: R-Mode, C |
From: 2
Bottom Left Door
To: 1
Top Left Door
Entrance condition: {
"comeInWithGMode": {
"mode": "direct",
"morphed": false
}
}Requires: {
"itemNotCollectedAtNode": 3
}
"canRiskPermanentLossOfAccess"
{
"or": [
{
"canShineCharge": {
"usedTiles": 16,
"openEnd": 2
}
},
{
"blueSuitShinecharge": {}
}
]
}
{
"or": [
{
"shinespark": {
"frames": 138,
"excessFrames": 6
}
},
{
"and": [
"h_artificialMorphCrystalFlash",
{
"or": [
"Morph",
"canArtificialMorph"
]
},
{
"shinespark": {
"frames": 138,
"excessFrames": 6
}
}
]
}
]
} |
|
Gravity Suit can use the main runway, while suitless must use the shelf. The entire setup can be done with just the Zeros if you are patient enough (and/or have Gravity). Gravity (only) can also run through just the first thick portion of the speedway to use the the Skulltera and Puyos. Entrance condition: {
"comeInWithRMode": {}
}Requires: {
"or": [
"h_CrystalFlashForReserveEnergy",
{
"and": [
"h_RModeCanRefillReserves",
{
"resourceMissingAtMost": [
{
"type": "PowerBomb",
"count": 0
}
]
},
{
"partialRefill": {
"type": "ReserveEnergy",
"limit": 5
}
}
]
}
]
}
{
"or": [
{
"and": [
"Gravity",
"h_shinechargeMaxRunway"
]
},
{
"and": [
{
"or": [
"SpaceJump",
{
"and": [
"canSuitlessMaridia",
{
"or": [
"canPreciseWallJump",
"canBombJumpWaterEscape",
{
"and": [
"h_useSpringBall",
"canJumpIntoIBJ"
]
},
{
"and": [
"canBePatient",
"canTrickyUseFrozenEnemies",
{
"ammo": {
"type": "Super",
"count": 1
}
}
]
}
]
}
]
}
]
},
{
"canShineCharge": {
"usedTiles": 32,
"openEnd": 1
}
}
]
}
]
}
{
"autoReserveTrigger": {
"maxReserveEnergy": 95
}
}
"canRModeSparkInterrupt"
{
"partialRefill": {
"type": "Energy",
"limit": 25
}
}Clears obstacles: A |
From: 1
Right Door
To: 3
Dry Platform Junction
Requires a precise shinespark end or Gravity to destroy the speedblocks without killing the Skultera Entrance condition: {
"comeInWithRMode": {}
}Requires: "h_RModeCanRefillReserves"
{
"resourceMissingAtMost": [
{
"type": "PowerBomb",
"count": 0
}
]
}
{
"or": [
"Gravity",
{
"and": [
{
"or": [
"canPreciseWallJump",
"SpaceJump",
{
"and": [
"Ice",
{
"ammo": {
"type": "Super",
"count": 1
}
}
]
}
]
},
"canControlShinesparkEnd",
{
"canShineCharge": {
"usedTiles": 31,
"openEnd": 1
}
},
{
"shinespark": {
"frames": 30
}
}
]
}
]
}
{
"canShineCharge": {
"usedTiles": 31,
"openEnd": 1
}
}
"h_RModeKnockbackSpark" |
|
Four Boyons to farm have a poor chance of providing reserve energy. Once you have it, damage down to 20/10/5 energy and jump into the plant with forward moement for shinecharge. Jump high above a Boyon and interrupt, or use the thorns and pause abuse. Entrance condition: {
"comeInWithRMode": {}
}Requires: {
"or": [
"h_CrystalFlashForReserveEnergy",
{
"and": [
{
"enemyKill": {
"enemies": [
[
"Boyon",
"Boyon",
"Boyon"
]
]
}
},
"h_RModeCanRefillReserves",
{
"resourceMissingAtMost": [
{
"type": "Missile",
"count": 0
}
]
},
{
"or": [
{
"and": [
"canBeLucky",
{
"partialRefill": {
"type": "ReserveEnergy",
"limit": 5
}
}
]
},
{
"and": [
"canBeVeryLucky",
{
"partialRefill": {
"type": "ReserveEnergy",
"limit": 20
}
}
]
}
]
}
]
}
]
}
"canSamusEaterStandUp"
{
"samusEaterCycles": 1
}
"h_shinechargeMaxRunway"
{
"autoReserveTrigger": {
"maxReserveEnergy": 95
}
}
"canRModeSparkInterrupt" |
From: 1
Right Door
To: 1
Right Door
Kill the Sidehoppers using only morph and beams or Screw Attack. Using morph and dodging it can be done damage-free. Shinecharge on the runway, then take a ceiling thorn hit and pause abuse to spark interrupt. Entrance condition: {
"comeInWithRMode": {}
}Requires: {
"or": [
{
"and": [
"Morph",
"canDodgeWhileShooting",
"canCameraManip",
"canTrickyJump"
]
},
"ScrewAttack"
]
}
"h_RModeCanRefillReserves"
{
"resourceMissingAtMost": [
{
"type": "Missile",
"count": 0
}
]
}
{
"resourceMissingAtMost": [
{
"type": "Super",
"count": 0
}
]
}
{
"or": [
{
"and": [
"canBeLucky",
{
"partialRefill": {
"type": "ReserveEnergy",
"limit": 20
}
}
]
},
{
"partialRefill": {
"type": "ReserveEnergy",
"limit": 5
}
}
]
}
{
"canShineCharge": {
"usedTiles": 29,
"openEnd": 0
}
}
{
"autoReserveTrigger": {}
}
"canHorizontalDamageBoost"
"canRModePauseAbuseSparkInterrupt"Clears obstacles: A |
From: 5
Top Right Door (Through Morph Tunnel)
To: 5
Top Right Door (Through Morph Tunnel)
Open the gate, farm the Cacatacs and Zeros, while leading one back up to the Morph tunnel. Shinecharge under the gate, then get hit by the Zero to interrupt. Entrance condition: {
"comeInWithRMode": {}
}Requires: {
"ammo": {
"type": "Super",
"count": 1
}
}
"Morph"
{
"or": [
"h_CrystalFlashForReserveEnergy",
{
"and": [
"h_RModeCanRefillReserves",
{
"or": [
{
"and": [
{
"resourceMissingAtMost": [
{
"type": "Super",
"count": 1
}
]
},
{
"partialRefill": {
"type": "ReserveEnergy",
"limit": 20
}
}
]
},
{
"and": [
{
"resourceMissingAtMost": [
{
"type": "PowerBomb",
"count": 0
}
]
},
{
"partialRefill": {
"type": "ReserveEnergy",
"limit": 15
}
}
]
}
]
}
]
}
]
}
{
"or": [
"HiJump",
"canWallJump",
"SpaceJump",
"canIBJ",
"canSpringBallJumpMidAir",
"canTrickyUseFrozenEnemies",
{
"and": [
"canNeutralDamageBoost",
{
"or": [
{
"and": [
"canTrickyDodgeEnemies",
"h_crouchJumpDownGrab",
{
"enemyDamage": {
"enemy": "Cacatac",
"type": "spike",
"hits": 1
}
}
]
},
{
"and": [
"canMidAirMorph",
"canTrickyJump",
"canCrouchJump",
{
"enemyDamage": {
"enemy": "Zero",
"type": "contact",
"hits": 1
}
}
]
}
]
}
]
}
]
}
"canBePatient"
{
"canShineCharge": {
"usedTiles": 17,
"openEnd": 0
}
}
{
"autoReserveTrigger": {}
}
"canRModeSparkInterrupt"Clears obstacles: A, B |
From: 2
Right Door
To: 2
Right Door
Farm no more than one fireflea: Samus sprite and spike tiles are darkened by the Fireflea effect during R-Mode. Shinecharge in the right pit next to the spikes, then use the spikes to pause abuse and interrupt. Requires: {
"obstaclesCleared": [
"R-Mode"
]
}
{
"or": [
"h_CrystalFlashForReserveEnergy",
{
"and": [
"h_RModeCanRefillReserves",
{
"resourceMissingAtMost": [
{
"type": "PowerBomb",
"count": 0
}
]
},
{
"partialRefill": {
"type": "ReserveEnergy",
"limit": 40
}
}
]
}
]
}
{
"canShineCharge": {
"usedTiles": 13,
"openEnd": 0
}
}
{
"autoReserveTrigger": {}
}
"canRModePauseAbuseSparkInterrupt"Resets obstacles: R-Mode |
From: 2
Right Door
To: 2
Right Door
Farm no more than one fireflea: Samus sprite and spike tiles are darkened by the Fireflea effect during R-Mode. Enter Spike X-Mode in the spike pit and shinecharge, then jump into another fireflea to interrupt. Entrance condition: {
"comeInWithRMode": {}
}Requires: {
"obstaclesCleared": [
"R-Mode"
]
}
{
"or": [
"h_CrystalFlashForReserveEnergy",
{
"and": [
"h_RModeCanRefillReserves",
{
"resourceMissingAtMost": [
{
"type": "PowerBomb",
"count": 0
}
]
},
{
"partialRefill": {
"type": "ReserveEnergy",
"limit": 40
}
}
]
}
]
}
"canBeVeryPatient"
"canXMode"
"h_XModeSpikeHit"
"h_shinechargeMaxRunway"
"canShinechargeMovement"
{
"autoReserveTrigger": {}
}
"canRModeSparkInterrupt"Resets obstacles: R-Mode |
|
Shoot the pirates with Power Beam to prevent their lasers and jump over them. Build up to blue speed to skip past Mini-Kraid's spikes and destroy Mini Kraid which will drop multiple Large Energy. If you're missing some Supers, quickly grab the four supers that drop so that the 5th drop can be Large Energy. Ceiling thorns, lingering Mini-Kraid Spikes, or Pirates can be used at-will to damage down. Go back to the right side, full-speed into a shinecharge, then got shot by a pirate for Spark Interrupt. Entrance condition: {
"comeInWithRMode": {}
}Requires: {
"or": [
"canTrickyJump",
{
"and": [
"canCarefulJump",
{
"enemyKill": {
"enemies": [
[
"Green Space Pirate (standing)",
"Green Space Pirate (standing)"
]
],
"explicitWeapons": [
"Missile",
"Super",
"Plasma"
]
}
}
]
},
{
"and": [
"canDodgeWhileShooting",
{
"enemyKill": {
"enemies": [
[
"Green Space Pirate (standing)",
"Green Space Pirate (standing)"
]
],
"excludedWeapons": [
"Bombs",
"PowerBomb"
]
}
}
]
},
"ScrewAttack"
]
}
{
"or": [
{
"getBlueSpeed": {
"usedTiles": 29,
"openEnd": 2
}
},
"ScrewAttack",
{
"and": [
{
"or": [
"canDodgeWhileShooting",
{
"enemyDamage": {
"enemy": "Mini-Kraid",
"type": "spike",
"hits": 1
}
}
]
},
{
"or": [
{
"enemyKill": {
"enemies": [
[
"Mini-Kraid"
]
],
"excludedWeapons": [
"PowerBeam",
"Ice",
"Wave",
"Spazer",
"Bombs",
"Charge"
]
}
},
{
"and": [
{
"enemyKill": {
"enemies": [
[
"Mini-Kraid"
]
]
}
},
{
"enemyDamage": {
"enemy": "Mini-Kraid",
"type": "spike",
"hits": 3
}
}
]
}
]
}
]
}
]
}
{
"or": [
"h_CrystalFlashForReserveEnergy",
{
"and": [
"h_RModeCanRefillReserves",
{
"or": [
{
"and": [
{
"resourceMissingAtMost": [
{
"type": "Super",
"count": 0
}
]
},
{
"partialRefill": {
"type": "ReserveEnergy",
"limit": 100
}
}
]
},
{
"and": [
{
"resourceMissingAtMost": [
{
"type": "Super",
"count": 4
}
]
},
{
"partialRefill": {
"type": "ReserveEnergy",
"limit": 20
}
}
]
}
]
}
]
}
]
}
"h_shinechargeMaxRunway"
{
"autoReserveTrigger": {
"maxReserveEnergy": 95
}
}
"canRModeSparkInterrupt"Clears obstacles: A, door_1 |
|
Kill Mini-Kraid after entry which will drop multiple Large Energy. If you're missing some Supers, quickly grab the four supers that drop so that the 5th drop can be Large Energy. Ceiling thorns, lingering Mini-Kraid Spikes, or Pirates can be used at-will to damage down. Go back to the right side, full-speed into a shinecharge, then got shot by a pirate for Spark Interrupt. Entrance condition: {
"comeInWithRMode": {}
}Requires: {
"or": [
{
"enemyKill": {
"enemies": [
[
"Mini-Kraid"
]
],
"excludedWeapons": [
"PowerBeam",
"Ice",
"Wave",
"Spazer",
"Bombs",
"Charge"
]
}
},
{
"and": [
{
"enemyKill": {
"enemies": [
[
"Mini-Kraid"
]
]
}
},
{
"or": [
"canDodgeWhileShooting",
{
"enemyDamage": {
"enemy": "Mini-Kraid",
"type": "stone",
"hits": 1
}
}
]
}
]
}
]
}
{
"or": [
"h_CrystalFlashForReserveEnergy",
{
"and": [
"h_RModeCanRefillReserves",
{
"or": [
{
"and": [
{
"resourceMissingAtMost": [
{
"type": "Super",
"count": 0
}
]
},
{
"partialRefill": {
"type": "ReserveEnergy",
"limit": 100
}
}
]
},
{
"and": [
{
"resourceMissingAtMost": [
{
"type": "Super",
"count": 4
}
]
},
{
"partialRefill": {
"type": "ReserveEnergy",
"limit": 20
}
}
]
}
]
}
]
}
]
}
"h_shinechargeMaxRunway"
{
"autoReserveTrigger": {
"maxReserveEnergy": 95
}
}
"canRModeSparkInterrupt"Clears obstacles: A, door_2 |
From: 1
Left Door
To: 1
Left Door
Crystal Flash upon entering the room, then use the thorns to damage down and perform Spike X-Mode. Once shinecharge is gained, get Kraid to charge or spit at Samus and use that for R-Mode interrupt. Entrance condition: {
"comeInWithRMode": {}
}Requires: {
"not": "f_DefeatedKraid"
}
"canRiskPermanentLossOfAccess"
"h_CrystalFlashForReserveEnergy"
"h_thornXModeShinecharge"
{
"autoReserveTrigger": {
"maxReserveEnergy": 95
}
}
"canRModeSparkInterrupt"Clears obstacles: door_1 Dev note: In randomizers that do not initially lock the boss door, the player can escape once blue suit is gained. |
|
Crystal Flash and then get poked by Kraid's hand. Entrance condition: {
"comeInWithGMode": {
"mode": "direct",
"morphed": true
}
}Requires: {
"not": "f_DefeatedKraid"
}
"canRiskPermanentLossOfAccess"
"h_artificialMorphRModeCrystalFlashInterrupt"
{
"ammo": {
"type": "Missile",
"count": 10
}
}
{
"ammo": {
"type": "Super",
"count": 10
}
}Clears obstacles: door_1 |
|
The only projectiles that Kraid can hit Samus with through the transition are the spinning talons after he stands up. This requires Kraid to not be defeated and the door to be open during the second phase. Requires: {
"not": "f_DefeatedKraid"
}
"canRiskPermanentLossOfAccess"
{
"or": [
"Charge",
{
"ammo": {
"type": "Missile",
"count": 2
}
},
{
"ammo": {
"type": "Super",
"count": 1
}
}
]
}Exit condition: {
"leaveWithGModeSetup": {}
} |
From: 1
Left Door
To: 1
Left Door
Force Kraid to stand up and farm his nails for energy, then perform a Spike X-Mode on the thorns to get shinecharge. Get interrupted by Kraid for blue suit. You will be forced to defeat Kraid afterward. Entrance condition: {
"comeInWithRMode": {}
}Requires: {
"not": "f_DefeatedKraid"
}
"canRiskPermanentLossOfAccess"
{
"or": [
"canBeVeryPatient",
{
"disableEquipment": "ETank"
}
]
}
{
"refill": [
"Energy"
]
}
{
"or": [
"Charge",
{
"ammo": {
"type": "Missile",
"count": 2
}
},
{
"ammo": {
"type": "Super",
"count": 1
}
}
]
}
{
"or": [
"HiJump",
"canWallJump",
"SpaceJump",
"canSpringBallJumpMidAir",
{
"and": [
"canDodgeWhileShooting",
{
"or": [
"canCarefulJump",
"h_crouchJumpDownGrab"
]
}
]
}
]
}
"h_thornXModeShinecharge"
{
"autoReserveTrigger": {
"maxReserveEnergy": 95
}
}
"canRModeSparkInterrupt"Clears obstacles: f_DefeatedKraid, door_1 Sets flags: f_DefeatedKraid |
From: 1
Left Door
To: 1
Left Door
If Kraid is alive, use X-mode on the thorns to gain blue speed. Hold an angle button to turn around while retaining blue. If needed, arm pump to get close to the ledge without touching it. While in X-mode on the thorns, Samus' will be flashing as i-frames periodically refresh; by timing the shinecharge and X-Ray release to happen soon after i-frames refresh, a second thorn hit can be avoided. Requires: "h_thornXModeShinecharge"
{
"or": [
{
"canShineCharge": {
"usedTiles": 22,
"openEnd": 0
}
},
{
"and": [
{
"not": "f_DefeatedKraid"
},
"canRiskPermanentLossOfAccess"
]
}
]
}
{
"shineChargeFrames": 45
}
{
"or": [
"canBeVeryPatient",
{
"and": [
"h_XModeThornHit",
{
"shineChargeFrames": 20
}
]
}
]
}Exit condition: {
"leaveShinecharged": {}
}Dev note: If Kraid is alive, leaving with a horizontal damage boost is also possible, but not easy to model. |
|
Crystal Flash and then get poked by Kraid's hand. Entrance condition: {
"comeInWithRMode": {}
}Requires: {
"not": "f_DefeatedKraid"
}
"canRiskPermanentLossOfAccess"
"canRModeCrystalFlashInterrupt"
{
"ammo": {
"type": "Missile",
"count": 10
}
}
{
"ammo": {
"type": "Super",
"count": 10
}
}Clears obstacles: door_1 |
From: 2
Right Door
To: 1
Left Door
Entrance condition: {
"comeInWithGrappleTeleport": {
"blockPositions": [
[
2,
18
]
]
}
}Requires: {
"not": "f_DefeatedKraid"
}
"canRiskPermanentLossOfAccess"Exit condition: {
"leaveWithGrappleTeleport": {
"blockPositions": [
[
2,
18
]
]
}
}Clears obstacles: door_2 Bypasses door shell: true |
From: 2
Right Door
To: 1
Left Door
Entrance condition: {
"comeInWithGrappleTeleport": {
"blockPositions": [
[
2,
18
]
]
}
}Requires: {
"not": "f_DefeatedKraid"
}
"canRiskPermanentLossOfAccess"Clears obstacles: door_2 Bypasses door shell: true |
From: 2
Right Door
To: 1
Left Door
You can crystal flash for early setup, then bounce between thorns and Kraid to setup. Alternatively, force Kraid to stand up and farm his nails for energy. Then perform a Spike X-Mode on the thorns to get shinecharge. Get interrupted by Kraid for blue suit. After gaining blue suit you can proceed to defeat Kraid. Entrance condition: {
"comeInWithRMode": {}
}Requires: {
"not": "f_DefeatedKraid"
}
"canRiskPermanentLossOfAccess"
{
"or": [
{
"thornHits": 1
},
{
"and": [
{
"or": [
"canPrepareForNextRoom",
"h_KraidCameraFix"
]
},
"SpaceJump"
]
}
]
}
{
"or": [
"h_CrystalFlashForReserveEnergy",
{
"and": [
{
"or": [
"canBeVeryPatient",
{
"disableEquipment": "ETank"
}
]
},
{
"refill": [
"Energy"
]
},
{
"or": [
"Charge",
{
"ammo": {
"type": "Missile",
"count": 2
}
},
{
"ammo": {
"type": "Super",
"count": 1
}
}
]
}
]
}
]
}
{
"or": [
"HiJump",
"canWallJump",
"SpaceJump",
"canSpringBallJumpMidAir",
{
"and": [
"canDodgeWhileShooting",
{
"or": [
"canCarefulJump",
"h_crouchJumpDownGrab"
]
}
]
}
]
}
"canXMode"
"h_XModeThornHit"
"h_shinechargeMaxRunway"
{
"autoReserveTrigger": {
"maxReserveEnergy": 95
}
}
"canRModeSparkInterrupt"Clears obstacles: f_DefeatedKraid, door_2 Sets flags: f_DefeatedKraid |
|
Crystal Flash and then get poked by Kraid's hand. Entrance condition: {
"comeInWithRMode": {}
}Requires: {
"or": [
{
"thornHits": 1
},
{
"and": [
"SpaceJump",
"h_KraidCameraFix"
]
}
]
}
{
"not": "f_DefeatedKraid"
}
"canRiskPermanentLossOfAccess"
"canRModeCrystalFlashInterrupt"
{
"ammo": {
"type": "Missile",
"count": 10
}
}
{
"ammo": {
"type": "Super",
"count": 10
}
}Clears obstacles: door_2 Dev note: This can be done in G-mode, but only if the camera is not fixed. It requires Spring Ball or immobile (and a contact hit). |
From: 2
Right Door
To: 2
Right Door
If Kraid is alive, use X-mode on the thorns to gain blue speed. Hold an angle button to turn around while retaining blue. If needed, arm pump to get close to the ledge without touching it. While in X-mode on the thorns, Samus' will be flashing as i-frames periodically refresh; by timing the shinecharge and X-Ray release to happen soon after i-frames refresh, a second thorn hit can be avoided. Requires: "h_KraidCameraFix"
"h_thornXModeShinecharge"
"h_thornXModeFramePerfectExtraLeniency"
{
"or": [
{
"canShineCharge": {
"usedTiles": 22,
"openEnd": 0
}
},
{
"and": [
{
"not": "f_DefeatedKraid"
},
"canRiskPermanentLossOfAccess"
]
}
]
}
{
"shineChargeFrames": 45
}
{
"or": [
"canBeVeryPatient",
{
"and": [
"h_XModeThornHit",
{
"shineChargeFrames": 20
}
]
}
]
}Exit condition: {
"leaveShinecharged": {}
}Dev note: If Kraid is alive, leaving with a horizontal damage boost is also possible, but not easy to model. |
From: 1
Left Vertical Door
To: 5
Kihunter Junction
Farm Kihunters, keeping one alive. Knock its wings off and freeze it on one end of the room, or use i-frames to run through it. Run across to shinecharge, then use the Kihunter to interrupt. Entrance condition: {
"comeInWithRMode": {},
"comesThroughToilet": "no"
}Requires: "canTrickyJump"
"canDodgeWhileShooting"
{
"or": [
"h_CrystalFlashForReserveEnergy",
{
"and": [
"h_RModeCanRefillReserves",
{
"or": [
{
"partialRefill": {
"type": "ReserveEnergy",
"limit": 5
}
},
{
"and": [
{
"partialRefill": {
"type": "ReserveEnergy",
"limit": 20
}
},
"canBeLucky"
]
}
]
}
]
}
]
}
{
"or": [
"canUseIFrames",
"canUseFrozenEnemies"
]
}
{
"canShineCharge": {
"usedTiles": 27,
"openEnd": 2
}
}
{
"autoReserveTrigger": {
"maxReserveEnergy": 95
}
}
"canRModeSparkInterrupt"Clears obstacles: C |
From: 2
Bottom Right Door
To: 5
Kihunter Junction
Farm Kihunters from below, keeping one alive. Knock its wings off and either freeze it or take a hit and use i-frames to run through it. Run across the left side of the broken shot block, then use the Kihunter to interrupt. Entrance condition: {
"comeInWithRMode": {}
}Requires: "h_crouchJumpDownGrab"
{
"or": [
"canTrickyDodgeEnemies",
{
"enemyDamage": {
"enemy": "Kihunter (green)",
"type": "contact",
"hits": 2
}
}
]
}
{
"or": [
"h_CrystalFlashForReserveEnergy",
{
"and": [
"h_RModeCanRefillReserves",
{
"or": [
{
"partialRefill": {
"type": "ReserveEnergy",
"limit": 5
}
},
{
"and": [
{
"partialRefill": {
"type": "ReserveEnergy",
"limit": 20
}
},
"canBeLucky"
]
}
]
}
]
}
]
}
{
"or": [
"canUseIFrames",
"canUseFrozenEnemies"
]
}
{
"canShineCharge": {
"usedTiles": 13,
"openEnd": 2
}
}
{
"autoReserveTrigger": {
"maxReserveEnergy": 95
}
}
"canRModeSparkInterrupt"Clears obstacles: C, D |
From: 3
Top Right Door
To: 5
Kihunter Junction
Bomb the block: if using a Power Bomb, place it no further left than under the item to avoid breaking the shot block. Farm Kihunters using the morph tunnel as needed, keeping one alive. Knock its wings off and freeze it on one end of the room, or use i-frames to run through it. Run across to shinecharge, then use the Kihunter to interrupt. Entrance condition: {
"comeInWithRMode": {}
}Requires: "h_bombThings"
{
"or": [
"h_CrystalFlashForReserveEnergy",
{
"and": [
"h_RModeCanRefillReserves",
{
"or": [
{
"partialRefill": {
"type": "ReserveEnergy",
"limit": 5
}
},
{
"and": [
{
"partialRefill": {
"type": "ReserveEnergy",
"limit": 20
}
},
"canBeLucky"
]
}
]
}
]
}
]
}
{
"or": [
"canUseIFrames",
"canUseFrozenEnemies"
]
}
{
"canShineCharge": {
"usedTiles": 27,
"openEnd": 2
}
}
{
"autoReserveTrigger": {
"maxReserveEnergy": 95
}
}
"canRModeSparkInterrupt"Clears obstacles: B, C |
From: 4
Bottom Junction (Cleared Runway)
To: 1
Left Door
Kill the enemies, break the shotblock, and shinecharge. Quickly climb up before the block respawns. Heat interrupt just before leaving the door. Requires: {
"obstaclesCleared": [
"R-Mode"
]
}
"HiJump"
{
"or": [
"h_heatedCrystalFlashForReserveEnergy",
{
"and": [
"h_heatProof",
"h_RModeCanRefillReserves",
{
"partialRefill": {
"type": "ReserveEnergy",
"limit": 20
}
}
]
}
]
}
{
"canShineCharge": {
"usedTiles": 43,
"openEnd": 0
}
}
{
"or": [
"canPreciseWallJump",
"canInsaneJump",
"SpaceJump"
]
}
{
"or": [
{
"heatFrames": 540
},
{
"and": [
{
"heatFrames": 310
},
"canHeroShot"
]
}
]
}
"h_heatTriggerRModeSparkInterrupt"
{
"heatFrames": 10
}Resets obstacles: R-Mode |
From: 4
Bottom Junction (Cleared Runway)
To: 2
Right Door
Kill the enemies and shinecharge. Quickly climb up, and heat interrupt just before leaving the door. Requires: {
"obstaclesCleared": [
"R-Mode"
]
}
"HiJump"
{
"or": [
"h_heatedCrystalFlashForReserveEnergy",
{
"and": [
"h_heatProof",
"h_RModeCanRefillReserves",
{
"partialRefill": {
"type": "ReserveEnergy",
"limit": 20
}
}
]
}
]
}
{
"canShineCharge": {
"usedTiles": 43,
"openEnd": 0
}
}
{
"heatFrames": 320
}
"h_heatTriggerRModeSparkInterrupt"
{
"heatFrames": 10
}Resets obstacles: R-Mode |
From: 4
Bottom Junction (Cleared Runway)
To: 4
Bottom Junction (Cleared Runway)
Farm the Sovas and Sm. Dessgeegas to clear the bottom runway in order to shinecharge. Leave one Sova to use for interrupt. Requires: {
"obstaclesCleared": [
"R-Mode"
]
}
{
"or": [
"h_heatedCrystalFlashForReserveEnergy",
{
"and": [
"h_heatProof",
"h_RModeCanRefillReserves",
{
"partialRefill": {
"type": "ReserveEnergy",
"limit": 20
}
}
]
}
]
}
{
"heatFrames": 200
}
{
"canShineCharge": {
"usedTiles": 43,
"openEnd": 0
}
}
{
"autoReserveTrigger": {}
}
"canRModeSparkInterrupt"Resets obstacles: R-Mode |
|
Speedy jump to farm a Fune or Morph over to the Kago. Shinecharge at the bottom left, then jump back up and heat interrupt at the top left door before leaving. Requires: {
"obstaclesCleared": [
"R-Mode"
]
}
"HiJump"
{
"or": [
"SpaceJump",
{
"and": [
"canPreciseWallJump",
"canTrickyJump"
]
}
]
}
{
"or": [
"h_heatedCrystalFlashForReserveEnergy",
{
"and": [
"h_RModeCanRefillReserves",
{
"or": [
{
"and": [
"h_heatProof",
{
"enemyKill": {
"enemies": [
[
"Fune"
],
[
"Fune"
]
]
}
},
{
"resourceMissingAtMost": [
{
"type": "Missile",
"count": 0
}
]
},
{
"partialRefill": {
"type": "ReserveEnergy",
"limit": 20
}
}
]
},
{
"and": [
"Morph",
{
"heatFrames": 560
},
{
"or": [
{
"disableEquipment": "ETank"
},
"h_heatProof"
]
},
{
"partialRefill": {
"type": "ReserveEnergy",
"limit": 100
}
},
{
"heatFrames": 160
}
]
}
]
}
]
}
]
}
{
"heatFrames": 400
}
{
"canShineCharge": {
"usedTiles": 28,
"gentleUpTiles": 3,
"gentleDownTiles": 3,
"openEnd": 0
}
}
"h_heatTriggerRModeSparkInterrupt"
{
"heatFrames": 10
}Resets obstacles: R-Mode |
|
Speedy jump to farm a Fune or Morph over to the Kago. Shinecharge at the bottom left, then heat interrupt in the door and quickly leave. Requires: {
"obstaclesCleared": [
"R-Mode"
]
}
{
"or": [
"h_heatedCrystalFlashForReserveEnergy",
{
"and": [
"h_RModeCanRefillReserves",
{
"or": [
{
"and": [
"h_heatProof",
{
"enemyKill": {
"enemies": [
[
"Fune"
],
[
"Fune"
]
]
}
},
{
"resourceMissingAtMost": [
{
"type": "Missile",
"count": 0
}
]
},
{
"partialRefill": {
"type": "ReserveEnergy",
"limit": 20
}
}
]
},
{
"and": [
"Morph",
{
"heatFrames": 560
},
{
"or": [
{
"disableEquipment": "ETank"
},
"h_heatProof"
]
},
{
"partialRefill": {
"type": "ReserveEnergy",
"limit": 100
}
},
{
"heatFrames": 160
}
]
}
]
}
]
}
]
}
{
"heatFrames": 300
}
{
"canShineCharge": {
"usedTiles": 28,
"gentleUpTiles": 3,
"gentleDownTiles": 3,
"openEnd": 0
}
}
"h_heatTriggerRModeSparkInterrupt"
{
"heatFrames": 10
}Resets obstacles: R-Mode |
From: 2
Bottom Left Door
To: 3
Right Door
Come in with G-Mode Morph, after passing through the morph tunnel unmorph and exit G-Mode. Disable any E-Tanks and farm the Kago to put Energy into reserves. Get into postion under the top blocks and disable Varia. Time a down jump to reach the apex as reserves trigger. Release down during the reserve refil. Entrance condition: {
"comeInWithGMode": {
"mode": "direct",
"morphed": true
}
}Requires: "canArtificialMorph"
"h_heatProof"
"canRModeStandupClip"
"canBeVeryPatient"
"h_RModeCanRefillReserves"
{
"partialRefill": {
"type": "ReserveEnergy",
"limit": 100
}
}
{
"disableEquipment": "Varia"
}
{
"autoReserveTrigger": {
"implicitHeatFrames": "suitless"
}
}
{
"suitlessHeatFrames": 30
}Dev note: FIXME: Add suitless version. |
|
Enter with R-Mode, disable any E-Tanks and farm the Kago to put Energy into reserves. Get into postion under the top blocks and disable Varia. Time a down jump to reach the apex as reserves trigger. Release down during the reserve refill. A mid air morph increases the frame window Samus can clip through the blocks. Entrance condition: {
"comeInWithRMode": {}
}Requires: "h_heatProof"
"canMidAirMorph"
"canRModeStandupClip"
"h_RModeCanRefillReserves"
{
"partialRefill": {
"type": "ReserveEnergy",
"limit": 100
}
}
{
"disableEquipment": "Varia"
}
{
"autoReserveTrigger": {
"implicitHeatFrames": "suitless"
}
}
{
"suitlessHeatFrames": 30
}Dev note: FIXME: Add suitless version. |
|
Use Speed Booster break all of the blocks and farm all but one Beetom. Carefully use the last Beetom to damage down, and then use it to interrupt. Entrance condition: {
"comeInWithRMode": {}
}Requires: {
"or": [
"h_CrystalFlashForReserveEnergy",
{
"and": [
"h_RModeCanRefillReserves",
{
"resourceMissingAtMost": [
{
"type": "PowerBomb",
"count": 0
}
]
},
{
"partialRefill": {
"type": "ReserveEnergy",
"limit": 30
}
}
]
}
]
}
"canStopOnADime"
"canEscapeEnemyGrab"
"h_shinechargeMaxRunway"
{
"autoReserveTrigger": {
"maxReserveEnergy": 63
}
}
"canRModeSparkInterrupt" |
|
Requires: {
"obstaclesCleared": [
"R-Mode"
]
}
{
"or": [
"h_heatedCrystalFlashForReserveEnergy",
{
"and": [
"h_heatProof",
"h_RModeCanRefillReserves",
{
"resourceMissingAtMost": [
{
"type": "PowerBomb",
"count": 0
}
]
},
{
"partialRefill": {
"type": "ReserveEnergy",
"limit": 20
}
}
]
}
]
}
{
"or": [
{
"canShineCharge": {
"usedTiles": 13,
"openEnd": 0
}
},
{
"and": [
{
"doorUnlockedAtNode": 3
},
{
"canShineCharge": {
"usedTiles": 14,
"openEnd": 0
}
}
]
}
]
}
{
"or": [
{
"autoReserveTrigger": {}
},
{
"and": [
"canReserveTriggerBufferXRay",
{
"autoReserveTrigger": {
"implicitHeatFrames": "no"
}
}
]
}
]
}
"canRModeSparkInterrupt"
{
"heatFrames": 30
}Resets obstacles: R-Mode |
From: 2
Left Shaft - Bottom Right Door
To: 2
Left Shaft - Bottom Right Door
Farm the enemies, and leave the bottom Alcoon alive to interrupt after shinecharging at the bottom door. Requires: {
"obstaclesCleared": [
"R-Mode"
]
}
{
"or": [
"h_heatedCrystalFlashForReserveEnergy",
{
"and": [
"h_heatProof",
"h_RModeCanRefillReserves",
{
"resourceMissingAtMost": [
{
"type": "PowerBomb",
"count": 0
}
]
},
{
"partialRefill": {
"type": "ReserveEnergy",
"limit": 20
}
}
]
}
]
}
{
"or": [
{
"canShineCharge": {
"usedTiles": 12,
"gentleUpTiles": 4,
"openEnd": 0
}
},
{
"and": [
{
"doorUnlockedAtNode": 2
},
{
"canShineCharge": {
"usedTiles": 13,
"gentleUpTiles": 4,
"openEnd": 0
}
}
]
}
]
}
{
"autoReserveTrigger": {
"maxReserveEnergy": 95
}
}
"canRModeSparkInterrupt"Resets obstacles: R-Mode |
|
Farm the Metarees if able. Farm the Geruta while they are trapped. After the third Geruta, run toward the right door to shinecharge and use heat damage to interrupt. Entrance condition: {
"comeInWithRMode": {}
}Requires: {
"or": [
"h_heatedCrystalFlashForReserveEnergy",
{
"and": [
"h_RModeCanRefillReserves",
"h_heatProof",
{
"or": [
{
"enemyKill": {
"enemies": [
[
"Metaree",
"Metaree"
]
]
}
},
{
"resourceMissingAtMost": [
{
"type": "Missile",
"count": 0
}
]
}
]
},
{
"or": [
{
"resourceMissingAtMost": [
{
"type": "Missile",
"count": 0
}
]
},
{
"resourceMissingAtMost": [
{
"type": "Super",
"count": 0
}
]
}
]
},
{
"partialRefill": {
"type": "ReserveEnergy",
"limit": 20
}
}
]
}
]
}
{
"or": [
{
"and": [
"h_speedButSlow",
{
"simpleHeatFrames": 560
},
{
"heatFrames": 60
}
]
},
{
"and": [
"h_speedDash",
{
"simpleHeatFrames": 310
},
{
"heatFrames": 40
}
]
}
]
}
"h_shinechargeMaxRunway"
"h_heatTriggerRModeSparkInterrupt"Clears obstacles: A |
|
The three Gerutas can be farmed while trapped. Run the rest of the way to the left door and use heat damage to interrupt. Entrance condition: {
"comeInWithRMode": {}
}Requires: "f_ClearedSpeedBoosterLavaTrap"
{
"or": [
"h_CrystalFlashForReserveEnergy",
{
"and": [
"h_heatProof",
"h_RModeCanRefillReserves",
{
"resourceMissingAtMost": [
{
"type": "Missile",
"count": 0
}
]
},
{
"partialRefill": {
"type": "ReserveEnergy",
"limit": 20
}
}
]
}
]
}
{
"or": [
{
"and": [
"h_speedButSlow",
{
"simpleHeatFrames": 560
},
{
"heatFrames": 60
}
]
},
{
"and": [
"h_speedDash",
{
"simpleHeatFrames": 310
},
{
"heatFrames": 40
}
]
}
]
}
"h_shinechargeMaxRunway"
"h_heatTriggerRModeSparkInterrupt"Clears obstacles: A |
From: 1
Left Door
To: 1
Left Door
Ride the Tripper across to the center platform. Farm the right-side Tripper. Enter X-Mode on the spike and shinecharge, then use heat damage to interrupt. Ride the Tripper back to the left door before farming it on the way out. Entrance condition: {
"comeInWithRMode": {}
}Requires: "h_heatProof"
"Morph"
"h_RModeCanRefillReserves"
{
"enemyKill": {
"enemies": [
[
"Tripper"
]
]
}
}
{
"resourceMissingAtMost": [
{
"type": "Missile",
"count": 0
}
]
}
{
"or": [
{
"partialRefill": {
"type": "ReserveEnergy",
"limit": 5
}
},
{
"and": [
{
"or": [
"h_lavaProof",
"Grapple",
{
"and": [
"canWallJump",
{
"or": [
"Super",
"Ice"
]
}
]
},
"SpaceJump"
]
},
{
"partialRefill": {
"type": "ReserveEnergy",
"limit": 20
}
},
{
"or": [
{
"enemyKill": {
"enemies": [
[
"Tripper"
]
]
}
},
"canBeLucky"
]
}
]
}
]
}
"canBeVeryPatient"
"canXMode"
"h_XModeSpikeHit"
"h_shinechargeMaxRunway"
{
"disableEquipment": "Varia"
}
{
"disableEquipment": "Gravity"
}
{
"autoReserveTrigger": {}
}
"canRModePauseAbuseSparkInterrupt" |
From: 1
Left Door
To: 2
Right Door
Ride the Tripper across to the center platform, then farm it for energy. Enter X-Mode on the spike and shinecharge, then use heat damage to interrupt. Ride the second tripper to the opposite door - farm it on the way out if needed. Entrance condition: {
"comeInWithRMode": {}
}Requires: "h_heatProof"
"Morph"
"h_RModeCanRefillReserves"
{
"enemyKill": {
"enemies": [
[
"Tripper"
]
]
}
}
{
"resourceMissingAtMost": [
{
"type": "Missile",
"count": 0
}
]
}
{
"or": [
{
"partialRefill": {
"type": "ReserveEnergy",
"limit": 5
}
},
{
"and": [
{
"or": [
"h_lavaProof",
"Grapple",
{
"and": [
"canWallJump",
{
"or": [
"Super",
"Ice"
]
}
]
},
"SpaceJump"
]
},
{
"partialRefill": {
"type": "ReserveEnergy",
"limit": 20
}
},
{
"or": [
{
"enemyKill": {
"enemies": [
[
"Tripper"
]
]
}
},
"canBeLucky"
]
}
]
}
]
}
"canBeVeryPatient"
"canXMode"
"h_XModeSpikeHit"
"h_shinechargeMaxRunway"
{
"disableEquipment": "Varia"
}
{
"disableEquipment": "Gravity"
}
{
"autoReserveTrigger": {}
}
"canRModePauseAbuseSparkInterrupt"Exit condition: {
"leaveNormally": {}
}Unlocks doors: {"nodeId":2,"types":["ammo"],"requires":[]} |
From: 2
Right Door
To: 1
Left Door
Ride the Tripper across to the center platform, then farm it for energy. Enter X-Mode on the spike and shinecharge, then use heat damage to interrupt. Ride the second tripper to the opposite door - farm it on the way out if needed. Entrance condition: {
"comeInWithRMode": {}
}Requires: "h_heatProof"
"Morph"
"h_RModeCanRefillReserves"
{
"enemyKill": {
"enemies": [
[
"Tripper"
]
]
}
}
{
"resourceMissingAtMost": [
{
"type": "Missile",
"count": 0
}
]
}
{
"or": [
{
"partialRefill": {
"type": "ReserveEnergy",
"limit": 5
}
},
{
"and": [
{
"or": [
"h_lavaProof",
"Grapple",
{
"and": [
"canWallJump",
{
"or": [
"Super",
"Ice"
]
}
]
},
"SpaceJump"
]
},
{
"partialRefill": {
"type": "ReserveEnergy",
"limit": 20
}
},
{
"or": [
{
"enemyKill": {
"enemies": [
[
"Tripper"
]
]
}
},
"canBeLucky"
]
}
]
}
]
}
"canBeVeryPatient"
"canXMode"
"h_XModeSpikeHit"
"h_shinechargeMaxRunway"
{
"disableEquipment": "Varia"
}
{
"disableEquipment": "Gravity"
}
{
"autoReserveTrigger": {}
}
"canRModePauseAbuseSparkInterrupt"Exit condition: {
"leaveNormally": {}
}Unlocks doors: {"nodeId":1,"types":["ammo"],"requires":[]} |
From: 2
Right Door
To: 2
Right Door
Ride the Tripper across to the center platform. Farm the left Tripper for energy. Enter X-Mode on the spike and shinecharge, then use heat damage to interrupt. Ride the Tripper back to the right door before farming it on the way out. Entrance condition: {
"comeInWithRMode": {}
}Requires: "h_heatProof"
"Morph"
"h_RModeCanRefillReserves"
{
"enemyKill": {
"enemies": [
[
"Tripper"
]
]
}
}
{
"resourceMissingAtMost": [
{
"type": "Missile",
"count": 0
}
]
}
{
"or": [
{
"partialRefill": {
"type": "ReserveEnergy",
"limit": 5
}
},
{
"and": [
{
"or": [
"h_lavaProof",
"Grapple",
{
"and": [
"canWallJump",
{
"or": [
"Super",
"Ice"
]
}
]
},
"SpaceJump"
]
},
{
"partialRefill": {
"type": "ReserveEnergy",
"limit": 20
}
},
{
"enemyKill": {
"enemies": [
[
"Tripper"
]
]
}
}
]
}
]
}
"canBeVeryPatient"
"canXMode"
"h_XModeSpikeHit"
"h_shinechargeMaxRunway"
{
"disableEquipment": "Varia"
}
{
"disableEquipment": "Gravity"
}
{
"autoReserveTrigger": {}
}
"canRModePauseAbuseSparkInterrupt" |
|
Farm using Sovas. Interrupt with the Sova circling the platform above the runway between the bottom doors. Entrance condition: {
"comeInWithRMode": {}
}Requires: {
"or": [
"h_CrystalFlashForReserveEnergy",
{
"and": [
"h_RModeCanRefillReserves",
{
"partialRefill": {
"type": "ReserveEnergy",
"limit": 40
}
}
]
}
]
}
{
"or": [
{
"canShineCharge": {
"usedTiles": 12,
"openEnd": 0
}
},
{
"and": [
{
"or": [
{
"doorUnlockedAtNode": 3
},
{
"doorUnlockedAtNode": 5
}
]
},
{
"canShineCharge": {
"usedTiles": 13,
"openEnd": 0
}
}
]
},
{
"and": [
{
"doorUnlockedAtNode": 3
},
{
"doorUnlockedAtNode": 5
},
{
"canShineCharge": {
"usedTiles": 14,
"openEnd": 0
}
}
]
}
]
}
{
"autoReserveTrigger": {}
}
"canRModeSparkInterrupt"Unlocks doors: {"nodeId":3,"types":["ammo"],"requires":[]}
{"nodeId":5,"types":["ammo"],"requires":[]} |
|
Farm the Dragons and Geruta. Shinecharge on the upper platform with the Geruta, then weave back down to the Dragon by the door to interrupt. Entrance condition: {
"comeInWithRMode": {}
}Requires: "h_heatProof"
{
"or": [
"h_heatedCrystalFlashForReserveEnergy",
{
"and": [
"h_RModeCanRefillReserves",
{
"or": [
{
"and": [
{
"enemyKill": {
"enemies": [
[
"Dragon"
],
[
"Dragon"
],
[
"Dragon"
],
[
"Dragon"
],
[
"Dragon"
]
],
"explicitWeapons": [
"Missile",
"Super",
"Charge",
"Plasma"
]
}
},
"Grapple"
]
},
{
"and": [
{
"enemyKill": {
"enemies": [
[
"Dragon"
],
[
"Dragon"
],
[
"Dragon"
],
[
"Dragon"
],
[
"Dragon"
]
]
}
},
"h_lavaProof"
]
}
]
},
{
"partialRefill": {
"type": "ReserveEnergy",
"limit": 20
}
}
]
}
]
}
"canTrickyJump"
{
"or": [
{
"canShineCharge": {
"usedTiles": 15,
"openEnd": 2
}
},
{
"and": [
{
"notable": "Frozen Geruta Shinecharge"
},
"h_trickyFrozenEnemyRunway",
{
"canShineCharge": {
"usedTiles": 17,
"openEnd": 1
}
},
"canShinechargeMovementTricky"
]
}
]
}
{
"autoReserveTrigger": {
"maxReserveEnergy": 95
}
}
"canRModeSparkInterrupt" |
|
Run through all the Pirates and all but the first Multiviola. Run back to the door and use the Multiviola to interrupt. Entrance condition: {
"comeInWithRMode": {}
}Requires: {
"or": [
{
"and": [
"h_heatedCrystalFlashForReserveEnergy",
{
"simpleHeatFrames": 600
},
{
"heatFrames": 180
}
]
},
{
"and": [
"h_heatProof",
"h_RModeCanRefillReserves",
{
"resourceMissingAtMost": [
{
"type": "Missile",
"count": 0
}
]
},
{
"partialRefill": {
"type": "ReserveEnergy",
"limit": 20
}
}
]
}
]
}
"h_shinechargeMaxRunway"
{
"autoReserveTrigger": {}
}
"canRModeSparkInterrupt"
{
"heatFrames": 30
} |
|
Run through Pirates and Multiviolas to farm. Then run through to the end and shinecharge at the speed blocks. Use heat damage to interrupt. Entrance condition: {
"comeInWithRMode": {}
}Requires: {
"or": [
{
"and": [
"h_heatedCrystalFlashForReserveEnergy",
{
"simpleHeatFrames": 300
},
{
"heatFrames": 90
},
{
"or": [
"h_speedDash",
{
"and": [
"h_speedButSlow",
{
"simpleHeatFrames": 325
}
]
}
]
}
]
},
{
"and": [
"h_heatProof",
"h_RModeCanRefillReserves",
{
"resourceMissingAtMost": [
{
"type": "Missile",
"count": 0
}
]
},
{
"partialRefill": {
"type": "ReserveEnergy",
"limit": 20
}
}
]
}
]
}
"h_shinechargeMaxRunway"
"h_heatTriggerRModeSparkInterrupt"Clears obstacles: A |
From: 2
Right Door
To: 1
Left Door
Placing a Power Bomb a 0.5 to 1 tile away from the item plinth to bounce Samus onto it (where the right item usually is) while also overloading PLMs as the explosion hits the left item. Wait for the explosion to completely finish before touching the crumble blocks or they will remain solid. The camera will not scroll to the left side of the room, but it is possible to kill the Sova with the Power Bomb boost. Entrance condition: {
"comeInWithGMode": {
"mode": "direct",
"morphed": true
}
}Requires: "canPowerBombItemOverloadPLMs"
{
"itemNotCollectedAtNode": 4
}
"canRiskPermanentLossOfAccess"
"h_artificialMorphPowerBomb"Collects items: 3 Dev note: FIXME: It is possible to avoid collecting 3 by using a second Power Bomb to boost through the item after PLMs are overloaded. |
From: 2
Right Door
To: 1
Left Door
Touch both the item and the camera scroll blocks in the morph tunnel before PLMs are overloaded, then use either to finish overloading them. This will make it so that Samus can fix the camera after exiting G-mode on the left. It is possible to wait for the Sova to appear on screen before going to the left, in order to ensure Samus won't touch it. With only a Power Bomb boost to touch the item, it is not possible to fix the camera, but it is possible to kill the Sova. Entrance condition: {
"comeInWithGMode": {
"mode": "direct",
"morphed": true
}
}Requires: "canRemoteAcquire"
{
"itemNotCollectedAtNode": 3
}
"canRiskPermanentLossOfAccess"
{
"or": [
"h_artificialMorphMovement",
"h_artificialMorphPowerBomb"
]
}Collects items: 3 Dev note: The only loss of access here is the camera fix, but there is another strat that can be used without. |
From: 1
Top Left Door
To: 7
Junction Below Power Bomb Blocks
Farm the enemies on the bottom - the first Sm. Dessgeega will give back the Power Bomb used to get down. Shinecharge and use any enemy at the bottom to interrupt. Entrance condition: {
"comeInWithRMode": {}
}Requires: {
"or": [
"h_CrystalFlashForReserveEnergy",
{
"and": [
"h_usePowerBomb",
"h_RModeCanRefillReserves",
{
"or": [
{
"resourceMissingAtMost": [
{
"type": "Missile",
"count": 0
}
]
},
{
"resourceMissingAtMost": [
{
"type": "PowerBomb",
"count": 1
}
]
}
]
},
{
"partialRefill": {
"type": "ReserveEnergy",
"limit": 20
}
}
]
}
]
}
"h_shinechargeMaxRunway"
{
"autoReserveTrigger": {
"maxReserveEnergy": 95
}
}
"canRModeSparkInterrupt"Clears obstacles: A, B, C, D |
From: 2
Middle Left Door
To: 7
Junction Below Power Bomb Blocks
Farm the enemies on the bottom - the first Sm. Dessgeega will give back the Power Bomb used to get down. Shinecharge and use any enemy at the bottom to interrupt. Entrance condition: {
"comeInWithRMode": {}
}Requires: {
"or": [
"h_CrystalFlashForReserveEnergy",
{
"and": [
"h_usePowerBomb",
"h_RModeCanRefillReserves",
{
"or": [
{
"resourceMissingAtMost": [
{
"type": "Missile",
"count": 0
}
]
},
{
"resourceMissingAtMost": [
{
"type": "PowerBomb",
"count": 1
}
]
}
]
},
{
"partialRefill": {
"type": "ReserveEnergy",
"limit": 20
}
}
]
}
]
}
"h_shinechargeMaxRunway"
{
"autoReserveTrigger": {
"maxReserveEnergy": 95
}
}
"canRModeSparkInterrupt"Clears obstacles: C, D |
From: 3
Bottom Left Door
To: 7
Junction Below Power Bomb Blocks
Kill or run past an enemy before attempting to Crystal Flash, or farm the Sm. Dessgeegas and Mellas. Shinecharge and use any enemy at the bottom to interrupt. Entrance condition: {
"comeInWithRMode": {}
}Requires: {
"or": [
{
"enemyDamage": {
"enemy": "Sm. Dessgeega",
"type": "contact",
"hits": 1
}
},
{
"enemyKill": {
"enemies": [
[
"Sm. Dessgeega"
]
],
"explicitWeapons": [
"Missile",
"Super"
]
}
}
]
}
{
"or": [
"h_CrystalFlashForReserveEnergy",
{
"and": [
"h_RModeCanRefillReserves",
{
"or": [
{
"resourceMissingAtMost": [
{
"type": "Missile",
"count": 0
}
]
},
{
"resourceMissingAtMost": [
{
"type": "PowerBomb",
"count": 1
}
]
}
]
},
{
"partialRefill": {
"type": "ReserveEnergy",
"limit": 20
}
}
]
}
]
}
"h_shinechargeMaxRunway"
{
"autoReserveTrigger": {
"maxReserveEnergy": 95
}
}
"canRModeSparkInterrupt"Clears obstacles: D |
From: 4
Right Door
To: 7
Junction Below Power Bomb Blocks
Farm the enemies on the bottom - the first Sm. Dessgeega will give back the Power Bomb used to get down. Shinecharge and use any enemy at the bottom to interrupt. Entrance condition: {
"comeInWithRMode": {}
}Requires: "h_speedDash"
{
"or": [
"h_CrystalFlashForReserveEnergy",
{
"and": [
"h_usePowerBomb",
"h_RModeCanRefillReserves",
{
"or": [
{
"resourceMissingAtMost": [
{
"type": "Missile",
"count": 0
}
]
},
{
"resourceMissingAtMost": [
{
"type": "PowerBomb",
"count": 1
}
]
}
]
},
{
"partialRefill": {
"type": "ReserveEnergy",
"limit": 20
}
}
]
}
]
}
"h_shinechargeMaxRunway"
{
"autoReserveTrigger": {
"maxReserveEnergy": 95
}
}
"canRModeSparkInterrupt"Clears obstacles: C, D |
|
Kill the Funes first, then the Sovas. Shinecharge at the bottom and use heat damage to interrupt. Entrance condition: {
"comeInWithRMode": {}
}Requires: {
"or": [
{
"and": [
{
"heatFrames": 30
},
"h_heatedCrystalFlashForReserveEnergy",
{
"heatFrames": 170
}
]
},
{
"and": [
"h_heatProof",
"h_RModeCanRefillReserves",
{
"enemyKill": {
"enemies": [
[
"Fune",
"Fune"
],
[
"Fune"
]
]
}
},
{
"partialRefill": {
"type": "ReserveEnergy",
"limit": 40
}
}
]
}
]
}
{
"enemyKill": {
"enemies": [
[
"Fune"
]
]
}
}
{
"or": [
{
"canShineCharge": {
"usedTiles": 12,
"openEnd": 0
}
},
{
"and": [
{
"doorUnlockedAtNode": 3
},
{
"canShineCharge": {
"usedTiles": 13,
"openEnd": 0
}
}
]
}
]
}
"h_heatTriggerRModeSparkInterrupt"
{
"heatFrames": 10
}Unlocks doors: {"nodeId":3,"types":["ammo"],"requires":[]} |
From: 2
Middle Right Door
To: 3
Bottom Right Door
Kill the Funes first, then the Sovas. Shinecharge at the bottom and use heat damage to interrupt. Entrance condition: {
"comeInWithRMode": {}
}Requires: {
"enemyKill": {
"enemies": [
[
"Fune"
]
]
}
}
{
"or": [
{
"and": [
"h_heatedCrystalFlashForReserveEnergy",
{
"heatFrames": 280
}
]
},
{
"and": [
"Morph",
"h_heatProof",
"h_RModeCanRefillReserves",
{
"enemyKill": {
"enemies": [
[
"Fune",
"Fune"
],
[
"Fune"
]
]
}
},
{
"partialRefill": {
"type": "ReserveEnergy",
"limit": 40
}
}
]
}
]
}
{
"or": [
{
"canShineCharge": {
"usedTiles": 12,
"openEnd": 0
}
},
{
"and": [
{
"doorUnlockedAtNode": 3
},
{
"canShineCharge": {
"usedTiles": 13,
"openEnd": 0
}
}
]
}
]
}
"h_heatTriggerRModeSparkInterrupt"
{
"heatFrames": 10
}Unlocks doors: {"nodeId":3,"types":["ammo"],"requires":[]} |
From: 3
Bottom Right Door
To: 3
Bottom Right Door
Kill the Funes first, then the Sovas. Shinecharge at the bottom and use heat damage to interrupt. Entrance condition: {
"comeInWithRMode": {}
}Requires: {
"enemyKill": {
"enemies": [
[
"Fune"
]
]
}
}
{
"or": [
"h_heatedCrystalFlashForReserveEnergy",
{
"and": [
"h_heatProof",
"h_RModeCanRefillReserves",
{
"enemyKill": {
"enemies": [
[
"Fune",
"Fune"
],
[
"Fune"
]
]
}
},
{
"partialRefill": {
"type": "ReserveEnergy",
"limit": 40
}
}
]
}
]
}
{
"or": [
{
"canShineCharge": {
"usedTiles": 12,
"openEnd": 0
}
},
{
"and": [
{
"doorUnlockedAtNode": 3
},
{
"canShineCharge": {
"usedTiles": 13,
"openEnd": 0
}
}
]
}
]
}
"h_heatTriggerRModeSparkInterrupt"
{
"heatFrames": 10
}Unlocks doors: {"nodeId":3,"types":["ammo"],"requires":[]} |
From: 2
Top Door
To: 4
Central Junction
Farm for reserves and to clear enough runway to shinecharge. Interrupt from Crocomire's swipe or fireballs, or kill Crocomire and use the acid. Entrance condition: {
"comeInWithRMode": {},
"comesThroughToilet": "no"
}Requires: {
"not": "f_DefeatedCrocomire"
}
"canRiskPermanentLossOfAccess"
"canDodgeWhileShooting"
"canBePatient"
{
"or": [
{
"ammo": {
"type": "Missile",
"count": 30
}
},
{
"and": [
"canFarmWhileShooting",
{
"ammo": {
"type": "Missile",
"count": 2
}
},
{
"resourceCapacity": [
{
"type": "Missile",
"count": 10
}
]
}
]
},
{
"and": [
"Charge",
{
"disableEquipment": "Plasma"
}
]
}
]
}
{
"refill": [
"Energy"
]
}
"h_shinechargeMaxRunway"
{
"autoReserveTrigger": {
"maxReserveEnergy": 95
}
}
"canRModeSparkInterrupt"Clears obstacles: f_DefeatedCrocomire, door_2 Sets flags: f_DefeatedCrocomire |
From: 4
Central Junction
To: 4
Central Junction
Requires: {
"not": "f_DefeatedCrocomire"
}
"canRiskPermanentLossOfAccess"
{
"canShineCharge": {
"usedTiles": 22,
"openEnd": 1
}
}
{
"spikeHits": 1
}
"canSpikeSuit"
"h_spikeSuitSpikeHitLeniency"
{
"shinespark": {
"frames": 4,
"excessFrames": 4
}
} |
From: 1
Left Door
To: 5
Small Platforms Junction
Crystal Flash, or farm Mellas and use a Power Bomb. Run through the speed blocks and use a Mella or the acid to interrupt. Entrance condition: {
"comeInWithRMode": {}
}Requires: {
"or": [
"h_CrystalFlashForReserveEnergy",
{
"and": [
"h_RModeCanRefillReserves",
{
"resourceMissingAtMost": [
{
"type": "Missile",
"count": 0
}
]
},
{
"partialRefill": {
"type": "ReserveEnergy",
"limit": 20
}
},
"h_usePowerBomb"
]
}
]
}
"h_shinechargeMaxRunway"
{
"or": [
{
"autoReserveTrigger": {
"maxReserveEnergy": 95
}
},
{
"and": [
{
"autoReserveTrigger": {}
},
{
"acidFrames": 20
}
]
}
]
}
"canRModeSparkInterrupt"Clears obstacles: A, B |
From: 1
Left Door
To: 5
Small Platforms Junction
Get past the speed blocks and farm the Mellas. Shinecharge while running back and use a Mella to interrupt. Getting past the blocks without Morph requires either an Insane Short Charge or an Acid Shinespark. Entrance condition: {
"comeInWithRMode": {}
}Requires: {
"or": [
"Morph",
{
"getBlueSpeed": {
"usedTiles": 12,
"gentleDownTiles": 6,
"openEnd": 1
}
},
{
"and": [
{
"notable": "Acid Shinespark"
},
"Gravity",
"canSuitlessLavaDive",
"h_shinechargeMaxRunway",
{
"acidFrames": 120
},
{
"shinespark": {
"frames": 35
}
}
]
}
]
}
"h_RModeCanRefillReserves"
{
"resourceMissingAtMost": [
{
"type": "Missile",
"count": 0
}
]
}
{
"partialRefill": {
"type": "ReserveEnergy",
"limit": 20
}
}
{
"canShineCharge": {
"usedTiles": 17,
"openEnd": 0
}
}
{
"autoReserveTrigger": {
"maxReserveEnergy": 95
}
}
"canRModeSparkInterrupt"Clears obstacles: B Dev note: FIXME: The acid spark could benefit from farming a Ripper first instead of needing to end with 99 E and disableable tanks. It could also maybe be done with both suits and some farming luck. |
From: 2
Right Vertical Door
To: 5
Small Platforms Junction
Crystal Flash, or farm Mellas and use a Power Bomb. Run through the speed blocks and use a Mella or the acid to interrupt. Entrance condition: {
"comeInWithRMode": {},
"comesThroughToilet": "no"
}Requires: {
"or": [
"h_CrystalFlashForReserveEnergy",
{
"and": [
"h_RModeCanRefillReserves",
{
"resourceMissingAtMost": [
{
"type": "Missile",
"count": 0
}
]
},
{
"partialRefill": {
"type": "ReserveEnergy",
"limit": 20
}
},
"h_usePowerBomb"
]
}
]
}
"h_shinechargeMaxRunway"
{
"or": [
{
"autoReserveTrigger": {
"maxReserveEnergy": 95
}
},
{
"and": [
{
"autoReserveTrigger": {}
},
{
"acidFrames": 20
}
]
}
]
}
"canRModeSparkInterrupt"Clears obstacles: A, B |
From: 2
Right Vertical Door
To: 5
Small Platforms Junction
Farm the Mellas for energy, then run through the speed blocks, shinecharge, and use a Mella to interrupt. Entrance condition: {
"comeInWithRMode": {},
"comesThroughToilet": "no"
}Requires: "h_RModeCanRefillReserves"
{
"resourceMissingAtMost": [
{
"type": "Missile",
"count": 0
}
]
}
{
"partialRefill": {
"type": "ReserveEnergy",
"limit": 20
}
}
{
"canShineCharge": {
"usedTiles": 17,
"openEnd": 0
}
}
{
"autoReserveTrigger": {
"maxReserveEnergy": 95
}
}
"canRModeSparkInterrupt"Clears obstacles: B |
From: 2
Bottom Right Door
To: 4
Junction Above Acid Plug, Without Acid
Entrance condition: {
"comeInWithRMode": {}
}Requires: "canRModeStandupClip"
"h_RModeCanRefillReserves"
"h_heatProof"
"Morph"
{
"or": [
"h_bombThings",
{
"haveBlueSuit": {}
}
]
}
{
"or": [
"HiJump",
"canWallJump",
"canSpringBallJumpMidAir",
"canDoubleBombJump"
]
}
{
"partialRefill": {
"type": "ReserveEnergy",
"limit": 100
}
}
{
"disableEquipment": "Varia"
}
{
"autoReserveTrigger": {
"implicitHeatFrames": "suitless"
}
}
{
"suitlessHeatFrames": 30
} |
|
With Crystal Flash the best option is to wait for the rippers to start going off screen. Then the two bottom ones will be destroyed by the light orb and drop Supers for opening the gate. With Screw Attack, you'll want to tag the top Ripper of the first pair to appear, then the three that come in behind them, and grab the second Ripper of the first pair on the way down from the jump. Then jump into the last Ripper on the way across to the platform, pausing to get its energy. You can also lay an immediate Power Bomb. Roll off of it (or time a morph/unmorph to avoid a bomb jump) and then collect the drops from the five supers that get hit. Jump past the last ripper on the way to the platform. The drops give a lot of Reserve if collected quickly - manually draw some of it to have enough energy to shinecharge. Open the gate and go back to the left side to start running right. If you have Varia, you can afford to spare a Ripper of choice and use it to interrupt. Do so close to the right door and the Ripper won't make it back in time to hit you again even with a 400-point Reserve fill. Otherwise, you will use a heat interrupt: shoot the door as you approach during the run and shinecharge before you reach it. With Varia you can afford to go back and use Power Bombs or Supers to farm any remaining Rippers, but Screw Attack will no longer destroy them while you have blue suit. Entrance condition: {
"comeInWithRMode": {}
}Requires: {
"or": [
{
"and": [
{
"heatFrames": 150
},
"h_heatedCrystalFlashForReserveEnergy",
{
"partialRefill": {
"type": "Super",
"limit": 1
}
}
]
},
{
"and": [
"h_RModeCanRefillReserves",
"ScrewAttack",
{
"heatFramesWithEnergyDrops": {
"frames": 350,
"drops": [
{
"enemy": "Ripper 2 (red)",
"count": 4
}
]
}
},
{
"or": [
{
"and": [
"h_heatProof",
{
"resourceMissingAtMost": [
{
"type": "Super",
"count": 4
}
]
}
]
},
{
"resourceMissingAtMost": [
{
"type": "Super",
"count": 0
}
]
}
]
},
{
"partialRefill": {
"type": "ReserveEnergy",
"limit": 20
}
}
]
},
{
"and": [
"h_RModeCanRefillReserves",
{
"enemyKill": {
"enemies": [
[
"Ripper 2 (red)",
"Ripper 2 (red)"
]
],
"explicitWeapons": [
"PowerBomb"
]
}
},
{
"heatFrames": 236
},
{
"or": [
{
"and": [
"h_heatProof",
{
"resourceMissingAtMost": [
{
"type": "Super",
"count": 4
}
]
}
]
},
{
"resourceMissingAtMost": [
{
"type": "Super",
"count": 0
}
]
}
]
},
{
"partialRefill": {
"type": "ReserveEnergy",
"limit": 50
}
}
]
}
]
}
{
"ammo": {
"type": "Super",
"count": 1
}
}
{
"heatFrames": 144
}
{
"canShineCharge": {
"usedTiles": 28,
"openEnd": 0
}
}
{
"or": [
{
"and": [
"h_heatProof",
{
"autoReserveTrigger": {}
},
"canRModeSparkInterrupt"
]
},
"h_heatTriggerRModeSparkInterrupt"
]
}
{
"heatFrames": 10
}Clears obstacles: A, B |
From: 1
Left Door
To: 3
Junction Left of Green Gate
With Crystal Flash the best option is to wait for the rippers to start going off screen. Then the two bottom ones will be destroyed by the light orb and drop Supers for opening the gate. With Screw Attack, you'll want to tag the top Ripper of the first pair to appear, then the three that come in behind them, and grab the second Ripper of the first pair on the way down from the jump. Then jump into the last Ripper on the way across to the platform, pausing to get its energy. You can also lay an immediate Power Bomb. Roll off of it (or time a morph/unmorph to avoid a bomb jump) and then collect the drops from the five supers that get hit. Jump past the last ripper on the way to the platform. The drops give a lot of Reserve if collected quickly - manually draw some of it to have enough energy to shinecharge. With Varia, you can spare one Ripper of your choice. For high reserve after Crystal Flash, the best is any of the bottom three as they have the longest cycle. Run left to right and shinecharge near the gate, and take the interrupt hit with the Ripper moving right. Otherwise, use a heat interrupt, and run right to left so that you're closer to the left door for less energy used to escape. If any rippers remain, you can farm them with Power Bombs (or Supers at low health) but Screw Attack will no longer destroy them while you have blue suit. Entrance condition: {
"comeInWithRMode": {}
}Requires: {
"or": [
{
"and": [
{
"heatFrames": 150
},
"h_heatedCrystalFlashForReserveEnergy",
{
"partialRefill": {
"type": "Super",
"limit": 1
}
}
]
},
{
"and": [
"h_RModeCanRefillReserves",
"ScrewAttack",
{
"heatFramesWithEnergyDrops": {
"frames": 350,
"drops": [
{
"enemy": "Ripper 2 (red)",
"count": 4
}
]
}
},
{
"or": [
{
"and": [
"h_heatProof",
{
"resourceMissingAtMost": [
{
"type": "Super",
"count": 4
}
]
}
]
},
{
"resourceMissingAtMost": [
{
"type": "Super",
"count": 0
}
]
}
]
},
{
"partialRefill": {
"type": "ReserveEnergy",
"limit": 20
}
}
]
},
{
"and": [
"h_RModeCanRefillReserves",
{
"enemyKill": {
"enemies": [
[
"Ripper 2 (red)",
"Ripper 2 (red)"
]
],
"explicitWeapons": [
"PowerBomb"
]
}
},
{
"heatFrames": 236
},
{
"or": [
{
"and": [
"h_heatProof",
{
"resourceMissingAtMost": [
{
"type": "Super",
"count": 4
}
]
}
]
},
{
"resourceMissingAtMost": [
{
"type": "Super",
"count": 0
}
]
}
]
},
{
"partialRefill": {
"type": "ReserveEnergy",
"limit": 50
}
}
]
}
]
}
{
"heatFrames": 64
}
{
"canShineCharge": {
"usedTiles": 18,
"openEnd": 0
}
}
{
"or": [
{
"autoReserveTrigger": {
"maxReserveEnergy": 300
}
},
{
"and": [
{
"autoReserveTrigger": {}
},
{
"enemyDamage": {
"enemy": "Ripper 2 (red)",
"type": "contact",
"hits": 1
}
}
]
}
]
}
{
"or": [
{
"and": [
"h_heatProof",
{
"or": [
{
"autoReserveTrigger": {
"maxReserveEnergy": 300
}
},
{
"and": [
{
"autoReserveTrigger": {}
},
{
"enemyDamage": {
"enemy": "Ripper 2 (red)",
"type": "contact",
"hits": 1
}
}
]
}
]
},
"canRModeSparkInterrupt"
]
},
"h_heatTriggerRModeSparkInterrupt"
]
}Clears obstacles: B |
|
You can Crystal Flash first, then open the gate, dodge the bottom most rippers that come across the platform, and pick up their Super drops when they hit the light orb. Alternatively, open the gate first, farm the bottom two Rippers with Power Bombs or Screw Attack to get your Supers back and Crystal Flash afterwards. The runway is now clear to shinecharge. Alternatively, you can farm with Screw Attack or Power Bombs. Kill the bottom two Rippers first, then the one bouncing between platforms. Keep the third Ripper from the top alive for the best interrupt. With high reserve energy, take the interrupt close to the right door and with the Ripper moving right - it will not come back in time to hit you again. Once you have blue suit, you cannot kill any more Rippers with Screw Attack, but you are still invulnerable to contact hits. Entrance condition: {
"comeInWithRMode": {}
}Requires: "h_heatedGreenGateGlitch"
{
"or": [
{
"and": [
{
"or": [
{
"resourceAvailable": [
{
"type": "Super",
"count": 10
}
]
},
{
"and": [
{
"resourceAvailable": [
{
"type": "Super",
"count": 8
}
]
},
{
"resourceAvailable": [
{
"type": "Energy",
"count": 51
}
]
},
{
"or": [
"ScrewAttack",
{
"enemyKill": {
"enemies": [
[
"Ripper 2 (red)",
"Ripper 2 (red)"
]
],
"explicitWeapons": [
"PowerBomb"
]
}
}
]
},
{
"heatFrames": 600
},
{
"partialRefill": {
"type": "Super",
"limit": 10
}
}
]
}
]
},
"h_heatedCrystalFlashForReserveEnergy"
]
},
{
"and": [
{
"or": [
"ScrewAttack",
{
"enemyKill": {
"enemies": [
[
"Ripper 2 (red)",
"Ripper 2 (red)"
],
[
"Ripper 2 (red)"
]
],
"explicitWeapons": [
"PowerBomb"
]
}
}
]
},
"h_heatProof",
"h_RModeCanRefillReserves",
{
"resourceMissingAtMost": [
{
"type": "Super",
"count": 2
}
]
},
{
"partialRefill": {
"type": "ReserveEnergy",
"limit": 60
}
}
]
},
{
"and": [
{
"or": [
"ScrewAttack",
{
"enemyKill": {
"enemies": [
[
"Ripper 2 (red)"
]
],
"explicitWeapons": [
"PowerBomb"
]
}
}
]
},
"h_heatProof",
"h_RModeCanRefillReserves",
{
"resourceMissingAtMost": [
{
"type": "Super",
"count": 4
}
]
},
{
"partialRefill": {
"type": "ReserveEnergy",
"limit": 20
}
}
]
}
]
}
{
"canShineCharge": {
"usedTiles": 28,
"openEnd": 0
}
}
{
"autoReserveTrigger": {}
}
{
"or": [
{
"and": [
"h_heatProof",
{
"autoReserveTrigger": {}
},
"canRModeSparkInterrupt"
]
},
"h_heatTriggerRModeSparkInterrupt"
]
}Clears obstacles: A, B |
From: 1
Left Door
To: 2
Right Door
At any point during the fight, use a Crystal Flash. Then damage down enough to survive one hit. Run into and through GT, turn around, and start down the runway. Get shinecharged, come back and interrupt using whatever attack pattern is ongoing. Then finish the fight. Blue suit will give invulnerability but otherwise does not help to defeat Golden Torizo. Entrance condition: {
"comeInWithRMode": {}
}Requires: "h_heatProof"
{
"not": "f_DefeatedGoldenTorizo"
}
"canRiskPermanentLossOfAccess"
{
"notable": "Crystal Flash During Fight"
}
"h_heatedCrystalFlashForReserveEnergy"
{
"enemyDamage": {
"enemy": "Golden Torizo",
"type": "contact",
"hits": 1
}
}
"canUseIFrames"
{
"canShineCharge": {
"usedTiles": 28,
"openEnd": 0
}
}
{
"autoReserveTrigger": {
"maxReserveEnergy": 95
}
}
"canRModeSparkInterrupt"Clears obstacles: f_DefeatedGoldenTorizo Sets flags: f_DefeatedGoldenTorizo |
|
Avoid stepping on all three crumble blocks before moving through the item to overload PLMs, then go through the crumble blocks. After dropping below, move to the door quickly in order to prevent GT falling on Samus. Note that if the item is not there, it is still possible to overload PLMs by using bomb spreads on crumble blocks that have never been stepped on. Entrance condition: {
"comeInWithGMode": {
"mode": "direct",
"morphed": false
}
}Requires: "canRemoteAcquire"
{
"or": [
{
"and": [
{
"itemNotCollectedAtNode": 3
},
"canRiskPermanentLossOfAccess"
]
},
{
"and": [
"Charge",
"h_useMorphBombs"
]
}
]
}
"h_heatedGModeOffCameraDoor"Exit condition: {
"leaveNormally": {}
}Collects items: 3 Unlocks doors: {"types":["missiles"],"requires":[{"heatFrames":50}]}
{"types":["super"],"requires":[]}
{"types":["powerbomb"],"requires":[{"heatFrames":110}]}Dev note: This strat forces Samus to leave the room because the camera is stuck at the top left of the room. FIXME: It is possible to get to the top right item, but its not easy or too useful. It is possible to use the item to break the Bomb blocks and escape. Fighting GT while blind is unreasonable. |
From: 1
Left Door
To: 2
Right Door
Manipulate into the GT Safe Spot and farm for energy. Keep your Missiles below 30 to force the attack pattern that has drops. Taking damage to get ready for the interrupt may require leaving the safe spot. Leave enough to survive one hit from GT. Push GT back into the corner, run into and through to get your shinecharge. Come back and interrupt using whatever attack pattern is happening. After you gain blue suit, you'll need to use any standard kill strategy. Blue suit will not help with defeating GT except for invulnerability. Entrance condition: {
"comeInWithRMode": {}
}Requires: {
"not": "f_DefeatedGoldenTorizo"
}
"canRiskPermanentLossOfAccess"
{
"heatFrames": 700
}
{
"notable": "Safe Spot Kill"
}
{
"or": [
"h_heatProof",
{
"and": [
"Plasma",
{
"resourceMaxCapacity": [
{
"type": "Missile",
"count": 30
}
]
},
{
"resourceMaxCapacity": [
{
"type": "RegularEnergy",
"count": 99
}
]
}
]
}
]
}
{
"refill": [
"ReserveEnergy"
]
}
{
"enemyDamage": {
"enemy": "Golden Torizo",
"type": "contact",
"hits": 1
}
}
"canUseIFrames"
{
"canShineCharge": {
"usedTiles": 28,
"openEnd": 0
}
}
{
"autoReserveTrigger": {
"maxReserveEnergy": 95
}
}
"canRModeSparkInterrupt" |
From: 2
Right Door
To: 2
Right Door
At any point during the fight, use a Crystal Flash. Then damage down enough to survive one hit. Run into and through GT, turn around, and start down the runway. Get shinecharged, come back and interrupt using whatever attack pattern is ongoing. Then finish the fight. Blue suit will give invulnerability but otherwise does not help to defeat Golden Torizo. Entrance condition: {
"comeInWithRMode": {}
}Requires: "h_heatProof"
{
"not": "f_DefeatedGoldenTorizo"
}
"canRiskPermanentLossOfAccess"
{
"notable": "Crystal Flash During Fight"
}
"h_heatedCrystalFlashForReserveEnergy"
{
"enemyDamage": {
"enemy": "Golden Torizo",
"type": "contact",
"hits": 1
}
}
"canUseIFrames"
{
"canShineCharge": {
"usedTiles": 28,
"openEnd": 0
}
}
{
"autoReserveTrigger": {
"maxReserveEnergy": 95
}
}
"canRModeSparkInterrupt"Clears obstacles: f_DefeatedGoldenTorizo, door_2 Sets flags: f_DefeatedGoldenTorizo Dev note: FIXME: Evaluate heated fight options. |
From: 2
Right Door
To: 2
Right Door
Manipulate into the GT Safe Spot and farm for energy. Keep your Missiles below 30 to force the attack pattern that has drops. Taking damage to get ready for the interrupt may require leaving the safe spot. Leave enough to survive one hit from GT. Push GT back into the corner, run into and through to get your shinecharge. Come back and interrupt using whatever attack pattern is happening. After you gain blue suit, you'll need to use any standard kill strategy. Blue suit will not help with defeating GT except for invulnerability. Entrance condition: {
"comeInWithRMode": {}
}Requires: {
"not": "f_DefeatedGoldenTorizo"
}
"canRiskPermanentLossOfAccess"
{
"heatFrames": 540
}
{
"notable": "Safe Spot Kill"
}
{
"or": [
"h_heatProof",
{
"resourceMaxCapacity": [
{
"type": "Missile",
"count": 30
}
]
}
]
}
{
"refill": [
"Energy"
]
}
{
"enemyDamage": {
"enemy": "Golden Torizo",
"type": "contact",
"hits": 1
}
}
"canUseIFrames"
{
"canShineCharge": {
"usedTiles": 28,
"openEnd": 0
}
}
{
"autoReserveTrigger": {
"maxReserveEnergy": 95
}
}
"canRModeSparkInterrupt"Clears obstacles: door_2 |
|
Requires: {
"not": "f_DefeatedGoldenTorizo"
}
"canRiskPermanentLossOfAccess"
{
"enemyDamage": {
"enemy": "Golden Torizo",
"type": "contact",
"hits": 1
}
} |
From: 1
Bottom Left Door
To: 3
Top Right Door
Enter the room in Direct G-mode, with the item uncollected. Bomb the Chozo ball to overload PLMs then IBJ to the top. Entrance condition: {
"comeInWithGMode": {
"mode": "direct",
"morphed": true
}
}Requires: {
"itemNotCollectedAtNode": 4
}
"canRiskPermanentLossOfAccess"
"h_artificialMorphLongIBJ"
"h_heatedGModeOpenDifferentDoor" |
From: 1
Bottom Left Door
To: 3
Top Right Door
Enter the room in Direct G-mode, with the item uncollected. Shoot the Chozo ball to overload PLMs then climb the room. Entrance condition: {
"comeInWithGMode": {
"mode": "direct",
"morphed": false
}
}Requires: {
"itemNotCollectedAtNode": 4
}
"canRiskPermanentLossOfAccess"
{
"or": [
"SpaceJump",
"canSpringwall"
]
}
"h_heatedGModeOpenDifferentDoor" |
From: 1
Bottom Left Door
To: 5
Junction Above Bottom Blocks
Enter the room in Direct G-mode, with the item uncollected. Shoot the Chozo ball to overload PLMs then climb the room. Entrance condition: {
"comeInWithGMode": {
"mode": "direct",
"morphed": false
}
}Requires: "h_heatedGMode"
{
"itemNotCollectedAtNode": 4
}
"canRiskPermanentLossOfAccess"
{
"heatFrames": 0
} |
From: 2
Right Door
To: 2
Right Door
If you're fast, you can find enough time to kill a Yellow Pirate on the way up: Supers, Screw Attack, or charged Microwave are fast enough to do this. Either way, kill the pirate at the top, Crystal Flash if you need it, and get the shinecharge. If you're heat-proof, wait for the acid to finish rising and you can interrupt in the small bit that reaches the runway. Otherwise, use heat to interrupt. Requires: {
"obstaclesCleared": [
"R-Mode"
]
}
{
"obstaclesCleared": [
"A"
]
}
{
"or": [
"h_heatedCrystalFlashForReserveEnergy",
{
"and": [
{
"or": [
"ScrewAttack",
{
"and": [
"Charge",
"Plasma",
"canXRayWaitForIFrames"
]
},
{
"enemyKill": {
"enemies": [
[
"Yellow Space Pirate (standing)"
]
],
"explicitWeapons": [
"Super"
]
}
}
]
},
"h_RModeCanRefillReserves",
{
"resourceMissingAtMost": [
{
"type": "Missile",
"count": 0
}
]
},
{
"partialRefill": {
"type": "ReserveEnergy",
"limit": 20
}
}
]
}
]
}
{
"enemyKill": {
"enemies": [
[
"Yellow Space Pirate (standing)"
]
]
}
}
{
"canShineCharge": {
"usedTiles": 20,
"gentleDownTiles": 6,
"openEnd": 1
}
}
{
"or": [
"h_heatTriggerRModeSparkInterrupt",
{
"and": [
"h_heatProof",
{
"autoReserveTrigger": {}
},
"canRModeSparkInterrupt",
{
"acidFrames": 32
}
]
}
]
}Resets obstacles: R-Mode, A |
From: 2
Right Door
To: 2
Right Door
Kill the runway pirate for a drop and Crystal Flash if needed. To interrupt, you can either use heat, or stand in the acid at the very end of the runway. Acid damage does not accumulate during reserve trigger as heat does, so escape quickly to minimize exposure. Entrance condition: {
"comeInWithRMode": {}
}Requires: {
"or": [
"h_heatedCrystalFlashForReserveEnergy",
{
"and": [
"h_RModeCanRefillReserves",
{
"enemyKill": {
"enemies": [
[
"Yellow Space Pirate (standing)"
]
]
}
},
{
"resourceMissingAtMost": [
{
"type": "Missile",
"count": 0
}
]
},
{
"partialRefill": {
"type": "ReserveEnergy",
"limit": 20
}
}
]
}
]
}
{
"canShineCharge": {
"usedTiles": 20,
"gentleDownTiles": 6,
"openEnd": 1
}
}
{
"or": [
"h_heatTriggerRModeSparkInterrupt",
{
"and": [
{
"autoReserveTrigger": {}
},
"canRModeSparkInterrupt",
{
"acidFrames": 32
},
{
"heatFrames": 32
}
]
}
]
} |
From: 1
Top Left Door
To: 1
Top Left Door
Kill the bottom standing pirate. Shinecharge over the PB blocks and then jump into a wall pirate shot to interrupt. Entrance condition: {
"comeInWithRMode": {}
}Requires: "h_heatProof"
"h_RModeCanRefillReserves"
"canDodgeWhileShooting"
{
"or": [
{
"enemyKill": {
"enemies": [
[
"Yellow Space Pirate (standing)",
"Yellow Space Pirate (wall)",
"Yellow Space Pirate (wall)"
]
],
"explicitWeapons": [
"ScrewAttack",
"Charge+Plasma",
"Charge+Ice+Wave+Spazer",
"Missile",
"Super"
]
}
},
{
"and": [
{
"enemyKill": {
"enemies": [
[
"Yellow Space Pirate (standing)",
"Yellow Space Pirate (wall)",
"Yellow Space Pirate (wall)"
]
],
"explicitWeapons": [
"Charge"
]
}
},
"canBePatient"
]
}
]
}
{
"or": [
{
"resourceMissingAtMost": [
{
"type": "Missile",
"count": 0
}
]
},
"canBeLucky"
]
}
{
"partialRefill": {
"type": "ReserveEnergy",
"limit": 20
}
}
{
"or": [
{
"canShineCharge": {
"usedTiles": 12,
"openEnd": 0
}
},
{
"and": [
{
"doorUnlockedAtNode": 1
},
{
"canShineCharge": {
"usedTiles": 13,
"openEnd": 0
}
}
]
}
]
}
{
"autoReserveTrigger": {
"maxReserveEnergy": 95
}
}
"canRModeSparkInterrupt"Unlocks doors: {"nodeId":1,"types":["missiles","super"],"requires":[]}
{"nodeId":1,"types":["powerbomb"],"requires":["never"]} |
|
Kill the pirates to get them out of the way before using a Crystal Flash on the floating platform to open the bomb barrier. Alternatively, farm them for energy and use a Power Bomb on the floating platform. Shinecharge at the bottom runway and then jump into a Viola to interrupt. For power bomb pirate kill: interrupt the standing pirate with a shot then jump and place the power bomb low to hit all three pirates. Repeat three times. For slow charge beam: interrupt with a shot, then crouch and fire charged shots. Jump when the wall pirate approaches to make it jump to the other wall. Entrance condition: {
"comeInWithRMode": {}
}Requires: "h_heatProof"
{
"or": [
{
"and": [
{
"or": [
{
"enemyKill": {
"enemies": [
[
"Yellow Space Pirate (standing)",
"Yellow Space Pirate (wall)",
"Yellow Space Pirate (wall)"
]
],
"explicitWeapons": [
"ScrewAttack",
"Charge+Plasma",
"Charge+Ice+Wave+Spazer",
"Missile",
"Super"
]
}
},
{
"and": [
{
"enemyKill": {
"enemies": [
[
"Yellow Space Pirate (standing)",
"Yellow Space Pirate (wall)",
"Yellow Space Pirate (wall)"
]
],
"explicitWeapons": [
"Charge"
]
}
},
"canBePatient"
]
},
"h_usePowerBomb"
]
},
"h_heatedCrystalFlashForReserveEnergy"
]
},
{
"and": [
"h_heatProof",
"h_RModeCanRefillReserves",
"canDodgeWhileShooting",
{
"or": [
{
"enemyKill": {
"enemies": [
[
"Yellow Space Pirate (standing)",
"Yellow Space Pirate (wall)",
"Yellow Space Pirate (wall)"
]
],
"explicitWeapons": [
"ScrewAttack",
"Charge+Plasma",
"Charge+Ice+Wave+Spazer",
"Missile",
"Super"
]
}
},
{
"and": [
{
"enemyKill": {
"enemies": [
[
"Yellow Space Pirate (standing)",
"Yellow Space Pirate (wall)",
"Yellow Space Pirate (wall)"
]
],
"explicitWeapons": [
"Charge"
]
}
},
"canBePatient"
]
},
{
"and": [
{
"enemyKill": {
"enemies": [
[
"Yellow Space Pirate (standing)",
"Yellow Space Pirate (wall)",
"Yellow Space Pirate (wall)"
]
],
"explicitWeapons": [
"PowerBomb"
]
}
},
"canTrickyDodgeEnemies"
]
}
]
},
{
"or": [
{
"resourceMissingAtMost": [
{
"type": "Missile",
"count": 0
}
]
},
"canBeLucky"
]
},
"h_usePowerBomb",
{
"partialRefill": {
"type": "ReserveEnergy",
"limit": 20
}
}
]
}
]
}
{
"or": [
{
"canShineCharge": {
"usedTiles": 12,
"gentleUpTiles": 2,
"gentleDownTiles": 2,
"openEnd": 0
}
},
{
"and": [
{
"or": [
{
"doorUnlockedAtNode": 2
},
{
"doorUnlockedAtNode": 3
}
]
},
{
"canShineCharge": {
"usedTiles": 13,
"gentleUpTiles": 2,
"gentleDownTiles": 2,
"openEnd": 0
}
}
]
},
{
"and": [
{
"doorUnlockedAtNode": 2
},
{
"doorUnlockedAtNode": 3
},
{
"canShineCharge": {
"usedTiles": 14,
"gentleUpTiles": 2,
"gentleDownTiles": 2,
"openEnd": 0
}
}
]
}
]
}
{
"autoReserveTrigger": {}
}
"canRModeSparkInterrupt"Clears obstacles: A Unlocks doors: {"nodeId":2,"types":["ammo"],"requires":[]}
{"nodeId":3,"types":["ammo"],"requires":[]} |
From: 2
Bottom Left Door
To: 5
Bottom Junction
Entrance condition: {
"comeInWithRMode": {}
}Requires: "h_heatProof"
"h_RModeCanRefillReserves"
{
"resourceMissingAtMost": [
{
"type": "PowerBomb",
"count": 0
}
]
}
{
"partialRefill": {
"type": "ReserveEnergy",
"limit": 10
}
}
{
"or": [
{
"canShineCharge": {
"usedTiles": 12,
"gentleUpTiles": 2,
"gentleDownTiles": 2,
"openEnd": 0
}
},
{
"and": [
{
"or": [
{
"doorUnlockedAtNode": 2
},
{
"doorUnlockedAtNode": 3
}
]
},
{
"canShineCharge": {
"usedTiles": 13,
"gentleUpTiles": 2,
"gentleDownTiles": 2,
"openEnd": 0
}
}
]
},
{
"and": [
{
"doorUnlockedAtNode": 2
},
{
"doorUnlockedAtNode": 3
},
{
"canShineCharge": {
"usedTiles": 14,
"gentleUpTiles": 2,
"gentleDownTiles": 2,
"openEnd": 0
}
}
]
}
]
}
{
"autoReserveTrigger": {}
}
"canRModeSparkInterrupt"Unlocks doors: {"nodeId":2,"types":["ammo"],"requires":[]}
{"nodeId":3,"types":["ammo"],"requires":[]} |
From: 3
Bottom Right Door
To: 5
Bottom Junction
Farm one Viola and shinecharge. Use the other to interrupt. Entrance condition: {
"comeInWithRMode": {}
}Requires: "h_heatProof"
"h_RModeCanRefillReserves"
{
"resourceMissingAtMost": [
{
"type": "PowerBomb",
"count": 0
}
]
}
{
"partialRefill": {
"type": "ReserveEnergy",
"limit": 10
}
}
{
"or": [
{
"canShineCharge": {
"usedTiles": 12,
"gentleUpTiles": 2,
"gentleDownTiles": 2,
"openEnd": 0
}
},
{
"and": [
{
"or": [
{
"doorUnlockedAtNode": 2
},
{
"doorUnlockedAtNode": 3
}
]
},
{
"canShineCharge": {
"usedTiles": 13,
"gentleUpTiles": 2,
"gentleDownTiles": 2,
"openEnd": 0
}
}
]
},
{
"and": [
{
"doorUnlockedAtNode": 2
},
{
"doorUnlockedAtNode": 3
},
{
"canShineCharge": {
"usedTiles": 14,
"gentleUpTiles": 2,
"gentleDownTiles": 2,
"openEnd": 0
}
}
]
}
]
}
{
"autoReserveTrigger": {}
}
"canRModeSparkInterrupt"Unlocks doors: {"nodeId":2,"types":["ammo"],"requires":[]}
{"nodeId":3,"types":["ammo"],"requires":[]} |
From: 4
Top Right Door
To: 1
Top Left Door
Avoid the wall pirate while falling in. Kill the bottom standing pirate. Shinecharge over the PB blocks and then jump into a wall pirate shot to interrupt. Entrance condition: {
"comeInWithRMode": {}
}Requires: "h_heatProof"
"canCarefulJump"
{
"enemyKill": {
"enemies": [
[
"Yellow Space Pirate (standing)",
"Yellow Space Pirate (wall)",
"Yellow Space Pirate (wall)"
]
],
"excludedWeapons": [
"PowerBomb"
]
}
}
"h_RModeCanRefillReserves"
"canDodgeWhileShooting"
{
"or": [
{
"enemyKill": {
"enemies": [
[
"Yellow Space Pirate (standing)",
"Yellow Space Pirate (wall)",
"Yellow Space Pirate (wall)"
]
],
"explicitWeapons": [
"ScrewAttack",
"Charge+Plasma",
"Charge+Ice+Wave+Spazer",
"Missile",
"Super"
]
}
},
{
"and": [
{
"enemyKill": {
"enemies": [
[
"Yellow Space Pirate (standing)",
"Yellow Space Pirate (wall)",
"Yellow Space Pirate (wall)"
]
],
"explicitWeapons": [
"Charge"
]
}
},
"canBePatient"
]
}
]
}
{
"or": [
{
"resourceMissingAtMost": [
{
"type": "Missile",
"count": 0
}
]
},
"canBeLucky"
]
}
{
"partialRefill": {
"type": "ReserveEnergy",
"limit": 20
}
}
{
"or": [
{
"canShineCharge": {
"usedTiles": 12,
"openEnd": 0
}
},
{
"and": [
{
"doorUnlockedAtNode": 1
},
{
"canShineCharge": {
"usedTiles": 13,
"openEnd": 0
}
}
]
}
]
}
{
"autoReserveTrigger": {
"maxReserveEnergy": 95
}
}
"canRModeSparkInterrupt"Unlocks doors: {"nodeId":1,"types":["missiles","super"],"requires":[]}
{"nodeId":1,"types":["powerbomb"],"requires":["never"]} |
From: 4
Top Right Door
To: 5
Bottom Junction
Kill the pirates to get them out of the way before using a Crystal Flash on the floating platform to open the bomb barrier. Alternatively, farm them for energy and use a Power Bomb on the floating platform. Shinecharge at the bottom runway and then jump into a Viola to interrupt. For power bomb pirate kill: interrupt the standing pirate with a shot then jump and place the power bomb low to hit all three pirates. Repeat three times. For slow charge beam: interrupt with a shot, then crouch and fire charged shots. Jump when the wall pirate approaches to make it jump to the other wall. Entrance condition: {
"comeInWithRMode": {}
}Requires: "h_heatProof"
{
"or": [
{
"and": [
{
"or": [
{
"enemyKill": {
"enemies": [
[
"Yellow Space Pirate (standing)",
"Yellow Space Pirate (wall)",
"Yellow Space Pirate (wall)"
]
],
"explicitWeapons": [
"ScrewAttack",
"Charge+Plasma",
"Charge+Ice+Wave+Spazer",
"Missile",
"Super"
]
}
},
{
"and": [
{
"enemyKill": {
"enemies": [
[
"Yellow Space Pirate (standing)",
"Yellow Space Pirate (wall)",
"Yellow Space Pirate (wall)"
]
],
"explicitWeapons": [
"Charge"
]
}
},
"canBePatient"
]
},
"h_usePowerBomb"
]
},
"h_heatedCrystalFlashForReserveEnergy"
]
},
{
"and": [
"h_heatProof",
"h_RModeCanRefillReserves",
"canDodgeWhileShooting",
{
"or": [
{
"enemyKill": {
"enemies": [
[
"Yellow Space Pirate (standing)",
"Yellow Space Pirate (wall)",
"Yellow Space Pirate (wall)"
]
],
"explicitWeapons": [
"ScrewAttack",
"Charge+Plasma",
"Charge+Ice+Wave+Spazer",
"Super"
]
}
},
{
"and": [
{
"enemyKill": {
"enemies": [
[
"Yellow Space Pirate (standing)",
"Yellow Space Pirate (wall)",
"Yellow Space Pirate (wall)"
]
],
"explicitWeapons": [
"Charge"
]
}
},
"canBePatient"
]
},
{
"and": [
{
"enemyKill": {
"enemies": [
[
"Yellow Space Pirate (standing)",
"Yellow Space Pirate (wall)",
"Yellow Space Pirate (wall)"
]
],
"explicitWeapons": [
"PowerBomb"
]
}
},
"canTrickyDodgeEnemies"
]
}
]
},
{
"or": [
{
"resourceMissingAtMost": [
{
"type": "Missile",
"count": 0
}
]
},
"canBeLucky"
]
},
"h_usePowerBomb",
{
"partialRefill": {
"type": "ReserveEnergy",
"limit": 20
}
}
]
}
]
}
{
"or": [
{
"canShineCharge": {
"usedTiles": 12,
"gentleUpTiles": 2,
"gentleDownTiles": 2,
"openEnd": 0
}
},
{
"and": [
{
"or": [
{
"doorUnlockedAtNode": 2
},
{
"doorUnlockedAtNode": 3
}
]
},
{
"canShineCharge": {
"usedTiles": 13,
"gentleUpTiles": 2,
"gentleDownTiles": 2,
"openEnd": 0
}
}
]
},
{
"and": [
{
"doorUnlockedAtNode": 2
},
{
"doorUnlockedAtNode": 3
},
{
"canShineCharge": {
"usedTiles": 14,
"gentleUpTiles": 2,
"gentleDownTiles": 2,
"openEnd": 0
}
}
]
}
]
}
{
"autoReserveTrigger": {}
}
"canRModeSparkInterrupt"Clears obstacles: A Unlocks doors: {"nodeId":2,"types":["ammo"],"requires":[]}
{"nodeId":3,"types":["ammo"],"requires":[]} |
From: 1
Top Left Door
To: 3
Top Right Door
With Supers or PBs, kill Funes except for the topmost. If you have neither, use Morph and bombs or springball to get over the secret Fune and farm a fireflea. Shinespark can get you back out of the fireflea pit if you can't jump out. Entrance condition: {
"comeInWithRMode": {}
}Requires: "canTrickyJump"
{
"or": [
"Morph",
{
"enemyKill": {
"enemies": [
[
"Boulder"
]
]
}
},
{
"and": [
{
"disableEquipment": "ScrewAttack"
},
"canPseudoScrew"
]
}
]
}
{
"or": [
{
"and": [
{
"enemyKill": {
"enemies": [
[
"Fune"
]
]
}
},
"h_RModeCanRefillReserves",
{
"partialRefill": {
"type": "ReserveEnergy",
"limit": 20
}
},
{
"resourceMissingAtMost": [
{
"type": "Missile",
"count": 0
}
]
}
]
},
{
"and": [
"Morph",
{
"or": [
"h_useSpringBall",
{
"and": [
"h_useMorphBombs",
"canBombHorizontally"
]
}
]
},
"h_RModeCanRefillReserves",
{
"partialRefill": {
"type": "ReserveEnergy",
"limit": 20
}
},
{
"resourceMissingAtMost": [
{
"type": "PowerBomb",
"count": 0
}
]
},
{
"canShineCharge": {
"usedTiles": 17,
"gentleUpTiles": 6,
"steepUpTiles": 1,
"openEnd": 1
}
},
{
"shinespark": {
"frames": 9,
"excessFrames": 4
}
}
]
}
]
}
{
"canShineCharge": {
"usedTiles": 21,
"gentleUpTiles": 3,
"gentleDownTiles": 3,
"openEnd": 1
}
}
{
"autoReserveTrigger": {
"maxReserveEnergy": 95
}
}
"canRModeSparkInterrupt"Dev note: FIXME: Notable strat 'Morph Over The Fune' for getting over the secret fune (and then R-Jump to get out) isn't included. |
From: 2
Bottom Left Door
To: 2
Bottom Left Door
Kill the Fune. Crystal Flash or farm the top fireflea. After the shine charge, jump up to the first fune and take a fireball to interrupt. Note: farming more than the top fireflea while still in R-Mode will cause Samus to become difficult to see. Entrance condition: {
"comeInWithRMode": {}
}Requires: {
"enemyKill": {
"enemies": [
[
"Fune"
]
]
}
}
{
"or": [
"h_CrystalFlashForReserveEnergy",
{
"and": [
"h_RModeCanRefillReserves",
{
"partialRefill": {
"type": "ReserveEnergy",
"limit": 20
}
},
{
"or": [
{
"resourceMissingAtMost": [
{
"type": "PowerBomb",
"count": 0
}
]
},
{
"resourceMissingAtMost": [
{
"type": "Missile",
"count": 0
}
]
}
]
}
]
}
]
}
{
"canShineCharge": {
"usedTiles": 20,
"gentleDownTiles": 2,
"openEnd": 1
}
}
{
"autoReserveTrigger": {
"maxReserveEnergy": 95
}
}
"canRModeSparkInterrupt"Clears obstacles: A |
From: 3
Top Right Door
To: 3
Top Right Door
With Supers or PBs, kill Funes except for the topmost. If you have neither, use Morph and bombs or springball to get over the secret Fune and farm a fireflea. Shinespark can get you back out of the fireflea pit if you can't jump out. Entrance condition: {
"comeInWithRMode": {}
}Requires: "canTrickyJump"
{
"or": [
"Morph",
{
"enemyKill": {
"enemies": [
[
"Boulder"
]
]
}
},
{
"and": [
{
"disableEquipment": "ScrewAttack"
},
"canPseudoScrew"
]
}
]
}
{
"or": [
{
"and": [
{
"enemyKill": {
"enemies": [
[
"Fune"
]
]
}
},
"h_RModeCanRefillReserves",
{
"partialRefill": {
"type": "ReserveEnergy",
"limit": 20
}
},
{
"resourceMissingAtMost": [
{
"type": "Missile",
"count": 0
}
]
}
]
},
{
"and": [
"Morph",
{
"or": [
"h_useSpringBall",
{
"and": [
"h_useMorphBombs",
"canBombHorizontally"
]
}
]
},
"h_RModeCanRefillReserves",
{
"partialRefill": {
"type": "ReserveEnergy",
"limit": 20
}
},
{
"resourceMissingAtMost": [
{
"type": "PowerBomb",
"count": 0
}
]
},
{
"canShineCharge": {
"usedTiles": 17,
"gentleUpTiles": 6,
"steepUpTiles": 1,
"openEnd": 1
}
},
{
"shinespark": {
"frames": 9,
"excessFrames": 4
}
}
]
}
]
}
{
"canShineCharge": {
"usedTiles": 21,
"gentleUpTiles": 3,
"gentleDownTiles": 3,
"openEnd": 1
}
}
{
"autoReserveTrigger": {
"maxReserveEnergy": 95
}
}
"canRModeSparkInterrupt"Dev note: FIXME: Notable strat 'Morph Over The Fune' for getting over the secret fune (and then R-Jump to get out) isn't included. |
From: 1
Left Door
To: 7
Junction By Lower Alcoons (Left of Spike Pits)
Clear the Alcoon in the runway, then shinecharge and jump down to be interrupted by the lower left Alcoon. Entrance condition: {
"comeInWithRMode": {}
}Requires: {
"heatFrames": 60
}
{
"or": [
{
"and": [
"canDodgeWhileShooting",
{
"enemyKill": {
"enemies": [
[
"Alcoon"
]
],
"explicitWeapons": [
"Missile",
"Super",
"Charge+Plasma"
]
}
},
{
"heatFrames": 120
}
]
},
{
"and": [
{
"enemyKill": {
"enemies": [
[
"Alcoon"
]
],
"explicitWeapons": [
"Missile",
"Super",
"Wave",
"Ice+Spazer",
"Plasma",
"ScrewAttack",
"PseudoScrew",
"PowerBomb"
]
}
},
{
"heatFrames": 180
}
]
},
{
"and": [
{
"heatFrames": 200
},
{
"or": [
"canDodgeWhileShooting",
"Morph"
]
}
]
},
{
"and": [
{
"heatFrames": 160
},
{
"enemyDamage": {
"enemy": "Alcoon",
"type": "fireball",
"hits": 1
}
}
]
}
]
}
{
"or": [
"h_heatedCrystalFlashForReserveEnergy",
{
"and": [
"h_heatProof",
"h_RModeCanRefillReserves",
{
"or": [
{
"and": [
{
"resourceMissingAtMost": [
{
"type": "PowerBomb",
"count": 0
}
]
},
{
"partialRefill": {
"type": "ReserveEnergy",
"limit": 20
}
}
]
},
{
"and": [
{
"resourceMissingAtMost": [
{
"type": "PowerBomb",
"count": 3
}
]
},
{
"partialRefill": {
"type": "ReserveEnergy",
"limit": 5
}
}
]
}
]
}
]
}
]
}
{
"canShineCharge": {
"usedTiles": 27,
"gentleUpTiles": 2,
"openEnd": 0
}
}
{
"or": [
"canDownBack",
"canTrickyJump"
]
}
{
"heatFrames": 120
}
{
"autoReserveTrigger": {
"maxReserveEnergy": 95
}
}
"canRModeSparkInterrupt"Clears obstacles: A |
From: 3
Bottom Horizontal Door
To: 7
Junction By Lower Alcoons (Left of Spike Pits)
Get past the spike Alcoons, and climb up - leave the lower left Alcoon alive to use for later. Clear the runway Alcoon and get the shinecharge, then drop into the lower left Alcoon to interrupt. If you Crystal Flash early, stay near the door to ensure you kill only the two spike Alcoons. Entrance condition: {
"comeInWithRMode": {}
}Requires: {
"or": [
{
"and": [
"h_heatedCrystalFlashForReserveEnergy",
{
"heatFrames": 100
}
]
},
{
"and": [
"ScrewAttack",
"canCarefulJump",
{
"heatFrames": 100
}
]
},
{
"and": [
"canDodgeWhileShooting",
{
"or": [
"h_heatProof",
{
"enemyKill": {
"enemies": [
[
"Alcoon"
]
],
"explicitWeapons": [
"Missile",
"Super",
"Wave+Plasma"
]
}
},
{
"and": [
"canPseudoScrew",
{
"heatFrames": 30
}
]
}
]
},
"canCarefulJump",
{
"heatFrames": 100
}
]
},
{
"and": [
{
"enemyKill": {
"enemies": [
[
"Alcoon",
"Alcoon"
]
],
"explicitWeapons": [
"Missile",
"Super",
"Plasma",
"Wave+Spazer"
]
}
},
{
"heatFrames": 200
}
]
},
{
"and": [
"canCarefulJump",
{
"heatFrames": 199
}
]
},
{
"and": [
{
"enemyDamage": {
"enemy": "Alcoon",
"type": "contact",
"hits": 1
}
},
{
"heatFrames": 180
}
]
}
]
}
{
"heatFrames": 160
}
{
"or": [
"canWallJump",
"HiJump",
"canSpringBallJumpMidAir",
"SpaceJump",
{
"and": [
"canSpringBallBombJump",
{
"heatFrames": 60
}
]
},
{
"and": [
"canIBJ",
"canBombHorizontally",
"canJumpIntoIBJ",
{
"heatFrames": 110
},
{
"or": [
"canDoubleBombJump",
{
"heatFrames": 190
}
]
}
]
},
{
"and": [
"canTrickyDashJump",
"canInsaneJump",
{
"heatFrames": 20
}
]
},
{
"and": [
"canUseFrozenEnemies",
"canInsaneJump",
{
"heatFrames": 150
}
]
}
]
}
{
"or": [
{
"and": [
"canDodgeWhileShooting",
{
"enemyKill": {
"enemies": [
[
"Alcoon"
]
],
"explicitWeapons": [
"Missile",
"Super",
"Charge+Plasma"
]
}
},
{
"heatFrames": 120
}
]
},
{
"and": [
{
"enemyKill": {
"enemies": [
[
"Alcoon"
]
],
"explicitWeapons": [
"Wave",
"Ice+Spazer",
"Plasma",
"ScrewAttack",
"PseudoScrew",
"PowerBomb"
]
}
},
{
"heatFrames": 180
}
]
},
{
"heatFrames": 200
}
]
}
{
"or": [
{
"resourceAvailable": [
{
"type": "ReserveEnergy",
"count": 1
}
]
},
{
"and": [
"h_heatProof",
"h_RModeCanRefillReserves",
{
"or": [
{
"and": [
{
"resourceMissingAtMost": [
{
"type": "PowerBomb",
"count": 0
}
]
},
{
"partialRefill": {
"type": "ReserveEnergy",
"limit": 20
}
}
]
},
{
"and": [
{
"resourceMissingAtMost": [
{
"type": "PowerBomb",
"count": 3
}
]
},
{
"partialRefill": {
"type": "ReserveEnergy",
"limit": 5
}
}
]
}
]
}
]
}
]
}
{
"canShineCharge": {
"usedTiles": 27,
"gentleUpTiles": 2,
"openEnd": 0
}
}
{
"or": [
"canDownBack",
"canTrickyJump"
]
}
{
"heatFrames": 120
}
{
"autoReserveTrigger": {
"maxReserveEnergy": 95
}
}
"canRModeSparkInterrupt"Clears obstacles: A |
|
Cross to the center platform to get to the shinecharge runway. Any Dragons you kill along the way, you can try to collect their drops with Grapple Beam instead of risking the acid. Keep one Dragon to the left of the elevator to use their fireball for interrupt. Or you can also use a heat interrupt. Entrance condition: {
"comeInWithRMode": {}
}Requires: {
"or": [
{
"and": [
"canTrickyJump",
{
"heatFrames": 570
}
]
},
{
"and": [
"SpaceJump",
{
"heatFrames": 510
}
]
},
{
"and": [
"h_heatProof",
"Morph",
{
"enemyKill": {
"enemies": [
[
"Dragon"
]
],
"explicitWeapons": [
"PowerBombPeriphery"
]
}
},
{
"enemyKill": {
"enemies": [
[
"Dragon",
"Dragon"
]
],
"explicitWeapons": [
"PowerBomb"
]
}
}
]
}
]
}
{
"or": [
"h_heatedCrystalFlashForReserveEnergy",
{
"and": [
{
"or": [
"Grapple",
"SpaceJump"
]
},
"canTrickyJump",
"h_heatProof",
"h_RModeCanRefillReserves",
{
"enemyKill": {
"enemies": [
[
"Dragon"
]
],
"excludedWeapons": [
"Missile",
"PowerBomb"
]
}
},
{
"resourceMissingAtMost": [
{
"type": "Missile",
"count": 0
}
]
},
{
"or": [
{
"partialRefill": {
"type": "ReserveEnergy",
"limit": 5
}
},
{
"and": [
"canBeLucky",
{
"partialRefill": {
"type": "ReserveEnergy",
"limit": 20
}
}
]
}
]
}
]
}
]
}
{
"heatFrames": 300
}
{
"canShineCharge": {
"usedTiles": 24.5,
"openEnd": 1
}
}
{
"autoReserveTrigger": {
"maxReserveEnergy": 95
}
}
"canRModeSparkInterrupt"
{
"heatFrames": 80
} |
From: 1
Left Door
To: 3
Metal Pirates Junction
Kill both pirates with ammo or beams. Collect their drops and use heat to interrupt. Or kill and farm one pirate, then hitbox the other and interrupt from it before killing it with ammo or beams. Blue suit doesn't damage the pirates, but keeps Samus invulnerable while moving. Entrance condition: {
"comeInWithRMode": {}
}Requires: {
"heatFrames": 125
}
{
"or": [
{
"and": [
"Charge",
"Plasma",
"canDodgeWhileShooting",
"canTrickyJump",
{
"or": [
{
"and": [
"Ice",
{
"heatFrames": 700
}
]
},
{
"and": [
"Wave",
{
"heatFrames": 700
}
]
},
{
"and": [
"canInsaneJump",
"Ice",
{
"heatFrames": 520
}
]
},
{
"and": [
"canInsaneJump",
"Wave",
{
"heatFrames": 520
}
]
},
{
"and": [
"Ice",
"Wave",
{
"heatFrames": 400
}
]
},
{
"heatFrames": 950
},
{
"and": [
"canInsaneJump",
{
"heatFrames": 700
}
]
},
{
"and": [
"canXRayWaitForIFrames",
{
"heatFrames": 420
}
]
}
]
}
]
},
{
"and": [
"Charge",
"Spazer",
"canDodgeWhileShooting",
{
"or": [
{
"heatFrames": 4400
},
{
"and": [
"Ice",
{
"heatFrames": 3000
}
]
},
{
"and": [
"Wave",
{
"heatFrames": 2650
}
]
},
"Ice",
"Wave",
{
"heatFrames": 1750
}
]
}
]
},
{
"and": [
"Plasma",
"canDodgeWhileShooting",
{
"heatFrames": 2000
}
]
},
{
"and": [
"h_heatProof",
"canDodgeWhileShooting",
{
"or": [
{
"and": [
"Charge",
"Wave"
]
},
{
"and": [
"Charge",
"Ice",
"canBePatient"
]
},
{
"and": [
"canBeVeryPatient",
{
"or": [
"Charge",
"Spazer"
]
}
]
}
]
}
]
},
{
"and": [
"canDodgeWhileShooting",
{
"enemyKill": {
"enemies": [
[
"Space Pirate (fighting)",
"Space Pirate (fighting)"
]
],
"explicitWeapons": [
"Super"
]
}
},
{
"heatFrames": 450
}
]
},
{
"and": [
"canDodgeWhileShooting",
{
"enemyKill": {
"enemies": [
[
"Space Pirate (fighting)",
"Space Pirate (fighting)"
]
],
"explicitWeapons": [
"Missile"
]
}
},
{
"heatFrames": 2700
}
]
}
]
}
{
"or": [
"h_heatedCrystalFlashForReserveEnergy",
{
"and": [
"h_RModeCanRefillReserves",
{
"or": [
{
"and": [
{
"resourceMissingAtMost": [
{
"type": "Super",
"count": 0
}
]
},
{
"partialRefill": {
"type": "ReserveEnergy",
"limit": 240
}
}
]
},
{
"partialRefill": {
"type": "ReserveEnergy",
"limit": 120
}
}
]
}
]
},
{
"and": [
{
"disableEquipment": "ETank"
},
{
"or": [
{
"and": [
{
"resourceMissingAtMost": [
{
"type": "Super",
"count": 0
}
]
},
{
"partialRefill": {
"type": "ReserveEnergy",
"limit": 140
}
}
]
},
{
"partialRefill": {
"type": "ReserveEnergy",
"limit": 20
}
}
]
}
]
}
]
}
"h_shinechargeMaxRunway"
{
"disableEquipment": "Varia"
}
{
"disableEquipment": "Gravity"
}
{
"or": [
{
"and": [
"canHitbox",
{
"autoReserveTrigger": {
"maxReserveEnergy": 95
}
},
"canRModeSparkInterrupt"
]
},
{
"and": [
"canReserveTriggerBufferXRay",
{
"autoReserveTrigger": {
"implicitHeatFrames": "no"
}
},
"canRModeSparkInterrupt",
{
"suitlessHeatFrames": 32
}
]
},
{
"and": [
"h_heatProof",
{
"autoReserveTrigger": {}
},
"canRModePauseAbuseSparkInterrupt"
]
},
{
"and": [
{
"autoReserveTrigger": {
"implicitHeatFrames": "suitless"
}
},
"canRModeSparkInterrupt",
{
"suitlessHeatFrames": 32
}
]
}
]
}Clears obstacles: A, door_1 |
From: 1
Left Door
To: 3
Metal Pirates Junction
Entrance condition: {
"comeInWithRMode": {}
}Requires: {
"notable": "Speed Echoes Kill"
}
"canUseSpeedEchoes"
"canHitbox"
{
"canShineCharge": {
"usedTiles": 38,
"openEnd": 2
}
}
{
"or": [
{
"canShineCharge": {
"usedTiles": 23,
"openEnd": 2
}
},
{
"heatFrames": 60
}
]
}
{
"or": [
{
"and": [
"HiJump",
{
"shinespark": {
"frames": 1
}
}
]
},
{
"shinespark": {
"frames": 9
}
}
]
}
{
"heatFrames": 630
}
{
"or": [
"h_heatedCrystalFlashForReserveEnergy",
{
"and": [
"h_RModeCanRefillReserves",
{
"or": [
{
"and": [
{
"resourceMissingAtMost": [
{
"type": "Super",
"count": 0
}
]
},
{
"partialRefill": {
"type": "ReserveEnergy",
"limit": 240
}
}
]
},
{
"partialRefill": {
"type": "ReserveEnergy",
"limit": 120
}
}
]
}
]
},
{
"and": [
{
"disableEquipment": "ETank"
},
{
"or": [
{
"and": [
{
"resourceMissingAtMost": [
{
"type": "Super",
"count": 0
}
]
},
{
"partialRefill": {
"type": "ReserveEnergy",
"limit": 140
}
}
]
},
{
"partialRefill": {
"type": "ReserveEnergy",
"limit": 20
}
}
]
}
]
}
]
}
"h_shinechargeMaxRunway"
{
"disableEquipment": "Varia"
}
{
"disableEquipment": "Gravity"
}
{
"or": [
{
"and": [
"canReserveTriggerBufferXRay",
{
"autoReserveTrigger": {
"implicitHeatFrames": "no"
}
},
"canRModeSparkInterrupt",
{
"suitlessHeatFrames": 32
}
]
},
{
"and": [
"h_heatProof",
{
"autoReserveTrigger": {}
},
"canRModePauseAbuseSparkInterrupt"
]
},
{
"and": [
{
"autoReserveTrigger": {
"implicitHeatFrames": "suitless"
}
},
"canRModeSparkInterrupt",
{
"suitlessHeatFrames": 32
}
]
}
]
}Clears obstacles: A, door_1 |
From: 2
Right Door
To: 3
Metal Pirates Junction
Kill both pirates with ammo or beams. Collect their drops and use heat to interrupt. Or kill and farm one pirate, then hitbox the other and interrupt from it before killing it with ammo or beams. Blue suit doesn't damage the pirates, but keeps Samus invulnerable while moving. Entrance condition: {
"comeInWithRMode": {}
}Requires: {
"heatFrames": 125
}
{
"or": [
{
"and": [
"Charge",
"Plasma",
"canDodgeWhileShooting",
{
"or": [
{
"and": [
"Ice",
{
"heatFrames": 700
}
]
},
{
"and": [
"Wave",
{
"heatFrames": 700
}
]
},
{
"and": [
"Ice",
"Wave",
{
"heatFrames": 450
}
]
},
{
"heatFrames": 950
},
{
"and": [
"canXRayWaitForIFrames",
{
"heatFrames": 420
}
]
},
{
"and": [
"Ice",
"Wave",
"canTrickyJump",
{
"heatFrames": 400
}
]
},
{
"and": [
"Ice",
"canInsaneJump",
{
"heatFrames": 520
}
]
},
{
"and": [
"Wave",
"canInsaneJump",
{
"heatFrames": 520
}
]
},
{
"and": [
"canInsaneJump",
{
"heatFrames": 700
}
]
}
]
}
]
},
{
"and": [
"h_heatProof",
"canDodgeWhileShooting",
{
"or": [
"Plasma",
{
"and": [
"Charge",
"Wave"
]
},
{
"and": [
"Charge",
"Spazer",
"Ice",
"Wave"
]
},
{
"and": [
"Charge",
"Spazer",
"canBePatient"
]
},
{
"and": [
"Charge",
"Ice",
"canBePatient"
]
},
{
"and": [
"canBeVeryPatient",
{
"or": [
"Charge",
"Spazer"
]
}
]
},
{
"enemyKill": {
"enemies": [
[
"Space Pirate (fighting)",
"Space Pirate (fighting)"
]
],
"explicitWeapons": [
"Missile"
]
}
}
]
}
]
},
{
"and": [
"canDodgeWhileShooting",
{
"enemyKill": {
"enemies": [
[
"Space Pirate (fighting)",
"Space Pirate (fighting)"
]
],
"explicitWeapons": [
"Super"
]
}
},
{
"heatFrames": 450
}
]
}
]
}
{
"or": [
"h_heatedCrystalFlashForReserveEnergy",
{
"and": [
"h_RModeCanRefillReserves",
{
"or": [
{
"and": [
{
"resourceMissingAtMost": [
{
"type": "Super",
"count": 0
}
]
},
{
"partialRefill": {
"type": "ReserveEnergy",
"limit": 240
}
}
]
},
{
"partialRefill": {
"type": "ReserveEnergy",
"limit": 120
}
}
]
}
]
},
{
"and": [
{
"disableEquipment": "ETank"
},
{
"or": [
{
"and": [
{
"resourceMissingAtMost": [
{
"type": "Super",
"count": 0
}
]
},
{
"partialRefill": {
"type": "ReserveEnergy",
"limit": 140
}
}
]
},
{
"partialRefill": {
"type": "ReserveEnergy",
"limit": 20
}
}
]
}
]
}
]
}
{
"heatFrames": 90
}
"h_shinechargeMaxRunway"
{
"or": [
{
"and": [
"canHitbox",
{
"autoReserveTrigger": {}
},
"canRModeSparkInterrupt"
]
},
"h_heatTriggerRModeSparkInterrupt"
]
}Clears obstacles: A, door_2 |
From: 2
Right Door
To: 3
Metal Pirates Junction
Entrance condition: {
"comeInWithRMode": {}
}Requires: {
"notable": "Speed Echoes Kill"
}
"canUseSpeedEchoes"
"canHitbox"
{
"canShineCharge": {
"usedTiles": 38,
"openEnd": 2
}
}
{
"or": [
{
"canShineCharge": {
"usedTiles": 23,
"openEnd": 2
}
},
{
"heatFrames": 60
}
]
}
{
"or": [
{
"and": [
"HiJump",
{
"shinespark": {
"frames": 1
}
}
]
},
{
"shinespark": {
"frames": 9
}
}
]
}
{
"heatFrames": 630
}
{
"or": [
"h_heatedCrystalFlashForReserveEnergy",
{
"and": [
"h_RModeCanRefillReserves",
{
"or": [
{
"and": [
{
"resourceMissingAtMost": [
{
"type": "Super",
"count": 0
}
]
},
{
"partialRefill": {
"type": "ReserveEnergy",
"limit": 240
}
}
]
},
{
"partialRefill": {
"type": "ReserveEnergy",
"limit": 120
}
}
]
}
]
},
{
"and": [
{
"disableEquipment": "ETank"
},
{
"or": [
{
"and": [
{
"resourceMissingAtMost": [
{
"type": "Super",
"count": 0
}
]
},
{
"partialRefill": {
"type": "ReserveEnergy",
"limit": 140
}
}
]
},
{
"partialRefill": {
"type": "ReserveEnergy",
"limit": 20
}
}
]
}
]
}
]
}
"h_shinechargeMaxRunway"
"h_heatTriggerRModeSparkInterrupt"Clears obstacles: A, door_2 |
From: 1
Bottom Left Door
To: 2
Top Right Door
Entrance condition: {
"comeInWithRMode": {}
}Requires: "canRModeStandupClip"
"h_RModeCanRefillReserves"
"h_heatProof"
{
"or": [
"Plasma",
"ScrewAttack"
]
}
{
"or": [
"canMidAirMorph",
"canBeVeryPatient"
]
}
{
"partialRefill": {
"type": "ReserveEnergy",
"limit": 40
}
}
{
"disableEquipment": "Varia"
}
{
"autoReserveTrigger": {
"implicitHeatFrames": "suitless"
}
}
{
"suitlessHeatFrames": 30
} |
From: 1
Bottom Left Door
To: 6
Bottom Right Corner Junction
Due to X-Ray beam cooldown, Screw Attack is the only way to avoid a Multiviola hit on entry. Clear the runway. If that was enough to get reserve energy, you can use the final Dessgeega to interrupt, otherwise carry the shinecharge into the first Multiviola box, or use a heat interrupt. Entrance condition: {
"comeInWithRMode": {}
}Requires: {
"or": [
{
"and": [
{
"enemyDamage": {
"enemy": "Multiviola",
"type": "contact",
"hits": 1
}
},
{
"heatFrames": 40
}
]
},
{
"and": [
{
"enemyKill": {
"enemies": [
[
"Multiviola"
]
],
"explicitWeapons": [
"ScrewAttack"
]
}
},
{
"heatFrames": 30
}
]
}
]
}
{
"or": [
{
"and": [
"canDodgeWhileShooting",
"Plasma",
"canHitbox",
"h_getBlueSpeedMaxRunway"
]
},
{
"and": [
"canDodgeWhileShooting",
"Charge",
"Ice",
"Wave",
"Spazer",
{
"heatFrames": 1080
}
]
},
{
"and": [
{
"enemyKill": {
"enemies": [
[
"Dessgeega",
"Dessgeega",
"Dessgeega",
"Multiviola",
"Multiviola"
]
],
"explicitWeapons": [
"Missile"
]
}
},
{
"heatFrames": 480
}
]
},
{
"and": [
{
"enemyKill": {
"enemies": [
[
"Dessgeega",
"Dessgeega",
"Dessgeega",
"Multiviola",
"Multiviola"
]
],
"explicitWeapons": [
"Super"
]
}
},
{
"heatFrames": 380
}
]
},
{
"and": [
"ScrewAttack",
{
"heatFrames": 230
}
]
}
]
}
{
"or": [
"h_heatedCrystalFlashForReserveEnergy",
{
"and": [
"h_heatProof",
"h_RModeCanRefillReserves",
{
"resourceMissingAtMost": [
{
"type": "Missile",
"count": 0
}
]
},
{
"partialRefill": {
"type": "ReserveEnergy",
"limit": 20
}
}
]
}
]
}
"h_shinechargeMaxRunway"
{
"autoReserveTrigger": {
"maxReserveEnergy": 95
}
}
"canRModeSparkInterrupt"Clears obstacles: C, E, F Dev note: FIXME: Room needs movement/heatframe counts to enter the Multiviola boxes from below and return. |
|
Use normal bombs or a Power Bomb to open the bomb blocks, then navigate the Multiviola boxes. Kill the two right Dessgeegas, then clear the rest of the runway. Use the Multiviola at the end to interrupt, or use a heat interrupt. If Samus ends up needing to Crystal Flash at any point, remember that Samus cannot use Power Bombs or X-Ray afterwards until R-Mode ends. Entrance condition: {
"comeInWithRMode": {}
}Requires: "canBeLucky"
{
"or": [
{
"and": [
"h_usePowerBomb",
{
"heatFrames": 180
}
]
},
{
"and": [
{
"heatFrames": 160
},
{
"or": [
"ScrewAttack",
{
"and": [
"h_useMorphBombs",
{
"heatFrames": 60
}
]
}
]
}
]
}
]
}
{
"or": [
{
"and": [
"ScrewAttack",
{
"heatFrames": 650
}
]
},
{
"and": [
"Plasma",
{
"heatFrames": 850
},
{
"or": [
"Wave",
{
"heatFrames": 300
}
]
}
]
},
{
"and": [
{
"or": [
{
"and": [
{
"enemyKill": {
"enemies": [
[
"Multiviola",
"Multiviola"
],
[
"Multiviola",
"Multiviola",
"Multiviola"
]
],
"explicitWeapons": [
"PowerBomb"
]
}
},
{
"heatFrames": 500
}
]
},
{
"and": [
"Ice",
"Wave",
"Spazer",
{
"heatFrames": 750
}
]
},
{
"and": [
"Wave",
{
"heatFrames": 1350
}
]
},
{
"and": [
{
"heatFrames": 400
},
{
"enemyDamage": {
"enemy": "Multiviola",
"type": "contact",
"hits": 3
}
}
]
}
]
},
{
"or": [
{
"and": [
{
"enemyKill": {
"enemies": [
[
"Dessgeega",
"Dessgeega"
]
],
"explicitWeapons": [
"Missile"
]
}
},
{
"heatFrames": 670
}
]
},
{
"and": [
{
"enemyKill": {
"enemies": [
[
"Dessgeega",
"Dessgeega"
]
],
"explicitWeapons": [
"Super"
]
}
},
{
"heatFrames": 400
}
]
},
{
"and": [
{
"enemyKill": {
"enemies": [
[
"Dessgeega",
"Dessgeega"
]
],
"explicitWeapons": [
"PowerBomb"
]
}
},
{
"heatFrames": 500
}
]
},
{
"and": [
"Ice",
"Wave",
"Spazer",
{
"heatFrames": 750
}
]
}
]
}
]
},
{
"and": [
"h_heatProof",
{
"enemyKill": {
"enemies": [
[
"Dessgeega",
"Dessgeega"
]
],
"excludedWeapons": [
"Bombs",
"PseudoScrew",
"PowerBomb"
]
}
}
]
}
]
}
{
"or": [
{
"and": [
{
"getBlueSpeed": {
"usedTiles": 23,
"openEnd": 2
}
},
{
"heatFrames": 200
}
]
},
{
"and": [
"h_heatProof",
"canDodgeWhileShooting",
{
"enemyKill": {
"enemies": [
[
"Dessgeega"
],
[
"Dessgeega"
],
[
"Dessgeega"
],
[
"Multiviola"
],
[
"Multiviola"
]
],
"excludedWeapons": [
"Bombs",
"PseudoScrew",
"PowerBomb",
"PowerBeam"
]
}
}
]
},
{
"and": [
{
"heatFrames": 400
},
"Plasma",
{
"or": [
"Wave",
{
"heatFrames": 100
}
]
}
]
},
{
"and": [
{
"enemyKill": {
"enemies": [
[
"Dessgeega"
],
[
"Dessgeega"
],
[
"Dessgeega"
],
[
"Multiviola"
],
[
"Multiviola"
]
],
"explicitWeapons": [
"Missile"
]
}
},
{
"heatFrames": 500
}
]
},
{
"and": [
{
"enemyKill": {
"enemies": [
[
"Dessgeega"
],
[
"Dessgeega"
],
[
"Dessgeega"
],
[
"Multiviola"
],
[
"Multiviola"
]
],
"explicitWeapons": [
"Super"
]
}
},
{
"heatFrames": 400
}
]
},
{
"and": [
"ScrewAttack",
{
"heatFrames": 320
}
]
}
]
}
"h_RModeCanRefillReserves"
{
"partialRefill": {
"type": "ReserveEnergy",
"limit": 20
}
}
"h_shinechargeMaxRunway"
{
"autoReserveTrigger": {
"maxReserveEnergy": 95
}
}
"canRModeSparkInterrupt"
{
"heatFrames": 30
}Clears obstacles: A, B, C, D, E, F |
|
Clear the two Holtzes that greet you and collect their drops. With heat protection, you can farm up at a Zebbo pipe. Run across the acid then jump up to a Zebbo pipe for the interrupt. Entrance condition: {
"comeInWithRMode": {}
}Requires: "Gravity"
{
"or": [
{
"and": [
"canDodgeWhileShooting",
{
"or": [
"Plasma",
{
"and": [
"Ice",
"Wave",
"Spazer"
]
}
]
},
{
"heatFrames": 550
}
]
},
{
"and": [
{
"enemyKill": {
"enemies": [
[
"Holtz",
"Holtz"
]
],
"explicitWeapons": [
"ScrewAttack",
"Ice+Wave+Plasma"
]
}
},
{
"heatFrames": 100
}
]
},
{
"and": [
"canDodgeWhileShooting",
{
"enemyKill": {
"enemies": [
[
"Holtz",
"Holtz"
]
],
"explicitWeapons": [
"Super"
]
}
},
{
"heatFrames": 300
}
]
},
{
"and": [
"canTrickyJump",
{
"enemyKill": {
"enemies": [
[
"Holtz",
"Holtz"
]
],
"explicitWeapons": [
"PowerBomb"
]
}
},
{
"heatFrames": 600
}
]
}
]
}
{
"or": [
"h_heatedCrystalFlashForReserveEnergy",
{
"and": [
"h_heatProof",
"h_RModeCanRefillReserves",
{
"resourceMissingAtMost": [
{
"type": "Missile",
"count": 0
}
]
},
{
"resourceMissingAtMost": [
{
"type": "PowerBomb",
"count": 0
}
]
},
{
"resourceMissingAtMost": [
{
"type": "Super",
"count": 0
}
]
},
{
"refill": [
"Energy"
]
}
]
}
]
}
{
"canShineCharge": {
"usedTiles": 38,
"openEnd": 0
}
}
{
"heatFrames": 390
}
{
"acidFrames": 133
}
{
"autoReserveTrigger": {
"maxReserveEnergy": 95
}
}
"canRModeSparkInterrupt"
{
"heatFrames": 80
} |
|
Clear the two Holtzes that greet you and collect their drops. With heat protection, you can farm up at a Zebbo pipe. Run across the acid then jump up to a Zebbo pipe for the interrupt. Entrance condition: {
"comeInWithRMode": {}
}Requires: "Gravity"
{
"or": [
{
"and": [
"canBePatient",
"canDodgeWhileShooting",
{
"heatFrames": 2400
}
]
},
{
"and": [
{
"or": [
"Wave",
"Spazer"
]
},
{
"heatFrames": 950
}
]
},
{
"and": [
{
"or": [
"Plasma",
{
"and": [
"Ice",
"Wave",
"Spazer"
]
}
]
},
{
"heatFrames": 500
}
]
},
{
"and": [
{
"enemyKill": {
"enemies": [
[
"Holtz",
"Holtz"
]
],
"explicitWeapons": [
"ScrewAttack",
"Ice+Wave+Plasma"
]
}
},
{
"heatFrames": 100
}
]
},
{
"and": [
"canDodgeWhileShooting",
{
"enemyKill": {
"enemies": [
[
"Holtz",
"Holtz"
]
],
"explicitWeapons": [
"Super",
"PowerBomb"
]
}
},
{
"heatFrames": 550
}
]
}
]
}
{
"or": [
"h_heatedCrystalFlashForReserveEnergy",
{
"and": [
"h_RModeCanRefillReserves",
{
"resourceMissingAtMost": [
{
"type": "Missile",
"count": 0
}
]
},
{
"resourceMissingAtMost": [
{
"type": "PowerBomb",
"count": 0
}
]
},
{
"resourceMissingAtMost": [
{
"type": "Super",
"count": 0
}
]
},
{
"or": [
{
"partialRefill": {
"type": "ReserveEnergy",
"limit": 40
}
},
{
"and": [
"h_heatProof",
{
"refill": [
"Energy"
]
}
]
}
]
}
]
}
]
}
{
"canShineCharge": {
"usedTiles": 38,
"openEnd": 0
}
}
{
"heatFrames": 390
}
{
"acidFrames": 133
}
{
"autoReserveTrigger": {
"maxReserveEnergy": 95
}
}
"canRModeSparkInterrupt"
{
"heatFrames": 80
} |
|
Requires: {
"not": "f_DefeatedRidley"
}
"canRiskPermanentLossOfAccess"
{
"enemyDamage": {
"enemy": "Ridley",
"type": "contact",
"hits": 1
}
} |
|
Requires: {
"heatFrames": 500
}
{
"not": "f_DefeatedRidley"
}
"canRiskPermanentLossOfAccess"Exit condition: {
"leaveWithGModeSetup": {}
}Dev note: Not likely to be possible, as it requires canRiskPermanentLossOfAccess and Ridley alive with the door unlocked. |
|
Manipulate Ridley into a pogo pattern facing left. Morph and position near the center of the leftmost tile of the platform. When Ridley is descending above Samus and about to pound the ground with his tail, place a Power Bomb and immediately unmorph. If successful, Samus will get grabbed, triggering auto-reserves before the Power Bomb explodes. Ridley will fly away from the Power Bomb explosion, carrying Samus to the top right into the door transition. Requires: {
"notable": "Ridley Grab Door Lock Skip"
}
"canUseEnemies"
{
"heatFrames": 745
}
"h_usePowerBomb"
{
"autoReserveTrigger": {}
}
{
"enemyDamage": {
"enemy": "Ridley",
"type": "contact",
"hits": 2
}
}
{
"heatFrames": 310
}
{
"or": [
{
"and": [
{
"not": "f_DefeatedRidley"
},
"canRiskPermanentLossOfAccess"
]
},
"canWallJump",
"SpaceJump",
{
"and": [
"HiJump",
"canSpringBallJumpMidAir"
]
},
{
"and": [
"HiJump",
"canSpeedyJump",
"canTrickyJump"
]
},
"canJumpIntoIBJ"
]
}Bypasses door shell: true |
|
Requires: {
"not": "f_DefeatedRidley"
}
"canRiskPermanentLossOfAccess"
{
"enemyDamage": {
"enemy": "Ridley",
"type": "contact",
"hits": 1
}
}Dev note: FIXME: Ridley could also be used to set up G-mode, but the chaos of the fight makes this difficult. |
|
It is much more common for Ridley to hit Samus when Ridley is facing left. One way to get Ridley to turn around is when it pogos on the right side of the room, stationary spin jump and break spin. The fireballs can be tricky to deal with in the door frame, but can be done by dropping down and quickly wall jumping back up or by kagoing them. Requires: {
"heatFrames": 900
}
{
"or": [
"canTrickyGMode",
{
"heatFrames": 180
}
]
}
"canComplexGMode"
{
"or": [
"SpaceJump",
"canWallJump",
{
"and": [
"HiJump",
"canSpringBallJumpMidAir"
]
}
]
}
{
"not": "f_DefeatedRidley"
}
"canRiskPermanentLossOfAccess"Exit condition: {
"leaveWithGModeSetup": {}
}Dev note: Not likely to be possible, as it requires canRiskPermanentLossOfAccess and Ridley alive with the door unlocked. The extra heat frames are a leniency to account for randomness. |
|
Use 17 Power Bombs while pressed against the crumble blocks to overload PLMs and go through the crumble blocks. Anywhere else in the left section of the room requires one more Power Bomb. Entrance condition: {
"comeInWithGMode": {
"mode": "direct",
"morphed": true
}
}Requires: "h_heatedGMode"
"canPowerBombItemOverloadPLMs"
{
"itemNotCollectedAtNode": 3
}
"canRiskPermanentLossOfAccess"
{
"ammo": {
"type": "PowerBomb",
"count": 17
}
}
{
"heatFrames": 50
}Dev note: It is possible to go to 3, but then it takes extra heat frames to get out, being almost the same as ending at 2 and going to 3. |
|
Use 9 Power Bombs against the right crumble blocks to overload PLMs and roll through the crumble blocks on the left. Entrance condition: {
"comeInWithGMode": {
"mode": "direct",
"morphed": true
},
"comesThroughToilet": "any"
}Requires: "canComplexGMode"
"h_heatedGMode"
"canPowerBombItemOverloadPLMs"
{
"itemNotCollectedAtNode": 3
}
"canRiskPermanentLossOfAccess"
{
"ammo": {
"type": "PowerBomb",
"count": 9
}
}
"h_heatedGModeOpenDifferentDoor" |
From: 4
Junction Right of Power Bomb Blocks
To: 4
Junction Right of Power Bomb Blocks
Farm the Dessgeegas, their energy rate is poor. Keep one Dessgeega alive to use for interrupt. Or kill all four and use heat with pause abuse to interrupt. Requires: {
"obstaclesCleared": [
"R-Mode"
]
}
{
"obstaclesCleared": [
"C",
"D"
]
}
{
"or": [
"h_heatedCrystalFlashForReserveEnergy",
{
"and": [
"h_RModeCanRefillReserves",
{
"or": [
{
"partialRefill": {
"type": "ReserveEnergy",
"limit": 5
}
},
{
"and": [
"canBeLucky",
{
"partialRefill": {
"type": "ReserveEnergy",
"limit": 20
}
}
]
}
]
}
]
}
]
}
{
"heatFrames": 90
}
{
"canShineCharge": {
"usedTiles": 30,
"openEnd": 0
}
}
{
"autoReserveTrigger": {
"maxReserveEnergy": 95
}
}
"canRModeSparkInterrupt"Resets obstacles: R-Mode Dev note: FIXME: Evaluate unprotected heat option with disable E-Tank + CF for full reserves, once heated bluesuit movement is implemented. |
|
Requires: {
"not": "f_DefeatedPhantoon"
}
"canRiskPermanentLossOfAccess"
{
"resetRoom": {
"nodes": [
1,
2,
3
]
}
}
"h_useMorphBombs"
{
"cycleFrames": 2300
}
{
"or": [
"canDash",
{
"cycleFrames": 380
}
]
}Resets obstacles: A Farm cycle drops: 4 Trapped Atomic |
|
Requires: {
"not": "f_DefeatedPhantoon"
}
"canRiskPermanentLossOfAccess"
{
"resetRoom": {
"nodes": [
1,
2,
3
]
}
}
"canShinechargeMovementComplex"
"canUseSpeedEchoes"
{
"canShineCharge": {
"usedTiles": 20,
"openEnd": 0
}
}
{
"shinespark": {
"frames": 4,
"excessFrames": 4
}
}
{
"cycleFrames": 2600
}Resets obstacles: A Farm cycle drops: 8 Trapped Atomic |
|
Requires: {
"not": "f_DefeatedPhantoon"
}
"canRiskPermanentLossOfAccess"
{
"or": [
"ScrewAttack",
{
"haveBlueSuit": {}
},
{
"and": [
"Plasma",
{
"cycleFrames": 60
}
]
},
{
"and": [
"Wave",
{
"cycleFrames": 120
}
]
},
{
"and": [
"Spazer",
{
"cycleFrames": 150
}
]
},
{
"and": [
"Ice",
"canDodgeWhileShooting",
{
"cycleFrames": 240
}
]
},
{
"and": [
"canPseudoScrew",
"canFarmWhileShooting",
{
"cycleFrames": 120
}
]
},
{
"cycleFrames": 540
}
]
}
{
"cycleFrames": 480
}Farm cycle drops: 1 Covern |
|
Requires: {
"not": "f_DefeatedPhantoon"
}
{
"resetRoom": {
"nodes": [
1
]
}
}
{
"or": [
{
"and": [
"Plasma",
{
"cycleFrames": 930
}
]
},
{
"and": [
{
"or": [
"canDodgeWhileShooting",
"canRiskPermanentLossOfAccess"
]
},
"Wave",
{
"cycleFrames": 1010
}
]
},
{
"and": [
{
"or": [
"canDodgeWhileShooting",
"canRiskPermanentLossOfAccess"
]
},
"Spazer",
{
"cycleFrames": 1140
}
]
},
{
"and": [
{
"or": [
"canFarmWhileShooting",
"canRiskPermanentLossOfAccess"
]
},
"Ice",
{
"cycleFrames": 1300
}
]
},
{
"and": [
"canFarmWhileShooting",
{
"cycleFrames": 1980
}
]
}
]
}
{
"or": [
"canDash",
{
"cycleFrames": 380
}
]
}Resets obstacles: A Farm cycle drops: 3 Trapped Atomic |
|
Requires: {
"not": "f_DefeatedPhantoon"
}
"canRiskPermanentLossOfAccess"Clears obstacles: A |
|
Power Off: fill up reserves using the trapped Atomics and the respawning Coverns. Shinecharge across the bottom door and use the next Covern spawn to interrupt. Power On: farm the Kihunters and 3 Atomics. Shinecharge across the door and use the remaining Atomic to interrupt. Entrance condition: {
"comeInWithRMode": {}
}Requires: {
"or": [
"h_CrystalFlashForReserveEnergy",
{
"and": [
{
"or": [
"ScrewAttack",
"Plasma",
"canTrickyDodgeEnemies",
{
"enemyKill": {
"enemies": [
[
"Kihunter (yellow)"
],
[
"Kihunter (yellow)"
],
[
"Kihunter (yellow)",
"Kihunter (yellow)"
]
],
"explicitWeapons": [
"Missile",
"Super"
]
}
}
]
},
"h_RModeCanRefillReserves",
{
"partialRefill": {
"type": "ReserveEnergy",
"limit": 40
}
}
]
}
]
}
{
"canShineCharge": {
"usedTiles": 35,
"openEnd": 0
}
}
{
"autoReserveTrigger": {
"maxReserveEnergy": 95
}
}
"canRModeSparkInterrupt"Clears obstacles: A |
|
Requires: {
"not": "f_DefeatedPhantoon"
}
"canRiskPermanentLossOfAccess"Clears obstacles: A |
|
Requires: {
"or": [
{
"enemyDamage": {
"enemy": "Kihunter (yellow)",
"type": "contact",
"hits": 1
}
},
{
"and": [
{
"enemyDamage": {
"enemy": "Covern",
"type": "contact",
"hits": 1
}
},
{
"not": "f_DefeatedPhantoon"
},
"canRiskPermanentLossOfAccess"
]
}
]
}Dev note: The Kihunter will do more damage than the Covern, so whether Phantoon is dead or not, that strat will be accurate or conservative. |
|
Power Off: fill up reserves using the trapped Atomics and the respawning Coverns. Shinecharge across the bottom door and use the next Covern spawn to interrupt. Power On: farm the Kihunters and 3 Atomics. Shinecharge across the door and use the remaining Atomic to interrupt. Entrance condition: {
"comeInWithRMode": {},
"comesThroughToilet": "no"
}Requires: {
"or": [
"h_CrystalFlashForReserveEnergy",
{
"and": [
{
"or": [
"ScrewAttack",
"Plasma",
"canTrickyDodgeEnemies",
{
"enemyKill": {
"enemies": [
[
"Kihunter (yellow)"
],
[
"Kihunter (yellow)"
],
[
"Kihunter (yellow)",
"Kihunter (yellow)"
]
],
"explicitWeapons": [
"Missile",
"Super"
]
}
}
]
},
"h_RModeCanRefillReserves",
{
"partialRefill": {
"type": "ReserveEnergy",
"limit": 40
}
}
]
}
]
}
{
"canShineCharge": {
"usedTiles": 35,
"openEnd": 0
}
}
{
"autoReserveTrigger": {
"maxReserveEnergy": 95
}
}
"canRModeSparkInterrupt"Clears obstacles: A |
|
Requires: {
"not": "f_DefeatedPhantoon"
}
{
"resetRoom": {
"nodes": [
2
]
}
}
{
"or": [
{
"and": [
{
"or": [
"canDodgeWhileShooting",
"canRiskPermanentLossOfAccess"
]
},
"Plasma",
{
"cycleFrames": 930
}
]
},
{
"and": [
{
"or": [
"canTrickyDodgeEnemies",
"canRiskPermanentLossOfAccess"
]
},
"Wave",
{
"cycleFrames": 1010
}
]
},
{
"and": [
{
"or": [
"canTrickyDodgeEnemies",
"canRiskPermanentLossOfAccess"
]
},
"Spazer",
{
"cycleFrames": 1140
}
]
},
{
"and": [
{
"or": [
"canTrickyDodgeEnemies",
"canRiskPermanentLossOfAccess"
]
},
"Ice",
{
"cycleFrames": 1300
}
]
},
{
"and": [
{
"or": [
"canInsaneJump",
"canRiskPermanentLossOfAccess"
]
},
"canFarmWhileShooting",
{
"cycleFrames": 1980
}
]
}
]
}
{
"or": [
"canDash",
{
"cycleFrames": 200
}
]
}Resets obstacles: A Farm cycle drops: 3 Trapped Atomic |
|
Requires: {
"not": "f_DefeatedPhantoon"
}
"canRiskPermanentLossOfAccess"Clears obstacles: A |
|
Requires: {
"not": "f_DefeatedPhantoon"
}
"canRiskPermanentLossOfAccess"Clears obstacles: A |
|
Power Off: fill up reserves using the trapped Atomics and the respawning Coverns. Shinecharge across the bottom door and use the next Covern spawn to interrupt. Power On: farm the Kihunters and 3 Atomics. Shinecharge across the door and use the remaining Atomic to interrupt. Entrance condition: {
"comeInWithRMode": {}
}Requires: {
"or": [
"h_CrystalFlashForReserveEnergy",
{
"and": [
{
"or": [
"ScrewAttack",
"Plasma",
"canTrickyDodgeEnemies",
{
"enemyKill": {
"enemies": [
[
"Kihunter (yellow)"
],
[
"Kihunter (yellow)"
],
[
"Kihunter (yellow)",
"Kihunter (yellow)"
]
],
"explicitWeapons": [
"Missile",
"Super"
]
}
}
]
},
"h_RModeCanRefillReserves",
{
"partialRefill": {
"type": "ReserveEnergy",
"limit": 40
}
}
]
}
]
}
{
"canShineCharge": {
"usedTiles": 35,
"openEnd": 0
}
}
{
"autoReserveTrigger": {
"maxReserveEnergy": 95
}
}
"canRModeSparkInterrupt"Clears obstacles: A |
|
Use a Covern or Kihunter. A flying Kihunter will collide with Samus eventually, which could take up to 30 seconds, based on her positioning. Requires: {
"or": [
{
"enemyDamage": {
"enemy": "Kihunter (yellow)",
"type": "contact",
"hits": 1
}
},
{
"and": [
{
"enemyDamage": {
"enemy": "Covern",
"type": "contact",
"hits": 1
}
},
{
"not": "f_DefeatedPhantoon"
},
"canRiskPermanentLossOfAccess"
]
}
]
}Dev note: The Kihunter will do more damage than the Covern, so whether Phantoon is dead or not, that strat will be accurate or conservative. |
|
Requires: {
"not": "f_DefeatedPhantoon"
}
{
"resetRoom": {
"nodes": [
3
]
}
}
{
"or": [
{
"and": [
"Plasma",
{
"cycleFrames": 930
}
]
},
{
"and": [
{
"or": [
"canDodgeWhileShooting",
"canRiskPermanentLossOfAccess"
]
},
"Wave",
{
"cycleFrames": 1010
}
]
},
{
"and": [
{
"or": [
"canDodgeWhileShooting",
"canRiskPermanentLossOfAccess"
]
},
"Spazer",
{
"cycleFrames": 1140
}
]
},
{
"and": [
{
"or": [
"canInsaneJump",
"canRiskPermanentLossOfAccess"
]
},
"Ice",
{
"cycleFrames": 1300
}
]
}
]
}
{
"or": [
"canDash",
{
"cycleFrames": 380
}
]
}Resets obstacles: A Farm cycle drops: 3 Trapped Atomic |
|
Requires: {
"not": "f_DefeatedPhantoon"
}
"canRiskPermanentLossOfAccess"Exit condition: {
"leaveWithRunway": {
"length": 5,
"openEnd": 0
}
}Dev note: The length is more similar to 5 with 0 open end, than 4 with 1. |
|
Entrance condition: {
"comeInWithRMode": {}
}Requires: "f_DefeatedPhantoon"
{
"or": [
"h_CrystalFlashForReserveEnergy",
{
"and": [
"h_RModeCanRefillReserves",
{
"partialRefill": {
"type": "ReserveEnergy",
"limit": 20
}
}
]
}
]
}
"h_shinechargeMaxRunway"
{
"autoReserveTrigger": {
"maxReserveEnergy": 95
}
}
"canRModeSparkInterrupt" |
|
Entrance condition: {
"comeInWithRMode": {},
"comesThroughToilet": "no"
}Requires: "f_DefeatedPhantoon"
{
"or": [
"h_CrystalFlashForReserveEnergy",
{
"and": [
"h_RModeCanRefillReserves",
{
"partialRefill": {
"type": "ReserveEnergy",
"limit": 20
}
}
]
}
]
}
"h_shinechargeMaxRunway"
{
"autoReserveTrigger": {
"maxReserveEnergy": 95
}
}
"canRModeSparkInterrupt" |
|
Farm atomics and push the robots apart to open up the runway. Use an Atomic to interrupt. Entrance condition: {
"comeInWithRMode": {}
}Requires: "f_DefeatedPhantoon"
{
"or": [
"h_CrystalFlashForReserveEnergy",
{
"and": [
"h_bombThings",
"h_RModeCanRefillReserves",
{
"partialRefill": {
"type": "ReserveEnergy",
"limit": 20
}
}
]
}
]
}
"h_shinechargeMaxRunway"
{
"autoReserveTrigger": {
"maxReserveEnergy": 95
}
}
"canRModeSparkInterrupt"Clears obstacles: A |
From: 2
Middle Left Door
To: 1
Top Left Door
Gain a shinecharge near the Chozo statue, jump on top of it, press against the wall to the right, and activate a horizontal shinespark to the right. Samus will clip into the wall and be able to X-Ray climb to the space above. This trick works because the wall is made of half-tile slopes, rather than regular solid tiles. Requires: {
"not": "f_DefeatedPhantoon"
}
"canRiskPermanentLossOfAccess"
{
"or": [
"h_shinechargeMaxRunway",
"h_storedSpark"
]
}
"canShinechargeMovement"
{
"shinespark": {
"frames": 1,
"excessFrames": 1
}
}
"canShinesparkSlopeClip"
"canXRayClimb"
{
"or": [
{
"getBlueSpeed": {
"usedTiles": 16,
"steepDownTiles": 4,
"openEnd": 0
}
},
"can4HighMidAirMorph"
]
}Exit condition: {
"leaveNormally": {}
}Unlocks doors: {"types":["ammo"],"requires":[]}Dev note: The leaveNormally is to ensure it won't be required to do the Speed block moondance blind up there. |
|
Requires: {
"not": "f_DefeatedPhantoon"
}
"canRiskPermanentLossOfAccess"
"h_shinechargeMaxRunway"
"h_CrystalSpark" |
From: 2
Middle Left Door
To: 2
Middle Left Door
Requires: {
"not": "f_DefeatedPhantoon"
}
"canRiskPermanentLossOfAccess"
"h_shinechargeMaxRunway"
"canShinechargeMovement"
{
"shineChargeFrames": 40
}Exit condition: {
"leaveShinecharged": {}
} |
From: 2
Middle Left Door
To: 2
Middle Left Door
Requires: {
"not": "f_DefeatedPhantoon"
}
"canRiskPermanentLossOfAccess"Exit condition: {
"leaveSpaceJumping": {
"remoteRunway": {
"length": 45,
"openEnd": 0
}
}
} |
|
Requires: {
"not": "f_DefeatedPhantoon"
}
"canRiskPermanentLossOfAccess"Exit condition: {
"leaveSpinning": {
"remoteRunway": {
"length": 45,
"openEnd": 1
}
}
} |
From: 2
Middle Left Door
To: 2
Middle Left Door
Requires: {
"not": "f_DefeatedPhantoon"
}
"canRiskPermanentLossOfAccess"Exit condition: {
"leaveWithMockball": {
"remoteRunway": {
"length": 45,
"openEnd": 1
},
"landingRunway": {
"length": 3,
"openEnd": 1
}
}
} |
From: 2
Middle Left Door
To: 2
Middle Left Door
Requires: {
"not": "f_DefeatedPhantoon"
}
"canRiskPermanentLossOfAccess"
{
"or": [
"canMomentumConservingMorph",
{
"and": [
"canMomentumConservingTurnaround",
"canInsaneJump"
]
}
]
}Exit condition: {
"leaveWithSidePlatform": {
"height": 3,
"runway": {
"length": 45,
"openEnd": 1
},
"obstruction": [
3,
0
]
}
}Dev note: Max extra run speed $7.0. |
From: 2
Middle Left Door
To: 2
Middle Left Door
Requires: {
"not": "f_DefeatedPhantoon"
}
"canRiskPermanentLossOfAccess"Exit condition: {
"leaveWithSpringBallBounce": {
"remoteRunway": {
"length": 31,
"openEnd": 0
},
"landingRunway": {
"length": 3,
"openEnd": 1
},
"movementType": "uncontrolled"
}
} |
From: 2
Middle Left Door
To: 2
Middle Left Door
Requires: {
"not": "f_DefeatedPhantoon"
}
"canRiskPermanentLossOfAccess"
"h_shinechargeMaxRunway"
"canChainTemporaryBlue"Exit condition: {
"leaveWithTemporaryBlue": {}
} |
|
Climb up about half a screen. If Phantoon is dead, the last part of the climb should be done carefully to avoid triggering collision with the spikes: Do not press forward or turn-around except while X-Ray is active. For each X-ray stand-up, release the turn-around input quickly to make sure that it is not still held after X-Ray deactivates; alternatively, hold both angle up and angle down to prevent Samus from touching the spikes (though this no longer gives protection if climbing so high that the bottom of Samus' hitbox reaches the spikes). Once Samus is high enough, unequip X-Ray, jump up (from either standing or crouch) to clip past the spikes, and land, taking a single spike hit. Then use the i-frames from the spike hit to run and jump to the left to make it to the door. Samus is high enough after the top of her arm cannon first becomes visible at the bottom of the screen; or up to 3 additional climbs can be performed after that point. In case of an accidental spike collision, it is possible to recover: Unless Samus climbed higher than needed, she will still be stuck in the wall, will take a single spike hit, and be able to continue climbing. With Grapple it is possible to swing on the Grapple blocks, avoiding all spike damage. Spike damage can also be avoided with Space Jump, by doing a stationary turn-around spin jump, which is very precise. With a blue suit, Samus will instantly lose i-frames, making the spikes very dangerous. Entrance condition: {
"comeInWithDoorStuckSetup": {}
}Requires: {
"notable": "X-Ray Climb"
}
"canXRayClimb"
{
"or": [
{
"and": [
{
"spikeHits": 3
},
{
"resourceCapacity": [
{
"type": "RegularEnergy",
"count": 199
}
]
}
]
},
{
"and": [
{
"not": "f_DefeatedPhantoon"
},
"canRiskPermanentLossOfAccess"
]
},
{
"and": [
"canOffScreenMovement",
{
"or": [
{
"and": [
"canDash",
{
"spikeHits": 1
},
"canUseIFrames"
]
},
{
"and": [
"canBlueSuitSpikeJump",
{
"spikeHits": 2
}
]
},
{
"and": [
"canBlueSuitSpikeJump",
"canWallJump",
"canBeVeryPatient",
{
"spikeHits": 1
}
]
},
"Grapple",
{
"and": [
"SpaceJump",
"canInsaneJump",
"canBeVeryPatient"
]
}
]
}
]
}
]
}Exit condition: {
"leaveNormally": {}
}Unlocks doors: {"types":["ammo"],"requires":[]}Dev note: FIXME: The canBeVeryPatient is for difficulty placement, as the damageless Space Jump version would likely require many attempts. The resourceCapacity requirement is to ensure that reserve energy management will not be needed for the lower-difficulty version of the strat; this could be refined since suits can affect spike damage, but we don't yet have a good way to represent that cleanly, given that randomizers are likely to modify suit damage protection. The leaveNormally is because the camera will be broken and we don't want to require unreasonable things without being able to reset it. |
From: 6
Bowling Chozo Statue
To: 1
Top Left Door
Jump or Spring Ball jump into a breakable Grapple block. The timing is precise and it can help to break two Grapple blocks to use one as a cue. Crystal Flash then X-ray climb to the region above (less than 1 screen). There is a chance that Samus will not be able to Crystal Flash unless first placing a Bomb or Power Bomb. Requires: {
"notable": "Grapple Block Crystal Flash"
}
"canUseGrapple"
"canJumpIntoRespawningBlock"
"canTrickyJump"
{
"or": [
"HiJump",
"canTrickySpringBallJump",
{
"and": [
"canSpringBallJumpMidAir",
{
"not": "f_DefeatedPhantoon"
},
"canRiskPermanentLossOfAccess"
]
}
]
}
"h_bombThings"
"h_CrystalFlash"
"canXRayClimb"
{
"or": [
"h_fourTileJumpMorph",
"h_useSpringBall",
"canIBJ",
{
"getBlueSpeed": {
"usedTiles": 16,
"steepDownTiles": 4,
"openEnd": 0
}
},
{
"and": [
{
"not": "f_DefeatedPhantoon"
},
"canRiskPermanentLossOfAccess"
]
}
]
}Exit condition: {
"leaveNormally": {}
}Unlocks doors: {"types":["ammo"],"requires":[]}Dev note: FIXME: This may be possible with a spike hit and speedy jump. |
From: 6
Bowling Chozo Statue
To: 1
Top Left Door
Use a Grapple fling to get stuck inside a breakable Grapple block. It can help to break two or more Grapple blocks in a row. Crystal Flash then X-ray climb to the region above (less than 1 screen). There is a chance that Samus will not be able to Crystal Flash unless first placing a Bomb or Power Bomb. Requires: {
"notable": "Grapple Block Crystal Flash"
}
"canPreciseGrapple"
"canJumpIntoRespawningBlock"
"canInsaneJump"
"h_bombThings"
"h_CrystalFlash"
"canXRayClimb"
{
"or": [
"h_fourTileJumpMorph",
"h_useSpringBall",
"canIBJ",
{
"getBlueSpeed": {
"usedTiles": 16,
"steepDownTiles": 4,
"openEnd": 0
}
},
{
"and": [
{
"not": "f_DefeatedPhantoon"
},
"canRiskPermanentLossOfAccess"
]
}
]
}Exit condition: {
"leaveNormally": {}
}Unlocks doors: {"types":["ammo"],"requires":[]} |
From: 6
Bowling Chozo Statue
To: 1
Top Left Door
IBJ into a breakable Grapple block. The timing is very precise and requires a quick morph and ascent with precisely placed double bomb jumps. Crystal Flash then X-ray climb to the region above (less than 1 screen). There is a chance that Samus will not be able to Crystal Flash unless first placing a Bomb or Power Bomb. Requires: {
"notable": "Grapple Block Crystal Flash"
}
"canUseGrapple"
"canJumpIntoRespawningBlock"
"canInsaneJump"
"canJumpIntoIBJ"
"canDoubleBombJump"
{
"or": [
{
"spikeHits": 1
},
{
"and": [
{
"not": "f_DefeatedPhantoon"
},
"canRiskPermanentLossOfAccess"
]
}
]
}
"h_CrystalFlash"
"canXRayClimb"Exit condition: {
"leaveNormally": {}
}Unlocks doors: {"types":["ammo"],"requires":[]}Dev note: FIXME: This may be possible without a spike hit. |
From: 1
Top Left Door
To: 1
Top Left Door
Entrance condition: {
"comeInShinecharging": {
"length": 3,
"openEnd": 0
},
"comesInHeated": "no"
}Requires: {
"not": "f_DefeatedPhantoon"
}
"canRiskPermanentLossOfAccess"
"h_CrystalSpark"Dev note: This requires the power off, because otherwise the sparks deal damage, and ending the runway just a bit shorter is too short to consider for a crystal spark. |
|
Requires: {
"not": "f_DefeatedPhantoon"
}
"canRiskPermanentLossOfAccess" |
From: 3
Bottom Left Door
To: 3
Bottom Left Door
Requires: {
"or": [
"Gravity",
{
"and": [
{
"not": "f_DefeatedPhantoon"
},
"canRiskPermanentLossOfAccess"
]
}
]
}Exit condition: {
"leaveWithSidePlatform": {
"height": 5,
"runway": {
"length": 5,
"openEnd": 0,
"steepDownTiles": 3
},
"obstruction": [
5,
5
]
}
}Dev note: Max extra run speed $1.7. This strat is included for completeness, though it apparently doesn't have any applications. |
From: 1
Left Door
To: 1
Left Door
Phantoon will place stationary, invisible flames, which need to be avoided while starting to Crystal Flash. Crystal Flash and have Phantoon spawn on top of Samus to trigger reserves. Requires a lot of luck. Entrance condition: {
"comeInWithGMode": {
"mode": "direct",
"morphed": true
}
}Requires: {
"not": "f_DefeatedPhantoon"
}
"canRiskPermanentLossOfAccess"
"canBeVeryLucky"
"h_artificialMorphComplexRModeCrystalFlashInterrupt"
{
"ammo": {
"type": "Missile",
"count": 10
}
}
{
"ammo": {
"type": "Super",
"count": 10
}
}
{
"ammo": {
"type": "PowerBomb",
"count": 10
}
}Clears obstacles: door_1 |
|
Requires: {
"enemyDamage": {
"enemy": "Phantoon",
"type": "contact",
"hits": 1
}
}
{
"not": "f_DefeatedPhantoon"
}
"canRiskPermanentLossOfAccess"Dev note: This would only be useful to leave in g-mode. |
|
Requires: {
"not": "f_DefeatedPhantoon"
}
"canRiskPermanentLossOfAccess"Exit condition: {
"leaveWithGModeSetup": {}
}Dev note: Not likely to be possible, as it requires canRiskPermanentLossOfAccess and Phantoon alive with the door unlocked. |
|
Crystal Flash and have Phantoon spawn on top of Samus to trigger reserves. Requires a bit of luck. Entrance condition: {
"comeInWithRMode": {}
}Requires: {
"not": "f_DefeatedPhantoon"
}
"canRiskPermanentLossOfAccess"
"canBeLucky"
"canComplexRModeCrystalFlashInterrupt"
{
"ammo": {
"type": "Missile",
"count": 10
}
}
{
"ammo": {
"type": "Super",
"count": 10
}
}
{
"ammo": {
"type": "PowerBomb",
"count": 10
}
}Clears obstacles: door_1 |
|
Farm the flames to fill up on energy. Shinecharge and use a flame hit to interrupt. Entrance condition: {
"comeInWithRMode": {}
}Requires: {
"not": "f_DefeatedPhantoon"
}
"canRiskPermanentLossOfAccess"
"canBeVeryLucky"
{
"or": [
"Charge",
{
"resourceCapacity": [
{
"type": "Missile",
"count": 2
}
]
},
{
"and": [
{
"resourceCapacity": [
{
"type": "Super",
"count": 1
}
]
},
"ScrewAttack"
]
}
]
}
{
"refill": [
"Energy"
]
}
{
"canShineCharge": {
"usedTiles": 12,
"openEnd": 0
}
}
{
"autoReserveTrigger": {
"maxReserveEnergy": 95
}
}
"canRModeSparkInterrupt"Clears obstacles: door_1 |
From: 1
Left Door
To: 1
Left Door
It is only possible to enter X-Mode with a first frame unmorph in this room Entrance condition: {
"comeInShinecharged": {}
}Requires: {
"not": "f_DefeatedPhantoon"
}
{
"or": [
"canRiskPermanentLossOfAccess",
{
"canShineCharge": {
"usedTiles": 15,
"openEnd": 1
}
}
]
}
{
"shineChargeFrames": 140
}
"h_thornXModeBlueSuit"
"h_thornXModeFramePerfectExtraLeniency"
{
"shinespark": {
"frames": 3
}
} |
From: 1
Left Door
To: 1
Left Door
Entrance condition: {
"comeInShinecharged": {}
}Requires: {
"not": "f_DefeatedPhantoon"
}
{
"or": [
"canRiskPermanentLossOfAccess",
{
"canShineCharge": {
"usedTiles": 15,
"openEnd": 1
}
}
]
}
{
"shineChargeFrames": 75
}
{
"thornHits": 1
}
"h_spikeSuitThornHitLeniency"
"canPatientSpikeSuit"
{
"shinespark": {
"frames": 6,
"excessFrames": 6
}
} |
|
Requires: {
"not": "f_DefeatedPhantoon"
}
"canRiskPermanentLossOfAccess"Exit condition: {
"leaveWithRunway": {
"length": 10,
"openEnd": 1
}
} |
|
Requires: {
"not": "f_DefeatedPhantoon"
}
"canRiskPermanentLossOfAccess"Exit condition: {
"leaveSpaceJumping": {
"remoteRunway": {
"length": 4,
"openEnd": 2
}
}
} |
|
Requires: {
"not": "f_DefeatedPhantoon"
}
"canRiskPermanentLossOfAccess"
"SpaceJump"Exit condition: {
"leaveSpinning": {
"remoteRunway": {
"length": 4,
"openEnd": 2
}
}
} |
|
Requires: {
"not": "f_DefeatedPhantoon"
}
"canRiskPermanentLossOfAccess"Exit condition: {
"leaveWithMockball": {
"remoteRunway": {
"length": 4,
"openEnd": 2
},
"landingRunway": {
"length": 1,
"openEnd": 1
}
}
} |
|
Requires: {
"or": [
{
"and": [
"Gravity",
"canTrickyDodgeEnemies"
]
},
{
"and": [
{
"not": "f_DefeatedPhantoon"
},
"canRiskPermanentLossOfAccess"
]
}
]
}Exit condition: {
"leaveWithSidePlatform": {
"height": 3,
"runway": {
"length": 4,
"openEnd": 0
},
"obstruction": [
1,
0
]
}
}Dev note: Max extra run speed $0.F. |
From: 1
Left Door
To: 1
Left Door
Requires: {
"not": "f_DefeatedPhantoon"
}
"canRiskPermanentLossOfAccess"Exit condition: {
"leaveWithSpringBallBounce": {
"remoteRunway": {
"length": 4,
"openEnd": 2
},
"landingRunway": {
"length": 1,
"openEnd": 1
},
"movementType": "uncontrolled"
}
} |
|
Land on the floor, then jump and fire a shot mid-air and activate the shinespark wind-up. Wait until the shot is at a specific position before sparking. Sparking too late will cause the shot to despawn before reaching the door. Sparking too early will cause Samus to bonk the door as it will not yet be open. A beam shot, Missile, or Super can be used. Entrance condition: {
"comeInShinecharged": {}
}Requires: {
"shineChargeFrames": 70
}
{
"not": "f_DefeatedPhantoon"
}
"canRiskPermanentLossOfAccess"
"canShinechargeMovementTricky"
"canHeroShot"
{
"shinespark": {
"frames": 37,
"excessFrames": 0
}
}Exit condition: {
"leaveWithSpark": {}
}Unlocks doors: {"types":["super"],"requires":[]}
{"types":["missiles","powerbomb"],"requires":["never"]} |
|
Entrance condition: {
"comeInShinecharging": {
"length": 0,
"openEnd": 1
}
}Requires: {
"not": "f_DefeatedPhantoon"
}
"canRiskPermanentLossOfAccess"
"canShinechargeMovementComplex"
{
"shinespark": {
"frames": 20,
"excessFrames": 0
}
}Exit condition: {
"leaveWithSpark": {}
}Unlocks doors: {"types":["super"],"requires":[]}
{"types":["missiles","powerbomb"],"requires":["never"]} |
From: 1
Left Door
To: 2
Right Door
Entrance condition: {
"comeInShinecharging": {
"length": 0,
"openEnd": 1
}
}Requires: {
"not": "f_DefeatedPhantoon"
}
"canRiskPermanentLossOfAccess"
"canShinechargeMovementTricky"
{
"shinespark": {
"frames": 8,
"excessFrames": 0
}
}Exit condition: {
"leaveWithSpark": {}
}Unlocks doors: {"types":["super"],"requires":[]}
{"types":["missiles","powerbomb"],"requires":["never"]} |
|
Requires: {
"not": "f_DefeatedPhantoon"
}
"canRiskPermanentLossOfAccess" |
|
Land on the floor, then jump and fire a shot mid-air and activate the shinespark wind-up. Wait until the shot is at a specific position before sparking. Sparking too late will cause the shot to despawn before reaching the door. Sparking too early will cause Samus to bonk the door as it will not yet be open. A beam shot, Missile, or Super can be used. Entrance condition: {
"comeInShinecharged": {}
}Requires: {
"shineChargeFrames": 70
}
{
"not": "f_DefeatedPhantoon"
}
"canRiskPermanentLossOfAccess"
"canShinechargeMovementTricky"
"canHeroShot"
{
"shinespark": {
"frames": 37,
"excessFrames": 0
}
}Exit condition: {
"leaveWithSpark": {}
}Unlocks doors: {"types":["super"],"requires":[]}
{"types":["missiles","powerbomb"],"requires":["never"]} |
|
Entrance condition: {
"comeInShinecharging": {
"length": 0,
"openEnd": 1
}
}Requires: {
"not": "f_DefeatedPhantoon"
}
"canRiskPermanentLossOfAccess"
"canShinechargeMovementComplex"
{
"shinespark": {
"frames": 20,
"excessFrames": 0
}
}Exit condition: {
"leaveWithSpark": {}
}Unlocks doors: {"types":["super"],"requires":[]}
{"types":["missiles","powerbomb"],"requires":["never"]} |
From: 2
Right Door
To: 1
Left Door
Entrance condition: {
"comeInShinecharging": {
"length": 0,
"openEnd": 1
}
}Requires: {
"not": "f_DefeatedPhantoon"
}
"canRiskPermanentLossOfAccess"
"canShinechargeMovementTricky"
{
"shinespark": {
"frames": 8,
"excessFrames": 0
}
}Exit condition: {
"leaveWithSpark": {}
}Unlocks doors: {"types":["super"],"requires":[]}
{"types":["missiles","powerbomb"],"requires":["never"]} |
|
Requires: {
"not": "f_DefeatedPhantoon"
}
"canRiskPermanentLossOfAccess" |
|
Requires: {
"not": "f_DefeatedPhantoon"
}
"canRiskPermanentLossOfAccess"Exit condition: {
"leaveSpaceJumping": {
"remoteRunway": {
"length": 4,
"openEnd": 2
}
}
} |
From: 2
Right Door
To: 2
Right Door
Requires: {
"not": "f_DefeatedPhantoon"
}
"canRiskPermanentLossOfAccess"
"SpaceJump"Exit condition: {
"leaveSpinning": {
"remoteRunway": {
"length": 4,
"openEnd": 2
}
}
} |
|
Requires: {
"not": "f_DefeatedPhantoon"
}
"canRiskPermanentLossOfAccess"Exit condition: {
"leaveWithMockball": {
"remoteRunway": {
"length": 4,
"openEnd": 2
},
"landingRunway": {
"length": 1,
"openEnd": 1
}
}
} |
|
Requires: {
"or": [
{
"and": [
"Gravity",
"canTrickyDodgeEnemies"
]
},
{
"and": [
{
"not": "f_DefeatedPhantoon"
},
"canRiskPermanentLossOfAccess"
]
}
]
}Exit condition: {
"leaveWithSidePlatform": {
"height": 3,
"runway": {
"length": 4,
"openEnd": 0
},
"obstruction": [
1,
0
]
}
}Dev note: Max extra run speed $0.F. |
From: 2
Right Door
To: 2
Right Door
Requires: {
"not": "f_DefeatedPhantoon"
}
"canRiskPermanentLossOfAccess"Exit condition: {
"leaveWithSpringBallBounce": {
"remoteRunway": {
"length": 4,
"openEnd": 2
},
"landingRunway": {
"length": 1,
"openEnd": 1
},
"movementType": "uncontrolled"
}
} |
From: 1
Left Door
To: 1
Left Door
Entrance condition: {
"comeInShinecharging": {
"length": 20,
"openEnd": 0,
"steepDownTiles": 3
},
"comesInHeated": "no"
}Requires: {
"or": [
"Gravity",
{
"and": [
{
"not": "f_DefeatedPhantoon"
},
"canRiskPermanentLossOfAccess"
]
}
]
}
"h_CrystalSpark" |
|
Requires: {
"or": [
"Gravity",
{
"and": [
{
"not": "f_DefeatedPhantoon"
},
"canRiskPermanentLossOfAccess"
]
}
]
}
{
"canShineCharge": {
"usedTiles": 20,
"steepUpTiles": 3,
"openEnd": 0
}
}
"h_CrystalSpark" |
|
Requires: {
"or": [
"Gravity",
{
"and": [
{
"not": "f_DefeatedPhantoon"
},
"canRiskPermanentLossOfAccess"
]
}
]
}Exit condition: {
"leaveWithRunway": {
"length": 21,
"openEnd": 0,
"steepUpTiles": 3
}
} |
From: 1
Left Door
To: 2
Right Door
Entrance condition: {
"comeInShinecharging": {
"length": 19,
"openEnd": 0,
"steepDownTiles": 3
}
}Requires: {
"or": [
"Gravity",
{
"and": [
{
"not": "f_DefeatedPhantoon"
},
"canRiskPermanentLossOfAccess"
]
}
]
}
"canShinechargeMovementComplex"
{
"shineChargeFrames": 70
}Exit condition: {
"leaveShinecharged": {}
}Unlocks doors: {"types":["super"],"requires":[]}
{"types":["missiles","powerbomb"],"requires":["never"]}Dev note: One runway tile is considered unusable, in order to allow a quick jump up without needing to turn around. |
|
Requires: {
"or": [
{
"and": [
{
"not": "f_DefeatedPhantoon"
},
"canRiskPermanentLossOfAccess"
]
},
"Gravity"
]
}Exit condition: {
"leaveSpaceJumping": {
"remoteRunway": {
"length": 15,
"openEnd": 1
},
"minExtraRunSpeed": "$1.8"
}
}Unlocks doors: {"types":["ammo"],"requires":[]} |
|
Requires: {
"or": [
{
"and": [
{
"not": "f_DefeatedPhantoon"
},
"canRiskPermanentLossOfAccess"
]
},
"Gravity"
]
}
{
"doorUnlockedAtNode": 1
}Exit condition: {
"leaveSpaceJumping": {
"remoteRunway": {
"length": 16,
"openEnd": 1
},
"minExtraRunSpeed": "$1.8"
}
}Unlocks doors: {"types":["ammo"],"requires":[]} |
|
Requires: {
"or": [
{
"and": [
{
"not": "f_DefeatedPhantoon"
},
"canRiskPermanentLossOfAccess"
]
},
"Gravity"
]
}Exit condition: {
"leaveSpinning": {
"remoteRunway": {
"length": 15,
"openEnd": 1
},
"minExtraRunSpeed": "$1.6"
}
}Unlocks doors: {"types":["ammo"],"requires":[]} |
|
Requires: {
"or": [
{
"and": [
{
"not": "f_DefeatedPhantoon"
},
"canRiskPermanentLossOfAccess"
]
},
"Gravity"
]
}
{
"doorUnlockedAtNode": 1
}Exit condition: {
"leaveSpinning": {
"remoteRunway": {
"length": 16,
"openEnd": 1
},
"minExtraRunSpeed": "$1.6"
}
}Unlocks doors: {"types":["ammo"],"requires":[]} |
|
Requires: {
"or": [
{
"and": [
{
"not": "f_DefeatedPhantoon"
},
"canRiskPermanentLossOfAccess"
]
},
"Gravity"
]
}Exit condition: {
"leaveWithMockball": {
"remoteRunway": {
"length": 15,
"openEnd": 1
},
"landingRunway": {
"length": 2,
"openEnd": 1
}
}
}Unlocks doors: {"types":["ammo"],"requires":[]}Dev note: Longer landing runway could be used but would be difficult at high run speeds. |
|
Requires: {
"or": [
{
"and": [
{
"not": "f_DefeatedPhantoon"
},
"canRiskPermanentLossOfAccess"
]
},
"Gravity"
]
}
{
"doorUnlockedAtNode": 1
}Exit condition: {
"leaveWithMockball": {
"remoteRunway": {
"length": 16,
"openEnd": 1
},
"landingRunway": {
"length": 2,
"openEnd": 1
}
}
}Unlocks doors: {"types":["ammo"],"requires":[]}Dev note: Longer landing runway could be used but would be difficult at high run speeds. |
From: 1
Left Door
To: 2
Right Door
Requires: {
"or": [
{
"and": [
{
"not": "f_DefeatedPhantoon"
},
"canRiskPermanentLossOfAccess"
]
},
"Gravity"
]
}
{
"canShineCharge": {
"usedTiles": 19,
"steepDownTiles": 3,
"openEnd": 0
}
}
"canChainTemporaryBlue"Exit condition: {
"leaveWithTemporaryBlue": {}
}Unlocks doors: {"types":["ammo"],"requires":[]} |
From: 1
Left Door
To: 2
Right Door
If possible (and applicable), kill the Bull ahead of time, and do a shinecharge to gain temporary blue. Otherwise, shoot the Bull to get it out of the way; then, after getting blue speed with a stutter water shinecharge, jump directly into a spring ball jump rather than shinecharging first. Requires: {
"or": [
{
"enemyKill": {
"enemies": [
[
"Bull"
]
]
}
},
{
"and": [
{
"not": "f_DefeatedPhantoon"
},
"canRiskPermanentLossOfAccess"
]
},
"canTrickyJump"
]
}
"canStutterWaterShineCharge"
"h_getBlueSpeedMaxRunway"
"canTrickySpringBallJump"
"canChainTemporaryBlue"Exit condition: {
"leaveWithTemporaryBlue": {}
}Unlocks doors: {"types":["ammo"],"requires":[]}Dev note: FIXME: Leaving with a blue spring ball bounce is possible without `canChainTemporaryBlue`, allowing a flash suit to be carried. |
|
Requires: {
"not": "f_DefeatedPhantoon"
}
"canRiskPermanentLossOfAccess" |
|
Enter the room with a shinecharge. Run and jump off the ledge. Fire a shot mid-air and activate the shinespark wind-up. Take a hit from the the Bull (if power is on). Wait until the shot is at a specific position before sparking. Sparking too late will cause the shot to despawn before reaching the door. Sparking too early will cause Samus to bonk the door as it will not yet be open. A beam shot, Missile, or Super can be used. Entrance condition: {
"comeInShinecharged": {}
}Requires: {
"shineChargeFrames": 60
}
"canShinechargeMovementTricky"
"canHeroShot"
{
"or": [
{
"enemyDamage": {
"enemy": "Bull",
"type": "contact",
"hits": 1
}
},
{
"and": [
{
"not": "f_DefeatedPhantoon"
},
"canRiskPermanentLossOfAccess"
]
}
]
}
{
"shinespark": {
"frames": 32,
"excessFrames": 0
}
}Exit condition: {
"leaveWithSpark": {}
}Unlocks doors: {"types":["super"],"requires":[]}
{"types":["missiles","powerbomb"],"requires":["never"]} |
From: 2
Right Door
To: 2
Right Door
Requires: {
"canShineCharge": {
"usedTiles": 19,
"steepDownTiles": 3,
"openEnd": 0
}
}
{
"or": [
"Gravity",
{
"and": [
{
"not": "f_DefeatedPhantoon"
},
"canRiskPermanentLossOfAccess"
]
}
]
}
"canShinechargeMovementComplex"
{
"shineChargeFrames": 70
}Exit condition: {
"leaveShinecharged": {}
}Unlocks doors: {"types":["super"],"requires":[]}
{"types":["missiles","powerbomb"],"requires":["never"]}Dev note: One runway tile is considered unusable, in order to allow a quick jump up without needing to turn around. |
|
Any beam can kill the Atomics by aiming for the seam in the glass. The drop may be hard to collect; try spin jumping along the side of the glass. Requires: {
"not": "f_DefeatedPhantoon"
}
"canRiskPermanentLossOfAccess"
{
"resetRoom": {
"nodes": [
1
]
}
}
"canDodgeWhileShooting"
{
"or": [
{
"and": [
"Plasma",
{
"cycleFrames": 1020
}
]
},
{
"and": [
"Wave",
{
"cycleFrames": 960
}
]
},
{
"and": [
"Spazer",
{
"cycleFrames": 1400
}
]
}
]
}Resets obstacles: R-Mode Farm cycle drops: 4 Trapped Atomic Dev note: Other options should just farm the Covern. |
|
Requires: {
"not": "f_DefeatedPhantoon"
}
"canRiskPermanentLossOfAccess"
{
"or": [
"ScrewAttack",
{
"haveBlueSuit": {}
},
{
"and": [
"Plasma",
{
"cycleFrames": 60
}
]
},
{
"and": [
"Wave",
{
"cycleFrames": 120
}
]
},
{
"and": [
"Spazer",
{
"cycleFrames": 150
}
]
},
{
"and": [
"Ice",
"canDodgeWhileShooting",
{
"cycleFrames": 240
}
]
},
{
"and": [
"canPseudoScrew",
"canFarmWhileShooting",
{
"cycleFrames": 120
}
]
},
{
"cycleFrames": 540
}
]
}
{
"cycleFrames": 480
}Farm cycle drops: 1 Covern |
|
Requires: {
"not": "f_DefeatedPhantoon"
}
"canRiskPermanentLossOfAccess"
{
"canShineCharge": {
"usedTiles": 14,
"openEnd": 0
}
}
"h_CrystalSpark"Dev note: With the power on, this gives a longer runway, but it is not reasonable to get to solid ground and place the Power Bomb. |
From: 1
Left Door
To: 1
Left Door
Requires: {
"not": "f_DefeatedPhantoon"
}
"canRiskPermanentLossOfAccess"Exit condition: {
"leaveSpaceJumping": {
"remoteRunway": {
"length": 11,
"openEnd": 2
}
}
} |
|
If needing the highest possible speed, run on the conveyor furthest from the door. Requires: {
"not": "f_DefeatedPhantoon"
}
"canRiskPermanentLossOfAccess"
"SpaceJump"Exit condition: {
"leaveSpinning": {
"remoteRunway": {
"length": 11,
"openEnd": 2
}
}
} |
From: 1
Left Door
To: 1
Left Door
Requires: {
"not": "f_DefeatedPhantoon"
}
"canRiskPermanentLossOfAccess"Exit condition: {
"leaveWithMockball": {
"remoteRunway": {
"length": 11,
"openEnd": 2
},
"landingRunway": {
"length": 3,
"openEnd": 1
}
}
} |
From: 1
Left Door
To: 1
Left Door
Requires: {
"not": "f_DefeatedPhantoon"
}
"canRiskPermanentLossOfAccess"Exit condition: {
"leaveWithSpringBallBounce": {
"remoteRunway": {
"length": 11,
"openEnd": 2
},
"landingRunway": {
"length": 3,
"openEnd": 1
},
"movementType": "uncontrolled"
}
} |
From: 1
Left Door
To: 1
Left Door
Requires: {
"not": "f_DefeatedPhantoon"
}
"canRiskPermanentLossOfAccess"
{
"canShineCharge": {
"usedTiles": 14,
"openEnd": 0
}
}
"canChainTemporaryBlue"Exit condition: {
"leaveWithTemporaryBlue": {}
} |
From: 1
Left Door
To: 1
Left Door
Power Off: Farm using Coverns or trapped Atomics. Use any conveyor belt to shinecharge and then use the next Covern spawn to interrupt. Power On: Kill the Bulls for energy. Run against a conveyor belt direction to shinecharge, and then use the spikes to pause abuse and interrupt. Requires: {
"obstaclesCleared": [
"R-Mode"
]
}
{
"or": [
"h_CrystalFlashForReserveEnergy",
{
"and": [
"h_RModeCanRefillReserves",
{
"enemyKill": {
"enemies": [
[
"Bull",
"Bull"
]
],
"excludedWeapons": [
"PowerBomb"
]
}
},
{
"resourceMissingAtMost": [
{
"type": "PowerBomb",
"count": 0
}
]
},
{
"partialRefill": {
"type": "ReserveEnergy",
"limit": 40
}
}
]
}
]
}
{
"or": [
{
"canShineCharge": {
"usedTiles": 14,
"openEnd": 0
}
},
{
"and": [
"f_DefeatedPhantoon",
{
"canShineCharge": {
"usedTiles": 20,
"openEnd": 2
}
}
]
}
]
}
{
"autoReserveTrigger": {
"maxReserveEnergy": 95
}
}
"canRModePauseAbuseSparkInterrupt"Resets obstacles: R-Mode |
From: 1
Right Door
To: 1
Right Door
Entrance condition: {
"comeInShinecharged": {}
}Requires: {
"or": [
"Gravity",
{
"and": [
{
"not": "f_DefeatedPhantoon"
},
"canRiskPermanentLossOfAccess"
]
}
]
}
{
"shineChargeFrames": 120
}
"h_spikeSuitThornHitLeniency"
{
"thornHits": 1
}
"canSpikeSuit"
{
"shinespark": {
"frames": 2,
"excessFrames": 2
}
} |
From: 1
Right Door
To: 1
Right Door
Entrance condition: {
"comeInShinecharging": {
"length": 7,
"openEnd": 0,
"steepDownTiles": 2
},
"comesInHeated": "no"
}Requires: {
"or": [
"Gravity",
{
"and": [
{
"not": "f_DefeatedPhantoon"
},
"canRiskPermanentLossOfAccess"
]
}
]
}
"h_CrystalSpark" |
From: 1
Right Door
To: 1
Right Door
Requires: {
"or": [
"Gravity",
{
"and": [
{
"not": "f_DefeatedPhantoon"
},
"canRiskPermanentLossOfAccess"
]
}
]
}
"h_thornDoubleXModeBlueSuit"
{
"shinespark": {
"frames": 0,
"excessFrames": 0
}
} |
From: 1
Right Door
To: 1
Right Door
Requires: {
"or": [
"Gravity",
{
"and": [
{
"not": "f_DefeatedPhantoon"
},
"canRiskPermanentLossOfAccess"
]
}
]
}Exit condition: {
"leaveWithRunway": {
"length": 8,
"openEnd": 1,
"steepUpTiles": 2
}
} |
From: 1
Right Door
To: 1
Right Door
Requires: {
"or": [
"Gravity",
{
"and": [
{
"not": "f_DefeatedPhantoon"
},
"canRiskPermanentLossOfAccess"
]
}
]
}
"h_thornXModeSpikeSuit"
{
"shinespark": {
"frames": 2,
"excessFrames": 2
}
} |
From: 1
Right Door
To: 1
Right Door
Power Off: Crystal Flash, enter X-Mode using the bottom spikes and shinecharge, then pause abuse from the spikes to interrupt. Power On: Crystal Flash or farm Skultera. Enter X-Mode using the bottom spikes and shinecharge, then pause abuse from the spikes to interrupt. Entrance condition: {
"comeInWithRMode": {}
}Requires: {
"or": [
"Gravity",
{
"and": [
{
"not": "f_DefeatedPhantoon"
},
"canRiskPermanentLossOfAccess"
]
}
]
}
{
"or": [
"h_CrystalFlashForReserveEnergy",
{
"and": [
"f_DefeatedPhantoon",
"h_RModeCanRefillReserves",
"canBeLucky",
{
"resourceMissingAtMost": [
{
"type": "Missile",
"count": 0
}
]
},
{
"or": [
{
"partialRefill": {
"type": "ReserveEnergy",
"limit": 5
}
},
{
"and": [
{
"partialRefill": {
"type": "ReserveEnergy",
"limit": 20
}
},
"canBeVeryLucky"
]
}
]
}
]
}
]
}
"canBeVeryPatient"
"h_thornXModeShinecharge"
"h_thornXModeFramePerfectExtraLeniency"
{
"autoReserveTrigger": {}
}
"canRModePauseAbuseSparkInterrupt" |
From: 1
Right Door
To: 1
Right Door
Requires: "h_thornXModeShinecharge"
"h_thornXModeFramePerfectExtraLeniency"
"SpaceJump"
"HiJump"
"canShinechargeMovementComplex"
{
"shinespark": {
"frames": 21,
"excessFrames": 0
}
}
{
"or": [
"Gravity",
{
"and": [
{
"not": "f_DefeatedPhantoon"
},
"canRiskPermanentLossOfAccess"
]
}
]
}Exit condition: {
"leaveWithSpark": {}
}Dev note: Two thorn hits are expected per attempt (with any additional leniency hits being multiplied by this amount). FIXME: There is likely a fast wall jump climb strat with more spark frames. |
From: 1
Right Door
To: 2
Item
Jump as far as possible before activating the spark, while sparking high enough to crash into the Chozo statue's hand. Entrance condition: {
"comeInShinecharged": {}
}Requires: {
"shineChargeFrames": 100
}
"canShinechargeMovementComplex"
{
"shinespark": {
"frames": 33,
"excessFrames": 7
}
}
{
"or": [
{
"and": [
{
"not": "f_DefeatedPhantoon"
},
"canRiskPermanentLossOfAccess"
]
},
"Gravity",
{
"disableEquipment": "HiJump"
},
"canTrickyJump"
]
}Dev note: If power is on, then this strat may not quite work because the water can interfere with the runway for the jump. But in that case, platforming is possible as a relatively free alternative. |
From: 1
Right Door
To: 2
Item
Gain a shinecharge while entering the room. Run back to the door, and then run left and jump as far as possible before activating the spark, while sparking high enough to crash into the Chozo statue's hand. Entrance condition: {
"comeInShinecharging": {
"length": 7,
"openEnd": 0,
"steepDownTiles": 2
}
}Requires: "canShinechargeMovementComplex"
{
"shinespark": {
"frames": 33,
"excessFrames": 7
}
}
{
"or": [
{
"and": [
{
"not": "f_DefeatedPhantoon"
},
"canRiskPermanentLossOfAccess"
]
},
"Gravity",
{
"disableEquipment": "HiJump"
},
"canTrickyJump"
]
}Dev note: If power is on, then this strat may not quite work because the water can interfere with the runway. But in that case, platforming is possible as a relatively free alternative. |
From: 1
Right Door
To: 2
Item
Requires: {
"thornHits": 1
}
"HiJump"
"canSpringBallJumpMidAir"
{
"not": "f_DefeatedPhantoon"
}
{
"or": [
"canRiskPermanentLossOfAccess",
{
"and": [
"canDash",
"canCarefulJump",
{
"disableEquipment": "HiJump"
}
]
},
{
"and": [
"canJumpIntoIBJ",
"canBombHorizontally",
"canTrickyJump"
]
},
"Gravity",
"canSpringFling"
]
} |
From: 1
Right Door
To: 2
Item
Run from the adjacent room and jump at the end of the platform. From the top right platform, jump to the left and wall jump just above the spikes and climb the left wall. Entrance condition: {
"comeInRunning": {
"speedBooster": "yes",
"minTiles": 5
}
}Requires: "h_speedJump"
"canCarefulJump"
"canConsecutiveWallJump"
{
"not": "f_DefeatedPhantoon"
}
{
"or": [
{
"disableEquipment": "HiJump"
},
"canRiskPermanentLossOfAccess",
"canTrickyJump"
]
}Dev note: This variant of the strat includes an extra couple of tiles of runway for lenience. |
|
Requires: {
"thornHits": 1
}
{
"or": [
{
"and": [
"canUseIFrames",
"canDash"
]
},
{
"and": [
{
"tech": "canHorizontalDamageBoost"
},
"h_complexToCarryFlashSuit"
]
},
{
"thornHits": 1
}
]
}
"canWallJump"
{
"not": "f_DefeatedPhantoon"
}
{
"or": [
"canRiskPermanentLossOfAccess",
{
"and": [
"canDash",
"canCarefulJump",
{
"disableEquipment": "HiJump"
}
]
},
{
"and": [
"Gravity",
"canDash"
]
},
{
"and": [
"canJumpIntoIBJ",
"canBombHorizontally",
"canTrickyJump"
]
},
{
"and": [
"Gravity",
"canSpringBallJumpMidAir"
]
},
"canSpringFling",
{
"and": [
"HiJump",
"Gravity",
"canInsaneJump"
]
}
]
}Dev note: The canCarefulJump and Gravity are here, as with either of those, there is access across with or without f_DefeatedPhantoon. |
|
Requires: {
"or": [
{
"and": [
{
"not": "f_DefeatedPhantoon"
},
"canRiskPermanentLossOfAccess"
]
},
"canDash"
]
}
{
"thornHits": 1
}
{
"or": [
"HiJump",
"canWallJump",
"canUseIFrames",
"Grapple",
"canHorizontalDamageBoost",
{
"thornHits": 1
}
]
}Dev note: When the power is off, the floor has thorns. if power is on and dash is available, then the floating platforms could be used instead to avoid all damage. |
|
Requires: {
"not": "f_DefeatedPhantoon"
}
"canRiskPermanentLossOfAccess"Exit condition: {
"leaveWithRunway": {
"length": 45,
"openEnd": 1
}
} |
From: 2
Right Door
To: 2
Right Door
Requires: {
"not": "f_DefeatedPhantoon"
}
"canRiskPermanentLossOfAccess"Exit condition: {
"leaveWithRunway": {
"length": 45,
"openEnd": 1
}
} |
From: 1
Top Door
To: 1
Top Door
Freeze an Atomic or Covern at a precise distance below the door in order to jump up and clip through the door shell. If Phantoon is defeated, it is possible to lure the Atomic from below the shot blocks by placing a Power Bomb. Freezing it while it is moving horizontally and Samus is standing works as a trivial setup. If Phantoon is not defeated, stand on the stairs so that Samus is just a few pixels lower, then freeze the Covern low in its cycle. Alternatively, freeze it high then perform a tight down grab to get onto it for a pixel perfect clip. Entrance condition: {
"comeInWithGMode": {
"mode": "indirect",
"morphed": true
},
"comesThroughToilet": "any"
}Requires: "canComplexGMode"
{
"or": [
"h_artificialMorphPowerBomb",
{
"and": [
{
"not": "f_DefeatedPhantoon"
},
"canRiskPermanentLossOfAccess"
]
}
]
}
{
"or": [
"h_preciseIceClip",
"h_highPixelIceClip"
]
}Exit condition: {
"leaveWithGMode": {
"morphed": false
}
}Bypasses door shell: true Dev note: This is only for indirect G-Mode, because it is trivial while in direct, and would use a different strat. FIXME: If Phantoon is not defeated, this does not require Morph or artificial morph. |
|
Requires: {
"enemyDamage": {
"enemy": "Covern",
"type": "contact",
"hits": 1
}
}
{
"not": "f_DefeatedPhantoon"
}
"canRiskPermanentLossOfAccess" |
|
Requires: {
"enemyDamage": {
"enemy": "Covern",
"type": "contact",
"hits": 1
}
}
{
"not": "f_DefeatedPhantoon"
}
"canRiskPermanentLossOfAccess" |
From: 2
Top Left Door
To: 2
Top Left Door
Requires: "canBeExtremelyPatient"
{
"not": "f_DefeatedPhantoon"
}
"canRiskPermanentLossOfAccess"
{
"canShineCharge": {
"usedTiles": 11,
"steepUpTiles": 7,
"openEnd": 1
}
}
{
"enemyDamage": {
"enemy": "Covern",
"type": "contact",
"hits": 1
}
}
"canSlopeSpark"
{
"shinespark": {
"frames": 3,
"excessFrames": 3
}
} |
|
Use the camera scroll blocks just right of the bomb blocks, in order to overload PLMs and go through them. Exit G-mode and travel to the item and back while off screen. Entrance condition: {
"comeInWithGMode": {
"mode": "any",
"morphed": true
}
}Requires: {
"or": [
{
"and": [
"canOffScreenMovement",
"canTrickyGMode"
]
},
{
"and": [
{
"not": "f_DefeatedPhantoon"
},
"canRiskPermanentLossOfAccess"
]
}
]
}Dev note: This is only useful if the item is Morph. If Samus already has Morph, she can fix the camera, using another strat. |
From: 3
Bottom Left Door
To: 3
Bottom Left Door
Requires: {
"enemyDamage": {
"enemy": "Covern",
"type": "contact",
"hits": 1
}
}
{
"not": "f_DefeatedPhantoon"
}
"canRiskPermanentLossOfAccess" |
|
Damage a Covern to prepare it to be frozen. Stand a few tiles away from the bomb block, and walk toward it as the Covern is about to reappear. If successful, the Covern will spawn inside the wall but close enough that Samus can clip into it. Freeze the Covern by pressing against the wall, then jumping and shooting down. Run into the wall with as much speed as possible to clip into it. Once Samus is clipped into the wall, perform a low turnaround spin jump to the right and immediately turn back to the left while still spinning, using Screw Attack to break the bomb block. If Phantoon is already dead, a moonfall with two frozen Atomics can instead be used to clip into the floor to be able to break the bomb block. Requires: {
"notable": "Covern Wall Ice Screw Clip"
}
{
"not": "f_DefeatedPhantoon"
}
{
"or": [
"canRiskPermanentLossOfAccess",
{
"and": [
{
"notable": "Atomic Ice Moonfall Screw Clip"
},
{
"enemyDamage": {
"enemy": "Atomic",
"type": "contact",
"hits": 1
}
}
]
}
]
}
"canDash"
"canMidairWiggle"
"canWallIceClip"
"ScrewAttack"
"Morph"Clears obstacles: C Dev note: FIXME: Dashing is probably not required, even if it makes it easier. |
From: 3
Bottom Left Door
To: 8
Item
Use the camera scroll blocks just right of the bomb blocks, in order to overload PLMs and go through them. Exit g-mode and travel to the item and back while off screen. Entrance condition: {
"comeInWithGMode": {
"mode": "any",
"morphed": true
}
}Requires: {
"or": [
"h_artificialMorphIBJ",
"h_artificialMorphSpringBallBombJump",
{
"and": [
"h_artificialMorphSpringBall",
"HiJump"
]
}
]
}
{
"or": [
{
"and": [
"canOffScreenMovement",
"canTrickyGMode"
]
},
{
"and": [
{
"not": "f_DefeatedPhantoon"
},
"canRiskPermanentLossOfAccess"
]
}
]
}Dev note: This is only useful if the item is Morph. If Samus already has Morph, she can fix the camera, using another strat. |
From: 3
Bottom Left Door
To: 8
Item
Fall into the first Samus Eater in Hellway or the second Samus Eater of Alpha Power Bomb Room. After teleporting and passing through the transition, X-Ray climb to reach the space above (about 1 screen), to the left of the bomb blocks. Samus will be off-camera, but the slopes at the top will push the camera up, indicating when the climb is done. Equip Morph Ball and touch the scroll PLMs in the morph tunnel, to fix the camera to be able to see the way to the item. Entrance condition: {
"comeInWithSamusEaterTeleport": {
"floorPositions": [
[
1,
13
],
[
2,
13
]
],
"ceilingPositions": []
}
}Requires: "canXRayClimb"
{
"or": [
"Morph",
{
"and": [
{
"not": "f_DefeatedPhantoon"
},
"canRiskPermanentLossOfAccess"
]
}
]
}Dev note: Other Samus Eaters can also probably work. Blind navigation to the item with power on is theoretically possible but seems unreasonable, as a spike hit will cause death. |
|
Requires: {
"not": "f_DefeatedPhantoon"
}
"canRiskPermanentLossOfAccess"
{
"or": [
"ScrewAttack",
{
"haveBlueSuit": {}
},
{
"and": [
"Plasma",
{
"cycleFrames": 60
}
]
},
{
"and": [
"Wave",
{
"cycleFrames": 120
}
]
},
{
"and": [
"Spazer",
{
"cycleFrames": 150
}
]
},
{
"and": [
"Ice",
"canDodgeWhileShooting",
{
"cycleFrames": 240
}
]
},
{
"and": [
"canPseudoScrew",
"canFarmWhileShooting",
{
"cycleFrames": 120
}
]
},
{
"cycleFrames": 540
}
]
}
{
"cycleFrames": 480
}Farm cycle drops: 1 Covern |
From: 4
Top Right Door
To: 4
Top Right Door
Requires: {
"enemyDamage": {
"enemy": "Covern",
"type": "contact",
"hits": 1
}
}
{
"not": "f_DefeatedPhantoon"
}
"canRiskPermanentLossOfAccess" |
From: 4
Top Right Door
To: 4
Top Right Door
Power Off: Farm Coverns and use either the ramp to the upper right door or the ramp by the inactive treadmills to shinecharge. Interrupt using the next Covern spawn. Power On: Farm Atomics and shinecharge using the ramp to the upper right door, using an Atomic to interrupt. Or open the path to the treadmills, shinecharge there, and jump under a Kzan to interrupt. Requires: {
"obstaclesCleared": [
"R-Mode"
]
}
{
"or": [
"h_CrystalFlashForReserveEnergy",
{
"and": [
"h_RModeCanRefillReserves",
{
"partialRefill": {
"type": "ReserveEnergy",
"limit": 40
}
}
]
}
]
}
{
"or": [
{
"canShineCharge": {
"usedTiles": 12,
"steepUpTiles": 7,
"openEnd": 1
}
},
{
"and": [
{
"obstaclesCleared": [
"C"
]
},
"Morph",
{
"or": [
{
"canShineCharge": {
"usedTiles": 16,
"steepUpTiles": 6,
"openEnd": 0
}
},
{
"and": [
"f_DefeatedPhantoon",
{
"canShineCharge": {
"usedTiles": 19,
"steepDownTiles": 6,
"openEnd": 1
}
}
]
}
]
}
]
}
]
}
{
"autoReserveTrigger": {
"maxReserveEnergy": 95
}
}
"canRModeSparkInterrupt"Resets obstacles: R-Mode |
|
Use the camera scroll blocks just right of the bomb blocks, in order to overload PLMs and go through them. Exit g-mode and travel to the item and back while off screen. Entrance condition: {
"comeInWithGMode": {
"mode": "any",
"morphed": true
}
}Requires: {
"or": [
{
"and": [
"canOffScreenMovement",
"canTrickyGMode"
]
},
{
"and": [
{
"not": "f_DefeatedPhantoon"
},
"canRiskPermanentLossOfAccess"
]
}
]
}Dev note: This is only useful if the item is Morph. If Samus already has Morph, she can fix the camera, using another strat. |
From: 5
Middle Right Door
To: 5
Middle Right Door
Requires: {
"enemyDamage": {
"enemy": "Covern",
"type": "contact",
"hits": 1
}
}
{
"not": "f_DefeatedPhantoon"
}
"canRiskPermanentLossOfAccess" |
From: 5
Middle Right Door
To: 8
Item
Use the camera scroll blocks just right of the bomb blocks, in order to overload PLMs and go through them. Exit g-mode and travel to the item and back while off screen. Entrance condition: {
"comeInWithGMode": {
"mode": "any",
"morphed": true
}
}Requires: {
"or": [
{
"and": [
"canOffScreenMovement",
"canTrickyGMode"
]
},
{
"and": [
{
"not": "f_DefeatedPhantoon"
},
"canRiskPermanentLossOfAccess"
]
}
]
}Dev note: This is only useful if the item is Morph. If Samus already has Morph, she can fix the camera, using another strat. |
|
Requires: {
"not": "f_DefeatedPhantoon"
}
"canRiskPermanentLossOfAccess"
{
"or": [
"ScrewAttack",
{
"haveBlueSuit": {}
},
{
"and": [
"Plasma",
{
"cycleFrames": 60
}
]
},
{
"and": [
"Wave",
{
"cycleFrames": 120
}
]
},
{
"and": [
"Spazer",
{
"cycleFrames": 150
}
]
},
{
"and": [
"Ice",
"canDodgeWhileShooting",
{
"cycleFrames": 240
}
]
},
{
"and": [
"canPseudoScrew",
"canFarmWhileShooting",
{
"cycleFrames": 120
}
]
},
{
"cycleFrames": 540
}
]
}
{
"cycleFrames": 480
}Farm cycle drops: 1 Covern |
From: 6
Bottom Right Door
To: 6
Bottom Right Door
Requires: {
"enemyDamage": {
"enemy": "Covern",
"type": "contact",
"hits": 1
}
}
{
"not": "f_DefeatedPhantoon"
}
"canRiskPermanentLossOfAccess" |
From: 6
Bottom Right Door
To: 6
Bottom Right Door
Requires: {
"or": [
"h_bombThings",
{
"obstaclesCleared": [
"A"
]
},
{
"and": [
{
"not": "f_DefeatedPhantoon"
},
"canRiskPermanentLossOfAccess"
]
}
]
}Exit condition: {
"leaveWithGModeSetup": {}
} |
From: 6
Bottom Right Door
To: 8
Item
Roll through the bomb blocks then exit g-mode and travel to the item and back while off screen. If a Spring Ball bomb jump off of a Power Bomb is the only way up, first overload PLMs using the camera scroll block in front of the bottom bomb block or the top block will remain solid. Entrance condition: {
"comeInWithGMode": {
"mode": "any",
"morphed": true
}
}Requires: "h_blueSuitGMode"
{
"or": [
"h_artificialMorphIBJ",
"h_artificialMorphSpringBallBombJump",
{
"and": [
"h_artificialMorphSpringBall",
"HiJump"
]
}
]
}
{
"or": [
{
"and": [
"canOffScreenMovement",
"canTrickyGMode"
]
},
{
"and": [
{
"not": "f_DefeatedPhantoon"
},
"canRiskPermanentLossOfAccess"
]
}
]
}Clears obstacles: A Dev note: This is only useful if the item is Morph. |
From: 7
Bottom Door
To: 3
Bottom Left Door
Use the Covern to partial ceiling clip so your beam can reach the shot block of the ceiling at the end of the Morph tunnel to the left. It is possible to mid-air morph to get into the morph tunnel with nothing, from the Covern, the ground, or the stairs below. Requires: {
"notable": "Partial Covern Ice Clip"
}
"canTrickyUseFrozenEnemies"
"canCeilingClip"
{
"not": "f_DefeatedPhantoon"
}
"canRiskPermanentLossOfAccess"
{
"or": [
{
"and": [
"canCarefulJump",
"canMidAirMorph",
"canDisableEquipment"
]
},
"h_useSpringBall"
]
}Clears obstacles: B |
From: 7
Bottom Door
To: 3
Bottom Left Door
In R-Mode, kill the Coverns until there is Energy in Samus's Reserves. Get into the Morph tunnel and go to the far left. Wait for Coverns to damage Samus down until Reserves trigger, forcing a stand up and enabling her to shoot the shot blocks and escape. Entrance condition: {
"comeInWithRMode": {},
"comesThroughToilet": "any"
}Requires: {
"not": "f_DefeatedPhantoon"
}
"canRiskPermanentLossOfAccess"
{
"or": [
"canBePatient",
"Plasma"
]
}
{
"partialRefill": {
"type": "ReserveEnergy",
"limit": 20
}
}
{
"or": [
{
"and": [
"canCarefulJump",
"canMidAirMorph",
"canDisableEquipment"
]
},
"h_useSpringBall"
]
}
{
"autoReserveTrigger": {}
}Clears obstacles: B Resets obstacles: R-Mode |
|
To shoot the Atomics with Ice or Plasma, crouch near the edge of the glass and shoot forward; angled shots downwards also work but from a tile further back. Requires: {
"not": "f_DefeatedPhantoon"
}
"canRiskPermanentLossOfAccess"
{
"or": [
{
"and": [
"Plasma",
"canDodgeWhileShooting",
{
"cycleFrames": 360
}
]
},
{
"and": [
"Wave",
{
"cycleFrames": 330
}
]
},
{
"and": [
"Spazer",
{
"cycleFrames": 450
}
]
},
{
"and": [
"h_useMorphBombs",
{
"cycleFrames": 840
}
]
},
{
"and": [
"Ice",
"canFarmWhileShooting",
{
"cycleFrames": 840
}
]
}
]
}
{
"resetRoom": {
"nodes": [
7
]
}
}Resets obstacles: A, B, C, R-Mode Farm cycle drops: 2 Trapped Atomic Dev note: Killing the Coverns with any of these options can be done on a single cycle. Screw Attack can kill the Coverns quickly, but can't kill the Atomics. Bombs can kill the Atimics easily, but not the Coverns. FIXME: Should this require another tech? canRiskPermanentLossOfAccess is a pretty high-level requirement. |
|
Requires: {
"not": "f_DefeatedPhantoon"
}
"canRiskPermanentLossOfAccess"
{
"or": [
"ScrewAttack",
{
"haveBlueSuit": {}
},
{
"and": [
"Plasma",
{
"cycleFrames": 60
}
]
},
{
"and": [
"Wave",
{
"cycleFrames": 120
}
]
},
{
"and": [
"Spazer",
{
"cycleFrames": 150
}
]
},
{
"and": [
"Ice",
"canDodgeWhileShooting",
{
"cycleFrames": 240
}
]
},
{
"and": [
"canPseudoScrew",
"canFarmWhileShooting",
{
"cycleFrames": 120
}
]
},
{
"cycleFrames": 540
}
]
}
{
"cycleFrames": 480
}Farm cycle drops: 1 Covern |
|
Line up with the far right or left side of doorframe in the room below, to be able to not fall back through after entry, as the door remains open. Be careful not to fall into the door while being hit by the Covern. Requires: {
"enemyDamage": {
"enemy": "Covern",
"type": "contact",
"hits": 1
}
}
{
"not": "f_DefeatedPhantoon"
}
"canRiskPermanentLossOfAccess" |
From: 8
Item
To: 3
Bottom Left Door
Requires: {
"not": "f_DefeatedPhantoon"
}
"canRiskPermanentLossOfAccess"
{
"getBlueSpeed": {
"usedTiles": 14,
"steepUpTiles": 3,
"openEnd": 0
}
}
"canSpeedball"Clears obstacles: C |
From: 8
Item
To: 3
Bottom Left Door
Requires: {
"not": "f_DefeatedPhantoon"
}
"canRiskPermanentLossOfAccess"
{
"canShineCharge": {
"usedTiles": 16,
"steepUpTiles": 4,
"openEnd": 0
}
}
"canTemporaryBlue"
"can4HighMidAirMorph"
"canSpringBallBounce"Clears obstacles: C |
|
Shinecharge on the left of the tunnel near the left item. This requires the power to be off because of the conveyors. Shinecharge right to left or left to right then move to the left a bit to avoid the low ceiling. Requires: {
"not": "f_DefeatedPhantoon"
}
"canRiskPermanentLossOfAccess"
{
"canShineCharge": {
"usedTiles": 16,
"steepUpTiles": 5,
"openEnd": 0
}
}
"h_CrystalSpark"Dev note: The runway is actually a half tile longer, but this will help prevent being stuck in the section with the low ceiling. |
|
Requires: {
"not": "f_DefeatedPhantoon"
}
"canRiskPermanentLossOfAccess"
{
"or": [
"ScrewAttack",
{
"haveBlueSuit": {}
},
{
"and": [
"Plasma",
{
"cycleFrames": 60
}
]
},
{
"and": [
"Wave",
{
"cycleFrames": 120
}
]
},
{
"and": [
"Spazer",
{
"cycleFrames": 150
}
]
},
{
"and": [
"Ice",
"canDodgeWhileShooting",
{
"cycleFrames": 240
}
]
},
{
"and": [
"canPseudoScrew",
"canFarmWhileShooting",
{
"cycleFrames": 120
}
]
},
{
"cycleFrames": 540
}
]
}
{
"cycleFrames": 480
}Farm cycle drops: 1 Covern |
|
Requires: {
"enemyDamage": {
"enemy": "Covern",
"type": "contact",
"hits": 1
}
}
{
"not": "f_DefeatedPhantoon"
}
"canRiskPermanentLossOfAccess" |
From: 1
Right Door
To: 1
Right Door
Requires: {
"not": "f_DefeatedPhantoon"
}
"canRiskPermanentLossOfAccess"Exit condition: {
"leaveWithGModeSetup": {}
} |
From: 1
Right Door
To: 1
Right Door
Stand a few pixels away from the bottom of the stairs to easily position the Covern and extend the runway as far as possible. Requires: "h_frozenEnemyRunway"
{
"not": "f_DefeatedPhantoon"
}
"canRiskPermanentLossOfAccess"Exit condition: {
"leaveWithRunway": {
"length": 7,
"openEnd": 0
}
} |
|
Requires: {
"not": "f_DefeatedPhantoon"
}
"canRiskPermanentLossOfAccess"
{
"or": [
"ScrewAttack",
{
"haveBlueSuit": {}
},
{
"and": [
"Plasma",
{
"cycleFrames": 60
}
]
},
{
"and": [
"Wave",
{
"cycleFrames": 120
}
]
},
{
"and": [
"Spazer",
{
"cycleFrames": 150
}
]
},
{
"and": [
"Ice",
"canDodgeWhileShooting",
{
"cycleFrames": 240
}
]
},
{
"and": [
"canPseudoScrew",
"canFarmWhileShooting",
{
"cycleFrames": 120
}
]
},
{
"cycleFrames": 540
}
]
}
{
"cycleFrames": 480
}Farm cycle drops: 1 Covern |
|
Requires: {
"enemyDamage": {
"enemy": "Covern",
"type": "contact",
"hits": 1
}
}
{
"not": "f_DefeatedPhantoon"
}
"canRiskPermanentLossOfAccess" |
|
Requires: {
"not": "f_DefeatedPhantoon"
}
"canRiskPermanentLossOfAccess"Exit condition: {
"leaveWithGModeSetup": {}
} |
From: 1
Left Door
To: 1
Left Door
Stand half way between the ledge and the save station to position the Covern and extend the runway as far as possible. Requires: "h_frozenEnemyRunway"
{
"not": "f_DefeatedPhantoon"
}
"canRiskPermanentLossOfAccess"Exit condition: {
"leaveWithRunway": {
"length": 6,
"openEnd": 0
}
} |
|
Open the gate to farm the Scisers. Shinecharge then use a remaining Sciser to interrupt. Entrance condition: {
"comeInWithRMode": {}
}Requires: "Gravity"
{
"ammo": {
"type": "Super",
"count": 1
}
}
{
"or": [
"h_CrystalFlashForReserveEnergy",
{
"and": [
"h_RModeCanRefillReserves",
{
"or": [
{
"and": [
{
"resourceMissingAtMost": [
{
"type": "PowerBomb",
"count": 0
}
]
},
{
"partialRefill": {
"type": "ReserveEnergy",
"limit": 120
}
}
]
},
{
"and": [
{
"resourceMissingAtMost": [
{
"type": "PowerBomb",
"count": 4
}
]
},
{
"partialRefill": {
"type": "ReserveEnergy",
"limit": 40
}
}
]
}
]
}
]
}
]
}
"h_shinechargeMaxRunway"
{
"autoReserveTrigger": {}
}
"canRModeSparkInterrupt"Clears obstacles: A |
|
Entrance condition: {
"comeInWithRMode": {}
}Requires: "Gravity"
{
"or": [
"h_CrystalFlashForReserveEnergy",
{
"and": [
"h_RModeCanRefillReserves",
{
"or": [
{
"and": [
{
"resourceMissingAtMost": [
{
"type": "PowerBomb",
"count": 0
}
]
},
{
"partialRefill": {
"type": "ReserveEnergy",
"limit": 100
}
}
]
},
{
"and": [
{
"resourceMissingAtMost": [
{
"type": "PowerBomb",
"count": 3
}
]
},
{
"partialRefill": {
"type": "ReserveEnergy",
"limit": 40
}
}
]
}
]
}
]
}
]
}
"h_shinechargeMaxRunway"
{
"autoReserveTrigger": {}
}
"canRModeSparkInterrupt" |
|
Farm the Skulteras, then shinecharge using the bottom runway and use the pirate's lasers to interrupt. Requires: "Gravity"
{
"obstaclesCleared": [
"R-Mode"
]
}
{
"or": [
"h_CrystalFlashForReserveEnergy",
{
"and": [
"h_RModeCanRefillReserves",
{
"resourceMissingAtMost": [
{
"type": "Missile",
"count": 0
}
]
},
{
"partialRefill": {
"type": "ReserveEnergy",
"limit": 20
}
}
]
}
]
}
{
"canShineCharge": {
"usedTiles": 32,
"openEnd": 1
}
}
{
"autoReserveTrigger": {
"maxReserveEnergy": 95
}
}
"canRModeSparkInterrupt"Resets obstacles: R-Mode |
|
Requires: {
"obstaclesCleared": [
"R-Mode"
]
}
"Gravity"
{
"or": [
"h_CrystalFlashForReserveEnergy",
{
"and": [
"h_RModeCanRefillReserves",
{
"partialRefill": {
"type": "ReserveEnergy",
"limit": 20
}
}
]
}
]
}
{
"or": [
{
"canShineCharge": {
"usedTiles": 24,
"gentleUpTiles": 3,
"gentleDownTiles": 3,
"openEnd": 1
}
},
{
"and": [
{
"doorUnlockedAtNode": 3
},
{
"canShineCharge": {
"usedTiles": 25,
"gentleUpTiles": 3,
"gentleDownTiles": 3,
"openEnd": 1
}
}
]
}
]
}
{
"autoReserveTrigger": {
"maxReserveEnergy": 95
}
}
"canRModeSparkInterrupt"Resets obstacles: R-Mode |
From: 10
Direct G-Mode Morph, On Ledge Above Speed Blocks
To: 6
Speed Blocked Item
Overloading the PLMs can be done with as few as 2 Power Bombs if they are placed precisely. Place them two ledges above the item - to the left of the morph tunnel item. It is important that they are placed on either of the flat tiles, not the sloped tile on the right. Samus can use the second Power Bomb to Crystal Flash to have enough Energy to take a crab hit or to get some Reserve Energy, but then she will not be able to use X-Ray to exit G-Mode, and will require a Reserve Trigger. If Samus uses the first Power Bomb to Crystal Flash, she is no longer able to place a second. Samus then needs to jump into the speed-locked item and hit the crab to trigger Reserves and exit G-Mode. This can be done with HiJump, Gravity, Spring Ball, or Ice. Turn around while inside the item to collect it. Requires: "canPowerBombItemOverloadPLMs"
{
"notable": "G-Mode Overload Speed Blocks then use Global Crab"
}
"canBePatient"
"h_navigateUnderwater"
"h_artificialMorphCrystalFlash"
{
"or": [
"h_artificialMorphPowerBomb",
{
"and": [
{
"itemNotCollectedAtNode": 7
},
"canRiskPermanentLossOfAccess"
]
}
]
}
{
"or": [
"HiJump",
"Gravity",
"canSpringBallJumpMidAir",
{
"and": [
"h_underwaterCrouchJump",
"canTrickyUseFrozenEnemies"
]
}
]
}
{
"autoReserveTrigger": {}
}Dev note: An item is expected at node 6, otherwise this strat isn't useful. It takes 2 PBs to overload PLMs, or only 1 if both items are uncollected. FIXME: If Samus has a lot of tanks, it could take too much time to damage down. Ice can be used to take multiple hits from a crab before it leaves. |
From: 10
Direct G-Mode Morph, On Ledge Above Speed Blocks
To: 11
G-Mode, Below Speed Blocks (Overloaded PLMs)
Overloading the PLMs can be done with as few as 2 Power Bombs if they are placed precisely. Place them two ledges above the item - to the left of the morph tunnel item. It is important that they are placed on either of the flat tiles, not the sloped tile on the right. Requires: "canPowerBombItemOverloadPLMs"
{
"notable": "G-Mode Overload Speed Blocks then use Global Crab"
}
"h_navigateUnderwater"
"h_artificialMorphPowerBomb"
{
"or": [
"h_artificialMorphPowerBomb",
{
"and": [
{
"itemNotCollectedAtNode": 7
},
"canRiskPermanentLossOfAccess"
]
}
]
}Dev note: An item is expected at node 6, otherwise this strat isn't useful. It takes 2 PBs to overload PLMs, or only 1 if both items are uncollected. |
|
Requires: {
"not": "f_MaridiaTubeBroken"
}
"canRiskPermanentLossOfAccess"Exit condition: {
"leaveWithRunway": {
"length": 14,
"openEnd": 0
}
}Dev note: FIXME: Needs a way to represent that this runway has an 'air' environment. |
|
Entrance condition: {
"comeInWithGMode": {
"mode": "any",
"morphed": true
}
}Requires: {
"or": [
"Morph",
"h_artificialMorphSpringBall",
{
"and": [
"Gravity",
"h_artificialMorphIBJ"
]
},
{
"and": [
"Gravity",
"h_artificialMorphBombHorizontally",
"h_artificialMorphBombThings"
]
},
{
"and": [
{
"not": "f_MaridiaTubeBroken"
},
"canRiskPermanentLossOfAccess"
]
}
]
}Exit condition: {
"leaveWithGMode": {
"morphed": true
}
}Dev note: Bomb jumping across the broken tube uses a second bomb to climb up to the tube. FIXME: Moving before the bomb explodes gives enough momentum to only need one power bomb. |
From: 1
Left Doorway
To: 3
Top Right Doorway
Entrance condition: {
"comeInShinecharging": {
"length": 13,
"openEnd": 0
}
}Requires: {
"not": "f_MaridiaTubeBroken"
}
"canRiskPermanentLossOfAccess"
{
"shineChargeFrames": 5
}Exit condition: {
"leaveShinecharged": {}
} |
|
Entrance condition: {
"comeInWithSpark": {}
}Requires: {
"or": [
{
"shinespark": {
"frames": 24,
"excessFrames": 0
}
},
{
"and": [
"Gravity",
{
"shinespark": {
"frames": 21,
"excessFrames": 0
}
}
]
},
{
"and": [
{
"not": "f_MaridiaTubeBroken"
},
"canRiskPermanentLossOfAccess",
{
"shinespark": {
"frames": 21,
"excessFrames": 0
}
}
]
}
]
}Exit condition: {
"leaveWithSpark": {}
} |
From: 1
Left Doorway
To: 3
Top Right Doorway
Entrance condition: {
"comeInWithStoredFallSpeed": {
"fallSpeedInTiles": 1
}
}Requires: {
"not": "f_MaridiaTubeBroken"
}
"canRiskPermanentLossOfAccess"Exit condition: {
"leaveWithStoredFallSpeed": {
"fallSpeedInTiles": 1
}
}Unlocks doors: {"types":["missiles","super"],"requires":[]}
{"types":["powerbomb"],"requires":["never"]} |
From: 1
Left Doorway
To: 3
Top Right Doorway
Entrance condition: {
"comeInWithStoredFallSpeed": {
"fallSpeedInTiles": 2
}
}Requires: {
"not": "f_MaridiaTubeBroken"
}
"canRiskPermanentLossOfAccess"Exit condition: {
"leaveWithStoredFallSpeed": {
"fallSpeedInTiles": 2
}
}Unlocks doors: {"types":["missiles","super"],"requires":[]}
{"types":["powerbomb"],"requires":["never"]} |
|
In direct G-Mode, the tube will break once Samus moves after exiting G-Mode or when the Power Bomb finishes detonating, whichever is later. In indirect G-Mode, Samus must exit G-Mode before the Power Bomb explodes. Either way, it is recommended to exit G-Mode before the Power Bomb goes off to be safe. Jump as the first action to gravity jump to the top of the room. Note that the door will be closed, so open it during the ascent. This can only be attempted once. Entrance condition: {
"comeInWithGMode": {
"mode": "any",
"morphed": true
}
}Requires: {
"notable": "Breaking the Tube Gravity Jump"
}
{
"not": "f_MaridiaTubeBroken"
}
"canRiskPermanentLossOfAccess"
"h_artificialMorphPowerBomb"
"canSuitlessMaridia"
"canTrickyJump"Clears obstacles: f_MaridiaTubeBroken Sets flags: f_MaridiaTubeBroken Unlocks doors: {"types":["super"],"requires":[]}
{"types":["missiles","powerbomb"],"requires":["never"]} |
From: 1
Left Doorway
To: 6
Platform Below Top Door
In direct G-Mode, the tube will break once Samus moves after exiting G-Mode or when the Power Bomb finishes detonating, whichever is later. In indirect G-Mode, Samus must exit G-Mode before the Power Bomb explodes. Either way, it is recommended to exit G-Mode before the Power Bomb goes off to be safe. Jump as the first action to gravity jump to the top of the room. This can only be attempted once. Entrance condition: {
"comeInWithGMode": {
"mode": "any",
"morphed": true
}
}Requires: {
"notable": "Breaking the Tube Gravity Jump"
}
{
"not": "f_MaridiaTubeBroken"
}
"canRiskPermanentLossOfAccess"
"h_artificialMorphPowerBomb"
"canSuitlessMaridia"
"canTrickyJump"Clears obstacles: f_MaridiaTubeBroken Sets flags: f_MaridiaTubeBroken Dev note: This could be useful as a way to unlock the top door for later, if there is no normal way to climb the room. FIXME: Strats to unlock door 4 from 6 need to be added. |
From: 2
Bottom Right Door
To: 2
Bottom Right Door
Entrance condition: {
"comeInShinecharging": {
"length": 4,
"openEnd": 0
},
"comesInHeated": "no"
}Requires: {
"or": [
"Gravity",
{
"and": [
{
"not": "f_MaridiaTubeBroken"
},
"canRiskPermanentLossOfAccess"
]
}
]
}
"h_CrystalSpark"Dev note: There is no variant of this at node 1 or 3 with canRiskPermanentLossOfAccess, because it would require a first-try Crystal Spark. |
From: 2
Bottom Right Door
To: 2
Bottom Right Door
Requires: {
"not": "f_MaridiaTubeBroken"
}
"canRiskPermanentLossOfAccess"Exit condition: {
"leaveWithRunway": {
"length": 5,
"openEnd": 1
}
}Dev note: FIXME: Needs a way to represent that this runway has an 'air' environment. |
From: 2
Bottom Right Door
To: 4
Top Door
Swing to the right, shoot open the door above, and grapple jump through it. The grapple beam will need to be retracted while swinging to the right, to avoid bonking on the small platform. Entrance condition: {
"comeInWithGrappleTeleport": {
"blockPositions": [
[
5,
3
]
]
}
}Requires: {
"notable": "Grapple Teleport into Grapple Jump (or Tube Intact)"
}
{
"doorUnlockedAtNode": 4
}
{
"or": [
{
"and": [
"canMidairWiggle",
"canTrickyGrappleJump",
"canInsaneJump"
]
},
{
"and": [
{
"not": "f_MaridiaTubeBroken"
},
"canRiskPermanentLossOfAccess"
]
}
]
}Unlocks doors: {"types":["super"],"requires":[]}
{"types":["missiles","powerbomb"],"requires":["never"]}Dev note: FIXME: Add a version of this with an exit condition for grapple jumping through the transition. FIXME: Add a canRiskPermanentLossOfAccess variation coming from Moat, which only works if door is not blue. |
From: 2
Bottom Right Door
To: 6
Platform Below Top Door
In direct G-Mode, the tube will break once Samus moves after exiting G-Mode or when the Power Bomb finishes detonating, whichever is later. In indirect G-Mode, Samus must exit G-Mode before the Power Bomb explodes. Either way, it is recommended to exit G-Mode before the Power Bomb goes off to be safe. Jump as the first action to gravity jump to the top of the room. This can only be attempted once. Entrance condition: {
"comeInWithGMode": {
"mode": "any",
"morphed": true
}
}Requires: {
"notable": "Breaking the Tube Gravity Jump"
}
{
"not": "f_MaridiaTubeBroken"
}
"canRiskPermanentLossOfAccess"
"h_artificialMorphSpringBall"
"h_artificialMorphPowerBomb"
"canSuitlessMaridia"
"canTrickyJump"Clears obstacles: f_MaridiaTubeBroken Sets flags: f_MaridiaTubeBroken Dev note: This could be useful as a way to unlock the top door for later, if there is no normal way to climb the room. FIXME: Strats to unlock door 4 from 6 need to be added. |
|
Entrance condition: {
"comeInWithGMode": {
"mode": "any",
"morphed": true
}
}Requires: {
"or": [
"Morph",
"h_artificialMorphSpringBall",
{
"and": [
"Gravity",
"h_artificialMorphIBJ"
]
},
{
"and": [
"Gravity",
"h_artificialMorphBombHorizontally",
"h_additionalBomb"
]
},
{
"and": [
{
"not": "f_MaridiaTubeBroken"
},
"canRiskPermanentLossOfAccess"
]
}
]
}Exit condition: {
"leaveWithGMode": {
"morphed": true
}
}Dev note: Bomb jumping across the broken tube uses a second bomb to climb up to the tube. FIXME: Moving before the bomb explodes gives enough momentum to only need one power bomb. |
From: 3
Top Right Doorway
To: 1
Left Doorway
Entrance condition: {
"comeInShinecharging": {
"length": 13,
"openEnd": 0
}
}Requires: {
"not": "f_MaridiaTubeBroken"
}
"canRiskPermanentLossOfAccess"
{
"shineChargeFrames": 5
}Exit condition: {
"leaveShinecharged": {}
} |
|
Entrance condition: {
"comeInWithSpark": {}
}Requires: {
"or": [
{
"shinespark": {
"frames": 24,
"excessFrames": 0
}
},
{
"and": [
"Gravity",
{
"shinespark": {
"frames": 21,
"excessFrames": 0
}
}
]
},
{
"and": [
{
"not": "f_MaridiaTubeBroken"
},
"canRiskPermanentLossOfAccess",
{
"shinespark": {
"frames": 21,
"excessFrames": 0
}
}
]
}
]
}Exit condition: {
"leaveWithSpark": {}
} |
From: 3
Top Right Doorway
To: 1
Left Doorway
Entrance condition: {
"comeInWithStoredFallSpeed": {
"fallSpeedInTiles": 1
}
}Requires: {
"not": "f_MaridiaTubeBroken"
}
"canRiskPermanentLossOfAccess"Exit condition: {
"leaveWithStoredFallSpeed": {
"fallSpeedInTiles": 1
}
}Unlocks doors: {"types":["missiles","super"],"requires":[]}
{"types":["powerbomb"],"requires":["never"]} |
From: 3
Top Right Doorway
To: 1
Left Doorway
Entrance condition: {
"comeInWithStoredFallSpeed": {
"fallSpeedInTiles": 2
}
}Requires: {
"not": "f_MaridiaTubeBroken"
}
"canRiskPermanentLossOfAccess"Exit condition: {
"leaveWithStoredFallSpeed": {
"fallSpeedInTiles": 2
}
}Unlocks doors: {"types":["missiles","super"],"requires":[]}
{"types":["powerbomb"],"requires":["never"]} |
From: 3
Top Right Doorway
To: 3
Top Right Doorway
Requires: {
"not": "f_MaridiaTubeBroken"
}
"canRiskPermanentLossOfAccess"Exit condition: {
"leaveWithRunway": {
"length": 14,
"openEnd": 0
}
}Dev note: FIXME: Needs a way to represent that this runway has an 'air' environment. |
From: 3
Top Right Doorway
To: 4
Top Door
In direct G-Mode, the tube will break once Samus moves after exiting G-Mode or when the Power Bomb finishes detonating, whichever is later. In indirect G-Mode, Samus must exit G-Mode before the Power Bomb explodes. Either way, it is recommended to exit G-Mode before the Power Bomb goes off to be safe. Jump as the first action to gravity jump to the top of the room. Note that the door will be closed, so open it during the ascent. This can only be attempted once. Entrance condition: {
"comeInWithGMode": {
"mode": "any",
"morphed": true
}
}Requires: {
"notable": "Breaking the Tube Gravity Jump"
}
{
"not": "f_MaridiaTubeBroken"
}
"canRiskPermanentLossOfAccess"
"h_artificialMorphPowerBomb"
"canSuitlessMaridia"
"canTrickyJump"Clears obstacles: f_MaridiaTubeBroken Sets flags: f_MaridiaTubeBroken Unlocks doors: {"types":["super"],"requires":[]}
{"types":["missiles","powerbomb"],"requires":["never"]} |
From: 3
Top Right Doorway
To: 4
Top Door
Swing to the right, shoot open the door above, and grapple jump through it. The grapple beam will need to be retracted while swinging to the right, to avoid bonking on the small platform. Entrance condition: {
"comeInWithGrappleTeleport": {
"blockPositions": [
[
5,
3
]
]
}
}Requires: {
"notable": "Grapple Teleport into Grapple Jump (or Tube Intact)"
}
{
"doorUnlockedAtNode": 4
}
{
"or": [
{
"and": [
"canMidairWiggle",
"canTrickyGrappleJump",
"canInsaneJump"
]
},
{
"and": [
{
"not": "f_MaridiaTubeBroken"
},
"canRiskPermanentLossOfAccess"
]
}
]
}Unlocks doors: {"types":["super"],"requires":[]}
{"types":["missiles","powerbomb"],"requires":["never"]}Dev note: FIXME: Add a version of this with an exit condition for grapple jumping through the transition. FIXME: Add a canRiskPermanentLossOfAccess variation coming from Moat, which only works if door is not blue. |
From: 3
Top Right Doorway
To: 6
Platform Below Top Door
In direct G-Mode, the tube will break once Samus moves after exiting G-Mode or when the Power Bomb finishes detonating, whichever is later. In indirect G-Mode, Samus must exit G-Mode before the Power Bomb explodes. Either way, it is recommended to exit G-Mode before the Power Bomb goes off to be safe. Jump as the first action to gravity jump to the top of the room. This can only be attempted once. Entrance condition: {
"comeInWithGMode": {
"mode": "any",
"morphed": true
}
}Requires: {
"notable": "Breaking the Tube Gravity Jump"
}
{
"not": "f_MaridiaTubeBroken"
}
"canRiskPermanentLossOfAccess"
"h_artificialMorphPowerBomb"
"canSuitlessMaridia"
"canTrickyJump"Clears obstacles: f_MaridiaTubeBroken Sets flags: f_MaridiaTubeBroken Dev note: This could be useful as a way to unlock the top door for later, if there is no normal way to climb the room. FIXME: Strats to unlock door 4 from 6 need to be added. |
|
Entrance condition: {
"comeInWithGMode": {
"mode": "direct",
"morphed": false
},
"comesThroughToilet": "any"
}Requires: {
"or": [
"Gravity",
"HiJump",
"canTrickySpringBallJump",
{
"and": [
{
"not": "f_MaridiaTubeBroken"
},
"canRiskPermanentLossOfAccess"
]
}
]
}Exit condition: {
"leaveWithGMode": {
"morphed": false
}
} |
|
Entrance condition: {
"comeInWithGMode": {
"mode": "direct",
"morphed": true
},
"comesThroughToilet": "any"
}Requires: {
"or": [
"Gravity",
"h_artificialMorphDoubleSpringBallJump",
{
"and": [
{
"not": "f_MaridiaTubeBroken"
},
"canRiskPermanentLossOfAccess"
]
}
]
}
{
"or": [
"h_artificialMorphIBJ",
{
"and": [
"HiJump",
"h_artificialMorphSpringBall"
]
},
{
"and": [
"h_artificialMorphSpringBallBombJump",
"h_artificialMorphSpringBall"
]
},
{
"and": [
"canGravityJump",
"h_artificialMorphSpringBall"
]
}
]
}Exit condition: {
"leaveWithGMode": {
"morphed": true
}
} |
|
In direct G-Mode, the tube will break once Samus moves after exiting G-Mode or when the Power Bomb finishes detonating, whichever is later. In indirect G-Mode, Samus must exit G-Mode before the Power Bomb explodes. Either way, it is recommended to exit G-Mode before the Power Bomb goes off to be safe. Be sure not to overload PLMs with the camera scroll blocks which are next to the tube. Jump as the first action to gravity jump to the top of the room. Note that the door will be closed, so open it during the ascent. This can only be attempted once. Entrance condition: {
"comeInWithGMode": {
"mode": "any",
"morphed": true
},
"comesThroughToilet": "any"
}Requires: {
"notable": "Breaking the Tube Gravity Jump"
}
{
"not": "f_MaridiaTubeBroken"
}
"canRiskPermanentLossOfAccess"
"h_artificialMorphPowerBomb"
"canSuitlessMaridia"
"canTrickyJump"Clears obstacles: f_MaridiaTubeBroken Sets flags: f_MaridiaTubeBroken Unlocks doors: {"types":["super"],"requires":[]}
{"types":["missiles","powerbomb"],"requires":["never"]} |
From: 5
Inside Maridia Tube Junction
To: 4
Top Door
Jump as the first action after breaking the tube to gravity jump to the top of the room. Open the door and go through it during the ascent. This can only be attempted once. Requires: {
"notable": "Breaking the Tube Gravity Jump"
}
{
"not": "f_MaridiaTubeBroken"
}
"canRiskPermanentLossOfAccess"
"h_usePowerBomb"
"canSuitlessMaridia"
"canTrickyJump"
"h_midAirShootUp"Clears obstacles: f_MaridiaTubeBroken Sets flags: f_MaridiaTubeBroken Unlocks doors: {"types":["super"],"requires":[]}
{"types":["missiles","powerbomb"],"requires":["never"]} |
From: 6
Platform Below Top Door
To: 4
Top Door
Jump as the first action after breaking the tube to gravity jump back up and out of the door. This can only be attempted once. Requires: {
"notable": "Breaking the Tube Gravity Jump"
}
{
"not": "f_MaridiaTubeBroken"
}
"canRiskPermanentLossOfAccess"
"h_usePowerBomb"
"canSuitlessMaridia"
"canTrickyJump"Clears obstacles: f_MaridiaTubeBroken Sets flags: f_MaridiaTubeBroken Unlocks doors: {"types":["ammo"],"requires":[]}Dev note: Any type of door can be unlocked, because it can be done before breaking the Tube. |
|
Until the tube is broken there is no water in this room. Requires: {
"not": "f_MaridiaTubeBroken"
}
"canRiskPermanentLossOfAccess"Unlocks doors: {"types":["ammo"],"requires":[]} |
|
Farm the Sciser in the bottom runway, then shinecharge. Interrupt using the Sciser on the center mountain. Entrance condition: {
"comeInWithRMode": {}
}Requires: "Gravity"
{
"or": [
"h_CrystalFlashForReserveEnergy",
{
"and": [
"h_RModeCanRefillReserves",
{
"partialRefill": {
"type": "ReserveEnergy",
"limit": 20
}
}
]
}
]
}
"h_shinechargeMaxRunway"
{
"autoReserveTrigger": {}
}
"canRModeSparkInterrupt" |
|
Farm the Sciser in the bottom runway, then shinecharge. Interrupt using the Sciser on the center mountain. Entrance condition: {
"comeInWithRMode": {},
"comesThroughToilet": "no"
}Requires: "Gravity"
{
"or": [
"canGravityJump",
"HiJump",
"canWallJump",
"SpaceJump",
"canJumpIntoIBJ",
"canSpringBallJumpMidAir"
]
}
{
"or": [
"h_CrystalFlashForReserveEnergy",
{
"and": [
"h_RModeCanRefillReserves",
{
"partialRefill": {
"type": "ReserveEnergy",
"limit": 20
}
}
]
}
]
}
"h_shinechargeMaxRunway"
{
"autoReserveTrigger": {}
}
"canRModeSparkInterrupt" |
|
Farm the Sciser in the bottom runway, then shinecharge. Interrupt using the Sciser on the center mountain. Entrance condition: {
"comeInWithRMode": {}
}Requires: "Gravity"
{
"or": [
"h_CrystalFlashForReserveEnergy",
{
"and": [
"h_RModeCanRefillReserves",
{
"partialRefill": {
"type": "ReserveEnergy",
"limit": 20
}
}
]
}
]
}
"h_shinechargeMaxRunway"
{
"autoReserveTrigger": {}
}
"canRModeSparkInterrupt" |
|
Farm the Sciser in the bottom runway, then shinecharge. Interrupt using the Sciser on the center mountain. Entrance condition: {
"comeInWithRMode": {},
"comesThroughToilet": "no"
}Requires: "Gravity"
{
"or": [
"h_CrystalFlashForReserveEnergy",
{
"and": [
"h_RModeCanRefillReserves",
{
"partialRefill": {
"type": "ReserveEnergy",
"limit": 20
}
}
]
}
]
}
"h_shinechargeMaxRunway"
{
"autoReserveTrigger": {}
}
"canRModeSparkInterrupt" |
From: 6
Left Morph Passage Doorway
To: 2
Bottom Left Door
Farm the Sciser in the bottom runway, then shinecharge. Interrupt using the Sciser on the center mountain. Entrance condition: {
"comeInWithRMode": {}
}Requires: "Gravity"
"Morph"
{
"or": [
"h_CrystalFlashForReserveEnergy",
{
"and": [
"h_RModeCanRefillReserves",
{
"partialRefill": {
"type": "ReserveEnergy",
"limit": 20
}
}
]
}
]
}
"h_shinechargeMaxRunway"
{
"autoReserveTrigger": {}
}
"canRModeSparkInterrupt"Dev note: Samus is able to enter this door in R-mode, even if the tunnel is not expanded. She can then morph and 'fall' into the tunnel. |
|
Farm four Yards for energy, or else Crystal Flash. Free the Yard from the bottom pit, then run across the bottom runway. Poke the Yard with a beam shot to anger it and have it interrupt the. shinespark windup. To kill a Yard with Speed, tap it with a beam shot to knock it down to the runway, run away from it, then run back towards it. (Morph Bombs also work and are safer.) Entrance condition: {
"comeInWithRMode": {}
}Requires: "Gravity"
{
"or": [
"h_CrystalFlashForReserveEnergy",
{
"and": [
"h_RModeCanRefillReserves",
{
"enemyKill": {
"enemies": [
[
"Yard"
],
[
"Yard"
],
[
"Yard"
],
[
"Yard"
]
],
"explicitWeapons": [
"BlueSuit",
"Bombs"
]
}
},
{
"partialRefill": {
"type": "ReserveEnergy",
"limit": 20
}
}
]
}
]
}
"h_shinechargeMaxRunway"
{
"autoReserveTrigger": {}
}
"canRModeSparkInterrupt" |
From: 5
Right Door
To: 11
G-Mode Overloaded PLMs (By Bottom Left Door)
PLMs can be overloaded in direct G-Mode with a single Power Bomb if both items are still there and 2 PBs if only one item is. There is a row of tiles that works, just above and to the left of the right door. The row is one tile higher than the horizontal pipe that is part of the door frame, spanning from the left to one tile away from the right wall. Entrance condition: {
"comeInWithGMode": {
"mode": "direct",
"morphed": true
}
}Requires: "canPowerBombItemOverloadPLMs"
{
"notable": "G-Mode Overload PLMs - Power Bomb the Items"
}
"canRiskPermanentLossOfAccess"
{
"or": [
{
"itemNotCollectedAtNode": 7
},
{
"itemNotCollectedAtNode": 8
}
]
}
"h_artificialMorphSpringBall"
"h_artificialMorphPowerBomb"
"h_artificialMorphPowerBomb"Dev note: This canRiskPermanentLossOfAccess variant is only added from this door, as the only other place to use overloaded PLMs would be the top left bomb block, and if you can get here artificially morphed, you can get to the top left and instead use the bomb on the block. |
|
Farm four Yards for energy, or else Crystal Flash. Free the Yard from the bottom pit, then run across the bottom runway. Poke the Yard with a beam shot to anger it and have it interrupt the. shinespark windup. To kill a Yard with Speed, tap it with a beam shot to knock it down to the runway, run away from it, then run back towards it. (Morph Bombs also work and are safer.) Entrance condition: {
"comeInWithRMode": {},
"comesThroughToilet": "no"
}Requires: "Gravity"
{
"or": [
"h_CrystalFlashForReserveEnergy",
{
"and": [
"h_RModeCanRefillReserves",
{
"enemyKill": {
"enemies": [
[
"Yard"
],
[
"Yard"
],
[
"Yard"
],
[
"Yard"
]
],
"explicitWeapons": [
"BlueSuit",
"Bombs"
]
}
},
{
"partialRefill": {
"type": "ReserveEnergy",
"limit": 20
}
}
]
}
]
}
"h_shinechargeMaxRunway"
{
"autoReserveTrigger": {}
}
"canRModeSparkInterrupt" |
|
Leave the Mochtroid trapped in the box just above the runway. Open up the runway, then damage down on the far right Puyo. Run right to left to shinecharge, open the box, and use the Mochtroid to interrupt. Entrance condition: {
"comeInWithRMode": {},
"comesThroughToilet": "no"
}Requires: "Gravity"
{
"or": [
"h_CrystalFlashForReserveEnergy",
{
"and": [
"h_RModeCanRefillReserves",
{
"or": [
{
"and": [
{
"resourceMissingAtMost": [
{
"type": "Missile",
"count": 0
}
]
},
{
"partialRefill": {
"type": "ReserveEnergy",
"limit": 40
}
}
]
},
{
"partialRefill": {
"type": "ReserveEnergy",
"limit": 20
}
}
]
}
]
}
]
}
"h_shinechargeMaxRunway"
{
"autoReserveTrigger": {
"maxReserveEnergy": 95
}
}
"canRModeSparkInterrupt" |
|
Leave the Mochtroid trapped in the box just above the runway. Open up the runway, then damage down on the far right Puyo. Run right to left to shinecharge, open the box, and use the Mochtroid to interrupt. Entrance condition: {
"comeInWithRMode": {}
}Requires: "Gravity"
{
"or": [
"h_CrystalFlashForReserveEnergy",
{
"and": [
"h_RModeCanRefillReserves",
{
"or": [
{
"and": [
{
"resourceMissingAtMost": [
{
"type": "Missile",
"count": 0
}
]
},
{
"partialRefill": {
"type": "ReserveEnergy",
"limit": 40
}
}
]
},
{
"partialRefill": {
"type": "ReserveEnergy",
"limit": 20
}
}
]
}
]
}
]
}
"h_shinechargeMaxRunway"
{
"autoReserveTrigger": {
"maxReserveEnergy": 95
}
}
"canRModeSparkInterrupt" |
|
Crystal Flash immediately on room entry to gain Reserve Energy. Shinecharge, then jump into Botwoon's movement path for the interrupt. Entrance condition: {
"comeInWithRMode": {}
}Requires: {
"not": "f_DefeatedBotwoon"
}
"canRiskPermanentLossOfAccess"
"Gravity"
"h_CrystalFlashForReserveEnergy"
{
"canShineCharge": {
"usedTiles": 13,
"openEnd": 0
}
}
{
"autoReserveTrigger": {
"maxReserveEnergy": 95
}
}
"canRModeSparkInterrupt"Clears obstacles: door_1 |
From: 1
Left Door
To: 1
Left Door
Farm the door Mochtroid and the one in the water. Jump over the sand pit and freeze the third Mochtroid. Climb using this Mochtroid up to the spike, then bounce off the Mochtroid and enter X-Mode. Arm-pump to move Samus off the spike tile (watch the Mochtroid). Shinecharge, release X-Ray, and start moving left as Samus falls back toward the sand. While falling, disable Ice Beam to force the Mochtroid to unfreeze and get grabbed by it while jumping out of the sand. Shinespark windup just before the Mochtroid drain hits to interrurpt. If Samus must land back in the sand, be sure to be moving horizontally to land on top of the sand rather than sinking into it. Entrance condition: {
"comeInWithRMode": {}
}Requires: "canTrickyUseFrozenEnemies"
{
"or": [
{
"enemyKill": {
"enemies": [
[
"Mochtroid",
"Mochtroid"
]
],
"excludedWeapons": [
"PowerBeam",
"Ice",
"Bombs"
]
}
},
"canInsaneJump"
]
}
"canPlayInSand"
{
"or": [
{
"and": [
"h_CrystalFlashForReserveEnergy",
"h_usePowerBomb",
"canOffScreenMovement"
]
},
{
"and": [
"h_RModeCanRefillReserves",
{
"partialRefill": {
"type": "ReserveEnergy",
"limit": 40
}
}
]
}
]
}
"canBeVeryPatient"
"canXMode"
"h_XModeSpikeHit"
"h_shinechargeMaxRunway"
{
"disableEquipment": "Ice"
}
{
"autoReserveTrigger": {
"maxReserveEnergy": 63
}
}
"canRModeSparkInterrupt"
{
"or": [
"Grapple",
{
"and": [
"Gravity",
"canWallJump"
]
}
]
} |
From: 2
Bottom Right Door
To: 2
Bottom Right Door
Farm the door Mochtroid and the one in the water. Lure one of the next pair of Mochtroids toward the spike and freeze it. Climb using this Mochtroid up to the spike, then bounce off the Mochtroid and enter X-Mode. Arm-pump to move Samus off the spike tile (watch the Mochtroid). Shinecharge, release X-Ray, and start moving toward the Mochtroid as Samus falls back toward the sand. While falling, disable Ice Beam to force the Mochtroid to unfreeze and get grabbed by it while jumping out of the sand. Shinespark windup just before the Mochtroid drain hits to interrurpt. If Samus must land back in the sand, be sure to be moving horizontally to land on top of the sand rather than sinking into it. Entrance condition: {
"comeInWithRMode": {}
}Requires: "canTrickyUseFrozenEnemies"
"canPlayInSand"
{
"or": [
{
"and": [
"h_CrystalFlashForReserveEnergy",
"h_usePowerBomb",
"canOffScreenMovement"
]
},
{
"and": [
"h_RModeCanRefillReserves",
{
"partialRefill": {
"type": "ReserveEnergy",
"limit": 40
}
}
]
}
]
}
"canBeVeryPatient"
"canXMode"
"h_XModeSpikeHit"
"h_shinechargeMaxRunway"
{
"disableEquipment": "Ice"
}
{
"autoReserveTrigger": {
"maxReserveEnergy": 63
}
}
"canRModeSparkInterrupt"
{
"or": [
"Grapple",
{
"and": [
"Gravity",
"canWallJump"
]
}
]
} |
From: 3
Top Right Door
To: 3
Top Right Door
Farm the door Mochtroid and the one in the water. Lure one of the next pair of Mochtroids toward the spike and freeze it. Climb using this Mochtroid up to the spike, then bounce off the Mochtroid and enter X-Mode. Arm-pump to move Samus off the spike tile (watch the Mochtroid). Shinecharge, release X-Ray, and start moving toward the Mochtroid as Samus falls back toward the sand. While falling, disable Ice Beam to force the Mochtroid to unfreeze and get grabbed by it while jumping out of the sand. Shinespark windup just before the Mochtroid drain hits to interrurpt. If Samus must land back in the sand, be sure to be moving horizontally to land on top of the sand rather than sinking into it. Entrance condition: {
"comeInWithRMode": {}
}Requires: "canTrickyUseFrozenEnemies"
"canPlayInSand"
{
"or": [
{
"and": [
"h_CrystalFlashForReserveEnergy",
"h_usePowerBomb",
"canOffScreenMovement"
]
},
{
"and": [
"h_RModeCanRefillReserves",
{
"partialRefill": {
"type": "ReserveEnergy",
"limit": 40
}
}
]
}
]
}
"canBeVeryPatient"
"canXMode"
"h_XModeSpikeHit"
"h_shinechargeMaxRunway"
{
"disableEquipment": "Ice"
}
{
"autoReserveTrigger": {
"maxReserveEnergy": 63
}
}
"canRModeSparkInterrupt"
{
"or": [
"Grapple",
{
"and": [
"Gravity",
"canWallJump"
]
}
]
} |
|
Farm three Scisers for energy or Crystal Flash. Run across the bottom, then use the last Sciser to interrupt. Requires: {
"obstaclesCleared": [
"R-Mode"
]
}
"Gravity"
{
"or": [
"h_CrystalFlashForReserveEnergy",
{
"and": [
"h_RModeCanRefillReserves",
{
"or": [
{
"and": [
{
"resourceMissingAtMost": [
{
"type": "PowerBomb",
"count": 2
}
]
},
{
"partialRefill": {
"type": "ReserveEnergy",
"limit": 40
}
}
]
},
{
"and": [
{
"resourceMissingAtMost": [
{
"type": "PowerBomb",
"count": 0
}
]
},
{
"partialRefill": {
"type": "ReserveEnergy",
"limit": 80
}
}
]
}
]
}
]
}
]
}
{
"canShineCharge": {
"usedTiles": 23,
"openEnd": 0
}
}
{
"autoReserveTrigger": {}
}
"canRModeSparkInterrupt"Resets obstacles: R-Mode |
From: 1
Left Door
To: 1
Left Door
Shinecharge during a goop phase and then allow a goop to hit Samus. Begin shinespark windup just before Draygon grabs Samus. Rapidly press directions on the D-Pad to escape Draygon with less damage taken. Requires: {
"not": "f_DefeatedDraygon"
}
"canRiskPermanentLossOfAccess"
"Gravity"
"h_breakThreeDraygonTurrets"
{
"canShineCharge": {
"usedTiles": 22,
"openEnd": 0
}
}
"canRModeSparkInterrupt" |
|
Requires: {
"not": "f_DefeatedDraygon"
}
"canRiskPermanentLossOfAccess"
{
"enemyDamage": {
"enemy": "Draygon",
"type": "contact",
"hits": 1
}
} |
|
Requires: {
"not": "f_DefeatedDraygon"
}
"canRiskPermanentLossOfAccess"
{
"or": [
"h_breakOneDraygonTurret",
{
"and": [
"canTrickyDodgeEnemies",
"Gravity"
]
},
{
"and": [
"canSuitlessMaridia",
"canTrickyGMode"
]
}
]
}Exit condition: {
"leaveWithGModeSetup": {}
}Dev note: Not likely to be possible, as it requires canRiskPermanentLossOfAccess and Draygon alive with the door unlocked. |
|
Shinecharge in-room, then horizontally spark through Draygon multiple times. It takes 3 Shinesparks if that is the only source of damage onto Draygon. Be careful of taking damage at the end of a Shinespark when near walls and on the killing Shinespark. Requires: {
"notable": "Shinespark Kill"
}
"Gravity"
"canShinechargeMovementComplex"
{
"or": [
{
"and": [
"canShinechargeMovementTricky",
{
"enemyDamage": {
"enemy": "Draygon",
"type": "turretProjectile",
"hits": 3
}
}
]
},
{
"and": [
"canShinechargeMovementTricky",
"canBeLucky"
]
},
"h_breakThreeDraygonTurrets"
]
}
{
"canShineCharge": {
"usedTiles": 22,
"openEnd": 0
}
}
{
"or": [
"canTrickyJump",
{
"enemyDamage": {
"enemy": "Draygon",
"type": "contact",
"hits": 1
}
}
]
}
{
"or": [
"HiJump",
{
"enemyDamage": {
"enemy": "Draygon",
"type": "contact",
"hits": 1
}
}
]
}
{
"enemyDamage": {
"enemy": "Draygon",
"type": "contact",
"hits": 2
}
}
{
"shinespark": {
"frames": 150
}
}
{
"or": [
"free",
{
"and": [
{
"not": "f_DefeatedDraygon"
},
"canRiskPermanentLossOfAccess",
"canShinechargeMovementTricky",
{
"gainBlueSuit": {}
}
]
}
]
}Clears obstacles: f_DefeatedDraygon Sets flags: f_DefeatedDraygon Dev note: 150 frames is an approximate sum of all required shinesparks. |
From: 4
Top Right Ledge Junction
To: 4
Top Right Ledge Junction
Farm the Cacatac, jump to the left dry platform, and jump into the spike pit to enter X-Mode and shinecharge. Use the other Cacatac to interrupt. Requires: {
"obstaclesCleared": [
"R-Mode"
]
}
{
"or": [
{
"and": [
"h_CrystalFlashForReserveEnergy",
"h_usePowerBomb",
"canOffScreenMovement"
]
},
{
"and": [
"h_RModeCanRefillReserves",
{
"or": [
{
"resourceMissingAtMost": [
{
"type": "Super",
"count": 0
}
]
},
{
"and": [
{
"resourceMissingAtMost": [
{
"type": "Super",
"count": 4
}
]
},
"Gravity"
]
}
]
},
{
"partialRefill": {
"type": "ReserveEnergy",
"limit": 40
}
}
]
}
]
}
"canBeVeryPatient"
"canXMode"
"h_XModeSpikeHit"
"h_shinechargeMaxRunway"
{
"autoReserveTrigger": {}
}
"canRModeSparkInterrupt"Resets obstacles: R-Mode |
|
Enter and farm all three Mochtroids, or Crystal Flash. Run right to left underneath the Ohms, then lead them to roll off the right side. Shinecharge and use the Ohm lick attack to interrupt. Requires: {
"obstaclesCleared": [
"R-Mode"
]
}
"Gravity"
"Morph"
"h_RModeCanRefillReserves"
{
"or": [
{
"resourceMissingAtMost": [
{
"type": "Missile",
"count": 2
}
]
},
{
"resourceMissingAtMost": [
{
"type": "Super",
"count": 1
}
]
}
]
}
{
"partialRefill": {
"type": "ReserveEnergy",
"limit": 20
}
}
"h_shinechargeMaxRunway"
{
"autoReserveTrigger": {
"maxReserveEnergy": 95
}
}
"canRModeSparkInterrupt"Resets obstacles: R-Mode |
|
Enter and farm all three Mochtroids, or Crystal Flash. Run right to left underneath the Ohms, then lead them to roll off the right side. Shinecharge and use the Ohm lick attack to interrupt. Requires: {
"obstaclesCleared": [
"R-Mode"
]
}
"Gravity"
"Morph"
{
"or": [
"h_CrystalFlashForReserveEnergy",
{
"and": [
"h_RModeCanRefillReserves",
{
"resourceMissingAtMost": [
{
"type": "Missile",
"count": 0
}
]
},
{
"resourceMissingAtMost": [
{
"type": "Super",
"count": 0
}
]
},
{
"partialRefill": {
"type": "ReserveEnergy",
"limit": 20
}
}
]
}
]
}
"h_shinechargeMaxRunway"
{
"autoReserveTrigger": {
"maxReserveEnergy": 95
}
}
"canRModeSparkInterrupt"Resets obstacles: R-Mode |
From: 1
Left Door
To: 3
Junction Left of Morph Tunnel
Farm the two Owtches for energy and clear away all but one Menu from the left. Shinecharge through the tunnel and use the last Menu to interrupt. If you had to kill it with a Power Bomb, there are more to the right. Entrance condition: {
"comeInWithRMode": {}
}Requires: {
"or": [
"h_CrystalFlashForReserveEnergy",
{
"and": [
"h_RModeCanRefillReserves",
{
"or": [
{
"and": [
{
"enemyKill": {
"enemies": [
[
"Owtch",
"Owtch"
]
],
"excludedWeapons": [
"PowerBomb"
]
}
},
{
"enemyKill": {
"enemies": [
[
"Menu",
"Menu"
]
],
"explicitWeapons": [
"Missile",
"Plasma",
"Ice+Wave+Spazer"
]
}
}
]
},
"h_usePowerBomb"
]
},
{
"partialRefill": {
"type": "ReserveEnergy",
"limit": 20
}
}
]
}
]
}
{
"canShineCharge": {
"usedTiles": 22,
"openEnd": 2
}
}
{
"autoReserveTrigger": {
"maxReserveEnergy": 95
}
}
"canRModeSparkInterrupt" |
From: 2
Right Door
To: 3
Junction Left of Morph Tunnel
Farm the two Owtches for energy and clear away all but one Menu from the left. Shinecharge through the tunnel and use the Menus from the left to interrupt. Entrance condition: {
"comeInWithRMode": {}
}Requires: {
"or": [
"h_bombThings",
"h_useSpringBall",
{
"and": [
"canMidAirMorph",
"Gravity",
"canTrickyJump"
]
},
"h_threeTileJumpMorph"
]
}
{
"or": [
"h_CrystalFlashForReserveEnergy",
{
"and": [
"h_RModeCanRefillReserves",
{
"or": [
{
"and": [
{
"enemyKill": {
"enemies": [
[
"Owtch",
"Owtch"
]
],
"excludedWeapons": [
"PowerBomb"
]
}
},
{
"enemyKill": {
"enemies": [
[
"Menu",
"Menu"
]
],
"explicitWeapons": [
"Missile",
"Plasma",
"Ice+Wave+Spazer"
]
}
}
]
},
"h_usePowerBomb"
]
},
{
"partialRefill": {
"type": "ReserveEnergy",
"limit": 20
}
}
]
}
]
}
{
"canShineCharge": {
"usedTiles": 22,
"openEnd": 2
}
}
{
"autoReserveTrigger": {
"maxReserveEnergy": 95
}
}
"canRModeSparkInterrupt" |
|
Kill most of the pirates: leave the standing pirate on the ledge above the runway. Shinecharge and jump into its beam path to interrupt. Entrance condition: {
"comeInWithRMode": {}
}Requires: {
"or": [
{
"and": [
"h_CrystalFlashForReserveEnergy",
{
"or": [
{
"and": [
"canUseIFrames",
{
"or": [
{
"enemyDamage": {
"enemy": "Pink Space Pirate (standing)",
"type": "laser",
"hits": 2
}
},
"h_pauseAbuseMinimalReserveRefill"
]
}
]
},
"ScrewAttack",
"Plasma",
{
"getBlueSpeed": {
"usedTiles": 19,
"openEnd": 0
}
}
]
}
]
},
{
"and": [
{
"or": [
"ScrewAttack",
"Plasma",
{
"and": [
"canUseSpeedEchoes",
{
"getBlueSpeed": {
"usedTiles": 19,
"openEnd": 0
}
}
]
}
]
},
"h_RModeCanRefillReserves",
{
"partialRefill": {
"type": "ReserveEnergy",
"limit": 20
}
}
]
}
]
}
{
"canShineCharge": {
"usedTiles": 21,
"openEnd": 0
}
}
{
"or": [
"HiJump",
"canWallJump",
"canSpeedyJump",
"canSpringBallJumpMidAir"
]
}
{
"autoReserveTrigger": {
"maxReserveEnergy": 95
}
}
"canRModeSparkInterrupt"Clears obstacles: A, C, door_1 |
From: 2
Bottom Right Door
To: 2
Bottom Right Door
Farm the lower Choots, Skultera, and the bottom Owtch by running through it. Shinecharge at the bottom, then use the Owtch on the small platform to interrupt. This can be done with pause abuse or by freezing it while it is moving left. Requires: {
"obstaclesCleared": [
"R-Mode"
]
}
"Gravity"
{
"or": [
"h_CrystalFlashForReserveEnergy",
{
"and": [
"h_RModeCanRefillReserves",
{
"partialRefill": {
"type": "ReserveEnergy",
"limit": 20
}
}
]
}
]
}
"h_shinechargeMaxRunway"
{
"autoReserveTrigger": {
"maxReserveEnergy": 95
}
}
{
"or": [
"canRModePauseAbuseSparkInterrupt",
{
"and": [
{
"or": [
"Charge",
"Plasma"
]
},
"canUseFrozenEnemies",
"canRModeSparkInterrupt"
]
}
]
}Resets obstacles: R-Mode |
|
Farm the Choots, then shinecharge along the bottom and use a Skultera to interrupt. Entrance condition: {
"comeInWithRMode": {}
}Requires: "Gravity"
{
"or": [
"h_CrystalFlashForReserveEnergy",
{
"and": [
"h_RModeCanRefillReserves",
{
"partialRefill": {
"type": "ReserveEnergy",
"limit": 20
}
}
]
}
]
}
"h_shinechargeMaxRunway"
{
"autoReserveTrigger": {}
}
"canRModeSparkInterrupt" |
|
Entrance condition: {
"comeInWithRMode": {},
"comesThroughToilet": "no"
}Requires: "Gravity"
{
"or": [
"h_CrystalFlashForReserveEnergy",
{
"and": [
"h_RModeCanRefillReserves",
{
"partialRefill": {
"type": "ReserveEnergy",
"limit": 20
}
}
]
}
]
}
"h_shinechargeMaxRunway"
{
"autoReserveTrigger": {}
}
"canRModeSparkInterrupt" |
|
Clear all the Puyos, and any Choots except for the one on the high platform to the left of the hill. Shinecharge in the space under this platform, then jump into the Choot to interrupt. Entrance condition: {
"comeInWithRMode": {}
}Requires: "Gravity"
"canDodgeWhileShooting"
{
"or": [
"h_CrystalFlashForReserveEnergy",
{
"and": [
"h_RModeCanRefillReserves",
{
"partialRefill": {
"type": "ReserveEnergy",
"limit": 60
}
}
]
}
]
}
{
"canShineCharge": {
"usedTiles": 16,
"openEnd": 0
}
}
{
"autoReserveTrigger": {
"maxReserveEnergy": 95
}
}
"canRModeSparkInterrupt" |
From: 1
Left Door
To: 1
Left Door
This requires a precisely timed Crystal Flash, such that Shaktool hits Samus immediately after she gets Reserve Energy, to prevent getting double hit. With a second Reserve Tank and an Energy Tank, or the damage reduction from a suit, Samus is able to survive a second hit. If the wall is already broken, either wait for Shaktool to cross the room or move in front of it. It is possible to enter the room and land on the doorsill, then bomb or Power Bomb boost across when the tide is high. Entrance condition: {
"comeInWithGMode": {
"mode": "direct",
"morphed": true
}
}Requires: "h_artificialMorphRModeCrystalFlashInterrupt"
{
"or": [
{
"and": [
{
"ammo": {
"type": "Missile",
"count": 10
}
},
{
"or": [
"h_partialEnemyDamageReduction",
{
"and": [
{
"resourceCapacity": [
{
"type": "RegularEnergy",
"count": 199
}
]
},
{
"resourceCapacity": [
{
"type": "ReserveEnergy",
"count": 199
}
]
}
]
}
]
}
]
},
{
"and": [
{
"ammo": {
"type": "Missile",
"count": 2
}
},
"h_artificialMorphComplexRModeCrystalFlashInterrupt"
]
}
]
}
{
"or": [
"h_artificialMorphSpringBall",
{
"and": [
{
"or": [
"canInsaneJump",
"Gravity"
]
},
{
"or": [
"h_artificialMorphBombs",
{
"ammo": {
"type": "PowerBomb",
"count": 2
}
}
]
}
]
},
"canBePatient",
{
"and": [
"canRiskPermanentLossOfAccess",
{
"not": "f_ShaktoolDoneDigging"
}
]
}
]
} |
|
Requires: {
"enemyDamage": {
"enemy": "Shaktool",
"type": "contact",
"hits": 1
}
}
{
"or": [
"canBePatient",
{
"and": [
"canRiskPermanentLossOfAccess",
{
"not": "f_ShaktoolDoneDigging"
}
]
}
]
} |
|
From left side, Wait for Shaktool to loop around to the ceiling. Crystal Flash, shinecharge, and jump into the path of Shaktool's rear wheel to interrupt. Or, farm Shaktool with a timed Shinespark: start a diagonal spark from the ground just as Shaktool's back wheel leaves the ceiling, and Shaktool will spawn five drops. Shinecharge again, and use a Yard to interrupt. If Samus came in from the right and can't free Shaktool, there are only the two Yards to work with. Kill a Yard by angering with a shot and then running through it with speed. Requires: {
"obstaclesCleared": [
"R-Mode",
"B"
]
}
{
"or": [
"h_CrystalFlashForReserveEnergy",
{
"and": [
"h_RModeCanRefillReserves",
{
"or": [
{
"and": [
{
"obstaclesCleared": [
"A"
]
},
"h_shinechargeMaxRunway",
{
"shinespark": {
"frames": 4,
"excessFrames": 0
}
},
{
"or": [
{
"and": [
{
"resourceMissingAtMost": [
{
"type": "Missile",
"count": 0
}
]
},
{
"partialRefill": {
"type": "ReserveEnergy",
"limit": 60
}
}
]
},
{
"partialRefill": {
"type": "ReserveEnergy",
"limit": 20
}
}
]
}
]
},
{
"partialRefill": {
"type": "ReserveEnergy",
"limit": 10
}
},
{
"and": [
"canBeLucky",
{
"partialRefill": {
"type": "ReserveEnergy",
"limit": 25
}
}
]
}
]
}
]
}
]
}
"h_shinechargeMaxRunway"
{
"or": [
"canWaterShineCharge",
"Gravity"
]
}
{
"autoReserveTrigger": {}
}
"canRModeSparkInterrupt"Resets obstacles: R-Mode |
|
Freeze the middle Metroid as soon as it comes on screen to use as a platform to cross over the acid. If no Metroids are alive, the far left Rinka can be used instead, at a high angle. The left Rinka can also just be used to setup an angle with the Rinka near the left edge of the pool. Requires: "canTrickyUseFrozenEnemies"
"canTrickyJump"
"canCameraManip"
{
"or": [
"canInsaneJump",
{
"and": [
{
"not": "f_KilledMetroidRoom1"
},
"canRiskPermanentLossOfAccess"
]
}
]
} |
|
Requires: {
"not": "f_KilledMetroidRoom1"
}
"canRiskPermanentLossOfAccess"Exit condition: {
"leaveWithGModeSetup": {
"knockback": false
}
} |
From: 2
Right Door
To: 2
Right Door
Use a frozen Metroid or a Rinka from the left to extend the length of the runway. Luring a Rinka is easiest with Morph - While morphed, barely move the bottom Rinka spawner on camera in order to have it shoot at a usable angle. Without Morph, use the top Rinka spawner and jump just before the Rinka starts moving to get a usable angle. Requires: {
"or": [
"h_trickyFrozenEnemyRunway",
{
"and": [
"h_frozenEnemyRunway",
{
"not": "f_KilledMetroidRoom1"
},
"canRiskPermanentLossOfAccess"
]
}
]
}Exit condition: {
"leaveWithRunway": {
"length": 4,
"openEnd": 1
}
} |
|
Do not kill all four Metroids, or else they cannot be farmed again, leaving only Crystal Flash as an option. Shinecharge at the left door, and then use a Rinka or the acid to interrupt. Requires: {
"obstaclesCleared": [
"R-Mode"
]
}
{
"or": [
{
"and": [
"h_CrystalFlashForReserveEnergy",
{
"or": [
"canInsaneJump",
{
"obstaclesCleared": [
"B"
]
}
]
}
]
},
{
"and": [
"canRiskPermanentLossOfAccess",
{
"not": "f_KilledMetroidRoom1"
},
"h_RModeCanRefillReserves",
"Ice",
{
"enemyKill": {
"enemies": [
[
"Metroid"
],
[
"Metroid"
],
[
"Metroid"
]
],
"explicitWeapons": [
"Missile",
"Super"
]
}
},
{
"partialRefill": {
"type": "ReserveEnergy",
"limit": 40
}
}
]
}
]
}
{
"or": [
{
"obstaclesCleared": [
"B"
]
},
"canMetroidAvoid",
"Ice"
]
}
{
"canShineCharge": {
"usedTiles": 29,
"openEnd": 1
}
}
{
"autoReserveTrigger": {
"maxReserveEnergy": 95
}
}
"canRModeSparkInterrupt"Resets obstacles: R-Mode |
From: 2
Bottom Right Door
To: 2
Bottom Right Door
Requires: {
"not": "f_KilledMetroidRoom2"
}
"canRiskPermanentLossOfAccess"Exit condition: {
"leaveWithGModeSetup": {
"knockback": false
}
} |
|
Do not kill all three Metroids, or else they cannot be farmed again, leaving only Crystal Flash as an option. Shinecharge at the long tunnel near the left door, then use a Rinka or the acid to interrupt. Requires: {
"obstaclesCleared": [
"R-Mode"
]
}
{
"or": [
"h_CrystalFlashForReserveEnergy",
{
"and": [
"canRiskPermanentLossOfAccess",
{
"not": "f_KilledMetroidRoom3"
},
"h_RModeCanRefillReserves",
"Ice",
{
"enemyKill": {
"enemies": [
[
"Metroid"
],
[
"Metroid"
]
],
"explicitWeapons": [
"Missile",
"Super"
]
}
},
{
"partialRefill": {
"type": "ReserveEnergy",
"limit": 20
}
}
]
}
]
}
{
"or": [
{
"or": [
"f_KilledMetroidRoom3",
{
"obstaclesCleared": [
"f_KilledMetroidRoom3"
]
}
]
},
"Ice",
"canMetroidAvoid"
]
}
{
"canShineCharge": {
"usedTiles": 29,
"openEnd": 2
}
}
{
"autoReserveTrigger": {
"maxReserveEnergy": 95
}
}
"canRModeSparkInterrupt"Resets obstacles: R-Mode |
|
Do not kill all three Metroids, or else they cannot be farmed again, leaving only Crystal Flash as an option. Kill two and lure the remaining Metroid to the top of the room. Shinecharge in the narrow space at the bottom door and use a Rinka to interrupt. Entrance condition: {
"comeInWithRMode": {}
}Requires: "Ice"
{
"or": [
{
"and": [
"h_CrystalFlashForReserveEnergy",
{
"or": [
"f_KilledMetroidRoom4",
{
"obstaclesCleared": [
"f_KilledMetroidRoom4"
]
}
]
}
]
},
{
"and": [
{
"not": "f_KilledMetroidRoom4"
},
"canRiskPermanentLossOfAccess",
"h_RModeCanRefillReserves",
{
"enemyKill": {
"enemies": [
[
"Metroid"
],
[
"Metroid"
]
],
"explicitWeapons": [
"Missile",
"Super"
]
}
},
{
"partialRefill": {
"type": "ReserveEnergy",
"limit": 20
}
},
{
"or": [
"Morph",
"canMetroidAvoid"
]
}
]
}
]
}
{
"canShineCharge": {
"usedTiles": 12,
"openEnd": 0
}
}
{
"autoReserveTrigger": {
"maxReserveEnergy": 95
}
}
"canRModeSparkInterrupt" |
|
Do not kill all three Metroids, or else they cannot be farmed again, leaving only Crystal Flash as an option. Kill two and lure the remaining Metroid to the top of the room. Shinecharge in the narrow space at the bottom door and use a Rinka to interrupt. Entrance condition: {
"comeInWithRMode": {},
"comesThroughToilet": "no"
}Requires: "Ice"
{
"or": [
{
"and": [
{
"or": [
"f_KilledMetroidRoom4",
{
"obstaclesCleared": [
"f_KilledMetroidRoom4"
]
}
]
},
"h_CrystalFlashForReserveEnergy"
]
},
{
"and": [
{
"not": "f_KilledMetroidRoom4"
},
"canRiskPermanentLossOfAccess",
"h_RModeCanRefillReserves",
{
"enemyKill": {
"enemies": [
[
"Metroid"
],
[
"Metroid"
]
],
"explicitWeapons": [
"Missile",
"Super"
]
}
},
{
"partialRefill": {
"type": "ReserveEnergy",
"limit": 20
}
},
"canCarefulJump"
]
}
]
}
{
"canShineCharge": {
"usedTiles": 12,
"openEnd": 0
}
}
{
"autoReserveTrigger": {
"maxReserveEnergy": 95
}
}
"canRModeSparkInterrupt" |


