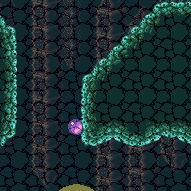
canSpringBallBombJump (Very Hard)
After gaining some height with a single bomb explosion from the ground, use Spring Ball to jump higher. Usable only when Samus' vertical speed is 0 (at the max height gained by the bomb).
Strats ()
From: 3
Bottom Left Door
To: 10
G-Mode Morph Junction (Middle Right Door)
With Spring Ball, it is possible to save a Power Bomb by placing it on the descent of the first jump by the bottom corner of the overhang, then bouncing on it on the ascent of the second. It is also possible but tighter to get high enough from bouncing on a Power Bomb with a single jump, similar to jumping into an IBJ. This doesn't save anything if breaking the Power Bomb blocks above. With an extra Power Bomb to spare, simply Spring Ball Bomb Jump. Entrance condition: {
"comeInWithGMode": {
"mode": "any",
"morphed": true
}
}Requires: {
"or": [
"h_artificialMorphIBJ",
{
"and": [
"h_artificialMorphSpringBall",
"h_artificialMorphPowerBomb",
"h_additionalBomb",
{
"or": [
"HiJump",
"h_artificialMorphSpringBallBombJump",
{
"tech": "canJumpIntoIBJ"
}
]
}
]
},
{
"and": [
"h_artificialMorphSpringBall",
"HiJump",
{
"enemyDamage": {
"enemy": "Green Space Pirate (standing)",
"type": "contact",
"hits": 5
}
}
]
}
]
} |
From: 3
Bottom Left Door
To: 10
G-Mode Morph Junction (Middle Right Door)
Use Spring Ball to climb the room. Without HiJump, Spring Ball Bomb Jump to get to the first ledge. Entrance condition: {
"comeInWithGMode": {
"mode": "any",
"morphed": true
}
}Requires: "h_blueSuitGMode"
"h_artificialMorphSpringBall"
{
"or": [
"HiJump",
"h_artificialMorphSpringBallBombJump"
]
} |
From: 4
Bottom Right Door
To: 10
G-Mode Morph Junction (Middle Right Door)
With Spring Ball, it is possible to save a Power Bomb by placing it on the descent of the first jump by the bottom corner of the overhang, then bouncing on it on the ascent of the second. It is also possible but tighter to get high enough from bouncing on a Power Bomb with a single jump, similar to jumping into an IBJ. This doesn't save anything if breaking the Power Bomb blocks above. With an extra Power Bomb to spare, simply Spring Ball Bomb Jump. Entrance condition: {
"comeInWithGMode": {
"mode": "any",
"morphed": true
}
}Requires: {
"or": [
"h_artificialMorphIBJ",
{
"and": [
"h_artificialMorphSpringBall",
"h_artificialMorphPowerBomb",
"h_additionalBomb",
{
"or": [
"HiJump",
"h_artificialMorphSpringBallBombJump",
{
"tech": "canJumpIntoIBJ"
}
]
}
]
},
{
"and": [
"h_artificialMorphSpringBall",
"HiJump",
{
"enemyDamage": {
"enemy": "Green Space Pirate (standing)",
"type": "contact",
"hits": 5
}
}
]
}
]
} |
From: 4
Bottom Right Door
To: 10
G-Mode Morph Junction (Middle Right Door)
Use Spring Ball to climb the room. Without HiJump, Spring Ball Bomb Jump to get to the first ledge. Entrance condition: {
"comeInWithGMode": {
"mode": "any",
"morphed": true
}
}Requires: "h_blueSuitGMode"
"h_artificialMorphSpringBall"
{
"or": [
"HiJump",
"h_artificialMorphSpringBallBombJump"
]
} |
|
Requires waiting until the last moment before SpringBall jumping. Requires: "canSpringBallBombJump" |
From: 8
Below Power Bomb Blocks - Bottom Left Door
To: 12
Above Power Bomb Blocks - Main Junction

Place a Power Bomb while on the top single tile platform, then exit g-mode before the Power Bomb explodes in order to break the blocks above. Entrance condition: {
"comeInWithGMode": {
"mode": "any",
"morphed": true
}
}Requires: "h_artificialMorphPowerBomb"
{
"or": [
"h_artificialMorphIBJ",
{
"and": [
"h_artificialMorphSpringBall",
"HiJump"
]
},
{
"and": [
"h_artificialMorphSpringBall",
{
"tech": "canSpringBallBombJump"
},
{
"ammo": {
"type": "PowerBomb",
"count": 6
}
}
]
}
]
}Clears obstacles: A |
From: 1
Top Left Door
To: 1
Top Left Door
Fall past the first bug, wait for the second to spawn before rolling off the ledge. Get into the tube with an IBJ, bomb boost Spring Ball jump, or HiJump Spring Fling. Touch the item then roll out of the tube before exiting G-mode to remote acquire the item. Entrance condition: {
"comeInWithGMode": {
"mode": "direct",
"morphed": true
}
}Requires: "canRemoteAcquire"
{
  "or": [
    "h_artificialMorphLongIBJ",
    "h_artificialMorphSpringBallBombJump",
    {
      "and": [
        "HiJump",
        "h_artificialMorphSpringFling"
      ]
    }
  ]
}Collects items: 4 |
From: 1
Top Left Door
To: 2
Top Right Door

Roll under the first bug, wait for the second to spawn before rolling off the ledge. IBJ, bomb boost spring ball jump, or HiJump Spring Fling into the pipe. While in G-mode, touch the item, roll out of the pipe, then get to the top right door before exiting G-mode and obtaining the item. With Bombs alone, it may help to kill the top respawning bug before descending to make it easier to get back up. Alternatively, on the way back up, IBJ directly below the pipe until the bug spawns, then quickly boost horizontally and move to the left. Get as far right as possible without another bug spawning, IBJ then boost horizontally at the top. Entrance condition: {
"comeInWithGMode": {
"mode": "direct",
"morphed": true
}
}Requires: "canRemoteAcquire"
{
"or": [
{
"and": [
"h_artificialMorphIBJ",
"canComplexGMode",
"canInsaneJump"
]
},
{
"and": [
"h_artificialMorphIBJ",
"h_artificialMorphPowerBomb"
]
},
{
"and": [
"h_artificialMorphSpringBallBombJump",
"h_additionalBomb",
"h_additionalBomb"
]
}
]
}Collects items: 4 |
|

Kill or Spring Ball over the first bug. Once on the pipe, bomb boost horizontally to the left then Spring Ball jump up to the door. With Bombs alone, IBJ far enough to the left to avoid spawning the bug; if it spawns, roll under it or let it swoop down and then roll to the left and it will eventually swoop back up over Samus. Entrance condition: {
"comeInWithGMode": {
"mode": "any",
"morphed": true
}
}Requires: {
"or": [
{
"and": [
"h_artificialMorphIBJ",
"canTrickyDodgeEnemies",
"h_artificialMorphBombHorizontally"
]
},
{
"and": [
"h_artificialMorphIBJ",
"h_artificialMorphPowerBomb"
]
},
"h_artificialMorphSpringBallBombJump"
]
} |
|
Roll under the first bug, wait for the second to spawn before rolling off the ledge. IBJ, bomb boost spring ball jump, or HiJump Spring Fling into the pipe. Entrance condition: {
"comeInWithGMode": {
"mode": "any",
"morphed": true
}
}Requires: {
"or": [
"h_artificialMorphLongIBJ",
"h_artificialMorphSpringBallBombJump",
{
"and": [
"HiJump",
"h_artificialMorphSpringFling"
]
}
]
} |
From: 2
Top Right Door
To: 1
Top Left Door
Fall past the first bug, wait for the second to spawn before rolling off the ledge. Get into the tube with an IBJ, bomb boost Spring Ball jump, or HiJump Spring Fling. Touch the item then roll out of the tube before exiting G-mode to remote acquire the item. Entrance condition: {
"comeInWithGMode": {
"mode": "direct",
"morphed": true
}
}Requires: "canRemoteAcquire"
{
  "or": [
    "h_artificialMorphLongIBJ",
    "h_artificialMorphSpringBallBombJump",
    {
      "and": [
        "HiJump",
        "h_artificialMorphSpringFling"
      ]
    }
  ]
}Collects items: 4 |
From: 2
Top Right Door
To: 2
Top Right Door


Roll under the first bug, wait for the second to spawn before rolling off the ledge. IBJ, bomb boost spring ball jump, or HiJump Spring Fling into the pipe. While in G-mode, touch the item, roll out of the pipe, then get to the top right door before exiting G-mode and obtaining the item. With Bombs alone, it may help to kill the top respawning bug before descending to make it easier to get back up. Alternatively, on the way back up, IBJ directly below the pipe until the bug spawns, then quickly boost horizontally and move to the left. Get as far right as possible without another bug spawning, IBJ then boost horizontally at the top. Entrance condition: {
"comeInWithGMode": {
"mode": "direct",
"morphed": true
}
}Requires: "canRemoteAcquire"
{
"or": [
{
"and": [
"h_artificialMorphIBJ",
"canComplexGMode",
"canInsaneJump"
]
},
{
"and": [
"h_artificialMorphIBJ",
"h_artificialMorphPowerBomb"
]
},
{
"and": [
"h_artificialMorphSpringBallBombJump",
"h_additionalBomb",
"h_additionalBomb"
]
}
]
}Collects items: 4 |
|
Fall past the first bug, wait for the second to spawn before rolling off the ledge. IBJ, bomb boost spring ball jump, or HiJump Spring Fling into the pipe. Entrance condition: {
"comeInWithGMode": {
"mode": "any",
"morphed": true
}
}Requires: {
"or": [
"h_artificialMorphLongIBJ",
"h_artificialMorphSpringBallBombJump",
{
"and": [
"HiJump",
"h_artificialMorphSpringFling"
]
}
]
} |
From: 3
Bottom Right Door
To: 2
Top Right Door
Use a Power Bombs to kill the first three hoppers, or carefully roll under the third one. The next hopper can be killed safely with many Bombs by staying on the top left of the raised ground; stay near the left edge of it without overhanging - otherwise it can hit Samus. Alternatively, lure and spring ball jump past it. Placing a Bomb next to a bug pipe can kill a bug inside of it. After killing a bug from a pipe, they will stop respawning there. The last hopper can be carefully killed with Bombs, killed with a Power Bomb, or dodged and lured off the edge. Getting past the last bug pipe can be the trickiest. This is easiest with an IBJ directly below the pipe until the bug spawns, then quickly boost horizontally and move to the left. Get as far right as possible without another bug spawning, IBJ then boost horizontally at the top. Entrance condition: {
"comeInWithGMode": {
"mode": "indirect",
"morphed": true
}
}Requires: {
"or": [
"canTrickyDodgeEnemies",
{
"ammo": {
"type": "PowerBomb",
"count": 2
}
},
{
"haveBlueSuit": {}
}
]
}
{
"or": [
{
"and": [
"h_artificialMorphIBJ",
{
"ammo": {
"type": "PowerBomb",
"count": 2
}
}
]
},
{
"and": [
"h_artificialMorphIBJ",
"canComplexGMode",
"canInsaneJump"
]
},
{
"and": [
"h_artificialMorphSpringBallBombJump",
"h_additionalBomb"
]
}
]
} |
From: 3
Bottom Right Door
To: 4
Item (Through the Pipe)
Use a Power Bombs to kill the first three hoppers, or carefully roll under the third one. The next hopper can be killed safely with many Bombs by staying on the top left of the raised ground; stay near the left edge of it without overhanging - otherwise it can hit Samus. Alternatively, lure and spring ball jump past it. Placing a Bomb next to a bug pipe can kill a bug inside of it. After killing a bug from a pipe, they will stop respawning there. The last hopper can be carefully killed with Bombs, killed with a Power Bomb, or dodged and lured off the edge. IBJ, bomb boost spring ball jump, or HiJump Spring Fling up to the pipe. Entrance condition: {
"comeInWithGMode": {
"mode": "indirect",
"morphed": true
}
}Requires: {
"or": [
"canTrickyDodgeEnemies",
{
"ammo": {
"type": "PowerBomb",
"count": 2
}
}
]
}
{
"or": [
{
"and": [
"h_artificialMorphIBJ",
{
"or": [
"canComplexGMode",
"h_artificialMorphPowerBomb"
]
}
]
},
"h_artificialMorphSpringBallBombJump",
{
"and": [
"HiJump",
"h_artificialMorphSpringFling"
]
}
]
}Dev note: This cannot be used to obtain the item remotely, as the item only spawns in direct G-mode. |
From: 3
Bottom Right Door
To: 4
Item (Through the Pipe)
Climb the room while safely killing the enemies by rolling into them. With Bombs alone, it is possible to kill the bugs in lower bug spawners by bombing underneath the pipe and placing a bomb at the peak of the boost. Note that Samus is vulnerable to damage while being boosted from a bomb. Entrance condition: {
"comeInWithGMode": {
"mode": "indirect",
"morphed": true
}
}Requires: "h_blueSuitGMode"
{
"or": [
"h_artificialMorphIBJ",
"h_artificialMorphSpringBallBombJump",
{
"and": [
"HiJump",
"h_artificialMorphSpringFling"
]
}
]
}Dev note: With other item combinations, another strat will be used instead. |
From: 2
Top Right Door
To: 2
Top Right Door
With Spring Ball alone, quickly jump over the Kihunter and wait for it to move away, then Spring Ball Bomb Jump through the door. Alternatively, place a Power Bomb and roll to the left on entry to kill the Kihunter, then quickly IBJ through the door before more arrive. Entrance condition: {
"comeInWithGMode": {
"mode": "direct",
"morphed": true
},
"comesThroughToilet": "any"
}Requires: {
"or": [
"canTrickyJump",
{
"enemyDamage": {
"enemy": "Kihunter (green)",
"type": "contact",
"hits": 1
}
}
]
}
{
"or": [
"h_artificialMorphSpringBallBombJump",
{
"and": [
"h_artificialMorphSpringBall",
"HiJump"
]
},
{
"and": [
"h_artificialMorphIBJ",
"h_artificialMorphPowerBomb"
]
},
"Morph"
]
}Exit condition: {
"leaveWithGMode": {
"morphed": true
}
}Dev note: It is possible to do this with Bombs alone, but it is pretty chaotic. |
From: 8
Right Side - Bottom Door
To: 1
Left Side - Top Door
While using multiple Power Bomb boost Spring Ball jumps, to climb the room, overload PLMs by moving through the camera scroll blocks in front of the passageway leading to the exit of Spore Spawn Supers. Note that one Power Bomb can be saved with a Spring Fling from the lower item pedestal; pause and just before the screen is fully black, jump, disable Spring ball, then buffer right on the unpause. Another can be saved by carefully jumping out of this morph passageway. Kill or carefully dodge the Sidehoppers at the top, then Power Bomb boost Spring Ball jump up to the top left door and exit G-Mode. Entrance condition: {
"comeInWithGMode": {
"mode": "any",
"morphed": true
}
}Requires: "h_artificialMorphSpringBallBombJump"
{
"ammo": {
"type": "PowerBomb",
"count": 2
}
}
{
"or": [
"h_artificialMorphSpringFling",
"h_artificialMorphPowerBomb"
]
}
{
"or": [
"canTrickyJump",
"h_artificialMorphPowerBomb"
]
}
{
"or": [
"canTrickyJump",
"h_artificialMorphPowerBomb",
{
"haveBlueSuit": {}
},
{
"enemyDamage": {
"enemy": "Sm. Sidehopper",
"type": "contact",
"hits": 1
}
}
]
}Dev note: With Morph, Bombs, or Spring Ball + HiJump, 8->15->1 will be used instead. FIXME: The spring fling variant would force collecting the item, if in direct G-mode. |
From: 8
Right Side - Bottom Door
To: 14
G-Mode Morph, Behind the Power Bomb Blocks
While using multiple Power Bomb boost Spring Ball jumps, to climb the room, overload PLMs by moving through the camera scroll blocks in front of the passageway leading to the exit of Spore Spawn Supers. Note that one Power Bomb can be saved with a Spring Fling from the lower item pedestal; pause and just before the screen is fully black, jump, disable Spring ball, then buffer right on the unpause. Another can be saved by carefully jumping out of this morph passageway. Drop into the Sidehopper pit and dodge the hoppers while getting up to the crumble block tunnel. Alternatively, carefully dodge the Reos below them and use a well-placed Power Bomb to kill both Reos and Sidehoppers. Entrance condition: {
"comeInWithGMode": {
"mode": "any",
"morphed": true
}
}Requires: {
"or": [
"h_artificialMorphSpringBallBombJump",
"h_artificialMorphSpringFling"
]
}
{
"or": [
"h_artificialMorphSpringBallBombJump",
"canTrickyJump"
]
}
{
"or": [
"canTrickyDodgeEnemies",
"h_artificialMorphPowerBomb",
{
"haveBlueSuit": {}
},
{
"enemyDamage": {
"enemy": "Sm. Sidehopper",
"type": "contact",
"hits": 1
}
}
]
}Clears obstacles: C Dev note: With Morph, Bombs, or Spring Ball + HiJump, 8->15->14 will be used instead. FIXME: The spring fling variant would force collecting the item, if in direct G-mode, unless leaving through 4. |
From: 8
Right Side - Bottom Door
To: 15
G-Mode Morph Junction (Middle Right)
If climbing the room with Spring Ball bomb boosts, note that one Power Bomb can be saved with a Spring Fling; pause and just before the screen is fully black, jump, disable Spring ball, then buffer right on the unpause. Another can be saved by carefully jumping out of the morph passageway in front of the off-screen Super block. Entrance condition: {
"comeInWithGMode": {
"mode": "any",
"morphed": true
}
}Requires: {
"or": [
"h_artificialMorphIBJ",
"Morph",
{
"and": [
"h_artificialMorphSpringBall",
"HiJump"
]
},
{
"and": [
"h_artificialMorphSpringFling",
{
"or": [
"h_artificialMorphSpringBallBombJump",
"canTrickyJump"
]
}
]
}
]
}Dev note: This strat does not have a Power Bomb Spring Ball jump option to avoid the Spring Fling, because it would solidify the block and make 8->15->12 unsound. These strats are split off and don't stop at 15 first. FIXME: The spring fling variant would force collecting the item, if in direct G-mode, unless leaving through 4. |
From: 9
Left Side - Bottom Door
To: 11
Middle Item
Go into the morph tunnel below the Charge Beam location and Crystal Flash to force a standup and jump through. Samus is now unable to use X-Ray. Without Morph, be careful not to overload PLMs using the camera scroll blocks on the path upward. Then partially floor clip into the left side of the bomb block, and jump to clip through and escape. To exit G-Mode, damage down until the reserves trigger, which can be done most quickly using the Sidehoppers. Entrance condition: {
"comeInWithGMode": {
"mode": "any",
"morphed": true
}
}Requires: "canComplexGMode"
{
"or": [
"h_artificialMorphIBJ",
"Morph",
{
"and": [
"h_artificialMorphSpringBall",
{
"or": [
"HiJump",
{
"and": [
"h_artificialMorphSpringBallBombJump",
"h_additionalBomb",
"h_additionalBomb",
"h_additionalBomb"
]
}
]
}
]
}
]
}
"h_artificialMorphCrystalFlash"
{
"or": [
"Morph",
{
"and": [
"canInsaneJump",
"canTwoTileSqueeze",
"canPartialFloorClip",
"canCeilingClip"
]
}
]
}
"canBePatient"
{
"autoReserveTrigger": {}
}Dev note: This assumes Samus has many Energy Tanks, which will take a while to empty. |
From: 9
Left Side - Bottom Door
To: 13
Central Junction
Go into the Morph Tunnel below the Charge Beam location and Crystal Flash to force a standup and jump through. Samus is now unable to use X-Ray. Without Morph, be careful not to overload PLMs using the camera scroll blocks on the path upward. Partially floor clip into the left side of the bomb block and jump to clip through and escape. Go to the 'main' left door's runway and shinecharge. Do not kill any Zebs during the ascent as they will not respawn until G-Mode ends. Shinecharge and jump to the Zeb pipe above the runway to interrupt. G-Mode will end and the Zeb pipe can be farmed to refill if needed. Entrance condition: {
"comeInWithGMode": {
"mode": "direct",
"morphed": true
}
}Requires: "canComplexGMode"
{
"or": [
"h_artificialMorphIBJ",
"Morph",
{
"and": [
"h_artificialMorphSpringBall",
{
"or": [
"HiJump",
{
"and": [
"h_artificialMorphSpringBallBombJump",
"h_additionalBomb",
"h_additionalBomb",
"h_additionalBomb"
]
}
]
}
]
}
]
}
"h_artificialMorphCrystalFlash"
{
"or": [
"Morph",
{
"and": [
"canInsaneJump",
"canTwoTileSqueeze",
"canPartialFloorClip",
"canCeilingClip"
]
}
]
}
{
"canShineCharge": {
"usedTiles": 25,
"openEnd": 1
}
}
{
"autoReserveTrigger": {
"maxReserveEnergy": 95
}
}
"canRModeSparkInterrupt"
{
"partialRefill": {
"type": "Energy",
"limit": 50
}
}Clears obstacles: E |
From: 15
G-Mode Morph Junction (Middle Right)
To: 1
Left Side - Top Door


Go down and overload PLMs by moving through the camera scroll blocks in front of the passageway leading to the exit of Spore Spawn Supers. Use multiple Power Bomb boost Spring Ball jumps, to climb the room; note that one Power Bomb can be saved by carefully jumping out of this morph passageway. Kill or carefully dodge the Sidehoppers at the top, then Power Bomb boost Spring Ball jump up to the top left door and exit G-Mode. Requires: "canGMode"
"h_artificialMorphSpringBallBombJump"
"h_artificialMorphPowerBomb"
"h_artificialMorphPowerBomb"
{
"or": [
"canTrickyJump",
"h_artificialMorphPowerBomb"
]
}
{
"or": [
"canTrickyDodgeEnemies",
"h_artificialMorphPowerBomb",
{
"haveBlueSuit": {}
},
{
"enemyDamage": {
"enemy": "Sm. Sidehopper",
"type": "contact",
"hits": 1
}
}
]
} |
From: 15
G-Mode Morph Junction (Middle Right)
To: 14
G-Mode Morph, Behind the Power Bomb Blocks
Overload PLMs by moving through the camera scroll blocks in front of the passageway leading to the exit of Spore Spawn Supers. Either carefully jump out of this morph tunnel or use a Power Bomb boost Spring Ball jump to get up to the ledge. Either place a Power Bomb by the Reos to kill both Reos and Sidehoppers above, or climb up and fall into the Sidehopper pit and dodge them. Using the Reo's hallway to lure the Sidehoppers to the left can help. Jump up and into the tunnel at the left side of the Sidehopper pit and go through the crumble block. Requires: "canGMode"
"h_artificialMorphSpringBall"
"canCameraManip"
{
"or": [
"canTrickyDodgeEnemies",
"h_artificialMorphPowerBomb",
{
"haveBlueSuit": {}
},
{
"enemyDamage": {
"enemy": "Sm. Sidehopper",
"type": "contact",
"hits": 1
}
}
]
}
{
"or": [
"HiJump",
"h_artificialMorphSpringBallBombJump",
"canTrickyJump"
]
} |
From: 16
Direct G-Mode Morph (Top Item, Above Hopper Pit)
To: 1
Left Side - Top Door
Avoiding the top Sidehoppers without Power Bombs can be tricky; if starting at the top of the room, it may help to lure them to the left before going down the room. For safety, it is also possible to lure the hoppers to the left from below with several IBJs or HiJump and Spring Ball. Requires: "canRemoteAcquire"
{
"or": [
"Morph",
"h_artificialMorphIBJ",
{
"and": [
"HiJump",
"h_artificialMorphSpringBall"
]
},
{
"and": [
"h_artificialMorphSpringBallBombJump",
{
"ammo": {
"type": "PowerBomb",
"count": 2
}
}
]
}
]
}
{
"or": [
"Morph",
"canTrickyDodgeEnemies",
"h_artificialMorphPowerBomb",
{
"and": [
"h_artificialMorphSpringBall",
{
"haveBlueSuit": {}
}
]
},
{
"enemyDamage": {
"enemy": "Sm. Sidehopper",
"type": "contact",
"hits": 1
}
}
]
}Collects items: 10 |
From: 17
Direct G-Mode Morph Junction (Middle Item)
To: 1
Left Side - Top Door


Fully overload PLMs with the item before climbing the room. The hardest part is getting past the Reo without Power Bombs, if it is stuck in the stairwell just above the door. Either manipulate it until it can escape, get it stuck swooping in the top right corner of the stairwell then kill it with Bombs, or avoid it entirely, and go up through the crumble blocks to the left after manipulating the Sidehoppers to be off-camera at the right of their pit. Avoiding the top Sidehoppers without Power Bombs can also be tricky; if starting at the top of the room, it may help to lure them to the left before going down the room. For safety, it is also possible to lure the hoppers to the left from below with several IBJs or HiJump and Spring Ball. Requires: "canRemoteAcquire"
{
"or": [
"Morph",
"h_artificialMorphIBJ",
{
"and": [
"HiJump",
"h_artificialMorphSpringBall"
]
},
{
"and": [
"h_artificialMorphSpringBallBombJump",
{
"ammo": {
"type": "PowerBomb",
"count": 2
}
},
{
"or": [
"h_artificialMorphPowerBomb",
"h_artificialMorphSpringFling"
]
},
{
"or": [
"h_artificialMorphPowerBomb",
"canTrickyJump"
]
}
]
}
]
}
{
"or": [
"Morph",
"canComplexGMode",
{
"and": [
"canTrickyDodgeEnemies",
"h_artificialMorphSpringBall"
]
},
{
"and": [
"h_artificialMorphSpringBall",
{
"haveBlueSuit": {}
}
]
},
"h_artificialMorphPowerBomb",
{
"enemyDamage": {
"enemy": "Reo",
"type": "contact",
"hits": 1
}
}
]
}
{
"or": [
"Morph",
"canTrickyDodgeEnemies",
"h_artificialMorphPowerBomb",
{
"and": [
"h_artificialMorphSpringBall",
{
"haveBlueSuit": {}
}
]
},
{
"enemyDamage": {
"enemy": "Sm. Sidehopper",
"type": "contact",
"hits": 1
}
}
]
}Collects items: 11 |
From: 17
Direct G-Mode Morph Junction (Middle Item)
To: 4
Left Side - Door Behind Power Bomb Blocks
Fully overload PLMs with the item before climbing the room. The hardest part is getting past the Reo without Power Bombs, if it is stuck in the stairwell just above the door. Either manipulate it until it can escape, get it stuck swooping in the top right corner of the stairwell then kill it with Bombs, or avoid it entirely, and go up through the crumble blocks to the left after manipulating the Sidehoppers to be off-camera at the right of their pit. Dodge or kill the Sidehoppers then go through the crumble block before exiting G-mode. Requires: "canRemoteAcquire"
{
"or": [
"Morph",
"h_artificialMorphIBJ",
{
"and": [
"HiJump",
"h_artificialMorphSpringBall"
]
},
{
"and": [
{
"or": [
"h_artificialMorphSpringBallBombJump",
"h_artificialMorphSpringFling"
]
},
{
"or": [
"h_artificialMorphSpringBallBombJump",
"canTrickyJump"
]
}
]
}
]
}
{
"or": [
"Morph",
"canComplexGMode",
{
"and": [
"canTrickyDodgeEnemies",
"h_artificialMorphSpringBall"
]
},
{
"and": [
"h_artificialMorphSpringBall",
{
"haveBlueSuit": {}
}
]
},
"h_artificialMorphPowerBomb",
{
"enemyDamage": {
"enemy": "Reo",
"type": "contact",
"hits": 1
}
}
]
}Collects items: 11 |
From: 17
Direct G-Mode Morph Junction (Middle Item)
To: 4
Left Side - Door Behind Power Bomb Blocks
Fully overload PLMs with the item before climbing the room. The hardest part is getting past the Reo without Power Bombs, if it is stuck in the stairwell just above the door. Either manipulate it until it can escape, get it stuck swooping in the top right corner of the stairwell then kill it with Bombs, or avoid it entirely, and go up through the crumble blocks to the left after manipulating the Sidehoppers to be off-camera at the right of their pit. Dodge or kill the Sidehoppers then go through the crumble block. Place a Power Bomb then quickly exit G-mode before it explodes to break the Power Bomb blocks. Requires: "canRemoteAcquire"
{
"or": [
"Morph",
"h_artificialMorphIBJ",
{
"and": [
"HiJump",
"h_artificialMorphSpringBall"
]
},
{
"and": [
{
"or": [
"h_artificialMorphSpringBallBombJump",
"h_artificialMorphSpringFling"
]
},
{
"or": [
"h_artificialMorphSpringBallBombJump",
"canTrickyJump"
]
}
]
}
]
}
{
"or": [
"Morph",
"canComplexGMode",
{
"and": [
"canTrickyDodgeEnemies",
"h_artificialMorphSpringBall"
]
},
"h_artificialMorphPowerBomb",
{
"and": [
"h_artificialMorphSpringBall",
{
"haveBlueSuit": {}
}
]
},
{
"enemyDamage": {
"enemy": "Reo",
"type": "contact",
"hits": 1
}
}
]
}
"h_artificialMorphPowerBomb"Collects items: 11 |
|
Requires: {
"obstaclesCleared": [
"B"
]
}
{
"or": [
"HiJump",
"canWallJump",
"canSpringBallJumpMidAir",
"SpaceJump",
"canIBJ",
"canSpringBallBombJump"
]
} |
|

Entrance condition: {
"comeInWithGMode": {
"mode": "any",
"morphed": true
}
}Requires: {
"or": [
"h_artificialMorphIBJ",
"h_artificialMorphSpringBallBombJump"
]
} |
|
Entrance condition: {
"comeInWithGMode": {
"mode": "any",
"morphed": true
}
}Requires: {
"or": [
"h_artificialMorphIBJ",
{
"and": [
"h_artificialMorphSpringBallBombJump",
"h_additionalBomb"
]
},
{
"and": [
"h_artificialMorphSpringBallBombJump",
"h_crouchJumpDownGrab"
]
}
]
}Exit condition: {
"leaveWithGMode": {
"morphed": false
}
} |
From: 2
Middle Left Door
To: 7
G-Mode Morph Indirect (In Morph Tunnel)
Entrance condition: {
"comeInWithGMode": {
"mode": "indirect",
"morphed": true
}
}Requires: {
"or": [
"h_artificialMorphIBJ",
{
"and": [
"h_artificialMorphSpringBallBombJump",
"h_additionalBomb"
]
},
{
"and": [
"h_artificialMorphSpringBall",
"HiJump"
]
},
{
"and": [
"Morph",
{
"or": [
"HiJump",
"canWallJump",
"SpaceJump",
"canSpringBallJumpMidAir",
{
"and": [
"canTrickyDashJump",
"h_crouchJumpDownGrab"
]
}
]
}
]
}
]
} |
From: 4
Bottom Right Door
To: 7
G-Mode Morph Indirect (In Morph Tunnel)
Entrance condition: {
"comeInWithGMode": {
"mode": "indirect",
"morphed": true
}
}Requires: {
"or": [
"h_artificialMorphIBJ",
"h_artificialMorphSpringBallBombJump",
{
"and": [
"h_artificialMorphSpringBall",
"HiJump"
]
},
{
"and": [
"Morph",
{
"or": [
"HiJump",
"canWallJump",
"SpaceJump",
"canSpringBallJumpMidAir",
"h_crouchJumpDownGrab"
]
}
]
}
]
} |
From: 3
Safe Block in the Middle of the Room
To: 2
Right Door
Requires: "canSpringBallBombJump" "canResetFallSpeed" |
|
Requires: {
"or": [
"canDash",
{
"disableEquipment": "HiJump"
},
{
"and": [
"HiJump",
"h_underwaterCrouchJumpDownGrab"
]
},
"canWallJump",
"Gravity",
"SpaceJump",
{
"and": [
"canSpringBallBombJump",
"canResetFallSpeed"
]
},
"canBombJumpWaterEscape"
]
} |
|
Use Spring Ball as a movement item to reach the Kraid Mouth ledge by jumping from the elevator runway, or by jumping from below. Requires: {
"or": [
"canSpringBallBombJump",
"canSpringBallJumpMidAir",
{
"and": [
"canMockball",
"h_useSpringBall"
]
}
]
}Dev note: By reaching 4, the super wall has been broken enough to fit in morph. |
From: 3
Right Vertical Door
To: 3
Right Vertical Door
Entrance condition: {
"comeInWithGMode": {
"mode": "direct",
"morphed": true
},
"comesThroughToilet": "any"
}Requires: {
"or": [
"h_artificialMorphSpringBallBombJump",
{
"and": [
"h_artificialMorphSpringBall",
"HiJump"
]
},
"h_artificialMorphIBJ",
"Morph"
]
}Exit condition: {
"leaveWithGMode": {
"morphed": true
}
} |
|
Entrance condition: {
"comeInWithGMode": {
"mode": "direct",
"morphed": true
},
"comesThroughToilet": "any"
}Requires: {
"or": [
"h_artificialMorphIBJ",
"h_artificialMorphSpringBallBombJump",
{
"and": [
"HiJump",
"h_artificialMorphSpringBall"
]
}
]
}Exit condition: {
"leaveWithGMode": {
"morphed": true
}
} |
From: 1
Left Shaft - Top Left Door
To: 5
Far Right Door


It is important avoid touching the invisible fireballs the Alcoons place. It is possible to bomb from the edge of the top door runway into the hidden morph tunnel, but if Samus is not at the edge, she will bonk and fall. After entering the morph tunnel, roll through the two camera scroll blocks a few times to overload PLMs. They are at the entrance and two tiles in the tunnel. Exit G-mode and go through the room to the far right door. Entrance condition: {
"comeInWithGMode": {
"mode": "any",
"morphed": true
}
}Requires: "canTrickyDodgeEnemies"
{
"or": [
"h_artificialMorphBombHorizontally",
"h_artificialMorphJumpIntoIBJ",
{
"and": [
"h_artificialMorphIBJ",
"h_artificialMorphPowerBomb"
]
},
{
"and": [
"h_artificialMorphSpringBall",
"HiJump"
]
},
"h_artificialMorphSpringBallBombJump"
]
}
"h_heatedGModeOffCameraDoor" |
From: 2
Left Shaft - Bottom Right Door
To: 5
Far Right Door
It is important avoid touching the invisible fireballs the Alcoons place. Jump over them or kill the Alcoons with Power Bombs. After entering the morph tunnel, roll through the two camera scroll blocks a few times to overload PLMs. They are at the entrance and two tiles in the tunnel. Exit G-mode and go through the room to the far right door. Entrance condition: {
"comeInWithGMode": {
"mode": "any",
"morphed": true
}
}Requires: {
"or": [
{
"and": [
"h_artificialMorphIBJ",
{
"ammo": {
"type": "PowerBomb",
"count": 3
}
}
]
},
{
"and": [
"h_artificialMorphSpringBall",
"HiJump"
]
},
{
"and": [
"h_artificialMorphSpringBallBombJump",
{
"or": [
"h_artificialMorphBombs",
{
"ammo": {
"type": "PowerBomb",
"count": 4
}
}
]
}
]
}
]
}
"h_heatedGModeOffCameraDoor" |
From: 3
Left Shaft - Middle Right Door
To: 5
Far Right Door
It is important avoid touching the invisible fireballs the Alcoons place. Jump over them or kill the Alcoons with Power Bombs. After entering the morph tunnel, roll through the two camera scroll blocks a few times to overload PLMs. They are at the entrance and two tiles in the tunnel. Exit G-mode and go through the room to the far right door. Entrance condition: {
"comeInWithGMode": {
"mode": "any",
"morphed": true
}
}Requires: {
"or": [
{
"and": [
"h_artificialMorphIBJ",
{
"ammo": {
"type": "PowerBomb",
"count": 2
}
}
]
},
{
"and": [
"h_artificialMorphSpringBall",
"HiJump"
]
},
{
"and": [
"h_artificialMorphSpringBallBombJump",
{
"or": [
"h_artificialMorphBombs",
{
"ammo": {
"type": "PowerBomb",
"count": 3
}
}
]
}
]
}
]
}
"h_heatedGModeOffCameraDoor" |
From: 4
Left Shaft - Top Right Door
To: 5
Far Right Door
It is important avoid touching the invisible fireballs the Alcoons place. Jump over them or kill the Alcoons with Power Bombs. After entering the morph tunnel, roll through the two camera scroll blocks a few times to overload PLMs. They are at the entrance and two tiles in the tunnel. Exit G-mode and go through the room to the far right door. Entrance condition: {
"comeInWithGMode": {
"mode": "any",
"morphed": true
}
}Requires: {
"or": [
{
"and": [
"h_artificialMorphIBJ",
"h_artificialMorphPowerBomb"
]
},
{
"and": [
"h_artificialMorphSpringBall",
"HiJump"
]
},
{
"and": [
"h_artificialMorphSpringBallBombJump",
"h_additionalBomb"
]
}
]
}
"h_heatedGModeOffCameraDoor" |
From: 1
Left Door
To: 1
Left Door
Get to the item with two Spring Ball bomb jumps and remote acquire the item back by the left door. Entrance condition: {
"comeInWithGMode": {
"mode": "direct",
"morphed": true
}
}Requires: "canRemoteAcquire" "h_artificialMorphSpringBallBombJump" "h_additionalBomb" Collects items: 4 Dev note: The Power Bombs will solidify the bomb block, preventing remote acquiring on the right. The Power Bombs are not going to overload many PLMs. |
From: 1
Left Door
To: 3
Top Right Item

Roll through the camera scroll block in the morph tunnel at the bottom of the room to overload PLMs, then get to the right side through the crumble blocks or bomb blocks near the left item. This can be done with an IBJ or two Spring Ball Bomb Jumps. Entrance condition: {
"comeInWithGMode": {
"mode": "any",
"morphed": true
}
}Requires: {
"or": [
"h_artificialMorphIBJ",
{
"and": [
"h_artificialMorphSpringBallBombJump",
"h_additionalBomb"
]
},
{
"and": [
"HiJump",
"h_artificialMorphSpringBall"
]
},
{
"and": [
"Morph",
{
"or": [
"HiJump",
"canWallJump",
"canSpringBallJumpMidAir",
"SpaceJump"
]
}
]
}
]
} |
|
Artificial morph IBJ or use two bomb boost spring ball jumps. Entrance condition: {
"comeInWithGMode": {
"mode": "any",
"morphed": true
}
}Requires: {
"or": [
"h_artificialMorphIBJ",
{
"and": [
"h_artificialMorphSpringBallBombJump",
"h_additionalBomb"
]
},
{
"and": [
"HiJump",
"h_artificialMorphSpringBall"
]
}
]
}Dev note: This is only useful if the item is Morph. |
From: 1
Top Right Door
To: 2
Middle Right Door

Entrance condition: {
"comeInWithGMode": {
"mode": "any",
"morphed": true
}
}Requires: {
"or": [
"h_artificialMorphIBJ",
{
"and": [
"HiJump",
"h_artificialMorphSpringBall"
]
},
{
"and": [
"h_artificialMorphSpringBallBombJump",
"h_additionalBomb"
]
}
]
}
"h_heatedGModeOffCameraDoor"Dev note: It is probably possible to farm the Sovas at this door, but it would be difficult and slow and isn't expected. |
From: 3
Bottom Right Door
To: 2
Middle Right Door
Entrance condition: {
"comeInWithGMode": {
"mode": "any",
"morphed": true
}
}Requires: {
"or": [
"h_artificialMorphIBJ",
{
"and": [
"HiJump",
"h_artificialMorphSpringBall"
]
},
{
"and": [
"h_artificialMorphSpringBallBombJump",
"h_additionalBomb"
]
}
]
}
"h_heatedGModeOffCameraDoor"Dev note: It is probably possible to farm the Sovas at this door, but it would be difficult and slow and isn't expected. |
From: 2
Bottom Right Door
To: 1
Top Right Door
Get to the top of the room with Spring Ball Bomb Jumps. To cross the room, perform a Spring Ball Bomb Jump after hitting the bomb with momentum to get a larger horizontal boost, then unmorph on the descent to reset fall speed. Entrance condition: {
"comeInWithGMode": {
"mode": "any",
"morphed": true
}
}Requires: "h_artificialMorphSpringBallBombJump"
{
"or": [
"HiJump",
{
"and": [
"canInsaneJump",
"h_artificialMorphResetFallSpeed",
{
"ammo": {
"type": "PowerBomb",
"count": 3
}
}
]
}
]
}Dev note: The HiJump strat can only be useful if preserving a blue suit. Leniency isn't included as Samus will likely unmorph. FIXME: Hitting the bomb with momentum should probably be a tech. |
|
Requires: {
"or": [
"canDash",
"Grapple",
"canWallJump",
"SpaceJump",
"canSpringBallJumpMidAir",
"canBombJumpWaterEscape",
{
"and": [
"HiJump",
"canDownGrab"
]
},
"canSpringBallBombJump"
]
} |
|
Entrance condition: {
"comeInWithGMode": {
"mode": "direct",
"morphed": true
},
"comesThroughToilet": "any"
}Requires: {
"or": [
"h_artificialMorphIBJ",
"h_artificialMorphSpringBallBombJump",
{
"and": [
"HiJump",
"h_artificialMorphSpringBall"
]
}
]
}Exit condition: {
"leaveWithGMode": {
"morphed": true
}
} |
From: 3
Bottom Horizontal Door
To: 1
Left Door
Entrance condition: {
"comeInWithGMode": {
"mode": "any",
"morphed": true
}
}Requires: {
"or": [
{
"and": [
"h_artificialMorphSpringBall",
"h_artificialMorphSpringBallBombJump"
]
},
{
"and": [
"h_artificialMorphIBJ",
"h_artificialMorphBombHorizontally"
]
}
]
}
"h_heatedGModeOpenDifferentDoor" |
From: 3
Bottom Horizontal Door
To: 2
Right Vertical Door
It is tricky to climb the room without fully overloading PLMs. With Ice and either HiJump or Spring Ball, freeze the left Alcoon to the right of where it jumps out of the ground. With HiJump, spin jump off of it and land directly on the middle stair platform. With Spring Ball, morph on top of the Alcoon, jump to barely land on the lowest platform while avoiding the camera scroll blocks one tile above, then use Spring Ball again to jump to the next platform. Alternatively, with Spring Ball and either HiJump, Bombs, or Power Bombs, jump to barely land on the lowest platform while avoiding the camera scroll blocks one tile above, then use Spring Ball again to jump to the next platform. The first jump can be done with HiJump or a bomb boost into Spring Ball jump. Once up above, unmorph and get onto the edge of the runway leading right, then run through the camera scroll blocks to reach the item. This will finish overloading PLMs. Blindly traverse the maze until the end, where Samus will be stuck at the far right next to the shot block. Exit G-mode just one tile to the left, Morph, use a Bomb or Power Bomb to destroy the shot block and escape through the door. There is a row of camera scroll blocks two-tiles above the bottom left platform, and a column two-tiles away from the right of the gap in front of the left door. Entrance condition: {
"comeInWithGMode": {
"mode": "direct",
"morphed": false
}
}Requires: "canRemoteAcquire"
"canOffScreenMovement"
"canTrickyGMode"
{
"or": [
{
"and": [
"canTrickyUseFrozenEnemies",
"HiJump"
]
},
{
"and": [
"canTrickyUseFrozenEnemies",
"h_useSpringBall"
]
},
{
"and": [
"HiJump",
"h_useSpringBall"
]
},
"canSpringBallBombJump"
]
}
"h_bombThings"
"h_heatedGModeOffCameraDoor"
{
"heatFrames": 200
}Collects items: 4 |
From: 3
Bottom Horizontal Door
To: 3
Bottom Horizontal Door
It is tricky to climb the room without fully overloading PLMs. With Spring Ball, jump to barely land on the lowest platform while avoiding the camera scroll blocks one tile above, then use Spring Ball again to jump to the next platform. The first jump can be done with HiJump or a bomb boost into Spring Ball jump. Up above, unmorph and get onto the edge of the runway leading right, then run through the camera scroll blocks to reach the item. Wait at least 35 seconds for the Alcoon to jump back down before returning to the door, or kill it with a Power Bomb or SBA. Stand close to the transition and use X-Ray then hold right to leave the room before the door closes. Note that spending any extra frames in the camera scroll blocks will overload PLMs before reaching the item and prevent remote acquiring it. There is a row of camera scroll blocks two-tiles above the bottom left platform, and a column two-tiles away from the right of the gap in front of the left door. Entrance condition: {
"comeInWithGMode": {
"mode": "direct",
"morphed": true
}
}Requires: "canRemoteAcquire"
"canTrickyGMode"
"h_artificialMorphSpringBall"
{
"or": [
"HiJump",
"h_artificialMorphSpringBallBombJump"
]
}
"h_heatedDirectGModeLeaveSameDoor"Collects items: 4 |
|
It is possible to climb up with a tricky dash jump and no wall jump. Either kill the Alcoon before it spawns any stationary, invisible fireballs, or let the right Alcoons shoot enough to overload projectiles. Entrance condition: {
"comeInWithGMode": {
"mode": "any",
"morphed": true
}
}Requires: "h_heatedGMode"
{
"or": [
{
"and": [
"h_artificialMorphSpringBall",
"h_artificialMorphSpringBallBombJump"
]
},
{
"and": [
"h_artificialMorphIBJ",
"h_artificialMorphBombHorizontally"
]
}
]
}
{
"heatFrames": 0
} |
From: 3
Bottom Horizontal Door
To: 7
Junction By Lower Alcoons (Left of Spike Pits)
Get past the spike Alcoons, and climb up - leave the lower left Alcoon alive to use for later. Clear the runway Alcoon and get the shinecharge, then drop into the lower left Alcoon to interrupt. If you Crystal Flash early, stay near the door to ensure you kill only the two spike Alcoons. Entrance condition: {
"comeInWithRMode": {}
}Requires: {
"or": [
{
"and": [
"h_heatedCrystalFlashForReserveEnergy",
{
"heatFrames": 100
}
]
},
{
"and": [
"ScrewAttack",
"canCarefulJump",
{
"heatFrames": 100
}
]
},
{
"and": [
"canDodgeWhileShooting",
{
"or": [
"h_heatProof",
{
"enemyKill": {
"enemies": [
[
"Alcoon"
]
],
"explicitWeapons": [
"Missile",
"Super",
"Wave+Plasma"
]
}
},
{
"and": [
"canPseudoScrew",
{
"heatFrames": 30
}
]
}
]
},
"canCarefulJump",
{
"heatFrames": 100
}
]
},
{
"and": [
{
"enemyKill": {
"enemies": [
[
"Alcoon",
"Alcoon"
]
],
"explicitWeapons": [
"Missile",
"Super",
"Plasma",
"Wave+Spazer"
]
}
},
{
"heatFrames": 200
}
]
},
{
"and": [
"canCarefulJump",
{
"heatFrames": 199
}
]
},
{
"and": [
{
"enemyDamage": {
"enemy": "Alcoon",
"type": "contact",
"hits": 1
}
},
{
"heatFrames": 180
}
]
}
]
}
{
"heatFrames": 160
}
{
"or": [
"canWallJump",
"HiJump",
"canSpringBallJumpMidAir",
"SpaceJump",
{
"and": [
"canSpringBallBombJump",
{
"heatFrames": 60
}
]
},
{
"and": [
"canIBJ",
"canBombHorizontally",
"canJumpIntoIBJ",
{
"heatFrames": 110
},
{
"or": [
"canDoubleBombJump",
{
"heatFrames": 190
}
]
}
]
},
{
"and": [
"canTrickyDashJump",
"canInsaneJump",
{
"heatFrames": 20
}
]
},
{
"and": [
"canUseFrozenEnemies",
"canInsaneJump",
{
"heatFrames": 150
}
]
}
]
}
{
"or": [
{
"and": [
"canDodgeWhileShooting",
{
"enemyKill": {
"enemies": [
[
"Alcoon"
]
],
"explicitWeapons": [
"Missile",
"Super",
"Charge+Plasma"
]
}
},
{
"heatFrames": 120
}
]
},
{
"and": [
{
"enemyKill": {
"enemies": [
[
"Alcoon"
]
],
"explicitWeapons": [
"Wave",
"Ice+Spazer",
"Plasma",
"ScrewAttack",
"PseudoScrew",
"PowerBomb"
]
}
},
{
"heatFrames": 180
}
]
},
{
"heatFrames": 200
}
]
}
{
"or": [
{
"resourceAvailable": [
{
"type": "ReserveEnergy",
"count": 1
}
]
},
{
"and": [
"h_heatProof",
"h_RModeCanRefillReserves",
{
"or": [
{
"and": [
{
"resourceMissingAtMost": [
{
"type": "PowerBomb",
"count": 0
}
]
},
{
"partialRefill": {
"type": "ReserveEnergy",
"limit": 20
}
}
]
},
{
"and": [
{
"resourceMissingAtMost": [
{
"type": "PowerBomb",
"count": 3
}
]
},
{
"partialRefill": {
"type": "ReserveEnergy",
"limit": 5
}
}
]
}
]
}
]
}
]
}
{
"canShineCharge": {
"usedTiles": 27,
"gentleUpTiles": 2,
"openEnd": 0
}
}
{
"or": [
"canDownBack",
"canTrickyJump"
]
}
{
"heatFrames": 120
}
{
"autoReserveTrigger": {
"maxReserveEnergy": 95
}
}
"canRModeSparkInterrupt"Clears obstacles: A |
From: 7
Junction By Lower Alcoons (Left of Spike Pits)
To: 1
Left Door


Requires: "canSpringBallBombJump"
{
"heatFrames": 240
}Unlocks doors: {"types":["powerbomb"],"requires":[{"heatFrames":60}]} |
From: 7
Junction By Lower Alcoons (Left of Spike Pits)
To: 6
Junction By Left Door (Right of Pit)
Requires: "canSpringBallBombJump"
{
"heatFrames": 220
} |
From: 4
Junction Below Bomb Blocks
To: 2
Top Right Door


Requires: {
"obstaclesCleared": [
"B"
]
}
{
"obstaclesNotCleared": [
"A"
]
}
{
"noBlueSuit": {}
}
{
"heatFrames": 160
}
{
"or": [
"h_crouchJumpDownGrab",
"canWallJump",
"canSpringBallJumpMidAir",
"HiJump",
{
"and": [
"SpaceJump",
{
"heatFrames": 20
}
]
},
{
"and": [
"canSpringBallBombJump",
{
"heatFrames": 50
}
]
},
{
"and": [
"canJumpIntoIBJ",
{
"heatFrames": 60
}
]
}
]
} |
|
It is possible to get back up with Spring Ball alone with a foosball off of the crumble block. Entrance condition: {
"comeInWithGMode": {
"mode": "direct",
"morphed": true
},
"comesThroughToilet": "any"
}Requires: {
"or": [
"h_artificialMorphIBJ",
"h_artificialMorphSpringBallBombJump",
{
"and": [
"HiJump",
"h_artificialMorphSpringBall"
]
},
{
"and": [
"canTrickyJump",
"h_artificialMorphSpringBall"
]
}
]
}Exit condition: {
"leaveWithGMode": {
"morphed": true
}
}Dev note: This is one of the easier foosballs because it is free to retry, because there is no heat damage in G-Mode. |
From: 4
Junction Above Bomb Block
To: 1
Top Left Door
Firing upwards has a good chance of hitting multiple Kihunters. And charge shot double hits will instantly kill a Kihunter. Requires: "canDash"
"Ice"
"Wave"
"Plasma"
{
"or": [
"Charge",
{
"heatFrames": 240
}
]
}
{
"or": [
"h_crouchJumpDownGrab",
"canWallJump",
"HiJump",
{
"and": [
"canSpringBallJumpMidAir",
{
"heatFrames": 120
}
]
},
"SpaceJump",
{
"and": [
"canIBJ",
"h_heatProof"
]
},
{
"and": [
"canSpringBallBombJump",
"h_additionalBomb",
"h_additionalBomb",
{
"heatFrames": 250
}
]
}
]
}
{
"heatFrames": 550
}Clears obstacles: A, B |
From: 4
Junction Above Bomb Block
To: 1
Top Left Door
Fire up from below and try not to jump too high as that will out the camera in a bad position. Requires: "canDash"
"Ice"
"Wave"
"Spazer"
{
"or": [
"Charge",
"canCarefulJump",
"h_heatProof"
]
}
{
"or": [
"h_crouchJumpDownGrab",
"canWallJump",
"HiJump",
{
"and": [
"canSpringBallJumpMidAir",
{
"heatFrames": 120
}
]
},
"SpaceJump",
{
"and": [
"canIBJ",
"h_heatProof"
]
},
{
"and": [
"canSpringBallBombJump",
"h_additionalBomb",
"h_additionalBomb",
{
"heatFrames": 250
}
]
}
]
}
{
"heatFrames": 1520
}Clears obstacles: A, B Dev note: FIXME IBJ strats could be added with heat frames. |
From: 4
Junction Above Bomb Block
To: 1
Top Left Door
Requires: {
"or": [
"canDash",
{
"heatFrames": 40
}
]
}
{
"or": [
{
"obstaclesCleared": [
"A"
]
},
{
"and": [
{
"haveBlueSuit": {}
},
{
"heatFrames": 10
},
{
"or": [
"Wave",
{
"heatFrames": 30
}
]
}
]
}
]
}
{
"or": [
{
"and": [
"h_heatedCrouchJumpDownGrab",
{
"heatFrames": 340
}
]
},
{
"and": [
"canWallJump",
{
"heatFrames": 290
}
]
},
{
"and": [
"HiJump",
{
"heatFrames": 240
}
]
},
{
"and": [
"canSpringBallJumpMidAir",
{
"heatFrames": 450
}
]
},
{
"and": [
"SpaceJump",
{
"heatFrames": 380
}
]
},
{
"and": [
"canIBJ",
"h_heatProof"
]
},
{
"and": [
"canJumpIntoIBJ",
{
"heatFrames": 660
},
{
"or": [
{
"obstaclesCleared": [
"A"
]
},
{
"heatFrames": 380
}
]
}
]
},
{
"and": [
"canSpringBallBombJump",
"h_additionalBomb",
"h_additionalBomb",
{
"heatFrames": 560
}
]
}
]
}Clears obstacles: B |
|
Fire up from below and try not to jump too high as that will put the camera in a bad position. Requires: "canDash"
"Plasma"
{
"or": [
"canCarefulJump",
{
"heatFrames": 100
}
]
}
{
"or": [
"h_crouchJumpDownGrab",
"canWallJump",
"HiJump",
{
"and": [
"canSpringBallJumpMidAir",
{
"heatFrames": 120
}
]
},
"SpaceJump",
{
"and": [
"canIBJ",
"h_heatProof"
]
},
{
"and": [
"canSpringBallBombJump",
"h_additionalBomb",
"h_additionalBomb",
{
"heatFrames": 250
}
]
}
]
}
{
"heatFrames": 1360
}Clears obstacles: A, B Dev note: FIXME IBJ strats could be added with heat frames. |
From: 4
Junction Above Bomb Block
To: 1
Top Left Door
Shoot them from below. It is possible for the Kihunters to fall through the gaps in the side, but is unlikely. Jumping may lower the camera position making it harder to shoot the Kihunters. But once it is lowered, jump to make them active and vulnerable to damage. Requires: "h_heatProof"
"canBePatient"
{
"enemyKill": {
"enemies": [
[
"Kihunter (red)",
"Kihunter (red)",
"Kihunter (red)"
]
]
}
}
{
"or": [
"h_crouchJumpDownGrab",
"canWallJump",
"HiJump",
"canSpringBallJumpMidAir",
"SpaceJump",
"canIBJ",
{
"and": [
"canSpringBallBombJump",
"h_additionalBomb",
"h_additionalBomb"
]
}
]
}Clears obstacles: A Dev note: SpringBallBombJump uses 3 powerbombs total. |
|
Fire up from below and try not to jump too high as that will put the camera in a bad position. Requires: "canDash"
{
"enemyKill": {
"enemies": [
[
"Kihunter (red)",
"Kihunter (red)",
"Kihunter (red)"
]
],
"explicitWeapons": [
"Super"
]
}
}
{
"or": [
"canCarefulJump",
{
"heatFrames": 210
}
]
}
{
"or": [
"h_crouchJumpDownGrab",
"canWallJump",
"HiJump",
{
"and": [
"canSpringBallJumpMidAir",
{
"heatFrames": 120
}
]
},
"SpaceJump",
{
"and": [
"canIBJ",
"h_heatProof"
]
},
{
"and": [
"canSpringBallBombJump",
"h_additionalBomb",
"h_additionalBomb",
{
"heatFrames": 250
}
]
}
]
}
{
"heatFrames": 1300
}Clears obstacles: A, B |
From: 4
Junction Above Bomb Block
To: 1
Top Left Door
Requires: "canDash"
"Wave"
"Plasma"
{
"or": [
"h_crouchJumpDownGrab",
"canWallJump",
"HiJump",
{
"and": [
"canSpringBallJumpMidAir",
{
"heatFrames": 120
}
]
},
"SpaceJump",
{
"and": [
"canIBJ",
"h_heatProof"
]
},
{
"and": [
"canSpringBallBombJump",
"h_additionalBomb",
"h_additionalBomb",
{
"heatFrames": 250
}
]
}
]
}
{
"heatFrames": 940
}Clears obstacles: A, B |
|
Requires: {
"or": [
"canWallJump",
"HiJump",
"SpaceJump",
"canIBJ",
"canSpeedyJump",
"h_crouchJumpDownGrab",
"canSpringBallJumpMidAir",
"canSpringBallBombJump",
"canUseFrozenEnemies"
]
}Dev note: FIXME: It is possible to get up with a damage boost, with or without Morph, which could preserve a flash suit. |
From: 3
Bottom Left Door
To: 8
Item

Use the camera scroll blocks just right of the bomb blocks, in order to overload PLMs and go through them. Exit g-mode and travel to the item and back while off screen. Entrance condition: {
"comeInWithGMode": {
"mode": "any",
"morphed": true
}
}Requires: {
"or": [
"h_artificialMorphIBJ",
"h_artificialMorphSpringBallBombJump",
{
"and": [
"h_artificialMorphSpringBall",
"HiJump"
]
}
]
}
{
"or": [
{
"and": [
"canOffScreenMovement",
"canTrickyGMode"
]
},
{
"and": [
{
"not": "f_DefeatedPhantoon"
},
"canRiskPermanentLossOfAccess"
]
}
]
}Dev note: This is only useful if the item is Morph. If Samus already has Morph, she can fix the camera, using another strat. |
From: 6
Bottom Right Door
To: 8
Item

Roll through the bomb blocks then exit g-mode and travel to the item and back while off screen. If a Spring Ball bomb jump off of a Power Bomb is the only way up, first overload PLMs using the camera scroll block in front of the bottom bomb block or the top block will remain solid. Entrance condition: {
"comeInWithGMode": {
"mode": "any",
"morphed": true
}
}Requires: "h_blueSuitGMode"
{
"or": [
"h_artificialMorphIBJ",
"h_artificialMorphSpringBallBombJump",
{
"and": [
"h_artificialMorphSpringBall",
"HiJump"
]
}
]
}
{
"or": [
{
"and": [
"canOffScreenMovement",
"canTrickyGMode"
]
},
{
"and": [
{
"not": "f_DefeatedPhantoon"
},
"canRiskPermanentLossOfAccess"
]
}
]
}Clears obstacles: A Dev note: This is only useful if the item is Morph. |
From: 2
Bottom Right Door
To: 3
Middle Right Door
Only requires a runway of one tile in the adjacent room. Bomb boost through the doorway, then use spring ball to get to the bottom left ledge. To avoid hitting the Skultera, place the bomb a few pixels from the doorway. One way to setup the positioning of the bomb is to place it, unmorph, rotate, and remorph Entrance condition: {
"comeInWithBombBoost": {}
}Requires: {
"tech": "canSpringBallBombJump"
}
"h_useSpringBall"
"canCrossRoomJumpIntoWater"
{
"or": [
"Gravity",
"HiJump",
"canSpringBallJumpMidAir",
"h_underwaterCrouchJumpDownGrab"
]
} |
|
Entrance condition: {
"comeInWithGMode": {
"mode": "direct",
"morphed": true
},
"comesThroughToilet": "any"
}Requires: {
"or": [
"Gravity",
"h_artificialMorphDoubleSpringBallJump",
{
"and": [
{
"not": "f_MaridiaTubeBroken"
},
"canRiskPermanentLossOfAccess"
]
}
]
}
{
"or": [
"h_artificialMorphIBJ",
{
"and": [
"HiJump",
"h_artificialMorphSpringBall"
]
},
{
"and": [
"h_artificialMorphSpringBallBombJump",
"h_artificialMorphSpringBall"
]
},
{
"and": [
"canGravityJump",
"h_artificialMorphSpringBall"
]
}
]
}Exit condition: {
"leaveWithGMode": {
"morphed": true
}
} |
|
Requires: "Gravity"
{
"or": [
"HiJump",
"canWallJump",
"canSpeedyJump",
"SpaceJump",
"canIBJ",
"canSpringBallJumpMidAir",
"canSpringBallBombJump"
]
} |
From: 2
Bottom Left Door
To: 7
Lower Hills Junction
This requires one spring ball bomb jump. Entrance condition: {
"comeInWithGMode": {
"mode": "any",
"morphed": true
},
"comesThroughToilet": "any"
}Requires: "Gravity" "h_artificialMorphSpringBallBombJump" |
|
Entrance condition: {
"comeInWithGMode": {
"mode": "any",
"morphed": false
},
"comesThroughToilet": "any"
}Requires: "Morph"
{
"or": [
{
"and": [
"Gravity",
{
"or": [
"HiJump",
"canWallJump",
"canSpeedyJump",
"SpaceJump",
"canSpringBallJumpMidAir",
"canSpringBallBombJump",
"canGravityJump",
{
"and": [
"h_crouchJumpDownGrab",
"canTrickyJump"
]
}
]
}
]
},
{
"and": [
"canSuitlessMaridia",
{
"or": [
"canTrickyUseFrozenEnemies",
{
"and": [
"HiJump",
"canSpringBallJumpMidAir"
]
},
"canUnderwaterWallJump"
]
}
]
}
]
}Dev note: The canCrouchJump is not a h_underwaterCrouchJump, because Gravity is required. |
From: 2
Bottom Left Door
To: 12
G-Mode Junction (In Morph Tunnel)
Entrance condition: {
"comeInWithGMode": {
"mode": "any",
"morphed": true
},
"comesThroughToilet": "any"
}Requires: "Gravity"
{
"or": [
"h_artificialMorphIBJ",
{
"and": [
"h_artificialMorphSpringBall",
{
"or": [
"canGravityJump",
"HiJump"
]
}
]
},
{
"and": [
"h_artificialMorphSpringBallBombJump",
"h_additionalBomb"
]
}
]
}Dev note: It is assumed that the door is open. |
From: 3
Bottom Right Door
To: 12
G-Mode Junction (In Morph Tunnel)
Entrance condition: {
"comeInWithGMode": {
"mode": "indirect",
"morphed": false
},
"comesThroughToilet": "any"
}Requires: "Morph"
{
"or": [
{
"and": [
"Gravity",
{
"or": [
"HiJump",
"canWallJump",
"SpaceJump",
"canIBJ",
"canSpringBallJumpMidAir",
"canSpringBallBombJump",
"canGravityJump"
]
}
]
},
{
"and": [
"canSuitlessMaridia",
{
"or": [
{
"and": [
"HiJump",
"canSpringBallJumpMidAir"
]
},
"canUnderwaterWallJump"
]
}
]
},
{
"and": [
"h_navigateUnderwater",
"canTrickyUseFrozenEnemies",
{
"ammo": {
"type": "Super",
"count": 1
}
},
{
"or": [
"canInsaneJump",
"Spazer",
"Wave",
"Plasma",
{
"ammo": {
"type": "Super",
"count": 1
}
}
]
}
]
}
]
}Dev note: Direct G-mode will have an open door and Samus will fall. Indirect will require a doorlock bypass in the room below. FIXME: A direct G-mode regain mobility and fall through the door would be possible if entering on the right side of the door, but there is not a way to represent that yet. |
|
Entrance condition: {
"comeInWithGMode": {
"mode": "any",
"morphed": true
}
}Requires: "Gravity"
{
"or": [
{
"and": [
"h_artificialMorphSpringBall",
{
"or": [
"canGravityJump",
"HiJump"
]
}
]
},
"h_artificialMorphLongIBJ",
{
"and": [
"h_artificialMorphIBJ",
"h_artificialMorphBombHorizontally"
]
},
"h_artificialMorphSpringBallBombJump"
]
} |
From: 6
Left Morph Passage Doorway
To: 7
Lower Hills Junction
After entering the room, quickly leave the morph tunnel in order to prevent getting hit by the crab. Entrance condition: {
"comeInWithGMode": {
"mode": "any",
"morphed": true
}
}Requires: "Gravity"
{
  "or": [
    "h_artificialMorphIBJ",
    "h_artificialMorphSpringBallBombJump"
  ]
}Dev note: The tunnel does not need to be expanded for Samus to get into the morph tunnel without getting stuck, regardless of if she has Morph or artificial morph, and is in direct or indirect G-mode. |
From: 1
Middle Left Door
To: 9
Junction Below Top Door
Bomb the Power Bomb blocks below to overload PLMs, then go up through the crumble blocks to escape. Entrance condition: {
"comeInWithGMode": {
"mode": "any",
"morphed": true
}
}Requires: "h_artificialMorphBombs"
"h_navigateUnderwater"
{
"or": [
{
"and": [
"Gravity",
{
"or": [
"h_artificialMorphLongIBJ",
"h_artificialMorphJumpIntoIBJ"
]
}
]
},
{
"and": [
"canGravityJump",
"h_artificialMorphSpringBall"
]
},
{
"and": [
"HiJump",
"canSpringBallJumpMidAir"
]
},
{
"and": [
"HiJump",
"canConsecutiveWallJump",
"canPreciseWallJump"
]
},
"h_artificialMorphDoubleSpringBallJump",
{
"and": [
"Gravity",
"HiJump",
"h_artificialMorphSpringBallBombJump"
]
}
]
}Dev note: FIXME: Eventually a CF doorlock bypass should be added from this 1 or from 12 with a 1->12 option. |
From: 1
Middle Left Door
To: 10
G-Mode Morph Junction (By Bottom Left Door)
Bomb the Power Bomb blocks below to overload PLMs, then IBJ up through the crumble blocks to escape. Entrance condition: {
"comeInWithGMode": {
"mode": "any",
"morphed": true
}
}Requires: "h_artificialMorphBombs"
{
"or": [
{
"and": [
"Gravity",
{
"or": [
"h_artificialMorphLongIBJ",
"h_artificialMorphJumpIntoIBJ"
]
}
]
},
{
"and": [
"canGravityJump",
"h_artificialMorphSpringBall"
]
},
"h_artificialMorphDoubleSpringBallJump",
{
"and": [
"Gravity",
"HiJump",
"h_artificialMorphSpringBallBombJump"
]
}
]
} |
From: 1
Middle Left Door
To: 11
G-Mode Overloaded PLMs (By Bottom Left Door)

Bomb the PB blocks below to overload PLMs, then go up through the crumble blocks to escape. Entrance condition: {
"comeInWithGMode": {
"mode": "any",
"morphed": true
}
}Requires: "h_artificialMorphBombs"
"h_navigateUnderwater"
{
"or": [
"canGravityJump",
{
"and": [
"Gravity",
{
"or": [
"h_artificialMorphLongIBJ",
"h_artificialMorphJumpIntoIBJ"
]
}
]
},
{
"and": [
"HiJump",
"canSpringBallJumpMidAir"
]
},
{
"and": [
"HiJump",
"canConsecutiveWallJump",
"canPreciseWallJump"
]
},
"h_artificialMorphDoubleSpringBallJump",
{
"and": [
"Gravity",
"HiJump",
"h_artificialMorphSpringBallBombJump"
]
}
]
} |
From: 2
Right Door
To: 4
Top Right Ledge Junction
Use the bomb boost as Samus is going through the doorway, then spring ball after breaking the water, then IBJ or use an unmorph bomb boost. Entrance condition: {
"comeInWithBombBoost": {}
}Requires: "canSpringBallBombJump"
"canCrossRoomJumpIntoWater"
"canInsaneJump"
{
"or": [
"canJumpIntoIBJ",
"canUnmorphBombBoost"
]
}Dev note: This strat requires a minimum of 2 bombs or Power Bombs. This strat requires fairly high precision in order to jump out of the water, particularly if using a Power Bomb and down grab. It is also not particularly useful, as a normal Spring Ball jump is easier and can be done with a single tile runway. It seems like the only real uses of this strat would then be to prevent a pause (maintain a blue suit without speedbooster), or a cross room artificial morph with no doorcap in the previous room (cross room + g-mode strats haven't been added to logic yet). |
|
Requires: "Gravity"
{
"or": [
"SpaceJump",
"canHBJ",
{
"and": [
"canDash",
{
"or": [
"canTrickyJump",
"canResetFallSpeed",
{
"enemyDamage": {
"enemy": "Cacatac",
"type": "spike",
"hits": 1
}
}
]
}
]
}
]
}
{
"or": [
"SpaceJump",
"canWallJump",
"HiJump",
"canIBJ",
"canHBJ",
"canSpringBallBombJump",
{
"spikeHits": 1
}
]
} |
|
IBJ or Spring Ball Bomb Jump through two sets of Crumble Blocks. Entrance condition: {
"comeInWithGMode": {
"mode": "any",
"morphed": true
},
"comesThroughToilet": "any"
}Requires: {
"or": [
{
"and": [
"Gravity",
{
"or": [
"h_artificialMorphIBJ",
{
"and": [
"h_artificialMorphSpringBallBombJump",
"h_additionalBomb"
]
},
{
"and": [
"HiJump",
"h_artificialMorphSpringBall"
]
},
{
"and": [
"canGravityJump",
"h_artificialMorphSpringBall"
]
}
]
}
]
},
"h_artificialMorphDoubleSpringBallJump"
]
}Dev note: Without this being Morph, there is no way to escape. PLMs are already overloaded from the sand. |
|


Requires: "Gravity"
{
"or": [
"h_crouchJumpDownGrab",
"canUseFrozenEnemies",
"canGravityJump",
"canWallJump",
"HiJump",
"canSpringBallJumpMidAir",
"SpaceJump",
"canIBJ",
"canSpringBallBombJump"
]
}Dev note: The canCrouchJump is not a h_underwaterCrouchJump, because Gravity is required. |
From: 7
Below Morph Tunnel Junction
To: 5
Morph Tunnel Junction
With Spring Ball it is safe to bounce on top of the crumble blocks while continuing to jump. Climb with HiJump, or use a bomb into Spring Ball jump to gain a little bit of extra height. Requires: "Gravity"
"h_useSpringBall"
{
"or": [
"canSpringBallBombJump",
"HiJump"
]
} |
From: 1
Bottom Left Door
To: 4
G-Mode Junction (Top by Elevator)
The Rippers can be killed with two Power Bombs, or one carefully placed Power Bomb and a careful dodge of the top-most Ripper. With a single Power Bomb, use Spring Ball to avoid the first Ripper, then place the Power Bomb at least two tiles above the next. This can be achieved with a Staggered IBJ or a Spring Ball Bomb Boost. Then climb the right side of the shaft and dodge the top Ripper. Entrance condition: {
"comeInWithGMode": {
"mode": "any",
"morphed": true
}
}Requires: "h_artificialMorphLongIBJ"
"h_artificialMorphSpringBallBombJump"
"h_artificialMorphPowerBomb"
{
"or": [
"h_artificialMorphStaggeredIBJ",
"h_artificialMorphPowerBomb",
{
"enemyDamage": {
"enemy": "Ripper",
"type": "contact",
"hits": 1
}
}
]
}Dev note: canSpringBallBombJump can be bypassed with SpringBall and other requirements, but that's being assumed with Bombs and SpringBall at this level. |
|
Requires: {
"or": [
"canWallJump",
"h_crouchJumpDownGrab",
"HiJump",
"SpaceJump",
"canSpringBallJumpMidAir",
"canSpringBallBombJump"
]
} |
|
Entrance condition: {
"comeInWithGMode": {
"mode": "any",
"morphed": true
},
"comesThroughToilet": "any"
}Requires: "h_artificialMorphLongIBJ"
{
"or": [
"h_artificialMorphSpringBallBombJump",
"h_artificialMorphBombHorizontally",
"Gravity"
]
} |
|
Requires: {
"or": [
"HiJump",
"canWallJump",
"SpaceJump",
"canSpringBallJumpMidAir",
{
"and": [
"canIBJ",
"canBombHorizontally"
]
},
{
"and": [
"canLongIBJ",
"Gravity"
]
},
{
"and": [
"canSpringBallBombJump",
"h_additionalBomb",
"h_additionalBomb"
]
}
]
} |
|
Entrance condition: {
"comeInWithGMode": {
"mode": "any",
"morphed": true
},
"comesThroughToilet": "any"
}Requires: {
"or": [
{
"and": [
"h_artificialMorphIBJ",
"h_artificialMorphBombHorizontally"
]
},
{
"and": [
"h_artificialMorphLongIBJ",
"Gravity"
]
},
{
"and": [
"h_artificialMorphSpringBallBombJump",
"h_additionalBomb",
"h_additionalBomb",
"h_additionalBomb"
]
},
{
"and": [
"h_artificialMorphSpringBallBombJump",
{
"notable": "Left Shaft Precise Crouch Jump Down Grab"
}
]
}
]
} |
|
Entrance condition: {
"comeInWithGMode": {
"mode": "any",
"morphed": true
}
}Requires: {
"or": [
{
"and": [
"Gravity",
{
"or": [
"h_artificialMorphLongIBJ",
{
"and": [
"h_artificialMorphIBJ",
"h_artificialMorphBombHorizontally"
]
}
]
}
]
},
{
"and": [
"h_artificialMorphDoubleSpringBallJump",
"canDownGrab"
]
},
{
"and": [
"canGravityJump",
"h_artificialMorphSpringBallBombJump"
]
}
]
} |
|

Entrance condition: {
"comeInWithGMode": {
"mode": "any",
"morphed": true
}
}Requires: {
"or": [
"Gravity",
{
"and": [
"canSuitlessMaridia",
"HiJump",
"h_artificialMorphSpringBall"
]
}
]
}
{
  "or": [
    "h_artificialMorphLongIBJ",
    {
      "and": [
        "Gravity",
        "h_artificialMorphIBJ",
        "h_artificialMorphBombHorizontally"
      ]
    },
    {
      "and": [
        "canGravityJump",
        "h_artificialMorphSpringBallBombJump",
        {
          "or": [
            "h_additionalBomb",
            {
              "tech": "canDoubleSpringBallJumpMidAir"
            }
          ]
        },
        {
          "or": [
            {
              "and": [
                "h_additionalBomb",
                "h_additionalBomb"
              ]
            },
            {
              "notable": "Left Shaft Precise Crouch Jump Down Grab"
            }
          ]
        }
      ]
    }
  ]
} |
|

Entrance condition: {
"comeInWithGMode": {
"mode": "any",
"morphed": true
}
}Requires: {
"or": [
"h_artificialMorphLongIBJ",
{
"and": [
"Gravity",
"h_artificialMorphIBJ",
"h_artificialMorphBombHorizontally"
]
},
{
"and": [
"canGravityJump",
"h_artificialMorphSpringBallBombJump",
{
"or": [
"h_additionalBomb",
{
"tech": "canDoubleSpringBallJumpMidAir"
}
]
},
{
"or": [
{
"and": [
"h_additionalBomb",
"h_additionalBomb"
]
},
{
"notable": "Left Shaft Precise Crouch Jump Down Grab"
}
]
}
]
}
]
} |
|
IBJ from below or bomb horizontally, then use Spring Ball with HiJump to jump around the overhang while avoiding the upper Choot. Entrance condition: {
"comeInWithGMode": {
"mode": "any",
"morphed": true
}
}Requires: {
"or": [
"h_artificialMorphLongIBJ",
{
"and": [
"HiJump",
"h_artificialMorphSpringBallBombJump",
{
"tech": "canBombHorizontally"
},
"canTrickyJump"
]
}
]
} |
From: 4
Top Right Door
To: 5
Top Junction
Bomb horizontally, then use spring ball to jump around the overhang. Either quickly kill the Choot or land on the left pixel to avoid a hit. Using a Power Bomb will kill the Choot just before it swings left another time and will make the landing area a bit larger. Requires: "HiJump"
"canSpringBallBombJump"
{
"tech": "canBombHorizontally"
}
"canTrickyJump" |
|
Avoid moving too much between the right of the Owtch and the item to avoid overloading PLMs until after touching the item. Entrance condition: {
"comeInWithGMode": {
"mode": "direct",
"morphed": true
}
}Requires: "canRemoteAcquire"
{
"or": [
{
"and": [
"Gravity",
"h_artificialMorphIBJ"
]
},
{
"and": [
"Gravity",
"h_artificialMorphSpringBallBombJump"
]
},
"h_artificialMorphDoubleSpringBallJump"
]
}Collects items: 3 |
|
Entrance condition: {
"comeInWithGMode": {
"mode": "any",
"morphed": true
},
"comesThroughToilet": "any"
}Requires: "canRemoteAcquire"
{
  "or": [
    {
      "and": [
        "Gravity",
        {
          "or": [
            "h_artificialMorphIBJ",
            "h_artificialMorphSpringBallBombJump"
          ]
        }
      ]
    },
    "h_artificialMorphDoubleSpringBallJump"
  ]
}Collects items: 3 |
|


Entrance condition: {
"comeInWithGMode": {
"mode": "any",
"morphed": true
},
"comesThroughToilet": "any"
}Requires: {
"or": [
{
"and": [
"Gravity",
{
"or": [
"h_artificialMorphIBJ",
"h_artificialMorphSpringBallBombJump"
]
}
]
},
"h_artificialMorphDoubleSpringBallJump"
]
} |
From: 1
Right Door
To: 1
Right Door

Kill the Choot at the bottom of the room. Freeze the two Zebs to create a runway to shinecharge with. Pixel perfect freezing of both Zebs provides the longest runway, but a slightly higher position of the second Zeb is still usable. Slide off the end of the runway while gaining a shinecharge. After landing on the center pedestal, do a short spin jump to the right, turn left, fire shot to break spin and collect the item. After the message box closes, depending on Samus' position, hold left and wait a moment to let Samus move down-left a few pixels before activating a diagonal spark. Freezing just a single Zeb is also possible but requires a 13-tile shortcharge. Requires: "h_trickyFrozenEnemyRunway"
{
"notable": "Double Frozen Zeb Runway"
}
{
"notable": "Double Frozen Zeb Item Collect Shinespark Escape"
}
"canShinechargeMovementTricky"
{
"canShineCharge": {
"usedTiles": 19,
"openEnd": 1
}
}
{
"shinespark": {
"frames": 20,
"excessFrames": 11
}
}
{
"or": [
"canWallJump",
"HiJump",
"SpaceJump",
"canIBJ",
"canSpringBallJumpMidAir",
"canSpringBallBombJump",
{
"and": [
"canCrouchJump",
{
"notable": "Precise Crouch Jump Down Grab"
}
]
}
]
}Collects items: 3 |
|
Requires: "Gravity"
{
"or": [
"canWallJump",
"HiJump",
"SpaceJump",
"canIBJ",
"canSpringBallJumpMidAir",
"canSpringBallBombJump"
]
} |
|
It may be necessary to turn off Gravity Suit in order have more time to jump and morph underwater. Requires: "Gravity"
{
"or": [
"canIBJ",
"canSpringBallBombJump",
"canSpringBallJumpMidAir",
{
"and": [
"canMidAirMorph",
{
"or": [
"canWallJump",
"HiJump",
"canGravityJump",
"SpaceJump",
{
"and": [
"canUnmorphBombBoost",
"canTrickyJump"
]
}
]
}
]
},
{
"and": [
"h_useSpringBall",
{
"or": [
"HiJump",
"canGravityJump"
]
}
]
}
]
} |
From: 1
Left Door
To: 2
Right Door
Requires: {
"haveBlueSuit": {}
}
"canSpringBallBombJump"
"canInsaneJump"
{
"or": [
{
"and": [
"Gravity",
{
"acidFrames": 15
}
]
},
{
"and": [
"canWallJump",
{
"acidFrames": 20
}
]
},
{
"and": [
"HiJump",
{
"disableEquipment": "HiJump"
},
{
"acidFrames": 20
}
]
},
{
"acidFrames": 75
}
]
} |
|
Kill the Metroids while artificially morphed with just Spring Ball to avoid them. A Rinka must be completely on screen while a Power Bomb explodes in order for it to lure the Metroids. Start the room with a bomb boost spring ball jump or a precise horizontal bomb boost. In general, this seems to be easiest by minimizing Samus's horizontal movement as much as possible and getting the Metroids in sync with each other while circling around her. While moving horizontally, their movement is less predictable and harder to sync. Note that it is necessary to exit G-Mode before exiting the room in order for the Metroids to remain killed. With only 3 Power Bombs, cross the room with a spring fling and cluster the Metroids before laying Power Bombs. Entrance condition: {
"comeInWithGMode": {
"mode": "any",
"morphed": true
}
}Requires: "canMetroidAvoid"
"canTrickyDodgeEnemies"
"h_artificialMorphSpringBall"
{
"or": [
{
"tech": "canSpringBallBombJump"
},
"canInsaneJump"
]
}
{
"ammo": {
"type": "PowerBomb",
"count": 3
}
}
{
"or": [
{
"and": [
"canTrickyGMode",
"h_artificialMorphSpringFling"
]
},
{
"ammo": {
"type": "PowerBomb",
"count": 1
}
}
]
}Clears obstacles: f_KilledMetroidRoom3 Sets flags: f_KilledMetroidRoom3 |
|
Tank 3 pirate hits then IBJ or spring ball bomb jump to avoid the wall jump. Entrance condition: {
"comeInWithGMode": {
"mode": "any",
"morphed": true
}
}Requires: {
"or": [
"h_artificialMorphIBJ",
"h_artificialMorphSpringBallBombJump"
]
}
{
"enemyDamage": {
"enemy": "Tourian Space Pirate (all)",
"type": "contact",
"hits": 3
}
} |
From: 1
Left Door
To: 2
Right Door
IBJ or spring ball bomb jump to avoid the wall jump. Using a total of 3 Power Bombs will allow Samus to roll through the bottom four pirates. Entrance condition: {
"comeInWithGMode": {
"mode": "any",
"morphed": true
}
}Requires: {
"or": [
"h_artificialMorphIBJ",
"h_artificialMorphSpringBallBombJump"
]
}
"h_artificialMorphPowerBomb"
"h_artificialMorphPowerBomb"
"h_artificialMorphPowerBomb"
"canHitbox" |
From: 1
Left Door
To: 2
Right Door
IBJ or spring ball bomb jump to avoid the wall jump. Killing the first pirate takes 2 Power Bombs, the next three can be killed with 3 total Power Bombs if they are placed under the middle pirate. Entrance condition: {
"comeInWithGMode": {
"mode": "any",
"morphed": true
}
}Requires: {
"or": [
"h_artificialMorphIBJ",
"h_artificialMorphSpringBallBombJump"
]
}
{
"ammo": {
"type": "PowerBomb",
"count": 5
}
}Clears obstacles: A |
|

Roll through the pirates then IBJ or spring ball bomb jump to avoid the wall jump. Entrance condition: {
"comeInWithGMode": {
"mode": "any",
"morphed": true
}
}Requires: "h_blueSuitGMode"
{
"or": [
"h_artificialMorphIBJ",
"h_artificialMorphSpringBallBombJump"
]
} |
From: 1
Left Door
To: 4
Top of Shaft Without Acid Triggered


Spring Ball bomb jump up to the top, then exit G-mode and fall to the bottom. It is recommended to stay near the right wall with the camera positioned so that the left wall pirates are off camera. Avoid touching any of the pirates' stationary, invisible lasers, which they place when they jump to the opposite wall. Entrance condition: {
"comeInWithGMode": {
"mode": "any",
"morphed": true
}
}Requires: "canCameraManip" "canInsaneJump" "h_artificialMorphSpringBallBombJump" "h_additionalBomb" "h_additionalBomb" "h_additionalBomb" "h_additionalBomb" Dev note: FIXME: This is likely possible with just Bombs, but seems very difficult, a diagonal bomb jump around the overhangs might make it feasible. |
From: 1
Top Right Door
To: 1
Top Right Door
Immediately on entry Spring Ball Bomb Jump. Be sure not to land left of the pillar below the door or it is harder to get up in time. Entrance condition: {
"comeInWithGMode": {
"mode": "direct",
"morphed": true,
"mobility": "mobile"
},
"comesThroughToilet": "any"
}Requires: "canTrickyJump" "h_artificialMorphSpringBallBombJump" Exit condition: {
"leaveWithGMode": {
"morphed": true
}
}Dev note: FIXME: This is possible with Bombs by luring the hoppers to the left, but it is dependent on hopper RNG. |