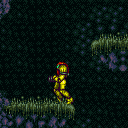
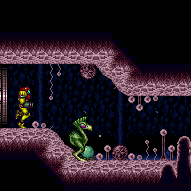
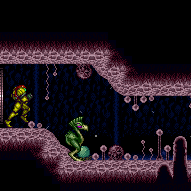
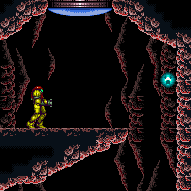
canConsecutiveWallJump (Medium)

Climbing a wall with three or more consecutive wall jumps without a mistake.
Strats ()
|

Wall jump up 5 times, placing a Power Bomb precisely in the top right corner to overload PLMs with as few Power Bombs as possible. This only works in direct G-mode with the item still uncollected. Entrance condition: {
"comeInWithGMode": {
"mode": "direct",
"morphed": false
}
}Requires: "canPowerBombItemOverloadPLMs"
{
"notable": "G-Mode Up with Power Bombs"
}
{
"itemNotCollectedAtNode": 3
}
"canConsecutiveWallJump"
"Morph"
{
"or": [
"canRiskPermanentLossOfAccess",
{
"and": [
"canComplexGMode",
"canLongXRayClimb",
"canBeVeryPatient"
]
}
]
}
{
"ammo": {
"type": "PowerBomb",
"count": 5
}
}
"canBePatient"
{
"or": [
"Ice",
"canTrickyDodgeEnemies",
"ScrewAttack",
{
"and": [
"h_getBlueSpeedMaxRunway",
"h_blueJump"
]
},
{
"enemyKill": {
"enemies": [
[
"Boyon",
"Boyon",
"Boyon",
"Boyon"
]
],
"excludedWeapons": [
"Bombs"
]
}
},
{
"enemyDamage": {
"enemy": "Boyon",
"type": "contact",
"hits": 1
}
},
{
"and": [
"canBeVeryPatient",
"h_useMorphBombs"
]
}
]
}Dev note: Using this strat doesn't have canRiskPermanentLossOfAccess if the player could x-ray climb instead: this requires direct G-mode and Samus can freely doorstuck here, and there is no benefit to going to the item instead of the top left door, unless the item is there. FIXME: Placing the Power Bombs lower, on the magic tile, could overload PLMs with fewer, likely with as low as 2 Power Bombs. |
From: 5
Bottom Junction (Right of Boyons)
To: 3
Item
Requires: {
"haveBlueSuit": {}
}
{
"or": [
"canConsecutiveWallJump",
"SpaceJump",
{
"and": [
"canLongIBJ",
"canBePatient"
]
}
]
} |
From: 5
Bottom Junction (Right of Boyons)
To: 3
Item


Requires: {
"useFlashSuit": {}
}
{
"shinespark": {
"frames": 9,
"excessFrames": 7
}
}
{
"or": [
"canConsecutiveWallJump",
"SpaceJump",
{
"and": [
"canLongIBJ",
"canUnmorphBombBoost",
"canBePatient"
]
}
]
} |
|
Requires: "canTrickyWallJump"
{
"or": [
"HiJump",
"canConsecutiveWallJump"
]
} |
|

Wall jump up and midair morph to get out without needing to break the bomb blocks to the right. Requires: {
"notable": "Alcatraz Escape"
}
"canPreciseWallJump"
"canWallJumpInstantMorph"
{
"or": [
"HiJump",
"canConsecutiveWallJump"
]
} |
|
Requires: "h_ZebesIsAwake"
{
"cycleFrames": 1860
}
{
"or": [
{
"resetRoom": {
"nodes": [
3,
4,
6,
7
]
}
},
{
"and": [
{
"resetRoom": {
"nodes": [
1
]
}
},
{
"cycleFrames": 420
},
{
"or": [
"ScrewAttack",
"h_useMorphBombs",
{
"and": [
{
"getBlueSpeed": {
"usedTiles": 25,
"steepUpTiles": 3,
"steepDownTiles": 3,
"openEnd": 1
}
},
"canCarefulJump",
"h_blueJump"
]
}
]
}
]
},
{
"and": [
{
"resetRoom": {
"nodes": [
2
]
}
},
{
"cycleFrames": 240
},
"Morph"
]
},
{
"and": [
"Morph",
{
"resetRoom": {
"nodes": [
5
]
}
},
{
"cycleFrames": 420
},
{
"or": [
"h_bombThings",
{
"and": [
"SpaceJump",
"canMidAirMorph",
"canCarefulJump"
]
},
{
"and": [
{
"notable": "Alcatraz Escape"
},
"canPreciseWallJump",
"canConsecutiveWallJump",
"canWallJumpInstantMorph"
]
},
{
"and": [
"canTrickySpringBallJump",
"canTrickyJump"
]
},
{
"and": [
"HiJump",
"canTrickyDashJump",
"canMidAirMorph"
]
}
]
}
]
}
]
}Resets obstacles: R-Mode Farm cycle drops: 11 Geemer (blue) Dev note: A two-way farming strat could be added, e.g. if it is possible to reset the room at both the top-right and the bottom. |
From: 13
Bottom Junction
To: 5
Lower Section - Bottom Right Door
It may be best to have shorter, later jumps to prevent bonking the ceiling or hitting the Ripper. Requires: "canDash"
{
"or": [
"canCarefulJump",
"canConsecutiveWallJump"
]
}
{
"or": [
"canDisableEquipment",
"canTrickyJump"
]
} |
From: 2
Top Left Door
To: 2
Top Left Door
Falling down the shaft and breaking the crumble block does not require Morph. Requires: "h_ZebesIsAwake"
{
"or": [
"h_destroyBombWalls",
{
"obstaclesCleared": [
"A"
]
}
]
}
{
"or": [
"canConsecutiveWallJump",
"SpaceJump",
"canLongIBJ"
]
}Exit condition: {
"leaveWithGModeSetup": {}
} |
From: 2
Top Left Door
To: 2
Top Left Door
Requires: {
"notable": "Return Through Crumble Blocks"
}
"h_ZebesIsAwake"
"Morph"
{
"or": [
"ScrewAttack",
{
"and": [
"h_useMorphBombs",
{
"cycleFrames": 80
}
]
},
{
"haveBlueSuit": {}
}
]
}
{
"or": [
"canConsecutiveWallJump",
{
"and": [
"SpaceJump",
{
"cycleFrames": 250
}
]
}
]
}
{
"resetRoom": {
"nodes": [
2
]
}
}
{
"cycleFrames": 1210
}
{
"or": [
"canDash",
{
"and": [
{
"haveBlueSuit": {}
},
{
"cycleFrames": 50
}
]
}
]
}Clears obstacles: A, B Resets obstacles: C Farm cycle drops: 2 Geemer (blue), 2 Skree, 1 Reo Dev note: Returning with an IBJ or frozen Geemer would also be possible, but these are probably too slow to model in a farm strat. |
|


Base strat when entering the room from below. Requires: {
"or": [
"h_usePowerBomb",
{
"obstaclesCleared": [
"C"
]
}
]
}
{
"or": [
"canConsecutiveWallJump",
"SpaceJump",
"canLongIBJ"
]
}
{
"or": [
{
"and": [
"h_usePowerBomb",
"canTrivialMidAirMorph"
]
},
"ScrewAttack"
]
}Clears obstacles: A, B, C Dev note: canWallJumpInstantMorph is not needed here, as the precision is very low. |
|
Requires: {
"haveBlueSuit": {}
}
{
"or": [
"h_usePowerBomb",
{
"obstaclesCleared": [
"C"
]
}
]
}
{
  "or": [
    "canConsecutiveWallJump",
    "SpaceJump"
  ]
}Clears obstacles: A, B, C |
From: 4
Right Item
To: 2
Top Left Door

By wall jumping fast enough and sparking close to the block, it can be broken even on low energy (29 or less). Requires: {
"notable": "Fast Wall Jump Spark"
}
{
"or": [
"h_usePowerBomb",
{
"obstaclesCleared": [
"C"
]
}
]
}
{
"canShineCharge": {
"usedTiles": 42,
"openEnd": 0
}
}
"canShinechargeMovementComplex"
"canConsecutiveWallJump"
"HiJump"
{
"shinespark": {
"frames": 9,
"excessFrames": 9
}
}Clears obstacles: A, B, C |
|
Placing the bomb against the bomb block at the top of the shaft can be somewhat tricky. Requires: {
"or": [
"h_usePowerBomb",
{
"obstaclesCleared": [
"C"
]
}
]
}
"h_useMorphBombs"
{
"or": [
{
"and": [
"SpaceJump",
"canMidAirMorph"
]
},
"canLongIBJ",
{
"and": [
"canConsecutiveWallJump",
"canWallJumpInstantMorph"
]
}
]
}Clears obstacles: A, B, C |
From: 4
Right Item
To: 2
Top Left Door

The Crumble Block does not respawn, so it's possible to grab the items and go back up without breaking the Power Bomb blocks. Requires: {
"notable": "Return Through Crumble Blocks"
}
"Morph"
{
"or": [
"canConsecutiveWallJump",
"SpaceJump",
"canLongIBJ"
]
}
{
"obstaclesCleared": [
"A",
"B"
]
} |
|


Requires: {
"obstaclesCleared": [
"C"
]
}
"h_storedSpark"
{
"or": [
{
"shinespark": {
"frames": 36,
"excessFrames": 3
}
},
{
"and": [
"HiJump",
{
"shinespark": {
"frames": 32,
"excessFrames": 3
}
}
]
},
{
"and": [
{
  "or": [
    "canConsecutiveWallJump",
    "SpaceJump"
  ]
},
{
"shinespark": {
"frames": 9,
"excessFrames": 9
}
}
]
}
]
}Clears obstacles: A |
From: 4
Right Item
To: 2
Top Left Door
Requires: {
"obstaclesCleared": [
"B"
]
}
"Morph"
{
"obstaclesNotCleared": [
"C"
]
}
"h_storedSpark"
{
"or": [
{
"shinespark": {
"frames": 33,
"excessFrames": 3
}
},
{
"and": [
"HiJump",
{
"shinespark": {
"frames": 29,
"excessFrames": 3
}
}
]
},
{
"and": [
{
  "or": [
    "canConsecutiveWallJump",
    "SpaceJump"
  ]
},
{
"shinespark": {
"frames": 9,
"excessFrames": 9
}
}
]
}
]
}Clears obstacles: A |
|

Breaking the Power Bomb blocks exactly wide enough makes it easier to quickly enter the one-tile gap. Aligning the Power Bomb with the left side of the ceiling fixture that sticks down will position the explosion correctly for this. Requires: {
"or": [
"h_usePowerBomb",
{
"obstaclesCleared": [
"C"
]
}
]
}
{
"canShineCharge": {
"usedTiles": 42,
"openEnd": 0
}
}
"canShinechargeMovementComplex"
"canConsecutiveWallJump"
{
"shinespark": {
"frames": 17,
"excessFrames": 3
}
}Clears obstacles: A, B, C Dev note: The runway here is 31 tiles before breaking the Power Bomb blocks, but becomes longer after. |
From: 5
G-Mode Morph Junction (Bottom)
To: 2
Top Left Door
Overload PLMs by repeatidly bombing the Power Bomb blocks or the side of the crumble block, then enter through the crumble block. If Samus is then going to IBJ up the shaft, and she has Morph, it is worth exiting G-mode first to allow the camera to follow her. Requires: "canGMode"
"h_artificialMorphIBJ"
{
"or": [
"canConsecutiveWallJump",
"SpaceJump",
{
"and": [
"h_artificialMorphLongIBJ",
"canOffScreenMovement"
]
},
{
"and": [
{
"blueSuitShinecharge": {}
},
{
"or": [
{
"shinespark": {
"frames": 32,
"excessFrames": 3
}
},
{
"and": [
"HiJump",
{
"shinespark": {
"frames": 29,
"excessFrames": 3
}
}
]
}
]
}
]
}
]
}
{
"or": [
"h_ZebesIsAwake",
{
"notable": "G-Mode Flashing Lights"
}
]
}Dev note: The off screen movement is just during an artificial morphed IBJ - the IBJ is long and Samus is covered for most of it. |
From: 5
G-Mode Morph Junction (Bottom)
To: 2
Top Left Door
Overload PLMs with a single Power Bomb by hitting the ceiling block item. This can be done with a single precisely placed Power Bomb. There should be one empty tile between Samus and the right wall. Because the item is in a shot block, this does not require Direct G-mode, nor does it require the item to be uncollected. Requires: "canPowerBombItemOverloadPLMs"
"canGMode"
"h_artificialMorphPowerBomb"
"h_artificialMorphMovement"
{
"or": [
"canConsecutiveWallJump",
"SpaceJump",
{
"and": [
{
"blueSuitShinecharge": {}
},
{
"or": [
{
"shinespark": {
"frames": 32,
"excessFrames": 3
}
},
{
"and": [
"HiJump",
{
"shinespark": {
"frames": 29,
"excessFrames": 3
}
}
]
}
]
}
]
}
]
}Clears obstacles: B, C Dev note: This strat is useless if Samus has Morph, so there will be no flashing lights. |
From: 5
G-Mode Morph Junction (Bottom)
To: 2
Top Left Door


Overload PLMs by shooting the ceiling block item many times. Because the item is in a shot block, this does not require Direct G-mode, nor does it require the item to be uncollected. Requires: "canGMode"
"Morph"
{
"or": [
"canConsecutiveWallJump",
"SpaceJump"
]
}
{
"or": [
"h_ZebesIsAwake",
{
"notable": "G-Mode Flashing Lights"
}
]
} |
From: 6
G-Mode Morph Junction Direct (Bottom)
To: 2
Top Left Door

Touch the item to overload PLMs then go through the crumble block and bomb block at the top of the shaft before exiting G-mode. Requires: "canGMode"
{
"itemNotCollectedAtNode": 4
}
"h_artificialMorphSpringBall"
{
"or": [
"canConsecutiveWallJump",
"SpaceJump",
{
"and": [
{
"blueSuitShinecharge": {}
},
{
"or": [
{
"shinespark": {
"frames": 32,
"excessFrames": 3
}
},
{
"and": [
"HiJump",
{
"shinespark": {
"frames": 29,
"excessFrames": 3
}
}
]
}
]
}
]
}
]
}
{
"or": [
"h_ZebesIsAwake",
{
"notable": "G-Mode Flashing Lights"
}
]
}Collects items: 4 Dev note: This will force Samus to pick up the item, so it can only be done once. itemNotCollectedAtNode implicitly includes canRiskPermanentLossOfAccess. Spring Ball is required, because Morph, Bombs, or a Power Bomb will allow other strats to be used instead. |
From: 8
Below Power Bomb Blocks - Bottom Left Door
To: 9
Right Etecoon Shaft - Top Left Door
Enter with G-Mode. Jump to the top of the shaft. Place a Power Bomb against the ceiling next to the shot block (do not touch the scroll block). Drop back to the bottom of the shaft, roll against the bomb block until Samus passes through. Jump through the crumble block and through the morph tunnel. Once Samus can stand up, do so and use X-Ray to switch to R-Mode: be sure to hold X-Ray until it fully widens. Bomb the block, roll back through the tunnel and stop next to the crumble block. Use a Power Bomb or Five-Bomb Drop to clear the lower bomb block. Wait next to the crumble block until the global Zeela is visible coming down the right wall. Wait until the last possible moment to touch the crumbe block and allow the Zeela through, and immediately roll away to avoid getting hit by it. Lead it back through the Morph tunnel. Jump up to the box with the item. Wait for the Zeela to leave if needed, then Crystal Flash inside. Damage back down using the Zeela. If this needs multiple laps, use a Super to knock it down off the right wall before it can enter the item box. Lead it back through the Morph tunnel and into the Etecoons shaft. Let the Zeela pass going up the left wall and wait until it has moved far enough up before using a Crystal Flash. Use the Zeela to damage back down, shinecharge on the runway, and jump into the Zeela to interrupt. Entrance condition: {
"comeInWithGMode": {
"mode": "direct",
"morphed": false
}
}Requires: "Morph"
"h_usePowerBomb"
"canMidAirMorph"
"h_bombThings"
{
"or": [
"h_usePowerBomb",
{
"and": [
"Charge",
"h_useMorphBombs"
]
}
]
}
"canBeVeryPatient"
"h_CrystalFlashForReserveEnergy"
{
"or": [
{
"disableEquipment": "ETank"
},
{
"resourceAtMost": [
{
"type": "ReserveEnergy",
"count": 5
}
]
}
]
}
{
"or": [
"canConsecutiveWallJump",
"canLongIBJ",
"SpaceJump"
]
}
{
"or": [
{
"disableEquipment": "ETank"
},
{
"ammo": {
"type": "Super",
"count": 3
}
}
]
}
{
"or": [
{
"canShineCharge": {
"usedTiles": 17,
"openEnd": 1
}
},
{
"and": [
"h_frozenEnemyRunway",
{
"ammo": {
"type": "Super",
"count": 1
}
},
{
"canShineCharge": {
"usedTiles": 18,
"openEnd": 1
}
}
]
}
]
}
{
"autoReserveTrigger": {}
}
"canRModeSparkInterrupt"Clears obstacles: A |
From: 9
Right Etecoon Shaft - Top Left Door
To: 15
Right Etecoon Shaft - Upper Tunnel Entrance
Requires: {
"or": [
"canMidAirMorph",
"h_useSpringBall",
{
"and": [
"canTrivialMidAirMorph",
{
"or": [
"SpaceJump",
"canConsecutiveWallJump"
]
}
]
},
{
"and": [
"canIBJ",
"canBombHorizontally"
]
}
]
}Dev note: Doable with just a very long IBJ, but if bombing horizontally is too hard, that will be too. |
From: 14
Right Etecoon Shaft - Wall Jump Checkpoint
To: 9
Right Etecoon Shaft - Top Left Door
Not quite the full climb, but close enough. Requires: "canConsecutiveWallJump" |
From: 14
Right Etecoon Shaft - Wall Jump Checkpoint
To: 9
Right Etecoon Shaft - Top Left Door
After performing the Zeela ice clip, remain morphed on top of the crumble block to let the Zeela follow Samus into the morph tunnel. It is possible to then quickly roll to the right and use a Power Bomb against the bomb block to avoid killing the Zeela, if necessary. Lure the Zeela up to the top door to be used for a G-mode setup. Requires: {
"notable": "Bottom Ice Clip"
}
{
"obstaclesCleared": [
"B"
]
}
"canTrickyGMode"
"canBePatient"
{
"or": [
"canConsecutiveWallJump",
"SpaceJump",
"canLongIBJ",
{
"and": [
"canTrickyUseFrozenEnemies",
"canBeVeryPatient"
]
}
]
}Exit condition: {
"leaveWithGModeSetup": {}
}Unlocks doors: {"types":["ammo"],"requires":[]} |
From: 14
Right Etecoon Shaft - Wall Jump Checkpoint
To: 10
Right Etecoon Shaft - Bottom Left Door
After performing the Zeela ice clip, remain morphed on top of the crumble block to let the Zeela follow Samus into the morph tunnel. It is possible to then quickly roll to the right and use a Power Bomb against the bomb block to avoid killing the Zeela, if necessary. Lure the Zeela around the room or use a Super while it is on the side of an overhang to get it to the bottom door to be used for a G-mode setup. Requires: {
"notable": "Bottom Ice Clip"
}
{
"obstaclesCleared": [
"B"
]
}
"canTrickyGMode"
"canBePatient"
{
"or": [
{
"ammo": {
"type": "Super",
"count": 1
}
},
{
"and": [
"canBeVeryPatient",
{
"or": [
"canConsecutiveWallJump",
"SpaceJump",
"canLongIBJ"
]
}
]
},
{
"and": [
"canBeExtremelyPatient",
"canTrickyUseFrozenEnemies"
]
}
]
}Exit condition: {
"leaveWithGModeSetup": {}
}Unlocks doors: {"types":["ammo"],"requires":[]} |
|
There are camera scroll blocks just below the speed blocks, so it is easy to overload PLMs by wall jumping or space jumping into them. Entrance condition: {
"comeInWithGMode": {
"mode": "any",
"morphed": false
}
}Requires: {
"or": [
"canConsecutiveWallJump",
"SpaceJump"
]
} |
|
Requires: {
"haveBlueSuit": {}
}
{
"or": [
"canConsecutiveWallJump",
"SpaceJump",
{
"and": [
"canLongIBJ",
"canBePatient"
]
}
]
} |
|
There are camera scroll blocks just below the speed blocks, so it is easy to overload PLMs by wall jumping or space jumping into them. Entrance condition: {
"comeInWithGMode": {
"mode": "any",
"morphed": false
}
}Requires: {
"or": [
"canConsecutiveWallJump",
"SpaceJump"
]
} |
|


Requires: {
"useFlashSuit": {}
}
{
"or": [
"canConsecutiveWallJump",
"SpaceJump",
{
"and": [
"canLongIBJ",
"canBePatient",
"canUnmorphBombBoost"
]
}
]
}
{
"shinespark": {
"frames": 9,
"excessFrames": 7
}
}Dev note: There is no point in using a blue suit to spark or sparking at the bottom if Samus can wall jump. |
From: 2
Bottom Left Door
To: 1
Top Left Door

Climb the shaft and overload PLMs with the camera scroll blocks which are against the crumble blocks. Entrance condition: {
"comeInWithGMode": {
"mode": "any",
"morphed": false
}
}Requires: {
"or": [
"canConsecutiveWallJump",
"SpaceJump"
]
}Dev note: This is mostly an alternative to the canBeVeryPatient X-Ray climb. |
|
Requires: {
"haveBlueSuit": {}
}
{
"or": [
"canConsecutiveWallJump",
"SpaceJump",
{
"and": [
"Gravity",
"canIBJ"
]
},
{
"and": [
"Gravity",
"canSpringBallJumpMidAir"
]
},
{
"and": [
{
"doorUnlockedAtNode": 1
},
{
"or": [
"HiJump",
"canSpringBallJumpMidAir",
{
"and": [
"canJumpIntoIBJ",
"can4HighMidAirMorph"
]
}
]
}
]
},
{
"and": [
"canBombJumpWaterEscape",
"canLongIBJ"
]
}
]
}Dev note: With a blue suit, the bomb blocks in front of the door cannot be used as a platform. |
|
Requires: {
"or": [
{
"and": [
{
"resetRoom": {
"nodes": [
1
]
}
},
{
"cycleFrames": 570
}
]
},
{
"and": [
{
"resetRoom": {
"nodes": [
1
]
}
},
"ScrewAttack",
{
"cycleFrames": 480
}
]
},
{
"and": [
{
"resetRoom": {
"nodes": [
3,
4
]
}
},
"HiJump",
"canWallJump",
{
"cycleFrames": 800
}
]
},
{
"and": [
{
"resetRoom": {
"nodes": [
5
]
}
},
{
"notable": "Hero Shot"
},
{
"or": [
{
"and": [
"ScrewAttack",
"canConsecutiveWallJump",
{
"cycleFrames": 1080
}
]
},
{
"and": [
"canTrickyWallJump",
{
"cycleFrames": 1770
}
]
}
]
}
]
}
]
}
{
"or": [
"ScrewAttack",
{
"haveBlueSuit": {}
},
"h_useMorphBombs",
"h_usePowerBomb",
{
"and": [
{
"or": [
{
"resourceCapacity": [
{
"type": "Missile",
"count": 1
}
]
},
{
"resourceCapacity": [
{
"type": "Super",
"count": 1
}
]
}
]
},
{
"cycleFrames": 500
}
]
}
]
}Resets obstacles: A, B Farm cycle drops: 1 Beetom Dev note: Using a Power Bomb to farm the Beetom is only useful if Power Bomb drops are modified to give more than 1. FIXME: Other options for resetting the room at the top and bottom nodes are possible. |
|
Without any suits or tanks, Samus will need to move the Beetom part way up the room, shake it off, and go back and farm multiple times. While the Beetom is near the top section, by the Rippers, shake the Beetom off, and re-grab it and ascend the shaft. Either use frozen Rippers as platforms, while shooting diagonally to prevent freezing the Beetom, or kill the Rippers before ascending. Be careful not to apply too many inputs after grabbing the Beetom in order to get to the top before it is shaken off. Requires: {
"obstaclesNotCleared": [
"A"
]
}
{
"noBlueSuit": {}
}
"HiJump"
{
"or": [
"canUseFrozenEnemies",
{
"and": [
"SpaceJump",
{
"obstaclesCleared": [
"B"
]
}
]
},
{
"and": [
"canConsecutiveWallJump",
{
"obstaclesCleared": [
"B"
]
}
]
}
]
}
{
"enemyDamage": {
"enemy": "Beetom",
"type": "contact",
"hits": 9
}
}Exit condition: {
"leaveWithGModeSetup": {
"knockback": false
}
}Dev note: Some items may reduce the number of Beetom hits, but it's irrelevant since there is an accesible farm in-room. FIXME: Add more options for how to ascend the shaft, either without HiJump, or without killing the Rippers. These may need to be notable. |
|
Requires: {
"or": [
"SpaceJump",
{
"and": [
"HiJump",
"canSpeedyJump",
{
"or": [
"canTrickyJump",
"canWallJump"
]
}
]
},
{
"and": [
"HiJump",
"canConsecutiveWallJump",
"canPreciseWallJump"
]
}
]
} |
From: 7
Junction (Bottom of Room)
To: 6
Junction (Above Bottom Rippers)
Requires: "canTrickySpringBallJump"
{
"or": [
"canConsecutiveWallJump",
"HiJump",
{
"and": [
"canTrickyJump",
"canLateralMidAirMorph",
"canResetFallSpeed",
{
"or": [
{
"ammo": {
"type": "PowerBomb",
"count": 1
}
},
{
"ammo": {
"type": "Super",
"count": 1
}
},
{
"enemyDamage": {
"enemy": "Ripper",
"type": "contact",
"hits": 1
}
},
"canTrickyDodgeEnemies"
]
}
]
},
"canSpringFling"
]
}
{
"or": [
"canTrickyJump",
"canLateralMidAirMorph",
"canSpringwall"
]
} |
From: 7
Junction (Bottom of Room)
To: 6
Junction (Above Bottom Rippers)
Requires: "h_storedSpark"
{
"or": [
{
"shinespark": {
"frames": 37,
"excessFrames": 6
}
},
{
"and": [
"HiJump",
{
"shinespark": {
"frames": 33,
"excessFrames": 6
}
}
]
},
{
"and": [
"canConsecutiveWallJump",
{
"shinespark": {
"frames": 13,
"excessFrames": 6
}
}
]
},
{
"and": [
"canTrivialUseFrozenEnemies",
{
"shinespark": {
"frames": 8,
"excessFrames": 6
}
}
]
}
]
} |
|
Kill the Rippers then wall jump up. Requires: {
"noBlueSuit": {}
}
"canConsecutiveWallJump"
"canPreciseWallJump"
"h_midAirShootUp"
{
"or": [
"canTrickyWallJump",
"canSpringwall",
"HiJump"
]
}
{
"obstaclesCleared": [
"B"
]
}Dev note: With these tech, it's not hard to get up |
From: 9
Junction (Top Rippers)
To: 9
Junction (Top Rippers)

Kill the Rippers with Screw Attack. Break spin before landing to prevent breaking the platform. Requires: {
"noBlueSuit": {}
}
"ScrewAttack"
{
"or": [
"SpaceJump",
"canConsecutiveWallJump",
{
"and": [
"canWallJump",
"HiJump"
]
}
]
}Clears obstacles: B |
From: 2
Left Side - Top Middle Door
To: 7
Top Right Door


Entrance condition: {
"comeInRunning": {
"speedBooster": "no",
"minTiles": 2.4375
}
}Requires: "canTrickyJump"
"canConsecutiveWallJump"
"canPreciseWallJump"
{
"or": [
"canTrickyWallJump",
"ScrewAttack",
"canWallJumpWithCharge",
{
"and": [
"canWallJumpInstantMorph",
{
"enemyDamage": {
"enemy": "Cacatac",
"type": "spike",
"hits": 1
}
}
]
}
]
} |
From: 2
Left Side - Top Middle Door
To: 7
Top Right Door
Entrance condition: {
"comeInRunning": {
"speedBooster": "no",
"minTiles": 4
}
}Requires: "canCarefulJump"
"canConsecutiveWallJump"
{
"or": [
"canTrickyWallJump",
"ScrewAttack",
"canWallJumpWithCharge",
{
"and": [
"canWallJumpInstantMorph",
{
"enemyDamage": {
"enemy": "Cacatac",
"type": "spike",
"hits": 1
}
}
]
}
]
} |
From: 2
Left Side - Top Middle Door
To: 7
Top Right Door


Entrance condition: {
"comeInRunning": {
"speedBooster": "any",
"minTiles": 5
}
}Requires: "canCarefulJump"
"canConsecutiveWallJump"
{
"or": [
"canTrickyWallJump",
"ScrewAttack",
"canWallJumpWithCharge",
{
"and": [
"canWallJumpInstantMorph",
{
"enemyDamage": {
"enemy": "Cacatac",
"type": "spike",
"hits": 1
}
}
]
}
]
} |
From: 9
Main Junction
To: 1
Left Side - Top Door
This is the same size of ledge as WRITG. Requires: "canConsecutiveWallJump" "canInsaneWallJump" |
|
A tricky, delayed walljump makes it possible to climb to top right in-room, with nothing. Requires: {
"notable": "Right Side Delayed Walljumps"
}
"canTrickyWallJump"
"canConsecutiveWallJump" |
|
Wall jump up the left wall, perform a delayed wall jump on the Fune to reach the door. Entrance condition: {
"comeInJumping": {
"speedBooster": "any",
"minTiles": 0
}
}Requires: "canPrepareForNextRoom"
"canTrickyWallJump"
"canConsecutiveWallJump"
"canTrickyJump"
"canFastWallJumpClimb"
"canUseEnemies"
{
"heatFrames": 120
}
{
"or": [
"canDash",
{
"heatFrames": 5
}
]
}Dev note: This differs from the canPrepareForNextRoom option of the previous strat only in requiring an air entry. FIXME: canFastWallJumpClimb is for difficulty placement. |
|
Wall jump up the left wall, perform a delayed wall jump on the Fune to reach the door. Requires: "canTrickyWallJump"
"canConsecutiveWallJump"
"canTrickyJump"
"canUseEnemies"
{
"or": [
{
"heatFrames": 190
},
{
"and": [
"canPrepareForNextRoom",
{
"heatFrames": 135
}
]
}
]
}
{
"or": [
"canDash",
{
"heatFrames": 5
}
]
} |
|
Wall jump up the left wall and then on the moving platform (Kamer) while avoiding the Fune's fireball. The Kamers will temporarily move down if Samus is below them, so it is best to walk under the first Kamer before climbing the wall. It is possible to freeze or kill the Fune with a Super or Power Bomb to make things easier. Requires: {
"notable": "Walljump Climb Using the Kamer"
}
"canTrickyWallJump"
"canConsecutiveWallJump"
"canUseEnemies"
{
"or": [
{
"and": [
"canDodgeWhileShooting",
{
"heatFrames": 360
}
]
},
{
"and": [
"canTrickyJump",
{
"heatFrames": 240
}
]
},
{
"and": [
{
"or": [
"canUseFrozenEnemies",
{
"ammo": {
"type": "Super",
"count": 1
}
}
]
},
{
"heatFrames": 432
}
]
},
{
"and": [
{
"ammo": {
"type": "PowerBomb",
"count": 1
}
},
{
"heatFrames": 456
}
]
}
]
}
{
"or": [
"canDash",
{
"heatFrames": 20
}
]
} |
|
Wall jump up the left wall, perform a delayed wall jump on the Fune. Entrance condition: {
"comeInJumping": {
"speedBooster": "any",
"minTiles": 0
}
}Requires: "canPrepareForNextRoom"
"canTrickyWallJump"
"canConsecutiveWallJump"
"canTrickyJump"
"canUseEnemies"
"canPrepareForNextRoom"
{
"heatFrames": 300
}
{
"or": [
{
"noFlashSuit": {}
},
"canComplexCarryFlashSuit",
"Ice",
"Wave",
"Spazer",
"Plasma",
{
"heatFrames": 300
}
]
}
{
"or": [
"canDash",
{
"heatFrames": 50
}
]
}Dev note: This differs from the canPrepareForNextRoom option of the previous strat only in requiring an air entry. |
|
Wall jump up the left wall, perform a delayed wall jump on the Fune. Requires: "canTrickyWallJump"
"canConsecutiveWallJump"
"canTrickyJump"
"canUseEnemies"
"canPrepareForNextRoom"
{
"heatFrames": 315
}
{
"or": [
{
"noFlashSuit": {}
},
"canComplexCarryFlashSuit",
"Ice",
"Wave",
"Spazer",
"Plasma",
{
"heatFrames": 300
}
]
}
{
"or": [
"canDash",
{
"heatFrames": 50
}
]
} |
From: 2
Right Door
To: 3
Above Lava Junction
Bounceball into the Lava, unmorphing with good timing to sink faster and drift efficiently towards the bottom right Namihe. Wall jump at about eye height (4 pixel window) to gain enough height to reach the center portion of ceiling. While rising, wiggle to shrink Samus' hitbox. Some walljump positions will not need to wiggle, when wall jumping far away from the Namihe. Jumping, from the wall, around the next lowest overhang is very precise and taking any extra time to position will increase the amount of lava damage being taken. It may help to disable Hi-Jump for this part. Then wall jump again to exit the lava and reach the left ledge. Requires: {
"notable": "GT Max Suitless Right Side Climb"
}
"canSuitlessLavaDive"
"canUseEnemies"
"HiJump"
"canBounceBall"
"canMidairWiggle"
"canConsecutiveWallJump"
"canInsaneWallJump"
{
"gravitylessLavaFrames": 392
}
{
"heatFrames": 515
}Dev note: FIXME: a dashless version could be added. |
|
It is possible to jump onto the first Tripper early enough that Samus can crouch under all of the first spikes. Jump onto it as early as possible; pressing against the wall above the first spike and breaking spin and falling neutrally can help and avoid touching the spike. Moving to the left side of the Tripper is important and Moonwalk can help. Using the second Tripper can save a lot of lava damage. With wall jumps, ride the Tripper and wall jump twice above the middle spike, fall into the lava and jump back onto the Tripper and wall jump on the opposite side of the middle spike until it returns. Without wall jumps, jump into the lava in front of the Tripper, spin jump once to move quickly then again to land on the Tripper after the middle spike. Entrance condition: {
"comeInWithGMode": {
"mode": "any",
"morphed": false
}
}Requires: {
"or": [
{
"lavaFrames": 175
},
{
"and": [
{
"or": [
"HiJump",
"canWallJump",
"Gravity"
]
},
{
"lavaFrames": 100
}
]
},
{
"and": [
"canTrickyJump",
"canConsecutiveWallJump",
{
"lavaFrames": 25
}
]
},
{
"and": [
"canTrickyJump",
{
"lavaFrames": 35
}
]
}
]
}
"h_heatedGModeOpenDifferentDoor" |
|
Wall jump in place on the hanging pillars to wait for the Trippers. A brief dip in the lava is needed only on the right side to get past the low, central spike, before immediately jumping back onto the Tripper. Requires: "h_heatProof"
"canTrickyJump"
"canConsecutiveWallJump"
{
"lavaFrames": 20
} |
|
With wall jumps, ride the Tripper and wall jump twice above the middle spike, fall into the lava and jump back onto the Tripper and wall jump on the opposite side of the middle spike until it returns. Without wall jumps, jump into the lava in front of the Tripper, spin jump once to move quickly then again to land on the Tripper after the middle spike. With a very precise timing, it is possible to ride the second Tripper without touching the lava, otherwise, cross the second pit with the same method as the first. To cross the second pit, jump onto the Tripper as early as possible, then position Samus as far right as possible; this can be made easier with Moonwalk. Entrance condition: {
"comeInWithGMode": {
"mode": "any",
"morphed": false
}
}Requires: {
"or": [
{
"lavaFrames": 110
},
{
"and": [
{
"or": [
"HiJump",
"canWallJump",
"Gravity"
]
},
{
"lavaFrames": 40
}
]
},
{
"and": [
"canTrickyJump",
"canConsecutiveWallJump",
{
"lavaFrames": 25
}
]
},
{
"and": [
"canTrickyJump",
{
"lavaFrames": 35
}
]
}
]
}
{
"or": [
{
"lavaFrames": 60
},
{
"and": [
"canTrickyJump",
"canConsecutiveWallJump",
{
"lavaFrames": 35
}
]
},
{
"and": [
"canTrickyJump",
{
"lavaFrames": 40
}
]
},
"canInsaneJump"
]
}
"h_heatedGModeOpenDifferentDoor" |
|
Wall jump in place on the hanging pillars to wait for the Trippers. A brief dip in the lava is needed only on the right side to get past the low, central spike, before immediately jumping back onto the Tripper. Requires: "h_heatProof"
"canTrickyJump"
"canConsecutiveWallJump"
{
"lavaFrames": 20
} |
|
Break each of the crumble platforms to group the Sovas at the bottom of the room. Requires: "h_heatProof"
"canDodgeWhileShooting"
{
"or": [
{
"and": [
"canConsecutiveWallJump",
{
"or": [
"canCrumbleJump",
"SpaceJump",
"canPreciseWallJump"
]
},
{
"cycleFrames": 930
}
]
},
{
"and": [
"h_useSpringBall",
{
"cycleFrames": 1200
}
]
},
{
"and": [
"SpaceJump",
{
"cycleFrames": 1320
}
]
},
{
"and": [
"canDoubleBombJump",
"canLongIBJ",
{
"cycleFrames": 2340
}
]
},
{
"and": [
"canJumpIntoIBJ",
"canLongIBJ",
"canBePatient",
{
"cycleFrames": 4640
}
]
}
]
}
{
"or": [
"canCrumbleJump",
{
"cycleFrames": 300
}
]
}
{
"resetRoom": {
"nodes": [
1,
2
]
}
}
{
"or": [
{
"haveBlueSuit": {}
},
"Wave",
"Spazer",
"Plasma",
"Grapple",
{
"cycleFrames": 120
}
]
}
{
"or": [
"canDash",
{
"cycleFrames": 90
}
]
}Resets obstacles: A Farm cycle drops: 6 Sova Dev note: Climb from 2 to 1 if resetting with 2. |
|
Enter with a spin jump, and wall jump up the right side; at the end, walljump off the top-middle crumble platform then off the top-right one. Requires: "canPreciseWallJump"
"canConsecutiveWallJump"
{
"or": [
{
"and": [
"HiJump",
{
"heatFrames": 270
}
]
},
{
"heatFrames": 340
}
]
}
{
"or": [
"canDodgeWhileShooting",
{
"heatFrames": 300
}
]
}
{
"or": [
"canTrickyJump",
{
"heatFrames": 300
}
]
} |
|
Wall jump up the right, then use Space Jump at the top. Requires: "SpaceJump"
"canConsecutiveWallJump"
{
"or": [
{
"and": [
"HiJump",
{
"heatFrames": 270
}
]
},
{
"heatFrames": 340
}
]
}
{
"or": [
"canDodgeWhileShooting",
{
"heatFrames": 300
}
]
} |
|
If entering from the bottom door, a Sova will be in the way in the top left: either wall jump in place while waiting for it, or wall jump around it using two crumble platforms to the right. Requires: "canConsecutiveWallJump"
{
"or": [
"canDash",
{
"heatFrames": 30
}
]
}
{
"or": [
{
"and": [
"HiJump",
{
"heatFrames": 290
},
{
"or": [
"canCrumbleJump",
{
"heatFrames": 30
}
]
}
]
},
{
"heatFrames": 360
}
]
}
{
"or": [
"ScrewAttack",
{
"haveBlueSuit": {}
},
{
"and": [
"canPreciseWallJump",
"canTrickyJump",
{
"heatFrames": 30
}
]
},
{
"and": [
"canTrickyWallJump",
{
"heatFrames": 80
}
]
},
{
"heatFrames": 330
}
]
}
{
"or": [
"canDodgeWhileShooting",
{
"heatFrames": 300
}
]
} |
|


Requires: {
"or": [
"canConsecutiveWallJump",
"SpaceJump",
"canLongIBJ"
]
} |
From: 1
Left Door
To: 3
Item
Takes three walljumps, and must shinespark at the apex. Entrance condition: {
"comeInShinecharged": {}
}Requires: {
"shineChargeFrames": 110
}
"canShinechargeMovementComplex"
"canPreciseWallJump"
"canConsecutiveWallJump"
{
"shinespark": {
"frames": 78
}
} |
From: 1
Left Door
To: 3
Item
Takes three walljumps, and must shinespark at the apex. Entrance condition: {
"comeInShinecharging": {
"length": 9,
"openEnd": 0
}
}Requires: "canShinechargeMovementComplex"
"canPreciseWallJump"
"canConsecutiveWallJump"
{
"shinespark": {
"frames": 78
}
} |
|
Freeze the Mella at a precise location in order to jump through the crumble block, then wall jump up the long channel and mid-air morph to get out. One normalized way to do this: Kill the first two Mellas, moonwalk to the right until the third Mella just barely goes off-camera, fire a shot, and move left to scroll the Mella back on-camera just before the shot would despawn, in order to freeze it at a specific height. While it is frozen, kill the remaining Mellas, and press against the wall of Speed blocks. Perform an action that changes Samus' pose (e.g., press an angle button, jump, or crouch/uncrouch) in order to be able to moonwalk from that position. Moonwalk backwards 5 pixels, then jump straight up, and continue holding jump while pressing right, to perform a buffered turn-around spin jump to the right. If executed correctly, the Mella will move horizontally left and will be at a good height to be able to freeze and clip through the crumble block with a crouch jump. Get on top of the Mella with a mid-air morph, position under the crumble block, then unmorph for the crouch jump. Quickly spin-jump to re-enter the shaft after breaking the crumble block. Tip: if Samus moonwalks back further than 5 pixels, press against the Speed blocks again before trying to moonwalk back again, to avoid possibly getting bad subpixels. Requires: {
"notable": "Mella Ice Clip"
}
"Morph"
"canMoonwalk"
"canManipulateMellas"
"h_preciseIceClip"
{
"or": [
"canConsecutiveWallJump",
{
"and": [
"HiJump",
"canWallJump"
]
}
]
}Dev note: The manipulation can also work with moonwalking back between 6 and 10 pixels, but depending on the exact position the bug may move at a shallow angle rather than exactly horizontally; in this case, the bug should be frozen a bit early (i.e. further right), to ensure it does not re-enter its idle animation where its height would become unpredictable. FIXME: Investigate if there is a normalized setup for freezing in the high-pixel position. FIXME: A freestyle version (or alternative normalized setup?) of the strat could be added, to avoid the canMoonwalk requirement, using X-Ray or a very precise freeze to get up. |
From: 1
Top Left Door
To: 1
Top Left Door
Entrance condition: {
"comeInShinecharging": {
"length": 9,
"openEnd": 0
},
"comesInHeated": "no"
}Requires: {
"or": [
"h_CrystalSpark",
{
"and": [
"h_enemyDrops",
"h_CrystalSparkWithoutLenience",
{
"or": [
"canConsecutiveWallJump",
"SpaceJump"
]
}
]
}
]
}Dev note: No lenience, if Samus can climb the shaft, because Power Bombs can be farmed from the Violas. |
From: 1
Top Left Door
To: 1
Top Left Door


Use a Super to knock off a Viola and follow it to this door. Requires: "h_frozenEnemyRunway"
{
"ammo": {
"type": "Super",
"count": 1
}
}
{
"or": [
"canConsecutiveWallJump",
"SpaceJump",
"canLongIBJ",
"canBePatient"
]
}Exit condition: {
"leaveWithRunway": {
"length": 11,
"openEnd": 1
}
} |
From: 3
Bottom Right Door
To: 1
Top Left Door
Use a Super to knock off a nearby Viola, then lure it to the top. To avoid a wall jump, it is possible to use the Viola as a frozen platform. Requires: {
"ammo": {
"type": "Super",
"count": 1
}
}
{
"or": [
"canConsecutiveWallJump",
"SpaceJump",
"canLongIBJ",
{
"and": [
"canTrickyUseFrozenEnemies",
"canBePatient"
]
}
]
}Exit condition: {
"leaveWithGModeSetup": {}
}Unlocks doors: {"types":["ammo"],"requires":[]} |
|
Requires: {
"or": [
{
"and": [
{
"resetRoom": {
"nodes": [
1,
4
]
}
},
{
"cycleFrames": 760
},
{
"or": [
"canConsecutiveWallJump",
{
"and": [
"SpaceJump",
{
"cycleFrames": 300
}
]
}
]
},
{
"or": [
"canMoonfall",
{
"cycleFrames": 40
}
]
}
]
},
{
"and": [
{
"resetRoom": {
"nodes": [
2
]
}
},
{
"cycleFrames": 400
}
]
},
{
"and": [
{
"resetRoom": {
"nodes": [
3
]
}
},
{
"cycleFrames": 320
}
]
}
]
}
{
"or": [
"Grapple",
"Wave",
"Plasma",
"Spazer",
{
"cycleFrames": 60
}
]
}Farm cycle drops: 4 Viola |
|


Requires: {
"or": [
"canConsecutiveWallJump",
"SpaceJump",
"canLongIBJ"
]
} |
|
Knock a Viola off of its platform and keep it on camera as it climbs to the top of the room. Freeze the Viola when it is only partially overhanging the door and midair morph, run jump and aim down directly onto it, or spin jump and down aim just before landing and quickly release inputs. With Morph or a down aim, Samus can jump directly onto the Viola without touching the transition. Requires: "canTrickyUseFrozenEnemies"
{
"ammo": {
"type": "Super",
"count": 1
}
}
"canUpwardGModeSetup"
{
"or": [
"canConsecutiveWallJump",
"SpaceJump",
"canLongIBJ",
"canBePatient"
]
}Exit condition: {
"leaveWithGModeSetup": {}
}Unlocks doors: {"types":["ammo"],"requires":[]} |
From: 3
Bottom Right Door
To: 4
Top Door
Use a Super to knock a Viola off of the middle platforms and ride it up the right wall by freezing it. Once it reaches the top door, use another Super to knock it off again, and freeze it mid-air pixel perfectly. Use a flash suit or blue suit from a crouched position to spark vertically and clip past the door shell. Requires: {
"or": [
"canConsecutiveWallJump",
"SpaceJump",
"canLongIBJ",
"canBePatient"
]
}
{
"ammo": {
"type": "Super",
"count": 2
}
}
"h_storedSparkIceClip"
{
"shinespark": {
"frames": 2,
"excessFrames": 1
}
}Exit condition: {
"leaveWithSpark": {}
}Bypasses door shell: true |
From: 3
Bottom Right Door
To: 4
Top Door
Use a Super to knock a Viola off of the middle platforms and ride it up the right wall by freezing it. Once it reaches the top door, use another Super to knock it off again, and freeze it mid-air. Use Morph and X-Ray to stand on top of it and clip up through the door shell above. Requires: {
"ammo": {
"type": "Super",
"count": 2
}
}
"h_XRayMorphIceClip"
{
"or": [
"canConsecutiveWallJump",
"SpaceJump",
"canLongIBJ",
"canBePatient"
]
}Bypasses door shell: true |
From: 2
Right Door
To: 4
Hidden Right Item
One vertical spark is needed to open up the area directly above. Then, a second horizontal spark is performed where those blocks were cleared. Try to aim for the seam between tiles to break more blocks. And the left side of the opening may be slightly easier. Requires: {
"notable": "Right Item Double Shinespark"
}
{
"or": [
"f_DefeatedGoldenTorizo",
{
"obstaclesCleared": [
"f_DefeatedGoldenTorizo"
]
}
]
}
"canShinechargeMovementComplex"
"canPreciseWallJump"
"canConsecutiveWallJump"
{
"canShineCharge": {
"usedTiles": 28,
"openEnd": 0
}
}
{
"heatFrames": 900
}
{
"shinespark": {
"frames": 12,
"excessFrames": 2
}
} |
From: 2
Right Door
To: 4
Hidden Right Item
Walljump up to reach the left ledge below the bomb blocks then perform an instant morph to place a bomb. Walljump up a second time and again instant morph off that left ledge to enter the 1 tile hole created by the bomb. Requires: "h_useMorphBombs"
"can3HighWallMidAirMorph"
"canConsecutiveWallJump"
{
"heatFrames": 650
} |
From: 7
G-Mode Junction (Bottom of Room)
To: 1
Left Door

Use the camera scroll blocks below the crumble blocks to overload PLMs and go through the crumble blocks. A good jumping through them a single time is enough to overload them for the next jump. This can be done while dodging GT. With a speedy jump, it is possible to overload PLMs and run back to GT before it stands up, get into the safe spot location to get him to jump back, and use the runway again. With shinesparks, diagonally spark into the crumble blocks and hold forward three times, then spark through. Note that when GT attacks, it will place stationary invisible projectiles, so it is much more difficult if not getting up quickly. Requires: "h_heatedGMode"
{
"or": [
{
"or": [
"f_DefeatedGoldenTorizo",
{
"obstaclesCleared": [
"f_DefeatedGoldenTorizo"
]
}
]
},
"canTrickyDodgeEnemies"
]
}
{
"or": [
"SpaceJump",
{
"and": [
"HiJump",
{
"or": [
"canTrickyWallJump",
"canSpringBallJumpMidAir",
"canSpeedyJump"
]
}
]
},
{
"and": [
"canSpringBallJumpMidAir",
"canSpeedyJump",
{
"or": [
{
"or": [
"f_DefeatedGoldenTorizo",
{
"obstaclesCleared": [
"f_DefeatedGoldenTorizo"
]
}
]
},
"canInsaneJump"
]
}
]
},
{
"and": [
{
"or": [
"f_DefeatedGoldenTorizo",
{
"obstaclesCleared": [
"f_DefeatedGoldenTorizo"
]
}
]
},
"canTrickyDashJump",
"canWallJump"
]
},
{
"and": [
{
"or": [
"f_DefeatedGoldenTorizo",
{
"obstaclesCleared": [
"f_DefeatedGoldenTorizo"
]
}
]
},
"canConsecutiveWallJump",
"canInsaneWallJump"
]
},
{
"and": [
{
"or": [
"f_DefeatedGoldenTorizo",
{
"obstaclesCleared": [
"f_DefeatedGoldenTorizo"
]
}
]
},
{
"canShineCharge": {
"usedTiles": 28,
"openEnd": 0
}
},
{
"or": [
{
"and": [
"canWallJump",
{
"shinespark": {
"frames": 9,
"excessFrames": 4
}
}
]
},
{
"and": [
"canSpeedyJump",
{
"shinespark": {
"frames": 9,
"excessFrames": 4
}
}
]
},
{
"shinespark": {
"frames": 32,
"excessFrames": 4
}
}
]
}
]
}
]
}
"h_heatedGModeOpenDifferentDoor" |
From: 7
G-Mode Junction (Bottom of Room)
To: 3
Top Left Item
Use the camera scroll blocks below the crumble blocks to overload PLMs and go through the crumble blocks. A good jumping through them a single time is enough to overload them for the next jump. This can be done while dodging GT. With a speedy jump, it is possible to overload PLMs and run back to GT before it stands up, get into the safe spot location to get him to jump back, and use the runway again. With shinesparks, diagonally spark into the crumble blocks and hold forward three times, then spark through. Note that when GT attacks, it will place stationary invisible projectiles, so it is much more difficult if not getting up quickly. Requires: "h_heatedGMode"
{
"or": [
{
"or": [
"f_DefeatedGoldenTorizo",
{
"obstaclesCleared": [
"f_DefeatedGoldenTorizo"
]
}
]
},
"canTrickyDodgeEnemies"
]
}
{
"or": [
"SpaceJump",
{
"and": [
"HiJump",
{
"or": [
"canTrickyWallJump",
"canSpringBallJumpMidAir",
"canSpeedyJump"
]
}
]
},
{
"and": [
"canSpringBallJumpMidAir",
"canSpeedyJump",
{
"or": [
{
"or": [
"f_DefeatedGoldenTorizo",
{
"obstaclesCleared": [
"f_DefeatedGoldenTorizo"
]
}
]
},
"canInsaneJump"
]
}
]
},
{
"and": [
{
"or": [
"f_DefeatedGoldenTorizo",
{
"obstaclesCleared": [
"f_DefeatedGoldenTorizo"
]
}
]
},
"canTrickyDashJump",
"canWallJump"
]
},
{
"and": [
{
"or": [
"f_DefeatedGoldenTorizo",
{
"obstaclesCleared": [
"f_DefeatedGoldenTorizo"
]
}
]
},
"canConsecutiveWallJump",
"canInsaneWallJump"
]
},
{
"and": [
{
"or": [
"f_DefeatedGoldenTorizo",
{
"obstaclesCleared": [
"f_DefeatedGoldenTorizo"
]
}
]
},
{
"canShineCharge": {
"usedTiles": 28,
"openEnd": 0
}
},
{
"or": [
{
"and": [
"canWallJump",
{
"shinespark": {
"frames": 9,
"excessFrames": 4
}
}
]
},
{
"and": [
"canSpeedyJump",
{
"shinespark": {
"frames": 9,
"excessFrames": 4
}
}
]
},
{
"shinespark": {
"frames": 32,
"excessFrames": 4
}
}
]
}
]
}
]
}
{
"heatFrames": 0
} |
|
Entrance condition: {
"comeInWithGMode": {
"mode": "direct",
"morphed": false
}
}Requires: {
"or": [
"SpaceJump",
"canConsecutiveWallJump",
{
"and": [
"canJumpIntoIBJ",
"canLongIBJ",
"canDoubleBombJump",
"canInsaneJump"
]
}
]
}Exit condition: {
"leaveWithGMode": {
"morphed": false
}
} |
From: 5
Below Left Door Junction
To: 1
Left Door
Climb to the top left door while in Acid. Requires: {
"notable": "Reverse Acid Dive"
}
{
"obstaclesNotCleared": [
"A"
]
}
"Gravity"
{
"or": [
{
"and": [
"HiJump",
"canConsecutiveWallJump",
{
"heatFrames": 150
},
{
"acidFrames": 150
}
]
},
{
"and": [
"canConsecutiveWallJump",
{
"heatFrames": 210
},
{
"acidFrames": 210
}
]
}
]
}Unlocks doors: {"types":["super"],"requires":[]}
{"types":["missiles","powerbomb"],"requires":["never"]} |
From: 5
Below Left Door Junction
To: 1
Left Door


It is possible to walljump in acid without Gravity Suit. Requires: {
"notable": "Reverse Acid Dive"
}
{
"obstaclesNotCleared": [
"A"
]
}
"canConsecutiveWallJump"
{
"or": [
{
"and": [
"HiJump",
{
"heatFrames": 280
},
{
"acidFrames": 280
}
]
},
{
"and": [
{
"heatFrames": 400
},
{
"acidFrames": 400
}
]
}
]
}Unlocks doors: {"types":["super"],"requires":[]}
{"types":["missiles","powerbomb"],"requires":["never"]} |
|
Requires: {
"obstaclesCleared": [
"A"
]
}
{
"or": [
{
"and": [
"canConsecutiveWallJump",
{
"heatFrames": 300
}
]
},
{
"and": [
"canConsecutiveWallJump",
"HiJump",
{
"heatFrames": 240
}
]
},
{
"and": [
"SpaceJump",
{
"heatFrames": 600
}
]
},
{
"and": [
"SpaceJump",
"HiJump",
{
"heatFrames": 390
}
]
}
]
}Unlocks doors: {"types":["super"],"requires":[]}
{"types":["missiles","powerbomb"],"requires":["never"]} |
From: 5
Below Left Door Junction
To: 5
Below Left Door Junction
Requires: "h_heatProof"
{
"resetRoom": {
"nodes": [
1
]
}
}
{
"obstaclesCleared": [
"A"
]
}
"canTrickyJump"
{
"cycleFrames": 145
}
{
"or": [
"ScrewAttack",
{
"and": [
"Charge",
"Plasma",
"Wave",
{
"cycleFrames": 60
},
"canFarmWhileShooting"
]
}
]
}
{
"or": [
"canMoonfall",
{
"cycleFrames": 60
}
]
}
{
"or": [
{
"and": [
"canConsecutiveWallJump",
{
"cycleFrames": 280
}
]
},
{
"and": [
"canConsecutiveWallJump",
"HiJump",
{
"cycleFrames": 220
}
]
},
{
"and": [
"SpaceJump",
{
"cycleFrames": 580
}
]
},
{
"and": [
"SpaceJump",
"HiJump",
{
"cycleFrames": 370
}
]
}
]
}Clears obstacles: A Resets obstacles: R-Mode Farm cycle drops: 1 Yellow Space Pirate (standing) |
From: 5
Firefleas Bottom Left Platform Junction
To: 7
Fireflea Statue's Claw Junction


Requires: "canConsecutiveWallJump"
"canPreciseWallJump"
"canCarefulJump"
{
"or": [
"canTrickyJump",
"canResetFallSpeed"
]
} |
From: 2
Bottom Left Door
To: 4
Junction Above Bomb Blocks

Requires: {
"haveBlueSuit": {}
}
"HiJump"
"canConsecutiveWallJump"
"canPreciseWallJump"
{
"heatFrames": 185
} |
From: 2
Bottom Left Door
To: 4
Junction Above Bomb Blocks


Use Screw Attack to remove the left wall Pirate and wall jump high enough to place a Power Bomb to destroy the bomb blocks Then wall jump up again to reach the upper region. Requires: "h_usePowerBomb"
"canPreciseWallJump"
"canConsecutiveWallJump"
"canTrivialMidAirMorph"
"HiJump"
"ScrewAttack"
{
"heatFrames": 330
}
{
"or": [
"h_heatResistant",
"canPauseAbuse",
{
"resourceCapacity": [
{
"type": "RegularEnergy",
"count": 149
}
]
}
]
}Clears obstacles: A Dev note: With Reserves only, canPauseAbuse is used as a proxy for pause abuse or optimal reserve management and character movement. |
From: 2
Bottom Left Door
To: 4
Junction Above Bomb Blocks


Requires: "SpaceJump"
{
"or": [
"ScrewAttack",
{
"haveBlueSuit": {}
}
]
}
{
"or": [
{
"and": [
"canConsecutiveWallJump",
"HiJump",
{
"heatFrames": 190
}
]
},
{
"and": [
"canConsecutiveWallJump",
{
"heatFrames": 240
}
]
},
{
"and": [
"HiJump",
{
"heatFrames": 240
}
]
},
{
"heatFrames": 360
}
]
} |
From: 6
Bottom Platform Junction With Pirates Killed
To: 4
Junction Above Bomb Blocks

Requires: "HiJump"
"canPreciseWallJump"
"canConsecutiveWallJump"
{
"heatFrames": 180
}
{
"or": [
"canTrickyWallJump",
{
"heatFrames": 300
}
]
}
{
"or": [
{
"obstaclesCleared": [
"A"
]
},
{
"haveBlueSuit": {}
}
]
}Clears obstacles: A |
From: 6
Bottom Platform Junction With Pirates Killed
To: 4
Junction Above Bomb Blocks
Break the bomb blocks with extremely precise walljumps. Either with a fully delayed max height jump from the wall, or with an instant turnaround after jumping from the lower layer of bomb blocks. Requires: {
"notable": "HiJump and Only Screw"
}
"h_heatProof"
"HiJump"
"ScrewAttack"
"canInsaneWallJump"
"canInsaneJump"
"canConsecutiveWallJump"
"canMidairWiggle"Clears obstacles: A |
From: 6
Bottom Platform Junction With Pirates Killed
To: 4
Junction Above Bomb Blocks
Requires: "canInsaneWallJump"
"canConsecutiveWallJump"
"h_heatProof"
{
"or": [
{
"obstaclesCleared": [
"A"
]
},
{
"haveBlueSuit": {}
}
]
}Clears obstacles: A |
From: 6
Bottom Platform Junction With Pirates Killed
To: 4
Junction Above Bomb Blocks
Requires: "SpaceJump"
{
"or": [
{
"and": [
"canConsecutiveWallJump",
"HiJump",
{
"heatFrames": 160
}
]
},
{
"and": [
"canConsecutiveWallJump",
{
"heatFrames": 210
}
]
},
{
"and": [
"HiJump",
{
"heatFrames": 210
}
]
},
{
"heatFrames": 300
}
]
}
{
"or": [
"ScrewAttack",
{
"haveBlueSuit": {}
},
{
"obstaclesCleared": [
"A"
]
}
]
}Clears obstacles: A |
From: 6
Bottom Platform Junction With Pirates Killed
To: 4
Junction Above Bomb Blocks

Requires: "h_heatedSpringwall"
"canConsecutiveWallJump"
{
"heatFrames": 220
}
{
"or": [
{
"obstaclesCleared": [
"A"
]
},
{
"haveBlueSuit": {}
}
]
}Clears obstacles: A |
From: 6
Bottom Platform Junction With Pirates Killed
To: 6
Bottom Platform Junction With Pirates Killed
Requires: "canMidAirMorph"
"h_useMorphBombs"
{
"or": [
{
"and": [
"HiJump",
"SpaceJump",
"canConsecutiveWallJump",
{
"heatFrames": 440
}
]
},
{
"and": [
"SpaceJump",
"HiJump",
{
"heatFrames": 540
}
]
},
{
"and": [
"SpaceJump",
"canConsecutiveWallJump",
{
"heatFrames": 520
}
]
},
{
"and": [
"SpaceJump",
{
"heatFrames": 730
}
]
},
{
"and": [
"h_heatedSpringwall",
{
"heatFrames": 480
}
]
},
{
"and": [
"canLongIBJ",
"canBePatient",
{
"heatFrames": 4000
}
]
},
{
"and": [
"canLongIBJ",
"canJumpIntoIBJ",
{
"heatFrames": 2500
}
]
},
{
"and": [
"canJumpIntoIBJ",
"canDoubleBombJump",
{
"heatFrames": 1400
}
]
}
]
}Clears obstacles: A |
|
Requires: "canUseEnemies"
{
"or": [
{
"and": [
"canWallJump",
{
"heatFrames": 390
}
]
},
{
"and": [
"canConsecutiveWallJump",
"canCarefulJump",
{
"heatFrames": 330
}
]
},
{
"and": [
"HiJump",
{
"heatFrames": 320
}
]
},
{
"and": [
"h_crouchJumpDownGrab",
{
"heatFrames": 610
}
]
}
]
} |
|
If Phantoon is killed, hold right while wall jumping, jump just before the spikes and after them. Don't release jump while passing the spikes to prevent taking a hit. Requires: {
"or": [
{
"obstaclesCleared": [
"A"
]
},
"h_usePowerBomb"
]
}
{
"haveBlueSuit": {}
}
{
  "or": [
    "canConsecutiveWallJump",
    "SpaceJump",
    "canLongIBJ"
  ]
}Clears obstacles: A |
|


If Phantoon is killed, hold right while wall jumping, jump just before the spikes and after them. Don't release jump while passing the spikes to prevent taking a hit. Requires: {
"or": [
{
"obstaclesCleared": [
"A"
]
},
"h_usePowerBomb"
]
}
{
"useFlashSuit": {}
}
{
"shinespark": {
"frames": 5,
"excessFrames": 3
}
}
{
"or": [
"canConsecutiveWallJump",
"SpaceJump",
{
"and": [
"canLongIBJ",
"canUnmorphBombBoost"
]
}
]
}Clears obstacles: A |
|
Wall jump repeatedly off of the left wall, jump before the spikes and hold jump while passing them to avoid wall jump checking them. Requires: {
"or": [
{
"obstaclesCleared": [
"A"
]
},
"h_usePowerBomb"
]
}
{
"or": [
{
"canShineCharge": {
"usedTiles": 35,
"openEnd": 1
}
},
{
"and": [
"f_DefeatedPhantoon",
"h_shinechargeMaxRunway"
]
}
]
}
"canShinechargeMovementComplex"
"canConsecutiveWallJump"
{
"or": [
{
"shinespark": {
"frames": 17,
"excessFrames": 2
}
},
{
"and": [
"HiJump",
{
"shinespark": {
"frames": 10,
"excessFrames": 2
}
}
]
},
{
"and": [
"canShinechargeMovementTricky",
"canFastWallJumpClimb",
{
"or": [
{
"shinespark": {
"frames": 10,
"excessFrames": 2
}
},
{
"and": [
"HiJump",
{
"shinespark": {
"frames": 6,
"excessFrames": 2
}
}
]
}
]
}
]
}
]
}Clears obstacles: A |
From: 1
Right Door
To: 2
Item


Run from the adjacent room and jump at the end of the platform. From the top right platform, jump to the left and wall jump just above the spikes and climb the left wall. With minimal runway length (2 tiles), this has a 2-frame window for the jump. With a last-frame jump it has a 3-frame window for wall jump, otherwise the wall jump is frame-perfect. Entrance condition: {
"comeInRunning": {
"speedBooster": "yes",
"minTiles": 2
}
}Requires: "h_speedJump"
"canInsaneJump"
"canConsecutiveWallJump"
{
"not": "f_DefeatedPhantoon"
} |
|
Run from the adjacent room and jump at the end of the platform. From the top right platform, jump to the left and wall jump just above the spikes and climb the left wall. Entrance condition: {
"comeInRunning": {
"speedBooster": "yes",
"minTiles": 5
}
}Requires: "h_speedJump"
"canCarefulJump"
"canConsecutiveWallJump"
{
"not": "f_DefeatedPhantoon"
}
{
"or": [
"canRiskPermanentLossOfAccess",
"canTrickyJump",
{
"and": [
{
"disableEquipment": "HiJump"
},
"canMoonwalk"
]
}
]
}Dev note: This variant of the strat includes an extra couple of tiles of runway for lenience. |
From: 1
Right Door
To: 2
Item
Run from the adjacent room and jump at the end of the platform. From the top right platform, jump to the left and wall jump just above the spikes and climb the left wall. Entrance condition: {
"comeInRunning": {
"speedBooster": "yes",
"minTiles": 3
}
}Requires: "h_speedJump"
"canTrickyJump"
"canConsecutiveWallJump"
{
"not": "f_DefeatedPhantoon"
} |
|
Entrance condition: {
"comeInWithGMode": {
"mode": "direct",
"morphed": false
},
"comesThroughToilet": "any"
}Requires: {
"or": [
"canGravityJump",
{
"and": [
"Gravity",
{
"or": [
"canConsecutiveWallJump",
"SpaceJump",
"canLongIBJ",
{
"and": [
"HiJump",
"canWallJump"
]
},
{
"and": [
"HiJump",
"canTrickyDashJump",
"canDownGrab"
]
},
"h_maxHeightSpringBallJump",
{
"and": [
"HiJump",
"canSpringBallJumpMidAir"
]
}
]
}
]
},
{
"and": [
"Gravity",
"canUseFrozenEnemies",
{
"or": [
"canWallJump",
{
"and": [
"HiJump",
"canSpeedyJump"
]
},
"canSpringBallJumpMidAir"
]
}
]
},
"h_doubleSpringBallJumpWithHiJump",
{
"and": [
"canSuitlessMaridia",
"canTrickyUseFrozenEnemies",
"HiJump",
"canTrickySpringBallJump"
]
}
]
}Exit condition: {
"leaveWithGMode": {
"morphed": false
}
}Dev note: The h_maxHeightSpringBallJump is not a h_underwaterMaxHeightSpringBallJump, because Gravity is required. |
|

Requires: "Gravity"
{
"or": [
{
"and": [
"HiJump",
"canWallJump"
]
},
{
"and": [
"canPreciseWallJump",
"canConsecutiveWallJump"
]
},
"SpaceJump",
"canUseFrozenEnemies"
]
} |
From: 6
Middle Junction Near Top Left Pirate
To: 6
Middle Junction Near Top Left Pirate
Requires: "Gravity"
{
"or": [
{
"and": [
{
"resetRoom": {
"nodes": [
3
]
}
},
{
"cycleFrames": 950
}
]
},
{
"and": [
{
"resetRoom": {
"nodes": [
2
]
}
},
{
"cycleFrames": 1260
}
]
},
{
"and": [
{
"resetRoom": {
"nodes": [
4
]
}
},
"canPreciseWallJump",
{
"cycleFrames": 1440
}
]
},
{
"and": [
{
"resetRoom": {
"nodes": [
1
]
}
},
"canConsecutiveWallJump",
{
"cycleFrames": 1600
}
]
}
]
}
{
"or": [
"canWallJump",
{
"cycleFrames": 90
}
]
}
{
"or": [
"ScrewAttack",
{
"and": [
"Plasma",
{
"cycleFrames": 150
}
]
},
{
"and": [
{
"haveBlueSuit": {}
},
{
"or": [
"canWallJump",
"SpaceJump"
]
},
{
"cycleFrames": 300
}
]
}
]
}Resets obstacles: R-Mode Farm cycle drops: 4 Pink Space Pirate (standing) Dev note: FIXME: there are other, slower ways to farm here, e.g. without Gravity. |
From: 6
Middle Junction Near Top Left Pirate
To: 6
Middle Junction Near Top Left Pirate
Requires: "Gravity"
"canConsecutiveWallJump"
{
"or": [
{
"and": [
{
"resetRoom": {
"nodes": [
3
]
}
},
{
"cycleFrames": 1300
}
]
},
{
"and": [
{
"resetRoom": {
"nodes": [
1
]
}
},
{
"cycleFrames": 1540
}
]
},
{
"and": [
{
"resetRoom": {
"nodes": [
4
]
}
},
"canPreciseWallJump",
{
"cycleFrames": 1690
}
]
},
{
"and": [
{
"resetRoom": {
"nodes": [
2
]
}
},
{
"cycleFrames": 1890
}
]
}
]
}
{
"or": [
"Plasma",
"ScrewAttack",
{
"and": [
{
"haveBlueSuit": {}
},
{
"cycleFrames": 400
}
]
},
{
"and": [
"Wave",
{
"cycleFrames": 365
}
]
},
{
"and": [
"Spazer",
{
"cycleFrames": 480
}
]
},
{
"and": [
"Ice",
{
"cycleFrames": 1250
}
]
},
{
"cycleFrames": 1685
}
]
}Resets obstacles: R-Mode Farm cycle drops: 4 Skultera Dev note: Farming Skulteras with Plasma, Screw Attack, or blue suit is included for completeness, though with these it would be better to farm the Pirates. FIXME: there are other, slower ways to farm here, e.g. without Gravity. |
|

Requires: "Gravity"
{
"or": [
"canConsecutiveWallJump",
{
"and": [
"canWallJump",
"HiJump"
]
},
"SpaceJump",
"canLongIBJ"
]
} |
|
Requires: "Gravity"
{
"or": [
"canConsecutiveWallJump",
{
"and": [
"canWallJump",
"HiJump"
]
},
"SpaceJump",
"canLongIBJ"
]
} |
From: 1
Top Left Door
To: 1
Top Left Door
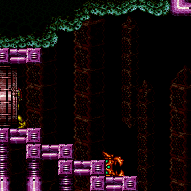
Follow the crab from the bottom right door to the top left door. This takes approximately 90 seconds. It is also possible to knock the crab off of the middle peak with a super and follow it to the left which may save time. Requires: "Gravity"
"canBePatient"
{
"or": [
"SpaceJump",
{
"and": [
{
"ammo": {
"type": "Super",
"count": 1
}
},
{
"or": [
"HiJump",
"canSpringBallJumpMidAir",
"canGravityJump",
"canConsecutiveWallJump",
"canSpeedyJump"
]
}
]
}
]
}Exit condition: {
"leaveWithGModeSetup": {}
} |
From: 1
Top Left Door
To: 1
Top Left Door


Follow the crab from the bottom right door to the top left door. This takes approximately 90 seconds. It is also possible to knock the crab off of the middle peak with a super and follow it to the left which may save time. Requires: "h_frozenEnemyRunway"
"Gravity"
"canBePatient"
{
  "or": [
    "SpaceJump",
    {
      "and": [
        {
          "ammo": {
            "type": "Super",
            "count": 1
          }
        },
        {
          "or": [
            "HiJump",
            "canSpringBallJumpMidAir",
            "canGravityJump",
            "canConsecutiveWallJump",
            "canSpeedyJump"
          ]
        }
      ]
    }
  ]
}
Exit condition: {
"leaveWithRunway": {
"length": 4,
"openEnd": 0
}
} |
From: 1
Middle Left Door
To: 9
Junction Below Top Door
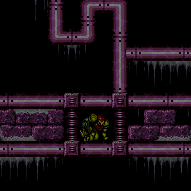
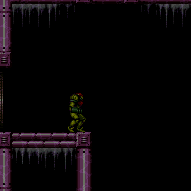
Bomb the Power Bomb blocks below to overload PLMs, then go up through the crumble blocks to escape. Entrance condition: {
"comeInWithGMode": {
"mode": "any",
"morphed": true
}
}Requires: "h_artificialMorphBombs"
"h_navigateUnderwater"
{
"or": [
{
"and": [
"Gravity",
{
"or": [
"h_artificialMorphLongIBJ",
"h_artificialMorphJumpIntoIBJ"
]
}
]
},
{
"and": [
"canGravityJump",
"h_artificialMorphSpringBall"
]
},
{
"and": [
"HiJump",
"canSpringBallJumpMidAir"
]
},
{
"and": [
"HiJump",
"canConsecutiveWallJump",
"canPreciseWallJump"
]
},
"h_artificialMorphDoubleSpringBallJump",
{
"and": [
"Gravity",
"HiJump",
"h_artificialMorphSpringBallBombJump"
]
}
]
}Dev note: FIXME: Eventually a CF doorlock bypass should be added from this 1 or from 12 with a 1->12 option. |
From: 1
Middle Left Door
To: 11
G-Mode Overloaded PLMs (By Bottom Left Door)
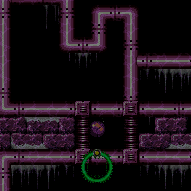

Bomb the PB blocks below to overload PLMs, then go up through the crumble blocks to escape. Entrance condition: {
"comeInWithGMode": {
"mode": "any",
"morphed": true
}
}Requires: "h_artificialMorphBombs"
"h_navigateUnderwater"
{
"or": [
"canGravityJump",
{
"and": [
"Gravity",
{
"or": [
"h_artificialMorphLongIBJ",
"h_artificialMorphJumpIntoIBJ"
]
}
]
},
{
"and": [
"HiJump",
"canSpringBallJumpMidAir"
]
},
{
"and": [
"HiJump",
"canConsecutiveWallJump",
"canPreciseWallJump"
]
},
"h_artificialMorphDoubleSpringBallJump",
{
"and": [
"Gravity",
"HiJump",
"h_artificialMorphSpringBallBombJump"
]
}
]
} |
|
Requires: "canSuitlessMaridia"
"HiJump"
"canConsecutiveWallJump"
"canTrickyWallJump"
{
"or": [
{
"obstaclesCleared": [
"A"
]
},
"h_usePowerBomb"
]
}Clears obstacles: A |
|
Requires: "Gravity"
{
"or": [
"SpaceJump",
"Grapple",
"canConsecutiveWallJump"
]
} |
From: 11
G-Mode Overloaded PLMs (By Bottom Left Door)
To: 1
Middle Left Door
After PLMs are overloaded, climb to the top left door and fall through the Bomb Blocks. Requires: "canGMode"
{
"or": [
"canSnailClimb",
{
"and": [
"Gravity",
{
"or": [
"SpaceJump",
"canConsecutiveWallJump"
]
}
]
}
]
} |
|


Cross the room with Grapple or wall jumps. Under the sand is spikes. Be sure not to turn around before landing or Samus will fall straight through the sand. Breaking spin while midair, such as by tapping an angle button, will help Samus land less deep in the sand - a quick jump when landing will give her a much higher jump. The last wall jump to get around the corner is tricky but it does not require a delayed wall jump, even without HiJump. Requires: "Gravity"
{
"or": [
{
"and": [
"HiJump",
"canWallJump",
{
"or": [
"canPlayInSand",
"canConsecutiveWallJump"
]
}
]
},
{
"and": [
"canTrickyWallJump",
"canConsecutiveWallJump"
]
},
{
"and": [
"canPreciseGrapple",
"canCarefulJump"
]
}
]
}
{
"or": [
{
"ammo": {
"type": "Missile",
"count": 2
}
},
{
"ammo": {
"type": "Super",
"count": 2
}
},
"canUseGrapple",
"canDodgeWhileShooting",
"Spazer",
"Wave",
"Plasma",
"ScrewAttack",
{
"haveBlueSuit": {}
},
{
"enemyDamage": {
"enemy": "Mochtroid",
"type": "contact",
"hits": 1
}
}
]
}
{
"or": [
"canPlayInSand",
{
"spikeHits": 2
}
]
}
{
"or": [
"Grapple",
{
"noBlueSuit": {}
}
]
} |
|
Use normalized movement to land on the sand without losing a blue suit. One way is to do the following: from the platforms at the top of the room, simply walk off the ledge; from the platforms two tiles above the sand, do a full height jump; from the sand itself, do full height jumps, with or without breaking spin. This same approach to the normalized movement can work with or without HiJump. Requires: {
"notable": "Blue Suit Sand Traversal"
}
{
"haveBlueSuit": {}
}
"Gravity"
"canConsecutiveWallJump" |
|
Entrance condition: {
"comeInShinecharged": {}
}Requires: "Gravity"
"canShinechargeMovementComplex"
{
"or": [
{
"and": [
"canConsecutiveWallJump",
{
"shineChargeFrames": 120
}
]
},
{
"and": [
"HiJump",
"canWallJump",
{
"shineChargeFrames": 95
}
]
},
{
"and": [
"HiJump",
"canGravityJump",
"canShinechargeMovementTricky",
{
"shineChargeFrames": 120
}
]
}
]
}Exit condition: {
"leaveShinecharged": {}
}Unlocks doors: {"types":["super"],"requires":[]}
{"types":["missiles","powerbomb"],"requires":["never"]} |
From: 2
Bottom Right Door
To: 3
Top Right Door

Entrance condition: {
"comeInShinecharged": {}
}Requires: "Gravity"
"canShinechargeMovementComplex"
{
"or": [
{
"and": [
"canConsecutiveWallJump",
{
"shineChargeFrames": 100
},
{
"shinespark": {
"frames": 6,
"excessFrames": 0
}
}
]
},
{
"and": [
"HiJump",
"canWallJump",
{
"or": [
{
"shineChargeFrames": 75
},
{
"and": [
"canSpeedyJump",
{
"shineChargeFrames": 70
}
]
}
]
},
{
"shinespark": {
"frames": 6,
"excessFrames": 0
}
}
]
},
{
"and": [
"HiJump",
"canGravityJump",
"canShinechargeMovementTricky",
{
"or": [
{
"shineChargeFrames": 105
},
{
"and": [
"canSpeedyJump",
{
"shineChargeFrames": 90
}
]
}
]
},
{
"shinespark": {
"frames": 6,
"excessFrames": 0
}
}
]
}
]
}Exit condition: {
"leaveWithSpark": {
"position": "top"
}
}Unlocks doors: {"types":["super"],"requires":[]}
{"types":["missiles","powerbomb"],"requires":["never"]} |
From: 2
Bottom Right Door
To: 3
Top Right Door

Entrance condition: {
"comeInShinecharged": {}
}Requires: "Gravity"
"canShinechargeMovementComplex"
{
"or": [
{
"and": [
"canConsecutiveWallJump",
{
"shineChargeFrames": 100
},
{
"shinespark": {
"frames": 6,
"excessFrames": 0
}
}
]
},
{
"and": [
"HiJump",
"canWallJump",
{
"or": [
{
"shineChargeFrames": 85
},
{
"and": [
"canSpeedyJump",
{
"shineChargeFrames": 80
}
]
}
]
},
{
"shinespark": {
"frames": 5,
"excessFrames": 0
}
}
]
},
{
"and": [
"HiJump",
"canGravityJump",
"canShinechargeMovementTricky",
{
"or": [
{
"shineChargeFrames": 115
},
{
"and": [
"canSpeedyJump",
{
"shineChargeFrames": 100
}
]
}
]
},
{
"shinespark": {
"frames": 4,
"excessFrames": 0
}
}
]
}
]
}Exit condition: {
"leaveWithSpark": {
"position": "top"
}
}Unlocks doors: {"types":["super"],"requires":[]}
{"types":["missiles","powerbomb"],"requires":["never"]} |
From: 2
Bottom Right Door
To: 3
Top Right Door
Entrance condition: {
"comeInShinecharging": {
"length": 2,
"openEnd": 1
}
}Requires: "Gravity"
"canShinechargeMovementComplex"
{
"or": [
{
"and": [
"canConsecutiveWallJump",
{
"shineChargeFrames": 120
}
]
},
{
"and": [
"HiJump",
"canWallJump",
{
"shineChargeFrames": 95
}
]
}
]
}Exit condition: {
"leaveShinecharged": {}
}Unlocks doors: {"types":["super"],"requires":[]}
{"types":["missiles","powerbomb"],"requires":["never"]} |
|


Cross the room with Grapple or wall jumps. Under the sand is spikes. Be sure not to turn around before landing or Samus will fall straight through the sand. Breaking spin while midair, such as by tapping an angle button, will help Samus land less deep in the sand - a quick jump when landing will give her a much higher jump. Requires: "Gravity"
{
"or": [
"canConsecutiveWallJump",
"Grapple",
{
"and": [
"canWallJump",
"HiJump",
"canPlayInSand"
]
}
]
}
{
"or": [
{
"ammo": {
"type": "Missile",
"count": 2
}
},
{
"ammo": {
"type": "Super",
"count": 2
}
},
"canUseGrapple",
"canDodgeWhileShooting",
"Spazer",
"Wave",
"Plasma",
"ScrewAttack",
{
"haveBlueSuit": {}
},
{
"enemyDamage": {
"enemy": "Mochtroid",
"type": "contact",
"hits": 1
}
}
]
}
{
"or": [
"canPlayInSand",
{
"spikeHits": 1
}
]
}
{
"or": [
"Grapple",
{
"noBlueSuit": {}
}
]
} |
|
Use normalized movement to land on the sand without losing a blue suit. One way is to do the following: from the platforms at the top of the room, simply walk off the ledge; from the platforms two tiles above the sand, do a full height jump; from the sand itself, do full height jumps, with or without breaking spin. This same approach to the normalized movement can work with or without HiJump. Requires: {
"notable": "Blue Suit Sand Traversal"
}
{
"haveBlueSuit": {}
}
"Gravity"
"canConsecutiveWallJump" |
From: 1
Left Door
To: 4
Platform Below Top Door
Wall jump back and forth up the shaft. It's a really long climb. Requires: {
"notable": "Suitless Walljump Climb with HiJump"
}
"canSuitlessMaridia"
"HiJump"
"canConsecutiveWallJump" |
From: 3
Junction Left of Morph Tunnel
To: 1
Left Door


Requires: "Gravity"
{
"or": [
{
"and": [
"canPreciseWallJump",
"canConsecutiveWallJump"
]
},
{
"and": [
"HiJump",
"canWallJump"
]
}
]
} |
From: 3
Junction Left of Morph Tunnel
To: 1
Left Door

Requires: "canSuitlessMaridia"
"HiJump"
"canPreciseWallJump"
{
"or": [
"canTrickyJump",
"canMidairWiggle"
]
}
{
"or": [
"canConsecutiveWallJump",
"canTrickyWallJump"
]
} |
|
Wall jump up the middle column and Morph into the hole to get to the item. This is easier in G-Mode because the crumbles above the tunnel will be air. Entrance condition: {
"comeInWithGMode": {
"mode": "any",
"morphed": false
},
"comesThroughToilet": "any"
}Requires: "canSuitlessMaridia" "HiJump" "canTrickyJump" "canConsecutiveWallJump" "canWallJumpInstantMorph" |
|

Walljump up and instant morph with exact timing and positioning so as to enter the Power Bomb location through the maze's exit. Requires: {
"notable": "Insane Walljump Morph"
}
"canSuitlessMaridia"
"canConsecutiveWallJump"
"canPlayInSand"
"HiJump"
"canInsaneWallJump"
"can3HighWallMidAirMorph" |
|
Requires: "Gravity"
{
"or": [
"SpaceJump",
{
"and": [
"HiJump",
{
"or": [
"canSpringBallJumpMidAir",
"canWallJump"
]
}
]
},
"canConsecutiveWallJump"
]
} |
From: 1
Top Left Door
To: 4
Top Right Door

Entrance condition: {
"comeInShinecharged": {}
}Requires: {
"shineChargeFrames": 95
}
"Gravity"
"canConsecutiveWallJump"
"canShinechargeMovementComplex"
{
"shinespark": {
"frames": 19,
"excessFrames": 0
}
}Exit condition: {
"leaveWithSpark": {}
}Unlocks doors: {"types":["super"],"requires":[]}
{"types":["missiles","powerbomb"],"requires":["never"]} |
From: 2
Bottom Left Door
To: 2
Bottom Left Door
Requires: "Gravity"
{
"cycleFrames": 330
}
{
"or": [
{
"resetRoom": {
"nodes": [
2
]
}
},
{
"and": [
{
"resetRoom": {
"nodes": [
4
]
}
},
{
"cycleFrames": 70
}
]
},
{
"and": [
{
"resetRoom": {
"nodes": [
1
]
}
},
{
"cycleFrames": 90
}
]
},
{
"and": [
{
"resetRoom": {
"nodes": [
3
]
}
},
"Morph",
{
"cycleFrames": 1210
}
]
}
]
}
{
"or": [
"canConsecutiveWallJump",
{
"and": [
"SpaceJump",
{
"cycleFrames": 40
}
]
},
{
"and": [
"Grapple",
{
"cycleFrames": 150
}
]
},
{
"and": [
"canGravityJump",
{
"cycleFrames": 120
},
"h_doubleEquipmentScreenCycleFrames"
]
}
]
}
{
"or": [
"ScrewAttack",
{
"haveBlueSuit": {}
},
{
"and": [
"Grapple",
{
"cycleFrames": 40
}
]
},
{
"and": [
"Plasma",
{
"cycleFrames": 20
}
]
},
{
"and": [
"Wave",
{
"cycleFrames": 160
}
]
},
{
"and": [
"Spazer",
{
"cycleFrames": 180
}
]
},
{
"and": [
"canDodgeWhileShooting",
{
"cycleFrames": 315
}
]
}
]
}Resets obstacles: R-Mode Farm cycle drops: 3 Mochtroid Dev note: FIXME: other options for this are possible (e.g. suitless) |
|
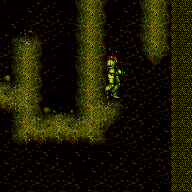
HiJump with a good jump from the sand can reach the Solid Rock Maze region. Use the sandfall if Samus gets stuck in the sand. Requires: "canPlayInSand" "HiJump" "canConsecutiveWallJump" "canSpaceJumpWaterBounce" |
From: 1
Top Sand Entrance
To: 7
Below Morph Tunnel Junction


HiJump with a good jump from the sand can reach the Solid Rock Maze region. Use the sandfall if Samus gets stuck in the sand. Perform several wall jumps to climb up to the water level, then precise wall jumps to break free. Requires: {
"notable": "Suitless Wall Jump Break Free"
}
"canSuitlessMaridia"
"canPlayInSand"
"HiJump"
"canConsecutiveWallJump"
"canPreciseWallJump" |
|
Requires: {
"or": [
"canConsecutiveWallJump",
{
"and": [
"HiJump",
"canWallJump"
]
},
"SpaceJump"
]
}
{
"enemyKill": {
"enemies": [
[
"Ripper",
"Ripper",
"Ripper"
]
]
}
} |
|
Requires: {
"noBlueSuit": {}
}
"ScrewAttack"
{
"or": [
{
"and": [
{
"resetRoom": {
"nodes": [
1
]
}
},
{
"cycleFrames": 780
}
]
},
{
"and": [
{
"resetRoom": {
"nodes": [
2
]
}
},
{
"cycleFrames": 710
}
]
},
{
"and": [
{
"resetRoom": {
"nodes": [
3
]
}
},
{
"cycleFrames": 1560
}
]
}
]
}
{
"or": [
"canConsecutiveWallJump",
{
"and": [
"SpaceJump",
{
"cycleFrames": 240
}
]
}
]
}Farm cycle drops: 6 Ripper |
|
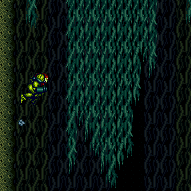
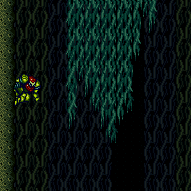
Either kill the wall Pirate or lead it to jump across the room; dodge the standing Pirate. This is the same size of ledge as Worst Room in the Game. Requires: "canInsaneWallJump" "canConsecutiveWallJump" |
|
Requires: {
"or": [
{
"resetRoom": {
"nodes": [
3
]
}
},
{
"and": [
{
"resetRoom": {
"nodes": [
2
]
}
},
{
"or": [
{
"and": [
"Gravity",
{
"cycleFrames": 835
}
]
},
{
"and": [
"canSuitlessMaridia",
"HiJump",
{
"cycleFrames": 1540
}
]
}
]
}
]
},
{
"and": [
{
"resetRoom": {
"nodes": [
4
]
}
},
{
"or": [
{
"and": [
"HiJump",
"SpaceJump",
{
"cycleFrames": 230
}
]
},
{
"and": [
"canTrickyWallJump",
"canConsecutiveWallJump",
{
"cycleFrames": 310
}
]
},
{
"and": [
"SpaceJump",
{
"cycleFrames": 400
}
]
}
]
}
]
}
]
}
{
"or": [
{
"and": [
"Plasma",
{
"cycleFrames": 320
}
]
},
{
"and": [
"Wave",
{
"cycleFrames": 340
}
]
},
{
"and": [
"Grapple",
{
"cycleFrames": 360
}
]
},
{
"and": [
"Spazer",
"canFarmWhileShooting",
{
"cycleFrames": 390
}
]
},
{
"and": [
"canDash",
"ScrewAttack",
"canDodgeWhileShooting",
{
"cycleFrames": 500
}
]
},
{
"cycleFrames": 640
}
]
}Resets obstacles: R-Mode Farm cycle drops: 2 Choot |
|
Requires: {
"or": [
"canConsecutiveWallJump",
"SpaceJump",
"canLongIBJ"
]
} |
|
Requires: {
"or": [
"canConsecutiveWallJump",
"SpaceJump",
"canLongIBJ"
]
}
{
"enemyDamage": {
"enemy": "Choot",
"type": "contact",
"hits": 1
}
} |
|
Shoot the Choot either before landing or from the safety of the ledge edge. If bomb jumping, there is a timing for rolling under the Choot. Requires: {
"or": [
"canConsecutiveWallJump",
"SpaceJump",
"canLongIBJ"
]
}
{
"or": [
"canTrickyJump",
{
"and": [
"canCarefulJump",
{
"enemyKill": {
"enemies": [
[
"Choot"
]
],
"explicitWeapons": [
"Missile",
"Super"
]
}
}
]
}
]
} |
|
To avoid damage, the Choot can be killed and then Samus can climb back up again. Requires: {
"or": [
"canConsecutiveWallJump",
"SpaceJump",
"canLongIBJ"
]
}
{
"or": [
{
"enemyKill": {
"enemies": [
[
"Choot"
]
],
"explicitWeapons": [
"Wave",
"Spazer",
"PowerBomb"
]
}
},
{
"and": [
"canBeVeryPatient",
{
"enemyKill": {
"enemies": [
[
"Choot"
]
]
}
}
]
}
]
}Dev note: Missile kill strats could fit here with a reclimb or by landing on the ledge, with the same requirements. |
|
Requires: {
"or": [
"canConsecutiveWallJump",
"SpaceJump"
]
}
{
"or": [
{
"enemyKill": {
"enemies": [
[
"Choot"
]
],
"explicitWeapons": [
"ScrewAttack"
]
}
},
{
"and": [
{
"or": [
"SpaceJump",
{
"and": [
"canConsecutiveWallJump",
"canWallJumpWithCharge"
]
}
]
},
{
"enemyKill": {
"enemies": [
[
"Choot"
]
],
"explicitWeapons": [
"PseudoScrew"
]
}
}
]
}
]
} |
|

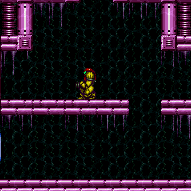
Requires: "canSuitlessMaridia"
{
"or": [
{
"and": [
"HiJump",
{
"or": [
"canDownGrab",
"canSpringBallJumpMidAir",
"canConsecutiveWallJump"
]
}
]
},
"h_underwaterMaxHeightSpringBallJump"
]
} |
|


Use the grapple block to initiate a Grapple Jump to climb up to the higher level and above the water line. Aiming the Grapple Jump to line up with the one tile hole is difficult and Samus is moving at high speeds. Escaping the water is also difficult as Samus must be standing at the water line when jumping for the next part of the grapple jump. It may be easier to jump out of the water by turning HiJump off. A Grapple Jump can be a spin jump by running briefly before jumping and that can be used to begin Walljumping or Space Jumping. Requires: {
"notable": "Grapple Jump"
}
"canSuitlessMaridia"
"canTrickyGrappleJump"
"canMidairWiggle"
{
"or": [
{
"enemyDamage": {
"enemy": "Menu",
"type": "contact",
"hits": 1
}
},
"SpaceJump",
{
"and": [
"canConsecutiveWallJump",
{
"or": [
"ScrewAttack",
"canTrickyWallJump"
]
}
]
},
"h_pauseAbuseMinimalReserveRefill",
"canTrickyDodgeEnemies"
]
} |
|

The swarm of Menus will attack Samus at the top of the room. Tank them, carefully dodge them, or kill them with Screw or Pseudo Screw. Requires: "Gravity"
"canConsecutiveWallJump"
{
"or": [
"ScrewAttack",
{
"haveBlueSuit": {}
},
"canTrickyWallJump",
"canWallJumpWithCharge",
{
"enemyDamage": {
"enemy": "Menu",
"type": "contact",
"hits": 1
}
}
]
}Dev note: The Menus prevent a reliable IBJ. |
From: 5
Junction Above Grapple Block
To: 5
Junction Above Grapple Block
Requires: {
"resetRoom": {
"nodes": [
1,
3
]
}
}
"Grapple"
"Gravity"
"SpaceJump"
{
"or": [
"ScrewAttack",
{
"haveBlueSuit": {}
}
]
}
"canConsecutiveWallJump"
{
"cycleFrames": 1120
}Farm cycle drops: 6 Menu Dev note: FIXME: Many other options are possible for movement and weapons. |
From: 3
Bottom Right Door
To: 1
Top Right Doorway
Entrance condition: {
"comeInShinecharging": {
"length": 0,
"openEnd": 1
}
}Requires: "canConsecutiveWallJump"
"canShinechargeMovementTricky"
{
"shineChargeFrames": 176
}
{
"shinespark": {
"frames": 5,
"excessFrames": 0
}
}Exit condition: {
"leaveWithSpark": {
"position": "top"
}
} |
From: 3
Bottom Right Door
To: 1
Top Right Doorway
Entrance condition: {
"comeInShinecharging": {
"length": 0,
"openEnd": 1
}
}Requires: "canConsecutiveWallJump"
"canShinechargeMovementTricky"
{
"shineChargeFrames": 170
}
{
"shinespark": {
"frames": 6,
"excessFrames": 0
}
}Exit condition: {
"leaveWithSpark": {
"position": "bottom"
}
} |
|


Navigate the room in reverse by killing or distracting the right side pirates and manipulating or dodging the left side pirates during the shaft climb. The acid starts rising when Samus is at the bottom of the long climb. The right-side pirates can be killed while going down to prevent having to dodge their lasers during the climb. Alternatively, jump and force the pirates to shoot just before starting to climb. Requires: {
"notable": "Dodge While Climbing"
}
"canCarefulJump"
{
"or": [
"canConsecutiveWallJump",
{
"and": [
"HiJump",
"SpaceJump"
]
}
]
}
{
"or": [
{
"enemyDamage": {
"enemy": "Tourian Space Pirate (all)",
"type": "contact",
"hits": 2
}
},
"canTrickyJump"
]
} |
From: 3
Bottom of Shaft
To: 1
Left Door


Use Pseudo Screw to avoid Space Pirate attacks while climbing the central shaft. The Screw Attack effect is not active when Samus is preparing to Walljump. Requires: {
"or": [
{
"and": [
"canConsecutiveWallJump",
"canWallJumpWithCharge"
]
},
{
"and": [
"SpaceJump",
"HiJump",
"canPseudoScrew"
]
}
]
}
{
"or": [
{
"enemyDamage": {
"enemy": "Tourian Space Pirate (all)",
"type": "contact",
"hits": 2
}
},
"canTrickyJump"
]
} |
From: 3
Bottom of Shaft
To: 1
Left Door


Use Screw Attack to avoid Space Pirate attacks while climbing the central shaft. The Screw Attack effect is not active when Samus is preparing to Walljump. Requires: "ScrewAttack"
{
"or": [
"canConsecutiveWallJump",
{
"and": [
"SpaceJump",
"HiJump"
]
}
]
} |