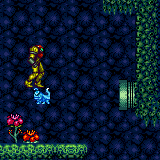
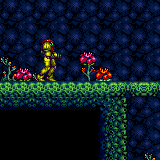
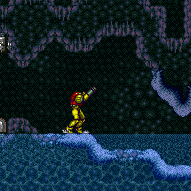
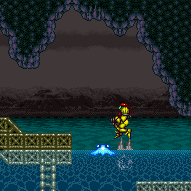
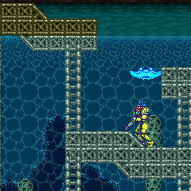
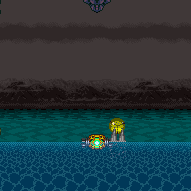
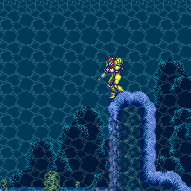
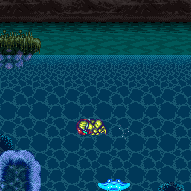
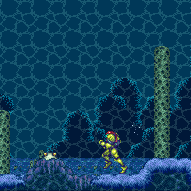
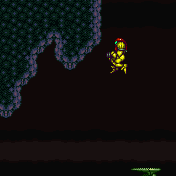
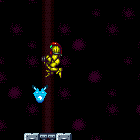
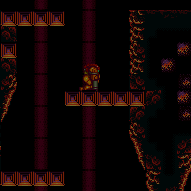
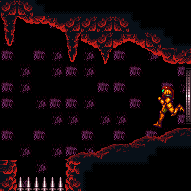
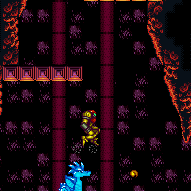
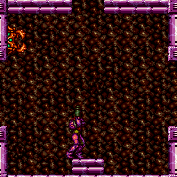
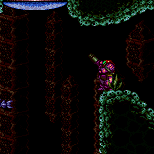
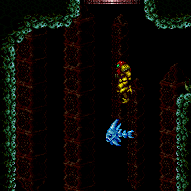
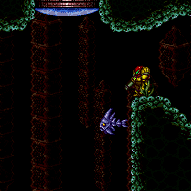
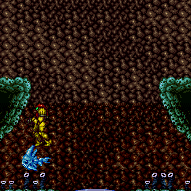
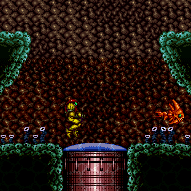
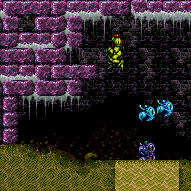
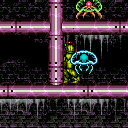
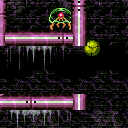
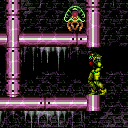
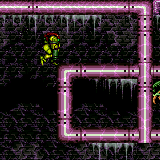
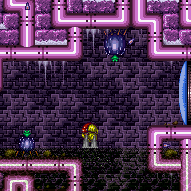
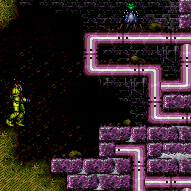
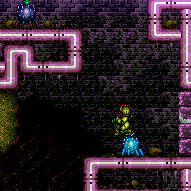
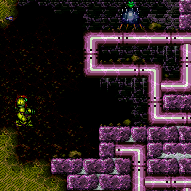
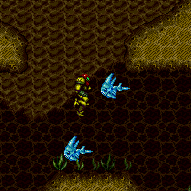
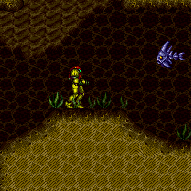
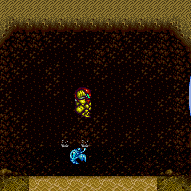
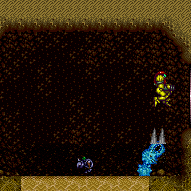
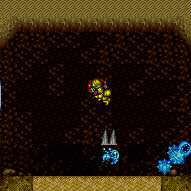
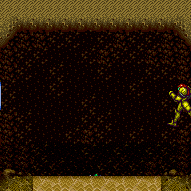
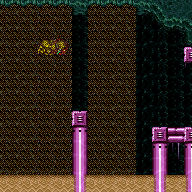
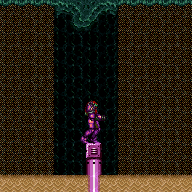
canUseFrozenEnemies (Basic)
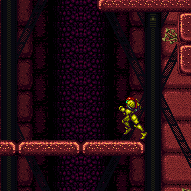
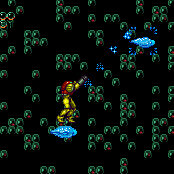
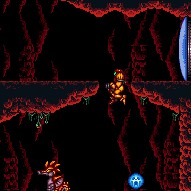
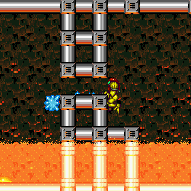
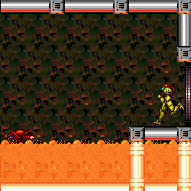
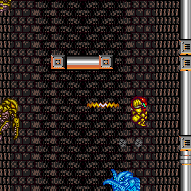
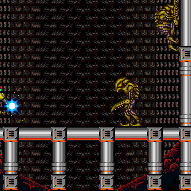
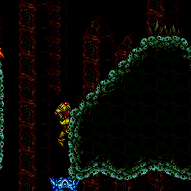
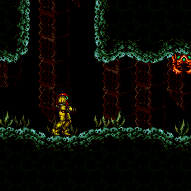
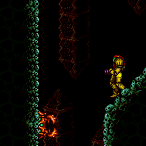
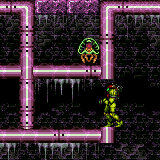
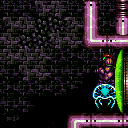
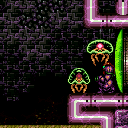
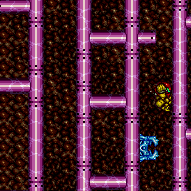
Can use Ice Beam to freeze enemies in nontrivial situations, such as to use as a platform or to wall jump off of. This may require removing Plasma Beam in order to prevent freezing and then killing the enemy with a single shot.
Dependencies: canUseEnemies, canTrivialUseFrozenEnemies
Strats ()
|
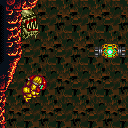
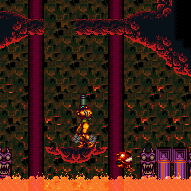
Freeze the Yapping Maw while it is in the air, extended. Requires: {
"obstaclesCleared": [
"A"
]
}
"canUseFrozenEnemies"
{
"canShineCharge": {
"usedTiles": 21,
"steepUpTiles": 2,
"steepDownTiles": 2,
"startingSteepDownTiles": 1,
"openEnd": 0
}
}
{
"shinespark": {
"frames": 45,
"excessFrames": 0
}
}Exit condition: {
"leaveWithSpark": {
"position": "top"
}
} |
|
Clear the bomb barriers and farm two Wavers. The two side wavers are local and easier to position for the R-Mode Spark Interrupt. It can help to pause abuse in the acid either to damage down or as part of the R-Mode Spark Interrupt. If grabbed by a Yapping Maw during a Shinespark, keep at least any button held to prevent a crash. Entrance condition: {
"comeInWithRMode": {}
}Requires: "canTrickyJump"
"canDodgeWhileShooting"
{
"or": [
"ScrewAttack",
"h_useMorphBombs",
{
"and": [
"Morph",
{
"or": [
{
"ammo": {
"type": "PowerBomb",
"count": 3
}
},
{
"and": [
"h_CrystalFlashForReserveEnergy",
{
"ammo": {
"type": "PowerBomb",
"count": 2
}
}
]
}
]
}
]
}
]
}
{
"or": [
{
"resourceAvailable": [
{
"type": "ReserveEnergy",
"count": 1
}
]
},
{
"and": [
"h_RModeCanRefillReserves",
{
"resourceMissingAtMost": [
{
"type": "Missile",
"count": 0
}
]
},
{
"resourceMissingAtMost": [
{
"type": "Super",
"count": 0
}
]
},
{
"partialRefill": {
"type": "ReserveEnergy",
"limit": 20
}
}
]
}
]
}
{
"or": [
{
"canShineCharge": {
"usedTiles": 18,
"steepUpTiles": 2,
"steepDownTiles": 1,
"openEnd": 1
}
},
{
"and": [
{
"or": [
"canUseFrozenEnemies",
{
"ammo": {
"type": "Super",
"count": 1
}
}
]
},
{
"canShineCharge": {
"usedTiles": 21,
"steepUpTiles": 2,
"steepDownTiles": 2,
"startingSteepDownTiles": 1,
"openEnd": 0
}
}
]
}
]
}
{
"autoReserveTrigger": {
"maxReserveEnergy": 95
}
}
{
"or": [
{
"and": [
"canInsaneJump",
"canRModeSparkInterrupt"
]
},
"canRModePauseAbuseSparkInterrupt"
]
}Clears obstacles: A |
|
Requires: {
"or": [
"canCarefulJump",
"canUseFrozenEnemies",
"SpaceJump",
{
"and": [
"Gravity",
{
"or": [
"HiJump",
"canWallJump",
"h_crouchJumpDownGrab",
"canIBJ",
"canSpringBallJumpMidAir"
]
}
]
}
]
} |
|
Requires: "canSuitlessMaridia" "canUseFrozenEnemies" |
From: 3
Junction (Left side Pit)
To: 4
Junction (Right side Pit)
Requires: "canSuitlessMaridia" "canUseFrozenEnemies" |
From: 4
Junction (Right side Pit)
To: 2
Right Door
In the center of the room, freeze the Skultera at the highest point in its cycle. Then use a max height Spring Ball jump to escape the water and land on the above platform. Use spacejump to continue to the door. Requires: "canSuitlessMaridia" "canUseFrozenEnemies" "h_underwaterMaxHeightSpringBallJump" "SpaceJump" |
From: 4
Junction (Right side Pit)
To: 3
Junction (Left side Pit)
Requires: "canSuitlessMaridia" "canUseFrozenEnemies" |
From: 4
Junction (Right side Pit)
To: 4
Junction (Right side Pit)
It is required to avoid double hitting the Skultera with the Power Bomb, and to position the Crystal Flash so that the Skultera can hit Samus from above so it avoids the light orb. To do this, use the bottom-right Skultera, and position Samus against the right pillar, or on the slope in front of the pillar. Place the Power Bomb to hit the fish as it reaches the left wall. If Samus has 75% enemy damage reduction, it is required to Crystal Flash on the sloped tile, otherwise she can use either tile. Requires: {
"obstaclesCleared": [
"R-Mode"
]
}
"canComplexRModeCrystalFlashInterrupt"
{
"ammo": {
"type": "Missile",
"count": 10
}
}
{
"ammo": {
"type": "Super",
"count": 5
}
}
{
"or": [
"h_partialEnemyDamageReduction",
{
"resourceAtMost": [
{
"type": "RegularEnergy",
"count": 19
}
]
},
{
"and": [
{
"resourceCapacity": [
{
"type": "RegularEnergy",
"count": 199
}
]
},
{
"resourceCapacity": [
{
"type": "ReserveEnergy",
"count": 199
}
]
}
]
}
]
}
{
"or": [
"Gravity",
"HiJump",
"canSpringBallJumpMidAir",
"canUseFrozenEnemies"
]
}Resets obstacles: R-Mode Dev note: FIXME: The movement items are to get to and from the fish spot. Other options could be added, such as using the spark to get to 2 or 3. |
From: 12
Top Junction
To: 9
Top Hidden Item (Above Trippers)
Jump on the left platforms to get the middle Tripper on screen, luring it to the right. Get on the middle Tripper and use it to jump to the item. This requires a somewhat precise shot and jump, particularly if the top Tripper is in the way. The jump and shot can be easier and done at the apex of a single jump starting with a crouch. Freezing the Trippers can make this much easier. Requires: "canUseEnemies"
{
"or": [
{
"and": [
"canUseFrozenEnemies",
"canPreciseWallJump"
]
},
"canTrickyWallJump",
{
"and": [
"canCameraManip",
"canCarefulJump"
]
}
]
} |
From: 1
Bottom Left Door
To: 3
Hidden Ceiling Item
Requires: "h_ZebesIsAwake" "canUseFrozenEnemies" |
|
Requires: "canUseFrozenEnemies" |
|
Requires: {
"or": [
"HiJump",
"SpaceJump",
"canLongIBJ",
"canJumpIntoIBJ",
"canWallJump",
"canUseFrozenEnemies",
"canSpringBallJumpMidAir"
]
} |
From: 1
Top Left Door
To: 5
Top Right Door
Entrance condition: {
"comeInShinecharged": {}
}Requires: {
"shineChargeFrames": 1
}
{
"shinespark": {
"frames": 68,
"excessFrames": 20
}
}
"canUseFrozenEnemies" |
|
Entrance condition: {
"comeInShinecharging": {
"length": 10,
"openEnd": 1
}
}Requires: {
"or": [
{
"shinespark": {
"frames": 68,
"excessFrames": 29
}
},
{
"and": [
"canMidairShinespark",
{
"shinespark": {
"frames": 60,
"excessFrames": 28
}
}
]
}
]
}
"canUseFrozenEnemies" |
|
Requires: "h_storedSpark"
{
"shinespark": {
"frames": 60,
"excessFrames": 28
}
}
"canUseFrozenEnemies" |
From: 1
Top Left Door
To: 5
Top Right Door
Entrance condition: {
"comeInShinecharged": {}
}Requires: {
"shineChargeFrames": 50
}
"canMidairShinespark"
{
"shinespark": {
"frames": 60,
"excessFrames": 28
}
}
"canUseFrozenEnemies" |
From: 1
Top Left Door
To: 5
Top Right Door
Entrance condition: {
"comeInShinecharged": {}
}Requires: {
"shineChargeFrames": 20
}
{
"shinespark": {
"frames": 68,
"excessFrames": 29
}
}
"canUseFrozenEnemies" |
|
Without any suits or tanks, Samus will need to move the Beetom part way up the room, shake it off, and go back and farm multiple times. While the Beetom is near the top section, by the Rippers, shake the Beetom off, and re-grab it and ascend the shaft. Either use frozen Rippers as platforms, while shooting diagonally to prevent freezing the Beetom, or kill the Rippers before ascending. Be careful not to apply too many inputs after grabbing the Beetom in order to get to the top before it is shaken off. Requires: {
"obstaclesNotCleared": [
"A"
]
}
{
"noBlueSuit": {}
}
"HiJump"
{
"or": [
"canUseFrozenEnemies",
{
"and": [
"SpaceJump",
{
"obstaclesCleared": [
"B"
]
}
]
},
{
"and": [
"canConsecutiveWallJump",
{
"obstaclesCleared": [
"B"
]
}
]
}
]
}
{
"enemyDamage": {
"enemy": "Beetom",
"type": "contact",
"hits": 9
}
}Exit condition: {
"leaveWithGModeSetup": {
"knockback": false
}
}Dev note: Some items may reduce the number of Beetom hits, but it's irrelevant since there is an accesible farm in-room. FIXME: Add more options for how to ascend the shaft, either without HiJump, or without killing the Rippers. These may need to be notable. |
From: 1
Left Vertical Door
To: 5
Kihunter Junction
Farm Kihunters, keeping one alive. Knock its wings off and freeze it on one end of the room, or use i-frames to run through it. Run across to shinecharge, then use the Kihunter to interrupt. Entrance condition: {
"comeInWithRMode": {},
"comesThroughToilet": "no"
}Requires: "canTrickyJump"
"canDodgeWhileShooting"
{
"or": [
"h_CrystalFlashForReserveEnergy",
{
"and": [
"h_RModeCanRefillReserves",
{
"or": [
{
"partialRefill": {
"type": "ReserveEnergy",
"limit": 5
}
},
{
"and": [
{
"partialRefill": {
"type": "ReserveEnergy",
"limit": 20
}
},
"canBeLucky"
]
}
]
}
]
}
]
}
{
"or": [
"canUseIFrames",
"canUseFrozenEnemies"
]
}
{
"canShineCharge": {
"usedTiles": 27,
"openEnd": 2
}
}
{
"autoReserveTrigger": {
"maxReserveEnergy": 95
}
}
"canRModeSparkInterrupt"Clears obstacles: C |
From: 2
Bottom Right Door
To: 5
Kihunter Junction
Farm Kihunters from below, keeping one alive. Knock its wings off and either freeze it or take a hit and use i-frames to run through it. Run across the left side of the broken shot block, then use the Kihunter to interrupt. Entrance condition: {
"comeInWithRMode": {}
}Requires: "h_crouchJumpDownGrab"
{
"or": [
"canTrickyDodgeEnemies",
{
"enemyDamage": {
"enemy": "Kihunter (green)",
"type": "contact",
"hits": 2
}
}
]
}
{
"or": [
"h_CrystalFlashForReserveEnergy",
{
"and": [
"h_RModeCanRefillReserves",
{
"or": [
{
"partialRefill": {
"type": "ReserveEnergy",
"limit": 5
}
},
{
"and": [
{
"partialRefill": {
"type": "ReserveEnergy",
"limit": 20
}
},
"canBeLucky"
]
}
]
}
]
}
]
}
{
"or": [
"canUseIFrames",
"canUseFrozenEnemies"
]
}
{
"canShineCharge": {
"usedTiles": 13,
"openEnd": 2
}
}
{
"autoReserveTrigger": {
"maxReserveEnergy": 95
}
}
"canRModeSparkInterrupt"Clears obstacles: C, D |
From: 3
Top Right Door
To: 5
Kihunter Junction
Bomb the block: if using a Power Bomb, place it no further left than under the item to avoid breaking the shot block. Farm Kihunters using the morph tunnel as needed, keeping one alive. Knock its wings off and freeze it on one end of the room, or use i-frames to run through it. Run across to shinecharge, then use the Kihunter to interrupt. Entrance condition: {
"comeInWithRMode": {}
}Requires: "h_bombThings"
{
"or": [
"h_CrystalFlashForReserveEnergy",
{
"and": [
"h_RModeCanRefillReserves",
{
"or": [
{
"partialRefill": {
"type": "ReserveEnergy",
"limit": 5
}
},
{
"and": [
{
"partialRefill": {
"type": "ReserveEnergy",
"limit": 20
}
},
"canBeLucky"
]
}
]
}
]
}
]
}
{
"or": [
"canUseIFrames",
"canUseFrozenEnemies"
]
}
{
"canShineCharge": {
"usedTiles": 27,
"openEnd": 2
}
}
{
"autoReserveTrigger": {
"maxReserveEnergy": 95
}
}
"canRModeSparkInterrupt"Clears obstacles: B, C |
|
Requires: "canUseFrozenEnemies"
{
"or": [
"HiJump",
"canSpringBallJumpMidAir",
{
"and": [
"canWallJump",
"canTrickyUseFrozenEnemies"
]
},
{
"and": [
"canTrickyJump",
"canTrickyUseFrozenEnemies"
]
}
]
} |
|
Requires: "canUseFrozenEnemies"
"canCarefulJump"
{
"or": [
"canWallJump",
{
"and": [
"canTrickyUseFrozenEnemies",
{
"or": [
"canTrickyJump",
"HiJump",
"canSpringBallJumpMidAir"
]
}
]
}
]
} |
|
Wall jump up the left wall and then on the moving platform (Kamer) while avoiding the Fune's fireball. The Kamers will temporarily move down if Samus is below them, so it is best to walk under the first Kamer before climbing the wall. It is possible to freeze or kill the Fune with a Super or Power Bomb to make things easier. Requires: {
"notable": "Walljump Climb Using the Kamer"
}
"canTrickyWallJump"
"canConsecutiveWallJump"
"canUseEnemies"
{
"or": [
{
"and": [
"canDodgeWhileShooting",
{
"heatFrames": 360
}
]
},
{
"and": [
"canTrickyJump",
{
"heatFrames": 240
}
]
},
{
"and": [
{
"or": [
"canUseFrozenEnemies",
{
"ammo": {
"type": "Super",
"count": 1
}
}
]
},
{
"heatFrames": 432
}
]
},
{
"and": [
{
"ammo": {
"type": "PowerBomb",
"count": 1
}
},
{
"heatFrames": 456
}
]
}
]
}
{
"or": [
"canDash",
{
"heatFrames": 20
}
]
} |
From: 2
Bottom Left Door
To: 1
Top Left Door
Wall jump up the left wall and then on the moving platform (Kamer) while avoiding the Fune's fireball. The Kamers will temporarily move down if Samus is below them, so it is best to walk under the first Kamer before climbing the wall. Requires: {
"notable": "Walljump Climb Using the Kamer"
}
"HiJump"
"canUseEnemies"
"canPreciseWallJump"
{
"or": [
{
"heatFrames": 360
},
{
"and": [
"canTrickyJump",
{
"heatFrames": 230
}
]
}
]
}
{
"or": [
"canDodgeWhileShooting",
{
"enemyDamage": {
"enemy": "Fune",
"type": "fireball",
"hits": 1
}
},
{
"and": [
"canUseFrozenEnemies",
{
"heatFrames": 70
}
]
},
{
"and": [
{
"ammo": {
"type": "Super",
"count": 1
}
},
{
"heatFrames": 70
}
]
},
{
"and": [
{
"ammo": {
"type": "PowerBomb",
"count": 1
}
},
{
"heatFrames": 90
}
]
}
]
}
{
"or": [
"canDash",
{
"heatFrames": 20
}
]
} |
From: 2
Left Shaft - Bottom Right Door
To: 3
Left Shaft - Middle Right Door
Requires: "canUseFrozenEnemies"
{
"heatFrames": 290
}
{
"or": [
"canTrickyJump",
{
"heatFrames": 160
}
]
} |
From: 6
Left Shaft - Top Junction
To: 1
Left Shaft - Top Left Door
Requires: "canUseFrozenEnemies"
{
"heatFrames": 285
}
{
"or": [
"canDash",
{
"heatFrames": 15
}
]
}Dev note: FIXME: this represents a worst case Multiviola cycle. Typically freezing the Multiviola is faster but the Alcoon is also an option. |
From: 5
Bottom Floating Platform Junction
To: 4
Top Floating Platform Junction
Requires: "canUseFrozenEnemies"
{
"heatFrames": 220
} |
|
Requires: "Morph"
{
"or": [
"canWallJump",
"HiJump",
"SpaceJump",
"canIBJ",
"canUseFrozenEnemies",
"canSpringBallJumpMidAir"
]
} |
|
Requires: {
"or": [
"canLongIBJ",
"canJumpIntoIBJ",
{
"and": [
"canMidAirMorph",
{
"or": [
"canWallJump",
"SpaceJump",
"canUseFrozenEnemies"
]
}
]
},
{
"and": [
"canUseFrozenEnemies",
"h_useSpringBall"
]
},
{
"and": [
"HiJump",
"canSpringBallJumpMidAir"
]
}
]
} |
|
An ice shot can shoot through the wall below the Morph tunnel and can freeze the Boyon even without Wave. Requires: {
"or": [
"canTrivialMidAirMorph",
"h_useSpringBall",
{
"and": [
"h_bombThings",
{
"heatFrames": 80
}
]
}
]
}
{
"or": [
"canTrickyUseFrozenEnemies",
{
"and": [
"canUseFrozenEnemies",
"Wave"
]
}
]
}
{
"heatFrames": 280
}
{
"or": [
"canDash",
{
"heatFrames": 100
}
]
} |
|
Requires: "Gravity"
{
"or": [
"canWallJump",
"HiJump",
"canSpringBallJumpMidAir",
"canIBJ",
"canUseFrozenEnemies",
"canGravityJump"
]
} |
|
Despawn the gate in indirect G-mode then cross the room while killing, freezing, dodging, or tanking the Rippers. Dodging the Rippers without Morph, requires crouching under the first two then jumping and aiming down over the next two; it also requires jumping over all three lower Rippers when most of the way across the room. It is possible to kill a Ripper near the right door and pause abuse to collect its drop on G-mode exit. Entrance condition: {
"comeInWithGMode": {
"mode": "indirect",
"morphed": false
}
}Requires: {
"or": [
"canInsaneJump",
{
"haveBlueSuit": {}
},
"ScrewAttack",
"canUseFrozenEnemies",
{
"and": [
"canTrickyDodgeEnemies",
"Morph"
]
},
{
"ammo": {
"type": "Super",
"count": 2
}
},
{
"enemyDamage": {
"enemy": "Ripper 2 (red)",
"type": "contact",
"hits": 2
}
}
]
}
{
"or": [
"h_heatedGModeOpenDifferentDoor",
{
"and": [
"h_heatedGModePauseAbuse",
"ScrewAttack"
]
},
{
"and": [
"h_heatedGModePauseAbuse",
{
"ammo": {
"type": "Super",
"count": 1
}
}
]
}
]
} |
From: 1
Left Door
To: 2
Right Door
Despawn the gate in indirect G-mode then exit G-mode while under it to open the gate without a Super. This requires killing, freezing, dodging, or tanking the Rippers. Dodging the Rippers without Morph, requires crouching under the first two then jumping and aiming down over the next two; it also requires jumping over all three lower Rippers when most of the way across the room. Then exiting G-mode while on the right side of the gate tile as the first Ripper approaches, so it hits the gate while it's opening. Then run towards the door and jump and aim down over the Ripper that makes it through, before quickly using the runway. Entrance condition: {
"comeInWithGMode": {
"mode": "indirect",
"morphed": false
}
}Requires: {
"or": [
"canInsaneJump",
{
"haveBlueSuit": {}
},
"ScrewAttack",
"canUseFrozenEnemies",
{
"and": [
"canTrickyDodgeEnemies",
"Morph"
]
},
{
"enemyDamage": {
"enemy": "Ripper 2 (red)",
"type": "contact",
"hits": 3
}
}
]
}
{
"heatFrames": 110
}Clears obstacles: A |
|
The room is a bit trickier to cross in direct G-mode because the Ripper cycle with the gate. Cross the room while killing, freezing, dodging, or tanking the Rippers. Dodging the Rippers without Morph, requires crouching under the first two then jumping and aiming down over the next two; either way, it also requires a precise jump over all three lower Rippers when most of the way across the room, or a morph under the first and quick jump over the next two. Entrance condition: {
"comeInWithGMode": {
"mode": "direct",
"morphed": false
}
}Requires: "h_heatedGMode"
{
"or": [
"canInsaneJump",
{
"haveBlueSuit": {}
},
"ScrewAttack",
"canUseFrozenEnemies",
{
"ammo": {
"type": "Super",
"count": 2
}
},
{
"enemyDamage": {
"enemy": "Ripper 2 (red)",
"type": "contact",
"hits": 2
}
}
]
}
{
"heatFrames": 0
} |
|
Despawn the gate in indirect G-mode then cross the room while killing, freezing, or tanking the Rippers. Without Morph, killing the lowest Ripper with a Super will make it possible but difficult to cross the room damageless. It is possible to kill a Ripper near the left door and pause abuse to collect its drop on G-mode exit. Entrance condition: {
"comeInWithGMode": {
"mode": "indirect",
"morphed": false
}
}Requires: {
"or": [
"ScrewAttack",
{
"haveBlueSuit": {}
},
"canUseFrozenEnemies",
{
"and": [
"canDash",
"canInsaneJump",
{
"ammo": {
"type": "Super",
"count": 1
}
}
]
},
{
"ammo": {
"type": "Super",
"count": 3
}
},
{
"enemyDamage": {
"enemy": "Ripper 2 (red)",
"type": "contact",
"hits": 2
}
}
]
}
{
"or": [
"h_heatedGModeOpenDifferentDoor",
{
"and": [
"h_heatedGModePauseAbuse",
"ScrewAttack"
]
},
{
"and": [
"h_heatedGModePauseAbuse",
{
"ammo": {
"type": "Super",
"count": 1
}
}
]
}
]
} |
From: 2
Right Door
To: 2
Right Door
Despawn the gate in indirect G-mode then exit G-mode while under it to open the gate without a Super. This requires killing, freezing, dodging, or tanking the Rippers. Dodging the Rippers without Morph, requires exiting G-mode while on the right side of the gate tile as the first Ripper approaches, so it hits the gate while it's opening. Then run towards the door and jump and aim down over the Ripper that makes it through, before quickly using the runway. Entrance condition: {
"comeInWithGMode": {
"mode": "indirect",
"morphed": false
}
}Requires: {
"or": [
{
"and": [
"canDash",
"canInsaneJump"
]
},
{
"haveBlueSuit": {}
},
"ScrewAttack",
"canUseFrozenEnemies",
"Morph",
{
"enemyDamage": {
"enemy": "Ripper 2 (red)",
"type": "contact",
"hits": 1
}
}
]
}
{
"heatFrames": 110
}Clears obstacles: A |
|
Crouch in front of the standing pirate to freely shoot charge shots. Shoot upon entering the room to interupt the pirate lazer attack. Stay far enough away from the wall to avoid the wall pirate. Jumping can be used to distract the wall pirate, in particular when trying to jump to the overhead platform. Requires: "Charge"
"canUseFrozenEnemies"
{
"or": [
"Wave",
"Spazer",
"Plasma",
{
"ammo": {
"type": "Super",
"count": 2
}
},
{
"ammo": {
"type": "Missile",
"count": 8
}
},
{
"heatFrames": 550
}
]
}
{
"heatFrames": 550
} |
|
After climbing the room, it is possible to shoot at the door and then use X-Ray, so the shot hits immediately afterwards. Entrance condition: {
"comeInWithGMode": {
"mode": "any",
"morphed": false
}
}Requires: "h_heatedGMode"
{
"or": [
"SpaceJump",
"canWallJump",
"HiJump",
"canSpringBallJumpMidAir",
{
"and": [
"Charge",
"canUseFrozenEnemies"
]
},
{
"and": [
"canTrickyDodgeEnemies",
"canJumpIntoIBJ"
]
}
]
}
{
"heatFrames": 70
}Dev note: FIXME: It may be possible to kill the upper pirates in a way where Samus can collect their drops on the path to the door. FIXME: It is possible to kill the pirates then IBJ or tricky dash jump, but using the runway will require at least one laser hit. |
|
Requires: "canUseFrozenEnemies"
"h_crouchJumpDownGrab"
{
"heatFrames": 660
}
{
"or": [
{
"and": [
"h_usePowerBomb",
{
"heatFrames": 50
}
]
},
{
"obstaclesCleared": [
"A"
]
}
]
}Clears obstacles: A Unlocks doors: {"types":["missiles"],"requires":[{"heatFrames":30}]}
{"types":["powerbomb"],"requires":[],"useImplicitRequires":false} |
From: 5
Firefleas Bottom Left Platform Junction
To: 7
Fireflea Statue's Claw Junction
Requires: {
"or": [
{
"and": [
"canWallJump",
"canUseFrozenEnemies"
]
},
{
"and": [
"HiJump",
"canUseFrozenEnemies"
]
},
"canTrickyUseFrozenEnemies"
]
} |
From: 1
Left Door
To: 7
Junction By Lower Alcoons (Left of Spike Pits)
Crystal Flash near the edge - just before Samus goes off-screen - to clear the runway Alcoon. Shinecharge to the left, then weave down and into the Alcoon to interrupt. Entrance condition: {
"comeInWithGMode": {
"mode": "direct",
"morphed": false
}
}Requires: {
"or": [
"canWallJump",
"HiJump",
"canSpringBallJumpMidAir",
"SpaceJump",
{
"and": [
"canIBJ",
"canBombHorizontally",
"canJumpIntoIBJ"
]
},
{
"and": [
"canUseFrozenEnemies",
"canInsaneJump"
]
}
]
}
"h_CrystalFlashForReserveEnergy"
{
"canShineCharge": {
"usedTiles": 27,
"gentleUpTiles": 2,
"openEnd": 0
}
}
{
"or": [
"canDownBack",
"canTrickyJump"
]
}
{
"or": [
{
"and": [
{
"disableEquipment": "ETank"
},
{
"autoReserveTrigger": {}
},
"canRModeSparkInterrupt",
{
"enemyDamage": {
"enemy": "Alcoon",
"type": "contact",
"hits": 1
}
}
]
},
{
"and": [
"canReserveTriggerBufferXRay",
{
"autoReserveTrigger": {
"implicitHeatFrames": "no"
}
},
"canRModePauseAbuseSparkInterrupt",
{
"heatFrames": 30
}
]
}
]
}Clears obstacles: A |
|
It is possible to climb up with a tricky dash jump and no wall jump. Either kill the Alcoon before it spawns any stationary, invisible fireballs, or let the right alcoons shoot enough to overload projectiles. Entrance condition: {
"comeInWithGMode": {
"mode": "any",
"morphed": false
}
}Requires: {
"or": [
"canWallJump",
"HiJump",
"canSpringBallJumpMidAir",
"SpaceJump",
"canUseFrozenEnemies",
{
"and": [
"canTrickyDashJump",
"canTrickyDodgeEnemies"
]
}
]
}
"h_heatedGModeOpenDifferentDoor" |
From: 3
Bottom Horizontal Door
To: 2
Right Vertical Door
PLMs will be overloaded using the camera scroll blocks while climbing the room. Blindly traverse the maze until the end, where Samus will be stuck at the far right next to the shot block. Exit G-mode just one tile to the left, Morph, use a Bomb or Power Bomb to destroy the shot block and escape through the door. Note that it is possible to climb up with a tricky dash jump and no wall jump. Either kill the Alcoon before it spawns and stationary, invisible lasers, or let the right alcoons shoot enough to overload projectiles. Entrance condition: {
"comeInWithGMode": {
"mode": "any",
"morphed": false
}
}Requires: "canOffScreenMovement"
{
"or": [
"canWallJump",
"HiJump",
"canSpringBallJumpMidAir",
"SpaceJump",
"canUseFrozenEnemies",
"canIBJ",
{
"and": [
"canTrickyDashJump",
"canTrickyDodgeEnemies"
]
}
]
}
"h_bombThings"
"h_heatedGModeOffCameraDoor"
{
"heatFrames": 200
} |
|
It is possible to climb up with a tricky dash jump and no wall jump. Either kill the Alcoon before it spawns any stationary, invisible fireballs, or let the right Alcoons shoot enough to overload projectiles. Entrance condition: {
"comeInWithGMode": {
"mode": "any",
"morphed": false
}
}Requires: "h_heatedGMode"
{
"or": [
"canWallJump",
"HiJump",
"canSpringBallJumpMidAir",
"SpaceJump",
"canUseFrozenEnemies",
{
"and": [
"canTrickyDashJump",
"canTrickyDodgeEnemies"
]
}
]
}
{
"heatFrames": 0
} |
From: 3
Bottom Horizontal Door
To: 7
Junction By Lower Alcoons (Left of Spike Pits)
Kill the spike Alcoons before climbing to the upper runway. Be sure to jump over the invisible fireball projectiles. Crystal Flash at the top right, just before Samus goes off-screen, to clear the runway Alcoon. Shinecharge to the left, then weave down and into the Alcoon to interrupt. Entrance condition: {
"comeInWithGMode": {
"mode": "direct",
"morphed": false
}
}Requires: {
"or": [
"canWallJump",
"HiJump",
"canSpringBallJumpMidAir",
"SpaceJump",
{
"and": [
"canIBJ",
"canBombHorizontally",
"canJumpIntoIBJ"
]
},
{
"and": [
"canUseFrozenEnemies",
"canInsaneJump"
]
}
]
}
"h_CrystalFlashForReserveEnergy"
{
"canShineCharge": {
"usedTiles": 27,
"gentleUpTiles": 2,
"openEnd": 0
}
}
{
"or": [
"canDownBack",
"canTrickyJump"
]
}
{
"or": [
{
"and": [
{
"disableEquipment": "ETank"
},
{
"autoReserveTrigger": {}
},
"canRModeSparkInterrupt",
{
"enemyDamage": {
"enemy": "Alcoon",
"type": "contact",
"hits": 1
}
}
]
},
{
"and": [
"canReserveTriggerBufferXRay",
{
"autoReserveTrigger": {
"implicitHeatFrames": "no"
}
},
"canRModePauseAbuseSparkInterrupt",
{
"heatFrames": 30
}
]
}
]
}Clears obstacles: A |
From: 3
Bottom Horizontal Door
To: 7
Junction By Lower Alcoons (Left of Spike Pits)
Get past the spike Alcoons, and climb up - leave the lower left Alcoon alive to use for later. Clear the runway Alcoon and get the shinecharge, then drop into the lower left Alcoon to interrupt. If you Crystal Flash early, stay near the door to ensure you kill only the two spike Alcoons. Entrance condition: {
"comeInWithRMode": {}
}Requires: {
"or": [
{
"and": [
"h_heatedCrystalFlashForReserveEnergy",
{
"heatFrames": 100
}
]
},
{
"and": [
"ScrewAttack",
"canCarefulJump",
{
"heatFrames": 100
}
]
},
{
"and": [
"canDodgeWhileShooting",
{
"or": [
"h_heatProof",
{
"enemyKill": {
"enemies": [
[
"Alcoon"
]
],
"explicitWeapons": [
"Missile",
"Super",
"Wave+Plasma"
]
}
},
{
"and": [
"canPseudoScrew",
{
"heatFrames": 30
}
]
}
]
},
"canCarefulJump",
{
"heatFrames": 100
}
]
},
{
"and": [
{
"enemyKill": {
"enemies": [
[
"Alcoon",
"Alcoon"
]
],
"explicitWeapons": [
"Missile",
"Super",
"Plasma",
"Wave+Spazer"
]
}
},
{
"heatFrames": 200
}
]
},
{
"and": [
"canCarefulJump",
{
"heatFrames": 199
}
]
},
{
"and": [
{
"enemyDamage": {
"enemy": "Alcoon",
"type": "contact",
"hits": 1
}
},
{
"heatFrames": 180
}
]
}
]
}
{
"heatFrames": 160
}
{
"or": [
"canWallJump",
"HiJump",
"canSpringBallJumpMidAir",
"SpaceJump",
{
"and": [
"canSpringBallBombJump",
{
"heatFrames": 60
}
]
},
{
"and": [
"canIBJ",
"canBombHorizontally",
"canJumpIntoIBJ",
{
"heatFrames": 110
},
{
"or": [
"canDoubleBombJump",
{
"heatFrames": 190
}
]
}
]
},
{
"and": [
"canTrickyDashJump",
"canInsaneJump",
{
"heatFrames": 20
}
]
},
{
"and": [
"canUseFrozenEnemies",
"canInsaneJump",
{
"heatFrames": 150
}
]
}
]
}
{
"or": [
{
"and": [
"canDodgeWhileShooting",
{
"enemyKill": {
"enemies": [
[
"Alcoon"
]
],
"explicitWeapons": [
"Missile",
"Super",
"Charge+Plasma"
]
}
},
{
"heatFrames": 120
}
]
},
{
"and": [
{
"enemyKill": {
"enemies": [
[
"Alcoon"
]
],
"explicitWeapons": [
"Wave",
"Ice+Spazer",
"Plasma",
"ScrewAttack",
"PseudoScrew",
"PowerBomb"
]
}
},
{
"heatFrames": 180
}
]
},
{
"heatFrames": 200
}
]
}
{
"or": [
{
"resourceAvailable": [
{
"type": "ReserveEnergy",
"count": 1
}
]
},
{
"and": [
"h_heatProof",
"h_RModeCanRefillReserves",
{
"or": [
{
"and": [
{
"resourceMissingAtMost": [
{
"type": "PowerBomb",
"count": 0
}
]
},
{
"partialRefill": {
"type": "ReserveEnergy",
"limit": 20
}
}
]
},
{
"and": [
{
"resourceMissingAtMost": [
{
"type": "PowerBomb",
"count": 3
}
]
},
{
"partialRefill": {
"type": "ReserveEnergy",
"limit": 5
}
}
]
}
]
}
]
}
]
}
{
"canShineCharge": {
"usedTiles": 27,
"gentleUpTiles": 2,
"openEnd": 0
}
}
{
"or": [
"canDownBack",
"canTrickyJump"
]
}
{
"heatFrames": 120
}
{
"autoReserveTrigger": {
"maxReserveEnergy": 95
}
}
"canRModeSparkInterrupt"Clears obstacles: A |
From: 7
Junction By Lower Alcoons (Left of Spike Pits)
To: 1
Left Door
Requires: "canUseFrozenEnemies"
{
"heatFrames": 330
}
{
"or": [
"canDash",
{
"heatFrames": 20
}
]
}Unlocks doors: {"types":["powerbomb"],"requires":[{"heatFrames":60}]} |
From: 7
Junction By Lower Alcoons (Left of Spike Pits)
To: 6
Junction By Left Door (Right of Pit)
Requires: "h_navigateHeatRooms"
"canUseFrozenEnemies"
{
"heatFrames": 310
}
{
"or": [
"canDash",
{
"heatFrames": 25
}
]
} |
|
Requires: {
"or": [
"canWallJump",
"HiJump",
"SpaceJump",
"canIBJ",
"canSpeedyJump",
"h_crouchJumpDownGrab",
"canSpringBallJumpMidAir",
"canSpringBallBombJump",
"canUseFrozenEnemies"
]
}Dev note: FIXME: It is possible to get up with a damage boost, with or without Morph, which could preserve a flash suit. |
|
Freeze a crab on the edge of the hole in the ceiling. Then get on top of it with Gravity and a wall jump, jump assist, or second frozen crab on the ground, or a suitless Spring Ball jump with HiJump. Requires: "canUseFrozenEnemies"
{
"or": [
{
"and": [
"Gravity",
{
"or": [
"HiJump",
"canWallJump",
"canSpringBallJumpMidAir",
"canTrickyUseFrozenEnemies"
]
},
{
"or": [
"canMidAirMorph",
"h_useSpringBall"
]
}
]
},
{
"and": [
"HiJump",
"canSpringBallJumpMidAir",
"canSuitlessMaridia"
]
}
]
} |
From: 1
Bottom Left Door
To: 5
Platform Junction Near Top Left Door
Requires: "Gravity" "canUseFrozenEnemies" "HiJump" "canSpeedyJump" |
From: 1
Bottom Left Door
To: 5
Platform Junction Near Top Left Door
Requires: "canUseFrozenEnemies"
{
"or": [
"HiJump",
"canSpringBallJumpMidAir"
]
}
"h_storedSpark"
{
"or": [
{
"shinespark": {
"frames": 15,
"excessFrames": 3
}
},
{
"and": [
"HiJump",
{
"shinespark": {
"frames": 12,
"excessFrames": 3
}
}
]
}
]
}Dev note: FIXME: Consider adding a node for this ledge, since there are many ways to reach it. |
|
Entrance condition: {
"comeInWithGMode": {
"mode": "direct",
"morphed": false
},
"comesThroughToilet": "any"
}Requires: {
"or": [
"canGravityJump",
{
"and": [
"Gravity",
{
"or": [
"canConsecutiveWallJump",
"SpaceJump",
"canLongIBJ",
{
"and": [
"HiJump",
"canWallJump"
]
},
{
"and": [
"HiJump",
"canTrickyDashJump",
"canDownGrab"
]
},
"h_maxHeightSpringBallJump",
{
"and": [
"HiJump",
"canSpringBallJumpMidAir"
]
}
]
}
]
},
{
"and": [
"Gravity",
"canUseFrozenEnemies",
{
"or": [
"canWallJump",
{
"and": [
"HiJump",
"canSpeedyJump"
]
},
"canSpringBallJumpMidAir"
]
}
]
},
"h_doubleSpringBallJumpWithHiJump",
{
"and": [
"canSuitlessMaridia",
"canTrickyUseFrozenEnemies",
"HiJump",
"canTrickySpringBallJump"
]
}
]
}Exit condition: {
"leaveWithGMode": {
"morphed": false
}
}Dev note: The h_maxHeightSpringBallJump is not a h_underwaterMaxHeightSpringBallJump, because Gravity is required. |
|
Requires: "Gravity"
{
"or": [
{
"and": [
"HiJump",
"canWallJump"
]
},
{
"and": [
"canPreciseWallJump",
"canConsecutiveWallJump"
]
},
"SpaceJump",
"canUseFrozenEnemies"
]
} |
From: 5
Platform Junction Near Top Left Door
To: 4
Top Left Door
Requires: "canSuitlessMaridia"
"canUseFrozenEnemies"
{
"or": [
"HiJump",
"canSpringBallJumpMidAir"
]
} |
From: 6
Middle Junction Near Top Left Pirate
To: 7
Platform Below Top Right Door
Requires: "canSuitlessMaridia" "Plasma" "canUseFrozenEnemies" |
From: 7
Platform Below Top Right Door
To: 6
Middle Junction Near Top Left Pirate
Kill or freeze the pirate then crouch jump and down grab or use another method to get to the ledge. Requires: "canSuitlessMaridia"
"Plasma"
{
"or": [
"HiJump",
"canSpringBallJumpMidAir",
"h_underwaterCrouchJumpDownGrab",
"canUseFrozenEnemies"
]
} |
From: 1
Bottom Door
To: 3
Middle Right Door
Run and spin jump to the left through the transition with as much horiziontal speed as possible, without bonking the door frame. Hold left through the transition to avoid the fish and land on the platform to the left. With limited runway, this may require a very precise jump. Then reach the platform above either using a crouch-jump down-grab or by freezing the fish. Entrance condition: {
"comeInWithPlatformBelow": {
"maxHeight": 6,
"maxLeftPosition": -0.5,
"minRightPosition": 2.5
},
"comesThroughToilet": "yes"
}Requires: "canDash"
"canCrossRoomJumpIntoWater"
"canInsaneJump"
{
"or": [
"h_underwaterCrouchJumpDownGrab",
"canUseFrozenEnemies"
]
}Dev note: This applies to Crab Maze, Forgotten Highway Elevator, and Red Brinstar Elevator Room. |
|
Spin jump to the left through the transition. Bonking the left side of the door frame works but is not required. Hold left through the transition to avoid the fish and land on the platform to the left. Then reach the platform above either using a crouch-jump down-grab or by freezing the fish. Entrance condition: {
"comeInWithPlatformBelow": {
"maxHeight": 6,
"maxLeftPosition": 2,
"minRightPosition": -2
},
"comesThroughToilet": "no"
}Requires: "canCrossRoomJumpIntoWater"
{
"or": [
"h_underwaterCrouchJumpDownGrab",
"canUseFrozenEnemies"
]
}Dev note: This doesn't work with passing through the Toilet (e.g. from Climb) because you would spawn higher and not be able to avoid the fish, given that no horiziontal speed is carried through the transition here. |
From: 1
Bottom Door
To: 3
Middle Right Door
Run and spin jump to the left through the transition with as much horiziontal speed as possible, without bonking the door frame. Hold left through the transition to avoid the fish and land on the platform to the left. Then reach the platform above either using a crouch-jump down-grab or by freezing the fish. Entrance condition: {
"comeInWithPlatformBelow": {
"maxHeight": 6,
"maxLeftPosition": -0.5,
"minRightPosition": 4.5
},
"comesThroughToilet": "yes"
}Requires: "canDash"
"canCrossRoomJumpIntoWater"
"canTrickyJump"
{
"or": [
"h_underwaterCrouchJumpDownGrab",
"canUseFrozenEnemies"
]
}Dev note: This applies to Basement and Wrecked Ship Main Shaft. |
|
Requires: "Gravity"
{
"or": [
"HiJump",
"canWallJump",
"SpaceJump",
"canIBJ",
"canUseFrozenEnemies",
"canSpringBallJumpMidAir",
"canGravityJump"
]
} |
From: 2
Bottom Left Door
To: 7
Lower Hills Junction
Requires: "canSuitlessMaridia"
"canUseFrozenEnemies"
{
"or": [
"HiJump",
"canSpringBallJumpMidAir"
]
} |
|
Requires: "h_navigateUnderwater"
{
"or": [
"h_useSpringBall",
"canMidAirMorph",
{
"and": [
"Gravity",
"canBombHorizontally"
]
},
{
"and": [
"Gravity",
"canLongIBJ",
"canJumpIntoIBJ"
]
},
{
"and": [
"Gravity",
"canTrivialMidAirMorph",
{
"or": [
"SpaceJump",
"canUseFrozenEnemies"
]
}
]
},
{
"and": [
"canTrivialMidAirMorph",
"canDisableEquipment"
]
}
]
}Dev note: It's possible to get in without a mid-air morph by rolling off from above, but that requires disabling Gravity and/or crab hits and the crab not killed. That's a lot of work to avoid something simple and barely reasonable at that level anyways. |
|
Requires: "canSuitlessMaridia"
"canUseFrozenEnemies"
{
"or": [
"canWallJump",
"canSpringBallJumpMidAir",
{
"and": [
"HiJump",
"canDownGrab"
]
},
"canBombJumpWaterEscape"
]
} |
From: 4
Right Door
To: 6
Junction Right of Morph Passage
Requires: "canSuitlessMaridia" "canUseFrozenEnemies" |
From: 1
Bottom Left Door
To: 2
Right Door
Crouch under the crumble blocks. Holding both angle buttons to aim upward, freeze the Mochtroid while it is on Samus. Jump onto the Mochtroid by quickly pressing down after jumping. When on it, press up to stand then jump through the ceiling. With no jump assists, use a frozen Mochtroid as a platform to get to the ledge above the door. Requires: {
"notable": "Mochtroid Ice Clip"
}
"h_navigateUnderwater"
"canUseFrozenEnemies"
{
"disableEquipment": "Gravity"
}
{
"or": [
"Gravity",
"HiJump",
"canTrickyUseFrozenEnemies"
]
}
"h_underwaterCrouchJump"
{
"or": [
"canTrickyJump",
{
"and": [
"canDodgeWhileShooting",
{
"enemyDamage": {
"enemy": "Mochtroid",
"type": "contact",
"hits": 1
}
}
]
},
{
"enemyDamage": {
"enemy": "Mochtroid",
"type": "contact",
"hits": 2
}
}
]
}Dev note: The canCeilingClip was left out, because this is easier than all other clips, and can instead be a notable in a lower difficulty. |
From: 1
Bottom Left Door
To: 2
Right Door
Find the crumble blocks and crystal flash mid-air, just below them. They are on the far right of the ceiling of the bottom right pathway. Hold down as the CF ends to break the non-respawning crumble blocks. This is for the much harder version, without Gravity and Bombs. Requires: "h_jumpIntoCrystalFlashClip"
"canSuitlessMaridia"
{
"or": [
"HiJump",
"canSpringBallJumpMidAir",
{
"and": [
"h_underwaterCrouchJumpDownGrab",
"canCarefulJump"
]
},
"canUseFrozenEnemies"
]
} |
|
Requires: {
"haveBlueSuit": {}
}
{
"or": [
"h_underwaterCrouchJump",
"Gravity",
"HiJump",
"canUseFrozenEnemies",
"canBootless2WideUWJ"
]
} |
From: 2
Right Door
To: 1
Bottom Left Door
Crouch under the crumble blocks. Holding both angle buttons to aim upward, freeze the Mochtroid while it is on Samus. Jump onto the Mochtroid by quickly pressing down after jumping. When on it, press up to stand then jump through the ceiling. Use the middle section of pipes as a platform to reach the top level, above the Mochtroid. Requires: {
"notable": "Mochtroid Ice Clip"
}
"h_navigateUnderwater"
"canUseFrozenEnemies"
{
"or": [
"HiJump",
"Gravity",
"canTrickySpringBallJump"
]
}
{
"disableEquipment": "Gravity"
}
{
"or": [
"canTrickyJump",
{
"and": [
"canDodgeWhileShooting",
{
"enemyDamage": {
"enemy": "Mochtroid",
"type": "contact",
"hits": 1
}
}
]
},
{
"enemyDamage": {
"enemy": "Mochtroid",
"type": "contact",
"hits": 2
}
}
]
}Dev note: The canCeilingClip was left out, because this is easier than all other clips, and can instead be a notable in a lower difficulty. |
From: 2
Right Door
To: 1
Bottom Left Door
Use the middle section of pipes as a platform to reach the top level, above the Mochtroid. A crouch jump and down grab is enough if the jump begins on the rightmost 75% of the rightmost pixel. Getting into this position can be made easier with a morph turnaround: Spin jump out, turn left then quickly break spin (i.e. with a shot or angle button), morph and press against the upper left wall, then briefly tap left on the descent to land on the edge. Then perform a morph turnaround by pressing right for a very short time to face right without moving. Unmorph and jump to the right by pressing right immediately after jumping (on the same frame or up to 5 frames later), and down grab on the upper right ledge. With the Mochtroid, crouch under the crumble blocks to the left. Holding both angle buttons to aim upward, freeze the Mochtroid while it is on Samus. Jump onto the Mochtroid by quickly pressing down after jumping. When on it, press up to stand then jump through the ceiling. Requires: {
"notable": "Mochtroid Ice Clip"
}
"canCeilingClip"
"canUseFrozenEnemies"
"canMorphTurnaround"
"h_underwaterCrouchJumpDownGrab"
{
"or": [
"canTrickyJump",
{
"enemyDamage": {
"enemy": "Mochtroid",
"type": "contact",
"hits": 1
}
}
]
} |
From: 2
Right Door
To: 1
Bottom Left Door
Use the middle section of pipes as a platform to reach the top level, above the Mochtroid. A crouch jump and down grab is enough if the jump begins on the rightmost 75% of the rightmost pixel. Getting into this position can be done by moonwalking to a certain pixel and then turning around to the right to end on the right-most pixel. With random subpixels, Samus will fall off 25% of the time when turning around to the right. If Samus starts on the correct pixel and does not fall off when turning around, then she is guaranteed to be on subpixels that will work for the jump. Crouch jump, pressing right immediately after jumping (on the same frame or up to 5 frames later), then down grab on the upper right ledge. Alternatively, moonwalking onto the correct pixel one frame at a time, stopping as soon as it is reached, can guarantee that Samus will not fall when turning around. With the Mochtroid, crouch under the crumble blocks. Holding both angle buttons to aim upward, freeze the Mochtroid while it is on Samus. Jump onto the Mochtroid by quickly pressing down after jumping. When on it, press up to stand then jump through the ceiling. Requires: {
"notable": "Mochtroid Ice Clip"
}
"canCeilingClip"
"canUseFrozenEnemies"
"canTrickyJump"
"h_underwaterCrouchJumpDownGrab" |
From: 2
Bottom Right Door
To: 2
Bottom Right Door
Crouch and freeze a Mochtroid to clip into the space behind the grapple blocks. Jump and tap grapple while aiming diagonally to be pushed into the wall just the right amount. Samus should be one tile below the grapple blocks and fully in the wall. Too short a tap and the next grapple will not work, too long and Samus will be stuck in the wall. Grapple diagonally again to be pushed into the transition. Requires: {
"notable": "Frozen Mochtroid Grapple Clip Door Lock Skip"
}
{
"or": [
{
"and": [
"Gravity",
"canUseFrozenEnemies",
"canCrouchJump",
"canCeilingClip"
]
},
{
"and": [
"h_XRayMorphIceClip",
"h_complexToCarryBlueSuit"
]
},
{
"and": [
"h_highPixelIceClip",
"h_trickyToCarryBlueSuit"
]
}
]
}
"canGrappleClip"Bypasses door shell: true Dev note: The 2-3 pixel window is trivial to get by crouching, the high pixel clip is easier here than normal, as no precise down grab is needed. The canCrouchJump is not a h_underwaterCrouchJump, because Gravity is required. |
|
Requires: "Gravity"
{
"or": [
"HiJump",
"canWallJump",
"SpaceJump",
"canIBJ",
"canUseFrozenEnemies",
"canGravityJump",
"canSpringBallJumpMidAir"
]
} |
|
Requires: "canSuitlessMaridia" "HiJump" "canUseFrozenEnemies" |
|
Entrance condition: {
"comeInWithGrappleTeleport": {
"blockPositions": [
[
12,
12
],
[
12,
13
]
]
}
}Requires: {
"or": [
"canUseFrozenEnemies",
"HiJump",
"canSpringBallJumpMidAir"
]
}Dev note: The requirements are for getting onto the platform. FIXME: it would probably be better to add another node below the platform; and flash suit is also an option for getting up onto it. |
|
Similar to naked Watering Hole escape. Freeze a crab under the gap above, do a stationary spinjump facing right, then walljump until you're up. Another frozen crab can help complete the way up. Requires: {
"notable": "Ice Only Crab Climb"
}
"canSunkenTileWideWallClimb"
"canUseFrozenEnemies"
"canStationarySpinJump" |
|
Requires: "canSuitlessMaridia"
"HiJump"
{
"or": [
"h_underwaterCrouchJumpDownGrab",
"canSpringBallJumpMidAir",
"canUseFrozenEnemies",
{
"and": [
"canTrickyJump",
"canDownGrab"
]
}
]
} |
|
Requires: "canSuitlessMaridia"
"canSpringBallJumpMidAir"
{
"or": [
"h_underwaterMaxHeightSpringBallJump",
"HiJump",
"canUseFrozenEnemies"
]
} |
|
Entrance condition: {
"comeInWithGrappleTeleport": {
"blockPositions": [
[
3,
12
],
[
3,
13
]
]
}
}Requires: {
"or": [
"canUseFrozenEnemies",
"HiJump",
"canSpringBallJumpMidAir"
]
}Dev note: Here Samus spawns at or slightly inside the left wall; the additional requirements are for getting up to the platform below the door. FIXME: end at a new node below the platform; a flash suit is another way to get up. |
|
If the top door is blue, it will open immediately after the teleport, not allowing Samus to swing directly onto the platform. Entrance condition: {
"comeInWithGrappleTeleport": {
"blockPositions": [
[
7,
2
]
]
}
}Requires: {
"or": [
"canUseFrozenEnemies",
"HiJump",
"canSpringBallJumpMidAir"
]
}Dev note: FIXME: Add a variation with canRiskPermanentLossOfAccess if the door is not blue. FIXME: end at a new node below the platform; a flash suit is another way to get up. |
|
Requires: "Gravity"
{
"or": [
"h_crouchJumpDownGrab",
"canUseFrozenEnemies",
"canGravityJump",
"canWallJump",
"HiJump",
"canSpringBallJumpMidAir",
"SpaceJump",
"canIBJ",
"canSpringBallBombJump"
]
}Dev note: The canCrouchJump is not a h_underwaterCrouchJump, because Gravity is required. |
From: 1
Bottom Left Door
To: 2
Top Right Door
Requires: "canSuitlessMaridia"
"HiJump"
{
"or": [
"canSpringBallJumpMidAir",
"canUseFrozenEnemies"
]
} |
From: 1
Bottom Left Door
To: 2
Top Right Door
Requires: "canSuitlessMaridia" "canUseFrozenEnemies" "canTrickySpringBallJump" "h_underwaterCrouchJump" |
|
Use a frozen Zoa as a platform to cross the sand without falling in. If Samus does fall into the sand, it is possible to get out using a crouch jump, in which case it can help to stand on a Zoa frozen low at the bottom of the sand. Requires: "canSuitlessMaridia" "canUseFrozenEnemies" "canPlayInSand" |
|
Requires: {
"or": [
"canWallJump",
"SpaceJump",
"canLongIBJ",
"canJumpIntoIBJ",
{
"and": [
"HiJump",
{
"or": [
"canSpringBallJumpMidAir",
"canUseFrozenEnemies"
]
}
]
}
]
} |
From: 3
Junction Left of Morph Tunnel
To: 1
Left Door
Requires: "canUseFrozenEnemies"
{
"or": [
"Plasma",
"Wave",
"Spazer",
"canTrickyJump",
{
"enemyDamage": {
"enemy": "Menu",
"type": "contact",
"hits": 1
}
}
]
}
{
"or": [
"canDodgeWhileShooting",
{
"enemyDamage": {
"enemy": "Menu",
"type": "contact",
"hits": 1
}
}
]
} |
From: 2
Bottom Right Door
To: 2
Bottom Right Door
Farm the lower Choots, Skultera, and the bottom Owtch by running through it. Shinecharge at the bottom, then use the Owtch on the small platform to interrupt. This can be done with pause abuse or by freezing it while it is moving left. Requires: {
"obstaclesCleared": [
"R-Mode"
]
}
"Gravity"
{
"or": [
"h_CrystalFlashForReserveEnergy",
{
"and": [
"h_RModeCanRefillReserves",
{
"partialRefill": {
"type": "ReserveEnergy",
"limit": 20
}
}
]
}
]
}
"h_shinechargeMaxRunway"
{
"autoReserveTrigger": {
"maxReserveEnergy": 95
}
}
{
"or": [
"canRModePauseAbuseSparkInterrupt",
{
"and": [
{
"or": [
"Charge",
"Plasma"
]
},
"canUseFrozenEnemies",
"canRModeSparkInterrupt"
]
}
]
}Resets obstacles: R-Mode |
|
Requires: "h_navigateUnderwater"
"canUseFrozenEnemies"
{
"or": [
"canTrickyUseFrozenEnemies",
"HiJump",
"canSpringBallJumpMidAir",
"Gravity",
"h_underwaterCrouchJumpDownGrab"
]
} |
|
Entrance condition: {
"comeInWithGMode": {
"mode": "direct",
"morphed": false
}
}Requires: "h_navigateUnderwater"
{
"or": [
"Gravity",
"HiJump",
"canWallJump",
"h_underwaterCrouchJumpDownGrab",
"canTrickySpringBallJump",
"canUseFrozenEnemies"
]
}Exit condition: {
"leaveWithGMode": {
"morphed": false
}
} |
|
Requires: "canSuitlessMaridia"
"canUseFrozenEnemies"
{
"doorUnlockedAtNode": 1
}Unlocks doors: {"nodeId":1,"types":["ammo"],"requires":[]} |
From: 4
Junction Below Left Door
To: 5
Junction Below Right Door
Freeze the Zoa as it spawns and jump on it then jump across the room. Freeze any Yapping Maws that attack and use them or a frozen Zoa as a platform to leave. Requires: "canSuitlessMaridia" "canUseFrozenEnemies" "canCarefulJump" |
|
Requires: "canSuitlessMaridia"
"canUseFrozenEnemies"
{
"doorUnlockedAtNode": 3
}Unlocks doors: {"nodeId":3,"types":["ammo"],"requires":[]} |
From: 5
Junction Below Right Door
To: 4
Junction Below Left Door
Freeze the Zoa as it spawns and jump on it then jump across the room. Freeze any Yapping Maws that attack and use them or a frozen Zoa as a platform to leave. Requires: "canSuitlessMaridia" "canUseFrozenEnemies" "canCarefulJump" |
From: 1
Left Door
To: 3
Junction Below Right Door
Quickly shoot to break the shot block and then do a momentumConservingTurnaround to ascend into the little region. Another movement item will be needed to get closer to the crumble blocks. Entrance condition: {
"comeInJumping": {
"speedBooster": "any",
"minTiles": 2
}
}Requires: "canTrickyJump"
"canCrossRoomJumpIntoWater"
"canMomentumConservingTurnaround"
{
"or": [
"canUseFrozenEnemies",
"canSpringBallJumpMidAir",
"HiJump"
]
}
{
"noFlashSuit": {}
}Dev note: The transition likely connects to Pants Room making this strat not likely to be useful. In any case, each option (Ice, Spring Ball, Hi-Jump) has an alternative in-room strat that can get up without needing a runway. FIXME: this can be done with 1 tile of runway, but it's a bit more difficult. FIXME: with a momentum-conserving morph, it is possible to reach the platforms below the crumble blocks. |
|
Requires: "canSuitlessMaridia"
"HiJump"
{
"or": [
"canSpringBallJumpMidAir",
"h_underwaterCrouchJumpDownGrab",
"canUseFrozenEnemies"
]
} |
|
Requires: "Gravity"
{
"or": [
"canTrickyJump",
"Ice",
"ScrewAttack",
{
"haveBlueSuit": {}
},
{
"enemyKill": {
"enemies": [
[
"Evir"
]
],
"explicitWeapons": [
"Plasma",
"Super",
"PowerBombPeriphery"
]
}
},
{
"enemyDamage": {
"enemy": "Evir",
"type": "particle",
"hits": 1
}
}
]
}
"canPlayInSand"
{
"or": [
"canWallJump",
"HiJump",
"canUseFrozenEnemies",
"canGravityJump",
{
"and": [
"canTrickyJump",
"can4HighMidAirMorph",
"canTrickySpringBallJump"
]
}
]
}
{
"or": [
{
"noBlueSuit": {}
},
{
"notable": "Blue Suit Sand Walk"
}
]
}Dev note: Technically it could make sense to clear obstacle A if the Evirs are killed, but with Gravity it is irrelevant. |
|
Requires: "Gravity"
{
"or": [
"canPlayInSand",
"canUseFrozenEnemies",
"canCarefulJump"
]
}
{
"or": [
"canCarefulJump",
{
"enemyDamage": {
"enemy": "Evir",
"type": "particle",
"hits": 1
}
}
]
} |
|
Wait for the Rinka to spawn, then jump, so the trajectory is as high as possible. Space jump makes this a bit easier. If the Metroids are alive, lure them off screen to the left. Requires: {
"or": [
"canTrickyJump",
"SpaceJump"
]
}
{
"or": [
"canMetroidAvoid",
"canUseFrozenEnemies",
"ScrewAttack",
{
"obstaclesCleared": [
"B"
]
}
]
}Exit condition: {
"leaveWithGModeSetup": {}
} |
From: 2
Bottom Right Door
To: 2
Bottom Right Door
Requires: {
"or": [
"canMetroidAvoid",
"canUseFrozenEnemies",
"ScrewAttack",
{
"or": [
"f_KilledMetroidRoom2",
{
"obstaclesCleared": [
"f_KilledMetroidRoom2"
]
}
]
}
]
}Exit condition: {
"leaveWithGModeSetup": {}
}Dev note: There could be another strat for a Metroid or Rinka, that doesn't have canMetroidAvoid or canRiskPermanentLossOfAccess, but canMetroidAvoid isn't too difficult for this level. |
