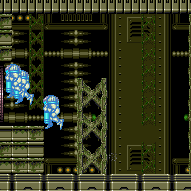
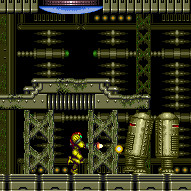
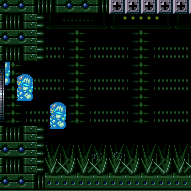
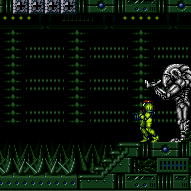
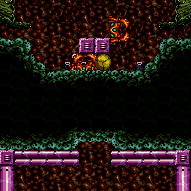
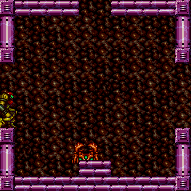
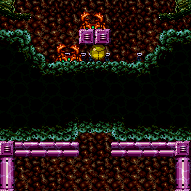
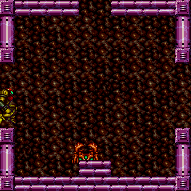
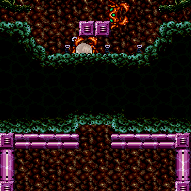
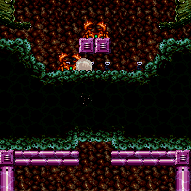
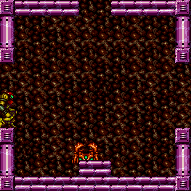
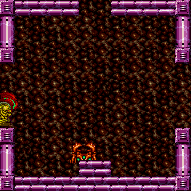
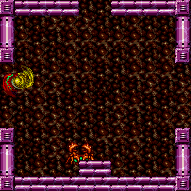
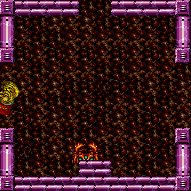
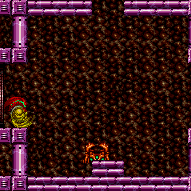
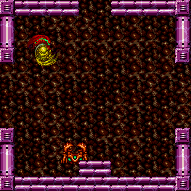
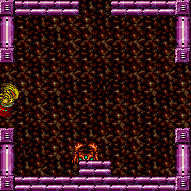
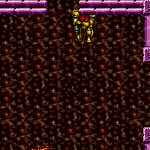
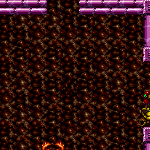
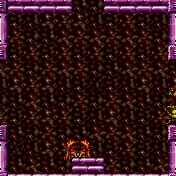
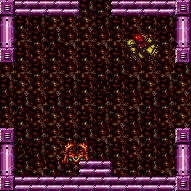
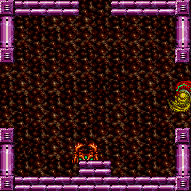
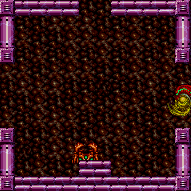
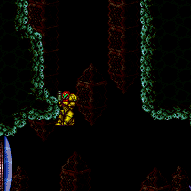
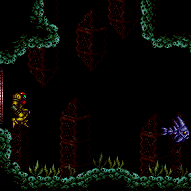
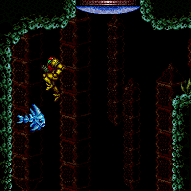
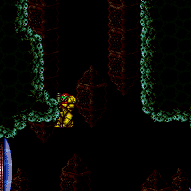
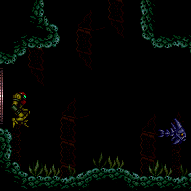
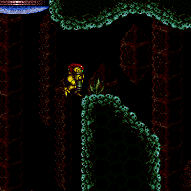
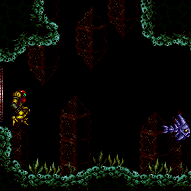
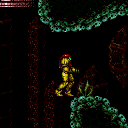
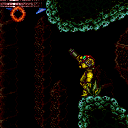
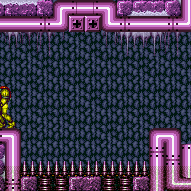
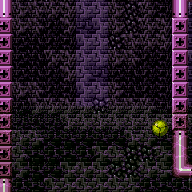
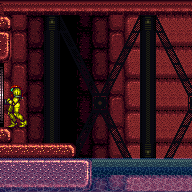
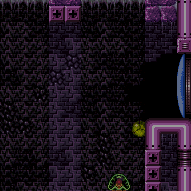
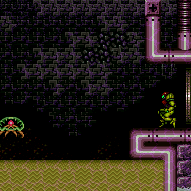
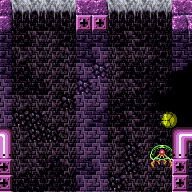
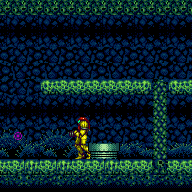
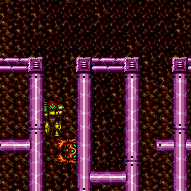
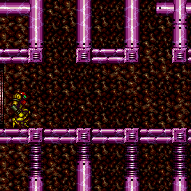
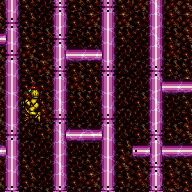
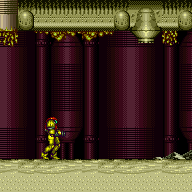
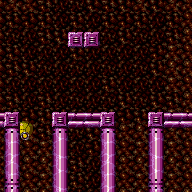
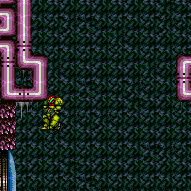
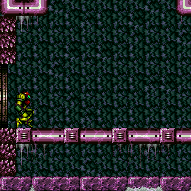
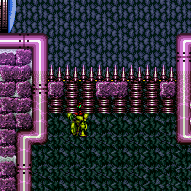
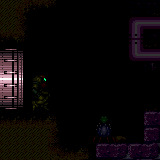
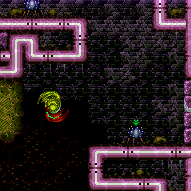
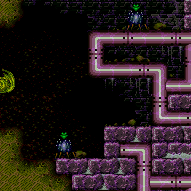
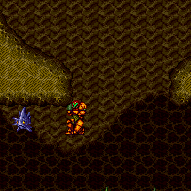
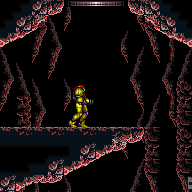
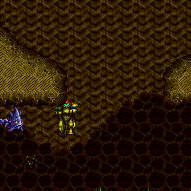
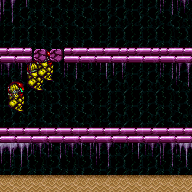
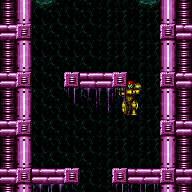
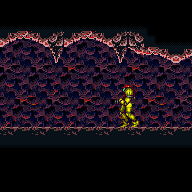
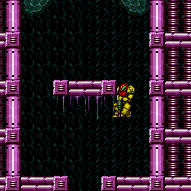
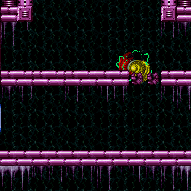
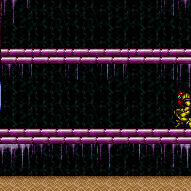
canMomentumConservingTurnaround (Very Hard)
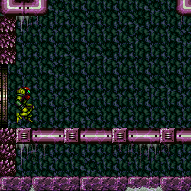
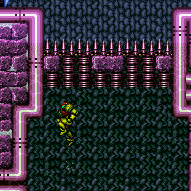
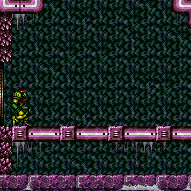
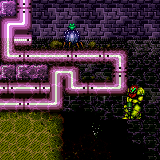
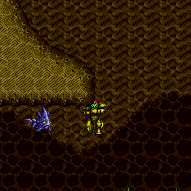
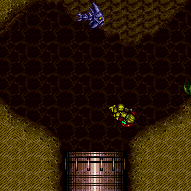
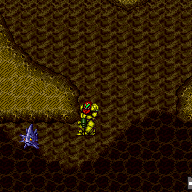
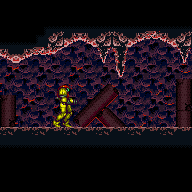
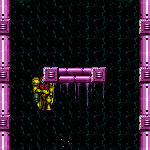
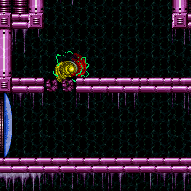
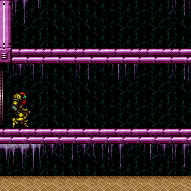
Uses the uninteruptable frames of turning around in order to continue moving after hitting a solid object. Can be used to make it through an opening door, or barely just past a ledge. It is often beneficial to be in a downward pose when hitting the ceiling, in order to shrink Samus' hitbox to delay contact. The difficulty is in judging the timing of the turnaround, predicting the ending position, and adjusting to movement speed.
Dependencies: canBufferedMomentumConservingTurnaround
Strats ()
|
Requires: "canTrickyJump"
{
"or": [
"canLateralMidAirMorph",
{
"and": [
"canMomentumConservingTurnaround",
"canInsaneJump"
]
}
]
}Exit condition: {
"leaveWithSidePlatform": {
"height": 2,
"runway": {
"length": 10,
"openEnd": 0
},
"obstruction": [
2,
0
]
}
}Dev note: Max extra run speed $2.5. |
|
Requires: "f_DefeatedPhantoon"
"h_speedJump"
{
"or": [
"canMomentumConservingMorph",
{
"and": [
"canMomentumConservingTurnaround",
"canInsaneJump"
]
}
]
}Exit condition: {
"leaveWithSidePlatform": {
"height": 3,
"runway": {
"length": 45,
"openEnd": 1
},
"obstruction": [
3,
0
]
}
}Dev note: Max extra run speed $7.0. |
From: 2
Middle Left Door
To: 2
Middle Left Door
Requires: {
"not": "f_DefeatedPhantoon"
}
"canRiskPermanentLossOfAccess"
{
"or": [
"canMomentumConservingMorph",
{
"and": [
"canMomentumConservingTurnaround",
"canInsaneJump"
]
}
]
}Exit condition: {
"leaveWithSidePlatform": {
"height": 3,
"runway": {
"length": 45,
"openEnd": 1
},
"obstruction": [
3,
0
]
}
}Dev note: Max extra run speed $7.0. |
From: 2
Bottom Left Door
To: 1
Top Left Doorway
Requires a runway of at least 6 tiles (with no open end) in the adjacent room. Use a Cross Room Jump into Water followed by a delayed Momentum Conserving Turnaround. Then morph and move right to go through the Morph tunnel above, avoiding damage from the crab. With the minimal runway length, this requires precise timing. Entrance condition: {
"comeInJumping": {
"speedBooster": "any",
"minTiles": 5.4375
}
}Requires: {
"notable": "Cross Room Jump Morph"
}
"canMidAirMorph"
"canCrossRoomJumpIntoWater"
"canMomentumConservingTurnaround"
"canInsaneJump"Dev note: This strat is included for completeness, but it is technically redundant with the airball strat, which may generally be preferable due to not risking a crab hit. |
From: 2
Bottom Left Door
To: 1
Top Left Doorway
Requires a runway of at least 4 tiles (with no open end) in the adjacent room. Use a Cross Room Jump into Water followed by a delayed Momentum Conserving Turnaround. Then morph and move right to go through the Morph tunnel above, avoiding damage from the crab. Entrance condition: {
"comeInJumping": {
"speedBooster": "yes",
"minTiles": 3.4375
}
}Requires: {
"notable": "Cross Room Jump Morph"
}
"canMidAirMorph"
"canCrossRoomJumpIntoWater"
"canMomentumConservingTurnaround" |
From: 2
Bottom Left Door
To: 1
Top Left Doorway
Requires a runway of at least 4 tiles (with no open end) in the adjacent room. Use a Cross Room Jump into Water followed by a delayed Momentum Conserving Turnaround to reach the Morph tunnel above. Climbing the Left side of the center hole will run into an unavoidable Sciser that can be passed through by Morphing. Crossing to the right from the left door requires slightly more runway and takes a more precise turnaround. Samus must also stay near a side of the center hole to reach the Morph tunnels. Entrance condition: {
"comeInJumping": {
"speedBooster": "no",
"minTiles": 3.4375
}
}Requires: {
"notable": "Cross Room Jump Morph"
}
"canMidAirMorph"
"canCrossRoomJumpIntoWater"
"canMomentumConservingTurnaround"
"canKago"
{
"or": [
{
"enemyDamage": {
"enemy": "Sciser",
"type": "contact",
"hits": 1
}
},
"h_pauseAbuseMinimalReserveRefill"
]
} |
From: 2
Bottom Left Door
To: 1
Top Left Doorway
Requires a runway of at least 3 tiles (with an open end) in the adjacent room. Use a Cross Room Jump into Water followed by a delayed Momentum Conserving Turnaround to reach the Morph tunnel above. Climbing the Left side of the center hole will run into an unavoidable Scisor that can be passed through by Morphing. Crossing to the right from the left door requires slightly more runway and takes a more precise turnaround. Samus must also stay near a side of the center hole to reach the Morph tunnels. Entrance condition: {
"comeInJumping": {
"speedBooster": "yes",
"minTiles": 3
}
}Requires: {
"notable": "Cross Room Jump Morph"
}
"canMidAirMorph"
"canCrossRoomJumpIntoWater"
"canMomentumConservingTurnaround"
"canKago"
{
"or": [
{
"enemyDamage": {
"enemy": "Sciser",
"type": "contact",
"hits": 1
}
},
"h_pauseAbuseMinimalReserveRefill"
]
}Dev note: Extra run speeds between $1.2 and about $2.5 can work. |
From: 2
Bottom Left Door
To: 1
Top Left Doorway
Turn around to the left just before bonking the ceiling, to retain upward momentum. Then turn back to the right and go through the morph tunnel to the right, avoiding crab damage. Entrance condition: {
"comeInSpaceJumping": {
"speedBooster": "no",
"minTiles": 6
}
}Requires: {
"notable": "Cross Room Jump Morph"
}
"canCrossRoomJumpIntoWater"
"canPreciseSpaceJump"
"canMomentumConservingTurnaround"
"canMidAirMorph"Dev note: Jump low through the door with at least $1.D extra run speed. |
From: 2
Bottom Left Door
To: 1
Top Left Doorway
Turn around to the left just before bonking the ceiling, to retain upward momentum. Then turn back to the right and go through the morph tunnel to the right, avoiding crab damage. Entrance condition: {
"comeInSpaceJumping": {
"speedBooster": "yes",
"minTiles": 3.5625
}
}Requires: {
"notable": "Cross Room Jump Morph"
}
"canCrossRoomJumpIntoWater"
"canPreciseSpaceJump"
"canMomentumConservingTurnaround"
"canMidAirMorph"Dev note: Jump low through the door with at least $1.5 extra run speed. |
From: 2
Bottom Left Door
To: 1
Top Left Doorway
Turn around to the left just before bonking the ceiling, to retain upward momentum. Then morph while passing through the crab and go through the morph tunnel to the left. Entrance condition: {
"comeInSpaceJumping": {
"speedBooster": "no",
"minTiles": 3.5625
}
}Requires: {
"notable": "Cross Room Jump Morph"
}
"canCrossRoomJumpIntoWater"
"canPreciseSpaceJump"
"canMomentumConservingTurnaround"
"canMidAirMorph"
"canKago"
{
"or": [
{
"enemyDamage": {
"enemy": "Sciser",
"type": "contact",
"hits": 1
}
},
"h_pauseAbuseMinimalReserveRefill"
]
}Dev note: Jump low through the door with at least $1.4 extra run speed. |
From: 2
Bottom Left Door
To: 1
Top Left Doorway
Turn around to the left just before bonking the ceiling, to retain upward momentum. Then morph while passing through the crab and go through the morph tunnel to the left. Entrance condition: {
"comeInSpaceJumping": {
"speedBooster": "yes",
"minTiles": 3
}
}Requires: {
"notable": "Cross Room Jump Morph"
}
"canCrossRoomJumpIntoWater"
"canPreciseSpaceJump"
"canMomentumConservingTurnaround"
"canMidAirMorph"
"canKago"
{
"or": [
{
"enemyDamage": {
"enemy": "Sciser",
"type": "contact",
"hits": 1
}
},
"h_pauseAbuseMinimalReserveRefill"
]
}Dev note: Jump low through the door with at least $1.2 extra run speed. |
From: 3
Bottom Right Door
To: 4
Top Right Doorway
Requires a runway of at least 4 tiles (with no open end) in the adjacent room. Use a Cross Room Jump into Water followed by a delayed Momentum Conserving Turnaround to reach the Morph tunnel above. Climbing the Left side of the center hole will run into an unavoidable Sciser. Samus must also stay near a side of the center hole to reach the Morph tunnels. Entrance condition: {
"comeInJumping": {
"speedBooster": "no",
"minTiles": 3.4375
}
}Requires: {
"notable": "Cross Room Jump Morph"
}
"canMidAirMorph"
"canCrossRoomJumpIntoWater"
"canMomentumConservingTurnaround" |
From: 3
Bottom Right Door
To: 4
Top Right Doorway
Requires a runway of at least 3 tiles (with an open end) in the adjacent room. Use a Cross Room Jump into Water followed by a delayed Momentum Conserving Turnaround to reach the Morph tunnel above. Climbing the Left side of the center hole will run into an unavoidable Scisor. Samus must also stay near a side of the center hole to reach the Morph tunnels. Entrance condition: {
"comeInJumping": {
"speedBooster": "yes",
"minTiles": 3
}
}Requires: {
"notable": "Cross Room Jump Morph"
}
"canMidAirMorph"
"canCrossRoomJumpIntoWater"
"canMomentumConservingTurnaround"Dev note: Extra run speeds between $1.2 and about $2.5 can work. |
From: 3
Bottom Right Door
To: 4
Top Right Doorway
Turn around to the right just before bonking the ceiling, to retain upward momentum. Then morph and go through the tunnel to the right. Entrance condition: {
"comeInSpaceJumping": {
"speedBooster": "no",
"minTiles": 3.5625
}
}Requires: {
"notable": "Cross Room Jump Morph"
}
"canCrossRoomJumpIntoWater"
"canPreciseSpaceJump"
"canMomentumConservingTurnaround"
"canMidAirMorph"Dev note: Jump low through the door with at least $1.5 extra run speed. |
From: 3
Bottom Right Door
To: 4
Top Right Doorway
Turn around to the right just before bonking the ceiling, to retain upward momentum. Then morph and go through the tunnel to the right. Entrance condition: {
"comeInSpaceJumping": {
"speedBooster": "yes",
"minTiles": 3
}
}Requires: {
"notable": "Cross Room Jump Morph"
}
"canCrossRoomJumpIntoWater"
"canPreciseSpaceJump"
"canMomentumConservingTurnaround"
"canMidAirMorph"Dev note: Jump low through the door with at least $1.2 extra run speed. |
From: 1
Bottom Left Door
To: 4
Top Left Door
Entrance condition: {
"comeInJumping": {
"speedBooster": "yes",
"minTiles": 4
}
}Requires: "HiJump" "canCrossRoomJumpIntoWater" "canMomentumConservingTurnaround" "h_midAirShootUp" Exit condition: {
"leaveNormally": {}
}Unlocks doors: {"types":["super"],"requires":[]}
{"types":["missiles","powerbomb"],"requires":["never"]}Dev note: Using more run speed to avoid the momentumConservingTurnaround requirement will bonk the door, requiring a turnaround to get through This would be a way to bring high vertical speed into the room on the other side of 4. |
From: 1
Bottom Left Door
To: 5
Platform Junction Near Top Left Door
Requires 2 tiles of run speed to make it past the overhang above the door. SpeedBooster must be turned off in order to get up. Cross Room jump and do not buffer aiming down on entry, because Samus's speed is higher underwater while spinning. Aim down and then turn around just before the overhang. Shooting at it from below can deal damage sooner to get a faster freeze. Hug the frozen fish to gain the extra height needed to climb on top. Note that with a slightly longer runway of 3 tiles with a closed end or more, it is not required to disable Speed Booster. Entrance condition: {
"comeInJumping": {
"speedBooster": "no",
"minTiles": 2
}
}Requires: "HiJump"
"canCrossRoomJumpIntoWater"
"canMomentumConservingTurnaround"
"canTrickyUseFrozenEnemies"
"canInsaneJump"
{
"or": [
"Wave",
"Spazer",
"Plasma"
]
}
"h_trickyToCarryFlashSuit"Dev note: FIXME: It is possible but tricky to freeze the fish with just Ice and 2 Missiles. There is no known benefit to modeling the variant that doesn't disable Speed Booster - especially because it is already not doable with a blue suit. |
From: 1
Bottom Left Door
To: 5
Platform Junction Near Top Left Door
With 3 tiles of run speed it is more lenient to make it past the overhang above the door. Cross Room jump and do not buffer aiming down on entry, because Samus's speed is higher underwater while spinning. Aim down and then turn around just before the overhang. Freeze the fish near the left wall and land on it. Entrance condition: {
"comeInJumping": {
"speedBooster": "any",
"minTiles": 3
}
}Requires: "HiJump"
"canCrossRoomJumpIntoWater"
"canMomentumConservingTurnaround"
"canTrickyUseFrozenEnemies"
"canTrickyDodgeEnemies"
{
"or": [
"Plasma",
{
"and": [
"Wave",
"Spazer"
]
}
]
}
"h_trickyToCarryFlashSuit"Dev note: This can be done with SpeedBooster, but there is no point, as Samus can jump directly to the ledge without using the fish. |
From: 1
Bottom Left Door
To: 5
Platform Junction Near Top Left Door
Entrance condition: {
"comeInJumping": {
"speedBooster": "any",
"minTiles": 4
}
}Requires: "HiJump" "canCrossRoomJumpIntoWater" "canMomentumConservingTurnaround" |
From: 1
Bottom Left Door
To: 5
Platform Junction Near Top Left Door
Entrance condition: {
"comeInJumping": {
"speedBooster": "yes",
"minTiles": 3
}
}Requires: "HiJump" "canCrossRoomJumpIntoWater" "canMomentumConservingTurnaround" "canTrickyJump" |
From: 1
Bottom Left Door
To: 5
Platform Junction Near Top Left Door
Entrance condition: {
"comeInJumping": {
"speedBooster": "yes",
"minTiles": 2.4375
}
}Requires: "HiJump" "canCrossRoomJumpIntoWater" "canMomentumConservingTurnaround" "canTrickySpringBallJump" "canInsaneJump" |
From: 1
Bottom Left Door
To: 5
Platform Junction Near Top Left Door
Requires running a precise distance of 7 tiles in the adjacent room, to hit a peak of the speed vs height graph. This requires a dash speed of $2.0 or $2.1. If 12 tiles of runway (with closed ends) is available, speeds of $2.F, $3.0, or $3.1 also work and do not require a turnaround. Entrance condition: {
"comeInJumping": {
"speedBooster": "yes",
"minTiles": 6.4375
}
}Requires: "canTrickyDashJump" "canCrossRoomJumpIntoWater" "canMomentumConservingTurnaround" |
From: 1
Bottom Left Door
To: 5
Platform Junction Near Top Left Door
Entrance condition: {
"comeInJumping": {
"speedBooster": "no",
"minTiles": 1.4375
}
}Requires: "canMomentumConservingTurnaround"
"h_storedSpark"
{
"or": [
{
"shinespark": {
"frames": 15,
"excessFrames": 3
}
},
{
"and": [
"HiJump",
{
"shinespark": {
"frames": 12,
"excessFrames": 3
}
}
]
}
]
} |
From: 5
Platform Junction Near Top Left Door
To: 4
Top Left Door
Jump towards the door with HiJump equipped. A Flatley style jump can position Samus over the edge of the ledge, closer to the door. Turning around while facing down, just before touching the ceiling, is another way to move Samus a few pixels closer to the door. Requires: {
"notable": "Top Left Direct Jump"
}
"canSuitlessMaridia"
"HiJump"
"canTrickyJump"
{
"or": [
"canFlatleyJump",
"canMomentumConservingTurnaround"
]
} |
From: 1
Left Doorway
To: 6
Platform Below Top Door
Jump through the transition with a buffered momentum-conserving turnaround to avoid bonking the overhang. Quickly turn around again to avoid bonking the next overhang. Entrance condition: {
"comeInJumping": {
"speedBooster": "any",
"minTiles": 0
}
}Requires: {
"or": [
"f_MaridiaTubeBroken",
{
"obstaclesCleared": [
"f_MaridiaTubeBroken"
]
}
]
}
"canCrossRoomJumpIntoWater"
"canTrickyJump"
"canMomentumConservingTurnaround" |
From: 2
Bottom Right Door
To: 4
Top Door
Requires a runway of at least 18 tiles in the adjacent room. Ride up the right wall just above the doorway, then turnaround before and after hitting the platform following the doorway slope. Continue up the rest of the way to reach the door. Entrance condition: {
"comeInJumping": {
"speedBooster": "yes",
"minTiles": 18
}
}Requires: {
"notable": "Cross Room Platform Stuck Wiggle to Top Door"
}
{
"or": [
"f_MaridiaTubeBroken",
{
"obstaclesCleared": [
"f_MaridiaTubeBroken"
]
}
]
}
"canCrossRoomJumpIntoWater"
"canMomentumConservingTurnaround"
"canTrickyDashJump"
"canInsaneJump"
"h_midAirShootUp"Unlocks doors: {"types":["super"],"requires":[]}
{"types":["missiles","powerbomb"],"requires":["never"]} |
|
Entrance condition: {
"comeInWithSidePlatform": {
"platforms": [
{
"minHeight": 2,
"maxHeight": 2,
"minTiles": 38,
"speedBooster": "yes",
"obstructions": [
[
1,
0
]
],
"requires": [],
"note": "Applies to Noob Bridge.",
"devNote": [
"FIXME: This (and other cases) can leave with enough vertical momentum to make it to the middle door of Main Street,",
"if the top door of Maridia Tube connects to the bottom of Main Street."
]
},
{
"minHeight": 2,
"maxHeight": 2,
"minTiles": 45,
"speedBooster": "yes",
"obstructions": [
[
3,
0
]
],
"requires": [
"canMomentumConservingMorph",
"canInsaneJump",
"canInsaneMidAirMorph"
],
"note": [
"This applies to Statues Hallway and Baby Kraid Room."
]
},
{
"minHeight": 3,
"maxHeight": 3,
"minTiles": 45,
"speedBooster": "yes",
"obstructions": [
[
3,
0
]
],
"requires": [
"canMomentumConservingMorph",
"canInsaneJump",
"canInsaneMidAirMorph"
],
"note": [
"This applies to Bowling Alley (middle, power off) and Basement (power on)."
]
},
{
"minHeight": 3,
"maxHeight": 3,
"minTiles": 39.4375,
"speedBooster": "yes",
"obstructions": [
[
3,
2
]
],
"requires": [],
"note": "Applies to Metal Pirates Room."
}
]
}
}Requires: {
"or": [
"f_MaridiaTubeBroken",
{
"obstaclesCleared": [
"f_MaridiaTubeBroken"
]
}
]
}
"canCrossRoomJumpIntoWater"
"canTrickyJump"
"canMomentumConservingTurnaround"
"h_midAirShootUp"Unlocks doors: {"types":["super"],"requires":[]}
{"types":["missiles","powerbomb"],"requires":["never"]} |
From: 3
Top Right Doorway
To: 6
Platform Below Top Door
Jump through the transition with a buffered momentum-conserving turnaround, then quickly turn around two more times to avoid bonking the overhang. Entrance condition: {
"comeInJumping": {
"speedBooster": "any",
"minTiles": 0
}
}Requires: {
"or": [
"f_MaridiaTubeBroken",
{
"obstaclesCleared": [
"f_MaridiaTubeBroken"
]
}
]
}
"canCrossRoomJumpIntoWater"
"canTrickyJump"
"canMomentumConservingTurnaround" |
|
Requires: {
"obstaclesCleared": [
"A"
]
}
"Gravity"
"canTrickyDashJump"
{
"or": [
"canMomentumConservingMorph",
"canMomentumConservingTurnaround"
]
}Exit condition: {
"leaveWithSidePlatform": {
"height": 1,
"runway": {
"length": 23,
"openEnd": 1,
"gentleUpTiles": 2,
"gentleDownTiles": 2,
"steepUpTiles": 1
},
"obstruction": [
3,
0
]
}
}Dev note: Max extra run speed $4.B. FIXME: The canTrickyDashJump is for difficulty placement but could probably be replaced by a more fitting tech, since this isn't actually relying on a spike in jump height based on gaining a specific speed. |
|
Requires: {
"obstaclesCleared": [
"A"
]
}
"Gravity"
"h_speedJump"
"canInsaneJump"
{
"or": [
{
"and": [
"canMomentumConservingMorph",
"canInsaneMidAirMorph"
]
},
"canMomentumConservingTurnaround"
]
}Exit condition: {
"leaveWithSidePlatform": {
"height": 1,
"runway": {
"length": 36,
"openEnd": 1,
"gentleUpTiles": 2
},
"obstruction": [
3,
0
]
}
}Dev note: Max extra run speed $6.3. |
|
Entrance condition: {
"comeInJumping": {
"speedBooster": "any",
"minTiles": 1
}
}Requires: "HiJump" "canTrickyJump" "canCrossRoomJumpIntoWater" "canMomentumConservingTurnaround" "canDownGrab" |
|
Entrance condition: {
"comeInJumping": {
"speedBooster": "no",
"minTiles": 1
}
}Requires: "canJumpIntoIBJ"
"canTrickyJump"
"canCrossRoomJumpIntoWater"
"canMomentumConservingTurnaround"
{
"enemyDamage": {
"enemy": "Mochtroid",
"type": "contact",
"hits": 2
}
}Dev note: Possible with no openend using a harder jump but a runway that small doesn't exist. |
From: 2
Bottom Right Door
To: 3
Top Right Door
Entrance condition: {
"comeInJumping": {
"speedBooster": "no",
"minTiles": 1
}
}Requires: "canTrickySpringBallJump" "canCrossRoomJumpIntoWater" "canTrickyJump" "canMomentumConservingTurnaround" Dev note: Possible with no openend using a harder jump but a runway that small doesn't exist. |
From: 2
Bottom Right Door
To: 3
Top Right Door
Entrance condition: {
"comeInJumping": {
"speedBooster": "no",
"minTiles": 2
}
}Requires: "canTrickySpringBallJump" "canCrossRoomJumpIntoWater" "canMomentumConservingTurnaround" Dev note: FIXME: Can be lowered to canBufferedMomentumConservingTurnaround. |
From: 2
Bottom Right Door
To: 3
Top Right Door
Entrance condition: {
"comeInWithSidePlatform": {
"platforms": [
{
"minHeight": 1,
"maxHeight": 1,
"minTiles": 4,
"speedBooster": "no",
"obstructions": [
[
1,
0
]
],
"note": "Applies to Skree Boost Room, Screw Attack Room, and Lava Dive"
},
{
"minHeight": 2,
"maxHeight": 2,
"minTiles": 5.4375,
"speedBooster": "no",
"obstructions": [
[
1,
0
]
],
"requires": [
"canTrickySpringBallJump",
"canTrickyJump"
],
"note": "Applies to Early Supers Room, Tourian Hopper Room, Bowling Alley (bottom), Dust Torizo Room, and Noob Bridge"
},
{
"minHeight": 3,
"maxHeight": 3,
"minTiles": 9.4375,
"speedBooster": "no",
"obstructions": [
[
1,
0
]
],
"requires": [
"canTrickySpringBallJump",
"canTrickyJump"
],
"note": "Applies to Bomb Torizo Room, Pink Brinstar Wave Gate Room, Phantoon's Room, Big Boy Room, and Double Chamber."
},
{
"minHeight": 3,
"maxHeight": 3,
"minTiles": 9.4375,
"speedBooster": "no",
"obstructions": [
[
3,
2
]
],
"requires": [
"canTrickySpringBallJump",
"canTrickyJump",
"canJumpIntoIBJ",
{
"enemyDamage": {
"enemy": "Mochtroid",
"type": "contact",
"hits": 1
}
}
],
"note": "Applies to Metal Pirates Room."
},
{
"minHeight": 2,
"maxHeight": 2,
"minTiles": 31,
"speedBooster": "yes",
"obstructions": [
[
3,
0
]
],
"requires": [
"canInsaneJump",
{
"or": [
"canMomentumConservingTurnaround",
"canMomentumConservingMorph"
]
}
],
"note": [
"This applies to Metroid Room 1."
],
"detailNote": [
"With ideal positioning, starting 5 or 6 pixels from the end of the runway,",
"this has a 2-frame window for the jump, and a 1-frame or 3-frame window for the turnaround based on the jump timing",
"(with a last-frame jump giving the larger window for the turnaround).",
"This can also be done with a momentum conserving morph:",
"it has a 2-frame window for the jump, and a 1-frame or 2-frame window for the turnaround based on the jump timing."
]
},
{
"minHeight": 3,
"maxHeight": 3,
"minTiles": 30.4375,
"speedBooster": "yes",
"obstructions": [
[
3,
0
]
],
"requires": [
"canInsaneJump",
"canMomentumConservingTurnaround"
],
"note": [
"This applies to Blue Brinstar Energy Tank Room (Power Bomb blocks intact)."
],
"detailNote": [
"With ideal starting position, this has a 2-frame window for the jump,",
"and a 1-frame or 3-frame window for the turnaround based on the jump timing",
"(with a last-frame jump giving the larger window for the turnaround)."
]
}
]
}
}Requires: "canCrossRoomJumpIntoWater" "canMomentumConservingTurnaround" "canSpringBallJumpMidAir" Dev note: This strat is included for completeness even though it's not really useful; it would be easier to use the runway attached to the door, even if it is only 1 tile long, i.e. with the 'Cross Room Jump with Spring Ball' strat (id: 51). |
|
Entrance condition: {
"comeInJumping": {
"speedBooster": "any",
"minTiles": 1
}
}Requires: "HiJump" "canTrickyJump" "canCrossRoomJumpIntoWater" "canMomentumConservingTurnaround" Dev note: Possible with no openend using a harder jump but a runway that small doesn't exist. |
|
Use a platform below the door in the other room to jump through the door while aiming down, carrying upward momentum into this room. Hold down and back through the transition, to perform a momentum-conserving turnaround past the corner. In cases where the previous room has an extended door ledge obstructing the exit, the turnaround may need to be initiated before the transition, to avoid bonking the ceiling of the door frame. Entrance condition: {
"comeInWithSidePlatform": {
"platforms": [
{
"minHeight": 2,
"maxHeight": 2,
"minTiles": 27.4375,
"speedBooster": "yes",
"obstructions": [
[
1,
0
]
],
"note": [
"This applies to Dust Torizo Room."
],
"devNote": [
"The jump could also be done with a shorter runway, with a tricky dash jump using run speed $4.0 or $4.1.",
"But it wouldn't apply to any more rooms in the game."
]
},
{
"minHeight": 3,
"maxHeight": 3,
"minTiles": 39.4375,
"speedBooster": "yes",
"obstructions": [
[
3,
2
]
],
"note": [
"This applies to Metal Pirates Room."
]
},
{
"minHeight": 2,
"maxHeight": 2,
"minTiles": 45,
"speedBooster": "yes",
"obstructions": [
[
3,
0
]
],
"requires": [
"canInsaneJump"
],
"note": [
"This applies to Statues Hallway."
],
"devNote": [
"The momentum conserving turnaround requires a last-frame jump and has a 2-frame window for the turnaround."
]
},
{
"minHeight": 3,
"maxHeight": 3,
"minTiles": 37.4375,
"speedBooster": "yes",
"obstructions": [
[
3,
0
]
],
"requires": [
"canInsaneJump",
"canBeVeryPatient"
],
"note": [
"This applies to Flyway."
],
"devNote": [
"The momentum conserving turnaround is double frame-perfect,",
"requiring a last-frame jump before Samus would get caught on the door ledge,",
"and a last-frame turnaround before Samus would bonk on the ceiling of the door frame.",
"After jumping, the aim-down must be delayed at least 6 frames;",
"being pressed at most 5 frames before the turnaround."
]
}
]
}
}Requires: "canCrossRoomJumpIntoWater" "canTrickyJump" "canMomentumConservingTurnaround" |
From: 1
Left Door
To: 4
Platform Below Top Door
Use a platform below the door in the other room to jump through the door while aiming down, carrying upward momentum into this room. Hold down and back through the transition, to perform a momentum-conserving turnaround past the corner. Perform a mid-air Spring Ball jump, timing a pause to hit soon after the mid-air jump. Unequip Spring Ball, lay a Bomb about half a tile below the peak of the jump. Press pause at the peak of the jump, to reequip Spring Ball immediately after Samus is boosted by the bomb. Buffer a jump out of the unpause, to get a second Spring Ball jump and make it up. Entrance condition: {
"comeInWithSidePlatform": {
"platforms": [
{
"minHeight": 1,
"maxHeight": 1,
"minTiles": 7.4375,
"speedBooster": "yes",
"obstructions": [
[
1,
0
]
],
"requires": [],
"note": [
"This applies to Warehouse Entrance."
]
}
]
}
}Requires: "canCrossRoomJumpIntoWater" "canTrickyDashJump" "canMomentumConservingTurnaround" "canUnderwaterBombIntoSpringBallJump" |
From: 2
Bottom Left Door
To: 1
Top Left Door
Requires a runway of 1 tile in the adjacent room. A momentum conserving turnaround is easier than a midair wiggle. Entrance condition: {
"comeInJumping": {
"speedBooster": "any",
"minTiles": 0.4375
}
}Requires: "HiJump"
"canCrossRoomJumpIntoWater"
{
  "or": [
    "canMomentumConservingTurnaround",
    "canMidairWiggle"
  ]
} |
From: 2
Bottom Left Door
To: 1
Top Left Door
Requires a runway of at least 7 tiles (with no open end) in the adjacent room. A momentum conserving turnaround is easier than a midair wiggle. Entrance condition: {
"comeInJumping": {
"speedBooster": "yes",
"minTiles": 6.4375
}
}Requires: "canCrossRoomJumpIntoWater"
"canTrickyDashJump"
{
"or": [
"canMomentumConservingTurnaround",
"canMidairWiggle"
]
} |
From: 2
Bottom Left Door
To: 1
Top Left Door
The lenient version requires a runway of at about 10 tiles in the adjacent room. A momentum conserving turnaround is easier than climbing the right side of the room. Entrance condition: {
"comeInJumping": {
"speedBooster": "yes",
"minTiles": 10
}
}Requires: "canCrossRoomJumpIntoWater"
{
"or": [
"canMomentumConservingTurnaround",
"canMidairWiggle"
]
} |
From: 1
Bottom Left Door
To: 2
Top Right Door
Requires a runway of at least 2 tiles (with no open end) in the adjacent room. This is typically easier without Speed Booster depending on the exact runway length and requires disabling HiJump. Entrance condition: {
"comeInJumping": {
"speedBooster": "no",
"minTiles": 1.4375
}
}Requires: "canCrossRoomJumpIntoWater"
"canMomentumConservingTurnaround"
"canTrickyJump"
{
"disableEquipment": "HiJump"
} |
From: 1
Bottom Left Door
To: 2
Top Right Door
Gain speed from a remote runway in the previous room, and Space Jump through the bottom of the doorway. Entrance condition: {
"comeInSpaceJumping": {
"speedBooster": "any",
"minTiles": 2
}
}Requires: "canCrossRoomJumpIntoWater" "canMomentumConservingTurnaround" "canTrickyJump" |
From: 1
Bottom Left Door
To: 2
Top Right Door
It is possible to jump to the top door using a runway of just one tile with Speed Booster and no HiJump. Requires a last-frame jump and down press that is late but not immediately before the turnaround. With a second-to-last-frame jump it is still possible but more precise. Entrance condition: {
"comeInJumping": {
"speedBooster": "yes",
"minTiles": 1
}
}Requires: "canCrossRoomJumpIntoWater"
"canMomentumConservingTurnaround"
"canTrickyDashJump"
{
"disableEquipment": "HiJump"
} |
From: 2
Bottom Door
To: 4
Water Level Junction
Run and spin jump from the platform in the room below, gaining horizontal speed but without bonking the door frame. Perform a momentum-conserving turn-around to make it around the corner of the ledge above. With limited runway for gaining horizontal speed, the timing of the jump and turn-around may be very precise. Entrance condition: {
"comeInWithPlatformBelow": {
"minHeight": 8.5,
"maxHeight": 9,
"maxLeftPosition": -1.5,
"minRightPosition": 1.5
},
"comesThroughToilet": "yes"
}Requires: "canDash" "canCrossRoomJumpIntoWater" "HiJump" "canMomentumConservingTurnaround" "canInsaneJump" Dev note: This applies to Warehouse Zeela Room and Tourian Hopper Room. |
From: 2
Bottom Door
To: 4
Water Level Junction
Run left-to-right and spin jump from the platform in the room below, passing through the transition without bonking the door. Pass through the Toilet, and then perform a momentum conserving turnaround to make it onto the ledge. Entrance condition: {
"comeInWithPlatformBelow": {
"minHeight": 7,
"maxHeight": 7,
"maxLeftPosition": -2.5,
"minRightPosition": 0.5
},
"comesThroughToilet": "yes"
}Requires: "canDash" "canCrossRoomJumpIntoWater" "HiJump" "canMomentumConservingTurnaround" Dev note: This is applicable using the platform in Tourian Escape Room 2. |
From: 2
Bottom Door
To: 4
Water Level Junction
Run and spin jump from the platform in the room below, gaining horizontal speed but without bonking the door frame. Perform a momentum-conserving turn-around to make it around the corner of the ledge above. Entrance condition: {
"comeInWithPlatformBelow": {
"minHeight": 8,
"maxHeight": 9,
"maxLeftPosition": -3,
"minRightPosition": 0
},
"comesThroughToilet": "yes"
}Requires: "canDash" "canCrossRoomJumpIntoWater" "HiJump" "canMomentumConservingTurnaround" |
From: 2
Bottom Door
To: 4
Water Level Junction
Spin jump from the platform in the room below, pressing right against the door frame through the transition. Perform a momentum-conserving turn-around to make it around the corner of the ledge above. Entrance condition: {
"comeInWithPlatformBelow": {
"minHeight": 7,
"maxHeight": 7,
"maxLeftPosition": 1,
"minRightPosition": 2
},
"comesThroughToilet": "no"
}Requires: "canCrossRoomJumpIntoWater" "HiJump" "canMomentumConservingTurnaround" Dev note: This strat is for platforms that are exactly 7 tiles below the door transition. For platforms that are 8 or 9 tiles below, no turn-around is needed. |
From: 2
Bottom Door
To: 4
Water Level Junction
Do a low spin jump and press against the right side of the door frame. Wall jump as low as possible, jumping as soon as possible after moving away from the wall. Immediately turn back to the right and try to press against the door frame again before the transition, while maintaining spin. After the transition, typically a momentum-conserving turnaround is needed to avoid bonking. Entrance condition: {
"comeInWithWallJumpBelow": {
"minHeight": 2
},
"comesThroughToilet": "no"
}Requires: "canCrossRoomJumpIntoWater"
{
"or": [
"canInsaneWallJump",
{
"and": [
"canPreciseWallJump",
"canMomentumConservingTurnaround"
]
}
]
}Dev note: This strat is for cases where the door frame below has only a two-tile-high surface available for wall-jumping. If a third tile is available, the jump can be done more easily. |
From: 2
Bottom Door
To: 4
Water Level Junction
Gain a few tiles of run speed and jump through the transition, without bonking against the door frame. Perform a momentum-conserving turn-around to make it around the corner of the ledge above. Entrance condition: {
"comeInWithPlatformBelow": {
"minHeight": 10,
"maxHeight": 10,
"maxLeftPosition": -4,
"minRightPosition": 0
},
"comesThroughToilet": "yes"
}Requires: "canDash" "canCrossRoomJumpIntoWater" "HiJump" "canSpeedyJump" "canMomentumConservingTurnaround" |
From: 1
Left Door
To: 3
Junction Below Right Door
Quickly shoot to break the shot block and then do a momentumConservingTurnaround to ascend into the little region. Another movement item will be needed to get closer to the crumble blocks. Entrance condition: {
"comeInJumping": {
"speedBooster": "any",
"minTiles": 2
}
}Requires: "canTrickyJump"
"canCrossRoomJumpIntoWater"
"canMomentumConservingTurnaround"
{
"or": [
"canUseFrozenEnemies",
"canSpringBallJumpMidAir",
"HiJump"
]
}
{
"noFlashSuit": {}
}Dev note: The transition likely connects to Pants Room making this strat not likely to be useful. In any case, each option (Ice, Spring Ball, Hi-Jump) has an alternative in-room strat that can get up without needing a runway. FIXME: this can be done with 1 tile of runway, but it's a bit more difficult. FIXME: with a momentum-conserving morph, it is possible to reach the platforms below the crumble blocks. |
From: 1
Left Door
To: 3
Top Door
Use a 2-tap shortcharge and jump into the room with a last-frame jump, breaking the bomb block with blue speed, and making it all the way through the top door. Use angle to break spin, and do a momentum conserving turnaround either on the same frame or one frame later; this first turnaround should be done early enough that the turnaround is complete by the time Samus clears the two-tile passage in the middle of the room. Do a second momentum conserving turnaround somewhat late, and by switching from holding left to holding right one frame later (a perfect 'boomerang'). Shoot open the door, and use a third momentum conserving turnaround on it as it opens. Lower run speeds are generally better, as long as the extra run speed is at least $3.4. this gives up to a 7-frame window for the first turnaround, and typically a 4-frame window for the second turnaround if the first turnaround is done early enough. A perfect boomerang is always required for the second turnaround, regardless of where in the window it is done. It is recommended to buffer the spin break, by holding angle (up or down), jump, and forward through the transition, then switching from forward to backward, with at most 1 frame of neutral in between, while still holding jump and angle. Entrance condition: {
"comeInGettingBlueSpeed": {
"length": 0,
"openEnd": 1,
"minExtraRunSpeed": "$3.4",
"maxExtraRunSpeed": "$3.F"
}
}Requires: {
"notable": "Cross Room Jump Boomerang To Top"
}
"h_blueJump"
"canInsaneJump"
"canCrossRoomJumpIntoWater"
"canMomentumConservingTurnaround"
{
"noFlashSuit": {}
}Exit condition: {
"leaveNormally": {}
}Unlocks doors: {"types":["super"],"requires":[]}
{"types":["missiles","powerbomb"],"requires":["never"]} |
From: 1
Left Door
To: 3
Top Door
Use Screw Attack to break the bomb block by entering from a non-water room with a spin jump, and make it all the way through the top door. Ideally, gain speed using between 13 and 13.5 tiles of runway (with an open end). Longer runway lengths can also work, up to 17 tiles, but will make the trick somewhat more precise. Use angle to break spin, and do a momentum conserving turnaround either on the same frame or one frame later; this first turnaround should be done early enough that the turnaround is complete by the time Samus clears the two-tile passage in the middle of the room. Do a second momentum conserving turnaround somewhat late, and by switching from holding left to holding right one frame later (a perfect 'boomerang'). Shoot open the door, and use a third momentum conserving turnaround on it as it opens. The optimal amount of extra run speed is $3.4 or $3.5, by using 13 tiles of runway or about a half tile more; this gives a 7-frame window for the first turnaround, and typically a 4-frame window for the second turnaround if the first turnaround is done early enough. Extra run speeds between $3.6 and $3.F can also work, but with shorter windows. A perfect boomerang is always required for the second turnaround, regardless of where in the window it is done. It is recommended to buffer the spin break, by holding angle (up or down), jump, and forward through the transition, then switching from forward to backward, with at most 1 frame of neutral in between, while still holding jump and angle. Entrance condition: {
"comeInJumping": {
"speedBooster": "yes",
"minTiles": 13
}
}Requires: {
"notable": "Cross Room Jump Boomerang To Top"
}
"canInsaneJump"
"canCrossRoomJumpIntoWater"
"ScrewAttack"
"canMomentumConservingTurnaround"
{
"noFlashSuit": {}
}Exit condition: {
"leaveNormally": {}
}Unlocks doors: {"types":["super"],"requires":[]}
{"types":["missiles","powerbomb"],"requires":["never"]}Dev note: This does not have collision oscillation. |
|
Use a 2-tap shortcharge and jump into the room with a last-frame jump, breaking the bomb block with blue speed, and making it all the way through the top door. Use angle to break spin, and do a momentum conserving turnaround either on the same frame or one frame later; this first turnaround should be done early enough that the turnaround is complete by the time Samus clears the two-tile passage in the middle of the room. Do a second momentum conserving turnaround somewhat late, and by switching from holding left to holding right one frame later (a perfect 'boomerang'). Lower run speeds are generally better, as long as the extra run speed is at least $3.2. this gives up to a 7-frame window for the first turnaround, and typically a 4-frame window for the second turnaround if the first turnaround is done early enough. A perfect boomerang is always required for the second turnaround, regardless of where in the window it is done. It is recommended to buffer the spin break, by holding angle (up or down), jump, and forward through the transition, then switching from forward to backward, with at most 1 frame of neutral in between, while still holding jump and angle. Entrance condition: {
"comeInGettingBlueSpeed": {
"length": 0,
"openEnd": 1,
"minExtraRunSpeed": "$3.2",
"maxExtraRunSpeed": "$3.F"
}
}Requires: {
"notable": "Cross Room Jump Boomerang To Top"
}
"h_blueJump"
"canInsaneJump"
"canCrossRoomJumpIntoWater"
"canMomentumConservingTurnaround"
"h_trickyToCarryFlashSuit" |
|
Use Screw Attack to break the bomb block by entering from a non-water room with a last-frame spin jump, and make it to the platform below the top door. Longer runway lengths can also work, up to 17 tiles, but will make the trick somewhat more precise. Use angle to break spin, and do a momentum conserving turnaround either on the same frame or one frame later; this first turnaround should be done early enough that the turnaround is complete by the time Samus clears the two-tile passage in the middle of the room. Do a second momentum conserving turnaround somewhat late, and by switching from holding left to holding right one frame later (a perfect 'boomerang'). The optimal amount of extra run speed is between $3.2 and $3.5, by using 13 tiles of runway or about a half tile more or less; this gives a 7-frame window for the first turnaround, and typically a 4-frame window for the second turnaround if the first turnaround is done early enough. Extra run speeds between $3.6 and $3.F can also work, but with shorter windows. A perfect boomerang is always required for the second turnaround, regardless of where in the window it is done. It is recommended to buffer the spin break, by holding angle (up or down), jump, and forward through the transition, then switching from forward to backward, with at most 1 frame of neutral in between, while still holding jump and angle. Entrance condition: {
"comeInJumping": {
"speedBooster": "yes",
"minTiles": 12.4375
}
}Requires: {
"notable": "Cross Room Jump Boomerang To Top"
}
"canInsaneJump"
"canCrossRoomJumpIntoWater"
"ScrewAttack"
"canMomentumConservingTurnaround"
"h_trickyToCarryFlashSuit"Dev note: This does not have collision oscillation. |
|
Use blue speed to break the bomb block by entering from a non-water room with a spin jump, and make it up to the center of the room. It helps to enter as low as possible and with as much horizontal speed as possible and with HiJump turned off. Enter with extra run speed between $3.2 and $3.F, with the lower speeds in this range being better. Entrance condition: {
"comeInGettingBlueSpeed": {
"length": 0,
"openEnd": 1,
"minExtraRunSpeed": "$3.2",
"maxExtraRunSpeed": "$3.F"
}
}Requires: "h_blueJump" "canInsaneJump" "canCrossRoomJumpIntoWater" "canMomentumConservingTurnaround" Dev note: This does not have collision oscillation. |
From: 1
Left Door
To: 9
Center Platforms
Use Screw Attack to break the bomb block by entering from a non-water room with a spin jump, and make it up to the center of the room. It helps to enter as low as possible and with as much horizontal speed as possible and with HiJump turned off. Enter with extra run speed between $3.2 and $3.F, with the lower speeds in this range being better. Entrance condition: {
"comeInJumping": {
"speedBooster": "yes",
"minTiles": 12.4375
}
}Requires: {
"notable": "Cross Room Jump with Screw Attack"
}
"canInsaneJump"
"canCrossRoomJumpIntoWater"
"ScrewAttack"
"canMomentumConservingTurnaround"Dev note: This does not have collision oscillation. |
From: 2
Right Door
To: 3
Top Door
Use a 2-tap shortcharge and jump into the room with a last-frame jump, breaking the bomb block with blue speed, and making it all the way through the top door. Use angle to break spin, and do a momentum conserving turnaround either on the same frame or one frame later; this first turnaround should be done early enough that the turnaround is complete by the time Samus clears the two-tile passage in the middle of the room. The second momentum conserving turnaround must be done somewhat late, and by switching from holding forward to holding backward one frame later (a perfect 'boomerang'). Shoot open the door, and use a third momentum conserving turnaround on it as it opens. Lower run speeds are generally better, as long as the extra run speed is at least $3.4. this gives up to a 7-frame window for the first turnaround, and typically a 4-frame window for the second turnaround if the first turnaround is done early enough. A perfect boomerang is always required for the second turnaround, regardless of where in the window it is done. It is recommended to buffer the spin break, by holding angle (up or down), jump, and forward through the transition, then switching from forward to backward, with at most 1 frame of neutral in between, while still holding jump and angle. Entrance condition: {
"comeInGettingBlueSpeed": {
"length": 0,
"openEnd": 1,
"minExtraRunSpeed": "$3.4",
"maxExtraRunSpeed": "$3.F"
}
}Requires: {
"notable": "Cross Room Jump Boomerang To Top"
}
"h_blueJump"
"canInsaneJump"
"canCrossRoomJumpIntoWater"
"canMomentumConservingTurnaround"
{
"noFlashSuit": {}
}Exit condition: {
"leaveNormally": {}
}Unlocks doors: {"types":["super"],"requires":[]}
{"types":["missiles","powerbomb"],"requires":["never"]} |
From: 2
Right Door
To: 3
Top Door
Use Screw Attack to break the bomb block by entering from a non-water room with a spin jump, and make it all the way through the top door. Ideally, gain speed using between 13 and 13.5 tiles of runway (with an open end). Longer runway lengths can also work, up to 17 tiles, but will make the trick somewhat more precise. Use angle to break spin, and do a momentum conserving turnaround either on the same frame or one frame later; this first turnaround should be done early enough that the turnaround is complete by the time Samus clears the two-tile passage in the middle of the room. The second momentum conserving turnaround must be done somewhat late, and by switching from holding forward to holding backward one frame later (a perfect 'boomerang'). Shoot open the door, and use a third momentum conserving turnaround on it as it opens. The optimal amount of extra run speed is $3.4 or $3.5, by using 13 tiles of runway or about a half tile more; this gives a 7-frame window for the first turnaround, and typically a 4-frame window for the second turnaround if the first turnaround is done early enough. Extra run speeds between $3.6 and $3.F can also work, but with shorter windows. A perfect boomerang is always required for the second turnaround, regardless of where in the window it is done. It is recommended to buffer the spin break, by holding angle (up or down), jump, and forward through the transition, then switching from forward to backward, with at most 1 frame of neutral in between, while still holding jump and angle. Entrance condition: {
"comeInJumping": {
"speedBooster": "yes",
"minTiles": 13
}
}Requires: {
"notable": "Cross Room Jump Boomerang To Top"
}
"canInsaneJump"
"canCrossRoomJumpIntoWater"
"ScrewAttack"
"canMomentumConservingTurnaround"
{
"noFlashSuit": {}
}Exit condition: {
"leaveNormally": {}
}Unlocks doors: {"types":["super"],"requires":[]}
{"types":["missiles","powerbomb"],"requires":["never"]}Dev note: This does not have collision oscillation. |
|
Use a 2-tap shortcharge and jump into the room with a last-frame jump, breaking the bomb block with blue speed, and making it all the way through the top door. Use angle to break spin, and do a momentum conserving turnaround either on the same frame or one frame later; this first turnaround should be done early enough that the turnaround is complete by the time Samus clears the two-tile passage in the middle of the room. Do a second momentum conserving turnaround somewhat late, and by switching from holding forward to holding backward one frame later (a perfect 'boomerang'). Lower run speeds are generally better, as long as the extra run speed is at least $3.2. this gives up to a 7-frame window for the first turnaround, and typically a 4-frame window for the second turnaround if the first turnaround is done early enough. A perfect boomerang is always required for the second turnaround, regardless of where in the window it is done. It is recommended to buffer the spin break, by holding angle (up or down), jump, and forward through the transition, then switching from forward to backward, with at most 1 frame of neutral in between, while still holding jump and angle. Entrance condition: {
"comeInGettingBlueSpeed": {
"length": 0,
"openEnd": 1,
"minExtraRunSpeed": "$3.2",
"maxExtraRunSpeed": "$3.F"
}
}Requires: {
"notable": "Cross Room Jump Boomerang To Top"
}
"h_blueJump"
"canInsaneJump"
"canCrossRoomJumpIntoWater"
"canMomentumConservingTurnaround"
"h_trickyToCarryFlashSuit" |
|
Use Screw Attack to break the bomb block by entering from a non-water room with a last-frame spin jump, and make it to the platform below the top door. Longer runway lengths can also work, up to 17 tiles, but will make the trick somewhat more precise. Use angle to break spin, and do a momentum conserving turnaround either on the same frame or one frame later; this first turnaround should be done early enough that the turnaround is complete by the time Samus clears the two-tile passage in the middle of the room. Do a second momentum conserving turnaround somewhat late, and by switching from holding forward to holding backward one frame later (a perfect 'boomerang'). The optimal amount of extra run speed is between $3.2 and $3.5, by using 13 tiles of runway or about a half tile more or less; this gives a 7-frame window for the first turnaround, and typically a 4-frame window for the second turnaround if the first turnaround is done early enough. Extra run speeds between $3.6 and $3.F can also work, but with shorter windows. A perfect boomerang is always required for the second turnaround, regardless of where in the window it is done. It is recommended to buffer the spin break, by holding angle (up or down), jump, and forward through the transition, then switching from forward to backward, with at most 1 frame of neutral in between, while still holding jump and angle. Entrance condition: {
"comeInJumping": {
"speedBooster": "yes",
"minTiles": 12.4375
}
}Requires: {
"notable": "Cross Room Jump Boomerang To Top"
}
"canInsaneJump"
"canCrossRoomJumpIntoWater"
"ScrewAttack"
"canMomentumConservingTurnaround"
"h_trickyToCarryFlashSuit"Dev note: This does not have collision oscillation. |
|
Use blue speed to break the bomb block by entering from a non-water room with a spin jump, and make it up to the center of the room. It helps to enter as low as possible and with as much horizontal speed as possible and with HiJump turned off. Enter with extra run speed between $3.2 and $3.F, with the lower speeds in this range being better. Entrance condition: {
"comeInGettingBlueSpeed": {
"length": 0,
"openEnd": 1,
"minExtraRunSpeed": "$3.2",
"maxExtraRunSpeed": "$3.F"
}
}Requires: "h_blueJump" "canInsaneJump" "canCrossRoomJumpIntoWater" "canMomentumConservingTurnaround" Dev note: This does not have collision oscillation. |
From: 2
Right Door
To: 9
Center Platforms
Use Screw Attack to break the bomb block by entering from a non-water room with a spin jump, and make it up to the center of the room. It helps to enter as low as possible and with as much horizontal speed as possible and with HiJump turned off. Enter with extra run speed between $3.2 and $3.F, with the lower speeds in this range being better. Entrance condition: {
"comeInJumping": {
"speedBooster": "yes",
"minTiles": 12.4375
}
}Requires: {
"notable": "Cross Room Jump with Screw Attack"
}
"canInsaneJump"
"canCrossRoomJumpIntoWater"
"ScrewAttack"
"canMomentumConservingTurnaround"Dev note: This does not have collision oscillation. |
|
It is best to start 4 or 5 pixels from the end of the runway; equivalently, start at the end of the runway and use arm pumps to advance 4 or 5 pixels while running. Requires: "h_speedJump"
{
"or": [
"canMetroidAvoid",
"Ice",
{
"obstaclesCleared": [
"A"
]
}
]
}
{
"or": [
"canMomentumConservingMorph",
{
"and": [
"canMomentumConservingTurnaround",
"canInsaneJump"
]
}
]
}Exit condition: {
"leaveWithSidePlatform": {
"height": 2,
"runway": {
"length": 31,
"openEnd": 1
},
"obstruction": [
3,
0
]
}
}Dev note: Max extra run speed $5.7. |
|
Requires: "h_speedJump"
{
"or": [
"canMetroidAvoid",
{
"obstaclesCleared": [
"B"
]
}
]
}
{
"or": [
"canMomentumConservingMorph",
{
"and": [
"canMomentumConservingTurnaround",
"canInsaneJump"
]
}
]
}Exit condition: {
"leaveWithSidePlatform": {
"height": 2,
"runway": {
"length": 23,
"openEnd": 1
},
"obstruction": [
3,
0
]
}
}Dev note: Max extra run speed $4.7. Using almost the full runway (between 3 and 6 pixels from the edge), the momentum conserving turnaround has a 2-frame window for the jump, and a 1-frame or 3-frame window for the turnaround, depending on the jump (with a last-frame jump giving the larger window). |


