canNeutralDamageBoost (Hard)


Using the small vertical knockback from taking enemy damage, while not holding any directional inputs, to assist Samus in her movement.
Dependencies: canUseEnemies
Dev note: A damage boost can be performed with a blue suit if Samus is stationary, but that is not the normal expectation of this tech and would be specified using an override or helper.
Strats ()
From: 1
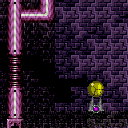
Top Left Door
To: 5
Alcatraz Door
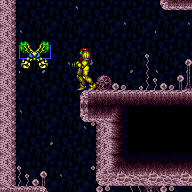
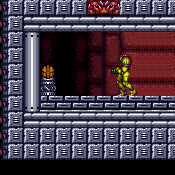
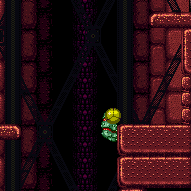
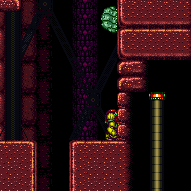
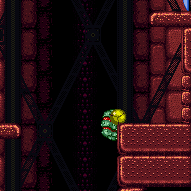
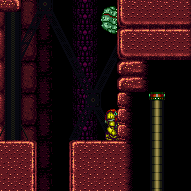
There are scroll PLMs one tile to the left of the bomb blocks which can be used to overload PLMs. The bomb blocks then become air and can be passed through. Use Bombs, Spring Ball, or a Geemer damage boost to get across the gap without unmorphing. To survive a Geemer hit, you will need Varia or Gravity or to come in with more than 4 energy (e.g. by coming in with indirect G-mode after leaving with G-mode immobile). Entrance condition: {
"comeInWithGMode": {
"mode": "any",
"morphed": true
}
}Requires: {
"or": [
"h_artificialMorphMovement",
"h_artificialMorphBombHorizontally",
{
"and": [
"canTrickyGMode",
"h_stationaryNeutralDamageBoost",
"h_ZebesIsAwake",
{
"enemyDamage": {
"enemy": "Geemer (blue)",
"type": "contact",
"hits": 1
}
}
]
}
]
} |
|


Wait for the global crab to traverse the room and boost Samus up the ledge. It takes just over a minute for the crab to get there. Entrance condition: {
"comeInWithGMode": {
"mode": "any",
"morphed": true
},
"comesThroughToilet": "any"
}Requires: "Gravity"
"canBePatient"
"h_stationaryNeutralDamageBoost"
{
"enemyDamage": {
"enemy": "Sciser",
"type": "contact",
"hits": 1
}
} |
|
Overload PLMs by placing Bombs at the far right, against the bottom of the crumble block, at the right of the low underwater ceiling. It is okay to kill the fast crab, and leave another crab alive, off camera. After PLMs are overloaded, lure a crab and take a hit when it is near the bottom right corner then another at the top of Samus' jump at the crumble block to boost to the right. This requires carefully timing the first hit and jump so that Samus can get hit at the peak of her jump. Entrance condition: {
"comeInWithGMode": {
"mode": "any",
"morphed": true
}
}Requires: "canComplexGMode"
"h_artificialMorphSpringBall"
"h_artificialMorphBombs"
"canUseIFrames"
"canNeutralDamageBoost"
{
"enemyDamage": {
"enemy": "Sciser",
"type": "contact",
"hits": 2
}
} |
|
Enter the room while building a shinespark and use it on the lowest part of the ramp to cross the room and reach a raised ledge on the right side wall. From there, use SpaceJump to escape the water. Carry the shinespark to the bottom of the ramp by delaying the first Choot with two Power Beam shots, killing it, or bounceballing through it. The Choot can be shot diagonally from the middle platform, and again by running off that platform and aiming down to float above it. Entrance condition: {
"comeInShinecharging": {
"length": 6,
"openEnd": 1,
"steepDownTiles": 1
}
}Requires: "canShinechargeMovementComplex"
"canCarefulJump"
{
"or": [
{
"and": [
"canShinechargeMovementTricky",
"canTrickyDodgeEnemies"
]
},
{
"and": [
{
"enemyDamage": {
"enemy": "Choot",
"type": "contact",
"hits": 1
}
},
"canNeutralDamageBoost",
"canBounceBall"
]
},
{
"and": [
"canMockball",
{
"or": [
"canPseudoScrew",
"ScrewAttack",
"Plasma",
"Wave",
{
"ammo": {
"type": "Missile",
"count": 1
}
},
{
"ammo": {
"type": "Super",
"count": 1
}
}
]
}
]
}
]
}
{
"shinespark": {
"frames": 125,
"excessFrames": 5
}
}
"canSpaceJumpWaterBounce"
{
"or": [
{
"and": [
"canTrickyJump",
"canDownGrab"
]
},
"canWallJump"
]
}Dev note: There is 1 unusable tile in this runway. |
From: 1
Left Door
To: 2
Right Door

Enter the room while building a shinespark and use it on the lowest part of the ramp to diagonally spark up and out of the water. Unmorphing with the correct timing and positioning for the Shinespark are very precise, and there are no extra frames on the Shinespark timer to work with. Carry the shinespark to the bottom of the ramp either with a bounce ball which takes damage from the Choot, or delay the first Choot with two shots and then use a late mockball. Then shinespark up and use SpaceJump to reach the door. Entrance condition: {
"comeInShinecharging": {
"length": 6,
"openEnd": 1,
"steepDownTiles": 1
}
}Requires: {
"notable": "Shinespark Water Escape With Lower Choot Alive"
}
{
"or": [
{
"and": [
{
"enemyDamage": {
"enemy": "Choot",
"type": "contact",
"hits": 1
}
},
"canNeutralDamageBoost",
"canBounceBall"
]
},
{
"and": [
"canDodgeWhileShooting",
"canMockball"
]
}
]
}
"canShinechargeMovementComplex"
{
"shinespark": {
"frames": 14,
"excessFrames": 5
}
}
"SpaceJump"
"canTrickyJump"Dev note: There is 1 unusable tile in this runway. |
From: 4
Junction (Right side Pit)
To: 3
Junction (Left side Pit)
Crouch jump down grab to get over the first two pillars. For the third pillar, crouch jump to time a damage boost on the Skultera. The initial jump is fairly lenient; jump approximately when the fish is over the sloped tile a few tiles away from Samus, Hold down at any time after jumping, then down grab the ledge by also pressing forward 10 to 30 frames after Samus' Energy lowers. With Morph, the jump is much tighter, with a 15 frame window, but the the forward press is no longer necessary, as the fish boosts Samus onto the ledge. Requires: {
"notable": "Suitless Damage Boost Underwater Pillar"
}
"canSuitlessMaridia"
"canTrickyJump"
"canNeutralDamageBoost"
"h_underwaterCrouchJump"
{
"or": [
{
"and": [
"canDownGrab",
{
"noBlueSuit": {}
}
]
},
"canMidAirMorph"
]
}
{
"enemyDamage": {
"enemy": "Skultera",
"type": "contact",
"hits": 1
}
} |
|
Get a Zeb to move left into the morph passage, and reach the end of the tunnel before it. Must be quick enough to shoot the shot block first. Requires a mockball on the 4 tile floor before the tunnel. This strat is a one-shot try and failure is a softlock. Requires: {
"notable": "Bug Boost"
}
"Morph"
{
"or": [
"canMockball",
{
"and": [
"canInsaneJump",
"canBeVeryPatient"
]
}
]
}
"h_stationaryNeutralDamageBoost"
{
"enemyDamage": {
"enemy": "Zeb",
"type": "contact",
"hits": 1
}
}Dev note: FIXME: replace canBeVeryPatient with a more appropriate tech to represent the required precision and softlock risk, for doing this dashless. Could use a failure definition? |
From: 6
Middle Right Door (By Zeb Farm)
To: 12
Top Junction
Get a Zeb to move left into the morph passage, and reach the end of the tunnel before it. Freeze the bug at the correct height, such that it will move and be able to hit Samus while in the morph tunnel. While in the first two-tile tall region, shoot and refreeze the bug. Then go to the second two-tile region and shoot the block. Return and lure the bug such that it hits Samus and boosts her up and onto the ledge to escape. Be careful not to despawn the enemy by moving it off camera, except while it is frozen. This strat is a one-shot try and failure is a softlock. Requires: {
"notable": "Bug Boost with Ice"
}
"Morph"
"h_stationaryNeutralDamageBoost"
"canTrickyUseFrozenEnemies"
"canCameraManip"
{
"enemyDamage": {
"enemy": "Zeb",
"type": "contact",
"hits": 1
}
}Dev note: Could use a failure definition? |
From: 6
Middle Right Door (By Zeb Farm)
To: 12
Top Junction
Get a Zeb to move left into the morph passage, and reach the end of the tunnel before it. Shoot the block with Wave or while crouching with Spazer before luring the bug. Quickly lure the bug then use a mockball on the 4 tile floor before the tunnel. This strat is a one-shot try and failure is a softlock. Requires: {
"notable": "Bug Boost with Wave or Spazer"
}
{
"or": [
"Wave",
"Spazer"
]
}
"Morph"
{
"or": [
"canMockball",
"canInsaneJump"
]
}
"h_stationaryNeutralDamageBoost"
{
"enemyDamage": {
"enemy": "Zeb",
"type": "contact",
"hits": 1
}
}Dev note: Could use a failure definition? |
From: 1
Bottom Left Door
To: 3
Hidden Ceiling Item
Have Samus shoot the shot block revealing the item and then quickly get hit by an enemy at the peak of her jump in order to reach the item. No directional inputs should be held while getting hit by the enemy in order to have a neutral boost and reach the item. This is traditionally done with the swooping Reo; after a few failed tries, it may help to reset the room to reposition it. The global Geemer may be easier to use, although it takes longer to get there; jump as it starts moving horizontally again while it is 3 tiles away from the item. Requires: {
"notable": "Ceiling Damage Boost"
}
"h_ZebesIsAwake"
"canNeutralDamageBoost"
{
"enemyDamage": {
"enemy": "Geemer (blue)",
"type": "contact",
"hits": 1
}
}Dev note: Although the Reo is traditionally used for the boost, the Geemer does less damage and should still put this in logic with low energy. |
From: 1
Bottom Left Door
To: 3
Hidden Ceiling Item
While carrying a blue suit, take damage from the Reo after mid-air morphing, to get a boost from it. It helps to crouch jump, using X-Ray to cancel the shinecharge if needed. A standing jump can also work, but with more precision. It is best to unmorph as soon as possible after taking damage, while Samus still has knockback. A slightly later unmorph, after knockback expires, can also work but depends on collision oscillation. Requires: {
"haveBlueSuit": {}
}
{
"notable": "Ceiling Damage Boost"
}
"h_ZebesIsAwake"
{
"tech": "canNeutralDamageBoost"
}
"canMidAirMorph"
"canTrickyDodgeEnemies"
{
"or": [
{
"and": [
"h_blueSuitXRayCancelShinecharge",
"canCrouchJump"
]
},
"canInsaneJump"
]
}
{
"enemyDamage": {
"enemy": "Reo",
"type": "contact",
"hits": 1
}
}Dev note: Technically a blue suit would not be required for this strat, so the `haveBlueSuit` requirement could be dropped, but without a blue suit there would be no reason to do it this way, and the name would be misleading. |
From: 4
Bottom Right Door
To: 2
Top Right Door

Freeze a Zebbo inside the wall above the right side of the spikeway, close to the ceiling thorns. Face right, equip X-Ray, move at least a few pixels away from the wall, and jump straight up into the ceiling thorns. If successful, Samus will be knocked back into the wall and end up standing inside it. Use X-Ray immediately to prevent additional thorn hits. If Samus is high enough to be touching the thorns, then i-frames will continue to be refreshed once per second. While X-Ray climbing, be careful to only release X-Ray soon after i-frames are refreshed. Crouch before pressing X-Ray again. Requires: {
"notable": "Wall Ice Clip X-Ray Climb"
}
"canWallIceClip"
{
"thornHits": 1
}
"canXRayClimb"
"canUseIFrames"
"canNeutralDamageBoost"Dev note: Standing at least 3 pixels away from the wall ensures that knockback pushes Samus fully up against the ceiling; there is also no problem with standing further right, even hanging off the ledge: as long as Samus is still in range to take damage from the thorns above, they will be able to knock Samus into the wall. It is possible to freeze the Zeebo lower, but if Samus is too low, it will be necessary to take 3 thorn hits. It is also possible to get stuck inside the wall by taking knockback from a floor thorn, or by using a frozen Beetom as a platform. However those methods are not any easier, more damage will be taken, and the climb will be longer. If Samus begins climbing at a level below the ceiling thorns, then as Samus approaches the thorns, X-Ray will need to only be released while turning to the right, in order to prevent the thorn hits from knocking Samus out of the wall. |
From: 13
Central Junction
To: 5
Left Side - Door Blocked by Crumble Blocks

Freeze a Zeb inside the left wall of the room, and use it to clip into the wall and X-Ray climb. Note that jumping directly against the wall to clip into it will put Samus into a forced crouch, unable to use X-Ray. Samus may either 1) perform a Crystal Flash to stand up, 2) use neutral knockback from a Reo to put Samus standing inside the wall, or 3) use the frozen Reo as a platform to walk or run and clip into the wall. To manipulate the Reo into a suitable position, lure it to the left and crouch at the edge of the platform; jump as needed to bring it back on camera when it goes off; it should perform 4 big swoops down to the left, 2 small swoops (hitting the overhang above), then 5 more big swoops, after which it will enter a slow hover moving directly towards Samus. Freeze the Reo when its left side is approximately flush with the ledge, or up to about a tile to the right. After X-Ray climbing a little over half a screen, it is possible to aim up and shoot the door (if it is blue) and listen for if it opens, to test if you are high enough to safely jump up. Alternatively, the sound of the crumble blocks breaking will indicate when Samus' feet are level with the bottom of the door. Requires: {
"notable": "Wall Ice Clip X-Ray Climb"
}
"canWallIceClip"
{
"or": [
{
"and": [
"canDash",
"h_CrystalFlash"
]
},
{
"and": [
"canNeutralDamageBoost",
{
"enemyDamage": {
"enemy": "Reo",
"type": "contact",
"hits": 1
}
}
]
},
{
"and": [
{
"or": [
"canWallJump",
"SpaceJump",
"canInsaneJump"
]
},
"canTrickyDodgeEnemies",
"canTrickyUseFrozenEnemies"
]
}
]
}
"canXRayClimb"Dev note: The Zeb moves 2 pixels per frame, and there are 3 positions where it can be frozen inside the wall using Ice beam alone, namely 2 pixels, 4 pixels, or 6 pixels deep inside the wall. For the method that uses the frozen Reo as a platform, only the 2-pixel-deep position will work; by moonwalking back inside the 2-tile space, it will work 100% reliably as long as the Zeb is frozen in that exact spot. For the method that jumps directly into the wall (with a Crystal Flash), either 2 or 4 pixels can work, or 6 with SpeedBooster; it will work more reliably the less deeply the Zeb is frozen inside the wall. Likewise, with the Reo knockback method either 2 or 4 pixels can work, though it is more reliable in the 2-pixel position; it helps to take the knockback a few pixels away from the wall, as it takes a few frames for the horizontal speed of the knockback to reach its maximum. The trick can work with Samus facing either toward or away from the wall when taking knockback; facing away makes it easier to quickly kill the Reo afterward to avoid taking a second hit. |
From: 1
Left Door
To: 1
Left Door
Use damage from the small sidehopper to align against the left wall. Jump straight up and shoot with the correct timing. This strat involves shooting a Super diagonally from the correct height while flush against the left wall. Its acceleration will cause it to clip into the blue gate off-screen. Requires: {
"notable": "Reverse Gate Glitch"
}
{
"obstaclesNotCleared": [
"A"
]
}
{
"enemyDamage": {
"enemy": "Sidehopper",
"type": "contact",
"hits": 1
}
}
"canTrickyJump"
"canNeutralDamageBoost"
"canUseIFrames"
"HiJump"
"canOffScreenSuperShot"
{
"or": [
{
"noFlashSuit": {}
},
"h_useSpringBall"
]
}Clears obstacles: B |
From: 4
Frozen Hopper Junction
To: 4
Frozen Hopper Junction
Freeze a small hopper to the side and kill the remaining Side Hoppers. Stand against the left wall (damage knockback will align Samus with the wall) and shoot up to freeze the hopper. Jump up to land on it, aligned with the wall. Alternatively, Jump and shoot down to freeze the hopper as a way to avoid damage. Fire a Super just above the door shell to hit the Gate. This strat involves shooting a Super diagonally from the correct height while flush against the left wall. Its acceleration will cause it to clip into the blue gate off-screen. Requires: {
"notable": "Reverse Gate Glitch"
}
{
"obstaclesNotCleared": [
"A"
]
}
"canTrickyUseFrozenEnemies"
"canTrickyJump"
"canOffScreenSuperShot"
{
"or": [
"h_backIntoCorner",
{
"and": [
{
"enemyDamage": {
"enemy": "Sidehopper",
"type": "contact",
"hits": 1
}
},
"canNeutralDamageBoost"
]
}
]
}Clears obstacles: B |
From: 1
Right Door
To: 2
Chozo Item
Traverse the room while rolling on the thorns and avoiding the Samus Eaters. Roll from the first platform onto the thorns under the first set of Boyons. When just past the first Boyons, turn right and wait on the safe spot for a second to overload PLMs. Move right to touch the thorns and use that to damage boost leftwards onto the next thorns and roll into the third Samus Eater. Place a Power Bomb and then quickly unmorph and jump onto the block above and exit G-Mode before the Power Bomb explodes to break the wall. Note that if Samus is teleported into the Samus Eater when exiting G-Mode, then PLMs weren't properly overloaded before entering it. PLMs can be overloaded by waiting on their petals before entering them. Also note that there are much easier strats with more Energy or more Power Bombs. Entrance condition: {
"comeInWithGMode": {
"mode": "any",
"morphed": true
}
}Requires: "canUseIFrames"
"canNeutralDamageBoost"
"canTrickyGMode"
{
"thornHits": 2
}
"h_artificialMorphPowerBomb"Clears obstacles: B Dev note: FIXME: this can be done with a blue suit, with more damage; also look at using the Boyons to boost instead of only the thorns. |
From: 1
Right Door
To: 2
Chozo Item
Traverse the room while rolling on the thorns and avoiding the Samus Eaters. Roll from the first platform onto the thorns under the first set of Boyons. When just past the first Boyons, turn right to damage boost up and hit the block and fall back on the thorns. While still facing right wait for the thorns to hit again; use the boost to get onto the next set of thorns and roll across them into the third Samus Eater before using a Power Bomb. Use the Power Bomb to boost up into the thorns. Hit the thorns again to get next to the Chozo statue. Place another Power Bomb and exit G-Mode before it goes off to break the wall. Note that if Samus is teleported into the Samus Eater when exiting G-Mode, then PLMs weren't properly overloaded before entering it. PLMs can be overloaded by waiting on their petals before entering them. Taking 2 thorn hits while under the first Boyons is important for this reason. Entrance condition: {
"comeInWithGMode": {
"mode": "any",
"morphed": true
}
}Requires: "canComplexGMode"
"canUseIFrames"
"canNeutralDamageBoost"
"canInsaneJump"
{
"thornHits": 5
}
"h_artificialMorphPowerBomb"
"h_additionalBomb"Clears obstacles: B |
|
Use the Solid Blocks next to the Samus Eater to clip up through the Power Bomb Blocks. Carefully jump around the thorns, use HiJump to jump over them, or walk through them using i-frames. Requires: "canCeilingClip"
"canPartialFloorClip"
{
"or": [
{
"and": [
"canCarefulJump",
"HiJump",
"canTwoTileSqueeze",
{
"or": [
"canTrickyJump",
{
"thornHits": 1
}
]
}
]
},
{
"and": [
"canNeutralDamageBoost",
"canUseIFrames",
{
"thornHits": 1
}
]
},
{
"and": [
"canPreciseWallJump",
"canTwoTileSqueeze"
]
}
]
} |
|
Requires: {
"obstaclesCleared": [
"B"
]
}
"canNeutralDamageBoost"
{
"or": [
"canMidAirMorph",
"canCarefulJump"
]
}
{
"thornHits": 1
} |
From: 1
Top Left Door
To: 1
Top Left Door
It takes around 3 minutes to get the Zero to this door. Crouch jump to touch a well timed Cacatac spike at the peak of Samus' jump. Use a neutral damage boost to gain some height. At the peak of the boost, down grab the ledge. The Zero only moves on camera and the camera scrolls when exiting the morph tunnel. Let the Zero lead through the morph tunnel or wait for the it to get very close to Samus before touching the scroll block at the exit. Requires: "canBeVeryPatient"
"Morph"
"canNeutralDamageBoost"
"canTrickyDodgeEnemies"
"h_crouchJumpDownGrab"
{
  "enemyDamage": {
    "enemy": "Cacatac",
    "type": "spike",
    "hits": 1
  }
}Exit condition: {
"leaveWithGModeSetup": {}
} |
From: 1
Top Left Door
To: 1
Top Left Door
It takes around 3 minutes to get the Zero to this door. Let the Zero climb the right wall and jump on top of it in Morph Ball form to bounce up to the Cacatac platform. The Zero only moves on camera and the camera scrolls when exiting the morph tunnel. Let the Zero lead through the morph tunnel or wait for the it to get very close to Samus before touching the scroll block at the exit. One setup is to do regular jumps while aiming down until the camera stops lowering, and then let the Zero move off camera. And then crouch jump and morph directly into it, while holding right. Requires: "canBeVeryPatient"
"h_midAirMorphDamageBoost"
"canTrickyJump"
"h_crouchJumpDownGrab"
{
"enemyDamage": {
"enemy": "Zero",
"type": "contact",
"hits": 1
}
}Exit condition: {
"leaveWithGModeSetup": {}
} |
From: 2
Middle Left Door
To: 2
Middle Left Door
It takes around 4 minutes to get the Zero to this door. Crouch jump to touch a well timed Cacatac spike at the peak of Samus' jump. Use a neutral damage boost to gain some height. At the peak of the boost, down grab the ledge. The Zero only moves on camera and the camera scrolls when exiting the morph tunnel. Let the Zero lead through the morph tunnel or wait for the it to get very close to Samus before touching the scroll block at the exit. Requires: "canBeVeryPatient"
"Morph"
"canNeutralDamageBoost"
"canTrickyDodgeEnemies"
"h_crouchJumpDownGrab"
{
  "enemyDamage": {
    "enemy": "Cacatac",
    "type": "spike",
    "hits": 1
  }
}
Exit condition: {
"leaveWithGModeSetup": {}
} |
From: 2
Middle Left Door
To: 2
Middle Left Door
It takes around 4 minutes to get the Zero to this door. Let the Zero climb the right wall and jump on top of it in Morph Ball form to bounce up to the Cacatac platform. The Zero only moves on camera and the camera scrolls when exiting the morph tunnel. Let the Zero lead through the morph tunnel or wait for the it to get very close to Samus before touching the scroll block at the exit. One setup is to do regular jumps while aiming down until the camera stops lowering, and then let the Zero move off camera. And then crouch jump and morph directly into it, while holding right. Requires: "canBeVeryPatient"
"h_midAirMorphDamageBoost"
"canTrickyJump"
"h_crouchJumpDownGrab"
{
"enemyDamage": {
"enemy": "Zero",
"type": "contact",
"hits": 1
}
}Exit condition: {
"leaveWithGModeSetup": {}
} |
|

Crouch jump to touch a well timed Cacatac spike at the peak of Samus' jump. Use a neutral damage boost to gain some height. At the peak of the boost, down grab the ledge. Requires: "canNeutralDamageBoost"
"canTrickyDodgeEnemies"
"h_crouchJumpDownGrab"
{
"enemyDamage": {
"enemy": "Cacatac",
"type": "spike",
"hits": 1
}
} |
|
Let the Zero (Caterpillar) climb the right wall and jump on top of it in Morph Ball form to bounce up to the Cacatac platform. One setup is to do regular jumps while aiming down until the camera stops lowering, and then let the Zero move off camera. And then crouch jump and morph directly into it, while holding right. Requires: "h_midAirMorphDamageBoost"
"canTrickyJump"
"canCrouchJump"
{
"enemyDamage": {
"enemy": "Zero",
"type": "contact",
"hits": 1
}
} |
From: 4
Bottom Right Door
To: 4
Bottom Right Door
Let the Caterpillar climb the right wall and then use a Cacatac spike to boost up to the same level. Crouch jump to touch a well timed Cacatac spike at the peak of Samus' jump. Use a neutral damage boost to gain some height. At the peak of the boost, down grab the ledge. Requires: "canNeutralDamageBoost"
"canTrickyDodgeEnemies"
"h_crouchJumpDownGrab"
{
"enemyDamage": {
"enemy": "Cacatac",
"type": "spike",
"hits": 1
}
}Exit condition: {
"leaveWithGModeSetup": {}
}Dev note: It takes around 50 seconds to get the Zero to this door. |
From: 4
Bottom Right Door
To: 4
Bottom Right Door
Let the Caterpillar climb the right wall and jump on top of it in Morph Ball form to bounce up to the Cacatac platform. One setup is to do regular jumps while aiming down until the camera stops lowering, and then let the Zero move off camera. And then crouch jump and morph directly into it, while holding right. Requires: "h_midAirMorphDamageBoost"
"canTrickyJump"
"canCrouchJump"
{
"enemyDamage": {
"enemy": "Zero",
"type": "contact",
"hits": 1
}
}Exit condition: {
"leaveWithGModeSetup": {}
}Dev note: It takes around 50 seconds to get the Zero to this door. |
From: 5
Top Right Door (Through Morph Tunnel)
To: 5
Top Right Door (Through Morph Tunnel)
It takes around 2 minutes to get the Zero to this door. Crouch jump to touch a well timed Cacatac spike at the peak of Samus' jump. Use a neutral damage boost to gain some height. At the peak of the boost, down grab the ledge. Requires: "canBePatient"
{
"or": [
{
"ammo": {
"type": "Super",
"count": 1
}
},
{
"obstaclesCleared": [
"A"
]
}
]
}
"Morph"
"canNeutralDamageBoost"
"canTrickyDodgeEnemies"
"h_crouchJumpDownGrab"
{
"enemyDamage": {
"enemy": "Cacatac",
"type": "spike",
"hits": 1
}
}Exit condition: {
"leaveWithGModeSetup": {}
} |
From: 5
Top Right Door (Through Morph Tunnel)
To: 5
Top Right Door (Through Morph Tunnel)
It takes around 2 minutes to get the Zero to this door. Let the Zero climb the right wall and jump on top of it in Morph Ball form to bounce up to the Cacatac platform. One setup is to do regular jumps while aiming down until the camera stops lowering, and then let the Zero move off camera. And then crouch jump and morph directly into it, while holding right. Requires: "canBePatient"
{
"or": [
{
"ammo": {
"type": "Super",
"count": 1
}
},
{
"obstaclesCleared": [
"A"
]
}
]
}
"h_midAirMorphDamageBoost"
"canTrickyJump"
"h_crouchJumpDownGrab"
{
"enemyDamage": {
"enemy": "Zero",
"type": "contact",
"hits": 1
}
}Exit condition: {
"leaveWithGModeSetup": {}
} |
From: 5
Top Right Door (Through Morph Tunnel)
To: 5
Top Right Door (Through Morph Tunnel)


Open the gate, farm the Cacatacs and Zeros, while leading one back up to the Morph tunnel. Shinecharge under the gate, then get hit by the Zero to interrupt. Entrance condition: {
"comeInWithRMode": {}
}Requires: {
"ammo": {
"type": "Super",
"count": 1
}
}
"Morph"
{
"or": [
"h_CrystalFlashForReserveEnergy",
{
"and": [
"h_RModeCanRefillReserves",
{
"or": [
{
"and": [
{
"resourceMissingAtMost": [
{
"type": "Super",
"count": 1
}
]
},
{
"partialRefill": {
"type": "ReserveEnergy",
"limit": 20
}
}
]
},
{
"and": [
{
"resourceMissingAtMost": [
{
"type": "PowerBomb",
"count": 0
}
]
},
{
"partialRefill": {
"type": "ReserveEnergy",
"limit": 15
}
}
]
}
]
}
]
}
]
}
{
"or": [
"HiJump",
"canWallJump",
"SpaceJump",
"canIBJ",
"canSpringBallJumpMidAir",
"canTrickyUseFrozenEnemies",
{
"and": [
"canNeutralDamageBoost",
{
"or": [
{
"and": [
"canTrickyDodgeEnemies",
"h_crouchJumpDownGrab",
{
"enemyDamage": {
"enemy": "Cacatac",
"type": "spike",
"hits": 1
}
}
]
},
{
"and": [
"canMidAirMorph",
"canTrickyJump",
"canCrouchJump",
{
"enemyDamage": {
"enemy": "Zero",
"type": "contact",
"hits": 1
}
}
]
}
]
}
]
}
]
}
"canBePatient"
{
"canShineCharge": {
"usedTiles": 17,
"openEnd": 0
}
}
{
"autoReserveTrigger": {}
}
"canRModeSparkInterrupt"Clears obstacles: A, B |
From: 2
Right Door
To: 3
Safe Block in the Middle of the Room
Crouch jump and Spring Ball near the peak of the jump to hit the side of the spikes and boost up onto them. This is also possible from standing on the spikes to avoid the crouch jump. With a very precise spring ball jump, it can also be done without a crouch jump. After getting up onto the spikes, take a second hit from the spikes, hold left, then face right, unmorph, and use either a horizontal damage boost or a couple of blue suit spike jumps to reach the safe platform. Requires: {
"or": [
{
"and": [
"h_maxHeightSpringBallJump",
"canNeutralDamageBoost"
]
},
{
"and": [
"canInsaneJump",
"canTrickySpringBallJump",
"canNeutralDamageBoost"
]
},
{
"and": [
{
"spikeHits": 1
},
"canTrickySpringBallJump",
"canTrickyJump",
"canNeutralDamageBoost"
]
}
]
}
{
"or": [
{
"and": [
{
"tech": "canHorizontalDamageBoost"
},
{
"noFlashSuit": {}
},
{
"spikeHits": 3
}
]
},
{
"and": [
"canBlueSuitSpikeJump",
{
"spikeHits": 4
}
]
}
]
} |
From: 2
Right Door
To: 3
Safe Block in the Middle of the Room


Crouch jump and Spring Ball near the peak of the jump to hit the side of the spikes and boost up onto them. This is also possible with a springwall, or from standing on the spikes to avoid the crouch jump. With a very precise spring ball jump, it can also be done without a crouch jump. Requires: {
"noBlueSuit": {}
}
{
"or": [
"h_trickySpringwall",
{
"and": [
"h_maxHeightSpringBallJump",
"canNeutralDamageBoost"
]
},
{
"and": [
"canInsaneJump",
"canTrickySpringBallJump",
"canNeutralDamageBoost"
]
},
{
"and": [
{
"spikeHits": 1
},
"canTrickySpringBallJump",
"canTrickyJump",
"canNeutralDamageBoost"
]
}
]
}
{
"spikeHits": 1
} |
|


Use a kihunter to knock Samus out of the hole at the peak of her jump This strat may take a few attempts to get a good boost. Requires: {
"obstaclesNotCleared": [
"C"
]
}
"canNeutralDamageBoost"
{
"enemyDamage": {
"enemy": "Kihunter (green)",
"type": "contact",
"hits": 1
}
}
{
"or": [
"canTrickyDodgeEnemies",
{
"enemyDamage": {
"enemy": "Kihunter (green)",
"type": "contact",
"hits": 2
}
}
]
}Clears obstacles: C, D |
|


Entrance condition: {
"comeInRunning": {
"speedBooster": "any",
"minTiles": 2
}
}Requires: {
"or": [
"canTrickyJump",
{
"and": [
"canSpeedyJump",
"canCarefulJump"
]
}
]
}
{
"or": [
"ScrewAttack",
{
"and": [
"canNeutralDamageBoost",
{
"enemyDamage": {
"enemy": "Cacatac",
"type": "contact",
"hits": 1
}
}
]
}
]
} |
|


King Cac can be killed by scrolling the camera before jumping across. Requires: "h_speedJump"
"canCarefulJump"
{
"or": [
{
"doorUnlockedAtNode": 1
},
"canTrickyJump"
]
}
{
"or": [
"canCameraManip",
{
"and": [
"canNeutralDamageBoost",
{
"enemyDamage": {
"enemy": "Cacatac",
"type": "contact",
"hits": 1
}
}
]
}
]
} |
|


King Cac can be killed by scrolling the camera before jumping across. Requires: "canDash"
"canWallJump"
"canCarefulJump"
{
"or": [
"canCameraManip",
"canTrickyWallJump",
{
"and": [
"canNeutralDamageBoost",
{
"enemyDamage": {
"enemy": "Cacatac",
"type": "contact",
"hits": 1
}
}
]
}
]
} |
From: 2
Left Side - Top Middle Door
To: 1
Left Side - Top Door

Entrance condition: {
"comeInRunning": {
"speedBooster": "yes",
"minTiles": 15
}
}Requires: "canSpeedyJump"
"canTrickyJump"
"canTrickySpringBallJump"
"canNeutralDamageBoost"
{
"enemyDamage": {
"enemy": "Waver",
"type": "contact",
"hits": 1
}
} |
From: 2
Left Side - Top Middle Door
To: 1
Left Side - Top Door
Use 7 tiles from the adjacent runway then use Spring Ball at the peak of the jump and bounce off the Waver to get up onto the top left ledge. Entrance condition: {
"comeInRunning": {
"speedBooster": "yes",
"minTiles": 7
}
}Requires: "canTrickyDashJump"
"canTrickySpringBallJump"
"canNeutralDamageBoost"
{
"enemyDamage": {
"enemy": "Waver",
"type": "contact",
"hits": 1
}
} |
From: 2
Left Side - Top Middle Door
To: 7
Top Right Door
Entrance condition: {
"comeInRunning": {
"speedBooster": "yes",
"minTiles": 15
}
}Requires: "canSpeedyJump"
"canTrickyJump"
"canTrickySpringBallJump"
"canNeutralDamageBoost"
{
"enemyDamage": {
"enemy": "Cacatac",
"type": "contact",
"hits": 1
}
} |
|
Cross the room and go through the morph tunnel. Without any morph movement items, carefully air ball over the Sova and use it to damage boost into the tunnel or wait for the global Sova. It is possible to kill a Sova on the door and pause abuse to grab its Energy drop on G-mode exit. Entrance condition: {
"comeInWithGMode": {
"mode": "any",
"morphed": false
}
}Requires: "Morph"
{
"or": [
"h_bombThings",
"h_useSpringBall",
{
"and": [
"canNeutralDamageBoost",
{
"enemyDamage": {
"enemy": "Sova",
"type": "contact",
"hits": 1
}
},
{
"or": [
{
"and": [
"canTrickyJump",
"canLateralMidAirMorph"
]
},
"canBePatient",
{
"ammo": {
"type": "Super",
"count": 1
}
}
]
}
]
}
]
}
{
"or": [
"h_heatedGModePauseAbuse",
"h_heatedGModeOpenDifferentDoor"
]
} |
|
Either race the nearby Sova to the morph tunnel or wait for it to come back through the morph tunnel and use a Super to knock it off behind Samus. Alternatively, it is possible to wait for the global Sova to come around. Build speed on the lower platform and jump towards the morph tunnel while performing a Midair Morph to reach the Sova in time. Guiding the local Sova around through the shot block again can be faster, but is not expected. Requires: "canNeutralDamageBoost"
"Morph"
{
"enemyDamage": {
"enemy": "Sova",
"type": "contact",
"hits": 1
}
}
{
"or": [
{
"and": [
"canTrickyJump",
"canLateralMidAirMorph",
"canCameraManip",
{
"heatFrames": 340
}
]
},
{
"and": [
{
"ammo": {
"type": "Super",
"count": 1
}
},
{
"heatFrames": 875
}
]
},
{
"heatFrames": 2700
}
]
}Dev note: The global Sova is moving while the player reaches this node and this heatFrame count reflects that. |
|
Use a very well timed and precise walljump into morph to hit the global Sova so that the damage bonks Samus up to the door ledge. Aim for the lowest part of slope looking wall tile, where it does not look possible to make contact with a walljump, and fully delay the jump. To try again, the Sova loops to the left side wall. Or a Super can knock it off the wall to climb the right side again. Requires: {
"notable": "Sova Morph Only Boost"
}
"canInsaneWallJump"
"canMidAirMorph"
"canNeutralDamageBoost"
{
"enemyDamage": {
"enemy": "Sova",
"type": "contact",
"hits": 1
}
}
{
"heatFrames": 1050
} |
|

Wait for the global Sova to begin climbing the wall below the door. Time a walljump into instant morph where Samus boosts off of the Sova with the right timing to bounce up to the door's ledge. The jump must be a fully delayed walljump. Normalizing the camera can help with timing the walljump. The damage boost can be attempted again when the Sova climbs down the left wall, or by knocking it off the wall with a Super Missile. Requires: {
"notable": "Sova Boost"
}
"canInsaneWallJump"
"canWallJumpInstantMorph"
"canNeutralDamageBoost"
"canCameraManip"
{
"heatFrames": 830
}
{
"enemyDamage": {
"enemy": "Sova",
"type": "contact",
"hits": 1
}
}
{
"heatFrames": 90
} |
From: 5
Bottom Floating Platform Junction
To: 4
Top Floating Platform Junction
Requires: "canNeutralDamageBoost"
{
"enemyDamage": {
"enemy": "Gamet",
"type": "contact",
"hits": 1
}
}
{
"heatFrames": 350
}Dev note: A damage boost allows getting up without a crouch jump, e.g. to preserve a flash suit. |
|
Ride the Geruta left to reach the missile location by freezing it repeatedly. Stay on its left side when it touches the ceiling for the enemy to continue moving forward. It may not be possible to climb back up to the Geruta if Samus falls. When it moves towards the ceiling, reset Samus' fall speed using an unmorph or by taking knockback damage, in order to wait for the Geruta to fall low enough to refreeze. Requires: {
"notable": "Ice Only Geruta Platforming"
}
"canTrickyUseFrozenEnemies"
"canTrickyJump"
{
"or": [
{
"and": [
"canResetFallSpeed",
"canTrickyDodgeEnemies",
{
"heatFrames": 1000
},
{
"or": [
"canInsaneJump",
{
"and": [
{
"noBlueSuit": {}
},
{
"enemyDamage": {
"enemy": "Geruta",
"type": "contact",
"hits": 1
}
}
]
}
]
}
]
},
{
"and": [
"canNeutralDamageBoost",
{
"enemyDamage": {
"enemy": "Geruta",
"type": "contact",
"hits": 3
}
}
]
}
]
}
{
"heatFrames": 3000
} |
|
Use mid-air Spring Ball jumps to manipulate the Geruta into position near the ledge. Then do a Spring Ball jump into a neutral damage boost (while still morphed) to reach the ledge. Requires: "canDash"
{
"notable": "Spring Ball Jump into Damage Boost"
}
{
"heatFrames": 1920
}
"canTrickyDodgeEnemies"
"canTrickySpringBallJump"
"canNeutralDamageBoost"
{
"enemyDamage": {
"enemy": "Geruta",
"type": "contact",
"hits": 1
}
} |
From: 9
Right of Crumble Bridge, Left of Main Shaft Speed Blocks
To: 2
Far Left Door
Kill the two pirates while in health bomb range, to force Energy drops. It is possible to jump over the second pirate to then fight it on solid ground. Samus needs a large Energy drop with 75% damage reduction, or both large Energy drops otherwise. Cross the speed blocks by tanking a pirate laser hit and boosting up. Requires: "canDash"
"h_heatProof"
{
"or": [
"h_hasBeamUpgrade",
{
"ammo": {
"type": "Missile",
"count": 2
}
},
{
"ammo": {
"type": "Super",
"count": 2
}
},
"ScrewAttack"
]
}
{
"resourceAtMost": [
{
"type": "Energy",
"count": 29
}
]
}
"h_partialEnemyDamageReduction"
{
"or": [
"h_fullEnemyDamageReduction",
"canBeVeryLucky"
]
}
"canMidAirMorph"
"canNeutralDamageBoost" |
From: 9
Right of Crumble Bridge, Left of Main Shaft Speed Blocks
To: 2
Far Left Door
Kill the first pirate, then jump over or kill the second. It is possible to jump straight into the first morph tunnel. Without a way to kill the pirates, it is instead possible to tank or pause abuse a hit and then Samus will have i-frames when running through the second one. Cross the speed blocks with Bombs, a Power Bomb, Spring Ball, or by tanking a pirate laser hit and boosting up. The rest of the room can be tricky to cross damageless, particularly if Samus has no way to kill the enemies. Carefully avoid the Multiviola in the middle of the sloped section by slowing down, and kill the last Multiviola to prevent it hitting Samus in the transition. Requires: "canDash"
"canMidAirMorph"
"canTrickyJump"
{
"or": [
{
"enemyDamage": {
"enemy": "Red Space Pirate (standing)",
"type": "contact",
"hits": 1
}
},
"Plasma",
{
"ammo": {
"type": "Missile",
"count": 1
}
},
{
"ammo": {
"type": "Super",
"count": 1
}
},
{
"and": [
"Ice",
"Wave",
"Spazer"
]
},
{
"and": [
"Ice",
"Spazer",
{
"heatFrames": 30
}
]
},
{
"and": [
"Ice",
"Wave",
{
"heatFrames": 30
}
]
},
{
"and": [
"Wave",
"Spazer",
{
"heatFrames": 30
}
]
},
{
"and": [
{
"or": [
"Ice",
"Wave",
"Spazer",
"ScrewAttack"
]
},
{
"heatFrames": 50
}
]
},
{
"and": [
"canPseudoScrew",
{
"heatFrames": 85
}
]
},
{
"and": [
"canPauseAbuse",
{
"resourceAtMost": [
{
"type": "RegularEnergy",
"count": 1
}
]
},
{
"resourceConsumed": [
{
"type": "ReserveEnergy",
"count": 1
}
]
}
]
}
]
}
{
"or": [
"h_useSpringBall",
{
"and": [
"h_bombThings",
{
"heatFrames": 60
}
]
},
{
"and": [
"canNeutralDamageBoost",
{
"enemyDamage": {
"enemy": "Red Space Pirate (standing)",
"type": "laser",
"hits": 1
}
},
{
"heatFrames": 120
}
]
}
]
}
{
"or": [
"h_heatProof",
"canTrickyDodgeEnemies",
{
"enemyDamage": {
"enemy": "Multiviola",
"type": "contact",
"hits": 1
}
}
]
}
{
"or": [
"Plasma",
"ScrewAttack",
{
"ammo": {
"type": "Missile",
"count": 5
}
},
{
"ammo": {
"type": "Super",
"count": 5
}
},
{
"heatFrames": 150
}
]
}
{
"heatFrames": 970
}Dev note: canTrickyJump is used to simplify the logic, as there is no feasible way to get to this node without SpeedBooster without this skill level. |
|
Crouch jump and let the Sova move into Samus from the right, to get a upward boost, then hold left to boost horizontally to the ledge. Then crouch jump from the slope on the left, and morph into a neutral damage boost. Requires: {
"notable": "Sova Boost"
}
"Morph"
"canCrouchJump"
"canTrickyJump"
{
"or": [
"canInsaneMidAirMorph",
"canHorizontalDamageBoost"
]
}
"h_midAirMorphDamageBoost"
{
"enemyDamage": {
"enemy": "Sova",
"type": "contact",
"hits": 2
}
} |
From: 7
Junction Below Power Bomb Blocks
To: 2
Middle Left Door
Place a Power Bomb to break the Power Bomb blocks and the bomb blocks, without killing the global Sova. Wait 30-50 seconds for the Sova to get into position. Crouch jump, morph, and hold right against the wall, hitting the Sova from below while near the peak of Samus's jump. Continue holding right to pass through the Sova and onto the ledge above. Requires: {
"notable": "Sova Boost"
}
"h_usePowerBomb"
"canCrouchJump"
"canTrickyJump"
"h_midAirMorphDamageBoost"
{
"enemyDamage": {
"enemy": "Sova",
"type": "contact",
"hits": 1
}
}Clears obstacles: A, B, C Dev note: This is only notable with wall jumps disabled. FIXME: Consider also adding a Mella version of this strat. It takes longer to setup but allows retrying. The Mella version does slightly less damage. With either the Mella or Sova, you could kill it and collect its drop after getting onto the ledge; for the Sova you'd have to wait for it to come back around. |
|
Wait for the Sova to leave the tunnel and jump morph into them to bounce up into the hole. Requires: "canCrouchJump"
"canMidAirMorph"
{
"tech": "canNeutralDamageBoost"
}
{
"enemyDamage": {
"enemy": "Sova",
"type": "contact",
"hits": 1
}
}
{
"heatFrames": 470
}
{
"or": [
"canDash",
{
"heatFrames": 20
}
]
} |
|
A well-executed lateral mid-air morph can get into the passage without taking a hit. Otherwise, the Boyon can be used to push Samus into the passage. Requires: "canLateralMidAirMorph"
{
"or": [
"canTrickyJump",
{
"and": [
"canNeutralDamageBoost",
{
"enemyDamage": {
"enemy": "Boyon",
"type": "contact",
"hits": 1
}
}
]
}
]
}
{
"heatFrames": 240
}Dev note: It's possible to get into the passage by a non-mockball mid-air morph, it just needs to be fairly late. Due to its risk and not really being easier, it's not included here |
From: 2
Right Door
To: 1
Left Door

Enter the lava pool as the Ripper touches the left wall. Place a Power Bomb in the corner and boost up into the Ripper to escape. The Power Bomb timing is somewhat lenient, but incorrectly timing it will kill the Ripper and leave Samus in the lava pool. Entrance condition: {
"comeInWithGMode": {
"mode": "any",
"morphed": true
}
}Requires: "canComplexGMode"
"Gravity"
"h_artificialMorphPowerBomb"
"canNeutralDamageBoost"
{
"enemyDamage": {
"enemy": "Ripper 2 (red)",
"type": "contact",
"hits": 1
}
}
"canTrickyJump"
{
"lavaFrames": 140
}
"h_additionalBomb"
{
"or": [
{
"and": [
{
"notable": "Impressive Damage Boost"
},
"canHorizontalDamageBoost",
{
"enemyDamage": {
"enemy": "Boyon",
"type": "contact",
"hits": 1
}
}
]
},
{
"lavaFrames": 25
}
]
}
"h_heatedGModeOpenDifferentDoor" |
|

Place a bomb just a bit left of the Fune and have it boost Samus horizontally to get over the Fune. The bomb can be placed at a similar time to when the Fune shoots a fireball. Alternatively, it is possible to land on a fireball to be boosted up. Requires: "h_useMorphBombs"
{
"or": [
{
"and": [
"canBombHorizontally",
{
"or": [
"Ice",
"canCarefulJump"
]
}
]
},
{
"and": [
"h_midAirMorphDamageBoost",
{
"enemyDamage": {
"enemy": "Fune",
"type": "fireball",
"hits": 1
}
}
]
}
]
} |
|
Position the Bull with beam shots before jumping into it. Requires: {
"notable": "Bull Boost"
}
"canSuitlessMaridia"
"HiJump"
"canUseEnemies"
"h_midAirMorphDamageBoost"
"h_underwaterCrouchJump"
"Morph"
{
"enemyDamage": {
"enemy": "Bull",
"type": "contact",
"hits": 1
}
} |
From: 1
Left Door
To: 3
Top Right Door
Use the spikes, which are not in the water, to jump from platform to platform as a way to cross the room. Requires knowing the position of every spike in the room, and hitting the spikes while morphed can help. The first jump is particularly tough. A Spring Ball jump from the sand to the spike with HiJump, or a frozen Mochtroid can be used to get past it. Requires: {
"notable": "Spike Platforming with Move Assist"
}
"canDash"
"canWallJump"
"canSuitlessMaridia"
"canPlayInSand"
"canTrickyJump"
"Morph"
"canUseIFrames"
"canNeutralDamageBoost"
{
"spikeHits": 3
}
{
"or": [
{
"and": [
"HiJump",
"canTrickySpringBallJump"
]
},
{
"and": [
"canMochtroidIceClimb",
{
"or": [
"canInsaneJump",
{
"enemyDamage": {
"enemy": "Mochtroid",
"type": "contact",
"hits": 1
}
}
]
}
]
}
]
}
{
"or": [
{
"spikeHits": 1
},
"canHorizontalDamageBoost"
]
} |
|
Stay out of the water, and by extension the sand, of the room by using the spikes as platforms. Morphing before landing on the spikes helps to be able to control the knockback. The final spike jump (which would be the most difficult) is avoided by doing a crouch jump into spring ball jump into IBJ to reach the left door. Perform the spring ball jump near max height. Place the first bomb between about 4 and 6 frames after the spring ball jump; ideally it should be just above the water line. Press pause between about 5 and 10 frames after placing the bomb, to disable Spring Ball (a 'spring fling', to reset fall speed). Place the second bomb soon after regaining control, while the game is fading back in. A spike hit in the center of the room can avoided by doing another spring ball jump into IBJ (also with a spring fling). Requires: {
"notable": "Bomb Jump Water Escape"
}
"canDash"
"HiJump"
"canPreciseWallJump"
"canUseIFrames"
{
"spikeHits": 1
}
"canNeutralDamageBoost"
"canTrickyJump"
{
"or": [
"canHorizontalDamageBoost",
{
"spikeHits": 1
}
]
}
{
"or": [
"canBePatient",
{
"spikeHits": 1
}
]
}
"h_underwaterMaxHeightSpringBallJump"
"canSpringFling"
"canBombJumpWaterEscape"
"canJumpIntoIBJ"Dev note: The IBJ at the left side of the room can be done without a 'spring fling' but is far more precise: the first bomb must be placed exactly two frames before the spring ball jump, and the spring ball jump should be performed just before max height, during the 4-frame window between 2 and 5 frames before the last possible frame to jump (there are also 1-frame windows at 0 and 8 frames before the last frame). FIXME: This can be possible to do while carrying a blue suit, with much greater difficulty. |
From: 3
Top Right Door
To: 1
Left Door
Use the spikes, which are not in the water, to jump from platform to platform as a way to cross the room. Requires knowing the position of every spike in the room, and hitting the spikes while morphed can help. The final jump is particularly tough so a frozen Mochtroid is used to get past it. Requires: {
"notable": "Spike Platforming with Move Assist"
}
"canDash"
"canWallJump"
"canSuitlessMaridia"
"canPlayInSand"
"canTrickyJump"
"Morph"
"canUseIFrames"
"canNeutralDamageBoost"
{
"spikeHits": 3
}
"canMochtroidIceClimb"
{
"or": [
"canInsaneJump",
{
"enemyDamage": {
"enemy": "Mochtroid",
"type": "contact",
"hits": 1
}
}
]
}
{
"or": [
{
"spikeHits": 1
},
"canHorizontalDamageBoost"
]
} |
From: 3
Top Right Door
To: 1
Left Door

Stay out of the water, and by extension the sand, of the room by using the spikes as platforms. Landing on spikes aiming down with no other direction pressed can help control the knockback. Requires knowing the position of every spike in the room. The final spike jump is very difficult. Requires: {
"notable": "Spike Platforming with No Equipment"
}
"canDash"
"canPreciseWallJump"
"canInsaneJump"
"canUseIFrames"
{
"spikeHits": 3
}
"canNeutralDamageBoost"
{
"or": [
{
"and": [
"canHorizontalDamageBoost",
{
"noFlashSuit": {}
}
]
},
{
"spikeHits": 1
}
]
} |
From: 5
Bottom Middle Junction
To: 4
Top Right Ledge Junction
When the Cacatac on the ground fires a spike, perform a Spring Ball jump to break the waterline and then hit the spike for extra height. With a blue suit, after the mid-air Spring Ball jump Samus would be invulnerable and unable to take a boost from the spike. But by unequipping Spring Ball again, it becomes possible. Requires: {
"notable": "Spring Ball Spike Boost"
}
"h_underwaterCrouchJump"
"HiJump"
"canSuitlessMaridia"
"canTrickyJump"
"canTrickySpringBallJump"
{
"or": [
"canInsaneJump",
"canStationaryLateralMidAirMorph"
]
}
{
"or": [
"canNeutralDamageBoost",
{
"and": [
"canSpringFling",
"h_midAirMorphDamageBoost"
]
}
]
}
{
"enemyDamage": {
"enemy": "Cacatac",
"type": "spike",
"hits": 2
}
}Dev note: The crouch jump is not strictly necessary but it helps significantly. |
From: 2
Right Door
To: 3
Junction Left of Morph Tunnel
Freeze one of the Menus (bugs) in a position where you can use it to get into the morph passage. One of the easier methods is with a damage boost. Stand in the water, take a hit for positioning, and freeze the bug near but left of Samus. Then morph on top and damage boost into the morph tunnel as it unfreezes. Requires: {
"notable": "Frozen Menu Bridge"
}
{
"noBlueSuit": {}
}
"Morph"
"h_navigateUnderwater"
"canTrickyUseFrozenEnemies"
"canNeutralDamageBoost"
{
"enemyDamage": {
"enemy": "Menu",
"type": "contact",
"hits": 2
}
}Dev note: FIXME: There is a damageless variant where Samus jumps high before morphing, giving a small bounce as she lands on the bug to get through the tunnel. FIXME: This could be done with a blue suit, with greater difficulty. |
From: 1
Left Door
To: 3
Junction Below Right Door
It is recommended to shoot the ceiling block immediately upon room entry to bring one of the Puyos down so that it will not be a problem later. Requires: "canSuitlessMaridia"
"h_underwaterMaxHeightSpringBallJump"
{
"or": [
"can4HighMidAirMorph",
"canStationaryLateralMidAirMorph",
{
"and": [
"canNeutralDamageBoost",
{
"enemyDamage": {
"enemy": "Puyo",
"type": "contact",
"hits": 2
}
}
]
}
]
} |
From: 1
Left Door
To: 4
Junction Below Sand Entrance
Requires a runway of 7 tiles (with no open end) in the adjacent room. Requires two precise inputs of jumping through the doorway and a short aiming down press before hitting the ceiling. Damage boost off of the right Evir in order to land on the first pillar. With Ice, instead freeze the Evir to land on it and avoid the damage. When entering the room with a bad jump, it is possible to perform a midair wiggle to get back to the door platform. Entrance condition: {
"comeInJumping": {
"speedBooster": "no",
"minTiles": 6.4375
}
}Requires: {
"notable": "Cross Room Jump with Ice or Damage Boost"
}
"canCrossRoomJumpIntoWater"
"canPlayInSand"
"canInsaneJump"
{
"or": [
"canTrickyUseFrozenEnemies",
{
"and": [
"canNeutralDamageBoost",
{
"enemyDamage": {
"enemy": "Evir",
"type": "contact",
"hits": 1
}
}
]
},
{
"and": [
"canNeutralDamageBoost",
"h_pauseAbuseMinimalReserveRefill"
]
}
]
} |
From: 4
Below Sand Entrance
To: 5
Left Pillar Junction
Use the projectile from a fully submerged Evir to boost Samus into the sandfall, providing just enough height to make the first and hardest jump. Time the projectile to hit Samus when at the maximum height from a jump. The hit must be on the right side of Samus and with no inputs held, but also hold forward during the damage knockback to move through the sandfall. Getting a good jump while on the right side of the next floating block can get Samus to the leftmost block. With a clean jump off of the sand, Samus can then get onto the final vertical pillar. Set reserves to manual to pause abuse the projectile hit. Setting them to auto works too, ideally with no more than 1 energy in reserves. Requires: {
"notable": "Suitless Damage Boost (Center to Left)"
}
"canSuitlessMaridia"
"canPlayInSand"
"canInsaneJump"
"h_underwaterCrouchJump"
"canNeutralDamageBoost"
{
"or": [
{
"enemyDamage": {
"enemy": "Evir",
"type": "particle",
"hits": 1
}
},
"h_pauseAbuseMinimalReserveRefill"
]
} |
|
Requires: "Morph"
{
"or": [
"f_KilledZebetites4",
{
"obstaclesCleared": [
"f_KilledZebetites4"
]
}
]
}
{
"or": [
{
"and": [
"canTrickyJump",
"canMidAirMorph"
]
},
{
"and": [
"canCarefulJump",
"h_useSpringBall"
]
},
{
"and": [
{
"enemyDamage": {
"enemy": "Rinka",
"type": "contact",
"hits": 1
}
},
{
"or": [
"canTrivialMidAirMorph",
"canNeutralDamageBoost",
"h_useSpringBall",
"h_bombThings"
]
}
]
}
]
} |
From: 5
Between First and Second Zebetite
To: 6
Between Second and Third Zebetite
Requires: "Morph"
{
"or": [
"f_KilledZebetites2",
{
"obstaclesCleared": [
"f_KilledZebetites2"
]
}
]
}
{
"or": [
{
"and": [
"canTrickyJump",
"canMidAirMorph"
]
},
{
"and": [
"canDodgeWhileShooting",
"h_useSpringBall"
]
},
{
"and": [
{
"enemyDamage": {
"enemy": "Rinka",
"type": "contact",
"hits": 1
}
},
{
"or": [
"canTrivialMidAirMorph",
"canNeutralDamageBoost",
"h_useSpringBall",
"h_bombThings"
]
}
]
}
]
}
{
"enemyDamage": {
"enemy": "Mother Brain 1",
"type": "turret",
"hits": 1
}
} |
From: 6
Between Second and Third Zebetite
To: 5
Between First and Second Zebetite
Requires: "Morph"
{
"or": [
"f_KilledZebetites2",
{
"obstaclesCleared": [
"f_KilledZebetites2"
]
}
]
}
{
"or": [
{
"and": [
"canTrickyJump",
"canMidAirMorph"
]
},
{
"and": [
"canCarefulJump",
"h_useSpringBall"
]
},
{
"and": [
{
"enemyDamage": {
"enemy": "Rinka",
"type": "contact",
"hits": 1
}
},
{
"or": [
"canTrivialMidAirMorph",
"canNeutralDamageBoost",
"h_useSpringBall",
"h_bombThings"
]
}
]
}
]
}
{
"enemyDamage": {
"enemy": "Mother Brain 1",
"type": "turret",
"hits": 1
}
} |
|
Requires: "Morph"
{
"or": [
"f_KilledZebetites4",
{
"obstaclesCleared": [
"f_KilledZebetites4"
]
}
]
}
{
"or": [
{
"and": [
"canTrickyJump",
"canMidAirMorph"
]
},
{
"and": [
"canDodgeWhileShooting",
"h_useSpringBall"
]
},
{
"and": [
{
"enemyDamage": {
"enemy": "Rinka",
"type": "contact",
"hits": 1
}
},
{
"or": [
"canTrivialMidAirMorph",
"canNeutralDamageBoost",
"h_useSpringBall",
"h_bombThings"
]
}
]
}
]
} |