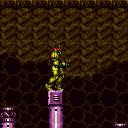
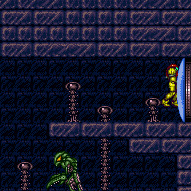
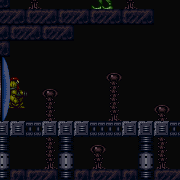
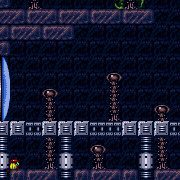
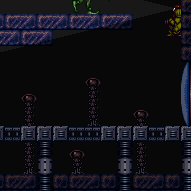
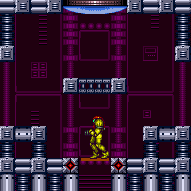
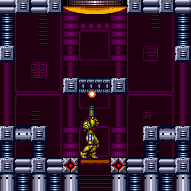
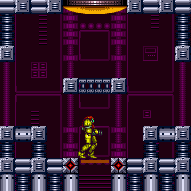
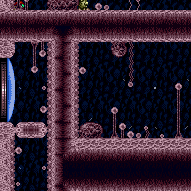
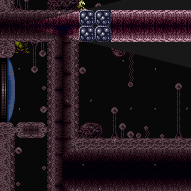
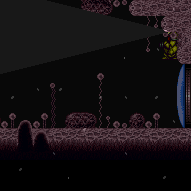
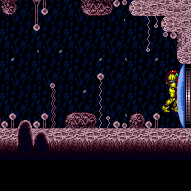
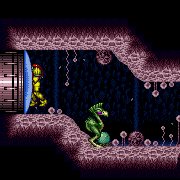
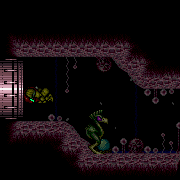
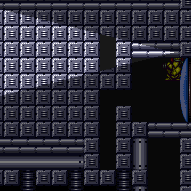
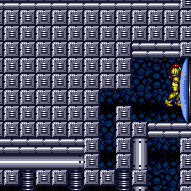
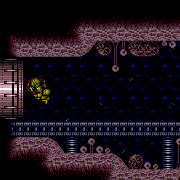
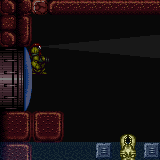
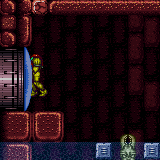
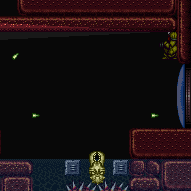
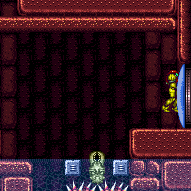
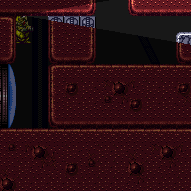
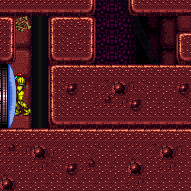
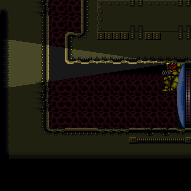
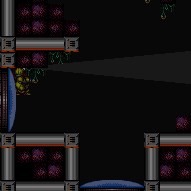
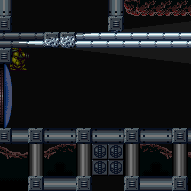
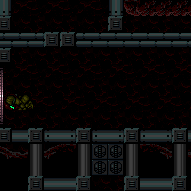
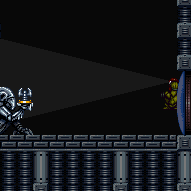
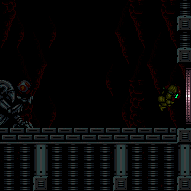
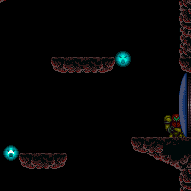
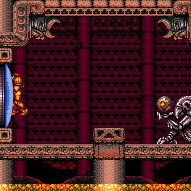
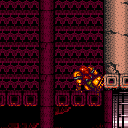
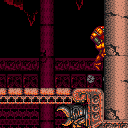
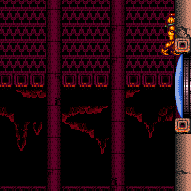
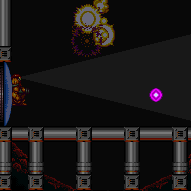
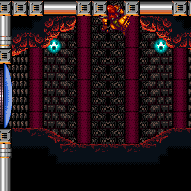
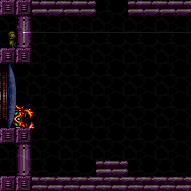
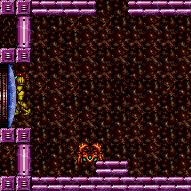
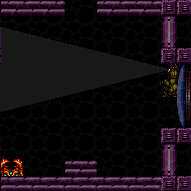
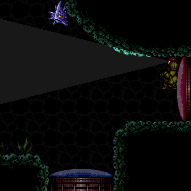
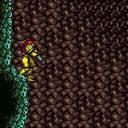
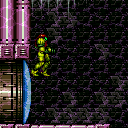
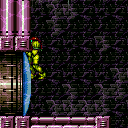
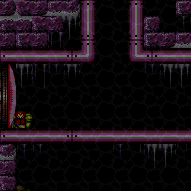
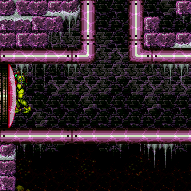
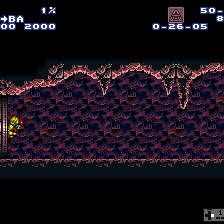
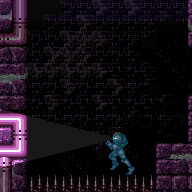
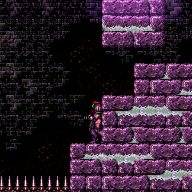
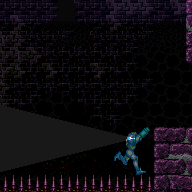
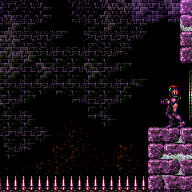
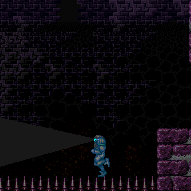
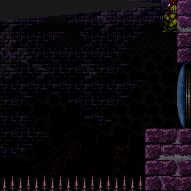
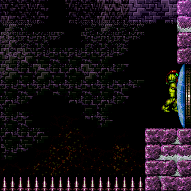
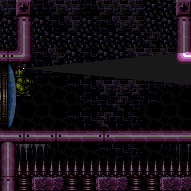
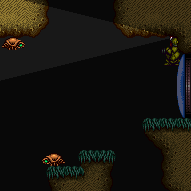
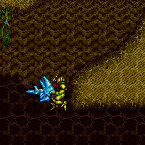
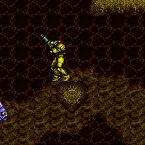
canStationarySpinJump (Very Hard)
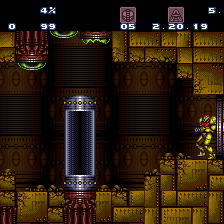
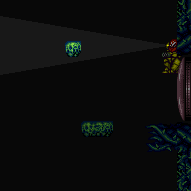
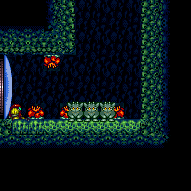
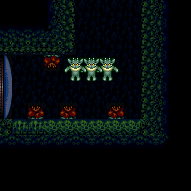
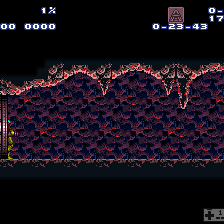
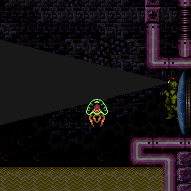
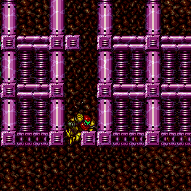
Spin jumping with no horizontal movement by quickly pressing and releasing forward and then immediately pressing jump (after stopping). Doing this while holding run produces a spin jump with very low horizontal speed.
Strats ()
|
Entrance condition: {
"comeInWithDoorStuckSetup": {}
}Requires: "canLongXRayClimb" "canBeVeryPatient" |
From: 5
Bottom Right Door
To: 3
Top Right Door
Climb 8 screens and position Samus to where she is visually standing above the door. For the last X-Ray turnaround, face right then press and hold the X-ray scope input, buffer a jump then perform the X-Ray turnaround. If done correctly Samus will be standing up and facing left, while the jump button is still pressed without a jump occuring. Press right to break the bomb blocks with a spinjump then left to exit the wall. Jump in place to fix the camera as needed. Entrance condition: {
"comeInWithDoorStuckSetup": {}
}Requires: "ScrewAttack" "Morph" "canBeVeryPatient" "canLongXRayClimb" |
From: 5
Bottom Right Door
To: 4
Middle Right Door
Use an X-Ray climb to position Samus to where she can break the Bomb block with Screw Attack. This is a 1 screen climb. Entrance condition: {
"comeInWithDoorStuckSetup": {}
}Requires: "ScrewAttack" "Morph" "canXRayClimb" Dev note: This is an alternative to using Moonfall to break the block with Screw Attack. |
|
Entrance condition: {
"comeInWithDoorStuckSetup": {}
}Requires: "canLongXRayClimb" "canBeVeryPatient" |
|
Become doorstuck in the bottom right door, use a Crystal Flash to continue X-Ray climbing past the slope above the door. Start by climbing until the slope pushed Samus down. Then auto-spinjump towards the door, and Morph to perform the Crystal Flash. Finally, continue X-Ray climbing to the top door. Climb up 3 screens. Entrance condition: {
"comeInWithDoorStuckSetup": {}
}Requires: {
"notable": "Crystal Flash X-Ray Climb"
}
"canLongXRayClimb"
"h_CrystalFlash"Dev note: FIXME: Requires a way to take damage. |
|
Entrance condition: {
"comeInWithDoorStuckSetup": {}
}Requires: "canXRayClimb" |
|
Climb until the camera fully shows Samus on the bottom of the screen. Shoot up to clear the shot blocks and resume climbing until you can walk out to the left. Fix the camera by shooting the floor shot block and jumping down. Entrance condition: {
"comeInWithDoorStuckSetup": {}
}Requires: "canXRayClimb" |
|
X-Ray climb about 2.5 screen lengths, until the camera shows Samus' helmet on the bottom of the screen. Shoot up to clear the shot blocks and resume climbing until you can walk out to the right. Fix the camera by shooting the floor shot block and jumping down. The pirate will attack while climbing past it. Entrance condition: {
"comeInWithDoorStuckSetup": {}
}Requires: "canLongXRayClimb"
{
"or": [
{
"enemyDamage": {
"enemy": "Green Space Pirate (standing)",
"type": "laser",
"hits": 1
}
},
{
"enemyKill": {
"enemies": [
[
"Green Space Pirate (standing)"
]
],
"explicitWeapons": [
"Charge",
"Ice",
"Wave",
"Spazer",
"Plasma",
"Missile",
"Super"
]
}
}
]
}
"canBePatient"Dev note: With a blue suit, Samus' i-frames still last a normal amount of time. |
|
X-Ray climb about 2.5 screen lengths, until the camera shows Samus' helmet on the bottom of the screen. Shoot up to clear the shot blocks and resume climbing until you can walk out to the left. Fix the camera by shooting the floor shot block and jumping down. The bottom pirate will attack while climbing past it. Entrance condition: {
"comeInWithDoorStuckSetup": {}
}Requires: "canLongXRayClimb"
{
"or": [
{
"enemyDamage": {
"enemy": "Green Space Pirate (standing)",
"type": "laser",
"hits": 1
}
},
{
"enemyKill": {
"enemies": [
[
"Green Space Pirate (standing)"
]
],
"explicitWeapons": [
"Charge",
"Ice",
"Wave",
"Spazer",
"Plasma",
"Missile",
"Super"
]
}
}
]
}
"canBePatient" |
|
In order to align and place a Power Bomb at the correct pixel, perform a suitless stationary spin jump and hit the ceiling before starting to morph. Requires: {
"or": [
"canInsaneJump",
{
"and": [
"canDisableEquipment",
"canStationarySpinJump"
]
}
]
}
"h_elevatorCrystalFlash"Exit condition: {
"leaveNormally": {}
} |
From: 2
Elevator
To: 2
Elevator
In order to align and place a Power Bomb at the correct pixel, perform a stationary spin jump and hit the ceiling before starting to morph. Requires: {
"or": [
"canInsaneJump",
{
"and": [
"h_fourTileJumpMorph",
"canStationarySpinJump"
]
}
]
}
"h_elevatorCrystalFlash"Exit condition: {
"leaveNormally": {}
} |
From: 4
Lower Section - Top Right Door
To: 4
Lower Section - Top Right Door
Entrance condition: {
"comeInWithDoorStuckSetup": {}
}Requires: "canPrepareForNextRoom"
{
"doorUnlockedAtNode": 4
}Unlocks doors: {"types":["ammo"],"requires":[]} |
From: 1
Bottom Left Door
To: 3
Hidden Ceiling Item
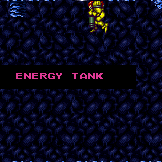
Samus must start pressed against the wall, facing left. Start by performing a dashing stationary spinjump. The initial left press needs to be exactly 3 or 4 frames. Jump needs to be pressed exactly 3 frames after the inital left press. Samus then needs to quickly walljump off the wall at a precise height. While spin jumping in the air, break spin with angle or shot and hold down to reduce the size of the hitbox. If the initial jump and subsequent walljump were performed correctly, depending on walljump height and the number of pixels away from the wall, Samus will have between 1-3 frames where it is possible to collect the tank Release down just as Samus is about to collide with the tank to collect. Even if the previous steps were performed correctly and down was released on the correct frame to collect the tank, there is a 50% chance of failure. The game will check if Samus is in contact with the wall or the item on alternating frames. If the item collection happens on a frame where the game is checking for a wall collision then the item will not be acquired. Requires: {
"notable": "Taco Tank"
}
"canCWJ"
"canInsaneWallJump"
"canStationarySpinJump" |
|
Entrance condition: {
"comeInWithDoorStuckSetup": {}
}Requires: "canXRayClimb" |
|
Entrance condition: {
"comeInWithDoorStuckSetup": {}
}Requires: "canXRayClimb" |
From: 7
Below Power Bomb Blocks - Top Right Door
To: 12
Above Power Bomb Blocks - Main Junction
Entrance condition: {
"comeInWithDoorStuckSetup": {}
}Requires: "canXRayClimb" |
From: 8
Below Power Bomb Blocks - Bottom Left Door
To: 12
Above Power Bomb Blocks - Main Junction
Climb up 4 screens. Entrance condition: {
"comeInWithDoorStuckSetup": {}
}Requires: "canLongXRayClimb" "canBePatient" |
From: 10
Right Etecoon Shaft - Bottom Left Door
To: 13
Below Power Bomb Blocks - Main Junction
Climb up 1 screen. Once Samus appears one tile above the bottom of the door, you will be unable to climb higher, and it is safe to morph at this point. Entrance condition: {
"comeInWithDoorStuckSetup": {}
}Requires: "canXRayClimb"
{
"or": [
"h_bombThings",
{
"haveBlueSuit": {}
}
]
}Dev note: This strat is useful in case wall jumping is not available, or to save a Power Bomb in case going around through the internal door at the top is not possible. |
From: 5
Left Side - Door Blocked by Crumble Blocks
To: 4
Left Side - Door Behind Power Bomb Blocks
Entrance condition: {
"comeInWithDoorStuckSetup": {}
}Requires: "canXRayClimb" |
From: 5
Left Side - Door Blocked by Crumble Blocks
To: 5
Left Side - Door Blocked by Crumble Blocks
Entrance condition: {
"comeInWithDoorStuckSetup": {}
}Requires: "canPrepareForNextRoom"
{
"doorUnlockedAtNode": 5
}Unlocks doors: {"types":["ammo"],"requires":[]} |
|
Entrance condition: {
"comeInWithDoorStuckSetup": {}
}Requires: "canXRayClimb" |
|
Entrance condition: {
"comeInWithDoorStuckSetup": {}
}Requires: "canLongXRayClimb" "canBeVeryPatient" |
|
Entrance condition: {
"comeInWithDoorStuckSetup": {}
}Requires: "canXRayClimb" |
From: 1
Left Door
To: 1
Left Door
Use a stationary spinjump, or spinjump against the wall and turn around without moving; and shoot with the same correct timing. This strat involves shooting a Super diagonally from the correct height while flush against the left wall. Its acceleration will cause it to clip into the blue gate off-screen. Requires: {
"notable": "Reverse Gate Glitch"
}
{
"obstaclesCleared": [
"A"
]
}
{
"or": [
"canTrickyJump",
"h_backIntoCorner"
]
}
"canStationarySpinJump"
"SpaceJump"
"canOffScreenSuperShot"Clears obstacles: B |
|
To minimize damage from the Hoppers, get stuck in the door relatively high and move quickly. Climb up somewhat less than 1 screen, until Samus' head appears between 1 and 3 tiles below the door. Then perform a turn-around spin jump to the right to get on top of the Grapple block. Entrance condition: {
"comeInWithDoorStuckSetup": {}
}Requires: {
"notable": "Hopper X-Ray Climb"
}
"canXRayClimb"
{
"enemyDamage": {
"enemy": "Sidehopper",
"type": "contact",
"hits": 2
}
}Dev note: It is possible to avoid all Hopper damage, but it is not clear if this can be done reliably. Two hits from the big Sidehopper appears to be a worst-case scenario. FIXME: a blue suit can be used to avoid damage, by turning around right to left as the Hoppers approach. |
From: 2
Right Door
To: 3
Top Junction
Get stuck 3 pixels inside the door, and X-ray climb to a precise height: after just one pixel of Samus' feet are visible while crouching facing left, perform exactly 7 more X-Ray stand-ups. Use X-ray to face left, then run and jump to barely make it onto the ledge. Entrance condition: {
"comeInWithDoorStuckSetup": {}
}Requires: "HiJump" "canXRayClimb" "canOffScreenMovement" "canInsaneJump" Dev note: 3 pixels stuck in the door is X position $1DE. |
From: 2
Right Door
To: 3
Top Junction
X-Ray climb until Samus is a little over halfway off screen; the position is not precise. Face right, then do a turnaround buffer spin jump into a Spring Ball jump to reach the ledge. The pause input can be pressed at the same time as the turnaround. It helps to do an airball to gain horizontal speed. The jump input after pausing should not be buffered, in order to allow a little time for the spring fling horizontal speed to take effect. Entrance condition: {
"comeInWithDoorStuckSetup": {}
}Requires: "canXRayClimb" "canTrickyJump" "canLateralMidAirMorph" "canTrickySpringBallJump" "canSpringFling" |
|
Entrance condition: {
"comeInWithDoorStuckSetup": {}
}Requires: "canLongXRayClimb" "canBeVeryPatient" |
|
Entrance condition: {
"comeInWithDoorStuckSetup": {}
}Requires: "canXRayClimb" |
|
Entrance condition: {
"comeInWithDoorStuckSetup": {}
}Requires: "canXRayClimb" |
|
Entrance condition: {
"comeInWithDoorStuckSetup": {}
}Requires: "canXRayClimb"
{
"or": [
"Wave",
"Spazer",
"canBeLucky",
{
"enemyDamage": {
"enemy": "Cacatac",
"type": "spike",
"hits": 1
}
}
]
} |
|
Entrance condition: {
"comeInWithDoorStuckSetup": {}
}Requires: "canLongXRayClimb" "canBePatient" |
From: 2
Middle Left Door (Behind Power Bomb Blocks)
To: 1
Top Left Door
Entrance condition: {
"comeInWithDoorStuckSetup": {}
}Requires: "canXRayClimb" |
From: 2
Middle Left Door (Behind Power Bomb Blocks)
To: 5
Top Right Door
Entrance condition: {
"comeInWithDoorStuckSetup": {}
}Requires: "canLongXRayClimb" "canBeVeryPatient" |
|
Entrance condition: {
"comeInWithDoorStuckSetup": {}
}Requires: "canXRayClimb"
{
"enemyDamage": {
"enemy": "Kihunter (green)",
"type": "contact",
"hits": 1
}
}Clears obstacles: C |
|
Entrance condition: {
"comeInWithDoorStuckSetup": {}
}Requires: "canXRayClimb"
{
"heatFrames": 1600
}Clears obstacles: A |
From: 2
Left Side - Top Middle Door
To: 1
Left Side - Top Door
Entrance condition: {
"comeInWithDoorStuckSetup": {}
}Requires: "canXRayClimb" |
From: 3
Left Side - Bottom Middle Door
To: 1
Left Side - Top Door
Entrance condition: {
"comeInWithDoorStuckSetup": {}
}Requires: "canLongXRayClimb" |
|
Entrance condition: {
"comeInWithDoorStuckSetup": {}
}Requires: "canLongXRayClimb" "canBePatient" |
From: 4
Left Side - Bottom Door
To: 3
Left Side - Bottom Middle Door
Entrance condition: {
"comeInWithDoorStuckSetup": {}
}Requires: "canXRayClimb" |
|
Climb up 3 screens. Entrance condition: {
"comeInWithDoorStuckSetup": {}
}Requires: "canLongXRayClimb"
{
"heatFrames": 4000
}
"canBePatient" |
|
Entrance condition: {
"comeInWithDoorStuckSetup": {}
}Requires: "canPrepareForNextRoom"
{
"doorUnlockedAtNode": 1
}Unlocks doors: {"types":["ammo"],"requires":[]} |
|
Entrance condition: {
"comeInWithDoorStuckSetup": {}
}Requires: "canLongXRayClimb" |
|
Entrance condition: {
"comeInWithDoorStuckSetup": {}
}Requires: "canLongXRayClimb" |
|
Entrance condition: {
"comeInWithDoorStuckSetup": {}
}Requires: "canBePatient" "canLongXRayClimb" |
From: 1
Bottom Left Door
To: 3
Top Right Door
Entrance condition: {
"comeInWithDoorStuckSetup": {}
}Requires: "canLongXRayClimb"
{
"heatFrames": 2800
}Dev note: FIXME: The heatFrames for this and almost all other heated X-ray climbs are much too loose. |
From: 1
Bottom Left Door
To: 5
Junction Above Bottom Blocks
Entrance condition: {
"comeInWithDoorStuckSetup": {}
}Requires: "canXRayClimb"
{
"heatFrames": 900
} |
|
Entrance condition: {
"comeInWithDoorStuckSetup": {}
}Requires: "canPrepareForNextRoom"
{
"heatFrames": 55
}
{
"doorUnlockedAtNode": 2
}Unlocks doors: {"types":["ammo"],"requires":[]} |
|
Position Samus in the doorway a few pixels from the edge. Dashing stationary spinjump into a delayed CWJ and hopefully catch the upper ledge with a walljump. Requires: {
"notable": "Doorway CWJ"
}
{
"obstaclesCleared": [
"A"
]
}
"h_heatProof"
"HiJump"
"canCWJ"
"canStationarySpinJump"
"canInsaneJump"
"canInsaneWallJump"
{
"doorUnlockedAtNode": 2
}Unlocks doors: {"nodeId":2,"types":["missiles"],"requires":[{"heatFrames":50}]}
{"nodeId":2,"types":["super"],"requires":[]}
{"nodeId":2,"types":["powerbomb"],"requires":[{"heatFrames":110}]} |
|
Entrance condition: {
"comeInWithDoorStuckSetup": {}
}Requires: "canXRayClimb"
{
"heatFrames": 1600
}Dev note: Heat frames split into the actual climb and the setup in the adjacent room. |
|
Entrance condition: {
"comeInWithDoorStuckSetup": {}
}Requires: "canPrepareForNextRoom"
{
"heatFrames": 55
}
{
"doorUnlockedAtNode": 1
}Unlocks doors: {"types":["ammo"],"requires":[]}Dev note: This would technically clear A, but depending on what is being done here, there will likely be too much acid to cross the room. |
|
X-Ray climb up the left wall in order to jump to the center platform. Quickly kill the pirates before beginning the X-Ray climb. Climb to just above the door shell and do a turnaround spinjump to reach the platform. Entrance condition: {
"comeInWithDoorStuckSetup": {}
}Requires: "canXRayClimb"
{
"enemyDamage": {
"enemy": "Yellow Space Pirate (standing)",
"type": "laser",
"hits": 1
}
}
{
"or": [
{
"and": [
"canTrickyDodgeEnemies",
{
"enemyKill": {
"enemies": [
[
"Yellow Space Pirate (standing)",
"Yellow Space Pirate (wall)"
]
],
"explicitWeapons": [
"Super",
"Charge+Plasma"
]
}
}
]
},
{
"and": [
{
"enemyDamage": {
"enemy": "Yellow Space Pirate (wall)",
"type": "contact",
"hits": 1
}
},
{
"enemyKill": {
"enemies": [
[
"Yellow Space Pirate (standing)",
"Yellow Space Pirate (wall)"
]
],
"explicitWeapons": [
"Missile",
"Super",
"Charge+Plasma"
]
}
}
]
}
]
}
{
"heatFrames": 1260
}Dev note: FIXME: other weapons could work for killing the Pirates, with more damage taken. |
|
Entrance condition: {
"comeInWithDoorStuckSetup": {}
}Requires: "canPrepareForNextRoom"
{
"heatFrames": 55
}
{
"doorUnlockedAtNode": 4
}Unlocks doors: {"types":["ammo"],"requires":[]} |
|
Requires: {
"or": [
{
"and": [
"canPreciseWallJump",
{
"or": [
"canStationarySpinJump",
{
"heatFrames": 250
}
]
}
]
},
"canSpringBallJumpMidAir",
{
"and": [
"SpaceJump",
{
"heatFrames": 35
}
]
}
]
}
{
"heatFrames": 190
}
{
"or": [
{
"and": [
"h_usePowerBomb",
{
"heatFrames": 50
}
]
},
{
"obstaclesCleared": [
"A"
]
}
]
}Clears obstacles: A Unlocks doors: {"types":["missiles"],"requires":[{"heatFrames":30}]}
{"types":["powerbomb"],"requires":[],"useImplicitRequires":false}Dev note: Destroying the obstacle isn't seen to take extra time for two reasons. 1- It destroys the shot blocks as well which are assumed to be manually destroyed each time since they respawn. 2- Some of the time loss of waiting for the PB is offset by having to setup for the jump up anyway. |
|
Entrance condition: {
"comeInWithDoorStuckSetup": {}
}Requires: "canPrepareForNextRoom"
{
"heatFrames": 55
}
{
"doorUnlockedAtNode": 2
}Clears obstacles: door_2 Unlocks doors: {"types":["ammo"],"requires":[]} |
From: 2
Bottom Left Door
To: 4
Junction Above Bomb Blocks
Climb the room while avoiding wall pirates and Namihe flames. Immediately climb above the Namihe flames and wait for the wall pirate to jump across into Samus. Once the pirate starts going up, resume X-Ray climbing. This is a 2-screen X-Ray climb. Watch for enemies when fixing the camera after the climb. Entrance condition: {
"comeInWithDoorStuckSetup": {}
}Requires: {
"notable": "X-Ray Climb"
}
"canLongXRayClimb"
{
"enemyDamage": {
"enemy": "Namihe",
"type": "fireball",
"hits": 2
}
}
{
"enemyDamage": {
"enemy": "Yellow Space Pirate (wall)",
"type": "contact",
"hits": 1
}
}
{
"heatFrames": 2800
}Dev note: Two Namihe hits as leniency. |
|
Entrance condition: {
"comeInWithDoorStuckSetup": {}
}Requires: "canLongXRayClimb"
{
"heatFrames": 2840
} |
|
Climb up about half a screen. If Phantoon is dead, the last part of the climb should be done carefully to avoid triggering collision with the spikes: Do not press forward or turn-around except while X-Ray is active. For each X-ray stand-up, release the turn-around input quickly to make sure that it is not still held after X-Ray deactivates; alternatively, hold both angle up and angle down to prevent Samus from touching the spikes (though this no longer gives protection if climbing so high that the bottom of Samus' hitbox reaches the spikes). Once Samus is high enough, unequip X-Ray, jump up (from either standing or crouch) to clip past the spikes, and land, taking a single spike hit. Then use the i-frames from the spike hit to run and jump to the left to make it to the door. Samus is high enough after the top of her arm cannon first becomes visible at the bottom of the screen; or up to 3 additional climbs can be performed after that point. In case of an accidental spike collision, it is possible to recover: Unless Samus climbed higher than needed, she will still be stuck in the wall, will take a single spike hit, and be able to continue climbing. With Grapple it is possible to swing on the Grapple blocks, avoiding all spike damage. Spike damage can also be avoided with Space Jump, by doing a stationary turn-around spin jump, which is very precise. With a blue suit, Samus will instantly lose i-frames, making the spikes very dangerous. Entrance condition: {
"comeInWithDoorStuckSetup": {}
}Requires: {
"notable": "X-Ray Climb"
}
"canXRayClimb"
{
"or": [
{
"and": [
{
"spikeHits": 3
},
{
"resourceCapacity": [
{
"type": "RegularEnergy",
"count": 199
}
]
}
]
},
{
"and": [
{
"not": "f_DefeatedPhantoon"
},
"canRiskPermanentLossOfAccess"
]
},
{
"and": [
"canOffScreenMovement",
{
"or": [
{
"and": [
"canDash",
{
"spikeHits": 1
},
"canUseIFrames"
]
},
{
"and": [
"canBlueSuitSpikeJump",
{
"spikeHits": 2
}
]
},
{
"and": [
"canBlueSuitSpikeJump",
"canWallJump",
"canBeVeryPatient",
{
"spikeHits": 1
}
]
},
"Grapple",
{
"and": [
"SpaceJump",
"canInsaneJump",
"canBeVeryPatient"
]
}
]
}
]
}
]
}Exit condition: {
"leaveNormally": {}
}Unlocks doors: {"types":["ammo"],"requires":[]}Dev note: FIXME: The canBeVeryPatient is for difficulty placement, as the damageless Space Jump version would likely require many attempts. The resourceCapacity requirement is to ensure that reserve energy management will not be needed for the lower-difficulty version of the strat; this could be refined since suits can affect spike damage, but we don't yet have a good way to represent that cleanly, given that randomizers are likely to modify suit damage protection. The leaveNormally is because the camera will be broken and we don't want to require unreasonable things without being able to reset it. |
|
Climb up 1 screen. The enemies are not active off-camera. Touch the camera scroll block just above the tunnel entrance to fix the camera. This can be done reliably without falling by alternating between inching towards the tunnel and jumping slightly; once the camera scroll block has been touched and Samus jumps, the camera will be fixed. Entrance condition: {
"comeInWithDoorStuckSetup": {}
}Requires: "canXRayClimb" |
|
Entrance condition: {
"comeInWithDoorStuckSetup": {}
}Requires: "canXRayClimb" "canTrickyDodgeEnemies" |
|
Entrance condition: {
"comeInWithDoorStuckSetup": {}
}Requires: "canXRayClimb" |
|
Entrance condition: {
"comeInWithDoorStuckSetup": {}
}Requires: "canXRayClimb" |
|
Perform a running stationary spinjump from a precise spot, with 3 frames of dash speed (the maximum possible); then do a CWJ off the wall above, one tile further out. This makes it possible to just barely walljump off the grapple block. Requires: {
"notable": "Insane Walljump"
}
"HiJump"
"canInsaneJump"
"canStationarySpinJump"
"canInsaneWallJump"
"canCWJ"Clears obstacles: B |
From: 2
Bottom Left Door
To: 11
Upper Left Ledge Junction
Continuous WallJump as close as possible to the transition after running briefly to gain slightly higher jump height Entrance condition: {
"comeInWithWallJumpBelow": {
"minHeight": 2
},
"comesThroughToilet": "any"
}Requires: "canCrossRoomJumpIntoWater" "HiJump" "canTrickyDashJump" "canCWJ" "canStationarySpinJump" |
From: 1
Middle Left Door
To: 9
Junction Below Top Door
Climb up 1 screen. Aim to end this XRay climb when Samus is visually near but not above the top of the left side door. Fall out of the wall by turning to the right, from a crouch if possible. This XRay climb has a window of 4 crouches, but with a way to break bomb blocks it can be ended earlier. Entrance condition: {
"comeInWithDoorStuckSetup": {}
}Requires: {
"notable": "Left-Side X-Ray Climb (Upper)"
}
"canXRayClimb" |
|
Entrance condition: {
"comeInWithDoorStuckSetup": {}
}Requires: "canXRayClimb" |
|
Entrance condition: {
"comeInWithDoorStuckSetup": {}
}Requires: "canXRayClimb" |
|
Immediately when entering the room, turn around to the left while using X-ray and kill the Mochtroid, to prevent or minimize damage. Climb up 1 screen. Entrance condition: {
"comeInWithDoorStuckSetup": {}
}Requires: "canXRayClimb"
{
"or": [
"Ice",
"Wave",
"Spazer",
"Plasma",
"Grapple",
{
"ammo": {
"type": "Missile",
"count": 1
}
},
{
"ammo": {
"type": "Super",
"count": 1
}
},
{
"enemyDamage": {
"enemy": "Mochtroid",
"type": "contact",
"hits": 1
}
}
]
} |
From: 1
Left Door
To: 2
Right Door
Slide into the hole where the shot block was and sink to the bottom. Shoot the door using a Hero shot and time the shinespark to follow the shot. Either kill the ceiling crab so that Samus can jump forward, or stationary spinjump to avoid using the Shinespark early. Entrance condition: {
"comeInShinecharging": {
"length": 1,
"openEnd": 0
}
}Requires: "canWaterShineCharge"
"canHeroShot"
"canShinechargeMovementTricky"
"HiJump"
{
"or": [
{
"and": [
"Plasma",
"Wave"
]
},
"canStationarySpinJump"
]
}
{
"shinespark": {
"frames": 41,
"excessFrames": 0
}
}Exit condition: {
"leaveWithSpark": {}
}Unlocks doors: {"types":["super"],"requires":[{"ammo":{"type":"Super","count":1}}]}
{"types":["missiles","powerbomb"],"requires":["never"]} |
|
Similar to naked Watering Hole escape. Freeze a crab under the gap above, do a stationary spinjump facing right, then walljump until you're up. Another frozen crab can help complete the way up. Requires: {
"notable": "Ice Only Crab Climb"
}
"canSunkenTileWideWallClimb"
"canUseFrozenEnemies"
"canStationarySpinJump" |
|
Requires: "canShinechargeMovementComplex"
"h_spikeXModeShinecharge"
{
"or": [
"h_XModeSpikeHit",
"canStationarySpinJump",
"canTrickyJump"
]
}
"Gravity"
{
"or": [
{
"and": [
"HiJump",
"SpaceJump",
{
"shineChargeFrames": 130
}
]
},
{
"and": [
"HiJump",
"canPreciseWallJump",
{
"shineChargeFrames": 160
}
]
},
{
"and": [
"SpaceJump",
"canPreciseWallJump",
{
"shineChargeFrames": 160
}
]
}
]
}Exit condition: {
"leaveShinecharged": {}
}Dev note: Two spike hits are expected per attempt (with any additional leniency hits being multiplied by this amount). |
|
Requires: "h_spikeXModeShinecharge"
{
"or": [
"h_XModeSpikeHit",
"canStationarySpinJump"
]
}
"Gravity"
"canShinechargeMovementComplex"
{
"shineChargeFrames": 65
}Exit condition: {
"leaveShinecharged": {}
}Dev note: Two spike hits are expected per attempt (with any additional leniency hits being multiplied by this amount). |
|
Requires: "Gravity"
"h_spikeXModeShinecharge"
{
"or": [
"h_XModeSpikeHit",
"canStationarySpinJump"
]
}
{
"shinespark": {
"frames": 25,
"excessFrames": 5
}
}Dev note: Two spike hits are expected per attempt (with any additional leniency hits being multiplied by this amount). |
|
X-ray climb until Samus is above the water surface. To avoid falling out, be careful not to turn left except while holding X-ray. From a standing position facing left, hold left and immediately jump, then use Space Jump to reach the ledge. Alternatively, from a standing position facing right, do a turn-around spin jump, waiting to jump until part way through the turn-around animation (otherwise Samus will bonk inside the wall) It is also possible to climb lower, with Samus' feet still in the water; in this case, the turn-around animation is slower, providing a larger window to jump, though in this case either a wall jump or a Space Jump water escape may be needed. Entrance condition: {
"comeInWithDoorStuckSetup": {}
}Requires: "canXRayClimb" "SpaceJump" |
|
Entrance condition: {
"comeInWithDoorStuckSetup": {}
}Requires: "canXRayClimb" |
From: 2
Bottom Left Door
To: 1
Top Left Door
Perform an X-Ray Climb until you are just above the door into Cacatac Alley. Walk left into the gap between pipes, behind the grapple blocks. Walk to the left wall, turn around, crouch, grapple the block and release. Samus will fall into the door transition. The camera does not follow Samus but the pipes are still visually in the same position. And the camera does not break after the transition. Entrance condition: {
"comeInWithDoorStuckSetup": {}
}Requires: "canXRayClimb" "canGrappleClip" Bypasses door shell: true |
|
Entrance condition: {
"comeInWithDoorStuckSetup": {}
}Requires: "canLongXRayClimb" |
|
Once Doorstuck, do 2 turnarounds and and kill the bottom Cacatac with angle shots. Resume the climb until you're at the second Cacatac' height and kill it. Resume the climb until Samus' chest pokes out of the ground and wiggle out to the right. Entrance condition: {
"comeInWithDoorStuckSetup": {}
}Requires: "canXRayClimb" |
|
Get stuck in the door with Samus standing. Then turnaround spin jump to the right to reach the ledge above. Entrance condition: {
"comeInWithDoorStuckSetup": {}
} |
|
Entrance condition: {
"comeInWithDoorStuckSetup": {}
}Requires: "canLongXRayClimb" "canBePatient" |
|
Entrance condition: {
"comeInWithDoorStuckSetup": {}
}Requires: "canLongXRayClimb" |
|
Use the Skultera to get onto the top right platform. There are two distinct ways to get up using the top Skultera. 1. Freeze it at the bottom of its path to the left. Crouch jump and down grab to get onto it. The positioning is very precise. 2. Freeze it about a half-tile from the right wall and very quickly stationary spin jump and quickly walljump mash to get up before it thaws. This may be easier by jumping away from the wall, towards the fish, to gain height faster. Requires: {
"notable": "Frozen Fish Climb"
}
"canSuitlessMaridia"
"canTrickyUseFrozenEnemies"
{
"or": [
{
"and": [
"canTrickyJump",
"h_underwaterCrouchJumpDownGrab"
]
},
{
"and": [
"canStationarySpinJump",
"canSunkenTileWideWallClimb"
]
}
]
} |
From: 3
Middle Right Door
To: 6
Hidden Fake Kassiuz Room Junction
Climb up 2 screens plus 2 tiles, to enter a normally inaccessible area behind the top right door, containing a copy of the bottom half of Kassiuz Room. There is a blue door on the other side of the top right door. Opening it and touching the transition behind it will lead to the same room as the bottom right door of the room; however, Samus will be placed a screen to the left of the door, which will usually be out-of-bounds. Entrance condition: {
"comeInWithDoorStuckSetup": {}
}Requires: {
"notable": "X-Ray Climb Into Fake Kassiuz Room"
}
"canLongXRayClimb"Dev note: FIXME: This strat and node 6 currently have no logical purpose, but there might be cases where the player could X-Ray climb to somewhere useful after passing through this wrong-facing transition. |
|
Entrance condition: {
"comeInWithDoorStuckSetup": {}
}Requires: "canXRayClimb" |
|
A stationary spinjump can fit into the 1 tile wide hole where Samus can slowly infinite walljump to freedom. Requires: "canSuitlessMaridia" "canStationarySpinJump" "canSunkenTileWideWallClimb" |
|
Entrance condition: {
"comeInWithDoorStuckSetup": {}
}Requires: "canPrepareForNextRoom"
{
"doorUnlockedAtNode": 1
}Unlocks doors: {"types":["ammo"],"requires":[]} |
|
Entrance condition: {
"comeInWithDoorStuckSetup": {}
}Requires: "canPrepareForNextRoom"
{
"doorUnlockedAtNode": 3
}Unlocks doors: {"types":["ammo"],"requires":[]} |
|
Enter the room with a door stuck setup. Perform a frame-perfect Flatley jump from inside the door to just barely reach the first pillar. Entrance condition: {
"comeInWithDoorStuckSetup": {}
}Requires: {
"notable": "Door Stuck Flatley Jump"
}
"canInsaneJump"Clears obstacles: A Dev note: This is only really useful when entering from a water room, since otherwise there is an easier strat that simply runs into the room with momentum and jumps. |
|
Entrance condition: {
"comeInWithDoorStuckSetup": {}
}Requires: "canXRayClimb" |
|
Entrance condition: {
"comeInWithDoorStuckSetup": {}
}Requires: "canXRayClimb" |
|
This climb is from the left side of the left room, the room with the breakable grapple block. Climb up 3 screens. The camera will not move up to Samus while on the left wall. Carefully jump over the pit without falling in. It helps to step down and use the two-tile long runway. Entrance condition: {
"comeInWithDoorStuckSetup": {}
}Requires: "canLongXRayClimb"
"canBePatient"
"canOffScreenMovement"
{
"or": [
"canTrickyJump",
"canWallJump",
"SpaceJump"
]
} |
|
This climb is from the left side of the left room, the room with the breakable grapple block. Climb up 3 screens. Then drop down to fix the camera. Entrance condition: {
"comeInWithDoorStuckSetup": {}
}Requires: "canLongXRayClimb" "canBePatient" |
|
This climb is right side of the left room - the room with the breakable grapple block. Climb up 3 screens. Entrance condition: {
"comeInWithDoorStuckSetup": {}
}Requires: "canLongXRayClimb" "canBePatient" |
|
Gets above the grapple block by doing a well-positioned and well-timed Gravity jump following a good jump off the sand. It is also possible to do this off of a wall jump on the side immediately followed by a gravity jump. Break spin before touching the sand, and then spinjump to get a good jump off of the sand. Breaking spin after jumping from the sand will remove horizontal momentum, or a stationary spinjump can help. Requires: {
"notable": "Gravity Jump"
}
"Grapple"
"canGravityJump"
"canPlayInSand"
"canStationarySpinJump"
"canTrickyJump" |
|
Requires: "Gravity" "Grapple" "canPlayInSand" "canJumpIntoIBJ" "canTrickyJump" "can4HighMidAirMorph" "canStationarySpinJump" |

