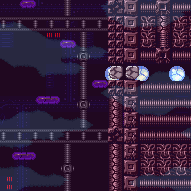
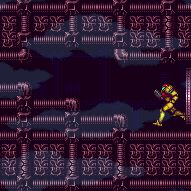
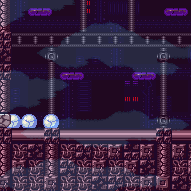
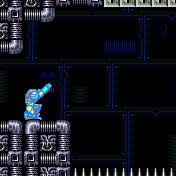
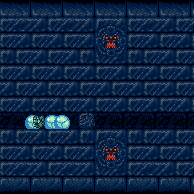
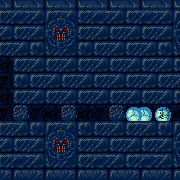
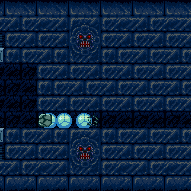
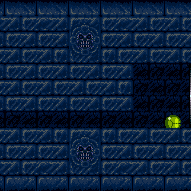
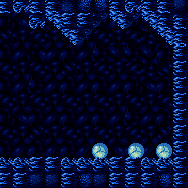
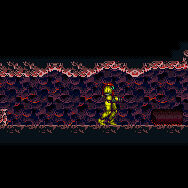
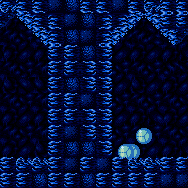
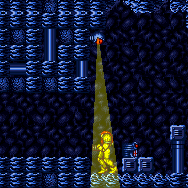
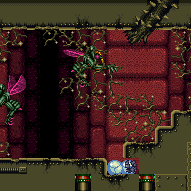
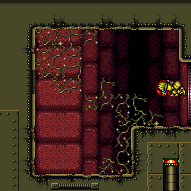
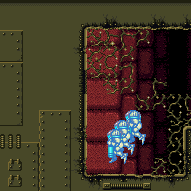
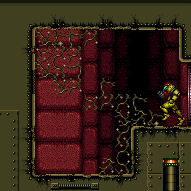
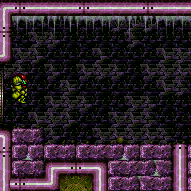
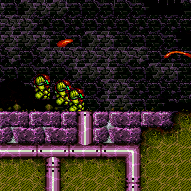
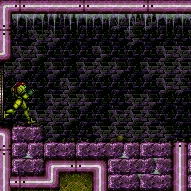
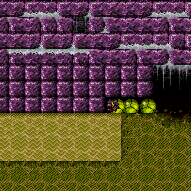
canSpeedball (Very Hard)
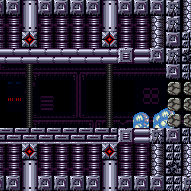
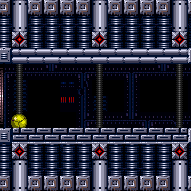
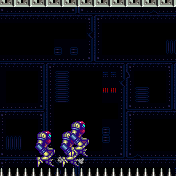
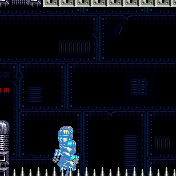
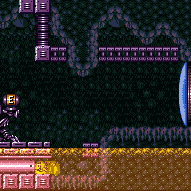
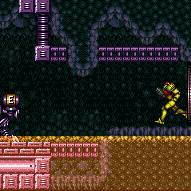
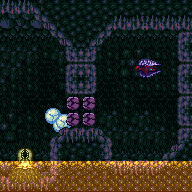
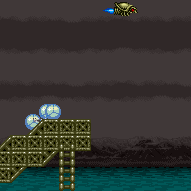
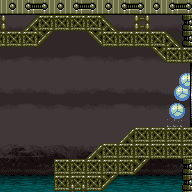
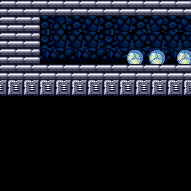
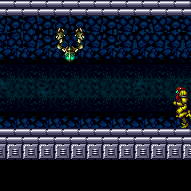
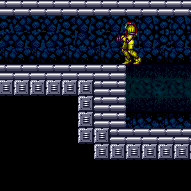
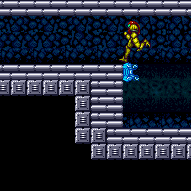
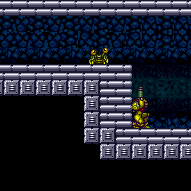
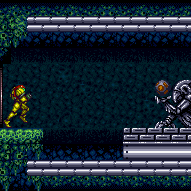
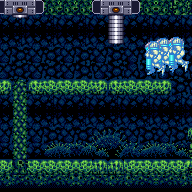
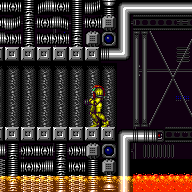
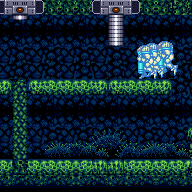
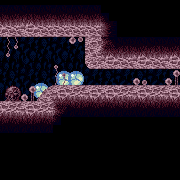
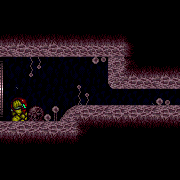
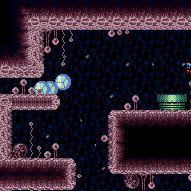
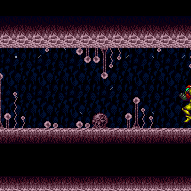
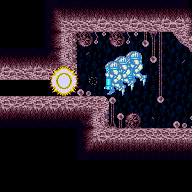
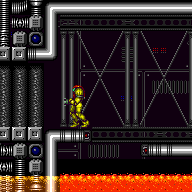
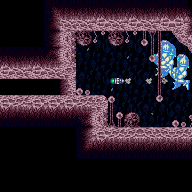
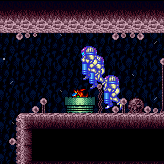
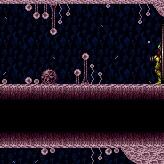
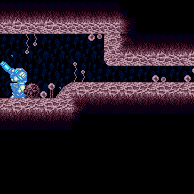
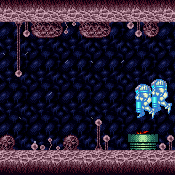
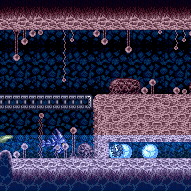
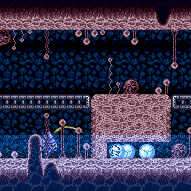
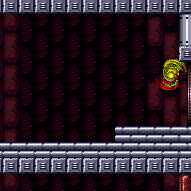
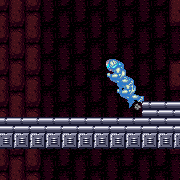
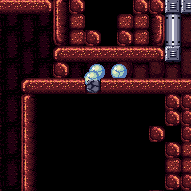
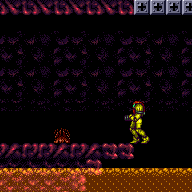
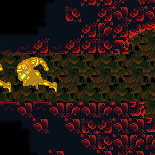
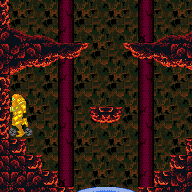
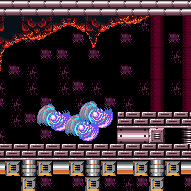
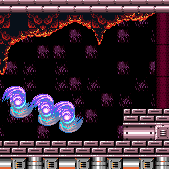
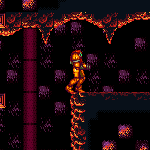
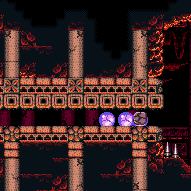
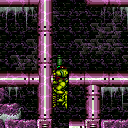
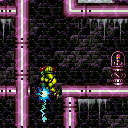
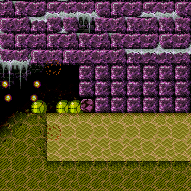
Maintain the SpeedBooster effect while rolling as a Morph Ball in order to destroy bomb blocks in Morph tunnels. A Speedball involves performing a Mockball at faster speeds and additionally it will help to be able to perform short jumps to reduce the amount of space needed. A Speedball can also be used with SpringBall as a way to jump with temporary blue state while maintaining Samus' momentum.
Dependencies: canTrivialMidAirMorph, canMockball, canMidAirMorph, canCarefulJump, canDash
Strats ()
|
Entrance condition: {
"comeInSpeedballing": {
"runway": {
"length": 14,
"openEnd": 0
}
}
}Clears obstacles: A, B Dev note: If we had a comeInWithSpeedball entrance condition, it should be used instead. This strat is for using a remote runway in the previous room to get the speedball; if the current runway were used then you could just run through with blue speed instead. |
|
Enter the room with a very specific run speed to jump from the door, and land a speedball perfectly in the tunnel to break the Bomb block. Entrance condition: {
"comeInGettingBlueSpeed": {
"length": 1,
"openEnd": 0,
"minExtraRunSpeed": "$5.2",
"maxExtraRunSpeed": "$5.F"
}
}Requires: {
"notable": "Morph Tunnel SpeedBall"
}
"canInsaneJump"
"canSpeedball"
"canTrickyDashJump"
"canSlowShortCharge"Dev note: There is 1 unusable tile in this runway. Speeds between $6.2 and $6.A can also work but are more difficult. |
|
Enter the room with a very specific run speed to jump from the door, squeeze by the ceiling, and land a speedball perfectly in the tunnel to break the Bomb block. Entrance condition: {
"comeInGettingBlueSpeed": {
"length": 2,
"openEnd": 0,
"minExtraRunSpeed": "$4.4",
"maxExtraRunSpeed": "$4.7"
}
}Requires: {
"notable": "Morph Tunnel SpeedBall"
}
"canSpeedball"
"canTrickyDashJump"
"canSlowShortCharge"
"canInsaneJump"
"canBeExtremelyPatient"Dev note: There is 1 unusable tile in this runway. The canBeExtremelyPatient requirement is for difficulty placement. |
|
Entrance condition: {
"comeInSpeedballing": {
"runway": {
"length": 12,
"openEnd": 0
}
}
}Clears obstacles: A Dev note: If we had a comeInWithSpeedball entrance condition, it should be used instead. This strat is for using a remote runway in the previous room to get the speedball; if the current runway were used then you could just run through with blue speed instead. |
From: 1
Top Left Door
To: 6
Right of Morph Tunnel with Temporary Blue
Using only the short runway and spike pit, use one or two speedkeeps to speedball towards the item location. This requires either a very short shortcharge, or a second speedkeep in the spikes which also resets Samus' run speed with a crouch jump before spike i-frames expire. Requires: {
"notable": "In-Room SpeedKeep for Temporary Blue"
}
"canSpeedKeep"
"canSlowShortCharge"
{
"doorUnlockedAtNode": 1
}
{
"or": [
{
"and": [
"canChainTemporaryBlue",
{
"getBlueSpeed": {
"usedTiles": 13,
"openEnd": 1
}
},
{
"spikeHits": "n_speedKeepAttempts"
}
]
},
{
"and": [
{
"getBlueSpeed": {
"usedTiles": 14,
"openEnd": 1
}
},
{
"spikeHits": {
"mul": [
2,
"n_speedKeepAttempts"
]
}
}
]
},
{
"and": [
"canChainTemporaryBlue",
{
"spikeHits": {
"mul": [
{
"add": [
"n_speedKeepAttempts",
2
]
},
"n_speedKeepAttempts"
]
}
}
]
}
]
}
"canSpeedball"Dev note: 1 - Stop and bounce on left ledge. 2 - Jump from ledge and bounce in spikes. 3 - Stop and bounce on left ledge, then stop in spikes and speedkeep again. |
From: 1
Top Left Door
To: 6
Right of Morph Tunnel with Temporary Blue
Entrance condition: {
"comeInGettingBlueSpeed": {
"length": 5,
"openEnd": 1
}
}Requires: "canSpeedball" "canBlueSpaceJump" |
From: 1
Top Left Door
To: 6
Right of Morph Tunnel with Temporary Blue
Bounce into the spikes and use a speedkeep to run on spikes to setup for a speedball towards the item. A damage boost speedkeep could be used instead of a spike speedkeep with enough runspeed. Entrance condition: {
"comeInRunning": {
"speedBooster": "yes",
"minTiles": 4
}
}Requires: "canSpeedKeep"
"canCarefulJump"
{
"getBlueSpeed": {
"usedTiles": 21,
"openEnd": 2
}
}
{
"spikeHits": "n_speedKeepAttempts"
}
{
"or": [
{
"spikeHits": "n_speedKeepAttempts"
},
{
"and": [
"canChainTemporaryBlue",
{
"spikeHits": "n_speedKeepLenience"
}
]
}
]
}
"canSpeedball"Dev note: The extra lenience is because of the need to either to perform a very precise jump off the spikes, or to start with a bounce on the spikes, taking an extra hit. |
From: 1
Top Left Door
To: 6
Right of Morph Tunnel with Temporary Blue
Bounce into the spikes and use a speedkeep to run on spikes to setup for a speedball towards the item. Bouncing on the platform near the door saves a spike hit. Or a damage boost speedkeep could be used instead of a spike speedkeep with enough runspeed. Entrance condition: {
"comeInRunning": {
"speedBooster": "yes",
"minTiles": 12
}
}Requires: "canSpeedKeep"
"canCarefulJump"
"canSlowShortCharge"
"can4HighMidAirMorph"
{
"spikeHits": "n_speedKeepAttempts"
}
"canSpeedball" |
From: 1
Top Left Door
To: 6
Right of Morph Tunnel with Temporary Blue
Bounce into the spikes and use a speedkeep to run on spikes to setup for a speedball towards the item. Bouncing on the platform near the door saves a spike hit. Entrance condition: {
"comeInWithTemporaryBlue": {}
}Requires: "canChainTemporaryBlue"
"can4HighMidAirMorph"
"canSpeedKeep"
{
"spikeHits": {
"add": [
"n_speedKeepAttempts",
"n_speedKeepLenience"
]
}
}
"canSpeedball"Dev note: The extra lenience is because of the need to either to perform a very precise jump off the spikes or to start with a bounce on the spikes, taking an extra hit. |
From: 1
Left Door
To: 2
Right Door
Entrance condition: {
"comeInSpeedballing": {
"runway": {
"length": 3,
"openEnd": 0
},
"maxExtraRunSpeed": "$3.8"
}
}Requires: "canChainTemporaryBlue" Exit condition: {
"leaveWithTemporaryBlue": {}
}Unlocks doors: {"types":["ammo"],"requires":[]}Dev note: Higher speeds could work, up to at least about $4.4, but with greater difficulty. |
From: 2
Right Door
To: 1
Left Door
Entrance condition: {
"comeInSpeedballing": {
"runway": {
"length": 3,
"openEnd": 0
},
"maxExtraRunSpeed": "$3.8"
}
}Requires: "canChainTemporaryBlue" Exit condition: {
"leaveWithTemporaryBlue": {}
}Unlocks doors: {"types":["ammo"],"requires":[]}Dev note: Higher speeds could work, up to at least about $4.4, but with greater difficulty. |
|
Entrance condition: {
"comeInSpeedballing": {
"runway": {
"length": 3,
"openEnd": 0
}
}
} |
|
Entrance condition: {
"comeInSpeedballing": {
"runway": {
"length": 0,
"openEnd": 1
}
}
}Dev note: None of the tiles in-room are usable, because there is no reason to speedball if you can come in gaining blue speed. |
|
Bring temporary blue from the right side door all the way to the missile location using Springball, SpaceJump, or Morph-UnMorphs. Entrance condition: {
"comeInShinecharging": {
"length": 1,
"openEnd": 1
}
}Requires: "canTemporaryBlue"
"canInsaneJump"
{
"or": [
"canLongChainTemporaryBlue",
{
"and": [
"canSpeedball",
"canSpringBallBounce",
"canSlowShortCharge"
]
},
{
"and": [
"canBlueSpaceJump",
"canMockball",
"canSlowShortCharge"
]
}
]
}Clears obstacles: A Dev note: There is 1 unusable tile in this runway. |
From: 2
Right Door
To: 4
Middle Junction (Left of Morph Tunnel)
Entrance condition: {
"comeInGettingBlueSpeed": {
"length": 1,
"openEnd": 0
}
}Requires: "canSpeedball"
"canCarefulJump"
"canSlowShortCharge"
{
"acidFrames": 60
}Dev note: There are 9 unusable tiles in this runway. |
From: 1
Left Door
To: 2
Right Door
Entrance condition: {
"comeInGettingBlueSpeed": {
"length": 6,
"openEnd": 1,
"steepUpTiles": 1,
"steepDownTiles": 1,
"minExtraRunSpeed": "$1.2",
"maxExtraRunSpeed": "$2.8"
}
}Requires: "canSlowShortCharge" "canSpeedball" "canSpringBallBounce" "canTrickyJump" Clears obstacles: A Dev note: FIXME: Larger speeds (as high as max speed $7.0) can also work but require greater precision It would also be possible to stop in the middle of the room and then gain blue speed in-room to continue. |
From: 2
Right Door
To: 1
Left Door
Entrance condition: {
"comeInGettingBlueSpeed": {
"length": 6,
"openEnd": 1,
"steepUpTiles": 1,
"steepDownTiles": 1,
"minExtraRunSpeed": "$2.2",
"maxExtraRunSpeed": "$2.8"
}
}Requires: "canSpeedball" "canSpringBallBounce" "canTrickyJump" Clears obstacles: A Dev note: FIXME: Larger speeds (as high as max speed $7.0) can also work but require greater precision It would also be possible to stop in the middle of the room and then gain blue speed in-room to continue. |
From: 1
Left Door
To: 2
Right Door
Enter with blue speed and bounce on the item pedestal to make it across, then unmorph into temporary blue. If entering at high speed, morph on the left side of the pedestal so that there is enough space to use a controlled Spring Ball bounce. If entering with very low speed, a spring fling can help make it across. Entrance condition: {
"comeInGettingBlueSpeed": {
"length": 2,
"openEnd": 0,
"steepDownTiles": 1,
"minExtraRunSpeed": "$0.8"
}
}Requires: "canTrickySpringBallBounce" "canChainTemporaryBlue" "canSpeedball" Exit condition: {
"leaveWithTemporaryBlue": {}
}Collects items: 3 Unlocks doors: {"types":["ammo"],"requires":[]} |
From: 4
Lower Section - Top Right Door
To: 4
Lower Section - Top Right Door
Requires: {
"getBlueSpeed": {
"usedTiles": 20,
"steepUpTiles": 1,
"steepDownTiles": 4,
"openEnd": 1
}
}
"canSpeedball"
"canSpringBallBounce"
"canTrickyJump"
"HiJump"
"canSpringBallJumpMidAir"
"canChainTemporaryBlue"Exit condition: {
"leaveWithTemporaryBlue": {}
} |
From: 5
Lower Section - Bottom Right Door
To: 5
Lower Section - Bottom Right Door
Requires: {
"getBlueSpeed": {
"usedTiles": 20,
"steepUpTiles": 1,
"steepDownTiles": 4,
"openEnd": 1
}
}
"canSpeedball"
"canSpringBallBounce"
"canTrickyJump"
"canChainTemporaryBlue"Exit condition: {
"leaveWithTemporaryBlue": {}
} |
|
Entrance condition: {
"comeInGettingBlueSpeed": {
"length": 2,
"openEnd": 0
}
}Requires: "canSpeedball" Clears obstacles: A Dev note: This is a direct link because clearing the hoppers is unnecessary. One tile is subtracted from the runway length since Samus must be blue before contacting the first Hopper. There is 1 unusable tile in this runway. |
|
It's a short charge into a speedball to break the bomb blocks. The Sidehoppers need to be destroyed beforehand to clear the running space. Requires: {
"obstaclesCleared": [
"C"
]
}
{
"speedBall": {
"length": 25,
"openEnd": 0
}
}Clears obstacles: A |
|
Cross the room then lure and kill the two floor Sidehoppers using the morph tunnel. With the ceiling Sidehopper in the top right corner, quickly roll to the left next to the stair. It is required to avoid double hitting the Sidehopper with the Power Bomb or it will die. Place a Power Bomb, Wait a second, then roll to the right to lure the hopper and quickly return and Crystal Flash. Waiting briefly will prevent the hopper from coming too soon and getting double hit. Entrance condition: {
"comeInWithRMode": {}
}Requires: "h_ZebesIsAwake"
"h_usePowerBomb"
{
"or": [
"h_bombThings",
{
"and": [
{
"getBlueSpeed": {
"usedTiles": 21,
"openEnd": 1
}
},
"canSpeedball"
]
},
"h_blueSuitGMode"
]
}
"canComplexRModeCrystalFlashInterrupt"
{
"ammo": {
"type": "Missile",
"count": 10
}
}
{
"or": [
"h_partialEnemyDamageReduction",
{
"resourceAtMost": [
{
"type": "RegularEnergy",
"count": 19
}
]
},
{
"and": [
{
"resourceCapacity": [
{
"type": "RegularEnergy",
"count": 199
}
]
},
{
"resourceCapacity": [
{
"type": "ReserveEnergy",
"count": 199
}
]
}
]
}
]
}
{
"obstaclesCleared": [
"A",
"B",
"C"
]
} |
|
The hoppers have a poor energy drop rate. The rightmost two can be killed easily for two chances at a drop, otherwise a Crystal Flash must be used to get reserves. Entrance condition: {
"comeInWithRMode": {}
}Requires: "h_ZebesIsAwake"
{
"or": [
"h_CrystalFlashForReserveEnergy",
{
"and": [
"h_usePowerBomb",
"h_RModeCanRefillReserves",
{
"or": [
{
"and": [
{
"resourceMissingAtMost": [
{
"type": "Missile",
"count": 0
}
]
},
{
"resourceMissingAtMost": [
{
"type": "Super",
"count": 0
}
]
}
]
},
"canBeVeryLucky"
]
},
"canBeLucky",
{
"partialRefill": {
"type": "ReserveEnergy",
"limit": 20
}
}
]
}
]
}
{
"or": [
{
"and": [
{
"getBlueSpeed": {
"usedTiles": 21,
"openEnd": 1
}
},
"canSpeedball"
]
},
"h_bombThings"
]
}
{
"canShineCharge": {
"usedTiles": 21,
"openEnd": 1
}
}
{
"autoReserveTrigger": {
"maxReserveEnergy": 95
}
}
"canRModeSparkInterrupt"Clears obstacles: A, B, C |
|
It's a short charge into a speedball to break the Bomb Blocks. The Power Bomb Blocks need to be destroyed to have enough running room. The sidehoppers that remain can be killed safely using the morph tunnel. Requires: {
"obstaclesCleared": [
"B"
]
}
{
"getBlueSpeed": {
"usedTiles": 21,
"openEnd": 1
}
}
"canSpeedball"Clears obstacles: A, C |
From: 2
Right Door
To: 1
Left Door
Entrance condition: {
"comeInGettingBlueSpeed": {
"length": 11,
"openEnd": 0
}
}Requires: "canSpeedball" Clears obstacles: A Dev note: There are 3 unusable tiles in this runway. |
|
Requires: {
"getBlueSpeed": {
"usedTiles": 14,
"openEnd": 1
}
}
"canSlowShortCharge"
"canSpeedball"Clears obstacles: A |
From: 2
Right Door
To: 1
Left Door
Requires: "h_frozenEnemyRunway"
{
"getBlueSpeed": {
"usedTiles": 15,
"openEnd": 1
}
}
"canSlowShortCharge"
"canSpeedball"Clears obstacles: A |
From: 1
Left Door
To: 4
Right Hidden Item
Speedball through the morph tunnel and use it to break the bomb blocks in front of the hidden Missile location. This can be done using Spring Ball, or by unmorphing and using temporary blue to bounce through the bomb blocks. Entrance condition: {
"comeInBlueSpinning": {
"maxExtraRunSpeed": "$3.0",
"unusableTiles": 4
}
}Requires: "canSpeedball"
"canTrickyJump"
{
"or": [
"canChainTemporaryBlue",
{
"and": [
"h_useSpringBall",
"canSlowShortCharge"
]
}
]
}Collects items: 3 |
From: 1
Left Door
To: 4
Right Hidden Item
Speedball through the morph tunnel and use it to break the bomb blocks in front of the hidden Missile location. This can be done using Spring Ball, or by unmorphing and using temporary blue to bounce through the bomb blocks. Entrance condition: {
"comeInGettingBlueSpeed": {
"length": 0,
"openEnd": 1,
"maxExtraRunSpeed": "$1.6"
}
}Requires: "canSpeedball"
"canTrickyJump"
{
"or": [
"canChainTemporaryBlue",
"h_useSpringBall"
]
}Collects items: 3 Dev note: FIXME: This can be done at higher speeds, e.g. up to at least $2.4, or using a little more in-room runway, but is more difficult. Higher speeds probably wouldn't serve a purpose worth modeling; but extra runway length could potentially matter. |
From: 2
Right Door
To: 1
Left Door
Gain blue speed in the other room, Space Jump through the transition, then speedball under the shutters. Entrance condition: {
"comeInBlueSpaceJumping": {
"minExtraRunSpeed": "$0.E",
"maxExtraRunSpeed": "$2.1"
}
}Requires: "canSpeedball" "canChainTemporaryBlue" "canInsaneJump" Exit condition: {
"leaveWithTemporaryBlue": {}
}Unlocks doors: {"types":["ammo"],"requires":[]} |
From: 2
Right Door
To: 1
Left Door
Entrance condition: {
"comeInWithSidePlatform": {
"platforms": [
{
"minHeight": 1,
"maxHeight": 1,
"minTiles": 16,
"speedBooster": "yes",
"obstructions": [
[
1,
0
]
],
"note": [
"This applies to Lava Dive."
]
},
{
"minHeight": 2,
"maxHeight": 2,
"minTiles": 27.4375,
"speedBooster": "yes",
"obstructions": [
[
1,
0
]
],
"note": [
"This applies to Dust Torizo Room and Noob Bridge."
]
},
{
"minHeight": 3,
"maxHeight": 3,
"minTiles": 15.4375,
"speedBooster": "yes",
"obstructions": [
[
1,
0
]
],
"requires": [
"HiJump",
{
"getBlueSpeed": {
"usedTiles": 14,
"openEnd": 1
}
}
],
"note": [
"This applies to Botwoon's Room."
]
},
{
"minHeight": 3,
"maxHeight": 3,
"minTiles": 28.2472,
"speedBooster": "yes",
"obstructions": [
[
1,
0
]
],
"note": [
"This applies to Double Chamber."
]
}
]
}
}Requires: {
"getBlueSpeed": {
"usedTiles": 15,
"openEnd": 1
}
}
"canSpeedball"
"canChainTemporaryBlue"
"canInsaneJump"
Exit condition: {
"leaveWithTemporaryBlue": {}
}Unlocks doors: {"types":["ammo"],"requires":[]} |
|
Entrance condition: {
"comeInGettingBlueSpeed": {
"length": 0,
"openEnd": 1,
"minExtraRunSpeed": "$0.E",
"maxExtraRunSpeed": "$1.D"
}
}Requires: "canSpeedball" "canChainTemporaryBlue" "canInsaneJump" Exit condition: {
"leaveWithTemporaryBlue": {}
}Unlocks doors: {"types":["ammo"],"requires":[]}Dev note: Slightly higher run speeds can work but with greater difficulty. FIXME: comeInGettingBlueSpeed is not technically the right entrance condition, since the jump needs to happen in the other room; we ignore this for now since it makes less than a tile of difference to the runway in the other room. |
From: 3
Bottom Left Door
To: 4
Bottom Right Door
Enter the room with a blue speed jump to speedball through the spike tunnel. Then perform a long temporary blue chain across the room. Entrance condition: {
"comeInBlueSpinning": {
"maxExtraRunSpeed": "$1.E",
"unusableTiles": 1
}
}Requires: "canSpeedball" "canLongChainTemporaryBlue" Exit condition: {
"leaveWithTemporaryBlue": {}
}Unlocks doors: {"types":["ammo"],"requires":[]}Dev note: Somewhat higher run speeds can also work but with greater difficulty. |
|
Entrance condition: {
"comeInSpeedballing": {
"runway": {
"length": 6,
"openEnd": 0
}
}
} |
From: 2
Right Side - Top Door
To: 1
Left Side - Top Door
Jump over the bug pipe while blue and roll into the morph tunnel to break the bomb block. Shortcharge too much and the jump will not be able to reach the morph tunnel. Entrance condition: {
"comeInGettingBlueSpeed": {
"length": 16,
"openEnd": 1
}
}Requires: "canSpeedball" Clears obstacles: A Dev note: Half a tile is unusable so you can jump over the pipe. |
From: 7
Right Side - Door Behind Super Block
To: 13
Central Junction
Entrance condition: {
"comeInBlueSpaceJumping": {
"maxExtraRunSpeed": "$1.F"
}
}Requires: {
"notable": "Super Block Speedball"
}
"canPreciseSpaceJump"
"canInsaneJump"
"canSpeedball"Clears obstacles: F |
From: 7
Right Side - Door Behind Super Block
To: 13
Central Junction
Enter with a low momentum blue speed jump, immediately shoot the Super block, and in the same motion take out the bomb blocks with a speedball. Lower run speeds (ideally $1.2 or slightly higher) provide more lenience for the Super shot. Entrance condition: {
"comeInWithSidePlatform": {
"platforms": [
{
"minHeight": 1,
"maxHeight": 1,
"minTiles": 16,
"speedBooster": "yes",
"obstructions": [
[
1,
0
]
],
"requires": [
{
"or": [
"h_heatProof",
"canBeVeryPatient"
]
}
],
"note": [
"This applies to Lava Dive Room."
]
},
{
"minHeight": 2,
"maxHeight": 2,
"minTiles": 27.4375,
"speedBooster": "yes",
"obstructions": [
[
1,
0
]
],
"note": [
"This applies to Dust Torizo Room and Noob Bridge."
]
},
{
"minHeight": 3,
"maxHeight": 3,
"minTiles": 28.2472,
"speedBooster": "yes",
"obstructions": [
[
1,
0
]
],
"requires": [
{
"or": [
"h_heatProof",
"canBeVeryPatient"
]
}
],
"note": [
"This applies to Double Chamber."
]
},
{
"minHeight": 3,
"maxHeight": 3,
"minTiles": 39.4375,
"speedBooster": "yes",
"obstructions": [
[
3,
2
]
],
"requires": [
{
"or": [
"h_heatProof",
"canBeVeryPatient"
]
}
],
"note": [
"This applies to Metal Pirates."
]
}
]
}
}Requires: {
"notable": "Super Block Speedball"
}
{
"getBlueSpeed": {
"usedTiles": 15,
"openEnd": 1
}
}
{
"or": [
{
"getBlueSpeed": {
"usedTiles": 14,
"openEnd": 1
}
},
"canInsaneJump"
]
}
"canSpeedball"
{
"ammo": {
"type": "Super",
"count": 1
}
}Clears obstacles: F Dev note: FIXME: this way of expressing a h_heatProof requirement is not very clean; when possible, we should have a more general way of representing the need for a strat to be retried many times, or to represent the need for the heated shortcharge in the other room. |
From: 7
Right Side - Door Behind Super Block
To: 13
Central Junction
Quickly jump and precisely shoot the super block and in the same motion take out the bomb blocks with a speedball. Entrance condition: {
"comeInGettingBlueSpeed": {
"length": 5,
"openEnd": 0
}
}Requires: {
"notable": "Super Block Speedball"
}
"canSpeedball"
"canTrickyJump"
"canSlowShortCharge"
{
"ammo": {
"type": "Super",
"count": 1
}
}Clears obstacles: F Dev note: The runway here has two unusable tiles. |
|
Jump over the bug pipe while blue and roll into the morph tunnel to break the bomb block. Shortcharge too much and the jump will not be able to reach the morph tunnel. But you can airball and bounce into the tunnel. Requires: {
"or": [
{
"getBlueSpeed": {
"usedTiles": 16,
"openEnd": 1
}
},
{
"and": [
{
"doorUnlockedAtNode": 2
},
{
"getBlueSpeed": {
"usedTiles": 17,
"openEnd": 1
}
}
]
}
]
}
"canSpeedball"Clears obstacles: A Unlocks doors: {"nodeId":2,"types":["ammo"],"requires":[]}Dev note: Half a tile unusable so you can jump over the pipe. |
From: 13
Central Junction
To: 1
Left Side - Top Door
Requires: {
"getBlueSpeed": {
"usedTiles": 17,
"openEnd": 0
}
}
"canSpeedball"
"canChainTemporaryBlue"
Exit condition: {
"leaveWithTemporaryBlue": {}
}Unlocks doors: {"types":["ammo"],"requires":[]} |
From: 13
Central Junction
To: 7
Right Side - Door Behind Super Block
Break the bomb blocks by jumping into them with speed. These is more easily done at low run speed. It is most lenient if Samus is still moving up while entering the tunnel. Requires: {
"notable": "Off Screen Super Block"
}
{
"notable": "Break Raised Bomb Blocks with Blue Speed"
}
{
"getBlueSpeed": {
"usedTiles": 20,
"openEnd": 2
}
}
"canSlowShortCharge"
"canSpeedball"
"canLateralMidAirMorph"
"canTrickyJump"
"canOffScreenSuperShot"Clears obstacles: F |
|
Build up to full run speed and speedball towards the left door. With a little luck, Samus will accelerate through the slope tiles and pass under the door. Entrance condition: {
"comeInGettingBlueSpeed": {
"length": 20,
"openEnd": 0,
"minExtraRunSpeed": "$7.0"
}
}Requires: {
"notable": "Roll Under Door"
}
"canSpeedball"Exit condition: {
"leaveWithMockball": {
"remoteRunway": {
"length": 45,
"openEnd": 1
},
"landingRunway": {
"length": 7,
"openEnd": 1
},
"minExtraRunSpeed": "$7.0"
}
}Bypasses door shell: true |
From: 1
Right Door
To: 2
Item
Entrance condition: {
"comeInBlueSpinning": {
"unusableTiles": 0
}
}Requires: "canSpeedball" Clears obstacles: A |
From: 1
Right Door
To: 2
Item
Roll through the whole room, breaking the speedblocks. The fish enemies will die but some puyos will remain. Entrance condition: {
"comeInGettingBlueSpeed": {
"length": 0,
"openEnd": 1
}
}Requires: "canSpeedball" Clears obstacles: A |
From: 3
Dry Platform Junction
To: 1
Right Door
Perform a speedball into a temporary blue chain to reach the door. If HiJump and Spring Ball are unavailable, then getting out of the water requires a very precise jump: delay aiming down for the mid-air morph until after Samus is above the water line. Requires: {
"getBlueSpeed": {
"usedTiles": 32,
"openEnd": 1
}
}
"canChainTemporaryBlue"
"canSpeedball"
{
"or": [
"canInsaneJump",
"HiJump",
"canSpringBallBounce"
]
}Exit condition: {
"leaveWithTemporaryBlue": {}
}Unlocks doors: {"types":["ammo"],"requires":[]}Dev note: FIXME: Other methods of getting to 3 should be added, such as using a flash suit. |
|
Entrance condition: {
"comeInBlueSpinning": {
"maxExtraRunSpeed": "$2.0",
"unusableTiles": 0
}
}Requires: {
"notable": "Jump Shot Speedball"
}
"canPreciseSpaceJump"
"canSpeedball"Dev note: This can also work at much higher speeds but would be more difficult. |
|
In the previous room, gain low-momentum blue speed and jump, bonking the top of the doorway. After the transition, perform a CWJ off the ledge, then fire a shot and speedball through the tunnel. Entrance condition: {
"comeInBlueSpinning": {
"minExtraRunSpeed": "$1.3",
"maxExtraRunSpeed": "$1.8",
"unusableTiles": 0
}
}Requires: {
"notable": "CWJ Jump Shot Speedball"
}
"canInsaneJump"
"canCWJ"
"canSpeedball"Dev note: Higher speeds could probably also work, but depending on the geometry in the previous room it may require a precise release of jump to avoid bonking the wall above the door. |
|
Run through the door and jump into a speedball to break the bomb blocks, timing a precise shot during the jump to clear the shot block. Note: Spazer can trivially break the shot block by shooting forward before jumping. Entrance condition: {
"comeInGettingBlueSpeed": {
"length": 3,
"openEnd": 1,
"minExtraRunSpeed": "$1.2"
}
}Requires: {
"notable": "Jump Shot Speedball"
}
"canSpeedball"
"canTrickyJump" |
|
Shoot forward with spazer to break the shot block, then jump into the morph tunnel while staying blue to break a bomb block. Entrance condition: {
"comeInGettingBlueSpeed": {
"length": 3,
"openEnd": 1,
"minExtraRunSpeed": "$1.2"
}
}Requires: "Spazer" "canSpeedball" "canCarefulJump" |
|
Jump through the door and into a speedball to break the bomb blocks, timing a shot during the jump, immediately after the transition, to clear the shot block. If Spazer or Wave are available, the timing for the shot is more lenient; otherwise, jumping with lower extra run speed (between $3.2 and $3.F) can help widen the timing window. If using a lower run speed, it often helps to aim down before bonking the ceiling, to avoid falling short of the ledge. Entrance condition: {
"comeInWithSidePlatform": {
"platforms": [
{
"minHeight": 2,
"maxHeight": 2,
"minTiles": 27.4375,
"speedBooster": "yes",
"obstructions": [
[
1,
0
]
],
"note": [
"This applies to Dust Torizo Room and Noob Bridge."
]
},
{
"minHeight": 3,
"maxHeight": 3,
"minTiles": 28.2472,
"speedBooster": "yes",
"obstructions": [
[
1,
0
]
],
"note": [
"This applies to Double Chamber."
]
},
{
"minHeight": 3,
"maxHeight": 3,
"minTiles": 39.4375,
"speedBooster": "yes",
"obstructions": [
[
3,
2
]
],
"note": [
"This applies to Metal Pirates."
]
}
]
}
}Requires: {
"notable": "Jump Shot Speedball"
}
{
"getBlueSpeed": {
"usedTiles": 20,
"openEnd": 1
}
}
{
"or": [
"canTrickyDashJump",
"Spazer",
"Wave"
]
}
"canSpeedball"Dev note: The run speed required is not overly precise, but certain ranges of speeds must be avoided (especially extra run speeds $4.0 and $4.1) to prevent Samus from getting too high of a jump and not being able to reach the ledge. |
From: 3
Top Right Door
To: 5
Kihunter Junction
Entrance condition: {
"comeInBlueSpinning": {
"minExtraRunSpeed": "$1.7",
"maxExtraRunSpeed": "$3.8",
"unusableTiles": 2
}
}Requires: "canSpeedball" Clears obstacles: B, C |
From: 3
Top Right Door
To: 5
Kihunter Junction
Entrance condition: {
"comeInGettingBlueSpeed": {
"length": 3,
"openEnd": 1,
"maxExtraRunSpeed": "$1.8"
}
}Requires: "canSpeedball" Clears obstacles: B, C Dev note: There is 1 unusable tile in this runway. This can also work at higher run speeds, at least up to $2.A, but this is more difficult and the usable runway would be less. |
|
A very low horizontal speed is needed to drop down and break the block without hitting the corner to the left or the block above the bomb block. Or with Temporary Blue, Samus can bounce into the bomb block. Requires: {
"notable": "Speedball"
}
"Morph"
{
"obstaclesCleared": [
"C"
]
}
{
"obstaclesNotCleared": [
"D"
]
}
{
"or": [
{
"and": [
{
"getBlueSpeed": {
"usedTiles": 17,
"openEnd": 0
}
},
"canSlowShortCharge",
"canSpeedball"
]
},
{
"and": [
{
"canShineCharge": {
"usedTiles": 30,
"openEnd": 1
}
},
"canTemporaryBlue",
"canLateralMidAirMorph"
]
}
]
}Clears obstacles: B |
From: 2
Bottom Left Door
To: 3
Right Vertical Door
Entrance condition: {
"comeInSpeedballing": {
"runway": {
"length": 4,
"openEnd": 0
}
}
}Clears obstacles: A |
From: 1
Left Side - Top Door
To: 6
Middle Right Door
Destroy the Cac by touching it while in aim-down pose; enter a speedball for a moment, before unmorphing past the two half-tile dropoffs. Alternatively, if enough run speed is available, it is also an option to airball over the Cac. Entrance condition: {
"comeInGettingBlueSpeed": {
"length": 3,
"openEnd": 1,
"minExtraRunSpeed": "$1.2"
}
}Requires: "canSpeedball" "canLongChainTemporaryBlue" Exit condition: {
"leaveWithTemporaryBlue": {}
}Unlocks doors: {"types":["ammo"],"requires":[]} |
From: 1
Left Side - Top Door
To: 7
Top Right Door
Destroy the Cac by touching it while in aim-down pose; enter a speedball for a moment, before unmorphing past the two half-tile drops. Alternatively, if enough run speed is available, it is also an option to airball over the Cac. Entrance condition: {
"comeInGettingBlueSpeed": {
"length": 3,
"openEnd": 1,
"minExtraRunSpeed": "$1.2"
}
}Requires: "canSpeedball" "canLongChainTemporaryBlue" Exit condition: {
"leaveWithTemporaryBlue": {}
}Unlocks doors: {"types":["ammo"],"requires":[]} |
From: 7
Top Right Door
To: 1
Left Side - Top Door
Entrance condition: {
"comeInGettingBlueSpeed": {
"length": 2.5,
"openEnd": 1,
"minExtraRunSpeed": "$1.9",
"maxExtraRunSpeed": "$2.8"
}
}Requires: "canSpeedball" "canTrickySpringBallBounce" "canChainTemporaryBlue" Exit condition: {
"leaveWithTemporaryBlue": {}
}Unlocks doors: {"types":["ammo"],"requires":[]}Dev note: Speeds higher or lower than this can work but with greater difficulty. |
From: 1
Left Door
To: 1
Left Door
Use SpeedBooster to construct a structure for Moondancing that has 1 chest height block and 1 head height block to the right of it and no other Speed blocks. Crystal Flash below the lower block, exactly pixel aligned with its right side, to standup and then begin Moondancing. After Samus sinks through the floor tiles, use Grapple to return to a standing position and count an additional 145 moonfalls. Then use Grapple to return to a crouch and wiggle right and Turn-Around Aim Cancel to escape to the right. Finally, use SpeedBooster if needed to break the remaining Speed blocks and reach the door. Requires: {
"notable": "Speed Block Moondance"
}
"h_CrystalFlash"
"canTrickyJump"
"canTurnaroundAimCancel"
"h_getBlueSpeedMaxRunway"
"canTemporaryBlue"
"canExtendedMoondance"
"canSpeedball"Exit condition: {
"leaveWithStoredFallSpeed": {
"fallSpeedInTiles": 2
}
} |
From: 1
Left Door
To: 1
Left Door
Use SpeedBooster to construct a structure for Moondancing that has 1 chest height block and 1 head height block to the right of it and no other Speed blocks. Crystal Flash below the lower block, exactly pixel aligned with its right side, to standup and then begin Moondancing. After Samus sinks through the bottom tile, it is possible to use Grapple to return to a crouch and wiggle right and then Turn-Around Aim Cancel to escape to the right. Without Grapple, count to 174 Moonfalls and delicately Moonfall so as to remain crouched and then wiggle to the right. Finally, use SpeedBooster if needed to break the remaining Speed blocks and reach the door. Requires: {
"notable": "Speed Block Moondance"
}
"h_CrystalFlash"
"canTrickyJump"
"canTurnaroundAimCancel"
"h_getBlueSpeedMaxRunway"
"canTemporaryBlue"
"canMoondance"
"canSpeedball"
{
"or": [
"canCount",
"Grapple"
]
}Exit condition: {
"leaveWithStoredFallSpeed": {
"fallSpeedInTiles": 1
}
} |
From: 1
Left Door
To: 2
Right Door
Use SpeedBooster to construct a structure for Moondancing that has 1 chest height block and 1 head height block to the right of it and no other Speed blocks. Crystal Flash below the lower block, exactly pixel aligned with its right side, to standup and then begin Moondancing. After Samus sinks through the floor tiles, use Grapple to return to a standing position and count an additional 145 moonfalls. Then use Grapple to return to a crouch and wiggle right and Turn-Around Aim Cancel to escape to the right. Finally, use SpeedBooster if needed to break the remaining Speed blocks and reach the door. Requires: {
"notable": "Speed Block Moondance"
}
"h_CrystalFlash"
"canTrickyJump"
"canTurnaroundAimCancel"
"h_getBlueSpeedMaxRunway"
"canTemporaryBlue"
"canExtendedMoondance"
"canSpeedball"Exit condition: {
"leaveWithStoredFallSpeed": {
"fallSpeedInTiles": 2
}
}Unlocks doors: {"types":["ammo"],"requires":[]} |
From: 1
Left Door
To: 2
Right Door
Use SpeedBooster to construct a structure for Moondancing that has 1 chest height block and 1 head height block to the right of it and no other Speed blocks. Crystal Flash below the lower block, exactly pixel aligned with its right side, to standup and then begin Moondancing. After Samus sinks through the bottom tile, it is possible to use Grapple to return to a crouch and wiggle right and then Turn-Around Aim Cancel to escape to the right. Without Grapple, count to 174 Moonfalls and delicately Moonfall so as to remain crouched and then wiggle to the right. Finally, use SpeedBooster if needed to break the remaining Speed blocks and reach the door. Requires: {
"notable": "Speed Block Moondance"
}
"h_CrystalFlash"
"canTrickyJump"
"canTurnaroundAimCancel"
"h_getBlueSpeedMaxRunway"
"canTemporaryBlue"
"canMoondance"
"canSpeedball"
{
"or": [
"canCount",
"Grapple"
]
}Exit condition: {
"leaveWithStoredFallSpeed": {
"fallSpeedInTiles": 1
}
}Unlocks doors: {"types":["ammo"],"requires":[]} |
From: 1
Left Door
To: 2
Right Door
Use Space Jump, Spring Ball, to carry blue speed across the room; alternatively, use a long series of temporary blue chains. Entrance condition: {
"comeInGettingBlueSpeed": {
"length": 13,
"openEnd": 1
}
}Requires: "canChainTemporaryBlue"
{
"or": [
{
"and": [
"canSpeedball",
"canSpringBallBounce",
{
"heatFrames": 490
}
]
},
{
"and": [
"SpaceJump",
{
"heatFrames": 420
}
]
},
{
"and": [
"canSpeedball",
"canLongChainTemporaryBlue",
{
"heatFrames": 780
}
]
}
]
}Exit condition: {
"leaveWithTemporaryBlue": {}
}Unlocks doors: {"types":["super","powerbomb"],"requires":[]}
{"types":["missiles"],"requires":[{"heatFrames":50}]} |
From: 1
Left Door
To: 3
Top Door
Use Space Jump, Spring Ball, to carry blue speed across the room; alternatively, use a long series of temporary blue chains. Entrance condition: {
"comeInShinecharging": {
"length": 13,
"openEnd": 1
}
}Requires: "canChainTemporaryBlue"
{
"or": [
{
"and": [
"canSpeedball",
"canSpringBallBounce",
{
"heatFrames": 400
}
]
},
{
"and": [
"SpaceJump",
{
"heatFrames": 420
}
]
},
{
"and": [
"canSpeedball",
"canLongChainTemporaryBlue",
{
"heatFrames": 670
}
]
}
]
}Exit condition: {
"leaveWithTemporaryBlue": {
"direction": "right"
}
}Unlocks doors: {"types":["super","powerbomb"],"requires":[]}
{"types":["missiles"],"requires":[{"heatFrames":50}]} |
From: 2
Right Door
To: 1
Left Door
Use Space Jump, Spring Ball, to carry blue speed across the room; alternatively, use a long series of temporary blue chains. Entrance condition: {
"comeInGettingBlueSpeed": {
"length": 13,
"openEnd": 1
}
}Requires: "canChainTemporaryBlue"
{
"or": [
{
"and": [
"canSpeedball",
"canSpringBallBounce",
{
"heatFrames": 490
}
]
},
{
"and": [
"SpaceJump",
{
"heatFrames": 420
}
]
},
{
"and": [
"canSpeedball",
"canLongChainTemporaryBlue",
{
"heatFrames": 790
}
]
}
]
}Exit condition: {
"leaveWithTemporaryBlue": {}
}Unlocks doors: {"types":["super","powerbomb"],"requires":[]}
{"types":["missiles"],"requires":[{"heatFrames":50}]} |
From: 1
Left Door
To: 2
Right Door
Jump into the room with blue speed, and fall between the door ledge and the first floating platform, to speedball through the room. Entrance condition: {
"comeInBlueSpinning": {
"minExtraRunSpeed": "$0.E",
"maxExtraRunSpeed": "$1.9",
"unusableTiles": 3
}
}Requires: "canSpeedball"
"canSlowShortCharge"
"canInsaneJump"
{
"heatFrames": 360
} |
From: 1
Left Door
To: 2
Right Door
Entrance condition: {
"comeInGettingBlueSpeed": {
"length": 3,
"openEnd": 1,
"minExtraRunSpeed": "$0.E",
"maxExtraRunSpeed": "$1.B"
}
}Requires: "canSpeedball"
"canSlowShortCharge"
{
"heatFrames": 350
}Dev note: Some heat frames are implicit in the entrance condition. |
From: 2
Far Left Door
To: 2
Far Left Door
Use SpeedBooster to construct a structure for Moondancing that has 1 chest height block and 1 head height block to the right of it and no other Speed blocks. Crystal Flash below the lower block, exactly pixel aligned with its right side, to standup and then begin Moondancing. After Samus sinks through the floor tiles, use Grapple to return to a standing position and count an additional 145 moonfalls. Then use Grapple to return to a crouch and wiggle right and Turn-Around Aim Cancel to escape to the right. Finally, use SpeedBooster if needed to break the remaining Speed blocks and reach the door. Requires: {
"notable": "Speed Block Moondance"
}
"h_heatProof"
"h_getBlueSpeedMaxRunway"
"h_CrystalFlash"
"canTrickyJump"
"canTurnaroundAimCancel"
"canTemporaryBlue"
"canExtendedMoondance"
"canSpeedball"Exit condition: {
"leaveWithStoredFallSpeed": {
"fallSpeedInTiles": 2
}
}Dev note: FIXME: R-Mode can be used instead of a Crystal Flash but that depends on having more Reserve Energy than Regular Energy. |
From: 2
Far Left Door
To: 2
Far Left Door
Use SpeedBooster to construct a structure for Moondancing that has 1 chest height block and 1 head height block to the right of it and no other Speed blocks. Crystal Flash below the lower block, exactly pixel aligned with its right side, to standup and then begin Moondancing. After Samus sinks through the bottom tile, it is possible to use Grapple to return to a crouch and wiggle right and then Turn-Around Aim Cancel to escape to the right. Without Grapple, count to 174 Moonfalls and delicately Moonfall so as to remain crouched and then wiggle to the right. Finally, use SpeedBooster if needed to break the remaining Speed blocks and reach the door. Requires: {
"notable": "Speed Block Moondance"
}
"h_heatProof"
"h_getBlueSpeedMaxRunway"
"h_CrystalFlash"
"canTrickyJump"
"canTurnaroundAimCancel"
"canTemporaryBlue"
"canMoondance"
"canSpeedball"
{
"or": [
"canCount",
"Grapple"
]
}Exit condition: {
"leaveWithStoredFallSpeed": {
"fallSpeedInTiles": 1
}
}Dev note: FIXME: R-Mode can be used instead of a Crystal Flash but that depends on having more Reserve Energy than Regular Energy. With a different Speed block structure (more difficult to set up), it is possible to avoid needing to count, without Grapple. |
From: 2
Far Left Door
To: 8
G-Mode, Bottom Right (Started at Left)
Run through the speed blocks then carefully cross the crumble bridge, as it will mostly be air. Alternatively, a speedball will prevent PLMs from overloading and Samus can roll over the bridge. Kill the pirate after the bridge before it places its invisible lasers, preventing Samus from getting through damageless. Samus can simply run to the right and fall through the bridge to safety below the pirate and kill it from below. It is also possible to perform one precise jump to cross most of the bridge and kill the pirate while blue. Entrance condition: {
"comeInWithGMode": {
"mode": "any",
"morphed": false
}
}Requires: "h_getBlueSpeedMaxRunway"
{
"or": [
"canSpeedball",
{
"and": [
"h_blueJump",
"canInsaneJump"
]
},
"h_hasBeamUpgrade",
{
"enemyKill": {
"enemies": [
[
"Red Space Pirate (standing)"
]
],
"explicitWeapons": [
"Missile",
"Super",
"ScrewAttack"
]
}
},
{
"enemyDamage": {
"enemy": "Red Space Pirate (standing)",
"type": "contact",
"hits": 1
}
}
]
}
{
"heatFrames": 0
}Dev note: It is possible to shinecharge before the bridge and spark vertically above it, then move the camera to kill the pirate with speed echoes, but this isn't really easier. |
From: 3
Bottom Door
To: 2
Far Left Door
Entrance condition: {
"comeInWithPlatformBelow": {
"minHeight": 9,
"maxHeight": 10,
"maxLeftPosition": 0,
"minRightPosition": 22
},
"comesThroughToilet": "any"
}Requires: "HiJump"
{
"getBlueSpeed": {
"usedTiles": 18,
"openEnd": 1
}
}
"canTrickyJump"
"canSpeedball"
{
"heatFrames": 505
}Dev note: This strat is applicable only with Crocomire's Room and Indiana Jones Room. |
From: 3
Bottom Door
To: 2
Far Left Door
In the room below, gain a precise amount of speed (extra run speed $6.0 or $6.1) then jump and aim down. After the transition, perform a speedball to cross the room. With a precisely timed unmorph and a buffered shot to open the door, it is possible to just barely make it through with no tanks. After unmorphing, walk instead of running, to avoid bonking the door. Coming from Crocomire's Room below, it works to use the full available runway length. Entrance condition: {
"comeInWithPlatformBelow": {
"minHeight": 10,
"maxHeight": 10,
"maxLeftPosition": 0,
"minRightPosition": 41.5
},
"comesThroughToilet": "any"
}Requires: "h_getBlueSpeedMaxRunway"
"canTrickyDashJump"
"canSpeedball"
{
"heatFrames": 392
}Dev note: This strat is applicable only with Crocomire's Room. |
|
Spark left through the speed blocks, then run to the right and back to get speed to go through the rest. If performing the spark with low energy, there is a risk of ending the spark above the spikes or in front of the Pirate; to be safe, assuming Samus has heat protection and begins sparking about 3 tiles from the Speed blocks, start with between 72 and 87 energy or at least 105 energy; with a buffered crumble jump to the right, up to 93 energy can work. Entrance condition: {
"comeInShinecharged": {},
"comesThroughToilet": "any"
}Requires: {
"shineChargeFrames": 35
}
{
"notable": "Reverse Spark"
}
"canShinechargeMovement"
"canHorizontalShinespark"
{
"or": [
{
"shinespark": {
"frames": 87,
"excessFrames": 10
}
},
{
"and": [
"h_heatProof",
"canControlShinesparkEnd",
{
"shinespark": {
"frames": 87,
"excessFrames": 44
}
}
]
}
]
}
{
"heatFrames": 675
}
{
"or": [
"h_speedDash",
{
"and": [
"h_speedButSlow",
{
"heatFrames": 270
}
]
}
]
}
"h_getBlueSpeedMaxRunway"
{
"or": [
"canSpeedball",
{
"heatFrames": 15
}
]
}Clears obstacles: A Dev note: FIXME: This should be split into 3->9 and 9->2 strats. |
From: 4
Bottom Right Door
To: 2
Far Left Door
Gain max run speed using a runway in the neighboring room, and jump through the door. With this amount of speed, it is possible to make it across without any tanks. Entrance condition: {
"comeInBlueSpinning": {
"minExtraRunSpeed": "$7.0",
"unusableTiles": 1
}
}Requires: {
"notable": "Reverse Speedball"
}
"canTrickyJump"
"canSpeedball"
{
"heatFrames": 370
} |
From: 4
Bottom Right Door
To: 2
Far Left Door
Gain high run speed using a runway in the neighboring room, and jump through the door. With a precisely timed unmorph and a buffered shot to open the door, it is possible to just barely make it through with no tanks. After unmorphing, walk instead of running, to avoid bonking the door. Entrance condition: {
"comeInBlueSpinning": {
"minExtraRunSpeed": "$6.5",
"unusableTiles": 1
}
}Requires: {
"notable": "Reverse Speedball"
}
"canInsaneJump"
"canSpeedball"
{
"heatFrames": 392
} |
From: 4
Bottom Right Door
To: 2
Far Left Door
Break the speed blocks by jumping over the gap with blue speed and continuing through the room with a speedball. If entering with low speed, unmorph after killing the last Pirate at the bottom of the sloped section, in order to run and gain more speed for the rest of the room. Entrance condition: {
"comeInGettingBlueSpeed": {
"length": 1,
"openEnd": 0,
"minExtraRunSpeed": "$2.4"
}
}Requires: {
"notable": "Reverse Speedball"
}
"canSpeedball"
{
"heatFrames": 570
}Clears obstacles: A Dev note: A run speed of $2.3 can also work but with greater difficulty. FIXME: add strats for cross-room spring ball bounce (with momentum or temp blue) and Space Jump |
From: 4
Bottom Right Door
To: 2
Far Left Door
Spark left through the speed blocks, then run to the right and back to get speed to go through the rest. If performing the spark with low energy, there is a risk of ending the spark above the spikes or in front of the Pirate; to be safe, assuming Samus has heat protection, begin the shinespark at the Speed blocks with between 68 and 84 energy, or at least 101 energy; with a buffered crumble jump to the right, up to 89 energy can work. Entrance condition: {
"comeInShinecharged": {}
}Requires: {
"shineChargeFrames": 85
}
{
"notable": "Reverse Spark"
}
"canShinechargeMovement"
"canHorizontalShinespark"
{
"or": [
{
"shinespark": {
"frames": 84,
"excessFrames": 10
}
},
{
"and": [
"h_heatProof",
"canControlShinesparkEnd",
{
"shinespark": {
"frames": 84,
"excessFrames": 45
}
}
]
}
]
}
{
"heatFrames": 715
}
{
"or": [
"h_speedDash",
{
"and": [
"h_speedButSlow",
{
"heatFrames": 270
}
]
}
]
}
"h_getBlueSpeedMaxRunway"
{
"or": [
"canSpeedball",
{
"heatFrames": 15
}
]
}Clears obstacles: A |
|
Either jump over a Cacatac or tank a spike hit. Perform a mid-air spark through the speed blocks. Then run to the right and back to get speed to go through the rest. If performing the spark with low energy, there is a risk of ending the spark above the spikes or in front of the Pirate; to be safe, assuming Samus has heat protection, begin the shinespark with between 73 and 88 energy, or at least 106 energy; with a buffered crumble jump to the right, up to 94 energy can work. Entrance condition: {
"comeInShinecharging": {
"length": 5,
"openEnd": 1
}
}Requires: {
"notable": "Reverse Spark"
}
"canShinechargeMovementTricky"
"canTrickyJump"
{
"or": [
{
"enemyDamage": {
"enemy": "Cacatac",
"type": "spike",
"hits": 1
}
},
"canBePatient"
]
}
{
"or": [
{
"shinespark": {
"frames": 88,
"excessFrames": 11
}
},
{
"and": [
"h_heatProof",
"canControlShinesparkEnd",
{
"shinespark": {
"frames": 88,
"excessFrames": 44
}
}
]
}
]
}
{
"heatFrames": 825
}
{
"or": [
"h_speedDash",
{
"and": [
"h_speedButSlow",
{
"heatFrames": 270
}
]
}
]
}
"h_getBlueSpeedMaxRunway"
{
"or": [
"canSpeedball",
{
"heatFrames": 15
}
]
}Clears obstacles: A Dev note: The canBePatient represents retrying until RNG works out to be able to jump over one of the Cacatacs without taking a hit. There is a possibility of getting a lucky drop from one of the two Pirates; but since it is low probability, we don't model it. The speedball exit is technically not a valid way to leave normally (e.g. in case the next room is heated and Samus needs to jump); but if necessary, it is possible to unmorph near the transition. FIXME: This should be split into 5->9 and 9->2 strats. |
From: 1
Left Door
To: 5
Spring Ball Maze Junction (Past the Bomb Blocks)
Spacejump through the room and break the bomb blocks in the Morph tunnel with Speedbooster. It is very helpful for the final jump to be close to the missile platform, to be as close to the tunnel as possible when Morphing. Entrance condition: {
"comeInBlueSpinning": {
"minExtraRunSpeed": "$6.E",
"unusableTiles": 0
}
}Requires: {
"notable": "Air Speedball"
}
"canPreciseSpaceJump"
"canInsaneJump"
"canLateralMidAirMorph"
"canSpeedball"
"canMomentumConservingMorph"
{
"heatFrames": 110
}Dev note: This is possible with less extra speed but where you jump changes with your speed and room entry. |
Come In Getting Blue Speed, Space Jump Through Morph Tunnel
(Extreme)
Lower Norfair Spring Ball Maze
From: 1
Left Door
To: 5
Spring Ball Maze Junction (Past the Bomb Blocks)
Spacejump through the room and break the bomb blocks in the Morph tunnel with Speedbooster. It is very helpful for the final jump to be close to the missile platform, to be as close to the tunnel as possible when Morphing. Entrance condition: {
"comeInGettingBlueSpeed": {
"length": 5,
"openEnd": 1,
"minExtraRunSpeed": "$5.B"
}
}Requires: {
"notable": "Air Speedball"
}
"canPreciseSpaceJump"
"canInsaneJump"
"canLateralMidAirMorph"
"canSpeedball"
"canMomentumConservingMorph"
{
"heatFrames": 110
} |
From: 6
Junction By Left Door (Right of Pit)
To: 5
Spring Ball Maze Junction (Past the Bomb Blocks)
Jump and Morph with a speedball to enter the morph tunnel and then use SpringBall to break the bomb blocks. Requires: {
"notable": "Air Speedball"
}
{
"getBlueSpeed": {
"usedTiles": 26,
"gentleDownTiles": 2,
"openEnd": 1
}
}
"canSpeedball"
"canLateralMidAirMorph"
"h_useSpringBall"
{
"heatFrames": 160
}Clears obstacles: B |
From: 4
Junction Right of Power Bomb Blocks
To: 8
Junction Below Top Right Door
Requires: {
"obstaclesCleared": [
"D"
]
}
"h_heatProof"
{
"or": [
{
"and": [
{
"getBlueSpeed": {
"usedTiles": 20,
"openEnd": 1
}
},
"canSpeedball"
]
},
{
"and": [
"h_additionalBomb",
"h_bombThings"
]
}
]
}
{
"canShineCharge": {
"usedTiles": 25,
"steepDownTiles": 4,
"openEnd": 1
}
}
"canShinechargeMovementTricky"
"canOffScreenMovement"
"h_spikeSuitSpikeHitLeniency"
{
"spikeHits": 1
}
"canTrickySpikeSuit"
{
"shinespark": {
"frames": 4,
"excessFrames": 4
}
} |
From: 4
Junction Right of Power Bomb Blocks
To: 8
Junction Below Top Right Door
Requires: {
"obstaclesCleared": [
"D"
]
}
{
"getBlueSpeed": {
"usedTiles": 20,
"openEnd": 1
}
}
"canSpeedball"
{
"or": [
"h_useSpringBall",
{
"hibashiHits": 1
}
]
}
{
"heatFrames": 300
} |
From: 5
Junction Below Shot Block
To: 8
Junction Below Top Right Door
Break the Power Bomb statue leaving 1 row of blocks. Partially clip beneath the Power Bomb blocks and the sold tiles beneath. Wait for a Dessgeega to jump over head and jump into it. The left ceiling Dessgeega works better. Aim down after jumping in order to fully boost over the solid statue. Damage boost to the right and use i-frames to run through all of the enemies. Begin shortcharging while running through the Dessgeegas for a speedball. It may help to end the damage boost early, but then it becomes more difficult to stutter for the shortcharge. Requires: {
"notable": "HiJumpless Statue Clip Damage Boost"
}
{
"obstaclesNotCleared": [
"A"
]
}
"h_usePowerBomb"
"canPartialFloorClip"
"canCeilingClip"
"canTrickyJump"
"canHorizontalDamageBoost"
"canUseIFrames"
{
"getBlueSpeed": {
"usedTiles": 16,
"openEnd": 1
}
}
"canSpeedball"
{
"enemyDamage": {
"enemy": "Dessgeega",
"type": "contact",
"hits": 1
}
}
{
"heatFrames": 390
}
{
"or": [
"h_useSpringBall",
{
"hibashiHits": 1
}
]
} |
From: 5
Junction Below Shot Block
To: 8
Junction Below Top Right Door
Break the Power Bomb statue leaving 1 row of blocks. Partially clip beneath the Power Bomb blocks and the sold tiles beneath. Wait for a Dessgeega to jump over head and jump into it. The left ceiling Dessgeega works better. Damage boost to the right and use i-frames to run through all of the enemies. Begin shortcharging while running through the Dessgeegas for a speedball. It may help to end the damage boost early, but then it becomes more difficult to stutter for the shortcharge. Requires: {
"notable": "Statue Clip Damage Boost"
}
{
"obstaclesNotCleared": [
"A"
]
}
"h_usePowerBomb"
"HiJump"
"canPartialFloorClip"
"canCeilingClip"
"canHorizontalDamageBoost"
"canUseIFrames"
{
"getBlueSpeed": {
"usedTiles": 16,
"openEnd": 1
}
}
"canSpeedball"
{
"enemyDamage": {
"enemy": "Dessgeega",
"type": "contact",
"hits": 1
}
}
{
"heatFrames": 390
}
{
"or": [
"h_useSpringBall",
{
"hibashiHits": 1
}
]
} |
From: 9
G-Mode Morph, Left of Morph Tunnel (Off-Camera)
To: 2
Top Right Door
Use Speedbooster to break the bomb block near the item to collect it and then again to speedball back to the door. Requires: "canGMode"
"h_heatProof"
"canOffScreenMovement"
{
"getBlueSpeed": {
"usedTiles": 20,
"steepDownTiles": 4,
"openEnd": 1
}
}
"canChainTemporaryBlue"
"canTrickyJump"
"canSpeedball"
{
"or": [
"canInsaneJump",
"h_useSpringBall",
{
"ammo": {
"type": "PowerBomb",
"count": 1
}
},
{
"hibashiHits": 1
},
{
"obstaclesCleared": [
"E"
]
}
]
}Clears obstacles: B Collects items: 3 |
|
Requires: {
"getBlueSpeed": {
"usedTiles": 22,
"openEnd": 0
}
}
"canSpeedball"
"canChainTemporaryBlue"
Exit condition: {
"leaveWithTemporaryBlue": {}
}Unlocks doors: {"types":["ammo"],"requires":[]} |
|
This speedball is harder with Phantoon alive and has a shorter runway because of the robot standing in the way. Requires: {
"getBlueSpeed": {
"usedTiles": 22,
"openEnd": 0
}
}
"canSpeedball"Clears obstacles: A |
|
This speedball is easier with Phantoon dead, since you can push the robots all the way left. It's even possible to setup the short hop mockball by bonking the center platform. Requires: "h_getBlueSpeedMaxRunway" "canSpeedball" "f_DefeatedPhantoon" Clears obstacles: A |
|
Entrance condition: {
"comeInBlueSpinning": {
"maxExtraRunSpeed": "$2.8",
"unusableTiles": 1
}
}Requires: "canSpeedball" "canCarefulJump" "canSlowShortCharge" Clears obstacles: A |
From: 1
Top Left Door
To: 1
Top Left Door
Use SpeedBooster to construct a structure for Moondancing that has 1 chest height block and 1 head height block to the right of it and no other Speed blocks. Crystal Flash below the lower block, exactly pixel aligned with its right side, to standup and then begin Moondancing. After Samus sinks through the floor tiles, use Grapple to return to a standing position and count an additional 145 moonfalls. Then use Grapple to return to a crouch and wiggle right and Turn-Around Aim Cancel to escape to the right. Finally, shortcharge to break the remaining Speed blocks and reach the door. Requires: {
"notable": "Speed Block Moondance"
}
"h_CrystalFlash"
"canTrickyJump"
"canTurnaroundAimCancel"
{
"getBlueSpeed": {
"usedTiles": 16,
"steepDownTiles": 4,
"openEnd": 0
}
}
"canTemporaryBlue"
"canExtendedMoondance"
"canSpeedball"
"Grapple"Exit condition: {
"leaveWithStoredFallSpeed": {
"fallSpeedInTiles": 2
}
} |
From: 1
Top Left Door
To: 1
Top Left Door
Use SpeedBooster to construct a structure for Moondancing that has 1 chest height block and 1 head height block to the right of it and no other Speed blocks. Crystal Flash below the lower block, exactly pixel aligned with its right side, to standup and then begin Moondancing. After Samus sinks through the bottom tile, it is possible to use Grapple to return to a crouch and wiggle right and then Turn-Around Aim Cancel to escape to the right. Without Grapple, count to 174 Moonfalls and delicately Moonfall so as to remain crouched and then wiggle to the right. Finally, shortcharge to break the remaining Speed blocks and reach the door. Requires: {
"notable": "Speed Block Moondance"
}
"h_CrystalFlash"
"canTrickyJump"
"canTurnaroundAimCancel"
{
"getBlueSpeed": {
"usedTiles": 16,
"steepDownTiles": 4,
"openEnd": 0
}
}
"canTemporaryBlue"
"canSpeedball"
"canMoondance"
{
"or": [
"canCount",
"Grapple"
]
}Exit condition: {
"leaveWithStoredFallSpeed": {
"fallSpeedInTiles": 1
}
} |
From: 1
Top Left Door
To: 5
Top Right Item
Use SpeedBooster to construct a structure for Moondancing that has 1 chest height block and 1 head height block to the right of it and no other Speed blocks. Crystal Flash below the lower block, exactly pixel aligned with its right side, to standup and then begin Moondancing. After Samus sinks through the bottom tile, it is possible to use Grapple to return to a crouch and wiggle right and then Turn-Around Aim Cancel to escape to the right. Without Grapple, count to 174 Moonfalls and delicately Moonfall so as to remain crouched and then wiggle to the right. The Camera will not follow Samus after clipping. Requires: {
"notable": "Speed Block Moondance"
}
"h_CrystalFlash"
"canTrickyJump"
"canTurnaroundAimCancel"
{
"getBlueSpeed": {
"usedTiles": 16,
"steepDownTiles": 4,
"openEnd": 0
}
}
"canTemporaryBlue"
"canMoondance"
"canSpeedball"
{
"or": [
"canCount",
"Grapple"
]
}Clears obstacles: B |
From: 3
Bottom Left Door
To: 4
Bottom Chozo Item
Land on the crumble blocks while unmorphing, in order to retain temporary blue while falling, breaking the bomb blocks Roll most of the way into the morph tunnel to unlock the camera scroll, then roll back left, crouch, fire a shot, and follow it to the right, to clear the shot blocks. It is possible to keep a flash suit with this method. Entrance condition: {
"comeInSpeedballing": {
"runway": {
"length": 0,
"openEnd": 1
}
}
}Requires: {
"tech": "canTemporaryBlue"
}
{
"notable": "Missile Chozo Camera Unlock"
}
"canCameraManip"
"canHeroShot"Dev note: If we had a comeInWithSpeedball entrance condition, it should be used instead. |
From: 4
Bottom Chozo Item
To: 3
Bottom Left Door
Gain temporary blue, and bounce into the morph tunnel, using Spring Ball to reach the left side while retaining temporary blue. After bouncing up out of the tunnel, unmorph, aim down, and use a pause buffer to remorph and land or bounce on the door frame, chaining temporary blue into the next room. FIXME: This needs the item to be collected or unspawned, at least if using the long runway variant. Requires: {
"obstaclesNotCleared": [
"B"
]
}
{
"or": [
{
"and": [
"f_DefeatedPhantoon",
{
"canShineCharge": {
"usedTiles": 16,
"openEnd": 0
}
}
]
},
{
"and": [
{
"obstaclesCleared": [
"A"
]
},
{
"getBlueSpeed": {
"usedTiles": 35,
"openEnd": 1
}
},
{
"or": [
"f_DefeatedPhantoon",
"canSpeedball"
]
}
]
}
]
}
"canSpringBallBounce"
"canPauseRemorphTemporaryBlue"Exit condition: {
"leaveWithTemporaryBlue": {}
}Unlocks doors: {"types":["ammo"],"requires":[]} |
From: 4
Bottom Chozo Item
To: 3
Bottom Left Door
Use Temporary Blue to bounce into the Morph Tunnel with temp blue then continue to the bomb block using SpringBall. Just left of center of the pit is a good place to bounce for entering the tunnel. Requires either a tight shortcharge or clearing the power bomb blocks to open up more runway. Requires: {
"obstaclesNotCleared": [
"B"
]
}
{
"or": [
{
"and": [
"f_DefeatedPhantoon",
{
"canShineCharge": {
"usedTiles": 16,
"openEnd": 0
}
}
]
},
{
"and": [
{
"obstaclesCleared": [
"A"
]
},
{
"getBlueSpeed": {
"usedTiles": 35,
"openEnd": 1
}
},
{
"or": [
"f_DefeatedPhantoon",
"canSpeedball"
]
}
]
}
]
}
"canTemporaryBlue"
"canSpringBallBounce"Dev note: Killing phantoon only removes requirements for the strat. The runway is a bit longer with Phantoon killed and the Power Bomb blocks broken, but it shouldn't matter at this difficulty. FIXME: This needs the item to be collected or unspawned, at least if using the long runway variant. |
From: 2
Right Door
To: 1
Left Door
Jump at the end of the runway to kill the Bull with blue speed, or jump over it. Then gain a speedball to approach the door with temporary blue. Entrance condition: {
"comeInGettingBlueSpeed": {
"length": 8,
"openEnd": 1,
"steepUpTiles": 2
}
}Requires: "canSpeedball" Exit condition: {
"leaveWithTemporaryBlue": {}
}Unlocks doors: {"types":["ammo"],"requires":[]} |
|
Entrance condition: {
"comeInSpeedballing": {
"runway": {
"length": 13,
"openEnd": 0
}
}
}Clears obstacles: A |
|
Entrance condition: {
"comeInSpeedballing": {
"runway": {
"length": 3,
"openEnd": 0
}
}
}Clears obstacles: A |
From: 8
Item
To: 3
Bottom Left Door
Requires: {
"not": "f_DefeatedPhantoon"
}
"canRiskPermanentLossOfAccess"
{
"getBlueSpeed": {
"usedTiles": 14,
"steepUpTiles": 3,
"openEnd": 0
}
}
"canSpeedball"Clears obstacles: C |
From: 2
Bottom Left Door
To: 4
Top Right Doorway
Jump through the transition with blue speed. Perform a very short speedball to kill the bottom crab and get into position below the hole. Perform a gravity jump and use Spring Ball to bounce through the top of the hole. Use a pause buffer to remorph, also taking the opportunity to equip Gravity again. Then chain temporary blue into the next room. Entrance condition: {
"comeInGettingBlueSpeed": {
"length": 0,
"openEnd": 1,
"maxExtraRunSpeed": "$1.A"
}
}Requires: "canSpeedball" "canGravityJump" "canSpringBallBounce" "canPauseRemorphTemporaryBlue" Exit condition: {
"leaveWithTemporaryBlue": {}
}Unlocks doors: {"types":["ammo"],"requires":[]}Dev note: This can be done at higher run speeds, with greater precision or an earlier jump through the door. |
From: 5
Right Door
To: 7
Top Right Left Item
Depending on Samus' speed and position, either perform a speedball or an uncontrolled bounce onto the platform below the Speed blocks. Unmorph and continue holding up in order to break the Speed blocks while passing up through them. The top Speed blocks will respawn; to get on top of them, it can help to press against the wall (to discard blue speed) and then aim down to reduce Samus' hitbox. If available, using Grapple while aiming down can also help. Alternatively, if Samus breaks only the right column of Speed blocks, Samus can use the center left Speed block as a stepping stone. Be careful not to fall through the Speed blocks below as it will result in a softlock. Entrance condition: {
"comeInBlueSpinning": {
"minExtraRunSpeed": "$3.4",
"maxExtraRunSpeed": "$4.C",
"unusableTiles": 1
}
}Requires: {
"notable": "Suitless Blue Bomber"
}
"canSuitlessMaridia"
"HiJump"
"canSpeedball"
"canTrickySpringBallBounce"
"canMomentumConservingMorph"Dev note: Slightly lower or higher speeds could work but with greater difficulty. |
From: 5
Right Door
To: 7
Top Right Left Item
In the previous room, perform a relatively precise 1-tap in order to gain blue speed with momentum in a specific range, then spin jump through the door transition. Depending on Samus' speed and position, either perform a speedball or an uncontrolled bounce onto the platform below the Speed blocks. Unmorph and continue holding up in order to break the Speed blocks while passing up through them. The top Speed blocks will respawn; to get on top of them, it can help to press against the wall (to discard blue speed) and then aim down to reduce Samus' hitbox. If available, using Grapple while aiming down can also help. Alternatively, if Samus breaks only the right column of Speed blocks, Samus can use the center left Speed block as a stepping stone. Be careful not to fall through the Speed blocks below as it will result in a softlock. Entrance condition: {
"comeInBlueSpinning": {
"minExtraRunSpeed": "$4.0",
"maxExtraRunSpeed": "$4.3",
"unusableTiles": 1
}
}Requires: {
"notable": "Suitless Blue Bomber"
}
"canSuitlessMaridia"
"canTrickyDashJump"
"canSpeedball"
"canTrickySpringBallBounce"
"canMomentumConservingMorph" |
From: 1
Left Door
To: 4
Right Door
Entrance condition: {
"comeInBlueSpinning": {
"unusableTiles": 0
}
}Requires: "canSpeedball" |
From: 1
Left Door
To: 4
Right Door
Entrance condition: {
"comeInGettingBlueSpeed": {
"length": 0,
"openEnd": 1
}
}Requires: "h_waterGetBlueSpeed" "canSpeedball" "canTrickyJump" |
From: 1
Left Door
To: 4
Right Door
Enter the room in a spin jump with blue speed, and enter a speedball. Then chain temporary blue into the next room. Entrance condition: {
"comeInBlueSpinning": {
"unusableTiles": 0
}
}Requires: "canSpeedball" "canChainTemporaryBlue" Exit condition: {
"leaveWithTemporaryBlue": {}
}Unlocks doors: {"types":["ammo"],"requires":[]} |
From: 1
Left Door
To: 4
Right Door
Enter the room with blue speed, and jump into a speedball. Then chain temporary blue into the next room. Entrance condition: {
"comeInGettingBlueSpeed": {
"length": 0,
"openEnd": 1
}
}Requires: "h_waterGetBlueSpeed" "canSpeedball" "canTrickyJump" "canChainTemporaryBlue" Exit condition: {
"leaveWithTemporaryBlue": {}
}Unlocks doors: {"types":["ammo"],"requires":[]} |
From: 4
Right Door
To: 7
Right of Sand with Blue Speed
Entrance condition: {
"comeInSpeedballing": {
"runway": {
"length": 6,
"openEnd": 1
}
}
}Requires: "canSpeedball" |
From: 2
Top Right Door
To: 1
Bottom Left Door
Use a short speedball to destroy the top Choot or go under it. Then chain temporary blue into the next room. Entrance condition: {
"comeInGettingBlueSpeed": {
"length": 0,
"openEnd": 1,
"maxExtraRunSpeed": "$1.D"
}
}Requires: "canSpeedball" "canChainTemporaryBlue" Exit condition: {
"leaveWithTemporaryBlue": {}
}Unlocks doors: {"types":["ammo"],"requires":[]} |
|
Entrance condition: {
"comeInSpeedballing": {
"runway": {
"length": 0,
"openEnd": 1
}
}
}Requires: "h_underwaterChainTemporaryBlue" Clears obstacles: A |
|
Entrance condition: {
"comeInSpeedballing": {
"runway": {
"length": 0,
"openEnd": 1
}
}
}Requires: "h_underwaterChainTemporaryBlue" Clears obstacles: A |


