canSpringFling (Expert)

The ability to gain extra distance merely by turning Springball on or off. When equipping or unequipping Springball while Morphed, Samus' speed is reset. If rising (and not in liquid physics), the horizontal speed is set to full roll speed. If falling, the vertical speed is set to zero and horizontal speed is reset unless SpeedBooster is equipped.
Dependencies: canDisableEquipment
Strats ()
|

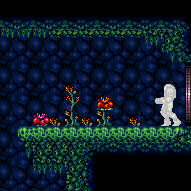
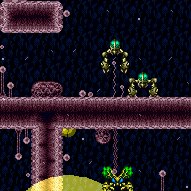
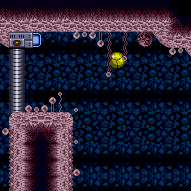
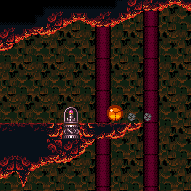
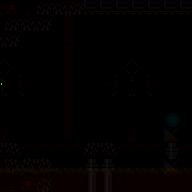
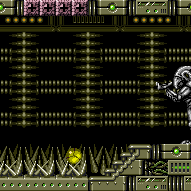
It is possible to cross the spike pit with spring flings and two spike hits. Pause then jump just before the fade out ends and turn Spring Ball off in order to get more horizontal distance at the start and avoid one spike hit. Turn Spring Ball off and on again while jumping on the spikes to get across to avoid another. Entrance condition: {
"comeInWithGMode": {
"mode": "any",
"morphed": true
}
}Requires: {
"or": [
"h_artificialMorphLongCeilingBombJump",
{
"and": [
"h_artificialMorphSpringBall",
{
"spikeHits": 4
}
]
},
{
"and": [
"h_artificialMorphSpringBall",
"h_artificialMorphBombHorizontally",
{
"spikeHits": 3
}
]
},
{
"and": [
"h_artificialMorphSpringFling",
"canTrickyJump",
{
"spikeHits": 2
}
]
},
{
"and": [
"h_artificialMorphIBJ",
{
"spikeHits": 10
},
{
"or": [
"h_artificialMorphBombHorizontally",
{
"spikeHits": 2
}
]
}
]
}
]
}Dev note: This is a softlock unless the item is Morph. The IBJ strat has 2 extra spike hits added as a leniency. |
From: 1
Top Left Door
To: 4
Top Junction (Right of Spikes)
Run and jump into an airball, pressing pause just as Samus hits the ceiling, in order to unequip Spring Ball to reset fall speed. Entrance condition: {
"comeInRunning": {
"speedBooster": "yes",
"minTiles": 28
}
}Requires: "h_speedJump" "canTrickyJump" "canLateralMidAirMorph" "canSpringFling" Dev note: This can be done with 26 tiles of other-room runway, but it would probably require a higher movement tech. |
From: 1
Top Left Door
To: 4
Top Junction (Right of Spikes)
Entrance condition: {
"comeInWithSpringBallBounce": {
"speedBooster": "yes",
"movementType": "controlled",
"remoteAndLandingMinTiles": [
[
30,
1
]
]
}
}Requires: "canTrickyJump" "canSpringFling" |
From: 1
Top Left Door
To: 5
Bottom Junction (Right of Boyons)
Place the PBs exactly two tiles left of the Morph tunnel. Be sure not to touch the item if this strat will be needed again in the future. It is possible to cross the spike pit with spring flings and two spike hits. Pause then jump just before the fade out ends and turn Spring Ball off in order to get more horizontal distance at the start and avoid one spike hit. Turn Spring Ball off and on again while jumping on the spikes to get across to avoid another. Entrance condition: {
"comeInWithGMode": {
"mode": "direct",
"morphed": true
}
}Requires: "canPowerBombItemOverloadPLMs"
{
"itemNotCollectedAtNode": 3
}
"canRiskPermanentLossOfAccess"
"h_artificialMorphPowerBomb"
"h_artificialMorphPowerBomb"
{
"or": [
{
"and": [
"h_artificialMorphSpringBall",
{
"spikeHits": 4
}
]
},
{
"and": [
"h_artificialMorphSpringBall",
"h_artificialMorphBombHorizontally",
{
"spikeHits": 3
}
]
},
{
"and": [
"h_artificialMorphSpringFling",
"canTrickyJump",
{
"spikeHits": 2
}
]
},
{
"and": [
"Morph",
{
"or": [
"SpaceJump",
{
"and": [
{
"spikeHits": 1
},
{
"or": [
"canUseIFrames",
{
"spikeHits": 1
}
]
}
]
}
]
}
]
}
]
} |
From: 1
Top Left Door
To: 5
Bottom Junction (Right of Boyons)
It is possible to cross the spike pit with spring flings and two spike hits. Pause then jump just before the fade out ends and turn Spring Ball off in order to get more horizontal distance at the start and avoid one spike hit. Turn Spring Ball off and on again while jumping on the spikes to get across to avoid another. Entrance condition: {
"comeInWithGMode": {
"mode": "any",
"morphed": true
}
}Requires: "h_artificialMorphBombs"
{
"or": [
{
"and": [
"h_artificialMorphSpringBall",
{
"spikeHits": 4
}
]
},
{
"and": [
"h_artificialMorphSpringBall",
"h_artificialMorphBombHorizontally",
{
"spikeHits": 3
}
]
},
{
"and": [
"h_artificialMorphSpringFling",
"canTrickyJump",
{
"spikeHits": 2
}
]
},
{
"and": [
"Morph",
{
"or": [
"SpaceJump",
{
"and": [
{
"spikeHits": 1
},
{
"or": [
"canUseIFrames",
{
"spikeHits": 1
}
]
}
]
}
]
}
]
},
{
"and": [
"h_artificialMorphIBJ",
{
"spikeHits": 10
},
{
"or": [
"h_artificialMorphBombHorizontally",
{
"spikeHits": 2
}
]
}
]
},
"h_artificialMorphLongCeilingBombJump"
]
}Dev note: The IBJ from spikes has 2 extra spike hits added as a leniency. |
From: 1
Top Left Door
To: 6
Right of Morph Tunnel with Temporary Blue
Run and jump into an airball, pressing pause just as Samus hits the ceiling, in order to unequip Spring Ball to reset fall speed. Entrance condition: {
"comeInGettingBlueSpeed": {
"length": 5,
"openEnd": 1,
"minExtraRunSpeed": "$5.8"
}
}Requires: "canTrickyJump" "canMomentumConservingMorph" "canSpringFling" "canTemporaryBlue" |
From: 1
Top Left Door
To: 6
Right of Morph Tunnel with Temporary Blue
Entrance condition: {
"comeInWithBlueSpringBallBounce": {
"movementType": "controlled",
"minExtraRunSpeed": "$5.8"
}
}Requires: "canTrickyJump" "canLateralMidAirMorph" "canSpringFling" "canTemporaryBlue" |
From: 1
Left Door
To: 2
Right Door
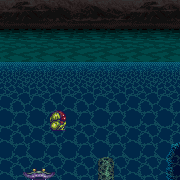
Build up run speed and then use controlled Spring Ball bounces to cross the ocean to the far right ledge, and then use Space Jump to reach the door. Mockball down the submerged ramp and begin Spring Ball bouncing under water using the platforms. Disable Spring Ball after the final jump once Samus starts falling again as a way to gain extra speed. Requires: {
"notable": "Spring Ball Bounce to the Door with SpaceJump"
}
"canTrickyJump"
"canSpaceJumpWaterBounce"
"canSpringBallBounce"
"canSpringFling"
"canMockball"
{
"or": [
"canDownGrab",
"canWallJump"
]
} |
|


Perform a double Spring Ball jump using a precisely timed bomb boost to propel Samus upward just long enough to get the mid-air Spring Ball jump. This needs to be done multiple times to cross the room with no other items; using Spring Flings to cross from peak to peak can reduce the required number of bomb into Spring Ball jumps to two or three. Entrance condition: {
"comeInWithGMode": {
"mode": "any",
"morphed": true
}
}Requires: "h_artificialMorphUnderwaterBombIntoSpringBallJump"
{
"or": [
"h_artificialMorphSpringFling",
"canBeVeryPatient"
]
} |
From: 2
Right Door
To: 3
Junction (Left side Pit)
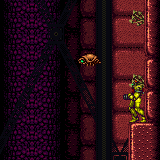
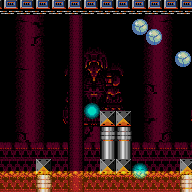
Perform a double Spring Ball jump using a precisely timed bomb boost to propel Samus upward just long enough to get the mid-air Spring Ball jump. This needs to be done multiple times to cross the room with no other items; using Spring Flings to cross from peak to peak can reduce the required number of bomb into Spring Ball jumps to just one or two. To Crystal Flash interrupt, it is required to avoid double hitting the Skultera with the Power Bomb, and to position the Crystal Flash so that the Skultera can hit Samus from above so it avoids the light orb. To do this, use the bottom-left Skultera, and move it off-camera at the far left end of its cycle. Go to the far right end of it's cycle and on the Crystal Flash on the sloped tile just below where it ends. Once the Skultera gets hit by the Power Bomb explosion, it will start moving, even while off-camera. Entrance condition: {
"comeInWithGMode": {
"mode": "direct",
"morphed": true
}
}Requires: "h_artificialMorphUnderwaterBombIntoSpringBallJump"
{
"or": [
"h_artificialMorphSpringFling",
"canBeVeryPatient"
]
}
"h_artificialMorphComplexRModeCrystalFlashInterrupt"
"canCameraManip"
{
"ammo": {
"type": "Missile",
"count": 10
}
}
{
"ammo": {
"type": "Super",
"count": 10
}
}
{
"ammo": {
"type": "PowerBomb",
"count": 5
}
}
{
"or": [
"h_partialEnemyDamageReduction",
{
"resourceAtMost": [
{
"type": "RegularEnergy",
"count": 19
}
]
},
{
"and": [
{
"resourceCapacity": [
{
"type": "RegularEnergy",
"count": 199
}
]
},
{
"resourceCapacity": [
{
"type": "ReserveEnergy",
"count": 199
}
]
}
]
}
]
}Dev note: Methods with more flexible movement items will instead be done at node 4, after which, they can be used to get here. FIXME: Add variants that can farm enough Energy to choot damage boost without enemy damage reduction or tanks. |
From: 4
Junction (Right side Pit)
To: 2
Right Door
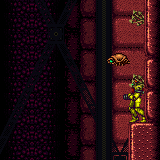
Freeze the Choot when it swings right on its jump. Quickly get on top of it by first getting onto the pillar to the left, or with a Spring Ball jump. Perform a precise spring ball jump to get to the far right ledge, while avoiding hitting the water surface. While on the ledge, stand on the raised ground to the right and jump to the surface, then space jump across the water to the left. Requires: "canTrickyUseFrozenEnemies"
"canTrickySpringBallJump"
{
"or": [
{
"and": [
"canResetFallSpeed",
"canTrickyJump"
]
},
"canStationaryLateralMidAirMorph",
"canSpringFling"
]
}
"canSpaceJumpWaterBounce"
"canWallJump" |
From: 4
Junction (Right side Pit)
To: 2
Right Door
Requires: "canSuitlessMaridia"
{
"or": [
{
"and": [
"HiJump",
"canSpringBallJumpMidAir"
]
},
{
"and": [
"HiJump",
"canTrickyUseFrozenEnemies"
]
},
{
"and": [
"canTrickyUseFrozenEnemies",
"canTrickySpringBallJump",
{
"or": [
"canResetFallSpeed",
"canStationaryLateralMidAirMorph",
"canSpringFling"
]
}
]
}
]
}
"h_storedSpark"
{
"shinespark": {
"frames": 11,
"excessFrames": 5
}
} |
|

With Spring Ball, pause then press right and jump just before the pause fully triggers. Disable Spring Ball in order to get a large horizontal boost. Pause again as soon as possible and re-enable Spring to reset fall speed. Entrance condition: {
"comeInWithGMode": {
"mode": "indirect",
"morphed": true
}
}Requires: "h_artificialMorphSpringFling"
"canInsaneJump"
{
"disableEquipment": "HiJump"
} |
|
With Spring Ball, pause then press right and jump just before the pause fully triggers. Disable Spring Ball in order to get a large horizontal boost. Pause again as soon as possible and re-enable Spring to reset fall speed. Entrance condition: {
"comeInWithGMode": {
"mode": "direct",
"morphed": true
}
}Requires: "h_artificialMorphSpringFling"
"canInsaneJump"
{
"disableEquipment": "HiJump"
}Collects items: 3 |
|
With Spring Ball, pause then press right and jump just before the pause fully triggers. Disable Spring Ball in order to get a large horizontal boost. Pause again as soon as possible and re-enable Spring to reset fall speed. Entrance condition: {
"comeInWithGMode": {
"mode": "any",
"morphed": true
}
}Requires: "h_artificialMorphSpringFling"
{
"disableEquipment": "HiJump"
}Collects items: 3 |
|
Requires: "canSpringFling" Collects items: 3 |
From: 2
Right Door
To: 2
Right Door
With Spring Ball, pause then press forward and jump just before the pause fully triggers. Disable Spring Ball in order to get a large horizontal boost. Pause again as soon as possible and re-enable Spring to reset fall speed. Entrance condition: {
"comeInWithGMode": {
"mode": "direct",
"morphed": true
}
}Requires: "canRemoteAcquire"
"h_artificialMorphSpringFling"
"canInsaneJump"
{
"disableEquipment": "HiJump"
}Collects items: 3 |
|
With Spring Ball, pause then press right and jump just before the pause fully triggers. Disable Spring Ball in order to get a large horizontal boost. Pause again as soon as possible and re-enable Spring to reset fall speed. Entrance condition: {
"comeInWithGMode": {
"mode": "any",
"morphed": true
}
}Requires: "h_artificialMorphSpringFling"
{
"disableEquipment": "HiJump"
}Collects items: 3 |
|
Requires: "canSpringFling" Collects items: 3 |
|

With Spring Ball, pause then press right and jump just before the pause fully triggers. Disable Spring Ball in order to get a large horizontal boost. Pause again as soon as possible and re-enable Spring to reset fall speed. Requires: "canSpringFling"
"canInsaneJump"
{
"disableEquipment": "HiJump"
}
{
"obstaclesNotCleared": [
"A",
"B",
"C"
]
}Collects items: 3 |
From: 2
Right Door
To: 1
Left Door
Artificial morph on entry to land on the doorsill. From the left edge, pause then press left and jump just before the pause fully triggers. Disable Spring Ball in order to get a large horizontal boost. Entrance condition: {
"comeInWithGMode": {
"mode": "direct",
"morphed": false
}
}Requires: "canArtificialMorph"
"h_artificialMorphSpringFling"
{
"disableEquipment": "HiJump"
} |
From: 1
Left Door
To: 4
Right Hidden Item


Gain temporary blue at the end of the runway. Then spring ball bounce through the tunnel. Press pause while exiting the tunnel. If Samus bounced far enough right, disable spring ball (a 'spring fling') to make it directly onto the item pedestal, chaining temporary blue from there. Otherwise, unpause without disabling spring ball, and chain temporary blue by landing on the ground. Entrance condition: {
"comeInShinecharging": {
"length": 3,
"openEnd": 0
}
}Requires: "canTrickyJump" "canChainTemporaryBlue" "canSpringBallBounce" "canSpringFling" Collects items: 3 Dev note: Technically, it is always seems possible to reach the item pedestal with a spring fling, but without a bounce far to the right it requires an earlier pause press (before exiting the tunnel); this can be hard to prepare for since the earlier pause won't work if the bounce happens to be further right. |
From: 1
Left Door
To: 4
Right Hidden Item

Gain temporary blue at the end of the runway. Then spring ball bounce through the tunnel. Press pause while exiting the tunnel. If Samus bounced far enough right, disable spring ball (a 'spring fling') to make it directly onto the item pedestal, chaining temporary blue from there. Otherwise, unpause without disabling spring ball, and chain temporary blue by landing on the ground. Entrance condition: {
"comeInWithTemporaryBlue": {}
}Requires: "canTrickyJump" "canChainTemporaryBlue" "canSpringBallBounce" "canSpringFling" Collects items: 3 Dev note: Technically, it is always seems possible to reach the item pedestal with a spring fling, but without a bounce far to the right it requires an earlier pause press (before exiting the tunnel); this can be hard to prepare for since the earlier pause won't work if the bounce happens to be further right. |
From: 1
Top Left Door
To: 1
Top Left Door
Fall past the first bug, wait for the second to spawn before rolling off the ledge. Get into the tube with an IBJ, bomb boost Spring Ball jump, or HiJump Spring Fling. Touch the item then roll out of the tube before exiting G-mode to remote acquire the item. Entrance condition: {
"comeInWithGMode": {
"mode": "direct",
"morphed": true
}
}Requires: "canRemoteAcquire"
{
"or": [
"h_artificialMorphLongIBJ",
"h_artificialMorphSpringBallBombJump",
{
"and": [
"HiJump",
"h_artificialMorphSpringFling"
]
}
]
}Collects items: 4 |
|
Roll under the first bug, wait for the second to spawn before rolling off the ledge. IBJ, bomb boost spring ball jump, or HiJump Spring Fling into the pipe. Entrance condition: {
"comeInWithGMode": {
"mode": "any",
"morphed": true
}
}Requires: {
"or": [
"h_artificialMorphLongIBJ",
"h_artificialMorphSpringBallBombJump",
{
"and": [
"HiJump",
"h_artificialMorphSpringFling"
]
}
]
} |
From: 2
Top Right Door
To: 1
Top Left Door
Fall past the first bug, wait for the second to spawn before rolling off the ledge. Get into the tube with an IBJ, bomb boost Spring Ball jump, or HiJump Spring Fling. Touch the item then roll out of the tube before exiting G-mode to remote acquire the item. Entrance condition: {
"comeInWithGMode": {
"mode": "direct",
"morphed": true
}
}Requires: "canRemoteAcquire"
{
"or": [
"h_artificialMorphLongIBJ",
"h_artificialMorphSpringBallBombJump",
{
"and": [
"HiJump",
"h_artificialMorphSpringFling"
]
}
]
}Collects items: 4 |
|
Fall past the first bug, wait for the second to spawn before rolling off the ledge. IBJ, bomb boost spring ball jump, or HiJump Spring Fling into the pipe. Entrance condition: {
"comeInWithGMode": {
"mode": "any",
"morphed": true
}
}Requires: {
"or": [
"h_artificialMorphLongIBJ",
"h_artificialMorphSpringBallBombJump",
{
"and": [
"HiJump",
"h_artificialMorphSpringFling"
]
}
]
} |
From: 3
Bottom Right Door
To: 4
Item (Through the Pipe)
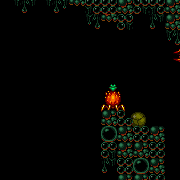
Use a Power Bombs to kill the first three hoppers, or carefully roll under the third one. The next hopper can be killed safely with many Bombs by staying on the top left of the raised ground; stay near the left edge of it without overhanging - otherwise it can hit Samus. Alternatively, lure and spring ball jump past it. Placing a Bomb next to a bug pipe can kill a bug inside of it. After killing a bug from a pipe, they will stop respawning there. The last hopper can be carefully killed with Bombs, killed with a Power Bomb, or dodged and lured off the edge. IBJ, bomb boost spring ball jump, or HiJump Spring Fling up to the pipe. Entrance condition: {
"comeInWithGMode": {
"mode": "indirect",
"morphed": true
}
}Requires: {
"or": [
"canTrickyDodgeEnemies",
{
"ammo": {
"type": "PowerBomb",
"count": 2
}
}
]
}
{
"or": [
{
"and": [
"h_artificialMorphIBJ",
{
"or": [
"canComplexGMode",
"h_artificialMorphPowerBomb"
]
}
]
},
"h_artificialMorphSpringBallBombJump",
{
"and": [
"HiJump",
"h_artificialMorphSpringFling"
]
}
]
}Dev note: This cannot be used to obtain the item remotely, as the item only spawns in direct G-mode. |
From: 3
Bottom Right Door
To: 4
Item (Through the Pipe)
Climb the room while safely killing the enemies by rolling into them. With Bombs alone, it is possible to kill the bugs in lower bug spawners by bombing underneath the pipe and placing a bomb at the peak of the boost. Note that Samus is vulnerable to damage while being boosted from a bomb. Entrance condition: {
"comeInWithGMode": {
"mode": "indirect",
"morphed": true
}
}Requires: "h_blueSuitGMode"
{
"or": [
"h_artificialMorphIBJ",
"h_artificialMorphSpringBallBombJump",
{
"and": [
"HiJump",
"h_artificialMorphSpringFling"
]
}
]
}Dev note: With other item combinations, another strat will be used instead. |
From: 1
Left Side - Top Door
To: 16
Direct G-Mode Morph (Top Item, Above Hopper Pit)

Roll directly through the bomb block on entry without rolling much in the morph tunnel to overload PLMs as little as possible. Avoiding the hoppers can be tricky; if possible, Power Bomb them or jump into them with Spring Ball. It is possible to kill the Zebs by placing a bomb next to the tube. IBJ from the lower hopper pit, or with HiJump, perform a Spring Fling from the right pillar by jumping immediately before the pause finishes and turning off Spring Ball, quickly pausing again and turning Spring Ball back on can help as well. Entrance condition: {
"comeInWithGMode": {
"mode": "direct",
"morphed": true
}
}Requires: {
"haveBlueSuit": {}
}
{
"or": [
"Morph",
"canTrickyDodgeEnemies",
"h_artificialMorphSpringBall",
{
"and": [
{
"or": [
"h_artificialMorphPowerBomb",
{
"enemyDamage": {
"enemy": "Sm. Sidehopper",
"type": "contact",
"hits": 1
}
}
]
},
{
"or": [
"h_artificialMorphPowerBomb",
{
"enemyDamage": {
"enemy": "Sm. Sidehopper",
"type": "contact",
"hits": 1
}
}
]
}
]
}
]
}
{
"or": [
"h_artificialMorphLongIBJ",
{
"and": [
"HiJump",
"h_artificialMorphSpringFling"
]
}
]
} |
From: 2
Right Side - Top Door
To: 16
Direct G-Mode Morph (Top Item, Above Hopper Pit)
Avoiding the hoppers can be tricky. Power Bomb them or lure them off-camera to the right while above. It is possible to kill the Zebs by placing a bomb next to the tube. IBJ from the lower hopper pit, or with HiJump, perform a Spring Fling from the right pillar by jumping immediately before the pause finishes and turning off Spring Ball, quickly pausing again and turning Spring Ball back on can help as well. Entrance condition: {
"comeInWithGMode": {
"mode": "direct",
"morphed": true
}
}Requires: {
"or": [
"Morph",
"canTrickyDodgeEnemies",
{
"and": [
"h_artificialMorphSpringBall",
{
"haveBlueSuit": {}
}
]
},
{
"and": [
{
"or": [
"h_artificialMorphPowerBomb",
{
"enemyDamage": {
"enemy": "Sm. Sidehopper",
"type": "contact",
"hits": 1
}
}
]
},
{
"or": [
"h_artificialMorphPowerBomb",
{
"enemyDamage": {
"enemy": "Sm. Sidehopper",
"type": "contact",
"hits": 1
}
}
]
}
]
}
]
}
{
"or": [
"h_artificialMorphLongIBJ",
{
"and": [
"HiJump",
"h_artificialMorphSpringFling"
]
}
]
} |
From: 3
Left Side - Top Middle Door (Main Entrance)
To: 16
Direct G-Mode Morph (Top Item, Above Hopper Pit)
IBJ from the lower hopper pit, or with HiJump, perform a Spring Fling from the right pillar by jumping immediately before the pause finishes and turning off Spring Ball, quickly pausing again and turning Spring Ball back on can help as well. Entrance condition: {
"comeInWithGMode": {
"mode": "direct",
"morphed": true
}
}Requires: {
"or": [
"Morph",
"canTrickyDodgeEnemies",
"h_artificialMorphPowerBomb",
{
"and": [
"h_artificialMorphSpringBall",
{
"haveBlueSuit": {}
}
]
},
{
"enemyDamage": {
"enemy": "Sm. Sidehopper",
"type": "contact",
"hits": 1
}
}
]
}
{
"or": [
"h_artificialMorphLongIBJ",
{
"and": [
"HiJump",
"h_artificialMorphSpringFling"
]
}
]
} |
From: 6
Right Side - Top Middle Door
To: 16
Direct G-Mode Morph (Top Item, Above Hopper Pit)


Avoid the Reo by jumping past it with quick short jumps, or slowly IBJ below it until it escapes above. IBJ from the lower hopper pit, or with HiJump, perform a Spring Fling from the right pillar by jumping immediately before the pause finishes and turning off Spring Ball, quickly pausing again and turning Spring Ball back on can help as well. Entrance condition: {
"comeInWithGMode": {
"mode": "direct",
"morphed": true
}
}Requires: {
"or": [
"Morph",
"canTrickyDodgeEnemies",
"h_artificialMorphPowerBomb",
{
"and": [
"h_artificialMorphSpringBall",
{
"haveBlueSuit": {}
}
]
},
{
"enemyDamage": {
"enemy": "Sm. Sidehopper",
"type": "contact",
"hits": 1
}
}
]
}
{
"or": [
"h_artificialMorphLongIBJ",
{
"and": [
"HiJump",
"h_artificialMorphSpringFling"
]
}
]
} |
From: 8
Right Side - Bottom Door
To: 1
Left Side - Top Door
While using multiple Power Bomb boost Spring Ball jumps, to climb the room, overload PLMs by moving through the camera scroll blocks in front of the passageway leading to the exit of Spore Spawn Supers. Note that one Power Bomb can be saved with a Spring Fling from the lower item pedestal; pause and just before the screen is fully black, jump, disable Spring ball, then buffer right on the unpause. Another can be saved by carefully jumping out of this morph passageway. Kill or carefully dodge the Sidehoppers at the top, then Power Bomb boost Spring Ball jump up to the top left door and exit G-Mode. Entrance condition: {
"comeInWithGMode": {
"mode": "any",
"morphed": true
}
}Requires: "h_artificialMorphSpringBallBombJump"
{
"ammo": {
"type": "PowerBomb",
"count": 2
}
}
{
"or": [
"h_artificialMorphSpringFling",
"h_artificialMorphPowerBomb"
]
}
{
"or": [
"canTrickyJump",
"h_artificialMorphPowerBomb"
]
}
{
"or": [
"canTrickyJump",
"h_artificialMorphPowerBomb",
{
"haveBlueSuit": {}
},
{
"enemyDamage": {
"enemy": "Sm. Sidehopper",
"type": "contact",
"hits": 1
}
}
]
}Dev note: With Morph, Bombs, or Spring Ball + HiJump, 8->15->1 will be used instead. FIXME: The spring fling variant would force collecting the item, if in direct G-mode. |
From: 8
Right Side - Bottom Door
To: 12
Bottom Chozo Item
Overload PLMs by moving through the camera scroll blocks in front of the passageway leading to the exit of Spore Spawn Supers. It is possible to get up with a Spring Fling; pause and just before the screen is fully black, jump, disable Spring ball, then buffer right on the unpause. Entrance condition: {
"comeInWithGMode": {
"mode": "any",
"morphed": true
}
}Requires: {
"or": [
"Morph",
"h_artificialMorphIBJ",
{
"and": [
"h_artificialMorphSpringBall",
"HiJump"
]
},
"h_artificialMorphSpringFling"
]
}Dev note: Using a Power Bomb boost into Spring Ball will not work, as it will make the blocks remain solid. FIXME: The spring fling variant would force collecting the item, if in direct G-mode. |
From: 8
Right Side - Bottom Door
To: 14
G-Mode Morph, Behind the Power Bomb Blocks
While using multiple Power Bomb boost Spring Ball jumps, to climb the room, overload PLMs by moving through the camera scroll blocks in front of the passageway leading to the exit of Spore Spawn Supers. Note that one Power Bomb can be saved with a Spring Fling from the lower item pedestal; pause and just before the screen is fully black, jump, disable Spring ball, then buffer right on the unpause. Another can be saved by carefully jumping out of this morph passageway. Drop into the Sidehopper pit and dodge the hoppers while getting up to the crumble block tunnel. Alternatively, carefully dodge the Reos below them and use a well-placed Power Bomb to kill both Reos and Sidehoppers. Entrance condition: {
"comeInWithGMode": {
"mode": "any",
"morphed": true
}
}Requires: {
"or": [
"h_artificialMorphSpringBallBombJump",
"h_artificialMorphSpringFling"
]
}
{
"or": [
"h_artificialMorphSpringBallBombJump",
"canTrickyJump"
]
}
{
"or": [
"canTrickyDodgeEnemies",
"h_artificialMorphPowerBomb",
{
"haveBlueSuit": {}
},
{
"enemyDamage": {
"enemy": "Sm. Sidehopper",
"type": "contact",
"hits": 1
}
}
]
}Clears obstacles: C Dev note: With Morph, Bombs, or Spring Ball + HiJump, 8->15->14 will be used instead. FIXME: The spring fling variant would force collecting the item, if in direct G-mode, unless leaving through 4. |
From: 8
Right Side - Bottom Door
To: 15
G-Mode Morph Junction (Middle Right)
If climbing the room with Spring Ball bomb boosts, note that one Power Bomb can be saved with a Spring Fling; pause and just before the screen is fully black, jump, disable Spring ball, then buffer right on the unpause. Another can be saved by carefully jumping out of the morph passageway in front of the off-screen Super block. Entrance condition: {
"comeInWithGMode": {
"mode": "any",
"morphed": true
}
}Requires: {
"or": [
"h_artificialMorphIBJ",
"Morph",
{
"and": [
"h_artificialMorphSpringBall",
"HiJump"
]
},
{
"and": [
"h_artificialMorphSpringFling",
{
"or": [
"h_artificialMorphSpringBallBombJump",
"canTrickyJump"
]
}
]
}
]
}Dev note: This strat does not have a Power Bomb Spring Ball jump option to avoid the Spring Fling, because it would solidify the block and make 8->15->12 unsound. These strats are split off and don't stop at 15 first. FIXME: The spring fling variant would force collecting the item, if in direct G-mode, unless leaving through 4. |
From: 8
Right Side - Bottom Door
To: 16
Direct G-Mode Morph (Top Item, Above Hopper Pit)
Climb the room while avoiding the Reo and the camera scroll block against the wall in front of the off-screen Super tunnel. IBJ from the lower hopper pit, or with HiJump, perform a Spring Fling from the right pillar by jumping immediately before the pause finishes and turning off Spring Ball, quickly pausing again and turning Spring Ball back on can help as well. Entrance condition: {
"comeInWithGMode": {
"mode": "direct",
"morphed": true
}
}Requires: {
"or": [
"Morph",
"canTrickyDodgeEnemies",
"h_artificialMorphPowerBomb",
{
"and": [
"h_artificialMorphSpringBall",
{
"haveBlueSuit": {}
}
]
},
{
"enemyDamage": {
"enemy": "Sm. Sidehopper",
"type": "contact",
"hits": 1
}
}
]
}
{
"or": [
"h_artificialMorphLongIBJ",
{
"and": [
"HiJump",
"h_artificialMorphSpringFling"
]
}
]
} |
From: 15
G-Mode Morph Junction (Middle Right)
To: 10
Top Item (Above Hopper Pit)
Perform a Spring Fling from the right pillar by jumping immediately before the pause finishes and turning off Spring Ball, quickly pausing again and turning Spring Ball back on can help as well. Requires: "canGMode"
"HiJump"
"h_artificialMorphSpringFling"
{
"or": [
"canTrickyDodgeEnemies",
"h_artificialMorphPowerBomb",
{
"and": [
"h_artificialMorphSpringBall",
{
"haveBlueSuit": {}
}
]
},
{
"enemyDamage": {
"enemy": "Sm. Sidehopper",
"type": "contact",
"hits": 1
}
}
]
} |
From: 17
Direct G-Mode Morph Junction (Middle Item)
To: 1
Left Side - Top Door


Fully overload PLMs with the item before climbing the room. The hardest part is getting past the Reo without Power Bombs, if it is stuck in the stairwell just above the door. Either manipulate it until it can escape, get it stuck swooping in the top right corner of the stairwell then kill it with Bombs, or avoid it entirely, and go up through the crumble blocks to the left after manipulating the Sidehoppers to be off-camera at the right of their pit. Avoiding the top Sidehoppers without Power Bombs can also be tricky; if starting at the top of the room, it may help to lure them to the left before going down the room. For safety, it is also possible to lure the hoppers to the left from below with several IBJs or HiJump and Spring Ball. Requires: "canRemoteAcquire"
{
"or": [
"Morph",
"h_artificialMorphIBJ",
{
"and": [
"HiJump",
"h_artificialMorphSpringBall"
]
},
{
"and": [
"h_artificialMorphSpringBallBombJump",
{
"ammo": {
"type": "PowerBomb",
"count": 2
}
},
{
"or": [
"h_artificialMorphPowerBomb",
"h_artificialMorphSpringFling"
]
},
{
"or": [
"h_artificialMorphPowerBomb",
"canTrickyJump"
]
}
]
}
]
}
{
"or": [
"Morph",
"canComplexGMode",
{
"and": [
"canTrickyDodgeEnemies",
"h_artificialMorphSpringBall"
]
},
{
"and": [
"h_artificialMorphSpringBall",
{
"haveBlueSuit": {}
}
]
},
"h_artificialMorphPowerBomb",
{
"enemyDamage": {
"enemy": "Reo",
"type": "contact",
"hits": 1
}
}
]
}
{
"or": [
"Morph",
"canTrickyDodgeEnemies",
"h_artificialMorphPowerBomb",
{
"and": [
"h_artificialMorphSpringBall",
{
"haveBlueSuit": {}
}
]
},
{
"enemyDamage": {
"enemy": "Sm. Sidehopper",
"type": "contact",
"hits": 1
}
}
]
}Collects items: 11 |
From: 17
Direct G-Mode Morph Junction (Middle Item)
To: 4
Left Side - Door Behind Power Bomb Blocks
Fully overload PLMs with the item before climbing the room. The hardest part is getting past the Reo without Power Bombs, if it is stuck in the stairwell just above the door. Either manipulate it until it can escape, get it stuck swooping in the top right corner of the stairwell then kill it with Bombs, or avoid it entirely, and go up through the crumble blocks to the left after manipulating the Sidehoppers to be off-camera at the right of their pit. Dodge or kill the Sidehoppers then go through the crumble block before exiting G-mode. Requires: "canRemoteAcquire"
{
"or": [
"Morph",
"h_artificialMorphIBJ",
{
"and": [
"HiJump",
"h_artificialMorphSpringBall"
]
},
{
"and": [
{
"or": [
"h_artificialMorphSpringBallBombJump",
"h_artificialMorphSpringFling"
]
},
{
"or": [
"h_artificialMorphSpringBallBombJump",
"canTrickyJump"
]
}
]
}
]
}
{
"or": [
"Morph",
"canComplexGMode",
{
"and": [
"canTrickyDodgeEnemies",
"h_artificialMorphSpringBall"
]
},
{
"and": [
"h_artificialMorphSpringBall",
{
"haveBlueSuit": {}
}
]
},
"h_artificialMorphPowerBomb",
{
"enemyDamage": {
"enemy": "Reo",
"type": "contact",
"hits": 1
}
}
]
}Collects items: 11 |
From: 17
Direct G-Mode Morph Junction (Middle Item)
To: 4
Left Side - Door Behind Power Bomb Blocks
Fully overload PLMs with the item before climbing the room. The hardest part is getting past the Reo without Power Bombs, if it is stuck in the stairwell just above the door. Either manipulate it until it can escape, get it stuck swooping in the top right corner of the stairwell then kill it with Bombs, or avoid it entirely, and go up through the crumble blocks to the left after manipulating the Sidehoppers to be off-camera at the right of their pit. Dodge or kill the Sidehoppers then go through the crumble block. Place a Power Bomb then quickly exit G-mode before it explodes to break the Power Bomb blocks. Requires: "canRemoteAcquire"
{
"or": [
"Morph",
"h_artificialMorphIBJ",
{
"and": [
"HiJump",
"h_artificialMorphSpringBall"
]
},
{
"and": [
{
"or": [
"h_artificialMorphSpringBallBombJump",
"h_artificialMorphSpringFling"
]
},
{
"or": [
"h_artificialMorphSpringBallBombJump",
"canTrickyJump"
]
}
]
}
]
}
{
"or": [
"Morph",
"canComplexGMode",
{
"and": [
"canTrickyDodgeEnemies",
"h_artificialMorphSpringBall"
]
},
"h_artificialMorphPowerBomb",
{
"and": [
"h_artificialMorphSpringBall",
{
"haveBlueSuit": {}
}
]
},
{
"enemyDamage": {
"enemy": "Reo",
"type": "contact",
"hits": 1
}
}
]
}
"h_artificialMorphPowerBomb"Collects items: 11 |
From: 2
Right Door
To: 3
Top Junction

X-Ray climb until Samus is a little over halfway off screen; the position is not precise. Face right, then do a turnaround buffer spin jump into a Spring Ball jump to reach the ledge. The pause input can be pressed at the same time as the turnaround. It helps to do an airball to gain horizontal speed. The jump input after pausing should not be buffered, in order to allow a little time for the spring fling horizontal speed to take effect. Entrance condition: {
"comeInWithDoorStuckSetup": {}
}Requires: "canXRayClimb" "canTrickyJump" "canLateralMidAirMorph" "canTrickySpringBallJump" "canSpringFling" |
From: 2
Right Door
To: 3
Safe Block in the Middle of the Room


Crouch jump and Spring Ball near the peak of the jump to hit the side of the spikes and boost up onto them. This is also possible with a springwall, or from standing on the spikes to avoid the crouch jump. With a very precise spring ball jump, it can also be done without a crouch jump. Requires: {
"noBlueSuit": {}
}
{
"or": [
"h_trickySpringwall",
{
"and": [
"h_maxHeightSpringBallJump",
"canNeutralDamageBoost"
]
},
{
"and": [
"canInsaneJump",
"canTrickySpringBallJump",
"canNeutralDamageBoost"
]
},
{
"and": [
{
"spikeHits": 1
},
"canTrickySpringBallJump",
"canTrickyJump",
"canNeutralDamageBoost"
]
}
]
}
{
"spikeHits": 1
} |
From: 3
Safe Block in the Middle of the Room
To: 2
Right Door
Morph, press pause, then press jump and forward just before the pause hits. Unequip Spring Ball to give Samus a large boost in horizontal speed, enough to clear the spikes. It can help to pause a second time to equip Spring Ball again. Requires: "canSpringFling" |
From: 7
Junction (Bottom of Room)
To: 6
Junction (Above Bottom Rippers)
Requires: "canTrickySpringBallJump"
{
"or": [
"canConsecutiveWallJump",
"HiJump",
{
"and": [
"canTrickyJump",
"canLateralMidAirMorph",
"canResetFallSpeed",
{
"or": [
{
"ammo": {
"type": "PowerBomb",
"count": 1
}
},
{
"ammo": {
"type": "Super",
"count": 1
}
},
{
"enemyDamage": {
"enemy": "Ripper",
"type": "contact",
"hits": 1
}
},
"canTrickyDodgeEnemies"
]
}
]
},
"canSpringFling"
]
}
{
"or": [
"canTrickyJump",
"canLateralMidAirMorph",
"canSpringwall"
]
} |
From: 1
Left Door
To: 2
Right Door
Wait for the pirates to move as far right as possible in order to kill them all with a single Power Bomb. Jump over Baby Kraid by pausing and holding jump and forward just before the pause fully triggers, then remove Spring Ball. After it starts moving to the left, move in to where it was, then Crystal Flash so that it will walk back into Samus and trigger reserves. Entrance condition: {
"comeInWithGMode": {
"mode": "direct",
"morphed": true
}
}Requires: "h_artificialMorphBombThings"
"h_artificialMorphSpringFling"
"h_artificialMorphTrickyRModeCrystalFlashInterrupt"
{
"ammo": {
"type": "Missile",
"count": 10
}
}
{
"ammo": {
"type": "Super",
"count": 5
}
}
{
"or": [
"h_fullEnemyDamageReduction",
{
"and": [
"h_partialEnemyDamageReduction",
{
"resourceAtMost": [
{
"type": "RegularEnergy",
"count": 49
}
]
}
]
},
{
"and": [
{
"resourceCapacity": [
{
"type": "RegularEnergy",
"count": 199
}
]
},
{
"resourceCapacity": [
{
"type": "ReserveEnergy",
"count": 199
}
]
}
]
}
]
}Clears obstacles: door_1 |
|
Wait on the right side of Baby Kraid for about 10 seconds so that he shoots the maximum amount of projectiles which will move to the right after exiting G-Mode. Jump over Baby Kraid by pausing and holding jump and forward just before the pause fully triggers, then remove Spring Ball. Alternatively, when it is as far left as possible, use a Power Bomb to boost up and hit the stationary, invisible spikes, then roll to the left and kill the pirates with another Power Bomb. To save a Power Bomb and take a bit more damage, roll through Baby Kraid then kill the left pirates with a Power Bomb. Only one is necessary when placing it next to the pirate when it is as far to the left as possible. Unmorph, freely kill Baby Kraid, then exit G-Mode. His projectiles should all shoot to the right. Entrance condition: {
"comeInWithGMode": {
"mode": "any",
"morphed": true
}
}Requires: {
"or": [
"h_artificialMorphSpringFling",
{
"enemyDamage": {
"enemy": "Mini-Kraid",
"type": "contact",
"hits": 1
}
},
{
"and": [
{
"or": [
"h_artificialMorphSpringBall",
"h_artificialMorphPowerBomb"
]
},
{
"enemyDamage": {
"enemy": "Mini-Kraid",
"type": "spike",
"hits": 10
}
}
]
}
]
}
"h_artificialMorphPowerBomb"Clears obstacles: A, door_2 |
From: 2
Right Door
To: 2
Right Door
Wait on the right side of Baby Kraid for about 10 seconds so that he shoots the maximum amount of projectiles. Jump over Baby Kraid by pausing and holding jump and forward just before the pause fully triggers, then remove Spring Ball. After it starts moving to the right, move in to where it was, then Crystal Flash so that it will walk back into Samus and trigger reserves. Entrance condition: {
"comeInWithGMode": {
"mode": "direct",
"morphed": true
}
}Requires: "h_artificialMorphSpringFling"
"h_artificialMorphTrickyRModeCrystalFlashInterrupt"
{
"ammo": {
"type": "Missile",
"count": 10
}
}
{
"ammo": {
"type": "Super",
"count": 5
}
}
{
"or": [
"h_fullEnemyDamageReduction",
{
"and": [
"h_partialEnemyDamageReduction",
{
"resourceAtMost": [
{
"type": "RegularEnergy",
"count": 49
}
]
}
]
},
{
"and": [
{
"resourceCapacity": [
{
"type": "RegularEnergy",
"count": 199
}
]
},
{
"resourceCapacity": [
{
"type": "ReserveEnergy",
"count": 199
}
]
}
]
}
]
}Clears obstacles: door_2 |
From: 1
Left Side - Top Door
To: 7
Top Right Door
Place a Power Bomb at the right edge of the runway to kill the Cacatac. It helps to delay placing it to also kill the Wavers. From the right edge, pause then press right and jump just before the pause fully triggers. Disable Spring Ball in order to get a large horizontal boost. Pause again as soon as possible and re-enable Spring to reset fall speed. Entrance condition: {
"comeInWithGMode": {
"mode": "any",
"morphed": true
}
}Requires: "h_artificialMorphPowerBomb"
"h_artificialMorphSpringFling"
"canInsaneJump"
{
"disableEquipment": "HiJump"
} |
|
Kill the Cacatac by shooting, jumping to the right to scroll the camera slightly, and returning. From the right edge, pause then press left and jump just before the pause fully triggers. Disable Spring Ball in order to get a large horizontal boost. Pause again as soon as possible and re-enable Spring to reset fall speed. Requires: "canHeroShot"
"canCameraManip"
"canSpringFling"
"canInsaneJump"
{
"disableEquipment": "HiJump"
} |
From: 6
Middle Right Door
To: 1
Left Side - Top Door

On entry, place a Power Bomb at the peak of a jump to kill the Cacatac without letting it place any projectiles. Without Power Bombs, either kill it with Bombs then jump over the projectiles it has spawned, or jump over it and land on one of the last pixels of the corner without touching it. From the left edge where the Cacatac was, pause then press left and jump just before the pause fully triggers. Disable Spring Ball in order to get a large horizontal boost. Pause again as soon as possible and re-enable Spring to reset fall speed. With the Cacatac alive, Samus can only use the last 4 pixels of the ledge; with the projectiles alone, she has 10 pixels available. Entrance condition: {
"comeInWithGMode": {
"mode": "any",
"morphed": true
}
}Requires: {
"or": [
"h_artificialMorphPowerBomb",
{
"and": [
"h_artificialMorphBombs",
"canComplexGMode"
]
},
"canTrickyGMode"
]
}
"h_artificialMorphSpringFling"
"canInsaneJump"
{
"disableEquipment": "HiJump"
} |
From: 7
Top Right Door
To: 1
Left Side - Top Door

Kill the Cacatac with a Power Bomb or Bombs, then jump over the projectiles it has spawned. Without a way to kill the Cacatac jump over it and land on one of the last pixels of the corner without touching it. From the left edge where the Cacatac was, pause then press left and jump just before the pause fully triggers. Disable Spring Ball in order to get a large horizontal boost. Pause again as soon as possible and re-enable Spring to reset fall speed. With the Cacatac alive, Samus can only use the last 4 pixels of the ledge; with the projectiles alone, she has 10 pixels available. Entrance condition: {
"comeInWithGMode": {
"mode": "any",
"morphed": true
}
}Requires: "canComplexGMode"
{
"or": [
"h_artificialMorphBombThings",
"canTrickyGMode"
]
}
"h_artificialMorphSpringFling"
"canInsaneJump"
{
"disableEquipment": "HiJump"
} |
|

From the left edge of the Cacatac's platform, pause then press left and jump just before the pause fully triggers. Disable Spring Ball in order to get a large horizontal boost. Pause again as soon as possible and re-enable Spring to reset fall speed. Requires: "canSpringFling"
"canInsaneJump"
{
"disableEquipment": "HiJump"
} |
|


Pause while crumble jumping, and quickly mid-air morph and equip Spring Ball, to obtain a boost in horizontal speed before mid-air Spring Ball jumping. Requires: "canCrumbleJump"
"canTrickySpringBallJump"
"canSpringFling"
"h_trickyToCarryFlashSuit"
{
"heatFrames": 270
}
{
"or": [
"canDash",
{
"and": [
{
"haveBlueSuit": {}
},
"canInsaneJump",
{
"heatFrames": 190
}
]
}
]
} |
|


Pause immediately on room entry, and bounce just before Samus would roll off the runway. Unequip Spring Ball, then pause again as soon as possible and re-equip Spring Ball. In the case of entering with minimal extra run speed ($1.7): The bounce should be done on the last possible frame; otherwise the timing for the first pause is frame-perfect (with a 2-frame window for the second pause). With a first-frame pause and last-frame bounce, the second pause has a 4-frame window. With a second-frame pause and last-frame bounce, the second pause has a 3-frame window. With a third-frame pause and last-frame bounce, the second pause is frame-perfect. Entrance condition: {
"comeInWithMockball": {
"speedBooster": "yes",
"remoteAndLandingMinTiles": [
[
4,
0
]
]
}
}Requires: "canSpringBallBounce"
"canSpringFling"
"canInsaneJump"
"canBeVeryPatient"
{
"heatFrames": 145
} |
|


Entrance condition: {
"comeInWithMockball": {
"speedBooster": "yes",
"remoteAndLandingMinTiles": [
[
5,
0
]
]
}
}Requires: "canSpringBallBounce"
"canSpringFling"
{
"heatFrames": 150
} |
|


Entrance condition: {
"comeInWithMockball": {
"speedBooster": "any",
"remoteAndLandingMinTiles": [
[
6.4375,
0
]
]
}
}Requires: "canSpringBallBounce"
"canSpringFling"
{
"heatFrames": 140
} |
|

Entrance condition: {
"comeInRunning": {
"speedBooster": "yes",
"minTiles": 3
}
}Requires: "h_speedJump"
"canMomentumConservingMorph"
"canSpringFling"
"h_unpauseKeepMomentum"
{
"heatFrames": 140
}Dev note: The momentum-conserving morph is not strictly required (particularly with longer runways) but makes it easier. |
|


Pause while crumble jumping, and quickly mid-air morph and equip Spring Ball, to obtain a boost in horizontal speed before mid-air Spring Ball jumping. Requires: "canCrumbleJump"
"canTrickySpringBallJump"
"canSpringFling"
"canInsaneJump"
"h_trickyToCarryFlashSuit"
{
"heatFrames": 280
}
{
"or": [
"canDash",
{
"heatFrames": 80
}
]
}Dev note: Compared to the other direction, this direction requires traveling one more tile horizontally, which makes it more difficult. |
|


Requires: "h_speedJump"
"canMomentumConservingMorph"
"canSpringFling"
{
"heatFrames": 190
} |
From: 2
Right Door
To: 1
Left Door

Entrance condition: {
"comeInWithGMode": {
"mode": "indirect",
"morphed": false
}
}Requires: {
"or": [
"SpaceJump",
{
"and": [
"HiJump",
"canSpeedyJump",
"canWallJump"
]
},
{
"and": [
"HiJump",
"canSpringBallJumpMidAir",
{
"or": [
{
"noBlueSuit": {}
},
{
"and": [
"Gravity",
{
"lavaFrames": 25
}
]
}
]
}
]
},
{
"and": [
{
"notable": "Spring Ball Bomb Boost"
},
{
"noBlueSuit": {}
},
"canSpringBallJumpMidAir",
"canUnmorphBombBoost",
"h_crouchJumpDownGrab",
{
"or": [
"canInsaneJump",
"h_additionalBomb"
]
}
]
},
{
"and": [
{
"or": [
{
"canShineCharge": {
"usedTiles": 15,
"openEnd": 2
}
},
"h_storedSpark"
]
},
"canShinechargeMovementComplex",
{
"or": [
{
"shinespark": {
"frames": 12,
"excessFrames": 2
}
},
{
"and": [
"h_speedJump",
{
"shinespark": {
"frames": 9,
"excessFrames": 3
}
}
]
}
]
}
]
},
{
"and": [
{
"notable": "Ceiling Mockball Spring Fling"
},
"h_speedJump",
"canInsaneJump",
"canMomentumConservingMorph",
"canSpringFling"
]
}
]
}
"h_heatedGModeOpenDifferentDoor" |
From: 2
Right Door
To: 2
Right Door


Touch the item as little as possible in order to prevent PLMs from being overloaded, so the platforms below remain solid. Entrance condition: {
"comeInWithGMode": {
"mode": "direct",
"morphed": false
}
}Requires: "canRemoteAcquire"
{
"or": [
"SpaceJump",
{
"and": [
"HiJump",
"canSpeedyJump",
"canWallJump"
]
},
{
"and": [
"HiJump",
"canSpringBallJumpMidAir",
{
"or": [
{
"noBlueSuit": {}
},
{
"and": [
"Gravity",
{
"lavaFrames": 25
}
]
}
]
}
]
},
{
"and": [
{
"notable": "Spring Ball Bomb Boost"
},
{
"noBlueSuit": {}
},
"canSpringBallJumpMidAir",
"canUnmorphBombBoost",
"h_crouchJumpDownGrab",
"canInsaneJump"
]
},
{
"and": [
{
"or": [
{
"canShineCharge": {
"usedTiles": 15,
"openEnd": 2
}
},
"h_storedSpark"
]
},
"canShinechargeMovementComplex",
{
"or": [
{
"shinespark": {
"frames": 12,
"excessFrames": 2
}
},
{
"and": [
"h_speedJump",
{
"shinespark": {
"frames": 9,
"excessFrames": 3
}
}
]
}
]
}
]
},
{
"and": [
{
"notable": "Ceiling Mockball Spring Fling"
},
"h_speedJump",
"canInsaneJump",
"canMomentumConservingMorph",
"canSpringFling"
]
}
]
}
"h_heatedDirectGModeLeaveSameDoor"Collects items: 3 Dev note: There is no leniency option for using an extra Power Bomb, because it will contribute to PLM overload. (2 PBs is technically barely possible) |
|
Position at the end of the runway (or up to 4 pixels away) at the top-right of the room, gain run speed, perform a last-frame jump and ceiling mockball, then equip or unequip Spring Ball in order to reset Samus' vertical speed and just barely make it onto the ledge with the item. Requires: {
"notable": "Ceiling Mockball Spring Fling"
}
"h_speedJump"
"canInsaneJump"
{
"heatFrames": 500
}
"canMomentumConservingMorph"
"canSpringFling"
{
"or": [
"h_heatProof",
"canBeVeryPatient"
]
} |
|
Entrance condition: {
"comeInWithGMode": {
"mode": "indirect",
"morphed": false
}
}Requires: "h_heatedGMode"
{
"or": [
"SpaceJump",
{
"and": [
"HiJump",
"canSpeedyJump",
"canWallJump"
]
},
{
"and": [
"HiJump",
"canSpringBallJumpMidAir",
{
"or": [
{
"noBlueSuit": {}
},
{
"and": [
"Gravity",
{
"lavaFrames": 25
}
]
}
]
}
]
},
{
"and": [
{
"notable": "Spring Ball Bomb Boost"
},
{
"noBlueSuit": {}
},
"canSpringBallJumpMidAir",
"canUnmorphBombBoost",
"h_crouchJumpDownGrab",
{
"or": [
"canInsaneJump",
"h_additionalBomb"
]
}
]
},
{
"and": [
{
"or": [
{
"canShineCharge": {
"usedTiles": 15,
"openEnd": 2
}
},
"h_storedSpark"
]
},
"canShinechargeMovementComplex",
{
"or": [
{
"shinespark": {
"frames": 12,
"excessFrames": 2
}
},
{
"and": [
"h_speedJump",
{
"shinespark": {
"frames": 9,
"excessFrames": 3
}
}
]
}
]
}
]
},
{
"and": [
{
"notable": "Ceiling Mockball Spring Fling"
},
"h_speedJump",
"canInsaneJump",
"canMomentumConservingMorph",
"canSpringFling"
]
}
]
}
{
"heatFrames": 90
}Clears obstacles: A Dev note: Goes to 3 because opening the gate mostly only makes sense when going back to the right for a longer runway or obtaining the item. FIXME: Variants with shinesparking or Geruta damage boost can be added. (Energy from immobile, CF, or energy free sparks) |
|
Entrance condition: {
"comeInWithGMode": {
"mode": "any",
"morphed": false
}
}Requires: "h_heatedGMode"
{
"or": [
"SpaceJump",
{
"and": [
"HiJump",
"canSpeedyJump",
"canWallJump"
]
},
{
"and": [
"HiJump",
"canSpringBallJumpMidAir",
{
"or": [
"canDash",
{
"and": [
{
"haveBlueSuit": {}
},
"Gravity"
]
}
]
}
]
},
{
"and": [
"canDash",
{
"notable": "Spring Ball Bomb Boost"
},
"canSpringBallJumpMidAir",
"canUnmorphBombBoost",
"h_crouchJumpDownGrab",
{
"or": [
"canInsaneJump",
"h_additionalBomb"
]
}
]
},
{
"and": [
{
"canShineCharge": {
"usedTiles": 15,
"openEnd": 2
}
},
"canShinechargeMovementComplex",
{
"or": [
{
"shinespark": {
"frames": 12,
"excessFrames": 2
}
},
{
"and": [
"h_speedJump",
{
"shinespark": {
"frames": 9,
"excessFrames": 3
}
}
]
}
]
}
]
},
{
"and": [
{
"notable": "Ceiling Mockball Spring Fling"
},
"h_speedJump",
"canInsaneJump",
"canMomentumConservingMorph",
"canSpringFling"
]
}
]
}
{
"heatFrames": 0
}Dev note: FIXME: Variants with Geruta damage boost can be added. (Energy from immobile or CF) |
|
Getting across the lava while artificially morphed requires an HBJ or Spring Fling. For the Spring Fling, jump immediately before the pause triggers. To save Energy, it is possible to kill to the Ripper at the far right, stand over where the drop will spawn and pause abuse to grab its Energy drop on G-mode exit. With a Power Bomb, place on the left edge when the Ripper is moving left, 2/3 of the way to the left edge. It is also possible to kill it with Screw Attack and a precise wall jump. Entrance condition: {
"comeInWithGMode": {
"mode": "any",
"morphed": true
}
}Requires: {
"or": [
{
"and": [
"h_artificialMorphSpringFling",
"canTrickyJump"
]
},
"h_artificialMorphHBJ",
{
"and": [
"Gravity",
"h_artificialMorphIBJ",
"h_artificialMorphBombHorizontally",
{
"lavaFrames": 160
}
]
},
{
"and": [
"Gravity",
"h_artificialMorphSpringBall",
{
"lavaFrames": 40
}
]
}
]
}
{
"or": [
"h_heatedGModeOpenDifferentDoor",
{
"and": [
"h_heatedGModePauseAbuse",
{
"or": [
{
"ammo": {
"type": "Super",
"count": 1
}
},
"h_artificialMorphPowerBomb",
{
"and": [
"ScrewAttack",
{
"or": [
"h_lavaProof",
"SpaceJump",
"canWallJump"
]
}
]
}
]
}
]
}
]
} |
|
Spring Fling or IBJ across the right pit and damage boost or lava dive in the second; to Spring Fling, jump immediately before the pause triggers. Entrance condition: {
"comeInWithGMode": {
"mode": "any",
"morphed": true
}
}Requires: {
"or": [
"Morph",
{
"and": [
"h_artificialMorphSpringFling",
"canTrickyJump"
]
},
{
"and": [
"h_artificialMorphIBJ",
"h_artificialMorphBombHorizontally"
]
},
{
"and": [
"Gravity",
"h_artificialMorphSpringBall",
{
"lavaFrames": 20
}
]
},
{
"and": [
"h_artificialMorphSpringBall",
{
"lavaFrames": 50
}
]
}
]
}
{
"or": [
{
"and": [
{
"notable": "Impressive Damage Boost"
},
"canHorizontalDamageBoost",
"canTrickyJump",
{
"enemyDamage": {
"enemy": "Boyon",
"type": "contact",
"hits": 1
}
}
]
},
{
"lavaFrames": 90
},
{
"and": [
"Gravity",
{
"lavaFrames": 35
}
]
}
]
}
"h_heatedGModeOpenDifferentDoor" |
|
Requires: {
"or": [
"f_DefeatedCrocomire",
{
"obstaclesCleared": [
"f_DefeatedCrocomire"
]
}
]
}
"can4HighMidAirMorph"
"canTrickySpringBallJump"
"canSpringFling"
{
"acidFrames": 50
} |
From: 1
Left Door
To: 4
Center Platform Junction
From the right edge of the top stair, pause then press right and jump just before the pause fully triggers and when the water is low. Disable Spring Ball in order to get a large horizontal boost. Entrance condition: {
"comeInWithGMode": {
"mode": "any",
"morphed": true
}
}Requires: "h_artificialMorphSpringFling"
"canTrickyJump"
{
"disableEquipment": "HiJump"
} |
From: 1
Left Door
To: 4
Center Platform Junction
Cross the room while in indirect G-Mode and the gate will not be there. From the right edge of the top stair, pause then press right and jump just before the pause fully triggers and when the water is low. Disable Spring Ball in order to get a large horizontal boost. Entrance condition: {
"comeInWithGMode": {
"mode": "indirect",
"morphed": true
}
}Requires: "h_artificialMorphSpringFling"
"canTrickyJump"
{
"disableEquipment": "HiJump"
}Clears obstacles: B Dev note: FIXME: It is possible but difficult to cross either of the moats with Grapple before PLMs are overloaded, but not both of them. |
|
Morph at the right edge of the top stair, pause then press right and jump just before the pause fully triggers and when the water is low. Disable Spring Ball in order to get a large horizontal boost. Requires: "canSpringFling"
"canTrickyJump"
{
"disableEquipment": "HiJump"
} |
From: 4
Center Platform Junction
To: 3
Junction Left of Green Gate
Requires: "canCarefulJump" "canLateralMidAirMorph" "canSpringFling" "h_speedJump" |
|


Carefully swing between the Rippers at the top of the room to the item. The last two swings are the hardest Morphing and unmorphing to reset Samus's fall speed can help give a bit more time to position the Rippers. It can help to Grapple the same Ripper again to get it in a better position. Position the third Ripper far to the right then fling to the fourth, which is far to the right and very close to the ceiling. Moving the fourth Ripper to the right a bit can also help in order to make the last fling less precise. Be careful not to fling directly into the ceiling, as it is easy to hit the uneven surface and fall. If Samus falls, it may be helpful to reset the room. Requires: {
"notable": "Indiana Jones Grapple (With Retries)"
}
"canUseEnemies"
"canPreciseGrapple"
"h_midAirShootUp"
{
"or": [
{
"and": [
"canInsaneJump",
"h_trickyToCarryFlashSuit"
]
},
{
"enemyDamage": {
"enemy": "Ripper 2 (green)",
"type": "contact",
"hits": 4
}
}
]
}
{
"or": [
{
"and": [
"HiJump",
"canSpringBallJumpMidAir"
]
},
{
"and": [
"canSpeedyJump",
"HiJump",
"canTrickyWallJump"
]
},
"h_trickySpringwall"
]
} |
|

Requires: "h_trickySpringwall" |
|
A particularly precise springwall. Aim the walljump at the bottom of the second sloped wall fixture, where it looks like you cant jump off of. Optimize pause timing, use an instant morph, and get a max height springball jump. A delayed wall jump helps. Requires: {
"notable": "Springwall"
}
"HiJump"
"h_trickySpringwall"
"canPreciseWallJump"
"can3HighWallMidAirMorph" |
From: 3
Bottom Right Door
To: 1
Top Left Door
Run on the the moving platform into a midair spring ball jump as far horizontal as possible. Unmorph or spring fling to reset fall speed can help. Requires: "canTrickyJump"
"canTrickySpringBallJump"
{
"or": [
"canDash",
"canSpringFling"
]
} |
|
Beginning with Speed Booster unequipped, run and jump over the acid into an airball. Once Samus begins falling, equip Spring Ball and Speed Booster to safely land on the other side near the statue. Requires: "canSpringFling"
"canDisableEquipment"
"canSpeedyJump"
"canTrickyJump"
"canLateralMidAirMorph"
{
"heatFrames": 210
} |
|


Use a Crystal Flash to refill reserve energy. If Golden Torizo is alive, perform the Crystal Flash in the left corner of the room; otherwise it can be done near the door. Then use heat damage to trigger an R-mode forced standup near the crumble blocks with upward momentum, in order to clip up through them. Several different combinations of items and techniques can make this possible: 1) Space Jump, with a mid-air morph (not required but makes it easier), 2) HiJump and a mid-air Spring Ball jump, most easily by equipping both HiJump and SpringBall during the pause, 3) A walljump into Spring Ball jump, equipping Spring Ball soon after the wall jump into order to gain horizontal speed before the mid-air jump. 4) HiJump and Speedbooster, running and jumping into a mid-air morph, In every case, precise timing is needed to be in the correct location when reserves trigger, just below the crumbles but without bonking them. Having less upward momentum can provide more lenience for timing the forced standup clip, though if Samus' momentum is not enough to make it onto the ledge then a crumble jump may also be required. Entrance condition: {
"comeInWithRMode": {}
}Requires: {
"notable": "R-Mode Forced Standup Clip"
}
"canRModeStandupClip"
{
"or": [
{
"or": [
"f_DefeatedGoldenTorizo",
{
"obstaclesCleared": [
"f_DefeatedGoldenTorizo"
]
}
]
},
{
"heatFrames": 100
}
]
}
"h_heatedCrystalFlash"
{
"or": [
{
"and": [
"SpaceJump",
"can4HighMidAirMorph"
]
},
{
"and": [
"HiJump",
"canSpringBallJumpMidAir"
]
},
{
"and": [
"HiJump",
"canSpeedyJump",
"canMidAirMorph",
"canCrumbleJump"
]
},
{
"and": [
"h_trickySpringwall",
"canCrumbleJump"
]
}
]
}
{
"resourceCapacity": [
{
"type": "RegularEnergy",
"count": 99
}
]
}
{
"autoReserveTrigger": {}
}
{
"heatFrames": 100
}Clears obstacles: door_2 Dev note: FIXME: A variant of this strat could go to the item node instead of the door, possibly with slightly different heat frames at the end. FIXME: As an alternative to doing a Crystal Flash, Golden Torizo could be used as a farm, with canRiskPermanentLossOfAccess. |
|
It may help to disable HiJump first and then re-equip it with the springball jump. Doing this, the springball jump may be buffered. Requires: {
"obstaclesCleared": [
"A"
]
}
"HiJump"
{
"doorUnlockedAtNode": 2
}
"canTrickySpringBallJump"
{
"or": [
"canLateralMidAirMorph",
"canSpringFling"
]
}
{
"heatFrames": 120
}Unlocks doors: {"nodeId":2,"types":["missiles"],"requires":[{"heatFrames":50}]}
{"nodeId":2,"types":["super"],"requires":[]}
{"nodeId":2,"types":["powerbomb"],"requires":[{"heatFrames":110}]} |
From: 1
Left Door
To: 2
Right Door
Entrance condition: {
"comeInWithSpringBallBounce": {
"speedBooster": "no",
"movementType": "controlled",
"remoteAndLandingMinTiles": [
[
30,
1
]
]
}
}Requires: "canTrickySpringBallBounce"
"canSpringFling"
{
"heatFrames": 140
} |
From: 2
Right Door
To: 1
Left Door
Entrance condition: {
"comeInWithSpringBallBounce": {
"speedBooster": "yes",
"movementType": "any",
"remoteAndLandingMinTiles": [
[
33,
1
]
]
}
}Requires: "canTrickySpringBallBounce"
"canSpringFling"
{
"heatFrames": 155
} |
|
Gain max run speed, without Speed Booster equipped, and bounce onto the second 2-tile-wide platform. Continue uncontrolled bouncing all the way across the room, taking a boost from a Hibashi hit. Perform a neutral bounce on the final single-tile platform. If Samus is positioned relatively far left, she may miss the last platform and fall into the acid; this can be avoided by unequipping Spring Ball (a 'spring fling') to reset Samus' vertical speed, bypassing the final platform. Requires: {
"disableEquipment": "SpeedBooster"
}
"canTrickySpringBallBounce"
{
"hibashiHits": 1
}
{
"or": [
"canSpringFling",
"canInsaneJump"
]
}
{
"heatFrames": 375
} |
From: 4
Junction Below Bomb Blocks
To: 2
Top Right Door

This is possible by jumping on the crumble blocks into a mid-air spring ball jump, or by avoiding them. The crumbles can be avoided by starting with either an air ball, a 3 tile high mid-air morph, or a low spring wall. These are generally safer, as bouncing on the crumble blocks with Spring Ball is trivial. Requires: {
"obstaclesCleared": [
"B"
]
}
"canDash"
"canTrickySpringBallJump"
{
"heatFrames": 250
}
{
"or": [
{
"and": [
"can4HighMidAirMorph",
"canSpringFling"
]
},
{
"and": [
"canLateralMidAirMorph",
"canTrickyJump"
]
},
"canCrumbleJump",
{
"and": [
"h_trickySpringwall",
"canPreciseWallJump"
]
}
]
} |
|
Wait for the Puromis to pass, or use Space Jump or Spring Ball to pass through them safely. Entrance condition: {
"comeInNormally": {}
}Requires: {
"haveBlueSuit": {}
}
{
"or": [
{
"and": [
"SpaceJump",
{
"heatFrames": 635
}
]
},
{
"and": [
"h_useSpringBall",
{
"heatFrames": 700
},
{
"acidFrames": 40
}
]
},
{
"and": [
"h_useSpringBall",
"canSpringFling",
"canInsaneJump",
{
"heatFrames": 700
}
]
},
{
"and": [
{
"heatFrames": 790
},
{
"acidFrames": 80
}
]
}
]
}Unlocks doors: {"types":["missiles"],"requires":[{"heatFrames":30}]}
{"types":["super"],"requires":[]}
{"types":["powerbomb"],"requires":[{"heatFrames":60}]}Dev note: It is possible to land on the Puromis without taking damage, but it's unclear if this can be done reliably. |
|
Entrance condition: {
"comeInWithGMode": {
"mode": "any",
"morphed": false
}
}Requires: {
"haveBlueSuit": {}
}
{
"or": [
"SpaceJump",
{
"and": [
"h_useSpringBall",
{
"acidFrames": 40
}
]
},
{
"and": [
"h_useSpringBall",
"canSpringFling",
"canInsaneJump"
]
},
{
"acidFrames": 80
}
]
}
"h_heatedGModeOpenDifferentDoor"Exit condition: {
"leaveNormally": {}
}Unlocks doors: {"types":["missiles"],"requires":[{"heatFrames":50},{"acidFrames":50}]}
{"types":["super"],"requires":[]}
{"types":["powerbomb"],"requires":[{"heatFrames":110},{"acidFrames":110}]}Dev note: FIXME: Artificial morph Spring Ball could also be an option. |
From: 2
Right Door
To: 5
G-Mode Morph Junction (Above Bomb Block)
Avoiding the acid completely requires precise movement. With Spring Ball and Bombs, jump into IBJ to delay while waiting for the acid. With just Spring Ball, perform a well-timed pause to trigger immediately after Samus jumps to get enough horizontal momentum to cross the second Hibashi and land in the alcove. A quick pause with a second spring fling on the descent can help a bit. With just Bombs, this is possible with well-timed, first-try double IBJs. Entrance condition: {
"comeInWithGMode": {
"mode": "any",
"morphed": true
}
}Requires: "canInsaneJump"
{
"or": [
"h_artificialMorphJumpIntoIBJ",
{
"and": [
"canTrickyGMode",
"h_artificialMorphSpringFling"
]
},
{
"and": [
"canTrickyGMode",
"h_artificialMorphDoubleBombJump",
"h_artificialMorphBombHorizontally"
]
}
]
}
{
"heatFrames": 0
}Dev note: FIXME: Could add strats that take acid damage and are more lenient. |
From: 2
Middle Left Door
To: 6
Bowling Chozo Statue

Start with Spring Ball disabled. Jump over the spikes and mid-air morph. Spring fling on the way down, Spring Ball bounce through the spikes, then spring fling again to reach the statue taking only one spike hit. Entrance condition: {
"comeInRunning": {
"speedBooster": "yes",
"minTiles": 12
}
}Requires: "h_speedJump"
"canTrickyJump"
"canSpringFling"
"h_unpauseKeepMomentum"
"canLateralMidAirMorph"
"canUseIFrames"
{
"spikeHits": 1
} |
From: 2
Middle Left Door
To: 6
Bowling Chozo Statue
Enter the room with a mockball or bounce. Time a pause to unequip Spring Ball soon after bouncing after the spike hit. Pause again to re-equip Spring Ball on the way down. Entrance condition: {
"comeInWithSpringBallBounce": {
"speedBooster": "yes",
"movementType": "any",
"remoteAndLandingMinTiles": [
[
14,
1
]
]
}
}Requires: "canTrickyJump"
"canSpringFling"
"canUseIFrames"
{
"spikeHits": 1
}Dev note: This can be done with 13 tiles of run speed, with greater difficulty. |
From: 2
Middle Left Door
To: 7
Bowling In G-Mode


Spring fling many times to cross the spikeway with as few hits as possible. Ride the statue, which will not take Samus down, and will instead drop her off in the spike pit somewhat near the door. Entrance condition: {
"comeInWithGMode": {
"mode": "any",
"morphed": true
}
}Requires: "canComplexGMode"
"f_DefeatedPhantoon"
"h_artificialMorphSpringFling"
"canDash"
"canInsaneJump"
{
"spikeHits": 4
} |
From: 1
Right Door
To: 2
Item
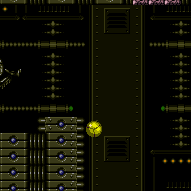
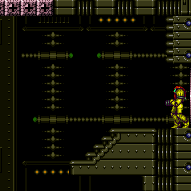
Requires: {
"thornHits": 1
}
"HiJump"
"canSpringBallJumpMidAir"
{
"not": "f_DefeatedPhantoon"
}
{
"or": [
"canRiskPermanentLossOfAccess",
{
"and": [
"canDash",
"canCarefulJump",
{
"disableEquipment": "HiJump"
},
{
"or": [
"canMoonwalk",
"canTrickyJump"
]
}
]
},
{
"and": [
"canJumpIntoIBJ",
"canBombHorizontally",
"canTrickyJump"
]
},
"Gravity",
"canSpringFling"
]
} |
From: 1
Right Door
To: 2
Item
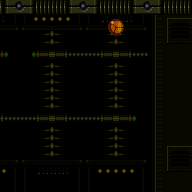

Using speed from the adjacent room, perform a ceiling mockball and equip or unequip Spring Ball to make it across the gap. Entrance condition: {
"comeInRunning": {
"speedBooster": "yes",
"minTiles": 12
}
}Requires: "h_speedJump"
"canTrickyJump"
"canMomentumConservingMorph"
"canSpringFling"
"h_unpauseKeepMomentum"
{
"or": [
"canInsaneJump",
{
"thornHits": 5
}
]
}
{
"not": "f_DefeatedPhantoon"
}Dev note: The 5 thornHits are for lenience since it is very difficult to get this first try. |
From: 1
Right Door
To: 2
Item
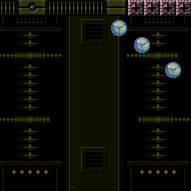
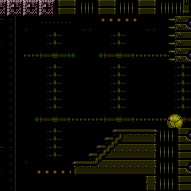
Entrance condition: {
"comeInWithMockball": {
"speedBooster": "yes",
"remoteAndLandingMinTiles": [
[
19,
0
]
]
}
}Requires: "canTrickyJump"
"canSpringBallBounce"
"canSpringFling"
{
"or": [
"canInsaneJump",
{
"thornHits": 5
}
]
}
{
"not": "f_DefeatedPhantoon"
}Dev note: The 5 thornHits are for lenience since it is difficult to get this first try. |
|
Bounce on the platform, timing a pause to hit soon after bouncing, then hold left and unequip Spring Ball to get a horizontal boost. Requires: "f_DefeatedPhantoon" "canSpringFling" |
|
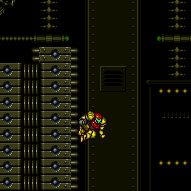
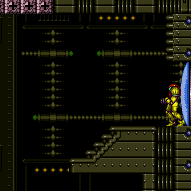
From the top right platform, jump to the left into the thorns, then climb the left wall. Requires: {
"thornHits": 1
}
{
"or": [
{
"and": [
"canUseIFrames",
"canDash"
]
},
{
"and": [
{
"tech": "canHorizontalDamageBoost"
},
"h_complexToCarryFlashSuit"
]
},
{
"thornHits": 1
}
]
}
"canWallJump"
{
"not": "f_DefeatedPhantoon"
}
{
"or": [
"canRiskPermanentLossOfAccess",
{
"and": [
"canDash",
"canCarefulJump",
{
"disableEquipment": "HiJump"
},
{
"or": [
"canMoonwalk",
"canTrickyJump"
]
}
]
},
{
"and": [
"Gravity",
"canDash"
]
},
{
"and": [
"canJumpIntoIBJ",
"canBombHorizontally",
"canTrickyJump"
]
},
{
"and": [
"Gravity",
"canSpringBallJumpMidAir"
]
},
"canSpringFling",
{
"and": [
"HiJump",
"Gravity",
"canInsaneJump"
]
}
]
}Dev note: The canCarefulJump and Gravity are here, as with either of those, there is access across with or without f_DefeatedPhantoon. |
|
Requires: "canSpringFling" |
From: 2
Bottom Right Door
To: 6
Middle Junction Near Top Left Pirate
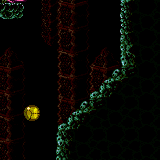
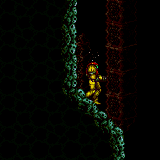
The second jump is harder than a normal mid-air spring ball jump. Use either a stationary lateral mid air morph, to gain enough horizontal momentum, or a SpringFling to reduce Samus' fall speed as soon as it begins to build up. Shooting towards Pirates will cause them to stop in place and not fire back. Requires: "canSuitlessMaridia"
"canTrickySpringBallJump"
{
"or": [
"canStationaryLateralMidAirMorph",
"canSpringFling"
]
}
{
"or": [
"canTrickyJump",
"canDodgeWhileShooting",
{
"enemyDamage": {
"enemy": "Pink Space Pirate (standing)",
"type": "contact",
"hits": 1
}
},
{
"enemyKill": {
"enemies": [
[
"Pink Space Pirate (standing)"
]
],
"explicitWeapons": [
"Plasma"
]
}
}
]
}
{
"or": [
"canTrickyJump",
{
"enemyDamage": {
"enemy": "Pink Space Pirate (standing)",
"type": "contact",
"hits": 1
}
},
{
"enemyKill": {
"enemies": [
[
"Pink Space Pirate (standing)"
]
],
"explicitWeapons": [
"Plasma"
]
}
}
]
} |
From: 3
Top Right Door
To: 2
Bottom Right Door
Reach the bottom middle of the room and avoid letting the pirate shoot any stationary, invisible lasers. The pirate will not touch Samus if she is high enough on the sloped tiles, but move too high and it will see Samus. Time the Power Bomb to go off so that Samus starts Crystal Flashing during or before the pirate turns around, and while ensuring that Samus will get hit by the lasers that will not move from their spawned location. With Gravity equipped, Samus will need to be boosted by the Power Bomb only while the pirate is moving its head. Samus will need to be able to survive a second hit after the Reserve trigger. This can be done with a 50% enemy damage reduction and no E-Tanks; a 75% reduction is not recommended and would require disabling and reenabling suits with a precise pause abuse. Without suits, this is possible with an E-Tank and two R-Tanks; it is sometimes possible to jump away after the Reserve trigger, but can require some luck. Entrance condition: {
"comeInWithGMode": {
"mode": "direct",
"morphed": true
},
"comesThroughToilet": "no"
}Requires: {
"or": [
{
"and": [
"Gravity",
"h_artificialMorphIBJ"
]
},
{
"and": [
"h_artificialMorphSpringBall",
{
"or": [
"Gravity",
"HiJump",
"canInsaneJump",
"h_artificialMorphSpringFling"
]
}
]
}
]
}
"h_artificialMorphRModeCrystalFlashInterrupt"
{
"ammo": {
"type": "Missile",
"count": 10
}
}
{
"or": [
{
"and": [
"h_partialEnemyDamageReduction",
{
"resourceAtMost": [
{
"type": "RegularEnergy",
"count": 19
}
]
}
]
},
{
"and": [
"canTrickyCarryFlashSuit",
{
"resourceCapacity": [
{
"type": "RegularEnergy",
"count": 199
}
]
},
{
"resourceCapacity": [
{
"type": "ReserveEnergy",
"count": 199
}
]
}
]
}
]
}Dev note: It is possible but extremely difficult to use one of the other pirates instead, but with these items, Samus can get back up from this location. FIXME: A 75% damage reduction method needs to be documented for if Samus only has Gravity and it provides 75% reduction. |
From: 6
Middle Junction Near Top Left Pirate
To: 7
Platform Below Top Right Door
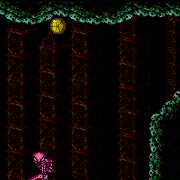
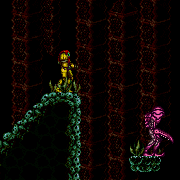
Requires: "canSuitlessMaridia"
"canCarefulJump"
"canSpringBallJumpMidAir"
{
"or": [
"canTrickyJump",
"canStationaryLateralMidAirMorph",
"canSpringFling"
]
} |
|
Requires: "canSpringwall" "canSpringFling" Clears obstacles: B |
From: 5
Top Left Junction
To: 2
Top Item
Time a pause before jumping to give a significant momentum boost in order to reach the Grapple Block. Requires: "canTrickySpringBallJump" "canTrickyJump" "canSpringFling" Clears obstacles: B |
From: 4
Top Right Door
To: 11
Upper Left Ledge Junction
With Speed Booster equipped, run into the room using at least about 2 tiles of runway (at least $0.C extra run speed). If needed, perform two spring flings by pausing and unequipping Spring Ball, then pausing again and re-equipping it before bouncing on the first Grapple platform. Afterward, perform additional spring flings as needed to make it across the room, taking care to avoid the Powamp. Entrance condition: {
"comeInRunning": {
"speedBooster": "yes",
"minTiles": 1.4375
}
}Requires: {
"notable": "Spring Ball Bounce Right to Left"
}
"canCrossRoomJumpIntoWater"
"canTrickySpringBallBounce"
"canSpringFling"
"h_unpauseKeepMomentum"
"canInsaneJump" |
From: 4
Top Right Door
To: 11
Upper Left Ledge Junction

Enter the room morphed, either in a mockball on the ground or descending from a controlled bounce, with about 1 tile worth of speed (at least $0.9 extra run speed). Use Spring Ball to jump or do a controlled bounce after the transition. While descending and before bouncing on the first Grapple platform, perform two spring flings by pausing and unequipping Spring Ball, then pausing again and re-equipping it. Afterward, perform additional spring flings as needed to make it across the room, taking care to avoid the Powamp. Note that Samus must be fully morphed when entering the room (not in the middle of a morphing animation), or the spring flings will not work, assuming Speed Booster is not equipped. Entrance condition: {
"comeInWithSpringBallBounce": {
"speedBooster": "any",
"movementType": "controlled",
"adjacentMinTiles": 4,
"remoteAndLandingMinTiles": [
[
0.4375,
1
]
]
}
}Requires: {
"notable": "Spring Ball Bounce Right to Left"
}
"canCrossRoomJumpIntoWater"
"canTrickySpringBallBounce"
"canSpringFling"
"canInsaneJump" |
From: 4
Top Right Door
To: 11
Upper Left Ledge Junction
Enter the room morphed, either in a mockball on the ground or descending from a controlled bounce, with about 5 or more runway tiles worth of speed (at least $1.8 extra run speed). Use Spring Ball to jump or do a controlled bounce after the transition. Bounce on the first Grapple platform. Then perform a 'spring fling' by unequipping Spring Ball while descending, to reset Samus' vertical speed and be able to make it across room. Note that Samus must be fully morphed when entering the room (not in the middle of a morphing animation), or the spring fling will not work, assuming Speed Booster is not equipped. Entrance condition: {
"comeInWithSpringBallBounce": {
"speedBooster": "any",
"movementType": "controlled",
"adjacentMinTiles": 8,
"remoteAndLandingMinTiles": [
[
4.4375,
2
]
]
}
}Requires: {
"notable": "Spring Ball Bounce Right to Left"
}
"canCrossRoomJumpIntoWater"
"canTrickySpringBallBounce"
"canSpringFling"Dev note: This can be done with a mockball with only 1 landing tile, but this is more difficult and it's unclear if we can guarantee it works in every possible room; it shouldn't be important to model, because the low-speed variant of this strat already covers the more difficult case. |
|
Entrance condition: {
"comeInWithGMode": {
"mode": "any",
"morphed": false
}
}Requires: "Morph"
"h_navigateUnderwater"
{
"or": [
"Gravity",
"HiJump",
{
"and": [
"Grapple",
"canUseEnemies"
]
},
{
"and": [
"canSpringBallJumpMidAir",
{
"or": [
"canTrickyJump",
"canSpringFling",
"canStationaryLateralMidAirMorph",
"canTrickyUseFrozenEnemies"
]
}
]
},
{
"and": [
"canTrickyUseFrozenEnemies",
"canTrickyJump"
]
}
]
} |
|
Requires: {
"or": [
"HiJump",
{
"and": [
"canTrickySpringBallJump",
"canSuitlessMaridia",
{
"or": [
"canTrickyJump",
"canSpringFling",
"canStationaryLateralMidAirMorph"
]
}
]
}
]
}Dev note: Using a frozen crab for an easier springball jump goes from 2 to 8. |
From: 8
Higher Hill Junction
To: 11
Upper Left Ledge Junction

From a crouch jump, perform a double Spring Ball jump, using a precisely timed bomb boost to propel Samus upward just long enough to get the second mid-air Spring Ball jump. In order to cover the horizontal distance, it is necessary to do at least one of the following: 1) begin with a stationary lateral mid-air morph, 2) move slightly left before the bomb boost to get boosted horizontally, 3) perform a spring fling by pausing near the peak of the second mid-air Spring Ball jump to unequip Spring Ball. Requires: "canUnderwaterBombIntoSpringBallJump"
{
"or": [
"canStationaryLateralMidAirMorph",
"canSpringFling",
"canBombHorizontally"
]
} |
From: 2
Bottom Left Door
To: 1
Middle Left Door
Use double spring ball jumps to reach the top-right of the room with temporary blue. To cross the two gaps at the top of the room to the left while chaining temporary blue, use spring ball jumps with HiJump disabled; in each case, perform a stationary lateral mid-air morph or a spring fling (or both); Entrance condition: {
"comeInRunning": {
"speedBooster": "yes",
"minTiles": 0.4375
}
}Requires: "h_waterGetBlueSpeed"
"HiJump"
"canLongChainTemporaryBlue"
"canBeExtremelyPatient"
"canXRayTurnaround"
"canDoubleSpringBallJumpMidAir"
"canTrickySpringBallJump"
{
  "or": [
    "canStationaryLateralMidAirMorph",
    "canSpringFling"
  ]
}
"can4HighMidAirMorph" |
From: 2
Bottom Left Door
To: 1
Middle Left Door
Use double spring ball jumps to reach the top-right of the room with temporary blue. To cross the two gaps at the top of the room to the left while chaining temporary blue, use spring ball jumps with HiJump disabled; in each case, perform a stationary lateral mid-air morph or a spring fling (or both); Entrance condition: {
"comeInWithTemporaryBlue": {}
}Requires: "HiJump"
"canLongChainTemporaryBlue"
"canBeExtremelyPatient"
"canXRayTurnaround"
"canDoubleSpringBallJumpMidAir"
"canTrickySpringBallJump"
{
"or": [
"canStationaryLateralMidAirMorph",
"canSpringFling"
]
}
"can4HighMidAirMorph" |
|
Use a double spring ball jump to reach the top of the room with temporary blue. To cross the two gaps at the top of the room while chaining temporary blue, use spring ball jumps with HiJump disabled; in each case, perform a stationary lateral mid-air morph or a spring fling (or both); Entrance condition: {
"comeInWithTemporaryBlue": {}
}Requires: "HiJump"
"canLongChainTemporaryBlue"
"canDoubleSpringBallJumpMidAir"
"canTrickySpringBallJump"
{
"or": [
"canStationaryLateralMidAirMorph",
"canSpringFling"
]
}
"canBeVeryPatient" |
|
Requires: "canSuitlessMaridia" "canSpringFling" "canTrickySpringBallJump" |
|
Requires either a spring fling or a stationary lateral midair morph with an unmorph to reset fall speed. Requires: "canSuitlessMaridia"
"canTrickySpringBallJump"
{
"or": [
"canSpringFling",
{
"and": [
"canStationaryLateralMidAirMorph",
"canResetFallSpeed"
]
}
]
} |
|
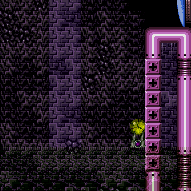
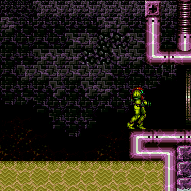
Perform the spring ball jump near max height. Place the first bomb between a few frames after the spring ball jump; ideally it should be just above the water line. Press pause a few frames after placing the bomb, to disable Spring Ball (a 'spring fling', to reset fall speed). Place the second bomb soon after regaining control, while the game is fading back in, then continue into an IBJ. Requires: {
"notable": "Bomb Jump Water Escape"
}
"HiJump"
"h_underwaterMaxHeightSpringBallJump"
"canSpringFling"
"canBombJumpWaterEscape"
"canJumpIntoIBJ" |
|
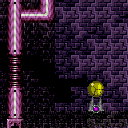
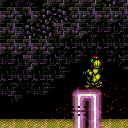
Stay out of the water, and by extension the sand, of the room by using the spikes as platforms. Morphing before landing on the spikes helps to be able to control the knockback. The final spike jump (which would be the most difficult) is avoided by doing a crouch jump into spring ball jump into IBJ to reach the left door. Perform the spring ball jump near max height. Place the first bomb between about 4 and 6 frames after the spring ball jump; ideally it should be just above the water line. Press pause between about 5 and 10 frames after placing the bomb, to disable Spring Ball (a 'spring fling', to reset fall speed). Place the second bomb soon after regaining control, while the game is fading back in. A spike hit in the center of the room can avoided by doing another spring ball jump into IBJ (also with a spring fling). Requires: {
"notable": "Bomb Jump Water Escape"
}
"canDash"
"HiJump"
"canPreciseWallJump"
"canUseIFrames"
{
"spikeHits": 1
}
"canNeutralDamageBoost"
"canTrickyJump"
{
"or": [
"canHorizontalDamageBoost",
{
"spikeHits": 1
}
]
}
{
"or": [
"canBePatient",
{
"spikeHits": 1
}
]
}
"h_underwaterMaxHeightSpringBallJump"
"canSpringFling"
"canBombJumpWaterEscape"
"canJumpIntoIBJ"Dev note: The IBJ at the left side of the room can be done without a 'spring fling' but is far more precise: the first bomb must be placed exactly two frames before the spring ball jump, and the spring ball jump should be performed just before max height, during the 4-frame window between 2 and 5 frames before the last possible frame to jump (there are also 1-frame windows at 0 and 8 frames before the last frame). FIXME: This can be possible to do while carrying a blue suit, with much greater difficulty. |
From: 2
Right Door
To: 1
Left Door


Pause and just before the pause fully triggers, jump and press left, and then disable Gravity and Spring Ball. With HiJump and a good jump, it is possible to jump straight to the high ledge, but quickly pausing and turning on Spring Ball and jumping again can help as a backup. Without HiJump, use this jump to start an IBJ directly over the spike pit, then boost horizontally to the left ledge. Jump over the Cacatac and the spike pits with suitless Spring Flings. The final jump can be done the same way as the first, if Samus is not able to wall jump. Entrance condition: {
"comeInWithGMode": {
"mode": "any",
"morphed": true
}
}Requires: "canGravityJump"
"h_artificialMorphSpringFling"
{
"or": [
"HiJump",
{
"and": [
"h_artificialMorphJumpIntoIBJ",
"canInsaneJump"
]
},
{
"and": [
"h_artificialMorphJumpIntoIBJ",
{
"spikeHits": 1
}
]
}
]
} |
From: 2
Right Door
To: 1
Left Door
Pause and on the last frame before the pause triggers, press left and jump, and then disable Gravity and Spring Ball. On the first possible frame, repause and equip Spring Ball again then buffer the second jump out of the pause. Both of these actions are frame perfect. If the first jump was done correctly, Samus will move upwards with very little horizontal movement until breaking the water, after which she will swing rapidly to the left. Jump over the Cacatac and the spike pits with suitless Spring Flings. The final jump can be done the same way as the first, if Samus is not able to wall jump. This one is more lenient, and has a 4-frame window for the second jump, if the first is performed frame-perfectly. Entrance condition: {
"comeInWithGMode": {
"mode": "any",
"morphed": true
}
}Requires: "canGravityJump"
"h_artificialMorphSpringFling"
"canTrickyGMode"
{
"or": [
"h_artificialMorphBombThings",
{
"enemyDamage": {
"enemy": "Cacatac",
"type": "contact",
"hits": 1
}
}
]
} |
|
Requires: {
"resetRoom": {
"nodes": [
2
]
}
}
{
"or": [
{
"and": [
"Gravity",
{
"or": [
{
"and": [
"canWallJump",
{
"cycleFrames": 740
}
]
},
{
"and": [
"SpaceJump",
{
"cycleFrames": 790
}
]
},
{
"and": [
"HiJump",
"canTrickyDashJump",
{
"cycleFrames": 795
}
]
},
{
"and": [
"canSpringBallJumpMidAir",
{
"or": [
"HiJump",
"canSpringFling"
]
},
{
"cycleFrames": 920
},
"h_doubleEquipmentScreenCycleFrames"
]
},
{
"and": [
"canDiagonalBombJump",
{
"cycleFrames": 1380
}
]
}
]
}
]
},
{
"and": [
"canSuitlessMaridia",
{
"or": [
{
"and": [
"HiJump",
"canSpaceJumpWaterBounce",
"canWallJump",
{
"cycleFrames": 810
}
]
},
{
"and": [
"HiJump",
"canSpaceJumpWaterEscape",
{
"cycleFrames": 850
}
]
},
{
"and": [
"HiJump",
"h_underwaterMaxHeightSpringBallJump",
"canTrickyJump",
"canStationaryLateralMidAirMorph",
{
"cycleFrames": 1070
},
"h_doubleEquipmentScreenCycleFrames"
]
}
]
}
]
}
]
}Resets obstacles: R-Mode Farm cycle drops: 2 Cacatac |
From: 2
Right Door
To: 4
Top Right Ledge Junction


There is just enough distance for a MidAir Spring Ball jump to reach without HiJump, with either a crouch jump or air ball. To do this, pause and morph early in order to get a spring fling from equipping Spring Ball. Requires: "Gravity"
"canSpringBallJumpMidAir"
{
"or": [
"HiJump",
{
"and": [
"h_maxHeightSpringBallJump",
"canSpringFling"
]
},
{
"and": [
"canTrickyJump",
"canLateralMidAirMorph",
"canTrickySpringBallJump",
"canSpringFling",
"h_complexToCarryFlashSuit"
]
}
]
}Dev note: The h_maxHeightSpringBallJump is not a h_underwaterMaxHeightSpringBallJump, because Gravity is required. |
From: 5
Bottom Middle Junction
To: 4
Top Right Ledge Junction
Perform the spring ball jump near max height. Place the first bomb after the spring ball jump; just above the water line. Press pause just after placing the bomb, to disable Spring Ball (a 'spring fling', to reset fall speed). Place the second bomb soon after regaining control, while the game is fading back in. Requires: {
"notable": "Bomb Jump Water Escape"
}
"HiJump"
"h_underwaterMaxHeightSpringBallJump"
"canSpringFling"
"canBombJumpWaterEscape"
"canJumpIntoIBJ" |
From: 5
Bottom Middle Junction
To: 4
Top Right Ledge Junction
When the Cacatac on the ground fires a spike, perform a Spring Ball jump to break the waterline and then hit the spike for extra height. With a blue suit, after the mid-air Spring Ball jump Samus would be invulnerable and unable to take a boost from the spike. But by unequipping Spring Ball again, it becomes possible. Requires: {
"notable": "Spring Ball Spike Boost"
}
"h_underwaterCrouchJump"
"HiJump"
"canSuitlessMaridia"
"canTrickyJump"
"canTrickySpringBallJump"
{
"or": [
"canInsaneJump",
"canStationaryLateralMidAirMorph"
]
}
{
"or": [
"canNeutralDamageBoost",
{
"and": [
"canSpringFling",
"h_midAirMorphDamageBoost"
]
}
]
}
{
"enemyDamage": {
"enemy": "Cacatac",
"type": "spike",
"hits": 2
}
}Dev note: The crouch jump is not strictly necessary but it helps significantly. |
From: 1
Top Left Door
To: 5
G-Mode Morph, In Morph Tunnel
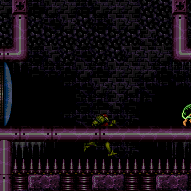

Enter morphed and kill the Mochtroid with Bombs or a Power Bomb, or roll off the edge with Gravity to drop fast enough not to lure the Mochtroid. It is also possible to Spring Fling by jumping from the ground immediately before the pause fully triggers to move right fast enough to avoid a hit. Entrance condition: {
"comeInWithGMode": {
"mode": "indirect",
"morphed": true
}
}Requires: {
"or": [
"Gravity",
{
"haveBlueSuit": {}
},
{
"and": [
"h_artificialMorphBombs",
"canInsaneJump"
]
},
"h_artificialMorphPowerBomb",
{
"and": [
"h_artificialMorphSpringFling",
"canTrickyGMode"
]
},
{
"enemyDamage": {
"enemy": "Mochtroid",
"type": "contact",
"hits": 1
}
}
]
} |
From: 4
Top Right Door
To: 1
Top Left Door
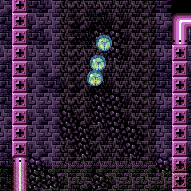
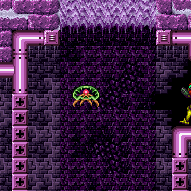
Entrance condition: {
"comeInShinecharging": {
"length": 0,
"openEnd": 1
}
}Requires: "canSuitlessMaridia" "canChainTemporaryBlue" "canSpringFling" Exit condition: {
"leaveWithTemporaryBlue": {}
}Unlocks doors: {"types":["ammo"],"requires":[]} |
From: 1
Top Left Door
To: 1
Top Left Door

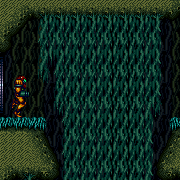
On entry, the pirate will place a stationary, invisible laser. Cross the chasm while trying to avoid allowing it to place more lasers, with a bomb boost or spring fling. Move to the top of the platform only while the pirate is turning its head. Just before it is about to rotate its head again, Crystal Flash in a spot that is free of lasers in order to be able to gain some Reserve Energy before getting hit. Entrance condition: {
"comeInWithGMode": {
"mode": "direct",
"morphed": true
}
}Requires: "h_artificialMorphRModeCrystalFlashInterrupt"
"canComplexGMode"
{
"ammo": {
"type": "Missile",
"count": 10
}
}
{
"or": [
"h_artificialMorphSpringFling",
{
"and": [
"h_artificialMorphBombHorizontally",
"h_additionalBomb"
]
}
]
}Clears obstacles: door_1 |
From: 3
Middle Right Door
To: 4
Top Right Door
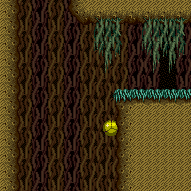
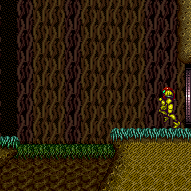
Run into the room, pressing pause immediately when entering. Jump into a mid-air spring ball jump to reach the ledge above. Perform the spring ball jump while still moving forward, in order to get a boost in jump height. Entrance condition: {
"comeInRunning": {
"speedBooster": "yes",
"minTiles": 5.4375
}
}Requires: "HiJump"
"canSpeedyJump"
"canTrickyJump"
"canLateralMidAirMorph"
"canTrickySpringBallJump"
{
"or": [
"canSpringFling",
"canInsaneJump",
"can4HighMidAirMorph"
]
}Dev note: This assumes extra run speed of $1.B entering the room, at least $2.6 when jumping (a 2-frame window in the worst case). |
From: 5
Top Junction
To: 4
Top Right Door
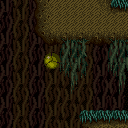
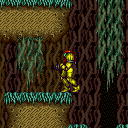
Roll off the above ledge and use both the vertical speed resets from first (un)equipping SpringBall and then by unmorphing in order to reach the door. Pause shortly after rolling off the ledge, after falling for 1 tile. The timing is very precise. A downback helps by shrinking Samus' hitbox. Requires: {
"notable": "Spring Fling into Top Right Door"
}
"canInsaneJump"
"canSpringFling"
"canResetFallSpeed"
"canDownBack" |
|

On the left side of the raised platform, jump for max height. Lateral Midair Morph for horizontal momentum, and perform the Spring Ball jump the moment before touching the sandfall. Pause again to disable Spring Ball as soon as possible. Requires: {
"notable": "Spring Ball HiJump"
}
"canSuitlessMaridia"
"HiJump"
"canTrickySpringBallJump"
"canStationaryLateralMidAirMorph"
"canSpringFling"
"canPlayInSand"
{
"or": [
{
"enemyDamage": {
"enemy": "Evir",
"type": "particle",
"hits": 1
}
},
{
"enemyKill": {
"enemies": [
[
"Evir"
]
],
"explicitWeapons": [
"Plasma",
"Super",
"PowerBomb"
]
}
},
"canTrickyDodgeEnemies",
"h_pauseAbuseMinimalReserveRefill"
]
}
{
"or": [
{
"noBlueSuit": {}
},
{
"notable": "Blue Suit Sand Walk"
}
]
} |
From: 5
Junction Above Grapple Block
To: 2
East Leg Right Door
Wait the water tide to reach its peak, then crouch jump into a spring ball jump into an IBJ. Perform the spring ball jump near max height. Place the first bomb between about 4 and 6 frames after the spring ball jump; ideally it should be just above the water line. Press pause between about 5 and 10 frames after placing the bomb, to disable Spring Ball (a 'spring fling', to reset fall speed). Place the second bomb soon after regaining control, while the game is fading back in. When close to the top, perform a spring ball jump to reach the ledge; release jump as soon as Samus is high enough to clear the ledge, in order to avoid taking a Menu hit. Requires: {
"notable": "Bomb Jump Water Escape"
}
"HiJump"
"h_underwaterMaxHeightSpringBallJump"
"canSpringFling"
"canBombJumpWaterEscape"
"canJumpIntoIBJ"
"canLongIBJ"
"canDoubleBombJump"Dev note: This trick can technically be done without a 'spring fling' but is extremely precise. |
|


Enter the room with a normalized extra run speed of $2.0, which can be obtained by gaining max run speed with Speedbooster unequipped; Speedbooster must then be reequipped before the transition. Use Spring Ball to jump within about the last half tile of runway, hold jump, and Samus should bounce off the floating block before the first Evir. After the bounce, perform a spring fling by unequipping and re-equipping Spring Ball, to make it easier to reach the pillar at the right of the room. If jumping or bouncing from further left of the entrance runway, an additional spring fling can be used to ensure Samus makes the bounce on the first floating block. Entrance condition: {
"comeInWithSpringBallBounce": {
"speedBooster": "yes",
"movementType": "controlled",
"adjacentMinTiles": 12,
"remoteAndLandingMinTiles": [
[
7,
1
]
]
}
}Requires: "canTrickySpringBallBounce" "canSpringFling" |
|
Enter with at least 1 tile of run speed from an air room, with Speed Booster unequipped. Jump from near the end of the runway (though a jump from 1-2 tiles away from the end can still work). Press pause while crossing the narrow first sandfall, then perform a lateral mid-air morph after exiting the sandfall. Equip both Spring Ball and Speed Booster, and perform a mid-air Spring Ball jump at somewhere close to the maximum height. Unequip Spring Ball while descending through the wide second sidefall. Entrance condition: {
"comeInRunning": {
"speedBooster": "no",
"minTiles": 1
}
}Requires: {
"notable": "Spring Fling with Momentum"
}
"canCrossRoomJumpIntoWater"
"canPlayInSand"
"canLateralMidAirMorph"
"canTrickySpringBallJump"
"canSpringFling"
"h_unpauseKeepMomentum" |
|
Requires: {
"haveBlueSuit": {}
}
"canSpringFling"
{
"or": [
{
"and": [
"Gravity",
{
"acidFrames": 15
}
]
},
{
"and": [
"canWallJump",
{
"acidFrames": 20
}
]
},
{
"and": [
"HiJump",
{
"disableEquipment": "HiJump"
},
{
"acidFrames": 20
}
]
},
{
"acidFrames": 75
}
]
} |
|
Requires: {
"haveBlueSuit": {}
}
"canSpringFling"
{
"acidFrames": 65
} |
|
Kill the Metroids while artificially morphed with just Spring Ball to avoid them. A Rinka must be completely on screen while a Power Bomb explodes in order for it to lure the Metroids. Start the room with a bomb boost spring ball jump or a precise horizontal bomb boost. In general, this seems to be easiest by minimizing Samus's horizontal movement as much as possible and getting the Metroids in sync with each other while circling around her. While moving horizontally, their movement is less predictable and harder to sync. Note that it is necessary to exit G-Mode before exiting the room in order for the Metroids to remain killed. With only 3 Power Bombs, cross the room with a spring fling and cluster the Metroids before laying Power Bombs. Entrance condition: {
"comeInWithGMode": {
"mode": "any",
"morphed": true
}
}Requires: "canMetroidAvoid"
"canTrickyDodgeEnemies"
"h_artificialMorphSpringBall"
{
"or": [
{
"tech": "canSpringBallBombJump"
},
"canInsaneJump"
]
}
{
"ammo": {
"type": "PowerBomb",
"count": 3
}
}
{
"or": [
{
"and": [
"canTrickyGMode",
"h_artificialMorphSpringFling"
]
},
{
"ammo": {
"type": "PowerBomb",
"count": 1
}
}
]
}Clears obstacles: f_KilledMetroidRoom3 Sets flags: f_KilledMetroidRoom3 |
|
Requires: {
"or": [
"canDash",
"canWallJump",
"SpaceJump",
"canSpringFling",
{
"and": [
"canMidAirMorph",
"h_useSpringBall",
"canResetFallSpeed",
{
"or": [
{
"disableEquipment": "HiJump"
},
"canInsaneJump"
]
}
]
},
"canBombHorizontally",
"canTrickyUseFrozenEnemies",
{
"acidFrames": 20
}
]
} |
|
Requires: {
"or": [
"canDash",
{
"and": [
"canCarefulJump",
{
"disableEquipment": "HiJump"
}
]
},
{
"and": [
{
"or": [
"canIBJ",
{
"tech": "canJumpIntoIBJ"
}
]
},
"canBombHorizontally"
]
},
"canSpringFling",
{
"and": [
"canMidAirMorph",
"h_useSpringBall",
"canInsaneJump",
"canResetFallSpeed"
]
},
"SpaceJump",
{
"and": [
"HiJump",
{
"acidFrames": 20
}
]
}
]
} |