canRModeCrystalFlashInterrupt (Expert+)


The ability to gain a flash suit by interrupting a Crystal Flash with an R-mode forced standup. This can be done by taking enough damage to force an auto reserve trigger after the Crystal Flash has at least partially filled the Reserve Energy.
It is typically required to have a small number of E-Tanks in order to be able to take enough damage to trigger reserves. It is also required to use an enemy that can survive a Power Bomb explosion, or one that can respawn near Samus and deal enough damage before dying. Note that the more Energy in reserves Samus has when they are triggered, the fewer remaining i-frames she will have when regaining mobility, so a second hit may be difficult to avoid or may trigger automatically, if the enemy stays nearby.
Dependencies: canCarryFlashSuit, canRMode, canUseEnemies, canShinechargeMovementComplex, canHorizontalMidairShinespark, canCrystalFlash, canHorizontalShinespark, canMidairShinespark, canShinechargeMovement, canShinespark
Dev note: Strats are only tested with zero E-Tanks, unless otherwise documented. FIXME: Some strats can be done with more than one E-Tank, which needs to be represented without requiring disabling E-Tanks. The amount of resources consumed depends upon when during the Crystal Flash the reserves trigger, which will be strat dependent. The amount of Energy remaining after the strat is complex and depends on the number of Reserve Tanks, when Samus gets hit, and by which enemy; for simplicity, it is just assumed that Samus retains the small amount of Energy she had before the Crystal Flash (50 or less) and doesn't gain any refill. For artificial morph setups, the reserve trigger exits G-mode. Being able to toggle suits is important for most applications; while it is not required for all applications, the logic is currently written assuming you can toggle them.
Strats ()
|


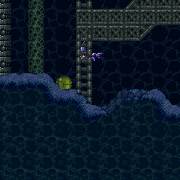
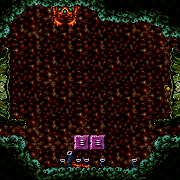
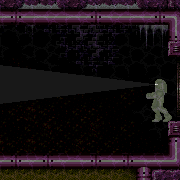
As Bomb Torizo is standing, Crystal Flash in front of it in order to get hit and reserve trigger. Entrance condition: {
"comeInWithRMode": {}
}Requires: {
"not": "f_DefeatedBombTorizo"
}
{
"not": "f_ZebesSetAblaze"
}
"canRiskPermanentLossOfAccess"
"h_activateBombTorizo"
"canRModeCrystalFlashInterrupt"
{
"ammo": {
"type": "Missile",
"count": 10
}
}Dev note: FIXME: If h_activateBombTorizo is changed to require collecting the item in-room, this strat would need a collectsItems. Otherwise, it is possible to avoid picking up the item while doing this. FIXME: This could be done with G-mode, but not if h_activateBombTorizo is changed to require collecting the item in-room (unless somehow the item was collected earlier without killing BT). FIXME: It is possible to farm during the fight before Crystal Flashing, but it requires Samus to be low on Missiles and it is much more difficult to find a safe time to CF. |
From: 1
Left Door
To: 3
Junction (Left side Pit)

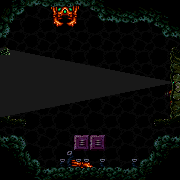
It is required to avoid double hitting the Skultera with the Power Bomb, and to position the Crystal Flash so that the Skultera can hit Samus from above so it avoids the light orb. To do this, use the bottom-left Skultera, and move it off-camera at the far left end of its cycle. Go to the far right end of it's cycle and on the Crystal Flash on the sloped tile just below where it ends. Once the Skultera gets hit by the Power Bomb explosion, it will start moving, even while off-camera. Entrance condition: {
"comeInWithGMode": {
"mode": "direct",
"morphed": true
}
}Requires: "h_artificialMorphComplexRModeCrystalFlashInterrupt"
"canCameraManip"
{
"ammo": {
"type": "Missile",
"count": 10
}
}
{
"ammo": {
"type": "Super",
"count": 10
}
}
{
"ammo": {
"type": "PowerBomb",
"count": 5
}
}
{
"or": [
"h_partialEnemyDamageReduction",
{
"resourceAtMost": [
{
"type": "RegularEnergy",
"count": 19
}
]
},
{
"and": [
{
"resourceCapacity": [
{
"type": "RegularEnergy",
"count": 199
}
]
},
{
"resourceCapacity": [
{
"type": "ReserveEnergy",
"count": 199
}
]
}
]
}
]
}Dev note: There is no reason to do this at node 4, because the movement items required to get to 4 and then do anything useful with the flash suit would also enable Samus to get the flash suit here and then take it to node 4. |
From: 2
Right Door
To: 3
Junction (Left side Pit)
Perform a double Spring Ball jump using a precisely timed bomb boost to propel Samus upward just long enough to get the mid-air Spring Ball jump. This needs to be done multiple times to cross the room with no other items; using Spring Flings to cross from peak to peak can reduce the required number of bomb into Spring Ball jumps to just one or two. To Crystal Flash interrupt, it is required to avoid double hitting the Skultera with the Power Bomb, and to position the Crystal Flash so that the Skultera can hit Samus from above so it avoids the light orb. To do this, use the bottom-left Skultera, and move it off-camera at the far left end of its cycle. Go to the far right end of it's cycle and on the Crystal Flash on the sloped tile just below where it ends. Once the Skultera gets hit by the Power Bomb explosion, it will start moving, even while off-camera. Entrance condition: {
"comeInWithGMode": {
"mode": "direct",
"morphed": true
}
}Requires: "h_artificialMorphUnderwaterBombIntoSpringBallJump"
{
"or": [
"h_artificialMorphSpringFling",
"canBeVeryPatient"
]
}
"h_artificialMorphComplexRModeCrystalFlashInterrupt"
"canCameraManip"
{
  "ammo": {
    "type": "Missile",
    "count": 10
  }
}
{
  "ammo": {
    "type": "Super",
    "count": 10
  }
}
{
  "ammo": {
    "type": "PowerBomb",
    "count": 5
  }
}
{
  "or": [
    "h_partialEnemyDamageReduction",
    {
      "resourceAtMost": [
        {
          "type": "RegularEnergy",
          "count": 19
        }
      ]
    },
    {
      "and": [
        {
          "resourceCapacity": [
            {
              "type": "RegularEnergy",
              "count": 199
            }
          ]
        },
        {
          "resourceCapacity": [
            {
              "type": "ReserveEnergy",
              "count": 199
            }
          ]
        }
      ]
    }
  ]
}
Dev note: Methods with more flexible movement items will instead be done at node 4, after which, they can be used to get here. FIXME: Add variants that can farm enough Energy to choot damage boost without enemy damage reduction or tanks. |
From: 2
Right Door
To: 4
Junction (Right side Pit)
It is required to avoid double hitting the Skultera with the Power Bomb, and to position the Crystal Flash so that the Skultera can hit Samus from above so it avoids the light orb. To do this, use the bottom-right Skultera, and position Samus against the right pillar, or on the slope in front of the pillar. Place the Power Bomb to hit the fish as it reaches the left wall. If Samus has 75% enemy damage reduction, it is required to Crystal Flash on the sloped tile, otherwise she can use either tile. Entrance condition: {
"comeInWithGMode": {
"mode": "direct",
"morphed": true
}
}Requires: {
"or": [
{
"and": [
"Gravity",
"h_artificialMorphIBJ"
]
},
{
"and": [
"Gravity",
"h_artificialMorphSpringBall"
]
},
{
"and": [
"HiJump",
"h_artificialMorphSpringBall"
]
}
]
}
"h_artificialMorphComplexRModeCrystalFlashInterrupt"
{
"ammo": {
"type": "Missile",
"count": 10
}
}
{
"ammo": {
"type": "Super",
"count": 5
}
}
{
"or": [
"h_partialEnemyDamageReduction",
{
"resourceAtMost": [
{
"type": "RegularEnergy",
"count": 19
}
]
},
{
"and": [
{
"resourceCapacity": [
{
"type": "RegularEnergy",
"count": 199
}
]
},
{
"resourceCapacity": [
{
"type": "ReserveEnergy",
"count": 199
}
]
}
]
}
]
} |
From: 1
Left Door
To: 1
Left Door
On entry, quickly roll to the right next to the stair, while Samus is protected with i-frames. It is required to avoid double hitting the Sidehopper with the Power Bomb or it will die. It can help to place a Power Bomb and roll to the right to reduce the chance that the ceiling hopper gets double hit, and to lure the third hopper. Quickly getting back into position and Crystal Flashing will usually get Samus hit by either the ceiling or right hopper. Entrance condition: {
"comeInWithGMode": {
"mode": "direct",
"morphed": true
}
}Requires: "h_ZebesIsAwake"
"h_artificialMorphComplexRModeCrystalFlashInterrupt"
{
"ammo": {
"type": "Missile",
"count": 10
}
}
{
"or": [
"h_partialEnemyDamageReduction",
{
"resourceAtMost": [
{
"type": "RegularEnergy",
"count": 19
}
]
},
{
"and": [
{
"resourceCapacity": [
{
"type": "RegularEnergy",
"count": 199
}
]
},
{
"resourceCapacity": [
{
"type": "ReserveEnergy",
"count": 199
}
]
}
]
}
]
}
{
"obstaclesCleared": [
"C"
]
}Dev note: Killing the hoppers after this is easy, as Samus will have i-frames, the Sidehoppers will be injured, and Samus will have some extra ammo just in case. A different setup could also break A, but Samus will end with at least 10 Power Bombs, so this is ignored for simplicity. |
From: 2
Bottom Door
To: 2
Bottom Door

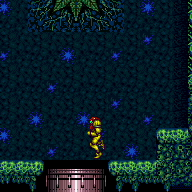
Crystal Flash on the left side of the room when Spore Spawn starts moving, or on the right side when it is in the top right of its swoop. Entrance condition: {
"comeInWithGMode": {
"mode": "direct",
"morphed": true
},
"comesThroughToilet": "no"
}Requires: "h_artificialMorphRModeCrystalFlashInterrupt"
{
"ammo": {
"type": "Missile",
"count": 10
}
}
{
"not": "f_DefeatedSporeSpawn"
}
"canRiskPermanentLossOfAccess"Clears obstacles: door_2 Dev note: With an immobile entry, the note will be wrong, but the timing is pretty lenient and easy to deduce. |
|

Crystal Flash on the left side of the room when Spore Spawn starts moving, or on the right side when it is in the top right of its swoop. Entrance condition: {
"comeInWithRMode": {},
"comesThroughToilet": "no"
}Requires: "canRModeCrystalFlashInterrupt"
{
"ammo": {
"type": "Missile",
"count": 10
}
}
{
"not": "f_DefeatedSporeSpawn"
}
"canRiskPermanentLossOfAccess"Clears obstacles: door_2 |
From: 1
Top Right Door
To: 1
Top Right Door
Place a Power Bomb on entry to kill the first Sidehopper, then cross to the left side of the room. It is required to avoid double hitting the ceiling Sidehopper with the Power Bomb, so lure it to the right, place a Power Bomb in the corner, roll over to lure the hopper and quickly roll back to Crystal Flash. In unlucky situations it is possible that the hopper only does small jumps and never hits Samus. It is possible to cross all the spikes and avoid damaging the ceiling hopper with just Power Bombs. Place a Power Bomb at the edge of the runway then hold forward with precise timing to get a boost to skip the first two then have a small bounce over the third spike. The optimal starting position is on the second-to-last pixel of the ledge and press forward on the 1st, 3rd, or 5th frame which gives Samus a large horizontal boost. (On the last pixel, only the 1st and 3rd frames work, and further to the right only has at most one usable frame. Rolling into the bomb with momentum is not recommended and gives only a 1-frame window.) Entrance condition: {
"comeInWithGMode": {
"mode": "direct",
"morphed": true
}
}Requires: "h_artificialMorphPowerBomb"
{
"or": [
"h_artificialMorphMovement",
{
"and": [
"h_artificialMorphPowerBomb",
"canTrickyGMode"
]
},
{
"spikeHits": 3
},
{
"and": [
"h_artificialMorphPowerBomb",
{
"spikeHits": 1
}
]
}
]
}
"h_artificialMorphComplexRModeCrystalFlashInterrupt"
{
"ammo": {
"type": "Missile",
"count": 10
}
}
{
"ammo": {
"type": "Super",
"count": 10
}
}
{
"ammo": {
"type": "PowerBomb",
"count": 5
}
}
{
"or": [
"h_partialEnemyDamageReduction",
{
"resourceAtMost": [
{
"type": "RegularEnergy",
"count": 19
}
]
},
{
"and": [
{
"resourceCapacity": [
{
"type": "RegularEnergy",
"count": 199
}
]
},
{
"resourceCapacity": [
{
"type": "ReserveEnergy",
"count": 199
}
]
}
]
}
]
}Dev note: It is possible to kill the first Sidehopper with just Bombs and a lot of luck, but that is ignored. |
From: 1
Right Door
To: 1
Right Door
Avoiding a double hit on the Sidehoppers can be pretty tricky. One somewhat reliable way it to lure the Sidehoppers just off-camera, then place a Power Bomb to Crystal Flash, which will hit and lure them to Samus. Be sure to also position Samus over a safe spot, as she will fall through the Power Bomb blocks as she exits G-mode. It can be helpful to think about where the Sidehoppers are and where there hops will be as they are lured on camera; If they hit Samus before she gains Reserve Energy, she will die. If the hoppers hit the side of her light orb, they will die before hitting Samus; this not reliable to account for, because the hoppers' trajectory varies if they have large or small hops. An alternate approach is to Crystal Flash in the left corner, while luring them to the right after placing the Power Bomb. This is relatively difficult to get them to survive, and they are more likely to hit the light orb if they do. Entrance condition: {
"comeInWithGMode": {
"mode": "direct",
"morphed": true
}
}Requires: "h_artificialMorphTrickyRModeCrystalFlashInterrupt"
{
"ammo": {
"type": "Missile",
"count": 10
}
}
{
"or": [
"h_partialEnemyDamageReduction",
{
"resourceAtMost": [
{
"type": "RegularEnergy",
"count": 19
}
]
},
{
"and": [
{
"resourceCapacity": [
{
"type": "RegularEnergy",
"count": 199
}
]
},
{
"resourceCapacity": [
{
"type": "ReserveEnergy",
"count": 199
}
]
}
]
}
]
} |
From: 1
Left Door
To: 2
Right Door
Wait for the pirates to move as far right as possible in order to kill them all with a single Power Bomb. Jump over Baby Kraid by pausing and holding jump and forward just before the pause fully triggers, then remove Spring Ball. After it starts moving to the left, move in to where it was, then Crystal Flash so that it will walk back into Samus and trigger reserves. Entrance condition: {
"comeInWithGMode": {
"mode": "direct",
"morphed": true
}
}Requires: "h_artificialMorphBombThings"
"h_artificialMorphSpringFling"
"h_artificialMorphTrickyRModeCrystalFlashInterrupt"
{
  "ammo": {
    "type": "Missile",
    "count": 10
  }
}
{
  "ammo": {
    "type": "Super",
    "count": 5
  }
}
{
  "or": [
    "h_fullEnemyDamageReduction",
    {
      "and": [
        "h_partialEnemyDamageReduction",
        {
          "resourceAtMost": [
            {
              "type": "RegularEnergy",
              "count": 49
            }
          ]
        }
      ]
    },
    {
      "and": [
        {
          "resourceCapacity": [
            {
              "type": "RegularEnergy",
              "count": 199
            }
          ]
        },
        {
          "resourceCapacity": [
            {
              "type": "ReserveEnergy",
              "count": 199
            }
          ]
        }
      ]
    }
  ]
}
Clears obstacles: door_1 |
From: 2
Right Door
To: 2
Right Door
Wait on the right side of Baby Kraid for about 10 seconds so that he shoots the maximum amount of projectiles. Jump over Baby Kraid by pausing and holding jump and forward just before the pause fully triggers, then remove Spring Ball. After it starts moving to the right, move in to where it was, then Crystal Flash so that it will walk back into Samus and trigger reserves. Entrance condition: {
"comeInWithGMode": {
"mode": "direct",
"morphed": true
}
}Requires: "h_artificialMorphSpringFling"
"h_artificialMorphTrickyRModeCrystalFlashInterrupt"
{
"ammo": {
"type": "Missile",
"count": 10
}
}
{
"ammo": {
"type": "Super",
"count": 5
}
}
{
"or": [
"h_fullEnemyDamageReduction",
{
"and": [
"h_partialEnemyDamageReduction",
{
"resourceAtMost": [
{
"type": "RegularEnergy",
"count": 49
}
]
}
]
},
{
"and": [
{
"resourceCapacity": [
{
"type": "RegularEnergy",
"count": 199
}
]
},
{
"resourceCapacity": [
{
"type": "ReserveEnergy",
"count": 199
}
]
}
]
}
]
}Clears obstacles: door_2 |
|

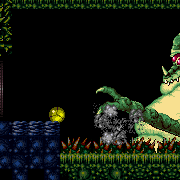
Crystal Flash and then get poked by Kraid's hand. Entrance condition: {
"comeInWithGMode": {
"mode": "direct",
"morphed": true
}
}Requires: {
"not": "f_DefeatedKraid"
}
"canRiskPermanentLossOfAccess"
"h_artificialMorphRModeCrystalFlashInterrupt"
{
"ammo": {
"type": "Missile",
"count": 10
}
}
{
"ammo": {
"type": "Super",
"count": 10
}
}Clears obstacles: door_1 |
|

Crystal Flash and then get poked by Kraid's hand. Entrance condition: {
"comeInWithRMode": {}
}Requires: {
"not": "f_DefeatedKraid"
}
"canRiskPermanentLossOfAccess"
"canRModeCrystalFlashInterrupt"
{
"ammo": {
"type": "Missile",
"count": 10
}
}
{
"ammo": {
"type": "Super",
"count": 10
}
}Clears obstacles: door_1 |
|
Crystal Flash and then get poked by Kraid's hand. Entrance condition: {
"comeInWithRMode": {}
}Requires: {
"or": [
{
"thornHits": 1
},
{
"and": [
"SpaceJump",
"h_KraidCameraFix"
]
}
]
}
{
  "not": "f_DefeatedKraid"
}
"canRiskPermanentLossOfAccess"
"canRModeCrystalFlashInterrupt"
{
  "ammo": {
    "type": "Missile",
    "count": 10
  }
}
{
  "ammo": {
    "type": "Super",
    "count": 10
  }
}
Clears obstacles: door_2 Dev note: This can be done in G-mode, but only if the camera is not fixed. It requires Spring Ball or immobile (and a contact hit). |
From: 1
Left Door
To: 1
Left Door

Phantoon will place stationary, invisible flames, which need to be avoided while starting to Crystal Flash. Crystal Flash and have Phantoon spawn on top of Samus to trigger reserves. Requires a lot of luck. Entrance condition: {
"comeInWithGMode": {
"mode": "direct",
"morphed": true
}
}Requires: {
"not": "f_DefeatedPhantoon"
}
"canRiskPermanentLossOfAccess"
"canBeVeryLucky"
"h_artificialMorphComplexRModeCrystalFlashInterrupt"
{
"ammo": {
"type": "Missile",
"count": 10
}
}
{
"ammo": {
"type": "Super",
"count": 10
}
}
{
"ammo": {
"type": "PowerBomb",
"count": 10
}
}Clears obstacles: door_1 |
From: 1
Left Door
To: 1
Left Door

With no Energy Tanks, roll against the Kzan. Once it starts moving up, roll a small number of pixels under it and quickly Crystal Flash. This is significantly easier with a smaller starting Energy. With a larger starting Energy, or on a particularly quick Power Bomb placement, Samus may have 50 or more in reserves; In this case, it is important to quickly land before turning around and jumping out of the Kzan. Turning around before touching the ground will move Samus several more pixels inside of the Kzan, likely resulting in death. Entrance condition: {
"comeInWithGMode": {
"mode": "direct",
"morphed": true
}
}Requires: "h_artificialMorphComplexRModeCrystalFlashInterrupt"
{
"ammo": {
"type": "Missile",
"count": 2
}
} |
From: 2
Right Door
To: 2
Right Door


With no Energy Tanks, roll against the Kzan. Once it starts moving up, roll a small number of pixels under it and quickly Crystal Flash. This is significantly easier with a smaller starting Energy. With a larger starting Energy, or on a particularly quick Power Bomb placement, Samus may have 50 or more in reserves; In this case, it is important to quickly land before turning around and jumping out of the Kzan. Turning around before touching the ground will move Samus several more pixels inside of the Kzan, likely resulting in death. Entrance condition: {
"comeInWithGMode": {
"mode": "direct",
"morphed": true
}
}Requires: "h_artificialMorphComplexRModeCrystalFlashInterrupt"
{
"ammo": {
"type": "Missile",
"count": 2
}
} |
From: 1
Top Door
To: 1
Top Door
It is required to avoid double hitting the Atomic with the Power Bomb, and to position the Crystal Flash so that the Atomic can hit Samus from below so it avoids the light orb. This is possible with no movement items. Roll down to the shot blocks and Crystal Flash in the middle of the screen. This can be done with up to 2 E-Tanks while suitless, or no E-Tanks and up to 50% damage reduction. Entrance condition: {
"comeInWithGMode": {
"mode": "direct",
"morphed": true
},
"comesThroughToilet": "no"
}Requires: "f_DefeatedPhantoon"
"h_artificialMorphComplexRModeCrystalFlashInterrupt"
{
"ammo": {
"type": "Missile",
"count": 10
}
}
{
"ammo": {
"type": "Super",
"count": 10
}
}
{
"ammo": {
"type": "PowerBomb",
"count": 10
}
} |
From: 2
Top Left Door
To: 2
Top Left Door
It is required to avoid double hitting the Atomic with the Power Bomb, and to position the Crystal Flash so that the Atomic can hit Samus from above or below so it avoids the light orb. With Bombs, IBJ a small distance to where the top bomb is placed near the top of the doorframe to the right, to barely lure the Atomic a bit off-screen, then fall to the ground and Crystal Flash. With Spring Ball, perform three full-height jumps in front of the door to the right, then Crystal Flash. With no movement items this will use more ammo; roll down to the next platform attached to the left wall, then Crystal Flash at the right edge of it. This can be done with up to 2 E-Tanks while suitless, or no E-Tanks and up to 50% damage reduction. Entrance condition: {
"comeInWithGMode": {
"mode": "direct",
"morphed": true
}
}Requires: "f_DefeatedPhantoon"
"h_artificialMorphComplexRModeCrystalFlashInterrupt"
{
"ammo": {
"type": "Missile",
"count": 10
}
}
{
"or": [
"h_artificialMorphSpringBall",
{
"and": [
"h_artificialMorphIBJ",
{
"ammo": {
"type": "Super",
"count": 10
}
}
]
},
{
"and": [
{
"ammo": {
"type": "Super",
"count": 10
}
},
{
"ammo": {
"type": "PowerBomb",
"count": 10
}
}
]
}
]
} |
From: 3
Bottom Left Door
To: 3
Bottom Left Door
It is required to avoid double hitting the Atomic with the Power Bomb, and to position the Crystal Flash so that the Atomic can hit Samus from above so it avoids the light orb. With Bombs, IBJ a small distance to where the top bomb is placed near the center of the doorframe, to barely lure the Atomic a bit off-screen, then fall to the ground and Crystal Flash. With Spring Ball, perform one full-height jump then place a Power Bomb to Crystal Flash; it is possible to do this with fewer Power Bombs by then performing one more full-height jump and landing in the Power Bomb explosion just in time to Crystal Flash. This can be done with up to 2 E-Tanks while suitless, or no E-Tanks and up to 50% damage reduction. Entrance condition: {
"comeInWithGMode": {
"mode": "direct",
"morphed": true
}
}Requires: "f_DefeatedPhantoon"
"h_artificialMorphComplexRModeCrystalFlashInterrupt"
{
"ammo": {
"type": "Missile",
"count": 10
}
}
{
"ammo": {
"type": "Super",
"count": 10
}
}
{
"or": [
"h_artificialMorphSpringBall",
{
"and": [
"h_artificialMorphIBJ",
{
"ammo": {
"type": "PowerBomb",
"count": 10
}
}
]
}
]
} |
From: 4
Top Right Door
To: 4
Top Right Door
It is required to avoid double hitting the Atomic with the Power Bomb, and to position the Crystal Flash so that the Atomic can hit Samus from above or below so it avoids the light orb. With Bombs, IBJ a small distance to where the top bomb is placed near the top of the doorframe, to barely lure the Atomic a bit off-screen, then fall to the ground and Crystal Flash. With Spring Ball, perform three full-height jumps in front of the door, then Crystal Flash. With no movement items this will use more ammo; roll down to the next platform attached to the left wall, then Crystal Flash at the right edge of it. This can be done with up to 2 E-Tanks while suitless, or no E-Tanks and up to 50% damage reduction. Entrance condition: {
"comeInWithGMode": {
"mode": "direct",
"morphed": true
}
}Requires: "f_DefeatedPhantoon"
"h_artificialMorphComplexRModeCrystalFlashInterrupt"
{
"ammo": {
"type": "Missile",
"count": 10
}
}
{
"or": [
"h_artificialMorphSpringBall",
{
"and": [
"h_artificialMorphIBJ",
{
"ammo": {
"type": "Super",
"count": 10
}
}
]
},
{
"and": [
{
"ammo": {
"type": "Super",
"count": 10
}
},
{
"ammo": {
"type": "PowerBomb",
"count": 10
}
}
]
}
]
} |
From: 5
Middle Right Door
To: 5
Middle Right Door
It is required to avoid double hitting the Atomic with the Power Bomb, and to position the Crystal Flash so that the Atomic can hit Samus from above or below so it avoids the light orb. Crystal Flashing on entry before moving will lure an Atomic from below which will work nicely. This can be done with up to 2 E-Tanks while suitless, or no E-Tanks and up to 50% damage reduction. Entrance condition: {
"comeInWithGMode": {
"mode": "direct",
"morphed": true
}
}Requires: "f_DefeatedPhantoon"
"h_artificialMorphComplexRModeCrystalFlashInterrupt"
{
"ammo": {
"type": "Missile",
"count": 10
}
}
{
"ammo": {
"type": "Super",
"count": 10
}
} |
From: 1
Top Left Doorway
To: 1
Top Left Doorway

Crystal Flash on the right edge of the floating blocks. Place the Power Bomb shortly after the slow crab leaves the screen; there should be a single slow crab on the ceiling, just to the left of center. This will avoid killing the fast crab and give it just enough time to come hit Samus from below. Entrance condition: {
"comeInWithGMode": {
"mode": "direct",
"morphed": true,
"mobility": "mobile"
}
}Requires: {
"or": [
"h_artificialMorphSpringBall",
{
"and": [
"Gravity",
"h_artificialMorphIBJ"
]
}
]
}
"h_artificialMorphComplexRModeCrystalFlashInterrupt"
{
  "ammo": {
    "type": "Missile",
    "count": 10
  }
}
{
  "ammo": {
    "type": "Super",
    "count": 10
  }
}
{
  "ammo": {
    "type": "PowerBomb",
    "count": 5
  }
}
{
  "or": [
    "h_fullEnemyDamageReduction",
    {
      "and": [
        "h_partialEnemyDamageReduction",
        {
          "resourceAtMost": [
            {
              "type": "RegularEnergy",
              "count": 39
            }
          ]
        }
      ]
    },
    {
      "and": [
        {
          "resourceCapacity": [
            {
              "type": "RegularEnergy",
              "count": 199
            }
          ]
        },
        {
          "resourceCapacity": [
            {
              "type": "ReserveEnergy",
              "count": 199
            }
          ]
        }
      ]
    }
  ]
}
Dev note: This could be done with more tanks in order to end with more Energy, but this is already a good farming room. |
From: 1
Top Left Doorway
To: 1
Top Left Doorway

Crystal Flash on the right edge of the floating blocks. Place the Power Bomb shortly after the slow crab leaves the screen; there should be a single slow crab on the ceiling, just to the left of center. This will avoid killing the fast crab and give it just enough time to come hit Samus from below. Entrance condition: {
"comeInWithGMode": {
"mode": "direct",
"morphed": true,
"mobility": "immobile"
}
}Requires: {
"or": [
"h_artificialMorphSpringBall",
{
"and": [
"Gravity",
"h_artificialMorphIBJ"
]
}
]
}
"h_artificialMorphComplexRModeCrystalFlashInterrupt"
{
"ammo": {
"type": "Missile",
"count": 10
}
}
{
"ammo": {
"type": "Super",
"count": 10
}
}
{
"ammo": {
"type": "PowerBomb",
"count": 5
}
}
{
"or": [
"h_fullEnemyDamageReduction",
{
"and": [
"h_partialEnemyDamageReduction",
{
"resourceAtMost": [
{
"type": "RegularEnergy",
"count": 39
}
]
}
]
},
{
"and": [
{
"resourceCapacity": [
{
"type": "RegularEnergy",
"count": 199
}
]
},
{
"resourceCapacity": [
{
"type": "ReserveEnergy",
"count": 199
}
]
}
]
}
]
}Dev note: This could be done with more tanks in order to end with more Energy, but this is already a good farming room. |
From: 2
Bottom Left Door
To: 2
Bottom Left Door

Crystal Flash in front of the lower-right door. Place the Power Bomb just as the slow crab turns the corner to go up the the top of the room. This will avoid killing the fast crab and give it just enough time to come hit Samus from above. If Samus only has Power Bombs to cross the room, place them quickly then wait about one extra second before Crystal Flashing. Entrance condition: {
"comeInWithGMode": {
"mode": "direct",
"morphed": true,
"mobility": "mobile"
}
}Requires: {
"or": [
"h_artificialMorphSpringBall",
{
"and": [
"Gravity",
"h_artificialMorphBombThings"
]
}
]
}
"h_artificialMorphComplexRModeCrystalFlashInterrupt"
{
"ammo": {
"type": "Missile",
"count": 10
}
}
{
"ammo": {
"type": "Super",
"count": 10
}
}
{
"ammo": {
"type": "PowerBomb",
"count": 5
}
}
{
"or": [
"h_fullEnemyDamageReduction",
{
"and": [
"h_partialEnemyDamageReduction",
{
"resourceAtMost": [
{
"type": "RegularEnergy",
"count": 39
}
]
}
]
},
{
"and": [
{
"resourceCapacity": [
{
"type": "RegularEnergy",
"count": 199
}
]
},
{
"resourceCapacity": [
{
"type": "ReserveEnergy",
"count": 199
}
]
}
]
}
]
}Dev note: This could be done with more tanks in order to end with more Energy, but this is already a good farming room. |
From: 2
Bottom Left Door
To: 2
Bottom Left Door

Crystal Flash in front of the lower-right door. Place the Power Bomb just as the slow crab turns the corner to go up the the top of the room. This will avoid killing the fast crab and give it just enough time to come hit Samus from above. Entrance condition: {
"comeInWithGMode": {
"mode": "direct",
"morphed": true,
"mobility": "immobile"
}
}Requires: {
"or": [
"h_artificialMorphSpringBall",
{
"and": [
"Gravity",
"h_artificialMorphBombs"
]
}
]
}
"h_artificialMorphComplexRModeCrystalFlashInterrupt"
{
"ammo": {
"type": "Missile",
"count": 10
}
}
{
"ammo": {
"type": "Super",
"count": 10
}
}
{
"ammo": {
"type": "PowerBomb",
"count": 5
}
}
{
"or": [
"h_fullEnemyDamageReduction",
{
"and": [
"h_partialEnemyDamageReduction",
{
"resourceAtMost": [
{
"type": "RegularEnergy",
"count": 39
}
]
}
]
},
{
"and": [
{
"resourceCapacity": [
{
"type": "RegularEnergy",
"count": 199
}
]
},
{
"resourceCapacity": [
{
"type": "ReserveEnergy",
"count": 199
}
]
}
]
}
]
}Dev note: With an immobile setup, the timing is a bit tighter but not too bad, and the Power Bomb movement option won't work. This could be done with more tanks in order to end with more Energy, but this is already a good farming room. |
From: 3
Bottom Right Door
To: 3
Bottom Right Door

Crystal Flash in front of the lower-right door. Place the Power Bomb just as the slow crab turns the corner to go up the the top of the room. This will avoid killing the fast crab and give it just enough time to come hit Samus from above. Entrance condition: {
"comeInWithGMode": {
"mode": "direct",
"morphed": true,
"mobility": "mobile"
}
}Requires: "h_artificialMorphComplexRModeCrystalFlashInterrupt"
{
"ammo": {
"type": "Missile",
"count": 10
}
}
{
"ammo": {
"type": "Super",
"count": 10
}
}
{
"ammo": {
"type": "PowerBomb",
"count": 5
}
}
{
"or": [
"h_fullEnemyDamageReduction",
{
"and": [
"h_partialEnemyDamageReduction",
{
"resourceAtMost": [
{
"type": "RegularEnergy",
"count": 39
}
]
}
]
},
{
"and": [
{
"resourceCapacity": [
{
"type": "RegularEnergy",
"count": 199
}
]
},
{
"resourceCapacity": [
{
"type": "ReserveEnergy",
"count": 199
}
]
}
]
}
]
}Dev note: This could be done with more tanks in order to end with more Energy, but this is already a good farming room. FIXME: This could use an immobile variant. |
From: 3
Bottom Right Door
To: 3
Bottom Right Door
Crystal Flash in front of the lower-right door. Wait for the fast crab to cycle the lower half of the room twice, then place the Power Bomb to Crystal Flash just after a slow crab enters the room and is on the middle of the right ceiling. This will avoid killing the fast crab and give it just enough time to come hit Samus from above. Entrance condition: {
"comeInWithGMode": {
"mode": "direct",
"morphed": true,
"mobility": "immobile"
}
}Requires: {
"or": [
"h_artificialMorphSpringBall",
{
"and": [
"Gravity",
"h_artificialMorphIBJ"
]
}
]
}
"h_artificialMorphComplexRModeCrystalFlashInterrupt"
{
"ammo": {
"type": "Missile",
"count": 10
}
}
{
"ammo": {
"type": "Super",
"count": 10
}
}
{
"ammo": {
"type": "PowerBomb",
"count": 5
}
}
{
"or": [
"h_fullEnemyDamageReduction",
{
"and": [
"h_partialEnemyDamageReduction",
{
"resourceAtMost": [
{
"type": "RegularEnergy",
"count": 39
}
]
}
]
},
{
"and": [
{
"resourceCapacity": [
{
"type": "RegularEnergy",
"count": 199
}
]
},
{
"resourceCapacity": [
{
"type": "ReserveEnergy",
"count": 199
}
]
}
]
}
]
}Dev note: This could be done with more tanks in order to end with more Energy, but this is already a good farming room. |
From: 4
Top Right Doorway
To: 4
Top Right Doorway

Crystal Flash on the right edge of the floating blocks. Place the Power Bomb shortly after the slow crab leaves the screen; there should be a single slow crab on the ceiling, just to the left of center. This will avoid killing the fast crab and give it just enough time to come hit Samus from below. Entrance condition: {
"comeInWithGMode": {
"mode": "direct",
"morphed": true,
"mobility": "mobile"
}
}Requires: {
"or": [
"h_artificialMorphSpringBall",
{
"and": [
"Gravity",
"h_artificialMorphBombs"
]
}
]
}
"h_artificialMorphComplexRModeCrystalFlashInterrupt"
{
"ammo": {
"type": "Missile",
"count": 10
}
}
{
"ammo": {
"type": "Super",
"count": 10
}
}
{
"ammo": {
"type": "PowerBomb",
"count": 5
}
}
{
"or": [
"h_fullEnemyDamageReduction",
{
"and": [
"h_partialEnemyDamageReduction",
{
"resourceAtMost": [
{
"type": "RegularEnergy",
"count": 39
}
]
}
]
},
{
"and": [
{
"resourceCapacity": [
{
"type": "RegularEnergy",
"count": 199
}
]
},
{
"resourceCapacity": [
{
"type": "ReserveEnergy",
"count": 199
}
]
}
]
}
]
}Dev note: This could be done with more tanks in order to end with more Energy, but this is already a good farming room. |
From: 4
Top Right Doorway
To: 4
Top Right Doorway

Crystal Flash on the right edge of the floating blocks. Place the Power Bomb shortly after the slow crab leaves the screen; there should be a single slow crab on the ceiling, just to the left of center. This will avoid killing the fast crab and give it just enough time to come hit Samus from below. Getting into position with just Gravity and Bombs requires fairly precise movement; it is recommended to immediately place a Bomb once morphed and move slightly to boost horizontally. Entrance condition: {
"comeInWithGMode": {
"mode": "direct",
"morphed": true,
"mobility": "immobile"
}
}Requires: {
"or": [
"h_artificialMorphSpringBall",
{
"and": [
"Gravity",
"h_artificialMorphBombs",
"canInsaneJump"
]
}
]
}
"h_artificialMorphComplexRModeCrystalFlashInterrupt"
{
"ammo": {
"type": "Missile",
"count": 10
}
}
{
"ammo": {
"type": "Super",
"count": 10
}
}
{
"ammo": {
"type": "PowerBomb",
"count": 5
}
}
{
"or": [
"h_fullEnemyDamageReduction",
{
"and": [
"h_partialEnemyDamageReduction",
{
"resourceAtMost": [
{
"type": "RegularEnergy",
"count": 39
}
]
}
]
},
{
"and": [
{
"resourceCapacity": [
{
"type": "RegularEnergy",
"count": 199
}
]
},
{
"resourceCapacity": [
{
"type": "ReserveEnergy",
"count": 199
}
]
}
]
}
]
}Dev note: This could be done with more tanks in order to end with more Energy, but this is already a good farming room. |
From: 1
Bottom Left Door
To: 1
Bottom Left Door

It is required to avoid double hitting the Skultera with the Power Bomb, and to position the Crystal Flash so that the Skultera can hit Samus from above so it avoids the light orb. To do this, Crystal Flash on the left-most flat tile just in front of the door and time the Power Bomb so that its first hit is when the Skultera is near the right wall. This can be done with no enemy damage reduction and up to 2 E-Tanks or a 50% enemy damage reduction and no E-Tanks; a 75% reduction is not recommended and would require disabling and reenabling suits with a precise pause abuse. Entrance condition: {
"comeInWithGMode": {
"mode": "direct",
"morphed": true
}
}Requires: "h_artificialMorphComplexRModeCrystalFlashInterrupt"
{
"ammo": {
"type": "Missile",
"count": 10
}
}
{
"ammo": {
"type": "Super",
"count": 10
}
}
{
"or": [
"h_partialEnemyDamageReduction",
{
"resourceAtMost": [
{
"type": "RegularEnergy",
"count": 19
}
]
},
{
"and": [
{
"resourceCapacity": [
{
"type": "RegularEnergy",
"count": 199
}
]
},
{
"resourceCapacity": [
{
"type": "ReserveEnergy",
"count": 199
}
]
}
]
}
]
}Dev note: FIXME: A 75% damage reduction method needs to be documented for if Samus only has Gravity and it provides 75% reduction. |
From: 1
Bottom Left Door
To: 2
Bottom Right Door

Reach the bottom middle of the room with an IBJ or gravity jump and avoid letting the pirate shoot any stationary, invisible lasers. The pirate will not touch Samus if she is high enough on the sloped tiles, but move too high and it will see Samus. Time the Power Bomb to go off so that Samus starts Crystal Flashing during or before the pirate turns around, and while ensuring that Samus will get hit by the lasers that will not move from their spawned location. With Gravity equipped, Samus will need to be boosted by the Power Bomb only while the pirate is moving its head. Samus will need to be able to survive a second hit after the Reserve trigger. This can be done with a 50% enemy damage reduction and no E-Tanks; a 75% reduction is not recommended and would require disabling and reenabling suits with a precise pause abuse. Without suits, this is possible with an E-Tank and two R-Tanks; it is sometimes possible to jump away after the Reserve trigger, but can require some luck. Entrance condition: {
"comeInWithGMode": {
"mode": "direct",
"morphed": true
}
}Requires: "Gravity"
{
"or": [
"h_artificialMorphIBJ",
{
"and": [
"h_artificialMorphSpringBall",
"canGravityJump"
]
}
]
}
"h_artificialMorphRModeCrystalFlashInterrupt"
{
"ammo": {
"type": "Missile",
"count": 10
}
}
{
"or": [
{
"and": [
"h_partialEnemyDamageReduction",
{
"resourceAtMost": [
{
"type": "RegularEnergy",
"count": 19
}
]
}
]
},
{
"and": [
"canTrickyCarryFlashSuit",
{
"resourceCapacity": [
{
"type": "RegularEnergy",
"count": 199
}
]
},
{
"resourceCapacity": [
{
"type": "ReserveEnergy",
"count": 199
}
]
}
]
}
]
}Dev note: FIXME: A 75% damage reduction method needs to be documented for if Samus only has Gravity and it provides 75% reduction. |
From: 2
Bottom Right Door
To: 2
Bottom Right Door

Carefully get into position at the bottom of the room without getting hit by the pirate. The pirate will not touch Samus if she is high enough on the sloped tiles, but move too high and it will see Samus. Time the Power Bomb to go off so that Samus starts Crystal Flashing during or before the pirate turns around. With Gravity equipped, Samus will need to be boosted by the Power Bomb only while the pirate is moving its head. Samus will need to be able to survive a second hit after the Reserve trigger. This can be done with a 50% enemy damage reduction and no E-Tanks; a 75% reduction is not recommended and would require disabling and reenabling suits with a precise pause abuse. Without suits, this is possible with an E-Tank and two R-Tanks; it is sometimes possible to jump away after the Reserve trigger, but can require some luck. Requires: {
"obstaclesCleared": [
"R-Mode"
]
}
"canRModeCrystalFlashInterrupt"
{
"ammo": {
"type": "Missile",
"count": 10
}
}
{
"or": [
{
"and": [
"h_partialEnemyDamageReduction",
{
"resourceAtMost": [
{
"type": "RegularEnergy",
"count": 19
}
]
}
]
},
{
"and": [
"canTrickyCarryFlashSuit",
{
"resourceCapacity": [
{
"type": "RegularEnergy",
"count": 199
}
]
},
{
"resourceCapacity": [
{
"type": "ReserveEnergy",
"count": 199
}
]
}
]
}
]
}Resets obstacles: R-Mode Dev note: There is not an artificial morph variant from door 2, as Samus will be off-camera and can't get hit by the pirate. FIXME: This is a good example of where it would be nice to be able to end with more than 50 Energy, as Samus could spark to the top left. FIXME: A 75% damage reduction method needs to be documented for if Samus only has Gravity and it provides 75% reduction. |
From: 3
Top Right Door
To: 1
Bottom Left Door
It is required to avoid double hitting the Skultera with the Power Bomb, and to position the Crystal Flash so that the Skultera can hit Samus from above so it avoids the light orb. To do this, Crystal Flash on the left-most flat tile just in front of the door and time the Power Bomb so that its first hit is when the Skultera is near the right wall. This can be done with no enemy damage reduction and up to 2 E-Tanks or a 50% enemy damage reduction and no E-Tanks; a 75% reduction is not recommended and would require disabling and reenabling suits with a precise pause abuse. Entrance condition: {
"comeInWithGMode": {
"mode": "direct",
"morphed": true
},
"comesThroughToilet": "no"
}Requires: {
"or": [
{
"and": [
"Gravity",
"h_artificialMorphIBJ"
]
},
{
"and": [
"h_artificialMorphSpringBall",
{
"or": [
"Gravity",
"HiJump"
]
}
]
}
]
}
"h_artificialMorphComplexRModeCrystalFlashInterrupt"
{
  "ammo": {
    "type": "Missile",
    "count": 10
  }
}
{
  "ammo": {
    "type": "Super",
    "count": 10
  }
}
{
  "or": [
    "h_partialEnemyDamageReduction",
    {
      "resourceAtMost": [
        {
          "type": "RegularEnergy",
          "count": 19
        }
      ]
    },
    {
      "and": [
        {
          "resourceCapacity": [
            {
              "type": "RegularEnergy",
              "count": 199
            }
          ]
        },
        {
          "resourceCapacity": [
            {
              "type": "ReserveEnergy",
              "count": 199
            }
          ]
        }
      ]
    }
  ]
}
Dev note: FIXME: A 75% damage reduction method needs to be documented for if Samus only has Gravity and it provides 75% reduction. |
From: 3
Top Right Door
To: 2
Bottom Right Door
Reach the bottom middle of the room and avoid letting the pirate shoot any stationary, invisible lasers. The pirate will not touch Samus if she is high enough on the sloped tiles, but move too high and it will see Samus. Time the Power Bomb to go off so that Samus starts Crystal Flashing during or before the pirate turns around, and while ensuring that Samus will get hit by the lasers that will not move from their spawned location. With Gravity equipped, Samus will need to be boosted by the Power Bomb only while the pirate is moving its head. Samus will need to be able to survive a second hit after the Reserve trigger. This can be done with a 50% enemy damage reduction and no E-Tanks; a 75% reduction is not recommended and would require disabling and reenabling suits with a precise pause abuse. Without suits, this is possible with an E-Tank and two R-Tanks; it is sometimes possible to jump away after the Reserve trigger, but can require some luck. Entrance condition: {
"comeInWithGMode": {
"mode": "direct",
"morphed": true
},
"comesThroughToilet": "no"
}Requires: {
"or": [
{
"and": [
"Gravity",
"h_artificialMorphIBJ"
]
},
{
"and": [
"h_artificialMorphSpringBall",
{
"or": [
"Gravity",
"HiJump",
"canInsaneJump",
"h_artificialMorphSpringFling"
]
}
]
}
]
}
"h_artificialMorphRModeCrystalFlashInterrupt"
{
"ammo": {
"type": "Missile",
"count": 10
}
}
{
"or": [
{
"and": [
"h_partialEnemyDamageReduction",
{
"resourceAtMost": [
{
"type": "RegularEnergy",
"count": 19
}
]
}
]
},
{
"and": [
"canTrickyCarryFlashSuit",
{
"resourceCapacity": [
{
"type": "RegularEnergy",
"count": 199
}
]
},
{
"resourceCapacity": [
{
"type": "ReserveEnergy",
"count": 199
}
]
}
]
}
]
}Dev note: It is possible but extremely difficult to use one of the other pirates instead, but with these items, Samus can get back up from this location. FIXME: A 75% damage reduction method needs to be documented for if Samus only has Gravity and it provides 75% reduction. |
From: 3
Top Right Door
To: 7
Platform Below Top Right Door
Fall straight down to the bottom of the room, staying on the left or right side to avoid the pirate's stationary, invisible lasers. The pirate will not touch Samus if she is high enough on the sloped tiles, but move too high and it will see Samus. Time the Power Bomb to go off so that Samus starts Crystal Flashing during or before the pirate turns around, and while ensuring that Samus will get hit by the lasers that will not move from their spawned location. With Gravity equipped, Samus will need to be boosted by the Power Bomb only while the pirate is moving its head. Samus will need to be able to survive a second hit after the Reserve trigger. This can be done with a 50% enemy damage reduction and no E-Tanks; a 75% reduction is not recommended and would require disabling and reenabling suits with a precise pause abuse. Without suits, this is possible with an E-Tank and two R-Tanks; it is sometimes possible to jump away after the Reserve trigger, but can require some luck. Entrance condition: {
"comeInWithGMode": {
"mode": "direct",
"morphed": true
},
"comesThroughToilet": "no"
}Requires: {
"or": [
"Gravity",
"HiJump"
]
}
"h_artificialMorphRModeCrystalFlashInterrupt"
{
"ammo": {
"type": "Missile",
"count": 10
}
}
{
"or": [
{
"and": [
"h_partialEnemyDamageReduction",
{
"resourceAtMost": [
{
"type": "RegularEnergy",
"count": 19
}
]
}
]
},
{
"and": [
"canTrickyCarryFlashSuit",
{
"resourceCapacity": [
{
"type": "RegularEnergy",
"count": 199
}
]
},
{
"resourceCapacity": [
{
"type": "ReserveEnergy",
"count": 199
}
]
}
]
}
]
}Dev note: It is possible but extremely difficult to use one of the other pirates instead, but with these items, Samus can get back up from this location. With any fewer items, such as Spring Ball alone, it doesn't seem quite possible to use the top right pirate. FIXME: A 75% damage reduction method needs to be documented for if Samus only has Gravity and it provides 75% reduction. |
From: 4
Top Left Door
To: 1
Bottom Left Door
It is required to avoid double hitting the Skultera with the Power Bomb, and to position the Crystal Flash so that the Skultera can hit Samus from above so it avoids the light orb. To do this, Crystal Flash on the left-most flat tile just in front of the door and time the Power Bomb so that its first hit is when the Skultera is near the right wall. This can be done with no enemy damage reduction and up to 2 E-Tanks or a 50% enemy damage reduction and no E-Tanks; a 75% reduction is not recommended and would require disabling and reenabling suits with a precise pause abuse. Entrance condition: {
"comeInWithGMode": {
"mode": "direct",
"morphed": true
},
"comesThroughToilet": "no"
}Requires: "h_artificialMorphComplexRModeCrystalFlashInterrupt"
{
"ammo": {
"type": "Missile",
"count": 10
}
}
{
"ammo": {
"type": "Super",
"count": 10
}
}
{
"or": [
"h_partialEnemyDamageReduction",
{
"resourceAtMost": [
{
"type": "RegularEnergy",
"count": 19
}
]
},
{
"and": [
{
"resourceCapacity": [
{
"type": "RegularEnergy",
"count": 199
}
]
},
{
"resourceCapacity": [
{
"type": "ReserveEnergy",
"count": 199
}
]
}
]
}
]
}Dev note: FIXME: A 75% damage reduction method needs to be documented for if Samus only has Gravity and it provides 75% reduction. |
From: 4
Top Left Door
To: 2
Bottom Right Door
Reach the bottom middle of the room with an IBJ or gravity jump and avoid letting the pirate shoot any stationary, invisible lasers. The pirate will not touch Samus if she is high enough on the sloped tiles, but move too high and it will see Samus. Time the Power Bomb to go off so that Samus starts Crystal Flashing during or before the pirate turns around, and while ensuring that Samus will get hit by the lasers that will not move from their spawned location. With Gravity equipped, Samus will need to be boosted by the Power Bomb only while the pirate is moving its head. Samus will need to be able to survive a second hit after the Reserve trigger. This can be done with a 50% enemy damage reduction and no E-Tanks; a 75% reduction is not recommended and would require disabling and reenabling suits with a precise pause abuse. Without suits, this is possible with an E-Tank and two R-Tanks; it is sometimes possible to jump away after the Reserve trigger, but can require some luck. Entrance condition: {
"comeInWithGMode": {
"mode": "direct",
"morphed": true
},
"comesThroughToilet": "no"
}Requires: "Gravity"
{
"or": [
"h_artificialMorphIBJ",
{
"and": [
"h_artificialMorphSpringBall",
"canGravityJump"
]
}
]
}
"h_artificialMorphRModeCrystalFlashInterrupt"
{
"ammo": {
"type": "Missile",
"count": 10
}
}
{
"or": [
{
"and": [
"h_partialEnemyDamageReduction",
{
"resourceAtMost": [
{
"type": "RegularEnergy",
"count": 19
}
]
}
]
},
{
"and": [
"canTrickyCarryFlashSuit",
{
"resourceCapacity": [
{
"type": "RegularEnergy",
"count": 199
}
]
},
{
"resourceCapacity": [
{
"type": "ReserveEnergy",
"count": 199
}
]
}
]
}
]
}Dev note: FIXME: A 75% damage reduction method needs to be documented for if Samus only has Gravity and it provides 75% reduction. |
From: 4
Top Right Door
To: 4
Top Right Door

It is required to avoid double hitting the Skultera with the Power Bomb, and to position the Crystal Flash so that the Skultera can hit Samus from above so it avoids the light orb. This is particularly precise because the fish is not global, which makes it so Samus needs to be closer to the fish when laying the Power Bomb. Samus also needs to be able to manipulate the camera, which can be difficult while morphed. Roll up the hill a bit until the Skultera is close to the wall, then move away so that it is a bit off camera. Crystal Flash while Samus is on one of the two lower sloped tiles and the Skultera is just off camera to the right, in order to lure it back to the left. This can be done with no enemy damage reduction and up to 2 E-Tanks or a 50% enemy damage reduction and no E-Tanks; a 75% reduction is not recommended and would require disabling and reenabling suits with a precise pause abuse. Entrance condition: {
"comeInWithGMode": {
"mode": "direct",
"morphed": true
}
}Requires: "canCameraManip"
"h_artificialMorphComplexRModeCrystalFlashInterrupt"
{
"ammo": {
"type": "Missile",
"count": 10
}
}
{
"ammo": {
"type": "Super",
"count": 10
}
}
{
"ammo": {
"type": "PowerBomb",
"count": 3
}
}
{
"or": [
"h_partialEnemyDamageReduction",
{
"resourceAtMost": [
{
"type": "RegularEnergy",
"count": 19
}
]
},
{
"and": [
{
"resourceCapacity": [
{
"type": "RegularEnergy",
"count": 199
}
]
},
{
"resourceCapacity": [
{
"type": "ReserveEnergy",
"count": 199
}
]
}
]
}
]
}
{
"or": [
"Gravity",
"HiJump"
]
}Dev note: FIXME: A 75% damage reduction method needs to be documented for if Samus only has Gravity and it provides 75% reduction. If there were another node near the fish, that could reduce a small amount of duplication. |
From: 4
Top Right Door
To: 9
Junction Below Speed Blocks
It is required to avoid double hitting the Skultera with the Power Bomb, and to position the Crystal Flash so that the Skultera can hit Samus from above so it avoids the light orb. This is particularly precise because the fish is not global, which makes it so Samus needs to be closer to the fish when laying the Power Bomb. Samus also needs to be able to manipulate the camera, which can be difficult while morphed. Roll up the hill a bit until the Skultera is close to the wall, then move away so that it is a bit off camera. Crystal Flash while Samus is on one of the two lower sloped tiles and the Skultera is just off camera to the right, in order to lure it back to the left. This can be done with no enemy damage reduction and up to 2 E-Tanks or a 50% enemy damage reduction and no E-Tanks; a 75% reduction is not recommended and would require disabling and reenabling suits with a precise pause abuse. Entrance condition: {
"comeInWithGMode": {
"mode": "direct",
"morphed": true
}
}Requires: "canCameraManip"
"h_artificialMorphComplexRModeCrystalFlashInterrupt"
{
"ammo": {
"type": "Missile",
"count": 10
}
}
{
"ammo": {
"type": "Super",
"count": 10
}
}
{
"ammo": {
"type": "PowerBomb",
"count": 3
}
}
{
"or": [
"h_partialEnemyDamageReduction",
{
"resourceAtMost": [
{
"type": "RegularEnergy",
"count": 19
}
]
},
{
"and": [
{
"resourceCapacity": [
{
"type": "RegularEnergy",
"count": 199
}
]
},
{
"resourceCapacity": [
{
"type": "ReserveEnergy",
"count": 199
}
]
}
]
}
]
}Dev note: FIXME: A 75% damage reduction method needs to be documented for if Samus only has Gravity and it provides 75% reduction. If there were another node near the fish, that could reduce a small amount of duplication. |
From: 10
Direct G-Mode Morph, On Ledge Above Speed Blocks
To: 4
Top Right Door
It is required to avoid double hitting the Skultera with the Power Bomb, and to position the Crystal Flash so that the Skultera can hit Samus from above so it avoids the light orb. This is particularly precise because the fish is not global, which makes it so Samus needs to be closer to the fish when laying the Power Bomb. Samus also needs to be able to manipulate the camera, which can be difficult while morphed. Roll up the hill a bit until the Skultera is close to the wall, then move away so that it is a bit off camera. Crystal Flash while Samus is on one of the two lower sloped tiles and the Skultera is just off camera to the right, in order to lure it back to the left. This can be done with no enemy damage reduction and up to 2 E-Tanks or a 50% enemy damage reduction and no E-Tanks; a 75% reduction is not recommended and would require disabling and reenabling suits with a precise pause abuse. Requires: {
"or": [
{
"and": [
"Gravity",
"h_artificialMorphIBJ"
]
},
{
"and": [
"Gravity",
"HiJump",
"h_artificialMorphSpringBall"
]
},
{
"and": [
"h_artificialMorphSpringBall",
"canGravityJump"
]
},
"h_artificialMorphDoubleSpringBallJump"
]
}
"canCameraManip"
"h_artificialMorphComplexRModeCrystalFlashInterrupt"
{
"ammo": {
"type": "Missile",
"count": 10
}
}
{
"ammo": {
"type": "Super",
"count": 10
}
}
{
"ammo": {
"type": "PowerBomb",
"count": 3
}
}
{
"or": [
"h_partialEnemyDamageReduction",
{
"resourceAtMost": [
{
"type": "RegularEnergy",
"count": 19
}
]
},
{
"and": [
{
"resourceCapacity": [
{
"type": "RegularEnergy",
"count": 199
}
]
},
{
"resourceCapacity": [
{
"type": "ReserveEnergy",
"count": 199
}
]
}
]
}
]
}Dev note: FIXME: A 75% damage reduction method needs to be documented for if Samus only has Gravity and it provides 75% reduction. |
From: 1
Left Door
To: 1
Left Door

On room entry, roll into one of the baby turtles in order to get Mama Turtle to wake up. This then requires a precisely timed Crystal Flash, such that Mama Turtle hits Samus immediately after she gets Reserve Energy, to prevent getting double hit. The precise timing is not required with the ability to survive another hit after the Reserve trigger. Samus will sometimes be forced onto Mama Turtle's back, which can force a third hit; this can be prevented by holding forward as she hits Samus. Entrance condition: {
"comeInWithGMode": {
"mode": "direct",
"morphed": true
}
}Requires: "h_artificialMorphRModeCrystalFlashInterrupt"
{
"or": [
{
"and": [
{
"ammo": {
"type": "Missile",
"count": 10
}
},
{
"or": [
"h_fullEnemyDamageReduction",
{
"and": [
"h_partialEnemyDamageReduction",
{
"resourceCapacity": [
{
"type": "RegularEnergy",
"count": 149
}
]
},
{
"resourceCapacity": [
{
"type": "ReserveEnergy",
"count": 149
}
]
}
]
},
{
"and": [
{
"resourceCapacity": [
{
"type": "RegularEnergy",
"count": 249
}
]
},
{
"resourceCapacity": [
{
"type": "ReserveEnergy",
"count": 249
}
]
}
]
}
]
}
]
},
{
"and": [
{
"ammo": {
"type": "Missile",
"count": 2
}
},
"canComplexRModeCrystalFlashInterrupt"
]
}
]
} |
|


This requires a precisely timed Crystal Flash, such that Mama Turtle hits Samus immediately after she gets Reserve Energy, to prevent getting double hit. The precise timing is not required with the ability to survive another hit after the Reserve trigger. Samus will sometimes be forced onto Mama Turtle's back, which can force a third hit; this can be prevented by holding forward as she hits Samus. Entrance condition: {
"comeInWithRMode": {}
}Requires: "canRModeCrystalFlashInterrupt"
{
"or": [
{
"and": [
{
"ammo": {
"type": "Missile",
"count": 10
}
},
{
"or": [
"h_fullEnemyDamageReduction",
{
"and": [
"h_partialEnemyDamageReduction",
{
"resourceCapacity": [
{
"type": "RegularEnergy",
"count": 149
}
]
},
{
"resourceCapacity": [
{
"type": "ReserveEnergy",
"count": 149
}
]
}
]
},
{
"and": [
{
"resourceCapacity": [
{
"type": "RegularEnergy",
"count": 249
}
]
},
{
"resourceCapacity": [
{
"type": "ReserveEnergy",
"count": 249
}
]
}
]
}
]
}
]
},
{
"and": [
{
"ammo": {
"type": "Missile",
"count": 2
}
},
"canComplexRModeCrystalFlashInterrupt"
]
}
]
} |
|


Kill the Zebbos and have their drops spawn out of the way. After a breif delay, Crystal Flash on the overhang of their spawn location. This requires no suits or E-Tanks. Requires: {
"obstaclesCleared": [
"R-Mode"
]
}
"canRModeCrystalFlashInterrupt"
{
"ammo": {
"type": "Missile",
"count": 10
}
}
{
"ammo": {
"type": "Super",
"count": 10
}
}Resets obstacles: R-Mode Dev note: This doesn't normally work in G-mode. Killing the Zebbos in G-mode will make them stop spawning, and from the right Samus will be off-camera. FIXME: It does look possible to place a Power Bomb midair and exit G-mode, collect a single drop and then get hit before the Crystal Flash occurs. |
From: 1
Left Door
To: 1
Left Door
Crystal Flash to where the ceiling crab will hit Samus from above. Samus needs to be positioned under the left edge of the large central structure and time the Power Bomb to avoid killing the crab. The crab only briefly intersects Samus while it is turning the corner, so it won't double hit Samus. Entrance condition: {
"comeInWithGMode": {
"mode": "direct",
"morphed": true
}
}Requires: "h_artificialMorphComplexRModeCrystalFlashInterrupt"
{
"ammo": {
"type": "Missile",
"count": 10
}
}
{
"ammo": {
"type": "Super",
"count": 10
}
}
{
"refill": [
"ReserveEnergy"
]
}
{
"autoReserveTrigger": {}
} |
From: 3
Top Door
To: 1
Left Door
Fall down the shaft then Crystal Flash to where the ceiling crab will hit Samus from above. Samus needs to be positioned under the left edge of the large central structure and time the Power Bomb to avoid killing the crab. The crab only briefly intersects Samus while it is turning the corner, so it won't double hit Samus. Entrance condition: {
"comeInWithGMode": {
"mode": "direct",
"morphed": true
},
"comesThroughToilet": "no"
}Requires: "h_artificialMorphComplexRModeCrystalFlashInterrupt"
{
"ammo": {
"type": "Missile",
"count": 10
}
}
{
"ammo": {
"type": "Super",
"count": 10
}
}
{
"refill": [
"ReserveEnergy"
]
}
{
"autoReserveTrigger": {}
} |
From: 3
Top Door
To: 3
Top Door
Crystal Flash on the top right corner of the central structure to where the crab will hit Samus from below. Time the Power Bomb to avoid killing the crab. Entrance condition: {
"comeInWithGMode": {
"mode": "direct",
"morphed": true
},
"comesThroughToilet": "no"
}Requires: "h_artificialMorphComplexRModeCrystalFlashInterrupt"
{
"ammo": {
"type": "Missile",
"count": 10
}
}
{
"ammo": {
"type": "Super",
"count": 10
}
}
{
"or": [
"h_fullEnemyDamageReduction",
{
"and": [
"h_partialEnemyDamageReduction",
{
"resourceAtMost": [
{
"type": "RegularEnergy",
"count": 39
}
]
}
]
},
{
"and": [
{
"resourceCapacity": [
{
"type": "RegularEnergy",
"count": 199
}
]
},
{
"resourceCapacity": [
{
"type": "ReserveEnergy",
"count": 199
}
]
}
]
}
]
}
{
"useFlashSuit": {}
}
{
"shinespark": {
"frames": 7,
"excessFrames": 0
}
}Exit condition: {
"leaveWithSpark": {}
}Unlocks doors: {"types":["ammo"],"requires":[]} |
From: 3
Top Door
To: 4
Platform Below Top Door
Crystal Flash on the top right corner of the central structure to where the crab will hit Samus from below. Time the Power Bomb to avoid killing the crab. Entrance condition: {
"comeInWithGMode": {
"mode": "direct",
"morphed": true
},
"comesThroughToilet": "no"
}Requires: "h_artificialMorphComplexRModeCrystalFlashInterrupt"
{
"ammo": {
"type": "Missile",
"count": 10
}
}
{
"ammo": {
"type": "Super",
"count": 10
}
}
{
"or": [
"h_fullEnemyDamageReduction",
{
"and": [
"h_partialEnemyDamageReduction",
{
"resourceAtMost": [
{
"type": "RegularEnergy",
"count": 39
}
]
}
]
},
{
"and": [
{
"resourceCapacity": [
{
"type": "RegularEnergy",
"count": 199
}
]
},
{
"resourceCapacity": [
{
"type": "ReserveEnergy",
"count": 199
}
]
}
]
}
]
}
{
"or": [
"Gravity",
"HiJump",
"canSpringBallJumpMidAir"
]
}Dev note: A node below the platform might help, but without the extra movement, Samus can always do this at 1 instead. With Ice, Samus would want to do this at 1 and then climb back up. |
From: 3
Bottom Right Door
To: 3
Bottom Right Door

Climb up and lure and Oum to the right pit, then time the Crystal Flash so that the Oum can hit Samus. This is fairly lenient, but one method is to Crystal Flash near the shot block pillar while the Oum is to the right of Samus moving right. With some testing, it seemed like the Oum was more likely to hit Samus when it is moving to the left. This is possible with a Bomb into Spring Ball jump using a precisely timed bomb boost to propel Samus upward just long enough to get the mid-air Spring Ball jump. Entrance condition: {
"comeInWithGMode": {
"mode": "direct",
"morphed": true
}
}Requires: {
"or": [
{
"and": [
"HiJump",
"h_artificialMorphSpringBall"
]
},
{
"and": [
"Gravity",
"h_artificialMorphIBJ"
]
},
"h_artificialMorphUnderwaterBombIntoSpringBallJump"
]
}
"h_artificialMorphRModeCrystalFlashInterrupt"
{
"ammo": {
"type": "Missile",
"count": 10
}
}
{
"or": [
{
"tech": "canComplexRModeCrystalFlashInterrupt"
},
{
"ammo": {
"type": "Super",
"count": 10
}
}
]
}
{
"or": [
"h_fullEnemyDamageReduction",
{
"and": [
"h_partialEnemyDamageReduction",
{
"resourceAtMost": [
{
"type": "RegularEnergy",
"count": 49
}
]
}
]
},
{
"and": [
{
"resourceCapacity": [
{
"type": "RegularEnergy",
"count": 199
}
]
},
{
"resourceCapacity": [
{
"type": "ReserveEnergy",
"count": 199
}
]
}
]
}
]
}Dev note: It is possible to enter with G-mode for the left side of the room and do this off-camera, but it is unreasonably difficult. |
From: 3
Bottom Right Door
To: 3
Bottom Right Door

Time the Crystal Flash so that the Oum can hit Samus. This is fairly lenient, but one method is to Crystal Flash near the shot block pillar while the Oum is to the right of Samus, near the door. Requires: {
"obstaclesCleared": [
"R-Mode"
]
}
"canRModeCrystalFlashInterrupt"
{
"ammo": {
"type": "Missile",
"count": 10
}
}
{
"or": [
{
"tech": "canComplexRModeCrystalFlashInterrupt"
},
{
"ammo": {
"type": "Super",
"count": 10
}
}
]
}
{
"or": [
"h_fullEnemyDamageReduction",
{
"and": [
"h_partialEnemyDamageReduction",
{
"resourceAtMost": [
{
"type": "RegularEnergy",
"count": 49
}
]
}
]
},
{
"and": [
{
"resourceCapacity": [
{
"type": "RegularEnergy",
"count": 199
}
]
},
{
"resourceCapacity": [
{
"type": "ReserveEnergy",
"count": 199
}
]
}
]
}
]
}Resets obstacles: R-Mode |
From: 1
Top Left Door
To: 1
Top Left Door

On entry, the pirate will place a stationary, invisible laser. Cross the chasm while trying to avoid allowing it to place more lasers, with a bomb boost or spring fling. Move to the top of the platform only while the pirate is turning its head. Just before it is about to rotate its head again, Crystal Flash in a spot that is free of lasers in order to be able to gain some Reserve Energy before getting hit. Entrance condition: {
"comeInWithGMode": {
"mode": "direct",
"morphed": true
}
}Requires: "h_artificialMorphRModeCrystalFlashInterrupt"
"canComplexGMode"
{
"ammo": {
"type": "Missile",
"count": 10
}
}
{
"or": [
"h_artificialMorphSpringFling",
{
"and": [
"h_artificialMorphBombHorizontally",
"h_additionalBomb"
]
}
]
}Clears obstacles: door_1 |
|

Crystal Flash behind the pirate while it is turning its head. It will turn around during the Crystal Flash and shoot Samus with lasers. Quickly remorph once Samus regains mobility to prevent taking a third laser hit. Entrance condition: {
"comeInWithRMode": {}
}Requires: "canRModeCrystalFlashInterrupt"
{
"ammo": {
"type": "Missile",
"count": 10
}
}
{
"or": [
"canTrickyDodgeEnemies",
{
"enemyDamage": {
"enemy": "Pink Space Pirate (standing)",
"type": "laser",
"hits": 1
}
}
]
}Clears obstacles: door_1 Dev note: Works with 0 or 1 E-Tank. FIXME: There may be a use for using a lower pirate instead, or for doing this while killing the pirates another way. |
From: 1
Left Vertical Door
To: 2
Bottom Right Door
It is required to avoid double hitting the Skultera with the Power Bomb, and to position the Crystal Flash so that the Skultera can hit Samus from above so it avoids the light orb. To do this, Crystal Flash just left of the top left corner of the raised floor and time the Power Bomb so that its first hit is when the Skultera is far to the left. This can be done with no enemy damage reduction and up to 2 E-Tanks or a 50% enemy damage reduction and no E-Tanks; a 75% reduction is not recommended and would require disabling and reenabling suits with a precise pause abuse. Entrance condition: {
"comeInWithGMode": {
"mode": "direct",
"morphed": true
},
"comesThroughToilet": "no"
}Requires: {
"or": [
"h_artificialMorphBombThings",
"h_artificialMorphSpringBall"
]
}
"h_artificialMorphComplexRModeCrystalFlashInterrupt"
{
  "ammo": {
    "type": "Missile",
    "count": 10
  }
}
{
  "ammo": {
    "type": "Super",
    "count": 10
  }
}
{
  "or": [
    "h_partialEnemyDamageReduction",
    {
      "resourceAtMost": [
        {
          "type": "RegularEnergy",
          "count": 19
        }
      ]
    },
    {
      "and": [
        {
          "resourceCapacity": [
            {
              "type": "RegularEnergy",
              "count": 199
            }
          ]
        },
        {
          "resourceCapacity": [
            {
              "type": "ReserveEnergy",
              "count": 199
            }
          ]
        }
      ]
    }
  ]
}
Dev note: FIXME: A 75% damage reduction method needs to be documented for if Samus only has Gravity and it provides 75% reduction. |
From: 2
Bottom Right Door
To: 2
Bottom Right Door

It is required to avoid double hitting the Skultera with the Power Bomb, and to position the Crystal Flash so that the Skultera can hit Samus from above so it avoids the light orb. To do this, Crystal Flash just left of the top left corner of the raised floor and time the Power Bomb so that its first hit is when the Skultera is far to the left. This can be done with no enemy damage reduction and up to 2 E-Tanks or a 50% enemy damage reduction and no E-Tanks; a 75% reduction is not recommended and would require disabling and reenabling suits with a precise pause abuse. Entrance condition: {
"comeInWithGMode": {
"mode": "direct",
"morphed": true
}
}Requires: {
"or": [
{
"and": [
"Gravity",
"h_artificialMorphIBJ"
]
},
"h_artificialMorphSpringBall"
]
}
"h_artificialMorphComplexRModeCrystalFlashInterrupt"
{
  "ammo": {
    "type": "Missile",
    "count": 10
  }
}
{
  "ammo": {
    "type": "Super",
    "count": 10
  }
}
{
  "or": [
    "h_partialEnemyDamageReduction",
    {
      "resourceAtMost": [
        {
          "type": "RegularEnergy",
          "count": 19
        }
      ]
    },
    {
      "and": [
        {
          "resourceCapacity": [
            {
              "type": "RegularEnergy",
              "count": 199
            }
          ]
        },
        {
          "resourceCapacity": [
            {
              "type": "ReserveEnergy",
              "count": 199
            }
          ]
        }
      ]
    }
  ]
}
Dev note: FIXME: A 75% damage reduction method needs to be documented for if Samus only has Gravity and it provides 75% reduction. |
From: 3
Middle Right Door
To: 2
Bottom Right Door

It is required to avoid double hitting the Skultera with the Power Bomb, and to position the Crystal Flash so that the Skultera can hit Samus from above so it avoids the light orb. To do this, Crystal Flash just left of the top left corner of the raised floor and time the Power Bomb so that its first hit is when the Skultera is far to the left. This can be done with no enemy damage reduction and up to 2 E-Tanks or a 50% enemy damage reduction and no E-Tanks; a 75% reduction is not recommended and would require disabling and reenabling suits with a precise pause abuse. Entrance condition: {
"comeInWithGMode": {
"mode": "direct",
"morphed": true
}
}Requires: "h_artificialMorphComplexRModeCrystalFlashInterrupt"
{
"ammo": {
"type": "Missile",
"count": 10
}
}
{
"ammo": {
"type": "Super",
"count": 10
}
}
{
"or": [
"h_partialEnemyDamageReduction",
{
"resourceAtMost": [
{
"type": "RegularEnergy",
"count": 19
}
]
},
{
"and": [
{
"resourceCapacity": [
{
"type": "RegularEnergy",
"count": 199
}
]
},
{
"resourceCapacity": [
{
"type": "ReserveEnergy",
"count": 199
}
]
}
]
}
]
}Dev note: FIXME: A 75% damage reduction method needs to be documented for if Samus only has Gravity and it provides 75% reduction. |
From: 4
Top Right Door
To: 2
Bottom Right Door

It is required to avoid double hitting the Skultera with the Power Bomb, and to position the Crystal Flash so that the Skultera can hit Samus from above so it avoids the light orb. To do this, Crystal Flash just left of the top left corner of the raised floor and time the Power Bomb so that its first hit is when the Skultera is far to the left. This can be done with no enemy damage reduction and up to 2 E-Tanks or a 50% enemy damage reduction and no E-Tanks; a 75% reduction is not recommended and would require disabling and reenabling suits with a precise pause abuse. Entrance condition: {
"comeInWithGMode": {
"mode": "direct",
"morphed": true
}
}Requires: "h_artificialMorphComplexRModeCrystalFlashInterrupt"
{
"ammo": {
"type": "Missile",
"count": 10
}
}
{
"ammo": {
"type": "Super",
"count": 10
}
}
{
"or": [
"h_partialEnemyDamageReduction",
{
"resourceAtMost": [
{
"type": "RegularEnergy",
"count": 19
}
]
},
{
"and": [
{
"resourceCapacity": [
{
"type": "RegularEnergy",
"count": 199
}
]
},
{
"resourceCapacity": [
{
"type": "ReserveEnergy",
"count": 199
}
]
}
]
}
]
}Dev note: FIXME: A 75% damage reduction method needs to be documented for if Samus only has Gravity and it provides 75% reduction. |
From: 1
Left Door
To: 2
Bottom Door

It is required to avoid double hitting the Skultera with the Power Bomb, and to position the Crystal Flash so that the Skultera can hit Samus from above so it avoids the light orb. To do this, Crystal Flash one tile left of the door and time the Power Bomb so that its first hit is when the Skultera is just a bit off-screen to the right. This can be done with no enemy damage reduction and up to 2 E-Tanks or a 50% enemy damage reduction and no E-Tanks; a 75% reduction is not recommended and would require disabling and reenabling suits with a precise pause abuse. Entrance condition: {
"comeInWithGMode": {
"mode": "direct",
"morphed": true
}
}Requires: "h_artificialMorphComplexRModeCrystalFlashInterrupt"
{
"ammo": {
"type": "Missile",
"count": 10
}
}
{
"ammo": {
"type": "Super",
"count": 10
}
}
{
"or": [
"h_partialEnemyDamageReduction",
{
"resourceAtMost": [
{
"type": "RegularEnergy",
"count": 19
}
]
},
{
"and": [
{
"resourceCapacity": [
{
"type": "RegularEnergy",
"count": 199
}
]
},
{
"resourceCapacity": [
{
"type": "ReserveEnergy",
"count": 199
}
]
}
]
}
]
}Dev note: FIXME: A 75% damage reduction method needs to be documented for if Samus only has Gravity and it provides 75% reduction. |
From: 2
Bottom Door
To: 2
Bottom Door
It is required to avoid double hitting the Skultera with the Power Bomb, and to position the Crystal Flash so that the Skultera can hit Samus from above so it avoids the light orb. To do this, Crystal Flash one tile left of the door and time the Power Bomb so that its first hit is when the Skultera is just a bit off-screen to the right. If Samus does not have a way to get to the left side of the door, instead Crystal Flash on the left-most flat tile to the right of the raised floor in the middle of the room. This can be done with no enemy damage reduction and up to 2 E-Tanks or a 50% enemy damage reduction and no E-Tanks; a 75% reduction is not recommended and would require disabling and reenabling suits with a precise pause abuse. Entrance condition: {
"comeInWithGMode": {
"mode": "direct",
"morphed": true
},
"comesThroughToilet": "no"
}Requires: "h_artificialMorphComplexRModeCrystalFlashInterrupt"
{
"ammo": {
"type": "Missile",
"count": 10
}
}
{
"ammo": {
"type": "Super",
"count": 10
}
}
{
"or": [
"h_partialEnemyDamageReduction",
{
"resourceAtMost": [
{
"type": "RegularEnergy",
"count": 19
}
]
},
{
"and": [
{
"resourceCapacity": [
{
"type": "RegularEnergy",
"count": 199
}
]
},
{
"resourceCapacity": [
{
"type": "ReserveEnergy",
"count": 199
}
]
}
]
}
]
}Dev note: FIXME: A 75% damage reduction method needs to be documented for if Samus only has Gravity and it provides 75% reduction. |
From: 1
Left Door
To: 1
Left Door

This requires a precisely timed Crystal Flash, such that Shaktool hits Samus immediately after she gets Reserve Energy, to prevent getting double hit. With a second Reserve Tank and an Energy Tank, or the damage reduction from a suit, Samus is able to survive a second hit. If the wall is already broken, either wait for Shaktool to cross the room or move in front of it. It is possible to enter the room and land on the doorsill, then bomb or Power Bomb boost across when the tide is high. Entrance condition: {
"comeInWithGMode": {
"mode": "direct",
"morphed": true
}
}Requires: "h_artificialMorphRModeCrystalFlashInterrupt"
{
"or": [
{
"and": [
{
"ammo": {
"type": "Missile",
"count": 10
}
},
{
"or": [
"h_partialEnemyDamageReduction",
{
"and": [
{
"resourceCapacity": [
{
"type": "RegularEnergy",
"count": 199
}
]
},
{
"resourceCapacity": [
{
"type": "ReserveEnergy",
"count": 199
}
]
}
]
}
]
}
]
},
{
"and": [
{
"ammo": {
"type": "Missile",
"count": 2
}
},
"h_artificialMorphComplexRModeCrystalFlashInterrupt"
]
}
]
}
{
"or": [
"h_artificialMorphSpringBall",
{
"and": [
{
"or": [
"canInsaneJump",
"Gravity"
]
},
{
"or": [
"h_artificialMorphBombs",
{
"ammo": {
"type": "PowerBomb",
"count": 2
}
}
]
}
]
},
"canBePatient",
{
"and": [
"canRiskPermanentLossOfAccess",
{
"not": "f_ShaktoolDoneDigging"
}
]
}
]
} |
|


This requires a precisely timed Crystal Flash, such that Shaktool hits Samus immediately after she gets Reserve Energy, to prevent getting double hit. With a second Reserve Tank and an Energy Tank, or the damage reduction from a suit, Samus is able to survive a second hit. Entrance condition: {
"comeInWithRMode": {}
}Requires: "canRModeCrystalFlashInterrupt"
{
"or": [
{
"and": [
{
"ammo": {
"type": "Missile",
"count": 10
}
},
{
"or": [
"h_partialEnemyDamageReduction",
{
"and": [
{
"resourceCapacity": [
{
"type": "RegularEnergy",
"count": 199
}
]
},
{
"resourceCapacity": [
{
"type": "ReserveEnergy",
"count": 199
}
]
}
]
}
]
}
]
},
{
"and": [
{
"ammo": {
"type": "Missile",
"count": 2
}
},
"canComplexRModeCrystalFlashInterrupt"
]
}
]
} |
From: 2
Right Door
To: 2
Right Door

This requires a precisely timed Crystal Flash, such that Shaktool hits Samus immediately after she gets Reserve Energy, to prevent getting double hit. With a second Reserve Tank and an Energy Tank, or the damage reduction from a suit, Samus is able to survive a second hit. Entrance condition: {
"comeInWithGMode": {
"mode": "direct",
"morphed": true
}
}Requires: {
"or": [
"f_ShaktoolDoneDigging",
{
"obstaclesCleared": [
"f_ShaktoolDoneDigging"
]
}
]
}
"h_artificialMorphRModeCrystalFlashInterrupt"
{
"or": [
{
"and": [
{
"ammo": {
"type": "Missile",
"count": 10
}
},
{
"or": [
"h_partialEnemyDamageReduction",
{
"and": [
{
"resourceCapacity": [
{
"type": "RegularEnergy",
"count": 199
}
]
},
{
"resourceCapacity": [
{
"type": "ReserveEnergy",
"count": 199
}
]
}
]
}
]
}
]
},
{
"and": [
{
"ammo": {
"type": "Missile",
"count": 2
}
},
"h_artificialMorphComplexRModeCrystalFlashInterrupt"
]
}
]
} |
|


This requires a precisely timed Crystal Flash, such that Shaktool hits Samus immediately after she gets Reserve Energy, to prevent getting double hit. With a second Reserve Tank and an Energy Tank, or the damage reduction from a suit, Samus is able to survive a second hit. Entrance condition: {
"comeInWithRMode": {}
}Requires: {
"or": [
"f_ShaktoolDoneDigging",
{
"obstaclesCleared": [
"f_ShaktoolDoneDigging"
]
}
]
}
"canRModeCrystalFlashInterrupt"
{
  "or": [
    {
      "and": [
        {
          "ammo": {
            "type": "Missile",
            "count": 10
          }
        },
        {
          "or": [
            "h_partialEnemyDamageReduction",
            {
              "and": [
                {
                  "resourceCapacity": [
                    {
                      "type": "RegularEnergy",
                      "count": 199
                    }
                  ]
                },
                {
                  "resourceCapacity": [
                    {
                      "type": "ReserveEnergy",
                      "count": 199
                    }
                  ]
                }
              ]
            }
          ]
        }
      ]
    },
    {
      "and": [
        {
          "ammo": {
            "type": "Missile",
            "count": 2
          }
        },
        "canComplexRModeCrystalFlashInterrupt"
      ]
    }
  ]
} |
|

On entry, kill or dodge the first Rinkas then Crystal Flash directly above or below a Rinka Spawner. Requires: {
"obstaclesCleared": [
"R-Mode"
]
}
{
"obstaclesCleared": [
"A"
]
}
"canRModeCrystalFlashInterrupt"
{
  "ammo": {
    "type": "Missile",
    "count": 10
  }
}
{
  "ammo": {
    "type": "Super",
    "count": 10
  }
}Resets obstacles: R-Mode Dev note: There could be a variant with the Metroids alive, but they will all lure to Samus and the light orb will disappear, so she will take heavy damage. This is not possible in G-mode, because the Power Bomb will kill the Rinka and prevent more from spawning. |
|

On entry, kill or dodge the first Rinkas then Crystal Flash directly above or below a Rinka Spawner. Requires: {
"obstaclesCleared": [
"R-Mode"
]
}
{
"obstaclesCleared": [
"B"
]
}
"canRModeCrystalFlashInterrupt"
{
  "ammo": {
    "type": "Missile",
    "count": 10
  }
}
{
  "ammo": {
    "type": "Super",
    "count": 10
  }
}Resets obstacles: R-Mode Dev note: There could be a variant with the Metroids alive, but they will all lure to Samus and the light orb will disappear, so she will take heavy damage. This is not possible in G-mode, because the Power Bomb will kill the Rinka and prevent more from spawning. |
|

On entry, kill or dodge the first Rinkas then Crystal Flash directly above or below a Rinka Spawner. Entrance condition: {
"comeInWithRMode": {}
}Requires: "canRModeCrystalFlashInterrupt"
{
"ammo": {
"type": "Missile",
"count": 10
}
}
{
"ammo": {
"type": "Super",
"count": 10
}
}Dev note: Note that this and the top of Metroid Room 4 are the only of the Metroid rooms that currently allows the Metroids to be alive, as they can get stuck on the ledge. This is not possible in G-mode, because the Power Bomb will kill the Rinka and prevent more from spawning. |
From: 2
Bottom Right Door
To: 2
Bottom Right Door

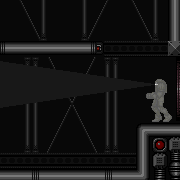
On entry, kill or dodge the first Rinkas then Crystal Flash directly above or below a Rinka Spawner. Entrance condition: {
"comeInWithRMode": {}
}Requires: {
"or": [
"f_KilledMetroidRoom2",
{
"obstaclesCleared": [
"f_KilledMetroidRoom2"
]
}
]
}
"canRModeCrystalFlashInterrupt"
{
  "ammo": {
    "type": "Missile",
    "count": 10
  }
}
{
  "ammo": {
    "type": "Super",
    "count": 10
  }
}
Dev note: There could be a variant with the Metroids alive, but they will all lure to Samus and the light orb will disappear, so she will take heavy damage. This is not possible in G-mode, because the Power Bomb will kill the Rinka and prevent more from spawning. |
|

On entry, kill or dodge the first Rinkas then Crystal Flash directly above or below a Rinka Spawner. Entrance condition: {
"comeInWithRMode": {}
}Requires: {
"or": [
"f_KilledMetroidRoom3",
{
"obstaclesCleared": [
"f_KilledMetroidRoom3"
]
}
]
}
"canRModeCrystalFlashInterrupt"
{
  "ammo": {
    "type": "Missile",
    "count": 10
  }
}
{
  "ammo": {
    "type": "Super",
    "count": 10
  }
}
Dev note: There could be a variant with the Metroids alive, but they will all lure to Samus and the light orb will disappear, so she will take heavy damage. This is not possible in G-mode, because the Power Bomb will kill the Rinka and prevent more from spawning. |
|

On entry, kill or dodge the first Rinkas then Crystal Flash directly above or below a Rinka Spawner. Entrance condition: {
"comeInWithRMode": {}
}Requires: "canRModeCrystalFlashInterrupt"
{
"ammo": {
"type": "Missile",
"count": 10
}
}
{
"ammo": {
"type": "Super",
"count": 10
}
}Dev note: Note that this and the top of Metroid Room 2 are the only of the Metroid rooms that currently allows the Metroids to be alive, as they can get stuck on the ledge. This is not possible in G-mode, because the Power Bomb will kill the Rinka and prevent more from spawning. |
|

On entry, kill or dodge the first Rinkas then Crystal Flash directly above or below a Rinka Spawner. Entrance condition: {
"comeInWithRMode": {},
"comesThroughToilet": "no"
}Requires: {
"or": [
"f_KilledMetroidRoom4",
{
"obstaclesCleared": [
"f_KilledMetroidRoom4"
]
}
]
}
"canRModeCrystalFlashInterrupt"
{
"ammo": {
"type": "Missile",
"count": 10
}
}
{
"ammo": {
"type": "Super",
"count": 10
}
}Dev note: There could be a variant with the Metroids alive, but they will all lure to Samus and the light orb will disappear, so she will take heavy damage. This is not possible in G-mode, because the Power Bomb will kill the Rinka and prevent more from spawning. |
From: 1
Left Blast Door
To: 1
Left Blast Door

On entry, kill or dodge the first Rinkas then Crystal Flash on the ledge next to Mother Brain's tank. Be careful not to get boosted off into the acid after getting the Crystal Flash interrupt. Requires: {
"obstaclesCleared": [
"R-Mode"
]
}
"canRModeCrystalFlashInterrupt"
{
"ammo": {
"type": "Missile",
"count": 10
}
}
{
"ammo": {
"type": "Super",
"count": 10
}
}Resets obstacles: R-Mode Dev note: This is not possible in G-mode, because the Power Bomb will kill the Rinka and prevent more from spawning. |
|

On entry, kill or dodge the first Rinkas then Crystal Flash almost directly above or below a Rinka Spawner. It may help to place the Power Bomb against the door, roll away and roll back to avoid the bomb boost. Requires: {
"obstaclesCleared": [
"R-Mode"
]
}
"canRModeCrystalFlashInterrupt"
{
"ammo": {
"type": "Missile",
"count": 10
}
}
{
"ammo": {
"type": "Super",
"count": 10
}
}Resets obstacles: R-Mode Dev note: This is not possible in G-mode, because the Power Bomb will kill the Rinka and prevent more from spawning. |
|


On entry, kill or dodge the first Rinkas then Crystal Flash almost directly above or below a Rinka Spawner, such as on the lowest platform, against the right wall. Entrance condition: {
"comeInWithRMode": {}
}Requires: "canRModeCrystalFlashInterrupt"
{
"ammo": {
"type": "Missile",
"count": 10
}
}
{
"ammo": {
"type": "Super",
"count": 10
}
}Dev note: This is not possible in G-mode, because the Power Bomb will kill the Rinka and prevent more from spawning. |
From: 2
Middle Left Door
To: 2
Middle Left Door

On entry, kill or dodge the first Rinkas then Crystal Flash almost directly above or below a Rinka Spawner, such as on the lowest platform, against the right wall. Entrance condition: {
"comeInWithRMode": {}
}Requires: "canRModeCrystalFlashInterrupt"
{
"ammo": {
"type": "Missile",
"count": 10
}
}
{
"ammo": {
"type": "Super",
"count": 10
}
}Dev note: This is not possible in G-mode, because the Power Bomb will kill the Rinka and prevent more from spawning. |
From: 3
Bottom Left Door
To: 3
Bottom Left Door

On entry, kill or dodge the first Rinkas then Crystal Flash almost directly above or below a Rinka Spawner, such as on the lowest platform, against the right wall. Entrance condition: {
"comeInWithRMode": {}
}Requires: "canRModeCrystalFlashInterrupt"
{
"ammo": {
"type": "Missile",
"count": 10
}
}
{
"ammo": {
"type": "Super",
"count": 10
}
}Dev note: This is not possible in G-mode, because the Power Bomb will kill the Rinka and prevent more from spawning. |
From: 1
Top Door
To: 2
Right Door
At the bottom of the room, Crystal Flash below a wall pirate to have it walk into Samus. The pirate will randomly walk up and down and wall, but if it sees Samus and jumps across, it will start climbing up the left wall or down the right wall. With a lot of luck, the pirate will sometimes climb down and hit Samus before it goes off camera. Be sure to avoid any stationary, invisible lasers that they might place. Entrance condition: {
"comeInWithGMode": {
"mode": "direct",
"morphed": true
},
"comesThroughToilet": "no"
}Requires: {
"or": [
"h_artificialMorphMovement",
"canBeVeryLucky"
]
}
"h_artificialMorphComplexRModeCrystalFlashInterrupt"
{
  "ammo": {
    "type": "Missile",
    "count": 10
  }
} |
From: 2
Right Door
To: 2
Right Door

At the bottom of the room, Crystal Flash below a wall pirate to have it walk into Samus. The pirate will randomly walk up and down and wall, but if it sees Samus and jumps across, it will start climbing up the left wall or down the right wall. With some luck, the pirate will sometimes climb down and hit Samus before it goes off camera. Entrance condition: {
"comeInWithGMode": {
"mode": "direct",
"morphed": true
}
}Requires: {
"or": [
"h_artificialMorphMovement",
"canBeLucky"
]
}
"h_artificialMorphComplexRModeCrystalFlashInterrupt"
{
"ammo": {
"type": "Missile",
"count": 10
}
} |
From: 1
Left Door
To: 1
Left Door
At the bottom of the room, Crystal Flash below a wall pirate to have it walk into Samus. The pirate will randomly walk up and down and wall, but if it sees Samus and jumps across, it will start climbing up the left wall or down the right wall. With a bit of luck, the pirate will sometimes climb down and hit Samus before it goes off camera. Try to delay as much as possible if it is going down, then fall in a way to make it hop to the right wall and continue down. Be sure to avoid any stationary, invisible lasers that they might place. Without any movement options, it is recommended to land in the doorframe as Samus morphs, then Crystal Flash on the ledge, as the pirate above will be moving down. Entrance condition: {
"comeInWithGMode": {
"mode": "direct",
"morphed": true
}
}Requires: "h_artificialMorphComplexRModeCrystalFlashInterrupt"
{
"ammo": {
"type": "Missile",
"count": 10
}
} |
From: 2
Right Door
To: 1
Left Door
The acid does not rise in G-mode. Bomb boost near the first pirate until it places 18 lasers and fully overloads them so that other pirates won't place more. Very carefully IBJ over it or use Spring Ball or Power Bombs to kill it. Climb the shaft with a very long IBJ. At the top of the room, Crystal Flash on one of the ledges, below a wall pirate, to have it walk into Samus and trigger reserves. The pirate will randomly walk up and down and wall, but if it sees Samus and jumps across, it will start climbing up the left wall or down the right wall. Entrance condition: {
"comeInWithGMode": {
"mode": "direct",
"morphed": true
}
}Requires: {
"or": [
"h_artificialMorphSpringBall",
"canComplexGMode",
{
"and": [
"h_artificialMorphPowerBomb",
"h_artificialMorphPowerBomb"
]
}
]
}
"h_artificialMorphLongIBJ"
"h_artificialMorphComplexRModeCrystalFlashInterrupt"
{
"ammo": {
"type": "Missile",
"count": 10
}
} |