canGModeXRayClimb (Extreme)
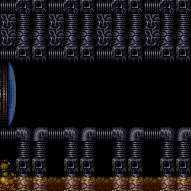
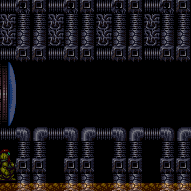
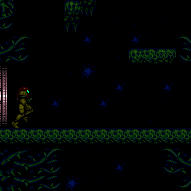
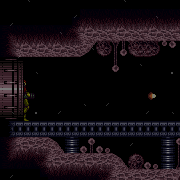
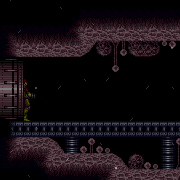
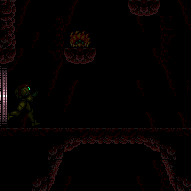
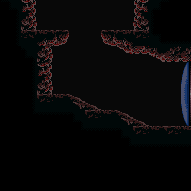
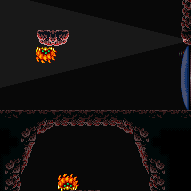
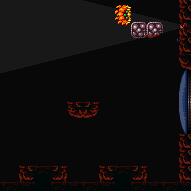
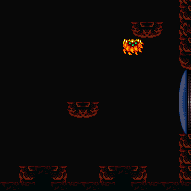
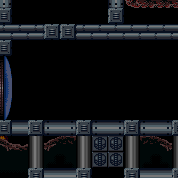
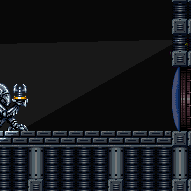
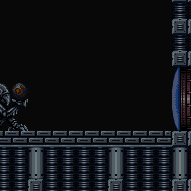
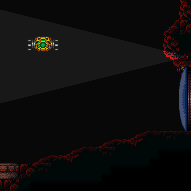
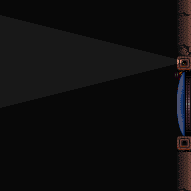
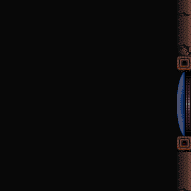
G-mode can be used to set up an X-Ray climb in several ways. The most common ways are to enter a room in direct G-mode, back up into the open doorway, then exit G-mode to have the door close on Samus. This can be used to initiate a 'deep stuck' X-Ray climb, which can enable Samus to climb past slopes which are in the column of tiles in front of the door shell. This can also be used to initiate a 'very deep stuck' X-Ray climb, which can enable Samus to climb up and trigger the transition of a door above without needing to open the door. Much less common examples include overloading PLMs and exiting G-mode while inside of overloaded blocks to solidify them and enable an X-Ray Climb; this variant will also require canComplexGMode.
Deep stuck requires Samus to be mostly enclosed within the tile behind the door shell (at least 6 of her 10 pixel width). She can be fully enclosed within the door, but one pixel deeper than that and she will not be able to wiggle out. If there is an openable door above, it doesn't matter how close to the door she is, otherwise, she will need to be between 7 and 11 pixels from the door transition. Very deep stuck requires Samus to between 1 and 6 pixels from the door transition. Then perform a turnaround buffered spin-jump away from the door to trigger the transition.
Dependencies: canPreciseReserveRefill, canUseEnemies, canManageReserves, canXRayClimb, canXRayStandUp, canGMode
Strats ()
|
Enter with G-mode direct, back up to between 1 and 6 pixels from the door transition, and activate X-ray to get very deep stuck in the door. Climb up 7 screens, and perform a turnaround buffered spin-jump away from the door to trigger the transition, bypassing any lock on the door. Entrance condition: {
"comeInWithGMode": {
"mode": "direct",
"morphed": false
}
}Requires: "canGModeXRayClimb" "canLongXRayClimb" "canBeVeryPatient" Bypasses door shell: true |
|


Climb up 3 screens. Entrance condition: {
"comeInWithGMode": {
"mode": "direct",
"morphed": false
}
}Requires: "canGModeXRayClimb" "canLongXRayClimb" "canBePatient" |
From: 4
Bottom Right Door
To: 3
Top Right Door

Refill at the ship then return and X-Ray climb up 3 screens. Entrance condition: {
"comeInWithGMode": {
"mode": "direct",
"morphed": false
}
}Requires: "canComplexGMode"
"canGModeXRayClimb"
{
"or": [
"canWallJump",
"HiJump",
"canSpringBallJumpMidAir",
"h_getBlueSpeedMaxRunway",
"ScrewAttack",
"h_blueSuitGMode"
]
}
{
"refill": [
"Energy",
"Missile",
"Super",
"PowerBomb"
]
}
"canLongXRayClimb"
"canBePatient" |
|
Enter with G-mode direct, back up to between 1 and 6 pixels from the door transition, and activate X-ray to get very deep stuck in the door. Climb up 3 screens, and perform a turnaround buffered spin-jump away from the door to trigger the transition, bypassing any lock on the door. Entrance condition: {
"comeInWithGMode": {
"mode": "direct",
"morphed": false
}
}Requires: "canGModeXRayClimb" "canLongXRayClimb" "canBePatient" Bypasses door shell: true |
From: 4
Bottom Right Door
To: 3
Top Right Door


Enter with G-mode direct, refill at the ship and return. Back up to between 1 and 6 pixels from the door transition, and activate X-ray to get very deep stuck in the door. Climb up 3 screens, and perform a turnaround buffered spin-jump away from the door to trigger the transition, bypassing any lock on the door. Entrance condition: {
"comeInWithGMode": {
"mode": "direct",
"morphed": false
}
}Requires: "canComplexGMode"
"canGModeXRayClimb"
{
"or": [
"canWallJump",
"HiJump",
"canSpringBallJumpMidAir",
"h_getBlueSpeedMaxRunway",
"ScrewAttack",
"h_blueSuitGMode"
]
}
{
"refill": [
"Energy",
"Missile",
"Super",
"PowerBomb"
]
}
"canLongXRayClimb"
"canBePatient"Bypasses door shell: true |
From: 4
Bottom Right Door
To: 2
Middle Right Door
Enter with G-mode direct and kill the bottom Pirate. Back up to between 1 and 6 pixels from the door transition, and activate X-ray to get very deep stuck in the door. Climb up 2 screens, and perform a turnaround buffered spin-jump away from the door to trigger the transition, bypassing any lock on the door. Entrance condition: {
"comeInWithGMode": {
"mode": "direct",
"morphed": false
}
}Requires: "canGModeXRayClimb"
"canLongXRayClimb"
{
"or": [
{
"enemyKill": {
"enemies": [
[
"Green Space Pirate (standing)"
]
]
}
},
"h_blueSuitGMode"
]
}Bypasses door shell: true |
From: 4
Bottom Right Door
To: 2
Middle Right Door
Enter with G-mode direct and kill the bottom Pirate with Bombs or a Power Bomb. Back up to between 1 and 6 pixels from the door transition, and activate X-ray to get very deep stuck in the door. Climb up 2 screens, and perform a turnaround buffered spin-jump away from the door to trigger the transition, bypassing any lock on the door. Entrance condition: {
"comeInWithGMode": {
"mode": "direct",
"morphed": true
}
}Requires: "canGModeXRayClimb"
"canLongXRayClimb"
{
"or": [
"h_artificialMorphPowerBomb",
"h_artificialMorphIBJ"
]
}Bypasses door shell: true |
From: 3
Upper Right Section - Bottom Right Door
To: 2
Upper Right Section - Top Right Door

Enter with G-mode direct, back up to between 1 and 6 pixels from the door transition, and activate X-ray to get very deep stuck in the door. Climb up 1 screen, and perform a turnaround buffered spin-jump away from the door to trigger the transition, bypassing any lock on the door. Entrance condition: {
"comeInWithGMode": {
"mode": "direct",
"morphed": false
}
}Requires: "canGModeXRayClimb" Bypasses door shell: true |
From: 4
Lower Section - Top Right Door
To: 8
Bridge Right Door (Leads to Bottom Right Door)
Climb up 1 screen. Entrance condition: {
"comeInWithGMode": {
"mode": "direct",
"morphed": false
}
}Requires: "canComplexGMode"
"canGModeXRayClimb"
{
"notable": "Get Inside the Bridge"
}
"canSkipDoorLock"
{
"or": [
"canArtificialMorph",
"canWallJump",
"SpaceJump",
{
"and": [
"canLongIBJ",
"Gravity"
]
},
{
"and": [
"HiJump",
"canJumpIntoIBJ"
]
},
{
"and": [
"canLongIBJ",
"canBombHorizontally",
"canResetFallSpeed"
]
},
{
"and": [
"canJumpIntoIBJ",
"canLongIBJ",
"canTrickyJump"
]
},
{
"and": [
"HiJump",
{
"or": [
"canSpeedyJump",
"canSpringBallJumpMidAir"
]
}
]
},
{
"and": [
"canTrickyJump",
"canPreciseGrapple"
]
},
{
"and": [
"Gravity",
"canMidairShinespark",
"h_shinechargeMaxRunway",
{
"shinespark": {
"frames": 35,
"excessFrames": 10
}
}
]
}
]
}
"canXRayClimb" |
From: 4
Lower Section - Top Right Door
To: 8
Bridge Right Door (Leads to Bottom Right Door)

Enter with G-mode direct, back up to between 1 and 6 pixels from the door transition, and activate X-ray to get very deep stuck in the door. Climb up 1 screen, and perform a turnaround buffered spin-jump away from the door to trigger the transition, bypassing any lock on the door. Entrance condition: {
"comeInWithGMode": {
"mode": "direct",
"morphed": false
}
}Requires: "canComplexGMode"
"canGModeXRayClimb"
{
"notable": "Get Inside the Bridge"
}
{
"or": [
"canArtificialMorph",
"canWallJump",
"SpaceJump",
{
"and": [
"canLongIBJ",
"Gravity"
]
},
{
"and": [
"HiJump",
"canJumpIntoIBJ"
]
},
{
"and": [
"canLongIBJ",
"canBombHorizontally",
"canResetFallSpeed"
]
},
{
"and": [
"canJumpIntoIBJ",
"canLongIBJ",
"canTrickyJump"
]
},
{
"and": [
"HiJump",
{
"or": [
"canSpeedyJump",
"canSpringBallJumpMidAir"
]
}
]
},
{
"and": [
"canTrickyJump",
"canPreciseGrapple"
]
},
{
"and": [
"Gravity",
"canMidairShinespark",
"h_shinechargeMaxRunway",
{
"shinespark": {
"frames": 35,
"excessFrames": 10
}
}
]
}
]
}
"canXRayClimb"Bypasses door shell: true |
From: 4
Lower Section - Top Right Door
To: 12
Top Junction

Climb up 2 screens. Entrance condition: {
"comeInWithGMode": {
"mode": "direct",
"morphed": false
}
}Requires: "canGModeXRayClimb"
{
"or": [
"canArtificialMorph",
"canWallJump",
"SpaceJump",
{
"and": [
"canLongIBJ",
"Gravity"
]
},
{
"and": [
"HiJump",
"canJumpIntoIBJ"
]
},
{
"and": [
"canLongIBJ",
"canBombHorizontally",
"canResetFallSpeed"
]
},
{
"and": [
"canJumpIntoIBJ",
"canLongIBJ",
"canTrickyJump"
]
},
{
"and": [
"HiJump",
{
"or": [
"canSpeedyJump",
"canSpringBallJumpMidAir"
]
}
]
},
{
"and": [
"canTrickyJump",
"canPreciseGrapple"
]
},
{
"and": [
"Gravity",
"canMidairShinespark",
"h_shinechargeMaxRunway",
{
"shinespark": {
"frames": 35,
"excessFrames": 10
}
}
]
}
]
}
"canLongXRayClimb"Clears obstacles: R-Mode |
From: 5
Lower Section - Bottom Right Door
To: 2
Upper Right Section - Top Right Door


Enter with G-mode direct, back up to between 1 and 6 pixels from the door transition, and activate X-ray to get very deep stuck in the door. Climb up 4 screens, and perform a turnaround buffered spin-jump away from the door to trigger the transition, bypassing any lock on the door. Entrance condition: {
"comeInWithGMode": {
"mode": "direct",
"morphed": false
}
}Requires: "canGModeXRayClimb" "canLongXRayClimb" "canBePatient" Clears obstacles: R-Mode Bypasses door shell: true |
From: 5
Lower Section - Bottom Right Door
To: 3
Upper Right Section - Bottom Right Door
Climb up 3 screens. Entrance condition: {
"comeInWithGMode": {
"mode": "direct",
"morphed": false
}
}Requires: "canGModeXRayClimb" "canLongXRayClimb" "canBePatient" Clears obstacles: R-Mode |
From: 5
Lower Section - Bottom Right Door
To: 3
Upper Right Section - Bottom Right Door
Enter with G-mode direct, back up to between 1 and 6 pixels from the door transition, and activate X-ray to get very deep stuck in the door. Climb up 3 screens, and perform a turnaround buffered spin-jump away from the door to trigger the transition, bypassing any lock on the door. Entrance condition: {
"comeInWithGMode": {
"mode": "direct",
"morphed": false
}
}Requires: "canGModeXRayClimb" "canLongXRayClimb" "canBePatient" Bypasses door shell: true |
From: 6
Middle Right Door (By Zeb Farm)
To: 12
Top Junction
Climb up 1 screen. Entrance condition: {
"comeInWithGMode": {
"mode": "direct",
"morphed": false
}
}Requires: "canGModeXRayClimb" Clears obstacles: R-Mode |
From: 3
Bottom Left Door
To: 1
Top Left Door
Enter with G-mode direct, back up to between 1 and 6 pixels from the door transition, and activate X-ray to get very deep stuck in the door. Climb up 1 screen, and perform a turnaround buffered spin-jump away from the door to trigger the transition, bypassing any lock on the door. Entrance condition: {
"comeInWithGMode": {
"mode": "direct",
"morphed": false
}
}Requires: "canGModeXRayClimb" Bypasses door shell: true |
From: 4
Above Power Bomb Blocks - Middle Left Door
To: 2
Above Power Bomb Blocks - Top Left Door
Enter with G-mode direct, back up to between 1 and 6 pixels from the door transition, and activate X-ray to get very deep stuck in the door. Climb up 1 screen, and perform a turnaround buffered spin-jump away from the door to trigger the transition, bypassing any lock on the door. Entrance condition: {
"comeInWithGMode": {
"mode": "direct",
"morphed": false
}
}Requires: "canGModeXRayClimb" Bypasses door shell: true |
From: 5
Above Power Bomb Blocks - Bottom Left Door
To: 2
Above Power Bomb Blocks - Top Left Door
Enter with G-mode direct, back up to between 1 and 6 pixels from the door transition, and activate X-ray to get very deep stuck in the door. Climb up 2 screens, and perform a turnaround buffered spin-jump away from the door to trigger the transition, bypassing any lock on the door. Entrance condition: {
"comeInWithGMode": {
"mode": "direct",
"morphed": false
}
}Requires: "canGModeXRayClimb" "canLongXRayClimb" Bypasses door shell: true |
From: 5
Above Power Bomb Blocks - Bottom Left Door
To: 4
Above Power Bomb Blocks - Middle Left Door

Enter with G-mode direct, back up to between 1 and 6 pixels from the door transition, and activate X-ray to get very deep stuck in the door. Climb up 1 screen, and perform a turnaround buffered spin-jump away from the door to trigger the transition, bypassing any lock on the door. Entrance condition: {
"comeInWithGMode": {
"mode": "direct",
"morphed": false
}
}Requires: "canGModeXRayClimb" Bypasses door shell: true |
From: 6
Above Power Bomb Blocks - Bottom Right Door
To: 3
Above Power Bomb Blocks - Top Right Door
Enter with G-mode direct, back up to between 1 and 6 pixels from the door transition, and activate X-ray to get very deep stuck in the door. Climb up 2 screens, and perform a turnaround buffered spin-jump away from the door to trigger the transition, bypassing any lock on the door. Entrance condition: {
"comeInWithGMode": {
"mode": "direct",
"morphed": false
}
}Requires: "canGModeXRayClimb" "canLongXRayClimb" Bypasses door shell: true |
From: 7
Below Power Bomb Blocks - Top Right Door
To: 3
Above Power Bomb Blocks - Top Right Door
Enter with G-mode direct, back up to between 1 and 6 pixels from the door transition, and activate X-ray to get very deep stuck in the door. Climb up 3 screens, and perform a turnaround buffered spin-jump away from the door to trigger the transition, bypassing any lock on the door. Entrance condition: {
"comeInWithGMode": {
"mode": "direct",
"morphed": false
}
}Requires: "canGModeXRayClimb" "canLongXRayClimb" "canBePatient" Bypasses door shell: true |
From: 7
Below Power Bomb Blocks - Top Right Door
To: 6
Above Power Bomb Blocks - Bottom Right Door

Enter with G-mode direct, back up to between 1 and 6 pixels from the door transition, and activate X-ray to get very deep stuck in the door. Climb up 1 screen, and perform a turnaround buffered spin-jump away from the door to trigger the transition, bypassing any lock on the door. Entrance condition: {
"comeInWithGMode": {
"mode": "direct",
"morphed": false
}
}Requires: "canGModeXRayClimb" Bypasses door shell: true |
From: 8
Below Power Bomb Blocks - Bottom Left Door
To: 2
Above Power Bomb Blocks - Top Left Door
Enter with G-mode direct, back up to between 1 and 6 pixels from the door transition, and activate X-ray to get very deep stuck in the door. Climb up 6 screens, and perform a turnaround buffered spin-jump away from the door to trigger the transition, bypassing any lock on the door. Entrance condition: {
"comeInWithGMode": {
"mode": "direct",
"morphed": false
}
}Requires: "canGModeXRayClimb" "canLongXRayClimb" "canBeVeryPatient" Bypasses door shell: true |
From: 8
Below Power Bomb Blocks - Bottom Left Door
To: 4
Above Power Bomb Blocks - Middle Left Door

Enter with G-mode direct, back up to between 1 and 6 pixels from the door transition, and activate X-ray to get very deep stuck in the door. Climb up 5 screens, and perform a turnaround buffered spin-jump away from the door to trigger the transition, bypassing any lock on the door. Entrance condition: {
"comeInWithGMode": {
"mode": "direct",
"morphed": false
}
}Requires: "canGModeXRayClimb" "canLongXRayClimb" "canBeVeryPatient" Bypasses door shell: true |
From: 8
Below Power Bomb Blocks - Bottom Left Door
To: 5
Above Power Bomb Blocks - Bottom Left Door
Enter with G-mode direct, back up to between 1 and 6 pixels from the door transition, and activate X-ray to get very deep stuck in the door. Climb up 4 screens, and perform a turnaround buffered spin-jump away from the door to trigger the transition, bypassing any lock on the door. Entrance condition: {
"comeInWithGMode": {
"mode": "direct",
"morphed": false
}
}Requires: "canGModeXRayClimb" "canLongXRayClimb" "canBePatient" Bypasses door shell: true |
From: 6
Right Side - Top Middle Door
To: 2
Right Side - Top Door
Enter with G-mode direct, back up to between 1 and 6 pixels from the door transition, and activate X-ray to get very deep stuck in the door. Climb up 4 screens, and perform a turnaround buffered spin-jump away from the door to trigger the transition, bypassing any lock on the door. Entrance condition: {
"comeInWithGMode": {
"mode": "direct",
"morphed": false
}
}Requires: "canGModeXRayClimb" "canLongXRayClimb" "canBePatient" Bypasses door shell: true |
From: 8
Right Side - Bottom Door
To: 2
Right Side - Top Door

Enter with G-mode direct, back up to between 1 and 6 pixels from the door transition, and activate X-ray to get very deep stuck in the door. Climb up 6 screens, and perform a turnaround buffered spin-jump away from the door to trigger the transition, bypassing any lock on the door. Entrance condition: {
"comeInWithGMode": {
"mode": "direct",
"morphed": false
}
}Requires: "canGModeXRayClimb" "canLongXRayClimb" "canBeVeryPatient" Bypasses door shell: true |
From: 8
Right Side - Bottom Door
To: 6
Right Side - Top Middle Door

Enter with G-mode direct, back up to between 1 and 6 pixels from the door transition, and activate X-ray to get very deep stuck in the door. Climb up 2 screens, and perform a turnaround buffered spin-jump away from the door to trigger the transition, bypassing any lock on the door. Entrance condition: {
"comeInWithGMode": {
"mode": "direct",
"morphed": false
}
}Requires: "canGModeXRayClimb" "canLongXRayClimb" Bypasses door shell: true |
|

Enter with G-mode direct, back up to between 1 and 6 pixels from the door transition, and activate X-ray to get very deep stuck in the door. Climb up 6 screens, and perform a turnaround buffered spin-jump away from the door to trigger the transition, bypassing any lock on the door. Entrance condition: {
"comeInWithGMode": {
"mode": "direct",
"morphed": false
}
}Requires: "canGModeXRayClimb" "canLongXRayClimb" "canBeVeryPatient" Bypasses door shell: true |
From: 2
Bottom Right Door
To: 1
Top Right Door
Enter with G-mode direct, back up to between 1 and 6 pixels from the door transition, and activate X-ray to get very deep stuck in the door. Climb up 1 screen, and perform a turnaround buffered spin-jump away from the door to trigger the transition, bypassing any lock on the door. Entrance condition: {
"comeInWithGMode": {
"mode": "direct",
"morphed": false
}
}Requires: "canGModeXRayClimb" Bypasses door shell: true |
From: 2
Right Door
To: 3
Top Junction
Enter with G-Mode and use X-Ray to get stuck 9 pixels inside the door. X-Ray climb to a relatively specific height: after just one pixel of Samus' feet are visible while crouching facing left, perform between 20 and 22 more X-Ray stand-ups (any of these work). Use X-ray to face left, then run and jump to barely make it onto the ledge. Entrance condition: {
"comeInWithGMode": {
"mode": "direct",
"morphed": false
}
}Requires: "canTrickyGMode" "canGModeXRayClimb" "canOffScreenMovement" "canInsaneJump" "canCount" Clears obstacles: R-Mode Dev note: 9 pixels stuck in the door is X position $1E4. The correct Y positions for the jump are $C1, $BC, and $BB FIXME: Some of the X position to the left ($1E2, $1E3) could also work; maybe investigate which vertical positions work for them? |
From: 2
Bottom Left Door
To: 1
Top Left Door
Enter with G-mode direct, back up to between 1 and 6 pixels from the door transition, and activate X-ray to get very deep stuck in the door. Climb up 8 screens, and perform a turnaround buffered spin-jump away from the door to trigger the transition, bypassing any lock on the door. Entrance condition: {
"comeInWithGMode": {
"mode": "direct",
"morphed": false
}
}Requires: "canGModeXRayClimb" "canLongXRayClimb" "canBeVeryPatient" Bypasses door shell: true |
|
Enter with G-mode direct, back up to between 1 and 6 pixels from the door transition, and activate X-ray to get very deep stuck in the door. Climb up 1 screen, and perform a turnaround buffered spin-jump away from the door to trigger the transition, bypassing any lock on the door. Entrance condition: {
"comeInWithGMode": {
"mode": "direct",
"morphed": false
}
}Requires: "canGModeXRayClimb" Bypasses door shell: true |
From: 2
Middle Left Door (Behind Power Bomb Blocks)
To: 1
Top Left Door
Enter with G-mode direct, back up to between 1 and 6 pixels from the door transition, and activate X-ray to get very deep stuck in the door. Climb up 2 screens, and perform a turnaround buffered spin-jump away from the door to trigger the transition, bypassing any lock on the door. Entrance condition: {
"comeInWithGMode": {
"mode": "direct",
"morphed": false
}
}Requires: "canGModeXRayClimb" "canLongXRayClimb" Bypasses door shell: true |
From: 2
Bottom Left Door
To: 1
Top Left Door
Enter with G-mode direct, back up to between 1 and 6 pixels from the door transition, and activate X-ray to get very deep stuck in the door. The camera will be messed up, so you will need to move blindly to get into position. Don't wait too long or the Zeela will hit you. Climb up 1 screen, and perform a turnaround buffered spin-jump away from the door to trigger the transition, bypassing any lock on the door. Entrance condition: {
"comeInWithGMode": {
"mode": "direct",
"morphed": false
}
}Requires: "canGModeXRayClimb" Bypasses door shell: true |
From: 2
Left Side - Top Middle Door
To: 1
Left Side - Top Door

Enter with G-mode direct, back up to between 1 and 6 pixels from the door transition, and activate X-ray to get very deep stuck in the door. Climb up 1 screen, and perform a turnaround buffered spin-jump away from the door to trigger the transition, bypassing any lock on the door. Entrance condition: {
"comeInWithGMode": {
"mode": "direct",
"morphed": false
}
}Requires: "canGModeXRayClimb" Bypasses door shell: true |
From: 3
Left Side - Bottom Middle Door
To: 1
Left Side - Top Door
Enter with G-mode direct, back up to between 1 and 6 pixels from the door transition, and activate X-ray to get very deep stuck in the door. Climb up 2 screens, and perform a turnaround buffered spin-jump away from the door to trigger the transition, bypassing any lock on the door. Entrance condition: {
"comeInWithGMode": {
"mode": "direct",
"morphed": false
}
}Requires: "canGModeXRayClimb" "canLongXRayClimb" Bypasses door shell: true |
From: 3
Left Side - Bottom Middle Door
To: 2
Left Side - Top Middle Door

Enter with G-mode direct, back up to between 1 and 6 pixels from the door transition, and activate X-ray to get very deep stuck in the door. Climb up 1 screen, and perform a turnaround buffered spin-jump away from the door to trigger the transition, bypassing any lock on the door. Entrance condition: {
"comeInWithGMode": {
"mode": "direct",
"morphed": false
}
}Requires: "canGModeXRayClimb" Bypasses door shell: true |
From: 4
Left Side - Bottom Door
To: 1
Left Side - Top Door
Enter with G-mode direct, back up to between 1 and 6 pixels from the door transition, and activate X-ray to get very deep stuck in the door. Climb up 3 screens, and perform a turnaround buffered spin-jump away from the door to trigger the transition, bypassing any lock on the door. Entrance condition: {
"comeInWithGMode": {
"mode": "direct",
"morphed": false
}
}Requires: "canGModeXRayClimb" "canLongXRayClimb" "canBePatient" Bypasses door shell: true |
From: 4
Left Side - Bottom Door
To: 2
Left Side - Top Middle Door

Enter with G-mode direct, back up to between 1 and 6 pixels from the door transition, and activate X-ray to get very deep stuck in the door. Climb up 2 screens, and perform a turnaround buffered spin-jump away from the door to trigger the transition, bypassing any lock on the door. Entrance condition: {
"comeInWithGMode": {
"mode": "direct",
"morphed": false
}
}Requires: "canGModeXRayClimb" "canLongXRayClimb" Bypasses door shell: true |
From: 4
Left Side - Bottom Door
To: 3
Left Side - Bottom Middle Door
Enter with G-mode direct, back up to between 1 and 6 pixels from the door transition, and activate X-ray to get very deep stuck in the door. Climb up 1 screen, and perform a turnaround buffered spin-jump away from the door to trigger the transition, bypassing any lock on the door. Entrance condition: {
"comeInWithGMode": {
"mode": "direct",
"morphed": false
}
}Requires: "canGModeXRayClimb" Bypasses door shell: true |
From: 6
Middle Right Door
To: 7
Top Right Door
Enter with G-mode direct, back up to between 1 and 6 pixels from the door transition, and activate X-ray to get very deep stuck in the door. Climb up 1 screen, and perform a turnaround buffered spin-jump away from the door to trigger the transition, bypassing any lock on the door. Entrance condition: {
"comeInWithGMode": {
"mode": "direct",
"morphed": false
}
}Requires: "canGModeXRayClimb" Bypasses door shell: true |
|
Climb up 1 screen. Entrance condition: {
"comeInWithGMode": {
"mode": "direct",
"morphed": false
}
}Requires: "canGModeXRayClimb" "h_heatProof" |
|
Enter with G-mode direct, back up to between 1 and 6 pixels from the door transition, and activate X-ray to get very deep stuck in the door. Climb up 1 screen, and perform a turnaround buffered spin-jump away from the door to trigger the transition, bypassing any lock on the door. Entrance condition: {
"comeInWithGMode": {
"mode": "direct",
"morphed": false
}
}Requires: "canGModeXRayClimb" "h_heatProof" Bypasses door shell: true |
|
Enter with G-mode direct, back up to between 1 and 6 pixels from the door transition, and activate X-ray to get very deep stuck in the door. Climb up 1 screen, and perform a turnaround buffered spin-jump away from the door to trigger the transition, bypassing any lock on the door. Entrance condition: {
"comeInWithGMode": {
"mode": "direct",
"morphed": false
}
}Requires: "canGModeXRayClimb" Bypasses door shell: true |
|
Enter with G-mode direct, back up to between 1 and 6 pixels from the door transition, and activate X-ray to get very deep stuck in the door. Climb up 2 screens, and perform a turnaround buffered spin-jump away from the door to trigger the transition, bypassing any lock on the door. Entrance condition: {
"comeInWithGMode": {
"mode": "direct",
"morphed": false
}
}Requires: "canGModeXRayClimb" "canLongXRayClimb" Bypasses door shell: true |
From: 3
Bottom Left Door
To: 2
Middle Left Door
Enter with G-mode direct, back up to between 1 and 6 pixels from the door transition, and activate X-ray to get very deep stuck in the door. Climb up 1 screen, and perform a turnaround buffered spin-jump away from the door to trigger the transition, bypassing any lock on the door. Entrance condition: {
"comeInWithGMode": {
"mode": "direct",
"morphed": false
}
}Requires: "canGModeXRayClimb" Bypasses door shell: true |
From: 4
Bottom Right Door
To: 5
Middle Right Door
Enter with G-mode direct, back up to between 1 and 6 pixels from the door transition, and activate X-ray to get very deep stuck in the door. Climb up 1 screen, and perform a turnaround buffered spin-jump away from the door to trigger the transition, bypassing any lock on the door. Entrance condition: {
"comeInWithGMode": {
"mode": "direct",
"morphed": false
}
}Requires: "canGModeXRayClimb" Bypasses door shell: true |
From: 4
Bottom Right Door
To: 6
Top Right Door
Enter with G-mode direct, back up to between 1 and 6 pixels from the door transition, and activate X-ray to get very deep stuck in the door. Climb up 3 screens, and perform a turnaround buffered spin-jump away from the door to trigger the transition, bypassing any lock on the door. Entrance condition: {
"comeInWithGMode": {
"mode": "direct",
"morphed": false
}
}Requires: "canGModeXRayClimb" "canLongXRayClimb" "canBePatient" Bypasses door shell: true |
From: 5
Middle Right Door
To: 6
Top Right Door

Enter with G-mode direct, back up to between 1 and 6 pixels from the door transition, and activate X-ray to get very deep stuck in the door. Climb up 2 screens, and perform a turnaround buffered spin-jump away from the door to trigger the transition, bypassing any lock on the door. Entrance condition: {
"comeInWithGMode": {
"mode": "direct",
"morphed": false
}
}Requires: "canGModeXRayClimb" "canLongXRayClimb" Bypasses door shell: true |
From: 7
G-Mode, Bottom Right (Started at Right)
To: 1
Top of the Shaft Left Door
Enter the right-most speed block, to where Samus is fully within it and between 0 and 5 pixels from the left edge of the block. Exit G-mode while inside the speed blocks then X-Ray climb up. The camera will move up slightly once Samus is high enough, as she is pushed up from a slope below the door. Stand up one more time, face left, then perform a turnaround buffered spin-jump away from the door to trigger the transition. Note that it is possible to be slightly left of this range if a low transition is usable in the next room, or if very precisely timed X-Ray climbs are performed while inside the door transition to prevent triggering it. Requires: "h_heatProof"
"canComplexGMode"
{
"noBlueSuit": {}
}
"canGModeXRayClimb"
"canLongXRayClimb"
Bypasses door shell: true |
From: 8
G-Mode, Bottom Right (Started at Left)
To: 1
Top of the Shaft Left Door
Enter the right-most speed block, to where Samus is fully within it and between 0 and 5 pixels from the left edge of the block. This is when Samus enters the screen again and then moves right so there is just over one full tile gap between her and the left edge of the screen. Alternatively, go past that and press against the left edge of the top stair, then jump up to the next stair and move left exactly or slightly less than 2 tiles. Exit G-mode while inside the speed blocks then X-Ray climb up. The camera will move up slightly once Samus is high enough, as she is pushed up from a slope below the door. Stand up one more time, face left, then perform a turnaround buffered spin-jump away from the door to trigger the transition. Note that it is possible to be slightly left of this range if a low transition is usable in the next room, or if very precisely timed X-Ray climbs are performed while inside the door transition to prevent triggering it. Requires: "h_heatProof"
"canComplexGMode"
"canOffScreenMovement"
{
"noBlueSuit": {}
}
"canGModeXRayClimb"
"canLongXRayClimb"
Bypasses door shell: true |
|
Enter with G-mode direct, back up to between 1 and 6 pixels from the door transition, and activate X-ray to get very deep stuck in the door. Climb up 3 screens, and perform a turnaround buffered spin-jump away from the door to trigger the transition, bypassing any lock on the door. Entrance condition: {
"comeInWithGMode": {
"mode": "direct",
"morphed": false
}
}Requires: "canGModeXRayClimb" "h_heatProof" "canLongXRayClimb" "canBePatient" Bypasses door shell: true |
From: 2
Middle Left Door
To: 1
Top Left Door

Enter with G-mode direct, back up to between 1 and 6 pixels from the door transition, and activate X-ray to get very deep stuck in the door. Climb up 2 screens, and perform a turnaround buffered spin-jump away from the door to trigger the transition, bypassing any lock on the door. Entrance condition: {
"comeInWithGMode": {
"mode": "direct",
"morphed": false
}
}Requires: "canGModeXRayClimb" "canLongXRayClimb" Bypasses door shell: true |
From: 2
Bottom Right Door
To: 1
Top Right Door
Enter with G-mode direct, back up to between 1 and 6 pixels from the door transition, and activate X-ray to get very deep stuck in the door. Climb up 2 screens, and perform a turnaround buffered spin-jump away from the door to trigger the transition, bypassing any lock on the door. Entrance condition: {
"comeInWithGMode": {
"mode": "direct",
"morphed": false
}
}Requires: "canGModeXRayClimb" "canLongXRayClimb" Bypasses door shell: true |
From: 3
Bottom Right Door
To: 4
Top Right Door
Climb up 1 screen. Entrance condition: {
"comeInWithGMode": {
"mode": "direct",
"morphed": false
}
}Requires: "canGModeXRayClimb" |
From: 3
Bottom Right Door
To: 4
Top Right Door

Enter with G-mode direct, back up to between 1 and 6 pixels from the door transition, and activate X-ray to get very deep stuck in the door. Climb up 1 screen, and perform a turnaround buffered spin-jump away from the door to trigger the transition, bypassing any lock on the door. Entrance condition: {
"comeInWithGMode": {
"mode": "direct",
"morphed": false
}
}Requires: "canGModeXRayClimb" Bypasses door shell: true |
From: 2
Middle Right Door
To: 3
Top Right Door
Enter with G-mode direct, back up to between 1 and 6 pixels from the door transition, and activate X-ray to get very deep stuck in the door. Climb up 1 screen, and perform a turnaround buffered spin-jump away from the door to trigger the transition, bypassing any lock on the door. Entrance condition: {
"comeInWithGMode": {
"mode": "direct",
"morphed": false
}
}Requires: "canGModeXRayClimb"
"h_heatProof"
{
"or": [
"canWallJump",
"h_crouchJumpDownGrab",
"HiJump",
"SpaceJump",
"canIBJ",
"canArtificialMorph"
]
}
"canXRayClimb"Bypasses door shell: true |
From: 2
Bottom Left Door
To: 1
Top Left Door

Climb up 1 screen. Entrance condition: {
"comeInWithGMode": {
"mode": "direct",
"morphed": false
}
}Requires: "canGModeXRayClimb"
{
"heatFrames": 1600
} |
From: 2
Bottom Left Door
To: 1
Top Left Door
Enter with G-mode direct, back up to between 1 and 6 pixels from the door transition, and activate X-ray to get very deep stuck in the door. Climb up 1 screen, and perform a turnaround buffered spin-jump away from the door to trigger the transition, bypassing any lock on the door. Entrance condition: {
"comeInWithGMode": {
"mode": "direct",
"morphed": false
}
}Requires: "canGModeXRayClimb" "h_heatProof" Bypasses door shell: true |
From: 3
Bottom Right Door
To: 1
Top Left Door

Climb up 1 screen. Entrance condition: {
"comeInWithGMode": {
"mode": "direct",
"morphed": false
}
}Requires: "canGModeXRayClimb"
{
"heatFrames": 1650
} |
From: 3
Bottom Right Door
To: 4
Top Right Door
Enter with G-mode direct, back up to between 1 and 6 pixels from the door transition, and activate X-ray to get very deep stuck in the door. Climb up 2 screens, and perform a turnaround buffered spin-jump away from the door to trigger the transition, bypassing any lock on the door. Entrance condition: {
"comeInWithGMode": {
"mode": "direct",
"morphed": false
}
}Requires: "canGModeXRayClimb" "h_heatProof" "canLongXRayClimb" Bypasses door shell: true |
From: 2
Bottom Left Door
To: 1
Top Left Door

Enter with G-mode direct, back up to between 1 and 6 pixels from the door transition, and activate X-ray to get very deep stuck in the door. Climb up 5 screens, and perform a turnaround buffered spin-jump away from the door to trigger the transition, bypassing any lock on the door. Entrance condition: {
"comeInWithGMode": {
"mode": "direct",
"morphed": false
}
}Requires: "canGModeXRayClimb" "h_heatProof" "canLongXRayClimb" "canBeVeryPatient" Bypasses door shell: true |
From: 3
Bottom Left Door
To: 1
Top Left Door
Enter with G-mode direct, back up to between 1 and 6 pixels from the door transition, and activate X-ray to get very deep stuck in the door. Climb up 2 screens, and perform a turnaround buffered spin-jump away from the door to trigger the transition, bypassing any lock on the door. Entrance condition: {
"comeInWithGMode": {
"mode": "direct",
"morphed": false
}
}Requires: "canGModeXRayClimb" "canLongXRayClimb" Bypasses door shell: true |
From: 5
Middle Right Door
To: 4
Top Right Door
Enter with G-mode direct, back up to between 1 and 6 pixels from the door transition, and activate X-ray to get very deep stuck in the door. Climb up 1 screen, and perform a turnaround buffered spin-jump away from the door to trigger the transition, bypassing any lock on the door. If Phantoon is not defeated then you have to move quickly to prevent the Coverns from hitting you. Entrance condition: {
"comeInWithGMode": {
"mode": "direct",
"morphed": false
}
}Requires: "canGModeXRayClimb" Bypasses door shell: true |
From: 2
Bottom Right Door
To: 3
Top Right Doorway

Climb up 1 screen. Entrance condition: {
"comeInWithGMode": {
"mode": "direct",
"morphed": false
}
}Requires: "canGModeXRayClimb" |
|
Enter with G-mode direct, back up to between 1 and 6 pixels from the door transition, and activate X-ray to get very deep stuck in the door. Climb up 1 screen, and perform a turnaround buffered spin-jump away from the door to trigger the transition, bypassing any lock on the door. Entrance condition: {
"comeInWithGMode": {
"mode": "direct",
"morphed": false
}
}Requires: "canGModeXRayClimb" Bypasses door shell: true |
From: 1
Left Door
To: 6
Junction Right of Morph Passage


Overload PLMs by touching the sand, then move through the speed blocks. Avoiding the sand pits is easier without Gravity or HiJump. Exit G-mode while inside the speed blocks then X-Ray climb up. Entrance condition: {
"comeInWithGMode": {
"mode": "any",
"morphed": false
}
}Requires: "canComplexGMode"
"canSuitlessMaridia"
{
"noBlueSuit": {}
}
"canGModeXRayClimb"
"Morph" |
From: 4
Right Door
To: 6
Junction Right of Morph Passage


Overload PLMs by touching the sand, then move through the speed blocks. Avoiding the sand pits is easier without Gravity or HiJump. Exit G-mode while inside the speed blocks then X-Ray climb up. Entrance condition: {
"comeInWithGMode": {
"mode": "any",
"morphed": false
}
}Requires: "canComplexGMode"
"canSuitlessMaridia"
{
"noBlueSuit": {}
}
"canGModeXRayClimb"
"Morph"Dev note: This requires canInsaneJump even though it is not difficult, because it is not very intuitive. |
|
Enter with G-mode direct, back up to between 1 and 6 pixels from the door transition, and activate X-ray to get very deep stuck in the door. Climb up 1 screen, and perform a turnaround buffered spin-jump away from the door to trigger the transition, bypassing any lock on the door. Entrance condition: {
"comeInWithGMode": {
"mode": "direct",
"morphed": false
}
}Requires: "canGModeXRayClimb" Bypasses door shell: true |
|

Enter with G-mode direct, back up to exactly 8 pixels away from the door transition, and activate X-ray to get very deep stuck in the door. Climb up a little less than 1 screen, and perform a turnaround buffered spin-jump away from the door to trigger the transition, bypassing any lock on the door. Perform the spin-jump when Samus' feet are between about 0.5 and 2 tiles below the bottom of the door. Entrance condition: {
"comeInWithGMode": {
"mode": "direct",
"morphed": false
}
}Requires: "canComplexGMode"
"canGModeXRayClimb"
{
"notable": "Very Deep Stuck X-Ray Climb"
}
"canXRayClimb"Bypasses door shell: true Dev note: Standing any closer to the door will cause Samus to no longer be stuck in the wall when reaching the air pocket above. Standing any further from the door will make it impossible to get a wall-jump check from the transition tiles. |
From: 2
Bottom Left Door
To: 1
Top Left Door
Enter with G-mode direct, back up to between 1 and 6 pixels from the door transition, and activate X-ray to get very deep stuck in the door. Climb up 2 screens, and perform a turnaround buffered spin-jump away from the door to trigger the transition, bypassing any lock on the door. Entrance condition: {
"comeInWithGMode": {
"mode": "direct",
"morphed": false
}
}Requires: "canGModeXRayClimb" "canLongXRayClimb" Bypasses door shell: true |
|
Climb up 2.5 screens. Stop when about half of Samus (or less) is visible at the top of the screen. Turn-around a couple times to move to the right, to get close to falling out. Then perform a buffered spin-jump while turning around to the right, to make it onto the platform. The Choot will be safely off-camera and will not hit Samus while passing through it. Entrance condition: {
"comeInWithGMode": {
"mode": "direct",
"morphed": false
}
}Requires: "canComplexGMode" "canGModeXRayClimb" "canLongXRayClimb" "canBePatient" "canOffScreenMovement" |
From: 2
Bottom Right Door
To: 3
Middle Right Door

Climb up 2 screens. Entrance condition: {
"comeInWithGMode": {
"mode": "direct",
"morphed": false
}
}Requires: "canGModeXRayClimb" "canLongXRayClimb" |
From: 2
Bottom Right Door
To: 3
Middle Right Door
Enter with G-mode direct, back up to between 1 and 6 pixels from the door transition, and activate X-ray to get very deep stuck in the door. Climb up 2 screens, and perform a turnaround buffered spin-jump away from the door to trigger the transition, bypassing any lock on the door. Entrance condition: {
"comeInWithGMode": {
"mode": "direct",
"morphed": false
}
}Requires: "canGModeXRayClimb" "canLongXRayClimb" Bypasses door shell: true |
From: 2
Bottom Right Door
To: 1
Top Right Door

Enter with G-mode direct, using artificial morph to avoid the Metroids if they are still alive. Go to the top of the room and Crystal Flash, with the Metroids stuck below (if alive). The Crystal Flash will leave behind a light orb, which can be used to kill the Metroids. Use the Rinkas to damage down. For the final hit that will trigger auto-reserves, stand in the open doorway between 1 and 6 pixels from the transition. The auto reserve trigger will cancel G-mode and close the door on top of Samus. Climb up 1 screen, moving quickly to minimize Rinka damage. Perform a turnaround buffered spin-jump away from the door to trigger the transition, bypassing any lock on the door. Entrance condition: {
"comeInWithGMode": {
"mode": "direct",
"morphed": false
}
}Requires: "canComplexGMode"
"h_CrystalFlash"
{
"autoReserveTrigger": {}
}
"canGModeXRayClimb"
{
"enemyDamage": {
"enemy": "Rinka",
"type": "contact",
"hits": 1
}
}Bypasses door shell: true |
From: 2
Bottom Right Door
To: 1
Top Right Door
Enter with G-mode direct, and quickly freeze the Metroids (if still alive) and Rinkas. Back up to between 1 and 6 pixels from the door transition, and activate X-ray to get very deep stuck in the door. Climb up 1 screen, moving quickly to avoid Rinka damage. Perform a turnaround buffered spin-jump away from the door to trigger the transition, bypassing any lock on the door. Entrance condition: {
"comeInWithGMode": {
"mode": "direct",
"morphed": false
}
}Requires: "canComplexGMode" "Ice" "canGModeXRayClimb" Bypasses door shell: true |
From: 2
Bottom Right Door
To: 1
Top Right Door
Enter immobile with G-mode direct, with the Metroids having been killed previously. Take a Rinka hit to regain mobility. Back up to between 1 and 6 pixels from the door transition, and activate X-ray to get very deep stuck in the door. Climb up 1 screen, moving quickly to minimize Rinka damage. Perform a turnaround buffered spin-jump away from the door to trigger the transition, bypassing any lock on the door. Entrance condition: {
"comeInWithGMode": {
"mode": "direct",
"morphed": false,
"mobility": "immobile"
}
}Requires: "canComplexGMode"
"canGModeXRayClimb"
{
"or": [
"f_KilledMetroidRoom2",
{
"obstaclesCleared": [
"f_KilledMetroidRoom2"
]
}
]
}
{
"enemyDamage": {
"enemy": "Rinka",
"type": "contact",
"hits": 1
}
}
"canXRayClimb"Bypasses door shell: true Dev note: The 'immobile' requirement in the entranceCondition is not necessary but is included for clarity. Without coming in immobile, it would not be possible to have enough energy to survive the Rinka hit. The enemyDamage in this strat is for a second Rinka hit while climbing. The first Rinka hit is included in the gModeImmobile requirement. |
|
Enter with G-mode direct, back up to between 1 and 6 pixels from the door transition, and activate X-Ray to get very deep stuck in the door. Climb up 1 screen, moving quickly to avoid Rinka hits, and perform a turnaround buffered spin-jump away from the door to trigger the transition, bypassing any lock on the door. Entrance condition: {
"comeInWithGMode": {
"mode": "direct",
"morphed": false
}
}Requires: "canComplexGMode" "canGModeXRayClimb" Bypasses door shell: true |
From: 3
Bottom Left Door
To: 1
Top Left Door
Enter with G-mode direct, and go to the top of the room to perform a Crystal Flash to refill on energy without destroying all the bottom Rinkas. Use the Rinkas to damage down. For the final hit that will trigger auto-reserves, stand in the open doorway between 1 and 6 pixels from the transition. The auto reserve trigger will cancel G-mode and close the door on top of Samus. Climb up 2 screens, moving quickly to minimize Rinka damage. Perform a turnaround buffered spin-jump away from the door to trigger the transition, bypassing any lock on the door. Entrance condition: {
"comeInWithGMode": {
"mode": "direct",
"morphed": false
}
}Requires: "canComplexGMode"
"canGModeXRayClimb"
"h_CrystalFlash"
{
"autoReserveTrigger": {}
}
"canLongXRayClimb"
{
"enemyDamage": {
"enemy": "Rinka",
"type": "contact",
"hits": 2
}
}Bypasses door shell: true |
From: 3
Bottom Left Door
To: 1
Top Left Door
Enter with G-mode direct, and freeze the bottom Rinka near the door. Back up to between 1 and 6 pixels from the door transition, and activate X-Ray to get very deep stuck in the door. Climb up 2 screens, moving quickly to avoid Rinka damage. Perform a turnaround buffered spin-jump away from the door to trigger the transition, bypassing any lock on the door. Entrance condition: {
"comeInWithGMode": {
"mode": "direct",
"morphed": false
}
}Requires: "canComplexGMode" "canGModeXRayClimb" "Ice" "canLongXRayClimb" Bypasses door shell: true |
From: 3
Bottom Left Door
To: 1
Top Left Door
Enter immobile with G-mode direct, taking a Rinka hit to regain mobility. Back up to between 1 and 6 pixels from the door transition, and activate X-Ray to get very deep stuck in the door. Climb up 2 screens, moving quickly to minimize Rinka damage. Perform a turnaround buffered spin-jump away from the door to trigger the transition, bypassing any lock on the door. Entrance condition: {
"comeInWithGMode": {
"mode": "direct",
"morphed": false,
"mobility": "immobile"
}
}Requires: "canComplexGMode"
"canGModeXRayClimb"
{
"enemyDamage": {
"enemy": "Rinka",
"type": "contact",
"hits": 1
}
}
"canLongXRayClimb"Bypasses door shell: true Dev note: The 'immobile' requirement in the entranceCondition is not necessary but is included for clarity. Without coming in immobile, it would not be possible to have enough energy to survive the Rinka hit. The enemyDamage in this strat is for a second Rinka hit while climbing. The first Rinka hit is included in the gModeImmobile requirement. |
From: 3
Bottom Left Door
To: 2
Middle Left Door
Enter with G-mode direct, and go to the top of the room to perform a Crystal Flash to refill on energy without destroying all the bottom Rinkas. Use a Rinka to damage down. For the final hit that will trigger auto-reserves, stand in the open doorway between 1 and 6 pixels from the transition. The auto reserve trigger will cancel G-mode and close the door on top of Samus. Climb up 1 screen, moving quickly to minimize Rinka damage. Perform a turnaround buffered spin-jump away from the door to trigger the transition, bypassing any lock on the door. Entrance condition: {
"comeInWithGMode": {
"mode": "direct",
"morphed": false
}
}Requires: "canComplexGMode"
"h_CrystalFlash"
{
"autoReserveTrigger": {}
}
"canGModeXRayClimb"
{
"enemyDamage": {
"enemy": "Rinka",
"type": "contact",
"hits": 2
}
}Bypasses door shell: true |
From: 3
Bottom Left Door
To: 2
Middle Left Door
Enter with G-mode direct, and freeze the bottom Rinka near the door. Back up to between 1 and 6 pixels from the door transition, and activate X-Ray to get very deep stuck in the door. Climb up 1 screen, moving quickly to avoid Rinka damage. Perform a turnaround buffered spin-jump away from the door to trigger the transition, bypassing any lock on the door. Entrance condition: {
"comeInWithGMode": {
"mode": "direct",
"morphed": false
}
}Requires: "canComplexGMode" "Ice" "canGModeXRayClimb" Bypasses door shell: true |
From: 3
Bottom Left Door
To: 2
Middle Left Door
Enter immobile with G-mode direct, taking a Rinka hit to regain mobility. Back up to between 1 and 6 pixels from the door transition, and activate X-Ray to get very deep stuck in the door. Climb up 1 screen, moving quickly to minimize Rinka damage. Perform a turnaround buffered spin-jump away from the door to trigger the transition, bypassing any lock on the door. Entrance condition: {
"comeInWithGMode": {
"mode": "direct",
"morphed": false,
"mobility": "immobile"
}
}Requires: "canComplexGMode"
{
"enemyDamage": {
"enemy": "Rinka",
"type": "contact",
"hits": 1
}
}
"canGModeXRayClimb"Bypasses door shell: true Dev note: The 'immobile' requirement in the entranceCondition is not necessary but is included for clarity. Without coming in immobile, it would not be possible to have enough energy to survive the Rinka hit. The enemyDamage in this strat is for a second Rinka hit while climbing. The first Rinka hit is included in the gModeImmobile requirement. |