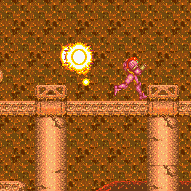
canGravityJump (Medium)

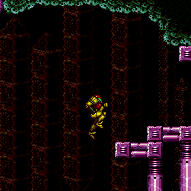
Turning off Gravity Suit right after the start of an underwater jump to achieve a much higher jump. Can be performed in water, lava, or acid.
Dependencies: canDisableEquipment
Strats ()
|


Requires: "f_TourianOpen"
"Gravity"
{
"or": [
"HiJump",
"SpaceJump",
"canIBJ",
"canSpringBallJumpMidAir",
"canWallJump",
"canGravityJump"
]
} |
|


Gain temporary blue using the runway on the left side of the room, using HiJump or a Gravity jump where needed to get onto the ocean platforms. Requires: "Gravity"
{
"canShineCharge": {
"usedTiles": 20,
"steepUpTiles": 4,
"steepDownTiles": 2,
"startingSteepDownTiles": 1,
"openEnd": 0
}
}
"canLongChainTemporaryBlue"
"can4HighMidAirMorph"
{
"or": [
"HiJump",
"canGravityJump"
]
}Exit condition: {
"leaveWithTemporaryBlue": {}
}Dev note: With very precise mid-air morphs/unmorphs, it is possible to get onto the first or second ocean platform directly without HiJump or canGravityJump, by using the runway on the right side of the room. |
|


Requires: "Gravity"
"HiJump"
{
"or": [
{
"and": [
{
"canShineCharge": {
"usedTiles": 21,
"steepUpTiles": 3,
"steepDownTiles": 3,
"startingSteepDownTiles": 1,
"openEnd": 0
}
},
"canXRayTurnaround"
]
},
{
"canShineCharge": {
"usedTiles": 18,
"steepUpTiles": 2,
"steepDownTiles": 3,
"startingSteepDownTiles": 1,
"openEnd": 0
}
}
]
}
"canGravityJump"
"canChainTemporaryBlue"Exit condition: {
"leaveWithTemporaryBlue": {}
} |
|
Gravity jump from the ledge to get up to the door. This requires a moderately precise gravity jump and is much easier to prevent bonking while facing towards the left. Requires: "canGravityJump" "canCarefulJump" |
From: 1
Left Door
To: 2
Right Door
Entrance condition: {
"comeInShinecharging": {
"length": 2,
"openEnd": 0,
"steepDownTiles": 1
}
}Requires: "canChainTemporaryBlue"
{
"or": [
"canBlueSpaceJump",
{
"and": [
"canGravityJump",
"canLongChainTemporaryBlue"
]
}
]
}Exit condition: {
"leaveWithTemporaryBlue": {}
}Unlocks doors: {"types":["ammo"],"requires":[]} |
|


Requires: {
"or": [
"Grapple",
"SpaceJump",
{
"and": [
"Gravity",
"canDash"
]
},
{
"and": [
"Gravity",
"canWallJump"
]
},
{
"and": [
"Gravity",
"HiJump"
]
},
"canGravityJump"
]
}Collects items: 3 |
|


Requires: "Gravity"
{
"or": [
"canWallJump",
"canGravityJump",
{
"and": [
"canSpringBallJumpMidAir",
"HiJump"
]
}
]
} |
|
Requires: "canGravityJump" Collects items: 3 |
|
Requires: "canGravityJump"
{
"obstaclesNotCleared": [
"A",
"B",
"C"
]
} |
|
Requires: "Gravity"
{
"or": [
"canWallJump",
"HiJump",
"canIBJ",
"canGravityJump"
]
}Dev note: A speedy jump would be obsoleted by another strat for being tricky. |
|
Requires: {
"or": [
{
"and": [
{
"resetRoom": {
"nodes": [
1
]
}
},
{
"or": [
{
"and": [
"Gravity",
"canDash",
{
"cycleFrames": 790
}
]
},
{
"and": [
"canDash",
{
"cycleFrames": 1380
}
]
},
{
"and": [
"Gravity",
{
"cycleFrames": 1220
}
]
},
{
"cycleFrames": 1785
}
]
}
]
},
{
"and": [
{
"resetRoom": {
"nodes": [
4
]
}
},
{
"or": [
{
"and": [
"Gravity",
"SpaceJump",
{
"cycleFrames": 750
},
{
"or": [
"canDash",
{
"cycleFrames": 185
}
]
}
]
},
{
"and": [
"Gravity",
"canWallJump",
{
"cycleFrames": 650
},
{
"or": [
"canDash",
{
"and": [
"canGravityJump",
{
"cycleFrames": 150
},
"h_doubleEquipmentScreenCycleFrames"
]
}
]
}
]
},
{
"and": [
"SpaceJump",
{
"cycleFrames": 1390
},
{
"or": [
"canDash",
{
"cycleFrames": 530
}
]
}
]
},
{
"and": [
"canDash",
"canWallJump",
{
"cycleFrames": 1420
}
]
}
]
}
]
},
{
"and": [
{
"resetRoom": {
"nodes": [
5
]
}
},
{
"or": [
{
"and": [
"Gravity",
"SpaceJump",
{
"cycleFrames": 690
},
{
"or": [
"canDash",
{
"cycleFrames": 355
}
]
}
]
},
{
"and": [
"Gravity",
"canDash",
"canWallJump",
{
"cycleFrames": 820
}
]
},
{
"and": [
"Gravity",
"canDash",
{
"cycleFrames": 1110
}
]
},
{
"and": [
"canGravityJump",
{
"cycleFrames": 1120
}
]
},
{
"and": [
"canDash",
{
"cycleFrames": 1600
}
]
}
]
}
]
}
]
}
{
"or": [
{
"and": [
"ScrewAttack",
"Gravity"
]
},
{
"haveBlueSuit": {}
},
{
"and": [
"Plasma",
{
"cycleFrames": 50
}
]
},
{
"and": [
"Wave",
{
"cycleFrames": 160
}
]
},
{
"and": [
"Spazer",
{
"cycleFrames": 200
}
]
},
{
"and": [
"Ice",
{
"cycleFrames": 290
}
]
},
{
"and": [
"canPseudoScrew",
{
"cycleFrames": 290
}
]
},
{
"cycleFrames": 500
}
]
}Resets obstacles: A, B, R-Mode Farm cycle drops: 2 Skultera |
From: 2
Right Door
To: 1
Left Door


Triple Spring Ball jump through the Lava Dive. Start with a Gravity jump, then delay the second jump as much as possible, and get all of the pauses close to as early as possible. Entrance condition: {
"comeInWithGMode": {
"mode": "any",
"morphed": true
}
}Requires: {
"notable": "Artificial Morph, Triple Spring Ball Jump"
}
"canTrickyGMode"
"canGravityJump"
{
"tech": "canDoubleSpringBallJumpMidAir"
}
"h_artificialMorphSpringBall"
"canInsaneJump"
{
"lavaFrames": 275
}
{
"gravitylessLavaFrames": 200
}
"h_heatedGModeOpenDifferentDoor" |
|


Entrance condition: {
"comeInWithGMode": {
"mode": "any",
"morphed": false
}
}Requires: {
"lavaFrames": 210
}
{
"or": [
{
"and": [
"canDash",
{
"disableEquipment": "SpeedBooster"
}
]
},
{
"lavaFrames": 60
}
]
}
"canSuitlessLavaDive"
"canGravityJump"
{
"or": [
{
"and": [
"HiJump",
{
"gravitylessLavaFrames": 115
}
]
},
{
"and": [
"canTrickyWallJump",
"canTrickyJump",
{
"gravitylessLavaFrames": 175
}
]
}
]
}
"h_heatedGModeOpenDifferentDoor"Dev note: FIXME: Many strats without Gravity have been skipped for now. |
From: 5
Lava, Center Namihe
To: 3
Above Lava Junction


Gravity jump from two platforms below the lowest-right Namihe. Double Spring Ball Jump out of the lava without HiJump. Requires: "canSuitlessLavaDive"
"canGravityJump"
"canDoubleSpringBallJumpMidAir"
{
"heatFrames": 400
}
{
"lavaFrames": 100
}
{
"gravitylessLavaFrames": 200
} |
From: 5
Lava, Center Namihe
To: 3
Above Lava Junction
Gravity jump from below the Lowest-Right Namihe. A crouch jump or walljump can help exit the lava in one jump, but are not required. Requires: "canSuitlessLavaDive"
"canGravityJump"
"HiJump"
{
"heatFrames": 155
}
{
"gravitylessLavaFrames": 125
}
{
"lavaFrames": 20
} |
From: 5
Lava, Center Namihe
To: 3
Above Lava Junction
Gravity jump from below the Lowest-Right Namihe. Walljump using the right side wall to reach the top of the lava, avoiding the Namihe fireball. Turning Gravity Suit back on can reduce lava damage, but may make the walljumps more difficult. Requires: "canSuitlessLavaDive"
"canGravityJump"
"canTrickyWallJump"
"canTrickyJump"
{
"heatFrames": 290
}
{
"gravitylessLavaFrames": 230
}
{
"lavaFrames": 20
}Dev note: Assumes Gravity is not reenabled until after the strat is complete. A left wall gravity jump would save a small number of gravityless lava frames at the cost of more heat and lava frames. |
|
Requires: "Gravity"
{
"or": [
"canWallJump",
"HiJump",
"canSpringBallJumpMidAir",
"canIBJ",
"canUseFrozenEnemies",
"canGravityJump"
]
} |
From: 4
Center Platform Junction
To: 3
Junction Left of Green Gate
Requires: "Gravity"
{
"or": [
"canWallJump",
"canGravityJump",
"canLongIBJ",
{
"and": [
"HiJump",
"canJumpIntoIBJ"
]
},
{
"and": [
"HiJump",
"canSpeedyJump"
]
}
]
} |
|
Requires: "canSuitlessLavaDive"
"Gravity"
{
"or": [
"canDash",
{
"and": [
{
"acidFrames": 70
},
{
"heatFrames": 100
}
]
}
]
}
{
"or": [
{
"and": [
{
"disableEquipment": "HiJump"
},
"HiJump",
{
"acidFrames": 75
},
{
"heatFrames": 230
}
]
},
{
"and": [
"canWallJump",
{
"acidFrames": 90
},
{
"heatFrames": 245
}
]
},
{
"and": [
"canSpringBallJumpMidAir",
{
"acidFrames": 75
},
{
"heatFrames": 230
}
]
},
{
"and": [
"canGravityJump",
{
"heatFrames": 190
},
{
"acidFrames": 40
},
{
"gravitylessAcidFrames": 35
},
{
"gravitylessHeatFrames": 45
}
]
}
]
}Dev note: FIXME: An IBJ option can be added back here. |
|
Clear the runway by killing the pirate. Then Gravity jump after building as much run speed as possible. Requires: {
"notable": "Reverse Acid Dive"
}
{
"obstaclesNotCleared": [
"A"
]
}
"HiJump"
"canTrickyDashJump"
"canGravityJump"
{
"enemyKill": {
"enemies": [
[
"Yellow Space Pirate (standing)"
]
],
"explicitWeapons": [
"ScrewAttack",
"Super",
"Charge+Plasma"
]
}
}
{
"heatFrames": 240
}
{
"acidFrames": 240
}
{
"gravitylessHeatFrames": 150
}
{
"gravitylessAcidFrames": 150
}Unlocks doors: {"types":["super"],"requires":[]}
{"types":["missiles","powerbomb"],"requires":["never"]}Dev note: This strat is only used to avoid walljumping. |
From: 5
Below Left Door Junction
To: 1
Left Door
Perform a gravity jump followed by a springball jump to reach the left side door. The gravity jump will only get high enough if it is within the last two frames, and the Spring Ball jump must be delayed and near the peak of the jump. Requires: {
"notable": "Reverse Acid Dive"
}
{
"obstaclesNotCleared": [
"A"
]
}
"HiJump"
"canTrickyJump"
"canGravityJump"
{
"or": [
"h_crouchJumpDownGrab",
{
"and": [
"canTrickyCarryFlashSuit",
"canDownGrab"
]
}
]
}
"canSpringBallJumpMidAir"
{
"heatFrames": 50
}
{
"acidFrames": 50
}
{
"gravitylessHeatFrames": 300
}
{
"gravitylessAcidFrames": 300
}Unlocks doors: {"types":["super"],"requires":[]}
{"types":["missiles","powerbomb"],"requires":["never"]}Dev note: It is possible to do this with a flash suit, and no crouch jump, but it requires a frame perfect jump and then a Spring Ball jump within 3 pixels of its peak. |
|
Sink on the platform until it on or near the floor, then gravity jump. Requires: "f_DefeatedPhantoon" "canGravityJump" |
|
Press pause, wall jump from about halfway down the wall, disable Gravity, then wall jump off the floating platform. Requires: "canPreciseWallJump" "canGravityJump" "canTrickyJump" |
|
When the power is on, the floor has spikes (not thorns), and Samus will quickly lose i-frames. Requires: {
"haveBlueSuit": {}
}
"canBlueSuitSpikeJump"
{
"or": [
{
"and": [
"canGravityJump",
{
"spikeHits": 1
}
]
},
{
"and": [
{
"disableEquipment": "Gravity"
},
{
"spikeHits": 2
}
]
},
{
"and": [
"Gravity",
"HiJump",
{
"spikeHits": 2
}
]
},
{
"and": [
"Gravity",
{
"tech": "canHorizontalDamageBoost"
},
{
"noFlashSuit": {}
},
{
"spikeHits": 2
}
]
},
{
"spikeHits": 3
}
]
} |
From: 1
Top Left Doorway
To: 4
Top Right Doorway
To save a bomb, it is possible to roll from the doorway onto the platform with movement similar to a Gravity jump - hold forward just before the pause to disable gravity. Entrance condition: {
"comeInWithGMode": {
"mode": "any",
"morphed": true
}
}Requires: {
"or": [
"Morph",
"h_artificialMorphSpringBall",
{
"and": [
"Gravity",
{
"or": [
"h_artificialMorphLongIBJ",
"h_artificialMorphJumpIntoIBJ"
]
}
]
},
{
"and": [
"Gravity",
"h_artificialMorphBombHorizontally",
{
"or": [
"h_additionalBomb",
"canTrickyGMode",
{
"and": [
"canTrickyDodgeEnemies",
"canGravityJump"
]
}
]
}
]
}
]
}Exit condition: {
"leaveWithGMode": {
"morphed": true
}
}Dev note: It is possible to cross with a single Power Bomb, but it requires a last pixel jump with a frame perfect forward press. A crab hit could bounce Samus onto the middle platform, but the gravity jump is better. If Samus has a blue suit and cant pause, then she also cant boost from the crab. |
From: 2
Bottom Left Door
To: 1
Top Left Doorway

Perform a gravity jump and use Spring Ball to bounce through the top of the hole. Use a pause buffer to remorph, also taking the opportunity to equip Gravity again. Then chain temporary blue into the next room. Entrance condition: {
"comeInShinecharging": {
"length": 1,
"openEnd": 0
}
}Requires: "canXRayCancelShinecharge" "canXRayTurnaround" "canGravityJump" "canSpringBallBounce" "canPauseRemorphTemporaryBlue" Exit condition: {
"leaveWithTemporaryBlue": {}
}Unlocks doors: {"types":["ammo"],"requires":[]} |
|
Requires: "canGravityJump"
{
"or": [
"canMidAirMorph",
"h_useSpringBall"
]
} |
From: 2
Bottom Left Door
To: 4
Top Right Doorway
Jump through the transition with blue speed. Perform a very short speedball to kill the bottom crab and get into position below the hole. Perform a gravity jump and use Spring Ball to bounce through the top of the hole. Use a pause buffer to remorph, also taking the opportunity to equip Gravity again. Then chain temporary blue into the next room. Entrance condition: {
"comeInGettingBlueSpeed": {
"length": 0,
"openEnd": 1,
"maxExtraRunSpeed": "$1.A"
}
}Requires: "canSpeedball" "canGravityJump" "canSpringBallBounce" "canPauseRemorphTemporaryBlue" Exit condition: {
"leaveWithTemporaryBlue": {}
}Unlocks doors: {"types":["ammo"],"requires":[]}Dev note: This can be done at higher run speeds, with greater precision or an earlier jump through the door. |
From: 2
Bottom Left Door
To: 4
Top Right Doorway
Gain a shinecharge while entering, and either kill the crab before it touches Samus, or use X-Ray to cancel the shinecharge. Perform a gravity jump and use Spring Ball to bounce through the top of the hole. Use a pause buffer to remorph, also taking the opportunity to equip Gravity again. Then chain temporary blue into the next room. Entrance condition: {
"comeInShinecharging": {
"length": 1,
"openEnd": 0
}
}Requires: {
"or": [
"canXRayCancelShinecharge",
{
"enemyKill": {
"enemies": [
[
"Sciser"
]
],
"explicitWeapons": [
"Missile",
"Super",
"Grapple",
"Wave",
"Spazer",
"Plasma",
"Ice Shield"
]
}
}
]
}
"canGravityJump"
"canSpringBallBounce"
"canPauseRemorphTemporaryBlue"
Exit condition: {
"leaveWithTemporaryBlue": {}
}Unlocks doors: {"types":["ammo"],"requires":[]} |
|
Entrance condition: {
"comeInWithGMode": {
"mode": "any",
"morphed": false
}
}Requires: "Morph"
"h_navigateUnderwater"
{
"or": [
"canGravityJump",
{
"and": [
"Gravity",
"HiJump",
{
"or": [
"canSpringBallJumpMidAir",
"canWallJump"
]
}
]
},
{
"and": [
"canTrickyUseFrozenEnemies",
"HiJump",
"h_underwaterCrouchJumpDownGrab"
]
},
{
"and": [
{
"ammo": {
"type": "Super",
"count": 1
}
},
"canTrickyUseFrozenEnemies",
"canOffScreenMovement"
]
},
{
"and": [
"canTrickyJump",
"canSpringBallJumpMidAir",
"canTrickyUseFrozenEnemies",
"canOffScreenMovement"
]
}
]
} |
From: 2
Bottom Left Door
To: 5
G-Mode Morph Junction (Top Half)
The shaft will be clear of crabs on room entry. Quickly gravity jump before the bottom crab enters the shaft and exit the left morph tunnel to be safe. This is a bit tighter when entering in G-Mode Immobile. Entrance condition: {
"comeInWithGMode": {
"mode": "any",
"morphed": true
}
}Requires: "canGravityJump" "h_artificialMorphSpringBall" |
From: 3
Bottom Right Door
To: 1
Top Left Doorway
Perform a gravity jump and use Spring Ball to bounce through the top of the hole. Use a pause buffer to remorph, also taking the opportunity to equip Gravity again. Then chain temporary blue into the next room. Entrance condition: {
"comeInShinecharging": {
"length": 1,
"openEnd": 0
}
}Requires: "canGravityJump" "canSpringBallBounce" "canPauseRemorphTemporaryBlue" Exit condition: {
"leaveWithTemporaryBlue": {}
}Unlocks doors: {"types":["ammo"],"requires":[]} |
From: 3
Bottom Right Door
To: 4
Top Right Doorway

Perform a gravity jump and use Spring Ball to bounce through the top of the hole. Use a pause buffer to remorph, also taking the opportunity to equip Gravity again. Then chain temporary blue into the next room. Entrance condition: {
"comeInShinecharging": {
"length": 1,
"openEnd": 0
}
}Requires: "canXRayTurnaround" "canGravityJump" "canSpringBallBounce" "canPauseRemorphTemporaryBlue" Exit condition: {
"leaveWithTemporaryBlue": {}
}Unlocks doors: {"types":["ammo"],"requires":[]} |
|
Entrance condition: {
"comeInWithGMode": {
"mode": "any",
"morphed": false
}
}Requires: "Morph"
"h_navigateUnderwater"
{
"or": [
"canGravityJump",
{
"and": [
"Gravity",
"HiJump",
{
"or": [
"canSpringBallJumpMidAir",
"canWallJump"
]
}
]
},
{
"and": [
"canTrickyUseFrozenEnemies",
"HiJump",
"h_underwaterCrouchJumpDownGrab"
]
},
{
"and": [
{
"ammo": {
"type": "Super",
"count": 1
}
},
"canTrickyUseFrozenEnemies",
"canOffScreenMovement"
]
},
{
"and": [
"canTrickyJump",
"canSpringBallJumpMidAir",
"canTrickyUseFrozenEnemies",
"canOffScreenMovement"
]
}
]
} |
From: 3
Bottom Right Door
To: 5
G-Mode Morph Junction (Top Half)

The shaft will be clear of crabs on room entry. Quickly gravity jump before the bottom crab enters the shaft and exit the left morph tunnel to be safe. The same strategy works when entering in G-Mode Immobile. Move to the center platform and gravity jump shortly after getting hit. Entrance condition: {
"comeInWithGMode": {
"mode": "any",
"morphed": true
}
}Requires: "canGravityJump" "h_artificialMorphSpringBall" |
From: 4
Top Right Doorway
To: 1
Top Left Doorway
To save a bomb, it is possible to roll from the doorway onto the platform with similar to a Gravity jump - hold forward just before the pause to disable gravity. Entrance condition: {
"comeInWithGMode": {
"mode": "any",
"morphed": true
}
}Requires: {
"or": [
"Morph",
"h_artificialMorphSpringBall",
{
"and": [
"Gravity",
"h_artificialMorphIBJ"
]
},
{
"and": [
"Gravity",
"h_artificialMorphBombHorizontally",
{
"or": [
"h_additionalBomb",
"canTrickyGMode",
{
"and": [
"canTrickyJump",
"canGravityJump"
]
}
]
}
]
}
]
}Exit condition: {
"leaveWithGMode": {
"morphed": true
}
}Dev note: It is possible to cross with a single Power Bomb, but it requires a last pixel jump with a frame perfect forward press. A crab hit could bounce Samus onto the middle platform, but the gravity jump is better. If Samus has a blue suit and cant pause, then she also cant boost from the crab. |
|

Use the runway at the bottom-right side of the room to gain temporary blue. Use Gravity jumps to navigate to the left, chaining temporary blue through the door. Requires: {
"getBlueSpeed": {
"usedTiles": 24,
"openEnd": 1
}
}
"canLongChainTemporaryBlue"
"canGravityJump"Exit condition: {
"leaveWithTemporaryBlue": {}
} |
From: 1
Bottom Left Door
To: 2
Bottom Right Door

Reach the bottom middle of the room with an IBJ or gravity jump and avoid letting the pirate shoot any stationary, invisible lasers. The pirate will not touch Samus if she is high enough on the sloped tiles, but move too high and it will see Samus. Time the Power Bomb to go off so that Samus starts Crystal Flashing during or before the pirate turns around, and while ensuring that Samus will get hit by the lasers that will not move from their spawned location. With Gravity equipped, Samus will need to be boosted by the Power Bomb only while the pirate is moving its head. Samus will need to be able to survive a second hit after the Reserve trigger. This can be done with a 50% enemy damage reduction and no E-Tanks; a 75% reduction is not recommended and would require disabling and reenabling suits with a precise pause abuse. Without suits, this is possible with an E-Tank and two R-Tanks; it is sometimes possible to jump away after the Reserve trigger, but can require some luck. Entrance condition: {
"comeInWithGMode": {
"mode": "direct",
"morphed": true
}
}Requires: "Gravity"
{
"or": [
"h_artificialMorphIBJ",
{
"and": [
"h_artificialMorphSpringBall",
"canGravityJump"
]
}
]
}
"h_artificialMorphRModeCrystalFlashInterrupt"
{
"ammo": {
"type": "Missile",
"count": 10
}
}
{
"or": [
{
"and": [
"h_partialEnemyDamageReduction",
{
"resourceAtMost": [
{
"type": "RegularEnergy",
"count": 19
}
]
}
]
},
{
"and": [
"canTrickyCarryFlashSuit",
{
"resourceCapacity": [
{
"type": "RegularEnergy",
"count": 199
}
]
},
{
"resourceCapacity": [
{
"type": "ReserveEnergy",
"count": 199
}
]
}
]
}
]
}Dev note: FIXME: A 75% damage reduction method needs to be documented for if Samus only has Gravity and it provides 75% reduction. |
|
Requires: "canGravityJump"
{
"or": [
"HiJump",
"canCarefulJump"
]
} |
|
Requires: "canGravityJump" |
|


Requires: "Gravity"
{
"or": [
"HiJump",
"canWallJump",
"SpaceJump",
"canIBJ",
{
"and": [
"canDash",
"canCarefulJump"
]
},
"canSpringBallJumpMidAir",
"canGravityJump",
{
"enemyDamage": {
"enemy": "Pink Space Pirate (standing)",
"type": "contact",
"hits": 1
}
},
{
"enemyKill": {
"enemies": [
[
"Pink Space Pirate (standing)"
]
],
"explicitWeapons": [
"Plasma",
"ScrewAttack"
]
}
}
]
} |
|


Use the runway at the bottom-right side of the room to gain temporary blue. Use Gravity jumps to navigate the room, chaining temporary blue through the door. Requires: {
"getBlueSpeed": {
"usedTiles": 24,
"openEnd": 1
}
}
"canLongChainTemporaryBlue"
"canGravityJump"
"canXRayTurnaround"Exit condition: {
"leaveWithTemporaryBlue": {
"direction": "any"
}
} |
From: 4
Top Left Door
To: 2
Bottom Right Door
Reach the bottom middle of the room with an IBJ or gravity jump and avoid letting the pirate shoot any stationary, invisible lasers. The pirate will not touch Samus if she is high enough on the sloped tiles, but move too high and it will see Samus. Time the Power Bomb to go off so that Samus starts Crystal Flashing during or before the pirate turns around, and while ensuring that Samus will get hit by the lasers that will not move from their spawned location. With Gravity equipped, Samus will need to be boosted by the Power Bomb only while the pirate is moving its head. Samus will need to be able to survive a second hit after the Reserve trigger. This can be done with a 50% enemy damage reduction and no E-Tanks; a 75% reduction is not recommended and would require disabling and reenabling suits with a precise pause abuse. Without suits, this is possible with an E-Tank and two R-Tanks; it is sometimes possible to jump away after the Reserve trigger, but can require some luck. Entrance condition: {
"comeInWithGMode": {
"mode": "direct",
"morphed": true
},
"comesThroughToilet": "no"
}Requires: "Gravity"
{
"or": [
"h_artificialMorphIBJ",
{
"and": [
"h_artificialMorphSpringBall",
"canGravityJump"
]
}
]
}
"h_artificialMorphRModeCrystalFlashInterrupt"
{
"ammo": {
"type": "Missile",
"count": 10
}
}
{
"or": [
{
"and": [
"h_partialEnemyDamageReduction",
{
"resourceAtMost": [
{
"type": "RegularEnergy",
"count": 19
}
]
}
]
},
{
"and": [
"canTrickyCarryFlashSuit",
{
"resourceCapacity": [
{
"type": "RegularEnergy",
"count": 199
}
]
},
{
"resourceCapacity": [
{
"type": "ReserveEnergy",
"count": 199
}
]
}
]
}
]
}Dev note: FIXME: A 75% damage reduction method needs to be documented for if Samus only has Gravity and it provides 75% reduction. |
|
Entrance condition: {
"comeInWithGMode": {
"mode": "direct",
"morphed": false
},
"comesThroughToilet": "any"
}Requires: {
"or": [
"canGravityJump",
{
"and": [
"Gravity",
{
"or": [
"canConsecutiveWallJump",
"SpaceJump",
"canLongIBJ",
{
"and": [
"HiJump",
"canWallJump"
]
},
{
"and": [
"HiJump",
"canTrickyDashJump",
"canDownGrab"
]
},
"h_maxHeightSpringBallJump",
{
"and": [
"HiJump",
"canSpringBallJumpMidAir"
]
}
]
}
]
},
{
"and": [
"Gravity",
"canUseFrozenEnemies",
{
"or": [
"canWallJump",
{
"and": [
"HiJump",
"canSpeedyJump"
]
},
"canSpringBallJumpMidAir"
]
}
]
},
"h_doubleSpringBallJumpWithHiJump",
{
"and": [
"canSuitlessMaridia",
"canTrickyUseFrozenEnemies",
"HiJump",
"canTrickySpringBallJump"
]
}
]
}Exit condition: {
"leaveWithGMode": {
"morphed": false
}
}Dev note: The h_maxHeightSpringBallJump is not a h_underwaterMaxHeightSpringBallJump, because Gravity is required. |
|
Entrance condition: {
"comeInWithGMode": {
"mode": "direct",
"morphed": true
},
"comesThroughToilet": "any"
}Requires: "Gravity"
{
"or": [
"h_artificialMorphLongIBJ",
{
"and": [
"canGravityJump",
"h_artificialMorphSpringBall"
]
}
]
}Exit condition: {
"leaveWithGMode": {
"morphed": true
}
} |
|


Use the runway at the bottom-right side of the room to gain temporary blue. Use Gravity jumps to navigate to the left, chaining temporary blue through the door. Requires: {
"getBlueSpeed": {
"usedTiles": 24,
"openEnd": 1
}
}
"canChainTemporaryBlue"
"canGravityJump"Exit condition: {
"leaveWithTemporaryBlue": {
"direction": "left"
}
}Dev note: FIXME: A suitless version of this can be possible (coming in from node 2) with Spring Ball; but it requires some space to the left of the door in the room above, e.g. it won't work with the vanilla connection, and we would need some way to model that. |
From: 6
Middle Junction Near Top Left Pirate
To: 7
Platform Below Top Right Door
Requires: "Gravity"
{
"or": [
"HiJump",
"canWallJump",
"SpaceJump",
"canIBJ",
"canGravityJump",
{
"and": [
"canDash",
"canCarefulJump"
]
},
"canSpringBallJumpMidAir",
{
"enemyDamage": {
"enemy": "Pink Space Pirate (standing)",
"type": "contact",
"hits": 1
}
},
{
"enemyKill": {
"enemies": [
[
"Pink Space Pirate (standing)"
]
],
"explicitWeapons": [
"Plasma",
"ScrewAttack"
]
}
},
{
"haveBlueSuit": {}
}
]
} |
From: 7
Platform Below Top Right Door
To: 6
Middle Junction Near Top Left Pirate
Requires: "Gravity"
{
"or": [
"HiJump",
"canWallJump",
"canSpringBallJumpMidAir",
"canDodgeWhileShooting",
"canGravityJump",
"canCrouchJump",
"canDownGrab",
{
"enemyDamage": {
"enemy": "Pink Space Pirate (standing)",
"type": "contact",
"hits": 1
}
},
{
"enemyKill": {
"enemies": [
[
"Pink Space Pirate (standing)"
]
],
"explicitWeapons": [
"Plasma"
]
}
},
{
"haveBlueSuit": {}
}
]
}Dev note: The canCrouchJump is not a h_underwaterCrouchJump, because Gravity is required. |
From: 1
Bottom Door
To: 1
Bottom Door
Freeze the bottom Skulltera and a Sciser above the door, to set up a moonfall between them, and aim down. After gaining enough speed, press forward to fall down and clip past the door shell below. Falling with too much speed can cause Samus to go out of bounds. Gravity Suit is needed in order to gain enough fall speed before the enemies thaw. Requires: "Gravity"
{
"or": [
"canWallJump",
"canGravityJump",
"SpaceJump",
"canIBJ",
"HiJump",
"canSpringBallJumpMidAir"
]
}
"canEnemyStuckMoonfall"
"canFreeFallClip"
"canTrickyUseFrozenEnemies"Bypasses door shell: true |
|
Entrance condition: {
"comeInWithGMode": {
"mode": "direct",
"morphed": false
},
"comesThroughToilet": "no"
}Requires: {
"notable": "G-Mode Overload Speed Blocks then use Global Crab"
}
"canComplexGMode"
"h_navigateUnderwater"
{
"or": [
"canGravityJump",
{
"and": [
"Gravity",
"canWallJump"
]
},
{
"and": [
"Gravity",
"canTrickyUseFrozenEnemies",
"h_underwaterCrouchJumpDownGrab"
]
},
{
"and": [
"HiJump",
{
"or": [
{
"and": [
{
"notable": "Underwater Walljumps"
},
"canUnderwaterWallJump"
]
},
"canSpringBallJumpMidAir",
{
"and": [
"canTrickyUseFrozenEnemies",
"h_underwaterCrouchJump"
]
}
]
}
]
},
{
"and": [
"h_underwaterMaxHeightSpringBallJump",
"canTrickyUseFrozenEnemies",
"canBeVeryPatient",
{
"or": [
"canStationaryLateralMidAirMorph",
{
"ammo": {
"type": "Super",
"count": 1
}
}
]
}
]
}
]
}Clears obstacles: B |
From: 1
Bottom Door
To: 12
G-Mode Junction By Middle Right Door
Entrance condition: {
"comeInWithGMode": {
"mode": "indirect",
"morphed": false
},
"comesThroughToilet": "any"
}Requires: {
"notable": "G-Mode Overload Speed Blocks then use Global Crab"
}
"canComplexGMode"
"h_navigateUnderwater"
{
"or": [
"canGravityJump",
{
"and": [
"Gravity",
"canWallJump"
]
},
{
"and": [
"Gravity",
"canTrickyUseFrozenEnemies",
"h_underwaterCrouchJumpDownGrab"
]
},
{
"and": [
"HiJump",
{
"or": [
{
"and": [
{
"notable": "Underwater Walljumps"
},
"canUnderwaterWallJump"
]
},
"canSpringBallJumpMidAir",
{
"and": [
"canTrickyUseFrozenEnemies",
"h_underwaterCrouchJump"
]
}
]
}
]
},
{
"and": [
"h_underwaterMaxHeightSpringBallJump",
"canTrickyUseFrozenEnemies",
"canBeVeryPatient",
{
"or": [
"canStationaryLateralMidAirMorph",
{
"ammo": {
"type": "Super",
"count": 1
}
}
]
}
]
}
]
} |
From: 1
Bottom Door
To: 13
G-Mode Morph Junction By Middle Right Door
Entrance condition: {
"comeInWithGMode": {
"mode": "direct",
"morphed": true
},
"comesThroughToilet": "no"
}Requires: {
"or": [
{
"and": [
"Gravity",
{
"or": [
"h_artificialMorphIBJ",
{
"and": [
"h_artificialMorphSpringBall",
"HiJump"
]
},
{
"and": [
"h_artificialMorphSpringBall",
"canGravityJump"
]
}
]
}
]
},
"h_artificialMorphDoubleSpringBallJump"
]
}Clears obstacles: B |
From: 2
Bottom Right Door
To: 12
G-Mode Junction By Middle Right Door
Entrance condition: {
"comeInWithGMode": {
"mode": "direct",
"morphed": false
}
}Requires: {
"notable": "G-Mode Overload Speed Blocks then use Global Crab"
}
"canComplexGMode"
"h_navigateUnderwater"
{
"or": [
"canGravityJump",
{
"and": [
"Gravity",
"canWallJump"
]
},
{
"and": [
"Gravity",
"canTrickyUseFrozenEnemies",
"h_underwaterCrouchJumpDownGrab"
]
},
{
"and": [
"HiJump",
{
"or": [
{
"and": [
{
"notable": "Underwater Walljumps"
},
"canUnderwaterWallJump"
]
},
"canSpringBallJumpMidAir",
{
"and": [
"canTrickyUseFrozenEnemies",
"h_underwaterCrouchJump"
]
}
]
}
]
},
{
"and": [
"h_underwaterMaxHeightSpringBallJump",
"canTrickyUseFrozenEnemies",
"canBeVeryPatient",
{
"or": [
"canStationaryLateralMidAirMorph",
{
"ammo": {
"type": "Super",
"count": 1
}
}
]
}
]
}
]
}Clears obstacles: B |
From: 2
Bottom Right Door
To: 12
G-Mode Junction By Middle Right Door
Entrance condition: {
"comeInWithGMode": {
"mode": "indirect",
"morphed": false
}
}Requires: {
"notable": "G-Mode Overload Speed Blocks then use Global Crab"
}
"canComplexGMode"
"h_navigateUnderwater"
{
"or": [
"canGravityJump",
{
"and": [
"Gravity",
"canWallJump"
]
},
{
"and": [
"Gravity",
"canTrickyUseFrozenEnemies",
"h_underwaterCrouchJumpDownGrab"
]
},
{
"and": [
"HiJump",
{
"or": [
{
"and": [
{
"notable": "Underwater Walljumps"
},
"canUnderwaterWallJump"
]
},
"canSpringBallJumpMidAir",
{
"and": [
"canTrickyUseFrozenEnemies",
"h_underwaterCrouchJump"
]
}
]
}
]
},
{
"and": [
"h_underwaterMaxHeightSpringBallJump",
"canTrickyUseFrozenEnemies",
"canBeVeryPatient",
{
"or": [
"canStationaryLateralMidAirMorph",
{
"ammo": {
"type": "Super",
"count": 1
}
}
]
}
]
}
]
} |
From: 2
Bottom Right Door
To: 13
G-Mode Morph Junction By Middle Right Door
Entrance condition: {
"comeInWithGMode": {
"mode": "direct",
"morphed": true
}
}Requires: {
"or": [
{
"and": [
"Gravity",
{
"or": [
"h_artificialMorphIBJ",
{
"and": [
"h_artificialMorphSpringBall",
"HiJump"
]
},
{
"and": [
"h_artificialMorphSpringBall",
"canGravityJump"
]
}
]
}
]
},
"h_artificialMorphDoubleSpringBallJump"
]
}Clears obstacles: B |
|


Requires: "Gravity"
{
"or": [
"HiJump",
"canWallJump",
"SpaceJump",
"canIBJ",
"canUseFrozenEnemies",
"canSpringBallJumpMidAir",
"canGravityJump"
]
} |
|

Requires: "Gravity"
{
"or": [
"HiJump",
"canWallJump",
"SpaceJump",
"canIBJ",
"canSpringBallJumpMidAir",
"canGravityJump"
]
} |
|


Requires: "Gravity"
{
"or": [
"HiJump",
"canWallJump",
"SpaceJump",
"canIBJ",
"canSpringBallJumpMidAir",
"h_crouchJumpDownGrab",
"canGravityJump",
"canTrickyUseFrozenEnemies"
]
} |
From: 10
Direct G-Mode Morph, On Ledge Above Speed Blocks
To: 4
Top Right Door
It is required to avoid double hitting the Skultera with the Power Bomb, and to position the Crystal Flash so that the Skultera can hit Samus from above so it avoids the light orb. This is particularly precise because the fish is not global, which makes it so Samus needs to be closer to the fish when laying the Power Bomb. Samus also needs to be able to manipulate the camera, which can be difficult while morphed. Roll up the hill a bit until the Skultera is close to the wall, then move away so that it is a bit off camera. Crystal Flash while Samus is on one of the two lower sloped tiles and the Skultera is just off camera to the right, in order to lure it back to the left. This can be done with no enemy damage reduction and up to 2 E-Tanks or a 50% enemy damage reduction and no E-Tanks; a 75% reduction is not recommended and would require disabling and reenabling suits with a precise pause abuse. Requires: {
"or": [
{
"and": [
"Gravity",
"h_artificialMorphIBJ"
]
},
{
"and": [
"Gravity",
"HiJump",
"h_artificialMorphSpringBall"
]
},
{
"and": [
"h_artificialMorphSpringBall",
"canGravityJump"
]
},
"h_artificialMorphDoubleSpringBallJump"
]
}
"canCameraManip"
"h_artificialMorphComplexRModeCrystalFlashInterrupt"
{
"ammo": {
"type": "Missile",
"count": 10
}
}
{
"ammo": {
"type": "Super",
"count": 10
}
}
{
"ammo": {
"type": "PowerBomb",
"count": 3
}
}
{
"or": [
"h_partialEnemyDamageReduction",
{
"resourceAtMost": [
{
"type": "RegularEnergy",
"count": 19
}
]
},
{
"and": [
{
"resourceCapacity": [
{
"type": "RegularEnergy",
"count": 199
}
]
},
{
"resourceCapacity": [
{
"type": "ReserveEnergy",
"count": 199
}
]
}
]
}
]
}Dev note: FIXME: A 75% damage reduction method needs to be documented for if Samus only has Gravity and it provides 75% reduction. |
From: 12
G-Mode Junction By Middle Right Door
To: 10
Direct G-Mode Morph, On Ledge Above Speed Blocks
Climb to the ledge left of the morph tunnel item. With Ice, carefully and quickly freeze the last crab high enough to use as a platform. With a slow ascent, such as with Spring Ball and Ice, the crab will need to circle the entire room, it is possible to use a Super when it passes the speed blocks to speed this up significantly. Requires: {
"obstaclesCleared": [
"B"
]
}
"Morph"
"h_navigateUnderwater"
{
"or": [
"canGravityJump",
{
"and": [
"Gravity",
"canWallJump"
]
},
{
"and": [
"Gravity",
"canTrickyUseFrozenEnemies"
]
},
{
"and": [
"HiJump",
{
"or": [
"canSpringBallJumpMidAir",
{
"and": [
{
"notable": "Underwater Walljumps"
},
"canUnderwaterWallJump"
]
}
]
}
]
},
{
"and": [
"HiJump",
"canTrickyUseFrozenEnemies",
{
"or": [
"h_underwaterCrouchJump",
"canDownGrab"
]
}
]
},
{
"and": [
"h_underwaterMaxHeightSpringBallJump",
"canTrickyUseFrozenEnemies",
"canBeVeryPatient"
]
}
]
}Dev note: FIXME: HiJump strats may need canBeVeryPatient if they can't be done before the crab is in position |
From: 12
G-Mode Junction By Middle Right Door
To: 11
G-Mode, Below Speed Blocks (Overloaded PLMs)


Place bombs against the speed blocks until they are overloaded. With a slow ascent, such as with Spring Ball and Ice, the crab will need to circle the entire room, it is possible to use a Super when it passes the speed blocks to speed this up significantly. Requires: "canComplexGMode"
{
"notable": "G-Mode Overload Speed Blocks then use Global Crab"
}
"h_useMorphBombs"
"h_navigateUnderwater"
{
"or": [
"canGravityJump",
{
"and": [
"Gravity",
"canWallJump"
]
},
{
"and": [
"HiJump",
{
"or": [
"canSpringBallJumpMidAir",
{
"and": [
{
"notable": "Underwater Walljumps"
},
"canUnderwaterWallJump"
]
}
]
}
]
},
{
"and": [
"canTrickyUseFrozenEnemies",
{
"or": [
"HiJump",
"Gravity",
"h_underwaterMaxHeightSpringBallJump"
]
}
]
}
]
}
{
"or": [
{
"and": [
"Gravity",
"h_useSpringBall"
]
},
{
"and": [
"HiJump",
"h_useSpringBall"
]
},
{
"and": [
"Gravity",
"canCeilingBombJump"
]
},
"canBeVeryPatient"
]
} |
From: 13
G-Mode Morph Junction By Middle Right Door
To: 10
Direct G-Mode Morph, On Ledge Above Speed Blocks
This is a long climb, and getting around the fish under the speed blocks can be tricky or slow. Requires: "h_navigateUnderwater"
{
"obstaclesCleared": [
"B"
]
}
{
"or": [
{
"and": [
"Gravity",
{
"or": [
"h_artificialMorphJumpIntoIBJ",
"h_artificialMorphDoubleBombJump",
"h_artificialMorphStaggeredIBJ",
{
"and": [
"h_artificialMorphIBJ",
"canBeVeryPatient"
]
},
{
"and": [
"h_artificialMorphIBJ",
"h_artificialMorphPowerBomb"
]
},
{
"and": [
"h_artificialMorphSpringBall",
"HiJump"
]
},
{
"and": [
"h_artificialMorphSpringBall",
"canGravityJump"
]
}
]
}
]
},
"h_artificialMorphDoubleSpringBallJump"
]
}Dev note: FIXME: Some IBJ strats may need canBeVeryPatient if they can't be done before the crab is in position |
From: 13
G-Mode Morph Junction By Middle Right Door
To: 11
G-Mode, Below Speed Blocks (Overloaded PLMs)
This is a long climb, and getting around the fish under the missiles can be tricky or slow. Place bombs against the speed blocks until they are overloaded. Requires: "canComplexGMode"
{
"notable": "G-Mode Overload Speed Blocks then use Global Crab"
}
"h_navigateUnderwater"
"h_artificialMorphBombs"
{
"or": [
{
"and": [
"Gravity",
{
"or": [
"h_artificialMorphIBJ",
{
"and": [
"h_artificialMorphSpringBall",
"HiJump"
]
},
{
"and": [
"h_artificialMorphSpringBall",
"canGravityJump"
]
}
]
},
{
"or": [
"h_artificialMorphSpringBall",
"h_artificialMorphCeilingBombJump",
"canBeVeryPatient"
]
}
]
},
"h_artificialMorphDoubleSpringBallJump"
]
} |
From: 1
Left Door
To: 5
Top Left Junction
Gravity jump, then quickly pause and turn on Spring Ball for a Spring Ball jump. Requires: "canGravityJump" "HiJump" "canTrickySpringBallJump" |
|
Entrance condition: {
"comeInWithGMode": {
"mode": "direct",
"morphed": true
},
"comesThroughToilet": "any"
}Requires: {
"or": [
"Gravity",
"h_artificialMorphDoubleSpringBallJump",
{
"and": [
{
"not": "f_MaridiaTubeBroken"
},
"canRiskPermanentLossOfAccess"
]
}
]
}
{
"or": [
"h_artificialMorphIBJ",
{
"and": [
"HiJump",
"h_artificialMorphSpringBall"
]
},
{
"and": [
"h_artificialMorphSpringBallBombJump",
"h_artificialMorphSpringBall"
]
},
{
"and": [
"canGravityJump",
"h_artificialMorphSpringBall"
]
}
]
}Exit condition: {
"leaveWithGMode": {
"morphed": true
}
} |
From: 1
Top Left Door
To: 1
Top Left Door
Follow the crab from the bottom right door to the top left door. This takes approximately 90 seconds. It is also possible to knock the crab off of the middle peak with a super and follow it to the left which may save time. Requires: "Gravity"
"canBePatient"
{
"or": [
"SpaceJump",
{
"and": [
{
"ammo": {
"type": "Super",
"count": 1
}
},
{
"or": [
"HiJump",
"canSpringBallJumpMidAir",
"canGravityJump",
"canConsecutiveWallJump",
"canSpeedyJump"
]
}
]
}
]
}Exit condition: {
"leaveWithGModeSetup": {}
} |
From: 1
Top Left Door
To: 1
Top Left Door
Follow the crab from the bottom right door to the top left door with Gravity or Grapple. It is also possible to knock the crab off of the middle peak with a super and follow it to the left with Ice or HiJump and Spring Ball. Requires: "canBeVeryPatient"
{
"or": [
"canGravityJump",
{
"and": [
"canPreciseGrapple",
{
"or": [
"HiJump",
"Gravity"
]
}
]
},
{
"and": [
{
"ammo": {
"type": "Super",
"count": 1
}
},
{
"or": [
"canTrickyUseFrozenEnemies",
{
"and": [
"HiJump",
"canSpringBallJumpMidAir"
]
}
]
}
]
}
]
}Exit condition: {
"leaveWithGModeSetup": {}
}Dev note: These strats take approximately 2 minutes each, but because it is just for a G-Mode Setup, canBeVeryPatient was added. This could be done with many other sets of item combinations, but it would be very tedious for a g-mode setup. |
From: 1
Top Left Door
To: 1
Top Left Door


Follow the crab from the bottom right door to the top left door. This takes approximately 90 seconds. It is also possible to knock the crab off of the middle peak with a super and follow it to the left which may save time. Requires: "h_frozenEnemyRunway"
"Gravity"
"canBePatient"
{
  "or": [
    "SpaceJump",
    {
      "and": [
        {
          "ammo": {
            "type": "Super",
            "count": 1
          }
        },
        {
          "or": [
            "HiJump",
            "canSpringBallJumpMidAir",
            "canGravityJump",
            "canConsecutiveWallJump",
            "canSpeedyJump"
          ]
        }
      ]
    }
  ]
}
Exit condition: {
"leaveWithRunway": {
"length": 4,
"openEnd": 0
}
} |
From: 1
Top Left Door
To: 1
Top Left Door


Follow the crab from the bottom right door to the top left door. It is also possible to knock the crab off of the middle peak with a super and follow it. Requires: "h_frozenEnemyRunway"
"Gravity"
"canBeVeryPatient"
{
"or": [
"canGravityJump",
"canPreciseGrapple",
{
"ammo": {
"type": "Super",
"count": 1
}
}
]
}Exit condition: {
"leaveWithRunway": {
"length": 4,
"openEnd": 0
}
}Dev note: These strats take approximately 2 minutes each, but because it is just for a 1.5 tile runway extension, canBeVeryPatient was added. This could be done with many other sets of item combinations, but it would be very tedious for a runway extension. |
|
Use the runway at the bottom of the room to gain temporary blue. Then Gravity jump three times to chain it up to the door. Requires: {
"canShineCharge": {
"usedTiles": 30,
"gentleUpTiles": 2,
"gentleDownTiles": 3,
"openEnd": 0
}
}
"canGravityJump"
"canLongChainTemporaryBlue"Exit condition: {
"leaveWithTemporaryBlue": {}
} |
From: 1
Top Left Door
To: 5
Top Door

If HiJump or Spring Ball is available, use a Gravity jump from the top of the island; otherwise, use the higher ledge to the left, jump slightly early to avoid getting too much jump height (to avoid bonking the ceiling Grapple blocks), and quickly do a stationary lateral mid-air morph. Entrance condition: {
"comeInShinecharging": {
"length": 1,
"openEnd": 0
}
}Requires: "canGravityJump"
"canLongChainTemporaryBlue"
{
"or": [
"HiJump",
"canTrickySpringBallJump",
{
"and": [
"canStationaryLateralMidAirMorph",
"canInsaneJump"
]
}
]
}Exit condition: {
"leaveWithTemporaryBlue": {
"direction": "right"
}
}Unlocks doors: {"types":["ammo"],"requires":[]}Dev note: FIXME: A suitless version of this could work, with HiJump + Spring Ball; but it would require leaving while morphed, which would need some space to move horizontally in the room above before landing, which we don't yet have a way to model. |
|
Climb to the morph tunnel with wall jumps or a Gravity Jump. Requires: "Gravity"
"canMidAirMorph"
"h_EverestMorphTunnelExpanded"
"h_shinechargeMaxRunway"
"canShinechargeMovementTricky"
{
"or": [
{
"and": [
"canWallJump",
{
"shineChargeFrames": 145
}
]
},
{
"and": [
"canGravityJump",
{
"shineChargeFrames": 155
}
]
}
]
}Exit condition: {
"leaveShinecharged": {}
}Dev note: The frames remaining accounts for time needed to unmorph before going through the transition. Leaving with a shinecharge could be done even if the morph tunnel isn't expanded, but this would mean leaving shinecharged while morphed, which wouldn't technically adhere to what this exit condition specifies. |
|
Requires: "canGravityJump" |
|
Entrance condition: {
"comeInWithGMode": {
"mode": "any",
"morphed": false
},
"comesThroughToilet": "any"
}Requires: "Morph"
{
"or": [
{
"and": [
"Gravity",
{
"or": [
"HiJump",
"canWallJump",
"canSpeedyJump",
"SpaceJump",
"canSpringBallJumpMidAir",
"canSpringBallBombJump",
"canGravityJump",
{
"and": [
"h_crouchJumpDownGrab",
"canTrickyJump"
]
}
]
}
]
},
{
"and": [
"canSuitlessMaridia",
{
"or": [
"canTrickyUseFrozenEnemies",
{
"and": [
"HiJump",
"canSpringBallJumpMidAir"
]
},
"canUnderwaterWallJump"
]
}
]
}
]
}Dev note: The canCrouchJump is not a h_underwaterCrouchJump, because Gravity is required. |
From: 2
Bottom Left Door
To: 12
G-Mode Junction (In Morph Tunnel)
Entrance condition: {
"comeInWithGMode": {
"mode": "any",
"morphed": true
},
"comesThroughToilet": "any"
}Requires: "Gravity"
{
"or": [
"h_artificialMorphIBJ",
{
"and": [
"h_artificialMorphSpringBall",
{
"or": [
"canGravityJump",
"HiJump"
]
}
]
},
{
"and": [
"h_artificialMorphSpringBallBombJump",
"h_additionalBomb"
]
}
]
}Dev note: It is assumed that the door is open. |
|
Farm the Sciser in the bottom runway, then shinecharge. Interrupt using the Sciser on the center mountain. Entrance condition: {
"comeInWithRMode": {},
"comesThroughToilet": "no"
}Requires: "Gravity"
{
"or": [
"canGravityJump",
"HiJump",
"canWallJump",
"SpaceJump",
"canJumpIntoIBJ",
"canSpringBallJumpMidAir"
]
}
{
"or": [
"h_CrystalFlashForReserveEnergy",
{
"and": [
"h_RModeCanRefillReserves",
{
"partialRefill": {
"type": "ReserveEnergy",
"limit": 20
}
}
]
}
]
}
"h_shinechargeMaxRunway"
{
"autoReserveTrigger": {}
}
"canRModeSparkInterrupt" |
|
Requires: {
"resetRoom": {
"nodes": [
3
]
}
}
{
"or": [
{
"and": [
"Grapple",
{
"cycleFrames": 90
}
]
},
{
"and": [
{
"or": [
{
"and": [
"Gravity",
{
"or": [
"canWallJump",
"HiJump",
{
"and": [
"canSpringBallJumpMidAir",
"h_doubleEquipmentScreenCycleFrames"
]
},
{
"and": [
{
"or": [
"Plasma",
"Wave"
]
},
"canDodgeWhileShooting"
]
}
]
}
]
},
{
"and": [
"canGravityJump",
"h_doubleEquipmentScreenCycleFrames",
{
"cycleFrames": 60
}
]
},
{
"and": [
"HiJump",
"canSpringBallJumpMidAir",
"h_doubleEquipmentScreenCycleFrames",
{
"cycleFrames": 170
}
]
}
]
},
{
"or": [
{
"and": [
"Plasma",
{
"cycleFrames": 120
}
]
},
{
"and": [
"Wave",
{
"cycleFrames": 150
}
]
},
{
"and": [
"ScrewAttack",
{
"cycleFrames": 165
}
]
},
{
"and": [
{
"haveBlueSuit": {}
},
{
"cycleFrames": 165
}
]
},
{
"and": [
"Spazer",
{
"cycleFrames": 200
}
]
},
{
"and": [
"Ice",
{
"cycleFrames": 280
}
]
},
{
"cycleFrames": 330
}
]
}
]
}
]
}Resets obstacles: A, B Farm cycle drops: 1 Sciser |
|
Requires: "canGravityJump" |
From: 3
Bottom Right Door
To: 12
G-Mode Junction (In Morph Tunnel)
Entrance condition: {
"comeInWithGMode": {
"mode": "indirect",
"morphed": false
},
"comesThroughToilet": "any"
}Requires: "Morph"
{
"or": [
{
"and": [
"Gravity",
{
"or": [
"HiJump",
"canWallJump",
"SpaceJump",
"canIBJ",
"canSpringBallJumpMidAir",
"canSpringBallBombJump",
"canGravityJump"
]
}
]
},
{
"and": [
"canSuitlessMaridia",
{
"or": [
{
"and": [
"HiJump",
"canSpringBallJumpMidAir"
]
},
"canUnderwaterWallJump"
]
}
]
},
{
"and": [
"h_navigateUnderwater",
"canTrickyUseFrozenEnemies",
{
"ammo": {
"type": "Super",
"count": 1
}
},
{
"or": [
"canInsaneJump",
"Spazer",
"Wave",
"Plasma",
{
"ammo": {
"type": "Super",
"count": 1
}
}
]
}
]
}
]
}Dev note: Direct G-mode will have an open door and Samus will fall. Indirect will require a doorlock bypass in the room below. FIXME: A direct G-mode regain mobility and fall through the door would be possible if entering on the right side of the door, but there is not a way to represent that yet. |
From: 4
Top Right Door
To: 4
Top Right Door

Follow the crab from the bottom right door to the top right door. Depending on the item setup, this takes 30-50 seconds. Requires: {
"or": [
{
"and": [
"Gravity",
"SpaceJump"
]
},
"canGravityJump",
{
"and": [
"Grapple",
{
"or": [
"HiJump",
"Gravity"
]
}
]
},
"h_doubleSpringBallJumpWithHiJump"
]
}Exit condition: {
"leaveWithGModeSetup": {}
}Dev note: This could be done with many other sets of item combinations, but it would be very tedious for a g-mode setup. |
|


Follow the crab from the bottom right door to the top right door. Depending on the item setup, this takes 30-50 seconds. Keep a half-tile gap between the crab and the runway in order to extend it as much as possible. Requires: "h_frozenEnemyRunway"
"Gravity"
{
"or": [
"SpaceJump",
"canGravityJump",
"Grapple"
]
}Exit condition: {
"leaveWithRunway": {
"length": 6,
"openEnd": 0
}
}Dev note: This could be done with many other sets of item combinations, but it would be very tedious for a 1.5 tile runway extension. |
|
Use an in-room runway to gain temporary blue. Then Gravity jump to chain it up to the door. It is easiest to gain a shinecharge at the bottom of the room, though this requires a longer sequence of gravity jumps. Requires: {
"or": [
{
"and": [
{
"canShineCharge": {
"usedTiles": 36,
"gentleUpTiles": 1,
"gentleDownTiles": 2,
"steepUpTiles": 1,
"openEnd": 0
}
},
"canLongChainTemporaryBlue"
]
},
{
"and": [
{
"canShineCharge": {
"usedTiles": 20,
"gentleUpTiles": 3,
"gentleDownTiles": 2,
"steepUpTiles": 1,
"openEnd": 1
}
},
"canXRayTurnaround"
]
},
{
"canShineCharge": {
"usedTiles": 15,
"gentleDownTiles": 2,
"steepDownTiles": 1,
"openEnd": 1
}
}
]
}
"canChainTemporaryBlue"
"canGravityJump"Exit condition: {
"leaveWithTemporaryBlue": {}
} |
|
Entrance condition: {
"comeInWithGMode": {
"mode": "any",
"morphed": true
}
}Requires: "Gravity"
{
"or": [
{
"and": [
"h_artificialMorphSpringBall",
{
"or": [
"canGravityJump",
"HiJump"
]
}
]
},
"h_artificialMorphLongIBJ",
{
"and": [
"h_artificialMorphIBJ",
"h_artificialMorphBombHorizontally"
]
},
"h_artificialMorphSpringBallBombJump"
]
} |
|
Note that it is possible to get up with Grapple alone by using the Powamps. Fling from the Powamp into the side of the top platform to align horizontally. Entrance condition: {
"comeInWithGMode": {
"mode": "direct",
"morphed": false
},
"comesThroughToilet": "any"
}Requires: "h_navigateUnderwater"
{
"or": [
{
"and": [
"Gravity",
{
"or": [
"HiJump",
"canSpringBallJumpMidAir",
"SpaceJump",
"canIBJ",
"canGravityJump"
]
}
]
},
{
"and": [
"canUseEnemies",
"canPreciseGrapple"
]
},
{
"and": [
"HiJump",
"canSpringBallJumpMidAir"
]
}
]
}Exit condition: {
"leaveWithGMode": {
"morphed": false
}
} |
|
Entrance condition: {
"comeInWithGMode": {
"mode": "direct",
"morphed": true
},
"comesThroughToilet": "any"
}Requires: {
"or": [
{
"and": [
"Gravity",
{
"or": [
"h_artificialMorphIBJ",
{
"and": [
"HiJump",
"h_artificialMorphSpringBall"
]
},
{
"and": [
"canGravityJump",
"h_artificialMorphSpringBall"
]
}
]
}
]
},
"h_artificialMorphDoubleSpringBallJump"
]
}Exit condition: {
"leaveWithGMode": {
"morphed": true
}
} |
|
Lure the crab to the top of the room and freeze it close enough to the corner that it will be able to hit Samus after it thaws. Without Morph, this is much trickier, requiring fairly precise freeze positioning and movement to get onto the crab. Aim down before landing on the crab to avoid triggering the transition. Be sure to touch the transition before it thaws or Samus will be in a falling pose, but late enough that it will be able to rotate around the corner and hit Samus in time. Requires: "canBePatient"
{
"or": [
{
"and": [
"Gravity",
"SpaceJump"
]
},
{
"and": [
"Gravity",
"HiJump",
"canPreciseGrapple"
]
},
{
"and": [
"HiJump",
"canPreciseGrapple",
"canSpringBallJumpMidAir",
"canBeVeryPatient"
]
},
{
"and": [
"HiJump",
"canGravityJump",
"canBeVeryPatient"
]
}
]
}
"canUpwardGModeSetup"
"canTrickyUseFrozenEnemies"
{
"or": [
"Morph",
"canTrickyGMode"
]
}Exit condition: {
"leaveWithGModeSetup": {}
}Dev note: Without Morph, this is not difficult enough to require canTrickyGMode, but it is easy to fail and the setup is very slow. The patience requirements for these strats are lenient, but there is a good chance of not getting the setup or entering G-mode first try. |
|

Use the runway at either the bottom or right side of the room to gain temporary blue. Then Gravity jump two or more times to chain it up to the door. Requires: {
"or": [
{
"and": [
{
"canShineCharge": {
"usedTiles": 30,
"gentleUpTiles": 2,
"gentleDownTiles": 3,
"openEnd": 0
}
},
"canXRayTurnaround",
"canInsaneJump"
]
},
{
"and": [
{
"canShineCharge": {
"usedTiles": 20,
"gentleUpTiles": 3,
"gentleDownTiles": 1,
"steepUpTiles": 1,
"openEnd": 0
}
},
"HiJump"
]
}
]
}
"canGravityJump"
"canLongChainTemporaryBlue"Exit condition: {
"leaveWithTemporaryBlue": {
"direction": "left"
}
} |
|
Lure a crab to the top door. Use a Super to knock it off and freeze it frame-perfectly below the door. Use Morph and X-Ray to stand up, then jump to clip past the door shell. Requires: "Gravity"
"canBeVeryPatient"
{
"or": [
"canGravityJump",
"SpaceJump"
]
}
{
"ammo": {
"type": "Super",
"count": 1
}
}
"h_XRayMorphIceClip"Bypasses door shell: true Dev note: It isn't possible to get the crab frozen at the high pixel position here, nor is it possible to clip without Morph and X-Ray. FIXME: suitless variations would be possible with HiJump in combination with Spring Ball or Grapple and patience. |
|
Lure a crab to the top door. Use a Super to knock it off and freeze it frame-perfectly below the door. Use a flash suit or blue suit from a crouched position to spark vertically and clip past the door shell. Requires: "canBeVeryPatient"
{
"or": [
{
"and": [
"Gravity",
"SpaceJump"
]
},
{
"and": [
"Gravity",
"HiJump",
"canPreciseGrapple"
]
},
{
"and": [
"HiJump",
"canPreciseGrapple",
"canSpringBallJumpMidAir"
]
},
{
"and": [
"HiJump",
"canGravityJump"
]
}
]
}
{
"ammo": {
"type": "Super",
"count": 1
}
}
"h_storedSparkIceClip"
{
"shinespark": {
"frames": 2,
"excessFrames": 1
}
}Exit condition: {
"leaveWithSpark": {}
}Bypasses door shell: true |
From: 6
Left Morph Passage Doorway
To: 2
Bottom Left Door
Crystal Flash after exiting the Morph tunnel, or else exit activate X-Ray and hold until the beam is at full width to exit G-Mode and remain in R-Mode to farm enemies. For farming from Mobile entry, disable all E-Tanks and farm all Scisers. Shinecharge and jump on top of the right side mountain. Shoot up and windup underneath the Powamp when it explodes. For farming from Immobile entry, disable to the nearest full E-Tank and farm until you have reserve energy. Entrance condition: {
"comeInWithGMode": {
"mode": "direct",
"morphed": true
}
}Requires: "Gravity"
{
"disableEquipment": "ETank"
}
{
"or": [
{
"and": [
"h_artificialMorphCrystalFlash",
{
"refill": [
"ReserveEnergy"
]
}
]
},
{
"and": [
{
"resourceMissingAtMost": [
{
"type": "PowerBomb",
"count": 0
}
]
},
"canGravityJump",
{
"partialRefill": {
"type": "ReserveEnergy",
"limit": 20
}
}
]
},
{
"and": [
{
"resourceAvailable": [
{
"type": "RegularEnergy",
"count": 99
}
]
},
{
"partialRefill": {
"type": "ReserveEnergy",
"limit": 20
}
}
]
}
]
}
"h_shinechargeMaxRunway"
{
"autoReserveTrigger": {}
}
"canRModeSparkInterrupt"Dev note: Samus is able to enter this door with Morph or artificial morph, even if the tunnel is not expanded. When morphing, she will 'fall' into the tunnel. |
|
Requires: "Gravity"
{
"or": [
{
"and": [
"SpaceJump",
{
"or": [
{
"and": [
{
"resetRoom": {
"nodes": [
1
]
}
},
{
"cycleFrames": 1280
}
]
},
{
"and": [
{
"resetRoom": {
"nodes": [
2
]
}
},
{
"cycleFrames": 1065
}
]
},
{
"and": [
{
"resetRoom": {
"nodes": [
3
]
}
},
{
"cycleFrames": 1000
}
]
},
{
"and": [
{
"resetRoom": {
"nodes": [
4
]
}
},
{
"cycleFrames": 1240
}
]
},
{
"and": [
{
"resetRoom": {
"nodes": [
5
]
}
},
{
"cycleFrames": 1000
}
]
},
{
"and": [
{
"resetRoom": {
"nodes": [
6
]
}
},
"Morph",
{
"cycleFrames": 1385
}
]
}
]
}
]
},
{
"and": [
"HiJump",
{
"or": [
{
"and": [
{
"resetRoom": {
"nodes": [
1
]
}
},
{
"cycleFrames": 1235
}
]
},
{
"and": [
{
"resetRoom": {
"nodes": [
2
]
}
},
{
"cycleFrames": 1250
}
]
},
{
"and": [
{
"resetRoom": {
"nodes": [
3
]
}
},
{
"cycleFrames": 1170
}
]
},
{
"and": [
{
"resetRoom": {
"nodes": [
4
]
}
},
"canGravityJump",
{
"cycleFrames": 1510
},
"h_doubleEquipmentScreenCycleFrames",
{
"or": [
"canPreciseWallJump",
"h_doubleEquipmentScreenCycleFrames"
]
}
]
},
{
"and": [
{
"resetRoom": {
"nodes": [
5
]
}
},
"canGravityJump",
{
"cycleFrames": 1000
},
"h_doubleEquipmentScreenCycleFrames",
{
"or": [
"canTrickyJump",
"h_doubleEquipmentScreenCycleFrames"
]
}
]
},
{
"and": [
{
"resetRoom": {
"nodes": [
6
]
}
},
"Morph",
{
"cycleFrames": 1410
}
]
}
]
}
]
},
{
"and": [
"Grapple",
{
"or": [
{
"and": [
{
"resetRoom": {
"nodes": [
1
]
}
},
{
"cycleFrames": 1210
}
]
},
{
"and": [
{
"resetRoom": {
"nodes": [
2
]
}
},
{
"cycleFrames": 1125
},
{
"or": [
"canWallJump",
{
"and": [
"canGravityJump",
{
"cycleFrames": 55
},
"h_doubleEquipmentScreenCycleFrames"
]
},
{
"and": [
"h_crouchJumpDownGrab",
"canTrickyJump",
{
"cycleFrames": 50
}
]
}
]
}
]
},
{
"and": [
{
"resetRoom": {
"nodes": [
3
]
}
},
{
"cycleFrames": 1145
},
{
"or": [
"canWallJump",
{
"and": [
"canGravityJump",
{
"cycleFrames": 80
},
"h_doubleEquipmentScreenCycleFrames"
]
}
]
}
]
},
{
"and": [
{
"resetRoom": {
"nodes": [
4
]
}
},
{
"cycleFrames": 1885
}
]
},
{
"and": [
{
"resetRoom": {
"nodes": [
5
]
}
},
{
"cycleFrames": 1570
}
]
},
{
"and": [
{
"resetRoom": {
"nodes": [
6
]
}
},
"Morph",
{
"cycleFrames": 1400
},
{
"or": [
"canWallJump",
{
"and": [
"canGravityJump",
{
"cycleFrames": 55
},
"h_doubleEquipmentScreenCycleFrames"
]
},
{
"and": [
"h_crouchJumpDownGrab",
"canTrickyJump",
{
"cycleFrames": 50
}
]
}
]
}
]
}
]
}
]
}
]
}Resets obstacles: A, B Farm cycle drops: 3 Powamp Dev note: Other movement options are possible, though slower (e.g. Gravity jump everywhere). The canCrouchJump is not a h_underwaterCrouchJump, because Gravity is required. |
|
Requires: "canGravityJump" Clears obstacles: A, B Dev note: It is possible to bring 2 crabs with gravity jump alone, but is relatively pointless. |
|
Barely works without HiJump with a late gravity jump. Requires: "canGravityJump"
{
"or": [
"HiJump",
"canTrickyJump"
]
} |
|
With a running jump from the peak of the island, this requires no other movement tech or items. Requires: "Gravity"
{
"or": [
{
"and": [
"canDash",
"canCarefulJump"
]
},
"HiJump",
"SpaceJump",
"canWallJump",
"canGravityJump",
"canIBJ",
"canSpringBallJumpMidAir"
]
} |
|
Requires: "canGravityJump" |
|
Requires: "canGravityJump" |
|
Run right-to-left to gain a shinecharge on the upper right ledge. Use a gravity jump, Space Jump, or HiJump to approach the door above and spark out. Requires: "Gravity"
{
"or": [
"SpaceJump",
"canGravityJump",
{
"and": [
"HiJump",
{
"or": [
"canWallJump",
"canTrickyDashJump"
]
}
]
}
]
}
{
"canShineCharge": {
"usedTiles": 20,
"gentleUpTiles": 3,
"gentleDownTiles": 1,
"steepUpTiles": 1,
"openEnd": 0
}
}
"canShinechargeMovementComplex"
{
"shinespark": {
"frames": 8,
"excessFrames": 0
}
}Exit condition: {
"leaveWithSpark": {}
}Unlocks doors: {"types":["ammo"],"requires":[]}Dev note: With some of these methods it is technically possible (but harder) to reach the door transition with a few frames remaining. |
From: 11
Upper Left Ledge Junction
To: 9
Platform Below Top Door
This is most easily done with a late jump at the bottom of the slope. It is a bit less precise with an air ball or turning gravity suit back on and wall jumping on the platform at the end. An alternate method is to airball simultaneously with the gravity jump pause. Requires: "canGravityJump"
{
"or": [
"canTrickyJump",
{
"and": [
"can4HighMidAirMorph",
"canCarefulJump",
"canLateralMidAirMorph"
]
}
]
} |
From: 1
Middle Left Door
To: 9
Junction Below Top Door
Bomb the Power Bomb blocks below to overload PLMs, then go up through the crumble blocks to escape. Entrance condition: {
"comeInWithGMode": {
"mode": "any",
"morphed": true
}
}Requires: "h_artificialMorphBombs"
"h_navigateUnderwater"
{
"or": [
{
"and": [
"Gravity",
{
"or": [
"h_artificialMorphLongIBJ",
"h_artificialMorphJumpIntoIBJ"
]
}
]
},
{
"and": [
"canGravityJump",
"h_artificialMorphSpringBall"
]
},
{
"and": [
"HiJump",
"canSpringBallJumpMidAir"
]
},
{
"and": [
"HiJump",
"canConsecutiveWallJump",
"canPreciseWallJump"
]
},
"h_artificialMorphDoubleSpringBallJump",
{
"and": [
"Gravity",
"HiJump",
"h_artificialMorphSpringBallBombJump"
]
}
]
}Dev note: FIXME: Eventually a CF doorlock bypass should be added from this 1 or from 12 with a 1->12 option. |
From: 1
Middle Left Door
To: 10
G-Mode Morph Junction (By Bottom Left Door)
Bomb the Power Bomb blocks below to overload PLMs, then IBJ up through the crumble blocks to escape. Entrance condition: {
"comeInWithGMode": {
"mode": "any",
"morphed": true
}
}Requires: "h_artificialMorphBombs"
{
"or": [
{
"and": [
"Gravity",
{
"or": [
"h_artificialMorphLongIBJ",
"h_artificialMorphJumpIntoIBJ"
]
}
]
},
{
"and": [
"canGravityJump",
"h_artificialMorphSpringBall"
]
},
"h_artificialMorphDoubleSpringBallJump",
{
"and": [
"Gravity",
"HiJump",
"h_artificialMorphSpringBallBombJump"
]
}
]
} |
From: 1
Middle Left Door
To: 11
G-Mode Overloaded PLMs (By Bottom Left Door)

Bomb the PB blocks below to overload PLMs, then go up through the crumble blocks to escape. Entrance condition: {
"comeInWithGMode": {
"mode": "any",
"morphed": true
}
}Requires: "h_artificialMorphBombs"
"h_navigateUnderwater"
{
"or": [
"canGravityJump",
{
"and": [
"Gravity",
{
"or": [
"h_artificialMorphLongIBJ",
"h_artificialMorphJumpIntoIBJ"
]
}
]
},
{
"and": [
"HiJump",
"canSpringBallJumpMidAir"
]
},
{
"and": [
"HiJump",
"canConsecutiveWallJump",
"canPreciseWallJump"
]
},
"h_artificialMorphDoubleSpringBallJump",
{
"and": [
"Gravity",
"HiJump",
"h_artificialMorphSpringBallBombJump"
]
}
]
} |
|
Requires: "canGravityJump" |
|
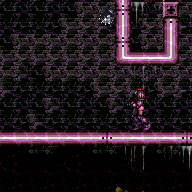
Requires: "Gravity"
{
"or": [
{
"obstaclesCleared": [
"A"
]
},
"h_usePowerBomb"
]
}
"h_shinechargeMaxRunway"
"canShinechargeMovementComplex"
{
"or": [
{
"and": [
"HiJump",
"canWallJump",
{
"shineChargeFrames": 100
}
]
},
{
"and": [
"HiJump",
"SpaceJump",
{
"shineChargeFrames": 105
}
]
},
{
"and": [
"HiJump",
{
"shineChargeFrames": 125
}
]
},
{
"and": [
"canWallJump",
{
"shineChargeFrames": 125
}
]
},
{
"and": [
"SpaceJump",
{
"shineChargeFrames": 130
}
]
},
{
"and": [
"canGravityJump",
"canShinechargeMovementTricky",
{
"shineChargeFrames": 125
}
]
}
]
}Exit condition: {
"leaveShinecharged": {}
}Unlocks doors: {"types":["ammo"],"requires":[]} |
|

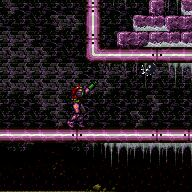
Requires: "canGravityJump" |
|
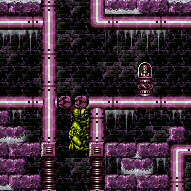
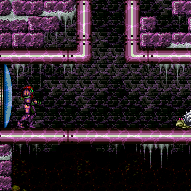
Gain temporary blue using the long runway. Chaining temporary blue, use two Gravity jumps to navigate the room and break the Speed blocks. Requires: "h_shinechargeMaxRunway"
"canGravityJump"
"canTemporaryBlue"
{
"or": [
"canChainTemporaryBlue",
"HiJump"
]
}Dev note: This avoids the energy requirement of performing a shinespark. |
|
Gravity Jump up to the top with HiJump. It is possible to jump up without HiJump with a precise jump and equipping Spring Ball and Gravity at the peak of the jump. Requires: "canGravityJump"
{
"or": [
"HiJump",
{
"and": [
"canSpringBallJumpMidAir",
"canTrickyJump"
]
}
]
} |
From: 2
Bottom Right Door
To: 1
Left Door

Entrance condition: {
"comeInShinecharged": {}
}Requires: "canGravityJump"
"HiJump"
"canShinechargeMovementTricky"
{
"or": [
{
"and": [
"canSpeedyJump",
{
"shineChargeFrames": 90
},
{
"shinespark": {
"frames": 116,
"excessFrames": 5
}
}
]
},
{
"and": [
{
"shineChargeFrames": 125
},
{
"shinespark": {
"frames": 125,
"excessFrames": 5
}
}
]
}
]
} |
|


Requires: "Gravity"
{
"or": [
"canWallJump",
"SpaceJump",
"canLongIBJ",
"canJumpIntoIBJ",
{
"and": [
"HiJump",
"canSpringBallJumpMidAir"
]
},
{
"and": [
"HiJump",
"canGravityJump"
]
}
]
} |
|
Entrance condition: {
"comeInShinecharged": {}
}Requires: "Gravity"
"canShinechargeMovementComplex"
{
"or": [
{
"and": [
"canConsecutiveWallJump",
{
"shineChargeFrames": 120
}
]
},
{
"and": [
"HiJump",
"canWallJump",
{
"shineChargeFrames": 95
}
]
},
{
"and": [
"HiJump",
"canGravityJump",
"canShinechargeMovementTricky",
{
"shineChargeFrames": 120
}
]
}
]
}Exit condition: {
"leaveShinecharged": {}
}Unlocks doors: {"types":["super"],"requires":[]}
{"types":["missiles","powerbomb"],"requires":["never"]} |
From: 2
Bottom Right Door
To: 3
Top Right Door

Entrance condition: {
"comeInShinecharged": {}
}Requires: "Gravity"
"canShinechargeMovementComplex"
{
"or": [
{
"and": [
"canConsecutiveWallJump",
{
"shineChargeFrames": 100
},
{
"shinespark": {
"frames": 6,
"excessFrames": 0
}
}
]
},
{
"and": [
"HiJump",
"canWallJump",
{
"or": [
{
"shineChargeFrames": 75
},
{
"and": [
"canSpeedyJump",
{
"shineChargeFrames": 70
}
]
}
]
},
{
"shinespark": {
"frames": 6,
"excessFrames": 0
}
}
]
},
{
"and": [
"HiJump",
"canGravityJump",
"canShinechargeMovementTricky",
{
"or": [
{
"shineChargeFrames": 105
},
{
"and": [
"canSpeedyJump",
{
"shineChargeFrames": 90
}
]
}
]
},
{
"shinespark": {
"frames": 6,
"excessFrames": 0
}
}
]
}
]
}Exit condition: {
"leaveWithSpark": {
"position": "top"
}
}Unlocks doors: {"types":["super"],"requires":[]}
{"types":["missiles","powerbomb"],"requires":["never"]} |
From: 2
Bottom Right Door
To: 3
Top Right Door

Entrance condition: {
"comeInShinecharged": {}
}Requires: "Gravity"
"canShinechargeMovementComplex"
{
"or": [
{
"and": [
"canConsecutiveWallJump",
{
"shineChargeFrames": 100
},
{
"shinespark": {
"frames": 6,
"excessFrames": 0
}
}
]
},
{
"and": [
"HiJump",
"canWallJump",
{
"or": [
{
"shineChargeFrames": 85
},
{
"and": [
"canSpeedyJump",
{
"shineChargeFrames": 80
}
]
}
]
},
{
"shinespark": {
"frames": 5,
"excessFrames": 0
}
}
]
},
{
"and": [
"HiJump",
"canGravityJump",
"canShinechargeMovementTricky",
{
"or": [
{
"shineChargeFrames": 115
},
{
"and": [
"canSpeedyJump",
{
"shineChargeFrames": 100
}
]
}
]
},
{
"shinespark": {
"frames": 4,
"excessFrames": 0
}
}
]
}
]
}Exit condition: {
"leaveWithSpark": {
"position": "top"
}
}Unlocks doors: {"types":["super"],"requires":[]}
{"types":["missiles","powerbomb"],"requires":["never"]} |
From: 2
Bottom Right Door
To: 3
Top Right Door
Entrance condition: {
"comeInShinecharging": {
"length": 3,
"openEnd": 0
}
}Requires: "canXRayTurnaround" "canGravityJump" "HiJump" "canChainTemporaryBlue" Exit condition: {
"leaveWithTemporaryBlue": {}
}Unlocks doors: {"types":["ammo"],"requires":[]} |
Come in Shinecharging, Leave With Temporary Blue (Gravity Jump, Spring Ball Jump, Pause Remorph)
(Extreme+)
Colosseum
From: 2
Bottom Right Door
To: 3
Top Right Door

Position as far left as possible, hanging over the ledge, and use X-Ray to turn around to the right. Perform a gravity jump into a spring ball jump. Immediately after the spring ball jump, unmorph to avoid bonking the wall and losing blue speed. Use a pause buffer to morph again without losing temporary blue: pause as early as possible, and hold angle and aim-down while the pause hits; during the black screen, hold only the down input, to buffer a morph; coming out of the pause, during the morphing animation roll from down to right, and then hold angle and unmorph to chain temporary blue. Entrance condition: {
"comeInShinecharging": {
"length": 3,
"openEnd": 0
}
}Requires: "canXRayTurnaround" "canGravityJump" "canSpringBallJumpMidAir" "canInsaneJump" "canChainTemporaryBlue" "canPauseRemorphTemporaryBlue" Exit condition: {
"leaveWithTemporaryBlue": {}
}Unlocks doors: {"types":["ammo"],"requires":[]} |
From: 2
Bottom Right Door
To: 3
Top Right Door


Quickly kill the Mochtroids with Bombs or a Power Bomb, or just roll into place and Gravity jump before they get to Samus. (With Bombs, place them without moving horizontally, such that multiple hit the Mochtroid immediately as it attaches without being boosted into the doorway or sand.) Start with a precise Gravity jump, where the initial jump is just before the pause fully triggers. Turn off Spring Ball and Gravity at the same time, then precisely repause and turn Spring back on. Entrance condition: {
"comeInWithGMode": {
"mode": "any",
"morphed": true
}
}Requires: "canGravityJump"
{
"tech": "canSpringBallJumpMidAir"
}
"h_artificialMorphSpringBall"
"canTrickyJump"Dev note: FIXME: It may be possible to cross the room both directions with HiJump, Gravity, Spring and some spike hits. |
|

Pause for the Gravity Jump as late as possible and then repause as soon as possible for the Spring Ball jump. Requires: "canTrickySpringBallJump" "canGravityJump" "canTrickyJump" |
|
Requires: "h_storedSpark"
{
"or": [
{
"shinespark": {
"frames": 20,
"excessFrames": 6
}
},
{
"and": [
"HiJump",
{
"shinespark": {
"frames": 17,
"excessFrames": 7
}
}
]
},
{
"and": [
"canGravityJump",
{
"shinespark": {
"frames": 10,
"excessFrames": 6
}
}
]
}
]
} |
|
Requires: "Gravity"
{
"or": [
"HiJump",
"canWallJump",
"SpaceJump",
"canIBJ",
"canUseFrozenEnemies",
"canGravityJump",
"canSpringBallJumpMidAir"
]
} |
|

Kill Draygon by grappling to an exposed turret as you get grabbed. This avoids taking damage from Draygon once grabbed. Requires: {
"notable": "Grapple Quick Kill"
}
"h_navigateUnderwater"
"canPreciseGrapple"
{
"or": [
"Gravity",
"Morph",
"canTrickyDodgeEnemies",
{
"enemyDamage": {
"enemy": "Draygon",
"type": "contact",
"hits": 2
}
}
]
}
{
"or": [
"Gravity",
"canTrickyJump",
{
"enemyDamage": {
"enemy": "Draygon",
"type": "turretProjectile",
"hits": 1
}
}
]
}
{
"or": [
"h_breakThreeDraygonTurrets",
{
"and": [
{
"or": [
"canTrickyDodgeEnemies",
{
"enemyDamage": {
"enemy": "Draygon",
"type": "turretProjectile",
"hits": 2
}
}
]
},
"h_breakOneDraygonTurret"
]
},
{
"and": [
"Gravity",
"canTrickyDodgeEnemies",
{
"or": [
"canBeLucky",
{
"enemyDamage": {
"enemy": "Draygon",
"type": "turretProjectile",
"hits": 1
}
}
]
},
{
"or": [
"canWallJump",
"canGravityJump"
]
}
]
}
]
}
{
"draygonElectricityFrames": 240
}
"h_complexToCarryFlashSuit"Clears obstacles: f_DefeatedDraygon Sets flags: f_DefeatedDraygon Dev note: FIXME: HiJump + canDoubleSpringBallJumpMidAir can work but needs to be looked into more. |
|
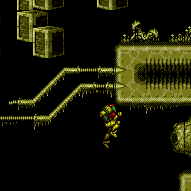
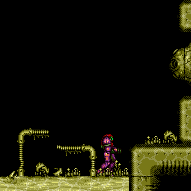
Requires: "Gravity" "canGravityJump" |
|
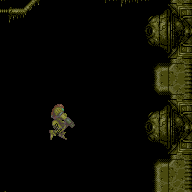

Requires: "Gravity"
"canShinechargeMovementComplex"
{
"canShineCharge": {
"usedTiles": 20,
"openEnd": 1
}
}
{
"or": [
{
"and": [
"HiJump",
"SpaceJump",
{
"shineChargeFrames": 115
}
]
},
{
"and": [
"SpaceJump",
{
"shineChargeFrames": 140
}
]
},
{
"and": [
"HiJump",
"canWallJump",
{
"shineChargeFrames": 155
}
]
},
{
"and": [
"HiJump",
"canGravityJump",
"canShinechargeMovementTricky",
{
"shineChargeFrames": 115
}
]
},
{
"and": [
"canGravityJump",
"canShinechargeMovementTricky",
{
"shineChargeFrames": 140
}
]
}
]
}Exit condition: {
"leaveShinecharged": {}
}Unlocks doors: {"types":["ammo"],"requires":[]} |
|
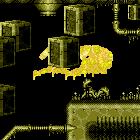
Charge a shinespark in the bottom of the room, then Gravity jump up in order to shinespark out of the right door. Requires: "canGravityJump"
"canShinechargeMovementComplex"
"canTrickyJump"
{
"canShineCharge": {
"usedTiles": 20,
"openEnd": 1
}
}
{
"shinespark": {
"frames": 14,
"excessFrames": 0
}
}Exit condition: {
"leaveWithSpark": {}
}Unlocks doors: {"types":["ammo"],"requires":[]} |
|
Requires: {
"canShineCharge": {
"usedTiles": 20,
"openEnd": 1
}
}
"canGravityJump"
"canChainTemporaryBlue"
{
"or": [
{
"or": [
"f_DefeatedDraygon",
{
"obstaclesCleared": [
"f_DefeatedDraygon"
]
}
]
},
{
"and": [
"h_breakOneDraygonTurret",
"h_breakOneDraygonTurret"
]
}
]
}Exit condition: {
"leaveWithTemporaryBlue": {}
}Dev note: This may be possible without destroying the turrets, but it might be unreliable or need other requirements. |
From: 2
Right Door
To: 1
Left Door


Pause and just before the pause fully triggers, jump and press left, and then disable Gravity and Spring Ball. With HiJump and a good jump, it is possible to jump straight to the high ledge, but quickly pausing and turning on Spring Ball and jumping again can help as a backup. Without HiJump, use this jump to start an IBJ directly over the spike pit, then boost horizontally to the left ledge. Jump over the Cacatac and the spike pits with suitless Spring Flings. The final jump can be done the same way as the first, if Samus is not able to wall jump. Entrance condition: {
"comeInWithGMode": {
"mode": "any",
"morphed": true
}
}Requires: "canGravityJump"
"h_artificialMorphSpringFling"
{
"or": [
"HiJump",
{
"and": [
"h_artificialMorphJumpIntoIBJ",
"canInsaneJump"
]
},
{
"and": [
"h_artificialMorphJumpIntoIBJ",
{
"spikeHits": 1
}
]
}
]
} |
From: 2
Right Door
To: 1
Left Door
Pause and on the last frame before the pause triggers, press left and jump, and then disable Gravity and Spring Ball. On the first possible frame, repause and equip Spring Ball again then buffer the second jump out of the pause. Both of these actions are frame perfect. If the first jump was done correctly, Samus will move upwards with very little horizontal movement until breaking the water, after which she will swing rapidly to the left. Jump over the Cacatac and the spike pits with suitless Spring Flings. The final jump can be done the same way as the first, if Samus is not able to wall jump. This one is more lenient, and has a 4-frame window for the second jump, if the first is performed frame-perfectly. Entrance condition: {
"comeInWithGMode": {
"mode": "any",
"morphed": true
}
}Requires: "canGravityJump"
"h_artificialMorphSpringFling"
"canTrickyGMode"
{
"or": [
"h_artificialMorphBombThings",
{
"enemyDamage": {
"enemy": "Cacatac",
"type": "contact",
"hits": 1
}
}
]
} |
From: 2
Right Door
To: 4
Top Right Ledge Junction
Take a spike hit and pause just after getting hit. Quickly crouch and jump just before the fade out ends. With a precise Gravity jump, it is possible to not need a crouch jump or down grab. Requires: "canGravityJump"
"HiJump"
{
"spikeHits": 1
}
"canUseIFrames"
"canTrickyJump"
{
"or": [
"canInsaneJump",
"canCrouchJump",
"canDownGrab"
]
}
{
"or": [
"canInsaneJump",
{
"spikeHits": 1
}
]
}
{
"or": [
{
"noBlueSuit": {}
},
"canBlueSuitSpikeJump"
]
}Dev note: The canCrouchJump is not a h_underwaterCrouchJump, because Gravity is required. |
From: 5
Bottom Middle Junction
To: 4
Top Right Ledge Junction


Kill the Cacatac above by standing near the edge, jumping, and shooting just before hitting the ceiling. While near the edge, perform a Gravity jump out of the water. A running jump makes this significantly harder. Requires: "canGravityJump" "canTrickyJump" |
|
IBJ or Spring Ball Bomb Jump through two sets of Crumble Blocks. Entrance condition: {
"comeInWithGMode": {
"mode": "any",
"morphed": true
},
"comesThroughToilet": "any"
}Requires: {
"or": [
{
"and": [
"Gravity",
{
"or": [
"h_artificialMorphIBJ",
{
"and": [
"h_artificialMorphSpringBallBombJump",
"h_additionalBomb"
]
},
{
"and": [
"HiJump",
"h_artificialMorphSpringBall"
]
},
{
"and": [
"canGravityJump",
"h_artificialMorphSpringBall"
]
}
]
}
]
},
"h_artificialMorphDoubleSpringBallJump"
]
}Dev note: Without this being Morph, there is no way to escape. PLMs are already overloaded from the sand. |
|
Requires: "Gravity"
"Morph"
"canPlayInSand"
{
"or": [
{
"and": [
{
"or": [
"canWallJump",
"canGravityJump",
"HiJump"
]
},
{
"or": [
"canMidAirMorph",
"canDodgeWhileShooting",
{
"enemyDamage": {
"enemy": "Boulder",
"type": "contact",
"hits": 1
}
}
]
}
]
},
{
"and": [
"canSpringBallJumpMidAir",
"canTrickyJump"
]
},
{
"and": [
"h_useSpringBall",
"canJumpIntoIBJ"
]
},
{
"and": [
"canTrickyJump",
"can4HighMidAirMorph",
"canJumpIntoIBJ"
]
}
]
}Dev note: FIXME: WallJump + canMidAirMorph is actually a canWallJumpInstantMorph. |
|

Requires: "canGravityJump" "HiJump" "canSpeedyJump" "canCarefulJump" |
|

Requires: "Gravity"
{
"or": [
"SpaceJump",
"canLongIBJ",
"canJumpIntoIBJ",
"canWallJump",
"canGravityJump",
{
"and": [
"HiJump",
{
"or": [
"canSpringBallJumpMidAir",
"canSpeedyJump"
]
}
]
}
]
} |
From: 2
Bottom Left Door
To: 1
Top Left Door
Entrance condition: {
"comeInShinecharging": {
"length": 12,
"openEnd": 0
}
}Requires: "canGravityJump"
"canShinechargeMovementTricky"
{
"shineChargeFrames": 125
}Exit condition: {
"leaveShinecharged": {}
}Unlocks doors: {"types":["super"],"requires":[]}
{"types":["missiles","powerbomb"],"requires":["never"]} |
From: 2
Bottom Left Door
To: 2
Bottom Left Door
Requires: "Gravity"
{
"cycleFrames": 330
}
{
"or": [
{
"resetRoom": {
"nodes": [
2
]
}
},
{
"and": [
{
"resetRoom": {
"nodes": [
4
]
}
},
{
"cycleFrames": 70
}
]
},
{
"and": [
{
"resetRoom": {
"nodes": [
1
]
}
},
{
"cycleFrames": 90
}
]
},
{
"and": [
{
"resetRoom": {
"nodes": [
3
]
}
},
"Morph",
{
"cycleFrames": 1210
}
]
}
]
}
{
"or": [
"canConsecutiveWallJump",
{
"and": [
"SpaceJump",
{
"cycleFrames": 40
}
]
},
{
"and": [
"Grapple",
{
"cycleFrames": 150
}
]
},
{
"and": [
"canGravityJump",
{
"cycleFrames": 120
},
"h_doubleEquipmentScreenCycleFrames"
]
}
]
}
{
"or": [
"ScrewAttack",
{
"haveBlueSuit": {}
},
{
"and": [
"Grapple",
{
"cycleFrames": 40
}
]
},
{
"and": [
"Plasma",
{
"cycleFrames": 20
}
]
},
{
"and": [
"Wave",
{
"cycleFrames": 160
}
]
},
{
"and": [
"Spazer",
{
"cycleFrames": 180
}
]
},
{
"and": [
"canDodgeWhileShooting",
{
"cycleFrames": 315
}
]
}
]
}Resets obstacles: R-Mode Farm cycle drops: 3 Mochtroid Dev note: FIXME: other options for this are possible (e.g. suitless) |
From: 2
Bottom Left Door
To: 4
Top Right Door

Entrance condition: {
"comeInShinecharging": {
"length": 3,
"openEnd": 1
}
}Requires: "HiJump"
{
"or": [
{
"and": [
"canGravityJump",
"canTrickySpringBallJump",
"canChainTemporaryBlue"
]
},
{
"and": [
"canTrickyUseFrozenEnemies",
"canLongChainTemporaryBlue"
]
}
]
}Exit condition: {
"leaveWithTemporaryBlue": {}
}Unlocks doors: {"types":["ammo"],"requires":[]}Dev note: FIXME: Probably more of the runway could be used, but with increasing difficulty. |
From: 2
Bottom Left Door
To: 4
Top Right Door
Gravity jump, then quickly pause and turn on Spring Ball for a Spring Ball jump. Requires: "canGravityJump" "HiJump" "canTrickySpringBallJump" |
From: 5
G-Mode Morph, In Morph Tunnel
To: 4
Top Right Door
Climb the room with a Gravity jump + Spring Ball jump. Turn off Spring Ball and Gravity at the same time, then repause after a short delay and turn Spring back on. If coming from the right, Samus will be off camera. Requires: "canComplexGMode"
"canGravityJump"
"HiJump"
{
"tech": "canSpringBallJumpMidAir"
}
"h_artificialMorphSpringBall" |
From: 6
Bottom Shinecharged
To: 1
Top Left Door
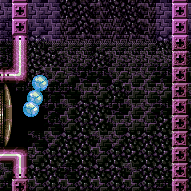
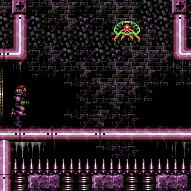
Requires: "h_shinechargeMaxRunway"
{
"shineChargeFrames": 0
}
"canXRayTurnaround"
"canChainTemporaryBlue"
{
"or": [
"canGravityJump",
{
"and": [
"HiJump",
"canTrickyUseFrozenEnemies",
"canLongChainTemporaryBlue"
]
}
]
}Exit condition: {
"leaveWithTemporaryBlue": {}
}Unlocks doors: {"types":["ammo"],"requires":[]} |
From: 6
Bottom Shinecharged
To: 4
Top Right Door
Requires: "h_shinechargeMaxRunway"
{
"shineChargeFrames": 0
}
"canXRayTurnaround"
"HiJump"
{
"or": [
{
"and": [
"canGravityJump",
"canTrickySpringBallJump",
"canChainTemporaryBlue"
]
},
{
"and": [
"canTrickyUseFrozenEnemies",
"canLongChainTemporaryBlue"
]
}
]
}Exit condition: {
"leaveWithTemporaryBlue": {}
}Unlocks doors: {"types":["ammo"],"requires":[]} |
|
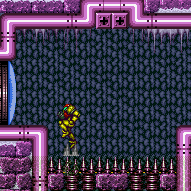
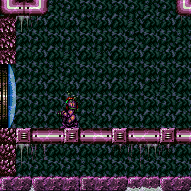
Requires: "canGravityJump" |
From: 4
Bottom Right Shinecharged
To: 1
Top Left Door
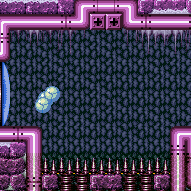
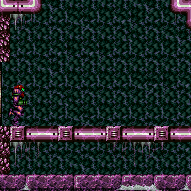
To get out of the water at the top, do another gravity jump or spring ball jump, preferably while the water is high. Requires: "h_shinechargeMaxRunway"
{
"shineChargeFrames": 0
}
"canXRayTurnaround"
"canLongChainTemporaryBlue"
{
"or": [
"canGravityJump",
{
"and": [
"HiJump",
"canTrickySpringBallJump"
]
}
]
}Exit condition: {
"leaveWithTemporaryBlue": {}
}Unlocks doors: {"types":["ammo"],"requires":[]} |
|


Requires: "Gravity"
{
"or": [
"h_crouchJumpDownGrab",
"canUseFrozenEnemies",
"canGravityJump",
"canWallJump",
"HiJump",
"canSpringBallJumpMidAir",
"SpaceJump",
"canIBJ",
"canSpringBallBombJump"
]
}Dev note: The canCrouchJump is not a h_underwaterCrouchJump, because Gravity is required. |
|
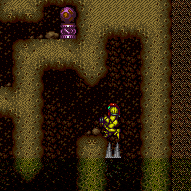
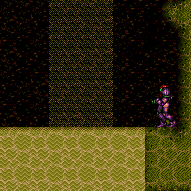
Gravity with a good jump from the sand can reach the Solid Rock Maze region. Requires: "Gravity"
"canPlayInSand"
{
"or": [
"HiJump",
"canSpringBallJumpMidAir",
"canWallJump",
"canIBJ",
"canGravityJump"
]
} |
|
Entrance condition: {
"comeInWithGMode": {
"mode": "any",
"morphed": true
}
}Requires: {
"or": [
{
"and": [
"Gravity",
{
"or": [
"h_artificialMorphLongIBJ",
{
"and": [
"h_artificialMorphIBJ",
"h_artificialMorphBombHorizontally"
]
}
]
}
]
},
{
"and": [
"h_artificialMorphDoubleSpringBallJump",
"canDownGrab"
]
},
{
"and": [
"canGravityJump",
"h_artificialMorphSpringBallBombJump"
]
}
]
} |
From: 2
Bottom Right Door
To: 1
Left Vertical Door
Gravity jump out of the water then perform a precise crouch jump + down grab to get onto the next ledge. Requires: {
"notable": "Left Shaft Precise Crouch Jump Down Grab"
}
"canGravityJump"
"h_crouchJumpDownGrab"
"canTrickyJump" |
|
With HiJump, jump left and spark up right while against the left wall to save Energy. With Ice, wait for the Skultera and use it save a small amount of Energy. With HiJump and Ice, crouch jump from the frozen fish while shooting to prevent activating the spark, then downgrab the ledge above. Requires: "h_storedSpark"
{
"or": [
{
"shinespark": {
"frames": 72,
"excessFrames": 49
}
},
{
"and": [
{
"shinespark": {
"frames": 72,
"excessFrames": 58
}
},
"h_crouchJumpDownGrab",
{
"notable": "Left Shaft Precise Crouch Jump Down Grab"
}
]
},
{
"and": [
"HiJump",
{
"shinespark": {
"frames": 24,
"excessFrames": 13
}
}
]
},
{
"and": [
"canGravityJump",
{
"shinespark": {
"frames": 13,
"excessFrames": 12
}
}
]
},
{
"and": [
"HiJump",
"canTrickyUseFrozenEnemies",
{
"shinespark": {
"frames": 14,
"excessFrames": 13
}
}
]
}
]
} |
|


Gain a shinecharge by running right-to-left on the underwater runway on the right side of the room. Use HiJump or a Spring Ball jump to quickly exit the water to the left and spark up. Requires: "Gravity"
{
"or": [
"HiJump",
"canTrickySpringBallJump",
"canWallJump",
{
"and": [
"canGravityJump",
"canShinechargeMovementTricky"
]
}
]
}
{
"enemyKill": {
"enemies": [
[
"Owtch",
"Owtch"
]
]
}
}
"canShinechargeMovementComplex"
{
"canShineCharge": {
"usedTiles": 16,
"gentleUpTiles": 2,
"gentleDownTiles": 2,
"steepUpTiles": 1,
"steepDownTiles": 1,
"startingSteepDownTiles": 1,
"startingGentleDownTiles": 2,
"openEnd": 2
}
}
{
"shinespark": {
"frames": 43,
"excessFrames": 3
}
}Dev note: FIXME: It's technically possible to evade the Owtches without killing them, but it's unclear if this can be done reliably. A 2->5 shinespark strat from here can also be added, using less energy than the existing strat that uses the runway at the bottom of the room. |
|

Entrance condition: {
"comeInWithGMode": {
"mode": "any",
"morphed": true
}
}Requires: {
"or": [
"Gravity",
{
"and": [
"canSuitlessMaridia",
"HiJump",
"h_artificialMorphSpringBall"
]
}
]
}
{
"or": [
"h_artificialMorphLongIBJ",
{
"and": [
"Gravity",
"h_artificialMorphIBJ",
"h_artificialMorphBombHorizontally"
]
},
{
"and": [
"canGravityJump",
"h_artificialMorphSpringBallBombJump",
{
"or": [
"h_additionalBomb",
{
"tech": "canDoubleSpringBallJumpMidAir"
}
]
},
{
"or": [
{
"and": [
"h_additionalBomb",
"h_additionalBomb"
]
},
{
"notable": "Left Shaft Precise Crouch Jump Down Grab"
}
]
}
]
}
]
} |
|
Requires: "h_storedSpark"
{
"or": [
{
"shinespark": {
"frames": 72,
"excessFrames": 14
}
},
{
"and": [
"canGravityJump",
{
"shinespark": {
"frames": 50,
"excessFrames": 13
}
}
]
}
]
} |
|

Entrance condition: {
"comeInWithGMode": {
"mode": "any",
"morphed": true
}
}Requires: {
"or": [
"h_artificialMorphLongIBJ",
{
"and": [
"Gravity",
"h_artificialMorphIBJ",
"h_artificialMorphBombHorizontally"
]
},
{
"and": [
"canGravityJump",
"h_artificialMorphSpringBallBombJump",
{
"or": [
"h_additionalBomb",
{
"tech": "canDoubleSpringBallJumpMidAir"
}
]
},
{
"or": [
{
"and": [
"h_additionalBomb",
"h_additionalBomb"
]
},
{
"notable": "Left Shaft Precise Crouch Jump Down Grab"
}
]
}
]
}
]
} |
|


Destroy the Owtch using blue speed. Requires: "Gravity"
{
"canShineCharge": {
"usedTiles": 22,
"gentleUpTiles": 2,
"gentleDownTiles": 4,
"steepUpTiles": 2,
"steepDownTiles": 3,
"openEnd": 0
}
}
{
"or": [
"HiJump",
"canGravityJump",
"canTrickySpringBallJump"
]
}
"canChainTemporaryBlue"Exit condition: {
"leaveWithTemporaryBlue": {}
} |
|


Destroy the Owtch using blue speed. Requires: "Gravity"
{
"canShineCharge": {
"usedTiles": 22,
"gentleUpTiles": 2,
"gentleDownTiles": 4,
"steepUpTiles": 2,
"steepDownTiles": 3,
"openEnd": 0
}
}
{
"or": [
"HiJump",
"canGravityJump",
"canTrickySpringBallJump"
]
}
"canChainTemporaryBlue"Exit condition: {
"leaveWithTemporaryBlue": {
"direction": "left"
}
} |
|
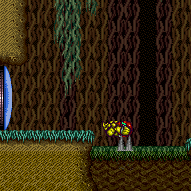

Requires: "Gravity"
{
"or": [
"HiJump",
"canWallJump",
"SpaceJump",
"canIBJ",
"canSpeedyJump",
"h_crouchJumpDownGrab",
"canSpringBallJumpMidAir",
"canGravityJump"
]
}Dev note: The canCrouchJump is not a h_underwaterCrouchJump, because Gravity is required. |
From: 2
Right Door
To: 2
Right Door
Requires: {
"resetRoom": {
"nodes": [
2
]
}
}
"Gravity"
{
"or": [
"ScrewAttack",
{
"haveBlueSuit": {}
},
{
"and": [
"Plasma",
"Wave"
]
}
]
}
"canCarefulJump"
{
"cycleFrames": 290
}
{
"or": [
"SpaceJump",
{
"and": [
"canPlayInSand",
{
"or": [
"HiJump",
"canWallJump",
{
"and": [
"canGravityJump",
"canTrickyJump",
"h_doubleEquipmentScreenCycleFrames"
]
}
]
}
]
}
]
}
{
"or": [
{
"noBlueSuit": {}
},
{
"notable": "Blue Suit Sand Walk"
}
]
}Resets obstacles: A Farm cycle drops: 1 Evir Dev note: Other ways of farming Evirs with Gravity are covered in the 3 Evir farm strat. These strong weapon cases are unique in that farming just the first Evir can be done at significantly lower difficulty. Technically it could make sense to clear obstacle A, but with Gravity it is irrelevant. |
|
The Evirs must be killed quickly before they descend too far. It can help to fire at the Evirs from a safe distance so they will not be triggered to attack Samus. Requires: {
"resetRoom": {
"nodes": [
2
]
}
}
"Gravity"
"canDodgeWhileShooting"
"canPlayInSand"
{
"or": [
{
"and": [
"Plasma",
"Wave"
]
},
"canTrickyJump"
]
}
{
"or": [
{
"and": [
"Plasma",
{
"cycleFrames": 900
}
]
},
{
"and": [
{
"haveBlueSuit": {}
},
{
"cycleFrames": 900
}
]
},
{
"and": [
"Wave",
{
"disableEquipment": "Ice"
},
{
"cycleFrames": 1320
}
]
},
{
"and": [
"ScrewAttack",
"canFarmWhileShooting",
{
"cycleFrames": 980
}
]
},
{
"and": [
"Spazer",
{
"disableEquipment": "Ice"
},
"canFarmWhileShooting",
{
"cycleFrames": 1360
}
]
}
]
}
{
"or": [
"canWallJump",
"HiJump",
{
"and": [
"canGravityJump",
"canTrickyJump",
"h_doubleEquipmentScreenCycleFrames"
]
}
]
}
{
"or": [
{
"noBlueSuit": {}
},
{
"notable": "Blue Suit Sand Walk"
}
]
}Resets obstacles: A Farm cycle drops: 3 Evir Dev note: Technically it could make sense to clear obstacle A, but with Gravity it is irrelevant. FIXME: HiJump + Spring fling can be an alternative to Gravity. |
From: 4
Junction Below Sand Entrance
To: 5
Right Pillar
Simply walk off the ledges and hold forward to walk on the sand with a blue suit. Requires: {
"haveBlueSuit": {}
}
{
"notable": "Blue Suit Sand Walk"
}
"Gravity"
"canPlayInSand"
{
"or": [
"canWallJump",
"HiJump",
"canUseFrozenEnemies",
"canGravityJump",
"canTrickySpringBallJump"
]
} |
|
From the low platform, Gravity Jump to the raised platform. The pause should initiate significantly later than a normal Gravity Jump, while Samus is a couple tiles off the ground. It is possible to instead Spring Ball jump off the sand, with a tight midair morph, but this is more precise. Requires: {
"noBlueSuit": {}
}
"Gravity"
"canTrickyJump"
"canPlayInSand"
{
"or": [
"canGravityJump",
{
"and": [
"can4HighMidAirMorph",
"canTrickySpringBallJump"
]
}
]
} |
|
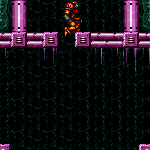
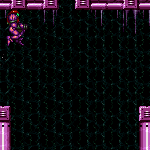
Gets above the grapple block by doing a well-positioned and well-timed Gravity jump following a good jump off the sand. It is also possible to do this off of a wall jump on the side immediately followed by a gravity jump. Break spin before touching the sand, and then spinjump to get a good jump off of the sand. Breaking spin after jumping from the sand will remove horizontal momentum, or a stationary spinjump can help. Requires: {
"notable": "Gravity Jump"
}
"Grapple"
"canGravityJump"
"canPlayInSand"
"canStationarySpinJump"
"canTrickyJump" |
From: 5
Junction Above Grapple Block
To: 2
East Leg Right Door
Shinespark up right in order to avoid the Menus. Requires: "Grapple"
"h_storedSpark"
"canDodgeWhileShooting"
{
"or": [
{
"shinespark": {
"frames": 46,
"excessFrames": 5
}
},
{
"and": [
"HiJump",
{
"shinespark": {
"frames": 42,
"excessFrames": 4
}
}
]
},
{
"and": [
"canGravityJump",
{
"shinespark": {
"frames": 35,
"excessFrames": 4
}
}
]
},
{
"and": [
"canGravityJump",
"HiJump",
{
"shinespark": {
"frames": 31,
"excessFrames": 4
}
}
]
}
]
} |
|
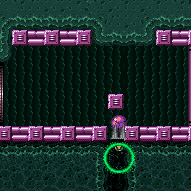
It may be necessary to turn off Gravity Suit in order have more time to jump and morph underwater. Requires: "Gravity"
{
"or": [
"canIBJ",
"canSpringBallBombJump",
"canSpringBallJumpMidAir",
{
"and": [
"canMidAirMorph",
{
"or": [
"canWallJump",
"HiJump",
"canGravityJump",
"SpaceJump",
{
"and": [
"canUnmorphBombBoost",
"canTrickyJump"
]
}
]
}
]
},
{
"and": [
"h_useSpringBall",
{
"or": [
"HiJump",
"canGravityJump"
]
}
]
}
]
} |