canTrickyGrappleJump (Insane)

The ability to perform grapple jumps requiring complex or highly precise sequences of movement, including 1) Aiming a grapple fling with a highly precise angle. 2) Using turnarounds or wiggles in order to reach a precise position without normalization, 3) Moving greater horizontal distances using denser sequences of arm pumps, and 4) Morphing and unmorphing quickly in between other actions.
Dependencies: canPreciseGrappleJump, canGrappleJump, canUseGrapple, canTrivialMidAirMorph, canMidAirMorph
Strats ()
From: 10
Right Etecoon Shaft - Bottom Left Door
To: 9
Right Etecoon Shaft - Top Left Door

Entrance condition: {
"comeInWithGrappleSwing": {
"blocks": [
{
"position": [
8,
3
],
"note": "Grapple Beam Room"
},
{
"position": [
7,
3
],
"note": "Colosseum"
}
]
}
}Requires: "canTrickyGrappleJump" Dev note: Aside from these two, other setup rooms do not appear to work. |
From: 3
Bottom Right Door
To: 2
Top Right Door
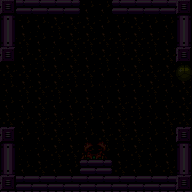
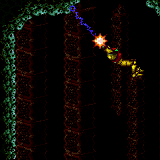
After teleporting, swing back and forth to fix the camera. Swing to the right by soft-bouncing against the door followed by fully extending the Grapple Beam. Release grapple low, but not too low, to get enough momentum while also leaving enough space to gain more height with a grapple jump to reach the ledge. Holding jump just before releasing Grapple may help prevent losing momentum. Entrance condition: {
"comeInWithGrappleTeleport": {
"blockPositions": [
[
5,
3
]
]
}
}Requires: {
"notable": "Grapple Teleport into Grapple Jump (from Red Brinstar Firefleas)"
}
"canTrickyGrappleJump"
"canInsaneJump" |
|

Entrance condition: {
"comeInWithGrappleSwing": {
"blocks": [
{
"position": [
8,
2
],
"note": "Bowling Alley"
},
{
"position": [
7,
3
],
"obstructions": [
[
6,
10
]
],
"note": "Red Brinstar Firefleas Room"
}
]
}
}Requires: "canTrickyGrappleJump" Dev note: This appears not to be possible from Climb Supers Room? |
From: 2
Right Door
To: 3
Top Junction


Entrance condition: {
"comeInWithGrappleSwing": {
"blocks": [
{
"position": [
7,
3
],
"environment": "water",
"note": "Pants Room"
}
]
}
}Requires: "Gravity" "canTrickyGrappleJump" |
|
Entrance condition: {
"comeInWithGrappleSwing": {
"blocks": [
{
"position": [
6,
2
],
"note": "Lava Grapple Tunnel"
},
{
"position": [
5,
2
],
"note": "The Moat, Double Chamber, Wrecked Ship Energy Tank Room"
},
{
"position": [
2.375,
4.5625
],
"note": "Post Crocomire Farming Room"
}
]
}
}Requires: "canTrickyGrappleJump" |
From: 3
Bottom Left Door
To: 6
Junction (Above Bottom Rippers)
Entrance condition: {
"comeInWithGrappleSwing": {
"blocks": [
{
"position": [
7,
3
],
"note": "Colosseum"
},
{
"position": [
6,
4
],
"note": "Grapple Tutorial Room 2"
}
]
}
}Requires: "canTrickyGrappleJump" "canBeExtremelyPatient" Dev note: FIXME: Setups from other rooms, such as Moat, are theoretically possible but appear to be even more difficult. |
From: 3
Bottom Left Door
To: 6
Junction (Above Bottom Rippers)

Entrance condition: {
"comeInWithGrappleSwing": {
"blocks": [
{
"position": [
-1,
5
],
"environment": "water",
"note": "Mt. Everest"
},
{
"position": [
8,
3
],
"note": "Grapple Beam Room"
}
]
}
}Requires: "canTrickyGrappleJump" |
From: 2
Left Side - Top Middle Door
To: 1
Left Side - Top Door
Entrance condition: {
"comeInWithGrappleSwing": {
"blocks": [
{
"position": [
6,
4
],
"note": "Grapple Tutorial Room 2"
},
{
"position": [
6,
2
],
"note": "Lava Grapple Tunnel"
},
{
"position": [
5,
2
],
"note": "The Moat, Double Chamber, Wrecked Ship Energy Tank Room"
},
{
"position": [
2.375,
4.5625
],
"note": "Post Crocomire Farming Room"
}
]
}
}Requires: "canTrickyGrappleJump" |
From: 3
Left Side - Bottom Middle Door
To: 1
Left Side - Top Door
Entrance condition: {
"comeInWithGrappleSwing": {
"blocks": [
{
"position": [
6,
4
],
"note": "Grapple Tutorial Room 2"
},
{
"position": [
6,
2
],
"note": "Lava Grapple Tunnel"
},
{
"position": [
5,
2
],
"note": "The Moat, Double Chamber, Wrecked Ship Energy Tank Room"
},
{
"position": [
2.375,
4.5625
],
"note": "Post Crocomire Farming Room"
}
]
}
}Requires: "canTrickyGrappleJump" |
|

Entrance condition: {
"comeInWithGrappleSwing": {
"blocks": [
{
"position": [
-1,
5
],
"environment": "water",
"note": "Mt. Everest"
},
{
"position": [
8,
3
],
"note": "Grapple Beam Room"
},
{
"position": [
7,
3
],
"note": "Colosseum"
},
{
"position": [
6,
4
],
"note": "Grapple Tutorial Room 2"
},
{
"position": [
6,
2
],
"note": "Lava Grapple Tunnel"
},
{
"position": [
5,
2
],
"note": "The Moat, Double Chamber, Wrecked Ship Energy Tank Room"
},
{
"position": [
2.375,
4.5625
],
"note": "Post Crocomire Farming Room"
}
]
}
}Requires: "canTrickyGrappleJump" "h_heatProof" Dev note: The Kamers make this tricky since it's easy to bonk on them. |
|
Entrance condition: {
"comeInWithGrappleSwing": {
"blocks": [
{
"position": [
13,
5
],
"environment": "water",
"note": "Mt. Everest"
},
{
"position": [
7,
3
],
"note": "The Precious Room"
}
]
}
}Requires: "canTrickyGrappleJump" Dev note: This is only useful as a way to preserve a flash suit without Hi-Jump or wall jump. FIXME: This can be possible from other rooms, with greater difficulty. |
|
Entrance condition: {
"comeInWithGrappleSwing": {
"blocks": [
{
"position": [
-1,
5
],
"environment": "water",
"note": "Mt. Everest"
},
{
"position": [
8,
3
],
"note": "Grapple Beam Room"
},
{
"position": [
7,
3
],
"note": "Colosseum"
},
{
"position": [
6,
4
],
"note": "Grapple Tutorial Room 2"
}
]
}
}Requires: "canTrickyGrappleJump"
{
"noFlashSuit": {}
}Dev note: FIXME: Other setup rooms such as Moat are theoretically possible but seem unreasonably difficult? FIXME: Carrying a flash suit can be possible in some cases, though very difficult. |
|
Entrance condition: {
"comeInWithGrappleSwing": {
"blocks": [
{
"position": [
8,
2
],
"note": "Bowling Alley"
},
{
"position": [
7,
3
],
"obstructions": [
[
6,
10
]
],
"note": "Red Brinstar Firefleas Room"
},
{
"position": [
7,
3
],
"environment": "water",
"note": "Pants Room"
}
]
}
}Requires: "canTrickyGrappleJump"
{
"noFlashSuit": {}
}Dev note: This appears not to be possible from Climb Supers Room? |
|

Entrance condition: {
"comeInWithGrappleSwing": {
"blocks": [
{
"position": [
5,
2
],
"note": "The Moat, Double Chamber, Wrecked Ship Energy Tank Room"
},
{
"position": [
2.375,
4.5625
],
"note": "Post Crocomire Farming Room"
}
]
}
}Requires: "h_heatProof" "canTrickyGrappleJump" "canBeExtremelyPatient" |
|
Entrance condition: {
"comeInWithGrappleSwing": {
"blocks": [
{
"position": [
-1,
5
],
"environment": "water",
"note": "Mt. Everest"
},
{
"position": [
8,
3
],
"note": "Grapple Beam Room"
},
{
"position": [
7,
3
],
"note": "Colosseum"
},
{
"position": [
6,
4
],
"note": "Grapple Tutorial Room 2"
},
{
"position": [
6,
2
],
"note": "Lava Grapple Tunnel"
}
]
}
}Requires: "h_heatProof" "canTrickyGrappleJump" |
|

Entrance condition: {
"comeInWithGrappleSwing": {
"blocks": [
{
"position": [
6,
4
],
"note": "Grapple Tutorial Room 2"
},
{
"position": [
6,
2
],
"note": "Lava Grapple Tunnel"
},
{
"position": [
5,
2
],
"note": "The Moat, Double Chamber, Wrecked Ship Energy Tank Room"
},
{
"position": [
2.375,
4.5625
],
"note": "Post Crocomire Farming Room"
}
]
}
}Requires: "h_heatProof" "canTrickyGrappleJump" Clears obstacles: door_1 |
From: 1
Bottom Left Door
To: 4
Farm Junction Left of Gate
Entrance condition: {
"comeInWithGrappleSwing": {
"blocks": [
{
"position": [
-1,
5
],
"environment": "water",
"note": "Mt. Everest"
},
{
"position": [
8,
3
],
"note": "Grapple Beam Room"
},
{
"position": [
7,
3
],
"note": "Colosseum"
},
{
"position": [
6,
4
],
"note": "Grapple Tutorial Room 2"
}
]
}
}Requires: "canTrickyGrappleJump" |
|
Entrance condition: {
"comeInWithGrappleSwing": {
"blocks": [
{
"position": [
6,
2
],
"note": "Lava Grapple Tunnel"
},
{
"position": [
5,
2
],
"note": "The Moat, Double Chamber, Wrecked Ship Energy Tank Room"
},
{
"position": [
2.375,
4.5625
],
"note": "Post Crocomire Farming Room"
}
]
}
}Requires: "canTrickyGrappleJump" "canBeExtremelyPatient" |
|
Entrance condition: {
"comeInWithGrappleSwing": {
"blocks": [
{
"position": [
6,
4
],
"note": "Grapple Tutorial Room 2"
}
]
}
}Requires: "canTrickyGrappleJump"
{
"or": [
{
"noFlashSuit": {}
},
{
"and": [
"canTrickyCarryFlashSuit",
"canBeExtremelyPatient"
]
}
]
} |
|
Entrance condition: {
"comeInWithGrappleSwing": {
"blocks": [
{
"position": [
8,
2
],
"note": "Bowling Alley"
},
{
"position": [
7,
3
],
"obstructions": [
[
6,
10
]
],
"note": "Red Brinstar Firefleas Room"
},
{
"position": [
9,
2
],
"note": "Climb Supers Room, Bubble Mountain, Lava Grapple Tunnel"
}
]
}
}Requires: "canTrickyGrappleJump" |
|
Entrance condition: {
"comeInWithGrappleSwing": {
"blocks": [
{
"position": [
-1,
5
],
"environment": "water",
"note": "Mt. Everest"
},
{
"position": [
8,
3
],
"note": "Grapple Beam Room"
},
{
"position": [
7,
3
],
"note": "Colosseum"
},
{
"position": [
6,
4
],
"note": "Grapple Tutorial Room 2"
},
{
"position": [
6,
2
],
"note": "Lava Grapple Tunnel"
},
{
"position": [
5,
2
],
"note": "The Moat, Double Chamber, Wrecked Ship Energy Tank Room"
},
{
"position": [
2.375,
4.5625
],
"note": "Post Crocomire Farming Room"
}
]
}
}Requires: "canTrickyGrappleJump"
{
"or": [
{
"noFlashSuit": {}
},
"HiJump",
{
"and": [
"canTrickyCarryFlashSuit",
"canBeExtremelyPatient"
]
}
]
}Exit condition: {
"leaveWithGrappleJump": {
"position": "any"
}
}Unlocks doors: {"types":["ammo"],"requires":[]} |
From: 1
Bottom Left Door
To: 5
Platform Junction Near Top Left Door
Entrance condition: {
"comeInWithGrappleSwing": {
"blocks": [
{
"position": [
6,
2
],
"note": "Lava Grapple Tunnel"
},
{
"position": [
5,
2
],
"note": "The Moat, Double Chamber, Wrecked Ship Energy Tank Room"
},
{
"position": [
2.375,
4.5625
],
"note": "Post Crocomire Farming Room"
}
]
}
}Requires: "canTrickyGrappleJump" |
From: 2
Bottom Right Door
To: 4
Top Left Door
Swing to the right, shoot open the door above, and grapple jump through it. Entrance condition: {
"comeInWithGrappleTeleport": {
"blockPositions": [
[
5,
3
]
]
}
}Requires: {
"notable": "Grapple Teleport into Grapple Jump"
}
{
"doorUnlockedAtNode": 4
}
"canMidairWiggle"
"canTrickyGrappleJump"
"canInsaneJump"Unlocks doors: {"types":["super"],"requires":[]}
{"types":["missiles","powerbomb"],"requires":["never"]}Dev note: FIXME: Add a version of this with an exit condition for grapple jumping through the transition. |
|

Entrance condition: {
"comeInWithGrappleSwing": {
"blocks": [
{
"position": [
8,
2
],
"note": "Bowling Alley"
},
{
"position": [
7,
3
],
"obstructions": [
[
6,
10
]
],
"note": "Red Brinstar Firefleas Room"
},
{
"position": [
9,
2
],
"note": "Climb Supers Room, Bubble Mountain, Lava Grapple Tunnel"
}
]
}
}Requires: "canTrickyGrappleJump" Dev note: Entering from Pants Room (suitless) apparently doesn't work, due to not being able to get enough horizontal speed. |
From: 2
Bottom Right Door
To: 9
Junction Below Speed Blocks
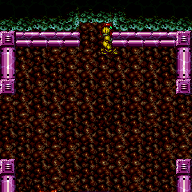
Arm pump as needed, to avoid bonking a floating platform above. Entrance condition: {
"comeInWithGrappleSwing": {
"blocks": [
{
"position": [
7,
3
],
"note": "The Precious Room"
},
{
"position": [
7,
2
],
"note": "The Moat"
},
{
"position": [
8,
2
],
"note": "Bowling Alley"
},
{
"position": [
7,
3
],
"obstructions": [
[
6,
10
]
],
"note": "Red Brinstar Firefleas Room"
},
{
"position": [
9,
2
],
"note": "Climb Supers Room, Bubble Mountain, Lava Grapple Tunnel"
}
]
}
}Requires: "canPreciseGrappleJump"
{
"or": [
"HiJump",
"canTrickyGrappleJump"
]
}
"h_trickyToCarryFlashSuit" |
From: 2
Bottom Right Door
To: 9
Junction Below Speed Blocks

Morph or unmorph while passing through the Skultera, to avoid taking knockback. Arm pump as needed, to move left a tile past the initial ledge, to avoid bonking a floating platform above. Grapple jump quickly to get past the second Skultera, or kago through it as well. Entrance condition: {
"comeInWithGrappleSwing": {
"blocks": [
{
"position": [
13,
5
],
"environment": "water",
"note": "Mt. Everest"
}
]
}
}Requires: "canPreciseGrappleJump"
{
"or": [
"HiJump",
"canTrickyGrappleJump"
]
}
"canKago"
{
"enemyDamage": {
"enemy": "Skultera",
"type": "contact",
"hits": 1
}
}
{
"or": [
{
"enemyDamage": {
"enemy": "Skultera",
"type": "contact",
"hits": 1
}
},
"h_trickyToCarryFlashSuit"
]
} |
From: 1
Left Doorway
To: 4
Top Door

Entrance condition: {
"comeInWithGrappleSwing": {
"blocks": [
{
"position": [
-1,
5
],
"environment": "water",
"note": "Mt. Everest"
},
{
"position": [
8,
3
],
"note": "Grapple Beam Room"
},
{
"position": [
7,
3
],
"note": "Colosseum"
},
{
"position": [
6,
4
],
"note": "Grapple Tutorial Room 2"
},
{
"position": [
6,
2
],
"note": "Lava Grapple Tunnel"
},
{
"position": [
5,
2
],
"note": "The Moat, Double Chamber, Wrecked Ship Energy Tank Room"
},
{
"position": [
2.375,
4.5625
],
"note": "Post Crocomire Farming Room"
}
]
}
}Requires: {
"or": [
"f_MaridiaTubeBroken",
{
"obstaclesCleared": [
"f_MaridiaTubeBroken"
]
}
]
}
"canTrickyGrappleJump"Exit condition: {
"leaveWithGrappleJump": {
"position": "any"
}
}Unlocks doors: {"types":["ammo"],"requires":[]} |
From: 2
Bottom Right Door
To: 4
Top Door
Swing to the right, shoot open the door above, and grapple jump through it. The grapple beam will need to be retracted while swinging to the right, to avoid bonking on the small platform. Entrance condition: {
"comeInWithGrappleTeleport": {
"blockPositions": [
[
5,
3
]
]
}
}Requires: {
"notable": "Grapple Teleport into Grapple Jump (or Tube Intact)"
}
{
"doorUnlockedAtNode": 4
}
{
"or": [
{
"and": [
"canMidairWiggle",
"canTrickyGrappleJump",
"canInsaneJump"
]
},
{
"and": [
{
"not": "f_MaridiaTubeBroken"
},
"canRiskPermanentLossOfAccess"
]
}
]
}Unlocks doors: {"types":["super"],"requires":[]}
{"types":["missiles","powerbomb"],"requires":["never"]}Dev note: FIXME: Add a version of this with an exit condition for grapple jumping through the transition. FIXME: Add a canRiskPermanentLossOfAccess variation coming from Moat, which only works if door is not blue. |
From: 2
Bottom Right Door
To: 4
Top Door
Entrance condition: {
"comeInWithGrappleSwing": {
"blocks": [
{
"position": [
13,
5
],
"environment": "water",
"note": "Mt. Everest"
},
{
"position": [
7,
3
],
"note": "The Precious Room"
},
{
"position": [
7,
2
],
"note": "The Moat"
},
{
"position": [
8,
2
],
"note": "Bowling Alley"
},
{
"position": [
7,
3
],
"obstructions": [
[
6,
10
]
],
"note": "Red Brinstar Firefleas Room"
},
{
"position": [
9,
2
],
"note": "Climb Supers Room, Bubble Mountain, Lava Grapple Tunnel"
}
]
}
}Requires: {
"or": [
"f_MaridiaTubeBroken",
{
"obstaclesCleared": [
"f_MaridiaTubeBroken"
]
}
]
}
"canTrickyGrappleJump"Exit condition: {
"leaveWithGrappleJump": {
"position": "any"
}
}Unlocks doors: {"types":["ammo"],"requires":[]}Dev note: Opening a Missile door while grapple jumping is tricky but possible. |
From: 2
Bottom Right Door
To: 4
Top Door
Entrance condition: {
"comeInWithGrappleSwing": {
"blocks": [
{
"position": [
7,
3
],
"environment": "water",
"note": "Pants Room"
}
]
}
}Requires: {
"or": [
"f_MaridiaTubeBroken",
{
"obstaclesCleared": [
"f_MaridiaTubeBroken"
]
}
]
}
"canTrickyGrappleJump"Exit condition: {
"leaveWithGrappleJump": {
"position": "right"
}
}Unlocks doors: {"types":["ammo"],"requires":[]} |
From: 3
Top Right Doorway
To: 4
Top Door
Swing to the right, shoot open the door above, and grapple jump through it. The grapple beam will need to be retracted while swinging to the right, to avoid bonking on the small platform. Entrance condition: {
"comeInWithGrappleTeleport": {
"blockPositions": [
[
5,
3
]
]
}
}Requires: {
"notable": "Grapple Teleport into Grapple Jump (or Tube Intact)"
}
{
"doorUnlockedAtNode": 4
}
{
"or": [
{
"and": [
"canMidairWiggle",
"canTrickyGrappleJump",
"canInsaneJump"
]
},
{
"and": [
{
"not": "f_MaridiaTubeBroken"
},
"canRiskPermanentLossOfAccess"
]
}
]
}Unlocks doors: {"types":["super"],"requires":[]}
{"types":["missiles","powerbomb"],"requires":["never"]}Dev note: FIXME: Add a version of this with an exit condition for grapple jumping through the transition. FIXME: Add a canRiskPermanentLossOfAccess variation coming from Moat, which only works if door is not blue. |
From: 3
Top Right Doorway
To: 4
Top Door
Entrance condition: {
"comeInWithGrappleSwing": {
"blocks": [
{
"position": [
13,
5
],
"environment": "water",
"note": "Mt. Everest"
},
{
"position": [
7,
3
],
"note": "The Precious Room"
},
{
"position": [
7,
2
],
"note": "The Moat"
},
{
"position": [
8,
2
],
"note": "Bowling Alley"
},
{
"position": [
7,
3
],
"obstructions": [
[
6,
10
]
],
"note": "Red Brinstar Firefleas Room"
}
]
}
}Requires: {
"or": [
"f_MaridiaTubeBroken",
{
"obstaclesCleared": [
"f_MaridiaTubeBroken"
]
}
]
}
"canTrickyGrappleJump"Exit condition: {
"leaveWithGrappleJump": {
"position": "any"
}
}Unlocks doors: {"types":["ammo"],"requires":[]}Dev note: Coming in from Pants Room (suitless, right position) might be possible with enough arm pumping. |
From: 3
Top Right Doorway
To: 4
Top Door

Entrance condition: {
"comeInWithGrappleSwing": {
"blocks": [
{
"position": [
9,
2
],
"note": "Climb Supers Room, Bubble Mountain, Lava Grapple Tunnel"
}
]
}
}Requires: {
"or": [
"f_MaridiaTubeBroken",
{
"obstaclesCleared": [
"f_MaridiaTubeBroken"
]
}
]
}
"canTrickyGrappleJump"Exit condition: {
"leaveWithGrappleJump": {
"position": "left"
}
}Unlocks doors: {"types":["ammo"],"requires":[]} |
From: 3
Top Right Doorway
To: 4
Top Door
Entrance condition: {
"comeInWithGrappleSwing": {
"blocks": [
{
"position": [
7,
3
],
"environment": "water",
"note": "Pants Room"
}
]
}
}Requires: {
"or": [
"f_MaridiaTubeBroken",
{
"obstaclesCleared": [
"f_MaridiaTubeBroken"
]
}
]
}
"canTrickyGrappleJump"Exit condition: {
"leaveWithGrappleJump": {
"position": "right"
}
}Unlocks doors: {"types":["ammo"],"requires":[]} |
|
Entrance condition: {
"comeInWithGrappleSwing": {
"blocks": [
{
"position": [
6,
4
],
"note": "Grapple Tutorial Room 2"
},
{
"position": [
6,
2
],
"note": "Lava Grapple Tunnel"
},
{
"position": [
5,
2
],
"note": "The Moat, Double Chamber, Wrecked Ship Energy Tank Room"
},
{
"position": [
2.375,
4.5625
],
"note": "Post Crocomire Farming Room"
}
]
}
}Requires: "canTrickyGrappleJump" |
|
Entrance condition: {
"comeInWithGrappleSwing": {
"blocks": [
{
"position": [
5,
2
],
"note": "The Moat, Double Chamber, Wrecked Ship Energy Tank Room"
},
{
"position": [
2.375,
4.5625
],
"note": "Post Crocomire Farming Room"
}
]
}
}Requires: "canTrickyGrappleJump" Clears obstacles: door_1 Dev note: Coming from Grapple Tutorial Room 2 does not work (with or without HiJump), as it's not possible to gain enough horizontal speed. |
|

Entrance condition: {
"comeInWithGrappleSwing": {
"blocks": [
{
"position": [
-1,
5
],
"environment": "water",
"note": "Mt. Everest"
}
]
}
}Requires: "HiJump" "canTrickyGrappleJump" Clears obstacles: door_1 |
|
Entrance condition: {
"comeInWithGrappleSwing": {
"blocks": [
{
"position": [
8,
2
],
"note": "Bowling Alley"
},
{
"position": [
7,
3
],
"obstructions": [
[
6,
10
]
],
"note": "Red Brinstar Firefleas Room"
},
{
"position": [
9,
2
],
"note": "Climb Supers Room, Bubble Mountain, Lava Grapple Tunnel"
}
]
}
}Requires: "canTrickyGrappleJump" |
From: 2
Right Door
To: 4
Top Right Ledge Junction

Entrance condition: {
"comeInWithGrappleSwing": {
"blocks": [
{
"position": [
7,
3
],
"environment": "water",
"note": "Pants Room"
}
]
}
}Requires: "canTrickyGrappleJump"
{
"or": [
"SpaceJump",
{
"and": [
"canJumpIntoIBJ",
"canBombHorizontally"
]
}
]
} |
|
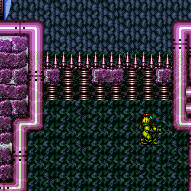
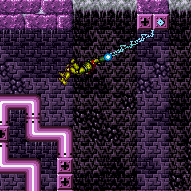
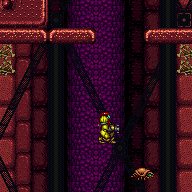
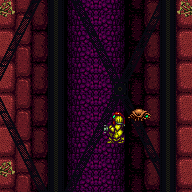
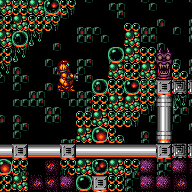
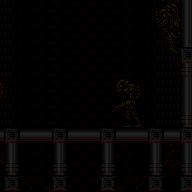
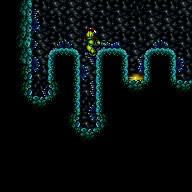
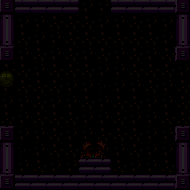
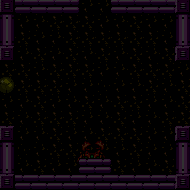
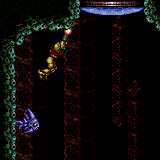
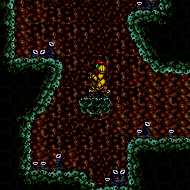
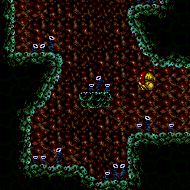
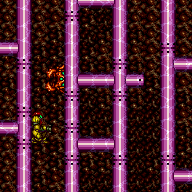
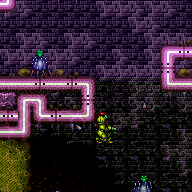
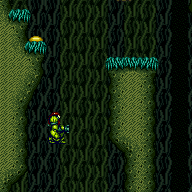
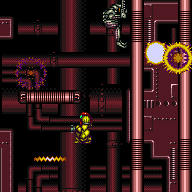
Samus must be carefully positioned in order to make it up to the top of the room. One method is to press against the pipes jutting out on either side of the room, turn around while morphed, then arm pump in between grapple jumps in order to move one tile toward the center of the room. Entrance condition: {
"comeInWithGrappleSwing": {
"blocks": [
{
"position": [
-1,
5
],
"environment": "water",
"note": "Mt. Everest"
},
{
"position": [
8,
3
],
"note": "Grapple Beam Room"
},
{
"position": [
7,
3
],
"note": "Colosseum"
},
{
"position": [
6,
4
],
"note": "Grapple Tutorial Room 2"
},
{
"position": [
6,
2
],
"note": "Lava Grapple Tunnel"
},
{
"position": [
5,
2
],
"note": "The Moat, Double Chamber, Wrecked Ship Energy Tank Room"
},
{
"position": [
2.375,
4.5625
],
"note": "Post Crocomire Farming Room"
}
]
}
}Requires: "canTrickyGrappleJump" |
|
Entrance condition: {
"comeInWithGrappleSwing": {
"blocks": [
{
"position": [
-1,
5
],
"environment": "water",
"note": "Mt. Everest"
},
{
"position": [
8,
3
],
"note": "Grapple Beam Room"
},
{
"position": [
7,
3
],
"note": "Colosseum"
},
{
"position": [
6,
4
],
"note": "Grapple Tutorial Room 2"
}
]
}
}Requires: "canTrickyGrappleJump" |
|
Entrance condition: {
"comeInWithGrappleSwing": {
"blocks": [
{
"position": [
8,
3
],
"note": "Grapple Beam Room"
},
{
"position": [
7,
3
],
"note": "Colosseum"
},
{
"position": [
6,
2
],
"note": "Lava Grapple Tunnel"
},
{
"position": [
5,
2
],
"note": "The Moat, Double Chamber, Wrecked Ship Energy Tank Room"
}
]
}
}Requires: "canTrickyGrappleJump" "canMidairWiggle" "canBeExtremelyPatient" |
From: 1
Bottom Left Door
To: 2
Top Right Door

Entrance condition: {
"comeInWithGrappleSwing": {
"blocks": [
{
"position": [
8,
3
],
"note": "Grapple Beam Room"
},
{
"position": [
7,
3
],
"note": "Colosseum"
}
]
}
}Requires: "canTrickyGrappleJump"
{
"or": [
{
"ammo": {
"type": "Missile",
"count": 1
}
},
{
"ammo": {
"type": "Super",
"count": 1
}
},
"Plasma",
{
"and": [
"canKago",
{
"enemyDamage": {
"enemy": "Choot",
"type": "contact",
"hits": 1
}
}
]
}
]
} |
From: 1
Bottom Left Door
To: 2
Top Right Door
Entrance condition: {
"comeInWithGrappleSwing": {
"blocks": [
{
"position": [
6,
2
],
"note": "Lava Grapple Tunnel"
},
{
"position": [
5,
2
],
"note": "The Moat, Double Chamber, Wrecked Ship Energy Tank Room"
}
]
}
}Requires: "canTrickyGrappleJump"
"HiJump"
{
"or": [
{
"ammo": {
"type": "Missile",
"count": 1
}
},
{
"ammo": {
"type": "Super",
"count": 1
}
},
"Plasma",
{
"and": [
"canKago",
{
"enemyDamage": {
"enemy": "Choot",
"type": "contact",
"hits": 1
}
}
]
}
]
} |
|
Entrance condition: {
"comeInWithGrappleSwing": {
"blocks": [
{
"position": [
-1,
5
],
"environment": "water",
"note": "Mt. Everest"
},
{
"position": [
6,
4
],
"note": "Grapple Tutorial Room 2"
},
{
"position": [
2.375,
4.5625
],
"note": "Post Crocomire Farming Room"
}
]
}
}Requires: "canTrickyGrappleJump" "canMidairWiggle" |
|
Entrance condition: {
"comeInWithGrappleSwing": {
"blocks": [
{
"position": [
6,
2
],
"note": "Lava Grapple Tunnel"
},
{
"position": [
5,
2
],
"note": "The Moat, Double Chamber, Wrecked Ship Energy Tank Room"
},
{
"position": [
2.375,
4.5625
],
"note": "Post Crocomire Farming Room"
}
]
}
}Requires: "canTrickyGrappleJump" |
|

Entrance condition: {
"comeInWithGrappleSwing": {
"blocks": [
{
"position": [
7,
3
],
"environment": "water",
"note": "Pants Room"
}
]
}
}Requires: "Gravity" "canTrickyGrappleJump" "h_extremelyTrickyToCarryFlashSuit" |
|


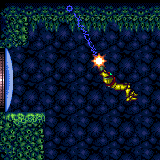
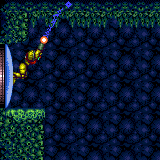
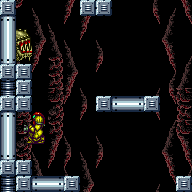
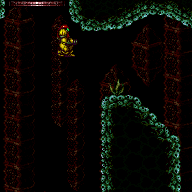
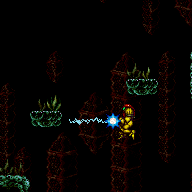
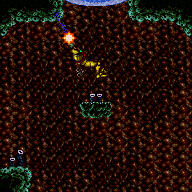
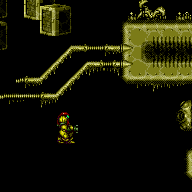
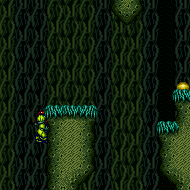
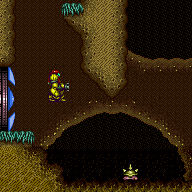
Use the grapple block to initiate a Grapple Jump to climb up to the higher level and above the water line. Aiming the Grapple Jump to line up with the one tile hole is difficult and Samus is moving at high speeds. Escaping the water is also difficult as Samus must be standing at the water line when jumping for the next part of the grapple jump. It may be easier to jump out of the water by turning HiJump off. A Grapple Jump can be a spin jump by running briefly before jumping and that can be used to begin Walljumping or Space Jumping. Requires: {
"notable": "Grapple Jump"
}
"canSuitlessMaridia"
"canTrickyGrappleJump"
"canMidairWiggle"
{
"or": [
{
"enemyDamage": {
"enemy": "Menu",
"type": "contact",
"hits": 1
}
},
"SpaceJump",
{
"and": [
"canConsecutiveWallJump",
{
"or": [
"ScrewAttack",
"canTrickyWallJump"
]
}
]
},
"h_pauseAbuseMinimalReserveRefill",
"canTrickyDodgeEnemies"
]
} |
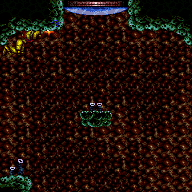
From: 4
West Leg Sand
To: 5
Junction Above Grapple Block

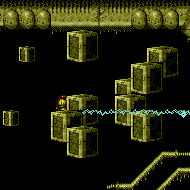
Use the grapple block to initiate a Grapple Jump to climb up to the higher level. Aiming the Grapple Jump to line up with the one tile hole is difficult and Samus is moving at high speeds. Requires: {
"notable": "Grapple Jump"
}
"canSuitlessMaridia"
"canTrickyGrappleJump"
"canMidairWiggle" |
From: 1
Left Door
To: 4
Top of Shaft Without Acid Triggered
Entrance condition: {
"comeInWithGrappleSwing": {
"blocks": [
{
"position": [
-1,
5
],
"environment": "water",
"note": "Mt. Everest"
},
{
"position": [
8,
3
],
"note": "Grapple Beam Room"
},
{
"position": [
7,
3
],
"note": "Colosseum"
},
{
"position": [
6,
4
],
"note": "Grapple Tutorial Room 2"
}
]
}
}Requires: "canTrickyGrappleJump" Dev note: FIXME: Setups from other rooms are possible but with greater difficulty. Carrying a flash suit might be possible in some cases, with great difficulty. |