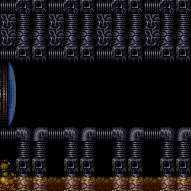
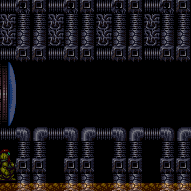
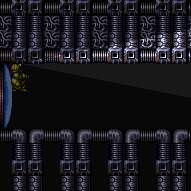
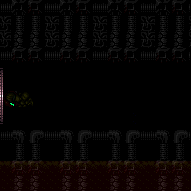
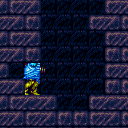
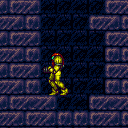
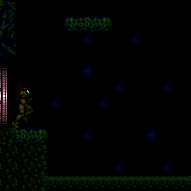
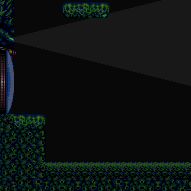
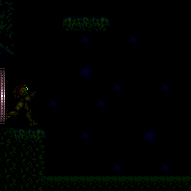
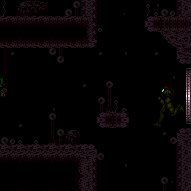
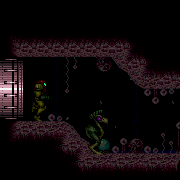
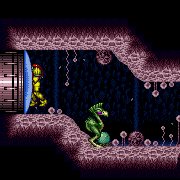
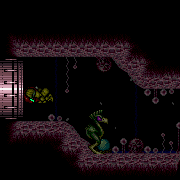
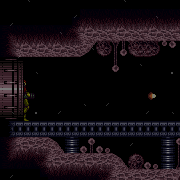
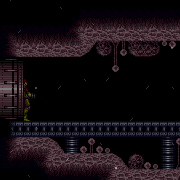
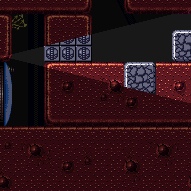
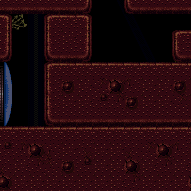
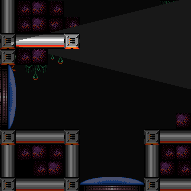
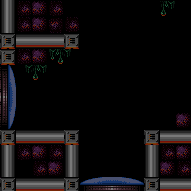
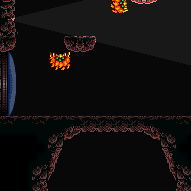
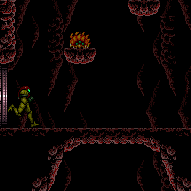
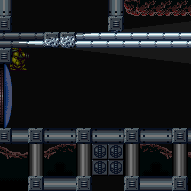
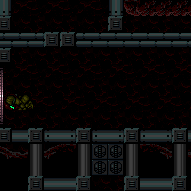
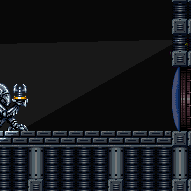
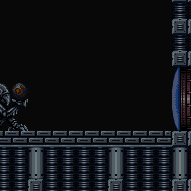
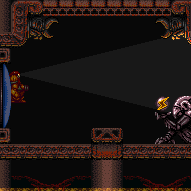
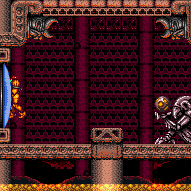
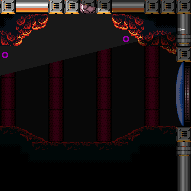
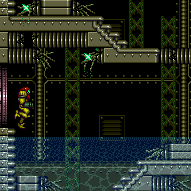
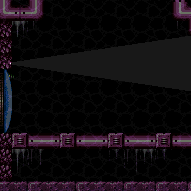
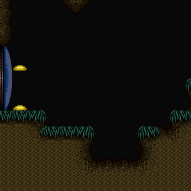
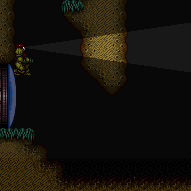
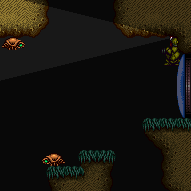
canLongXRayClimb (Expert+)
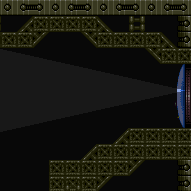
Performing an X-Ray climb of distance approximately two screens or more.
Dependencies: canXRayClimb, canXRayStandUp
Strats ()
|
Entrance condition: {
"comeInWithDoorStuckSetup": {}
}Requires: "canLongXRayClimb" "canBeVeryPatient" |
|
Enter with G-mode direct, back up to between 1 and 6 pixels from the door transition, and activate X-ray to get very deep stuck in the door. Climb up 7 screens, and perform a turnaround buffered spin-jump away from the door to trigger the transition, bypassing any lock on the door. Entrance condition: {
"comeInWithGMode": {
"mode": "direct",
"morphed": false
}
}Requires: "canGModeXRayClimb" "canLongXRayClimb" "canBeVeryPatient" Bypasses door shell: true |
From: 5
Bottom Right Door
To: 3
Top Right Door
Climb 8 screens and position Samus to where she is visually standing above the door. For the last X-Ray turnaround, face right then press and hold the X-ray scope input, buffer a jump then perform the X-Ray turnaround. If done correctly Samus will be standing up and facing left, while the jump button is still pressed without a jump occuring. Press right to break the bomb blocks with a spinjump then left to exit the wall. Jump in place to fix the camera as needed. Entrance condition: {
"comeInWithDoorStuckSetup": {}
}Requires: "ScrewAttack" "Morph" "canBeVeryPatient" "canLongXRayClimb" |
|
Enter with G-mode direct, back up to between 1 and 6 pixels from the door transition, and activate X-ray to get very deep stuck in the door. Climb up 7 screens, and perform a turnaround buffered spin-jump away from the door to trigger the transition, bypassing any lock on the door. Entrance condition: {
"comeInWithGMode": {
"mode": "direct",
"morphed": false
}
}Requires: "canGModeXRayClimb" "canLongXRayClimb" "canBeVeryPatient" Bypasses door shell: true |
|
Entrance condition: {
"comeInWithDoorStuckSetup": {}
}Requires: "canLongXRayClimb" "canBeVeryPatient" |
|
Wall jump up 5 times, placing a Power Bomb precisely in the top right corner to overload PLMs with as few Power Bombs as possible. This only works in direct G-mode with the item still uncollected. Entrance condition: {
"comeInWithGMode": {
"mode": "direct",
"morphed": false
}
}Requires: "canPowerBombItemOverloadPLMs"
{
"notable": "G-Mode Up with Power Bombs"
}
{
"itemNotCollectedAtNode": 3
}
"canConsecutiveWallJump"
"Morph"
{
"or": [
"canRiskPermanentLossOfAccess",
{
"and": [
"canComplexGMode",
"canLongXRayClimb",
"canBeVeryPatient"
]
}
]
}
{
"ammo": {
"type": "PowerBomb",
"count": 5
}
}
"canBePatient"
{
"or": [
"Ice",
"canTrickyDodgeEnemies",
"ScrewAttack",
{
"and": [
"h_getBlueSpeedMaxRunway",
"h_blueJump"
]
},
{
"enemyKill": {
"enemies": [
[
"Boyon",
"Boyon",
"Boyon",
"Boyon"
]
],
"excludedWeapons": [
"Bombs"
]
}
},
{
"enemyDamage": {
"enemy": "Boyon",
"type": "contact",
"hits": 1
}
},
{
"and": [
"canBeVeryPatient",
"h_useMorphBombs"
]
}
]
}Dev note: Using this strat doesn't have canRiskPermanentLossOfAccess if the player could x-ray climb instead: this requires direct G-mode and Samus can freely doorstuck here, and there is no benefit to going to the item instead of the top left door, unless the item is there. FIXME: Placing the Power Bombs lower, on the magic tile, could overload PLMs with fewer, likely with as low as 2 Power Bombs. |
|
Become doorstuck in the bottom right door, use a Crystal Flash to continue X-Ray climbing past the slope above the door. Start by climbing until the slope pushed Samus down. Then auto-spinjump towards the door, and Morph to perform the Crystal Flash. Finally, continue X-Ray climbing to the top door. Climb up 3 screens. Entrance condition: {
"comeInWithDoorStuckSetup": {}
}Requires: {
"notable": "Crystal Flash X-Ray Climb"
}
"canLongXRayClimb"
"h_CrystalFlash"Dev note: FIXME: Requires a way to take damage. |
|
Climb up 3 screens. Entrance condition: {
"comeInWithGMode": {
"mode": "direct",
"morphed": false
}
}Requires: "canGModeXRayClimb" "canLongXRayClimb" "canBePatient" |
From: 4
Bottom Right Door
To: 3
Top Right Door
Refill at the ship then return and X-Ray climb up 3 screens. Entrance condition: {
"comeInWithGMode": {
"mode": "direct",
"morphed": false
}
}Requires: "canComplexGMode"
"canGModeXRayClimb"
{
"or": [
"canWallJump",
"HiJump",
"canSpringBallJumpMidAir",
"h_getBlueSpeedMaxRunway",
"ScrewAttack",
"h_blueSuitGMode"
]
}
{
"refill": [
"Energy",
"Missile",
"Super",
"PowerBomb"
]
}
"canLongXRayClimb"
"canBePatient" |
|
Enter with G-mode direct, back up to between 1 and 6 pixels from the door transition, and activate X-ray to get very deep stuck in the door. Climb up 3 screens, and perform a turnaround buffered spin-jump away from the door to trigger the transition, bypassing any lock on the door. Entrance condition: {
"comeInWithGMode": {
"mode": "direct",
"morphed": false
}
}Requires: "canGModeXRayClimb" "canLongXRayClimb" "canBePatient" Bypasses door shell: true |
From: 4
Bottom Right Door
To: 3
Top Right Door
Enter with G-mode direct, refill at the ship and return. Back up to between 1 and 6 pixels from the door transition, and activate X-ray to get very deep stuck in the door. Climb up 3 screens, and perform a turnaround buffered spin-jump away from the door to trigger the transition, bypassing any lock on the door. Entrance condition: {
"comeInWithGMode": {
"mode": "direct",
"morphed": false
}
}Requires: "canComplexGMode"
"canGModeXRayClimb"
{
"or": [
"canWallJump",
"HiJump",
"canSpringBallJumpMidAir",
"h_getBlueSpeedMaxRunway",
"ScrewAttack",
"h_blueSuitGMode"
]
}
{
"refill": [
"Energy",
"Missile",
"Super",
"PowerBomb"
]
}
"canLongXRayClimb"
"canBePatient"Bypasses door shell: true |
|
Fall into the first Samus Eater in Hellway or Alpha Power Bomb Room. After teleporting and passing through the transition, X-Ray climb 2 screens to reach the space behind the bomb blocks at the top of the room. Samus will be off-camera, but the slopes at the top will push the camera up, indicating when the climb is done. Entrance condition: {
"comeInWithSamusEaterTeleport": {
"floorPositions": [
[
1,
13
],
[
2,
13
]
],
"ceilingPositions": []
}
}Requires: "canLongXRayClimb" Dev note: FIXME: In Hellway, a ceiling Samus Eater could probably also work, and shorten the X-Ray climb. |
From: 3
Bottom Left Horizontal Door
To: 1
Top Left Door
Fall into the first Samus Eater in Hellway or Alpha Power Bomb Room. After teleporting and passing through the transition, X-Ray climb 3 screens to reach the space behind the bomb blocks at the top of the room. Samus will be off-camera, but the slopes at the top will push the camera up, indicating when the climb is done. Entrance condition: {
"comeInWithSamusEaterTeleport": {
"floorPositions": [
[
1,
13
],
[
8,
13
]
],
"ceilingPositions": []
}
}Requires: "canLongXRayClimb" "canBePatient" Dev note: FIXME: Other Samus Eaters can also probably work. In particular, in Hellway a ceiling Samus Eater could probably shorten the X-Ray climb. |
From: 4
Top Right Door
To: 1
Top Left Door
Exit the previous room with Samus in a standing pose (while grappled). After teleporting, press right to release Grapple while staying standing (not being forced into a crouch). Then X-ray climb 2 screens to get up to the door transition, without needing to open the door. Samus will not be visible during the climb. Entrance condition: {
"comeInWithGrappleTeleport": {
"blockPositions": [
[
2,
34
]
]
}
}Requires: "canLongXRayClimb" Bypasses door shell: true |
From: 5
Alcatraz Door
To: 8
Central Junction
Jump into the second Samus Eater in the ceiling of Hellway. After teleporting and passing through the transition, X-Ray climb about 2 screens to reach the top of the room. Samus will be off-camera, but the slopes at the top will push the camera up, indicating when the climb is done. Entrance condition: {
"comeInWithSamusEaterTeleport": {
"floorPositions": [],
"ceilingPositions": [
[
11,
13
]
]
}
}Requires: "canLongXRayClimb" Dev note: Several other Samus Eaters could probably also work. |
From: 6
Bottom Right Door (On the Left Shaft)
To: 1
Top Left Door
Exit the previous room with Samus in a standing pose (while grappled). After teleporting, press right to release Grapple while staying standing (not being forced into a crouch). Then X-ray climb 2 screens to get up to the door transition, without needing to open the door. Samus will not be visible during the climb. Entrance condition: {
"comeInWithGrappleTeleport": {
"blockPositions": [
[
2,
34
]
]
}
}Requires: "canLongXRayClimb" Bypasses door shell: true |
|
X-Ray climb about 2.5 screen lengths, until the camera shows Samus' helmet on the bottom of the screen. Shoot up to clear the shot blocks and resume climbing until you can walk out to the right. Fix the camera by shooting the floor shot block and jumping down. The pirate will attack while climbing past it. Entrance condition: {
"comeInWithDoorStuckSetup": {}
}Requires: "canLongXRayClimb"
{
"or": [
{
"enemyDamage": {
"enemy": "Green Space Pirate (standing)",
"type": "laser",
"hits": 1
}
},
{
"enemyKill": {
"enemies": [
[
"Green Space Pirate (standing)"
]
],
"explicitWeapons": [
"Charge",
"Ice",
"Wave",
"Spazer",
"Plasma",
"Missile",
"Super"
]
}
}
]
}
"canBePatient"Dev note: With a blue suit, Samus' i-frames still last a normal amount of time. |
From: 4
Bottom Right Door
To: 2
Middle Right Door
Enter with G-mode direct and kill the bottom Pirate. Back up to between 1 and 6 pixels from the door transition, and activate X-ray to get very deep stuck in the door. Climb up 2 screens, and perform a turnaround buffered spin-jump away from the door to trigger the transition, bypassing any lock on the door. Entrance condition: {
"comeInWithGMode": {
"mode": "direct",
"morphed": false
}
}Requires: "canGModeXRayClimb"
"canLongXRayClimb"
{
"or": [
{
"enemyKill": {
"enemies": [
[
"Green Space Pirate (standing)"
]
]
}
},
"h_blueSuitGMode"
]
}Bypasses door shell: true |
From: 4
Bottom Right Door
To: 2
Middle Right Door
Enter with G-mode direct and kill the bottom Pirate with Bombs or a Power Bomb. Back up to between 1 and 6 pixels from the door transition, and activate X-ray to get very deep stuck in the door. Climb up 2 screens, and perform a turnaround buffered spin-jump away from the door to trigger the transition, bypassing any lock on the door. Entrance condition: {
"comeInWithGMode": {
"mode": "direct",
"morphed": true
}
}Requires: "canGModeXRayClimb"
"canLongXRayClimb"
{
"or": [
"h_artificialMorphPowerBomb",
"h_artificialMorphIBJ"
]
}Bypasses door shell: true |
|
X-Ray climb about 2.5 screen lengths, until the camera shows Samus' helmet on the bottom of the screen. Shoot up to clear the shot blocks and resume climbing until you can walk out to the left. Fix the camera by shooting the floor shot block and jumping down. The bottom pirate will attack while climbing past it. Entrance condition: {
"comeInWithDoorStuckSetup": {}
}Requires: "canLongXRayClimb"
{
"or": [
{
"enemyDamage": {
"enemy": "Green Space Pirate (standing)",
"type": "laser",
"hits": 1
}
},
{
"enemyKill": {
"enemies": [
[
"Green Space Pirate (standing)"
]
],
"explicitWeapons": [
"Charge",
"Ice",
"Wave",
"Spazer",
"Plasma",
"Missile",
"Super"
]
}
}
]
}
"canBePatient" |
|
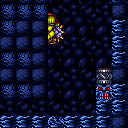
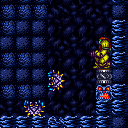
Shoot out only the lower 2 shot blocks on the side Samus will be climbing. Grab a Beetom and use Morph or a tunnel crawl to pixel align the Beetom 1 pixel deep into the wall (2 or 3 pixels can also work). If morphed, use X-Ray stand up. Shoot to the right (horizontally or diagonally down) to freeze the Beetom. Continue refreezing during the next steps. Grab the other Beetom and stand close, but not too close, to the first. Do a small jump, but not too low, and do an aim-up shot the frame before Samus lands. This second Beetom needs to be exactly 1 pixel below the first. Refreeze the first before testing the positioning. Jump onto the second Beetom, and run into the wall to clip into it (walking can also work if the Beetom is not too deep). X-Ray climb up 2.5 screens and then fire upwards to clear shot blocks. Continue climbing and finish by walking away from the crumble blocks. For freezing the second Beetom, only certain jump heights will work. Otherwise the Beetom will skip over the correct position and may be frozen too low (2 pixels below the other Beetom). From a standing position, holding jump for 5, 8, 9, or 12 frames will work; with a crouch jump, holding jump for 5, 6, or 10 frames will work. It is recommended to use a crouch jump, aiming for a 5 or 6 frame jump. Requires: {
"noBlueSuit": {}
}
{
"notable": "Beetom X-Ray Climb"
}
{
"enemyDamage": {
"enemy": "Beetom",
"type": "contact",
"hits": 6
}
}
{
"or": [
"Morph",
{
"and": [
"canTunnelCrawl",
{
"enemyDamage": {
"enemy": "Beetom",
"type": "contact",
"hits": 3
}
}
]
}
]
}
"canWallIceClip"
"canLongXRayClimb"
"canBeVeryPatient"Resets obstacles: A Dev note: 2 hits are assumed to position the two Beetoms (plus 3 more if tunnel crawling), then 1 hit for each failed clip attempt, with 4 failed attempts. With Ice, Samus would be able to slowly farm the Green Pirates. One could descend through 8 visiting one of 5 or 6 and X-Ray climb back up to the top door using the non visited node. |
From: 2
Right Door
To: 1
Left Door
Exit the previous room with Samus in a standing pose (while grappled). After teleporting, press right to release Grapple while staying standing (not being forced into a crouch). Then X-ray climb 2 screens to get up to the door transition, without needing to open the door. Entrance condition: {
"comeInWithGrappleTeleport": {
"blockPositions": [
[
2,
34
]
]
}
}Requires: "canLongXRayClimb" Bypasses door shell: true |
From: 4
Lower Section - Top Right Door
To: 12
Top Junction
Entrance condition: {
"comeInWithGMode": {
"mode": "direct",
"morphed": false
}
}Requires: "canGModeXRayClimb"
{
"or": [
"canArtificialMorph",
"canWallJump",
"SpaceJump",
{
"and": [
"canLongIBJ",
"Gravity"
]
},
{
"and": [
"HiJump",
"canJumpIntoIBJ"
]
},
{
"and": [
"canLongIBJ",
"canBombHorizontally",
"canResetFallSpeed"
]
},
{
"and": [
"canJumpIntoIBJ",
"canLongIBJ",
"canTrickyJump"
]
},
{
"and": [
"HiJump",
{
"or": [
"canSpeedyJump",
"canSpringBallJumpMidAir"
]
}
]
},
{
"and": [
"canTrickyJump",
"canPreciseGrapple"
]
},
{
"and": [
"Gravity",
"canMidairShinespark",
"h_shinechargeMaxRunway",
{
"shinespark": {
"frames": 35,
"excessFrames": 10
}
}
]
}
]
}
"canLongXRayClimb"Clears obstacles: R-Mode |
From: 4
Lower Section - Top Right Door
To: 12
Top Junction
Entrance condition: {
"comeInShinecharged": {}
}Requires: {
"shineChargeFrames": 1
}
{
"shinespark": {
"frames": 1,
"excessFrames": 1
}
}
"canShinesparkDeepStuck"
"canLongXRayClimb" |
From: 5
Lower Section - Bottom Right Door
To: 2
Upper Right Section - Top Right Door
Enter with G-mode direct, back up to between 1 and 6 pixels from the door transition, and activate X-ray to get very deep stuck in the door. Climb up 4 screens, and perform a turnaround buffered spin-jump away from the door to trigger the transition, bypassing any lock on the door. Entrance condition: {
"comeInWithGMode": {
"mode": "direct",
"morphed": false
}
}Requires: "canGModeXRayClimb" "canLongXRayClimb" "canBePatient" Clears obstacles: R-Mode Bypasses door shell: true |
From: 5
Lower Section - Bottom Right Door
To: 3
Upper Right Section - Bottom Right Door
Climb up 3 screens. Entrance condition: {
"comeInWithGMode": {
"mode": "direct",
"morphed": false
}
}Requires: "canGModeXRayClimb" "canLongXRayClimb" "canBePatient" Clears obstacles: R-Mode |
From: 5
Lower Section - Bottom Right Door
To: 3
Upper Right Section - Bottom Right Door
Entrance condition: {
"comeInShinecharged": {}
}Requires: {
"shineChargeFrames": 1
}
{
"shinespark": {
"frames": 1,
"excessFrames": 1
}
}
"canShinesparkDeepStuck"
"canLongXRayClimb"
"canBePatient" |
From: 5
Lower Section - Bottom Right Door
To: 3
Upper Right Section - Bottom Right Door
Enter with G-mode direct, back up to between 1 and 6 pixels from the door transition, and activate X-ray to get very deep stuck in the door. Climb up 3 screens, and perform a turnaround buffered spin-jump away from the door to trigger the transition, bypassing any lock on the door. Entrance condition: {
"comeInWithGMode": {
"mode": "direct",
"morphed": false
}
}Requires: "canGModeXRayClimb" "canLongXRayClimb" "canBePatient" Bypasses door shell: true |
From: 4
Right Item
To: 2
Top Left Door
Keep the two Geemers on screen while moving to the right side of the room. Freeze the second Geemer as it exits the Morph Tunnel, with the Crumble block. Use a Super Missile to knock the first Geemer down and freeze it at the pixel perfect height. Become stuck in the wall after using Grapple to kill the frozen Geemer as it walks through Samus, firing to the left. This re-enables XRay climbing. Requires: {
"notable": "Geemer Ice Stuck XRay Climb"
}
"h_ZebesIsAwake"
"canWallIceClip"
"canLongXRayClimb"
"Grapple"
{
"ammo": {
"type": "Super",
"count": 1
}
}
{
"enemyDamage": {
"enemy": "Geemer (blue)",
"type": "contact",
"hits": 1
}
}Dev note: FIXME: The Reo can be used to avoid spending a Super, but it's chaotic. |
From: 5
Above Power Bomb Blocks - Bottom Left Door
To: 2
Above Power Bomb Blocks - Top Left Door
Enter with G-mode direct, back up to between 1 and 6 pixels from the door transition, and activate X-ray to get very deep stuck in the door. Climb up 2 screens, and perform a turnaround buffered spin-jump away from the door to trigger the transition, bypassing any lock on the door. Entrance condition: {
"comeInWithGMode": {
"mode": "direct",
"morphed": false
}
}Requires: "canGModeXRayClimb" "canLongXRayClimb" Bypasses door shell: true |
From: 6
Above Power Bomb Blocks - Bottom Right Door
To: 3
Above Power Bomb Blocks - Top Right Door
Enter with G-mode direct, back up to between 1 and 6 pixels from the door transition, and activate X-ray to get very deep stuck in the door. Climb up 2 screens, and perform a turnaround buffered spin-jump away from the door to trigger the transition, bypassing any lock on the door. Entrance condition: {
"comeInWithGMode": {
"mode": "direct",
"morphed": false
}
}Requires: "canGModeXRayClimb" "canLongXRayClimb" Bypasses door shell: true |
From: 7
Below Power Bomb Blocks - Top Right Door
To: 3
Above Power Bomb Blocks - Top Right Door
Enter with G-mode direct, back up to between 1 and 6 pixels from the door transition, and activate X-ray to get very deep stuck in the door. Climb up 3 screens, and perform a turnaround buffered spin-jump away from the door to trigger the transition, bypassing any lock on the door. Entrance condition: {
"comeInWithGMode": {
"mode": "direct",
"morphed": false
}
}Requires: "canGModeXRayClimb" "canLongXRayClimb" "canBePatient" Bypasses door shell: true |
From: 8
Below Power Bomb Blocks - Bottom Left Door
To: 2
Above Power Bomb Blocks - Top Left Door
Enter with G-mode direct, back up to between 1 and 6 pixels from the door transition, and activate X-ray to get very deep stuck in the door. Climb up 6 screens, and perform a turnaround buffered spin-jump away from the door to trigger the transition, bypassing any lock on the door. Entrance condition: {
"comeInWithGMode": {
"mode": "direct",
"morphed": false
}
}Requires: "canGModeXRayClimb" "canLongXRayClimb" "canBeVeryPatient" Bypasses door shell: true |
From: 8
Below Power Bomb Blocks - Bottom Left Door
To: 4
Above Power Bomb Blocks - Middle Left Door
Enter with G-mode direct, back up to between 1 and 6 pixels from the door transition, and activate X-ray to get very deep stuck in the door. Climb up 5 screens, and perform a turnaround buffered spin-jump away from the door to trigger the transition, bypassing any lock on the door. Entrance condition: {
"comeInWithGMode": {
"mode": "direct",
"morphed": false
}
}Requires: "canGModeXRayClimb" "canLongXRayClimb" "canBeVeryPatient" Bypasses door shell: true |
From: 8
Below Power Bomb Blocks - Bottom Left Door
To: 5
Above Power Bomb Blocks - Bottom Left Door
Enter with G-mode direct, back up to between 1 and 6 pixels from the door transition, and activate X-ray to get very deep stuck in the door. Climb up 4 screens, and perform a turnaround buffered spin-jump away from the door to trigger the transition, bypassing any lock on the door. Entrance condition: {
"comeInWithGMode": {
"mode": "direct",
"morphed": false
}
}Requires: "canGModeXRayClimb" "canLongXRayClimb" "canBePatient" Bypasses door shell: true |
From: 8
Below Power Bomb Blocks - Bottom Left Door
To: 12
Above Power Bomb Blocks - Main Junction
Climb up 4 screens. Entrance condition: {
"comeInWithDoorStuckSetup": {}
}Requires: "canLongXRayClimb" "canBePatient" |
From: 2
Top Right Door
To: 1
Top Left Door
Exit the previous room with Samus in a standing pose (while grappled). After teleporting, press right to release Grapple while staying standing (not being forced into a crouch). Then X-ray climb 2 screens to get up to the door transition, without needing to open the door. Samus will not be visible during the climb. Entrance condition: {
"comeInWithGrappleTeleport": {
"blockPositions": [
[
2,
34
]
]
}
}Requires: "canLongXRayClimb" Bypasses door shell: true |
From: 3
Bottom Right Door
To: 1
Top Left Door
Exit the previous room with Samus in a standing pose (while grappled). After teleporting, press right to release Grapple while staying standing (not being forced into a crouch). Then X-ray climb 2 screens to get up to the door transition, without needing to open the door. Samus will not be visible during the climb. Entrance condition: {
"comeInWithGrappleTeleport": {
"blockPositions": [
[
2,
34
]
]
}
}Requires: "canLongXRayClimb" Bypasses door shell: true |
From: 3
Left Side - Top Middle Door (Main Entrance)
To: 1
Left Side - Top Door
Fall into the first Samus Eater in Hellway or the second Samus Eater of Alpha Power Bomb Room. After teleporting and passing through the transition, X-Ray climb (about 2 screens) to reach the space above, to the left of the morph tunnel and bomb block. Samus will be off-camera, but the slopes at the top will push the camera up, indicating when the climb is done. Entrance condition: {
"comeInWithSamusEaterTeleport": {
"floorPositions": [
[
1,
13
],
[
2,
13
]
],
"ceilingPositions": []
}
}Requires: "canLongXRayClimb" Dev note: Other Samus Eaters can also probably work. |
From: 4
Left Side - Door Behind Power Bomb Blocks
To: 1
Left Side - Top Door
Fall into the first Samus Eater in Hellway or the second Samus Eater of Alpha Power Bomb Room. After teleporting and passing through the transition, X-Ray climb (about 3 screens) to reach the space above, to the left of the morph tunnel and bomb block. Samus will be off-camera, but the slopes at the top will push the camera up, indicating when the climb is done. Entrance condition: {
"comeInWithSamusEaterTeleport": {
"floorPositions": [
[
1,
13
],
[
2,
13
]
],
"ceilingPositions": []
}
}Requires: "canLongXRayClimb" "canBePatient" Dev note: Other Samus Eaters can also probably work. |
From: 5
Left Side - Door Blocked by Crumble Blocks
To: 1
Left Side - Top Door
Fall into the first Samus Eater in Hellway or the second Samus Eater of Alpha Power Bomb Room. After teleporting and passing through the transition, X-Ray climb (about 4 screens) to reach the space above, to the left of the morph tunnel and bomb block. Samus will be off-camera, but the slopes at the top will push the camera up, indicating when the climb is done. Entrance condition: {
"comeInWithSamusEaterTeleport": {
"floorPositions": [
[
1,
13
],
[
2,
13
]
],
"ceilingPositions": []
}
}Requires: "canLongXRayClimb" "canBePatient" Dev note: Other Samus Eaters can also probably work. |
From: 6
Right Side - Top Middle Door
To: 2
Right Side - Top Door
Enter with G-mode direct, back up to between 1 and 6 pixels from the door transition, and activate X-ray to get very deep stuck in the door. Climb up 4 screens, and perform a turnaround buffered spin-jump away from the door to trigger the transition, bypassing any lock on the door. Entrance condition: {
"comeInWithGMode": {
"mode": "direct",
"morphed": false
}
}Requires: "canGModeXRayClimb" "canLongXRayClimb" "canBePatient" Bypasses door shell: true |
From: 8
Right Side - Bottom Door
To: 2
Right Side - Top Door
Enter with G-mode direct, back up to between 1 and 6 pixels from the door transition, and activate X-ray to get very deep stuck in the door. Climb up 6 screens, and perform a turnaround buffered spin-jump away from the door to trigger the transition, bypassing any lock on the door. Entrance condition: {
"comeInWithGMode": {
"mode": "direct",
"morphed": false
}
}Requires: "canGModeXRayClimb" "canLongXRayClimb" "canBeVeryPatient" Bypasses door shell: true |
From: 8
Right Side - Bottom Door
To: 6
Right Side - Top Middle Door
Enter with G-mode direct, back up to between 1 and 6 pixels from the door transition, and activate X-ray to get very deep stuck in the door. Climb up 2 screens, and perform a turnaround buffered spin-jump away from the door to trigger the transition, bypassing any lock on the door. Entrance condition: {
"comeInWithGMode": {
"mode": "direct",
"morphed": false
}
}Requires: "canGModeXRayClimb" "canLongXRayClimb" Bypasses door shell: true |
|
Enter with G-mode direct, back up to between 1 and 6 pixels from the door transition, and activate X-ray to get very deep stuck in the door. Climb up 6 screens, and perform a turnaround buffered spin-jump away from the door to trigger the transition, bypassing any lock on the door. Entrance condition: {
"comeInWithGMode": {
"mode": "direct",
"morphed": false
}
}Requires: "canGModeXRayClimb" "canLongXRayClimb" "canBeVeryPatient" Bypasses door shell: true |
|
Entrance condition: {
"comeInWithDoorStuckSetup": {}
}Requires: "canLongXRayClimb" "canBeVeryPatient" |
From: 3
Right Door
To: 1
Top Left Door
Exit the previous room with Samus in a standing pose (while grappled). After teleporting, press right to release Grapple while staying standing (not being forced into a crouch). Then X-ray climb 2 screens to get up to the door transition, without needing to open the door. Entrance condition: {
"comeInWithGrappleTeleport": {
"blockPositions": [
[
2,
34
]
]
}
}Requires: "canLongXRayClimb" Bypasses door shell: true |
From: 2
Bottom Left Door
To: 1
Top Left Door
Enter with G-mode direct, back up to between 1 and 6 pixels from the door transition, and activate X-ray to get very deep stuck in the door. Climb up 8 screens, and perform a turnaround buffered spin-jump away from the door to trigger the transition, bypassing any lock on the door. Entrance condition: {
"comeInWithGMode": {
"mode": "direct",
"morphed": false
}
}Requires: "canGModeXRayClimb" "canLongXRayClimb" "canBeVeryPatient" Bypasses door shell: true |
|
Entrance condition: {
"comeInWithDoorStuckSetup": {}
}Requires: "canLongXRayClimb" "canBeVeryPatient" |
From: 1
Top Left Door
To: 2
Middle Left Door (Behind Power Bomb Blocks)
Get grabbed by the Beetom and carry it to the 4-tile high gap one screen above the bottom-left door. Position Samus one pixel to the right of being against the wall. Jump and freeze the Beetom mid-air in as high a position as possible, such that Samus can get on top of it, morph, and barely have enough space to unmorph. Use X-Ray to stand up, turn around just before the Beetom thaws, then freeze it as high as possible. A Flatley jump may help with freezing the Beetom in a high enough position but is not required. Use a Ripper to get knocked back onto the frozen Beetom. This will clip Samus into the wall, making it possible to X-Ray climb. X-Ray climb up 2 screens. Requires: {
"notable": "Frozen Beetom X-Ray Climb with Morph"
}
{
"noBlueSuit": {}
}
{
"enemyDamage": {
"enemy": "Beetom",
"type": "contact",
"hits": 1
}
}
"Morph"
"canXRayStandUp"
{
"enemyDamage": {
"enemy": "Ripper",
"type": "contact",
"hits": 1
}
}
"canWallIceClip"
"canLongXRayClimb" |
From: 1
Top Left Door
To: 2
Middle Left Door (Behind Power Bomb Blocks)
Gain R-mode while entering the room. Use the respawning bugs to refill reserve energy. Get grabbed by the Beetom and carry it to the 4-tile high gap one screen above the bottom-left door. Position Samus one pixel to the right of being against the wall. Jump and aim down, reaching the ceiling at the same time that reserves are triggered. This will force Samus to stand up, briefly clipping into the wall above. Immediately freeze the Beetom inside the wall, by buffering a shot during the reserve trigger. Use a Ripper to get knocked back onto the frozen Beetom. This will clip Samus one pixel left into the wall, making it possible to X-ray climb. X-ray climb up 2 screens. Entrance condition: {
"comeInWithRMode": {}
}Requires: {
"notable": "R-Mode Frozen Beetom X-Ray Climb"
}
{
"noBlueSuit": {}
}
{
"refill": [
"ReserveEnergy"
]
}
{
"autoReserveTrigger": {}
}
{
"enemyDamage": {
"enemy": "Beetom",
"type": "contact",
"hits": 1
}
}
{
"enemyDamage": {
"enemy": "Ripper",
"type": "contact",
"hits": 1
}
}
"canWallIceClip"
"canLongXRayClimb" |
|
Entrance condition: {
"comeInWithDoorStuckSetup": {}
}Requires: "canLongXRayClimb" "canBePatient" |
From: 2
Middle Left Door (Behind Power Bomb Blocks)
To: 1
Top Left Door
Enter with G-mode direct, back up to between 1 and 6 pixels from the door transition, and activate X-ray to get very deep stuck in the door. Climb up 2 screens, and perform a turnaround buffered spin-jump away from the door to trigger the transition, bypassing any lock on the door. Entrance condition: {
"comeInWithGMode": {
"mode": "direct",
"morphed": false
}
}Requires: "canGModeXRayClimb" "canLongXRayClimb" Bypasses door shell: true |
From: 2
Middle Left Door (Behind Power Bomb Blocks)
To: 5
Top Right Door
Entrance condition: {
"comeInWithDoorStuckSetup": {}
}Requires: "canLongXRayClimb" "canBeVeryPatient" |
From: 3
Bottom Left Door
To: 2
Middle Left Door (Behind Power Bomb Blocks)
Gain R-mode while entering the room. Use the respawning bugs to refill reserve energy. Get grabbed by the Beetom and carry it to the 4-tile high gap one screen above the bottom-left door. Position Samus one pixel to the right of being against the wall. Jump and aim down, reaching the ceiling at the same time that reserves are triggered. This will force Samus to stand up, briefly clipping into the wall above. Immediately freeze the Beetom inside the wall, by buffering a shot during the reserve trigger. Use a Ripper to get knocked back onto the frozen Beetom. This will clip Samus one pixel left into the wall, making it possible to X-ray climb. X-ray climb up 2 screens. Entrance condition: {
"comeInWithRMode": {}
}Requires: {
"notable": "R-Mode Frozen Beetom X-Ray Climb"
}
{
"noBlueSuit": {}
}
{
"or": [
"canWallJump",
"HiJump",
"SpaceJump",
"canIBJ",
"canSpringBallJumpMidAir"
]
}
{
"refill": [
"Energy"
]
}
{
"autoReserveTrigger": {}
}
{
"enemyDamage": {
"enemy": "Beetom",
"type": "contact",
"hits": 1
}
}
{
"enemyDamage": {
"enemy": "Ripper",
"type": "contact",
"hits": 1
}
}
"canWallIceClip"
"canLongXRayClimb" |
From: 4
Bottom Right Door
To: 2
Middle Left Door (Behind Power Bomb Blocks)
Gain R-mode while entering the room. Use the respawning bugs to refill reserve energy. Get grabbed by the Beetom and carry it to the 4-tile high gap one screen above the bottom-left door. Position Samus one pixel to the right of being against the wall. Jump and aim down, reaching the ceiling at the same time that reserves are triggered. This will force Samus to stand up, briefly clipping into the wall above. Immediately freeze the Beetom inside the wall, by buffering a shot during the reserve trigger. Use a Ripper to get knocked back onto the frozen Beetom. This will clip Samus one pixel left into the wall, making it possible to X-ray climb. X-ray climb up 2 screens. Entrance condition: {
"comeInWithRMode": {}
}Requires: {
"notable": "R-Mode Frozen Beetom X-Ray Climb"
}
{
"noBlueSuit": {}
}
{
"or": [
"canWallJump",
"HiJump",
"SpaceJump",
"canIBJ",
"canSpringBallJumpMidAir"
]
}
{
"refill": [
"Energy"
]
}
{
"autoReserveTrigger": {}
}
{
"enemyDamage": {
"enemy": "Beetom",
"type": "contact",
"hits": 1
}
}
{
"enemyDamage": {
"enemy": "Ripper",
"type": "contact",
"hits": 1
}
}
"canWallIceClip"
"canLongXRayClimb" |
From: 5
Top Right Door
To: 2
Middle Left Door (Behind Power Bomb Blocks)
Gain R-mode while entering the room. Use the respawning bugs to refill reserve energy. Get grabbed by the Beetom and carry it to the 4-tile high gap one screen above the bottom-left door. Position Samus one pixel to the right of being against the wall. Jump and aim down, reaching the ceiling at the same time that reserves are triggered. This will force Samus to stand up, briefly clipping into the wall above. Immediately freeze the Beetom inside the wall, by buffering a shot during the reserve trigger. Use a Ripper to get knocked back onto the frozen Beetom. This will clip Samus one pixel left into the wall, making it possible to X-ray climb. X-ray climb up 2 screens. Entrance condition: {
"comeInWithRMode": {}
}Requires: {
"notable": "R-Mode Frozen Beetom X-Ray Climb"
}
{
"noBlueSuit": {}
}
{
"refill": [
"Energy"
]
}
{
"autoReserveTrigger": {}
}
{
"enemyDamage": {
"enemy": "Beetom",
"type": "contact",
"hits": 1
}
}
{
"enemyDamage": {
"enemy": "Ripper",
"type": "contact",
"hits": 1
}
}
"canWallIceClip"
"canLongXRayClimb" |
From: 3
Left Side - Bottom Middle Door
To: 1
Left Side - Top Door
Enter with G-mode direct, back up to between 1 and 6 pixels from the door transition, and activate X-ray to get very deep stuck in the door. Climb up 2 screens, and perform a turnaround buffered spin-jump away from the door to trigger the transition, bypassing any lock on the door. Entrance condition: {
"comeInWithGMode": {
"mode": "direct",
"morphed": false
}
}Requires: "canGModeXRayClimb" "canLongXRayClimb" Bypasses door shell: true |
From: 3
Left Side - Bottom Middle Door
To: 1
Left Side - Top Door
Entrance condition: {
"comeInWithDoorStuckSetup": {}
}Requires: "canLongXRayClimb" |
From: 4
Left Side - Bottom Door
To: 1
Left Side - Top Door
Enter with G-mode direct, back up to between 1 and 6 pixels from the door transition, and activate X-ray to get very deep stuck in the door. Climb up 3 screens, and perform a turnaround buffered spin-jump away from the door to trigger the transition, bypassing any lock on the door. Entrance condition: {
"comeInWithGMode": {
"mode": "direct",
"morphed": false
}
}Requires: "canGModeXRayClimb" "canLongXRayClimb" "canBePatient" Bypasses door shell: true |
|
Entrance condition: {
"comeInWithDoorStuckSetup": {}
}Requires: "canLongXRayClimb" "canBePatient" |
From: 4
Left Side - Bottom Door
To: 2
Left Side - Top Middle Door
Enter with G-mode direct, back up to between 1 and 6 pixels from the door transition, and activate X-ray to get very deep stuck in the door. Climb up 2 screens, and perform a turnaround buffered spin-jump away from the door to trigger the transition, bypassing any lock on the door. Entrance condition: {
"comeInWithGMode": {
"mode": "direct",
"morphed": false
}
}Requires: "canGModeXRayClimb" "canLongXRayClimb" Bypasses door shell: true |
From: 6
Middle Right Door
To: 1
Left Side - Top Door
Exit the previous room with Samus in a standing pose (while grappled) with a horizontal position of 21 (as far right as possible). After teleporting, press right to release Grapple while staying standing (not being forced into a crouch). Then X-ray climb 2 screens to get up to the door transition above, without needing to open the door. At the beginning of the climb, avoid pressing left without X-Ray being held, to prevent triggering the transition of the lower door. Entrance condition: {
"comeInWithGrappleTeleport": {
"blockPositions": [
[
2,
34
]
]
}
}Requires: "canLongXRayClimb" Bypasses door shell: true |
From: 7
Top Right Door
To: 1
Left Side - Top Door
Exit the previous room with Samus in a standing pose (while grappled) with a horizontal position of 21 (as far right as possible). After teleporting, press right to release Grapple while staying standing (not being forced into a crouch). Then X-ray climb 2 screens to get up to the door transition above, without needing to open the door. At the beginning of the climb, avoid pressing left without X-Ray being held, to prevent triggering the transition of the lower door. Entrance condition: {
"comeInWithGrappleTeleport": {
"blockPositions": [
[
2,
34
]
]
}
}Requires: "canLongXRayClimb" Bypasses door shell: true |
From: 2
Right Door
To: 1
Left Door
Exit the previous room with Samus in a standing pose (while grappled). After teleporting, press right to release Grapple while staying standing (not being forced into a crouch). Then X-ray climb 2 screens to get up to the door transition, without needing to open the door. Entrance condition: {
"comeInWithGrappleTeleport": {
"blockPositions": [
[
2,
34
]
]
}
}Requires: "canLongXRayClimb"
{
"heatFrames": 2800
}
{
"lavaFrames": 2500
}Bypasses door shell: true |
|
Enter with G-mode direct, back up to between 1 and 6 pixels from the door transition, and activate X-ray to get very deep stuck in the door. Climb up 2 screens, and perform a turnaround buffered spin-jump away from the door to trigger the transition, bypassing any lock on the door. Entrance condition: {
"comeInWithGMode": {
"mode": "direct",
"morphed": false
}
}Requires: "canGModeXRayClimb" "canLongXRayClimb" Bypasses door shell: true |
From: 4
Bottom Right Door
To: 6
Top Right Door
Enter with G-mode direct, back up to between 1 and 6 pixels from the door transition, and activate X-ray to get very deep stuck in the door. Climb up 3 screens, and perform a turnaround buffered spin-jump away from the door to trigger the transition, bypassing any lock on the door. Entrance condition: {
"comeInWithGMode": {
"mode": "direct",
"morphed": false
}
}Requires: "canGModeXRayClimb" "canLongXRayClimb" "canBePatient" Bypasses door shell: true |
From: 5
Middle Right Door
To: 6
Top Right Door
Enter with G-mode direct, back up to between 1 and 6 pixels from the door transition, and activate X-ray to get very deep stuck in the door. Climb up 2 screens, and perform a turnaround buffered spin-jump away from the door to trigger the transition, bypassing any lock on the door. Entrance condition: {
"comeInWithGMode": {
"mode": "direct",
"morphed": false
}
}Requires: "canGModeXRayClimb" "canLongXRayClimb" Bypasses door shell: true |
From: 4
Bottom Right Door
To: 2
Far Left Door
Exit the previous room with Samus in a standing pose (while grappled). After teleporting, press right to release Grapple while staying standing (not being forced into a crouch). Then X-ray climb 2 screens to get up to the door transition, without needing to open the door. Entrance condition: {
"comeInWithGrappleTeleport": {
"blockPositions": [
[
2,
34
]
]
}
}Requires: "canLongXRayClimb"
{
"heatFrames": 2800
}Bypasses door shell: true |
From: 5
Top Right Door
To: 2
Far Left Door
Exit the previous room with Samus in a standing pose (while grappled). After teleporting, press right to release Grapple while staying standing (not being forced into a crouch). Then X-ray climb to get up to the door transition, without needing to open the door. Entrance condition: {
"comeInWithGrappleTeleport": {
"blockPositions": [
[
2,
34
]
]
}
}Requires: "canLongXRayClimb"
{
"heatFrames": 2800
}Bypasses door shell: true |
|
Enter with G-mode direct, back up to between 1 and 6 pixels from the door transition, and activate X-ray to get very deep stuck in the door. Climb up 3 screens, and perform a turnaround buffered spin-jump away from the door to trigger the transition, bypassing any lock on the door. Entrance condition: {
"comeInWithGMode": {
"mode": "direct",
"morphed": false
}
}Requires: "canGModeXRayClimb" "h_heatProof" "canLongXRayClimb" "canBePatient" Bypasses door shell: true |
|
Climb up 3 screens. Entrance condition: {
"comeInWithDoorStuckSetup": {}
}Requires: "canLongXRayClimb"
{
"heatFrames": 4000
}
"canBePatient" |
From: 2
Middle Left Door
To: 1
Top Left Door
Enter with G-mode direct, back up to between 1 and 6 pixels from the door transition, and activate X-ray to get very deep stuck in the door. Climb up 2 screens, and perform a turnaround buffered spin-jump away from the door to trigger the transition, bypassing any lock on the door. Entrance condition: {
"comeInWithGMode": {
"mode": "direct",
"morphed": false
}
}Requires: "canGModeXRayClimb" "canLongXRayClimb" Bypasses door shell: true |
|
Entrance condition: {
"comeInWithDoorStuckSetup": {}
}Requires: "canLongXRayClimb" |
From: 2
Bottom Right Door
To: 1
Top Right Door
Enter with G-mode direct, back up to between 1 and 6 pixels from the door transition, and activate X-ray to get very deep stuck in the door. Climb up 2 screens, and perform a turnaround buffered spin-jump away from the door to trigger the transition, bypassing any lock on the door. Entrance condition: {
"comeInWithGMode": {
"mode": "direct",
"morphed": false
}
}Requires: "canGModeXRayClimb" "canLongXRayClimb" Bypasses door shell: true |
|
Entrance condition: {
"comeInWithDoorStuckSetup": {}
}Requires: "canLongXRayClimb" |
|
Entrance condition: {
"comeInWithDoorStuckSetup": {}
}Requires: "canBePatient" "canLongXRayClimb" |
From: 1
Bottom Left Door
To: 3
Top Right Door
Entrance condition: {
"comeInWithDoorStuckSetup": {}
}Requires: "canLongXRayClimb"
{
"heatFrames": 2800
}Dev note: FIXME: The heatFrames for this and almost all other heated X-ray climbs are much too loose. |
From: 3
Bottom Right Door
To: 4
Top Right Door
Enter with G-mode direct, back up to between 1 and 6 pixels from the door transition, and activate X-ray to get very deep stuck in the door. Climb up 2 screens, and perform a turnaround buffered spin-jump away from the door to trigger the transition, bypassing any lock on the door. Entrance condition: {
"comeInWithGMode": {
"mode": "direct",
"morphed": false
}
}Requires: "canGModeXRayClimb" "h_heatProof" "canLongXRayClimb" Bypasses door shell: true |
From: 3
Top Right Door
To: 1
Top Left Door
Exit the previous room with Samus in a standing pose (while grappled). After teleporting, press right to release Grapple while staying standing (not being forced into a crouch). Then X-ray climb 2 screens to get up to the door transition, without needing to open the door. Samus will not be visible during the climb. Entrance condition: {
"comeInWithGrappleTeleport": {
"blockPositions": [
[
2,
34
]
]
}
}Requires: "canLongXRayClimb" Bypasses door shell: true |
From: 2
Bottom Left Door
To: 1
Top Left Door
Enter with G-mode direct, back up to between 1 and 6 pixels from the door transition, and activate X-ray to get very deep stuck in the door. Climb up 5 screens, and perform a turnaround buffered spin-jump away from the door to trigger the transition, bypassing any lock on the door. Entrance condition: {
"comeInWithGMode": {
"mode": "direct",
"morphed": false
}
}Requires: "canGModeXRayClimb" "h_heatProof" "canLongXRayClimb" "canBeVeryPatient" Bypasses door shell: true |
From: 2
Bottom Left Door
To: 4
Junction Above Bomb Blocks
Climb the room while avoiding wall pirates and Namihe flames. Immediately climb above the Namihe flames and wait for the wall pirate to jump across into Samus. Once the pirate starts going up, resume X-Ray climbing. This is a 2-screen X-Ray climb. Watch for enemies when fixing the camera after the climb. Entrance condition: {
"comeInWithDoorStuckSetup": {}
}Requires: {
"notable": "X-Ray Climb"
}
"canLongXRayClimb"
{
"enemyDamage": {
"enemy": "Namihe",
"type": "fireball",
"hits": 2
}
}
{
"enemyDamage": {
"enemy": "Yellow Space Pirate (wall)",
"type": "contact",
"hits": 1
}
}
{
"heatFrames": 2800
}Dev note: Two Namihe hits as leniency. |
From: 3
Top Right Door
To: 1
Top Left Door
Exit the previous room with Samus in a standing pose (while grappled). After teleporting, press right to release Grapple while staying standing (not being forced into a crouch). Then X-ray climb 2 screens to get up to the door transition, without needing to open the door. Climb quickly in order to minimize damage from the Namihe and the Pirate. Entrance condition: {
"comeInWithGrappleTeleport": {
"blockPositions": [
[
2,
34
]
]
}
}Requires: "canLongXRayClimb"
{
"heatFrames": 2800
}
{
"enemyDamage": {
"enemy": "Namihe",
"type": "kago",
"hits": 9
}
}
{
"enemyDamage": {
"enemy": "Yellow Space Pirate (standing)",
"type": "laser",
"hits": 1
}
}Bypasses door shell: true |
|
Entrance condition: {
"comeInWithDoorStuckSetup": {}
}Requires: "canLongXRayClimb"
{
"heatFrames": 2840
} |
From: 3
Bottom Left Door
To: 1
Top Left Door
Enter with G-mode direct, back up to between 1 and 6 pixels from the door transition, and activate X-ray to get very deep stuck in the door. Climb up 2 screens, and perform a turnaround buffered spin-jump away from the door to trigger the transition, bypassing any lock on the door. Entrance condition: {
"comeInWithGMode": {
"mode": "direct",
"morphed": false
}
}Requires: "canGModeXRayClimb" "canLongXRayClimb" Bypasses door shell: true |
From: 2
Bottom Left Door
To: 1
Top Left Door
Enter with G-mode direct, back up to between 1 and 6 pixels from the door transition, and activate X-ray to get very deep stuck in the door. Climb up 2 screens, and perform a turnaround buffered spin-jump away from the door to trigger the transition, bypassing any lock on the door. Entrance condition: {
"comeInWithGMode": {
"mode": "direct",
"morphed": false
}
}Requires: "canGModeXRayClimb" "canLongXRayClimb" Bypasses door shell: true |
|
Entrance condition: {
"comeInWithDoorStuckSetup": {}
}Requires: "canLongXRayClimb" |
|
Climb up 2.5 screens. Stop when about half of Samus (or less) is visible at the top of the screen. Turn-around a couple times to move to the right, to get close to falling out. Then perform a buffered spin-jump while turning around to the right, to make it onto the platform. The Choot will be safely off-camera and will not hit Samus while passing through it. Entrance condition: {
"comeInWithGMode": {
"mode": "direct",
"morphed": false
}
}Requires: "canComplexGMode" "canGModeXRayClimb" "canLongXRayClimb" "canBePatient" "canOffScreenMovement" |
From: 1
Bottom Left Door
To: 2
Top Right Door
Climb up 2.5 screens. Stop when about half of Samus (or less) is visible at the top of the screen. Turn-around a couple times to move to the right, to get close to falling out. Then perform a buffered spin-jump while turning around to the right, to make it onto the platform. The Choot will be safely off-camera and will not hit Samus while passing through it. Entrance condition: {
"comeInShinecharged": {}
}Requires: {
"shineChargeFrames": 1
}
"canShinesparkDeepStuck"
{
"shinespark": {
"frames": 1,
"excessFrames": 1
}
}
"canLongXRayClimb"
"canBePatient"
"canOffScreenMovement" |
|
Entrance condition: {
"comeInWithDoorStuckSetup": {}
}Requires: "canLongXRayClimb" "canBePatient" |
|
Entrance condition: {
"comeInWithDoorStuckSetup": {}
}Requires: "canLongXRayClimb" |
From: 2
Bottom Right Door
To: 3
Middle Right Door
Climb up 2 screens. Entrance condition: {
"comeInWithGMode": {
"mode": "direct",
"morphed": false
}
}Requires: "canGModeXRayClimb" "canLongXRayClimb" |
From: 2
Bottom Right Door
To: 3
Middle Right Door
Entrance condition: {
"comeInShinecharged": {}
}Requires: {
"shineChargeFrames": 1
}
{
"shinespark": {
"frames": 1,
"excessFrames": 1
}
}
"canShinesparkDeepStuck"
"canLongXRayClimb" |
From: 2
Bottom Right Door
To: 3
Middle Right Door
Enter with G-mode direct, back up to between 1 and 6 pixels from the door transition, and activate X-ray to get very deep stuck in the door. Climb up 2 screens, and perform a turnaround buffered spin-jump away from the door to trigger the transition, bypassing any lock on the door. Entrance condition: {
"comeInWithGMode": {
"mode": "direct",
"morphed": false
}
}Requires: "canGModeXRayClimb" "canLongXRayClimb" Bypasses door shell: true |
From: 3
Middle Right Door
To: 6
Hidden Fake Kassiuz Room Junction
Climb up 2 screens plus 2 tiles, to enter a normally inaccessible area behind the top right door, containing a copy of the bottom half of Kassiuz Room. There is a blue door on the other side of the top right door. Opening it and touching the transition behind it will lead to the same room as the bottom right door of the room; however, Samus will be placed a screen to the left of the door, which will usually be out-of-bounds. Entrance condition: {
"comeInWithDoorStuckSetup": {}
}Requires: {
"notable": "X-Ray Climb Into Fake Kassiuz Room"
}
"canLongXRayClimb"Dev note: FIXME: This strat and node 6 currently have no logical purpose, but there might be cases where the player could X-Ray climb to somewhere useful after passing through this wrong-facing transition. |
|
This climb is from the left side of the left room, the room with the breakable grapple block. Climb up 3 screens. The camera will not move up to Samus while on the left wall. Carefully jump over the pit without falling in. It helps to step down and use the two-tile long runway. Entrance condition: {
"comeInWithDoorStuckSetup": {}
}Requires: "canLongXRayClimb"
"canBePatient"
"canOffScreenMovement"
{
"or": [
"canTrickyJump",
"canWallJump",
"SpaceJump"
]
} |
|
This climb is from the left side of the left room, the room with the breakable grapple block. Climb up 3 screens. Then drop down to fix the camera. Entrance condition: {
"comeInWithDoorStuckSetup": {}
}Requires: "canLongXRayClimb" "canBePatient" |
|
This climb is right side of the left room - the room with the breakable grapple block. Climb up 3 screens. Entrance condition: {
"comeInWithDoorStuckSetup": {}
}Requires: "canLongXRayClimb" "canBePatient" |
From: 3
Bottom Left Door
To: 1
Top Left Door
Enter with G-mode direct, and go to the top of the room to perform a Crystal Flash to refill on energy without destroying all the bottom Rinkas. Use the Rinkas to damage down. For the final hit that will trigger auto-reserves, stand in the open doorway between 1 and 6 pixels from the transition. The auto reserve trigger will cancel G-mode and close the door on top of Samus. Climb up 2 screens, moving quickly to minimize Rinka damage. Perform a turnaround buffered spin-jump away from the door to trigger the transition, bypassing any lock on the door. Entrance condition: {
"comeInWithGMode": {
"mode": "direct",
"morphed": false
}
}Requires: "canComplexGMode"
"canGModeXRayClimb"
"h_CrystalFlash"
{
"autoReserveTrigger": {}
}
"canLongXRayClimb"
{
"enemyDamage": {
"enemy": "Rinka",
"type": "contact",
"hits": 2
}
}Bypasses door shell: true |
From: 3
Bottom Left Door
To: 1
Top Left Door
Enter with G-mode direct, and freeze the bottom Rinka near the door. Back up to between 1 and 6 pixels from the door transition, and activate X-Ray to get very deep stuck in the door. Climb up 2 screens, moving quickly to avoid Rinka damage. Perform a turnaround buffered spin-jump away from the door to trigger the transition, bypassing any lock on the door. Entrance condition: {
"comeInWithGMode": {
"mode": "direct",
"morphed": false
}
}Requires: "canComplexGMode" "canGModeXRayClimb" "Ice" "canLongXRayClimb" Bypasses door shell: true |
From: 3
Bottom Left Door
To: 1
Top Left Door
Enter immobile with G-mode direct, taking a Rinka hit to regain mobility. Back up to between 1 and 6 pixels from the door transition, and activate X-Ray to get very deep stuck in the door. Climb up 2 screens, moving quickly to minimize Rinka damage. Perform a turnaround buffered spin-jump away from the door to trigger the transition, bypassing any lock on the door. Entrance condition: {
"comeInWithGMode": {
"mode": "direct",
"morphed": false,
"mobility": "immobile"
}
}Requires: "canComplexGMode"
"canGModeXRayClimb"
{
"enemyDamage": {
"enemy": "Rinka",
"type": "contact",
"hits": 1
}
}
"canLongXRayClimb"Bypasses door shell: true Dev note: The 'immobile' requirement in the entranceCondition is not necessary but is included for clarity. Without coming in immobile, it would not be possible to have enough energy to survive the Rinka hit. The enemyDamage in this strat is for a second Rinka hit while climbing. The first Rinka hit is included in the gModeImmobile requirement. |
