canSpikeSuit (Expert+)
The ability to gain a flash suit using spikes or similar damage source. Gain a shinecharge, take a spike hit while morphed, unmorphing either 1 or 2 frames after taking damage. Then press jump to activate a shinespark on the last frame of knockback, 10 frames after taking damage.
Dependencies: canHorizontalMidairShinespark, canCarryFlashSuit, canShinechargeMovement, canShinechargeMovementComplex, canShinespark, canHorizontalShinespark, canMidairShinespark
Strats ()
From: 1
Top Left Door
To: 1
Top Left Door


Entrance condition: {
"comeInShinecharged": {}
}Requires: {
"shineChargeFrames": 70
}
"h_spikeSuitSpikeHitLeniency"
{
"spikeHits": 1
}
"canSpikeSuit"
{
"shinespark": {
"frames": 4,
"excessFrames": 4
}
} |
From: 1
Top Left Door
To: 1
Top Left Door


Entrance condition: {
"comeInShinecharging": {
"length": 3,
"openEnd": 1
}
}Requires: {
"spikeHits": 1
}
"h_spikeSuitSpikeHitLeniency"
"canSpikeSuit"
{
"shinespark": {
"frames": 5,
"excessFrames": 5
}
} |
|
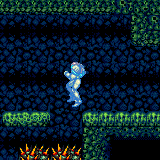
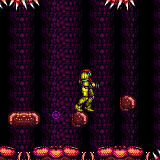
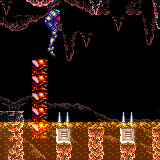
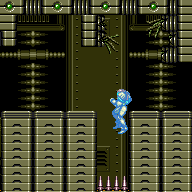
Gain a spike suit and shinespark vertically into the spikes, being careful not to turn around or move forward until Samus falls far enough, to avoid additional spike hits. Position the spark as far left as possible, to be able to land on the ledge and avoid acid damage in case of failure. After gaining the spike suit successfully, for extra safety the shinespark can be delayed to wait for the acid tide to go low. Requires: {
"obstaclesCleared": [
"B"
]
}
{
"or": [
{
"and": [
{
"doorUnlockedAtNode": 1
},
{
"canShineCharge": {
"usedTiles": 19,
"steepUpTiles": 1,
"steepDownTiles": 1,
"openEnd": 0
}
}
]
},
{
"canShineCharge": {
"usedTiles": 18,
"steepUpTiles": 1,
"steepDownTiles": 1,
"openEnd": 0
}
}
]
}
"h_runOverRespawningEnemies"
{
"spikeHits": 1
}
"canSpikeSuit"
{
"shinespark": {
"frames": 1,
"excessFrames": 1
}
}Dev note: Leniency is not included, because there is a farm available. |
From: 3
Right Door, In the Water
To: 3
Right Door, In the Water
Requires: "Gravity"
{
"canShineCharge": {
"usedTiles": 19,
"openEnd": 2
}
}
{
"spikeHits": 1
}
"h_spikeSuitSpikeHitLeniency"
"canSpikeSuit"
{
"shinespark": {
"frames": 6,
"excessFrames": 6
}
} |
From: 2
Right Door
To: 2
Right Door
Requires: {
"or": [
{
"canShineCharge": {
"usedTiles": 16,
"openEnd": 0
}
},
{
"and": [
{
"doorUnlockedAtNode": 2
},
{
"canShineCharge": {
"usedTiles": 17,
"openEnd": 0
}
}
]
}
]
}
{
"or": [
{
"thornHits": "n_spikeSuitAttempts"
},
{
"and": [
{
"resetRoom": {
"nodes": [
1,
2
]
}
},
{
"thornHits": 1
}
]
}
]
}
"canSpikeSuit"
{
"shinespark": {
"frames": 5,
"excessFrames": 5
}
}Dev note: Assuming the room can be reset, lenience is not included because a farm is available. |
From: 4
Top Left Junction
To: 4
Top Left Junction

Requires: {
"obstaclesCleared": [
"A"
]
}
{
"obstaclesNotCleared": [
"B"
]
}
{
"canShineCharge": {
"usedTiles": 16,
"openEnd": 0
}
}
{
"spikeHits": 1
}
"h_spikeSuitSpikeHitLeniency"
"canSpikeSuit"
{
"shinespark": {
"frames": 4,
"excessFrames": 4
}
} |
|
Requires: "canSamusEaterStandUp"
{
"samusEaterCycles": 1
}
"h_shinechargeMaxRunway"
{
"thornHits": 1
}
"h_spikeSuitSamusEaterLeniency"
"h_spikeSuitThornHitLeniency"
"canSpikeSuit"
{
"shinespark": {
"frames": 5,
"excessFrames": 5
}
} |
|
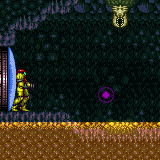
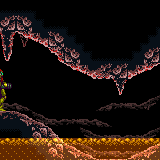
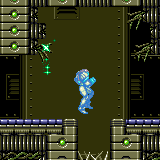
Without Super Missiles or to save using a Super Missile, jump over the yapping maw to make it try to grab Samus, the Samus Eater can then be entered from the other side avoiding being grabbed. Requires: {
"obstaclesCleared": [
"A"
]
}
"h_spikeSuitThornHitLeniency"
{
"or": [
{
"and": [
{
"obstaclesNotCleared": [
"B"
]
},
{
"canShineCharge": {
"usedTiles": 29,
"openEnd": 0
}
},
{
"thornHits": 4
},
"canSpikeSuit",
{
"shinespark": {
"frames": 1,
"excessFrames": 1
}
}
]
},
{
"and": [
{
"obstaclesCleared": [
"B"
]
},
"canSamusEaterStandUp",
{
"samusEaterCycles": 1
},
"h_shinechargeMaxRunway",
"h_spikeSuitSamusEaterLeniency",
{
"thornHits": 1
},
"canSpikeSuit",
{
"shinespark": {
"frames": 4,
"excessFrames": 4
}
}
]
}
]
} |
|
Requires: "canSamusEaterStandUp"
{
"samusEaterCycles": 1
}
"h_shinechargeMaxRunway"
{
"thornHits": 1
}
"canSpikeSuit"
{
"shinespark": {
"frames": 6,
"excessFrames": 6
}
}Dev note: Leniency is not included, since there is a farm available. |
|

Requires: {
"obstaclesCleared": [
"A"
]
}
"h_shinechargeMaxRunway"
"canSpikeSuit"
{
"thornHits": 1
}
{
"or": [
{
"thornHits": "n_spikeSuitLenience"
},
{
"resetRoom": {
"nodes": [
1,
2
]
}
}
]
}
{
"shinespark": {
"frames": 1,
"excessFrames": 1
}
}Clears obstacles: A Dev note: Assuming the room can be reset, leniency is not included because a farm is available. |
From: 3
Bottom Right Door
To: 3
Bottom Right Door

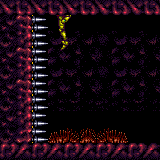
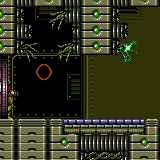
Failing the spikesuit attempt with a spark early by 1 frame will lose the original flash suit. Only unmorphing on the first possible frame will work; second frame will bonk the platform. Requires: {
"useFlashSuit": {}
}
"canUseFlashSuitInitialSpark"
"canTrickyCarryFlashSuit"
{
"thornHits": 1
}
"canSpikeSuit"
{
"shinespark": {
"frames": 13,
"excessFrames": 0
}
}Exit condition: {
"leaveWithSpark": {
"position": "bottom"
}
} |
|

Requires: "h_heatProof"
{
"or": [
{
"and": [
"h_shinechargeMaxRunway",
{
"obstaclesNotCleared": [
"A"
]
}
]
},
{
"canShineCharge": {
"usedTiles": 14,
"openEnd": 1
}
}
]
}
{
"or": [
{
"and": [
"canComplexCarryFlashSuit",
"can4HighMidAirMorph"
]
},
"canWallJumpInstantMorph"
]
}
{
"spikeHits": 1
}
"h_spikeSuitSpikeHitLeniency"
"canSpikeSuit"
{
"shinespark": {
"frames": 1,
"excessFrames": 1
}
}Clears obstacles: A |
|


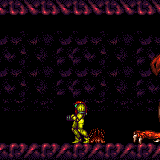
Shortcharging and stopping between the crumbles should allow for 3 attemps before the room needs to be reset or a shorter shortcharge is the only option. Requires: "h_SpeedBoosterHallNoRisingLava"
"h_heatProof"
{
"obstaclesNotCleared": [
"A"
]
}
{
"canShineCharge": {
"usedTiles": 17,
"openEnd": 1
}
}
{
"or": [
{
"and": [
"canComplexCarryFlashSuit",
"can4HighMidAirMorph"
]
},
"canWallJumpInstantMorph"
]
}
{
"spikeHits": 1
}
"h_spikeSuitSpikeHitLeniency"
"canSpikeSuit"
{
"shinespark": {
"frames": 1,
"excessFrames": 1
}
}Clears obstacles: A |
|
Requires: {
"canShineCharge": {
"usedTiles": 33,
"gentleUpTiles": 8,
"gentleDownTiles": 8,
"steepUpTiles": 2,
"steepDownTiles": 2,
"openEnd": 0
}
}
{
"spikeHits": 1
}
"canSpikeSuit"
{
"shinespark": {
"frames": 3,
"excessFrames": 3
}
}Dev note: Leniency is not included, because a farm is available. |
From: 4
Central Junction
To: 4
Central Junction
Requires: {
"not": "f_DefeatedCrocomire"
}
"canRiskPermanentLossOfAccess"
{
"canShineCharge": {
"usedTiles": 22,
"openEnd": 1
}
}
{
"spikeHits": 1
}
"canSpikeSuit"
"h_spikeSuitSpikeHitLeniency"
{
"shinespark": {
"frames": 4,
"excessFrames": 4
}
} |
From: 4
Item
To: 7
Junction By Lower Alcoons (Left of Spike Pits)
Requires: {
"obstaclesCleared": [
"A"
]
}
{
"canShineCharge": {
"usedTiles": 27,
"gentleUpTiles": 2,
"openEnd": 1
}
}
{
"spikeHits": 1
}
"h_spikeSuitSpikeHitLeniency"
"h_heatProof"
"canSpikeSuit"
{
"shinespark": {
"frames": 6,
"excessFrames": 6
}
}Dev note: FIXME: h_heatProof isn't really required, but we don't yet have a good way to express how spike suit leniency impacts heat frames. FIXME: using the bottom-left runway or a neighboring room would also be possible. |
|
Requires: {
"obstaclesCleared": [
"A"
]
}
"f_DefeatedPhantoon"
{
"canShineCharge": {
"usedTiles": 20,
"openEnd": 0
}
}
{
"thornHits": 1
}
"h_spikeSuitThornHitLeniency"
"canSpikeSuit"
{
"shinespark": {
"frames": 2,
"excessFrames": 2
}
} |
From: 4
Bottom Chozo Item
To: 4
Bottom Chozo Item
Requires: "f_DefeatedPhantoon"
{
"obstaclesNotCleared": [
"B"
]
}
{
"or": [
{
"and": [
{
"obstaclesCleared": [
"A"
]
},
{
"canShineCharge": {
"usedTiles": 30,
"openEnd": 1
}
}
]
},
{
"canShineCharge": {
"usedTiles": 14,
"openEnd": 1
}
}
]
}
{
"spikeHits": 1
}
"h_spikeSuitSpikeHitLeniency"
"canSpikeSuit"
{
"shinespark": {
"frames": 6,
"excessFrames": 6
}
} |
From: 1
Left Door
To: 1
Left Door
Requires: "f_DefeatedPhantoon"
{
"canShineCharge": {
"usedTiles": 15,
"openEnd": 1
}
}
{
"thornHits": 1
}
"h_spikeSuitThornHitLeniency"
"canSpikeSuit"
{
"shinespark": {
"frames": 6,
"excessFrames": 6
}
} |
From: 1
Left Door
To: 1
Left Door


Jump into the side of the spark to avoid taking extra damage. Requires: "f_DefeatedPhantoon"
"canShinechargeMovement"
"canInsaneJump"
{
"canShineCharge": {
"usedTiles": 20,
"openEnd": 2
}
}
{
"thornHits": 1
}
"h_spikeSuitThornHitLeniency"
"canSpikeSuit"
{
"shinespark": {
"frames": 1,
"excessFrames": 1
}
} |
From: 1
Right Door
To: 1
Right Door

Entrance condition: {
"comeInShinecharged": {}
}Requires: {
"or": [
"Gravity",
{
"and": [
{
"not": "f_DefeatedPhantoon"
},
"canRiskPermanentLossOfAccess"
]
}
]
}
{
"shineChargeFrames": 120
}
"h_spikeSuitThornHitLeniency"
{
"thornHits": 1
}
"canSpikeSuit"
{
"shinespark": {
"frames": 2,
"excessFrames": 2
}
} |
|


Requires: "f_DefeatedPhantoon"
{
"canShineCharge": {
"usedTiles": 20,
"steepDownTiles": 5,
"openEnd": 0
}
}
{
"spikeHits": 1
}
"h_spikeSuitSpikeHitLeniency"
"canSpikeSuit"
{
"shinespark": {
"frames": 1,
"excessFrames": 1
}
} |
|

Requires: {
"or": [
"f_DefeatedDraygon",
{
"obstaclesCleared": [
"f_DefeatedDraygon"
]
}
]
}
"Gravity"
{
"canShineCharge": {
"usedTiles": 21,
"openEnd": 0
}
}
{
"thornHits": 1
}
"h_spikeSuitThornHitLeniency"
"canSpikeSuit"
{
"or": [
"h_breakOneDraygonTurret",
"canTrickyWallJump"
]
}
{
"shinespark": {
"frames": 2,
"excessFrames": 2
}
}Dev note: FIXME: Obtaining a spikesuit while Draygon is still alive is possible but requires more complex modelling |