canBeLucky (Extreme+)
Executing a strat that has a reasonable chance to fail due to random elements such as enemy drops. This is used where failure is unforgiving and may result in a death or a slow process to reattempt.
Strats ()
|


Kill all three Boyons for energy, or Crystal Flash. If you need to freeze Boyons for extra runway, disable Ice Beam to force them to unfreeze so you can interrupt spark. If you end up killing all four Boyons, you can also dip in the acid for the spark interrupt. Entrance condition: {
"comeInWithRMode": {}
}Requires: {
"or": [
"h_CrystalFlashForReserveEnergy",
{
"and": [
"h_RModeCanRefillReserves",
{
"resourceMissingAtMost": [
{
"type": "Missile",
"count": 0
}
]
},
{
"enemyKill": {
"enemies": [
[
"Boyon",
"Boyon",
"Boyon"
]
],
"excludedWeapons": [
"PseudoScrew"
]
}
},
{
"or": [
{
"and": [
"canBeLucky",
{
"partialRefill": {
"type": "ReserveEnergy",
"limit": 5
}
}
]
},
{
"and": [
"canBeVeryLucky",
{
"partialRefill": {
"type": "ReserveEnergy",
"limit": 20
}
}
]
}
]
}
]
}
]
}
{
"or": [
{
"canShineCharge": {
"usedTiles": 25,
"openEnd": 0
}
},
{
"and": [
"canTrivialUseFrozenEnemies",
{
"canShineCharge": {
"usedTiles": 31,
"openEnd": 0
}
},
{
"disableEquipment": "Ice"
}
]
}
]
}
{
"autoReserveTrigger": {}
}
"canRModeSparkInterrupt"Clears obstacles: A |
From: 5
Alcatraz Door
To: 8
Central Junction
There are scroll PLMs next to the bomb blocks and on the ledge below the Alcatraz exit, which will overload PLMs when going through them. Samus will need to briefly navigate off-screen while to the right of Alcatraz before coming back left. With a fast ascent, the global Geemers may still be in the top right section and can hit Samus off-screen. Use X-Ray until the beam reaches full width to exit G-mode and remain in R-mode. Kill the Skree while in health-bomb range, then the Geemers until Samus has Reserve Energy. Shinecharge and interrupt on a Geemer or the Ripper on the left. With unlucky drops, it is possible to not get Reserve Energy. It is possible to farm the top right off-screen Geemer to help reduce the chance. With Morph, partially enter the Alcatraz morph tunnel in order to fix the camera. Without Morph, kill the Geemer with a Power Bomb once in this section after overloading PLMs and before unmorphing and exiting G-mode. Entrance condition: {
"comeInWithGMode": {
"mode": "direct",
"morphed": true
}
}Requires: "h_ZebesIsAwake"
{
"not": "f_ZebesSetAblaze"
}
"h_artificialMorphMovement"
{
"or": [
{
"and": [
{
"or": [
"canRiskPermanentLossOfAccess",
{
"disableEquipment": "ETank"
}
]
},
{
"or": [
{
"partialRefill": {
"type": "ReserveEnergy",
"limit": 5
}
},
{
"and": [
{
"or": [
"Morph",
"canBeLucky",
"h_artificialMorphPowerBomb"
]
},
{
"partialRefill": {
"type": "ReserveEnergy",
"limit": 20
}
}
]
}
]
}
]
},
{
"and": [
"canRiskPermanentLossOfAccess",
{
"resourceMissingAtMost": [
{
"type": "RegularEnergy",
"count": 5
}
]
},
{
"partialRefill": {
"type": "ReserveEnergy",
"limit": 50
}
}
]
},
{
"and": [
{
"disableEquipment": "ETank"
},
{
"resourceAvailable": [
{
"type": "RegularEnergy",
"count": 94
}
]
},
{
"partialRefill": {
"type": "ReserveEnergy",
"limit": 50
}
}
]
}
]
}
{
"canShineCharge": {
"usedTiles": 25,
"steepUpTiles": 3,
"steepDownTiles": 3,
"openEnd": 0
}
}
{
"autoReserveTrigger": {}
}
"canRModeSparkInterrupt" |
From: 1
Left Door
To: 1
Left Door
Crystal Flashing on the Zebbo spawner will usually not deal enough damage to Samus to trigger reserves. One way to make this fairly reliable is to kill the Yapping Maw then take a Zebbo hit while on its spawner, and then place the Power Bomb such that it explodes and kills a Zebbo shortly after it spawns. Samus will then pick up the drop and start Crystal Flashing where her refill is usually in a good rhythm for the Zebbo to be able to trigger reserves. There is an approximate 2/3 chance of success. This can only be done suitless and with no E-Tanks. Requires: {
"obstaclesCleared": [
"R-Mode"
]
}
"canComplexRModeCrystalFlashInterrupt"
{
"ammo": {
"type": "Missile",
"count": 10
}
}
{
"ammo": {
"type": "Super",
"count": 10
}
}
"canBeLucky"Resets obstacles: R-Mode Dev note: This can not be done in G-mode, because the Power Bomb will kill the Zebbo and prevent more from spawning. |
|
Jump and Morph very quickly to place a bomb to boost Samus to the right. The bomb should be as far right as possible, and just above door height. Requires: "h_bombThings"
{
"or": [
"canBeLucky",
"Bombs",
{
"ammo": {
"type": "PowerBomb",
"count": 4
}
}
]
}
{
"tech": "canUnmorphBombBoost"
}
"canResetFallSpeed"
"can4HighMidAirMorph"Collects items: 3 Dev note: canBeLucky added for difficulty placement. |
|

Due to R-Mode Entry, getting hit by the Sidehopper can only be avoided by a quick Screw Attack after releasing the X-Ray Scope. You can attempt to farm the two ground Sidehoppers for Reserve Energy. Otherwise, you must use a Crystal Flash. Leave the ceiling Sidehopper alive to clear the runway for a shortcharge. Initiate the shinespark in midair so that Samus is in the path to be hit. Entrance condition: {
"comeInWithRMode": {}
}Requires: "h_ZebesIsAwake"
{
"or": [
"ScrewAttack",
{
"and": [
{
"enemyDamage": {
"enemy": "Sidehopper",
"type": "contact",
"hits": 1
}
},
{
"enemyKill": {
"enemies": [
[
"Sidehopper",
"Sidehopper"
]
],
"explicitWeapons": [
"Missile",
"Super",
"PowerBomb",
"Plasma"
]
}
}
]
}
]
}
{
"or": [
"h_CrystalFlashForReserveEnergy",
{
"and": [
"h_RModeCanRefillReserves",
{
"or": [
{
"and": [
{
"resourceMissingAtMost": [
{
"type": "Missile",
"count": 0
}
]
},
{
"resourceMissingAtMost": [
{
"type": "Super",
"count": 0
}
]
}
]
},
"canBeVeryLucky"
]
},
"canBeLucky",
{
"partialRefill": {
"type": "ReserveEnergy",
"limit": 20
}
}
]
}
]
}
"canTrickyDodgeEnemies"
{
"canShineCharge": {
"usedTiles": 25,
"openEnd": 0
}
}
{
"autoReserveTrigger": {
"maxReserveEnergy": 95
}
}
"canRModeSparkInterrupt"Clears obstacles: C Dev note: FIXME: More equipment combinations can work. |
|
The hoppers have a poor energy drop rate. The rightmost two can be killed easily for two chances at a drop, otherwise a Crystal Flash must be used to get reserves. Entrance condition: {
"comeInWithRMode": {}
}Requires: "h_ZebesIsAwake"
{
"or": [
"h_CrystalFlashForReserveEnergy",
{
"and": [
"h_usePowerBomb",
"h_RModeCanRefillReserves",
{
"or": [
{
"and": [
{
"resourceMissingAtMost": [
{
"type": "Missile",
"count": 0
}
]
},
{
"resourceMissingAtMost": [
{
"type": "Super",
"count": 0
}
]
}
]
},
"canBeVeryLucky"
]
},
"canBeLucky",
{
"partialRefill": {
"type": "ReserveEnergy",
"limit": 20
}
}
]
}
]
}
{
"or": [
{
"and": [
{
"getBlueSpeed": {
"usedTiles": 21,
"openEnd": 1
}
},
"canSpeedball"
]
},
"h_bombThings"
]
}
{
"canShineCharge": {
"usedTiles": 21,
"openEnd": 1
}
}
{
"autoReserveTrigger": {
"maxReserveEnergy": 95
}
}
"canRModeSparkInterrupt"Clears obstacles: A, B, C |
From: 1
Left Door
To: 4
Top Left Item
Climbing the room and remaining at the top has a very high risk of getting hit by a Waver. Quickly move to the right and exit G-mode to fix the camera. It is possible to kill the Wavers off-screen with one or two Power Bombs or a blue suit; Screw Attack is also relatively safe. Without any of those, it is best to roll to the right without unmorphing, and requires a bit of luck. Entrance condition: {
"comeInWithGMode": {
"mode": "any",
"morphed": true
}
}Requires: "canOffScreenMovement"
"canComplexGMode"
"h_artificialMorphIBJ"
{
"or": [
"ScrewAttack",
"h_artificialMorphPowerBomb",
"canBeLucky",
{
"haveBlueSuit": {}
},
{
"enemyDamage": {
"enemy": "Waver",
"type": "contact",
"hits": 1
}
}
]
} |
From: 1
Left Door
To: 4
Top Left Item
Climbing the room and remaining at the top has a very high risk of getting hit by a Waver. Quickly move to the right and exit G-mode to fix the camera. It is possible to kill the Wavers off-screen with one or two Power Bombs or a blue suit; Screw Attack is also relatively safe. With Morph alone, it is possible to cross but requires some luck. Entrance condition: {
"comeInWithGMode": {
"mode": "any",
"morphed": false
}
}Requires: "canOffScreenMovement"
"canComplexGMode"
{
"or": [
"canWallJump",
"SpaceJump",
{
"and": [
"HiJump",
"canTrickyUseFrozenEnemies"
]
},
{
"and": [
"HiJump",
"canSpringBallJumpMidAir"
]
},
{
"and": [
{
"blueSuitShinecharge": {}
},
{
"or": [
{
"shinespark": {
"frames": 13,
"excessFrames": 4
}
},
{
"and": [
"HiJump",
{
"shinespark": {
"frames": 9,
"excessFrames": 4
}
}
]
}
]
}
]
}
]
}
{
"or": [
"ScrewAttack",
"h_usePowerBomb",
{
"and": [
"canBeLucky",
"Morph"
]
},
{
"haveBlueSuit": {}
},
{
"enemyDamage": {
"enemy": "Waver",
"type": "contact",
"hits": 1
}
}
]
} |
|


Maximum two Kihunters can be killed for energy, and their drop rate is poor. Otherwise, Crystal Flash. Turn off extra beams and shoot off the remaining Kihunter's wings to help trap it against the side, giving free access to the runway. Entrance condition: {
"comeInWithRMode": {}
}Requires: {
"or": [
"h_CrystalFlashForReserveEnergy",
{
"and": [
"canTrickyDodgeEnemies",
"h_RModeCanRefillReserves",
{
"resourceMissingAtMost": [
{
"type": "Missile",
"count": 0
}
]
},
{
"or": [
{
"and": [
{
"partialRefill": {
"type": "ReserveEnergy",
"limit": 20
}
},
"canBeLucky"
]
},
{
"partialRefill": {
"type": "ReserveEnergy",
"limit": 5
}
}
]
}
]
}
]
}
{
"canShineCharge": {
"usedTiles": 32,
"openEnd": 0
}
}
{
"autoReserveTrigger": {
"maxReserveEnergy": 95
}
}
"canRModeSparkInterrupt" |
From: 2
Top Right Door
To: 2
Top Right Door
Maximum two Kihunters can be killed for energy, and their drop rate is poor. Otherwise, Crystal Flash. Turn off extra beams and shoot off the remaining Kihunter's wings to help trap it against the side, giving free access to the runway. Entrance condition: {
"comeInWithRMode": {},
"comesThroughToilet": "no"
}Requires: {
"or": [
"h_CrystalFlashForReserveEnergy",
{
"and": [
"h_RModeCanRefillReserves",
{
"resourceMissingAtMost": [
{
"type": "Missile",
"count": 0
}
]
},
{
"or": [
{
"and": [
{
"partialRefill": {
"type": "ReserveEnergy",
"limit": 20
}
},
"canBeLucky"
]
},
{
"partialRefill": {
"type": "ReserveEnergy",
"limit": 5
}
}
]
}
]
}
]
}
{
"canShineCharge": {
"usedTiles": 32,
"openEnd": 0
}
}
{
"autoReserveTrigger": {
"maxReserveEnergy": 95
}
}
"canRModeSparkInterrupt" |
From: 4
Top Left Junction
To: 4
Top Left Junction
Kill both Sidehoppers for energy, or else Crystal Flash (kill both Sidehoppers anyway so you have the runway free). Use the spikes for pause-abuse interrupt. Requires: {
"obstaclesCleared": [
"R-Mode"
]
}
{
"obstaclesCleared": [
"A"
]
}
{
"or": [
"h_CrystalFlashForReserveEnergy",
{
"and": [
"h_RModeCanRefillReserves",
{
"resourceMissingAtMost": [
{
"type": "Missile",
"count": 0
}
]
},
{
"resourceMissingAtMost": [
{
"type": "Super",
"count": 0
}
]
},
{
"or": [
{
"and": [
"canBeLucky",
{
"partialRefill": {
"type": "ReserveEnergy",
"limit": 5
}
}
]
},
{
"and": [
"canBeVeryLucky",
{
"partialRefill": {
"type": "ReserveEnergy",
"limit": 20
}
}
]
}
]
}
]
}
]
}
{
"or": [
{
"canShineCharge": {
"usedTiles": 16,
"openEnd": 0
}
},
{
"and": [
{
"spikeHits": 1
},
"canUseIFrames",
{
"canShineCharge": {
"usedTiles": 23,
"openEnd": 0
}
}
]
}
]
}
{
"autoReserveTrigger": {}
}
"canRModePauseAbuseSparkInterrupt"Resets obstacles: R-Mode |
From: 1
Left Door
To: 1
Left Door
Kill the hoppers. Use Spike X-Mode to gain shine charge, then use manual reserve and pause abuse on the spikes to interrupt the shinespark. Requires: {
"obstaclesCleared": [
"R-Mode"
]
}
{
"obstaclesCleared": [
"A"
]
}
{
"or": [
{
"and": [
"h_CrystalFlashForReserveEnergy",
"h_usePowerBomb",
"canOffScreenMovement"
]
},
{
"and": [
"h_RModeCanRefillReserves",
{
"resourceMissingAtMost": [
{
"type": "Missile",
"count": 0
}
]
},
{
"resourceMissingAtMost": [
{
"type": "Super",
"count": 0
}
]
},
{
"or": [
{
"and": [
"canBeLucky",
{
"partialRefill": {
"type": "ReserveEnergy",
"limit": 5
}
}
]
},
{
"and": [
"canBeVeryLucky",
{
"partialRefill": {
"type": "ReserveEnergy",
"limit": 20
}
}
]
}
]
}
]
}
]
}
"h_destroyBombWalls"
"h_spikeXModeShinecharge"
"canBeVeryPatient"
"canPauseAbuse"
{
"autoReserveTrigger": {}
}
"canRModeSparkInterrupt"Resets obstacles: R-Mode, C |
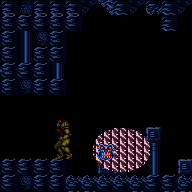
|


Four Boyons to farm have a poor chance of providing reserve energy. Once you have it, damage down to 20/10/5 energy and jump into the plant with forward moement for shinecharge. Jump high above a Boyon and interrupt, or use the thorns and pause abuse. Entrance condition: {
"comeInWithRMode": {}
}Requires: {
"or": [
"h_CrystalFlashForReserveEnergy",
{
"and": [
{
"enemyKill": {
"enemies": [
[
"Boyon",
"Boyon",
"Boyon"
]
]
}
},
"h_RModeCanRefillReserves",
{
"resourceMissingAtMost": [
{
"type": "Missile",
"count": 0
}
]
},
{
"or": [
{
"and": [
"canBeLucky",
{
"partialRefill": {
"type": "ReserveEnergy",
"limit": 5
}
}
]
},
{
"and": [
"canBeVeryLucky",
{
"partialRefill": {
"type": "ReserveEnergy",
"limit": 20
}
}
]
}
]
}
]
}
]
}
"canSamusEaterStandUp"
{
"samusEaterCycles": 1
}
"h_shinechargeMaxRunway"
{
"autoReserveTrigger": {
"maxReserveEnergy": 95
}
}
"canRModeSparkInterrupt" |
From: 1
Right Door
To: 1
Right Door
Kill the Sidehoppers using only morph and beams or Screw Attack. Using morph and dodging it can be done damage-free. Shinecharge on the runway, then take a ceiling thorn hit and pause abuse to spark interrupt. Entrance condition: {
"comeInWithRMode": {}
}Requires: {
"or": [
{
"and": [
"Morph",
"canDodgeWhileShooting",
"canCameraManip",
"canTrickyJump"
]
},
"ScrewAttack"
]
}
"h_RModeCanRefillReserves"
{
"resourceMissingAtMost": [
{
"type": "Missile",
"count": 0
}
]
}
{
"resourceMissingAtMost": [
{
"type": "Super",
"count": 0
}
]
}
{
"or": [
{
"and": [
"canBeLucky",
{
"partialRefill": {
"type": "ReserveEnergy",
"limit": 20
}
}
]
},
{
"partialRefill": {
"type": "ReserveEnergy",
"limit": 5
}
}
]
}
{
"canShineCharge": {
"usedTiles": 29,
"openEnd": 0
}
}
{
"autoReserveTrigger": {}
}
"canHorizontalDamageBoost"
"canRModePauseAbuseSparkInterrupt"Clears obstacles: A |
|


Climb up 1 screen. Kill the Cacatac once Samus' feet at almost off-camera. Entrance condition: {
"comeInWithDoorStuckSetup": {}
}Requires: "canXRayClimb"
{
"or": [
"Wave",
"Spazer",
"canBeLucky",
{
"enemyDamage": {
"enemy": "Cacatac",
"type": "spike",
"hits": 1
}
}
]
} |
|
Kill a Zebbo so that its drop is out of the way then Crystal Flash so a Zebbo can hit Samus from below and trigger reserves. The positioning of the Crystal Flash is pixel-perfect; Samus must be overhanging one of the Zebbo spawners while on the last pixel of the ledge. Note that a Zebbo will usually not deal enough damage to Samus to trigger reserves. One way to make this fairly reliable is to wait for its drop to dissapear then quickly place a Power Bomb such that it explodes and kills a Zebbo and Samus immediately collects its drop as she lands. This can only be done with no enemy damage reduction and no E-Tanks. When placing the Power Bomb quickly after the drop disappears, it may be best to be hanging off the left, so the bug hits the right side of Samus. When placing it 15 frames after the drop disappears, there is an 11-frame window, of which 10 frames will work. Otherwise, randomly placing the Power Bomb there is approximately a 60% chance that the Zebbo will trigger reserves, regardless of which side Samus is on. Entrance condition: {
"comeInWithRMode": {}
}Requires: "canComplexRModeCrystalFlashInterrupt"
"canBeLucky"
{
"ammo": {
"type": "Missile",
"count": 10
}
}
{
"ammo": {
"type": "Super",
"count": 10
}
}
{
"ammo": {
"type": "PowerBomb",
"count": 5
}
}Dev note: This can not be done in G-mode, because the Power Bomb will kill the Zebbo and prevent more from spawning. TAS-ing this out, there were 58 frames where the bug would reach Samus and 34 on the left worked, 33 on the right worked. But, if subpixels matter, this might not be accurate, as it was only tested with one random subpixel value. |
From: 1
Left Vertical Door
To: 5
Kihunter Junction


Farm Kihunters, keeping one alive. Knock its wings off and freeze it on one end of the room, or use i-frames to run through it. Run across to shinecharge, then use the Kihunter to interrupt. Entrance condition: {
"comeInWithRMode": {},
"comesThroughToilet": "no"
}Requires: "canTrickyJump"
"canDodgeWhileShooting"
{
"or": [
"h_CrystalFlashForReserveEnergy",
{
"and": [
"h_RModeCanRefillReserves",
{
"or": [
{
"partialRefill": {
"type": "ReserveEnergy",
"limit": 5
}
},
{
"and": [
{
"partialRefill": {
"type": "ReserveEnergy",
"limit": 20
}
},
"canBeLucky"
]
}
]
}
]
}
]
}
{
"or": [
"canUseIFrames",
"canUseFrozenEnemies"
]
}
{
"canShineCharge": {
"usedTiles": 27,
"openEnd": 2
}
}
{
"autoReserveTrigger": {
"maxReserveEnergy": 95
}
}
"canRModeSparkInterrupt"Clears obstacles: C |
From: 2
Bottom Right Door
To: 5
Kihunter Junction
Farm Kihunters from below, keeping one alive. Knock its wings off and either freeze it or take a hit and use i-frames to run through it. Run across the left side of the broken shot block, then use the Kihunter to interrupt. Entrance condition: {
"comeInWithRMode": {}
}Requires: "h_crouchJumpDownGrab"
{
"or": [
"canTrickyDodgeEnemies",
{
"enemyDamage": {
"enemy": "Kihunter (green)",
"type": "contact",
"hits": 2
}
}
]
}
{
"or": [
"h_CrystalFlashForReserveEnergy",
{
"and": [
"h_RModeCanRefillReserves",
{
"or": [
{
"partialRefill": {
"type": "ReserveEnergy",
"limit": 5
}
},
{
"and": [
{
"partialRefill": {
"type": "ReserveEnergy",
"limit": 20
}
},
"canBeLucky"
]
}
]
}
]
}
]
}
{
"or": [
"canUseIFrames",
"canUseFrozenEnemies"
]
}
{
"canShineCharge": {
"usedTiles": 13,
"openEnd": 2
}
}
{
"autoReserveTrigger": {
"maxReserveEnergy": 95
}
}
"canRModeSparkInterrupt"Clears obstacles: C, D |
From: 3
Top Right Door
To: 5
Kihunter Junction
Bomb the block: if using a Power Bomb, place it no further left than under the item to avoid breaking the shot block. Farm Kihunters using the morph tunnel as needed, keeping one alive. Knock its wings off and freeze it on one end of the room, or use i-frames to run through it. Run across to shinecharge, then use the Kihunter to interrupt. Entrance condition: {
"comeInWithRMode": {}
}Requires: "h_bombThings"
{
"or": [
"h_CrystalFlashForReserveEnergy",
{
"and": [
"h_RModeCanRefillReserves",
{
"or": [
{
"partialRefill": {
"type": "ReserveEnergy",
"limit": 5
}
},
{
"and": [
{
"partialRefill": {
"type": "ReserveEnergy",
"limit": 20
}
},
"canBeLucky"
]
}
]
}
]
}
]
}
{
"or": [
"canUseIFrames",
"canUseFrozenEnemies"
]
}
{
"canShineCharge": {
"usedTiles": 27,
"openEnd": 2
}
}
{
"autoReserveTrigger": {
"maxReserveEnergy": 95
}
}
"canRModeSparkInterrupt"Clears obstacles: B, C |
From: 2
Left Side - Top Middle Door
To: 7
Top Right Door


Entrance condition: {
"comeInShinecharged": {}
}Requires: {
"or": [
{
"and": [
"canSpeedyJump",
{
"shineChargeFrames": 125
}
]
},
{
"and": [
{
"shineChargeFrames": 160
},
{
"enemyDamage": {
"enemy": "Waver",
"type": "contact",
"hits": 1
}
}
]
}
]
}
"canHeroShot"
"HiJump"
"canWallJump"
"canShinechargeMovementTricky"
{
"shinespark": {
"frames": 27,
"excessFrames": 0
}
}
{
"or": [
"canBeLucky",
{
"enemyDamage": {
"enemy": "Cacatac",
"type": "spike",
"hits": 1
}
}
]
}Exit condition: {
"leaveWithSpark": {}
}Unlocks doors: {"types":["super"],"requires":[]}
{"types":["missiles","powerbomb"],"requires":["never"]} |
From: 7
Top Right Door
To: 1
Left Side - Top Door


Dealing with spikes is up to luck. It is possible to shoot the Cacatac while jumping towards it. Entrance condition: {
"comeInShinecharged": {}
}Requires: {
"shineChargeFrames": 100
}
"canShinechargeMovementComplex"
"canCarefulJump"
{
  "or": [
    "canBeLucky",
    {
      "enemyDamage": {
        "enemy": "Cacatac",
        "type": "spike",
        "hits": 1
      }
    }
  ]
}
{
  "shinespark": {
    "frames": 30,
    "excessFrames": 6
  }
} |
From: 7
Top Right Door
To: 1
Left Side - Top Door
Dealing with spikes is up to luck. It is possible to shoot the Cacatac while jumping towards it. Entrance condition: {
"comeInShinecharging": {
"length": 2.5,
"openEnd": 1
}
}Requires: "canShinechargeMovementComplex"
"canCarefulJump"
{
"or": [
"canBeLucky",
{
"enemyDamage": {
"enemy": "Cacatac",
"type": "spike",
"hits": 1
}
}
]
}
{
"shinespark": {
"frames": 30,
"excessFrames": 6
}
} |
From: 1
Left Door
To: 1
Left Door
Ride the Tripper across to the center platform. Farm the right-side Tripper. Enter X-Mode on the spike and shinecharge, then use heat damage to interrupt. Ride the Tripper back to the left door before farming it on the way out. Entrance condition: {
"comeInWithRMode": {}
}Requires: "h_heatProof"
"Morph"
"h_RModeCanRefillReserves"
{
"enemyKill": {
"enemies": [
[
"Tripper"
]
]
}
}
{
"resourceMissingAtMost": [
{
"type": "Missile",
"count": 0
}
]
}
{
"or": [
{
"partialRefill": {
"type": "ReserveEnergy",
"limit": 5
}
},
{
"and": [
{
"or": [
"h_lavaProof",
"Grapple",
{
"and": [
"canWallJump",
{
"or": [
"Super",
"Ice"
]
}
]
},
"SpaceJump"
]
},
{
"partialRefill": {
"type": "ReserveEnergy",
"limit": 20
}
},
{
"or": [
{
"enemyKill": {
"enemies": [
[
"Tripper"
]
]
}
},
"canBeLucky"
]
}
]
}
]
}
"canBeVeryPatient"
"canXMode"
"h_XModeSpikeHit"
"h_shinechargeMaxRunway"
{
"disableEquipment": "Varia"
}
{
"disableEquipment": "Gravity"
}
{
"autoReserveTrigger": {}
}
"canRModePauseAbuseSparkInterrupt" |
From: 1
Left Door
To: 2
Right Door
Ride the Tripper across to the center platform, then farm it for energy. Enter X-Mode on the spike and shinecharge, then use heat damage to interrupt. Ride the second tripper to the opposite door - farm it on the way out if needed. Entrance condition: {
"comeInWithRMode": {}
}Requires: "h_heatProof"
"Morph"
"h_RModeCanRefillReserves"
{
"enemyKill": {
"enemies": [
[
"Tripper"
]
]
}
}
{
"resourceMissingAtMost": [
{
"type": "Missile",
"count": 0
}
]
}
{
"or": [
{
"partialRefill": {
"type": "ReserveEnergy",
"limit": 5
}
},
{
"and": [
{
"or": [
"h_lavaProof",
"Grapple",
{
"and": [
"canWallJump",
{
"or": [
"Super",
"Ice"
]
}
]
},
"SpaceJump"
]
},
{
"partialRefill": {
"type": "ReserveEnergy",
"limit": 20
}
},
{
"or": [
{
"enemyKill": {
"enemies": [
[
"Tripper"
]
]
}
},
"canBeLucky"
]
}
]
}
]
}
"canBeVeryPatient"
"canXMode"
"h_XModeSpikeHit"
"h_shinechargeMaxRunway"
{
"disableEquipment": "Varia"
}
{
"disableEquipment": "Gravity"
}
{
"autoReserveTrigger": {}
}
"canRModePauseAbuseSparkInterrupt"Exit condition: {
"leaveNormally": {}
}Unlocks doors: {"nodeId":2,"types":["ammo"],"requires":[]} |
From: 2
Right Door
To: 1
Left Door
Ride the Tripper across to the center platform, then farm it for energy. Enter X-Mode on the spike and shinecharge, then use heat damage to interrupt. Ride the second tripper to the opposite door - farm it on the way out if needed. Entrance condition: {
"comeInWithRMode": {}
}Requires: "h_heatProof"
"Morph"
"h_RModeCanRefillReserves"
{
"enemyKill": {
"enemies": [
[
"Tripper"
]
]
}
}
{
"resourceMissingAtMost": [
{
"type": "Missile",
"count": 0
}
]
}
{
"or": [
{
"partialRefill": {
"type": "ReserveEnergy",
"limit": 5
}
},
{
"and": [
{
"or": [
"h_lavaProof",
"Grapple",
{
"and": [
"canWallJump",
{
"or": [
"Super",
"Ice"
]
}
]
},
"SpaceJump"
]
},
{
"partialRefill": {
"type": "ReserveEnergy",
"limit": 20
}
},
{
"or": [
{
"enemyKill": {
"enemies": [
[
"Tripper"
]
]
}
},
"canBeLucky"
]
}
]
}
]
}
"canBeVeryPatient"
"canXMode"
"h_XModeSpikeHit"
"h_shinechargeMaxRunway"
{
"disableEquipment": "Varia"
}
{
"disableEquipment": "Gravity"
}
{
"autoReserveTrigger": {}
}
"canRModePauseAbuseSparkInterrupt"Exit condition: {
"leaveNormally": {}
}Unlocks doors: {"nodeId":1,"types":["ammo"],"requires":[]} |
From: 1
Top Left Door
To: 1
Top Left Door
Kill the bottom standing pirate. Shinecharge over the PB blocks and then jump into a wall pirate shot to interrupt. Entrance condition: {
"comeInWithRMode": {}
}Requires: "h_heatProof"
"h_RModeCanRefillReserves"
"canDodgeWhileShooting"
{
"or": [
{
"enemyKill": {
"enemies": [
[
"Yellow Space Pirate (standing)",
"Yellow Space Pirate (wall)",
"Yellow Space Pirate (wall)"
]
],
"explicitWeapons": [
"ScrewAttack",
"Charge+Plasma",
"Charge+Ice+Wave+Spazer",
"Missile",
"Super"
]
}
},
{
"and": [
{
"enemyKill": {
"enemies": [
[
"Yellow Space Pirate (standing)",
"Yellow Space Pirate (wall)",
"Yellow Space Pirate (wall)"
]
],
"explicitWeapons": [
"Charge"
]
}
},
"canBePatient"
]
}
]
}
{
"or": [
{
"resourceMissingAtMost": [
{
"type": "Missile",
"count": 0
}
]
},
"canBeLucky"
]
}
{
"partialRefill": {
"type": "ReserveEnergy",
"limit": 20
}
}
{
"or": [
{
"canShineCharge": {
"usedTiles": 12,
"openEnd": 0
}
},
{
"and": [
{
"doorUnlockedAtNode": 1
},
{
"canShineCharge": {
"usedTiles": 13,
"openEnd": 0
}
}
]
}
]
}
{
"autoReserveTrigger": {
"maxReserveEnergy": 95
}
}
"canRModeSparkInterrupt"Unlocks doors: {"nodeId":1,"types":["missiles","super"],"requires":[]}
{"nodeId":1,"types":["powerbomb"],"requires":["never"]} |
|
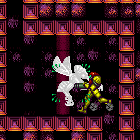
Kill the pirates to get them out of the way before using a Crystal Flash on the floating platform to open the bomb barrier. Alternatively, farm them for energy and use a Power Bomb on the floating platform. Shinecharge at the bottom runway and then jump into a Viola to interrupt. For power bomb pirate kill: interrupt the standing pirate with a shot then jump and place the power bomb low to hit all three pirates. Repeat three times. For slow charge beam: interrupt with a shot, then crouch and fire charged shots. Jump when the wall pirate approaches to make it jump to the other wall. Entrance condition: {
"comeInWithRMode": {}
}Requires: "h_heatProof"
{
"or": [
{
"and": [
{
"or": [
{
"enemyKill": {
"enemies": [
[
"Yellow Space Pirate (standing)",
"Yellow Space Pirate (wall)",
"Yellow Space Pirate (wall)"
]
],
"explicitWeapons": [
"ScrewAttack",
"Charge+Plasma",
"Charge+Ice+Wave+Spazer",
"Missile",
"Super"
]
}
},
{
"and": [
{
"enemyKill": {
"enemies": [
[
"Yellow Space Pirate (standing)",
"Yellow Space Pirate (wall)",
"Yellow Space Pirate (wall)"
]
],
"explicitWeapons": [
"Charge"
]
}
},
"canBePatient"
]
},
"h_usePowerBomb"
]
},
"h_heatedCrystalFlashForReserveEnergy"
]
},
{
"and": [
"h_heatProof",
"h_RModeCanRefillReserves",
"canDodgeWhileShooting",
{
"or": [
{
"enemyKill": {
"enemies": [
[
"Yellow Space Pirate (standing)",
"Yellow Space Pirate (wall)",
"Yellow Space Pirate (wall)"
]
],
"explicitWeapons": [
"ScrewAttack",
"Charge+Plasma",
"Charge+Ice+Wave+Spazer",
"Missile",
"Super"
]
}
},
{
"and": [
{
"enemyKill": {
"enemies": [
[
"Yellow Space Pirate (standing)",
"Yellow Space Pirate (wall)",
"Yellow Space Pirate (wall)"
]
],
"explicitWeapons": [
"Charge"
]
}
},
"canBePatient"
]
},
{
"and": [
{
"enemyKill": {
"enemies": [
[
"Yellow Space Pirate (standing)",
"Yellow Space Pirate (wall)",
"Yellow Space Pirate (wall)"
]
],
"explicitWeapons": [
"PowerBomb"
]
}
},
"canTrickyDodgeEnemies"
]
}
]
},
{
"or": [
{
"resourceMissingAtMost": [
{
"type": "Missile",
"count": 0
}
]
},
"canBeLucky"
]
},
"h_usePowerBomb",
{
"partialRefill": {
"type": "ReserveEnergy",
"limit": 20
}
}
]
}
]
}
{
"or": [
{
"canShineCharge": {
"usedTiles": 12,
"gentleUpTiles": 2,
"gentleDownTiles": 2,
"openEnd": 0
}
},
{
"and": [
{
"or": [
{
"doorUnlockedAtNode": 2
},
{
"doorUnlockedAtNode": 3
}
]
},
{
"canShineCharge": {
"usedTiles": 13,
"gentleUpTiles": 2,
"gentleDownTiles": 2,
"openEnd": 0
}
}
]
},
{
"and": [
{
"doorUnlockedAtNode": 2
},
{
"doorUnlockedAtNode": 3
},
{
"canShineCharge": {
"usedTiles": 14,
"gentleUpTiles": 2,
"gentleDownTiles": 2,
"openEnd": 0
}
}
]
}
]
}
{
"autoReserveTrigger": {}
}
"canRModeSparkInterrupt"Clears obstacles: A Unlocks doors: {"nodeId":2,"types":["ammo"],"requires":[]}
{"nodeId":3,"types":["ammo"],"requires":[]} |
From: 1
Top Left Door
To: 6
R-Mode, Bottom Junction
Enter G-Mode with a full reserve tank. Wait for the wall pirate to jump on Samus to regain mobility and enter artificial morph. Lay a power bomb on top of the second pit from the left, wait for it to explode, then unmorph, activate X-Ray and hold until the beam reaches full width to exit G-Mode and remain in R-Mode. Samus will fall into the pit and avoid getting hit by the pirate lasers. Use jump shots or Screw Attack to kill the pirate safely. Shinecharge at the bottom runway and use heat damage to interrupt. Entrance condition: {
"comeInWithGMode": {
"mode": "direct",
"morphed": true,
"mobility": "immobile"
}
}Requires: "h_heatProof"
{
"disableEquipment": "ETank"
}
{
"resourceAvailable": [
{
"type": "RegularEnergy",
"count": 99
}
]
}
"h_artificialMorphPowerBomb"
{
"enemyKill": {
"enemies": [
[
"Yellow Space Pirate (standing)"
]
],
"excludedWeapons": [
"Bombs"
]
}
}
{
"or": [
{
"resourceMissingAtMost": [
{
"type": "Missile",
"count": 0
}
]
},
"canBeLucky"
]
}
{
"partialRefill": {
"type": "ReserveEnergy",
"limit": 5
}
}Clears obstacles: A |
From: 1
Top Left Door
To: 6
R-Mode, Bottom Junction
Enter G-Mode with a full reserve tank. Wait for the wall pirate to jump on Samus to regain mobility and enter artificial morph. While the pirate is still near the wall, use bomb boosts to trigger the pirate to attempt to shoot and then turn right. Repeat until shots are overloaded, which is after the pirate shoots at least 6 times. Damage the pirate with bombs: between 17 and 23 total bomb hits. If it gets too close to the door, use a bomb boost to force it to walk back to the right. Once enough bombs have hit, use one more bomb boost to force the pirate against the right wall. Get close, lay a power bomb, then unmorph and remain crouched. Immediately activate X-Ray and hold until the beam is at full width to exit G-Mode and remain in R-Mode. The Power Bomb should finish off the pirate - collect the drop. Shinecharge at the bottom runway and use heat damage to interrupt. Entrance condition: {
"comeInWithGMode": {
"mode": "direct",
"morphed": true,
"mobility": "immobile"
}
}Requires: "h_heatProof"
{
"disableEquipment": "ETank"
}
{
"resourceAvailable": [
{
"type": "RegularEnergy",
"count": 99
}
]
}
"h_artificialMorphBombs"
"h_artificialMorphPowerBomb"
"canComplexGMode"
{
"or": [
{
"resourceMissingAtMost": [
{
"type": "Missile",
"count": 0
}
]
},
"canBeLucky"
]
}
{
"partialRefill": {
"type": "ReserveEnergy",
"limit": 5
}
}Clears obstacles: A |
From: 1
Top Left Door
To: 6
R-Mode, Bottom Junction
Enter G-Mode with a full reserve tank. Wait for the wall pirate to jump on Samus to regain mobility and enter artificial morph. Lay three power bombs to kill the standing pirate. Avoid being boosted by the powerbombs to prevent excess shots from the wall pirate. Go all the way to the right and unmorph, then activate and hold X-Ray until the beam is at full width to exit G-Mode and remain in R-Mode. Release X-Ray and Samus will fall into the pit without getting hit by the pirate lasers. Pick up energy drops and drop to the bottom section. Shinecharge at the bottom runway and use heat damage to interrupt. Entrance condition: {
"comeInWithGMode": {
"mode": "direct",
"morphed": true,
"mobility": "immobile"
}
}Requires: "h_heatProof"
{
"disableEquipment": "ETank"
}
{
"resourceAvailable": [
{
"type": "RegularEnergy",
"count": 99
}
]
}
"h_artificialMorphPowerBomb"
{
"ammo": {
"type": "PowerBomb",
"count": 2
}
}
{
"or": [
{
"resourceMissingAtMost": [
{
"type": "Missile",
"count": 0
}
]
},
"canBeLucky"
]
}
{
"partialRefill": {
"type": "ReserveEnergy",
"limit": 5
}
}Clears obstacles: A |
From: 4
Top Right Door
To: 1
Top Left Door
Avoid the wall pirate while falling in. Kill the bottom standing pirate. Shinecharge over the PB blocks and then jump into a wall pirate shot to interrupt. Entrance condition: {
"comeInWithRMode": {}
}Requires: "h_heatProof"
"canCarefulJump"
{
"enemyKill": {
"enemies": [
[
"Yellow Space Pirate (standing)",
"Yellow Space Pirate (wall)",
"Yellow Space Pirate (wall)"
]
],
"excludedWeapons": [
"PowerBomb"
]
}
}
"h_RModeCanRefillReserves"
"canDodgeWhileShooting"
{
"or": [
{
"enemyKill": {
"enemies": [
[
"Yellow Space Pirate (standing)",
"Yellow Space Pirate (wall)",
"Yellow Space Pirate (wall)"
]
],
"explicitWeapons": [
"ScrewAttack",
"Charge+Plasma",
"Charge+Ice+Wave+Spazer",
"Missile",
"Super"
]
}
},
{
"and": [
{
"enemyKill": {
"enemies": [
[
"Yellow Space Pirate (standing)",
"Yellow Space Pirate (wall)",
"Yellow Space Pirate (wall)"
]
],
"explicitWeapons": [
"Charge"
]
}
},
"canBePatient"
]
}
]
}
{
"or": [
{
"resourceMissingAtMost": [
{
"type": "Missile",
"count": 0
}
]
},
"canBeLucky"
]
}
{
"partialRefill": {
"type": "ReserveEnergy",
"limit": 20
}
}
{
"or": [
{
"canShineCharge": {
"usedTiles": 12,
"openEnd": 0
}
},
{
"and": [
{
"doorUnlockedAtNode": 1
},
{
"canShineCharge": {
"usedTiles": 13,
"openEnd": 0
}
}
]
}
]
}
{
"autoReserveTrigger": {
"maxReserveEnergy": 95
}
}
"canRModeSparkInterrupt"Unlocks doors: {"nodeId":1,"types":["missiles","super"],"requires":[]}
{"nodeId":1,"types":["powerbomb"],"requires":["never"]} |
From: 4
Top Right Door
To: 5
Bottom Junction
Kill the pirates to get them out of the way before using a Crystal Flash on the floating platform to open the bomb barrier. Alternatively, farm them for energy and use a Power Bomb on the floating platform. Shinecharge at the bottom runway and then jump into a Viola to interrupt. For power bomb pirate kill: interrupt the standing pirate with a shot then jump and place the power bomb low to hit all three pirates. Repeat three times. For slow charge beam: interrupt with a shot, then crouch and fire charged shots. Jump when the wall pirate approaches to make it jump to the other wall. Entrance condition: {
"comeInWithRMode": {}
}Requires: "h_heatProof"
{
"or": [
{
"and": [
{
"or": [
{
"enemyKill": {
"enemies": [
[
"Yellow Space Pirate (standing)",
"Yellow Space Pirate (wall)",
"Yellow Space Pirate (wall)"
]
],
"explicitWeapons": [
"ScrewAttack",
"Charge+Plasma",
"Charge+Ice+Wave+Spazer",
"Missile",
"Super"
]
}
},
{
"and": [
{
"enemyKill": {
"enemies": [
[
"Yellow Space Pirate (standing)",
"Yellow Space Pirate (wall)",
"Yellow Space Pirate (wall)"
]
],
"explicitWeapons": [
"Charge"
]
}
},
"canBePatient"
]
},
"h_usePowerBomb"
]
},
"h_heatedCrystalFlashForReserveEnergy"
]
},
{
"and": [
"h_heatProof",
"h_RModeCanRefillReserves",
"canDodgeWhileShooting",
{
"or": [
{
"enemyKill": {
"enemies": [
[
"Yellow Space Pirate (standing)",
"Yellow Space Pirate (wall)",
"Yellow Space Pirate (wall)"
]
],
"explicitWeapons": [
"ScrewAttack",
"Charge+Plasma",
"Charge+Ice+Wave+Spazer",
"Super"
]
}
},
{
"and": [
{
"enemyKill": {
"enemies": [
[
"Yellow Space Pirate (standing)",
"Yellow Space Pirate (wall)",
"Yellow Space Pirate (wall)"
]
],
"explicitWeapons": [
"Charge"
]
}
},
"canBePatient"
]
},
{
"and": [
{
"enemyKill": {
"enemies": [
[
"Yellow Space Pirate (standing)",
"Yellow Space Pirate (wall)",
"Yellow Space Pirate (wall)"
]
],
"explicitWeapons": [
"PowerBomb"
]
}
},
"canTrickyDodgeEnemies"
]
}
]
},
{
"or": [
{
"resourceMissingAtMost": [
{
"type": "Missile",
"count": 0
}
]
},
"canBeLucky"
]
},
"h_usePowerBomb",
{
"partialRefill": {
"type": "ReserveEnergy",
"limit": 20
}
}
]
}
]
}
{
"or": [
{
"canShineCharge": {
"usedTiles": 12,
"gentleUpTiles": 2,
"gentleDownTiles": 2,
"openEnd": 0
}
},
{
"and": [
{
"or": [
{
"doorUnlockedAtNode": 2
},
{
"doorUnlockedAtNode": 3
}
]
},
{
"canShineCharge": {
"usedTiles": 13,
"gentleUpTiles": 2,
"gentleDownTiles": 2,
"openEnd": 0
}
}
]
},
{
"and": [
{
"doorUnlockedAtNode": 2
},
{
"doorUnlockedAtNode": 3
},
{
"canShineCharge": {
"usedTiles": 14,
"gentleUpTiles": 2,
"gentleDownTiles": 2,
"openEnd": 0
}
}
]
}
]
}
{
"autoReserveTrigger": {}
}
"canRModeSparkInterrupt"Clears obstacles: A Unlocks doors: {"nodeId":2,"types":["ammo"],"requires":[]}
{"nodeId":3,"types":["ammo"],"requires":[]} |
|
Cross to the center platform to get to the shinecharge runway. Any Dragons you kill along the way, you can try to collect their drops with Grapple Beam instead of risking the acid. Keep one Dragon to the left of the elevator to use their fireball for interrupt. Or you can also use a heat interrupt. Entrance condition: {
"comeInWithRMode": {}
}Requires: {
"or": [
{
"and": [
"canTrickyJump",
{
"heatFrames": 570
}
]
},
{
"and": [
"SpaceJump",
{
"heatFrames": 510
}
]
},
{
"and": [
"h_heatProof",
"Morph",
{
"enemyKill": {
"enemies": [
[
"Dragon"
]
],
"explicitWeapons": [
"PowerBombPeriphery"
]
}
},
{
"enemyKill": {
"enemies": [
[
"Dragon",
"Dragon"
]
],
"explicitWeapons": [
"PowerBomb"
]
}
}
]
}
]
}
{
"or": [
"h_heatedCrystalFlashForReserveEnergy",
{
"and": [
{
"or": [
"Grapple",
"SpaceJump"
]
},
"canTrickyJump",
"h_heatProof",
"h_RModeCanRefillReserves",
{
"enemyKill": {
"enemies": [
[
"Dragon"
]
],
"excludedWeapons": [
"Missile",
"PowerBomb"
]
}
},
{
"resourceMissingAtMost": [
{
"type": "Missile",
"count": 0
}
]
},
{
"or": [
{
"partialRefill": {
"type": "ReserveEnergy",
"limit": 5
}
},
{
"and": [
"canBeLucky",
{
"partialRefill": {
"type": "ReserveEnergy",
"limit": 20
}
}
]
}
]
}
]
}
]
}
{
"heatFrames": 300
}
{
"canShineCharge": {
"usedTiles": 24.5,
"openEnd": 1
}
}
{
"autoReserveTrigger": {
"maxReserveEnergy": 95
}
}
"canRModeSparkInterrupt"
{
"heatFrames": 80
} |
|


Cross to the center platform to get to the shinecharge runway. Of the two Dragons left of the elevator, farm the left one and to use the right one's fireball to interrupt while at the leftmost side of the of the center runway. Or you can also use a heat interrupt. Entrance condition: {
"comeInWithRMode": {}
}Requires: {
"heatFrames": 360
}
{
"or": [
"h_heatedCrystalFlashForReserveEnergy",
{
"and": [
{
"or": [
"Grapple",
"SpaceJump"
]
},
"canTrickyJump",
"h_heatProof",
{
"enemyKill": {
"enemies": [
[
"Dragon"
]
],
"excludedWeapons": [
"Missile",
"PowerBomb"
]
}
},
{
"resourceMissingAtMost": [
{
"type": "Missile",
"count": 0
}
]
},
{
"or": [
{
"partialRefill": {
"type": "ReserveEnergy",
"limit": 5
}
},
{
"and": [
"canBeLucky",
{
"partialRefill": {
"type": "ReserveEnergy",
"limit": 20
}
}
]
}
]
}
]
}
]
}
{
"heatFrames": 300
}
{
"canShineCharge": {
"usedTiles": 24.5,
"openEnd": 1
}
}
{
"autoReserveTrigger": {
"maxReserveEnergy": 95
}
}
"canRModeSparkInterrupt"
{
"heatFrames": 80
} |
|
Use normal bombs or a Power Bomb to open the bomb blocks, then navigate the Multiviola boxes. Kill the two right Dessgeegas, then clear the rest of the runway. Use the Multiviola at the end to interrupt, or use a heat interrupt. If Samus ends up needing to Crystal Flash at any point, remember that Samus cannot use Power Bombs or X-Ray afterwards until R-Mode ends. Entrance condition: {
"comeInWithRMode": {}
}Requires: "canBeLucky"
{
"or": [
{
"and": [
"h_usePowerBomb",
{
"heatFrames": 180
}
]
},
{
"and": [
{
"heatFrames": 160
},
{
"or": [
"ScrewAttack",
{
"and": [
"h_useMorphBombs",
{
"heatFrames": 60
}
]
}
]
}
]
}
]
}
{
"or": [
{
"and": [
"ScrewAttack",
{
"heatFrames": 650
}
]
},
{
"and": [
"Plasma",
{
"heatFrames": 850
},
{
"or": [
"Wave",
{
"heatFrames": 300
}
]
}
]
},
{
"and": [
{
"or": [
{
"and": [
{
"enemyKill": {
"enemies": [
[
"Multiviola",
"Multiviola"
],
[
"Multiviola",
"Multiviola",
"Multiviola"
]
],
"explicitWeapons": [
"PowerBomb"
]
}
},
{
"heatFrames": 500
}
]
},
{
"and": [
"Ice",
"Wave",
"Spazer",
{
"heatFrames": 750
}
]
},
{
"and": [
"Wave",
{
"heatFrames": 1350
}
]
},
{
"and": [
{
"heatFrames": 400
},
{
"enemyDamage": {
"enemy": "Multiviola",
"type": "contact",
"hits": 3
}
}
]
}
]
},
{
"or": [
{
"and": [
{
"enemyKill": {
"enemies": [
[
"Dessgeega",
"Dessgeega"
]
],
"explicitWeapons": [
"Missile"
]
}
},
{
"heatFrames": 670
}
]
},
{
"and": [
{
"enemyKill": {
"enemies": [
[
"Dessgeega",
"Dessgeega"
]
],
"explicitWeapons": [
"Super"
]
}
},
{
"heatFrames": 400
}
]
},
{
"and": [
{
"enemyKill": {
"enemies": [
[
"Dessgeega",
"Dessgeega"
]
],
"explicitWeapons": [
"PowerBomb"
]
}
},
{
"heatFrames": 500
}
]
},
{
"and": [
"Ice",
"Wave",
"Spazer",
{
"heatFrames": 750
}
]
}
]
}
]
},
{
"and": [
"h_heatProof",
{
"enemyKill": {
"enemies": [
[
"Dessgeega",
"Dessgeega"
]
],
"excludedWeapons": [
"Bombs",
"PseudoScrew",
"PowerBomb"
]
}
}
]
}
]
}
{
"or": [
{
"and": [
{
"getBlueSpeed": {
"usedTiles": 23,
"openEnd": 2
}
},
{
"heatFrames": 200
}
]
},
{
"and": [
"h_heatProof",
"canDodgeWhileShooting",
{
"enemyKill": {
"enemies": [
[
"Dessgeega"
],
[
"Dessgeega"
],
[
"Dessgeega"
],
[
"Multiviola"
],
[
"Multiviola"
]
],
"excludedWeapons": [
"Bombs",
"PseudoScrew",
"PowerBomb",
"PowerBeam"
]
}
}
]
},
{
"and": [
{
"heatFrames": 400
},
"Plasma",
{
"or": [
"Wave",
{
"heatFrames": 100
}
]
}
]
},
{
"and": [
{
"enemyKill": {
"enemies": [
[
"Dessgeega"
],
[
"Dessgeega"
],
[
"Dessgeega"
],
[
"Multiviola"
],
[
"Multiviola"
]
],
"explicitWeapons": [
"Missile"
]
}
},
{
"heatFrames": 500
}
]
},
{
"and": [
{
"enemyKill": {
"enemies": [
[
"Dessgeega"
],
[
"Dessgeega"
],
[
"Dessgeega"
],
[
"Multiviola"
],
[
"Multiviola"
]
],
"explicitWeapons": [
"Super"
]
}
},
{
"heatFrames": 400
}
]
},
{
"and": [
"ScrewAttack",
{
"heatFrames": 320
}
]
}
]
}
"h_RModeCanRefillReserves"
{
"partialRefill": {
"type": "ReserveEnergy",
"limit": 20
}
}
"h_shinechargeMaxRunway"
{
"autoReserveTrigger": {
"maxReserveEnergy": 95
}
}
"canRModeSparkInterrupt"
{
"heatFrames": 30
}Clears obstacles: A, B, C, D, E, F |
|
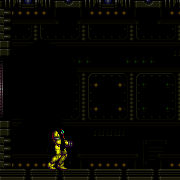
To save Energy, it is possible to lure a pirate to the door and pause abuse to grab its Energy drop on G-mode exit. This requires traversing the room quickly enough to prevent the enemies from overloading shots, or by using Ice and Plasma to freeze the Namihes on the descent. Either kill the lowest pirate immediately as it lands on the left wall, which requires a large Energy drop to escape (2/3 chance), or let it jump back to the right and hope it climbs low fast enough to be able to escape with even a small drop (50% chance, or Plasma and Ice). Entrance condition: {
"comeInWithGMode": {
"mode": "any",
"morphed": false
}
}Requires: {
"or": [
"ScrewAttack",
{
"haveBlueSuit": {}
}
]
}
{
"or": [
"h_heatedGModeOpenDifferentDoor",
{
"and": [
"h_heatedGModePauseAbuse",
"canBeLucky"
]
},
{
"and": [
"h_heatedGModePauseAbuse",
"Ice",
"Plasma"
]
}
]
}Clears obstacles: A |
From: 4
Junction Above Bomb Block
To: 1
Top Left Door

Wait for the Kihunters to move away from where Samus will jump up. This may mean Hitboxing through the middle Kihunter multiple times. Requires: "canDash"
"h_PlasmaHitbox"
"canTrickyDodgeEnemies"
{
"or": [
"canInsaneJump",
{
"enemyDamage": {
"enemy": "Kihunter (red)",
"type": "contact",
"hits": 1
}
}
]
}
{
"or": [
{
"and": [
"canWallJump",
{
"heatFrames": 410
}
]
},
{
"and": [
"h_crouchJumpDownGrab",
{
"heatFrames": 460
}
]
},
{
"and": [
"HiJump",
{
"heatFrames": 360
}
]
},
{
"and": [
"SpaceJump",
"canInsaneJump",
{
"heatFrames": 490
}
]
}
]
}
{
"or": [
"canBeLucky",
{
"heatFrames": 130
}
]
}
{
"or": [
"Wave",
{
"heatFrames": 40
}
]
}Clears obstacles: A, B |
From: 4
Junction Right of Power Bomb Blocks
To: 4
Junction Right of Power Bomb Blocks
Farm the Dessgeegas, their energy rate is poor. Keep one Dessgeega alive to use for interrupt. Or kill all four and use heat with pause abuse to interrupt. Requires: {
"obstaclesCleared": [
"R-Mode"
]
}
{
"obstaclesCleared": [
"C",
"D"
]
}
{
"or": [
"h_heatedCrystalFlashForReserveEnergy",
{
"and": [
"h_RModeCanRefillReserves",
{
"or": [
{
"partialRefill": {
"type": "ReserveEnergy",
"limit": 5
}
},
{
"and": [
"canBeLucky",
{
"partialRefill": {
"type": "ReserveEnergy",
"limit": 20
}
}
]
}
]
}
]
}
]
}
{
"heatFrames": 90
}
{
"canShineCharge": {
"usedTiles": 30,
"openEnd": 0
}
}
{
"autoReserveTrigger": {
"maxReserveEnergy": 95
}
}
"canRModeSparkInterrupt"Resets obstacles: R-Mode Dev note: FIXME: Evaluate unprotected heat option with disable E-Tank + CF for full reserves, once heated bluesuit movement is implemented. |
|

Crystal Flash and have Phantoon spawn on top of Samus to trigger reserves. Requires a bit of luck. Entrance condition: {
"comeInWithRMode": {}
}Requires: {
"not": "f_DefeatedPhantoon"
}
"canRiskPermanentLossOfAccess"
"canBeLucky"
"canComplexRModeCrystalFlashInterrupt"
{
"ammo": {
"type": "Missile",
"count": 10
}
}
{
"ammo": {
"type": "Super",
"count": 10
}
}
{
"ammo": {
"type": "PowerBomb",
"count": 10
}
}Clears obstacles: door_1 |
From: 1
Right Door
To: 1
Right Door
Power Off: Crystal Flash, enter X-Mode using the bottom spikes and shinecharge, then pause abuse from the spikes to interrupt. Power On: Crystal Flash or farm Skultera. Enter X-Mode using the bottom spikes and shinecharge, then pause abuse from the spikes to interrupt. Entrance condition: {
"comeInWithRMode": {}
}Requires: {
"or": [
"Gravity",
{
"and": [
{
"not": "f_DefeatedPhantoon"
},
"canRiskPermanentLossOfAccess"
]
}
]
}
{
"or": [
"h_CrystalFlashForReserveEnergy",
{
"and": [
"f_DefeatedPhantoon",
"h_RModeCanRefillReserves",
"canBeLucky",
{
"resourceMissingAtMost": [
{
"type": "Missile",
"count": 0
}
]
},
{
"or": [
{
"partialRefill": {
"type": "ReserveEnergy",
"limit": 5
}
},
{
"and": [
{
"partialRefill": {
"type": "ReserveEnergy",
"limit": 20
}
},
"canBeVeryLucky"
]
}
]
}
]
}
]
}
"canBeVeryPatient"
"h_thornXModeShinecharge"
"h_thornXModeFramePerfectExtraLeniency"
{
"autoReserveTrigger": {}
}
"canRModePauseAbuseSparkInterrupt" |
From: 3
Top Right Door
To: 3
Top Right Door
Crystal Flashing in one of the Zebbo spawner holes will usually not deal enough damage to Samus to trigger reserves. One way to make this fairly reliable is to take a Zebbo hit and then place the Power Bomb such that it explodes and kills a Zebbo shortly after it spawns. Samus will then pick up the drop and start Crystal Flashing where her refill is usually in a good rhythm for the Zebbo to be able to trigger reserves. There is an approximate 2/3 chance of success. This can only be done suitless and with no E-Tanks. Requires: {
"obstaclesCleared": [
"R-Mode"
]
}
"canComplexRModeCrystalFlashInterrupt"
{
"ammo": {
"type": "Missile",
"count": 10
}
}
{
"ammo": {
"type": "Super",
"count": 5
}
}
"canBeLucky"Resets obstacles: R-Mode Dev note: This strat does not work in G-mode because the Power Bomb will prevent the Zebbos from respawning, and the Boyons don't deal enough damage. |
From: 4
Farm Junction Left of Gate
To: 4
Farm Junction Left of Gate
Crystal Flashing in one of the Zebbo spawner holes will usually not deal enough damage to Samus to trigger reserves. One way to make this fairly reliable is to take a Zebbo hit and then place the Power Bomb such that it explodes and kills a Zebbo shortly after it spawns. Samus will then pick up the drop and start Crystal Flashing where her refill is usually in a good rhythm for the Zebbo to be able to trigger reserves. There is an approximate 2/3 chance of success. This can only be done suitless and with no E-Tanks. Requires: {
"obstaclesCleared": [
"R-Mode"
]
}
"canComplexRModeCrystalFlashInterrupt"
{
"ammo": {
"type": "Missile",
"count": 10
}
}
{
"ammo": {
"type": "Super",
"count": 5
}
}
"canBeLucky"Resets obstacles: R-Mode Dev note: This strat does not work in G-mode because the Power Bomb will prevent the Zebbos from respawning, and the Boyons don't deal enough damage. Coming from below will also put Samus off-camera fand the Zebbos can not deal damage. |
|
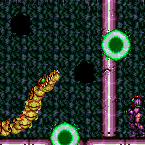
Stand near the dividing wall and unleash the Plasma Special Beam Attack! Requires: {
"notable": "Back-Side Plasma Shield Fight"
}
"h_navigateUnderwater"
"canSpecialBeamAttack"
"Plasma"
{
"ammo": {
"type": "PowerBomb",
"count": 5
}
}
{
"or": [
"canBeLucky",
{
"ammo": {
"type": "PowerBomb",
"count": 2
}
}
]
}
{
"or": [
"Gravity",
"canTrickyDodgeEnemies",
{
"enemyDamage": {
"enemy": "Botwoon 1",
"type": "acid",
"hits": 2
}
}
]
}Clears obstacles: f_DefeatedBotwoon Sets flags: f_DefeatedBotwoon |
|


Wait for Botwoon to spawn then use a Plasma Special Beam Attack. Use XRay to slow time and watch for a particle to overlap Botwoons head, then proceed to Microwave. Requires: {
"notable": "Back-Side Plasma Shield Microwave"
}
"h_navigateUnderwater"
"canSpecialBeamAttack"
"Plasma"
"canXRayWaitForIFrames"
{
"ammo": {
"type": "PowerBomb",
"count": 1
}
}
{
"or": [
"canTrickyDodgeEnemies",
{
"ammo": {
"type": "PowerBomb",
"count": 2
}
}
]
}
{
"or": [
"canBeLucky",
{
"ammo": {
"type": "PowerBomb",
"count": 1
}
}
]
}Clears obstacles: f_DefeatedBotwoon Sets flags: f_DefeatedBotwoon Dev note: Killing in 1 SBA takes some luck. Microwaving effeciently takes some dexterity. This strat only applies to those who don't know the magic pixel strat is possible. |
|

Kill Draygon by grappling to the top left turret. Number of Draygon and turret hits varies; Close to a worst-case scenario is assumed. Requires: {
"notable": "Grapple Kill"
}
"h_navigateUnderwater"
{
"or": [
{
"and": [
"h_breakThreeDraygonTurrets",
{
"or": [
"Gravity",
"canTrickyJump",
{
"enemyDamage": {
"enemy": "Draygon",
"type": "turretProjectile",
"hits": 1
}
}
]
},
{
"or": [
"Gravity",
"Morph",
"canTrickyJump",
{
"enemyDamage": {
"enemy": "Draygon",
"type": "contact",
"hits": 1
}
}
]
}
]
},
{
"and": [
"canDodgeWhileShooting",
{
"or": [
"Gravity",
"canTrickyJump",
{
"enemyDamage": {
"enemy": "Draygon",
"type": "turretProjectile",
"hits": 3
}
}
]
},
{
"or": [
"Gravity",
{
"enemyDamage": {
"enemy": "Draygon",
"type": "turretProjectile",
"hits": 2
}
}
]
},
{
"or": [
"Morph",
{
"enemyDamage": {
"enemy": "Draygon",
"type": "contact",
"hits": 2
}
}
]
},
{
"enemyDamage": {
"enemy": "Draygon",
"type": "turretProjectile",
"hits": 2
}
}
]
},
{
"and": [
"canTrickyDodgeEnemies",
"canBeLucky",
{
"enemyDamage": {
"enemy": "Draygon",
"type": "turretProjectile",
"hits": 1
}
}
]
}
]
}
"canUseGrapple"
{
"draygonElectricityFrames": 240
}
{
"or": [
{
"enemyDamage": {
"enemy": "Draygon",
"type": "contact",
"hits": 4
}
},
{
"and": [
"canBeLucky",
{
"enemyDamage": {
"enemy": "Draygon",
"type": "contact",
"hits": 2
}
}
]
}
]
}Clears obstacles: f_DefeatedDraygon Sets flags: f_DefeatedDraygon |
|

Kill Draygon by grappling to an exposed turret as you get grabbed. This avoids taking damage from Draygon once grabbed. Requires: {
"notable": "Grapple Quick Kill"
}
"h_navigateUnderwater"
"canPreciseGrapple"
{
"or": [
"Gravity",
"Morph",
"canTrickyDodgeEnemies",
{
"enemyDamage": {
"enemy": "Draygon",
"type": "contact",
"hits": 2
}
}
]
}
{
"or": [
"Gravity",
"canTrickyJump",
{
"enemyDamage": {
"enemy": "Draygon",
"type": "turretProjectile",
"hits": 1
}
}
]
}
{
"or": [
"h_breakThreeDraygonTurrets",
{
"and": [
{
"or": [
"canTrickyDodgeEnemies",
{
"enemyDamage": {
"enemy": "Draygon",
"type": "turretProjectile",
"hits": 2
}
}
]
},
"h_breakOneDraygonTurret"
]
},
{
"and": [
"Gravity",
"canTrickyDodgeEnemies",
{
"or": [
"canBeLucky",
{
"enemyDamage": {
"enemy": "Draygon",
"type": "turretProjectile",
"hits": 1
}
}
]
},
{
"or": [
"canWallJump",
"canGravityJump"
]
}
]
}
]
}
{
"draygonElectricityFrames": 240
}
"h_complexToCarryFlashSuit"Clears obstacles: f_DefeatedDraygon Sets flags: f_DefeatedDraygon Dev note: FIXME: HiJump + canDoubleSpringBallJumpMidAir can work but needs to be looked into more. |
|


Shinecharge in-room, then horizontally spark through Draygon multiple times. It takes 3 Shinesparks if that is the only source of damage onto Draygon. Be careful of taking damage at the end of a Shinespark when near walls and on the killing Shinespark. Requires: {
"notable": "Shinespark Kill"
}
"Gravity"
"canShinechargeMovementComplex"
{
"or": [
{
"and": [
"canShinechargeMovementTricky",
{
"enemyDamage": {
"enemy": "Draygon",
"type": "turretProjectile",
"hits": 3
}
}
]
},
{
"and": [
"canShinechargeMovementTricky",
"canBeLucky"
]
},
"h_breakThreeDraygonTurrets"
]
}
{
"canShineCharge": {
"usedTiles": 22,
"openEnd": 0
}
}
{
"or": [
"canTrickyJump",
{
"enemyDamage": {
"enemy": "Draygon",
"type": "contact",
"hits": 1
}
}
]
}
{
"or": [
"HiJump",
{
"enemyDamage": {
"enemy": "Draygon",
"type": "contact",
"hits": 1
}
}
]
}
{
"enemyDamage": {
"enemy": "Draygon",
"type": "contact",
"hits": 2
}
}
{
"shinespark": {
"frames": 150
}
}
{
"or": [
"free",
{
"and": [
{
"not": "f_DefeatedDraygon"
},
"canRiskPermanentLossOfAccess",
"canShinechargeMovementTricky",
{
"gainBlueSuit": {}
}
]
}
]
}Clears obstacles: f_DefeatedDraygon Sets flags: f_DefeatedDraygon Dev note: 150 frames is an approximate sum of all required shinesparks. |
|


From left side, Wait for Shaktool to loop around to the ceiling. Crystal Flash, shinecharge, and jump into the path of Shaktool's rear wheel to interrupt. Or, farm Shaktool with a timed Shinespark: start a diagonal spark from the ground just as Shaktool's back wheel leaves the ceiling, and Shaktool will spawn five drops. Shinecharge again, and use a Yard to interrupt. If Samus came in from the right and can't free Shaktool, there are only the two Yards to work with. Kill a Yard by angering with a shot and then running through it with speed. Requires: {
"obstaclesCleared": [
"R-Mode",
"B"
]
}
{
"or": [
"h_CrystalFlashForReserveEnergy",
{
"and": [
"h_RModeCanRefillReserves",
{
"or": [
{
"and": [
{
"obstaclesCleared": [
"A"
]
},
"h_shinechargeMaxRunway",
{
"shinespark": {
"frames": 4,
"excessFrames": 0
}
},
{
"or": [
{
"and": [
{
"resourceMissingAtMost": [
{
"type": "Missile",
"count": 0
}
]
},
{
"partialRefill": {
"type": "ReserveEnergy",
"limit": 60
}
}
]
},
{
"partialRefill": {
"type": "ReserveEnergy",
"limit": 20
}
}
]
}
]
},
{
"partialRefill": {
"type": "ReserveEnergy",
"limit": 10
}
},
{
"and": [
"canBeLucky",
{
"partialRefill": {
"type": "ReserveEnergy",
"limit": 25
}
}
]
}
]
}
]
}
]
}
"h_shinechargeMaxRunway"
{
"or": [
"canWaterShineCharge",
"Gravity"
]
}
{
"autoReserveTrigger": {}
}
"canRModeSparkInterrupt"Resets obstacles: R-Mode |
|
Walljump into a midair Horizontal Bomb Jump from just above the acid to reach the first platform. HBJ from the ground to reach the second platform. Then simply jump to reach the far runway. Requires: "canInsaneWallJump"
"canWallJumpBombBoost"
"canHBJ"
{
"or": [
{
"obstaclesCleared": [
"B"
]
},
{
"and": [
"canBeLucky",
"canCameraManip",
"canMetroidAvoid"
]
}
]
} |
From: 2
Right Door
To: 2
Right Door

At the bottom of the room, Crystal Flash below a wall pirate to have it walk into Samus. The pirate will randomly walk up and down and wall, but if it sees Samus and jumps across, it will start climbing up the left wall or down the right wall. With some luck, the pirate will sometimes climb down and hit Samus before it goes off camera. Entrance condition: {
"comeInWithGMode": {
"mode": "direct",
"morphed": true
}
}Requires: {
"or": [
"h_artificialMorphMovement",
"canBeLucky"
]
}
"h_artificialMorphComplexRModeCrystalFlashInterrupt"
{
"ammo": {
"type": "Missile",
"count": 10
}
} |