canDoubleBombJump (Expert+)

The ability to place a second bomb near the top of a bomb boost during an IBJ in order to ascend much faster.
Dependencies: canIBJ
Strats ()
|

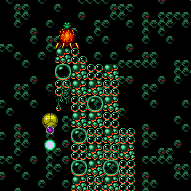
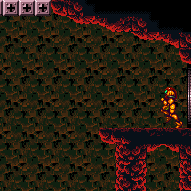
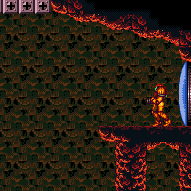
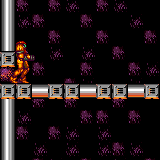
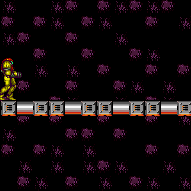
Ascend with a long IBJ, then go through the speed blocks to the item. The Boyons can be killed with bombs or 3 Power Bombs, or Samus can jump through them with Spring Ball, which is easy as long as she doesn't stop jumping. Note that Samus can not bomb boost through the Boyons while blue. Entrance condition: {
"comeInWithGMode": {
"mode": "any",
"morphed": true
}
}Requires: "h_blueSuitGMode"
"h_artificialMorphLongIBJ"
"canBePatient"
{
"or": [
"canBeVeryPatient",
{
"and": [
{
"ammo": {
"type": "PowerBomb",
"count": 3
}
},
"canDoubleBombJump"
]
},
{
"and": [
"h_artificialMorphSpringBall",
"canDoubleBombJump"
]
}
]
} |
From: 2
Bottom Left Door
To: 4
Top Junction (Right of Spikes)
Ascend with a long IBJ, then go through the speed blocks to the item. The Boyons can be killed with bombs or 3 Power Bombs, or Samus can jump through them with Spring Ball, which is easy as long as she doesn't stop jumping. Note that Samus can not bomb boost through the Boyons while blue. Entrance condition: {
"comeInWithGMode": {
"mode": "any",
"morphed": true
}
}Requires: "h_blueSuitGMode"
"h_artificialMorphLongIBJ"
"canBePatient"
"canComplexGMode"
"canRemoteAcquire"
{
"or": [
"canBeVeryPatient",
{
"and": [
{
"ammo": {
"type": "PowerBomb",
"count": 3
}
},
"canDoubleBombJump"
]
},
{
"and": [
"h_artificialMorphSpringBall",
"canDoubleBombJump"
]
}
]
}Collects items: 3 Dev note: FIXME: It would be possible to remote acquire to the left after using spring into ceiling bomb jump, but it would require restructuring the room, a long CIBJ, and canBeExtremelyPatient. |
From: 2
Bottom Left Door
To: 4
Top Junction (Right of Spikes)
Ascend with a long IBJ, then go through the speed blocks and through the morph tunnel. The Boyons can be killed with bombs or 3 Power Bombs, or Samus can jump through them with Spring Ball, which is easy as long as she doesn't stop jumping. Note that Samus can not bomb boost through the Boyons while blue. Entrance condition: {
"comeInWithGMode": {
"mode": "any",
"morphed": true
}
}Requires: "h_blueSuitGMode"
"h_artificialMorphLongIBJ"
"canBePatient"
{
"or": [
"canBeVeryPatient",
{
"and": [
{
"ammo": {
"type": "PowerBomb",
"count": 3
}
},
"canDoubleBombJump"
]
},
{
"and": [
"h_artificialMorphSpringBall",
"canDoubleBombJump"
]
}
]
}Dev note: There is not a ceiling bomb jump strat from here, because it would be easier to just have X-Ray climbed the room. |
|
Requires: {
"or": [
{
"and": [
{
"resetRoom": {
"nodes": [
2
]
}
},
{
"cycleFrames": 460
}
]
},
{
"and": [
{
"resetRoom": {
"nodes": [
4
]
}
},
{
"cycleFrames": 660
},
{
"or": [
"canWallJump",
"HiJump",
{
"and": [
"canDoubleBombJump",
{
"cycleFrames": 140
}
]
},
{
"and": [
"canSpringBallJumpMidAir",
{
"cycleFrames": 40
},
"h_doubleEquipmentScreenCycleFrames"
]
}
]
}
]
},
{
"and": [
{
"resetRoom": {
"nodes": [
1
]
}
},
{
"cycleFrames": 840
},
{
"or": [
"canWallJump",
"HiJump",
"SpaceJump",
{
"and": [
"canDoubleBombJump",
{
"cycleFrames": 140
},
{
"or": [
{
"cycleFrames": 140
},
"h_crouchJumpDownGrab"
]
}
]
},
{
"and": [
"canSpringBallJumpMidAir",
{
"cycleFrames": 40
},
"h_doubleEquipmentScreenCycleFrames",
{
"or": [
"h_crouchJumpDownGrab",
{
"and": [
{
"cycleFrames": 40
},
"h_doubleEquipmentScreenCycleFrames"
]
}
]
}
]
}
]
}
]
},
{
"and": [
{
"resetRoom": {
"nodes": [
6
]
}
},
{
"cycleFrames": 1900
},
{
"or": [
"canWallJump",
"HiJump",
"SpaceJump",
{
"and": [
"canDoubleBombJump",
{
"cycleFrames": 140
},
{
"or": [
{
"cycleFrames": 140
},
"h_crouchJumpDownGrab"
]
}
]
},
{
"and": [
"canSpringBallJumpMidAir",
{
"cycleFrames": 40
},
"h_doubleEquipmentScreenCycleFrames",
{
"or": [
"h_crouchJumpDownGrab",
{
"and": [
{
"cycleFrames": 40
},
"h_doubleEquipmentScreenCycleFrames"
]
}
]
}
]
}
]
}
]
}
]
}
{
"or": [
"Wave",
"Plasma",
{
"and": [
"Spazer",
{
"cycleFrames": 60
}
]
},
{
"and": [
"ScrewAttack",
{
"cycleFrames": 70
}
]
},
{
"cycleFrames": 130
}
]
}Clears obstacles: B Resets obstacles: A Farm cycle drops: 3 Zero Dev note: Resetting at the bottom of the room (node 3) is covered in a separate 3->3 strat. FIXME: this should probably be adjusted a bit for blue suit. |
|
Requires: {
"or": [
{
"and": [
{
"resetRoom": {
"nodes": [
4
]
}
},
{
"cycleFrames": 210
}
]
},
{
"and": [
{
"or": [
{
"and": [
{
"resetRoom": {
"nodes": [
1,
2
]
}
},
{
"cycleFrames": 400
}
]
},
{
"and": [
{
"resetRoom": {
"nodes": [
3
]
}
},
{
"cycleFrames": 860
}
]
},
{
"and": [
{
"resetRoom": {
"nodes": [
6
]
}
},
{
"cycleFrames": 1470
}
]
}
]
},
{
"or": [
"canWallJump",
"HiJump",
"SpaceJump",
{
"and": [
"canDoubleBombJump",
{
"cycleFrames": 140
}
]
},
{
"and": [
"canSpringBallJumpMidAir",
{
"cycleFrames": 40
},
"h_doubleEquipmentScreenCycleFrames"
]
}
]
}
]
}
]
}
{
"or": [
"Wave",
"Spazer",
"Plasma",
{
"cycleFrames": 40
}
]
}Resets obstacles: A, B Farm cycle drops: 2 Cacatac |
From: 5
Top Right Door (Through Morph Tunnel)
To: 5
Top Right Door (Through Morph Tunnel)
Requires: {
"ammo": {
"type": "Super",
"count": 1
}
}
"Morph"
{
"resetRoom": {
"nodes": [
5
]
}
}
{
"cycleFrames": 1340
}
{
"or": [
"canWallJump",
"HiJump",
"SpaceJump",
{
"and": [
"canDoubleBombJump",
{
"cycleFrames": 140
},
{
"or": [
{
"cycleFrames": 140
},
"h_crouchJumpDownGrab"
]
}
]
},
{
"and": [
"canSpringBallJumpMidAir",
{
"cycleFrames": 40
},
"h_doubleEquipmentScreenCycleFrames",
{
"or": [
"h_crouchJumpDownGrab",
{
"and": [
{
"cycleFrames": 40
},
"h_doubleEquipmentScreenCycleFrames"
]
}
]
}
]
}
]
}
{
"or": [
"Wave",
"Spazer",
"Plasma",
{
"cycleFrames": 250
}
]
}Resets obstacles: A, B Farm cycle drops: 2 Cacatac, 3 Zero Dev note: It is possible to roll off of the platform above to avoid a mid-air morph. FIXME: add a Cac-only farm since it can be done with fewer requirements. |
From: 3
Bottom Left Door
To: 2
Middle Left Door (Behind Power Bomb Blocks)
Requires switching between single and double IBJs. While Doubles are not techincally necessary, they make the strat more bearable. Exit G-Mode before the Power Bomb explodes in order to break the wall. With an extra Power Bomb, it may be worthwhile to use it to kill some of the Rippers. Entrance condition: {
"comeInWithGMode": {
"mode": "any",
"morphed": true
}
}Requires: {
"notable": "IBJ Between the Bottom Rippers"
}
"h_artificialMorphDoubleBombJump"
"h_artificialMorphStaggeredIBJ"
"h_artificialMorphPowerBomb"
"h_artificialMorphLongIBJ"
{
"or": [
"canWallJump",
"HiJump"
]
}Clears obstacles: A Dev note: This will kill the Beetom, which could prevent using it to get up, so this needs to get all the way to 2. Anything with Morph can exit G-Mode at 6. |
From: 3
Bottom Left Door
To: 6
Junction (Above Bottom Rippers)


Requires switching between single and double IBJs. While Doubles are not techincally necessary, they make the strat more bearable. With a Power Bomb, it can help to kill some of the Rippers. Entrance condition: {
"comeInWithGMode": {
"mode": "any",
"morphed": true
}
}Requires: {
"notable": "IBJ Between the Bottom Rippers"
}
"h_artificialMorphDoubleBombJump"
"h_artificialMorphStaggeredIBJ"
"h_artificialMorphPowerBomb"
"h_artificialMorphLongIBJ" |
From: 4
Bottom Right Door
To: 2
Middle Left Door (Behind Power Bomb Blocks)
Requires switching between single and double IBJs. While Doubles are not techincally necessary, they make the strat more bearable. Exit G-Mode before the Power Bomb explodes in order to break the wall. With an extra Power Bomb, it may be worthwhile to use it to kill some of the Rippers. Entrance condition: {
"comeInWithGMode": {
"mode": "any",
"morphed": true
}
}Requires: {
"notable": "IBJ Between the Bottom Rippers"
}
"h_artificialMorphDoubleBombJump"
"h_artificialMorphStaggeredIBJ"
"h_artificialMorphPowerBomb"
"h_artificialMorphLongIBJ"
{
"or": [
"canWallJump",
"HiJump"
]
}Clears obstacles: A Dev note: This will kill the Beetom, which could prevent using it to get up, so this needs to get all the way to 2. Anything with Morph can exit G-Mode at 6. |
From: 4
Bottom Right Door
To: 6
Junction (Above Bottom Rippers)


Requires switching between single and double IBJs. While Doubles are not techincally necessary, they make the strat more bearable. With a Power Bomb, it can help to kill some of the Rippers. Entrance condition: {
"comeInWithGMode": {
"mode": "any",
"morphed": true
}
}Requires: {
"notable": "IBJ Between the Bottom Rippers"
}
"h_artificialMorphDoubleBombJump"
"h_artificialMorphStaggeredIBJ"
"h_artificialMorphPowerBomb"
"h_artificialMorphLongIBJ" |
From: 7
Junction (Bottom of Room)
To: 6
Junction (Above Bottom Rippers)
Requires switching between single and double IBJs. While Doubles are not techincally necessary, they make the strat more bearable. Requires: {
"notable": "IBJ Between the Bottom Rippers"
}
"canDoubleBombJump"
"canStaggeredIBJ"
"canLongIBJ" |
From: 9
Junction (Top Rippers)
To: 9
Junction (Top Rippers)
To kill the Rippers with a single Power Bomb without breaking the ledge, place the bomb just above the second Ripper. Requires: "h_usePowerBomb"
"canCarefulJump"
{
"or": [
"canWallJump",
"canSpringBallJumpMidAir",
"SpaceJump",
{
"and": [
"HiJump",
"canTrickyDashJump"
]
},
{
"and": [
"canJumpIntoIBJ",
{
"or": [
"canStaggeredIBJ",
"canDoubleBombJump"
]
}
]
}
]
}Clears obstacles: B |
From: 10
G-Mode Morph, Above the Power Bomb Blocks
To: 1
Left Side - Top Door

Carefully dodge the Wavers while being prepared to abort the IBJ and start over if necessary. Requires: "canGMode"
"h_artificialMorphLongIBJ"
{
"or": [
"h_artificialMorphPowerBomb",
{
"and": [
"canTrickyDodgeEnemies",
{
"or": [
"canBePatient",
"canDoubleBombJump"
]
}
]
}
]
} |
From: 10
G-Mode Morph, Above the Power Bomb Blocks
To: 7
Top Right Door
Carefully dodge the Wavers while being prepared to abort the IBJ and start over if necessary. It may be best to first IBJ to the top left side and kill the top Waver with Bombs; this can be done by placing bombs in a vertical line, then dodging the Waver as it approaches. Requires: "canGMode"
"h_artificialMorphLongIBJ"
{
"or": [
"h_artificialMorphPowerBomb",
{
"and": [
"canTrickyDodgeEnemies",
"canBePatient",
{
"or": [
"canBeVeryPatient",
"canDoubleBombJump"
]
}
]
}
]
} |
|
Requires: {
"or": [
{
"and": [
"canIBJ",
{
"heatFrames": 1020
}
]
},
{
"and": [
"canDoubleBombJump",
{
"heatFrames": 510
}
]
}
]
} |
|
Requires: {
"or": [
{
"and": [
"canJumpIntoIBJ",
{
"heatFrames": 450
}
]
},
{
"and": [
"canDoubleBombJump",
{
"heatFrames": 300
}
]
}
]
} |
From: 1
Top Left Door
To: 3
Right Door
Overload PLMs by bombing the gate or crumble blocks, then go through the crumble blocks below and get to the door. IBJ past the Ripper or kill it. The Kago bugs will not spawn until Samus exits G-mode, so it is fine to kill it or IBJ from on top of it. Entrance condition: {
"comeInWithGMode": {
"mode": "any",
"morphed": true
}
}Requires: {
"or": [
"h_artificialMorphLongIBJ",
"h_artificialMorphJumpIntoIBJ"
]
}
"h_artificialMorphBombHorizontally"
{
"or": [
"h_artificialMorphPowerBomb",
{
"and": [
"Morph",
{
"ammo": {
"type": "Missile",
"count": 2
}
}
]
},
{
"and": [
"Morph",
{
"ammo": {
"type": "Super",
"count": 1
}
}
]
},
{
"and": [
"h_artificialMorphDoubleBombJump",
"h_artificialMorphStaggeredIBJ"
]
}
]
}
"h_heatedGModeOpenDifferentDoor" |
From: 1
Top Left Door
To: 4
Item
Overload PLMs by bombing the gate or crumble blocks, then go through the crumble blocks below and get to the item. IBJ past the Ripper or kill it. The Kago bugs will not spawn until Samus exits G-mode, so it is fine to kill it or IBJ from on top of it. Entrance condition: {
"comeInWithGMode": {
"mode": "direct",
"morphed": true
}
}Requires: {
"or": [
"h_artificialMorphLongIBJ",
"h_artificialMorphJumpIntoIBJ"
]
}
"h_artificialMorphBombHorizontally"
{
"or": [
"h_artificialMorphPowerBomb",
{
"and": [
"Morph",
{
"ammo": {
"type": "Missile",
"count": 2
}
}
]
},
{
"and": [
"Morph",
{
"ammo": {
"type": "Super",
"count": 1
}
}
]
},
{
"and": [
"h_artificialMorphDoubleBombJump",
"h_artificialMorphStaggeredIBJ"
]
}
]
}
{
"heatFrames": 0
} |
|


Requires: {
"or": [
{
"and": [
"canLongIBJ",
{
"heatFrames": 1450
}
]
},
{
"and": [
"canJumpIntoIBJ",
{
"heatFrames": 960
}
]
},
{
"and": [
"HiJump",
"canJumpIntoIBJ",
{
"heatFrames": 620
}
]
},
{
"and": [
"canDoubleBombJump",
{
"heatFrames": 560
}
]
},
{
"and": [
"HiJump",
"canDoubleBombJump",
{
"heatFrames": 490
}
]
}
]
}
{
"or": [
"canDash",
{
"heatFrames": 30
}
]
} |
From: 2
Bottom Left Door
To: 3
Right Door
Overload PLMs by bombing the gate or crumble blocks, then go through the crumble blocks below and get to the door. IBJ past the Ripper or kill it. The Kago bugs will not spawn until Samus exits G-mode, so it is fine to kill it or IBJ from on top of it. Entrance condition: {
"comeInWithGMode": {
"mode": "any",
"morphed": true
}
}Requires: {
"or": [
"h_artificialMorphLongIBJ",
"h_artificialMorphJumpIntoIBJ"
]
}
"h_artificialMorphBombHorizontally"
{
"or": [
"h_artificialMorphPowerBomb",
{
"and": [
"Morph",
{
"ammo": {
"type": "Missile",
"count": 2
}
}
]
},
{
"and": [
"Morph",
{
"ammo": {
"type": "Super",
"count": 1
}
}
]
},
{
"and": [
"h_artificialMorphDoubleBombJump",
"h_artificialMorphStaggeredIBJ"
]
}
]
}
"h_heatedGModeOpenDifferentDoor" |
From: 2
Bottom Left Door
To: 4
Item
Overload PLMs by bombing the gate or crumble blocks, then go through the crumble blocks below and get to the item. IBJ past the Ripper or kill it. The Kago bugs will not spawn until Samus exits G-mode, so it is fine to kill it or IBJ from on top of it. Entrance condition: {
"comeInWithGMode": {
"mode": "direct",
"morphed": true
}
}Requires: {
"or": [
"h_artificialMorphLongIBJ",
"h_artificialMorphJumpIntoIBJ"
]
}
"h_artificialMorphBombHorizontally"
{
"or": [
"h_artificialMorphPowerBomb",
{
"and": [
"Morph",
{
"ammo": {
"type": "Missile",
"count": 2
}
}
]
},
{
"and": [
"Morph",
{
"ammo": {
"type": "Super",
"count": 1
}
}
]
},
{
"and": [
"h_artificialMorphDoubleBombJump",
"h_artificialMorphStaggeredIBJ"
]
}
]
}
{
"heatFrames": 0
} |
|
Bomb horizontally on room entry to jump over the Ripper and land on the crumble blocks, or use a Power Bomb to kill the Ripper. Avoid touching all 6 crumbles, so Samus can use the item to overload PLMs and go through one of the crumbles to get to the left side of the room. If the item has already been obtained, Samus can shoot or Bomb the gate many times to overload PLMs. Entrance condition: {
"comeInWithGMode": {
"mode": "direct",
"morphed": true
}
}Requires: "canRemoteAcquire"
{
  "or": [
    "h_artificialMorphCeilingBombJump",
    {
      "and": [
        "h_artificialMorphBombHorizontally",
        "h_artificialMorphIBJ",
        "h_artificialMorphPowerBomb"
      ]
    },
    {
      "and": [
        "h_artificialMorphBombHorizontally",
        "canTrickyDodgeEnemies",
        "h_artificialMorphDoubleBombJump",
        "h_artificialMorphStaggeredIBJ"
      ]
    }
  ]
}
"h_heatedGModeOpenDifferentDoor"Collects items: 4 |
From: 3
Right Door
To: 1
Top Left Door

Bomb horizontally on room entry to jump over the Ripper and land on the crumble blocks, or use a Power Bomb to kill the Ripper. Entrance condition: {
"comeInWithGMode": {
"mode": "indirect",
"morphed": true
}
}Requires: {
"or": [
"h_artificialMorphCeilingBombJump",
{
"and": [
"h_artificialMorphBombHorizontally",
"h_artificialMorphIBJ",
"h_artificialMorphPowerBomb"
]
},
{
"and": [
"h_artificialMorphBombHorizontally",
"canTrickyDodgeEnemies",
"h_artificialMorphDoubleBombJump",
"h_artificialMorphStaggeredIBJ"
]
}
]
}
"h_heatedGModeOpenDifferentDoor" |
From: 3
Right Door
To: 2
Bottom Left Door
Bomb horizontally on room entry to jump over the Ripper and land on the crumble blocks, or use a Power Bomb to kill the Ripper. Avoid touching all 6 crumbles, so Samus can use the item to overload PLMs and go through one of the crumbles to get to the left side of the room. If the item has already been obtained, Samus can shoot or Bomb the gate many times to overload PLMs. Entrance condition: {
"comeInWithGMode": {
"mode": "direct",
"morphed": true
}
}Requires: "canRemoteAcquire"
{
  "or": [
    "h_artificialMorphCeilingBombJump",
    {
      "and": [
        "h_artificialMorphBombHorizontally",
        "h_artificialMorphIBJ",
        "h_artificialMorphPowerBomb"
      ]
    },
    {
      "and": [
        "h_artificialMorphBombHorizontally",
        "canTrickyDodgeEnemies",
        "h_artificialMorphDoubleBombJump",
        "h_artificialMorphStaggeredIBJ"
      ]
    }
  ]
}
"h_heatedGModeOpenDifferentDoor"Collects items: 4 |
From: 3
Right Door
To: 2
Bottom Left Door
Bomb horizontally on room entry to jump over the Ripper and land on the crumble blocks, or use a Power Bomb to kill the Ripper. Entrance condition: {
"comeInWithGMode": {
"mode": "indirect",
"morphed": true
}
}Requires: {
"or": [
"h_artificialMorphCeilingBombJump",
{
"and": [
"h_artificialMorphBombHorizontally",
"h_artificialMorphIBJ",
"h_artificialMorphPowerBomb"
]
},
{
"and": [
"h_artificialMorphBombHorizontally",
"canTrickyDodgeEnemies",
"h_artificialMorphDoubleBombJump",
"h_artificialMorphStaggeredIBJ"
]
}
]
}
"h_heatedGModeOpenDifferentDoor" |
From: 3
Right Door
To: 3
Right Door


Bomb horizontally on room entry to jump over the Ripper and land on the crumble blocks, or use a Power Bomb to kill the Ripper. Entrance condition: {
"comeInWithGMode": {
"mode": "direct",
"morphed": true
}
}Requires: "canRemoteAcquire"
{
"or": [
"h_artificialMorphLongCeilingBombJump",
{
"and": [
"h_artificialMorphBombHorizontally",
"h_artificialMorphIBJ",
"h_artificialMorphPowerBomb"
]
},
{
"and": [
"h_artificialMorphBombHorizontally",
"canTrickyDodgeEnemies",
"h_artificialMorphDoubleBombJump",
"h_artificialMorphStaggeredIBJ"
]
}
]
}
"h_heatedDirectGModeLeaveSameDoor"Collects items: 4 |
|
Jump onto the crumble blocks to make them solid, then use them as a platform to cross the room. Entrance condition: {
"comeInWithGMode": {
"mode": "direct",
"morphed": false
}
}Requires: "canRemoteAcquire"
{
"or": [
"SpaceJump",
{
"and": [
"canPreciseGrapple",
"canUseEnemies"
]
},
"canSpringBallJumpMidAir",
"canInsaneWallJump",
{
"and": [
"HiJump",
"canWallJump"
]
},
{
"and": [
"HiJump",
"canSpeedyJump"
]
},
{
"and": [
"canStaggeredIBJ",
"canDoubleBombJump",
"canBombHorizontally"
]
},
{
"and": [
"h_IBJFromSpikes",
"h_IBJFromSpikes"
]
},
{
"and": [
"h_IBJFromSpikes",
"canCameraManip",
"canMoonwalk"
]
}
]
}
"h_heatedDirectGModeLeaveSameDoor"Collects items: 4 |
|
Jump onto the crumble blocks to make them solid, then use them as a platform to cross the room. With Grapple, a running jump then single Grapple swing can be used before PLMs are overloaded, alternatively jump on the crumble blocks and Grapple the Ripper. Entrance condition: {
"comeInWithGMode": {
"mode": "any",
"morphed": false
}
}Requires: {
"or": [
"SpaceJump",
{
"and": [
"canStaggeredIBJ",
"canDoubleBombJump",
"canBombHorizontally"
]
},
{
"and": [
"canDash",
{
"or": [
"canTrickySpringBallJump",
"canInsaneWallJump",
{
"and": [
"HiJump",
"canWallJump"
]
},
{
"and": [
"HiJump",
"canSpeedyJump"
]
},
"h_IBJFromSpikes"
]
}
]
},
{
"and": [
"canPreciseGrapple",
{
"or": [
"canDash",
"canUseEnemies",
"canInsaneJump"
]
}
]
}
]
}
{
"heatFrames": 0
}Dev note: FIXME: some more of these options may be possible with a blue suit, with greater difficulty. |
|
Bomb horizontally on room entry to jump over the Ripper and land on the crumble blocks, or use a Power Bomb to kill the Ripper. Entrance condition: {
"comeInWithGMode": {
"mode": "any",
"morphed": true
}
}Requires: {
"or": [
"h_artificialMorphCeilingBombJump",
{
"and": [
"h_artificialMorphBombHorizontally",
"h_artificialMorphIBJ",
"h_artificialMorphPowerBomb"
]
},
{
"and": [
"h_artificialMorphBombHorizontally",
"canTrickyDodgeEnemies",
"h_artificialMorphDoubleBombJump",
"h_artificialMorphStaggeredIBJ"
]
}
]
}
{
"heatFrames": 0
} |
|
Bomb horizontally on room entry to jump over the Ripper and land on the crumble blocks, or use a Power Bomb to kill the Ripper. In indirect G-mode, stand where the gate will spawn and exit G-mode to open the gate. In direct G-mode, overload PLMs by shooting the gate then position Samus a few pixels away from the gate to where upward diagonal shots go through it. Crouch then shoot diagonally and quickly exit G-mode (3-7 frames later) to open the gate on G-mode exit. Entrance condition: {
"comeInWithGMode": {
"mode": "any",
"morphed": true
}
}Requires: "canComplexGMode"
"h_heatedGMode"
{
"or": [
"h_artificialMorphCeilingBombJump",
{
"and": [
"h_artificialMorphBombHorizontally",
"h_artificialMorphIBJ",
"h_artificialMorphPowerBomb"
]
},
{
"and": [
"h_artificialMorphBombHorizontally",
"canTrickyDodgeEnemies",
"h_artificialMorphDoubleBombJump",
"h_artificialMorphStaggeredIBJ"
]
}
]
}
{
"heatFrames": 35
}Clears obstacles: A Dev note: Artificial morph strats can be useful, for instance, in indirect G-mode without heat protection, where Samus needs to collect the item. The canComplexGMode is only used here to describe opening the gate in direct G-mode without gate glitching. However, the indirect variant still requires canHeatedGMode or Varia - with Varia, indirect strats can instead be used to go to the top left door and return. |
|

Jump onto the crumble blocks to make them solid, then use them as a platform to cross the room. With Grapple, a running jump then single Grapple swing can be used before PLMs are overloaded, alternatively jump on the crumble blocks and Grapple the Ripper. In indirect G-mode, stand where the gate will spawn and exit G-mode to open the gate. In direct G-mode, overload PLMs by shooting the gate then position Samus a few pixels away from the gate to where upward diagonal shots go through it. Crouch then shoot diagonally and quickly exit G-mode (3-7 frames later) to open the gate on G-mode exit. Entrance condition: {
"comeInWithGMode": {
"mode": "any",
"morphed": false
}
}Requires: "canComplexGMode"
"h_heatedGMode"
{
"or": [
"SpaceJump",
{
"and": [
"canStaggeredIBJ",
"canDoubleBombJump",
"canBombHorizontally"
]
},
{
"and": [
"canDash",
{
"or": [
"canTrickySpringBallJump",
"canInsaneWallJump",
{
"and": [
"HiJump",
"canWallJump"
]
},
{
"and": [
"HiJump",
"canSpeedyJump"
]
},
"h_IBJFromSpikes"
]
}
]
},
{
"and": [
"canPreciseGrapple",
{
"or": [
"canDash",
"canUseEnemies",
"canInsaneJump"
]
}
]
}
]
}
{
"heatFrames": 35
}Clears obstacles: A Dev note: The canComplexGMode is only used here to describe opening the gate in direct G-mode without gate glitching. However, the indirect variant still requires canHeatedGMode or Varia - with Varia, indirect strats can instead be used to go to the top left door and return. FIXME: some more of these options may be possible with a blue suit, with greater difficulty. |
|
Requires: "canDash"
"h_heatedIBJFromSpikes"
{
"or": [
{
"heatFrames": 730
},
{
"and": [
"canDoubleBombJump",
{
"heatFrames": 550
}
]
}
]
}Dev note: FIXME: A crumble jump into IBJ is also possible. |
From: 3
Right Door
To: 6
G-Mode, Remote Acquire Junction (Bottom Right)
Bomb horizontally on room entry to jump over the Ripper and land on the crumble blocks, or use a Power Bomb to kill the Ripper. Avoid touching all 6 crumbles, so Samus can use the item to overload PLMs and go through one of the crumbles to get to the left side of the room. If the item has already been obtained, Samus can shoot or Bomb the gate many times to overload PLMs. Entrance condition: {
"comeInWithGMode": {
"mode": "direct",
"morphed": true
}
}Requires: "canRemoteAcquire"
{
  "or": [
    "h_artificialMorphCeilingBombJump",
    {
      "and": [
        "h_artificialMorphBombHorizontally",
        "h_artificialMorphIBJ",
        "h_artificialMorphPowerBomb"
      ]
    },
    {
      "and": [
        "h_artificialMorphBombHorizontally",
        "canTrickyDodgeEnemies",
        "h_artificialMorphDoubleBombJump",
        "h_artificialMorphStaggeredIBJ"
      ]
    }
  ]
}
{
  "heatFrames": 0
}Dev note: This is only useful if the item is Morph, because with Morph, another strat would have been used. |
From: 3
Right Door
To: 6
G-Mode, Remote Acquire Junction (Bottom Right)
Jump onto the crumble blocks to make them solid, then use them as a platform to get to the item. With Grapple, a running jump then single Grapple swing can be used before PLMs are overloaded, alternatively jump on the crumble blocks and Grapple the Ripper. Avoid touching all 6 crumbles, so Samus can use the item to overload PLMs and go through one of the crumbles to get to the left side of the room. If the item has already been obtained, Samus can shoot the gate many times to overload PLMs. Entrance condition: {
"comeInWithGMode": {
"mode": "direct",
"morphed": false
}
}Requires: "canRemoteAcquire"
{
"or": [
"SpaceJump",
"canCeilingBombJump",
{
"and": [
"canBombHorizontally",
"canIBJ",
"h_usePowerBomb"
]
},
{
"and": [
"canStaggeredIBJ",
"canDoubleBombJump",
"canBombHorizontally"
]
},
{
"and": [
"canPreciseGrapple",
"canUseEnemies"
]
},
{
"and": [
"canDash",
{
"or": [
"canTrickySpringBallJump",
"canInsaneWallJump",
{
"and": [
"HiJump",
"canWallJump"
]
},
{
"and": [
"HiJump",
"canSpeedyJump"
]
},
"h_IBJFromSpikes"
]
}
]
}
]
}
{
"heatFrames": 0
} |
From: 3
Right Door
To: 7
G-Mode Junction (Bottom Right)
Jump onto the crumble blocks to make them solid, then use them as a platform to cross the room. With Grapple, a running jump then single Grapple swing can be used before PLMs are overloaded, alternatively jump on the crumble blocks and Grapple the Ripper. Entrance condition: {
"comeInWithGMode": {
"mode": "indirect",
"morphed": false
}
}Requires: "Morph"
{
"or": [
"SpaceJump",
"canCeilingBombJump",
{
"and": [
"canStaggeredIBJ",
"canDoubleBombJump",
"canBombHorizontally"
]
},
{
"and": [
"canBombHorizontally",
"canIBJ",
"h_usePowerBomb"
]
},
{
"and": [
"canDash",
{
"or": [
"canTrickySpringBallJump",
"canInsaneWallJump",
{
"and": [
"HiJump",
"canWallJump"
]
},
{
"and": [
"HiJump",
"canSpeedyJump"
]
},
"h_IBJFromSpikes"
]
}
]
},
{
"and": [
"canPreciseGrapple",
{
"or": [
"canDash",
"canUseEnemies",
"canInsaneJump"
]
}
]
}
]
}
{
"heatFrames": 0
}Dev note: With Grapple, Morph isn't needed, but there's no reason to go there without Morph. |
|


Requires: "canDash"
"h_heatedIBJFromSpikes"
{
"or": [
{
"heatFrames": 730
},
{
"and": [
"canDoubleBombJump",
{
"heatFrames": 550
}
]
}
]
}Dev note: FIXME: A crumble jump into IBJ is also possible. |
|
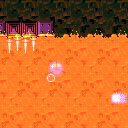
Begin on top of the lower left Namihe Jump into a double IBJ with such timing that Samus passes above the fired flame and such a way that there is no horizontal speed. A forward jump with run not held will work. Begin diagonal bomb jumping once past the start of the 2nd spike group from the top. Requires: {
"notable": "Diagonal Bomb Jump"
}
"h_heatProof"
"Gravity"
{
"or": [
"h_lavaProof",
"canSuitlessLavaDive"
]
}
"canJumpIntoIBJ"
"canLongIBJ"
"canDoubleBombJump"
"canDiagonalBombJump"
"canStaggeredIBJ"
"canInsaneJump"
{
"heatFrames": 1560
}
{
"lavaFrames": 1520
}Dev note: heatProof because each attempt at this strat costs so many heat frames and its hard enough already. |
From: 5
Lava, Center Namihe
To: 3
Above Lava Junction
Align with the above platform and scroll the camera left by walking into the left side of the bottom-most tiles. Freeze both left side Namihes and begin bomb jumping Requires: "Gravity"
{
"or": [
"h_lavaProof",
"canSuitlessLavaDive"
]
}
"canJumpIntoIBJ"
"canLongIBJ"
"canDoubleBombJump"
"Plasma"
"Ice"
"canCameraManip"
{
"heatFrames": 1040
}
{
"lavaFrames": 1020
} |
From: 3
Left Shaft - Middle Right Door
To: 7
Left Shaft - Middle Junction
Requires: "canIBJ"
{
"or": [
{
"heatFrames": 770
},
{
"and": [
"canJumpIntoIBJ",
{
"heatFrames": 320
}
]
},
{
"and": [
"canDoubleBombJump",
{
"heatFrames": 275
}
]
}
]
} |
|
Kill the enemies, then IBJ. Requires: "canIBJ"
{
"or": [
{
"heatFrames": 735
},
{
"and": [
"canJumpIntoIBJ",
{
"heatFrames": 285
}
]
},
{
"and": [
"canDoubleBombJump",
{
"heatFrames": 240
}
]
}
]
}
{
"or": [
"canTrickyDodgeEnemies",
{
"heatFrames": 100
}
]
}
{
"or": [
"canDash",
{
"and": [
{
"haveBlueSuit": {}
},
{
"heatFrames": 40
}
]
}
]
} |
|
Requires: "canIBJ"
{
"or": [
{
"heatFrames": 670
},
{
"and": [
"canJumpIntoIBJ",
{
"heatFrames": 220
}
]
},
{
"and": [
"canDoubleBombJump",
{
"heatFrames": 175
}
]
}
]
} |
From: 8
Left Shaft - Bottom Junction
To: 3
Left Shaft - Middle Right Door
Requires: "canIBJ"
{
"or": [
{
"heatFrames": 670
},
{
"and": [
"canJumpIntoIBJ",
{
"heatFrames": 220
}
]
},
{
"and": [
"canDoubleBombJump",
{
"heatFrames": 175
}
]
}
]
} |
|
With a blue suit, the IBJ must start from the lava, since the blue suit destroys the bomb block platforms. The blue suit can be used to kill the Dragons. Requires: {
"haveBlueSuit": {}
}
"canJumpIntoIBJ"
"canBombHorizontally"
"canBombJumpWaterEscape"
"canInsaneJump"
"canDoubleBombJump"
{
"heatFrames": 1260
}
{
"lavaFrames": 120
} |
|
Requires: "canDash"
"canJumpIntoIBJ"
"canBombHorizontally"
{
"heatFrames": 810
}
{
"or": [
"canDoubleBombJump",
{
"and": [
"canJumpIntoIBJ",
{
"heatFrames": 330
}
]
}
]
} |
|
Break each of the crumble platforms to group the Sovas at the bottom of the room. Requires: "h_heatProof"
"canDodgeWhileShooting"
{
"or": [
{
"and": [
"canConsecutiveWallJump",
{
"or": [
"canCrumbleJump",
"SpaceJump",
"canPreciseWallJump"
]
},
{
"cycleFrames": 930
}
]
},
{
"and": [
"h_useSpringBall",
{
"cycleFrames": 1200
}
]
},
{
"and": [
"SpaceJump",
{
"cycleFrames": 1320
}
]
},
{
"and": [
"canDoubleBombJump",
"canLongIBJ",
{
"cycleFrames": 2340
}
]
},
{
"and": [
"canJumpIntoIBJ",
"canLongIBJ",
"canBePatient",
{
"cycleFrames": 4640
}
]
}
]
}
{
"or": [
"canCrumbleJump",
{
"cycleFrames": 300
}
]
}
{
"resetRoom": {
"nodes": [
1,
2
]
}
}
{
"or": [
{
"haveBlueSuit": {}
},
"Wave",
"Spazer",
"Plasma",
"Grapple",
{
"cycleFrames": 120
}
]
}
{
"or": [
"canDash",
{
"cycleFrames": 90
}
]
}Resets obstacles: A Farm cycle drops: 6 Sova Dev note: Climb from 2 to 1 if resetting with 2. |
|


Either use a Power Bomb or Wave + Plasma to kill all the Sovas off-camera, or if heat protection is available, wait for all the Sovas to come out of the tunnel. Requires: {
"or": [
{
"and": [
"HiJump",
{
"or": [
"canTrivialMidAirMorph",
"h_useSpringBall"
]
}
]
},
{
"and": [
"SpaceJump",
"canTrivialMidAirMorph",
{
"heatFrames": 40
}
]
},
{
"and": [
"canWallJump",
"canTrivialMidAirMorph"
]
},
"canSpringBallJumpMidAir",
{
"and": [
"canIBJ",
{
"heatFrames": 900
}
]
},
{
"and": [
"canJumpIntoIBJ",
{
"heatFrames": 520
}
]
},
{
"and": [
"canJumpIntoIBJ",
"canDoubleBombJump",
{
"heatFrames": 400
}
]
}
]
}
{
"or": [
"h_heatProof",
{
"and": [
"canDash",
{
"or": [
"h_usePowerBomb",
{
"and": [
"Wave",
"Plasma",
"canTrickyJump",
{
"heatFrames": 80
}
]
}
]
}
]
},
{
"and": [
{
"haveBlueSuit": {}
},
{
"heatFrames": 40
}
]
}
]
}
{
"or": [
{
"heatFrames": 180
},
{
"and": [
"canFarmWhileShooting",
{
"heatFramesWithEnergyDrops": {
"frames": 115,
"drops": [
{
"enemy": "Sova",
"count": 3
}
]
}
},
{
"heatFrames": 65
}
]
}
]
} |
|
Requires: "canDash"
{
"or": [
{
"and": [
"HiJump",
{
"or": [
"canTrivialMidAirMorph",
"h_useSpringBall"
]
}
]
},
{
"and": [
"SpaceJump",
"canTrivialMidAirMorph",
{
"heatFrames": 40
}
]
},
{
"and": [
"canWallJump",
"canTrivialMidAirMorph"
]
},
"canSpringBallJumpMidAir",
{
"and": [
"canJumpIntoIBJ",
{
"heatFrames": 240
}
]
},
{
"and": [
"canJumpIntoIBJ",
"canDoubleBombJump",
{
"heatFrames": 120
}
]
},
{
"and": [
"canDoubleBombJump",
{
"heatFrames": 300
}
]
}
]
}
{
"heatFrames": 180
}
{
"enemyDamage": {
"enemy": "Sova",
"type": "contact",
"hits": 1
}
}Dev note: Base IBJ should kill the Sovas or go around. |
From: 1
Left Door
To: 6
G-Mode Morph Junction (At Speed Blocks)
Bomb boost horizontally at the top of an IBJ and land in the acid, then roll to the right and bomb out to safety. To save some Energy, it is possible to IBJ or double IBJ out of the acid onto the first solid platform. Entrance condition: {
"comeInWithGMode": {
"mode": "any",
"morphed": true
}
}Requires: "Gravity"
"h_artificialMorphIBJ"
"h_artificialMorphBombHorizontally"
"canSuitlessLavaDive"
{
"or": [
{
"acidFrames": 280
},
{
"and": [
"canTrickyJump",
{
"acidFrames": 220
}
]
},
{
"and": [
"canInsaneJump",
"h_artificialMorphDoubleBombJump",
{
"acidFrames": 175
}
]
}
]
} |
From: 4
Top Right Door
To: 4
Top Right Door
Lure the Gamets while using the Kamer, then get up to the doorway with a quick crouch jump + down grab or by other means. Requires: {
"or": [
"HiJump",
"SpaceJump",
"canWallJump",
"canSpringBallJumpMidAir",
"canTrickyUseFrozenEnemies",
{
"and": [
"canTrickyJump",
"h_crouchJumpDownGrab"
]
},
{
"and": [
"canInsaneJump",
"canPreciseGrapple"
]
},
{
"and": [
"canJumpIntoIBJ",
"canDoubleBombJump"
]
}
]
}Exit condition: {
"leaveWithGModeSetup": {}
}Dev note: A crouch jump + down grab should always be usable except when preserving a blue suit. A flash suit is lost when using X-Ray, so it can not be kept through a G-Mode setup. |
From: 2
Bottom Right Door
To: 4
Junction Above Acid Plug, Without Acid


Entrance condition: {
"comeInWithRMode": {}
}Requires: "canRModeStandupClip"
"h_RModeCanRefillReserves"
"h_heatProof"
"Morph"
{
"or": [
"h_bombThings",
{
"haveBlueSuit": {}
}
]
}
{
"or": [
"HiJump",
"canWallJump",
"canSpringBallJumpMidAir",
"canDoubleBombJump"
]
}
{
"partialRefill": {
"type": "ReserveEnergy",
"limit": 100
}
}
{
"disableEquipment": "Varia"
}
{
"autoReserveTrigger": {
"implicitHeatFrames": "suitless"
}
}
{
"suitlessHeatFrames": 30
} |
|
Requires: {
"or": [
{
"and": [
"canLongIBJ",
{
"heatFrames": 780
}
]
},
{
"and": [
"canJumpIntoIBJ",
{
"heatFrames": 560
}
]
},
{
"and": [
"canJumpIntoIBJ",
"canDoubleBombJump",
{
"heatFrames": 360
}
]
}
]
} |
From: 6
Junction Below Acid Plug
To: 4
Junction Above Acid Plug, Without Acid
Requires: {
"or": [
"f_UsedAcidChozoStatue",
{
"obstaclesCleared": [
"f_UsedAcidChozoStatue"
]
}
]
}
{
"or": [
{
"and": [
"canLongIBJ",
{
"heatFrames": 790
}
]
},
{
"and": [
"canJumpIntoIBJ",
{
"heatFrames": 330
}
]
},
{
"and": [
"canJumpIntoIBJ",
"canDoubleBombJump",
{
"heatFrames": 260
}
]
}
]
} |
|
Quickly roll to the left side of the room and IBJ through the crumble blocks before GT gets there, if it is alive. Starting from a jump or with a double bomb jump can help speed this up and make it much easier, but Samus needs to bomb slowly near the top to prevent hitting the crumble blocks before PLMs are overloaded. Otherwise, it can help to IBJ through the left-most crumble block, as GT will often jump away when first reaching Samus. The left-most crumble block is the 4th tile away from the wall. With a failed IBJ start, GT often times won't touch Samus if she is Morphed on the ground, and can jump away, giving another chance to IBJ. Entrance condition: {
"comeInWithGMode": {
"mode": "any",
"morphed": true
}
}Requires: "h_artificialMorphLongIBJ"
{
"or": [
{
"or": [
"f_DefeatedGoldenTorizo",
{
"obstaclesCleared": [
"f_DefeatedGoldenTorizo"
]
}
]
},
{
"and": [
"canTrickyDodgeEnemies",
{
"or": [
"h_artificialMorphJumpIntoIBJ",
"h_artificialMorphDoubleBombJump",
"canInsaneJump"
]
}
]
}
]
}
"h_heatedGModeOpenDifferentDoor"Clears obstacles: door_2 |
|
Quickly roll to the left side of the room and IBJ through the crumble blocks before GT gets there, if it is alive. Starting from a jump or with a double bomb jump can help speed this up and make it much easier, but Samus needs to bomb slowly near the top to prevent hitting the crumble blocks before PLMs are overloaded. Otherwise, it can help to IBJ through the left-most crumble block, as GT will often jump away when first reaching Samus. The left-most crumble block is the 4th tile away from the wall. With a failed IBJ start, GT often times won't touch Samus if she is Morphed on the ground, and can jump away, giving another chance to IBJ. Entrance condition: {
"comeInWithGMode": {
"mode": "any",
"morphed": true
}
}Requires: "h_heatedGMode"
"h_artificialMorphLongIBJ"
{
"or": [
{
"or": [
"f_DefeatedGoldenTorizo",
{
"obstaclesCleared": [
"f_DefeatedGoldenTorizo"
]
}
]
},
{
"and": [
"canTrickyDodgeEnemies",
{
"or": [
"h_artificialMorphJumpIntoIBJ",
"h_artificialMorphDoubleBombJump",
"canInsaneJump"
]
}
]
}
]
}
{
"heatFrames": 0
}Clears obstacles: door_2 |
|
Quickly roll to the left side of the room and IBJ through the crumble blocks before GT gets there, if it is alive. Starting from a jump or with a double bomb jump can help speed this up and make it much easier, but Samus needs to bomb slowly near the top to prevent hitting the crumble blocks before PLMs are overloaded. Get GT to jump away then again jump into IBJ and climb to the right item. Note that Samus can roll under GT, but when it attacks, it places stationary invisible projectiles, which may block Samus' path. Place a Power Bomb then quickly exit G-mode to quickly clear all of the bomb blocks, otherwise it is possible to get out with a few Bombs or Screw Attack. Entrance condition: {
"comeInWithGMode": {
"mode": "any",
"morphed": true
}
}Requires: "h_heatedGMode"
"h_artificialMorphLongIBJ"
{
"or": [
{
"or": [
"f_DefeatedGoldenTorizo",
{
"obstaclesCleared": [
"f_DefeatedGoldenTorizo"
]
}
]
},
{
"and": [
"canInsaneJump",
"h_artificialMorphJumpIntoIBJ"
]
},
{
"and": [
"canTrickyGMode",
"h_artificialMorphDoubleBombJump"
]
}
]
}
{
"or": [
{
"and": [
"h_artificialMorphPowerBomb",
{
"heatFrames": 70
}
]
},
{
"and": [
"h_useMorphBombs",
{
"heatFrames": 250
}
]
},
{
"and": [
"ScrewAttack",
{
"heatFrames": 50
}
]
}
]
}Clears obstacles: door_2 |
|
Requires: {
"or": [
"f_DefeatedGoldenTorizo",
{
"obstaclesCleared": [
"f_DefeatedGoldenTorizo"
]
}
]
}
{
"or": [
{
"and": [
"canLongIBJ",
{
"heatFrames": 3000
}
]
},
{
"and": [
"canJumpIntoIBJ",
{
"heatFrames": 1860
}
]
},
{
"and": [
"HiJump",
"canJumpIntoIBJ",
{
"heatFrames": 1300
}
]
},
{
"and": [
"canJumpIntoIBJ",
"canDoubleBombJump",
{
"heatFrames": 1180
}
]
},
{
"and": [
"HiJump",
"canJumpIntoIBJ",
"canDoubleBombJump",
{
"heatFrames": 900
}
]
},
{
"and": [
"canJumpIntoIBJ",
"canDoubleBombJump",
"canBombAboveIBJ",
{
"heatFrames": 890
}
]
},
{
"and": [
"HiJump",
"canJumpIntoIBJ",
"canDoubleBombJump",
"canBombAboveIBJ",
{
"heatFrames": 700
}
]
}
]
} |
|
Requires: {
"or": [
"f_DefeatedGoldenTorizo",
{
"obstaclesCleared": [
"f_DefeatedGoldenTorizo"
]
}
]
}
{
"haveBlueSuit": {}
}
{
"or": [
{
"and": [
"canJumpIntoIBJ",
{
"heatFrames": 690
}
]
},
{
"and": [
"HiJump",
"canJumpIntoIBJ",
{
"heatFrames": 500
}
]
},
{
"and": [
"canJumpIntoIBJ",
"canDoubleBombJump",
{
"heatFrames": 450
}
]
},
{
"and": [
"HiJump",
"canJumpIntoIBJ",
"canDoubleBombJump",
{
"heatFrames": 315
}
]
}
]
} |
|
Requires: {
"obstaclesCleared": [
"B",
"C"
]
}
"canLongIBJ"
{
"or": [
{
"heatFrames": 2090
},
{
"and": [
"canJumpIntoIBJ",
{
"or": [
{
"heatFrames": 1510
},
{
"and": [
"canDoubleBombJump",
{
"heatFrames": 980
}
]
},
{
"and": [
"HiJump",
"canDoubleBombJump",
{
"heatFrames": 860
}
]
}
]
}
]
}
]
}
{
"or": [
{
"obstaclesCleared": [
"A"
]
},
"canPowerBombMidIBJ",
{
"haveBlueSuit": {}
},
{
"and": [
"canBombAboveIBJ",
{
"heatFrames": 60
}
]
}
]
}Clears obstacles: A Dev note: This assumes the bottom bomb blocks are completely broken, making it necessary to start the IBJ from the bottom of the room. |
|
This expects that Samus falls down afterwards. Requires: {
"obstaclesCleared": [
"B",
"C"
]
}
"canLongIBJ"
{
"or": [
{
"heatFrames": 2120
},
{
"and": [
"canJumpIntoIBJ",
{
"or": [
{
"heatFrames": 1540
},
{
"and": [
"canDoubleBombJump",
{
"heatFrames": 1010
}
]
},
{
"and": [
"HiJump",
"canDoubleBombJump",
{
"heatFrames": 890
}
]
}
]
}
]
}
]
}Clears obstacles: A Dev note: This assumes the bottom bomb blocks are completely broken, making it necessary to start the IBJ from the bottom of the room. |
|
Requires: {
"obstaclesNotCleared": [
"C"
]
}
{
"noBlueSuit": {}
}
"canJumpIntoIBJ"
"canLongIBJ"
{
"or": [
{
"heatFrames": 1300
},
{
"and": [
"canDoubleBombJump",
{
"heatFrames": 690
}
]
},
{
"and": [
"HiJump",
"canDoubleBombJump",
{
"heatFrames": 590
}
]
}
]
}
{
"or": [
{
"obstaclesCleared": [
"A"
]
},
"canPowerBombMidIBJ",
{
"and": [
"canBombAboveIBJ",
{
"heatFrames": 60
}
]
}
]
}Clears obstacles: A |
From: 5
Junction Above Bottom Blocks
To: 5
Junction Above Bottom Blocks
This expects that Samus falls down afterwards. Requires: {
"obstaclesNotCleared": [
"C"
]
}
{
"noBlueSuit": {}
}
"canLongIBJ"
"canJumpIntoIBJ"
{
"or": [
{
"heatFrames": 1150
},
{
"and": [
"canDoubleBombJump",
{
"heatFrames": 660
}
]
},
{
"and": [
"HiJump",
"canDoubleBombJump",
{
"heatFrames": 540
}
]
}
]
}Clears obstacles: A Dev note: This assumes the lower bomb blocks are not completely broken (due to having used a Power Bomb). |
|
Entrance condition: {
"comeInWithGMode": {
"mode": "direct",
"morphed": false
}
}Requires: {
"or": [
"SpaceJump",
"canConsecutiveWallJump",
{
"and": [
"canJumpIntoIBJ",
"canLongIBJ",
"canDoubleBombJump",
"canInsaneJump"
]
}
]
}Exit condition: {
"leaveWithGMode": {
"morphed": false
}
} |
|
Kill the pirates to free up the full runway for a speedy jump, or to start an IBJ. If the wall pirate jumps over a Samus who is not crouched, it will climb offscreen on its own. But may still need to be killed after. Requires: {
"or": [
{
"and": [
"canTrickyDodgeEnemies",
{
"enemyKill": {
"enemies": [
[
"Yellow Space Pirate (standing)"
],
[
"Yellow Space Pirate (wall)"
]
],
"explicitWeapons": [
"Charge"
]
}
},
{
"heatFrames": 2100
}
]
},
{
"and": [
"canDodgeWhileShooting",
{
"enemyKill": {
"enemies": [
[
"Yellow Space Pirate (standing)"
],
[
"Yellow Space Pirate (wall)"
]
],
"explicitWeapons": [
"Charge+Plasma"
]
}
},
{
"heatFrames": 240
}
]
},
{
"and": [
"canDodgeWhileShooting",
{
"enemyKill": {
"enemies": [
[
"Yellow Space Pirate (standing)"
],
[
"Yellow Space Pirate (wall)"
]
],
"explicitWeapons": [
"Charge+Ice+Wave+Spazer"
]
}
},
{
"heatFrames": 660
}
]
},
{
"and": [
{
"enemyKill": {
"enemies": [
[
"Yellow Space Pirate (standing)"
],
[
"Yellow Space Pirate (wall)"
]
],
"explicitWeapons": [
"Missile",
"Super"
]
}
},
{
"heatFrames": 330
}
]
},
{
"and": [
"canDash",
"ScrewAttack",
"canDodgeWhileShooting",
{
"heatFrames": 80
}
]
},
{
"and": [
{
"haveBlueSuit": {}
},
"canDodgeWhileShooting",
{
"heatFrames": 100
}
]
}
]
}
{
"or": [
{
"and": [
"canTrickyDashJump",
{
"heatFrames": 150
}
]
},
{
"and": [
"canIBJ",
{
"heatFrames": 1320
}
]
},
{
"and": [
"canJumpIntoIBJ",
{
"heatFrames": 540
}
]
},
{
"and": [
"canDoubleBombJump",
{
"heatFrames": 310
}
]
}
]
} |
|
The shot block may respawn while bomb jumping and can be cleared by weaving a Power Bomb into the IBJ, or with a bomb placed overhead while bomb jumping. The Power Bomb can be placed one tile higher than the doors to also clear the Power Bomb Blocks above at the same time. Requires: "canIBJ"
{
"or": [
{
"and": [
{
"or": [
"canBombAboveIBJ",
"canPowerBombMidIBJ"
]
},
{
"heatFrames": 1000
}
]
},
{
"and": [
"canJumpIntoIBJ",
{
"heatFrames": 480
}
]
},
{
"and": [
"canDoubleBombJump",
"canJumpIntoIBJ",
{
"heatFrames": 300
}
]
}
]
}
{
"or": [
{
"and": [
"h_usePowerBomb",
{
"heatFrames": 50
}
]
},
{
"obstaclesCleared": [
"A"
]
}
]
}Clears obstacles: A Unlocks doors: {"types":["missiles"],"requires":[{"heatFrames":30}]}
{"types":["powerbomb"],"requires":[],"useImplicitRequires":false}Dev note: Placing a power bomb to break the shot block and the power bomb blocks without dropping the IBJ is the same level of control as canBombAboveIBJ. |
From: 3
Bottom Horizontal Door
To: 7
Junction By Lower Alcoons (Left of Spike Pits)
Get past the spike Alcoons, and climb up - leave the lower left Alcoon alive to use for later. Clear the runway Alcoon and get the shinecharge, then drop into the lower left Alcoon to interrupt. If you Crystal Flash early, stay near the door to ensure you kill only the two spike Alcoons. Entrance condition: {
"comeInWithRMode": {}
}Requires: {
"or": [
{
"and": [
"h_heatedCrystalFlashForReserveEnergy",
{
"heatFrames": 100
}
]
},
{
"and": [
"ScrewAttack",
"canCarefulJump",
{
"heatFrames": 100
}
]
},
{
"and": [
"canDodgeWhileShooting",
{
"or": [
"h_heatProof",
{
"enemyKill": {
"enemies": [
[
"Alcoon"
]
],
"explicitWeapons": [
"Missile",
"Super",
"Wave+Plasma"
]
}
},
{
"and": [
"canPseudoScrew",
{
"heatFrames": 30
}
]
}
]
},
"canCarefulJump",
{
"heatFrames": 100
}
]
},
{
"and": [
{
"enemyKill": {
"enemies": [
[
"Alcoon",
"Alcoon"
]
],
"explicitWeapons": [
"Missile",
"Super",
"Plasma",
"Wave+Spazer"
]
}
},
{
"heatFrames": 200
}
]
},
{
"and": [
"canCarefulJump",
{
"heatFrames": 199
}
]
},
{
"and": [
{
"enemyDamage": {
"enemy": "Alcoon",
"type": "contact",
"hits": 1
}
},
{
"heatFrames": 180
}
]
}
]
}
{
"heatFrames": 160
}
{
"or": [
"canWallJump",
"HiJump",
"canSpringBallJumpMidAir",
"SpaceJump",
{
"and": [
"canSpringBallBombJump",
{
"heatFrames": 60
}
]
},
{
"and": [
"canIBJ",
"canBombHorizontally",
"canJumpIntoIBJ",
{
"heatFrames": 110
},
{
"or": [
"canDoubleBombJump",
{
"heatFrames": 190
}
]
}
]
},
{
"and": [
"canTrickyDashJump",
"canInsaneJump",
{
"heatFrames": 20
}
]
},
{
"and": [
"canUseFrozenEnemies",
"canInsaneJump",
{
"heatFrames": 150
}
]
}
]
}
{
"or": [
{
"and": [
"canDodgeWhileShooting",
{
"enemyKill": {
"enemies": [
[
"Alcoon"
]
],
"explicitWeapons": [
"Missile",
"Super",
"Charge+Plasma"
]
}
},
{
"heatFrames": 120
}
]
},
{
"and": [
{
"enemyKill": {
"enemies": [
[
"Alcoon"
]
],
"explicitWeapons": [
"Wave",
"Ice+Spazer",
"Plasma",
"ScrewAttack",
"PseudoScrew",
"PowerBomb"
]
}
},
{
"heatFrames": 180
}
]
},
{
"heatFrames": 200
}
]
}
{
"or": [
{
"resourceAvailable": [
{
"type": "ReserveEnergy",
"count": 1
}
]
},
{
"and": [
"h_heatProof",
"h_RModeCanRefillReserves",
{
"or": [
{
"and": [
{
"resourceMissingAtMost": [
{
"type": "PowerBomb",
"count": 0
}
]
},
{
"partialRefill": {
"type": "ReserveEnergy",
"limit": 20
}
}
]
},
{
"and": [
{
"resourceMissingAtMost": [
{
"type": "PowerBomb",
"count": 3
}
]
},
{
"partialRefill": {
"type": "ReserveEnergy",
"limit": 5
}
}
]
}
]
}
]
}
]
}
{
"canShineCharge": {
"usedTiles": 27,
"gentleUpTiles": 2,
"openEnd": 0
}
}
{
"or": [
"canDownBack",
"canTrickyJump"
]
}
{
"heatFrames": 120
}
{
"autoReserveTrigger": {
"maxReserveEnergy": 95
}
}
"canRModeSparkInterrupt"Clears obstacles: A |
From: 7
Junction By Lower Alcoons (Left of Spike Pits)
To: 1
Left Door
Requires: "canIBJ"
{
"or": [
{
"and": [
"canBombHorizontally",
{
"heatFrames": 840
}
]
},
{
"and": [
"canJumpIntoIBJ",
"canDoubleBombJump",
{
"heatFrames": 275
}
]
},
{
"and": [
"canJumpIntoIBJ",
{
"heatFrames": 420
}
]
}
]
}
{
"or": [
"canDash",
{
"heatFrames": 20
}
]
}Unlocks doors: {"types":["powerbomb"],"requires":[{"heatFrames":60}]} |
From: 7
Junction By Lower Alcoons (Left of Spike Pits)
To: 6
Junction By Left Door (Right of Pit)
Requires: "canIBJ"
{
"or": [
{
"and": [
"canBombHorizontally",
{
"heatFrames": 820
}
]
},
{
"and": [
"canJumpIntoIBJ",
"canDoubleBombJump",
{
"heatFrames": 255
}
]
},
{
"and": [
"canJumpIntoIBJ",
{
"heatFrames": 400
}
]
}
]
}
{
"or": [
"canDash",
{
"heatFrames": 25
}
]
} |
From: 4
Junction Below Bomb Blocks
To: 2
Top Right Door
Jump and mid-air morph off a crumble block to begin the IBJ. Use double bomb jumps to make it up quickly before the shot block respawns. Requires: {
"obstaclesCleared": [
"B"
]
}
"canCrumbleJump"
"canInsaneJump"
"canJumpIntoIBJ"
"canDoubleBombJump"
{
"heatFrames": 360
}Dev note: This is likely to only be useful if the in-room item is Bombs, and Samus had to break the blocks with a Power Bomb to get to it. |
|
Shoot the block before starting or in mid-air, then use Spring Ball to bounce on the crumble blocks and start an IBJ. The shot block respawns quickly so it's pretty unforgiving on the IBJ executions. Conservatively placing bombs for the IBJ will not make it up in time, unless the block is broken while IBJing. Requires: {
"obstaclesCleared": [
"B"
]
}
"canJumpIntoIBJ"
"h_useSpringBall"
{
"or": [
"canTrickyJump",
"canDoubleBombJump",
"canBombAboveIBJ",
{
"ammo": {
"type": "PowerBomb",
"count": 1
}
}
]
}
{
"heatFrames": 500
} |
|
Entrance condition: {
"comeInWithGMode": {
"mode": "direct",
"morphed": false
}
}Requires: {
"or": [
"SpaceJump",
"canWallJump",
{
"and": [
"canJumpIntoIBJ",
"canInsaneJump",
{
"or": [
"HiJump",
{
"and": [
"canLongIBJ",
"canDoubleBombJump"
]
}
]
}
]
},
{
"and": [
{
"or": [
"f_DefeatedRidley",
{
"obstaclesCleared": [
"f_DefeatedRidley"
]
}
]
},
{
"or": [
"canLongIBJ",
{
"and": [
"canJumpIntoIBJ",
"HiJump"
]
}
]
}
]
},
{
"and": [
"HiJump",
"canSpringBallJumpMidAir"
]
},
{
"and": [
"HiJump",
"canSpeedyJump",
"canTrickyJump",
{
"or": [
"canInsaneJump",
{
"or": [
"f_DefeatedRidley",
{
"obstaclesCleared": [
"f_DefeatedRidley"
]
}
]
}
]
}
]
}
]
}Exit condition: {
"leaveWithGMode": {
"morphed": false
}
}Clears obstacles: door_2 |
|


Requires: {
"heatFrames": 25
}
{
"or": [
"canDash",
{
"heatFrames": 10
}
]
}
{
"or": [
{
"and": [
"canDoubleBombJump",
{
"heatFrames": 560
}
]
},
{
"and": [
"canDoubleBombJump",
"HiJump",
{
"heatFrames": 420
}
]
},
{
"and": [
{
"or": [
"f_DefeatedRidley",
{
"obstaclesCleared": [
"f_DefeatedRidley"
]
}
]
},
"canJumpIntoIBJ",
{
"or": [
"canLongIBJ",
"HiJump"
]
},
{
"heatFrames": 1000
}
]
}
]
} |
From: 6
Bottom Platform Junction With Pirates Killed
To: 4
Junction Above Bomb Blocks
Requires: "canLongIBJ"
{
"or": [
{
"and": [
"canJumpIntoIBJ",
{
"heatFrames": 1250
}
]
},
{
"and": [
"canJumpIntoIBJ",
"canDoubleBombJump",
{
"heatFrames": 700
}
]
},
{
"and": [
"HiJump",
"canJumpIntoIBJ",
"canDoubleBombJump",
{
"heatFrames": 630
}
]
},
{
"heatFrames": 2000
}
]
}
{
"or": [
"canPowerBombMidIBJ",
{
"and": [
"canBombAboveIBJ",
"canStaggeredIBJ",
{
"heatFrames": 220
}
]
},
{
"obstaclesCleared": [
"A"
]
},
{
"haveBlueSuit": {}
}
]
}Clears obstacles: A |
From: 6
Bottom Platform Junction With Pirates Killed
To: 6
Bottom Platform Junction With Pirates Killed
Requires: "canMidAirMorph"
"h_useMorphBombs"
{
"or": [
{
"and": [
"HiJump",
"SpaceJump",
"canConsecutiveWallJump",
{
"heatFrames": 440
}
]
},
{
"and": [
"SpaceJump",
"HiJump",
{
"heatFrames": 540
}
]
},
{
"and": [
"SpaceJump",
"canConsecutiveWallJump",
{
"heatFrames": 520
}
]
},
{
"and": [
"SpaceJump",
{
"heatFrames": 730
}
]
},
{
"and": [
"h_heatedSpringwall",
{
"heatFrames": 480
}
]
},
{
"and": [
"canLongIBJ",
"canBePatient",
{
"heatFrames": 4000
}
]
},
{
"and": [
"canLongIBJ",
"canJumpIntoIBJ",
{
"heatFrames": 2500
}
]
},
{
"and": [
"canJumpIntoIBJ",
"canDoubleBombJump",
{
"heatFrames": 1400
}
]
}
]
}Clears obstacles: A |
From: 6
Bottom Platform Junction With Pirates Killed
To: 6
Bottom Platform Junction With Pirates Killed
First use HiJump and wall jumps to break the leftmost set of bomb blocks on the bottom layer. Then use one of many movement options to break the next bomb blocks above. Requires: "canMidAirMorph"
"h_useMorphBombs"
"HiJump"
"canWallJump"
{
"heatFrames": 200
}
{
"or": [
{
"and": [
"SpaceJump",
{
"heatFrames": 235
}
]
},
{
"and": [
"h_heatedSpringwall",
{
"heatFrames": 210
}
]
},
{
"and": [
"canLongIBJ",
{
"heatFrames": 2000
}
]
},
{
"and": [
"canJumpIntoIBJ",
{
"heatFrames": 1250
}
]
},
{
"and": [
"canJumpIntoIBJ",
"canDoubleBombJump",
{
"heatFrames": 630
}
]
}
]
}Clears obstacles: A |
From: 2
Right Door
To: 5
G-Mode Morph Junction (Above Bomb Block)
Avoiding the acid completely requires precise movement. With Spring Ball and Bombs, jump into IBJ to delay while waiting for the acid. With just Spring Ball, perform a well-timed pause to trigger immediately after Samus jumps to get enough horizontal momentum to cross the second Hibashi and land in the alcove. A quick pause with a second spring fling on the descent can help a bit. With just Bombs, this is possible with well-timed, first-try double IBJs. Entrance condition: {
"comeInWithGMode": {
"mode": "any",
"morphed": true
}
}Requires: "canInsaneJump"
{
"or": [
"h_artificialMorphJumpIntoIBJ",
{
"and": [
"canTrickyGMode",
"h_artificialMorphSpringFling"
]
},
{
"and": [
"canTrickyGMode",
"h_artificialMorphDoubleBombJump",
"h_artificialMorphBombHorizontally"
]
}
]
}
{
"heatFrames": 0
}Dev note: FIXME: Could add strats that take acid damage and are more lenient. |
From: 6
Bowling Chozo Statue
To: 1
Top Left Door
IBJ into a breakable Grapple block. The timing is very precise and requires a quick morph and ascent with precisely placed double bomb jumps. Crystal Flash then X-ray climb to the region above (less than 1 screen). There is a chance that Samus will not be able to Crystal Flash unless first placing a Bomb or Power Bomb. Requires: {
"notable": "Grapple Block Crystal Flash"
}
"canUseGrapple"
"canJumpIntoRespawningBlock"
"canInsaneJump"
"canJumpIntoIBJ"
"canDoubleBombJump"
{
"or": [
{
"spikeHits": 1
},
{
"and": [
{
"not": "f_DefeatedPhantoon"
},
"canRiskPermanentLossOfAccess"
]
}
]
}
"h_CrystalFlash"
"canXRayClimb"Exit condition: {
"leaveNormally": {}
}Unlocks doors: {"types":["ammo"],"requires":[]}Dev note: FIXME: This may be possible without a spike hit. |
|
This is a long climb, and getting around the fish under the missiles can be tricky or slow. Entrance condition: {
"comeInWithGMode": {
"mode": "any",
"morphed": true
}
}Requires: "h_artificialMorphIBJ"
"Gravity"
{
"or": [
"h_artificialMorphJumpIntoIBJ",
"h_artificialMorphDoubleBombJump",
"h_artificialMorphStaggeredIBJ",
"canBeVeryPatient"
]
} |
From: 13
G-Mode Morph Junction By Middle Right Door
To: 4
Top Right Door
Climb the room with IBJ or double Spring Ball jump. Requires: "canGMode"
"h_navigateUnderwater"
{
"or": [
{
"and": [
"h_artificialMorphIBJ",
"Gravity",
{
"or": [
"h_artificialMorphDoubleBombJump",
"h_artificialMorphStaggeredIBJ",
"canBePatient",
"h_artificialMorphPowerBomb"
]
}
]
},
"h_artificialMorphDoubleSpringBallJump"
]
} |
From: 13
G-Mode Morph Junction By Middle Right Door
To: 10
Direct G-Mode Morph, On Ledge Above Speed Blocks
This is a long climb, and getting around the fish under the speed blocks can be tricky or slow. Requires: "h_navigateUnderwater"
{
"obstaclesCleared": [
"B"
]
}
{
"or": [
{
"and": [
"Gravity",
{
"or": [
"h_artificialMorphJumpIntoIBJ",
"h_artificialMorphDoubleBombJump",
"h_artificialMorphStaggeredIBJ",
{
"and": [
"h_artificialMorphIBJ",
"canBeVeryPatient"
]
},
{
"and": [
"h_artificialMorphIBJ",
"h_artificialMorphPowerBomb"
]
},
{
"and": [
"h_artificialMorphSpringBall",
"HiJump"
]
},
{
"and": [
"h_artificialMorphSpringBall",
"canGravityJump"
]
}
]
}
]
},
"h_artificialMorphDoubleSpringBallJump"
]
}Dev note: FIXME: Some IBJ strats may need canBeVeryPatient if they can't be done before the crab is in position |
|
Start an IBJ by either bouncing on the sand with Spring Ball, doing a stationary spinjump on the sand, or by crouch jumping in the sand while holding down. Requires: {
"noBlueSuit": {}
}
"Gravity"
"canLongIBJ"
"canJumpIntoIBJ"
{
"or": [
{
"and": [
"canTrickyJump",
"can4HighMidAirMorph",
"canPlayInSand"
]
},
"h_useSpringBall"
]
}
{
"or": [
"canDoubleBombJump",
"canStaggeredIBJ",
"canBePatient"
]
} |
|
Requires: {
"resetRoom": {
"nodes": [
1
]
}
}
{
"or": [
{
"and": [
"Gravity",
{
"or": [
{
"and": [
"HiJump",
"canSpeedyJump",
"canTrickyJump",
{
"cycleFrames": 300
}
]
},
{
"and": [
"HiJump",
"canWallJump",
{
"cycleFrames": 310
}
]
},
{
"and": [
"SpaceJump",
{
"cycleFrames": 360
}
]
},
{
"and": [
"canTrickyWallJump",
{
"cycleFrames": 380
}
]
},
{
"and": [
"canSpringBallJumpMidAir",
{
"or": [
"HiJump",
"canSpringwall",
{
"and": [
"canTrickySpringBallJump",
"canTrickyJump"
]
}
]
},
{
"cycleFrames": 340
},
"h_doubleEquipmentScreenCycleFrames"
]
},
{
"and": [
"canDoubleBombJump",
{
"cycleFrames": 830
}
]
}
]
}
]
},
{
"and": [
"canSuitlessMaridia",
{
"or": [
{
"and": [
"HiJump",
"canTrickyJump",
"canMidairWiggle",
"canTrickyWallJump",
{
"cycleFrames": 360
}
]
},
{
"and": [
"HiJump",
"canSpaceJumpWaterBounce",
"canWallJump",
{
"cycleFrames": 390
}
]
},
{
"and": [
"HiJump",
"canSpaceJumpWaterEscape",
{
"cycleFrames": 430
}
]
},
{
"and": [
{
"notable": "Suitless Bootless Space Jump"
},
"canSpaceJumpWaterBounce",
"canWallJump",
{
"cycleFrames": 440
}
]
},
{
"and": [
"HiJump",
"canTrickySpringBallJump",
{
"or": [
"canTrickyJump",
"canFlatleyJump"
]
},
{
"cycleFrames": 360
},
"h_doubleEquipmentScreenCycleFrames"
]
}
]
}
]
}
]
}Resets obstacles: R-Mode Farm cycle drops: 1 Cacatac |
|

Only requires a runway of approximately 1 tile in the adjacent room. Take two Mochtroid hits or kill it using a Power Bomb or 5 Bombs. Entrance condition: {
"comeInJumping": {
"speedBooster": "any",
"minTiles": 1
}
}Requires: "canJumpIntoIBJ"
{
"or": [
{
"ammo": {
"type": "PowerBomb",
"count": 1
}
},
{
"and": [
"canCeilingBombJump",
{
"enemyDamage": {
"enemy": "Mochtroid",
"type": "contact",
"hits": 1
}
}
]
},
{
"and": [
"canDoubleBombJump",
{
"enemyDamage": {
"enemy": "Mochtroid",
"type": "contact",
"hits": 2
}
}
]
},
{
"enemyDamage": {
"enemy": "Mochtroid",
"type": "contact",
"hits": 3
}
}
]
}
"canCrossRoomJumpIntoWater"
"canBufferedMomentumConservingTurnaround"
"canTrickyJump"Dev note: The rhythm for placing 4 Bombs quickly is the main component of ceiling bomb jumps. canTrickyJump for the IBJ more than the through-door jump. |
From: 2
Bottom Left Door
To: 4
Top Right Door
Requires a runway of 1 tile in the adjacent room. Use a spring ball jump after breaking the water, then ibj. Take two Mochtroid hits or use a double bomb jump. Entrance condition: {
"comeInJumping": {
"speedBooster": "no",
"minTiles": 1
}
}Requires: "canTrickySpringBallJump"
"canJumpIntoIBJ"
"canTrickyJump"
{
"or": [
"canDoubleBombJump",
{
"enemyDamage": {
"enemy": "Mochtroid",
"type": "contact",
"hits": 2
}
}
]
}
"canCrossRoomJumpIntoWater" |
From: 1
Bottom Left Door
To: 4
G-Mode Junction (Top by Elevator)
The Rippers can be killed with three Power Bombs, or one carefully placed Power Bomb, Gravity, and a careful dodge of the top-most Ripper. With a single Power Bomb, IBJ from the water to avoid the first Ripper, then place the Power Bomb at least two tiles above the next. This can be achieved with a Staggered IBJ. Then climb the right side of the shaft and similarly dodge the top Ripper. Entrance condition: {
"comeInWithGMode": {
"mode": "any",
"morphed": true
}
}Requires: "h_artificialMorphLongIBJ"
{
"or": [
"Gravity",
"h_artificialMorphPowerBomb",
{
"enemyDamage": {
"enemy": "Ripper",
"type": "contact",
"hits": 1
}
},
{
"and": [
"canInsaneJump",
"h_artificialMorphDoubleBombJump",
"h_artificialMorphStaggeredIBJ"
]
}
]
}
"h_artificialMorphPowerBomb"
{
"or": [
"h_artificialMorphStaggeredIBJ",
"h_artificialMorphPowerBomb",
{
"enemyDamage": {
"enemy": "Ripper",
"type": "contact",
"hits": 1
}
}
]
} |
|
Requires: {
"resetRoom": {
"nodes": [
1
]
}
}
{
"or": [
"canDash",
{
"cycleFrames": 100
}
]
}
{
"or": [
{
"and": [
"HiJump",
"SpaceJump",
{
"cycleFrames": 930
}
]
},
{
"and": [
"HiJump",
"canTrickyWallJump",
{
"cycleFrames": 960
}
]
},
{
"and": [
"SpaceJump",
{
"cycleFrames": 1220
}
]
},
{
"and": [
"canSpringwall",
{
"cycleFrames": 1035
},
"h_doubleEquipmentScreenCycleFrames"
]
},
{
"and": [
"HiJump",
"canSpringBallJumpMidAir",
{
"cycleFrames": 910
},
"h_doubleEquipmentScreenCycleFrames"
]
},
{
"and": [
"canDoubleBombJump",
{
"or": [
"canWallJump",
"h_crouchJumpDownGrab"
]
},
{
"cycleFrames": 1410
}
]
},
{
"and": [
"canDoubleBombJump",
{
"cycleFrames": 1560
}
]
}
]
}
{
"or": [
"ScrewAttack",
{
"haveBlueSuit": {}
},
"Plasma"
]
}Resets obstacles: A, B, C Farm cycle drops: 4 Pink Space Pirate (standing), 2 Pink Space Pirate (wall) Dev note: FIXME: Add option to kill the Pirates with speed echoes, and possibly to get back up with a shinespark. |
|
Requires: {
"resetRoom": {
"nodes": [
1
]
}
}
{
"or": [
"canDash",
{
"cycleFrames": 120
}
]
}
{
"or": [
"canWallJump",
"HiJump",
{
"and": [
"SpaceJump",
{
"cycleFrames": 300
}
]
},
{
"and": [
"canTrickySpringBallJump",
{
"cycleFrames": 360
},
"h_doubleEquipmentScreenCycleFrames",
"h_doubleEquipmentScreenCycleFrames",
"h_doubleEquipmentScreenCycleFrames"
]
},
{
"and": [
"canDoubleBombJump",
{
"cycleFrames": 930
}
]
}
]
}
{
"or": [
{
"and": [
{
"or": [
"Grapple",
"Wave",
"Plasma"
]
},
{
"cycleFrames": 750
}
]
},
{
"and": [
{
"or": [
"ScrewAttack",
{
"haveBlueSuit": {}
}
]
},
{
"cycleFrames": 820
}
]
},
{
"and": [
"Spazer",
{
"cycleFrames": 850
}
]
},
{
"and": [
"canPseudoScrew",
{
"cycleFrames": 870
}
]
},
{
"cycleFrames": 1080
}
]
}Resets obstacles: R-Mode Farm cycle drops: 3 Choot |
From: 5
Junction Above Grapple Block
To: 2
East Leg Right Door
Wait the water tide to reach its peak, then crouch jump into a spring ball jump into an IBJ. Perform the spring ball jump near max height. Place the first bomb between about 4 and 6 frames after the spring ball jump; ideally it should be just above the water line. Press pause between about 5 and 10 frames after placing the bomb, to disable Spring Ball (a 'spring fling', to reset fall speed). Place the second bomb soon after regaining control, while the game is fading back in. When close to the top, perform a spring ball jump to reach the ledge; release jump as soon as Samus is high enough to clear the ledge, in order to avoid taking a Menu hit. Requires: {
"notable": "Bomb Jump Water Escape"
}
"HiJump"
"h_underwaterMaxHeightSpringBallJump"
"canSpringFling"
"canBombJumpWaterEscape"
"canJumpIntoIBJ"
"canLongIBJ"
"canDoubleBombJump"Dev note: This trick can technically be done without a 'spring fling' but is extremely precise. |
|

Clear the right side Space Pirates and then race the rising acid by bomb jumping. Requires: {
"notable": "IBJ and Acid Bath"
}
"canSuitlessLavaDive"
"canJumpIntoIBJ"
"canLongIBJ"
"canDoubleBombJump"
{
"or": [
{
"and": [
"Gravity",
{
"acidFrames": 150
}
]
},
{
"acidFrames": 450
}
]
} |