canUseGrapple (Implicit)
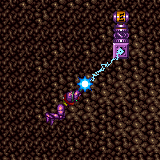
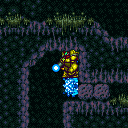
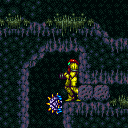
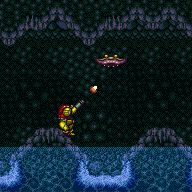
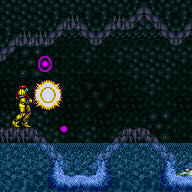
The ability to fling Samus moderate distances by grappling onto attach points to build up momentum. Knowing how to use Grapple also means knowing that the Grapple Beam can be used as a weapon to instantly kill certain enemies.
Strats ()
From: 5
Alcatraz Door
To: 8
Central Junction
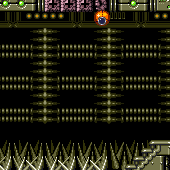
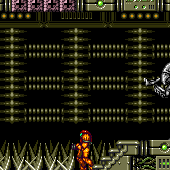
Wait for a global Geemer to make the long trip along the map, or shoot a Super 20 to 30 seconds after entering the room to knock it off the ceiling and save a lot of time. Freeze it just after it starts climbing the bomb blocks. Spin-jump above it, which will put Samus into a forced crouch where X-Ray cannot be used. Use Grapple to kill a second Geemer, restoring the ability to use X-Ray. Use X-Ray to stand up, then jump up through the ceiling. Requires: {
"notable": "Alcatraz Escape with Grapple X-Ray Ceiling Clip"
}
"h_ZebesIsAwake"
"canBePatient"
{
"or": [
"canBeVeryPatient",
{
"ammo": {
"type": "Super",
"count": 1
}
}
]
}
"h_preciseIceClip"
"canUseGrapple"
"canXRayStandUp"Dev note: Morph could also be used instead of Grapple, but with Morph there is an easier strat that goes up through the tunnel to the left. |
|
Requires: "Morph"
{
"resetRoom": {
"nodes": [
1
]
}
}
{
"cycleFrames": 2700
}
{
"or": [
"Gravity",
{
"cycleFrames": 700
}
]
}
{
"or": [
{
"haveBlueSuit": {}
},
"Wave",
"Spazer",
"Plasma",
"canUseGrapple",
{
"and": [
"Ice",
{
"cycleFrames": 560
}
]
},
{
"cycleFrames": 1550
}
]
}Farm cycle drops: 8 Sciser |
|
Requires: {
"or": [
{
"and": [
{
"resetRoom": {
"nodes": [
1,
2
]
}
},
"canCameraManip"
]
},
{
"resetRoom": {
"nodes": [
3
]
}
}
]
}
{
"or": [
{
"and": [
"canDash",
{
"or": [
{
"and": [
"ScrewAttack",
{
"cycleFrames": 720
}
]
},
{
"and": [
"Plasma",
{
"cycleFrames": 770
}
]
},
{
"and": [
"canPseudoScrew",
{
"cycleFrames": 1000
}
]
},
{
"and": [
"canUseGrapple",
{
"cycleFrames": 1020
}
]
},
{
"and": [
"Wave",
{
"cycleFrames": 1050
}
]
},
{
"and": [
"Spazer",
{
"cycleFrames": 1080
}
]
},
{
"and": [
"Ice",
{
"cycleFrames": 1170
}
]
},
{
"and": [
"canDodgeWhileShooting",
{
"cycleFrames": 1440
}
]
}
]
}
]
},
{
"and": [
{
"haveBlueSuit": {}
},
{
"cycleFrames": 1010
}
]
}
]
}Farm cycle drops: 2 Sciser, 2 Kihunter (green) |
|
Requires: "Gravity"
{
"or": [
{
"and": [
"canDash",
{
"or": [
{
"and": [
"Plasma",
{
"cycleFrames": 410
}
]
},
{
"and": [
"canUseGrapple",
{
"cycleFrames": 440
}
]
},
{
"and": [
"Wave",
{
"cycleFrames": 460
}
]
},
{
"and": [
"Spazer",
{
"cycleFrames": 540
}
]
},
{
"and": [
"canDodgeWhileShooting",
{
"cycleFrames": 730
}
]
}
]
}
]
},
{
"and": [
{
"haveBlueSuit": {}
},
{
"cycleFrames": 710
}
]
}
]
}Farm cycle drops: 4 Choot |
|
Farm 3 Choots using Grapple to collect the drops, without dipping into the water. Requires: "canUseGrapple"
{
"cycleFrames": 330
}
{
"or": [
"canDash",
{
"cycleFrames": 90
}
]
}Farm cycle drops: 3 Choot |
|
Requires: "Gravity"
{
"cycleFrames": 270
}
{
"or": [
"canDash",
{
"cycleFrames": 90
}
]
}
{
"or": [
"HiJump",
{
"and": [
"canWallJump",
{
"cycleFrames": 45
}
]
}
]
}
{
"or": [
"Plasma",
{
"and": [
"canUseGrapple",
{
"cycleFrames": 15
}
]
},
{
"and": [
"ScrewAttack",
{
"cycleFrames": 15
}
]
},
{
"and": [
"Wave",
{
"cycleFrames": 35
}
]
},
{
"and": [
{
"haveBlueSuit": {}
},
{
"cycleFrames": 40
}
]
},
{
"and": [
"Spazer",
{
"cycleFrames": 55
}
]
},
{
"cycleFrames": 105
}
]
}Farm cycle drops: 1 Choot |
|
Requires: {
"resetRoom": {
"nodes": [
1,
2
]
}
}
"canUseGrapple"
"canTrickyJump"
{
"cycleFrames": 150
}
{
"or": [
{
"noFlashSuit": {}
},
{
"and": [
"canComplexCarryFlashSuit",
"h_useSpringBall",
{
"cycleFrames": 60
}
]
},
{
"and": [
"canTrickyCarryFlashSuit",
"canInsaneMidAirMorph",
"canBeExtremelyPatient",
{
"cycleFrames": 200
}
]
}
]
}Farm cycle drops: 1 Geemer (orange) |
From: 1
Left Door
To: 1
Left Door
Requires: {
"resetRoom": {
"nodes": [
1
]
}
}
{
"resetRoom": {
"nodes": [
2
]
}
}
{
"or": [
{
"and": [
"canDash",
{
"or": [
{
"and": [
"ScrewAttack",
{
"cycleFrames": 990
}
]
},
{
"and": [
"Plasma",
{
"cycleFrames": 620
}
]
},
{
"and": [
"Wave",
{
"cycleFrames": 920
}
]
},
{
"and": [
"Spazer",
{
"cycleFrames": 1010
}
]
},
{
"and": [
{
"or": [
"canDodgeWhileShooting",
"Ice"
]
},
{
"cycleFrames": 1740
}
]
},
{
"and": [
"canUseGrapple",
{
"cycleFrames": 740
}
]
}
]
}
]
},
{
"and": [
{
"haveBlueSuit": {}
},
{
"cycleFrames": 1160
}
]
}
]
}Farm cycle drops: 6 Waver, 6 Choot |
From: 1
Left Door
To: 1
Left Door
Requires: {
"resetRoom": {
"nodes": [
1,
2
]
}
}
{
"cycleFrames": 100
}
{
"or": [
{
"and": [
"canDash",
{
"or": [
{
"and": [
"ScrewAttack",
{
"cycleFrames": 495
}
]
},
{
"and": [
"Plasma",
{
"cycleFrames": 310
}
]
},
{
"and": [
"Wave",
{
"cycleFrames": 460
}
]
},
{
"and": [
"Spazer",
{
"cycleFrames": 505
}
]
},
{
"and": [
{
"or": [
"canDodgeWhileShooting",
"Ice"
]
},
{
"cycleFrames": 870
}
]
},
{
"and": [
"canUseGrapple",
{
"cycleFrames": 370
}
]
}
]
}
]
},
{
"and": [
{
"haveBlueSuit": {}
},
{
"cycleFrames": 580
}
]
}
]
}Farm cycle drops: 3 Waver, 3 Choot Dev note: The 100 extra cycleFrames is an average extra time needed to return back to the entry door rather than continuing to the opposite door. For simplicity, the weapon-specific cycleFrames are exactly half those in the 'Both Doors' variant, even though technically some weapons may be affected slightly more than others by having to use a specific door. |
From: 1
Top Left Door
To: 2
Middle Left Door
Entrance condition: {
"comeInWithGMode": {
"mode": "indirect",
"morphed": true
}
}Requires: {
"or": [
"h_artificialMorphMovement",
"h_artificialMorphBombHorizontally"
]
}
"h_heatedGModeOffCameraDoor"Dev note: It is possible to open the gate as it closes, but isn't expected since this is off camera. To do that would require resetting the room. |
From: 2
Middle Left Door
To: 1
Top Left Door
Entrance condition: {
"comeInWithGMode": {
"mode": "indirect",
"morphed": true
}
}Requires: "canOffScreenMovement" "h_heatedGModeOffCameraDoor" |
From: 2
Middle Left Door
To: 3
Bottom Left Door
Entrance condition: {
"comeInWithGMode": {
"mode": "indirect",
"morphed": true
}
}Requires: "h_heatedGModeOffCameraDoor" |
From: 2
Middle Left Door
To: 4
Top Right Door
Entrance condition: {
"comeInWithGMode": {
"mode": "indirect",
"morphed": true
}
}Requires: "canOffScreenMovement" "h_heatedGModeOffCameraDoor" |
From: 3
Bottom Left Door
To: 2
Middle Left Door
Entrance condition: {
"comeInWithGMode": {
"mode": "indirect",
"morphed": true
}
}Requires: "h_artificialMorphMovement" "h_heatedGModeOffCameraDoor" Dev note: It is possible to open the gate as it closes, but isn't expected since this is off camera. To do that would require resetting the room. |
From: 4
Top Right Door
To: 2
Middle Left Door
Entrance condition: {
"comeInWithGMode": {
"mode": "indirect",
"morphed": true
}
}Requires: {
"or": [
"h_artificialMorphMovement",
"h_artificialMorphBombHorizontally"
]
}
"h_heatedGModeOffCameraDoor"Dev note: It is possible to open the gate as it closes, but isn't expected since this is off camera. To do that would require resetting the room. |
|
Entrance condition: {
"comeInWithGMode": {
"mode": "any",
"morphed": false
},
"comesThroughToilet": "any"
}Requires: "h_heatedGModeOffCameraDoor" |
|
Entrance condition: {
"comeInWithGMode": {
"mode": "any",
"morphed": false
},
"comesThroughToilet": "any"
}Requires: "h_heatedGModeOffCameraDoor" |
|
Requires: "canUseGrapple"
{
"or": [
"canWallJump",
"HiJump",
"SpaceJump",
"canSpringBallJumpMidAir"
]
}Dev note: ScrewAttack and PowerBombs would use Kill the Pirates. |
|
Carefully shoot the enemies from above. Requires: {
"or": [
"canUseGrapple",
{
"enemyKill": {
"enemies": [
[
"Red Space Pirate (standing)",
"Red Space Pirate (standing)"
],
[
"Red Space Pirate (standing)"
]
]
}
}
]
} |
From: 1
Left Shaft - Top Left Door
To: 5
Far Right Door
It is important avoid touching the invisible fireballs the Alcoons place. It is possible to bomb from the edge of the top door runway into the hidden morph tunnel, but if Samus is not at the edge, she will bonk and fall. After entering the morph tunnel, roll through the two camera scroll blocks a few times to overload PLMs. They are at the entrance and two tiles in the tunnel. Exit G-mode and go through the room to the far right door. Entrance condition: {
"comeInWithGMode": {
"mode": "any",
"morphed": true
}
}Requires: "canTrickyDodgeEnemies"
{
"or": [
"h_artificialMorphBombHorizontally",
"h_artificialMorphJumpIntoIBJ",
{
"and": [
"h_artificialMorphIBJ",
"h_artificialMorphPowerBomb"
]
},
{
"and": [
"h_artificialMorphSpringBall",
"HiJump"
]
},
"h_artificialMorphSpringBallBombJump"
]
}
"h_heatedGModeOffCameraDoor" |
From: 1
Left Shaft - Top Left Door
To: 5
Far Right Door
It is important avoid touching the invisible fireballs the Alcoons place. It is possible to kill them without any beam upgrades or ammo by jumping and shooting horizontally near the floor surface. Stay near the far wall when shooting to prevent getting too close and triggering their jump. After entering the morph tunnel, roll through the two camera scroll blocks a few times to overload PLMs. They are at the entrance and two tiles in the tunnel. Exit G-mode and go through the room to the far right door. Entrance condition: {
"comeInWithGMode": {
"mode": "any",
"morphed": false
}
}Requires: "Morph"
{
"or": [
{
"and": [
"canBombHorizontally",
"canTrickyJump"
]
},
"HiJump",
"canWallJump",
"SpaceJump",
"canSpringBallJumpMidAir",
"canIBJ",
"canTrickyUseFrozenEnemies"
]
}
"h_heatedGModeOffCameraDoor"Dev note: It is possible to go from 5->1 with a bomb spread, but it requires difficult off-screen movement to escape the room. |
From: 2
Left Shaft - Bottom Right Door
To: 5
Far Right Door
It is important avoid touching the invisible fireballs the Alcoons place. Jump over them or kill the Alcoons with Power Bombs. After entering the morph tunnel, roll through the two camera scroll blocks a few times to overload PLMs. They are at the entrance and two tiles in the tunnel. Exit G-mode and go through the room to the far right door. Entrance condition: {
"comeInWithGMode": {
"mode": "any",
"morphed": true
}
}Requires: {
"or": [
{
"and": [
"h_artificialMorphIBJ",
{
"ammo": {
"type": "PowerBomb",
"count": 3
}
}
]
},
{
"and": [
"h_artificialMorphSpringBall",
"HiJump"
]
},
{
"and": [
"h_artificialMorphSpringBallBombJump",
{
"or": [
"h_artificialMorphBombs",
{
"ammo": {
"type": "PowerBomb",
"count": 4
}
}
]
}
]
}
]
}
"h_heatedGModeOffCameraDoor" |
From: 2
Left Shaft - Bottom Right Door
To: 5
Far Right Door
It is important avoid touching the invisible fireballs the Alcoons place. It is possible to kill them without any beam upgrades or ammo by jumping and shooting horizontally near the floor surface. Stay near the far wall when shooting to prevent getting too close and triggering their jump. After entering the morph tunnel, roll through the two camera scroll blocks a few times to overload PLMs. They are at the entrance and two tiles in the tunnel. Exit G-mode and go through the room to the far right door. Entrance condition: {
"comeInWithGMode": {
"mode": "any",
"morphed": false
}
}Requires: "Morph"
{
"or": [
"HiJump",
"canWallJump",
"SpaceJump",
"canSpringBallJumpMidAir",
"canIBJ",
{
"and": [
"h_crouchJumpDownGrab",
"canBombHorizontally"
]
},
{
"and": [
"h_crouchJumpDownGrab",
"canTrickyUseFrozenEnemies"
]
}
]
}
"h_heatedGModeOffCameraDoor"Dev note: Frozen Alcoon platforms and Artificial morph IBJ are not included, as Samus can crouch jump and down grab; they can be considered if G-mode + flash suits are added, though they are still likely not useful. |
From: 3
Left Shaft - Middle Right Door
To: 5
Far Right Door
It is important avoid touching the invisible fireballs the Alcoons place. Jump over them or kill the Alcoons with Power Bombs. After entering the morph tunnel, roll through the two camera scroll blocks a few times to overload PLMs. They are at the entrance and two tiles in the tunnel. Exit G-mode and go through the room to the far right door. Entrance condition: {
"comeInWithGMode": {
"mode": "any",
"morphed": true
}
}Requires: {
"or": [
{
"and": [
"h_artificialMorphIBJ",
{
"ammo": {
"type": "PowerBomb",
"count": 2
}
}
]
},
{
"and": [
"h_artificialMorphSpringBall",
"HiJump"
]
},
{
"and": [
"h_artificialMorphSpringBallBombJump",
{
"or": [
"h_artificialMorphBombs",
{
"ammo": {
"type": "PowerBomb",
"count": 3
}
}
]
}
]
}
]
}
"h_heatedGModeOffCameraDoor" |
From: 3
Left Shaft - Middle Right Door
To: 5
Far Right Door
It is important avoid touching the invisible fireballs the Alcoons place. It is possible to kill them without any beam upgrades or ammo by jumping and shooting horizontally near the floor surface. Stay near the far wall when shooting to prevent getting too close and triggering their jump. After entering the morph tunnel, roll through the two camera scroll blocks a few times to overload PLMs. They are at the entrance and two tiles in the tunnel. Exit G-mode and go through the room to the far right door. Entrance condition: {
"comeInWithGMode": {
"mode": "any",
"morphed": false
}
}Requires: "Morph"
{
"or": [
"HiJump",
"canWallJump",
"SpaceJump",
"canSpringBallJumpMidAir",
"canIBJ",
{
"and": [
"h_crouchJumpDownGrab",
"canBombHorizontally"
]
},
{
"and": [
"h_crouchJumpDownGrab",
"canTrickyUseFrozenEnemies"
]
}
]
}
"h_heatedGModeOffCameraDoor"Dev note: Frozen Alcoon platforms and Artificial morph IBJ are not included, as Samus can crouch jump and down grab; they can be considered if G-mode + flash suits are added, though they are still likely not useful. |
From: 4
Left Shaft - Top Right Door
To: 5
Far Right Door
It is important avoid touching the invisible fireballs the Alcoons place. Jump over them or kill the Alcoons with Power Bombs. After entering the morph tunnel, roll through the two camera scroll blocks a few times to overload PLMs. They are at the entrance and two tiles in the tunnel. Exit G-mode and go through the room to the far right door. Entrance condition: {
"comeInWithGMode": {
"mode": "any",
"morphed": true
}
}Requires: {
"or": [
{
"and": [
"h_artificialMorphIBJ",
"h_artificialMorphPowerBomb"
]
},
{
"and": [
"h_artificialMorphSpringBall",
"HiJump"
]
},
{
"and": [
"h_artificialMorphSpringBallBombJump",
"h_additionalBomb"
]
}
]
}
"h_heatedGModeOffCameraDoor" |
From: 4
Left Shaft - Top Right Door
To: 5
Far Right Door
It is important avoid touching the invisible fireballs the Alcoons place. It is possible to kill them without any beam upgrades or ammo by jumping and shooting horizontally near the floor surface. Stay near the far wall when shooting to prevent getting too close and triggering their jump. After entering the morph tunnel, roll through the two camera scroll blocks a few times to overload PLMs. They are at the entrance and two tiles in the tunnel. Exit G-mode and go through the room to the far right door. Entrance condition: {
"comeInWithGMode": {
"mode": "any",
"morphed": false
}
}Requires: "Morph"
{
"or": [
"HiJump",
"canWallJump",
"SpaceJump",
"canSpringBallJumpMidAir",
"canIBJ",
{
"and": [
"h_crouchJumpDownGrab",
"canBombHorizontally"
]
},
{
"and": [
"h_crouchJumpDownGrab",
"canTrickyUseFrozenEnemies"
]
}
]
}
"h_heatedGModeOffCameraDoor"Dev note: Frozen Alcoon platforms and Artificial morph IBJ are not included, as Samus can crouch jump and down grab; they can be considered if G-mode + flash suits are added, though they are still likely not useful. |
From: 5
Top Right Door
To: 6
Bottom Right Junction
Kill both Cacatacs and collect their drops along the way. There will be a risk of a spike hit unless the first Cacatac is safely killed from above. Requires: "canDash"
{
"or": [
"canInsaneJump",
{
"and": [
{
"enemyDamage": {
"enemy": "Cacatac",
"type": "spike",
"hits": 1
}
},
{
"heatFrames": 20
}
]
},
{
"and": [
"canDodgeWhileShooting",
{
"heatFrames": 40
}
]
}
]
}
{
"or": [
{
"and": [
"Wave",
{
"or": [
"Spazer",
"Plasma"
]
},
{
"heatFramesWithEnergyDrops": {
"frames": 105,
"drops": [
{
"enemy": "Cacatac",
"count": 2
}
]
}
}
]
},
{
"and": [
"Plasma",
{
"heatFramesWithEnergyDrops": {
"frames": 115,
"drops": [
{
"enemy": "Cacatac",
"count": 2
}
]
}
}
]
},
{
"and": [
"canUseGrapple",
{
"heatFramesWithEnergyDrops": {
"frames": 125,
"drops": [
{
"enemy": "Cacatac",
"count": 2
}
]
}
}
]
},
{
"and": [
"Wave",
{
"heatFramesWithEnergyDrops": {
"frames": 135,
"drops": [
{
"enemy": "Cacatac",
"count": 2
}
]
}
}
]
},
{
"and": [
{
"ammo": {
"type": "Missile",
"count": 2
}
},
{
"heatFramesWithEnergyDrops": {
"frames": 135,
"drops": [
{
"enemy": "Cacatac",
"count": 2
}
]
}
}
]
},
{
"and": [
"Spazer",
{
"heatFramesWithEnergyDrops": {
"frames": 145,
"drops": [
{
"enemy": "Cacatac",
"count": 2
}
]
}
}
]
},
{
"and": [
"ScrewAttack",
{
"heatFramesWithEnergyDrops": {
"frames": 175,
"drops": [
{
"enemy": "Cacatac",
"count": 2
}
]
}
}
]
},
{
"heatFramesWithEnergyDrops": {
"frames": 205,
"drops": [
{
"enemy": "Cacatac",
"count": 2
}
]
}
}
]
}
{
"heatFrames": 95
} |
From: 7
G-Mode, Bottom Right (Started at Right)
To: 2
Far Left Door
The crumble bridge will be air. Either tank a spike hit, carefully Space Jump over it, or with SpeedBooster, use the full runway to run over the pit. Note that there is a slight incline just before the bridge, which can be used as an indicator for where to Space Jump. Requires: {
"or": [
{
"and": [
"canTrickyJump",
"SpaceJump"
]
},
"h_speedJump",
{
"spikeHits": 1
}
]
}
"h_heatedGModeOffCameraDoor"Exit condition: {
"leaveNormally": {}
}Unlocks doors: {"types":["missiles"],"requires":[{"heatFrames":50}]}
{"types":["super"],"requires":[]}
{"types":["powerbomb"],"requires":[{"heatFrames":110}]}Dev note: Requires leaving the room, as Samus is off camera and shouldn't be expected to do more in-room. |
From: 8
G-Mode, Bottom Right (Started at Left)
To: 1
Top of the Shaft Left Door
The speed block platform above the bottom door will not be usable, so Samus must blindly wall jump up the first ledge or use some assist. There is some visibility on the left side of the screen, which is useful in determining which ledge she is on. The Cacatacs will not be able to damage Samus off screen. Requires: "canOffScreenMovement"
{
"or": [
"canWallJump",
"HiJump",
"canSpringBallJumpMidAir",
"SpaceJump"
]
}
"h_heatedGModeOffCameraDoor"Exit condition: {
"leaveNormally": {}
}Unlocks doors: {"types":["missiles"],"requires":[{"heatFrames":50}]}
{"types":["super"],"requires":[]}
{"types":["powerbomb"],"requires":[{"heatFrames":110}]}Dev note: Requires leaving the room, as Samus is off camera and shouldn't be expected to do more in-room. FIXME: It is possible to X-Ray climb from inside the speed blocks. Count shots to determine Samus' position. |
From: 8
G-Mode, Bottom Right (Started at Left)
To: 3
Bottom Door
Walk back and forth until it is obvious Samus is on the doorshell. Use X-Ray, jump, and shoot down at the bottom of the jump, this may take a couple attempts. For a faster exit, place a Bomb on the door, then quickly unmorph and use X-Ray. With Grapple it is faster still; use X-Ray while crouched, then quickly use Grapple while angling down. Requires: "h_heatedGMode"
{
"or": [
{
"heatFrames": 160
},
{
"and": [
"h_useMorphBombs",
{
"heatFrames": 85
}
]
},
{
"and": [
"canUseGrapple",
{
"heatFrames": 50
}
]
}
]
}Exit condition: {
"leaveNormally": {}
}Unlocks doors: {"types":["missiles"],"requires":[{"heatFrames":50}]}
{"types":["super"],"requires":[]}
{"types":["powerbomb"],"requires":[{"heatFrames":110}]}Dev note: Requires leaving the room, as Samus is off camera and shouldn't be expected to do more in-room. It's possible to use a Bomb while still artificially morphed, but that only saves a few heat frames and is ignored. |
From: 8
G-Mode, Bottom Right (Started at Left)
To: 4
Bottom Right Door
Requires: "h_heatedGModeOffCameraDoor" Exit condition: {
"leaveNormally": {}
}Unlocks doors: {"types":["missiles"],"requires":[{"heatFrames":50}]}
{"types":["super"],"requires":[]}
{"types":["powerbomb"],"requires":[{"heatFrames":110}]}Dev note: Requires leaving the room, as Samus is off camera and shouldn't be expected to do more in-room. |
From: 8
G-Mode, Bottom Right (Started at Left)
To: 5
Top Right Door
The speed block platform above the bottom door will not be usable, so Samus must blindly wall jump up the first ledge or use some assist. There is some visibility on the left side of the screen, which is useful in determining which ledge she is on. The Cacatacs will not be able to damage Samus off screen. Requires: "canOffScreenMovement"
{
"or": [
"canWallJump",
"HiJump",
"canSpringBallJumpMidAir",
"SpaceJump"
]
}
"h_heatedGModeOffCameraDoor"Exit condition: {
"leaveNormally": {}
}Unlocks doors: {"types":["missiles"],"requires":[{"heatFrames":50}]}
{"types":["super"],"requires":[]}
{"types":["powerbomb"],"requires":[{"heatFrames":110}]}Dev note: Requires leaving the room, as Samus is off camera and shouldn't be expected to do more in-room. |
|
Jump and aim down to bring the Sova on camera. Farm with Grapple while crouched and touching the crumble platform. Requires: "h_heatProof"
"canUseGrapple"
"canCameraManip"
{
"resetRoom": {
"nodes": [
1
]
}
}
{
"simpleCycleFrames": 105
}
{
"cycleFrames": 25
}Resets obstacles: A Farm cycle drops: 1 Sova |
|
Requires: "h_heatProof"
"canUseGrapple"
{
"resetRoom": {
"nodes": [
2
]
}
}
{
"cycleFrames": 250
}
{
"or": [
{
"noFlashSuit": {}
},
{
"and": [
"canMidAirMorph",
{
"cycleFrames": 30
}
]
}
]
}Resets obstacles: A Farm cycle drops: 2 Sova |
From: 1
Top Right Door
To: 2
Middle Right Door
Entrance condition: {
"comeInWithGMode": {
"mode": "any",
"morphed": true
}
}Requires: {
"or": [
"h_artificialMorphIBJ",
{
"and": [
"HiJump",
"h_artificialMorphSpringBall"
]
},
{
"and": [
"h_artificialMorphSpringBallBombJump",
"h_additionalBomb"
]
}
]
}
"h_heatedGModeOffCameraDoor"Dev note: It is probably possible to farm the Sovas at this door, but it would be difficult and slow and isn't expected. |
From: 1
Top Right Door
To: 2
Middle Right Door
Entrance condition: {
"comeInWithGMode": {
"mode": "any",
"morphed": false
}
}Requires: "Morph"
{
"or": [
"HiJump",
"canWallJump",
"canSpringBallJumpMidAir",
"SpaceJump",
"canIBJ",
"canTrickyUseFrozenEnemies"
]
}
"h_heatedGModeOffCameraDoor"Dev note: It is probably possible to farm the Sovas at this door, but it would be difficult and slow and isn't expected. |
From: 2
Middle Right Door
To: 1
Top Right Door
Kill the Sovas or wait at around 25 seconds for them to get out of the way before going down and passing them while climbing to the top door. It is possible to wait 2.5 minutes for the Sovas to return on camera to be sure Samus won't touch them. Entrance condition: {
"comeInWithGMode": {
"mode": "any",
"morphed": true
}
}Requires: "h_artificialMorphMovement" "canOffScreenMovement" "h_heatedGModeOffCameraDoor" Dev note: The single tile ledge at this door doesn't seem to make it any slower to exit. It is probably possible to farm the Sovas at this door, but it would be difficult and isn't expected. |
From: 2
Middle Right Door
To: 3
Bottom Right Door
Kill the Sovas or wait at least 20 seconds for them to get out of the way before going to the bottom door. It is slightly safer but very slow to wait 2.5 minutes for the Sovas to return on camera to be sure Samus won't touch them. Entrance condition: {
"comeInWithGMode": {
"mode": "any",
"morphed": true
}
}Requires: "h_artificialMorphMovement" "h_heatedGModeOffCameraDoor" Dev note: It is probably possible to farm the Sovas at this door, but it would be difficult and isn't expected. |
From: 3
Bottom Right Door
To: 2
Middle Right Door
Entrance condition: {
"comeInWithGMode": {
"mode": "any",
"morphed": true
}
}Requires: {
"or": [
"h_artificialMorphIBJ",
{
"and": [
"HiJump",
"h_artificialMorphSpringBall"
]
},
{
"and": [
"h_artificialMorphSpringBallBombJump",
"h_additionalBomb"
]
}
]
}
"h_heatedGModeOffCameraDoor"Dev note: It is probably possible to farm the Sovas at this door, but it would be difficult and slow and isn't expected. |
From: 3
Bottom Right Door
To: 2
Middle Right Door
Entrance condition: {
"comeInWithGMode": {
"mode": "any",
"morphed": false
}
}Requires: "Morph"
{
"or": [
"HiJump",
"canWallJump",
"canSpringBallJumpMidAir",
"SpaceJump",
"canIBJ",
"canTrickyUseFrozenEnemies"
]
}
"h_heatedGModeOffCameraDoor"Dev note: It is probably possible to farm the Sovas at this door, but it would be difficult and slow and isn't expected. |
|
Requires: {
"or": [
{
"and": [
{
"simpleCycleFrames": 140
},
{
"cycleFrames": 20
}
]
},
{
"and": [
"canFarmWhileShooting",
"canUseGrapple",
{
"simpleCycleFrames": 100
},
{
"cycleFrames": 35
}
]
}
]
}Farm cycle drops: 5 Gamet |
|
Avoid stepping on all three crumble blocks before moving through the item to overload PLMs, then go through the crumble blocks. After dropping below, move to the door quickly in order to prevent GT falling on Samus. Note that if the item is not there, it is still possible to overload PLMs by using bomb spreads on crumble blocks that have never been stepped on. Entrance condition: {
"comeInWithGMode": {
"mode": "direct",
"morphed": false
}
}Requires: "canRemoteAcquire"
{
"or": [
{
"and": [
{
"itemNotCollectedAtNode": 3
},
"canRiskPermanentLossOfAccess"
]
},
{
"and": [
"Charge",
"h_useMorphBombs"
]
}
]
}
"h_heatedGModeOffCameraDoor"Exit condition: {
"leaveNormally": {}
}Collects items: 3 Unlocks doors: {"types":["missiles"],"requires":[{"heatFrames":50}]}
{"types":["super"],"requires":[]}
{"types":["powerbomb"],"requires":[{"heatFrames":110}]}Dev note: This strat forces Samus to leave the room because the camera is stuck at the top left of the room. FIXME: It is possible to get to the top right item, but its not easy or too useful. It is possible to use the item to break the Bomb blocks and escape. Fighting GT while blind is unreasonable. |
From: 1
Left Door
To: 2
Right Door
Avoid stepping on all three crumble blocks. Use many bomb spreads to place bombs on them and overload PLMs before going through. After dropping below, move to the door quickly in order to prevent GT falling on Samus. Entrance condition: {
"comeInWithGMode": {
"mode": "any",
"morphed": false
}
}Requires: "canComplexGMode" "Charge" "h_useMorphBombs" "h_heatedGModeOffCameraDoor" Exit condition: {
"leaveNormally": {}
}Unlocks doors: {"types":["missiles"],"requires":[{"heatFrames":50}]}
{"types":["super"],"requires":[]}
{"types":["powerbomb"],"requires":[{"heatFrames":110}]}Dev note: This strat forces Samus to leave the room because the camera is stuck at the top left of the room. FIXME: It is possible to get to the top right item, but its not easy or too useful. It is possible to use the item to break the Bomb blocks and escape. Fighting GT while blind is unreasonable. |
From: 1
Left Door
To: 2
Right Vertical Door
Overload PLMs using the camera scroll blocks just right of the downward passageway by the left door. Blindly traverse the maze until the end, where Samus will be stuck at the far right next to the shot block. Exit G-mode just one tile to the left, Morph, use a Bomb or Power Bomb to destroy the shot block and escape through the door. Entrance condition: {
"comeInWithGMode": {
"mode": "any",
"morphed": false
}
}Requires: "canOffScreenMovement"
"h_bombThings"
"h_heatedGModeOffCameraDoor"
{
"heatFrames": 200
} |
From: 1
Left Door
To: 2
Right Vertical Door
Be careful not to overload PLMs with the camera scroll blocks just right of the downward passageway by the left door; use the item to finish overloading PLMs. Blindly traverse the maze until the end, where Samus will be stuck at the far right next to the shot block. Exit G-mode just one tile to the left, Morph, use a Bomb or Power Bomb to destroy the shot block and escape through the door. Entrance condition: {
"comeInWithGMode": {
"mode": "direct",
"morphed": false
}
}Requires: "canRemoteAcquire"
"canOffScreenMovement"
"h_bombThings"
"h_heatedGModeOffCameraDoor"
{
  "heatFrames": 200
}Collects items: 4 |
From: 3
Bottom Horizontal Door
To: 2
Right Vertical Door
PLMs will be overloaded using the camera scroll blocks while climbing the room. Blindly traverse the maze until the end, where Samus will be stuck at the far right next to the shot block. Exit G-mode just one tile to the left, Morph, use a Bomb or Power Bomb to destroy the shot block and escape through the door. Note that it is possible to climb up with a tricky dash jump and no wall jump. Either kill the Alcoon before it spawns and stationary, invisible lasers, or let the right alcoons shoot enough to overload projectiles. Entrance condition: {
"comeInWithGMode": {
"mode": "any",
"morphed": false
}
}Requires: "canOffScreenMovement"
{
"or": [
"canWallJump",
"HiJump",
"canSpringBallJumpMidAir",
"SpaceJump",
"canUseFrozenEnemies",
"canIBJ",
{
"and": [
"canTrickyDashJump",
"canTrickyDodgeEnemies"
]
}
]
}
"h_bombThings"
"h_heatedGModeOffCameraDoor"
{
"heatFrames": 200
} |
From: 3
Bottom Horizontal Door
To: 2
Right Vertical Door
It is tricky to climb the room without fully overloading PLMs. With Ice and either HiJump or Spring Ball, freeze the left Alcoon to the right of where it jumps out of the ground. With HiJump, spin jump off of it and land directly on the middle stair platform. With Spring Ball, morph on top of the Alcoon, jump to barely land on the lowest platform while avoiding the camera scroll blocks one tile above, then use Spring Ball again to jump to the next platform. Alternatively, with Spring Ball and either HiJump, Bombs, or Power Bombs, jump to barely land on the lowest platform while avoiding the camera scroll blocks one tile above, then use Spring Ball again to jump to the next platform. The first jump can be done with HiJump or a bomb boost into Spring Ball jump. Once up above, unmorph and get onto the edge of the runway leading right, then run through the camera scroll blocks to reach the item. This will finish overloading PLMs. Blindly traverse the maze until the end, where Samus will be stuck at the far right next to the shot block. Exit G-mode just one tile to the left, Morph, use a Bomb or Power Bomb to destroy the shot block and escape through the door. There is a row of camera scroll blocks two-tiles above the bottom left platform, and a column two-tiles away from the right of the gap in front of the left door. Entrance condition: {
"comeInWithGMode": {
"mode": "direct",
"morphed": false
}
}Requires: "canRemoteAcquire"
"canOffScreenMovement"
"canTrickyGMode"
{
"or": [
{
"and": [
"canTrickyUseFrozenEnemies",
"HiJump"
]
},
{
"and": [
"canTrickyUseFrozenEnemies",
"h_useSpringBall"
]
},
{
"and": [
"HiJump",
"h_useSpringBall"
]
},
"canSpringBallBombJump"
]
}
"h_bombThings"
"h_heatedGModeOffCameraDoor"
{
"heatFrames": 200
}Collects items: 4 |
|
Shinecharge either right to left or left to right before horizontally sparking across the room. Use the raised step to the left or the lowered step to the right to be able to find the end of the runway. Entrance condition: {
"comeInWithGMode": {
"mode": "any",
"morphed": false
}
}Requires: "canOffScreenMovement"
"canHorizontalMidairShinespark"
{
"canShineCharge": {
"usedTiles": 24.5,
"openEnd": 1
}
}
{
"shinespark": {
"frames": 75,
"excessFrames": 5
}
}
"h_heatedGModeOffCameraDoor" |
|
Space Jump across without falling. The Hibashi (fire pillars) can not hit Samus while off camera. Entrance condition: {
"comeInWithGMode": {
"mode": "any",
"morphed": false
}
}Requires: "canComplexGMode" "SpaceJump" "h_heatedGModeOffCameraDoor" |
|
Entrance condition: {
"comeInWithGMode": {
"mode": "any",
"morphed": false
}
}Requires: "h_heatedGModeOffCameraDoor" |
|
Overload PLMs by rolling through the camera scroll block just right of the bomb blocks, then roll through the morph tunnel and use a bomb boost or Spring Ball to escape the tunnel and get to the door. Without a way to boost out of the tunnel, exit G-mode and use a two-turn X-Ray climb, then ceiling clip by jumping out of the tunnel. Note that the Kihunter is global, and will hit Samus. Without any way to know where the Kihunter will be, a contact hit is expected without Screw Attack or blue suit. Entrance condition: {
"comeInWithGMode": {
"mode": "any",
"morphed": true
},
"comesThroughToilet": "any"
}Requires: "h_artificialMorphMovement"
"canOffScreenMovement"
{
"or": [
"h_artificialMorphBombThings",
"h_artificialMorphSpringBall",
{
"and": [
"canXRayClimb",
"canCeilingClip",
{
"heatFrames": 450
},
{
"or": [
"canTrickyGMode",
{
"heatFrames": 200
}
]
}
]
}
]
}
{
"or": [
"ScrewAttack",
{
"haveBlueSuit": {}
},
{
"enemyDamage": {
"enemy": "Kihunter (red)",
"type": "contact",
"hits": 1
}
}
]
}
"h_heatedGModeOffCameraDoor"Exit condition: {
"leaveNormally": {}
}Unlocks doors: {"types":["missiles"],"requires":[{"heatFrames":50}]}
{"types":["super"],"requires":[]}
{"types":["powerbomb"],"requires":[{"heatFrames":110}]}Dev note: It is also possible, but not expected, to kill the Kihunter by the door and use its drop to get out of the room. Because this is blind and there doesn't appear to be a way to fix the camera, it is not expected to climb higher in the room. FIXME: These door unlock heat frames could be lowered, but it depends on if the Kihunter is alive, and if Samus had to exit G-mode to get out of the tunnel. FIXME: It is possible to pause abuse a drop from the Kihunter. |
|
Overload PLMs by rolling through the camera scroll block just left of the bomb blocks, then roll through to the door. Jump and shoot down to hit the door, or use Grapple to save a few heat frames. Entrance condition: {
"comeInWithGMode": {
"mode": "any",
"morphed": true
}
}Requires: "h_artificialMorphMovement"
{
"heatFrames": 30
}
"h_heatedGModeOffCameraDoor"Dev note: This door is slightly slower to get through than normal off-camera doors because it's vertical. |
From: 6
Bowling Chozo Statue
To: 1
Top Left Door
Jump or Spring Ball jump into a breakable Grapple block. The timing is precise and it can help to break two Grapple blocks to use one as a cue. Crystal Flash then X-ray climb to the region above (less than 1 screen). There is a chance that Samus will not be able to Crystal Flash unless first placing a Bomb or Power Bomb. Requires: {
"notable": "Grapple Block Crystal Flash"
}
"canUseGrapple"
"canJumpIntoRespawningBlock"
"canTrickyJump"
{
"or": [
"HiJump",
"canTrickySpringBallJump",
{
"and": [
"canSpringBallJumpMidAir",
{
"not": "f_DefeatedPhantoon"
},
"canRiskPermanentLossOfAccess"
]
}
]
}
"h_bombThings"
"h_CrystalFlash"
"canXRayClimb"
{
"or": [
"h_fourTileJumpMorph",
"h_useSpringBall",
"canIBJ",
{
"getBlueSpeed": {
"usedTiles": 16,
"steepDownTiles": 4,
"openEnd": 0
}
},
{
"and": [
{
"not": "f_DefeatedPhantoon"
},
"canRiskPermanentLossOfAccess"
]
}
]
}Exit condition: {
"leaveNormally": {}
}Unlocks doors: {"types":["ammo"],"requires":[]}Dev note: FIXME: This may be possible with a spike hit and speedy jump. |
From: 6
Bowling Chozo Statue
To: 1
Top Left Door
IBJ into a breakable Grapple block. The timing is very precise and requires a quick morph and ascent with precisely placed double bomb jumps. Crystal Flash then X-ray climb to the region above (less than 1 screen). There is a chance that Samus will not be able to Crystal Flash unless first placing a Bomb or Power Bomb. Requires: {
"notable": "Grapple Block Crystal Flash"
}
"canUseGrapple"
"canJumpIntoRespawningBlock"
"canInsaneJump"
"canJumpIntoIBJ"
"canDoubleBombJump"
{
"or": [
{
"spikeHits": 1
},
{
"and": [
{
"not": "f_DefeatedPhantoon"
},
"canRiskPermanentLossOfAccess"
]
}
]
}
"h_CrystalFlash"
"canXRayClimb"Exit condition: {
"leaveNormally": {}
}Unlocks doors: {"types":["ammo"],"requires":[]}Dev note: FIXME: This may be possible without a spike hit. |
|
Requires: "h_navigateUnderwater"
{
"or": [
{
"resetRoom": {
"nodes": [
1
]
}
},
{
"and": [
{
"resetRoom": {
"nodes": [
4
]
}
},
{
"cycleFrames": 50
}
]
}
]
}
{
"or": [
{
"and": [
"canUseGrapple",
{
"cycleFrames": 120
}
]
},
{
"and": [
"Gravity",
"ScrewAttack",
{
"cycleFrames": 225
}
]
},
{
"and": [
"Plasma",
{
"cycleFrames": 260
}
]
},
{
"and": [
"Wave",
{
"cycleFrames": 300
}
]
},
{
"and": [
{
"haveBlueSuit": {}
},
{
"cycleFrames": 300
}
]
},
{
"and": [
"Spazer",
{
"cycleFrames": 330
}
]
},
{
"and": [
"Gravity",
"canPseudoScrew",
{
"cycleFrames": 400
}
]
},
{
"and": [
"Ice",
{
"cycleFrames": 600
}
]
},
{
"and": [
"canFarmWhileShooting",
{
"cycleFrames": 880
}
]
},
{
"cycleFrames": 1500
}
]
}Farm cycle drops: 3 Sciser Dev note: One more Sciser could be farmed, but in most scenarios it seems not worth it. Gravity can also slightly speed up some other variants but not enough to be worth modeling. |
|
Requires: "h_navigateUnderwater"
{
"or": [
{
"resetRoom": {
"nodes": [
2
]
}
},
{
"and": [
{
"resetRoom": {
"nodes": [
3
]
}
},
{
"cycleFrames": 80
}
]
}
]
}
{
"or": [
{
"and": [
"canUseGrapple",
{
"cycleFrames": 95
}
]
},
{
"and": [
"Gravity",
"ScrewAttack",
{
"cycleFrames": 120
}
]
},
{
"and": [
"Plasma",
{
"cycleFrames": 150
}
]
},
{
"and": [
"Gravity",
"canPseudoScrew",
{
"cycleFrames": 170
}
]
},
{
"and": [
{
"haveBlueSuit": {}
},
{
"cycleFrames": 170
}
]
},
{
"and": [
"Wave",
{
"cycleFrames": 180
}
]
},
{
"and": [
"Spazer",
{
"cycleFrames": 200
}
]
},
{
"and": [
"Ice",
{
"cycleFrames": 240
}
]
},
{
"cycleFrames": 300
}
]
}Farm cycle drops: 1 Sciser Dev note: More than one Sciser could be farmed, but in most scenarios it seems not worth it. Gravity can also slightly speed up some other variants but not enough to be worth modeling. |
|
Get a bit of run speed on the block and jump to the right ledge. If Samus misses the ledge, try to shoot the block to still collect the item. Requires: {
"or": [
{
"and": [
"canDash",
"canCarefulJump",
"canDisableEquipment"
]
},
"canUseGrapple",
"canWallJump",
"SpaceJump"
]
}
{
"obstaclesCleared": [
"B"
]
}Resets obstacles: B Collects items: 2 |
|
With a miss of the Grapple, if Samus hasn't moved horizontally, simply fall straight down to land safely back on Mama Turtle. Requires: "canUseGrapple"
{
"or": [
"HiJump",
"canSpringBallJumpMidAir"
]
}
"h_midAirShootUp" |
|
Requires: {
"or": [
"canWallJump",
"SpaceJump",
{
"and": [
"HiJump",
"canDash",
"canCarefulJump"
]
},
{
"and": [
"canUseGrapple",
{
"or": [
"HiJump",
"canSpringBallJumpMidAir",
"canPreciseGrapple"
]
},
"h_midAirShootUp"
]
}
]
} |
|
Grappling the block does not require canPreciseGrapple if Mama Turtle is asleep, as there is no risk of death on a miss. Requires: "canUseGrapple"
"h_midAirShootUp"
{
"obstaclesNotCleared": [
"A"
]
}Clears obstacles: B |
|
Grappling the block does not require canPreciseGrapple if Mama Turtle is asleep, as there is no risk of death on a miss. Requires: "canUseGrapple"
{
"obstaclesNotCleared": [
"A"
]
}Clears obstacles: B |
|
Requires: "Morph"
{
"or": [
"Gravity",
"Ice",
"Wave",
"Spazer",
"Plasma",
{
"ammo": {
"type": "Missile",
"count": 2
}
},
{
"ammo": {
"type": "Super",
"count": 1
}
},
{
"ammo": {
"type": "PowerBomb",
"count": 1
}
},
"canUseGrapple",
{
"haveBlueSuit": {}
},
{
"enemyDamage": {
"enemy": "Sciser",
"type": "contact",
"hits": 1
}
}
]
} |
|
Requires: {
"or": [
"h_navigateUnderwater",
{
"enemyDamage": {
"enemy": "Puyo",
"type": "contact",
"hits": 2
}
},
{
"enemyKill": {
"enemies": [
[
"Puyo"
],
[
"Puyo",
"Puyo"
],
[
"Puyo"
]
],
"explicitWeapons": [
"Missile",
"Super",
"PowerBomb",
"Wave",
"Spazer",
"Plasma"
]
}
},
"canUseGrapple"
]
} |
|
Cross the room with Grapple or wall jumps. Under the sand is spikes. Be sure not to turn around before landing or Samus will fall straight through the sand. Breaking spin while midair, such as by tapping an angle button, will help Samus land less deep in the sand - a quick jump when landing will give her a much higher jump. The last wall jump to get around the corner is tricky but it does not require a delayed wall jump, even without HiJump. Requires: "Gravity"
{
"or": [
{
"and": [
"HiJump",
"canWallJump",
{
"or": [
"canPlayInSand",
"canConsecutiveWallJump"
]
}
]
},
{
"and": [
"canTrickyWallJump",
"canConsecutiveWallJump"
]
},
{
"and": [
"canPreciseGrapple",
"canCarefulJump"
]
}
]
}
{
"or": [
{
"ammo": {
"type": "Missile",
"count": 2
}
},
{
"ammo": {
"type": "Super",
"count": 2
}
},
"canUseGrapple",
"canDodgeWhileShooting",
"Spazer",
"Wave",
"Plasma",
"ScrewAttack",
{
"haveBlueSuit": {}
},
{
"enemyDamage": {
"enemy": "Mochtroid",
"type": "contact",
"hits": 1
}
}
]
}
{
"or": [
"canPlayInSand",
{
"spikeHits": 2
}
]
}
{
"or": [
"Grapple",
{
"noBlueSuit": {}
}
]
} |
|
Requires: "SpaceJump"
{
"or": [
{
"ammo": {
"type": "Missile",
"count": 3
}
},
{
"ammo": {
"type": "Super",
"count": 3
}
},
"canUseGrapple",
"canTrickyJump",
"canDodgeWhileShooting",
"Spazer",
"Wave",
"Plasma",
"ScrewAttack",
{
"haveBlueSuit": {}
},
{
"enemyDamage": {
"enemy": "Mochtroid",
"type": "contact",
"hits": 2
}
}
]
} |
|
Cross the room with Grapple or wall jumps. Under the sand is spikes. Be sure not to turn around before landing or Samus will fall straight through the sand. Breaking spin while midair, such as by tapping an angle button, will help Samus land less deep in the sand - a quick jump when landing will give her a much higher jump. Requires: "Gravity"
{
"or": [
"canConsecutiveWallJump",
"Grapple",
{
"and": [
"canWallJump",
"HiJump",
"canPlayInSand"
]
}
]
}
{
"or": [
{
"ammo": {
"type": "Missile",
"count": 2
}
},
{
"ammo": {
"type": "Super",
"count": 2
}
},
"canUseGrapple",
"canDodgeWhileShooting",
"Spazer",
"Wave",
"Plasma",
"ScrewAttack",
{
"haveBlueSuit": {}
},
{
"enemyDamage": {
"enemy": "Mochtroid",
"type": "contact",
"hits": 1
}
}
]
}
{
"or": [
"canPlayInSand",
{
"spikeHits": 1
}
]
}
{
"or": [
"Grapple",
{
"noBlueSuit": {}
}
]
} |
|
Requires: "SpaceJump"
{
"or": [
{
"ammo": {
"type": "Missile",
"count": 3
}
},
{
"ammo": {
"type": "Super",
"count": 3
}
},
"canUseGrapple",
"canTrickyJump",
"canDodgeWhileShooting",
"Spazer",
"Wave",
"Plasma",
"ScrewAttack",
{
"haveBlueSuit": {}
},
{
"enemyDamage": {
"enemy": "Mochtroid",
"type": "contact",
"hits": 2
}
}
]
} |
|
Kill Draygon by grappling to the top left turret. Number of Draygon and turret hits varies; Close to a worst-case scenario is assumed. Requires: {
"notable": "Grapple Kill"
}
"h_navigateUnderwater"
{
"or": [
{
"and": [
"h_breakThreeDraygonTurrets",
{
"or": [
"Gravity",
"canTrickyJump",
{
"enemyDamage": {
"enemy": "Draygon",
"type": "turretProjectile",
"hits": 1
}
}
]
},
{
"or": [
"Gravity",
"Morph",
"canTrickyJump",
{
"enemyDamage": {
"enemy": "Draygon",
"type": "contact",
"hits": 1
}
}
]
}
]
},
{
"and": [
"canDodgeWhileShooting",
{
"or": [
"Gravity",
"canTrickyJump",
{
"enemyDamage": {
"enemy": "Draygon",
"type": "turretProjectile",
"hits": 3
}
}
]
},
{
"or": [
"Gravity",
{
"enemyDamage": {
"enemy": "Draygon",
"type": "turretProjectile",
"hits": 2
}
}
]
},
{
"or": [
"Morph",
{
"enemyDamage": {
"enemy": "Draygon",
"type": "contact",
"hits": 2
}
}
]
},
{
"enemyDamage": {
"enemy": "Draygon",
"type": "turretProjectile",
"hits": 2
}
}
]
},
{
"and": [
"canTrickyDodgeEnemies",
"canBeLucky",
{
"enemyDamage": {
"enemy": "Draygon",
"type": "turretProjectile",
"hits": 1
}
}
]
}
]
}
"canUseGrapple"
{
"draygonElectricityFrames": 240
}
{
"or": [
{
"enemyDamage": {
"enemy": "Draygon",
"type": "contact",
"hits": 4
}
},
{
"and": [
"canBeLucky",
{
"enemyDamage": {
"enemy": "Draygon",
"type": "contact",
"hits": 2
}
}
]
}
]
}Clears obstacles: f_DefeatedDraygon Sets flags: f_DefeatedDraygon |
|
Requires: {
"or": [
"Wave",
"Spazer",
"Plasma",
"canUseGrapple",
{
"and": [
"SpaceJump",
"canCarefulJump",
"ScrewAttack"
]
},
{
"haveBlueSuit": {}
},
{
"and": [
"h_usePowerBomb",
{
"ammo": {
"type": "PowerBomb",
"count": 1
}
}
]
}
]
}
{
"or": [
"h_navigateUnderwater",
{
"enemyDamage": {
"enemy": "Puyo",
"type": "contact",
"hits": 1
}
}
]
} |
|
Requires: {
"or": [
"Wave",
"Spazer",
"Plasma",
"canUseGrapple",
{
"and": [
"SpaceJump",
"canCarefulJump",
"ScrewAttack"
]
},
{
"haveBlueSuit": {}
},
{
"and": [
"h_usePowerBomb",
{
"ammo": {
"type": "PowerBomb",
"count": 1
}
}
]
}
]
}
{
"or": [
"h_navigateUnderwater",
{
"enemyDamage": {
"enemy": "Puyo",
"type": "contact",
"hits": 1
}
}
]
} |
