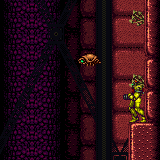
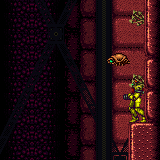
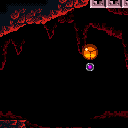
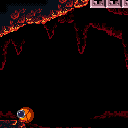
canResetFallSpeed (Hard)
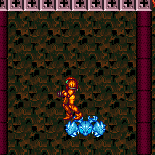
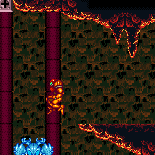
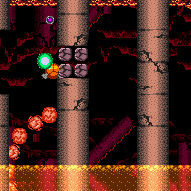
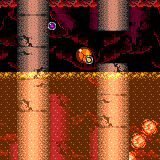
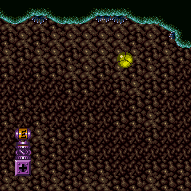
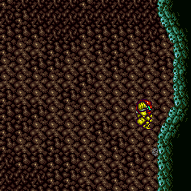
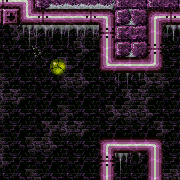
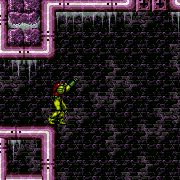
Using unmorph as a way to reset fall speed.
Dev note: Taking enemy damage can get the same effect but more situations where this is used would need to be found first.
Strats ()
From: 8
Central Junction
To: 5
Alcatraz Door
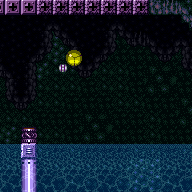
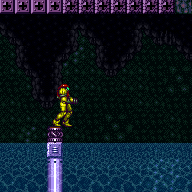
Unmorph a few tiles above the ground, and hold right to land on the platform aligning Samus with the top of the doorway. If needed, shoot the door open while falling, and hold jump to buffer the shinespark activation as soon as Samus lands. Requires: {
"canShineCharge": {
"usedTiles": 25,
"steepUpTiles": 3,
"steepDownTiles": 3,
"openEnd": 1
}
}
"Morph"
"canResetFallSpeed"
"canShinechargeMovementTricky"
{
"shinespark": {
"frames": 12,
"excessFrames": 0
}
}Exit condition: {
"leaveWithSpark": {
"position": "top"
}
}Unlocks doors: {"types":["super"],"requires":[]}
{"types":["missiles","powerbomb"],"requires":["never"]} |
From: 4
Junction (Right side Pit)
To: 2
Right Door
Freeze the Choot when it swings right on its jump. Quickly get on top of it by first getting onto the pillar to the left, or with a Spring Ball jump. Perform a precise spring ball jump to get to the far right ledge, while avoiding hitting the water surface. While on the ledge, stand on the raised ground to the right and jump to the surface, then space jump across the water to the left. Requires: "canTrickyUseFrozenEnemies"
"canTrickySpringBallJump"
{
"or": [
{
"and": [
"canResetFallSpeed",
"canTrickyJump"
]
},
"canStationaryLateralMidAirMorph",
"canSpringFling"
]
}
"canSpaceJumpWaterBounce"
"canWallJump" |
From: 4
Junction (Right side Pit)
To: 2
Right Door
Requires: "canSuitlessMaridia"
{
"or": [
{
"and": [
"HiJump",
"canSpringBallJumpMidAir"
]
},
{
"and": [
"HiJump",
"canTrickyUseFrozenEnemies"
]
},
{
"and": [
"canTrickyUseFrozenEnemies",
"canTrickySpringBallJump",
{
"or": [
"canResetFallSpeed",
"canStationaryLateralMidAirMorph",
"canSpringFling"
]
}
]
}
]
}
"h_storedSpark"
{
"shinespark": {
"frames": 11,
"excessFrames": 5
}
} |
|
Jump and Morph very quickly to place a bomb to boost Samus to the right. The bomb should be as far right as possible, and just above door height. Requires: "h_bombThings"
{
"or": [
"canBeLucky",
"Bombs",
{
"ammo": {
"type": "PowerBomb",
"count": 4
}
}
]
}
{
"tech": "canUnmorphBombBoost"
}
"canResetFallSpeed"
"can4HighMidAirMorph"Collects items: 3 Dev note: canBeLucky added for difficulty placement. |
|
Perform a wall jump off the item pedestal while avoiding the water. Lay a Power Bomb (or Bomb) and use it to boost to the right, with a well-timed unmorph to reset fall speed. The placement of the bomb is more lenient with a CWJ. It is ideal to gain 3 frames of dash speed, the maximum possible, but lower amounts can work. It is even possible to do a regular wall jump instead of a CWJ, but the CWJ makes it significantly more lenient. It is best for the wall jump to be performed as high as possible. If Speed Booster is available, equipping it will generally be helpful, as it will increase the height of Samus' wall jump based on the amount of dash speed. Requires: {
"notable": "Walljump Bomb Boost"
}
{
"or": [
"canCWJ",
"canBePatient"
]
}
"canWallJumpBombBoost"
"canResetFallSpeed"
{
"obstaclesNotCleared": [
"A",
"B",
"C"
]
} |
From: 4
Lower Section - Top Right Door
To: 4
Lower Section - Top Right Door
Entrance condition: {
"comeInWithGMode": {
"mode": "direct",
"morphed": false
}
}Requires: {
"or": [
"SpaceJump",
"canWallJump",
{
"and": [
"canLongIBJ",
"Gravity"
]
},
{
"and": [
"HiJump",
"canJumpIntoIBJ"
]
},
{
"and": [
"canLongIBJ",
"canBombHorizontally",
"canResetFallSpeed"
]
},
{
"and": [
"canJumpIntoIBJ",
"canLongIBJ",
"canTrickyJump"
]
},
{
"and": [
"HiJump",
{
"or": [
"canSpeedyJump",
"canSpringBallJumpMidAir"
]
}
]
},
{
"and": [
"canTrickyJump",
"canPreciseGrapple"
]
},
{
"and": [
"Gravity",
"canMidairShinespark",
"h_shinechargeMaxRunway",
{
"shinespark": {
"frames": 35,
"excessFrames": 10
}
}
]
}
]
}Exit condition: {
"leaveWithGMode": {
"morphed": false
}
} |
From: 4
Lower Section - Top Right Door
To: 8
Bridge Right Door (Leads to Bottom Right Door)
Climb up 1 screen. Entrance condition: {
"comeInWithGMode": {
"mode": "direct",
"morphed": false
}
}Requires: "canComplexGMode"
"canGModeXRayClimb"
{
"notable": "Get Inside the Bridge"
}
"canSkipDoorLock"
{
"or": [
"canArtificialMorph",
"canWallJump",
"SpaceJump",
{
"and": [
"canLongIBJ",
"Gravity"
]
},
{
"and": [
"HiJump",
"canJumpIntoIBJ"
]
},
{
"and": [
"canLongIBJ",
"canBombHorizontally",
"canResetFallSpeed"
]
},
{
"and": [
"canJumpIntoIBJ",
"canLongIBJ",
"canTrickyJump"
]
},
{
"and": [
"HiJump",
{
"or": [
"canSpeedyJump",
"canSpringBallJumpMidAir"
]
}
]
},
{
"and": [
"canTrickyJump",
"canPreciseGrapple"
]
},
{
"and": [
"Gravity",
"canMidairShinespark",
"h_shinechargeMaxRunway",
{
"shinespark": {
"frames": 35,
"excessFrames": 10
}
}
]
}
]
}
"canXRayClimb" |
From: 4
Lower Section - Top Right Door
To: 8
Bridge Right Door (Leads to Bottom Right Door)
Enter with G-mode direct, back up to between 1 and 6 pixels from the door transition, and activate X-ray to get very deep stuck in the door. Climb up 1 screen, and perform a turnaround buffered spin-jump away from the door to trigger the transition, bypassing any lock on the door. Entrance condition: {
"comeInWithGMode": {
"mode": "direct",
"morphed": false
}
}Requires: "canComplexGMode"
"canGModeXRayClimb"
{
"notable": "Get Inside the Bridge"
}
{
"or": [
"canArtificialMorph",
"canWallJump",
"SpaceJump",
{
"and": [
"canLongIBJ",
"Gravity"
]
},
{
"and": [
"HiJump",
"canJumpIntoIBJ"
]
},
{
"and": [
"canLongIBJ",
"canBombHorizontally",
"canResetFallSpeed"
]
},
{
"and": [
"canJumpIntoIBJ",
"canLongIBJ",
"canTrickyJump"
]
},
{
"and": [
"HiJump",
{
"or": [
"canSpeedyJump",
"canSpringBallJumpMidAir"
]
}
]
},
{
"and": [
"canTrickyJump",
"canPreciseGrapple"
]
},
{
"and": [
"Gravity",
"canMidairShinespark",
"h_shinechargeMaxRunway",
{
"shinespark": {
"frames": 35,
"excessFrames": 10
}
}
]
}
]
}
"canXRayClimb"Bypasses door shell: true |
From: 4
Lower Section - Top Right Door
To: 12
Top Junction
Entrance condition: {
"comeInWithGMode": {
"mode": "direct",
"morphed": false
}
}Requires: "canGModeXRayClimb"
{
"or": [
"canArtificialMorph",
"canWallJump",
"SpaceJump",
{
"and": [
"canLongIBJ",
"Gravity"
]
},
{
"and": [
"HiJump",
"canJumpIntoIBJ"
]
},
{
"and": [
"canLongIBJ",
"canBombHorizontally",
"canResetFallSpeed"
]
},
{
"and": [
"canJumpIntoIBJ",
"canLongIBJ",
"canTrickyJump"
]
},
{
"and": [
"HiJump",
{
"or": [
"canSpeedyJump",
"canSpringBallJumpMidAir"
]
}
]
},
{
"and": [
"canTrickyJump",
"canPreciseGrapple"
]
},
{
"and": [
"Gravity",
"canMidairShinespark",
"h_shinechargeMaxRunway",
{
"shinespark": {
"frames": 35,
"excessFrames": 10
}
}
]
}
]
}
"canLongXRayClimb"Clears obstacles: R-Mode |
From: 5
Lower Section - Bottom Right Door
To: 4
Lower Section - Top Right Door
Jump into an IBJ while avoiding the Ripper, or start an IBJ from the platform to the left and boost horizontally at the top. Requires: {
"or": [
{
"and": [
"HiJump",
"canJumpIntoIBJ"
]
},
{
"and": [
"canLongIBJ",
"canBombHorizontally",
"canResetFallSpeed"
]
},
{
"and": [
"canJumpIntoIBJ",
"canLongIBJ",
"canTrickyJump"
]
}
]
} |
From: 1
Left Door
To: 1
Left Door
Bounce on the Power Bomb, then quickly kill the remaining Sidehopper with a strong beam, ammo, or pseudo-screw. If Samus has a weak beam, use the bomb to boost to the right to get the Sidehopper to jump to the right, then morph under it while killing it. Entrance condition: {
"comeInJumping": {
"speedBooster": "any",
"minTiles": 0.4375
}
}Requires: "canPrepareForNextRoom"
{
"tech": "canJumpIntoIBJ"
}
"canResetFallSpeed"
"h_usePowerBomb"
"canHitbox"
{
"or": [
"canPseudoScrew",
"Plasma",
{
"ammo": {
"type": "Missile",
"count": 2
}
},
{
"ammo": {
"type": "Super",
"count": 1
}
},
{
"and": [
"Ice",
"Wave"
]
},
{
"and": [
"Ice",
"Spazer"
]
},
{
"and": [
"Wave",
"Spazer"
]
},
{
"and": [
"canTrickyJump",
{
"tech": "canBombHorizontally"
}
]
}
]
}Dev note: This is significantly easier than a typical canUnmorphBombBoost, so it is instead modeled with canJumpIntoIBJ and canResetFallSpeed. |
From: 1
Left Door
To: 4
Small Ledge Below Left Door
Requires: "canTrickyJump"
{
"or": [
"canDash",
"canWallJump",
{
"and": [
"canFlatleyJump",
{
"disableEquipment": "HiJump"
}
]
},
{
"and": [
"h_useSpringBall",
"canResetFallSpeed"
]
}
]
} |
From: 3
Safe Block in the Middle of the Room
To: 2
Right Door
Requires: "canSpringBallBombJump" "canResetFallSpeed" |
From: 7
Junction (Bottom of Room)
To: 6
Junction (Above Bottom Rippers)
Requires: "canTrickySpringBallJump"
{
"or": [
"canConsecutiveWallJump",
"HiJump",
{
"and": [
"canTrickyJump",
"canLateralMidAirMorph",
"canResetFallSpeed",
{
"or": [
{
"ammo": {
"type": "PowerBomb",
"count": 1
}
},
{
"ammo": {
"type": "Super",
"count": 1
}
},
{
"enemyDamage": {
"enemy": "Ripper",
"type": "contact",
"hits": 1
}
},
"canTrickyDodgeEnemies"
]
}
]
},
"canSpringFling"
]
}
{
"or": [
"canTrickyJump",
"canLateralMidAirMorph",
"canSpringwall"
]
} |
|
Requires: {
"or": [
"canDash",
{
"disableEquipment": "HiJump"
},
{
"and": [
"HiJump",
"h_underwaterCrouchJumpDownGrab"
]
},
"canWallJump",
"Gravity",
"SpaceJump",
{
"and": [
"canSpringBallBombJump",
"canResetFallSpeed"
]
},
"canBombJumpWaterEscape"
]
} |
|
Samus can ceiling bomb jump up gentle slopes. Going down gentle slopes is also possible but harder, instead an unmorph to reset fall speed is recommended here. Requires: "h_heatProof" "canCeilingBombJump" "canResetFallSpeed" |
|
Samus can ceiling bomb jump up gentle slopes. Going down gentle slopes is also possible but harder, instead an unmorph to reset fall speed is recommended here. Requires: "h_heatProof" "canCeilingBombJump" "canResetFallSpeed" |
|
Samus can ceiling bomb jump up gentle slopes. Going down gentle slopes is also possible but harder, instead an unmorph to reset fall speed is recommended here. Requires: "h_heatProof" "canLongCeilingBombJump" "canResetFallSpeed" |
From: 1
Left Door
To: 2
Right Door
While crossing the Spiky Lava, land on frozen Yapping Maws to reduce the number of spike hits needed. Damage boost towards then freeze the Leftmost enemy as it extends. Morph and unmorph while above the middle Yapping Maw to land on it just above the lava line. Ignore the rightmost Yapping Maw. Delay the damage boost from the spikes slightly in order to rise above the lava before moving. Requires: {
"notable": "Frozen Maw Platforms"
}
"canDash"
"canResetFallSpeed"
"canTrickyUseFrozenEnemies"
"canTrickyJump"
{
"or": [
{
"and": [
{
"notable": "Suitless Damage Boosts"
},
"canHorizontalDamageBoost"
]
},
{
"and": [
{
"spikeHits": 2
},
{
"lavaFrames": 30
},
{
"heatFrames": 240
}
]
}
]
}
"canUseIFrames"
{
"spikeHits": 2
}
{
"lavaFrames": 35
}
{
"heatFrames": 520
}
"h_complexToCarryFlashSuit" |
From: 1
Left Door
To: 2
Right Door
Samus can ceiling bomb jump up gentle slopes. Going down gentle slopes is also possible but harder, instead an unmorph to reset fall speed is recommended here. Entrance condition: {
"comeInWithGMode": {
"mode": "any",
"morphed": true
}
}Requires: "h_artificialMorphLongCeilingBombJump" "h_artificialMorphResetFallSpeed" "h_heatedGModeOpenDifferentDoor" |
|
Entrance condition: {
"comeInWithGMode": {
"mode": "any",
"morphed": false
}
}Requires: "canDash"
{
"or": [
{
"and": [
{
"lavaFrames": 150
},
{
"spikeHits": 7
}
]
},
{
"and": [
{
"notable": "Suitless Damage Boosts"
},
{
"lavaFrames": 80
},
{
"spikeHits": 3
},
"canUseIFrames",
"canHorizontalDamageBoost"
]
},
{
"and": [
"Gravity",
{
"disableEquipment": "SpeedBooster"
},
{
"lavaFrames": 100
},
{
"spikeHits": 2
},
{
"or": [
"canUseIFrames",
"canHorizontalDamageBoost"
]
}
]
},
{
"and": [
{
"notable": "Frozen Maw Platforms"
},
"canResetFallSpeed",
"canTrickyUseFrozenEnemies",
"canTrickyJump",
"canHorizontalDamageBoost",
"canUseIFrames",
{
"spikeHits": 2
},
{
"lavaFrames": 15
}
]
}
]
}
"h_heatedGModeOpenDifferentDoor"Dev note: FIXME: Grapple could maybe be used to skip some damage by partially swinging across the room. Blue suit damage boost options could also be added. |
|
Samus can ceiling bomb jump up gentle slopes. Going down gentle slopes is also possible but harder, instead an unmorph to reset fall speed is recommended here. Requires: "h_heatProof" "canLongCeilingBombJump" "canResetFallSpeed" |
From: 2
Right Door
To: 1
Left Door
While crossing the Spiky Lava, land on frozen Yapping Maws to reduce the number of spike hits needed. Morph and unmorph while above the rightmost Yapping Maw to land on it just above the lava line. Ignore the second Yapping Maw. Freeze the Leftmost enemy as it extends. Delay the damage boost from the spikes slightly in order to rise above the lava before moving. Requires: "canDash"
{
"notable": "Frozen Maw Platforms"
}
"canResetFallSpeed"
"canTrickyUseFrozenEnemies"
"canTrickyJump"
{
"or": [
{
"and": [
{
"notable": "Suitless Damage Boosts"
},
"canHorizontalDamageBoost"
]
},
{
"and": [
{
"spikeHits": 1
},
{
"lavaFrames": 20
},
{
"heatFrames": 240
}
]
}
]
}
"canUseIFrames"
{
"spikeHits": 2
}
{
"lavaFrames": 35
}
{
"heatFrames": 520
}
"h_complexToCarryFlashSuit" |
From: 2
Right Door
To: 1
Left Door
Samus can ceiling bomb jump up gentle slopes. Going down gentle slopes is also possible but harder, instead an unmorph to reset fall speed is recommended here. Entrance condition: {
"comeInWithGMode": {
"mode": "any",
"morphed": true
}
}Requires: "h_artificialMorphLongCeilingBombJump" "h_artificialMorphResetFallSpeed" "h_heatedGModeOpenDifferentDoor" |
|
Entrance condition: {
"comeInWithGMode": {
"mode": "any",
"morphed": false
}
}Requires: "canDash"
{
"or": [
{
"and": [
{
"lavaFrames": 150
},
{
"spikeHits": 7
}
]
},
{
"and": [
{
"notable": "Suitless Damage Boosts"
},
{
"lavaFrames": 80
},
{
"spikeHits": 3
},
"canUseIFrames",
"canHorizontalDamageBoost"
]
},
{
"and": [
"Gravity",
{
"disableEquipment": "SpeedBooster"
},
{
"lavaFrames": 100
},
{
"spikeHits": 2
},
{
"or": [
"canUseIFrames",
"canHorizontalDamageBoost"
]
}
]
},
{
"and": [
{
"notable": "Frozen Maw Platforms"
},
"canResetFallSpeed",
"canTrickyUseFrozenEnemies",
"canTrickyJump",
"canHorizontalDamageBoost",
"canUseIFrames",
{
"spikeHits": 2
},
{
"lavaFrames": 15
}
]
}
]
}
"h_heatedGModeOpenDifferentDoor"Dev note: FIXME: Grapple could maybe be used to skip some damage by partially swinging across the room. |
|
Ride the Geruta left to reach the missile location by freezing it repeatedly. Stay on its left side when it touches the ceiling for the enemy to continue moving forward. It may not be possible to climb back up to the Geruta if Samus falls. When it moves towards the ceiling, reset Samus' fall speed using an unmorph or by taking knockback damage, in order to wait for the Geruta to fall low enough to refreeze. Requires: {
"notable": "Ice Only Geruta Platforming"
}
"canTrickyUseFrozenEnemies"
"canTrickyJump"
{
"or": [
{
"and": [
"canResetFallSpeed",
"canTrickyDodgeEnemies",
{
"heatFrames": 1000
},
{
"or": [
"canInsaneJump",
{
"and": [
{
"noBlueSuit": {}
},
{
"enemyDamage": {
"enemy": "Geruta",
"type": "contact",
"hits": 1
}
}
]
}
]
}
]
},
{
"and": [
"canNeutralDamageBoost",
{
"enemyDamage": {
"enemy": "Geruta",
"type": "contact",
"hits": 3
}
}
]
}
]
}
{
"heatFrames": 3000
} |
From: 2
Bottom Right Door
To: 1
Top Right Door
Get to the top of the room with Spring Ball Bomb Jumps. To cross the room, perform a Spring Ball Bomb Jump after hitting the bomb with momentum to get a larger horizontal boost, then unmorph on the descent to reset fall speed. Entrance condition: {
"comeInWithGMode": {
"mode": "any",
"morphed": true
}
}Requires: "h_artificialMorphSpringBallBombJump"
{
"or": [
"HiJump",
{
"and": [
"canInsaneJump",
"h_artificialMorphResetFallSpeed",
{
"ammo": {
"type": "PowerBomb",
"count": 3
}
}
]
}
]
}Dev note: The HiJump strat can only be useful if preserving a blue suit. Leniency isn't included as Samus will likely unmorph. FIXME: Hitting the bomb with momentum should probably be a tech. |
From: 3
Junction Left of Green Gate
To: 4
Center Platform Junction
Requires: {
"or": [
"Grapple",
"SpaceJump",
"canResetFallSpeed",
{
"and": [
"canTrickyJump",
"canLateralMidAirMorph"
]
},
{
"and": [
"Gravity",
"canTrickyWallJump"
]
}
]
}Resets obstacles: B |
|
Carefully swing between the Rippers at the top of the room to the item. The last two swings are the hardest Morphing and unmorphing to reset Samus's fall speed can help give a bit more time to position the Rippers. It can help to Grapple the same Ripper again to get it in a better position. Position the third Ripper far to the right then fling to the fourth, which is far to the right and very close to the ceiling. Moving the fourth Ripper to the right a bit can also help in order to make the last fling less precise. Be careful not to fling directly into the ceiling, as it is easy to hit the uneven surface and fall. Requires: {
"notable": "Indiana Jones Grapple (First Try)"
}
"canUseEnemies"
"canPreciseGrapple"
"h_midAirShootUp"
{
"or": [
{
"and": [
"canInsaneJump",
"h_trickyToCarryFlashSuit"
]
},
{
"and": [
"canResetFallSpeed",
{
"enemyDamage": {
"enemy": "Ripper 2 (green)",
"type": "contact",
"hits": 2
}
}
]
}
]
} |
|
Involves Grappling off several Rippers, where falling may lead to a soft lock. Morphing and unmorphing to reset Samus's fall speed can help give a bit more time to position the Rippers. It can help to Grapple the same Ripper again to get it in a better position. Positioning the first Ripper far to the left until the second is visible can help make this much easier. Requires: {
"notable": "Indiana Jones Grapple (First Try)"
}
"canUseEnemies"
"canPreciseGrapple"
"h_midAirShootUp"
{
"or": [
{
"and": [
"canInsaneJump",
"h_trickyToCarryFlashSuit"
]
},
{
"and": [
"canResetFallSpeed",
{
"enemyDamage": {
"enemy": "Ripper 2 (green)",
"type": "contact",
"hits": 1
}
}
]
}
]
}Dev note: In general, the return route is easier, but is only useful after doing the left to right strat first. |
From: 3
Top Right Door
To: 2
Middle Right Door
Press down somewhat precisely to gain the shinecharge while breaking the bomb block. Then morph, roll off the edge, and unmorph near the door to shoot it open. Entrance condition: {
"comeInShinecharging": {
"length": 3,
"openEnd": 1
}
}Requires: "canShinechargeMovementTricky"
"canResetFallSpeed"
{
"heatFrames": 120
}
{
"shineChargeFrames": 120
}Exit condition: {
"leaveShinecharged": {}
}Unlocks doors: {"types":["super"],"requires":[]}
{"types":["missiles","powerbomb"],"requires":["never"]} |
From: 3
Top Right Door
To: 2
Middle Right Door
Requires: {
"or": [
{
"obstaclesCleared": [
"A"
]
},
{
"haveBlueSuit": {}
}
]
}
{
"doorUnlockedAtNode": 2
}
"canResetFallSpeed"
"canTrickyJump"
{
"heatFrames": 140
}Unlocks doors: {"types":["super"],"requires":["canPrepareForNextRoom"]}
{"types":["missiles","powerbomb"],"requires":["never"]} |
|
Requires: {
"or": [
{
"obstaclesCleared": [
"A"
]
},
{
"haveBlueSuit": {}
}
]
}
{
"doorUnlockedAtNode": 2
}
"canResetFallSpeed"
"Wave"
{
"heatFrames": 200
}Unlocks doors: {"types":["ammo"],"requires":["never"]} |
From: 5
Firefleas Bottom Left Platform Junction
To: 7
Fireflea Statue's Claw Junction
Requires: "canConsecutiveWallJump"
"canPreciseWallJump"
"canCarefulJump"
{
"or": [
"canTrickyJump",
"canResetFallSpeed"
]
} |
|
Cross the room with Bombs and minimal damage. Some acid damage is expected, but any mistakes greatly increases the time spent in acid. Entrance condition: {
"comeInRunning": {
"speedBooster": "any",
"minTiles": 1
}
}Requires: {
"notable": "Bombs"
}
"h_useMorphBombs"
"canWallJumpInstantMorph"
"canInsaneJump"
"canResetFallSpeed"
"canUnmorphBombBoost"
"canSuitlessLavaDive"
{
"heatFrames": 1320
}
{
"acidFrames": 128
}Unlocks doors: {"types":["missiles","super"],"requires":[]}
{"types":["powerbomb"],"requires":[{"heatFrames":50},{"acidFrames":50}]} |
|
Cross the room with Bombs and minimal damage. Acid damage is expected, but any mistakes greatly increases the time spent in acid. Entrance condition: {
"comeInRunning": {
"speedBooster": "any",
"minTiles": 1
}
}Requires: {
"notable": "Bombs"
}
"h_useMorphBombs"
"Gravity"
"canResetFallSpeed"
"canJumpIntoIBJ"
"canSuitlessLavaDive"
{
"enemyDamage": {
"enemy": "Puromi",
"type": "contact",
"hits": 2
}
}
{
"heatFrames": 1440
}
{
"acidFrames": 725
}Unlocks doors: {"types":["missiles"],"requires":[{"heatFrames":15},{"acidFrames":15}]}
{"types":["super"],"requires":[]}
{"types":["powerbomb"],"requires":[{"heatFrames":50},{"acidFrames":50}]} |
|
Place the PBs next to the pillars in order to only use 2. Minimize acid by unmorphing high to land back on the jump spot or walljumping before placing the bomb. Entrance condition: {
"comeInNormally": {}
}Requires: {
"notable": "Two Power Bombs"
}
"canDash"
"canMidAirMorph"
"canCarefulJump"
{
"ammo": {
"type": "PowerBomb",
"count": 2
}
}
{
"or": [
{
"and": [
"canCarefulJump",
"canResetFallSpeed",
{
"heatFrames": 660
}
]
},
{
"and": [
"canWallJump",
{
"heatFrames": 660
},
{
"or": [
"canWallJumpInstantMorph",
{
"acidFrames": 30
}
]
}
]
},
{
"and": [
"Gravity",
{
"heatFrames": 660
},
{
"acidFrames": 30
}
]
},
{
"and": [
"canTrickyJump",
"canSuitlessLavaDive",
{
"heatFrames": 720
},
{
"acidFrames": 52
}
]
}
]
}
{
"or": [
"canTrickyJump",
{
"and": [
"Gravity",
{
"heatFrames": 180
},
{
"acidFrames": 56
}
]
},
{
"and": [
"canSuitlessLavaDive",
{
"heatFrames": 240
},
{
"acidFrames": 96
}
]
}
]
}
{
"or": [
"h_heatResistant",
"canPauseAbuse",
{
"resourceCapacity": [
{
"type": "RegularEnergy",
"count": 149
}
]
}
]
}Unlocks doors: {"types":["missiles"],"requires":[{"heatFrames":15},{"acidFrames":15}]}
{"types":["super"],"requires":[]}
{"types":["powerbomb"],"requires":[{"heatFrames":30},{"acidFrames":30}]}Dev note: With Reserves only, canPauseAbuse is used as a proxy for pause abuse or optimal reserve management and character movement. |
|
Cross the room with Bombs and minimal damage. Some acid damage is expected, but any mistakes greatly increases the time spent in acid. Entrance condition: {
"comeInRunning": {
"speedBooster": "any",
"minTiles": 3
}
}Requires: {
"notable": "Bombs"
}
"canWallJumpInstantMorph"
"canInsaneJump"
"canResetFallSpeed"
"canUnmorphBombBoost"
"canHBJ"
"canSuitlessLavaDive"
{
"heatFrames": 1320
}
{
"acidFrames": 128
}Unlocks doors: {"types":["missiles","super"],"requires":[]}
{"types":["powerbomb"],"requires":[{"heatFrames":50},{"acidFrames":50}]} |
|
Cross the room with Bombs and minimal damage. Acid damage is expected, but any mistakes greatly increases the time spent in acid. Entrance condition: {
"comeInRunning": {
"speedBooster": "any",
"minTiles": 3
}
}Requires: {
"notable": "Bombs"
}
"h_useMorphBombs"
"Gravity"
"canResetFallSpeed"
"canJumpIntoIBJ"
"canSuitlessLavaDive"
{
"enemyDamage": {
"enemy": "Puromi",
"type": "contact",
"hits": 2
}
}
{
"heatFrames": 1440
}
{
"acidFrames": 725
}Unlocks doors: {"types":["missiles"],"requires":[{"heatFrames":15},{"acidFrames":15}]}
{"types":["super"],"requires":[]}
{"types":["powerbomb"],"requires":[{"heatFrames":50},{"acidFrames":50}]} |
From: 2
Bottom Left Door
To: 4
Junction Above Bomb Blocks
Deal an exact amount of damage to a wall pirate to freeze it while breaking the bomb blocks with a power bomb without taking damage. Wait briefly on the left side of the center platform, then jump and shoot 4 missiles at the top pirate. Walljump up the left wall such that the lower pirates are on screen long enough to jump accross to the left. Place a Bomb on the left wall to hit the top pirate when it jumps over, followed by a power bomb. Unmorph precisely below the middle pirate so both top pirates will jump back to the right, and begin charging Ice. Walljump up the left wall with charge held and freeze the top pirate when it jumps over and use it to reach the upper region. Requires: {
"notable": "New Low Ice Pirate Freeze"
}
"canTrickyUseFrozenEnemies"
"Charge"
"canPreciseWallJump"
"canResetFallSpeed"
"canWallJumpWithCharge"
"h_useMorphBombs"
"canWallJumpInstantMorph"
"canTrickyDodgeEnemies"
{
"ammo": {
"type": "Missile",
"count": 4
}
}
{
"ammo": {
"type": "PowerBomb",
"count": 1
}
}
{
"heatFrames": 900
}
{
"or": [
"h_heatResistant",
{
"and": [
"canInsaneJump",
"canPauseAbuse"
]
},
{
"resourceCapacity": [
{
"type": "RegularEnergy",
"count": 149
}
]
}
]
}Clears obstacles: A Dev note: With Reserves only, this strat requires much more precise movement and either pause abuse or optimal reserve management. |
|
Requires: "canKago"
"canUseIFrames"
"canResetFallSpeed"
{
"enemyDamage": {
"enemy": "Kzan",
"type": "contact",
"hits": 1
}
}
{
"heatFrames": 180
}Dev note: Useful when enemy damage can be reduced while still taking full heat damage. |
|
Fling Samus from the first set of grapple blocks to the second set without falling. This requires precise timing but is made easier by morphing and unmorphing to reset Samus' fall speed. Requires: "canPreciseGrapple"
"canLateralMidAirMorph"
"canResetFallSpeed"
{
"or": [
"canInsaneJump",
{
"thornHits": 5
}
]
}
"h_complexToCarryFlashSuit"Dev note: The 5 thornHits are for lenience since it is difficult to get this first try. |
|
Jump, place a bomb mid-air, then jump with controlled height to precisely mid-air morph and get a horizontal boost. Requires: "canJumpIntoIBJ" "canBombHorizontally" "canInsaneJump" "canInsaneMidAirMorph" "canResetFallSpeed" |
From: 4
Top Left Door
To: 5
Platform Junction Near Top Left Door
Morph and unmorph before reaching the transition, and then drift to the ledge. Enter the room as far right as possible. Entrance condition: {
"comeInNormally": {},
"comesThroughToilet": "no"
}Requires: {
"notable": "Room Entry Reset Fall Speed"
}
"canSuitlessMaridia"
"canResetFallSpeed"
"canPrepareForNextRoom"Dev note: FIXME: An enemy can hit Samus where she would unmorph as a way to perform this strat without Morph. |
|
Requires: "canDash"
"canDodgeWhileShooting"
"canCarefulJump"
{
"notable": "Shoot Down and Grab Right Item"
}
{
"or": [
"Wave",
"Spazer",
"h_usePowerBomb",
{
"and": [
"canTrickyJump",
"canDodgeWhileShooting",
{
"ammo": {
"type": "Missile",
"count": 5
}
}
]
},
{
"and": [
"canTrickyJump",
"canResetFallSpeed",
"canDownBack"
]
},
"canInsaneJump"
]
} |
|
Requires: "canSpringwall" "canResetFallSpeed" |
|
Pausing and morphing early can help by giving Samus a bit of a Spring Fling. Unmorph to reset Samus' fall speed to grab the item. Requires: "canTrickySpringBallJump" "canTrickyJump" "canResetFallSpeed" |
|
It is possible to springwall to grab the item, and then morph and reset fall speed again after entering the water suitless to land safely on the left ledge. Requires: "canSpringwall" "canResetFallSpeed" |
|
Requires either a spring fling or a stationary lateral midair morph with an unmorph to reset fall speed. Requires: "canSuitlessMaridia"
"canTrickySpringBallJump"
{
"or": [
"canSpringFling",
{
"and": [
"canStationaryLateralMidAirMorph",
"canResetFallSpeed"
]
}
]
} |
From: 4
Platform Below Top Door
To: 4
Platform Below Top Door
Requires: {
"resetRoom": {
"nodes": [
3
]
}
}
"canTrickyJump"
{
"or": [
{
"and": [
"Gravity",
{
"or": [
"ScrewAttack",
{
"haveBlueSuit": {}
}
]
},
{
"cycleFrames": 120
}
]
},
{
"and": [
"Plasma",
{
"cycleFrames": 150
}
]
},
{
"and": [
"canFarmWhileShooting",
"Wave",
"Spazer",
{
"cycleFrames": 160
}
]
},
{
"and": [
"Grapple",
{
"cycleFrames": 160
}
]
}
]
}
{
"or": [
{
"and": [
"Grapple",
"canPrepareForNextRoom",
{
"or": [
"canResetFallSpeed",
"canPreciseWallJump"
]
},
"canFarmWhileShooting",
"h_underwaterCrouchJump"
]
},
"HiJump",
"Gravity",
{
"and": [
"canSpringBallJumpMidAir",
"h_doubleEquipmentScreenCycleFrames",
{
"cycleFrames": 55
}
]
}
]
}Resets obstacles: R-Mode Farm cycle drops: 1 Sciser Dev note: FIXME: for the Grapple case, a water entry above can work as an alternative to wall jump or unmorph. |
From: 2
Right Door
To: 4
Top Right Ledge Junction
Requires a runway of at least 1 tiles in the adjacent room, although it is easier with more. Start the IBJ as far left as possible. The furthest right is just right of the waterfall. Turning around, carefully, is one way to lose forward momentum and begin the IBJ. At the top of the IBJ bomb to the left and unmorph to reset fall speed. Entrance condition: {
"comeInJumping": {
"speedBooster": "no",
"minTiles": 1
}
}Requires: {
"notable": "Cross Room Jump with IBJ"
}
"canJumpIntoIBJ"
"canBombHorizontally"
"canResetFallSpeed"
"canCrossRoomJumpIntoWater"
"canTrickyJump" |
|
Requires: "Gravity"
{
"or": [
"SpaceJump",
"canHBJ",
{
"and": [
"canDash",
{
"or": [
"canTrickyJump",
"canResetFallSpeed",
{
"enemyDamage": {
"enemy": "Cacatac",
"type": "spike",
"hits": 1
}
}
]
}
]
}
]
}
{
"or": [
"SpaceJump",
"canWallJump",
"HiJump",
"canIBJ",
"canHBJ",
"canSpringBallBombJump",
{
"spikeHits": 1
}
]
} |
From: 1
Top Sand Entrance
To: 7
Below Morph Tunnel Junction
Break the shot block before reaching the sand and then shinespark up. Samus cannot shinespark after unmorphing until she touches the sand and this can be used to shoot upwards without sparking. A diagonal ShineSpark will most likely not have any horizontal movement when performed from the sand. Entrance condition: {
"comeInShinecharged": {},
"comesThroughToilet": "any"
}Requires: {
"shineChargeFrames": 150
}
"h_navigateUnderwater"
"canPlayInSand"
"canShinechargeMovementTricky"
{
"or": [
"canResetFallSpeed",
{
"and": [
"canPrepareForNextRoom",
"h_usePowerBomb"
]
}
]
}
{
"shinespark": {
"frames": 24,
"excessFrames": 5
}
} |
From: 5
Top Junction
To: 4
Top Right Door
Roll off the above ledge and use both the vertical speed resets from first (un)equipping SpringBall and then by unmorphing in order to reach the door. Pause shortly after rolling off the ledge, after falling for 1 tile. The timing is very precise. A downback helps by shrinking Samus' hitbox. Requires: {
"notable": "Spring Fling into Top Right Door"
}
"canInsaneJump"
"canSpringFling"
"canResetFallSpeed"
"canDownBack" |
|
Using movement tricks to reduce fall speed even slightly can avoid touching the sand. A Flatley style turnaround over the grapple block hole reduces fall speed some, but also needs a down back or a tiny jump. Requires: "canSuitlessMaridia"
{
"disableEquipment": "Gravity"
}
"canTrickyJump"
{
"or": [
{
"and": [
"canFlatleyJump",
{
"or": [
"canInsaneJump",
"canDownBack"
]
}
]
},
"canWallJump",
"canResetFallSpeed"
]
}Dev note: The or following canFlatleyJump has no logical relevance but indicates there are two distinct ways of using the flatley jump. |
|
Bomb Jump between the two floating platforms. Requires: "canDash"
{
"or": [
{
"obstaclesCleared": [
"A"
]
},
{
"and": [
"canCameraManip",
"canMetroidAvoid"
]
}
]
}
{
"or": [
{
"and": [
"canHBJ",
"canResetFallSpeed"
]
},
{
"and": [
{
"obstaclesCleared": [
"A"
]
},
"canDiagonalBombJump"
]
},
"canCeilingBombJump"
]
} |
|
Requires: {
"or": [
"canDash",
"canWallJump",
"SpaceJump",
"canSpringFling",
{
"and": [
"canMidAirMorph",
"h_useSpringBall",
"canResetFallSpeed",
{
"or": [
{
"disableEquipment": "HiJump"
},
"canInsaneJump"
]
}
]
},
"canBombHorizontally",
"canTrickyUseFrozenEnemies",
{
"acidFrames": 20
}
]
} |
|
Requires: {
"or": [
"canDash",
{
"and": [
"canCarefulJump",
{
"disableEquipment": "HiJump"
}
]
},
{
"and": [
{
"or": [
"canIBJ",
{
"tech": "canJumpIntoIBJ"
}
]
},
"canBombHorizontally"
]
},
"canSpringFling",
{
"and": [
"canMidAirMorph",
"h_useSpringBall",
"canInsaneJump",
"canResetFallSpeed"
]
},
"SpaceJump",
{
"and": [
"HiJump",
{
"acidFrames": 20
}
]
}
]
} |
From: 3
Bottom of Shaft
To: 1
Left Door
Climbing the shaft with Space Jump is slower than other methods, so it is necessary to move quickly in order to minimize acid damage. With each Space Jump, release jump early rather than doing a full-height jump, in order to be able to Space Jump again more quickly. After reaching the top, fall down on the left side, keeping between the Pirates and the platforms. If Morph is available, use it to reset fall speed by unmorphing soon after taking damage from the bottom Pirate. With greater difficulty, the bottom Pirate can be avoided, resetting fall speed soon after getting past it. If Morph is not available, then take damage from the bottom Pirate, press against the left wall, and fire a carefully timed shot downward to open the door; in this case, use a down-back to fall directly into the doorway. If done quickly enough, it is possible to avoid any acid damage. Requires: {
"notable": "Bootless Walljumpless Space Jump"
}
"canPreciseSpaceJump"
{
"or": [
{
"and": [
"canInsaneJump",
"canResetFallSpeed"
]
},
{
"and": [
"canInsaneJump",
"canDownBack",
{
"enemyDamage": {
"enemy": "Tourian Space Pirate (all)",
"type": "contact",
"hits": 1
}
}
]
},
{
"and": [
"canResetFallSpeed",
{
"enemyDamage": {
"enemy": "Tourian Space Pirate (all)",
"type": "contact",
"hits": 1
}
}
]
}
]
}Exit condition: {
"leaveNormally": {}
}Unlocks doors: {"types":["ammo"],"requires":["never"]}Dev note: The leaveNormally exit condition is to prevent use of implicit door unlock strats, since unlocking the door would probably require some acid damage; FIXME: refine the door unlock requirements. |
