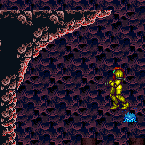
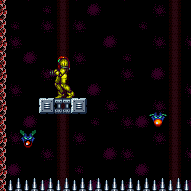
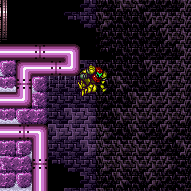
canTrickyWallJump (Hard)
A wall jump that is tricky to perform. This includes 'delayed wall jumps' in which Samus must move away as far from the wall as possible before wall jumping; it also includes cases in which Samus must dodge enemies or other obstacles while wall jumping.
Dependencies: canPreciseWallJump
Strats ()
From: 1
Top Left Door
To: 1
Top Left Door
Overload the scroll PLMs which are one tile to the left of the bomb blocks, then pass through them. Refill at the ship, then return. Entrance condition: {
"comeInWithGMode": {
"mode": "any",
"morphed": false
}
}Requires: "canComplexGMode"
{
"refill": [
"Energy",
"Missile",
"Super",
"PowerBomb"
]
}
{
"or": [
"SpaceJump",
{
"and": [
"HiJump",
"canSpringBallJumpMidAir"
]
},
"canTrickyWallJump",
{
"and": [
"canSpeedyJump",
{
"or": [
"HiJump",
"canSpringBallJumpMidAir",
"canWallJump"
]
}
]
},
{
"and": [
"h_shinechargeMaxRunway",
"canMidairShinespark",
{
"or": [
{
"shinespark": {
"frames": 29,
"excessFrames": 1
}
},
{
"and": [
"canShinechargeMovementComplex",
"h_speedJump",
{
"shinespark": {
"frames": 22,
"excessFrames": 1
}
}
]
},
{
"and": [
"HiJump",
{
"shinespark": {
"frames": 17,
"excessFrames": 11
}
}
]
}
]
}
]
}
]
} |
|
Requires: "canTrickyWallJump"
{
"or": [
"HiJump",
"canConsecutiveWallJump"
]
} |
From: 4
Middle Junction (Left of Morph Tunnel)
To: 1
Left Door

After destroying a single bomb block, Samus can spin jump into its spot to quickly escape the acid. To avoid the acid completely, morph quickly at the right height and place a bomb. Requires: "canDash"
{
"or": [
"canCarefulJump",
{
"acidFrames": 35
}
]
}
"h_useMorphBombs"
{
"or": [
"canTrickyJump",
{
"and": [
"canCarefulJump",
"canBombHorizontally",
{
"acidFrames": 35
}
]
},
{
"acidFrames": 100
}
]
}
{
"or": [
{
"and": [
"canTrickyJump",
"canTrickyWallJump"
]
},
{
"and": [
"canCarefulJump",
{
"acidFrames": 35
}
]
},
{
"acidFrames": 100
}
]
}
"h_complexToCarryFlashSuit"Clears obstacles: A, B |
|

Come in gaining blue speed, and chain temporary blue across the room, carefully avoiding the Yapping Maws and minimizing acid damage. After breaking the center bomb blocks, perform staggered walljumps (if available) on the wall to right, to wait for the acid to lower. Then use the runway in the center of the room to gain blue speed and continue chaining temporary blue. Entrance condition: {
"comeInGettingBlueSpeed": {
"length": 6,
"openEnd": 1,
"steepUpTiles": 1,
"steepDownTiles": 1
}
}Requires: {
"notable": "Temporary Blue Chains"
}
"canChainTemporaryBlue"
{
"acidFrames": 10
}
{
"or": [
"canTrickyWallJump",
{
"acidFrames": 30
}
]
}Dev note: It is technically possible to do this without acid damage, even without wall jumps, but this would seem unreasonably difficult. It can also be possible to leave with temporary blue here, but that seems unreasonable considering the length of this chain. |
From: 12
Top Junction
To: 9
Top Hidden Item (Above Trippers)

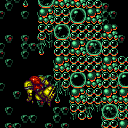
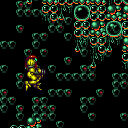
Jump on the left platforms to get the middle Tripper on screen, luring it to the right. Get on the middle Tripper and use it to jump to the item. This requires a somewhat precise shot and jump, particularly if the top Tripper is in the way. The jump and shot can be easier and done at the apex of a single jump starting with a crouch. Freezing the Trippers can make this much easier. Requires: "canUseEnemies"
{
"or": [
{
"and": [
"canUseFrozenEnemies",
"canPreciseWallJump"
]
},
"canTrickyWallJump",
{
"and": [
"canCameraManip",
"canCarefulJump"
]
}
]
} |
From: 13
Central Junction
To: 5
Left Side - Door Blocked by Crumble Blocks
Raise a Zeb to be just below the crumble blocks and blindly freeze it to set up an ice clip to reach the Power Bomb room exit door. Get a bug from the pipe to spawn facing left and freeze it while moving to the ledge below the Wave Gate Room door. While crouched, a spazer or wave beam shot will shoot through the floor in front of Samus. Shoot then immediately jump so that the bug can be frozen at a pixel perfect height, which is higher than where it would typically be frozen (when not needing to preserve a flash suit). Once frozen, wait for the bug to thaw, then blindly follow it to the left without letting it go off camera, which would cause it to despawn. Refreeze it below the crumble blocks, perform a very precise ledge grab onto it, then jump through the crumble block to reach the door, all while carefully avoiding losing the flash suit. Requires: {
"notable": "Blind Zeb Ice Clip (Preserve Flash Suit)"
}
"canTrickyWallJump"
"canCameraManip"
"canOffScreenMovement"
{
"or": [
"Wave",
"Spazer"
]
}
"canInsaneJump"
"h_highPixelIceClip" |
From: 13
Central Junction
To: 5
Left Side - Door Blocked by Crumble Blocks


Raise a Zeb to be just below the crumble blocks and blindly freeze it to set up an ice clip to reach the Power Bomb room exit door. Get a bug from the pipe to spawn facing left and freeze it while moving to the ledge below the Wave Gate Room door. While crouched, a spazer or wave beam shot will shoot through the floor in front of Samus. The bug must be frozen at a height between where Samus is crouched and where she is standing. Once frozen, somehow track how long until the freeze effect expires, and when the bug will reach the crumble blocks. If the bug is off camera when not frozen, it will despawn. Refreeze the Zeb below the crumble blocks and ice clip up to reach the door. Requires: {
"notable": "Zeb Ice Clip"
}
"canTrickyWallJump"
"canCameraManip"
{
"or": [
"Wave",
"Spazer"
]
}
"h_preciseIceClip" |
From: 13
Central Junction
To: 5
Left Side - Door Blocked by Crumble Blocks
Freeze the Zeb low in the pipe. Crouch and shoot works for that, or shooting as Samus is approaching it. Jump on the left side of the pipe and walk right until you get blocked by the frozen Zeb. Start the ice SBA facing right. The bottom particle will instantly kill the Zeb. Turn around towards the left. At the right moment, jump to prevent the tail particle of the clockwise rotation to freeze the Zeb inside the pipe. As Samus starts falling down again, push left to freeze the rising Zeb with the leading particle of the rotation. While preserving the remaining 2 particles, spinjump over the frozen Zeb to quickly get to the floor above Samus. Run left until Samus hits the wall. While in the standing pose and holding jump, press right to do a buffered turnaround spinjump. Holding L+R during the jump can help to stop at the correct position after landing. Wait until one of the remaining particles flies off and freezes the Zeb at the correct height. Move towards the right side of the floor below the Zeb pipe. While running left, un- and then re-equip ice to synchronize with the Zeb. At the left side, jump up and shoot up to freeze the Zeb one last time, then walljump up and do the clip. Note: If the Zeb drops something, the frozen position at the end will be 1 pixel lower. This doesn't matter, both pixels work. Requires: {
"notable": "Zeb Ice Clip"
}
"canSpecialBeamAttack"
{
"ammo": {
"type": "PowerBomb",
"count": 1
}
}
"canTrickyWallJump"
"h_preciseIceClip"
{
"disableEquipment": "Ice"
}Dev note: Disabling Ice is not a hard requirement, some other timing method could be used. |
|
Requires: {
"or": [
{
"and": [
{
"resetRoom": {
"nodes": [
1
]
}
},
{
"cycleFrames": 570
}
]
},
{
"and": [
{
"resetRoom": {
"nodes": [
1
]
}
},
"ScrewAttack",
{
"cycleFrames": 480
}
]
},
{
"and": [
{
"resetRoom": {
"nodes": [
3,
4
]
}
},
"HiJump",
"canWallJump",
{
"cycleFrames": 800
}
]
},
{
"and": [
{
"resetRoom": {
"nodes": [
5
]
}
},
{
"notable": "Hero Shot"
},
{
"or": [
{
"and": [
"ScrewAttack",
"canConsecutiveWallJump",
{
"cycleFrames": 1080
}
]
},
{
"and": [
"canTrickyWallJump",
{
"cycleFrames": 1770
}
]
}
]
}
]
}
]
}
{
"or": [
"ScrewAttack",
{
"haveBlueSuit": {}
},
"h_useMorphBombs",
"h_usePowerBomb",
{
"and": [
{
"or": [
{
"resourceCapacity": [
{
"type": "Missile",
"count": 1
}
]
},
{
"resourceCapacity": [
{
"type": "Super",
"count": 1
}
]
}
]
},
{
"cycleFrames": 500
}
]
}
]
}Resets obstacles: A, B Farm cycle drops: 1 Beetom Dev note: Using a Power Bomb to farm the Beetom is only useful if Power Bomb drops are modified to give more than 1. FIXME: Other options for resetting the room at the top and bottom nodes are possible. |
|
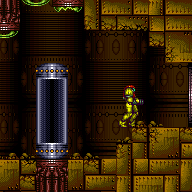
Fill up with the respawning Geegas. Climb to the top of the tower without killing the Rippers. Let the shot block respawn then shinecharge across it. Then quickly jump down into a Ripper to interrupt. Entrance condition: {
"comeInWithRMode": {}
}Requires: {
"refill": [
"Energy"
]
}
{
"or": [
"canTrivialUseFrozenEnemies",
{
"and": [
{
"notable": "Hero Shot"
},
"canHeroShot",
"canTrickyWallJump"
]
},
{
"and": [
"SpaceJump",
"HiJump",
"h_midAirShootUp",
"canTrickyJump"
]
},
{
"and": [
"canPreciseSpaceJump",
"canTrickyDodgeEnemies",
"h_midAirShootUp"
]
}
]
}
{
"or": [
{
"canShineCharge": {
"usedTiles": 12,
"openEnd": 0
}
},
{
"and": [
{
"doorUnlockedAtNode": 5
},
{
"canShineCharge": {
"usedTiles": 13,
"openEnd": 0
}
}
]
}
]
}
{
"autoReserveTrigger": {
"maxReserveEnergy": 95
}
}
"canRModeSparkInterrupt"Clears obstacles: B Unlocks doors: {"nodeId":5,"types":["ammo"],"requires":[]} |
From: 2
Middle Left Door (Behind Power Bomb Blocks)
To: 5
Top Right Door
Fill up with the respawning Geegas. Climb to the top of the tower without killing the Rippers. Let the shot block respawn then shinecharge across it. Then quickly jump down into a Ripper to interrupt. Entrance condition: {
"comeInWithRMode": {}
}Requires: "h_usePowerBomb"
{
  "refill": [
    "Energy"
  ]
}
{
  "or": [
    "canTrivialUseFrozenEnemies",
    {
      "and": [
        {
          "notable": "Hero Shot"
        },
        "canHeroShot",
        "canTrickyWallJump"
      ]
    },
    {
      "and": [
        "SpaceJump",
        "HiJump",
        "h_midAirShootUp",
        "canTrickyJump"
      ]
    },
    {
      "and": [
        "canPreciseSpaceJump",
        "canTrickyDodgeEnemies",
        "h_midAirShootUp"
      ]
    }
  ]
}
{
  "or": [
    {
      "canShineCharge": {
        "usedTiles": 12,
        "openEnd": 0
      }
    },
    {
      "and": [
        {
          "doorUnlockedAtNode": 5
        },
        {
          "canShineCharge": {
            "usedTiles": 13,
            "openEnd": 0
          }
        }
      ]
    }
  ]
}
{
  "autoReserveTrigger": {
    "maxReserveEnergy": 95
  }
}
"canRModeSparkInterrupt"
Clears obstacles: B Unlocks doors: {"nodeId":5,"types":["ammo"],"requires":[]} |
|
Fill up with the respawning Geegas. Climb back to the top of the tower without killing the Rippers. Let the shot block respawn then shinecharge across it. Then quickly jump down into a Ripper to interrupt. Entrance condition: {
"comeInWithRMode": {}
}Requires: {
"refill": [
"Energy"
]
}
{
"or": [
"canTrivialUseFrozenEnemies",
{
"and": [
{
"notable": "Hero Shot"
},
"canHeroShot",
"canTrickyWallJump"
]
},
{
"and": [
"SpaceJump",
"HiJump",
"h_midAirShootUp",
"canTrickyJump"
]
},
{
"and": [
"canPreciseSpaceJump",
"canTrickyDodgeEnemies",
"h_midAirShootUp"
]
}
]
}
{
"or": [
{
"canShineCharge": {
"usedTiles": 12,
"openEnd": 0
}
},
{
"and": [
{
"doorUnlockedAtNode": 5
},
{
"canShineCharge": {
"usedTiles": 13,
"openEnd": 0
}
}
]
}
]
}
{
"autoReserveTrigger": {
"maxReserveEnergy": 95
}
}
"canRModeSparkInterrupt"Clears obstacles: B Unlocks doors: {"nodeId":5,"types":["ammo"],"requires":[]} |
|
Wall jump between the Rippers. Either shoot the block, fall, and quickly climb again, or shoot from the bottom and follow Samus's shot up the tower. Requires: {
"notable": "Hero Shot"
}
{
"noBlueSuit": {}
}
"canHeroShot"
"canTrickyWallJump" |
|
Kill the Rippers then wall jump up. Requires: {
"noBlueSuit": {}
}
"canConsecutiveWallJump"
"canPreciseWallJump"
"h_midAirShootUp"
{
"or": [
"canTrickyWallJump",
"canSpringwall",
"HiJump"
]
}
{
"obstaclesCleared": [
"B"
]
}Dev note: With these tech, it's not hard to get up |
|


King Cac can be killed by scrolling the camera before jumping across. Requires: "canDash"
"canWallJump"
"canCarefulJump"
{
"or": [
"canCameraManip",
"canTrickyWallJump",
{
"and": [
"canNeutralDamageBoost",
{
"enemyDamage": {
"enemy": "Cacatac",
"type": "contact",
"hits": 1
}
}
]
}
]
} |
From: 2
Left Side - Top Middle Door
To: 7
Top Right Door


Entrance condition: {
"comeInRunning": {
"speedBooster": "no",
"minTiles": 2.4375
}
}Requires: "canTrickyJump"
"canConsecutiveWallJump"
"canPreciseWallJump"
{
"or": [
"canTrickyWallJump",
"ScrewAttack",
"canWallJumpWithCharge",
{
"and": [
"canWallJumpInstantMorph",
{
"enemyDamage": {
"enemy": "Cacatac",
"type": "spike",
"hits": 1
}
}
]
}
]
} |
From: 2
Left Side - Top Middle Door
To: 7
Top Right Door
Entrance condition: {
"comeInRunning": {
"speedBooster": "no",
"minTiles": 4
}
}Requires: "canCarefulJump"
"canConsecutiveWallJump"
{
"or": [
"canTrickyWallJump",
"ScrewAttack",
"canWallJumpWithCharge",
{
"and": [
"canWallJumpInstantMorph",
{
"enemyDamage": {
"enemy": "Cacatac",
"type": "spike",
"hits": 1
}
}
]
}
]
} |
From: 2
Left Side - Top Middle Door
To: 7
Top Right Door


Entrance condition: {
"comeInRunning": {
"speedBooster": "any",
"minTiles": 5
}
}Requires: "canCarefulJump"
"canConsecutiveWallJump"
{
"or": [
"canTrickyWallJump",
"ScrewAttack",
"canWallJumpWithCharge",
{
"and": [
"canWallJumpInstantMorph",
{
"enemyDamage": {
"enemy": "Cacatac",
"type": "spike",
"hits": 1
}
}
]
}
]
} |
|
Requires: {
"or": [
{
"and": [
{
"resetRoom": {
"nodes": [
1
]
}
},
{
"or": [
{
"and": [
"Grapple",
{
"cycleFrames": 300
}
]
},
{
"and": [
"SpaceJump",
{
"cycleFrames": 390
}
]
},
{
"and": [
"canDash",
"HiJump",
"canTrickyWallJump",
{
"cycleFrames": 690
}
]
}
]
}
]
},
{
"and": [
{
"resetRoom": {
"nodes": [
6
]
}
},
{
"cycleFrames": 370
}
]
},
{
"and": [
{
"resetRoom": {
"nodes": [
7
]
}
},
{
"cycleFrames": 360
}
]
}
]
}
{
"or": [
"canDash",
{
"cycleFrames": 20
}
]
}Resets obstacles: A Farm cycle drops: 1 Cacatac, 1 Waver |
|
A tricky, delayed walljump makes it possible to climb to top right in-room, with nothing. Requires: {
"notable": "Right Side Delayed Walljumps"
}
"canTrickyWallJump"
"canConsecutiveWallJump" |
|
Requires: {
"or": [
{
"resetRoom": {
"nodes": [
2
]
}
},
{
"and": [
{
"resetRoom": {
"nodes": [
3
]
}
},
{
"cycleFrames": 60
}
]
}
]
}
{
"or": [
{
"and": [
"SpaceJump",
{
"cycleFrames": 600
}
]
},
{
"and": [
"canDash",
"HiJump",
"canTrickyWallJump",
{
"cycleFrames": 660
}
]
}
]
}Resets obstacles: A Farm cycle drops: 1 Cacatac, 2 Waver |
|
Requires: {
"noBlueSuit": {}
}
"ScrewAttack"
{
"or": [
"canWallJump",
"HiJump",
"SpaceJump",
{
"and": [
"canSpringBallJumpMidAir",
"h_doubleEquipmentScreenCycleFrames",
{
"cycleFrames": 20
}
]
},
{
"and": [
"canIBJ",
{
"cycleFrames": 600
}
]
}
]
}
{
"or": [
{
"and": [
{
"resetRoom": {
"nodes": [
1
]
}
},
{
"or": [
{
"and": [
"SpaceJump",
{
"cycleFrames": 1050
}
]
},
{
"and": [
"canDash",
"HiJump",
"canTrickyWallJump",
{
"cycleFrames": 970
}
]
},
{
"and": [
"HiJump",
"canSpringBallJumpMidAir",
{
"cycleFrames": 970
},
"h_doubleEquipmentScreenCycleFrames"
]
}
]
}
]
},
{
"and": [
{
"resetRoom": {
"nodes": [
2
]
}
},
{
"cycleFrames": 840
}
]
},
{
"and": [
{
"resetRoom": {
"nodes": [
3
]
}
},
{
"cycleFrames": 960
}
]
},
{
"and": [
{
"resetRoom": {
"nodes": [
4
]
}
},
{
"cycleFrames": 1800
},
"h_useMorphBombs"
]
},
{
"and": [
{
"resetRoom": {
"nodes": [
5
]
}
},
{
"cycleFrames": 1800
},
"h_useMorphBombs"
]
}
]
}Resets obstacles: A Farm cycle drops: 1 Ripper 2 (red), 1 Waver |
|
Requires: {
"or": [
{
"and": [
{
"resetRoom": {
"nodes": [
1
]
}
},
{
"or": [
{
"and": [
"SpaceJump",
{
"cycleFrames": 1500
}
]
},
{
"and": [
"canDash",
"HiJump",
"canTrickyWallJump",
{
"cycleFrames": 1320
}
]
},
{
"and": [
"HiJump",
"canSpringBallJumpMidAir",
{
"cycleFrames": 1320
},
"h_doubleEquipmentScreenCycleFrames"
]
}
]
}
]
},
{
"and": [
{
"resetRoom": {
"nodes": [
2
]
}
},
{
"cycleFrames": 1140
}
]
},
{
"and": [
{
"resetRoom": {
"nodes": [
3
]
}
},
{
"cycleFrames": 1140
}
]
},
{
"and": [
{
"resetRoom": {
"nodes": [
4
]
}
},
{
"cycleFrames": 720
}
]
},
{
"and": [
{
"resetRoom": {
"nodes": [
5
]
}
},
{
"cycleFrames": 730
}
]
},
{
"and": [
{
"resetRoom": {
"nodes": [
6
]
}
},
{
"cycleFrames": 1770
},
{
"or": [
"SpaceJump",
{
"and": [
"canDash",
"HiJump",
"canTrickyWallJump"
]
}
]
}
]
},
{
"and": [
{
"resetRoom": {
"nodes": [
7
]
}
},
{
"cycleFrames": 1740
},
{
"or": [
"SpaceJump",
{
"and": [
"canDash",
"HiJump",
"canTrickyWallJump"
]
}
]
}
]
}
]
}
"h_useMorphBombs"Resets obstacles: A Farm cycle drops: 3 Sova |
|
Wall jump up the left wall, perform a delayed wall jump on the Fune to reach the door. Entrance condition: {
"comeInJumping": {
"speedBooster": "any",
"minTiles": 0
}
}Requires: "canPrepareForNextRoom"
"canTrickyWallJump"
"canConsecutiveWallJump"
"canTrickyJump"
"canFastWallJumpClimb"
"canUseEnemies"
{
"heatFrames": 120
}
{
"or": [
"canDash",
{
"heatFrames": 5
}
]
}Dev note: This differs from the canPrepareForNextRoom option of the previous strat only in requiring an air entry. FIXME: canFastWallJumpClimb is for difficulty placement. |
|
Wall jump up the left wall, perform a delayed wall jump on the Fune to reach the door. Requires: "canTrickyWallJump"
"canConsecutiveWallJump"
"canTrickyJump"
"canUseEnemies"
{
"or": [
{
"heatFrames": 190
},
{
"and": [
"canPrepareForNextRoom",
{
"heatFrames": 135
}
]
}
]
}
{
"or": [
"canDash",
{
"heatFrames": 5
}
]
} |
|
Wall jump up the left wall and then on the moving platform (Kamer) while avoiding the Fune's fireball. The Kamers will temporarily move down if Samus is below them, so it is best to walk under the first Kamer before climbing the wall. It is possible to freeze or kill the Fune with a Super or Power Bomb to make things easier. Requires: {
"notable": "Walljump Climb Using the Kamer"
}
"canTrickyWallJump"
"canConsecutiveWallJump"
"canUseEnemies"
{
"or": [
{
"and": [
"canDodgeWhileShooting",
{
"heatFrames": 360
}
]
},
{
"and": [
"canTrickyJump",
{
"heatFrames": 240
}
]
},
{
"and": [
{
"or": [
"canUseFrozenEnemies",
{
"ammo": {
"type": "Super",
"count": 1
}
}
]
},
{
"heatFrames": 432
}
]
},
{
"and": [
{
"ammo": {
"type": "PowerBomb",
"count": 1
}
},
{
"heatFrames": 456
}
]
}
]
}
{
"or": [
"canDash",
{
"heatFrames": 20
}
]
} |
|
Wall jump up the left wall, perform a delayed wall jump on the Fune. Entrance condition: {
"comeInJumping": {
"speedBooster": "any",
"minTiles": 0
}
}Requires: "canPrepareForNextRoom"
"canTrickyWallJump"
"canConsecutiveWallJump"
"canTrickyJump"
"canUseEnemies"
"canPrepareForNextRoom"
{
"heatFrames": 300
}
{
"or": [
{
"noFlashSuit": {}
},
"canComplexCarryFlashSuit",
"Ice",
"Wave",
"Spazer",
"Plasma",
{
"heatFrames": 300
}
]
}
{
"or": [
"canDash",
{
"heatFrames": 50
}
]
}Dev note: This differs from the canPrepareForNextRoom option of the previous strat only in requiring an air entry. |
|
Wall jump up the left wall, perform a delayed wall jump on the Fune. Requires: "canTrickyWallJump"
"canConsecutiveWallJump"
"canTrickyJump"
"canUseEnemies"
"canPrepareForNextRoom"
{
"heatFrames": 315
}
{
"or": [
{
"noFlashSuit": {}
},
"canComplexCarryFlashSuit",
"Ice",
"Wave",
"Spazer",
"Plasma",
{
"heatFrames": 300
}
]
}
{
"or": [
"canDash",
{
"heatFrames": 50
}
]
} |
|


Entrance condition: {
"comeInWithGMode": {
"mode": "any",
"morphed": false
}
}Requires: {
"lavaFrames": 210
}
{
"or": [
{
"and": [
"canDash",
{
"disableEquipment": "SpeedBooster"
}
]
},
{
"lavaFrames": 60
}
]
}
"canSuitlessLavaDive"
"canGravityJump"
{
"or": [
{
"and": [
"HiJump",
{
"gravitylessLavaFrames": 115
}
]
},
{
"and": [
"canTrickyWallJump",
"canTrickyJump",
{
"gravitylessLavaFrames": 175
}
]
}
]
}
"h_heatedGModeOpenDifferentDoor"Dev note: FIXME: Many strats without Gravity have been skipped for now. |
From: 4
Lava, Left Wall
To: 3
Above Lava Junction
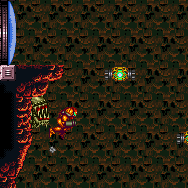
Wall jump off of the lower half of the upper-left Namihe to cross to the right side wall. Continue wall jumping up from there, waiting for the above flame to pass if it is in the way. Requires: {
"notable": "HiJump"
}
"HiJump"
"canSuitlessLavaDive"
"canUseEnemies"
"canTrickyWallJump"
{
"heatFrames": 270
}
{
"gravitylessLavaFrames": 240
} |
From: 4
Lava, Left Wall
To: 3
Above Lava Junction
Enter the bottom-left Namihe by kagoing inside of it. Wait for a second hit to gain i-frames and then very quickly walljump up the spikes and across to the right side wall. Requires: {
"notable": "HiJumpless Nahime Morph Kago"
}
{
"noBlueSuit": {}
}
"canSuitlessLavaDive"
"canInsaneWallJump"
"canInsaneJump"
"canUseIFrames"
"canTrickyWallJump"
"canFastWallJumpClimb"
"canUseEnemies"
"canKago"
{
"heatFrames": 510
}
{
"gravitylessLavaFrames": 480
}
{
"enemyDamage": {
"enemy": "Namihe",
"type": "kago",
"hits": 2
}
} |
From: 5
Lava, Center Namihe
To: 3
Above Lava Junction
Gravity jump from below the Lowest-Right Namihe. Walljump using the right side wall to reach the top of the lava, avoiding the Namihe fireball. Turning Gravity Suit back on can reduce lava damage, but may make the walljumps more difficult. Requires: "canSuitlessLavaDive"
"canGravityJump"
"canTrickyWallJump"
"canTrickyJump"
{
"heatFrames": 290
}
{
"gravitylessLavaFrames": 230
}
{
"lavaFrames": 20
}Dev note: Assumes Gravity is not reenabled until after the strat is complete. A left wall gravity jump would save a small number of gravityless lava frames at the cost of more heat and lava frames. |
|

Use the bottom-most right-side Namihe to generate a flame and walk with it to the bottom-most left Namihe head. Use a turnaround animation as Samus is hit by the flame to cancel out knockback frames. While invulnerability frames are active, walljump up the spikes either 2 or 3 times and jump accross to catch the middle wall and climb from there. Requires: {
"notable": "HiJumpless Dive"
}
{
"noBlueSuit": {}
}
"canSuitlessLavaDive"
"canUseIFrames"
"canTrickyWallJump"
"canFastWallJumpClimb"
"canUseEnemies"
"canCameraManip"
{
"heatFrames": 600
}
{
"gravitylessLavaFrames": 500
}
{
"enemyDamage": {
"enemy": "Namihe",
"type": "fireball",
"hits": 1
}
} |
From: 5
Lava, Center Namihe
To: 3
Above Lava Junction

Use the bottom-most right-side Namihe to generate a flame and walk with it to the bottommost left Namihe head. Pause and use a turnaround animation as Samus is hit by the flame to cancel out knockback frames. Manually refill energy from reserves. While invulnerability frames are active, wall jump up the spikes either 2 or 3 times and jump accross to catch the middle wall and climb from there. Requires: {
"notable": "HiJumpless Dive"
}
{
"noBlueSuit": {}
}
"canSuitlessLavaDive"
"canUseIFrames"
"canTrickyWallJump"
"canFastWallJumpClimb"
"canUseEnemies"
"canCameraManip"
{
"heatFrames": 175
}
{
"gravitylessLavaFrames": 175
}
"h_pauseAbuseMinimalReserveRefill"
{
"heatFrames": 375
}
{
"gravitylessLavaFrames": 300
} |
|

Jump and aim down to lower the camera so the middle platform Sova starts moving. Then shoot the shot block and walljump off the left side of the middle platform to reach the item. Requires: "canDash"
"canTrickyWallJump"
"canTrickyJump"
"canCameraManip"
{
"heatFrames": 230
}Clears obstacles: A |
From: 2
Bottom Right Door
To: 1
Top Right Door
Lure a Sova from the bottom to top of the room. If wall jumping, it may be easiest to follow behind the Sova and pass it at the top of the room. Requires: {
"heatFrames": 2070
}
{
"or": [
"h_useSpringBall",
{
"and": [
"canTrickyWallJump",
{
"heatFrames": 100
}
]
},
{
"and": [
"SpaceJump",
{
"heatFrames": 100
}
]
},
{
"and": [
"canCrumbleJump",
"canInsaneJump"
]
}
]
}Exit condition: {
"leaveWithGModeSetup": {}
}Unlocks doors: {"types":["missiles","super"],"requires":[]}
{"types":["powerbomb"],"requires":["h_heatProof"]}Dev note: FIXME: This could be doable with an X-Ray climb and then carefully and slowly returning the camera. |
|
If entering from the bottom door, a Sova will be in the way in the top left: either wall jump in place while waiting for it, or wall jump around it using two crumble platforms to the right. Requires: "canConsecutiveWallJump"
{
"or": [
"canDash",
{
"heatFrames": 30
}
]
}
{
"or": [
{
"and": [
"HiJump",
{
"heatFrames": 290
},
{
"or": [
"canCrumbleJump",
{
"heatFrames": 30
}
]
}
]
},
{
"heatFrames": 360
}
]
}
{
"or": [
"ScrewAttack",
{
"haveBlueSuit": {}
},
{
"and": [
"canPreciseWallJump",
"canTrickyJump",
{
"heatFrames": 30
}
]
},
{
"and": [
"canTrickyWallJump",
{
"heatFrames": 80
}
]
},
{
"heatFrames": 330
}
]
}
{
"or": [
"canDodgeWhileShooting",
{
"heatFrames": 300
}
]
} |
From: 1
Left Door
To: 2
Right Door

Carefully and quickly lure the Gamets to the right door without letting them go off camera. It may help to kill any extra Gamets once they spread apart. With Grapple, it can help to immediately press down after connecting to the block in order to get a quicker swing to the right. Requires: "h_navigateUnderwater"
"canDash"
{
"or": [
{
"resourceCapacity": [
{
"type": "Super",
"count": 1
}
]
},
{
"obstaclesCleared": [
"A"
]
}
]
}
"canTrickyGMode"
{
"or": [
{
"and": [
"Gravity",
"canPreciseGrapple"
]
},
{
"and": [
"Gravity",
"canTrickyWallJump"
]
},
{
"and": [
"HiJump",
"canPreciseGrapple"
]
}
]
}Exit condition: {
"leaveWithGModeSetup": {}
}Unlocks doors: {"types":["ammo"],"requires":[]}Dev note: In theory this could be done dashless with a blue suit, but it seems unreasonable. |
From: 3
Junction Left of Green Gate
To: 4
Center Platform Junction
Requires: {
"or": [
"Grapple",
"SpaceJump",
"canResetFallSpeed",
{
"and": [
"canTrickyJump",
"canLateralMidAirMorph"
]
},
{
"and": [
"Gravity",
"canTrickyWallJump"
]
}
]
}Resets obstacles: B |
|


Carefully swing between the Rippers at the top of the room to the item. The last two swings are the hardest Morphing and unmorphing to reset Samus's fall speed can help give a bit more time to position the Rippers. It can help to Grapple the same Ripper again to get it in a better position. Position the third Ripper far to the right then fling to the fourth, which is far to the right and very close to the ceiling. Moving the fourth Ripper to the right a bit can also help in order to make the last fling less precise. Be careful not to fling directly into the ceiling, as it is easy to hit the uneven surface and fall. If Samus falls, it may be helpful to reset the room. Requires: {
"notable": "Indiana Jones Grapple (With Retries)"
}
"canUseEnemies"
"canPreciseGrapple"
"h_midAirShootUp"
{
"or": [
{
"and": [
"canInsaneJump",
"h_trickyToCarryFlashSuit"
]
},
{
"enemyDamage": {
"enemy": "Ripper 2 (green)",
"type": "contact",
"hits": 4
}
}
]
}
{
"or": [
{
"and": [
"HiJump",
"canSpringBallJumpMidAir"
]
},
{
"and": [
"canSpeedyJump",
"HiJump",
"canTrickyWallJump"
]
},
"h_trickySpringwall"
]
} |
From: 5
Small Platforms Junction
To: 1
Left Door
Lure a Mella from the right by breaking the speed blocks or using Morph. Then manipulate it to go high enough to be used in the left doorway. Raise the Mella up to just below the door's ledge and then climb up to the door. Reposition the Mella once towards the door, and before it finishes moving, stand in the doorframe so that the next Mella movement will hit Samus. If it drops below the camera it will be necessary to go back down and raise it again. Requires: "canManipulateMellas"
"canCameraManip"
"canBePatient"
"canComplexGMode"
{
"or": [
"SpaceJump",
"canTrickyUseFrozenEnemies",
{
"and": [
"HiJump",
"canSpringBallJumpMidAir"
]
},
{
"and": [
"HiJump",
"canSpeedyJump",
"canTrickyWallJump"
]
}
]
}
{
"or": [
"canTrickyDodgeEnemies",
{
"enemyDamage": {
"enemy": "Mella",
"type": "contact",
"hits": 2
}
}
]
}
{
"or": [
{
"obstaclesCleared": [
"B"
]
},
"Morph"
]
}Exit condition: {
"leaveWithGModeSetup": {}
}Unlocks doors: {"types":["ammo"],"requires":[]} |
|

Run on the moving platform (Kamer). Requires: "canSpeedyJump" "HiJump" "canTrickyWallJump" |
From: 4
Top Right Door
To: 1
Top Left Door
Damage boost off the Ripper to reach the top-left of the room. This is a faster but likely more difficult alternative to using a Gamet to damage boost. Requires: {
"notable": "Damage Boost"
}
"canInsaneJump"
{
"or": [
"canTrickyWallJump",
"canDash"
]
}
"canHorizontalDamageBoost"
{
"enemyDamage": {
"enemy": "Ripper 2 (green)",
"type": "contact",
"hits": 1
}
}Dev note: This can be uniquely useful if carrying a flash suit, if wall jump cannot be used, since damage boosting off a Gamet would not be possible in that scenario. |
From: 7
G-Mode Junction (Bottom of Room)
To: 1
Left Door

Use the camera scroll blocks below the crumble blocks to overload PLMs and go through the crumble blocks. A good jumping through them a single time is enough to overload them for the next jump. This can be done while dodging GT. With a speedy jump, it is possible to overload PLMs and run back to GT before it stands up, get into the safe spot location to get him to jump back, and use the runway again. With shinesparks, diagonally spark into the crumble blocks and hold forward three times, then spark through. Note that when GT attacks, it will place stationary invisible projectiles, so it is much more difficult if not getting up quickly. Requires: "h_heatedGMode"
{
"or": [
{
"or": [
"f_DefeatedGoldenTorizo",
{
"obstaclesCleared": [
"f_DefeatedGoldenTorizo"
]
}
]
},
"canTrickyDodgeEnemies"
]
}
{
"or": [
"SpaceJump",
{
"and": [
"HiJump",
{
"or": [
"canTrickyWallJump",
"canSpringBallJumpMidAir",
"canSpeedyJump"
]
}
]
},
{
"and": [
"canSpringBallJumpMidAir",
"canSpeedyJump",
{
"or": [
{
"or": [
"f_DefeatedGoldenTorizo",
{
"obstaclesCleared": [
"f_DefeatedGoldenTorizo"
]
}
]
},
"canInsaneJump"
]
}
]
},
{
"and": [
{
"or": [
"f_DefeatedGoldenTorizo",
{
"obstaclesCleared": [
"f_DefeatedGoldenTorizo"
]
}
]
},
"canTrickyDashJump",
"canWallJump"
]
},
{
"and": [
{
"or": [
"f_DefeatedGoldenTorizo",
{
"obstaclesCleared": [
"f_DefeatedGoldenTorizo"
]
}
]
},
"canConsecutiveWallJump",
"canInsaneWallJump"
]
},
{
"and": [
{
"or": [
"f_DefeatedGoldenTorizo",
{
"obstaclesCleared": [
"f_DefeatedGoldenTorizo"
]
}
]
},
{
"canShineCharge": {
"usedTiles": 28,
"openEnd": 0
}
},
{
"or": [
{
"and": [
"canWallJump",
{
"shinespark": {
"frames": 9,
"excessFrames": 4
}
}
]
},
{
"and": [
"canSpeedyJump",
{
"shinespark": {
"frames": 9,
"excessFrames": 4
}
}
]
},
{
"shinespark": {
"frames": 32,
"excessFrames": 4
}
}
]
}
]
}
]
}
"h_heatedGModeOpenDifferentDoor" |
From: 7
G-Mode Junction (Bottom of Room)
To: 3
Top Left Item
Use the camera scroll blocks below the crumble blocks to overload PLMs and go through the crumble blocks. A good jumping through them a single time is enough to overload them for the next jump. This can be done while dodging GT. With a speedy jump, it is possible to overload PLMs and run back to GT before it stands up, get into the safe spot location to get him to jump back, and use the runway again. With shinesparks, diagonally spark into the crumble blocks and hold forward three times, then spark through. Note that when GT attacks, it will place stationary invisible projectiles, so it is much more difficult if not getting up quickly. Requires: "h_heatedGMode"
{
"or": [
{
"or": [
"f_DefeatedGoldenTorizo",
{
"obstaclesCleared": [
"f_DefeatedGoldenTorizo"
]
}
]
},
"canTrickyDodgeEnemies"
]
}
{
"or": [
"SpaceJump",
{
"and": [
"HiJump",
{
"or": [
"canTrickyWallJump",
"canSpringBallJumpMidAir",
"canSpeedyJump"
]
}
]
},
{
"and": [
"canSpringBallJumpMidAir",
"canSpeedyJump",
{
"or": [
{
"or": [
"f_DefeatedGoldenTorizo",
{
"obstaclesCleared": [
"f_DefeatedGoldenTorizo"
]
}
]
},
"canInsaneJump"
]
}
]
},
{
"and": [
{
"or": [
"f_DefeatedGoldenTorizo",
{
"obstaclesCleared": [
"f_DefeatedGoldenTorizo"
]
}
]
},
"canTrickyDashJump",
"canWallJump"
]
},
{
"and": [
{
"or": [
"f_DefeatedGoldenTorizo",
{
"obstaclesCleared": [
"f_DefeatedGoldenTorizo"
]
}
]
},
"canConsecutiveWallJump",
"canInsaneWallJump"
]
},
{
"and": [
{
"or": [
"f_DefeatedGoldenTorizo",
{
"obstaclesCleared": [
"f_DefeatedGoldenTorizo"
]
}
]
},
{
"canShineCharge": {
"usedTiles": 28,
"openEnd": 0
}
},
{
"or": [
{
"and": [
"canWallJump",
{
"shinespark": {
"frames": 9,
"excessFrames": 4
}
}
]
},
{
"and": [
"canSpeedyJump",
{
"shinespark": {
"frames": 9,
"excessFrames": 4
}
}
]
},
{
"shinespark": {
"frames": 32,
"excessFrames": 4
}
}
]
}
]
}
]
}
{
"heatFrames": 0
} |
From: 5
Firefleas Bottom Left Platform Junction
To: 7
Fireflea Statue's Claw Junction
This can only be attempted once. Requires: "canTrickyWallJump"
"canCarefulJump"
"canHorizontalDamageBoost"
{
"enemyDamage": {
"enemy": "Fireflea",
"type": "contact",
"hits": 1
}
} |
From: 2
Bottom Left Door
To: 4
Junction Above Bomb Blocks
Freeze the pirates to use as platforms to get up through the bomb blocks. Note that the pirates' hitboxes are larger than they seem. Requires: {
"notable": "Frozen Pirate Platforms"
}
"canTrickyUseFrozenEnemies"
"canDodgeWhileShooting"
"Charge"
"h_heatProof"
"canTrickyWallJump"
{
"or": [
"ScrewAttack",
{
"and": [
"h_bombThings",
"canMidAirMorph"
]
},
{
"obstaclesCleared": [
"A"
]
},
{
"haveBlueSuit": {}
}
]
}Clears obstacles: A Dev note: It is possible to place a PB on top of a frozen Pirate, but that requires keeping two alive or freezing one with Plasma and another beam. The 'Low Ice' strats can be used as a way to manipulate the pirates into position and do not have h_heatProof. |
From: 6
Bottom Platform Junction With Pirates Killed
To: 4
Junction Above Bomb Blocks

Requires: "HiJump"
"canPreciseWallJump"
"canConsecutiveWallJump"
{
"heatFrames": 180
}
{
"or": [
"canTrickyWallJump",
{
"heatFrames": 300
}
]
}
{
"or": [
{
"obstaclesCleared": [
"A"
]
},
{
"haveBlueSuit": {}
}
]
}Clears obstacles: A |
From: 6
Bottom Platform Junction With Pirates Killed
To: 6
Bottom Platform Junction With Pirates Killed
Use a wall jump morph to break the leftmost set of bomb blocks on the bottom layer. Then use a delayed wall jump morph to bomb out the next bomb blocks above. Requires: "HiJump"
"canTrickyWallJump"
"canWallJumpInstantMorph"
"canTrickyJump"
"h_useMorphBombs"
{
"heatFrames": 520
}
{
"or": [
"canInsaneWallJump",
{
"heatFrames": 500
}
]
}Clears obstacles: A |
|
Requires: "Morph"
{
"heatFrames": 660
}
{
"or": [
"canTrickyWallJump",
{
"hibashiHits": 1
},
"canTrickyDodgeEnemies",
{
"haveBlueSuit": {}
}
]
}
{
"or": [
"canTrickyWallJump",
{
"acidFrames": 50
},
{
"and": [
"HiJump",
{
"acidFrames": 15
}
]
}
]
}Clears obstacles: B |
From: 2
Right Door
To: 5
G-Mode Morph Junction (Above Bomb Block)
Entrance condition: {
"comeInWithGMode": {
"mode": "any",
"morphed": false
}
}Requires: "Morph"
{
"or": [
"SpaceJump",
"canTrickyWallJump",
{
"and": [
"canDash",
"HiJump"
]
},
{
"and": [
"canDash",
"canInsaneJump",
{
"disableEquipment": "SpeedBooster"
}
]
}
]
}
{
"heatFrames": 0
} |
From: 4
Junction Above Bomb Block
To: 2
Right Door
Wall jump in place while the acid goes away. Requires: {
"obstaclesNotCleared": [
"B"
]
}
"Morph"
"canTrickyWallJump"
{
"heatFrames": 600
}
{
"or": [
"canDash",
{
"heatFrames": 40
}
]
} |
|
It doesn't work from flush against the door. Start moving about half a tile away from it. This works with extra run speeds between $1.1 and $1.3, with higher speeds in this range giving a higher jump. Requires: "canSuitlessMaridia" "canTrickyDashJump" "canTrickyWallJump" Dev note: Extra run speeds between $0.1 and $0.3 can also work, but it is slower and the positioning is more precise. |
|

Requires: "Gravity"
{
"or": [
"canTrickyWallJump",
{
"and": [
"HiJump",
"canPreciseWallJump"
]
},
{
"and": [
"HiJump",
"canWallJump",
"canSpeedyJump"
]
}
]
} |
|
Requires: "canSuitlessMaridia"
"HiJump"
"canConsecutiveWallJump"
"canTrickyWallJump"
{
"or": [
{
"obstaclesCleared": [
"A"
]
},
"h_usePowerBomb"
]
}Clears obstacles: A |
|


Cross the room with Grapple or wall jumps. Under the sand is spikes. Be sure not to turn around before landing or Samus will fall straight through the sand. Breaking spin while midair, such as by tapping an angle button, will help Samus land less deep in the sand - a quick jump when landing will give her a much higher jump. The last wall jump to get around the corner is tricky but it does not require a delayed wall jump, even without HiJump. Requires: "Gravity"
{
"or": [
{
"and": [
"HiJump",
"canWallJump",
{
"or": [
"canPlayInSand",
"canConsecutiveWallJump"
]
}
]
},
{
"and": [
"canTrickyWallJump",
"canConsecutiveWallJump"
]
},
{
"and": [
"canPreciseGrapple",
"canCarefulJump"
]
}
]
}
{
"or": [
{
"ammo": {
"type": "Missile",
"count": 2
}
},
{
"ammo": {
"type": "Super",
"count": 2
}
},
"canUseGrapple",
"canDodgeWhileShooting",
"Spazer",
"Wave",
"Plasma",
"ScrewAttack",
{
"haveBlueSuit": {}
},
{
"enemyDamage": {
"enemy": "Mochtroid",
"type": "contact",
"hits": 1
}
}
]
}
{
"or": [
"canPlayInSand",
{
"spikeHits": 2
}
]
}
{
"or": [
"Grapple",
{
"noBlueSuit": {}
}
]
} |
|

Requires: {
"or": [
"f_DefeatedDraygon",
{
"obstaclesCleared": [
"f_DefeatedDraygon"
]
}
]
}
"Gravity"
{
"canShineCharge": {
"usedTiles": 21,
"openEnd": 0
}
}
{
"thornHits": 1
}
"h_spikeSuitThornHitLeniency"
"canSpikeSuit"
{
"or": [
"h_breakOneDraygonTurret",
"canTrickyWallJump"
]
}
{
"shinespark": {
"frames": 2,
"excessFrames": 2
}
}Dev note: FIXME: Obtaining a spikesuit while Draygon is still alive is possible but requires more complex modelling |
|
Requires: {
"resetRoom": {
"nodes": [
1
]
}
}
{
"or": [
{
"and": [
"Gravity",
{
"or": [
{
"and": [
"HiJump",
"canSpeedyJump",
"canTrickyJump",
{
"cycleFrames": 300
}
]
},
{
"and": [
"HiJump",
"canWallJump",
{
"cycleFrames": 310
}
]
},
{
"and": [
"SpaceJump",
{
"cycleFrames": 360
}
]
},
{
"and": [
"canTrickyWallJump",
{
"cycleFrames": 380
}
]
},
{
"and": [
"canSpringBallJumpMidAir",
{
"or": [
"HiJump",
"canSpringwall",
{
"and": [
"canTrickySpringBallJump",
"canTrickyJump"
]
}
]
},
{
"cycleFrames": 340
},
"h_doubleEquipmentScreenCycleFrames"
]
},
{
"and": [
"canDoubleBombJump",
{
"cycleFrames": 830
}
]
}
]
}
]
},
{
"and": [
"canSuitlessMaridia",
{
"or": [
{
"and": [
"HiJump",
"canTrickyJump",
"canMidairWiggle",
"canTrickyWallJump",
{
"cycleFrames": 360
}
]
},
{
"and": [
"HiJump",
"canSpaceJumpWaterBounce",
"canWallJump",
{
"cycleFrames": 390
}
]
},
{
"and": [
"HiJump",
"canSpaceJumpWaterEscape",
{
"cycleFrames": 430
}
]
},
{
"and": [
{
"notable": "Suitless Bootless Space Jump"
},
"canSpaceJumpWaterBounce",
"canWallJump",
{
"cycleFrames": 440
}
]
},
{
"and": [
"HiJump",
"canTrickySpringBallJump",
{
"or": [
"canTrickyJump",
"canFlatleyJump"
]
},
{
"cycleFrames": 360
},
"h_doubleEquipmentScreenCycleFrames"
]
}
]
}
]
}
]
}Resets obstacles: R-Mode Farm cycle drops: 1 Cacatac |
From: 3
Junction Left of Morph Tunnel
To: 1
Left Door

Requires: "canSuitlessMaridia"
"HiJump"
"canPreciseWallJump"
{
"or": [
"canTrickyJump",
"canMidairWiggle"
]
}
{
"or": [
"canConsecutiveWallJump",
"canTrickyWallJump"
]
} |
|
Requires: "Gravity" "canTrickyWallJump" |
|
Requires: "canDodgeWhileShooting"
{
"or": [
{
"and": [
{
"resetRoom": {
"nodes": [
1
]
}
},
{
"cycleFrames": 320
}
]
},
{
"and": [
{
"resetRoom": {
"nodes": [
2
]
}
},
{
"cycleFrames": 470
},
{
"or": [
"canWallJump",
"SpaceJump"
]
}
]
},
{
"and": [
{
"resetRoom": {
"nodes": [
3
]
}
},
{
"cycleFrames": 1680
},
"canTrickyWallJump",
"canTrickyJump"
]
}
]
}
{
"or": [
"Plasma",
"Charge",
{
"haveBlueSuit": {}
}
]
}
{
"cycleFrames": 300
}Farm cycle drops: 1 Owtch Dev note: The extra 300 frames is for waiting a random amount of time for the Owtch to go left. The Owtch can also be killed with Screw Attack, but farming the Rippers would make more sense in that case. FIXME: A more specific enemy-knowledge tech should ideally be required, for understanding how to kill the Owtch. |
From: 1
Bottom Left Door
To: 4
G-Mode Junction (Top by Elevator)
Entrance condition: {
"comeInWithGMode": {
"mode": "any",
"morphed": false
}
}Requires: {
"or": [
"canTrivialUseFrozenEnemies",
"canTrickyWallJump"
]
} |
|
Requires: "canTrickyWallJump"
{
"or": [
"canTrickyJump",
{
"enemyDamage": {
"enemy": "Ripper",
"type": "contact",
"hits": 2
}
}
]
} |
|
Entrance condition: {
"comeInWithGMode": {
"mode": "any",
"morphed": false
}
}Requires: {
"or": [
"canTrivialUseFrozenEnemies",
"canTrickyWallJump",
{
"and": [
"SpaceJump",
"canTrickyJump"
]
}
]
} |
|
Requires: {
"resetRoom": {
"nodes": [
1
]
}
}
{
"or": [
"canDash",
{
"cycleFrames": 100
}
]
}
{
"or": [
{
"and": [
"HiJump",
"SpaceJump",
{
"cycleFrames": 930
}
]
},
{
"and": [
"HiJump",
"canTrickyWallJump",
{
"cycleFrames": 960
}
]
},
{
"and": [
"SpaceJump",
{
"cycleFrames": 1220
}
]
},
{
"and": [
"canSpringwall",
{
"cycleFrames": 1035
},
"h_doubleEquipmentScreenCycleFrames"
]
},
{
"and": [
"HiJump",
"canSpringBallJumpMidAir",
{
"cycleFrames": 910
},
"h_doubleEquipmentScreenCycleFrames"
]
},
{
"and": [
"canDoubleBombJump",
{
"or": [
"canWallJump",
"h_crouchJumpDownGrab"
]
},
{
"cycleFrames": 1410
}
]
},
{
"and": [
"canDoubleBombJump",
{
"cycleFrames": 1560
}
]
}
]
}
{
"or": [
"ScrewAttack",
{
"haveBlueSuit": {}
},
"Plasma"
]
}Resets obstacles: A, B, C Farm cycle drops: 4 Pink Space Pirate (standing), 2 Pink Space Pirate (wall) Dev note: FIXME: Add option to kill the Pirates with speed echoes, and possibly to get back up with a shinespark. |
|
Requires: {
"or": [
{
"resetRoom": {
"nodes": [
3
]
}
},
{
"and": [
{
"resetRoom": {
"nodes": [
2
]
}
},
{
"or": [
{
"and": [
"Gravity",
{
"cycleFrames": 835
}
]
},
{
"and": [
"canSuitlessMaridia",
"HiJump",
{
"cycleFrames": 1540
}
]
}
]
}
]
},
{
"and": [
{
"resetRoom": {
"nodes": [
4
]
}
},
{
"or": [
{
"and": [
"HiJump",
"SpaceJump",
{
"cycleFrames": 230
}
]
},
{
"and": [
"canTrickyWallJump",
"canConsecutiveWallJump",
{
"cycleFrames": 310
}
]
},
{
"and": [
"SpaceJump",
{
"cycleFrames": 400
}
]
}
]
}
]
}
]
}
{
"or": [
{
"and": [
"Plasma",
{
"cycleFrames": 320
}
]
},
{
"and": [
"Wave",
{
"cycleFrames": 340
}
]
},
{
"and": [
"Grapple",
{
"cycleFrames": 360
}
]
},
{
"and": [
"Spazer",
"canFarmWhileShooting",
{
"cycleFrames": 390
}
]
},
{
"and": [
"canDash",
"ScrewAttack",
"canDodgeWhileShooting",
{
"cycleFrames": 500
}
]
},
{
"cycleFrames": 640
}
]
}Resets obstacles: R-Mode Farm cycle drops: 2 Choot |
|

Perform a precise wall jump as the water is lowering. Climbing up the right side of the room is slightly easier. Requires: "canSuitlessMaridia" "canTrickyWallJump" |
|


Use the grapple block to initiate a Grapple Jump to climb up to the higher level and above the water line. Aiming the Grapple Jump to line up with the one tile hole is difficult and Samus is moving at high speeds. Escaping the water is also difficult as Samus must be standing at the water line when jumping for the next part of the grapple jump. It may be easier to jump out of the water by turning HiJump off. A Grapple Jump can be a spin jump by running briefly before jumping and that can be used to begin Walljumping or Space Jumping. Requires: {
"notable": "Grapple Jump"
}
"canSuitlessMaridia"
"canTrickyGrappleJump"
"canMidairWiggle"
{
"or": [
{
"enemyDamage": {
"enemy": "Menu",
"type": "contact",
"hits": 1
}
},
"SpaceJump",
{
"and": [
"canConsecutiveWallJump",
{
"or": [
"ScrewAttack",
"canTrickyWallJump"
]
}
]
},
"h_pauseAbuseMinimalReserveRefill",
"canTrickyDodgeEnemies"
]
} |
|

Watch for the water level to start falling to time the jump to escape at its lowest point. Then use SpaceJump to splash on top of the water. Time another jump with the water level or walljump to fully escape the water. Requires: {
"or": [
{
"and": [
"canSpaceJumpWaterBounce",
"canWallJump"
]
},
"canSpaceJumpWaterEscape"
]
}
"HiJump"
{
"or": [
{
"enemyDamage": {
"enemy": "Menu",
"type": "contact",
"hits": 1
}
},
"ScrewAttack",
"canTrickyWallJump",
"canPseudoScrew",
{
"haveBlueSuit": {}
},
"h_pauseAbuseMinimalReserveRefill"
]
} |
|

The swarm of Menus will attack Samus at the top of the room. Tank them, carefully dodge them, or kill them with Screw or Pseudo Screw. Requires: "Gravity"
"canConsecutiveWallJump"
{
"or": [
"ScrewAttack",
{
"haveBlueSuit": {}
},
"canTrickyWallJump",
"canWallJumpWithCharge",
{
"enemyDamage": {
"enemy": "Menu",
"type": "contact",
"hits": 1
}
}
]
}Dev note: The Menus prevent a reliable IBJ. |
|

Requires: {
"or": [
{
"and": [
"canTrickyWallJump",
{
"acidFrames": 20
}
]
},
{
"and": [
"HiJump",
"canWallJump",
{
"acidFrames": 50
}
]
},
{
"and": [
"HiJump",
"canPreciseWallJump",
{
"acidFrames": 20
}
]
},
{
"and": [
"Gravity",
{
"acidFrames": 10
}
]
}
]
}
{
"or": [
{
"obstaclesCleared": [
"A",
"B"
]
},
"Ice",
"ScrewAttack",
"canMetroidAvoid",
{
"and": [
"canPseudoScrew",
"canTrickyJump"
]
},
{
"metroidFrames": 420
}
]
}
{
"or": [
"canInsaneJump",
{
"and": [
"canTrickyJump",
"canLateralMidAirMorph"
]
},
{
"and": [
"canTrickyJump",
"canPreciseWallJump",
{
"acidFrames": 16
}
]
},
{
"and": [
"Gravity",
{
"acidFrames": 16
}
]
},
{
"acidFrames": 27
}
]
}Dev note: 1) Jump from the acid to the floating platform. 2) Deal with the Metroid. 3) Jump from the platform to the ledge, potentially falling in acid. |