canComplexRModeCrystalFlashInterrupt (Extreme+)


The ability to R-mode forced standup Crystal Flash interrupt in more complex scenarios. This may include timing enemy contact to occur immediately after Samus gains Reserve Energy, to prevent a double hit; unintuitive enemy positioning, to prevent the enemy from being killed by the Power Bomb or light orb; and other unusual enemy setups.
Dependencies: canUseEnemies, canMidairShinespark, canRMode, canShinechargeMovementComplex, canHorizontalShinespark, canShinechargeMovement, canCrystalFlash, canShinespark, canRModeCrystalFlashInterrupt, canHorizontalMidairShinespark, canCarryFlashSuit
Strats ()
From: 1
Left Door
To: 1
Left Door
Crystal Flashing on the Zebbo spawner will usually not deal enough damage to Samus to trigger reserves. One way to make this fairly reliable is to kill the Yapping Maw then take a Zebbo hit while on its spawner, and then place the Power Bomb such that it explodes and kills a Zebbo shortly after it spawns. Samus will then pick up the drop and start Crystal Flashing where her refill is usually in a good rhythm for the Zebbo to be able to trigger reserves. There is an approximate 2/3 chance of success. This can only be done suitless and with no E-Tanks. Requires: {
"obstaclesCleared": [
"R-Mode"
]
}
"canComplexRModeCrystalFlashInterrupt"
{
"ammo": {
"type": "Missile",
"count": 10
}
}
{
"ammo": {
"type": "Super",
"count": 10
}
}
"canBeLucky"Resets obstacles: R-Mode Dev note: This can not be done in G-mode, because the Power Bomb will kill the Zebbo and prevent more from spawning. |
|
It is required to avoid hitting the Sciser with the Power Bomb, and to position the Crystal Flash so that the Sciser can hit Samus from above so it avoids the light orb. Using the global counter-clockwise crab, the only spot in the room that is usable is the spot with the two shot blocks by the left door. Break the two shot blocks, then wait below them for nearly two minutes, until the crab is visible in the visible spot, four tiles right of the bottom shot block. Wait approximately two more seconds before laying the Power Bomb to Crystal Flash, while Samus below or a bit to the left of the low pointy ceiling. Entrance condition: {
"comeInWithRMode": {},
"comesThroughToilet": "no"
}Requires: "canBeVeryPatient"
"canComplexRModeCrystalFlashInterrupt"
{
"ammo": {
"type": "Missile",
"count": 10
}
}
{
"ammo": {
"type": "Super",
"count": 10
}
}
{
"ammo": {
"type": "PowerBomb",
"count": 5
}
}
{
"or": [
"h_fullEnemyDamageReduction",
{
"and": [
"h_partialEnemyDamageReduction",
{
"resourceAtMost": [
{
"type": "RegularEnergy",
"count": 39
}
]
}
]
},
{
"and": [
{
"resourceCapacity": [
{
"type": "RegularEnergy",
"count": 199
}
]
},
{
"resourceCapacity": [
{
"type": "ReserveEnergy",
"count": 199
}
]
}
]
}
]
}Dev note: The clockwise global crab may also be usable, but it is more difficult to set free. Neither crab is usable in G-mode, because the blocks are not breakable. |
|
It is required to avoid hitting the Sciser with the Power Bomb, and to position the Crystal Flash so that the Sciser can hit Samus from above so it avoids the light orb. Using the global counter-clockwise crab, the only spot in the room that is usable is the spot with the two shot blocks by the left door. Break the two shot blocks, then wait below them for nearly two minutes, until the crab is visible in the visible spot, four tiles right of the bottom shot block and at the same height. Wait approximately two more seconds before laying the Power Bomb to Crystal Flash, while Samus below or a bit to the left of the low pointy ceiling just below the visible spot, below and right of the shot block. Entrance condition: {
"comeInWithRMode": {}
}Requires: "canBeVeryPatient"
"canComplexRModeCrystalFlashInterrupt"
{
"ammo": {
"type": "Missile",
"count": 10
}
}
{
"ammo": {
"type": "Super",
"count": 10
}
}
{
"ammo": {
"type": "PowerBomb",
"count": 5
}
}
{
"or": [
"h_fullEnemyDamageReduction",
{
"and": [
"h_partialEnemyDamageReduction",
{
"resourceAtMost": [
{
"type": "RegularEnergy",
"count": 39
}
]
}
]
},
{
"and": [
{
"resourceCapacity": [
{
"type": "RegularEnergy",
"count": 199
}
]
},
{
"resourceCapacity": [
{
"type": "ReserveEnergy",
"count": 199
}
]
}
]
}
]
}Dev note: The clockwise global crab may also be usable, but it is more difficult to set free. Neither crab is usable in G-mode, because the blocks are not breakable. |
From: 1
Left Door
To: 3
Junction (Left side Pit)

It is required to avoid double hitting the Skultera with the Power Bomb, and to position the Crystal Flash so that the Skultera can hit Samus from above so it avoids the light orb. To do this, use the bottom-left Skultera, and move it off-camera at the far left end of its cycle. Go to the far right end of it's cycle and on the Crystal Flash on the sloped tile just below where it ends. Once the Skultera gets hit by the Power Bomb explosion, it will start moving, even while off-camera. Entrance condition: {
"comeInWithGMode": {
"mode": "direct",
"morphed": true
}
}Requires: "h_artificialMorphComplexRModeCrystalFlashInterrupt"
"canCameraManip"
{
"ammo": {
"type": "Missile",
"count": 10
}
}
{
"ammo": {
"type": "Super",
"count": 10
}
}
{
"ammo": {
"type": "PowerBomb",
"count": 5
}
}
{
"or": [
"h_partialEnemyDamageReduction",
{
"resourceAtMost": [
{
"type": "RegularEnergy",
"count": 19
}
]
},
{
"and": [
{
"resourceCapacity": [
{
"type": "RegularEnergy",
"count": 199
}
]
},
{
"resourceCapacity": [
{
"type": "ReserveEnergy",
"count": 199
}
]
}
]
}
]
}Dev note: There is no reason to do this at node 4, because the movement items required to get to 4 and then do anything useful with the flash suit would also enable Samus to get the flash suit here and then take it to node 4. |
From: 2
Right Door
To: 3
Junction (Left side Pit)
Perform a double Spring Ball jump using a precisely timed bomb boost to propel Samus upward just long enough to get the mid-air Spring Ball jump. This needs to be done multiple times to cross the room with no other items; using Spring Flings to cross from peak to peak can reduce the required number of bomb into Spring Ball jumps to just one or two. To Crystal Flash interrupt, it is required to avoid double hitting the Skultera with the Power Bomb, and to position the Crystal Flash so that the Skultera can hit Samus from above so it avoids the light orb. To do this, use the bottom-left Skultera, and move it off-camera at the far left end of its cycle. Go to the far right end of it's cycle and on the Crystal Flash on the sloped tile just below where it ends. Once the Skultera gets hit by the Power Bomb explosion, it will start moving, even while off-camera. Entrance condition: {
"comeInWithGMode": {
"mode": "direct",
"morphed": true
}
}Requires: "h_artificialMorphUnderwaterBombIntoSpringBallJump"
{
"or": [
"h_artificialMorphSpringFling",
"canBeVeryPatient"
]
}
"h_artificialMorphComplexRModeCrystalFlashInterrupt"
"canCameraManip"
{
  "ammo": {
    "type": "Missile",
    "count": 10
  }
}
{
  "ammo": {
    "type": "Super",
    "count": 10
  }
}
{
  "ammo": {
    "type": "PowerBomb",
    "count": 5
  }
}
{
  "or": [
    "h_partialEnemyDamageReduction",
    {
      "resourceAtMost": [
        {
          "type": "RegularEnergy",
          "count": 19
        }
      ]
    },
    {
      "and": [
        {
          "resourceCapacity": [
            {
              "type": "RegularEnergy",
              "count": 199
            }
          ]
        },
        {
          "resourceCapacity": [
            {
              "type": "ReserveEnergy",
              "count": 199
            }
          ]
        }
      ]
    }
  ]
}
Dev note: Methods with more flexible movement items will instead be done at node 4, after which, they can be used to get here. FIXME: Add variants that can farm enough Energy to choot damage boost without enemy damage reduction or tanks. |
From: 2
Right Door
To: 4
Junction (Right side Pit)
It is required to avoid double hitting the Skultera with the Power Bomb, and to position the Crystal Flash so that the Skultera can hit Samus from above so it avoids the light orb. To do this, use the bottom-right Skultera, and position Samus against the right pillar, or on the slope in front of the pillar. Place the Power Bomb to hit the fish as it reaches the left wall. If Samus has 75% enemy damage reduction, it is required to Crystal Flash on the sloped tile, otherwise she can use either tile. Entrance condition: {
"comeInWithGMode": {
"mode": "direct",
"morphed": true
}
}Requires: {
"or": [
{
"and": [
"Gravity",
"h_artificialMorphIBJ"
]
},
{
"and": [
"Gravity",
"h_artificialMorphSpringBall"
]
},
{
"and": [
"HiJump",
"h_artificialMorphSpringBall"
]
}
]
}
"h_artificialMorphComplexRModeCrystalFlashInterrupt"
{
"ammo": {
"type": "Missile",
"count": 10
}
}
{
"ammo": {
"type": "Super",
"count": 5
}
}
{
"or": [
"h_partialEnemyDamageReduction",
{
"resourceAtMost": [
{
"type": "RegularEnergy",
"count": 19
}
]
},
{
"and": [
{
"resourceCapacity": [
{
"type": "RegularEnergy",
"count": 199
}
]
},
{
"resourceCapacity": [
{
"type": "ReserveEnergy",
"count": 199
}
]
}
]
}
]
} |
From: 3
Junction (Left side Pit)
To: 3
Junction (Left side Pit)

It is required to avoid double hitting the Skultera with the Power Bomb, and to position the Crystal Flash so that the Skultera can hit Samus from above so it avoids the light orb. To do this, use the bottom-left Skultera, and move it off-camera at the far left end of its cycle. Go to the far right end of it's cycle and on the Crystal Flash on the sloped tile just below where it ends. Once the Skultera gets hit by the Power Bomb explosion, it will start moving, even while off-camera. Requires: {
"obstaclesCleared": [
"R-Mode"
]
}
"canCameraManip"
"canComplexRModeCrystalFlashInterrupt"
{
"ammo": {
"type": "Missile",
"count": 10
}
}
{
"ammo": {
"type": "Super",
"count": 10
}
}
{
"ammo": {
"type": "PowerBomb",
"count": 5
}
}
{
"or": [
"h_partialEnemyDamageReduction",
{
"resourceAtMost": [
{
"type": "RegularEnergy",
"count": 19
}
]
},
{
"and": [
{
"resourceCapacity": [
{
"type": "RegularEnergy",
"count": 199
}
]
},
{
"resourceCapacity": [
{
"type": "ReserveEnergy",
"count": 199
}
]
}
]
}
]
}Resets obstacles: R-Mode |
From: 4
Junction (Right side Pit)
To: 4
Junction (Right side Pit)
It is required to avoid double hitting the Skultera with the Power Bomb, and to position the Crystal Flash so that the Skultera can hit Samus from above so it avoids the light orb. To do this, use the bottom-right Skultera, and position Samus against the right pillar, or on the slope in front of the pillar. Place the Power Bomb to hit the fish as it reaches the left wall. If Samus has 75% enemy damage reduction, it is required to Crystal Flash on the sloped tile, otherwise she can use either tile. Requires: {
"obstaclesCleared": [
"R-Mode"
]
}
"canComplexRModeCrystalFlashInterrupt"
{
"ammo": {
"type": "Missile",
"count": 10
}
}
{
"ammo": {
"type": "Super",
"count": 5
}
}
{
"or": [
"h_partialEnemyDamageReduction",
{
"resourceAtMost": [
{
"type": "RegularEnergy",
"count": 19
}
]
},
{
"and": [
{
"resourceCapacity": [
{
"type": "RegularEnergy",
"count": 199
}
]
},
{
"resourceCapacity": [
{
"type": "ReserveEnergy",
"count": 199
}
]
}
]
}
]
}
{
"or": [
"Gravity",
"HiJump",
"canSpringBallJumpMidAir",
"canUseFrozenEnemies"
]
}Resets obstacles: R-Mode Dev note: FIXME: The movement items are to get to and from the fish spot. Other options could be added, such as using the spark to get to 2 or 3. |
From: 1
Left Door
To: 1
Left Door
On entry, quickly roll to the right next to the stair, while Samus is protected with i-frames. It is required to avoid double hitting the Sidehopper with the Power Bomb or it will die. It can help to place a Power Bomb and roll to the right to reduce the chance that the ceiling hopper gets double hit, and to lure the third hopper. Quickly getting back into position and Crystal Flashing will usually get Samus hit by either the ceiling or right hopper. Entrance condition: {
"comeInWithGMode": {
"mode": "direct",
"morphed": true
}
}Requires: "h_ZebesIsAwake"
"h_artificialMorphComplexRModeCrystalFlashInterrupt"
{
"ammo": {
"type": "Missile",
"count": 10
}
}
{
"or": [
"h_partialEnemyDamageReduction",
{
"resourceAtMost": [
{
"type": "RegularEnergy",
"count": 19
}
]
},
{
"and": [
{
"resourceCapacity": [
{
"type": "RegularEnergy",
"count": 199
}
]
},
{
"resourceCapacity": [
{
"type": "ReserveEnergy",
"count": 199
}
]
}
]
}
]
}
{
"obstaclesCleared": [
"C"
]
}Dev note: Killing the hoppers after this is easy, as Samus will have i-frames, the Sidehoppers will be injured, and Samus will have some extra ammo just in case. A different setup could also break A, but Samus will end with at least 10 Power Bombs, so this is ignored for simplicity. |
|
Immediately on room entry, the Sidehopper is going to hit Samus. Afterwards, quickly roll to the right next to the stair. It is required to avoid double hitting the Sidehopper with the Power Bomb or it will die. It can help to place a Power Bomb and roll to the right to reduce the chance that the ceiling hopper gets double hit, and to lure the third hopper. Quickly getting back into position and Crystal Flashing will usually get Samus hit by either the ceiling or right hopper. Entrance condition: {
"comeInWithRMode": {}
}Requires: "h_ZebesIsAwake"
{
"enemyDamage": {
"enemy": "Sidehopper",
"type": "contact",
"hits": 1
}
}
"canComplexRModeCrystalFlashInterrupt"
{
"ammo": {
"type": "Missile",
"count": 10
}
}
{
"or": [
"h_partialEnemyDamageReduction",
{
"resourceAtMost": [
{
"type": "RegularEnergy",
"count": 19
}
]
},
{
"and": [
{
"resourceCapacity": [
{
"type": "RegularEnergy",
"count": 199
}
]
},
{
"resourceCapacity": [
{
"type": "ReserveEnergy",
"count": 199
}
]
}
]
}
]
}
{
"obstaclesCleared": [
"C"
]
}Dev note: Killing the hoppers after this is easy, as Samus will have i-frames, the Sidehoppers will be injured, and Samus will have some extra ammo just in case. A different setup could also break A, but Samus will end with at least 10 Power Bombs, so this is ignored for simplicity. |
|
Cross the room then lure and kill the two floor Sidehoppers using the morph tunnel. With the ceiling Sidehopper in the top right corner, quickly roll to the left next to the stair. It is required to avoid double hitting the Sidehopper with the Power Bomb or it will die. Place a Power Bomb, Wait a second, then roll to the right to lure the hopper and quickly return and Crystal Flash. Waiting briefly will prevent the hopper from coming too soon and getting double hit. Entrance condition: {
"comeInWithRMode": {}
}Requires: "h_ZebesIsAwake"
"h_usePowerBomb"
{
"or": [
"h_bombThings",
{
"and": [
{
"getBlueSpeed": {
"usedTiles": 21,
"openEnd": 1
}
},
"canSpeedball"
]
},
"h_blueSuitGMode"
]
}
"canComplexRModeCrystalFlashInterrupt"
{
"ammo": {
"type": "Missile",
"count": 10
}
}
{
"or": [
"h_partialEnemyDamageReduction",
{
"resourceAtMost": [
{
"type": "RegularEnergy",
"count": 19
}
]
},
{
"and": [
{
"resourceCapacity": [
{
"type": "RegularEnergy",
"count": 199
}
]
},
{
"resourceCapacity": [
{
"type": "ReserveEnergy",
"count": 199
}
]
}
]
}
]
}
{
"obstaclesCleared": [
"A",
"B",
"C"
]
} |
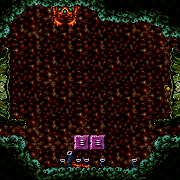
From: 7
Junction (Zebbo Farms)
To: 7
Junction (Zebbo Farms)
Crystal Flashing on one of the Zebbo spawners will usually not deal enough damage to Samus to trigger reserves. One way to make this fairly reliable is to take a Zebbo hit and then place the Power Bomb such that it explodes and kills a Zebbo shortly after it spawns. Samus will then pick up the drop and start Crystal Flashing where her refill is in a good rhythm for the Zebbo to be able to trigger reserves. This can only be done suitless and with no E-Tanks. Requires: {
"obstaclesCleared": [
"R-Mode"
]
}
"canComplexRModeCrystalFlashInterrupt"
{
"ammo": {
"type": "Missile",
"count": 10
}
}
{
"ammo": {
"type": "Super",
"count": 10
}
}Resets obstacles: R-Mode Dev note: This will not work in G-mode because the Power Bomb will kill the Zebbos and they will not respawn. |
From: 1
Top Right Door
To: 1
Top Right Door
Place a Power Bomb on entry to kill the first Sidehopper, then cross to the left side of the room. It is required to avoid double hitting the ceiling Sidehopper with the Power Bomb, so lure it to the right, place a Power Bomb in the corner, roll over to lure the hopper and quickly roll back to Crystal Flash. In unlucky situations it is possible that the hopper only does small jumps and never hits Samus. It is possible to cross all the spikes and avoid damaging the ceiling hopper with just Power Bombs. Place a Power Bomb at the edge of the runway then hold forward with precise timing to get a boost to skip the first two then have a small bounce over the third spike. The optimal starting position is on the second-to-last pixel of the ledge and press forward on the 1st, 3rd, or 5th frame which gives Samus a large horizontal boost. (On the last pixel, only the 1st and 3rd frames work, and further to the right only has at most one usable frame. Rolling into the bomb with momentum is not recommended and gives only a 1-frame window.) Entrance condition: {
"comeInWithGMode": {
"mode": "direct",
"morphed": true
}
}Requires: "h_artificialMorphPowerBomb"
{
"or": [
"h_artificialMorphMovement",
{
"and": [
"h_artificialMorphPowerBomb",
"canTrickyGMode"
]
},
{
"spikeHits": 3
},
{
"and": [
"h_artificialMorphPowerBomb",
{
"spikeHits": 1
}
]
}
]
}
"h_artificialMorphComplexRModeCrystalFlashInterrupt"
{
"ammo": {
"type": "Missile",
"count": 10
}
}
{
"ammo": {
"type": "Super",
"count": 10
}
}
{
"ammo": {
"type": "PowerBomb",
"count": 5
}
}
{
"or": [
"h_partialEnemyDamageReduction",
{
"resourceAtMost": [
{
"type": "RegularEnergy",
"count": 19
}
]
},
{
"and": [
{
"resourceCapacity": [
{
"type": "RegularEnergy",
"count": 199
}
]
},
{
"resourceCapacity": [
{
"type": "ReserveEnergy",
"count": 199
}
]
}
]
}
]
}Dev note: It is possible to kill the first Sidehopper with just Bombs and a lot of luck, but that is ignored. |
From: 1
Top Right Door
To: 1
Top Right Door
Kill the first Sidehopper on entry. Standing in the doorway to kill it, using a Power Bomb, or jumping over it can work. It is required to avoid double hitting the ceiling Sidehopper with the Power Bomb, so lure it to the right, place a Power Bomb in the corner, roll over to lure the hopper and quickly roll back to Crystal Flash. In unlucky situations it is possible that the hopper only does small jumps and never hits Samus. Entrance condition: {
"comeInWithRMode": {}
}Requires: "canComplexRModeCrystalFlashInterrupt"
{
"ammo": {
"type": "Missile",
"count": 10
}
}
{
"ammo": {
"type": "Super",
"count": 10
}
}
{
"ammo": {
"type": "PowerBomb",
"count": 5
}
}
{
"or": [
"h_partialEnemyDamageReduction",
{
"resourceAtMost": [
{
"type": "RegularEnergy",
"count": 19
}
]
},
{
"and": [
{
"resourceCapacity": [
{
"type": "RegularEnergy",
"count": 199
}
]
},
{
"resourceCapacity": [
{
"type": "ReserveEnergy",
"count": 199
}
]
}
]
}
]
} |
|
Kill a Zebbo so that its drop is out of the way then Crystal Flash so a Zebbo can hit Samus from below and trigger reserves. The positioning of the Crystal Flash is pixel-perfect; Samus must be overhanging one of the Zebbo spawners while on the last pixel of the ledge. Note that a Zebbo will usually not deal enough damage to Samus to trigger reserves. One way to make this fairly reliable is to wait for its drop to dissapear then quickly place a Power Bomb such that it explodes and kills a Zebbo and Samus immediately collects its drop as she lands. This can only be done with no enemy damage reduction and no E-Tanks. When placing the Power Bomb quickly after the drop disappears, it may be best to be hanging off the left, so the bug hits the right side of Samus. When placing it 15 frames after the drop disappears, there is an 11-frame window, of which 10 frames will work. Otherwise, randomly placing the Power Bomb there is approximately a 60% chance that the Zebbo will trigger reserves, regardless of which side Samus is on. Entrance condition: {
"comeInWithRMode": {}
}Requires: "canComplexRModeCrystalFlashInterrupt"
"canBeLucky"
{
"ammo": {
"type": "Missile",
"count": 10
}
}
{
"ammo": {
"type": "Super",
"count": 10
}
}
{
"ammo": {
"type": "PowerBomb",
"count": 5
}
}Dev note: This can not be done in G-mode, because the Power Bomb will kill the Zebbo and prevent more from spawning. TAS-ing this out, there were 58 frames where the bug would reach Samus and 34 on the left worked, 33 on the right worked. But, if subpixels matter, this might not be accurate, as it was only tested with one random subpixel value. |
From: 1
Left Door
To: 1
Left Door

Phantoon will place stationary, invisible flames, which need to be avoided while starting to Crystal Flash. Crystal Flash and have Phantoon spawn on top of Samus to trigger reserves. Requires a lot of luck. Entrance condition: {
"comeInWithGMode": {
"mode": "direct",
"morphed": true
}
}Requires: {
"not": "f_DefeatedPhantoon"
}
"canRiskPermanentLossOfAccess"
"canBeVeryLucky"
"h_artificialMorphComplexRModeCrystalFlashInterrupt"
{
"ammo": {
"type": "Missile",
"count": 10
}
}
{
"ammo": {
"type": "Super",
"count": 10
}
}
{
"ammo": {
"type": "PowerBomb",
"count": 10
}
}Clears obstacles: door_1 |
|

Crystal Flash and have Phantoon spawn on top of Samus to trigger reserves. Requires a bit of luck. Entrance condition: {
"comeInWithRMode": {}
}Requires: {
"not": "f_DefeatedPhantoon"
}
"canRiskPermanentLossOfAccess"
"canBeLucky"
"canComplexRModeCrystalFlashInterrupt"
{
"ammo": {
"type": "Missile",
"count": 10
}
}
{
"ammo": {
"type": "Super",
"count": 10
}
}
{
"ammo": {
"type": "PowerBomb",
"count": 10
}
}Clears obstacles: door_1 |
From: 1
Left Door
To: 1
Left Door

With no Energy Tanks, roll against the Kzan. Once it starts moving up, roll a small number of pixels under it and quickly Crystal Flash. This is significantly easier with a smaller starting Energy. With a larger starting Energy, or on a particularly quick Power Bomb placement, Samus may have 50 or more in reserves; In this case, it is important to quickly land before turning around and jumping out of the Kzan. Turning around before touching the ground will move Samus several more pixels inside of the Kzan, likely resulting in death. Entrance condition: {
"comeInWithGMode": {
"mode": "direct",
"morphed": true
}
}Requires: "h_artificialMorphComplexRModeCrystalFlashInterrupt"
{
"ammo": {
"type": "Missile",
"count": 2
}
} |
|


With no Energy Tanks, Morph and roll against the Kzan. Once it starts moving up, roll a small number of pixels under it and quickly Crystal Flash. This is significantly easier with a smaller starting Energy. With a larger starting Energy, or on a particularly quick Power Bomb placement, Samus may have 50 or more in reserves; In this case, it is important to quickly land before turning around and jumping out of the Kzan. Turning around before touching the ground will move Samus several more pixels inside of the Kzan, likely resulting in death. Entrance condition: {
"comeInWithRMode": {}
}Requires: "canComplexRModeCrystalFlashInterrupt"
{
"ammo": {
"type": "Missile",
"count": 2
}
} |
From: 2
Right Door
To: 2
Right Door


With no Energy Tanks, roll against the Kzan. Once it starts moving up, roll a small number of pixels under it and quickly Crystal Flash. This is significantly easier with a smaller starting Energy. With a larger starting Energy, or on a particularly quick Power Bomb placement, Samus may have 50 or more in reserves; In this case, it is important to quickly land before turning around and jumping out of the Kzan. Turning around before touching the ground will move Samus several more pixels inside of the Kzan, likely resulting in death. Entrance condition: {
"comeInWithGMode": {
"mode": "direct",
"morphed": true
}
}Requires: "h_artificialMorphComplexRModeCrystalFlashInterrupt"
{
"ammo": {
"type": "Missile",
"count": 2
}
} |
|


With no Energy Tanks, Morph and roll against the Kzan. Once it starts moving up, roll a small number of pixels under it and quickly Crystal Flash. This is significantly easier with a smaller starting Energy. With a larger starting Energy, or on a particularly quick Power Bomb placement, Samus may have 50 or more in reserves; In this case, it is important to quickly land before turning around and jumping out of the Kzan. Turning around before touching the ground will move Samus several more pixels inside of the Kzan, likely resulting in death. Entrance condition: {
"comeInWithRMode": {}
}Requires: "canComplexRModeCrystalFlashInterrupt"
{
"ammo": {
"type": "Missile",
"count": 2
}
} |
From: 1
Top Door
To: 1
Top Door
It is required to avoid double hitting the Atomic with the Power Bomb, and to position the Crystal Flash so that the Atomic can hit Samus from below so it avoids the light orb. This is possible with no movement items. Roll down to the shot blocks and Crystal Flash in the middle of the screen. This can be done with up to 2 E-Tanks while suitless, or no E-Tanks and up to 50% damage reduction. Entrance condition: {
"comeInWithGMode": {
"mode": "direct",
"morphed": true
},
"comesThroughToilet": "no"
}Requires: "f_DefeatedPhantoon"
"h_artificialMorphComplexRModeCrystalFlashInterrupt"
{
"ammo": {
"type": "Missile",
"count": 10
}
}
{
"ammo": {
"type": "Super",
"count": 10
}
}
{
"ammo": {
"type": "PowerBomb",
"count": 10
}
} |
From: 2
Top Left Door
To: 2
Top Left Door
It is required to avoid double hitting the Atomic with the Power Bomb, and to position the Crystal Flash so that the Atomic can hit Samus from above or below so it avoids the light orb. With Bombs, IBJ a small distance to where the top bomb is placed near the top of the doorframe to the right, to barely lure the Atomic a bit off-screen, then fall to the ground and Crystal Flash. With Spring Ball, perform three full-height jumps in front of the door to the right, then Crystal Flash. With no movement items this will use more ammo; roll down to the next platform attached to the left wall, then Crystal Flash at the right edge of it. This can be done with up to 2 E-Tanks while suitless, or no E-Tanks and up to 50% damage reduction. Entrance condition: {
"comeInWithGMode": {
"mode": "direct",
"morphed": true
}
}Requires: "f_DefeatedPhantoon"
"h_artificialMorphComplexRModeCrystalFlashInterrupt"
{
"ammo": {
"type": "Missile",
"count": 10
}
}
{
"or": [
"h_artificialMorphSpringBall",
{
"and": [
"h_artificialMorphIBJ",
{
"ammo": {
"type": "Super",
"count": 10
}
}
]
},
{
"and": [
{
"ammo": {
"type": "Super",
"count": 10
}
},
{
"ammo": {
"type": "PowerBomb",
"count": 10
}
}
]
}
]
} |
From: 3
Bottom Left Door
To: 3
Bottom Left Door
It is required to avoid double hitting the Atomic with the Power Bomb, and to position the Crystal Flash so that the Atomic can hit Samus from above so it avoids the light orb. With Bombs, IBJ a small distance to where the top bomb is placed near the center of the doorframe, to barely lure the Atomic a bit off-screen, then fall to the ground and Crystal Flash. With Spring Ball, perform one full-height jump then place a Power Bomb to Crystal Flash; it is possible to do this with fewer Power Bombs by then performing one more full-height jump and landing in the Power Bomb explosion just in time to Crystal Flash. This can be done with up to 2 E-Tanks while suitless, or no E-Tanks and up to 50% damage reduction. Entrance condition: {
"comeInWithGMode": {
"mode": "direct",
"morphed": true
}
}Requires: "f_DefeatedPhantoon"
"h_artificialMorphComplexRModeCrystalFlashInterrupt"
{
"ammo": {
"type": "Missile",
"count": 10
}
}
{
"ammo": {
"type": "Super",
"count": 10
}
}
{
"or": [
"h_artificialMorphSpringBall",
{
"and": [
"h_artificialMorphIBJ",
{
"ammo": {
"type": "PowerBomb",
"count": 10
}
}
]
}
]
} |
From: 3
Bottom Left Door
To: 3
Bottom Left Door
It is required to avoid double hitting the Atomic with the Power Bomb, and to position the Crystal Flash so that the Atomic can hit Samus from above so it avoids the light orb. To do this, while saving Power Bombs, shoot out the first two shot blocks in front of the bottom left door, then from there, perform two full-height jumps, and land on the ledge just in front of the door. Crystal Flash by the door to then lure the Atomic. If Samus is entering from higher in the room, instead climb to the top right door, and perform three full-height jumps in front of the door to lure the Atomic a bit but not too low. Then Crystal Flash by the door to then lure the Atomic. This can be done with up to 2 E-Tanks while suitless, or no E-Tanks and up to 50% damage reduction. Requires: "f_DefeatedPhantoon"
{
  "obstaclesCleared": [
    "R-Mode"
  ]
}
"canComplexRModeCrystalFlashInterrupt"
{
  "ammo": {
    "type": "Missile",
    "count": 10
  }
}
{
  "ammo": {
    "type": "Super",
    "count": 10
  }
}
Resets obstacles: R-Mode |
From: 4
Top Right Door
To: 4
Top Right Door
It is required to avoid double hitting the Atomic with the Power Bomb, and to position the Crystal Flash so that the Atomic can hit Samus from above or below so it avoids the light orb. With Bombs, IBJ a small distance to where the top bomb is placed near the top of the doorframe, to barely lure the Atomic a bit off-screen, then fall to the ground and Crystal Flash. With Spring Ball, perform three full-height jumps in front of the door, then Crystal Flash. With no movement items this will use more ammo; roll down to the next platform attached to the left wall, then Crystal Flash at the right edge of it. This can be done with up to 2 E-Tanks while suitless, or no E-Tanks and up to 50% damage reduction. Entrance condition: {
"comeInWithGMode": {
"mode": "direct",
"morphed": true
}
}Requires: "f_DefeatedPhantoon"
"h_artificialMorphComplexRModeCrystalFlashInterrupt"
{
"ammo": {
"type": "Missile",
"count": 10
}
}
{
"or": [
"h_artificialMorphSpringBall",
{
"and": [
"h_artificialMorphIBJ",
{
"ammo": {
"type": "Super",
"count": 10
}
}
]
},
{
"and": [
{
"ammo": {
"type": "Super",
"count": 10
}
},
{
"ammo": {
"type": "PowerBomb",
"count": 10
}
}
]
}
]
} |
From: 4
Top Right Door
To: 4
Top Right Door
It is required to avoid double hitting the Atomic with the Power Bomb, and to position the Crystal Flash so that the Atomic can hit Samus from above so it avoids the light orb. To do this, climb to the top right door, and perform three full-height jumps in front of the door to lure the Atomic a bit but not too low. Then Crystal Flash by the door to then lure the Atomic. If Samus can only enter from the top of the room, descend part way and get an atomic just above and off-camera, so that the Power Bomb lures the Atomic. This can be done with up to 2 E-Tanks while suitless, or no E-Tanks and up to 50% damage reduction. Requires: "f_DefeatedPhantoon"
{
"obstaclesCleared": [
"R-Mode"
]
}
"canComplexRModeCrystalFlashInterrupt"
{
"ammo": {
"type": "Missile",
"count": 10
}
}Resets obstacles: R-Mode |
From: 5
Middle Right Door
To: 5
Middle Right Door
It is required to avoid double hitting the Atomic with the Power Bomb, and to position the Crystal Flash so that the Atomic can hit Samus from above or below so it avoids the light orb. Crystal Flashing on entry before moving will lure an Atomic from below which will work nicely. This can be done with up to 2 E-Tanks while suitless, or no E-Tanks and up to 50% damage reduction. Entrance condition: {
"comeInWithGMode": {
"mode": "direct",
"morphed": true
}
}Requires: "f_DefeatedPhantoon"
"h_artificialMorphComplexRModeCrystalFlashInterrupt"
{
"ammo": {
"type": "Missile",
"count": 10
}
}
{
"ammo": {
"type": "Super",
"count": 10
}
} |
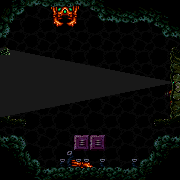
From: 3
Top Right Door
To: 3
Top Right Door
Crystal Flashing in one of the Zebbo spawner holes will usually not deal enough damage to Samus to trigger reserves. One way to make this fairly reliable is to take a Zebbo hit and then place the Power Bomb such that it explodes and kills a Zebbo shortly after it spawns. Samus will then pick up the drop and start Crystal Flashing where her refill is usually in a good rhythm for the Zebbo to be able to trigger reserves. There is an approximate 2/3 chance of success. This can only be done suitless and with no E-Tanks. Requires: {
"obstaclesCleared": [
"R-Mode"
]
}
"canComplexRModeCrystalFlashInterrupt"
{
"ammo": {
"type": "Missile",
"count": 10
}
}
{
"ammo": {
"type": "Super",
"count": 5
}
}
"canBeLucky"Resets obstacles: R-Mode Dev note: This strat does not work in G-mode because the Power Bomb will prevent the Zebbos from respawning, and the Boyons don't deal enough damage. |
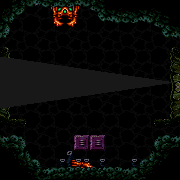
From: 4
Farm Junction Left of Gate
To: 4
Farm Junction Left of Gate
Crystal Flashing in one of the Zebbo spawner holes will usually not deal enough damage to Samus to trigger reserves. One way to make this fairly reliable is to take a Zebbo hit and then place the Power Bomb such that it explodes and kills a Zebbo shortly after it spawns. Samus will then pick up the drop and start Crystal Flashing where her refill is usually in a good rhythm for the Zebbo to be able to trigger reserves. There is an approximate 2/3 chance of success. This can only be done suitless and with no E-Tanks. Requires: {
"obstaclesCleared": [
"R-Mode"
]
}
"canComplexRModeCrystalFlashInterrupt"
{
"ammo": {
"type": "Missile",
"count": 10
}
}
{
"ammo": {
"type": "Super",
"count": 5
}
}
"canBeLucky"Resets obstacles: R-Mode Dev note: This strat does not work in G-mode because the Power Bomb will prevent the Zebbos from respawning, and the Boyons don't deal enough damage. Coming from below will also put Samus off-camera fand the Zebbos can not deal damage. |
From: 1
Top Left Doorway
To: 1
Top Left Doorway

Crystal Flash on the right edge of the floating blocks. Place the Power Bomb shortly after the slow crab leaves the screen; there should be a single slow crab on the ceiling, just to the left of center. This will avoid killing the fast crab and give it just enough time to come hit Samus from below. Entrance condition: {
"comeInWithGMode": {
"mode": "direct",
"morphed": true,
"mobility": "mobile"
}
}Requires: {
"or": [
"h_artificialMorphSpringBall",
{
"and": [
"Gravity",
"h_artificialMorphIBJ"
]
}
]
}
"h_artificialMorphComplexRModeCrystalFlashInterrupt"
{
"ammo": {
"type": "Missile",
"count": 10
}
}
{
"ammo": {
"type": "Super",
"count": 10
}
}
{
"ammo": {
"type": "PowerBomb",
"count": 5
}
}
{
"or": [
"h_fullEnemyDamageReduction",
{
"and": [
"h_partialEnemyDamageReduction",
{
"resourceAtMost": [
{
"type": "RegularEnergy",
"count": 39
}
]
}
]
},
{
"and": [
{
"resourceCapacity": [
{
"type": "RegularEnergy",
"count": 199
}
]
},
{
"resourceCapacity": [
{
"type": "ReserveEnergy",
"count": 199
}
]
}
]
}
]
}Dev note: This could be done with more tanks in order to end with more Energy, but this is already a good farming room. |
From: 1
Top Left Doorway
To: 1
Top Left Doorway

Crystal Flash on the right edge of the floating blocks. Place the Power Bomb shortly after the slow crab leaves the screen; there should be a single slow crab on the ceiling, just to the left of center. This will avoid killing the fast crab and give it just enough time to come hit Samus from below. Entrance condition: {
"comeInWithGMode": {
"mode": "direct",
"morphed": true,
"mobility": "immobile"
}
}Requires: {
"or": [
"h_artificialMorphSpringBall",
{
"and": [
"Gravity",
"h_artificialMorphIBJ"
]
}
]
}
"h_artificialMorphComplexRModeCrystalFlashInterrupt"
{
"ammo": {
"type": "Missile",
"count": 10
}
}
{
"ammo": {
"type": "Super",
"count": 10
}
}
{
"ammo": {
"type": "PowerBomb",
"count": 5
}
}
{
"or": [
"h_fullEnemyDamageReduction",
{
"and": [
"h_partialEnemyDamageReduction",
{
"resourceAtMost": [
{
"type": "RegularEnergy",
"count": 39
}
]
}
]
},
{
"and": [
{
"resourceCapacity": [
{
"type": "RegularEnergy",
"count": 199
}
]
},
{
"resourceCapacity": [
{
"type": "ReserveEnergy",
"count": 199
}
]
}
]
}
]
}Dev note: This could be done with more tanks in order to end with more Energy, but this is already a good farming room. |
|


Crystal Flash on the right edge of the floating blocks. Place the Power Bomb shortly after the slow crab leaves the screen; there should be a single slow crab on the ceiling, just to the left of center. This will avoid killing the fast crab and give it just enough time to come hit Samus from below. Entrance condition: {
"comeInWithRMode": {}
}Requires: "canComplexRModeCrystalFlashInterrupt"
{
"ammo": {
"type": "Missile",
"count": 10
}
}
{
"ammo": {
"type": "Super",
"count": 10
}
}
{
"ammo": {
"type": "PowerBomb",
"count": 5
}
}
{
"or": [
"h_fullEnemyDamageReduction",
{
"and": [
"h_partialEnemyDamageReduction",
{
"resourceAtMost": [
{
"type": "RegularEnergy",
"count": 39
}
]
}
]
},
{
"and": [
{
"resourceCapacity": [
{
"type": "RegularEnergy",
"count": 199
}
]
},
{
"resourceCapacity": [
{
"type": "ReserveEnergy",
"count": 199
}
]
}
]
}
]
}Dev note: This could be done with more tanks in order to end with more Energy, but this is already a good farming room. |
From: 2
Bottom Left Door
To: 2
Bottom Left Door

Crystal Flash in front of the lower-right door. Place the Power Bomb just as the slow crab turns the corner to go up the the top of the room. This will avoid killing the fast crab and give it just enough time to come hit Samus from above. If Samus only has Power Bombs to cross the room, place them quickly then wait about one extra second before Crystal Flashing. Entrance condition: {
"comeInWithGMode": {
"mode": "direct",
"morphed": true,
"mobility": "mobile"
}
}Requires: {
"or": [
"h_artificialMorphSpringBall",
{
"and": [
"Gravity",
"h_artificialMorphBombThings"
]
}
]
}
"h_artificialMorphComplexRModeCrystalFlashInterrupt"
{
"ammo": {
"type": "Missile",
"count": 10
}
}
{
"ammo": {
"type": "Super",
"count": 10
}
}
{
"ammo": {
"type": "PowerBomb",
"count": 5
}
}
{
"or": [
"h_fullEnemyDamageReduction",
{
"and": [
"h_partialEnemyDamageReduction",
{
"resourceAtMost": [
{
"type": "RegularEnergy",
"count": 39
}
]
}
]
},
{
"and": [
{
"resourceCapacity": [
{
"type": "RegularEnergy",
"count": 199
}
]
},
{
"resourceCapacity": [
{
"type": "ReserveEnergy",
"count": 199
}
]
}
]
}
]
}Dev note: This could be done with more tanks in order to end with more Energy, but this is already a good farming room. |
From: 2
Bottom Left Door
To: 2
Bottom Left Door

Crystal Flash in front of the lower-right door. Place the Power Bomb just as the slow crab turns the corner to go up the the top of the room. This will avoid killing the fast crab and give it just enough time to come hit Samus from above. Entrance condition: {
"comeInWithGMode": {
"mode": "direct",
"morphed": true,
"mobility": "immobile"
}
}Requires: {
"or": [
"h_artificialMorphSpringBall",
{
"and": [
"Gravity",
"h_artificialMorphBombs"
]
}
]
}
"h_artificialMorphComplexRModeCrystalFlashInterrupt"
{
"ammo": {
"type": "Missile",
"count": 10
}
}
{
"ammo": {
"type": "Super",
"count": 10
}
}
{
"ammo": {
"type": "PowerBomb",
"count": 5
}
}
{
"or": [
"h_fullEnemyDamageReduction",
{
"and": [
"h_partialEnemyDamageReduction",
{
"resourceAtMost": [
{
"type": "RegularEnergy",
"count": 39
}
]
}
]
},
{
"and": [
{
"resourceCapacity": [
{
"type": "RegularEnergy",
"count": 199
}
]
},
{
"resourceCapacity": [
{
"type": "ReserveEnergy",
"count": 199
}
]
}
]
}
]
}Dev note: With an immobile setup, the timing is a bit tighter but not too bad, and the Power Bomb movement option won't work. This could be done with more tanks in order to end with more Energy, but this is already a good farming room. |
|

Crystal Flash in front of the lower-right door. Place the Power Bomb just as the slow crab turns the corner to go up the the top of the room. This will avoid killing the fast crab and give it just enough time to come hit Samus from above. Entrance condition: {
"comeInWithRMode": {}
}Requires: "canComplexRModeCrystalFlashInterrupt"
{
"ammo": {
"type": "Missile",
"count": 10
}
}
{
"ammo": {
"type": "Super",
"count": 10
}
}
{
"ammo": {
"type": "PowerBomb",
"count": 5
}
}
{
"or": [
"h_fullEnemyDamageReduction",
{
"and": [
"h_partialEnemyDamageReduction",
{
"resourceAtMost": [
{
"type": "RegularEnergy",
"count": 39
}
]
}
]
},
{
"and": [
{
"resourceCapacity": [
{
"type": "RegularEnergy",
"count": 199
}
]
},
{
"resourceCapacity": [
{
"type": "ReserveEnergy",
"count": 199
}
]
}
]
}
]
}Dev note: This could be done with more tanks in order to end with more Energy, but this is already a good farming room. |
From: 3
Bottom Right Door
To: 3
Bottom Right Door

Crystal Flash in front of the lower-right door. Place the Power Bomb just as the slow crab turns the corner to go up the the top of the room. This will avoid killing the fast crab and give it just enough time to come hit Samus from above. Entrance condition: {
"comeInWithGMode": {
"mode": "direct",
"morphed": true,
"mobility": "mobile"
}
}Requires: "h_artificialMorphComplexRModeCrystalFlashInterrupt"
{
"ammo": {
"type": "Missile",
"count": 10
}
}
{
"ammo": {
"type": "Super",
"count": 10
}
}
{
"ammo": {
"type": "PowerBomb",
"count": 5
}
}
{
"or": [
"h_fullEnemyDamageReduction",
{
"and": [
"h_partialEnemyDamageReduction",
{
"resourceAtMost": [
{
"type": "RegularEnergy",
"count": 39
}
]
}
]
},
{
"and": [
{
"resourceCapacity": [
{
"type": "RegularEnergy",
"count": 199
}
]
},
{
"resourceCapacity": [
{
"type": "ReserveEnergy",
"count": 199
}
]
}
]
}
]
}Dev note: This could be done with more tanks in order to end with more Energy, but this is already a good farming room. FIXME: This could use an immobile variant. |
From: 3
Bottom Right Door
To: 3
Bottom Right Door
Crystal Flash in front of the lower-right door. Wait for the fast crab to cycle the lower half of the room twice, then place the Power Bomb to Crystal Flash just after a slow crab enters the room and is on the middle of the right ceiling. This will avoid killing the fast crab and give it just enough time to come hit Samus from above. Entrance condition: {
"comeInWithGMode": {
"mode": "direct",
"morphed": true,
"mobility": "immobile"
}
}Requires: {
"or": [
"h_artificialMorphSpringBall",
{
"and": [
"Gravity",
"h_artificialMorphIBJ"
]
}
]
}
"h_artificialMorphComplexRModeCrystalFlashInterrupt"
{
"ammo": {
"type": "Missile",
"count": 10
}
}
{
"ammo": {
"type": "Super",
"count": 10
}
}
{
"ammo": {
"type": "PowerBomb",
"count": 5
}
}
{
"or": [
"h_fullEnemyDamageReduction",
{
"and": [
"h_partialEnemyDamageReduction",
{
"resourceAtMost": [
{
"type": "RegularEnergy",
"count": 39
}
]
}
]
},
{
"and": [
{
"resourceCapacity": [
{
"type": "RegularEnergy",
"count": 199
}
]
},
{
"resourceCapacity": [
{
"type": "ReserveEnergy",
"count": 199
}
]
}
]
}
]
}Dev note: This could be done with more tanks in order to end with more Energy, but this is already a good farming room. |
From: 3
Bottom Right Door
To: 3
Bottom Right Door

Crystal Flash in front of the lower-right door. Place the Power Bomb just as the slow crab turns the corner to go up the the top of the room. This will avoid killing the fast crab and give it just enough time to come hit Samus from above. Entrance condition: {
"comeInWithRMode": {}
}Requires: "canComplexRModeCrystalFlashInterrupt"
{
"ammo": {
"type": "Missile",
"count": 10
}
}
{
"ammo": {
"type": "Super",
"count": 10
}
}
{
"ammo": {
"type": "PowerBomb",
"count": 5
}
}
{
"or": [
"h_fullEnemyDamageReduction",
{
"and": [
"h_partialEnemyDamageReduction",
{
"resourceAtMost": [
{
"type": "RegularEnergy",
"count": 39
}
]
}
]
},
{
"and": [
{
"resourceCapacity": [
{
"type": "RegularEnergy",
"count": 199
}
]
},
{
"resourceCapacity": [
{
"type": "ReserveEnergy",
"count": 199
}
]
}
]
}
]
}Dev note: This could be done with more tanks in order to end with more Energy, but this is already a good farming room. |
From: 4
Top Right Doorway
To: 4
Top Right Doorway

Crystal Flash on the right edge of the floating blocks. Place the Power Bomb shortly after the slow crab leaves the screen; there should be a single slow crab on the ceiling, just to the left of center. This will avoid killing the fast crab and give it just enough time to come hit Samus from below. Entrance condition: {
"comeInWithGMode": {
"mode": "direct",
"morphed": true,
"mobility": "mobile"
}
}Requires: {
"or": [
"h_artificialMorphSpringBall",
{
"and": [
"Gravity",
"h_artificialMorphBombs"
]
}
]
}
"h_artificialMorphComplexRModeCrystalFlashInterrupt"
{
"ammo": {
"type": "Missile",
"count": 10
}
}
{
"ammo": {
"type": "Super",
"count": 10
}
}
{
"ammo": {
"type": "PowerBomb",
"count": 5
}
}
{
"or": [
"h_fullEnemyDamageReduction",
{
"and": [
"h_partialEnemyDamageReduction",
{
"resourceAtMost": [
{
"type": "RegularEnergy",
"count": 39
}
]
}
]
},
{
"and": [
{
"resourceCapacity": [
{
"type": "RegularEnergy",
"count": 199
}
]
},
{
"resourceCapacity": [
{
"type": "ReserveEnergy",
"count": 199
}
]
}
]
}
]
}Dev note: This could be done with more tanks in order to end with more Energy, but this is already a good farming room. |
From: 4
Top Right Doorway
To: 4
Top Right Doorway

Crystal Flash on the right edge of the floating blocks. Place the Power Bomb shortly after the slow crab leaves the screen; there should be a single slow crab on the ceiling, just to the left of center. This will avoid killing the fast crab and give it just enough time to come hit Samus from below. Getting into position with just Gravity and Bombs requires fairly precise movement; it is recommended to immediately place a Bomb once morphed and move slightly to boost horizontally. Entrance condition: {
"comeInWithGMode": {
"mode": "direct",
"morphed": true,
"mobility": "immobile"
}
}Requires: {
"or": [
"h_artificialMorphSpringBall",
{
"and": [
"Gravity",
"h_artificialMorphBombs",
"canInsaneJump"
]
}
]
}
"h_artificialMorphComplexRModeCrystalFlashInterrupt"
{
"ammo": {
"type": "Missile",
"count": 10
}
}
{
"ammo": {
"type": "Super",
"count": 10
}
}
{
"ammo": {
"type": "PowerBomb",
"count": 5
}
}
{
"or": [
"h_fullEnemyDamageReduction",
{
"and": [
"h_partialEnemyDamageReduction",
{
"resourceAtMost": [
{
"type": "RegularEnergy",
"count": 39
}
]
}
]
},
{
"and": [
{
"resourceCapacity": [
{
"type": "RegularEnergy",
"count": 199
}
]
},
{
"resourceCapacity": [
{
"type": "ReserveEnergy",
"count": 199
}
]
}
]
}
]
}Dev note: This could be done with more tanks in order to end with more Energy, but this is already a good farming room. |
From: 4
Top Right Doorway
To: 4
Top Right Doorway

Crystal Flash on the right edge of the floating blocks. Place the Power Bomb shortly after the slow crab leaves the screen; there should be a single slow crab on the ceiling, just to the left of center. This will avoid killing the fast crab and give it just enough time to come hit Samus from below. Entrance condition: {
"comeInWithRMode": {}
}Requires: {
"or": [
"h_artificialMorphSpringBall",
{
"and": [
"Gravity",
"h_artificialMorphBombs"
]
}
]
}
"canComplexRModeCrystalFlashInterrupt"
{
  "ammo": {
    "type": "Missile",
    "count": 10
  }
}
{
  "ammo": {
    "type": "Super",
    "count": 10
  }
}
{
  "ammo": {
    "type": "PowerBomb",
    "count": 5
  }
}
{
  "or": [
    "h_fullEnemyDamageReduction",
    {
      "and": [
        "h_partialEnemyDamageReduction",
        {
          "resourceAtMost": [
            {
              "type": "RegularEnergy",
              "count": 39
            }
          ]
        }
      ]
    },
    {
      "and": [
        {
          "resourceCapacity": [
            {
              "type": "RegularEnergy",
              "count": 199
            }
          ]
        },
        {
          "resourceCapacity": [
            {
              "type": "ReserveEnergy",
              "count": 199
            }
          ]
        }
      ]
    }
  ]
}
Dev note: This could be done with more tanks in order to end with more Energy, but this is already a good farming room. |
From: 1
Bottom Left Door
To: 1
Bottom Left Door

It is required to avoid double hitting the Skultera with the Power Bomb, and to position the Crystal Flash so that the Skultera can hit Samus from above so it avoids the light orb. To do this, Crystal Flash on the left-most flat tile just in front of the door and time the Power Bomb so that its first hit is when the Skultera is near the right wall. This can be done with no enemy damage reduction and up to 2 E-Tanks or a 50% enemy damage reduction and no E-Tanks; a 75% reduction is not recommended and would require disabling and reenabling suits with a precise pause abuse. Entrance condition: {
"comeInWithGMode": {
"mode": "direct",
"morphed": true
}
}Requires: "h_artificialMorphComplexRModeCrystalFlashInterrupt"
{
"ammo": {
"type": "Missile",
"count": 10
}
}
{
"ammo": {
"type": "Super",
"count": 10
}
}
{
"or": [
"h_partialEnemyDamageReduction",
{
"resourceAtMost": [
{
"type": "RegularEnergy",
"count": 19
}
]
},
{
"and": [
{
"resourceCapacity": [
{
"type": "RegularEnergy",
"count": 199
}
]
},
{
"resourceCapacity": [
{
"type": "ReserveEnergy",
"count": 199
}
]
}
]
}
]
}Dev note: FIXME: A 75% damage reduction method needs to be documented for if Samus only has Gravity and it provides 75% reduction. |
From: 1
Bottom Left Door
To: 1
Bottom Left Door
It is required to avoid double hitting the Skultera with the Power Bomb, and to position the Crystal Flash so that the Skultera can hit Samus from above so it avoids the light orb. To do this, Crystal Flash on the left-most flat tile just in front of the door and time the Power Bomb so that its first hit is when the Skultera is near the right wall. This can be done with no enemy damage reduction and up to 2 E-Tanks or a 50% enemy damage reduction and no E-Tanks; a 75% reduction is not recommended and would require disabling and reenabling suits with a precise pause abuse. Requires: {
"obstaclesCleared": [
"R-Mode"
]
}
"canComplexRModeCrystalFlashInterrupt"
{
"ammo": {
"type": "Missile",
"count": 10
}
}
{
"ammo": {
"type": "Super",
"count": 10
}
}
{
"or": [
"h_partialEnemyDamageReduction",
{
"resourceAtMost": [
{
"type": "RegularEnergy",
"count": 19
}
]
},
{
"and": [
{
"resourceCapacity": [
{
"type": "RegularEnergy",
"count": 199
}
]
},
{
"resourceCapacity": [
{
"type": "ReserveEnergy",
"count": 199
}
]
}
]
}
]
}Resets obstacles: R-Mode Dev note: There is not an artificial morph variant from door 2, as Samus will be off-camera and can't get hit by the pirate. FIXME: This is a good example of where it would be nice to be able to end with more than 50 Energy, as Samus could spark to the top right. FIXME: A 75% damage reduction method needs to be documented for if Samus only has Gravity and it provides 75% reduction. |
From: 3
Top Right Door
To: 1
Bottom Left Door
It is required to avoid double hitting the Skultera with the Power Bomb, and to position the Crystal Flash so that the Skultera can hit Samus from above so it avoids the light orb. To do this, Crystal Flash on the left-most flat tile just in front of the door and time the Power Bomb so that its first hit is when the Skultera is near the right wall. This can be done with no enemy damage reduction and up to 2 E-Tanks or a 50% enemy damage reduction and no E-Tanks; a 75% reduction is not recommended and would require disabling and reenabling suits with a precise pause abuse. Entrance condition: {
"comeInWithGMode": {
"mode": "direct",
"morphed": true
},
"comesThroughToilet": "no"
}Requires: {
"or": [
{
"and": [
"Gravity",
"h_artificialMorphIBJ"
]
},
{
"and": [
"h_artificialMorphSpringBall",
{
"or": [
"Gravity",
"HiJump"
]
}
]
}
]
}
"h_artificialMorphComplexRModeCrystalFlashInterrupt"
{
  "ammo": {
    "type": "Missile",
    "count": 10
  }
}
{
  "ammo": {
    "type": "Super",
    "count": 10
  }
}
{
  "or": [
    "h_partialEnemyDamageReduction",
    {
      "resourceAtMost": [
        {
          "type": "RegularEnergy",
          "count": 19
        }
      ]
    },
    {
      "and": [
        {
          "resourceCapacity": [
            {
              "type": "RegularEnergy",
              "count": 199
            }
          ]
        },
        {
          "resourceCapacity": [
            {
              "type": "ReserveEnergy",
              "count": 199
            }
          ]
        }
      ]
    }
  ]
}
Dev note: FIXME: A 75% damage reduction method needs to be documented for if Samus only has Gravity and it provides 75% reduction. |
From: 4
Top Left Door
To: 1
Bottom Left Door
It is required to avoid double hitting the Skultera with the Power Bomb, and to position the Crystal Flash so that the Skultera can hit Samus from above so it avoids the light orb. To do this, Crystal Flash on the left-most flat tile just in front of the door and time the Power Bomb so that its first hit is when the Skultera is near the right wall. This can be done with no enemy damage reduction and up to 2 E-Tanks or a 50% enemy damage reduction and no E-Tanks; a 75% reduction is not recommended and would require disabling and reenabling suits with a precise pause abuse. Entrance condition: {
"comeInWithGMode": {
"mode": "direct",
"morphed": true
},
"comesThroughToilet": "no"
}Requires: "h_artificialMorphComplexRModeCrystalFlashInterrupt"
{
"ammo": {
"type": "Missile",
"count": 10
}
}
{
"ammo": {
"type": "Super",
"count": 10
}
}
{
"or": [
"h_partialEnemyDamageReduction",
{
"resourceAtMost": [
{
"type": "RegularEnergy",
"count": 19
}
]
},
{
"and": [
{
"resourceCapacity": [
{
"type": "RegularEnergy",
"count": 199
}
]
},
{
"resourceCapacity": [
{
"type": "ReserveEnergy",
"count": 199
}
]
}
]
}
]
}Dev note: FIXME: A 75% damage reduction method needs to be documented for if Samus only has Gravity and it provides 75% reduction. |
From: 4
Top Right Door
To: 4
Top Right Door

It is required to avoid double hitting the Skultera with the Power Bomb, and to position the Crystal Flash so that the Skultera can hit Samus from above so it avoids the light orb. This is particularly precise because the fish is not global, which makes it so Samus needs to be closer to the fish when laying the Power Bomb. Samus also needs to be able to manipulate the camera, which can be difficult while morphed. Roll up the hill a bit until the Skultera is close to the wall, then move away so that it is a bit off camera. Crystal Flash while Samus is on one of the two lower sloped tiles and the Skultera is just off camera to the right, in order to lure it back to the left. This can be done with no enemy damage reduction and up to 2 E-Tanks or a 50% enemy damage reduction and no E-Tanks; a 75% reduction is not recommended and would require disabling and reenabling suits with a precise pause abuse. Entrance condition: {
"comeInWithGMode": {
"mode": "direct",
"morphed": true
}
}Requires: "canCameraManip"
"h_artificialMorphComplexRModeCrystalFlashInterrupt"
{
"ammo": {
"type": "Missile",
"count": 10
}
}
{
"ammo": {
"type": "Super",
"count": 10
}
}
{
"ammo": {
"type": "PowerBomb",
"count": 3
}
}
{
"or": [
"h_partialEnemyDamageReduction",
{
"resourceAtMost": [
{
"type": "RegularEnergy",
"count": 19
}
]
},
{
"and": [
{
"resourceCapacity": [
{
"type": "RegularEnergy",
"count": 199
}
]
},
{
"resourceCapacity": [
{
"type": "ReserveEnergy",
"count": 199
}
]
}
]
}
]
}
{
"or": [
"Gravity",
"HiJump"
]
}Dev note: FIXME: A 75% damage reduction method needs to be documented for if Samus only has Gravity and it provides 75% reduction. If there were another node near the fish, that could reduce a small amount of duplication. |
|

It is required to avoid double hitting the Skultera with the Power Bomb, and to position the Crystal Flash so that the Skultera can hit Samus from above so it avoids the light orb. This is particularly precise because the fish is not global, which makes it so Samus needs to be closer to the fish when laying the Power Bomb. Moonwalk to move the camera to the right, but not all the way. The Skultera should be able to move back and forth while Samus is on one of the two lower sloped tiles. Crystal Flash and time the Power Bomb so that its first hit is when the Skultera is against the right wall. This can be done with no enemy damage reduction and up to 2 E-Tanks or a 50% enemy damage reduction and no E-Tanks; a 75% reduction is not recommended and would require disabling and reenabling suits with a precise pause abuse. Requires: {
"obstaclesCleared": [
"R-Mode"
]
}
"canCameraManip"
"canMoonwalk"
"canComplexRModeCrystalFlashInterrupt"
{
"ammo": {
"type": "Missile",
"count": 10
}
}
{
"ammo": {
"type": "Super",
"count": 10
}
}
{
"or": [
"h_partialEnemyDamageReduction",
{
"resourceAtMost": [
{
"type": "RegularEnergy",
"count": 19
}
]
},
{
"and": [
{
"resourceCapacity": [
{
"type": "RegularEnergy",
"count": 199
}
]
},
{
"resourceCapacity": [
{
"type": "ReserveEnergy",
"count": 199
}
]
}
]
}
]
}
{
"or": [
"Gravity",
"HiJump",
"canSpringBallJumpMidAir"
]
}Resets obstacles: R-Mode Dev note: FIXME: A 75% damage reduction method needs to be documented for if Samus only has Gravity and it provides 75% reduction. If there were another node near the fish, that could reduce a small amount of duplication. |
From: 4
Top Right Door
To: 9
Junction Below Speed Blocks
It is required to avoid double hitting the Skultera with the Power Bomb, and to position the Crystal Flash so that the Skultera can hit Samus from above so it avoids the light orb. This is particularly precise because the fish is not global, which makes it so Samus needs to be closer to the fish when laying the Power Bomb. Samus also needs to be able to manipulate the camera, which can be difficult while morphed. Roll up the hill a bit until the Skultera is close to the wall, then move away so that it is a bit off camera. Crystal Flash while Samus is on one of the two lower sloped tiles and the Skultera is just off camera to the right, in order to lure it back to the left. This can be done with no enemy damage reduction and up to 2 E-Tanks or a 50% enemy damage reduction and no E-Tanks; a 75% reduction is not recommended and would require disabling and reenabling suits with a precise pause abuse. Entrance condition: {
"comeInWithGMode": {
"mode": "direct",
"morphed": true
}
}Requires: "canCameraManip"
"h_artificialMorphComplexRModeCrystalFlashInterrupt"
{
"ammo": {
"type": "Missile",
"count": 10
}
}
{
"ammo": {
"type": "Super",
"count": 10
}
}
{
"ammo": {
"type": "PowerBomb",
"count": 3
}
}
{
"or": [
"h_partialEnemyDamageReduction",
{
"resourceAtMost": [
{
"type": "RegularEnergy",
"count": 19
}
]
},
{
"and": [
{
"resourceCapacity": [
{
"type": "RegularEnergy",
"count": 199
}
]
},
{
"resourceCapacity": [
{
"type": "ReserveEnergy",
"count": 199
}
]
}
]
}
]
}Dev note: FIXME: A 75% damage reduction method needs to be documented for if Samus only has Gravity and it provides 75% reduction. If there were another node near the fish, that could reduce a small amount of duplication. |
From: 4
Top Right Door
To: 9
Junction Below Speed Blocks
It is required to avoid double hitting the Skultera with the Power Bomb, and to position the Crystal Flash so that the Skultera can hit Samus from above so it avoids the light orb. This is particularly precise because the fish is not global, which makes it so Samus needs to be closer to the fish when laying the Power Bomb. Moonwalk to move the camera to the right, but not all the way. The Skultera should be able to move back and forth while Samus is on one of the two lower sloped tiles. Crystal Flash and time the Power Bomb so that its first hit is when the Skultera is against the right wall. This can be done with no enemy damage reduction and up to 2 E-Tanks or a 50% enemy damage reduction and no E-Tanks; a 75% reduction is not recommended and would require disabling and reenabling suits with a precise pause abuse. Requires: {
"obstaclesCleared": [
"R-Mode"
]
}
"canCameraManip"
"canMoonwalk"
"canComplexRModeCrystalFlashInterrupt"
{
"ammo": {
"type": "Missile",
"count": 10
}
}
{
"ammo": {
"type": "Super",
"count": 10
}
}
{
"or": [
"h_partialEnemyDamageReduction",
{
"resourceAtMost": [
{
"type": "RegularEnergy",
"count": 19
}
]
},
{
"and": [
{
"resourceCapacity": [
{
"type": "RegularEnergy",
"count": 199
}
]
},
{
"resourceCapacity": [
{
"type": "ReserveEnergy",
"count": 199
}
]
}
]
}
]
}Resets obstacles: R-Mode Dev note: FIXME: A 75% damage reduction method needs to be documented for if Samus only has Gravity and it provides 75% reduction. If there were another node near the fish, that could reduce a small amount of duplication. |
From: 10
Direct G-Mode Morph, On Ledge Above Speed Blocks
To: 4
Top Right Door
It is required to avoid double hitting the Skultera with the Power Bomb, and to position the Crystal Flash so that the Skultera can hit Samus from above so it avoids the light orb. This is particularly precise because the fish is not global, which makes it so Samus needs to be closer to the fish when laying the Power Bomb. Samus also needs to be able to manipulate the camera, which can be difficult while morphed. Roll up the hill a bit until the Skultera is close to the wall, then move away so that it is a bit off camera. Crystal Flash while Samus is on one of the two lower sloped tiles and the Skultera is just off camera to the right, in order to lure it back to the left. This can be done with no enemy damage reduction and up to 2 E-Tanks or a 50% enemy damage reduction and no E-Tanks; a 75% reduction is not recommended and would require disabling and reenabling suits with a precise pause abuse. Requires: {
"or": [
{
"and": [
"Gravity",
"h_artificialMorphIBJ"
]
},
{
"and": [
"Gravity",
"HiJump",
"h_artificialMorphSpringBall"
]
},
{
"and": [
"h_artificialMorphSpringBall",
"canGravityJump"
]
},
"h_artificialMorphDoubleSpringBallJump"
]
}
"canCameraManip"
"h_artificialMorphComplexRModeCrystalFlashInterrupt"
{
"ammo": {
"type": "Missile",
"count": 10
}
}
{
"ammo": {
"type": "Super",
"count": 10
}
}
{
"ammo": {
"type": "PowerBomb",
"count": 3
}
}
{
"or": [
"h_partialEnemyDamageReduction",
{
"resourceAtMost": [
{
"type": "RegularEnergy",
"count": 19
}
]
},
{
"and": [
{
"resourceCapacity": [
{
"type": "RegularEnergy",
"count": 199
}
]
},
{
"resourceCapacity": [
{
"type": "ReserveEnergy",
"count": 199
}
]
}
]
}
]
}Dev note: FIXME: A 75% damage reduction method needs to be documented for if Samus only has Gravity and it provides 75% reduction. |
From: 1
Left Door
To: 1
Left Door

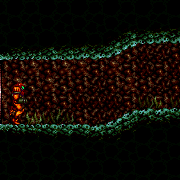
On room entry, roll into one of the baby turtles in order to get Mama Turtle to wake up. This then requires a precisely timed Crystal Flash, such that Mama Turtle hits Samus immediately after she gets Reserve Energy, to prevent getting double hit. The precise timing is not required with the ability to survive another hit after the Reserve trigger. Samus will sometimes be forced onto Mama Turtle's back, which can force a third hit; this can be prevented by holding forward as she hits Samus. Entrance condition: {
"comeInWithGMode": {
"mode": "direct",
"morphed": true
}
}Requires: "h_artificialMorphRModeCrystalFlashInterrupt"
{
"or": [
{
"and": [
{
"ammo": {
"type": "Missile",
"count": 10
}
},
{
"or": [
"h_fullEnemyDamageReduction",
{
"and": [
"h_partialEnemyDamageReduction",
{
"resourceCapacity": [
{
"type": "RegularEnergy",
"count": 149
}
]
},
{
"resourceCapacity": [
{
"type": "ReserveEnergy",
"count": 149
}
]
}
]
},
{
"and": [
{
"resourceCapacity": [
{
"type": "RegularEnergy",
"count": 249
}
]
},
{
"resourceCapacity": [
{
"type": "ReserveEnergy",
"count": 249
}
]
}
]
}
]
}
]
},
{
"and": [
{
"ammo": {
"type": "Missile",
"count": 2
}
},
"canComplexRModeCrystalFlashInterrupt"
]
}
]
} |
|


This requires a precisely timed Crystal Flash, such that Mama Turtle hits Samus immediately after she gets Reserve Energy, to prevent getting double hit. The precise timing is not required with the ability to survive another hit after the Reserve trigger. Samus will sometimes be forced onto Mama Turtle's back, which can force a third hit; this can be prevented by holding forward as she hits Samus. Entrance condition: {
"comeInWithRMode": {}
}Requires: "canRModeCrystalFlashInterrupt"
{
"or": [
{
"and": [
{
"ammo": {
"type": "Missile",
"count": 10
}
},
{
"or": [
"h_fullEnemyDamageReduction",
{
"and": [
"h_partialEnemyDamageReduction",
{
"resourceCapacity": [
{
"type": "RegularEnergy",
"count": 149
}
]
},
{
"resourceCapacity": [
{
"type": "ReserveEnergy",
"count": 149
}
]
}
]
},
{
"and": [
{
"resourceCapacity": [
{
"type": "RegularEnergy",
"count": 249
}
]
},
{
"resourceCapacity": [
{
"type": "ReserveEnergy",
"count": 249
}
]
}
]
}
]
}
]
},
{
"and": [
{
"ammo": {
"type": "Missile",
"count": 2
}
},
"canComplexRModeCrystalFlashInterrupt"
]
}
]
} |
From: 1
Left Door
To: 1
Left Door


Kill the Zoas so that their drops appear away from the sand pit. Quickly sink to the bottom middle of the pit, directly above the Zoa spawn point, then Crystal Flash. This sand is easy to escape without accidentally using the flash suit - hold down then press jump. This can only be done suitless and without and E-Tanks, otherwise the Zoas can't deal enough damage to trigger Samus' reserves. This sand is easy to escape without accidentally using the flash suit - hold down then press jump. Requires: {
"obstaclesCleared": [
"R-Mode"
]
}
{
"noBlueSuit": {}
}
"canComplexRModeCrystalFlashInterrupt"
{
"ammo": {
"type": "Missile",
"count": 10
}
}Resets obstacles: R-Mode Dev note: This doesn't work in G-mode because the Power Bomb will kill the Zoas and prevent them from respawning. |
From: 1
Left Door
To: 1
Left Door
Crystal Flash to where the ceiling crab will hit Samus from above. Samus needs to be positioned under the left edge of the large central structure and time the Power Bomb to avoid killing the crab. The crab only briefly intersects Samus while it is turning the corner, so it won't double hit Samus. Entrance condition: {
"comeInWithGMode": {
"mode": "direct",
"morphed": true
}
}Requires: "h_artificialMorphComplexRModeCrystalFlashInterrupt"
{
"ammo": {
"type": "Missile",
"count": 10
}
}
{
"ammo": {
"type": "Super",
"count": 10
}
}
{
"refill": [
"ReserveEnergy"
]
}
{
"autoReserveTrigger": {}
} |
|
Crystal Flash to where the ceiling crab will hit Samus from above. Samus needs to be positioned under the left edge of the large central structure and time the Power Bomb to avoid killing the crab. The crab only briefly intersects Samus while it is turning the corner, so it won't double hit Samus. Requires: {
"obstaclesCleared": [
"R-Mode"
]
}
"canComplexRModeCrystalFlashInterrupt"
{
"ammo": {
"type": "Missile",
"count": 10
}
}
{
"ammo": {
"type": "Super",
"count": 10
}
}
{
"refill": [
"ReserveEnergy"
]
}
{
"autoReserveTrigger": {}
}Resets obstacles: R-Mode |
From: 3
Top Door
To: 1
Left Door
Fall down the shaft then Crystal Flash to where the ceiling crab will hit Samus from above. Samus needs to be positioned under the left edge of the large central structure and time the Power Bomb to avoid killing the crab. The crab only briefly intersects Samus while it is turning the corner, so it won't double hit Samus. Entrance condition: {
"comeInWithGMode": {
"mode": "direct",
"morphed": true
},
"comesThroughToilet": "no"
}Requires: "h_artificialMorphComplexRModeCrystalFlashInterrupt"
{
"ammo": {
"type": "Missile",
"count": 10
}
}
{
"ammo": {
"type": "Super",
"count": 10
}
}
{
"refill": [
"ReserveEnergy"
]
}
{
"autoReserveTrigger": {}
} |
From: 3
Top Door
To: 3
Top Door
Crystal Flash on the top right corner of the central structure to where the crab will hit Samus from below. Time the Power Bomb to avoid killing the crab. Entrance condition: {
"comeInWithGMode": {
"mode": "direct",
"morphed": true
},
"comesThroughToilet": "no"
}Requires: "h_artificialMorphComplexRModeCrystalFlashInterrupt"
{
"ammo": {
"type": "Missile",
"count": 10
}
}
{
"ammo": {
"type": "Super",
"count": 10
}
}
{
"or": [
"h_fullEnemyDamageReduction",
{
"and": [
"h_partialEnemyDamageReduction",
{
"resourceAtMost": [
{
"type": "RegularEnergy",
"count": 39
}
]
}
]
},
{
"and": [
{
"resourceCapacity": [
{
"type": "RegularEnergy",
"count": 199
}
]
},
{
"resourceCapacity": [
{
"type": "ReserveEnergy",
"count": 199
}
]
}
]
}
]
}
{
"useFlashSuit": {}
}
{
"shinespark": {
"frames": 7,
"excessFrames": 0
}
}Exit condition: {
"leaveWithSpark": {}
}Unlocks doors: {"types":["ammo"],"requires":[]} |
From: 3
Top Door
To: 4
Platform Below Top Door
Crystal Flash on the top right corner of the central structure to where the crab will hit Samus from below. Time the Power Bomb to avoid killing the crab. Entrance condition: {
"comeInWithGMode": {
"mode": "direct",
"morphed": true
},
"comesThroughToilet": "no"
}Requires: "h_artificialMorphComplexRModeCrystalFlashInterrupt"
{
"ammo": {
"type": "Missile",
"count": 10
}
}
{
"ammo": {
"type": "Super",
"count": 10
}
}
{
"or": [
"h_fullEnemyDamageReduction",
{
"and": [
"h_partialEnemyDamageReduction",
{
"resourceAtMost": [
{
"type": "RegularEnergy",
"count": 39
}
]
}
]
},
{
"and": [
{
"resourceCapacity": [
{
"type": "RegularEnergy",
"count": 199
}
]
},
{
"resourceCapacity": [
{
"type": "ReserveEnergy",
"count": 199
}
]
}
]
}
]
}
{
"or": [
"Gravity",
"HiJump",
"canSpringBallJumpMidAir"
]
}Dev note: A node below the platform might help, but without the extra movement, Samus can always do this at 1 instead. With Ice, Samus would want to do this at 1 and then climb back up. |
From: 3
Bottom Right Door
To: 3
Bottom Right Door

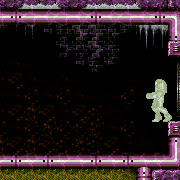
Climb up and lure and Oum to the right pit, then time the Crystal Flash so that the Oum can hit Samus. This is fairly lenient, but one method is to Crystal Flash near the shot block pillar while the Oum is to the right of Samus moving right. With some testing, it seemed like the Oum was more likely to hit Samus when it is moving to the left. This is possible with a Bomb into Spring Ball jump using a precisely timed bomb boost to propel Samus upward just long enough to get the mid-air Spring Ball jump. Entrance condition: {
"comeInWithGMode": {
"mode": "direct",
"morphed": true
}
}Requires: {
"or": [
{
"and": [
"HiJump",
"h_artificialMorphSpringBall"
]
},
{
"and": [
"Gravity",
"h_artificialMorphIBJ"
]
},
"h_artificialMorphUnderwaterBombIntoSpringBallJump"
]
}
"h_artificialMorphRModeCrystalFlashInterrupt"
{
"ammo": {
"type": "Missile",
"count": 10
}
}
{
"or": [
{
"tech": "canComplexRModeCrystalFlashInterrupt"
},
{
"ammo": {
"type": "Super",
"count": 10
}
}
]
}
{
"or": [
"h_fullEnemyDamageReduction",
{
"and": [
"h_partialEnemyDamageReduction",
{
"resourceAtMost": [
{
"type": "RegularEnergy",
"count": 49
}
]
}
]
},
{
"and": [
{
"resourceCapacity": [
{
"type": "RegularEnergy",
"count": 199
}
]
},
{
"resourceCapacity": [
{
"type": "ReserveEnergy",
"count": 199
}
]
}
]
}
]
}Dev note: It is possible to enter with G-mode for the left side of the room and do this off-camera, but it is unreasonably difficult. |
From: 3
Bottom Right Door
To: 3
Bottom Right Door

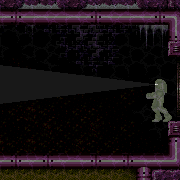
Time the Crystal Flash so that the Oum can hit Samus. This is fairly lenient, but one method is to Crystal Flash near the shot block pillar while the Oum is to the right of Samus, near the door. Requires: {
"obstaclesCleared": [
"R-Mode"
]
}
"canRModeCrystalFlashInterrupt"
{
"ammo": {
"type": "Missile",
"count": 10
}
}
{
"or": [
{
"tech": "canComplexRModeCrystalFlashInterrupt"
},
{
"ammo": {
"type": "Super",
"count": 10
}
}
]
}
{
"or": [
"h_fullEnemyDamageReduction",
{
"and": [
"h_partialEnemyDamageReduction",
{
"resourceAtMost": [
{
"type": "RegularEnergy",
"count": 49
}
]
}
]
},
{
"and": [
{
"resourceCapacity": [
{
"type": "RegularEnergy",
"count": 199
}
]
},
{
"resourceCapacity": [
{
"type": "ReserveEnergy",
"count": 199
}
]
}
]
}
]
}Resets obstacles: R-Mode |
From: 1
Left Vertical Door
To: 2
Bottom Right Door
It is required to avoid double hitting the Skultera with the Power Bomb, and to position the Crystal Flash so that the Skultera can hit Samus from above so it avoids the light orb. To do this, Crystal Flash just left of the top left corner of the raised floor and time the Power Bomb so that its first hit is when the Skultera is far to the left. This can be done with no enemy damage reduction and up to 2 E-Tanks or a 50% enemy damage reduction and no E-Tanks; a 75% reduction is not recommended and would require disabling and reenabling suits with a precise pause abuse. Entrance condition: {
"comeInWithGMode": {
"mode": "direct",
"morphed": true
},
"comesThroughToilet": "no"
}Requires: {
"or": [
"h_artificialMorphBombThings",
"h_artificialMorphSpringBall"
]
}
"h_artificialMorphComplexRModeCrystalFlashInterrupt"
{
  "ammo": {
    "type": "Missile",
    "count": 10
  }
}
{
  "ammo": {
    "type": "Super",
    "count": 10
  }
}
{
  "or": [
    "h_partialEnemyDamageReduction",
    {
      "resourceAtMost": [
        {
          "type": "RegularEnergy",
          "count": 19
        }
      ]
    },
    {
      "and": [
        {
          "resourceCapacity": [
            {
              "type": "RegularEnergy",
              "count": 199
            }
          ]
        },
        {
          "resourceCapacity": [
            {
              "type": "ReserveEnergy",
              "count": 199
            }
          ]
        }
      ]
    }
  ]
}
Dev note: FIXME: A 75% damage reduction method needs to be documented for if Samus only has Gravity and it provides 75% reduction. |
From: 2
Bottom Right Door
To: 2
Bottom Right Door

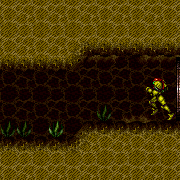
It is required to avoid double hitting the Skultera with the Power Bomb, and to position the Crystal Flash so that the Skultera can hit Samus from above so it avoids the light orb. To do this, Crystal Flash just left of the top left corner of the raised floor and time the Power Bomb so that its first hit is when the Skultera is far to the left. This can be done with no enemy damage reduction and up to 2 E-Tanks or a 50% enemy damage reduction and no E-Tanks; a 75% reduction is not recommended and would require disabling and reenabling suits with a precise pause abuse. Entrance condition: {
"comeInWithGMode": {
"mode": "direct",
"morphed": true
}
}Requires: {
"or": [
{
"and": [
"Gravity",
"h_artificialMorphIBJ"
]
},
"h_artificialMorphSpringBall"
]
}
"h_artificialMorphComplexRModeCrystalFlashInterrupt"
{
  "ammo": {
    "type": "Missile",
    "count": 10
  }
}
{
  "ammo": {
    "type": "Super",
    "count": 10
  }
}
{
  "or": [
    "h_partialEnemyDamageReduction",
    {
      "resourceAtMost": [
        {
          "type": "RegularEnergy",
          "count": 19
        }
      ]
    },
    {
      "and": [
        {
          "resourceCapacity": [
            {
              "type": "RegularEnergy",
              "count": 199
            }
          ]
        },
        {
          "resourceCapacity": [
            {
              "type": "ReserveEnergy",
              "count": 199
            }
          ]
        }
      ]
    }
  ]
}
Dev note: FIXME: A 75% damage reduction method needs to be documented for if Samus only has Gravity and it provides 75% reduction. |
From: 2
Bottom Right Door
To: 2
Bottom Right Door

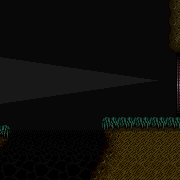
It is required to avoid double hitting the Skultera with the Power Bomb, and to position the Crystal Flash so that the Skultera can hit Samus from above so it avoids the light orb. To do this, Crystal Flash just left of the top left corner of the raised floor and time the Power Bomb so that its first hit is when the Skultera is far to the left. This can be done with no enemy damage reduction and up to 2 E-Tanks or a 50% enemy damage reduction and no E-Tanks; a 75% reduction is not recommended and would require disabling and reenabling suits with a precise pause abuse. Requires: {
"obstaclesCleared": [
"R-Mode"
]
}
"canComplexRModeCrystalFlashInterrupt"
{
  "ammo": {
    "type": "Missile",
    "count": 10
  }
}
{
  "ammo": {
    "type": "Super",
    "count": 10
  }
}
{
  "or": [
    "h_partialEnemyDamageReduction",
    {
      "resourceAtMost": [
        {
          "type": "RegularEnergy",
          "count": 19
        }
      ]
    },
    {
      "and": [
        {
          "resourceCapacity": [
            {
              "type": "RegularEnergy",
              "count": 199
            }
          ]
        },
        {
          "resourceCapacity": [
            {
              "type": "ReserveEnergy",
              "count": 199
            }
          ]
        }
      ]
    }
  ]
}Resets obstacles: R-Mode Dev note: FIXME: A 75% damage reduction method needs to be documented for if Samus only has Gravity and it provides 75% reduction. |
From: 3
Middle Right Door
To: 2
Bottom Right Door

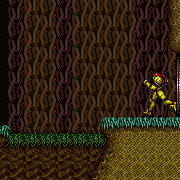
It is required to avoid double hitting the Skultera with the Power Bomb, and to position the Crystal Flash so that the Skultera can hit Samus from above so it avoids the light orb. To do this, Crystal Flash just left of the top left corner of the raised floor and time the Power Bomb so that its first hit is when the Skultera is far to the left. This can be done with no enemy damage reduction and up to 2 E-Tanks or a 50% enemy damage reduction and no E-Tanks; a 75% reduction is not recommended and would require disabling and reenabling suits with a precise pause abuse. Entrance condition: {
"comeInWithGMode": {
"mode": "direct",
"morphed": true
}
}Requires: "h_artificialMorphComplexRModeCrystalFlashInterrupt"
{
"ammo": {
"type": "Missile",
"count": 10
}
}
{
"ammo": {
"type": "Super",
"count": 10
}
}
{
"or": [
"h_partialEnemyDamageReduction",
{
"resourceAtMost": [
{
"type": "RegularEnergy",
"count": 19
}
]
},
{
"and": [
{
"resourceCapacity": [
{
"type": "RegularEnergy",
"count": 199
}
]
},
{
"resourceCapacity": [
{
"type": "ReserveEnergy",
"count": 199
}
]
}
]
}
]
}Dev note: FIXME: A 75% damage reduction method needs to be documented for if Samus only has Gravity and it provides 75% reduction. |
From: 4
Top Right Door
To: 2
Bottom Right Door

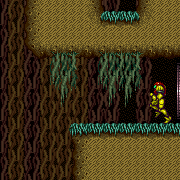
It is required to avoid double hitting the Skultera with the Power Bomb, and to position the Crystal Flash so that the Skultera can hit Samus from above so it avoids the light orb. To do this, Crystal Flash just left of the top left corner of the raised floor and time the Power Bomb so that its first hit is when the Skultera is far to the left. This can be done with no enemy damage reduction and up to 2 E-Tanks or a 50% enemy damage reduction and no E-Tanks; a 75% reduction is not recommended and would require disabling and reenabling suits with a precise pause abuse. Entrance condition: {
"comeInWithGMode": {
"mode": "direct",
"morphed": true
}
}Requires: "h_artificialMorphComplexRModeCrystalFlashInterrupt"
{
"ammo": {
"type": "Missile",
"count": 10
}
}
{
"ammo": {
"type": "Super",
"count": 10
}
}
{
"or": [
"h_partialEnemyDamageReduction",
{
"resourceAtMost": [
{
"type": "RegularEnergy",
"count": 19
}
]
},
{
"and": [
{
"resourceCapacity": [
{
"type": "RegularEnergy",
"count": 199
}
]
},
{
"resourceCapacity": [
{
"type": "ReserveEnergy",
"count": 199
}
]
}
]
}
]
}Dev note: FIXME: A 75% damage reduction method needs to be documented for if Samus only has Gravity and it provides 75% reduction. |
From: 1
Left Door
To: 2
Bottom Door

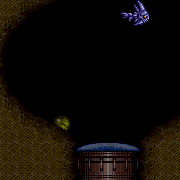
It is required to avoid double hitting the Skultera with the Power Bomb, and to position the Crystal Flash so that the Skultera can hit Samus from above so it avoids the light orb. To do this, Crystal Flash one tile left of the door and time the Power Bomb so that its first hit is when the Skultera is just a bit off-screen to the right. This can be done with no enemy damage reduction and up to 2 E-Tanks or a 50% enemy damage reduction and no E-Tanks; a 75% reduction is not recommended and would require disabling and reenabling suits with a precise pause abuse. Entrance condition: {
"comeInWithGMode": {
"mode": "direct",
"morphed": true
}
}Requires: "h_artificialMorphComplexRModeCrystalFlashInterrupt"
{
"ammo": {
"type": "Missile",
"count": 10
}
}
{
"ammo": {
"type": "Super",
"count": 10
}
}
{
"or": [
"h_partialEnemyDamageReduction",
{
"resourceAtMost": [
{
"type": "RegularEnergy",
"count": 19
}
]
},
{
"and": [
{
"resourceCapacity": [
{
"type": "RegularEnergy",
"count": 199
}
]
},
{
"resourceCapacity": [
{
"type": "ReserveEnergy",
"count": 199
}
]
}
]
}
]
}Dev note: FIXME: A 75% damage reduction method needs to be documented for if Samus only has Gravity and it provides 75% reduction. |
|

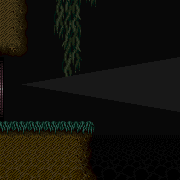
It is required to avoid double hitting the Skultera with the Power Bomb, and to position the Crystal Flash so that the Skultera can hit Samus from above so it avoids the light orb. To do this, Crystal Flash one tile left of the door and time the Power Bomb so that its first hit is when the Skultera is just a bit off-screen to the right. This can be done with no enemy damage reduction and up to 2 E-Tanks or a 50% enemy damage reduction and no E-Tanks; a 75% reduction is not recommended and would require disabling and reenabling suits with a precise pause abuse. Entrance condition: {
"comeInWithRMode": {}
}Requires: "canComplexRModeCrystalFlashInterrupt"
{
"ammo": {
"type": "Missile",
"count": 10
}
}
{
"ammo": {
"type": "Super",
"count": 10
}
}
{
"or": [
"h_partialEnemyDamageReduction",
{
"resourceAtMost": [
{
"type": "RegularEnergy",
"count": 19
}
]
},
{
"and": [
{
"resourceCapacity": [
{
"type": "RegularEnergy",
"count": 199
}
]
},
{
"resourceCapacity": [
{
"type": "ReserveEnergy",
"count": 199
}
]
}
]
}
]
}Dev note: FIXME: A 75% damage reduction method needs to be documented for if Samus only has Gravity and it provides 75% reduction. |
From: 2
Bottom Door
To: 2
Bottom Door
It is required to avoid double hitting the Skultera with the Power Bomb, and to position the Crystal Flash so that the Skultera can hit Samus from above so it avoids the light orb. To do this, Crystal Flash one tile left of the door and time the Power Bomb so that its first hit is when the Skultera is just a bit off-screen to the right. If Samus does not have a way to get to the left side of the door, instead Crystal Flash on the left-most flat tile to the right of the raised floor in the middle of the room. This can be done with no enemy damage reduction and up to 2 E-Tanks or a 50% enemy damage reduction and no E-Tanks; a 75% reduction is not recommended and would require disabling and reenabling suits with a precise pause abuse. Entrance condition: {
"comeInWithGMode": {
"mode": "direct",
"morphed": true
},
"comesThroughToilet": "no"
}Requires: "h_artificialMorphComplexRModeCrystalFlashInterrupt"
{
"ammo": {
"type": "Missile",
"count": 10
}
}
{
"ammo": {
"type": "Super",
"count": 10
}
}
{
"or": [
"h_partialEnemyDamageReduction",
{
"resourceAtMost": [
{
"type": "RegularEnergy",
"count": 19
}
]
},
{
"and": [
{
"resourceCapacity": [
{
"type": "RegularEnergy",
"count": 199
}
]
},
{
"resourceCapacity": [
{
"type": "ReserveEnergy",
"count": 199
}
]
}
]
}
]
}Dev note: FIXME: A 75% damage reduction method needs to be documented for if Samus only has Gravity and it provides 75% reduction. |
|
It is required to avoid double hitting the Skultera with the Power Bomb, and to position the Crystal Flash so that the Skultera can hit Samus from above so it avoids the light orb. To do this, Crystal Flash one tile left of the door and time the Power Bomb so that its first hit is when the Skultera is just a bit off-screen to the right. This can be done with no enemy damage reduction and up to 2 E-Tanks or a 50% enemy damage reduction and no E-Tanks; a 75% reduction is not recommended and would require disabling and reenabling suits with a precise pause abuse. Entrance condition: {
"comeInWithRMode": {},
"comesThroughToilet": "no"
}Requires: "canComplexRModeCrystalFlashInterrupt"
{
"ammo": {
"type": "Missile",
"count": 10
}
}
{
"ammo": {
"type": "Super",
"count": 10
}
}
{
"or": [
"h_partialEnemyDamageReduction",
{
"resourceAtMost": [
{
"type": "RegularEnergy",
"count": 19
}
]
},
{
"and": [
{
"resourceCapacity": [
{
"type": "RegularEnergy",
"count": 199
}
]
},
{
"resourceCapacity": [
{
"type": "ReserveEnergy",
"count": 199
}
]
}
]
}
]
}Dev note: FIXME: A 75% damage reduction method needs to be documented for if Samus only has Gravity and it provides 75% reduction. |
From: 1
Left Door
To: 1
Left Door

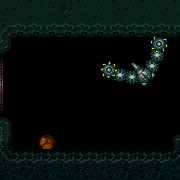
This requires a precisely timed Crystal Flash, such that Shaktool hits Samus immediately after she gets Reserve Energy, to prevent getting double hit. With a second Reserve Tank and an Energy Tank, or the damage reduction from a suit, Samus is able to survive a second hit. If the wall is already broken, either wait for Shaktool to cross the room or move in front of it. It is possible to enter the room and land on the doorsill, then bomb or Power Bomb boost across when the tide is high. Entrance condition: {
"comeInWithGMode": {
"mode": "direct",
"morphed": true
}
}Requires: "h_artificialMorphRModeCrystalFlashInterrupt"
{
"or": [
{
"and": [
{
"ammo": {
"type": "Missile",
"count": 10
}
},
{
"or": [
"h_partialEnemyDamageReduction",
{
"and": [
{
"resourceCapacity": [
{
"type": "RegularEnergy",
"count": 199
}
]
},
{
"resourceCapacity": [
{
"type": "ReserveEnergy",
"count": 199
}
]
}
]
}
]
}
]
},
{
"and": [
{
"ammo": {
"type": "Missile",
"count": 2
}
},
"h_artificialMorphComplexRModeCrystalFlashInterrupt"
]
}
]
}
{
"or": [
"h_artificialMorphSpringBall",
{
"and": [
{
"or": [
"canInsaneJump",
"Gravity"
]
},
{
"or": [
"h_artificialMorphBombs",
{
"ammo": {
"type": "PowerBomb",
"count": 2
}
}
]
}
]
},
"canBePatient",
{
"and": [
"canRiskPermanentLossOfAccess",
{
"not": "f_ShaktoolDoneDigging"
}
]
}
]
} |
|


This requires a precisely timed Crystal Flash, such that Shaktool hits Samus immediately after she gets Reserve Energy, to prevent getting double hit. With a second Reserve Tank and an Energy Tank, or the damage reduction from a suit, Samus is able to survive a second hit. Entrance condition: {
"comeInWithRMode": {}
}Requires: "canRModeCrystalFlashInterrupt"
{
"or": [
{
"and": [
{
"ammo": {
"type": "Missile",
"count": 10
}
},
{
"or": [
"h_partialEnemyDamageReduction",
{
"and": [
{
"resourceCapacity": [
{
"type": "RegularEnergy",
"count": 199
}
]
},
{
"resourceCapacity": [
{
"type": "ReserveEnergy",
"count": 199
}
]
}
]
}
]
}
]
},
{
"and": [
{
"ammo": {
"type": "Missile",
"count": 2
}
},
"canComplexRModeCrystalFlashInterrupt"
]
}
]
} |
From: 2
Right Door
To: 2
Right Door

This requires a precisely timed Crystal Flash, such that Shaktool hits Samus immediately after she gets Reserve Energy, to prevent getting double hit. With a second Reserve Tank and an Energy Tank, or the damage reduction from a suit, Samus is able to survive a second hit. Entrance condition: {
"comeInWithGMode": {
"mode": "direct",
"morphed": true
}
}Requires: {
"or": [
"f_ShaktoolDoneDigging",
{
"obstaclesCleared": [
"f_ShaktoolDoneDigging"
]
}
]
}
"h_artificialMorphRModeCrystalFlashInterrupt"
{
"or": [
{
"and": [
{
"ammo": {
"type": "Missile",
"count": 10
}
},
{
"or": [
"h_partialEnemyDamageReduction",
{
"and": [
{
"resourceCapacity": [
{
"type": "RegularEnergy",
"count": 199
}
]
},
{
"resourceCapacity": [
{
"type": "ReserveEnergy",
"count": 199
}
]
}
]
}
]
}
]
},
{
"and": [
{
"ammo": {
"type": "Missile",
"count": 2
}
},
"h_artificialMorphComplexRModeCrystalFlashInterrupt"
]
}
]
} |
|


This requires a precisely timed Crystal Flash, such that Shaktool hits Samus immediately after she gets Reserve Energy, to prevent getting double hit. With a second Reserve Tank and an Energy Tank, or the damage reduction from a suit, Samus is able to survive a second hit. Entrance condition: {
"comeInWithRMode": {}
}Requires: {
"or": [
"f_ShaktoolDoneDigging",
{
"obstaclesCleared": [
"f_ShaktoolDoneDigging"
]
}
]
}
"canRModeCrystalFlashInterrupt"
{
  "or": [
    {
      "and": [
        {
          "ammo": {
            "type": "Missile",
            "count": 10
          }
        },
        {
          "or": [
            "h_partialEnemyDamageReduction",
            {
              "and": [
                {
                  "resourceCapacity": [
                    {
                      "type": "RegularEnergy",
                      "count": 199
                    }
                  ]
                },
                {
                  "resourceCapacity": [
                    {
                      "type": "ReserveEnergy",
                      "count": 199
                    }
                  ]
                }
              ]
            }
          ]
        }
      ]
    },
    {
      "and": [
        {
          "ammo": {
            "type": "Missile",
            "count": 2
          }
        },
        "canComplexRModeCrystalFlashInterrupt"
      ]
    }
  ]
} |
From: 1
Top Door
To: 2
Right Door
At the bottom of the room, Crystal Flash below a wall pirate to have it walk into Samus. The pirate will randomly walk up and down and wall, but if it sees Samus and jumps across, it will start climbing up the left wall or down the right wall. With a lot of luck, the pirate will sometimes climb down and hit Samus before it goes off camera. Be sure to avoid any stationary, invisible lasers that they might place. Entrance condition: {
"comeInWithGMode": {
"mode": "direct",
"morphed": true
},
"comesThroughToilet": "no"
}Requires: {
"or": [
"h_artificialMorphMovement",
"canBeVeryLucky"
]
}
"h_artificialMorphComplexRModeCrystalFlashInterrupt"
{
  "ammo": {
    "type": "Missile",
    "count": 10
  }
} |
|
At the bottom of the room, Crystal Flash below a wall pirate to have it walk into Samus. The pirate will randomly walk up and down and wall, but if it sees Samus and jumps across, it will start climbing up the left wall or down the right wall. Entrance condition: {
"comeInWithRMode": {},
"comesThroughToilet": "no"
}Requires: "canComplexRModeCrystalFlashInterrupt"
{
"ammo": {
"type": "Missile",
"count": 10
}
} |
From: 2
Right Door
To: 2
Right Door

At the bottom of the room, Crystal Flash below a wall pirate to have it walk into Samus. The pirate will randomly walk up and down and wall, but if it sees Samus and jumps across, it will start climbing up the left wall or down the right wall. With some luck, the pirate will sometimes climb down and hit Samus before it goes off camera. Entrance condition: {
"comeInWithGMode": {
"mode": "direct",
"morphed": true
}
}Requires: {
"or": [
"h_artificialMorphMovement",
"canBeLucky"
]
}
"h_artificialMorphComplexRModeCrystalFlashInterrupt"
{
"ammo": {
"type": "Missile",
"count": 10
}
} |
|

At the bottom of the room, Crystal Flash below a wall pirate to have it walk into Samus. The pirate will randomly walk up and down and wall, but if it sees Samus and jumps across, it will start climbing up the left wall or down the right wall. Entrance condition: {
"comeInWithRMode": {}
}Requires: "canComplexRModeCrystalFlashInterrupt"
{
"ammo": {
"type": "Missile",
"count": 10
}
} |
From: 1
Left Door
To: 1
Left Door
At the bottom of the room, Crystal Flash below a wall pirate to have it walk into Samus. The pirate will randomly walk up and down and wall, but if it sees Samus and jumps across, it will start climbing up the left wall or down the right wall. With a bit of luck, the pirate will sometimes climb down and hit Samus before it goes off camera. Try to delay as much as possible if it is going down, then fall in a way to make it hop to the right wall and continue down. Be sure to avoid any stationary, invisible lasers that they might place. Without any movement options, it is recommended to land in the doorframe as Samus morphs, then Crystal Flash on the ledge, as the pirate above will be moving down. Entrance condition: {
"comeInWithGMode": {
"mode": "direct",
"morphed": true
}
}Requires: "h_artificialMorphComplexRModeCrystalFlashInterrupt"
{
"ammo": {
"type": "Missile",
"count": 10
}
} |
|
At the bottom of the room, Crystal Flash below a wall pirate to have it walk into Samus. The pirate will randomly walk up and down and wall, but if it sees Samus and jumps across, it will start climbing up the left wall or down the right wall. Without any movement options, it is possible to do this in the left doorframe without any luck, as the pirate just above will start moving down once on screen. Entrance condition: {
"comeInWithRMode": {}
}Requires: "canComplexRModeCrystalFlashInterrupt"
{
"ammo": {
"type": "Missile",
"count": 10
}
}
{
"or": [
"canWallJump",
"HiJump",
"SpaceJump",
"canIBJ",
"canSpringBallJumpMidAir",
{
"and": [
"canTrickyUseFrozenEnemies",
"canTrickyDodgeEnemies"
]
},
{
"and": [
"canInsaneJump",
{
"doorUnlockedAtNode": 1
}
]
}
]
}Unlocks doors: {"types":["missiles","super"],"requires":[]}
{"types":["powerbomb"],"requires":["never"]}Dev note: It is possible to get up with nothing but morph and a neutral damage boost, but its pretty tricky, especially with a flash suit. |
From: 2
Right Door
To: 1
Left Door
The acid does not rise in G-mode. Bomb boost near the first pirate until it places 18 lasers and fully overloads them so that other pirates won't place more. Very carefully IBJ over it or use Spring Ball or Power Bombs to kill it. Climb the shaft with a very long IBJ. At the top of the room, Crystal Flash on one of the ledges, below a wall pirate, to have it walk into Samus and trigger reserves. The pirate will randomly walk up and down and wall, but if it sees Samus and jumps across, it will start climbing up the left wall or down the right wall. Entrance condition: {
"comeInWithGMode": {
"mode": "direct",
"morphed": true
}
}Requires: {
"or": [
"h_artificialMorphSpringBall",
"canComplexGMode",
{
"and": [
"h_artificialMorphPowerBomb",
"h_artificialMorphPowerBomb"
]
}
]
}
"h_artificialMorphLongIBJ"
"h_artificialMorphComplexRModeCrystalFlashInterrupt"
{
"ammo": {
"type": "Missile",
"count": 10
}
} |