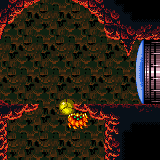
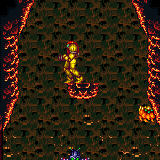
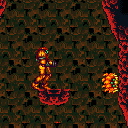
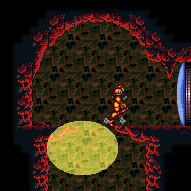
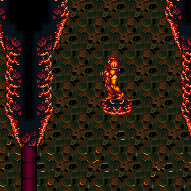
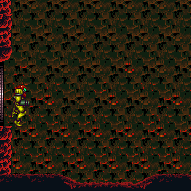
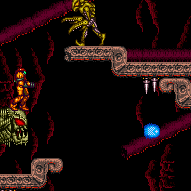
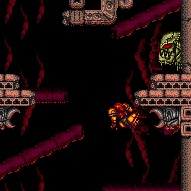
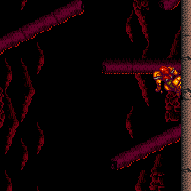
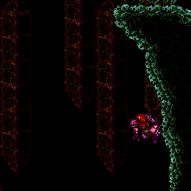
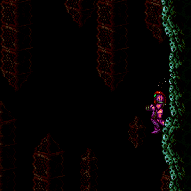
canInsaneWallJump (Extreme)
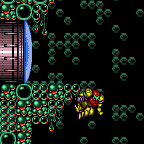
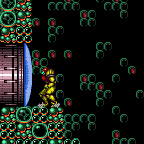
A wall jump with extreme precision, in the vicinity of pixel and frame perfect precision. These jumps are typically delayed wall jumps.
Dependencies: canTrickyWallJump, canPreciseWallJump
Strats ()
From: 3
Right Door, In the Water
To: 1
Left Door
It's a delayed walljump while the water is low, followed by a tight walljump off the bridge. This strat is easily bypassed by jumping through the door, or if the door can be opened. Requires: "canSuitlessMaridia" "canInsaneWallJump" |
From: 1
Bottom Left Door
To: 3
Hidden Ceiling Item
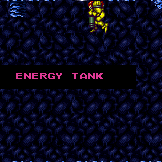
Samus must start pressed against the wall, facing left. Start by performing a dashing stationary spinjump. The initial left press needs to be exactly 3 or 4 frames. Jump needs to be pressed exactly 3 frames after the inital left press. Samus then needs to quickly walljump off the wall at a precise height. While spin jumping in the air, break spin with angle or shot and hold down to reduce the size of the hitbox. If the initial jump and subsequent walljump were performed correctly, depending on walljump height and the number of pixels away from the wall, Samus will have between 1-3 frames where it is possible to collect the tank Release down just as Samus is about to collide with the tank to collect. Even if the previous steps were performed correctly and down was released on the correct frame to collect the tank, there is a 50% chance of failure. The game will check if Samus is in contact with the wall or the item on alternating frames. If the item collection happens on a frame where the game is checking for a wall collision then the item will not be acquired. Requires: {
"notable": "Taco Tank"
}
"canCWJ"
"canInsaneWallJump"
"canStationarySpinJump" |
From: 4
Small Ledge Below Left Door
To: 1
Left Door
Jump up to the left door either by jumping from spikes or with a very precise jump. Cross the room by Jumping atop the spikes. Taking enemy damage can be used to reduce some spike damage. The final jump can either be made by jumping from the bottommost spike stair or from the safe stair. Setup run speed atop the spike stair by holding forward to be pushed backward. The safe stair jump is much harder, but can be made without every pixel of runway. Requires: {
"notable": "Spike Jumps with HiJump"
}
"HiJump"
"canDash"
"canTrickyJump"
{
"or": [
{
"and": [
"canInsaneWallJump",
"canInsaneJump",
"h_backIntoCorner"
]
},
{
"and": [
{
"spikeHits": 1
},
"canHorizontalDamageBoost",
"canPreciseWallJump",
"canUseIFrames"
]
}
]
} |
From: 9
Main Junction
To: 1
Left Side - Top Door
Requires: "canConsecutiveWallJump" "canInsaneWallJump" |
|
Unmorph after exiting the morph tunnel and get to the other side of the room. Killing the Dessgeegas can be done with no beam upgrades; Samus can jump over them while shooting the last few hits or retreat to the left. It is possible to kill a Sova on the door and pause abuse to grab its Energy drop on G-mode exit. Samus will likely need to wait at the door for about a minute for the global Sova gets there. Entrance condition: {
"comeInWithGMode": {
"mode": "any",
"morphed": true
}
}Requires: "h_artificialMorphMovement"
{
"or": [
"canTrickyJump",
"h_artificialMorphPowerBomb",
"h_hasBeamUpgrade",
{
"enemyKill": {
"enemies": [
[
"Sm. Dessgeega",
"Sm. Dessgeega"
]
],
"explicitWeapons": [
"Missile",
"Super",
"ScrewAttack"
]
}
},
{
"enemyDamage": {
"enemy": "Sm. Dessgeega",
"type": "contact",
"hits": 1
}
}
]
}
{
"or": [
"HiJump",
"SpaceJump",
"canSpringBallJumpMidAir",
"canIBJ",
"canTrickyDashJump",
{
"and": [
"canTrickyUseFrozenEnemies",
"canWallJump"
]
},
{
"and": [
{
"canShineCharge": {
"usedTiles": 43,
"openEnd": 0
}
},
{
"shinespark": {
"frames": 9,
"excessFrames": 5
}
}
]
},
{
"and": [
"canInsaneWallJump",
"canWallJumpInstantMorph",
"canUnmorphBombBoost",
"canDownGrab"
]
}
]
}
{
"or": [
{
"and": [
"h_heatedGModePauseAbuse",
"canBePatient"
]
},
"h_heatedGModeOpenDifferentDoor"
]
}Dev note: FIXME: Methods that require a Sova damage boost could be added |
|
Use a very well timed and precise walljump into morph to hit the global Sova so that the damage bonks Samus up to the door ledge. Aim for the lowest part of slope looking wall tile, where it does not look possible to make contact with a walljump, and fully delay the jump. To try again, the Sova loops to the left side wall. Or a Super can knock it off the wall to climb the right side again. Requires: {
"notable": "Sova Morph Only Boost"
}
"canInsaneWallJump"
"canMidAirMorph"
"canNeutralDamageBoost"
{
"enemyDamage": {
"enemy": "Sova",
"type": "contact",
"hits": 1
}
}
{
"heatFrames": 1050
} |
|
Wait for the global Sova to begin climbing the wall below the door. Time a walljump into instant morph where Samus boosts off of the Sova with the right timing to bounce up to the door's ledge. The jump must be a fully delayed walljump. Normalizing the camera can help with timing the walljump. The damage boost can be attempted again when the Sova climbs down the left wall, or by knocking it off the wall with a Super Missile. Requires: {
"notable": "Sova Boost"
}
"canInsaneWallJump"
"canWallJumpInstantMorph"
"canNeutralDamageBoost"
"canCameraManip"
{
"heatFrames": 830
}
{
"enemyDamage": {
"enemy": "Sova",
"type": "contact",
"hits": 1
}
}
{
"heatFrames": 90
} |
From: 5
Bottom Right Junction
To: 2
Right Door
Use a fully delayed walljump to gain enough horizontal distance to place a bomb past the lip of the overhang. Unmorph to hover in the air above the bomb while it explodes. Ride the explosion into a down-grab to reach the ledge. Requires: "h_heatProof"
"canInsaneWallJump"
"canWallJumpInstantMorph"
"canUnmorphBombBoost"
"canDownGrab"
{
"heatFrames": 215
}Dev note: FIXME: this should probably have extra Power Bomb lenience. |
|
Overload PLMs by shooting the gate, then go through the crumble blocks below and get to the item. Entrance condition: {
"comeInWithGMode": {
"mode": "direct",
"morphed": false
}
}Requires: "Morph"
{
"or": [
"SpaceJump",
{
"and": [
"canPreciseGrapple",
"canUseEnemies"
]
},
{
"and": [
"HiJump",
"canSpringBallJumpMidAir"
]
},
"canInsaneWallJump",
{
"and": [
"HiJump",
"canUseIFrames",
{
"noBlueSuit": {}
},
{
"enemyDamage": {
"enemy": "Ripper 2 (green)",
"type": "contact",
"hits": 1
}
},
{
"or": [
"canWallJump",
"canSpeedyJump"
]
}
]
},
"h_IBJFromSpikes"
]
}
{
"heatFrames": 0
} |
|
Overload PLMs by shooting the gate, then go through the crumble blocks below and get to the item. The gate can be shot while precisely positioned from below without requiring any items. The positioning is precise and off camera; while facing left, position Samus front foot barely on the flat part after the slope. Entrance condition: {
"comeInWithGMode": {
"mode": "direct",
"morphed": false
}
}Requires: "Morph"
{
"or": [
"SpaceJump",
{
"and": [
"canPreciseGrapple",
"canUseEnemies"
]
},
{
"and": [
"HiJump",
"canSpringBallJumpMidAir"
]
},
"canInsaneWallJump",
{
"and": [
"HiJump",
"canUseIFrames",
{
"noBlueSuit": {}
},
{
"enemyDamage": {
"enemy": "Ripper 2 (green)",
"type": "contact",
"hits": 1
}
},
{
"or": [
"canWallJump",
"canSpeedyJump"
]
}
]
},
"h_IBJFromSpikes"
]
}
{
"heatFrames": 0
} |
|
Run to the right, wait a moment for the platforms to come down, then wall jump off the second platform from the right. Alternatively, wall jump off the wall to the right to reach the platform sooner, to wall jump off of it. Requires: "HiJump"
"canWallJump"
"canTrickyJump"
{
"or": [
{
"and": [
"canHeroShot",
{
"heatFrames": 270
},
"canInsaneWallJump",
"h_trickyToCarryFlashSuit",
"canBeVeryPatient"
]
},
{
"and": [
{
"heatFrames": 360
},
{
"or": [
"h_complexToCarryFlashSuit",
"Ice",
"Wave",
"Spazer",
"Plasma",
{
"heatFrames": 300
}
]
}
]
}
]
}
{
"or": [
"canDash",
{
"heatFrames": 120
}
]
}Clears obstacles: A |
|
Jump onto the crumble blocks to make them solid, then use them as a platform to cross the room. With Grapple, a running jump then single Grapple swing can be used before PLMs are overloaded, alternatively jump on the crumble blocks and Grapple the Ripper. Entrance condition: {
"comeInWithGMode": {
"mode": "indirect",
"morphed": false
}
}Requires: {
"or": [
"SpaceJump",
{
"and": [
"canPreciseGrapple",
{
"or": [
"canDash",
"canUseEnemies",
"canInsaneJump"
]
}
]
},
"canInsaneWallJump",
{
"and": [
"HiJump",
"canWallJump"
]
},
{
"and": [
"HiJump",
"canSpeedyJump"
]
}
]
}
"h_heatedGModeOpenDifferentDoor"Dev note: This is only for strats that can't go to 7 - variants without Morph, or without a way to get back up after going down. |
From: 3
Right Door
To: 2
Bottom Left Door
Jump onto the crumble blocks to make them solid, then use them as a platform to cross the room. With Grapple, a running jump then single Grapple swing can be used before PLMs are overloaded, alternatively jump on the crumble blocks and Grapple the Ripper. Entrance condition: {
"comeInWithGMode": {
"mode": "indirect",
"morphed": false
}
}Requires: {
"or": [
"SpaceJump",
{
"and": [
"canPreciseGrapple",
{
"or": [
"canDash",
"canUseEnemies",
"canInsaneJump"
]
}
]
},
"canInsaneWallJump",
{
"and": [
"HiJump",
"canWallJump"
]
},
{
"and": [
"HiJump",
"canSpeedyJump"
]
}
]
}
"h_heatedGModeOpenDifferentDoor"Dev note: This is only for strats that can't go to 7 - variants without Morph. |
|
Entrance condition: {
"comeInWithGMode": {
"mode": "direct",
"morphed": false
}
}Requires: "canRemoteAcquire"
{
"or": [
"SpaceJump",
{
"and": [
"canPreciseGrapple",
"canUseEnemies"
]
},
"canSpringBallJumpMidAir",
"canInsaneWallJump",
{
"and": [
"HiJump",
"canWallJump"
]
},
{
"and": [
"HiJump",
"canSpeedyJump"
]
},
{
"and": [
"canStaggeredIBJ",
"canDoubleBombJump",
"canBombHorizontally"
]
},
{
"and": [
"h_IBJFromSpikes",
"h_IBJFromSpikes"
]
},
{
"and": [
"h_IBJFromSpikes",
"canCameraManip",
"canMoonwalk"
]
}
]
}
"h_heatedDirectGModeLeaveSameDoor"Collects items: 4 |
|
Jump onto the crumble blocks to make them solid, then use them as a platform to cross the room. With Grapple, a running jump then single Grapple swing can be used before PLMs are overloaded, alternatively jump on the crumble blocks and Grapple the Ripper. Entrance condition: {
"comeInWithGMode": {
"mode": "any",
"morphed": false
}
}Requires: {
"or": [
"SpaceJump",
{
"and": [
"canStaggeredIBJ",
"canDoubleBombJump",
"canBombHorizontally"
]
},
{
"and": [
"canDash",
{
"or": [
"canTrickySpringBallJump",
"canInsaneWallJump",
{
"and": [
"HiJump",
"canWallJump"
]
},
{
"and": [
"HiJump",
"canSpeedyJump"
]
},
"h_IBJFromSpikes"
]
}
]
},
{
"and": [
"canPreciseGrapple",
{
"or": [
"canDash",
"canUseEnemies",
"canInsaneJump"
]
}
]
}
]
}
{
"heatFrames": 0
}Dev note: FIXME: some more of these options may be possible with a blue suit, with greater difficulty. |
|
Jump onto the crumble blocks to make them solid, then use them as a platform to cross the room. With Grapple, a running jump then single Grapple swing can be used before PLMs are overloaded, alternatively jump on the crumble blocks and Grapple the Ripper. In indirect G-mode, stand where the gate will spawn and exit G-mode to open the gate. In direct G-mode, overload PLMs by shooting the gate then position Samus a few pixels away from the gate to where upward diagonal shots go through it. Crouch then shoot diagonally and quickly exit G-mode (3-7 frames later) to open the gate on G-mode exit. Entrance condition: {
"comeInWithGMode": {
"mode": "any",
"morphed": false
}
}Requires: "canComplexGMode"
"h_heatedGMode"
{
"or": [
"SpaceJump",
{
"and": [
"canStaggeredIBJ",
"canDoubleBombJump",
"canBombHorizontally"
]
},
{
"and": [
"canDash",
{
"or": [
"canTrickySpringBallJump",
"canInsaneWallJump",
{
"and": [
"HiJump",
"canWallJump"
]
},
{
"and": [
"HiJump",
"canSpeedyJump"
]
},
"h_IBJFromSpikes"
]
}
]
},
{
"and": [
"canPreciseGrapple",
{
"or": [
"canDash",
"canUseEnemies",
"canInsaneJump"
]
}
]
}
]
}
{
"heatFrames": 35
}Clears obstacles: A Dev note: The canComplexGMode is only used here to describe opening the gate in direct G-mode without gate glitching. However, the indirect variant still requires canHeatedGMode or Varia - with Varia, indirect strats can instead be used to go to the top left door and return. FIXME: some more of these options may be possible with a blue suit, with greater difficulty. |
|
Jump into the spike pit, hitting the Ripper to avoid spike damage. Climb the left wall while avoiding falling onto the spikes or through the crumble blocks. The ledge is the same size of that in writg. Requires: "canDash"
{
"notable": "HiJumpless Wall Jump"
}
"h_heatProof"
"canInsaneWallJump"
"canHorizontalDamageBoost"
{
"or": [
"canUseIFrames",
"canCrumbleJump"
]
}
{
"enemyDamage": {
"enemy": "Ripper 2 (green)",
"type": "contact",
"hits": 1
}
}Dev note: FIXME: a blue suit version of this could be possible, but would probably need to take spike hits. |
From: 3
Right Door
To: 6
G-Mode, Remote Acquire Junction (Bottom Right)
Jump onto the crumble blocks to make them solid, then use them as a platform to get to the item. With Grapple, a running jump then single Grapple swing can be used before PLMs are overloaded, alternatively jump on the crumble blocks and Grapple the Ripper. Avoid touching all 6 crumbles, so Samus can use the item to overload PLMs and go through one of the crumbles to get to the left side of the room. If the item has already been obtained, Samus can shoot the gate many times to overload PLMs. Entrance condition: {
"comeInWithGMode": {
"mode": "direct",
"morphed": false
}
}Requires: "canRemoteAcquire"
{
"or": [
"SpaceJump",
"canCeilingBombJump",
{
"and": [
"canBombHorizontally",
"canIBJ",
"h_usePowerBomb"
]
},
{
"and": [
"canStaggeredIBJ",
"canDoubleBombJump",
"canBombHorizontally"
]
},
{
"and": [
"canPreciseGrapple",
"canUseEnemies"
]
},
{
"and": [
"canDash",
{
"or": [
"canTrickySpringBallJump",
"canInsaneWallJump",
{
"and": [
"HiJump",
"canWallJump"
]
},
{
"and": [
"HiJump",
"canSpeedyJump"
]
},
"h_IBJFromSpikes"
]
}
]
}
]
}
{
"heatFrames": 0
} |
From: 3
Right Door
To: 7
G-Mode Junction (Bottom Right)
Jump onto the crumble blocks to make them solid, then use them as a platform to cross the room. With Grapple, a running jump then single Grapple swing can be used before PLMs are overloaded, alternatively jump on the crumble blocks and Grapple the Ripper. Entrance condition: {
"comeInWithGMode": {
"mode": "indirect",
"morphed": false
}
}Requires: "Morph"
{
"or": [
"SpaceJump",
"canCeilingBombJump",
{
"and": [
"canStaggeredIBJ",
"canDoubleBombJump",
"canBombHorizontally"
]
},
{
"and": [
"canBombHorizontally",
"canIBJ",
"h_usePowerBomb"
]
},
{
"and": [
"canDash",
{
"or": [
"canTrickySpringBallJump",
"canInsaneWallJump",
{
"and": [
"HiJump",
"canWallJump"
]
},
{
"and": [
"HiJump",
"canSpeedyJump"
]
},
"h_IBJFromSpikes"
]
}
]
},
{
"and": [
"canPreciseGrapple",
{
"or": [
"canDash",
"canUseEnemies",
"canInsaneJump"
]
}
]
}
]
}
{
"heatFrames": 0
}Dev note: With Grapple, Morph isn't needed, but there's no reason to go there without Morph. |
From: 2
Right Door
To: 3
Above Lava Junction
Bounceball into the Lava, unmorphing with good timing to sink faster and drift efficiently towards the bottom right Namihe. Wall jump at about eye height (4 pixel window) to gain enough height to reach the center portion of ceiling. While rising, wiggle to shrink Samus' hitbox. Some walljump positions will not need to wiggle, when wall jumping far away from the Namihe. Jumping, from the wall, around the next lowest overhang is very precise and taking any extra time to position will increase the amount of lava damage being taken. It may help to disable Hi-Jump for this part. Then wall jump again to exit the lava and reach the left ledge. Requires: {
"notable": "GT Max Suitless Right Side Climb"
}
"canSuitlessLavaDive"
"canUseEnemies"
"HiJump"
"canBounceBall"
"canMidairWiggle"
"canConsecutiveWallJump"
"canInsaneWallJump"
{
"gravitylessLavaFrames": 392
}
{
"heatFrames": 515
}Dev note: FIXME: a dashless version could be added. |
From: 4
Lava, Left Wall
To: 3
Above Lava Junction
Enter the bottom-left Namihe by kagoing inside of it. Wait for a second hit to gain i-frames and then very quickly walljump up the spikes and across to the right side wall. Requires: {
"notable": "HiJumpless Nahime Morph Kago"
}
{
"noBlueSuit": {}
}
"canSuitlessLavaDive"
"canInsaneWallJump"
"canInsaneJump"
"canUseIFrames"
"canTrickyWallJump"
"canFastWallJumpClimb"
"canUseEnemies"
"canKago"
{
"heatFrames": 510
}
{
"gravitylessLavaFrames": 480
}
{
"enemyDamage": {
"enemy": "Namihe",
"type": "kago",
"hits": 2
}
} |
From: 4
Center Platform Junction
To: 3
Junction Left of Green Gate
Run and jump at the very edge of the center platform. Wait for the water level to begin lowering to walljump on the far edge. An airball may be a little easier. Requires: "canDash"
"canTrickyJump"
{
"or": [
"canLateralMidAirMorph",
"canInsaneWallJump",
{
"and": [
"h_speedJump",
"canPreciseWallJump"
]
}
]
} |
From: 7
G-Mode Junction (Bottom of Room)
To: 1
Left Door
Use the camera scroll blocks below the crumble blocks to overload PLMs and go through the crumble blocks. A good jumping through them a single time is enough to overload them for the next jump. This can be done while dodging GT. With a speedy jump, it is possible to overload PLMs and run back to GT before it stands up, get into the safe spot location to get him to jump back, and use the runway again. With shinesparks, diagonally spark into the crumble blocks and hold forward three times, then spark through. Note that when GT attacks, it will place stationary invisible projectiles, so it is much more difficult if not getting up quickly. Requires: "h_heatedGMode"
{
"or": [
{
"or": [
"f_DefeatedGoldenTorizo",
{
"obstaclesCleared": [
"f_DefeatedGoldenTorizo"
]
}
]
},
"canTrickyDodgeEnemies"
]
}
{
"or": [
"SpaceJump",
{
"and": [
"HiJump",
{
"or": [
"canTrickyWallJump",
"canSpringBallJumpMidAir",
"canSpeedyJump"
]
}
]
},
{
"and": [
"canSpringBallJumpMidAir",
"canSpeedyJump",
{
"or": [
{
"or": [
"f_DefeatedGoldenTorizo",
{
"obstaclesCleared": [
"f_DefeatedGoldenTorizo"
]
}
]
},
"canInsaneJump"
]
}
]
},
{
"and": [
{
"or": [
"f_DefeatedGoldenTorizo",
{
"obstaclesCleared": [
"f_DefeatedGoldenTorizo"
]
}
]
},
"canTrickyDashJump",
"canWallJump"
]
},
{
"and": [
{
"or": [
"f_DefeatedGoldenTorizo",
{
"obstaclesCleared": [
"f_DefeatedGoldenTorizo"
]
}
]
},
"canConsecutiveWallJump",
"canInsaneWallJump"
]
},
{
"and": [
{
"or": [
"f_DefeatedGoldenTorizo",
{
"obstaclesCleared": [
"f_DefeatedGoldenTorizo"
]
}
]
},
{
"canShineCharge": {
"usedTiles": 28,
"openEnd": 0
}
},
{
"or": [
{
"and": [
"canWallJump",
{
"shinespark": {
"frames": 9,
"excessFrames": 4
}
}
]
},
{
"and": [
"canSpeedyJump",
{
"shinespark": {
"frames": 9,
"excessFrames": 4
}
}
]
},
{
"shinespark": {
"frames": 32,
"excessFrames": 4
}
}
]
}
]
}
]
}
"h_heatedGModeOpenDifferentDoor" |
From: 7
G-Mode Junction (Bottom of Room)
To: 3
Top Left Item
Use the camera scroll blocks below the crumble blocks to overload PLMs and go through the crumble blocks. A good jumping through them a single time is enough to overload them for the next jump. This can be done while dodging GT. With a speedy jump, it is possible to overload PLMs and run back to GT before it stands up, get into the safe spot location to get him to jump back, and use the runway again. With shinesparks, diagonally spark into the crumble blocks and hold forward three times, then spark through. Note that when GT attacks, it will place stationary invisible projectiles, so it is much more difficult if not getting up quickly. Requires: "h_heatedGMode"
{
"or": [
{
"or": [
"f_DefeatedGoldenTorizo",
{
"obstaclesCleared": [
"f_DefeatedGoldenTorizo"
]
}
]
},
"canTrickyDodgeEnemies"
]
}
{
"or": [
"SpaceJump",
{
"and": [
"HiJump",
{
"or": [
"canTrickyWallJump",
"canSpringBallJumpMidAir",
"canSpeedyJump"
]
}
]
},
{
"and": [
"canSpringBallJumpMidAir",
"canSpeedyJump",
{
"or": [
{
"or": [
"f_DefeatedGoldenTorizo",
{
"obstaclesCleared": [
"f_DefeatedGoldenTorizo"
]
}
]
},
"canInsaneJump"
]
}
]
},
{
"and": [
{
"or": [
"f_DefeatedGoldenTorizo",
{
"obstaclesCleared": [
"f_DefeatedGoldenTorizo"
]
}
]
},
"canTrickyDashJump",
"canWallJump"
]
},
{
"and": [
{
"or": [
"f_DefeatedGoldenTorizo",
{
"obstaclesCleared": [
"f_DefeatedGoldenTorizo"
]
}
]
},
"canConsecutiveWallJump",
"canInsaneWallJump"
]
},
{
"and": [
{
"or": [
"f_DefeatedGoldenTorizo",
{
"obstaclesCleared": [
"f_DefeatedGoldenTorizo"
]
}
]
},
{
"canShineCharge": {
"usedTiles": 28,
"openEnd": 0
}
},
{
"or": [
{
"and": [
"canWallJump",
{
"shinespark": {
"frames": 9,
"excessFrames": 4
}
}
]
},
{
"and": [
"canSpeedyJump",
{
"shinespark": {
"frames": 9,
"excessFrames": 4
}
}
]
},
{
"shinespark": {
"frames": 32,
"excessFrames": 4
}
}
]
}
]
}
]
}
{
"heatFrames": 0
} |
|
Position Samus in the doorway a few pixels from the edge. Dashing stationary spinjump into a delayed CWJ and hopefully catch the upper ledge with a walljump. Requires: {
"notable": "Doorway CWJ"
}
{
"obstaclesCleared": [
"A"
]
}
"h_heatProof"
"HiJump"
"canCWJ"
"canStationarySpinJump"
"canInsaneJump"
"canInsaneWallJump"
{
"doorUnlockedAtNode": 2
}Unlocks doors: {"nodeId":2,"types":["missiles"],"requires":[{"heatFrames":50}]}
{"nodeId":2,"types":["super"],"requires":[]}
{"nodeId":2,"types":["powerbomb"],"requires":[{"heatFrames":110}]} |
From: 3
Top Right Door
To: 2
Bottom Left Door
An extremely precise spinjump or walljump can avoid the top Boulder. The spinjump requires dash state and to jump right away. Aiming down shortly after helps by reducing Samus' hitbox. Requires: {
"or": [
"canInsaneWallJump",
"canInsaneJump"
]
} |
From: 2
Bottom Left Door
To: 1
Top Left Door
With Screw Attack, break the bomb blocks with either a fully delayed max height jump from the wall, or with an instant turnaround after jumping from the lower layer of bomb blocks. Hit the shot blocks at the top of the room with a Power Bomb or Wave before exiting G-mode to save some heat damage. Entrance condition: {
"comeInWithGMode": {
"mode": "any",
"morphed": false
}
}Requires: "h_heatedGMode"
{
"or": [
{
"and": [
{
"notable": "HiJump and Only Screw"
},
"ScrewAttack",
"HiJump",
"canMidairWiggle"
]
},
{
"haveBlueSuit": {}
}
]
}
"canInsaneWallJump"
"canInsaneJump"
{
"or": [
"Wave",
"h_usePowerBomb",
{
"heatFrames": 40
}
]
}
{
"heatFrames": 120
}Clears obstacles: A |
From: 2
Bottom Left Door
To: 3
Top Right Door
Break the bomb blocks with either a fully delayed max height jump from the wall, or with an instant turnaround after jumping from the lower layer of bomb blocks. It is possible to kill the pirate at the top of the room and use a pause abuse on G-mode exit to collect its drops. This requires getting somewhat lucky, as there is approximately a 70% chance that the pirate will give a large energy drop (small is not enough). To do this requires not climbing the room too quickly - one or two failed attempts at breaking the bomb blocks should be plenty, then exit G-mode, pause abuse, and kill the pirate before the pause triggers with a precisely timed spin jump into it. Entrance condition: {
"comeInWithGMode": {
"mode": "any",
"morphed": false
}
}Requires: {
"or": [
{
"and": [
{
"notable": "HiJump and Only Screw"
},
"ScrewAttack",
"HiJump",
"canMidairWiggle"
]
},
{
"haveBlueSuit": {}
}
]
}
"canInsaneWallJump"
"canInsaneJump"
{
"or": [
"h_heatedGModeOpenDifferentDoor",
{
"and": [
"h_heatedGModePauseAbuse",
"canTrickyGMode"
]
}
]
}Clears obstacles: A |
From: 5
Junction Below Top Pirate
To: 1
Top Left Door
Requires: "canWallJumpInstantMorph"
"canTrickyJump"
"canInsaneWallJump"
{
"heatFrames": 290
} |
From: 5
Junction Below Top Pirate
To: 3
Top Right Door
Walljump using the base of the platform the pirate is walking on and then Morph over its head. Requires: "canInsaneWallJump"
"canWallJumpInstantMorph"
"canTrickyJump"
{
"heatFrames": 160
} |
From: 6
Bottom Platform Junction With Pirates Killed
To: 4
Junction Above Bomb Blocks
Break the bomb blocks with extremely precise walljumps. Either with a fully delayed max height jump from the wall, or with an instant turnaround after jumping from the lower layer of bomb blocks. Requires: {
"notable": "HiJump and Only Screw"
}
"h_heatProof"
"HiJump"
"ScrewAttack"
"canInsaneWallJump"
"canInsaneJump"
"canConsecutiveWallJump"
"canMidairWiggle"Clears obstacles: A |
From: 6
Bottom Platform Junction With Pirates Killed
To: 4
Junction Above Bomb Blocks
Requires: "canInsaneWallJump"
"canConsecutiveWallJump"
"h_heatProof"
{
"or": [
{
"obstaclesCleared": [
"A"
]
},
{
"haveBlueSuit": {}
}
]
}Clears obstacles: A |
From: 6
Bottom Platform Junction With Pirates Killed
To: 6
Bottom Platform Junction With Pirates Killed
Use a wall jump morph to break the leftmost set of bomb blocks on the bottom layer. Then use a delayed wall jump morph to bomb out the next bomb blocks above. Requires: "HiJump"
"canTrickyWallJump"
"canWallJumpInstantMorph"
"canTrickyJump"
"h_useMorphBombs"
{
"heatFrames": 520
}
{
"or": [
"canInsaneWallJump",
{
"heatFrames": 500
}
]
}Clears obstacles: A |
From: 2
Right Door
To: 4
Junction Above Bomb Block
Run into the acid to quickly wall jump over the first pillar. Build speed and jump over the second pillar to mockball through the tunnel without taking much acid damage. Entrance condition: {
"comeInRunning": {
"speedBooster": "any",
"minTiles": 3
}
}Requires: "canMockball"
"HiJump"
"canSpeedyJump"
"canCarefulJump"
"canWallJump"
{
"or": [
"canInsaneWallJump",
{
"acidFrames": 30
}
]
}
{
"heatFrames": 310
}
{
"acidFrames": 5
}Clears obstacles: B |
|
Wall jump from near the top of the ledge to barely be able to wall jump off the floating platform. Requires: "Gravity" "canInsaneWallJump" |
|
Perform a running stationary spinjump from a precise spot, with 3 frames of dash speed (the maximum possible); then do a CWJ off the wall above, one tile further out. This makes it possible to just barely walljump off the grapple block. Requires: {
"notable": "Insane Walljump"
}
"HiJump"
"canInsaneJump"
"canStationarySpinJump"
"canInsaneWallJump"
"canCWJ"Clears obstacles: B |
From: 7
Lower Hills Junction
To: 10
Upper Right Ledge Junction
There is a ridiculously precise, but possible, walljump to get up there. With and without HiJump is equally difficult. Requires: "Gravity" "canInsaneWallJump" Clears obstacles: A, B Dev note: It is possible to bring 2 crabs with gravity and a wall jump, but is relatively pointless. |
|
Walljump up and instant morph with exact timing and positioning so as to enter the Power Bomb location through the maze's exit. Requires: {
"notable": "Insane Walljump Morph"
}
"canSuitlessMaridia"
"canConsecutiveWallJump"
"canPlayInSand"
"HiJump"
"canInsaneWallJump"
"can3HighWallMidAirMorph" |
|
Either kill the wall Pirate or lead it to jump across the room; dodge the standing Pirate. This is the same size of ledge as Worst Room in the Game. Requires: "canInsaneWallJump" "canConsecutiveWallJump" |
From: 2
Bottom Door
To: 4
Water Level Junction
Do a low spin jump and press against the right side of the door frame. Wall jump as low as possible, jumping as soon as possible after moving away from the wall. Immediately turn back to the right and try to press against the door frame again before the transition, while maintaining spin. After the transition, typically a momentum-conserving turnaround is needed to avoid bonking. Entrance condition: {
"comeInWithWallJumpBelow": {
"minHeight": 2
},
"comesThroughToilet": "no"
}Requires: "canCrossRoomJumpIntoWater"
{
"or": [
"canInsaneWallJump",
{
"and": [
"canPreciseWallJump",
"canMomentumConservingTurnaround"
]
}
]
}Dev note: This strat is for cases where the door frame below has only a two-tile-high surface available for wall-jumping. If a third tile is available, the jump can be done more easily. |
|
Align with the wall below the door while facing left. Hold dash, turn around, start running and arm pump once. Jump from the rightmost 'X' in the background. Release forward at some point while airborne, but repress it again before the CWJ. Immediately after the CWJ, shoot the Metroid to avoid getting grabbed. Requires: {
"notable": "Acid Skip CWJ"
}
"canCWJ"
"canInsaneWallJump"
{
"or": [
{
"obstaclesCleared": [
"A",
"B"
]
},
"canDodgeWhileShooting"
]
} |
|
Walljump into a midair Horizontal Bomb Jump from just above the acid to reach the first platform. HBJ from the ground to reach the second platform. Then simply jump to reach the far runway. Requires: "canInsaneWallJump"
"canWallJumpBombBoost"
"canHBJ"
{
"or": [
{
"obstaclesCleared": [
"B"
]
},
{
"and": [
"canBeLucky",
"canCameraManip",
"canMetroidAvoid"
]
}
]
} |
|
Jump to the first platform. Walljump low off the platform into a midair horizontal bomb jump. Finally, either jump into a horizontal bomb boost, or use another horizontal bomb jump to reach the far runway. Unmorph to clear the rinka while falling. Requires: "canInsaneWallJump"
"canWallJumpBombBoost"
"canHBJ"
{
"or": [
{
"obstaclesCleared": [
"A",
"B"
]
},
{
"and": [
"canTrickyDodgeEnemies",
"canCameraManip",
"canMetroidAvoid"
]
}
]
} |
