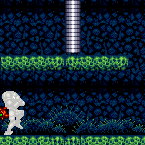
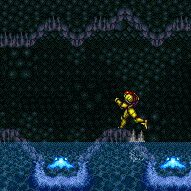
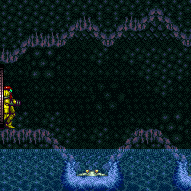
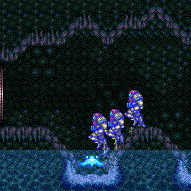
canTrickyEnemyExtendRunway (Extreme+)
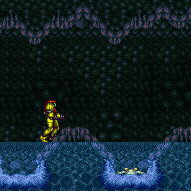
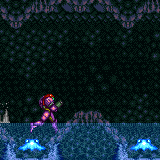
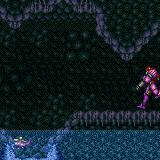
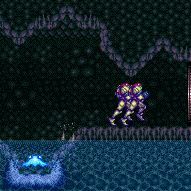
The ability to use tricky enemy setups to extend the length of a runway. This includes the use of unintuitive or particularly precise setups or the use of multiple enemies with non-trivial setups.
Dependencies: canEnemyExtendRunway, canUseEnemies
Strats ()
From: 9
Junction Below Items
To: 2
Middle Right Door
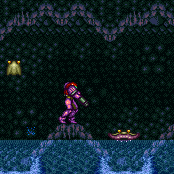
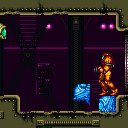
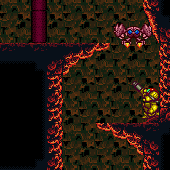
Bring a Beetom down from above and freeze it in position to extend the runway. Shoot it again then quickly go back up and grab the second Beetom. Keep a half-tile gap between the Beetoms and the runway in order to extend it as much as possible. This is possible without breaking the Power Bomb blocks, by having both Beetoms attach to Samus, roll through the crumble blocks, then shake off the Beetoms to separate them. Requires: {
"noBlueSuit": {}
}
"h_trickyFrozenEnemyRunway"
{
"enemyDamage": {
"enemy": "Beetom",
"type": "contact",
"hits": 9
}
}
{
"or": [
{
"obstaclesCleared": [
"A"
]
},
{
"and": [
"Morph",
"canEscapeEnemyGrab",
{
"enemyDamage": {
"enemy": "Beetom",
"type": "contact",
"hits": 3
}
}
]
}
]
}Exit condition: {
"leaveWithRunway": {
"length": 12,
"openEnd": 1
}
}Unlocks doors: {"types":["ammo"],"requires":[]} |
From: 1
Left Door
To: 1
Left Door
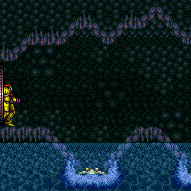
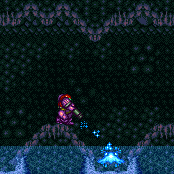
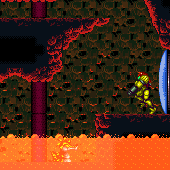
Freeze two Choots to significantly increase the length of the runway. Freeze each near the end of its descent or immediately after it jumps in order to be able to run onto and off of it without a problem. Standing between two Choots then precisely timing a crouched angle shot can help with the timing. A buffered X-Ray shot may also help. Requires: {
"notable": "Double Frozen Choot Runway"
}
"h_trickyFrozenEnemyRunway"
"Gravity"Exit condition: {
"leaveWithRunway": {
"length": 19,
"openEnd": 1,
"steepUpTiles": 6,
"steepDownTiles": 4
}
} |
From: 1
Left Door
To: 1
Left Door
Freeze two Choots to significantly increase the length of the runway. Freeze each near the end of its descent or immediately after it jumps in order to be able to run onto and off of it without a problem. Standing between two Choots then precisely timing a crouched angle shot can help with the timing. A buffered X-Ray shot may also help. Requires: {
"notable": "Double Frozen Choot Runway"
}
"h_trickyFrozenEnemyRunway"Exit condition: {
"leaveWithRunway": {
"length": 9,
"openEnd": 1,
"steepUpTiles": 3,
"steepDownTiles": 2
}
}Dev note: The submerged tiles don't contribute to the runway length. |
From: 1
Left Door
To: 1
Left Door
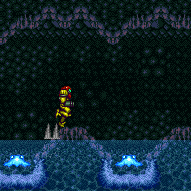
Freeze all three Choots to significantly increase the length of the runway and run across the entire room. Freeze each immediately after it jumps in order to be able to run onto and off of it without a problem. Jump between two of them and wait for them to fall and start to rise again, taking one Choot hit in the process. This will give Samus just enough time to shoot them both and jump and freeze the third and barely be able to use the runway before they thaw. With this runway, Samus can then get a suitless, in-room shinecharge, with just a 1-tap. Requires: {
"notable": "Triple Frozen Choot Runway"
}
"h_trickyFrozenEnemyRunway"
"Gravity"
"canInsaneJump"
{
"enemyDamage": {
"enemy": "Choot",
"type": "contact",
"hits": 1
}
}Exit condition: {
"leaveWithRunway": {
"length": 28,
"openEnd": 0,
"steepUpTiles": 6,
"steepDownTiles": 6
}
} |
From: 1
Left Door
To: 1
Left Door
Freeze all three Choots to significantly increase the length of the runway and run across the entire room. Freeze each immediately after it jumps in order to be able to run onto and off of it without a problem. Jump between two of them and wait for them to fall and start to rise again, taking one Choot hit in the process. This will give Samus just enough time to shoot them both and jump and freeze the third and barely be able to use the runway before they thaw. With this runway, Samus can then get a suitless, in-room shinecharge, with just a 1-tap. Requires: {
"notable": "Triple Frozen Choot Runway"
}
"h_trickyFrozenEnemyRunway"
"canInsaneJump"
{
"enemyDamage": {
"enemy": "Choot",
"type": "contact",
"hits": 1
}
}Exit condition: {
"leaveWithRunway": {
"length": 15,
"openEnd": 1
}
}Dev note: The submerged tiles don't contribute to the runway length. Although there is a longer runway available for shinecharging, this is an equivalent for how fast Samus can leave the room. It shouldn't be a problem, as this length should be enough for shinecharging at this difficulty. |
From: 1
Left Door
To: 2
Right Door
Freeze each of the three Choot enemies at the correct pixel height to walk across the room. Be careful about taking damage or falling on slopes. Entrance condition: {
"comeInWithStoredFallSpeed": {
"fallSpeedInTiles": 1
}
}Requires: "h_trickyFrozenEnemyRunway" Exit condition: {
"leaveWithStoredFallSpeed": {
"fallSpeedInTiles": 1
}
}Unlocks doors: {"types":["missiles","super"],"requires":[]}
{"types":["powerbomb"],"requires":["never"]} |
From: 1
Left Door
To: 2
Right Door
Freeze each of the three Choot enemies at the correct pixel height to walk across the room. Be careful about taking damage or falling on slopes. Entrance condition: {
"comeInWithStoredFallSpeed": {
"fallSpeedInTiles": 2
}
}Requires: "h_trickyFrozenEnemyRunway" Exit condition: {
"leaveWithStoredFallSpeed": {
"fallSpeedInTiles": 2
}
}Unlocks doors: {"types":["missiles","super"],"requires":[]}
{"types":["powerbomb"],"requires":["never"]} |
From: 2
Right Door
To: 1
Left Door
Freeze each of the three Choot enemies at the correct pixel height to walk across the room. Be careful about taking damage or falling on slopes. Entrance condition: {
"comeInWithStoredFallSpeed": {
"fallSpeedInTiles": 1
}
}Requires: "h_trickyFrozenEnemyRunway" Exit condition: {
"leaveWithStoredFallSpeed": {
"fallSpeedInTiles": 1
}
}Unlocks doors: {"types":["missiles","super"],"requires":[]}
{"types":["powerbomb"],"requires":["never"]} |
From: 2
Right Door
To: 1
Left Door
Freeze each of the three Choot enemies at the correct pixel height to walk across the room. Be careful about taking damage or falling on slopes. Entrance condition: {
"comeInWithStoredFallSpeed": {
"fallSpeedInTiles": 2
}
}Requires: "h_trickyFrozenEnemyRunway" Exit condition: {
"leaveWithStoredFallSpeed": {
"fallSpeedInTiles": 2
}
}Unlocks doors: {"types":["missiles","super"],"requires":[]}
{"types":["powerbomb"],"requires":["never"]} |
From: 2
Right Door
To: 2
Right Door
Freeze two Choots to significantly increase the length of the runway. Freeze each near the end of its descent or immediately after it jumps in order to be able to run onto and off of it without a problem. Standing between two Choots then precisely timing a crouched angle shot can help with the timing. A buffered X-Ray shot may also help. Requires: {
"notable": "Double Frozen Choot Runway"
}
"h_trickyFrozenEnemyRunway"
"Gravity"Exit condition: {
"leaveWithRunway": {
"length": 23,
"openEnd": 1,
"steepUpTiles": 6,
"steepDownTiles": 4
}
} |
From: 2
Right Door
To: 2
Right Door
Freeze two Choots to significantly increase the length of the runway. Freeze each near the end of its descent or immediately after it jumps in order to be able to run onto and off of it without a problem. Standing between two Choots then precisely timing a crouched angle shot can help with the timing. A buffered X-Ray shot may also help. Requires: {
"notable": "Double Frozen Choot Runway"
}
"h_trickyFrozenEnemyRunway"Exit condition: {
"leaveWithRunway": {
"length": 16,
"openEnd": 1,
"steepUpTiles": 3,
"steepDownTiles": 2
}
}Dev note: The submerged tiles don't contribute to the runway length. |
From: 2
Right Door
To: 2
Right Door
Freeze all three Choots to significantly increase the length of the runway and run across the entire room. Freeze each immediately after it jumps in order to be able to run onto and off of it without a problem. Jump between two of them and wait for them to fall and start to rise again, taking one Choot hit in the process. This will give Samus just enough time to shoot them both and jump and freeze the third and barely be able to use the runway before they thaw. With this runway, Samus can then get a suitless, in-room shinecharge, with just a 1-tap. Requires: {
"notable": "Triple Frozen Choot Runway"
}
"h_trickyFrozenEnemyRunway"
"Gravity"
"canInsaneJump"
{
"enemyDamage": {
"enemy": "Choot",
"type": "contact",
"hits": 1
}
}Exit condition: {
"leaveWithRunway": {
"length": 28,
"openEnd": 0,
"steepUpTiles": 6,
"steepDownTiles": 6
}
} |
From: 2
Right Door
To: 2
Right Door
Freeze all three Choots to significantly increase the length of the runway and run across the entire room. Freeze each immediately after it jumps in order to be able to run onto and off of it without a problem. Jump between two of them and wait for them to fall and start to rise again, taking one Choot hit in the process. This will give Samus just enough time to shoot them both and jump and freeze the third and barely be able to use the runway before they thaw. With this runway, Samus can then get a suitless, in-room shinecharge, with just a 1-tap. Requires: {
"notable": "Triple Frozen Choot Runway"
}
"h_trickyFrozenEnemyRunway"
"canInsaneJump"
{
"enemyDamage": {
"enemy": "Choot",
"type": "contact",
"hits": 1
}
}Exit condition: {
"leaveWithRunway": {
"length": 15,
"openEnd": 1
}
}Dev note: The submerged tiles don't contribute to the runway length. Although there is a longer runway available for shinecharging, this is an equivalent for how fast Samus can leave the room. It shouldn't be a problem, as this length should be enough for shinecharging at this difficulty. |
|
Stand to the right of the Zeb farm and freeze the Zeb as it starts moving horizontally. get onto the platform above the Zeb and wait for the Zeb to thaw and make it close to the right edge of the screen. Use a mockball to get to the right side of the room, ending it as quickly as possible at the end to prevent the Zeb going off screen. Freeze the Zeb adjacent to the right runway in order to extend it by a short distance. Requires: {
"obstaclesNotCleared": [
"A"
]
}
"h_trickyFrozenEnemyRunway"
"canMockball"
"canTrickyJump"Exit condition: {
"leaveWithRunway": {
"length": 3,
"openEnd": 0
}
}Unlocks doors: {"types":["missiles","super"],"requires":[]}
{
"types": [
"powerbomb"
],
"requires": [
{
"or": [
"canWallJump",
"HiJump",
"SpaceJump",
"canIBJ",
"canSpringBallJumpMidAir",
"h_crouchJumpDownGrab"
]
},
{
"resetRoom": {
"nodes": [
1
]
}
}
]
} |
From: 3
Bottom Left Door
To: 3
Bottom Left Door
An easy setup for this runway is to freeze one Beetom on the ground and then stand on it to freeze two other Beetoms at chest height. It is possible to leave the Beetoms and refill using the Zebbos. Requires: {
"noBlueSuit": {}
}
"Morph"
"h_trickyFrozenEnemyRunway"
{
"enemyDamage": {
"enemy": "Beetom",
"type": "contact",
"hits": 3
}
}Exit condition: {
"leaveWithRunway": {
"length": 9,
"openEnd": 0
}
} |
From: 6
Right Side - Top Middle Door
To: 6
Right Side - Top Middle Door
Kill the Reos in the hallway in front of the door, then go down and stand to the right of the Zeb spawner. Freeze the Zeb before it starts going horizontally then go up and wait for it. As the Zeb gets high enough, walk out of the doorway at the right time to get it to move horizontally at the optimal height. This is much easier with Morph - instead be morphed in the hallway and once the Zeb starts moving towards Samus, freeze it. Requires: "h_frozenEnemyRunway"
{
"or": [
"Morph",
"canTrickyEnemyExtendRunway"
]
}Exit condition: {
"leaveWithRunway": {
"length": 3,
"openEnd": 0
}
}Dev note: FIXME: This could be used at 4, or a Reo could be used at 5, but that would be pretty terrible. |
|
Freeze the left-most Zeb while it is rising and is 1 pixel too low from making a flat runway. When it is close to thawing, run into the thorns to the left and hold left to avoid a vertical damage boost, then refreeze the Zeb as it crosses. It will now be 1 pixel higher. Freeze the Zeb again once it is in the perfect position to bridge the gap, which has a 2-3 pixel range. Requires: {
"notable": "Frozen Zeb Runway"
}
"canTrickyJump"
"h_trickyFrozenEnemyRunway"
{
"thornHits": 2
}Exit condition: {
"leaveWithRunway": {
"length": 6,
"openEnd": 1
}
}Dev note: It is possible to farm another zeb and return and refreeze this Zeb to leave with full Energy, but that is not assumed here. FIXME: This could be done to extend the runway out of the right door as well, but it would only add 1 tile and is a pain. |
|
With Morph: Morph on the small ledge left of the Zeb spawner. After a Zeb starts moving horizontally, quickly unmorph and freeze it. After it thaws, refreeze it once it is in the correct position. Without Morph: Freeze the Zeb as it is rising. When it is close to thawing, walk into the spikes and continue to walk into the wall to prevent a vertical damage boost. Freeze the Zeb after it thaws, noting that it will rise one pixel relative to its first frozen location. Requires: {
"or": [
"Morph",
{
"and": [
"canTrickyEnemyExtendRunway",
"canTrickyJump",
{
"thornHits": 2
}
]
}
]
}
"h_frozenEnemyRunway"Exit condition: {
"leaveWithRunway": {
"length": 7,
"openEnd": 0
}
} |
From: 3
Bottom Right Door
To: 3
Bottom Right Door
With Morph: Morph on the small ledge right of the Zeb spawner. After a Zeb starts moving horizontally, quickly unmorph and freeze it. After it thaws, refreeze it once it is in the correct position. Without Morph: Freeze the Zeb as it is rising. When it is close to thawing, walk into the spikes and continue to walk into the wall to prevent a vertical damage boost. Freeze the Zeb after it thaws, noting that it will rise one pixel relative to its first frozen location. Requires: {
"or": [
"Morph",
{
"and": [
"canTrickyEnemyExtendRunway",
"canTrickyJump",
{
"thornHits": 2
}
]
}
]
}
"h_frozenEnemyRunway"Exit condition: {
"leaveWithRunway": {
"length": 5,
"openEnd": 0
}
} |
|
Freeze multiple Beetoms to extend the runway. Continually refreeze the ones that are in a good position while manipulating the rest. This assumes three extra tiles of runway, which can be accomplished with two perfectly placed Beetoms, three adjacent ones, or four which are partially overlapping. Requires: {
"notable": "Frozen Beetom Runway"
}
{
"obstaclesNotCleared": [
"A"
]
}
"canTrickyJump"
"h_trickyFrozenEnemyRunway"
{
"enemyDamage": {
"enemy": "Beetom",
"type": "contact",
"hits": 6
}
}Exit condition: {
"leaveWithRunway": {
"length": 4,
"openEnd": 1
}
} |
From: 5
Bottom Floating Platform Junction
To: 5
Bottom Floating Platform Junction
Fill up on the Gamets and kill the Fune to the right. Freeze a Gamet in perfect pixel position to bridge the runway between the center platform and right ledge. Run across and shinecharge, then use a Gamet to interrupt. Requires: {
"obstaclesCleared": [
"R-Mode"
]
}
{
"heatFrames": 60
}
{
"refill": [
"Energy"
]
}
{
"enemyKill": {
"enemies": [
[
"Fune"
]
]
}
}
"h_trickyFrozenEnemyRunway"
{
"canShineCharge": {
"usedTiles": 17,
"openEnd": 1
}
}
{
"autoReserveTrigger": {}
}
"canRModeSparkInterrupt"Resets obstacles: R-Mode |
From: 2
Right Door
To: 2
Right Door
Enter from the right door and spin jump onto the first ledge while barely landing on the ledge in order to prevent getting the Geruta on camera. Walk against the left wall and jump to trigger the Geruta. It should now be moving leftwards. Stand on the next platform against the right wall and shoot the Geruta to get it one shot away from being frozen. After a few swoops, it will come down; either freeze it or tank a hit. Then go up and stand on the corner and freeze it when it is in position. The Geruta will be stuck below and keep swooping, so if Energy permits, Samus will have several attempts. Quickly shinecharge left to right, kill the Geruta and spark out the bottom right door. Entrance condition: {
"comeInNormally": {}
}Requires: {
"notable": "Frozen Geruta Shinecharge"
}
"h_trickyFrozenEnemyRunway"
"canCarefulJump"
{
"canShineCharge": {
"usedTiles": 17,
"openEnd": 1
}
}
"canShinechargeMovementTricky"
{
"heatFrames": 1260
}
{
"shinespark": {
"frames": 2,
"excessFrames": 0
}
}Exit condition: {
"leaveWithSpark": {}
}Unlocks doors: {"types":["ammo"],"requires":[]} |
|
Farm the Dragons and Geruta. Shinecharge on the upper platform with the Geruta, then weave back down to the Dragon by the door to interrupt. Entrance condition: {
"comeInWithRMode": {}
}Requires: "h_heatProof"
{
"or": [
"h_heatedCrystalFlashForReserveEnergy",
{
"and": [
"h_RModeCanRefillReserves",
{
"or": [
{
"and": [
{
"enemyKill": {
"enemies": [
[
"Dragon"
],
[
"Dragon"
],
[
"Dragon"
],
[
"Dragon"
],
[
"Dragon"
]
],
"explicitWeapons": [
"Missile",
"Super",
"Charge",
"Plasma"
]
}
},
"Grapple"
]
},
{
"and": [
{
"enemyKill": {
"enemies": [
[
"Dragon"
],
[
"Dragon"
],
[
"Dragon"
],
[
"Dragon"
],
[
"Dragon"
]
]
}
},
"h_lavaProof"
]
}
]
},
{
"partialRefill": {
"type": "ReserveEnergy",
"limit": 20
}
}
]
}
]
}
"canTrickyJump"
{
"or": [
{
"canShineCharge": {
"usedTiles": 15,
"openEnd": 2
}
},
{
"and": [
{
"notable": "Frozen Geruta Shinecharge"
},
"h_trickyFrozenEnemyRunway",
{
"canShineCharge": {
"usedTiles": 17,
"openEnd": 1
}
},
"canShinechargeMovementTricky"
]
}
]
}
{
"autoReserveTrigger": {
"maxReserveEnergy": 95
}
}
"canRModeSparkInterrupt" |
From: 2
Right Door
To: 3
Item
Enter from the right door and spin jump onto the first ledge while barely landing on the ledge in order to prevent getting the Geruta on camera. Walk against the left wall and jump to trigger the Geruta. It should now be moving leftwards. Stand on the next platform against the right wall and shoot the Geruta to get it one shot away from being frozen. After a few swoops, it will come down; either freeze it or tank a hit. Then go up and stand on the corner and freeze it when it is in position. The Geruta will be stuck below and keep swooping, so if Energy permits, Samus will have several attempts. With full heat protection, Samus can quickly shinecharge left to right then run and spark midair to the left to save Energy. Entrance condition: {
"comeInNormally": {}
}Requires: {
"notable": "Frozen Geruta Shinecharge"
}
"h_trickyFrozenEnemyRunway"
"canCarefulJump"
"canHorizontalShinespark"
{
"canShineCharge": {
"usedTiles": 17,
"openEnd": 1
}
}
{
"heatFrames": 1050
}
{
"or": [
{
"and": [
"canHorizontalShinespark",
{
"shinespark": {
"frames": 54,
"excessFrames": 15
}
}
]
},
{
"and": [
"h_heatProof",
"canShinechargeMovementComplex",
{
"shinespark": {
"frames": 12,
"excessFrames": 2
}
}
]
},
{
"and": [
"h_heatProof",
"canShinechargeMovementComplex",
"h_speedJump",
{
"shinespark": {
"frames": 9,
"excessFrames": 3
}
}
]
}
]
} |
From: 1
Left Door
To: 1
Left Door
Lure the Gamets up out of the water. It may be helpful to freeze them on the ascent to prevent them from separating and moving horizontally. Positioning is much easier with Morph; simply morph on the runway before they start separating. Freeze a Gamet while there is a half-tile gap between it and the runway in order to extend it as much as possible. Requires: "h_navigateUnderwater"
{
  "or": [
    "h_trickyFrozenEnemyRunway",
    {
      "and": [
        "h_frozenEnemyRunway",
        "Morph"
      ]
    }
  ]
}
Exit condition: {
"leaveWithRunway": {
"length": 6,
"openEnd": 0
}
} |
From: 1
Left Door
To: 2
Right Door
Lure the Geemers up out of the water. It may be helpful to freeze them on the ascent to prevent them from separating and moving horizontally. At the top, position a Gamet flush with the central runway. Positioning is much easier with Morph; simply morph on the runway before they start separating. Freeze the Gamet before it begins moving horizontally, and it will be able to turn to the right. Use it as a frozen platform to cross both bodies of water. Lure the Gamet to the right and freeze it while there is a half-tile gap between it and the runway in order to extend it as much as possible. Requires: "h_navigateUnderwater"
"canTrickyJump"
{
"or": [
"h_trickyFrozenEnemyRunway",
{
"and": [
"h_frozenEnemyRunway",
"Morph"
]
}
]
}
{
"or": [
"canDash",
"canTrickyDodgeEnemies"
]
}
{
"or": [
{
"ammo": {
"type": "Super",
"count": 1
}
},
{
"obstaclesCleared": [
"A"
]
}
]
}Exit condition: {
"leaveWithRunway": {
"length": 9,
"openEnd": 0
}
}Unlocks doors: {"types":["ammo"],"requires":[]} |
From: 1
Top Left Door
To: 1
Top Left Door
Lure the Gamets up; it may be helpful to freeze them on the ascent to prevent them from separating and moving horizontally. Freeze a Gamet at the correct height, and then use it as a platform to reach the door. Positioning is much easier with Morph; simply morph on any of the stairs before they start separating. Finally, freeze a Gamet while there is a half-tile gap between it and the runway in order to extend it as much as possible. Requires: "SpaceJump"
{
"or": [
"h_trickyFrozenEnemyRunway",
{
"and": [
"h_frozenEnemyRunway",
"Morph"
]
}
]
}Exit condition: {
"leaveWithRunway": {
"length": 5,
"openEnd": 0
}
} |
From: 4
Top Right Door
To: 4
Top Right Door
Lure the Gamets up; it may be helpful to freeze them on the ascent to prevent them from separating and moving horizontally. At the top, freeze a Gamet while there is a half-tile gap between it and the runway in order to extend it as much as possible. Positioning is much easier with Morph; simply morph on any of the stairs before they start separating. Freezing one or two Gamets after they separate but before they start moving can help with dodging and avoiding damage. Requires: {
"or": [
"h_trickyFrozenEnemyRunway",
{
"and": [
"h_frozenEnemyRunway",
"Morph"
]
}
]
}Exit condition: {
"leaveWithRunway": {
"length": 5,
"openEnd": 0
}
} |
|
Requires: "h_trickyFrozenEnemyRunway"
{
"heatFrames": 800
}
{
"or": [
{
"and": [
"Wave",
{
"heatFrames": 500
}
]
},
{
"and": [
"Spazer",
{
"heatFrames": 500
}
]
},
{
"and": [
"Plasma",
{
"heatFrames": 200
}
]
}
]
}Exit condition: {
"leaveWithRunway": {
"length": 7,
"openEnd": 0
}
}Dev note: FIXME: These heatFrames can likely be tightened. |
From: 3
Farm Junction Free of Holtzes
To: 1
Left Door
Assumes killing all the Holtzes except for one that can be frozen to extend the runway. Get the Holtz stuck under the platform then farming to full before freezing it to extend the runway. Gaining Energy from the farm requires some sort of heat reduction. Requires: "canDash"
"h_heatResistant"
"h_trickyFrozenEnemyRunway"
{
"heatFrames": 300
}Exit condition: {
"leaveWithRunway": {
"length": 7,
"openEnd": 0
}
}Unlocks doors: {"types":["ammo"],"requires":[]}Dev note: FIXME: Another strat could be added without the farm or heat resistance. |
From: 3
Farm Junction Free of Holtzes
To: 2
Right Door
Assumes killing all the Holtzes except for one that can be frozen to extend the runway. Get the Holtz stuck under the platform then farming to full before freezing it to extend the runway. Gaining Energy from the farm requires some sort of heat reduction. Requires: "canDash"
"h_heatResistant"
"h_trickyFrozenEnemyRunway"
{
"heatFrames": 300
}Exit condition: {
"leaveWithRunway": {
"length": 7,
"openEnd": 0
}
}Unlocks doors: {"types":["ammo"],"requires":[]}Dev note: FIXME: Another strat could be added without the farm or heat resistance. |
|
Shinecharging up the stairs gives a longer effective runway than shinecharging down them. A frozen Atomic (or Covern) can be used for more runway. Requires: {
"or": [
{
"canShineCharge": {
"usedTiles": 11,
"steepUpTiles": 3,
"openEnd": 2
}
},
{
"and": [
"h_frozenEnemyRunway",
{
"or": [
"f_DefeatedPhantoon",
{
"and": [
"SpaceJump",
"h_trickyFrozenEnemyRunway"
]
}
]
},
{
"canShineCharge": {
"usedTiles": 13,
"steepUpTiles": 3,
"openEnd": 1
}
}
]
}
]
}
"canTemporaryBlue"
"canLateralMidAirMorph"Clears obstacles: C Dev note: There is 1/2 a unusable tile in this runway. |
From: 4
Top Right Door
To: 4
Top Right Door
Lure an Atomic or get a Covern to spawn to slightly extend the runway. Positioning a Covern is a bit tricky. Consecutive wall jump or Space Jump in place above the gap but not quite at the ceiling, or perform full height jumps to sometimes get the Covern to spawn in position. A crouch shot may help freeze the Coven when it is in position. Requires: "h_frozenEnemyRunway"
{
"or": [
"f_DefeatedPhantoon",
"h_trickyFrozenEnemyRunway"
]
}Exit condition: {
"leaveWithRunway": {
"length": 14,
"openEnd": 0,
"steepUpTiles": 7
}
} |
From: 5
Middle Right Door
To: 5
Middle Right Door
Lure an Atomic or get a Covern to spawn to extend the runway. Position the enemy horizontally centered in the hole to extend the runway all the way to the wall. Positioning a Covern is tricky. One way to set this up is with Space Jump. Align Samus left against the tile in the ceiling to align the Covern horizontally, then perform short Space Jumps half way between the desired Covern position and the ceiling until the Covern spawns in the correct position. Requires: "h_frozenEnemyRunway"
{
"or": [
"f_DefeatedPhantoon",
{
"and": [
"SpaceJump",
"h_trickyFrozenEnemyRunway"
]
}
]
}Exit condition: {
"leaveWithRunway": {
"length": 14,
"openEnd": 0,
"steepUpTiles": 6
}
}Dev note: FIXME: There may be other ways to set up the Covern positioning without Space Jump. |
From: 5
Middle Right Door
To: 8
Item
Shinecharging up the stairs gives a longer effective runway than shinecharging down them. Bounce down the stairs to make movement simpler. A frozen Atomic (or Covern) can be used for more runway. Requires: {
"or": [
{
"and": [
"can4HighMidAirMorph",
{
"doorUnlockedAtNode": 5
},
{
"canShineCharge": {
"usedTiles": 11,
"steepUpTiles": 7,
"openEnd": 2
}
}
]
},
{
"and": [
"h_frozenEnemyRunway",
{
"or": [
"f_DefeatedPhantoon",
{
"and": [
"SpaceJump",
"h_trickyFrozenEnemyRunway"
]
}
]
},
"can4HighMidAirMorph",
{
"doorUnlockedAtNode": 5
},
{
"canShineCharge": {
"usedTiles": 13,
"steepUpTiles": 7,
"openEnd": 1
}
}
]
},
{
"canShineCharge": {
"usedTiles": 10,
"steepUpTiles": 7,
"openEnd": 2
}
},
{
"and": [
"h_frozenEnemyRunway",
{
"or": [
"f_DefeatedPhantoon",
{
"and": [
"SpaceJump",
"h_trickyFrozenEnemyRunway"
]
}
]
},
{
"canShineCharge": {
"usedTiles": 12,
"steepUpTiles": 7,
"openEnd": 1
}
}
]
}
]
}
"canChainTemporaryBlue"
"canXRayTurnaround"Clears obstacles: C Dev note: There is 1/2 a unusable tile in this runway. |
From: 4
Farm Junction Left of Gate
To: 4
Farm Junction Left of Gate
Fill up on the respawning Zebbos. Shinecharge under the open gate, then jump into the left Boyon to interrupt. A frozen Zebbo can add to the runway if needed. Requires: {
"obstaclesCleared": [
"R-Mode"
]
}
{
"obstaclesCleared": [
"A"
]
}
{
"refill": [
"Energy"
]
}
{
"or": [
{
"canShineCharge": {
"usedTiles": 15,
"openEnd": 2
}
},
{
"and": [
{
"or": [
{
"and": [
"h_trickyFrozenEnemyRunway",
{
"enemyKill": {
"enemies": [
[
"Boyon"
]
]
}
}
]
},
{
"and": [
"h_frozenEnemyRunway",
"Morph"
]
}
]
},
{
"canShineCharge": {
"usedTiles": 18,
"openEnd": 1
}
}
]
}
]
}
{
"autoReserveTrigger": {
"maxReserveEnergy": 95
}
}
"canRModeSparkInterrupt"Resets obstacles: R-Mode |
|
Freeze the Zoa just a few pixels higher than it would be if Samus was standing next to the farm. Dodge and freeze the other Zoas, or tank a hit then kill them and don't collect their drops. Maintain a half-tile runway between the frozen Zoa and the runway in order to extend it as much as possible. Requires: "h_frozenEnemyRunway"
{
"or": [
"h_trickyFrozenEnemyRunway",
{
"enemyDamage": {
"enemy": "Zoa",
"type": "contact",
"hits": 1
}
}
]
}Exit condition: {
"leaveWithRunway": {
"length": 3,
"openEnd": 0
}
} |
From: 1
Bottom Left Door
To: 1
Bottom Left Door
Requires: "h_trickyFrozenEnemyRunway" Exit condition: {
"leaveWithRunway": {
"length": 4,
"openEnd": 1
}
} |
|
Freeze both Zebs in order to significantly extend the length of the runway. Requires a pixel-perfect freeze in order to run onto and off of the frozen Zebs. Requires: {
"notable": "Double Frozen Zeb Runway"
}
"h_trickyFrozenEnemyRunway"Exit condition: {
"leaveWithRunway": {
"length": 20,
"openEnd": 1
}
} |
|
Freeze the two Zebs to create a runway to shinecharge with. Pixel perfect freezing of both Zebs provides the longest runway, but a slightly higher position of the second Zeb is still usable. Requires: "canBeVeryPatient"
"h_trickyFrozenEnemyRunway"
{
"or": [
{
"canShineCharge": {
"usedTiles": 15,
"openEnd": 1
}
},
{
"and": [
{
"canShineCharge": {
"usedTiles": 19,
"openEnd": 1
}
},
{
"notable": "Double Frozen Zeb Runway"
}
]
}
]
}
"h_CrystalSpark" |
From: 1
Right Door
To: 1
Right Door
Kill the Choot at the bottom of the room. Freeze the two Zebs to create a runway to shinecharge with. Pixel perfect freezing of both Zebs provides the longest runway, but a slightly higher position of the second Zeb is still usable. Slide off the end of the runway while gaining a shinecharge. After landing on the center pedestal, do a short spin jump to the left, turn right, fire shot to break spin and collect the item. After the message box closes, depending on Samus' position, wait a moment to let Samus sink straight down a few pixels before activating a diagonal spark. Freezing just a single Zeb is also possible but requires a 13-tile shortcharge. Requires: "h_trickyFrozenEnemyRunway"
{
"notable": "Double Frozen Zeb Runway"
}
{
"notable": "Double Frozen Zeb Item Collect Shinespark Escape"
}
"canShinechargeMovementTricky"
{
"canShineCharge": {
"usedTiles": 19,
"openEnd": 1
}
}
{
"shinespark": {
"frames": 36,
"excessFrames": 28
}
}Collects items: 2 |
From: 1
Right Door
To: 1
Right Door
Kill the Choot at the bottom of the room. Freeze the two Zebs to create a runway to shinecharge with. Pixel perfect freezing of both Zebs provides the longest runway, but a slightly higher position of the second Zeb is still usable. Slide off the end of the runway while gaining a shinecharge. After landing on the center pedestal, do a short spin jump to the right, turn left, fire shot to break spin and collect the item. After the message box closes, depending on Samus' position, hold left and wait a moment to let Samus move down-left a few pixels before activating a diagonal spark. Freezing just a single Zeb is also possible but requires a 13-tile shortcharge. Requires: "h_trickyFrozenEnemyRunway"
{
"notable": "Double Frozen Zeb Runway"
}
{
"notable": "Double Frozen Zeb Item Collect Shinespark Escape"
}
"canShinechargeMovementTricky"
{
"canShineCharge": {
"usedTiles": 19,
"openEnd": 1
}
}
{
"shinespark": {
"frames": 20,
"excessFrames": 11
}
}
{
"or": [
"canWallJump",
"HiJump",
"SpaceJump",
"canIBJ",
"canSpringBallJumpMidAir",
"canSpringBallBombJump",
{
"and": [
"canCrouchJump",
{
"notable": "Precise Crouch Jump Down Grab"
}
]
}
]
}Collects items: 3 |
From: 1
Right Door
To: 1
Right Door
Freeze the two Zebs to create a runway to shinecharge with. Pixel perfect freezing of both Zebs provides the longest runway, but a slightly higher position of the second Zeb is still usable. Freezing just a single Zeb is also possible but requires a 13-tile shortcharge. Entrance condition: {
"comeInWithRMode": {}
}Requires: "h_trickyFrozenEnemyRunway"
{
"or": [
{
"canShineCharge": {
"usedTiles": 15,
"openEnd": 1
}
},
{
"and": [
{
"canShineCharge": {
"usedTiles": 19,
"openEnd": 1
}
},
{
"notable": "Double Frozen Zeb Runway"
}
]
}
]
}
{
"refill": [
"Energy"
]
}
{
"autoReserveTrigger": {
"maxReserveEnergy": 95
}
}
"canRModeSparkInterrupt" |
From: 2
Right Door
To: 2
Right Door
Use a frozen Metroid or a Rinka from the left to extend the length of the runway. Luring a Rinka is easiest with Morph - While morphed, barely move the bottom Rinka spawner on camera in order to have it shoot at a usable angle. Without Morph, use the top Rinka spawner and jump just before the Rinka starts moving to get a usable angle. Requires: {
"or": [
"h_trickyFrozenEnemyRunway",
{
"and": [
"h_frozenEnemyRunway",
{
"not": "f_KilledMetroidRoom1"
},
"canRiskPermanentLossOfAccess"
]
}
]
}Exit condition: {
"leaveWithRunway": {
"length": 4,
"openEnd": 1
}
} |
From: 1
Top Right Door
To: 1
Top Right Door
Kill or lure and freeze the Metroids at the bottom of the room. It may be easiest to stand on a frozen Rinka from the top left spawner to position a freeze of the other Rinka. Maintain a half-tile gap between the Rinka and the runway in order to extend it as far as possible. Requires: "h_trickyFrozenEnemyRunway" Exit condition: {
"leaveWithRunway": {
"length": 5,
"openEnd": 0
}
} |
From: 2
Bottom Right Door
To: 2
Bottom Right Door
Kill or lure and freeze the Metroids at the top of the room. It may be easiest to stand on a frozen Rinka from the left spawner to position a freeze of the other Rinka. It is possible maintain a half-tile gap between the Rinka and the runway in order to extend it as far as possible. Requires: "h_trickyFrozenEnemyRunway" Exit condition: {
"leaveWithRunway": {
"length": 5,
"openEnd": 0
}
} |
|
One simple setup to position a Rinka is to crouch a couple tiles away from the bottom right spawner. This will also prevent the left two Rinka spawners to activate, as they will be off camera. It is possible maintain a half-tile gap between the Rinka and the runway in order to extend it as far as possible. Requires: "h_trickyFrozenEnemyRunway" Exit condition: {
"leaveWithRunway": {
"length": 5,
"openEnd": 0
}
}Dev note: FIXME: It is possible but challenging to set up a frozen Rinka on the right door. |
From: 1
Top Left Door
To: 1
Top Left Door
Kill or lure and freeze the Metroid down lower in the room off camera. One simple setup to position a Rinka is to stand or crouch a couple tiles away from the edge of the runway and freeze the Rinka from the right spawner. It is possible maintain a half-tile gap between the Rinka and the runway in order to extend it as far as possible. Requires: "h_trickyFrozenEnemyRunway" Exit condition: {
"leaveWithRunway": {
"length": 12,
"openEnd": 0
}
} |
From: 2
Middle Left Door
To: 2
Middle Left Door
One simple setup to position a Rinka is to stand a few pixels away from the right edge of the floating platform in front of the door. The lower right Rinka spawner will spawn a Rinka at a good angle. It is possible maintain a half-tile gap between the Rinka and the runway in order to extend it as far as possible. Requires: "h_trickyFrozenEnemyRunway" Exit condition: {
"leaveWithRunway": {
"length": 5,
"openEnd": 0
}
}Dev note: FIXME: It is possible but challenging to set up a frozen Rinka at the top door by walking off of the small platform on the right side of the room. |

