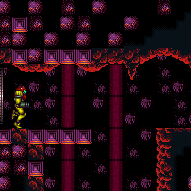
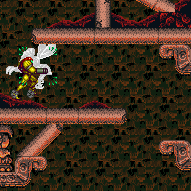
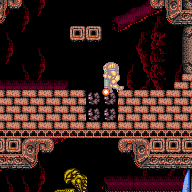
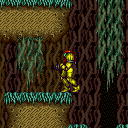
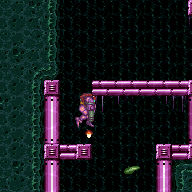
canDownBack (Very Hard)
Holding the direction buttons down and then also backwards in order to move forwards, while in the correct falling state.
Strats ()
From: 1
Top Left Door
To: 5
Junction The Left End of Morph Tube
Spark flush against the right wall (diagonal helps) then quickly down back to barely get into the pipe. Requires: "canDownBack"
"canShinechargeMovementComplex"
{
"canShineCharge": {
"usedTiles": 18,
"openEnd": 1
}
}
{
"shinespark": {
"frames": 5,
"excessFrames": 2
}
}Dev note: Assumes sparking from the ground, since there is an accessible farm before and after this strat. |
From: 1
Top Left Door
To: 5
Junction The Left End of Morph Tube
Requires: "h_storedSpark"
"canDownBack"
{
"shinespark": {
"frames": 5,
"excessFrames": 2
}
} |
|
Entrance condition: {
"comeInShinecharged": {}
}Requires: {
"shineChargeFrames": 115
}
"canDownBack"
"canShinechargeMovementTricky"Exit condition: {
"leaveShinecharged": {}
}Unlocks doors: {"types":["super"],"requires":[]}
{"types":["missiles","powerbomb"],"requires":["never"]} |
Come in Shinecharging, Gain Flash Suit (Spikesuit) - Leave with Shinespark
(Extreme+)
Kraid Eye Door Room
From: 2
Top Right Door
To: 1
Left Door
Requires precise movement. Down-back during the fall to clear the lower platform while shooting out the blocks. Unmorphing on the first possible frame leaves in top position; second frame leaves in middle position. Entrance condition: {
"comeInShinecharging": {
"length": 3,
"openEnd": 0
}
}Requires: "canUseFlashSuitInitialSpark"
{
"shineChargeFrames": 175
}
"canDownBack"
"canShinechargeMovementTricky"
{
"thornHits": 1
}
"canPatientSpikeSuit"
{
"shinespark": {
"frames": 19,
"excessFrames": 0
}
}Exit condition: {
"leaveWithSpark": {
"position": "top"
}
}Unlocks doors: {"types":["ammo"],"requires":["never"]}Dev note: It may be possible to open a green/red door with a super missile but it is on the edge of possibility. |
From: 2
Top Right Door
To: 2
Top Right Door
Requires precice movement. Down-back during the fall to clear the lower platform while shooting out the blocks. Entrance condition: {
"comeInShinecharging": {
"length": 3,
"openEnd": 0
}
}Requires: {
"shineChargeFrames": 175
}
"canDownBack"
"canShinechargeMovementTricky"
{
"thornHits": 1
}
"canPatientSpikeSuit"
{
"shinespark": {
"frames": 4,
"excessFrames": 4
}
}Dev note: Leniency is not included, because a farm is available. |
From: 1
Top Left Door
To: 2
Middle Left Door
Entrance condition: {
"comeInShinecharged": {}
}Requires: {
"shineChargeFrames": 125
}
{
"or": [
{
"enemyKill": {
"enemies": [
[
"Sova"
]
],
"explicitWeapons": [
"ScrewAttack",
"Wave",
"Spazer",
"Plasma",
"Missile",
"Super"
]
}
},
{
"and": [
{
"enemyKill": {
"enemies": [
[
"Sova"
]
],
"explicitWeapons": [
"PowerBeam"
]
}
},
"canDownBack"
]
}
]
}
"canShinechargeMovementComplex"Exit condition: {
"leaveShinecharged": {}
}Unlocks doors: {"types":["super"],"requires":[]}
{"types":["missiles","powerbomb"],"requires":["never"]} |
From: 1
Top Left Door
To: 2
Middle Left Door
Entrance condition: {
"comeInShinecharging": {
"length": 4,
"openEnd": 1,
"gentleDownTiles": 2
}
}Requires: "canShinechargeMovementComplex"
{
"or": [
"canDownBack",
{
"enemyDamage": {
"enemy": "Sova",
"type": "contact",
"hits": 1
}
}
]
}
{
"shineChargeFrames": 95
}Exit condition: {
"leaveShinecharged": {}
}Unlocks doors: {"types":["super"],"requires":[]}
{"types":["missiles","powerbomb"],"requires":["never"]} |
From: 1
Top Left Door
To: 3
Bottom Left Door
Entrance condition: {
"comeInShinecharging": {
"length": 4,
"openEnd": 1,
"gentleDownTiles": 2
}
}Requires: "canShinechargeMovementTricky"
"canDownBack"
{
"shineChargeFrames": 150
}Exit condition: {
"leaveShinecharged": {}
}Unlocks doors: {"types":["super"],"requires":[]}
{"types":["missiles","powerbomb"],"requires":["never"]} |
From: 3
Bottom Left Door
To: 4
Bottom Right Door
Entrance condition: {
"comeInShinecharging": {
"length": 12,
"openEnd": 0
}
}Requires: "canShinechargeMovementComplex"
"canDownBack"
{
"shineChargeFrames": 150
}Exit condition: {
"leaveShinecharged": {}
}Unlocks doors: {"types":["super"],"requires":[]}
{"types":["missiles","powerbomb"],"requires":["never"]} |
From: 3
Bottom Left Door
To: 4
Bottom Right Door
Fall around the floating platform with either a Downback or by jumping down with a Spinjump. Entrance condition: {
"comeInShinecharging": {
"length": 6,
"openEnd": 0
}
}Requires: "canShinechargeMovementComplex"
"canDownBack"
{
"shineChargeFrames": 120
}Exit condition: {
"leaveShinecharged": {}
}Unlocks doors: {"types":["super"],"requires":[]}
{"types":["missiles","powerbomb"],"requires":["never"]} |
|
Entrance condition: {
"comeInShinecharged": {}
}Requires: {
"shineChargeFrames": 135
}
"canShinechargeMovementComplex"
"canDownBack"Exit condition: {
"leaveShinecharged": {}
}Unlocks doors: {"types":["super"],"requires":[]}
{"types":["missiles","powerbomb"],"requires":["never"]} |
From: 5
Middle Right Door
To: 4
Bottom Right Door
Entrance condition: {
"comeInShinecharging": {
"length": 12,
"openEnd": 0
}
}Requires: "canShinechargeMovementComplex"
"canDownBack"
{
"shineChargeFrames": 150
}Exit condition: {
"leaveShinecharged": {}
}Unlocks doors: {"types":["super"],"requires":[]}
{"types":["missiles","powerbomb"],"requires":["never"]} |
From: 5
Middle Right Door
To: 4
Bottom Right Door
Fall around the floating platform with either a Downback or by jumping down with a Spinjump. Entrance condition: {
"comeInShinecharging": {
"length": 4,
"openEnd": 1
}
}Requires: "canShinechargeMovementComplex"
"canDownBack"
{
"shineChargeFrames": 120
}Exit condition: {
"leaveShinecharged": {}
}Unlocks doors: {"types":["super"],"requires":[]}
{"types":["missiles","powerbomb"],"requires":["never"]} |
From: 6
Top Right Door
To: 2
Middle Left Door
Shoot the top Sova while falling to delay its movement. Entrance condition: {
"comeInShinecharging": {
"length": 3,
"openEnd": 0
}
}Requires: "canShinechargeMovementTricky"
"canDownBack"
{
"shineChargeFrames": 110
}Exit condition: {
"leaveShinecharged": {}
}Unlocks doors: {"types":["super"],"requires":[]}
{"types":["missiles","powerbomb"],"requires":["never"]}Dev note: Closed end because this strat might not work if sliding off, depending on the run speed. |
|
Entrance condition: {
"comeInShinecharged": {}
}Requires: {
"shineChargeFrames": 140
}
"canShinechargeMovementComplex"
"canDownBack"Exit condition: {
"leaveShinecharged": {}
}Unlocks doors: {"types":["super"],"requires":[]}
{"types":["missiles","powerbomb"],"requires":["never"]} |
|
Requires: {
"or": [
{
"and": [
{
"doorUnlockedAtNode": 3
},
{
"doorUnlockedAtNode": 5
},
{
"canShineCharge": {
"usedTiles": 14,
"openEnd": 0
}
}
]
},
{
"and": [
{
"or": [
{
"doorUnlockedAtNode": 3
},
{
"doorUnlockedAtNode": 5
}
]
},
{
"canShineCharge": {
"usedTiles": 13,
"openEnd": 0
}
}
]
},
{
"canShineCharge": {
"usedTiles": 12,
"openEnd": 0
}
}
]
}
"canShinechargeMovementComplex"
"canDownBack"
{
  "shineChargeFrames": 150
}
Exit condition: {
"leaveShinecharged": {}
}Unlocks doors: {"nodeId":3,"types":["ammo"],"requires":[]}
{"nodeId":4,"types":["ammo"],"requires":[]}
{"nodeId":5,"types":["ammo"],"requires":[]} |
|
There is a hole in the left side wall that Samus can fit into by shrinking her hitbox. Once in the wall, stand up if crouched then turnaround into a buffered spinjump to jump out of the acid. Requires: {
"tech": "canPartialFloorClip"
}
"canSuitlessLavaDive"
{
"or": [
{
"and": [
"canLateralMidAirMorph",
"canDownBack",
"canTrickyJump",
{
"acidFrames": 110
},
{
"heatFrames": 285
}
]
},
{
"and": [
"canDash",
"canTrickyJump",
{
"acidFrames": 140
},
{
"heatFrames": 300
}
]
},
{
"and": [
{
"acidFrames": 230
},
{
"heatFrames": 390
}
]
}
]
} |
From: 1
Left Door
To: 7
Junction By Lower Alcoons (Left of Spike Pits)
Crystal Flash near the edge - just before Samus goes off-screen - to clear the runway Alcoon. Shinecharge to the left, then weave down and into the Alcoon to interrupt. Entrance condition: {
"comeInWithGMode": {
"mode": "direct",
"morphed": false
}
}Requires: {
"or": [
"canWallJump",
"HiJump",
"canSpringBallJumpMidAir",
"SpaceJump",
{
"and": [
"canIBJ",
"canBombHorizontally",
"canJumpIntoIBJ"
]
},
{
"and": [
"canUseFrozenEnemies",
"canInsaneJump"
]
}
]
}
"h_CrystalFlashForReserveEnergy"
{
"canShineCharge": {
"usedTiles": 27,
"gentleUpTiles": 2,
"openEnd": 0
}
}
{
"or": [
"canDownBack",
"canTrickyJump"
]
}
{
"or": [
{
"and": [
{
"disableEquipment": "ETank"
},
{
"autoReserveTrigger": {}
},
"canRModeSparkInterrupt",
{
"enemyDamage": {
"enemy": "Alcoon",
"type": "contact",
"hits": 1
}
}
]
},
{
"and": [
"canReserveTriggerBufferXRay",
{
"autoReserveTrigger": {
"implicitHeatFrames": "no"
}
},
"canRModePauseAbuseSparkInterrupt",
{
"heatFrames": 30
}
]
}
]
}Clears obstacles: A |
From: 1
Left Door
To: 7
Junction By Lower Alcoons (Left of Spike Pits)
Clear the Alcoon in the runway, then shinecharge and jump down to be interrupted by the lower left Alcoon. Entrance condition: {
"comeInWithRMode": {}
}Requires: {
"heatFrames": 60
}
{
"or": [
{
"and": [
"canDodgeWhileShooting",
{
"enemyKill": {
"enemies": [
[
"Alcoon"
]
],
"explicitWeapons": [
"Missile",
"Super",
"Charge+Plasma"
]
}
},
{
"heatFrames": 120
}
]
},
{
"and": [
{
"enemyKill": {
"enemies": [
[
"Alcoon"
]
],
"explicitWeapons": [
"Missile",
"Super",
"Wave",
"Ice+Spazer",
"Plasma",
"ScrewAttack",
"PseudoScrew",
"PowerBomb"
]
}
},
{
"heatFrames": 180
}
]
},
{
"and": [
{
"heatFrames": 200
},
{
"or": [
"canDodgeWhileShooting",
"Morph"
]
}
]
},
{
"and": [
{
"heatFrames": 160
},
{
"enemyDamage": {
"enemy": "Alcoon",
"type": "fireball",
"hits": 1
}
}
]
}
]
}
{
"or": [
"h_heatedCrystalFlashForReserveEnergy",
{
"and": [
"h_heatProof",
"h_RModeCanRefillReserves",
{
"or": [
{
"and": [
{
"resourceMissingAtMost": [
{
"type": "PowerBomb",
"count": 0
}
]
},
{
"partialRefill": {
"type": "ReserveEnergy",
"limit": 20
}
}
]
},
{
"and": [
{
"resourceMissingAtMost": [
{
"type": "PowerBomb",
"count": 3
}
]
},
{
"partialRefill": {
"type": "ReserveEnergy",
"limit": 5
}
}
]
}
]
}
]
}
]
}
{
"canShineCharge": {
"usedTiles": 27,
"gentleUpTiles": 2,
"openEnd": 0
}
}
{
"or": [
"canDownBack",
"canTrickyJump"
]
}
{
"heatFrames": 120
}
{
"autoReserveTrigger": {
"maxReserveEnergy": 95
}
}
"canRModeSparkInterrupt"Clears obstacles: A |
From: 1
Left Door
To: 7
Junction By Lower Alcoons (Left of Spike Pits)
Requires: {
"or": [
"canDownBack",
"canTrickyJump"
]
}
{
"heatFrames": 110
}
{
"or": [
"canDash",
{
"heatFrames": 10
}
]
} |
From: 2
Right Vertical Door
To: 7
Junction By Lower Alcoons (Left of Spike Pits)
Crystal Flash against the left edge of the tunnel, then jump through the ceiling. You cannot use Power Bombs or X-Ray after the Crystal Flash clip. Kill the Alcoon to clear the runway then drop into the lower left Alcoon to interrupt. Entrance condition: {
"comeInWithRMode": {},
"comesThroughToilet": "no"
}Requires: {
"notable": "Crystal Flash Clip"
}
{
"heatFrames": 100
}
"h_heatedCrystalFlashForReserveEnergy"
"canCeilingClip"
"canTrivialMidAirMorph"
{
"heatFrames": 240
}
{
"or": [
{
"enemyKill": {
"enemies": [
[
"Alcoon"
]
],
"explicitWeapons": [
"Missile",
"Super",
"Charge+Plasma",
"Wave+Plasma"
]
}
},
{
"heatFrames": 200
}
]
}
{
"canShineCharge": {
"usedTiles": 27,
"gentleUpTiles": 2,
"openEnd": 0
}
}
{
"or": [
"canDownBack",
"canTrickyJump"
]
}
{
"heatFrames": 120
}
{
"autoReserveTrigger": {
"maxReserveEnergy": 95
}
}
"canRModeSparkInterrupt"Clears obstacles: A, B |
From: 3
Bottom Horizontal Door
To: 7
Junction By Lower Alcoons (Left of Spike Pits)
Kill the spike Alcoons before climbing to the upper runway. Be sure to jump over the invisible fireball projectiles. Crystal Flash at the top right, just before Samus goes off-screen, to clear the runway Alcoon. Shinecharge to the left, then weave down and into the Alcoon to interrupt. Entrance condition: {
"comeInWithGMode": {
"mode": "direct",
"morphed": false
}
}Requires: {
"or": [
"canWallJump",
"HiJump",
"canSpringBallJumpMidAir",
"SpaceJump",
{
"and": [
"canIBJ",
"canBombHorizontally",
"canJumpIntoIBJ"
]
},
{
"and": [
"canUseFrozenEnemies",
"canInsaneJump"
]
}
]
}
"h_CrystalFlashForReserveEnergy"
{
"canShineCharge": {
"usedTiles": 27,
"gentleUpTiles": 2,
"openEnd": 0
}
}
{
"or": [
"canDownBack",
"canTrickyJump"
]
}
{
"or": [
{
"and": [
{
"disableEquipment": "ETank"
},
{
"autoReserveTrigger": {}
},
"canRModeSparkInterrupt",
{
"enemyDamage": {
"enemy": "Alcoon",
"type": "contact",
"hits": 1
}
}
]
},
{
"and": [
"canReserveTriggerBufferXRay",
{
"autoReserveTrigger": {
"implicitHeatFrames": "no"
}
},
"canRModePauseAbuseSparkInterrupt",
{
"heatFrames": 30
}
]
}
]
}Clears obstacles: A |
From: 3
Bottom Horizontal Door
To: 7
Junction By Lower Alcoons (Left of Spike Pits)
Get past the spike Alcoons, and climb up - leave the lower left Alcoon alive to use for later. Clear the runway Alcoon and get the shinecharge, then drop into the lower left Alcoon to interrupt. If you Crystal Flash early, stay near the door to ensure you kill only the two spike Alcoons. Entrance condition: {
"comeInWithRMode": {}
}Requires: {
"or": [
{
"and": [
"h_heatedCrystalFlashForReserveEnergy",
{
"heatFrames": 100
}
]
},
{
"and": [
"ScrewAttack",
"canCarefulJump",
{
"heatFrames": 100
}
]
},
{
"and": [
"canDodgeWhileShooting",
{
"or": [
"h_heatProof",
{
"enemyKill": {
"enemies": [
[
"Alcoon"
]
],
"explicitWeapons": [
"Missile",
"Super",
"Wave+Plasma"
]
}
},
{
"and": [
"canPseudoScrew",
{
"heatFrames": 30
}
]
}
]
},
"canCarefulJump",
{
"heatFrames": 100
}
]
},
{
"and": [
{
"enemyKill": {
"enemies": [
[
"Alcoon",
"Alcoon"
]
],
"explicitWeapons": [
"Missile",
"Super",
"Plasma",
"Wave+Spazer"
]
}
},
{
"heatFrames": 200
}
]
},
{
"and": [
"canCarefulJump",
{
"heatFrames": 199
}
]
},
{
"and": [
{
"enemyDamage": {
"enemy": "Alcoon",
"type": "contact",
"hits": 1
}
},
{
"heatFrames": 180
}
]
}
]
}
{
"heatFrames": 160
}
{
"or": [
"canWallJump",
"HiJump",
"canSpringBallJumpMidAir",
"SpaceJump",
{
"and": [
"canSpringBallBombJump",
{
"heatFrames": 60
}
]
},
{
"and": [
"canIBJ",
"canBombHorizontally",
"canJumpIntoIBJ",
{
"heatFrames": 110
},
{
"or": [
"canDoubleBombJump",
{
"heatFrames": 190
}
]
}
]
},
{
"and": [
"canTrickyDashJump",
"canInsaneJump",
{
"heatFrames": 20
}
]
},
{
"and": [
"canUseFrozenEnemies",
"canInsaneJump",
{
"heatFrames": 150
}
]
}
]
}
{
"or": [
{
"and": [
"canDodgeWhileShooting",
{
"enemyKill": {
"enemies": [
[
"Alcoon"
]
],
"explicitWeapons": [
"Missile",
"Super",
"Charge+Plasma"
]
}
},
{
"heatFrames": 120
}
]
},
{
"and": [
{
"enemyKill": {
"enemies": [
[
"Alcoon"
]
],
"explicitWeapons": [
"Wave",
"Ice+Spazer",
"Plasma",
"ScrewAttack",
"PseudoScrew",
"PowerBomb"
]
}
},
{
"heatFrames": 180
}
]
},
{
"heatFrames": 200
}
]
}
{
"or": [
{
"resourceAvailable": [
{
"type": "ReserveEnergy",
"count": 1
}
]
},
{
"and": [
"h_heatProof",
"h_RModeCanRefillReserves",
{
"or": [
{
"and": [
{
"resourceMissingAtMost": [
{
"type": "PowerBomb",
"count": 0
}
]
},
{
"partialRefill": {
"type": "ReserveEnergy",
"limit": 20
}
}
]
},
{
"and": [
{
"resourceMissingAtMost": [
{
"type": "PowerBomb",
"count": 3
}
]
},
{
"partialRefill": {
"type": "ReserveEnergy",
"limit": 5
}
}
]
}
]
}
]
}
]
}
{
"canShineCharge": {
"usedTiles": 27,
"gentleUpTiles": 2,
"openEnd": 0
}
}
{
"or": [
"canDownBack",
"canTrickyJump"
]
}
{
"heatFrames": 120
}
{
"autoReserveTrigger": {
"maxReserveEnergy": 95
}
}
"canRModeSparkInterrupt"Clears obstacles: A |
From: 6
Junction By Left Door (Right of Pit)
To: 7
Junction By Lower Alcoons (Left of Spike Pits)
Requires: {
"or": [
"canDownBack",
"canTrickyJump"
]
}
{
"or": [
{
"and": [
"canDash",
{
"heatFrames": 75
}
]
},
{
"heatFrames": 125
}
]
} |
From: 5
Top Junction Between Doors
To: 7
Middle Right Door With Bottom Kihunter Cleared
Very quickly move through the room to meet the bottom Kihunter in a position where it is possible to jump over it. Down back through the shot blocks. If coming through the right door, Morphing may be easier. Jump over the Kihunter where it dips while moving left. Additionally, build full run speed before jumping to land all the way next to the door. Requires: "canDash"
"canPrepareForNextRoom"
"canTrickyDodgeEnemies"
"canInsaneJump"
"canBeVeryPatient"
"canDownBack"
{
"heatFrames": 420
} |
From: 5
Top Junction Between Doors
To: 7
Middle Right Door With Bottom Kihunter Cleared
Requires: "canDash"
"canHitbox"
"Plasma"
{
"or": [
"canDownBack",
{
"and": [
"canCarefulJump",
{
"heatFrames": 50
}
]
},
{
"heatFrames": 130
}
]
}
{
"heatFrames": 410
} |
From: 1
Top Left Door
To: 3
Top Right Door
Entrance condition: {
"comeInShinecharging": {
"length": 3,
"openEnd": 0
}
}Requires: "canShinechargeMovementTricky"
{
"or": [
{
"and": [
"canDownBack",
"canInsaneJump",
{
"shineChargeFrames": 125
},
{
"heatFrames": 125
}
]
},
{
"and": [
{
"shineChargeFrames": 160
},
{
"heatFrames": 160
}
]
}
]
}Exit condition: {
"leaveShinecharged": {}
}Unlocks doors: {"types":["super"],"requires":[]}
{"types":["missiles","powerbomb"],"requires":["never"]} |
From: 1
Top Left Door
To: 4
Junction Above Bomb Blocks
Requires: "canInsaneJump"
"canTrickyDodgeEnemies"
{
"heatFrames": 190
}
{
"or": [
"canDownBack",
"Morph",
{
"heatFrames": 40
}
]
} |
From: 1
Top Left Door
To: 5
Junction Below Top Pirate
It is possible to get past the pirate without waiting by moving fast enough, or by making it turn around. Landing on the floating platform will make the fall simpler without scrolling the camera enough to activate the pirate. Requires: "canTrickyJump"
{
"heatFrames": 115
}
{
"or": [
"canDash",
{
"heatFrames": 5
}
]
}
{
"or": [
{
"and": [
"canInsaneJump",
"canTrickyDodgeEnemies"
]
},
{
"heatFrames": 35
}
]
}
{
"or": [
"canDownBack",
"Morph",
{
"heatFrames": 40
}
]
} |
|
Requires: "canDash"
"canDodgeWhileShooting"
"canCarefulJump"
{
"notable": "Shoot Down and Grab Right Item"
}
{
"or": [
"Wave",
"Spazer",
"h_usePowerBomb",
{
"and": [
"canTrickyJump",
"canDodgeWhileShooting",
{
"ammo": {
"type": "Missile",
"count": 5
}
}
]
},
{
"and": [
"canTrickyJump",
"canResetFallSpeed",
"canDownBack"
]
},
"canInsaneJump"
]
} |
From: 5
Top Junction
To: 4
Top Right Door
Roll off the above ledge and use both the vertical speed resets from first (un)equipping SpringBall and then by unmorphing in order to reach the door. Pause shortly after rolling off the ledge, after falling for 1 tile. The timing is very precise. A downback helps by shrinking Samus' hitbox. Requires: {
"notable": "Spring Fling into Top Right Door"
}
"canInsaneJump"
"canSpringFling"
"canResetFallSpeed"
"canDownBack" |
From: 2
Right Door
To: 1
Left Door
Entrance condition: {
"comeInShinecharging": {
"length": 6.5,
"openEnd": 1
}
}Requires: "Gravity"
"canShinechargeMovementTricky"
"canDownBack"
{
"shineChargeFrames": 130
}Exit condition: {
"leaveShinecharged": {}
}Unlocks doors: {"types":["super"],"requires":[]}
{"types":["missiles","powerbomb"],"requires":["never"]} |
|
Using movement tricks to reduce fall speed even slightly can avoid touching the sand. A Flatley style turnaround over the grapple block hole reduces fall speed some, but also needs a down back or a tiny jump. Requires: "canSuitlessMaridia"
{
"disableEquipment": "Gravity"
}
"canTrickyJump"
{
"or": [
{
"and": [
"canFlatleyJump",
{
"or": [
"canInsaneJump",
"canDownBack"
]
}
]
},
"canWallJump",
"canResetFallSpeed"
]
}Dev note: The or following canFlatleyJump has no logical relevance but indicates there are two distinct ways of using the flatley jump. |
|
Glitch through the Mother Brain Zebetites by using a frozen Rinka and i-frames. Freeze the Rinka at its spawn location, then spin jump or down-back onto it after acquiring i-frames to clip inside of the Zebetite, then jump through. I-frames can be acquired from a Rinka hit, a turret shot, or from the Zebetite itself. Note that Zebetites cause i-frames but deal no damage. If Screw Attack is equipped, then a down-back must be used, since spin jumping will cancel i-frames. With Ice+Wave, Samus can freeze the Rinka from above with an angle-down shot; Otherwise Samus must go below, press against the wall, and freeze it with an upward shot. With Ice+Plasma, Samus must be crouched when firing the shot. Requires: "h_AllMotherBrainBarriersCleared"
{
"notable": "Ice Zebetite Skip"
}
{
"noBlueSuit": {}
}
"canUseIFrames"
"canTrickyUseFrozenEnemies"
"Morph"
{
"or": [
{
"and": [
"Wave",
{
"enemyDamage": {
"enemy": "Rinka",
"type": "contact",
"hits": 1
}
}
]
},
"canTrickyJump"
]
}
{
"or": [
{
"disableEquipment": "ScrewAttack"
},
"canDownBack"
]
}
{
"or": [
"canTrickyDodgeEnemies",
{
"enemyDamage": {
"enemy": "Mother Brain 1",
"type": "turret",
"hits": 1
}
}
]
}
"h_complexToCarryFlashSuit"Dev note: This technically requires f_KilledZebetites1 to not be set, but there is minimal risk of loss of access, because there is no reason to kill any Zebs without being able to kill them all. It is also possible to Ice Zeb skip through the second Zeb with a morph/unmorph/remorph on a frozen Rinka; this is known as a Remorph Zebetite Skip or a Spring Ball Zebetite Skip. Technically this strat involves `canWallIceClip` but we don't include that requirement, since the positioning of the Rinka is freely normalized, which makes the trick easier than this tech would normally imply. FIXME: It is possible to Ice Zeb Skip out, but it is much harder and would only be useful if getting here with canRiskPermanentLossOfAccess. |
From: 3
Bottom of Shaft
To: 1
Left Door
Climbing the shaft with Space Jump is slower than other methods, so it is necessary to move quickly in order to minimize acid damage. With each Space Jump, release jump early rather than doing a full-height jump, in order to be able to Space Jump again more quickly. After reaching the top, fall down on the left side, keeping between the Pirates and the platforms. If Morph is available, use it to reset fall speed by unmorphing soon after taking damage from the bottom Pirate. With greater difficulty, the bottom Pirate can be avoided, resetting fall speed soon after getting past it. If Morph is not available, then take damage from the bottom Pirate, press against the left wall, and fire a carefully timed shot downward to open the door; in this case, use a down-back to fall directly into the doorway. If done quickly enough, it is possible to avoid any acid damage. Requires: {
"notable": "Bootless Walljumpless Space Jump"
}
"canPreciseSpaceJump"
{
"or": [
{
"and": [
"canInsaneJump",
"canResetFallSpeed"
]
},
{
"and": [
"canInsaneJump",
"canDownBack",
{
"enemyDamage": {
"enemy": "Tourian Space Pirate (all)",
"type": "contact",
"hits": 1
}
}
]
},
{
"and": [
"canResetFallSpeed",
{
"enemyDamage": {
"enemy": "Tourian Space Pirate (all)",
"type": "contact",
"hits": 1
}
}
]
}
]
}Exit condition: {
"leaveNormally": {}
}Unlocks doors: {"types":["ammo"],"requires":["never"]}Dev note: The leaveNormally exit condition is to prevent use of implicit door unlock strats, since unlocking the door would probably require some acid damage; FIXME: refine the door unlock requirements. |
