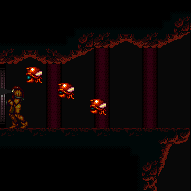
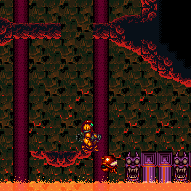
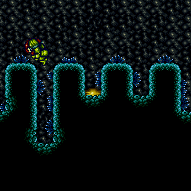
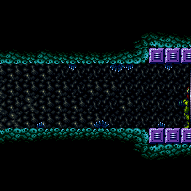
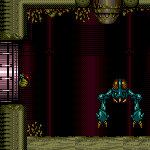
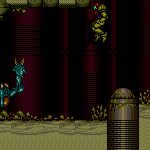
canMoonwalk (Hard)
This is an option that can be turned on in the special setting mode after selecting a save file. It is required for some tech.
Strats ()
|
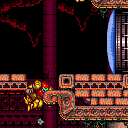
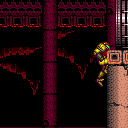
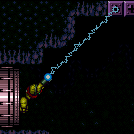
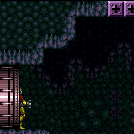
Hold angle-up, jump, bonk the ceiling, and use Grapple just before landing. Moonwalk into the transition on the same frame that the Grapple Beam reaches the Grapple block. Continue holding Grapple through the door transition to initiate a teleport in the next room. Requires: {
"notable": "Leave With Grapple Teleport"
}
"canMoonwalk"
"canInsaneJump"
{
"or": [
{
"noFlashSuit": {}
},
{
"and": [
"h_useSpringBall",
"canComplexCarryFlashSuit"
]
}
]
}Exit condition: {
"leaveWithGrappleTeleport": {
"blockPositions": [
[
7,
2
]
]
}
} |
|
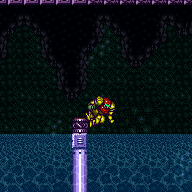
Stand on the farthest pixel into the door possible using moonwalk, X-Ray, or morphball turn around. Run towards the water and jump on the last possible frame. Perform the CWJ off of the item pedestal to cross to the other side. This requires running and jumping on the last possible frame before Samus would run off into the water. There is either a 1-frame or 2-frame window for the wall jump, depending on Samus' X subpixel position. To get a 2-frame window, Samus must start in the leftmost 75% of the pixel next to the transition. One method to guarantee that Samus gets a good subpixel is to jump and press against the overhang to align with it, then land, turn around, and moonwalk back into position. Requires: {
"or": [
{
"notable": "First-Try CWJ"
},
{
"and": [
"h_bombThings",
"h_additionalBomb",
"h_additionalBomb"
]
}
]
}
"canCWJ"
{
"disableEquipment": "HiJump"
}
{
"disableEquipment": "SpeedBooster"
}
{
"doorUnlockedAtNode": 1
}
"h_backIntoCorner"Collects items: 3 |
|
It's not necessary to jump through the door, the in-room doorsill gives enough running room to make it up. Requires: "canDash"
"canPreciseWallJump"
"canTrickyJump"
{
"or": [
{
"spikeHits": 1
},
"h_backIntoCorner"
]
} |
|
In direct G-mode, the door will not close, and the in-room doorsill gives enough running room to make it up to the invisible ledge. Entrance condition: {
"comeInWithGMode": {
"mode": "direct",
"morphed": false
}
}Requires: "canPreciseWallJump"
"canTrickyJump"
{
"or": [
{
"spikeHits": 1
},
"canMorphTurnaround",
"canMoonwalk",
{
"and": [
"canArtificialMorph",
{
"tech": "canMorphTurnaround"
}
]
}
]
} |
From: 2
Right Door
To: 1
Left Door
Jump and diagonally spark to the invisible platform. There is a small pixel range which lands on the platform and does not touch the boulder. It is possible to do this even below 29 Energy. It requires a last frame jump and then 4 frame spark window. It is more lenient with SpeedBooster. Requires: "h_storedSpark"
{
"or": [
{
"shinespark": {
"frames": 2,
"excessFrames": 0
}
},
{
"and": [
{
"shinespark": {
"frames": 2,
"excessFrames": 2
}
},
{
"or": [
"canMoonwalk",
"canMorphTurnaround"
]
},
{
"or": [
{
"and": [
"canTrickyJump",
"canSpeedyJump"
]
},
"canInsaneJump"
]
}
]
}
]
} |
|
Run then do a very small spin jump to clip into the left side of the first gate. While inside the gate, back up to get the maximum run distance using either Moonwalk or X-Ray Turnaround and repeat for the next gate. It is also possible to clip into the gates by aiming down while in the spin jump. A down-back is also possible for clipping into the first gate, but it is generally harder. Requires: {
"obstaclesNotCleared": [
"A"
]
}
"canDash"
"canCrouchGateClip"
{
"or": [
"canXRayTurnaround",
"canMoonwalk"
]
}Clears obstacles: A |
|
The only way the Wavers will get to the door is if the right crumble blocks are all broken. This assumes that Samus comes from the left with Speed, a mockball, or a crouch gate clip. After the crumbles are broken, shoot the ceiling block and wait by the door for the Waver to come. Note that if Samus takes more than 35 seconds after entering the room, before shooting the ceiling, the Waver will not come down. Requires: {
"obstaclesNotCleared": [
"A"
]
}
{
"or": [
"h_speedDash",
"canMockball",
{
"and": [
"canDash",
"canCrouchGateClip",
{
"or": [
"canXRayTurnaround",
"canMoonwalk"
]
}
]
},
{
"and": [
{
"notable": "Crouch Gate Clip Damage Boost"
},
"canHorizontalDamageBoost",
"canCrouchGateClip",
{
"enemyDamage": {
"enemy": "Zeb",
"type": "contact",
"hits": 2
}
},
{
"or": [
"canXRayWaitForIFrames",
{
"haveBlueSuit": {}
}
]
}
]
}
]
}Exit condition: {
"leaveWithGModeSetup": {}
}Unlocks doors: {"types":["ammo"],"requires":[]} |
|
Jump straight up and shoot with the correct timing. This strat involves shooting a Super diagonally from the correct height while flush against the left wall. Its acceleration will cause it to clip into the blue gate off-screen. Requires: {
"notable": "Reverse Gate Glitch"
}
{
"obstaclesCleared": [
"A"
]
}
{
"or": [
"canTrickyJump",
"h_backIntoCorner"
]
}
"HiJump"
"canOffScreenSuperShot"
{
"or": [
{
"noFlashSuit": {}
},
"h_useSpringBall"
]
}Clears obstacles: B Dev note: Springball jumps didn't look possible but was close. IBJ didn't look possible. It is possible to do this with a flash suit and no Spring Ball, but is extremely precise. |
From: 1
Left Door
To: 1
Left Door
Use a stationary spinjump, or spinjump against the wall and turn around without moving; and shoot with the same correct timing. This strat involves shooting a Super diagonally from the correct height while flush against the left wall. Its acceleration will cause it to clip into the blue gate off-screen. Requires: {
"notable": "Reverse Gate Glitch"
}
{
"obstaclesCleared": [
"A"
]
}
{
"or": [
"canTrickyJump",
"h_backIntoCorner"
]
}
"canStationarySpinJump"
"SpaceJump"
"canOffScreenSuperShot"Clears obstacles: B |
From: 4
Frozen Hopper Junction
To: 4
Frozen Hopper Junction
Freeze a small hopper to the side and kill the remaining Side Hoppers. Stand against the left wall (damage knockback will align Samus with the wall) and shoot up to freeze the hopper. Jump up to land on it, aligned with the wall. Alternatively, Jump and shoot down to freeze the hopper as a way to avoid damage. Fire a Super just above the door shell to hit the Gate. This strat involves shooting a Super diagonally from the correct height while flush against the left wall. Its acceleration will cause it to clip into the blue gate off-screen. Requires: {
"notable": "Reverse Gate Glitch"
}
{
"obstaclesNotCleared": [
"A"
]
}
"canTrickyUseFrozenEnemies"
"canTrickyJump"
"canOffScreenSuperShot"
{
"or": [
"h_backIntoCorner",
{
"and": [
{
"enemyDamage": {
"enemy": "Sidehopper",
"type": "contact",
"hits": 1
}
},
"canNeutralDamageBoost"
]
}
]
}Clears obstacles: B |
|
Moonwalk into the transition on the same frame that the Grapple Beam reaches the Grapple block. Continue holding Grapple through the door transition to initiate a teleport in the next room. Requires: "canMoonwalk" Exit condition: {
"leaveWithGrappleTeleport": {
"blockPositions": [
[
5,
3
]
]
}
}Dev note: FIXME: Strats could be added which come in shinecharging or shinecharged, and leave with both a grapple teleport and a shinecharge. Currently we don't have a way to represent this in the schema, as having multiple exit conditions is not allowed, but this could be relaxed in the future. There is a strat in Green Pirate Shaft that requires jumping, so a flash suit would be not usable there, but that strat already requires a Crystal Flash. |
From: 4
Small Ledge Below Left Door
To: 1
Left Door
Run and jump from the safe stair to just reach the door ledge. To avoid walljumping, use a full speed jump or jump from on top of the spikes (stairs or floor). Requires: "HiJump"
"canSpeedyJump"
{
"or": [
{
"and": [
"canWallJump",
{
"or": [
"canTrickyJump",
{
"spikeHits": 1
}
]
}
]
},
{
"and": [
"canTrickyDashJump",
"h_backIntoCorner",
"canInsaneJump"
]
},
{
"and": [
"canTrickyDashJump",
{
"spikeHits": 1
}
]
}
]
} |
From: 4
Small Ledge Below Left Door
To: 1
Left Door
Jump up to the left door either by jumping from spikes or with a very precise jump. Cross the room by Jumping atop the spikes. Taking enemy damage can be used to reduce some spike damage. The final jump can either be made by jumping from the bottommost spike stair or from the safe stair. Setup run speed atop the spike stair by holding forward to be pushed backward. The safe stair jump is much harder, but can be made without every pixel of runway. Requires: {
"notable": "Spike Jumps with HiJump"
}
"HiJump"
"canDash"
"canTrickyJump"
{
"or": [
{
"and": [
"canInsaneWallJump",
"canInsaneJump",
"h_backIntoCorner"
]
},
{
"and": [
{
"spikeHits": 1
},
"canHorizontalDamageBoost",
"canPreciseWallJump",
"canUseIFrames"
]
}
]
} |
|
Back up against the wall of the single-tile ledge. Run forward, perform a single arm pump, and jump on the last possible frame. Aim down just before reaching the platform. The arm pump can be performed by pressing shot, or by pressing an angle button (but not releasing it until after the jump). Requires: {
"notable": "Arm Pump Jump"
}
"h_backIntoCorner"
"canDash"
"canInsaneJump"
"canDownGrab" |
|
Entrance condition: {
"comeInWithGMode": {
"mode": "direct",
"morphed": false
}
}Requires: "canRemoteAcquire"
{
"or": [
"SpaceJump",
{
"and": [
"canPreciseGrapple",
"canUseEnemies"
]
},
"canSpringBallJumpMidAir",
"canInsaneWallJump",
{
"and": [
"HiJump",
"canWallJump"
]
},
{
"and": [
"HiJump",
"canSpeedyJump"
]
},
{
"and": [
"canStaggeredIBJ",
"canDoubleBombJump",
"canBombHorizontally"
]
},
{
"and": [
"h_IBJFromSpikes",
"h_IBJFromSpikes"
]
},
{
"and": [
"h_IBJFromSpikes",
"canCameraManip",
"canMoonwalk"
]
}
]
}
"h_heatedDirectGModeLeaveSameDoor"Collects items: 4 |
|
Requires: "h_backIntoCorner"
{
"heatFrames": 100
}Exit condition: {
"leaveWithPlatformBelow": {
"height": 9,
"leftPosition": -2,
"rightPosition": 6
}
}Unlocks doors: {"types":["missiles"],"requires":[{"heatFrames":50}]}
{"types":["super"],"requires":[]}
{"types":["powerbomb"],"requires":[{"heatFrames":110}]}Dev note: This includes time to moonwalk back against the right door, without shooting it open. An additional tile could be used by opening the right door but there is not yet any known application. |
From: 5
Bottom Floating Platform Junction
To: 1
Top Left Door
Requires: "canComplexGMode"
{
"heatFrames": 480
}
{
"or": [
"canWallJump",
"HiJump",
"SpaceJump",
"h_crouchJumpDownGrab"
]
}
{
"or": [
"canTrickyUseFrozenEnemies",
"canMoonwalk",
"canInsaneJump"
]
}
{
"or": [
"canDash",
"canTrickyGMode"
]
}Exit condition: {
"leaveWithGModeSetup": {}
}Unlocks doors: {"types":["super"],"requires":[]}
{"types":["missiles","powerbomb"],"requires":["never"]}Dev note: FIXME: the frozen enemy option should use extra heat frames (e.g. with pausing to turn off ice). |
From: 1
Top Left Door
To: 6
Top Right Door
After landing, do a small jump and spark mid-air. Alternatively, if you can avoid tripping while entering the room, another option is to moonwalk back against the left door to get high enough to spark without bonking the platform on the right. Entrance condition: {
"comeInShinecharged": {}
}Requires: {
"shineChargeFrames": 30
}
{
"or": [
"canHorizontalMidairShinespark",
"canMoonwalk"
]
}
{
"shinespark": {
"frames": 18,
"excessFrames": 0
}
}Exit condition: {
"leaveWithSpark": {
"position": "bottom"
}
}Unlocks doors: {"types":["super"],"requires":[]}
{"types":["missiles","powerbomb"],"requires":["never"]} |
From: 1
Left Door
To: 1
Left Door
Requires: "canMoonwalk"
"canTrickyDodgeEnemies"
{
"or": [
"h_heatProof",
"canInsaneJump"
]
}
{
"heatFrames": 260
}Exit condition: {
"leaveWithMockball": {
"remoteRunway": {
"length": 5,
"openEnd": 1
},
"landingRunway": {
"length": 3,
"openEnd": 1
},
"minExtraRunSpeed": "$1.5"
}
} |
|
Freeze the Mella at a precise location in order to jump through the crumble block, then wall jump up the long channel and mid-air morph to get out. One normalized way to do this: Kill the first two Mellas, moonwalk to the right until the third Mella just barely goes off-camera, fire a shot, and move left to scroll the Mella back on-camera just before the shot would despawn, in order to freeze it at a specific height. While it is frozen, kill the remaining Mellas, and press against the wall of Speed blocks. Perform an action that changes Samus' pose (e.g., press an angle button, jump, or crouch/uncrouch) in order to be able to moonwalk from that position. Moonwalk backwards 5 pixels, then jump straight up, and continue holding jump while pressing right, to perform a buffered turn-around spin jump to the right. If executed correctly, the Mella will move horizontally left and will be at a good height to be able to freeze and clip through the crumble block with a crouch jump. Get on top of the Mella with a mid-air morph, position under the crumble block, then unmorph for the crouch jump. Quickly spin-jump to re-enter the shaft after breaking the crumble block. Tip: if Samus moonwalks back further than 5 pixels, press against the Speed blocks again before trying to moonwalk back again, to avoid possibly getting bad subpixels. Requires: {
"notable": "Mella Ice Clip"
}
"Morph"
"canMoonwalk"
"canManipulateMellas"
"h_preciseIceClip"
{
"or": [
"canConsecutiveWallJump",
{
"and": [
"HiJump",
"canWallJump"
]
}
]
}Dev note: The manipulation can also work with moonwalking back between 6 and 10 pixels, but depending on the exact position the bug may move at a shallow angle rather than exactly horizontally; in this case, the bug should be frozen a bit early (i.e. further right), to ensure it does not re-enter its idle animation where its height would become unpredictable. FIXME: Investigate if there is a normalized setup for freezing in the high-pixel position. FIXME: A freestyle version (or alternative normalized setup?) of the strat could be added, to avoid the canMoonwalk requirement, using X-Ray or a very precise freeze to get up. |
|
Requires: {
"obstaclesCleared": [
"A"
]
}
"HiJump"
"canSpeedyJump"
"canPreciseWallJump"
"canCarefulJump"
{
"or": [
"canTrickyJump",
"h_backIntoCorner"
]
}
{
"or": [
"canInsaneJump",
{
"heatFrames": 40
}
]
}
{
"doorUnlockedAtNode": 2
}
{
"heatFrames": 160
}
{
"or": [
"canTrickyJump",
{
"heatFrames": 200
}
]
}Unlocks doors: {"nodeId":2,"types":["missiles"],"requires":[{"heatFrames":50}]}
{"nodeId":2,"types":["super"],"requires":[]}
{"nodeId":2,"types":["powerbomb"],"requires":[{"heatFrames":110}]}Dev note: Without canTrickyJump, this assumes you miss the jump and have to set it up a second time. |
|
It is possible to jump up, in-room, by opening the right door and starting close to the door transition. Requires: {
"doorUnlockedAtNode": 2
}
"h_backIntoCorner"
"HiJump"
"canTrickyDashJump"Unlocks doors: {"nodeId":2,"types":["ammo"],"requires":[]} |
|
It is required to avoid double hitting the Skultera with the Power Bomb, and to position the Crystal Flash so that the Skultera can hit Samus from above so it avoids the light orb. This is particularly precise because the fish is not global, which makes it so Samus needs to be closer to the fish when laying the Power Bomb. Moonwalk to move the camera to the right, but not all the way. The Skultera should be able to move back and forth while Samus is on one of the two lower sloped tiles. Crystal Flash and time the Power Bomb so that its first hit is when the Skultera is against the right wall. This can be done with no enemy damage reduction and up to 2 E-Tanks or a 50% enemy damage reduction and no E-Tanks; a 75% reduction is not recommended and would require disabling and reenabling suits with a precise pause abuse. Requires: {
"obstaclesCleared": [
"R-Mode"
]
}
"canCameraManip"
"canMoonwalk"
"canComplexRModeCrystalFlashInterrupt"
{
"ammo": {
"type": "Missile",
"count": 10
}
}
{
"ammo": {
"type": "Super",
"count": 10
}
}
{
"or": [
"h_partialEnemyDamageReduction",
{
"resourceAtMost": [
{
"type": "RegularEnergy",
"count": 19
}
]
},
{
"and": [
{
"resourceCapacity": [
{
"type": "RegularEnergy",
"count": 199
}
]
},
{
"resourceCapacity": [
{
"type": "ReserveEnergy",
"count": 199
}
]
}
]
}
]
}
{
"or": [
"Gravity",
"HiJump",
"canSpringBallJumpMidAir"
]
}Resets obstacles: R-Mode Dev note: FIXME: A 75% damage reduction method needs to be documented for if Samus only has Gravity and it provides 75% reduction. If there were another node near the fish, that could reduce a small amount of duplication. |
From: 4
Top Right Door
To: 9
Junction Below Speed Blocks
It is required to avoid double hitting the Skultera with the Power Bomb, and to position the Crystal Flash so that the Skultera can hit Samus from above so it avoids the light orb. This is particularly precise because the fish is not global, which makes it so Samus needs to be closer to the fish when laying the Power Bomb. Moonwalk to move the camera to the right, but not all the way. The Skultera should be able to move back and forth while Samus is on one of the two lower sloped tiles. Crystal Flash and time the Power Bomb so that its first hit is when the Skultera is against the right wall. This can be done with no enemy damage reduction and up to 2 E-Tanks or a 50% enemy damage reduction and no E-Tanks; a 75% reduction is not recommended and would require disabling and reenabling suits with a precise pause abuse. Requires: {
"obstaclesCleared": [
"R-Mode"
]
}
"canCameraManip"
"canMoonwalk"
"canComplexRModeCrystalFlashInterrupt"
{
"ammo": {
"type": "Missile",
"count": 10
}
}
{
"ammo": {
"type": "Super",
"count": 10
}
}
{
"or": [
"h_partialEnemyDamageReduction",
{
"resourceAtMost": [
{
"type": "RegularEnergy",
"count": 19
}
]
},
{
"and": [
{
"resourceCapacity": [
{
"type": "RegularEnergy",
"count": 199
}
]
},
{
"resourceCapacity": [
{
"type": "ReserveEnergy",
"count": 199
}
]
}
]
}
]
}Resets obstacles: R-Mode Dev note: FIXME: A 75% damage reduction method needs to be documented for if Samus only has Gravity and it provides 75% reduction. If there were another node near the fish, that could reduce a small amount of duplication. |
From: 1
Left Door
To: 2
Left Sand Pit
Reach the sand while luring a Puyo just off camera to where moonwalking on the partially submerged platform can lure the Puyo. Crouch in the sand and press forward when near the transition to stand up and touch the transition on the first frame of standing. Requires: "h_navigateUnderwater"
{
"noBlueSuit": {}
}
"canPlayInSand"
"canMoonwalk"
"canCameraManip"
"canDownwardGModeSetup"
"canOffScreenMovement"
"canTrickyGMode"Exit condition: {
"leaveWithGModeSetup": {}
} |
From: 1
Left Door
To: 3
Right Sand Pit
Reach the sand while luring a Puyo just off camera to where moonwalking on the partially submerged platform can lure the Puyo. Quickly move to the right section before the Puyo hits Samus. Crouch in the sand and press forward when near the transition to stand up and touch the transition on the first frame of standing. Requires: "h_navigateUnderwater"
{
"noBlueSuit": {}
}
"canPlayInSand"
"canMoonwalk"
"canCameraManip"
"canDownwardGModeSetup"
"canOffScreenMovement"
"canTrickyGMode"Exit condition: {
"leaveWithGModeSetup": {}
} |
|
Enter through the far left side of the door. Wait for the top hopper to move right to start running. Run under the right Hopper and jump over the left Hopper to avoid all damage. Jump when Samus reaches the leftmost lump in the ground to avoid the left hopper. It helps to keep the camera scrolled to the right. Entrance condition: {
"comeInNormally": {},
"comesThroughToilet": "no"
}Requires: {
"notable": "Hopper Dodge"
}
"canDash"
"canTrickyDodgeEnemies"
{
"or": [
"canPrepareForNextRoom",
{
"and": [
"canCameraManip",
"canMoonwalk",
"canInsaneJump"
]
}
]
}Unlocks doors: {"types":["super"],"requires":[]}
{"types":["missiles","powerbomb"],"requires":[{"enemyDamage":{"enemy":"Blue Sidehopper","type":"contact","hits":1}}]} |
|
Try to scroll the camera to the right to keep the left Hopper off-camera for longer. Wait for the top hopper to move right to start running. Run under the right Hopper and jump over the left Hopper to avoid all damage. Jump when Samus reaches the leftmost lump in the ground to avoid the left hopper. Entrance condition: {
"comeInNormally": {},
"comesThroughToilet": "any"
}Requires: {
"notable": "Hopper Dodge"
}
"canDash"
"canCameraManip"
"canMoonwalk"
"canInsaneJump"Unlocks doors: {"types":["super"],"requires":[]}
{"types":["missiles","powerbomb"],"requires":[{"enemyDamage":{"enemy":"Blue Sidehopper","type":"contact","hits":1}}]} |
