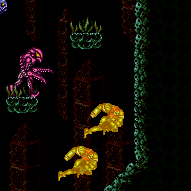
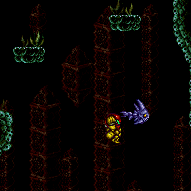
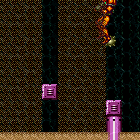
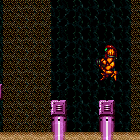
canPreciseReserveRefill (Expert+)
The ability to use Reserves to manually refill to an exact value. To refill by one, select the Reserve Tank and press up on the same frame (right or down can instead be used if Samus has items in those locations). To do this again without unpausing is requires a down and up input on consecutive frames, which is unreasonable. Alternatively, if Samus has items on the right column, pressing down and right on consecutive frames works. This can be useful for getting exact Reserve Energy for setting up G-Mode, or to pause abuse multiple times with minimal Energy loss.
Dependencies: canManageReserves
Dev note: In the vanilla/unpatched equipment screen, it is possible to move from Reserves to the right column with any item there except Screw Attack alone.
Strats ()
From: 1
Top Left Door
To: 4
Top Junction (Right of Spikes)
Requires: "canUseIFrames"
"h_pauseAbuseMinimalReserveRefill"
{
"or": [
"canDash",
{
"and": [
"h_pauseAbuseMinimalReserveRefill",
{
"or": [
{
"and": [
{
"tech": "canHorizontalDamageBoost"
},
"h_complexToCarryFlashSuit"
]
},
"h_pauseAbuseMinimalReserveRefill"
]
}
]
}
]
} |
From: 4
Top Junction (Right of Spikes)
To: 1
Top Left Door
Requires: "canUseIFrames"
"h_pauseAbuseMinimalReserveRefill"
{
"or": [
"canDash",
{
"and": [
"h_pauseAbuseMinimalReserveRefill",
{
"or": [
{
"and": [
{
"tech": "canHorizontalDamageBoost"
},
"h_complexToCarryBlueSuit"
]
},
"h_pauseAbuseMinimalReserveRefill"
]
}
]
}
]
} |
|
Tank a hit or use a pause abuse with a reserve refill. Entrance condition: {
"comeInWithMockball": {
"speedBooster": "any",
"adjacentMinTiles": 0,
"remoteAndLandingMinTiles": [
[
0,
0
]
]
}
}Requires: {
"or": [
{
"enemyDamage": {
"enemy": "Sidehopper",
"type": "contact",
"hits": 1
}
},
"h_pauseAbuseMinimalReserveRefill"
]
} |
|
Pseudo Screw the first ground hopper and focus fire on it until it dies while taking 2-3 hits. Kill the ceiling hopper while on the ground, crouched near the stair for some safety, or with Morph without risk. The third hopper can be killed with another Pseudo Screw with pause abuse, a Morph dodge, or a dodge by jumping over it while it lunges towards Samus. Entrance condition: {
"comeInNormally": {}
}Requires: "canPseudoScrew"
"h_pauseAbuseMinimalReserveRefill"
"h_pauseAbuseMinimalReserveRefill"
"h_pauseAbuseMinimalReserveRefill"
{
"or": [
"h_pauseAbuseMinimalReserveRefill",
"Morph"
]
}
{
"or": [
"h_pauseAbuseMinimalReserveRefill",
"canTrickyDodgeEnemies"
]
}Clears obstacles: C |
|
Entrance condition: {
"comeInNormally": {}
}Requires: "h_pauseAbuseMinimalReserveRefill"
{
"or": [
"Plasma",
{
"enemyKill": {
"enemies": [
[
"Sidehopper",
"Sidehopper",
"Sidehopper"
]
],
"explicitWeapons": [
"Missile",
"Super"
]
}
}
]
}Clears obstacles: C |
|
Entrance condition: {
"comeInNormally": {}
}Requires: "h_pauseAbuseMinimalReserveRefill" |
|
Requires: "h_pauseAbuseMinimalReserveRefill"
{
"or": [
"Spazer",
"Wave"
]
}
{
"or": [
"h_pauseAbuseMinimalReserveRefill",
{
"and": [
"Morph",
"canTrickyJump"
]
}
]
}Clears obstacles: C |
From: 1
Left Door
To: 1
Left Door
To save a hit, jump over the third Sidehopper as it lunges towards Samus. Requires: "h_pauseAbuseMinimalReserveRefill"
"h_pauseAbuseMinimalReserveRefill"
"h_pauseAbuseMinimalReserveRefill"
{
"or": [
"Ice",
{
"and": [
"h_pauseAbuseMinimalReserveRefill",
"h_pauseAbuseMinimalReserveRefill",
"h_pauseAbuseMinimalReserveRefill"
]
}
]
}
{
"or": [
"canTrickyDodgeEnemies",
"h_pauseAbuseMinimalReserveRefill"
]
}Clears obstacles: C |
|
Requires: "Morph"
"canTrickyDodgeEnemies"
"h_pauseAbuseMinimalReserveRefill"
"h_pauseAbuseMinimalReserveRefill"
{
"or": [
"Ice",
{
"and": [
"h_pauseAbuseMinimalReserveRefill",
"h_pauseAbuseMinimalReserveRefill"
]
}
]
}Clears obstacles: C |
From: 5
Lava, Center Namihe
To: 3
Above Lava Junction
Use the bottom-most right-side Namihe to generate a flame and walk with it to the bottommost left Namihe head. Pause and use a turnaround animation as Samus is hit by the flame to cancel out knockback frames. Manually refill energy from reserves. While invulnerability frames are active, wall jump up the spikes either 2 or 3 times and jump accross to catch the middle wall and climb from there. Requires: {
"notable": "HiJumpless Dive"
}
{
"noBlueSuit": {}
}
"canSuitlessLavaDive"
"canUseIFrames"
"canTrickyWallJump"
"canFastWallJumpClimb"
"canUseEnemies"
"canCameraManip"
{
"heatFrames": 175
}
{
"gravitylessLavaFrames": 175
}
"h_pauseAbuseMinimalReserveRefill"
{
"heatFrames": 375
}
{
"gravitylessLavaFrames": 300
} |
|
Enter the room with between 93 and 102 energy and quickly mid-air spark to the left through the Speed blocks. After the shinespark ends, run left and press pause before reaching zero energy, tanking the Pirate hit while at zero energy. Refill some energy (at least 11), and continue running to the left, using i-frames to pass through the next Pirate. Continue to pause abuse several more times. Arm pumping may be used but is not required and has little benefit; in any case, arm pumping should not be used until beginning to run through the Speed blocks, otherwise Samus will not obtain blue speed in time and will bonk into them. Entrance condition: {
"comeInShinecharged": {},
"comesThroughToilet": "any"
}Requires: {
"shineChargeFrames": 35
}
{
"notable": "Reverse Spark With Pause Abuse"
}
"canShinechargeMovementTricky"
"canTrickyJump"
"canControlShinesparkEnd"
"canPauseAbuse"
{
"resourceAvailable": [
{
"type": "RegularEnergy",
"count": 93
}
]
}
{
"shinespark": {
"frames": 0,
"excessFrames": 0
}
}
{
"resourceConsumed": [
{
"type": "ReserveEnergy",
"count": 61
}
]
}
"h_speedDash"
"h_getBlueSpeedMaxRunway"
{
"or": [
"canPreciseReserveRefill",
{
"resourceConsumed": [
{
"type": "ReserveEnergy",
"count": 15
}
]
}
]
}
{
"resourceAtMost": [
{
"type": "RegularEnergy",
"count": 1
}
]
}
{
"heatFrames": 0
}Clears obstacles: A Dev note: The zero shinespark requirement is to satisfy the tests, by marking that the shinecharge is used; the actual shinespark energy usage is accounted for in the resourceConsumed. This could possibly be rewritten to express the energy usage in the normal way. We don't include a `h_ShinesparksCostEnergy` requirement here, because even if shinesparks don't cost energy, it is still possible to use heat damage to make the shinespark stop in the correct place. FIXME: the regular energy required could be reduced in that case. FIXME: This should be split into 3->9 and 9->2 strats. FIXME: A h_speedButSlow variant could be added. |
From: 4
Bottom Right Door
To: 2
Far Left Door
Start a shinespark on the other side of the door with between 94 and 103 energy. After the shinespark ends, run left and press pause before reaching zero energy, tanking the Pirate hit while at zero energy. Refill some energy (at least 11), and continue running to the left, using i-frames to pass through the next Pirate. Continue to pause abuse several more times. Arm pumping may be used but is not required and has little benefit; in any case, arm pumping should not be used until beginning to run through the Speed blocks, otherwise Samus will not obtain blue speed in time and will bonk into them. Entrance condition: {
"comeInWithSpark": {
"position": "bottom"
}
}Requires: {
"notable": "Reverse Spark With Pause Abuse"
}
"canShinechargeMovementTricky"
"canTrickyJump"
"canControlShinesparkEnd"
"canPauseAbuse"
{
"resourceAvailable": [
{
"type": "RegularEnergy",
"count": 94
}
]
}
{
"shinespark": {
"frames": 0,
"excessFrames": 0
}
}
{
"resourceConsumed": [
{
"type": "ReserveEnergy",
"count": 61
}
]
}
"h_speedDash"
"h_getBlueSpeedMaxRunway"
{
"or": [
"canPreciseReserveRefill",
{
"resourceConsumed": [
{
"type": "ReserveEnergy",
"count": 15
}
]
}
]
}
{
"resourceAtMost": [
{
"type": "RegularEnergy",
"count": 1
}
]
}
{
"heatFrames": 0
}Clears obstacles: A Dev note: The zero shinespark requirement is to satisfy the tests, by marking that the shinecharge is used; the actual shinespark energy usage is accounted for in the resourceConsumed. This could possibly be rewritten to express the energy usage in the normal way. We don't include a `h_ShinesparksCostEnergy` requirement here, because even if shinesparks don't cost energy, it is still possible to use heat damage to make the shinespark stop in the correct place. FIXME: the regular energy required could be reduced in that case. FIXME: This should be split into 4->9 and 9->2 strats. FIXME: A h_speedButSlow variant could be added. |
From: 5
Top Right Door
To: 2
Far Left Door
Either jump over a Cacatac, tank a spike hit, or farm it if possible. While preparing to spark left through the speed blocks, press pause so that the pause hits during the shinespark wind-up Using reserves, try to refill to exactly 84 energy, the minimum amount needed to reliably break through the Speed blocks (assuming no heat protection). Hold jump and left while unpausing, to buffer activating the horizontal shinespark. After the shinespark ends, run left and press pause before reaching zero energy, tanking the Pirate hit while at zero energy. Refill to between about 11 and 13 energy, and continue running to the left, using i-frames to pass through the next Pirate. Continue to pause abuse 4 more times, trying to refill to between 11 and 13 energy each time except for the last. Arm pumping may be used but is not required and has little benefit; in any case, arm pumping should not be used until beginning to run through the Speed blocks, otherwise Samus will not obtain blue speed in time and will bonk into them. Entrance condition: {
"comeInShinecharging": {
"length": 5,
"openEnd": 1
}
}Requires: {
"notable": "Reverse Spark With Pause Abuse"
}
"canShinechargeMovementTricky"
"canTrickyJump"
"canControlShinesparkEnd"
"canPauseAbuse"
{
"resourceAvailable": [
{
"type": "RegularEnergy",
"count": 99
}
]
}
{
"shinespark": {
"frames": 0,
"excessFrames": 0
}
}
{
"resourceConsumed": [
{
"type": "ReserveEnergy",
"count": 80
}
]
}
"h_speedDash"
"h_getBlueSpeedMaxRunway"
{
"or": [
{
"resourceConsumed": [
{
"type": "ReserveEnergy",
"count": 20
}
]
},
{
"and": [
{
"resourceMissingAtMost": [
{
"type": "Super",
"count": 0
}
]
},
{
"or": [
{
"ammo": {
"type": "Missile",
"count": 1
}
},
"Grapple",
"Plasma",
{
"and": [
"Wave",
"Spazer"
]
}
]
}
]
}
]
}
{
"or": [
"canPreciseReserveRefill",
{
"resourceConsumed": [
{
"type": "ReserveEnergy",
"count": 15
}
]
}
]
}
{
"resourceAtMost": [
{
"type": "RegularEnergy",
"count": 1
}
]
}
{
"heatFrames": 0
}Clears obstacles: A Dev note: The zero shinespark requirement is to satisfy the tests, by marking that the shinecharge is used; the actual shinespark energy usage is accounted for in the resourceConsumed. This could possibly be rewritten to express the energy usage in the normal way. We don't include a `h_ShinesparksCostEnergy` requirement here, because even if shinesparks don't cost energy, it is still possible to use heat damage to make the shinespark stop in the correct place. FIXME: the regular energy required could be reduced in that case. FIXME: This should be split into 5->9 and 9->2 strats. FIXME: A h_speedButSlow variant could be added. |
From: 1
Top Left Door
To: 7
Middle Right Door With Bottom Kihunter Cleared
Entering from water or without a way to shoot both blocks simultaneously, pause abuse the first Kihunter and then stay ahead of the other two. Entrance condition: {
"comeInNormally": {}
}Requires: "canDodgeWhileShooting"
"canCarefulJump"
{
"heatFrames": 260
}
"h_pauseAbuseMinimalReserveRefill"
{
"heatFrames": 290
} |
From: 4
Top Right Door
To: 7
Middle Right Door With Bottom Kihunter Cleared
Entering from water or without a way to shoot both blocks simultaneously, pause abuse the first Kihunter and then stay ahead of the other two. Entrance condition: {
"comeInNormally": {}
}Requires: "canDodgeWhileShooting"
"canTrickyJump"
{
"heatFrames": 260
}
"h_pauseAbuseMinimalReserveRefill"
{
"heatFrames": 300
} |
From: 3
Top Right Door
To: 5
Junction Below Top Pirate
Requires: "canDash"
{
"heatFrames": 80
}
"h_pauseAbuseMinimalReserveRefill"
{
"heatFrames": 50
} |
From: 5
Junction Below Top Pirate
To: 3
Top Right Door
Requires: {
"heatFrames": 100
}
"h_pauseAbuseMinimalReserveRefill"
{
"heatFrames": 40
} |
From: 4
Junction Above Bomb Block
To: 1
Top Left Door
Requires: "canDash"
"canTrickyDodgeEnemies"
{
"heatFrames": 90
}
"h_pauseAbuseMinimalReserveRefill"
{
"heatFrames": 120
}
"h_pauseAbuseMinimalReserveRefill"
{
"heatFrames": 100
}
"h_pauseAbuseMinimalReserveRefill"
{
"heatFrames": 180
}
{
"or": [
"Wave",
{
"heatFrames": 40
}
]
}
{
"or": [
"HiJump",
"canWallJump"
]
}Clears obstacles: A, B |
|
Lure an Atomic from the left half of the room. Morph in the corner against the top stair and wait for the Atomic to approach. Quickly unmorph just before and freeze the Atomic just after it hits Samus. Requires: "f_DefeatedPhantoon"
{
"or": [
"h_bombThings",
{
"and": [
"Morph",
{
"obstaclesCleared": [
"A"
]
}
]
}
]
}
"h_frozenEnemyRunway"
{
"or": [
{
"enemyDamage": {
"enemy": "Atomic",
"type": "contact",
"hits": 1
}
},
"h_pauseAbuseMinimalReserveRefill"
]
}Exit condition: {
"leaveWithRunway": {
"length": 4,
"openEnd": 0
}
} |
From: 2
Middle Left Door
To: 7
Bowling In G-Mode
Crystal Flash then pause abuse to cross the spikeway with minimal Energy loss. Ride the statue, which will not take Samus down, and will instead drop her off in the spike pit somewhat near the door. Entrance condition: {
"comeInWithGMode": {
"mode": "any",
"morphed": false
}
}Requires: "canComplexGMode"
"f_DefeatedPhantoon"
"h_CrystalFlash"
{
"or": [
"SpaceJump",
{
"and": [
"canDash",
"canUseIFrames",
"h_pauseAbuseMinimalReserveRefill",
"h_pauseAbuseMinimalReserveRefill",
"h_pauseAbuseMinimalReserveRefill"
]
},
{
"and": [
"canUseIFrames",
"h_speedJump",
"h_pauseAbuseMinimalReserveRefill",
"h_pauseAbuseMinimalReserveRefill"
]
},
{
"and": [
{
"blueSuitShinecharge": {}
},
"canDash",
{
"shinespark": {
"frames": 80,
"excessFrames": 7
}
}
]
}
]
} |
From: 2
Bottom Left Door
To: 1
Top Left Doorway
Requires a runway of at least 4 tiles (with no open end) in the adjacent room. Use a Cross Room Jump into Water followed by a delayed Momentum Conserving Turnaround to reach the Morph tunnel above. Climbing the Left side of the center hole will run into an unavoidable Sciser that can be passed through by Morphing. Crossing to the right from the left door requires slightly more runway and takes a more precise turnaround. Samus must also stay near a side of the center hole to reach the Morph tunnels. Entrance condition: {
"comeInJumping": {
"speedBooster": "no",
"minTiles": 3.4375
}
}Requires: {
"notable": "Cross Room Jump Morph"
}
"canMidAirMorph"
"canCrossRoomJumpIntoWater"
"canMomentumConservingTurnaround"
"canKago"
{
"or": [
{
"enemyDamage": {
"enemy": "Sciser",
"type": "contact",
"hits": 1
}
},
"h_pauseAbuseMinimalReserveRefill"
]
} |
From: 2
Bottom Left Door
To: 1
Top Left Doorway
Requires a runway of at least 3 tiles (with an open end) in the adjacent room. Use a Cross Room Jump into Water followed by a delayed Momentum Conserving Turnaround to reach the Morph tunnel above. Climbing the Left side of the center hole will run into an unavoidable Scisor that can be passed through by Morphing. Crossing to the right from the left door requires slightly more runway and takes a more precise turnaround. Samus must also stay near a side of the center hole to reach the Morph tunnels. Entrance condition: {
"comeInJumping": {
"speedBooster": "yes",
"minTiles": 3
}
}Requires: {
"notable": "Cross Room Jump Morph"
}
"canMidAirMorph"
"canCrossRoomJumpIntoWater"
"canMomentumConservingTurnaround"
"canKago"
{
"or": [
{
"enemyDamage": {
"enemy": "Sciser",
"type": "contact",
"hits": 1
}
},
"h_pauseAbuseMinimalReserveRefill"
]
}Dev note: Extra run speeds between $1.2 and about $2.5 can work. |
From: 2
Bottom Left Door
To: 1
Top Left Doorway
Turn around to the left just before bonking the ceiling, to retain upward momentum. Then morph while passing through the crab and go through the morph tunnel to the left. Entrance condition: {
"comeInSpaceJumping": {
"speedBooster": "no",
"minTiles": 3.5625
}
}Requires: {
"notable": "Cross Room Jump Morph"
}
"canCrossRoomJumpIntoWater"
"canPreciseSpaceJump"
"canMomentumConservingTurnaround"
"canMidAirMorph"
"canKago"
{
"or": [
{
"enemyDamage": {
"enemy": "Sciser",
"type": "contact",
"hits": 1
}
},
"h_pauseAbuseMinimalReserveRefill"
]
}Dev note: Jump low through the door with at least $1.4 extra run speed. |
From: 2
Bottom Left Door
To: 1
Top Left Doorway
Turn around to the left just before bonking the ceiling, to retain upward momentum. Then morph while passing through the crab and go through the morph tunnel to the left. Entrance condition: {
"comeInSpaceJumping": {
"speedBooster": "yes",
"minTiles": 3
}
}Requires: {
"notable": "Cross Room Jump Morph"
}
"canCrossRoomJumpIntoWater"
"canPreciseSpaceJump"
"canMomentumConservingTurnaround"
"canMidAirMorph"
"canKago"
{
"or": [
{
"enemyDamage": {
"enemy": "Sciser",
"type": "contact",
"hits": 1
}
},
"h_pauseAbuseMinimalReserveRefill"
]
}Dev note: Jump low through the door with at least $1.2 extra run speed. |
From: 2
Bottom Right Door
To: 6
Middle Junction Near Top Left Pirate
Reduce Samus' run speed with a stutter or late dash tap in order to complete the shinecharge in time. With low energy, shinespark diagonally to the middle ledge on the left. Entrance condition: {
"comeInRunning": {
"speedBooster": "yes",
"minTiles": 4.4375
}
}Requires: "canWaterShineCharge"
{
"canShineCharge": {
"usedTiles": 23,
"openEnd": 2
}
}
{
"or": [
{
"shinespark": {
"frames": 43,
"excessFrames": 26
}
},
{
"and": [
"canMidairShinespark",
{
"shinespark": {
"frames": 38,
"excessFrames": 25
}
}
]
}
]
}
{
"or": [
{
"enemyDamage": {
"enemy": "Pink Space Pirate (standing)",
"type": "contact",
"hits": 1
}
},
{
"enemyKill": {
"enemies": [
[
"Pink Space Pirate (standing)"
]
],
"explicitWeapons": [
"Plasma"
]
}
},
"h_pauseAbuseMinimalReserveRefill",
{
"and": [
"canControlShinesparkEnd",
"canUseSpeedEchoes",
{
"resourceAtMost": [
{
"type": "RegularEnergy",
"count": 29
}
]
}
]
},
{
"and": [
"canInsaneJump",
"canTrickyDodgeEnemies"
]
}
]
}
{
"or": [
"h_underwaterCrouchJumpDownGrab",
"canSpringBallJumpMidAir",
{
"and": [
"Ice",
"Plasma"
]
}
]
} |
From: 2
Bottom Right Door
To: 6
Middle Junction Near Top Left Pirate
Start the dash as close to the door transition as possible in order to store the shinespark in time. Stand 2 or 3 pixels from the door for run speed to be low enough going into the next room. With low energy, shinespark diagonally to the middle ledge on the left. Entrance condition: {
"comeInRunning": {
"speedBooster": "yes",
"minTiles": 0.4375
}
}Requires: "canWaterShineCharge"
"canTrickyJump"
"h_shinechargeMaxRunway"
{
"or": [
{
"shinespark": {
"frames": 43,
"excessFrames": 26
}
},
{
"and": [
"canDodgeWhileShooting",
"canMidairShinespark",
{
"shinespark": {
"frames": 38,
"excessFrames": 25
}
}
]
}
]
}
{
"or": [
{
"enemyDamage": {
"enemy": "Pink Space Pirate (standing)",
"type": "contact",
"hits": 1
}
},
{
"enemyKill": {
"enemies": [
[
"Pink Space Pirate (standing)"
]
],
"explicitWeapons": [
"Plasma"
]
}
},
"h_pauseAbuseMinimalReserveRefill",
{
"and": [
"canControlShinesparkEnd",
"canUseSpeedEchoes",
{
"resourceAtMost": [
{
"type": "RegularEnergy",
"count": 29
}
]
}
]
},
{
"and": [
"canInsaneJump",
"canTrickyDodgeEnemies"
]
}
]
}
{
"or": [
"h_underwaterCrouchJumpDownGrab",
"canSpringBallJumpMidAir",
{
"and": [
"Ice",
"Plasma"
]
}
]
} |
From: 2
Bottom Right Door
To: 3
Middle Right Door
Run with enough speed to jump (after the transition) to reach the far left ledge. Either kill or Kago through the Fish enemy. At slightly higher run speeds, Samus can jump from the bottom of the slope and avoid the fish. Entrance condition: {
"comeInRunning": {
"speedBooster": "yes",
"minTiles": 7
}
}Requires: "HiJump"
"canSpeedyJump"
"canCrossRoomJumpIntoWater"
"canTrickyJump"
"canDodgeWhileShooting"
{
"or": [
{
"ammo": {
"type": "Super",
"count": 1
}
},
{
"and": [
"Charge",
"Plasma"
]
},
{
"and": [
"Plasma",
"canHitbox"
]
},
{
"and": [
"canKago",
"canLateralMidAirMorph",
{
"or": [
{
"enemyDamage": {
"enemy": "Skultera",
"type": "contact",
"hits": 1
}
},
"h_pauseAbuseMinimalReserveRefill"
]
}
]
}
]
} |
|
Requires: "canComplexGMode"
{
"notable": "G-Mode Overload Speed Blocks then use Global Crab"
}
"canKago"
{
"or": [
{
"enemyDamage": {
"enemy": "Sciser",
"type": "contact",
"hits": 1
}
},
"h_pauseAbuseMinimalReserveRefill"
]
}
{
"obstaclesCleared": [
"C"
]
}Dev note: This strat is here instead of part of 11->6, because if the item is an E-Tank, Samus can use it to escape. |
From: 1
Left Door
To: 3
Hidden Right Item
Requires getting back on Mama Turtle while she is at the right. The safest way is to have a normalized fall speed with either a full height jump or falling from the ledge above. If suitless, walking off the right ledge when she hits the left wall can be a good indicator to help land on her safely. Shrinking Samus' hitbox after touching the turtles back will also usually help. While near the right wall, shoot the item and grab it. If the shot misses, carefully fall back down and safely land on Mama Turtle again. After grabbing the item, fall on her again to avoid taking a hit; jump to the left at the top of the ride to escape the water safely. Requires: "h_navigateUnderwater"
"canUseEnemies"
"canCarefulJump"
{
"or": [
"canTrickyDodgeEnemies",
{
"and": [
"Gravity",
"canTrickyJump"
]
},
{
"enemyDamage": {
"enemy": "Kame (Tatori)",
"type": "contact",
"hits": 1
}
},
"h_pauseAbuseMinimalReserveRefill"
]
}Clears obstacles: A Dev note: FIXME: Is it worth adding a suitless bootless strat that follows this and gets back to the left without another hit? |
|
Requires getting back on Mama Turtle while she is at the right. The safest way is to have a normalized fall speed with either a full height jump or falling from the ledge above. If suitless, walking off the right ledge when she hits the left wall can be a good indicator to help land on her safely. Shrinking Samus' hitbox after touching the turtles back will also usually help. Requires: "h_navigateUnderwater"
"canUseEnemies"
{
"or": [
"canTrickyDodgeEnemies",
{
"and": [
"Gravity",
"canTrickyJump"
]
},
{
"haveBlueSuit": {}
},
{
"enemyDamage": {
"enemy": "Kame (Tatori)",
"type": "contact",
"hits": 1
}
},
"h_pauseAbuseMinimalReserveRefill"
]
}Clears obstacles: A |
|
Requires getting back on Mama Turtle while she is at the right. The safest way is to have a normalized fall speed with either a full height jump or falling from the ledge above. If suitless, walking off the right ledge when she hits the left wall can be a good indicator to help land on her safely. Shrinking Samus' hitbox after touching the turtles back will also usually help. At the top of the ride, jump to the top right ledge. Requires: "h_navigateUnderwater"
"canUseEnemies"
{
"or": [
"canTrickyDodgeEnemies",
{
"and": [
"Gravity",
"canTrickyJump"
]
},
{
"haveBlueSuit": {}
},
{
"enemyDamage": {
"enemy": "Kame (Tatori)",
"type": "contact",
"hits": 1
}
},
"h_pauseAbuseMinimalReserveRefill"
]
}Clears obstacles: A |
From: 1
Left Door
To: 5
Item
Needs a runway of 7 tiles with no open end in the adjacent room, to get enough height. This is a peak of height with speed booster, no hjb, while underwater. Jump before the transition with SpeedBooster off and then SpeedBooster back on after reaching the ceiling and Morphing. Entrance condition: {
"comeInJumping": {
"speedBooster": "yes",
"minTiles": 6.4375
}
}Requires: "canLateralMidAirMorph"
{
"disableEquipment": "SpeedBooster"
}
"canCrossRoomJumpIntoWater"
"canSpringBallBounce"
{
"or": [
{
"enemyDamage": {
"enemy": "Puyo",
"type": "contact",
"hits": 1
}
},
"canInsaneJump",
{
"and": [
"Plasma",
"canTrickyJump"
]
},
"h_pauseAbuseMinimalReserveRefill"
]
}Collects items: 5 |
|
It is important not to crouch before sparking, as the ceiling blocks are weird and will prevent the spark. Requires: {
"useFlashSuit": {}
}
{
"or": [
{
"shinespark": {
"frames": 120,
"excessFrames": 20
}
},
{
"and": [
"Gravity",
{
"shinespark": {
"frames": 94,
"excessFrames": 15
}
}
]
},
{
"and": [
"Gravity",
{
"shinespark": {
"frames": 94,
"excessFrames": 53
}
},
{
"or": [
{
"enemyDamage": {
"enemy": "Puyo",
"type": "contact",
"hits": 1
}
},
"h_pauseAbuseMinimalReserveRefill"
]
}
]
}
]
}Clears obstacles: A Dev note: Suitless with a reserve could use pause abuse, however, Samus can just refill, spark across, and then go back and refill. There are many ranges of Energy that could be used to spark through without a Puyo hit, but that is not considered, as Samus can just go back and refill. |
From: 3
Junction Left of Morph Tunnel
To: 1
Left Door
Requires: {
"or": [
"canIBJ",
"canWallJump",
"canSpringBallJumpMidAir"
]
}
{
"or": [
{
"enemyKill": {
"enemies": [
[
"Menu",
"Menu",
"Menu"
]
],
"explicitWeapons": [
"PowerBomb",
"ScrewAttack",
"Plasma",
"Missile",
"Super",
"Grapple"
]
}
},
{
"haveBlueSuit": {}
},
{
"and": [
{
"enemyKill": {
"enemies": [
[
"Menu",
"Menu",
"Menu"
]
]
}
},
{
"or": [
"canFarmWhileShooting",
{
"and": [
"canDodgeWhileShooting",
{
"or": [
"Wave",
"Spazer",
{
"enemyDamage": {
"enemy": "Menu",
"type": "contact",
"hits": 1
}
},
"h_pauseAbuseMinimalReserveRefill"
]
}
]
},
{
"enemyDamage": {
"enemy": "Menu",
"type": "contact",
"hits": 3
}
}
]
}
]
}
]
}Dev note: The Menus are relatively hard to dodge, and would end up with the same requirements as killing them with the Power Beam. |
|
Requires: "canPseudoScrew"
{
"or": [
{
"enemyDamage": {
"enemy": "Pink Space Pirate (standing)",
"type": "contact",
"hits": 1
}
},
"h_pauseAbuseMinimalReserveRefill"
]
}Clears obstacles: A |
|
Kill most of the pirates: leave the standing pirate on the ledge above the runway. Shinecharge and jump into its beam path to interrupt. Entrance condition: {
"comeInWithRMode": {}
}Requires: {
"or": [
{
"and": [
"h_CrystalFlashForReserveEnergy",
{
"or": [
{
"and": [
"canUseIFrames",
{
"or": [
{
"enemyDamage": {
"enemy": "Pink Space Pirate (standing)",
"type": "laser",
"hits": 2
}
},
"h_pauseAbuseMinimalReserveRefill"
]
}
]
},
"ScrewAttack",
"Plasma",
{
"getBlueSpeed": {
"usedTiles": 19,
"openEnd": 0
}
}
]
}
]
},
{
"and": [
{
"or": [
"ScrewAttack",
"Plasma",
{
"and": [
"canUseSpeedEchoes",
{
"getBlueSpeed": {
"usedTiles": 19,
"openEnd": 0
}
}
]
}
]
},
"h_RModeCanRefillReserves",
{
"partialRefill": {
"type": "ReserveEnergy",
"limit": 20
}
}
]
}
]
}
{
"canShineCharge": {
"usedTiles": 21,
"openEnd": 0
}
}
{
"or": [
"HiJump",
"canWallJump",
"canSpeedyJump",
"canSpringBallJumpMidAir"
]
}
{
"autoReserveTrigger": {
"maxReserveEnergy": 95
}
}
"canRModeSparkInterrupt"Clears obstacles: A, C, door_1 |
|
Requires: "canPseudoScrew"
{
"or": [
{
"enemyDamage": {
"enemy": "Pink Space Pirate (standing)",
"type": "contact",
"hits": 1
}
},
"h_pauseAbuseMinimalReserveRefill"
]
}Clears obstacles: C |
From: 3
Central Junction
To: 3
Central Junction
Requires: "canPseudoScrew"
{
"or": [
{
"enemyDamage": {
"enemy": "Pink Space Pirate (standing)",
"type": "contact",
"hits": 3
}
},
{
"and": [
"canTrickyJump",
{
"enemyDamage": {
"enemy": "Pink Space Pirate (standing)",
"type": "contact",
"hits": 2
}
}
]
},
{
"and": [
"h_pauseAbuseMinimalReserveRefill",
"h_pauseAbuseMinimalReserveRefill"
]
}
]
}Clears obstacles: B |
|
Spark vertically to avoid hitting the right ledge. Entrance condition: {
"comeInShinecharged": {},
"comesThroughToilet": "any"
}Requires: {
"shineChargeFrames": 120
}
"canShinechargeMovementComplex"
{
"or": [
{
"enemyDamage": {
"enemy": "Choot",
"type": "contact",
"hits": 1
}
},
{
"enemyKill": {
"enemies": [
[
"Choot"
]
],
"explicitWeapons": [
"Missile",
"Super",
"ScrewAttack",
"PseudoScrew",
"Plasma",
"Charge+Wave",
"Charge+Spazer"
]
}
},
"h_pauseAbuseMinimalReserveRefill"
]
}
{
"shinespark": {
"frames": 37,
"excessFrames": 10
}
} |
From: 1
Left Door
To: 4
Junction Below Sand Entrance
Requires a runway of 7 tiles (with no open end) in the adjacent room. Requires two precise inputs of jumping through the doorway and a short aiming down press before hitting the ceiling. Damage boost off of the right Evir in order to land on the first pillar. With Ice, instead freeze the Evir to land on it and avoid the damage. When entering the room with a bad jump, it is possible to perform a midair wiggle to get back to the door platform. Entrance condition: {
"comeInJumping": {
"speedBooster": "no",
"minTiles": 6.4375
}
}Requires: {
"notable": "Cross Room Jump with Ice or Damage Boost"
}
"canCrossRoomJumpIntoWater"
"canPlayInSand"
"canInsaneJump"
{
"or": [
"canTrickyUseFrozenEnemies",
{
"and": [
"canNeutralDamageBoost",
{
"enemyDamage": {
"enemy": "Evir",
"type": "contact",
"hits": 1
}
}
]
},
{
"and": [
"canNeutralDamageBoost",
"h_pauseAbuseMinimalReserveRefill"
]
}
]
} |
|
Requires: {
"or": [
{
"enemyDamage": {
"enemy": "Evir",
"type": "particle",
"hits": 1
}
},
"h_pauseAbuseMinimalReserveRefill"
]
} |
From: 4
Junction Below Sand Entrance
To: 1
Left Door
If entering from the sandfall above, come in at the far left of the transition, with either a spin-jump or i-frames, to avoid the Evir shot; land on the right side of the pillar to the left, being careful to not bring left Evir on camera. If coming from the right side of the room, then moonwalk on the center pillar to scroll the camera as far right as possible, to avoid getting hit by an Evir shot; alternatively, jump slightly to the left and freeze the Evir, then return back to the center pillar before jumping across the sand. Freeze the right Evir and jump onto it. Quickly move left and fire an angle-down shot to freeze the left Evir before it descends too far. Jump onto the left Evir, back up to the right side of it to maximize space to build momentum, and jump to the left onto the sand and then onto the ledge. If Samus does not quite get enough height to make it onto the ledge, then break spin, turn around to the right, land on the sand again, and do a turnaround spin-jump to the left. If the Evirs descend too far, it is possible to use a Power Bomb to bring them back up again, but caution is needed to avoid killing the first Evir, and it is difficult to avoid getting shot. Requires: {
"notable": "Suitless Bootless Evir Freeze (Center to Left)"
}
"canSuitlessMaridia"
"canTrickyJump"
"canTrickyUseFrozenEnemies"
"canPlayInSand"
"canCameraManip"
{
"or": [
"canTrickyDodgeEnemies",
{
"and": [
{
"ammo": {
"type": "PowerBomb",
"count": 1
}
},
{
"enemyDamage": {
"enemy": "Evir",
"type": "particle",
"hits": 2
}
}
]
},
{
"and": [
{
"ammo": {
"type": "PowerBomb",
"count": 1
}
},
"h_pauseAbuseMinimalReserveRefill",
"h_pauseAbuseMinimalReserveRefill"
]
}
]
}
{
"noBlueSuit": {}
}Dev note: This strat is still possible after falling through the sandpit after being centered by the toilet by landing towards the right, then crossing back left. |
|
Requires: "canSuitlessMaridia"
"HiJump"
"canPlayInSand"
{
"or": [
"canTrickyJump",
{
"enemyDamage": {
"enemy": "Evir",
"type": "particle",
"hits": 1
}
}
]
}
{
"or": [
"canTrickyDodgeEnemies",
{
"enemyDamage": {
"enemy": "Evir",
"type": "particle",
"hits": 1
}
},
"h_pauseAbuseMinimalReserveRefill"
]
}
{
"noBlueSuit": {}
} |
|
On the left side of the raised platform, jump for max height. Lateral Midair Morph for horizontal momentum, and perform the Spring Ball jump the moment before touching the sandfall. Pause again to disable springball as soon as possible. Requires: {
"notable": "Spring Ball HiJump"
}
"canSuitlessMaridia"
"HiJump"
"canTrickySpringBallJump"
"canStationaryLateralMidAirMorph"
"canSpringFling"
"canPlayInSand"
{
"or": [
{
"enemyDamage": {
"enemy": "Evir",
"type": "particle",
"hits": 1
}
},
{
"enemyKill": {
"enemies": [
[
"Evir"
]
],
"explicitWeapons": [
"Plasma",
"Super",
"PowerBomb"
]
}
},
"canTrickyDodgeEnemies",
"h_pauseAbuseMinimalReserveRefill"
]
}
{
"or": [
{
"noBlueSuit": {}
},
{
"notable": "Blue Suit Sand Walk"
}
]
} |
From: 1
West Leg Left Door
To: 2
East Leg Right Door
Preselect Grapple and be ready to use it when entering the room. Release up or angle up before releasing Grapple so the shinespark does not activate instantly. Use the windup frames for a shinespark to extend the duration timer. Entrance condition: {
"comeInShinecharged": {}
}Requires: {
"shineChargeFrames": 150
}
{
"notable": "Shinespark"
}
"h_navigateUnderwater"
"canShinechargeMovementComplex"
"Grapple"
{
"shinespark": {
"frames": 65,
"excessFrames": 9
}
}
{
"or": [
{
"enemyDamage": {
"enemy": "Menu",
"type": "contact",
"hits": 1
}
},
"h_pauseAbuseMinimalReserveRefill"
]
} |
From: 3
West Leg Right Door
To: 2
East Leg Right Door
Preselect Grapple and be ready to use it when entering the room. Release up or angle up before releasing Grapple so the shinespark does not activate instantly. Use the windup frames for a shinespark to extend the duration timer. Entrance condition: {
"comeInShinecharged": {}
}Requires: {
"shineChargeFrames": 150
}
{
"notable": "Shinespark"
}
"h_navigateUnderwater"
"canShinechargeMovementComplex"
"Grapple"
{
"shinespark": {
"frames": 65,
"excessFrames": 9
}
}
{
"or": [
{
"enemyDamage": {
"enemy": "Menu",
"type": "contact",
"hits": 1
}
},
"h_pauseAbuseMinimalReserveRefill"
]
} |
|
Use the grapple block to initiate a Grapple Jump to climb up to the higher level and above the water line. Aiming the Grapple Jump to line up with the one tile hole is difficult and Samus is moving at high speeds. Escaping the water is also difficult as Samus must be standing at the water line when jumping for the next part of the grapple jump. It may be easier to jump out of the water by turning HiJump off. A Grapple Jump can be a spin jump by running briefly before jumping and that can be used to begin Walljumping or Space Jumping. Requires: {
"notable": "Grapple Jump"
}
"canSuitlessMaridia"
"canTrickyGrappleJump"
"canMidairWiggle"
{
"or": [
{
"enemyDamage": {
"enemy": "Menu",
"type": "contact",
"hits": 1
}
},
"SpaceJump",
{
"and": [
"canConsecutiveWallJump",
{
"or": [
"ScrewAttack",
"canTrickyWallJump"
]
}
]
},
"h_pauseAbuseMinimalReserveRefill",
"canTrickyDodgeEnemies"
]
} |
|
The swarm of Menus will attack Samus at the top of the room. Tank them or kill them with Screw or Pseudo Screw. Requires: "Gravity"
"SpaceJump"
{
"or": [
"ScrewAttack",
"canPseudoScrew",
{
"haveBlueSuit": {}
},
{
"enemyDamage": {
"enemy": "Menu",
"type": "contact",
"hits": 1
}
},
"h_pauseAbuseMinimalReserveRefill"
]
}Dev note: FIXME: 5->2 strats could be added, including x-ray climb and g-mode. |
|
Watch for the water level to start falling to time the jump to escape at its lowest point. Then use SpaceJump to splash on top of the water. Time another jump with the water level or walljump to fully escape the water. Requires: {
"or": [
{
"and": [
"canSpaceJumpWaterBounce",
"canWallJump"
]
},
"canSpaceJumpWaterEscape"
]
}
"HiJump"
{
"or": [
{
"enemyDamage": {
"enemy": "Menu",
"type": "contact",
"hits": 1
}
},
"ScrewAttack",
"canTrickyWallJump",
"canPseudoScrew",
{
"haveBlueSuit": {}
},
"h_pauseAbuseMinimalReserveRefill"
]
} |
|
Requires: {
"or": [
{
"enemyDamage": {
"enemy": "Evir",
"type": "particle",
"hits": 1
}
},
"h_pauseAbuseMinimalReserveRefill"
]
} |
From: 4
Below Sand Entrance
To: 5
Left Pillar Junction
Use the projectile from a fully submerged Evir to boost Samus into the sandfall, providing just enough height to make the first and hardest jump. Time the projectile to hit Samus when at the maximum height from a jump. The hit must be on the right side of Samus and with no inputs held, but also hold forward during the damage knockback to move through the sandfall. Getting a good jump while on the right side of the next floating block can get Samus to the leftmost block. With a clean jump off of the sand, Samus can then get onto the final vertical pillar. Set reserves to manual to pause abuse the projectile hit. Setting them to auto works too, ideally with no more than 1 energy in reserves. Requires: {
"notable": "Suitless Damage Boost (Center to Left)"
}
"canSuitlessMaridia"
"canPlayInSand"
"canInsaneJump"
"h_underwaterCrouchJump"
"canNeutralDamageBoost"
{
  "or": [
    {
      "enemyDamage": {
        "enemy": "Evir",
        "type": "particle",
        "hits": 1
      }
    },
    "h_pauseAbuseMinimalReserveRefill"
  ]
} |
From: 1
Top Right Door
To: 2
Left Door
Entrance condition: {
"comeInShinecharged": {},
"comesThroughToilet": "no"
}Requires: {
"shineChargeFrames": 95
}
"canShinechargeMovementTricky"
{
  "or": [
    {
      "enemyDamage": {
        "enemy": "Blue Sidehopper",
        "type": "contact",
        "hits": 1
      }
    },
    "h_pauseAbuseMinimalReserveRefill"
  ]
}
{
"shinespark": {
"frames": 21,
"excessFrames": 0
}
}Exit condition: {
"leaveWithSpark": {}
}Unlocks doors: {"types":["super"],"requires":[]}
{"types":["missiles","powerbomb"],"requires":["never"]} |
|
Wait for the left hopper to move right so it does not follow Samus as i-frames run out. A damage boost using the top hopper also moves through the room fast enough to be safe. Requires: {
"or": [
{
"enemyDamage": {
"enemy": "Blue Sidehopper",
"type": "contact",
"hits": 1
}
},
"h_pauseAbuseMinimalReserveRefill"
]
}
{
"or": [
{
"and": [
"canTrickyJump",
"canUseIFrames"
]
},
{
"enemyDamage": {
"enemy": "Blue Sidehopper",
"type": "contact",
"hits": 1
}
}
]
}Unlocks doors: {"types":["super"],"requires":[]}
{"types":["missiles","powerbomb"],"requires":[{"enemyDamage":{"enemy":"Blue Sidehopper","type":"contact","hits":1}}]} |
|
Entrance condition: {
"comeInNormally": {}
}Requires: {
"or": [
{
"enemyDamage": {
"enemy": "Blue Sidehopper",
"type": "contact",
"hits": 1
}
},
"h_pauseAbuseMinimalReserveRefill"
]
}Unlocks doors: {"types":["super"],"requires":[]}
{"types":["missiles","powerbomb"],"requires":["never"]} |
From: 2
Left Door
To: 2
Left Door
Entrance condition: {
"comeInWithMockball": {
"speedBooster": "any",
"adjacentMinTiles": 0,
"remoteAndLandingMinTiles": [
[
0,
0
]
]
}
}Requires: {
"or": [
{
"enemyDamage": {
"enemy": "Blue Sidehopper",
"type": "contact",
"hits": 1
}
},
"h_pauseAbuseMinimalReserveRefill"
]
}Unlocks doors: {"types":["super"],"requires":[]}
{"types":["missiles","powerbomb"],"requires":["never"]}Dev note: This is used to fulfill the requirement on exiting the previous room. FIXME: The hopper hit can be avoided depending on the entry speed and canPrepareForNextRoom. |
