canPreciseSpaceJump (Expert)

Carefully controlling the height and timing of Space Jump in order to carry momentum, and possibly blue speed, across substantial distances to specific locations.
Strats ()
|
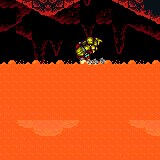
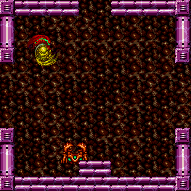
Gain speed using the long runway at the top-right of room, and use Space Jump to carry into the other room. Requires: "canPreciseSpaceJump"
{
"obstaclesCleared": [
"A"
]
}Exit condition: {
"leaveSpaceJumping": {
"remoteRunway": {
"length": 31,
"openEnd": 1,
"steepUpTiles": 9
},
"maxExtraRunSpeed": "$5.A"
}
}Dev note: This runway has some unusable tiles because the Space Jump descent will not work with too high speed. |
|
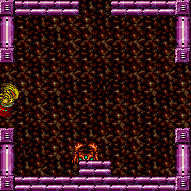
Gain speed using the long runway at the top-right of room, and use Space Jump to carry it into the next room. Requires: "canPreciseSpaceJump"
{
"obstaclesCleared": [
"A"
]
}Exit condition: {
"leaveSpinning": {
"remoteRunway": {
"length": 31,
"openEnd": 1,
"steepUpTiles": 9
},
"maxExtraRunSpeed": "$5.A"
}
} |
|
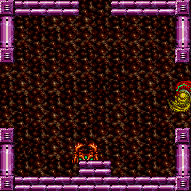
Gain speed using the long runway at the top-right of room, and use Space Jump to carry it across the room into a mockball (or speedball) at the doorway. Requires: "canPreciseSpaceJump"
{
"obstaclesCleared": [
"A"
]
}Exit condition: {
"leaveWithMockball": {
"remoteRunway": {
"length": 31,
"openEnd": 1,
"steepUpTiles": 9
},
"landingRunway": {
"length": 3,
"openEnd": 1
},
"maxExtraRunSpeed": "$5.A"
}
} |
From: 1
Top Left Door
To: 1
Top Left Door
Gain speed using the long runway at the top-right of room, and use Space Jump to carry it across the room into a spring ball bounce into the other room. Requires: "canPreciseSpaceJump"
{
"obstaclesCleared": [
"A"
]
}Exit condition: {
"leaveWithSpringBallBounce": {
"remoteRunway": {
"length": 31,
"openEnd": 1,
"steepUpTiles": 9
},
"landingRunway": {
"length": 3,
"openEnd": 1
},
"maxExtraRunSpeed": "$5.A",
"movementType": "uncontrolled"
}
} |
|
Requires: "Gravity" "canPreciseSpaceJump" "canInsaneJump" Exit condition: {
"leaveSpinning": {
"remoteRunway": {
"length": 18,
"openEnd": 1,
"steepUpTiles": 1,
"steepDownTiles": 2
},
"minExtraRunSpeed": "$1.3",
"maxExtraRunSpeed": "$2.A"
}
} |
|

Requires: "Gravity" "canPreciseSpaceJump" Exit condition: {
"leaveWithMockball": {
"remoteRunway": {
"length": 18,
"openEnd": 1,
"steepUpTiles": 1,
"steepDownTiles": 2
},
"landingRunway": {
"length": 8,
"openEnd": 1,
"steepUpTiles": 1
},
"maxExtraRunSpeed": "$2.F"
}
}Dev note: A bit higher speed can also work but would be more difficult |
|
Requires: "Gravity" "canPreciseSpaceJump" Exit condition: {
"leaveWithSpringBallBounce": {
"remoteRunway": {
"length": 18,
"openEnd": 1,
"steepUpTiles": 1,
"steepDownTiles": 2
},
"landingRunway": {
"length": 8,
"openEnd": 1,
"steepUpTiles": 1
},
"movementType": "controlled"
}
} |
From: 3
Junction (Left side Pit)
To: 2
Right Door
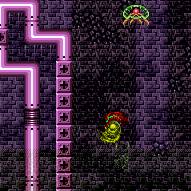
Standing from the rightmost platform, jump to the right of the stalagmite. Perform a midair wiggle to get to the left to the stalagmite, then precisely wall jump off of it. Then perform a frame perfect space jump at the water line to bounce on the water over to the Kamer platform. Requires: {
"notable": "Precise Space Jump Water Escape"
}
"canSpaceJumpWaterBounce"
"canPreciseSpaceJump"
"canPreciseWallJump"
"canInsaneJump"
"canMidairWiggle" |
From: 4
Lower Section - Top Right Door
To: 4
Lower Section - Top Right Door

Requires: "canPreciseSpaceJump" Exit condition: {
"leaveSpaceJumping": {
"remoteRunway": {
"length": 23,
"openEnd": 1,
"steepUpTiles": 1,
"steepDownTiles": 5
}
}
} |
From: 4
Lower Section - Top Right Door
To: 4
Lower Section - Top Right Door


Requires: "canPreciseSpaceJump" Exit condition: {
"leaveWithMockball": {
"remoteRunway": {
"length": 23,
"openEnd": 1,
"steepUpTiles": 1,
"steepDownTiles": 5
},
"landingRunway": {
"length": 1,
"openEnd": 1
}
}
} |
From: 4
Lower Section - Top Right Door
To: 4
Lower Section - Top Right Door
Requires: "canPreciseSpaceJump" Exit condition: {
"leaveWithSpringBallBounce": {
"remoteRunway": {
"length": 23,
"openEnd": 1,
"steepUpTiles": 1,
"steepDownTiles": 5
},
"landingRunway": {
"length": 1,
"openEnd": 1
},
"movementType": "uncontrolled"
}
} |
From: 5
Lower Section - Bottom Right Door
To: 5
Lower Section - Bottom Right Door

Requires: "canPreciseSpaceJump" Exit condition: {
"leaveSpaceJumping": {
"remoteRunway": {
"length": 23,
"openEnd": 1,
"steepUpTiles": 1,
"steepDownTiles": 5
}
}
} |
From: 5
Lower Section - Bottom Right Door
To: 5
Lower Section - Bottom Right Door
Requires: "canPreciseSpaceJump" Exit condition: {
"leaveWithSpringBallBounce": {
"remoteRunway": {
"length": 23,
"openEnd": 1,
"steepUpTiles": 1,
"steepDownTiles": 5
},
"landingRunway": {
"length": 9,
"openEnd": 1,
"steepUpTiles": 2
},
"movementType": "uncontrolled"
}
} |
|
Requires: "canPreciseSpaceJump" Exit condition: {
"leaveSpaceJumping": {
"remoteRunway": {
"length": 16,
"openEnd": 1
},
"minExtraRunSpeed": "$1.5",
"maxExtraRunSpeed": "$3.9"
}
}Unlocks doors: {"types":["ammo"],"requires":[]} |
|
Requires: "HiJump" "canPreciseSpaceJump" Exit condition: {
"leaveSpinning": {
"remoteRunway": {
"length": 14,
"openEnd": 1
},
"maxExtraRunSpeed": "$2.0",
"blue": "yes"
}
}Dev note: TODO: Instead of using blue speed, the bomb blocks could also be broken in a different way (or gone around) but it's not clear if there's any application. |
From: 7
Right Side - Door Behind Super Block
To: 13
Central Junction
Entrance condition: {
"comeInBlueSpaceJumping": {
"maxExtraRunSpeed": "$1.F"
}
}Requires: {
"notable": "Super Block Speedball"
}
"canPreciseSpaceJump"
"canInsaneJump"
"canSpeedball"Clears obstacles: F |
From: 3
Dry Platform Junction
To: 1
Right Door
Requires: "canPreciseSpaceJump" Exit condition: {
"leaveSpaceJumping": {
"remoteRunway": {
"length": 32,
"openEnd": 1
}
}
}Unlocks doors: {"types":["ammo"],"requires":[]} |
|
Shoot the block while moving up after a Space Jump; then speedball through the morph tunnel. Entrance condition: {
"comeInBlueSpinning": {
"maxExtraRunSpeed": "$2.0",
"unusableTiles": 0
}
}Requires: {
"notable": "Jump Shot Speedball"
}
"canPreciseSpaceJump"
"canSpeedball"Dev note: This can also work at much higher speeds but would be more difficult. |
From: 2
Right Door
To: 1
Left Door

Use Space Jump to carry blue speed all the way across the room. Entrance condition: {
"comeInGettingBlueSpeed": {
"length": 8,
"openEnd": 1
}
}Requires: "canPreciseSpaceJump" "canChainTemporaryBlue" Exit condition: {
"leaveWithTemporaryBlue": {}
}Unlocks doors: {"types":["ammo"],"requires":[]} |
|
Fill up with the respawning Geegas. Climb to the top of the tower without killing the Rippers. Let the shot block respawn then shinecharge across it. Then quickly jump down into a Ripper to interrupt. Entrance condition: {
"comeInWithRMode": {}
}Requires: {
"refill": [
"Energy"
]
}
{
"or": [
"canTrivialUseFrozenEnemies",
{
"and": [
{
"notable": "Hero Shot"
},
"canHeroShot",
"canTrickyWallJump"
]
},
{
"and": [
"SpaceJump",
"HiJump",
"h_midAirShootUp",
"canTrickyJump"
]
},
{
"and": [
"canPreciseSpaceJump",
"canTrickyDodgeEnemies",
"h_midAirShootUp"
]
}
]
}
{
"or": [
{
"canShineCharge": {
"usedTiles": 12,
"openEnd": 0
}
},
{
"and": [
{
"doorUnlockedAtNode": 5
},
{
"canShineCharge": {
"usedTiles": 13,
"openEnd": 0
}
}
]
}
]
}
{
"autoReserveTrigger": {
"maxReserveEnergy": 95
}
}
"canRModeSparkInterrupt"Clears obstacles: B Unlocks doors: {"nodeId":5,"types":["ammo"],"requires":[]} |
From: 2
Middle Left Door (Behind Power Bomb Blocks)
To: 5
Top Right Door
Fill up with the respawning Geegas. Climb to the top of the tower without killing the Rippers. Let the shot block respawn then shinecharge across it. Then quickly jump down into a Ripper to interrupt. Entrance condition: {
"comeInWithRMode": {}
}Requires: "h_usePowerBomb"
{
"refill": [
"Energy"
]
}
{
"or": [
"canTrivialUseFrozenEnemies",
{
"and": [
{
"notable": "Hero Shot"
},
"canHeroShot",
"canTrickyWallJump"
]
},
{
"and": [
"SpaceJump",
"HiJump",
"h_midAirShootUp",
"canTrickyJump"
]
},
{
"and": [
"canPreciseSpaceJump",
"canTrickyDodgeEnemies",
"h_midAirShootUp"
]
}
]
}
{
"or": [
{
"canShineCharge": {
"usedTiles": 12,
"openEnd": 0
}
},
{
"and": [
{
"doorUnlockedAtNode": 5
},
{
"canShineCharge": {
"usedTiles": 13,
"openEnd": 0
}
}
]
}
]
}
{
"autoReserveTrigger": {
"maxReserveEnergy": 95
}
}
"canRModeSparkInterrupt"Clears obstacles: B Unlocks doors: {"nodeId":5,"types":["ammo"],"requires":[]} |
|
Fill up with the respawning Geegas. Climb back to the top of the tower without killing the Rippers. Let the shot block respawn then shinecharge across it. Then quickly jump down into a Ripper to interrupt. Entrance condition: {
"comeInWithRMode": {}
}Requires: {
"refill": [
"Energy"
]
}
{
"or": [
"canTrivialUseFrozenEnemies",
{
"and": [
{
"notable": "Hero Shot"
},
"canHeroShot",
"canTrickyWallJump"
]
},
{
"and": [
"SpaceJump",
"HiJump",
"h_midAirShootUp",
"canTrickyJump"
]
},
{
"and": [
"canPreciseSpaceJump",
"canTrickyDodgeEnemies",
"h_midAirShootUp"
]
}
]
}
{
"or": [
{
"canShineCharge": {
"usedTiles": 12,
"openEnd": 0
}
},
{
"and": [
{
"doorUnlockedAtNode": 5
},
{
"canShineCharge": {
"usedTiles": 13,
"openEnd": 0
}
}
]
}
]
}
{
"autoReserveTrigger": {
"maxReserveEnergy": 95
}
}
"canRModeSparkInterrupt"Clears obstacles: B Unlocks doors: {"nodeId":5,"types":["ammo"],"requires":[]} |
From: 9
Junction (Top Rippers)
To: 5
Top Right Door


Climb the top of Red Tower with just Space Jump. This can be done by dodging the Rippers and shooting the block as Samus is going upward, so she goes through the block as it breaks. The positioning and timing of the final jump and shot is more precise without HiJump. Requires: "canPreciseSpaceJump" "canTrickyDodgeEnemies" "h_midAirShootUp" "h_trickyToCarryFlashSuit" |
|
Requires: "h_heatedRemoteRunwayPreciseSpaceJump"
{
"heatFrames": 470
}Exit condition: {
"leaveSpaceJumping": {
"remoteRunway": {
"length": 12,
"openEnd": 1
},
"minExtraRunSpeed": "$2.0"
}
}Dev note: This uses the runway in the middle of the room but logically starts at the door, to ensure it can be opened. |
|
Requires: "h_heatedRemoteRunwaySpaceJump"
{
"heatFrames": 470
}Exit condition: {
"leaveSpinning": {
"remoteRunway": {
"length": 12,
"openEnd": 1
},
"minExtraRunSpeed": "$2.0"
}
}Dev note: This uses the runway in the middle of the room but logically starts at the door, to ensure it can be opened. |
|
Requires: "h_heatedRemoteRunwaySpaceJump"
{
"heatFrames": 290
}Exit condition: {
"leaveSpaceJumping": {
"remoteRunway": {
"length": 15,
"openEnd": 0,
"gentleUpTiles": 3,
"gentleDownTiles": 3
}
}
} |
|
Requires: "h_heatedRemoteRunwayPreciseSpaceJump"
{
"heatFrames": 370
}Exit condition: {
"leaveSpaceJumping": {
"remoteRunway": {
"length": 11,
"openEnd": 1
},
"minExtraRunSpeed": "$2.0"
}
}Dev note: This uses the runway in the middle of the room but logically starts at the door, to ensure it can be opened. |
|
Requires: "h_heatedRemoteRunwaySpaceJump"
{
"heatFrames": 370
}Exit condition: {
"leaveSpinning": {
"remoteRunway": {
"length": 11,
"openEnd": 1
},
"minExtraRunSpeed": "$2.0"
}
}Dev note: This uses the runway in the middle of the room but logically starts at the door, to ensure it can be opened. |
|
Requires: {
"obstaclesCleared": [
"A"
]
}
"h_heatedRemoteRunwaySpaceJump"
{
"heatFrames": 215
}Exit condition: {
"leaveWithMockball": {
"remoteRunway": {
"length": 12,
"openEnd": 1
},
"landingRunway": {
"length": 6,
"openEnd": 1
},
"minExtraRunSpeed": "$2.0"
}
}Unlocks doors: {"types":["super"],"requires":[]}
{"types":["missiles","powerbomb"],"requires":["never"]} |
|
Requires: "h_heatedRemoteRunwaySpaceJump"
{
"heatFrames": 215
}Exit condition: {
"leaveWithSpringBallBounce": {
"remoteRunway": {
"length": 11,
"openEnd": 1
},
"landingRunway": {
"length": 6,
"openEnd": 1
},
"minExtraRunSpeed": "$2.0",
"movementType": "uncontrolled"
}
}Unlocks doors: {"types":["super"],"requires":[]}
{"types":["missiles","powerbomb"],"requires":["never"]} |
|
Requires: "h_heatedRemoteRunwaySpaceJump"
{
"heatFrames": 185
}Exit condition: {
"leaveWithMockball": {
"remoteRunway": {
"length": 11,
"openEnd": 1
},
"landingRunway": {
"length": 6,
"openEnd": 1
},
"minExtraRunSpeed": "$2.0"
}
}Unlocks doors: {"types":["super"],"requires":[]}
{"types":["missiles","powerbomb"],"requires":["never"]} |
|
Requires: "h_heatedRemoteRunwaySpaceJump"
{
"heatFrames": 185
}Exit condition: {
"leaveWithSpringBallBounce": {
"remoteRunway": {
"length": 11,
"openEnd": 1
},
"landingRunway": {
"length": 6,
"openEnd": 1
},
"minExtraRunSpeed": "$2.0",
"movementType": "uncontrolled"
}
}Unlocks doors: {"types":["super"],"requires":[]}
{"types":["missiles","powerbomb"],"requires":["never"]} |
|
Entrance condition: {
"comeInGettingBlueSpeed": {
"length": 3,
"openEnd": 1,
"minExtraRunSpeed": "$1.C"
}
}Requires: "canBlueSpaceJump"
"canPreciseSpaceJump"
{
"heatFrames": 230
} |
|

Entrance condition: {
"comeInGettingBlueSpeed": {
"length": 3,
"openEnd": 1
}
}Requires: "canBlueSpaceJump"
"canPreciseSpaceJump"
{
"heatFrames": 220
} |
|
Without Screw or pseudo screw, it is possible to carefully space jump over the left Multiviola. Requires: "canDash"
"SpaceJump"
{
"or": [
"ScrewAttack",
{
"and": [
"canPrepareForNextRoom",
"canPseudoScrew"
]
},
"canPreciseSpaceJump"
]
}
{
"heatFrames": 310
} |
|
Requires: "h_heatedRemoteRunwayPreciseSpaceJump"
{
"heatFrames": 320
}Exit condition: {
"leaveSpaceJumping": {
"remoteRunway": {
"length": 5,
"openEnd": 2
},
"minExtraRunSpeed": "$1.B"
}
} |
|
Requires: "h_heatedRemoteRunwaySpaceJump"
{
"heatFrames": 320
}Exit condition: {
"leaveSpinning": {
"remoteRunway": {
"length": 5,
"openEnd": 2
},
"minExtraRunSpeed": "$1.B"
}
} |
|
Requires: "canTrickyJump"
{
"or": [
"h_heatProof",
"h_heatedRemoteRunwaySpaceJump",
"canInsaneJump"
]
}
{
"heatFrames": 320
}Exit condition: {
"leaveWithMockball": {
"remoteRunway": {
"length": 5,
"openEnd": 2
},
"landingRunway": {
"length": 4,
"openEnd": 1
},
"minExtraRunSpeed": "$1.B"
}
} |
From: 1
Left Door
To: 1
Left Door
Requires: "h_heatedRemoteRunwaySpaceJump"
{
"heatFrames": 320
}Exit condition: {
"leaveWithSpringBallBounce": {
"remoteRunway": {
"length": 5,
"openEnd": 2
},
"landingRunway": {
"length": 4,
"openEnd": 1
},
"minExtraRunSpeed": "$1.B",
"movementType": "uncontrolled"
}
} |
|
Requires: "h_heatedRemoteRunwaySpaceJump"
{
"heatFrames": 540
}
{
"or": [
"canTrickyDodgeEnemies",
{
"and": [
{
"heatFrames": 100
},
{
"enemyKill": {
"enemies": [
[
"Dragon"
],
[
"Dragon"
]
],
"excludedWeapons": [
"Bombs"
]
}
}
]
}
]
}Exit condition: {
"leaveSpinning": {
"remoteRunway": {
"length": 5,
"openEnd": 2
},
"minExtraRunSpeed": "$1.A"
}
} |
|
Requires: "h_heatedRemoteRunwaySpaceJump"
{
"heatFrames": 540
}
{
"or": [
"canTrickyDodgeEnemies",
{
"and": [
{
"heatFrames": 100
},
{
"enemyKill": {
"enemies": [
[
"Dragon"
],
[
"Dragon"
]
],
"excludedWeapons": [
"Bombs"
]
}
}
]
}
]
}Exit condition: {
"leaveWithMockball": {
"remoteRunway": {
"length": 5,
"openEnd": 2
},
"landingRunway": {
"length": 4,
"openEnd": 1
},
"minExtraRunSpeed": "$1.A"
}
}Dev note: FIXME: a 1 -> 2 version of this could be added, to save heat frames. |
From: 2
Right Door
To: 2
Right Door
Requires: "h_heatedRemoteRunwaySpaceJump"
{
"heatFrames": 540
}
{
"or": [
"canTrickyDodgeEnemies",
{
"and": [
{
"heatFrames": 100
},
{
"enemyKill": {
"enemies": [
[
"Dragon"
],
[
"Dragon"
]
],
"excludedWeapons": [
"Bombs"
]
}
}
]
}
]
}Exit condition: {
"leaveWithSpringBallBounce": {
"remoteRunway": {
"length": 5,
"openEnd": 2
},
"landingRunway": {
"length": 4,
"openEnd": 1
},
"minExtraRunSpeed": "$1.A",
"movementType": "uncontrolled"
}
}Dev note: FIXME: a 1 -> 2 version of this could be added, to save heat frames. |
From: 3
Left Shaft - Middle Right Door
To: 3
Left Shaft - Middle Right Door
Requires: {
"heatFrames": 140
}
"h_heatedRemoteRunwayPreciseSpaceJump"Exit condition: {
"leaveSpaceJumping": {
"remoteRunway": {
"length": 7,
"openEnd": 0
}
}
} |
From: 4
Left Shaft - Top Right Door
To: 4
Left Shaft - Top Right Door
Requires: {
"heatFrames": 140
}
"h_heatedRemoteRunwayPreciseSpaceJump"Exit condition: {
"leaveSpaceJumping": {
"remoteRunway": {
"length": 7,
"openEnd": 0
}
}
} |
From: 1
Top Left Door
To: 2
Bottom Left Door
Requires: "canSuitlessLavaDive"
"canFarmWhileShooting"
{
"enemyKill": {
"enemies": [
[
"Fune",
"Fune"
]
],
"explicitWeapons": [
"PowerBomb"
]
}
}
{
"or": [
{
"and": [
"canTrickyJump",
{
"disableEquipment": "SpeedBooster"
},
"canMockball",
{
"lavaFramesWithEnergyDrops": {
"frames": 120,
"drops": [
{
"enemy": "Fune",
"count": 1
}
]
}
}
]
},
{
"lavaFramesWithEnergyDrops": {
"frames": 165,
"drops": [
{
"enemy": "Fune",
"count": 1
}
]
}
}
]
}
{
"lavaFrames": 35
}
{
"or": [
{
"and": [
"canSpaceJumpWaterBounce",
{
"or": [
{
"and": [
"canPreciseSpaceJump",
{
"lavaFrames": 35
}
]
},
{
"lavaFrames": 60
}
]
}
]
},
{
"lavaFrames": 150
}
]
}Exit condition: {
"leaveNormally": {}
}Unlocks doors: {"types":["missiles"],"requires":[{"lavaFrames":80}]}
{"types":["super"],"requires":[]}
{"types":["powerbomb"],"requires":[{"lavaFrames":150}]}Dev note: FIXME: a Gravity version of this could be added. |
|
Requires: "canSuitlessLavaDive"
"Morph"
{
"or": [
{
"and": [
"canTrickyJump",
{
"disableEquipment": "SpeedBooster"
},
"canMockball",
{
"lavaFrames": 155
}
]
},
{
"lavaFrames": 200
}
]
}
{
"or": [
{
"and": [
"canSpaceJumpWaterBounce",
{
"or": [
{
"and": [
"canPreciseSpaceJump",
{
"lavaFrames": 35
}
]
},
{
"lavaFrames": 60
}
]
}
]
},
{
"lavaFrames": 150
}
]
}Exit condition: {
"leaveNormally": {}
}Unlocks doors: {"types":["missiles"],"requires":[{"lavaFrames":80}]}
{"types":["super"],"requires":[]}
{"types":["powerbomb"],"requires":[{"lavaFrames":150}]} |
|
Jump and aim down to make the Dragons active by bringing them on camera. Requires: {
"noBlueSuit": {}
}
{
"resetRoom": {
"nodes": [
2
]
}
}
"h_heatProof"
{
"or": [
{
"and": [
"Morph",
"Grapple",
"Plasma",
"canCameraManip",
{
"cycleFrames": 1620
}
]
},
{
"and": [
"HiJump",
"canSpeedyJump",
"Grapple",
"Plasma",
"canCameraManip",
{
"cycleFrames": 1920
}
]
},
{
"and": [
"SpaceJump",
"Plasma",
"canCameraManip",
{
"cycleFrames": 1770
}
]
},
{
"and": [
"canPreciseSpaceJump",
"ScrewAttack",
{
"cycleFrames": 1440
}
]
}
]
}Resets obstacles: A Farm cycle drops: 5 Dragon |
From: 6
Bottom Right Junction
To: 4
Bottom Right Door
Requires: {
"obstaclesCleared": [
"A"
]
}
"h_heatedRemoteRunwayPreciseSpaceJump"
{
"heatFrames": 360
}Exit condition: {
"leaveSpaceJumping": {
"remoteRunway": {
"length": 19,
"openEnd": 1
},
"minExtraRunSpeed": "$2.E"
}
}Unlocks doors: {"types":["missiles"],"requires":[{"heatFrames":50}]}
{"types":["super"],"requires":[]}
{"types":["powerbomb"],"requires":[{"heatFrames":70}]}Dev note: FIXME: This should be changed to start at node 9. |
|
Requires: "h_heatedRemoteRunwaySpaceJump"
{
"heatFrames": 180
}Exit condition: {
"leaveSpaceJumping": {
"remoteRunway": {
"length": 4,
"openEnd": 1
}
}
} |
From: 2
Middle Right Door
To: 2
Middle Right Door
Requires: "h_heatedRemoteRunwaySpaceJump"
{
"heatFrames": 220
}Exit condition: {
"leaveSpaceJumping": {
"remoteRunway": {
"length": 3,
"openEnd": 1
}
}
} |
From: 1
Left Door
To: 1
Left Door
Requires: "h_heatedRemoteRunwayPreciseSpaceJump"
{
"heatFrames": 310
}Exit condition: {
"leaveSpaceJumping": {
"remoteRunway": {
"length": 5,
"openEnd": 1
},
"minExtraRunSpeed": "$1.A"
}
} |
From: 1
Left Door
To: 1
Left Door
Requires: "h_heatedRemoteRunwaySpaceJump"
{
"heatFrames": 310
}Exit condition: {
"leaveSpinning": {
"remoteRunway": {
"length": 5,
"openEnd": 1
},
"minExtraRunSpeed": "$1.A"
}
} |
From: 1
Left Door
To: 1
Left Door
Requires: "h_heatedRemoteRunwaySpaceJump"
{
"heatFrames": 310
}Exit condition: {
"leaveWithSpringBallBounce": {
"remoteRunway": {
"length": 5,
"openEnd": 1
},
"landingRunway": {
"length": 3,
"openEnd": 1
},
"minExtraRunSpeed": "$1.A",
"movementType": "uncontrolled"
}
} |
From: 2
Right Door
To: 2
Right Door
Requires: "h_heatedRemoteRunwayPreciseSpaceJump"
{
"heatFrames": 310
}Exit condition: {
"leaveSpaceJumping": {
"remoteRunway": {
"length": 5,
"openEnd": 1
},
"minExtraRunSpeed": "$1.A"
}
} |
From: 2
Right Door
To: 2
Right Door
Requires: "h_heatedRemoteRunwaySpaceJump"
{
"heatFrames": 310
}Exit condition: {
"leaveSpinning": {
"remoteRunway": {
"length": 5,
"openEnd": 1
},
"minExtraRunSpeed": "$1.A"
}
} |
From: 2
Right Door
To: 2
Right Door
Requires: "h_heatedRemoteRunwaySpaceJump"
{
"heatFrames": 310
}Exit condition: {
"leaveWithSpringBallBounce": {
"remoteRunway": {
"length": 5,
"openEnd": 1
},
"landingRunway": {
"length": 3,
"openEnd": 1
},
"minExtraRunSpeed": "$1.A",
"movementType": "uncontrolled"
}
} |
From: 1
Left Door
To: 2
Right Vertical Door
The blocks can be broken if you can generate blue speed using the previous room's runway, and carry it to the blocks by slowing floating down with Space Jump. Entrance condition: {
"comeInGettingBlueSpeed": {
"length": 9,
"openEnd": 0
}
}Requires: {
"notable": "Full Room Space Jump Through Speed Blocks"
}
"canBlueSpaceJump"
"canPreciseSpaceJump"Clears obstacles: B |
From: 2
Right Vertical Door
To: 1
Left Door
Requires: {
"obstaclesCleared": [
"A",
"B",
"E"
]
}
"canPreciseSpaceJump"
"canInsaneJump"Exit condition: {
"leaveSpaceJumping": {
"remoteRunway": {
"length": 45,
"openEnd": 1
}
}
}Unlocks doors: {"types":["ammo"],"requires":[],"useImplicitRequires":false} |
From: 2
Right Vertical Door
To: 1
Left Door


Requires: {
"obstaclesCleared": [
"B",
"E"
]
}
"canPreciseSpaceJump"
"canInsaneJump"Exit condition: {
"leaveSpaceJumping": {
"remoteRunway": {
"length": 32,
"openEnd": 1,
"gentleUpTiles": 6
}
}
}Unlocks doors: {"types":["ammo"],"requires":[],"useImplicitRequires":false} |
From: 2
Right Vertical Door
To: 1
Left Door
Requires: {
"obstaclesCleared": [
"A",
"B",
"E"
]
}
"canPreciseSpaceJump"Exit condition: {
"leaveSpinning": {
"remoteRunway": {
"length": 45,
"openEnd": 1
}
}
}Unlocks doors: {"types":["ammo"],"requires":[],"useImplicitRequires":false} |
From: 2
Right Vertical Door
To: 1
Left Door
Requires: {
"obstaclesCleared": [
"B",
"E"
]
}
"canPreciseSpaceJump"Exit condition: {
"leaveSpinning": {
"remoteRunway": {
"length": 32,
"openEnd": 1,
"gentleUpTiles": 6
}
}
}Unlocks doors: {"types":["ammo"],"requires":[],"useImplicitRequires":false} |
From: 2
Right Vertical Door
To: 1
Left Door
Requires: {
"obstaclesCleared": [
"A",
"B",
"E"
]
}
"canPreciseSpaceJump"
"canInsaneJump"Exit condition: {
"leaveWithSpringBallBounce": {
"remoteRunway": {
"length": 45,
"openEnd": 1
},
"landingRunway": {
"length": 10,
"openEnd": 1
},
"movementType": "uncontrolled"
}
}Unlocks doors: {"types":["ammo"],"requires":[],"useImplicitRequires":false} |
From: 2
Right Vertical Door
To: 1
Left Door


Requires: {
"obstaclesCleared": [
"B",
"E"
]
}
"canPreciseSpaceJump"
"canInsaneJump"Exit condition: {
"leaveWithSpringBallBounce": {
"remoteRunway": {
"length": 32,
"openEnd": 1,
"gentleUpTiles": 6
},
"landingRunway": {
"length": 10,
"openEnd": 1
},
"movementType": "uncontrolled"
}
}Unlocks doors: {"types":["ammo"],"requires":[],"useImplicitRequires":false} |
From: 5
Bottom Junction Right of Morph Tunnel
To: 2
Bottom Right Door
Requires: {
"obstaclesCleared": [
"A"
]
}
"h_heatedRemoteRunwayPreciseSpaceJump"
{
"heatFrames": 185
}Exit condition: {
"leaveSpaceJumping": {
"remoteRunway": {
"length": 10,
"openEnd": 1
},
"minExtraRunSpeed": "$2.0"
}
}Unlocks doors: {"types":["missiles"],"requires":[{"heatFrames":50}]}
{"types":["super"],"requires":[]}
{"types":["powerbomb"],"requires":[{"heatFrames":50}]}Dev note: It is assumed that the door was shot open when entering on the right, but extra heat frames are included here for it. |
From: 5
Bottom Junction Right of Morph Tunnel
To: 2
Bottom Right Door
Requires: {
"obstaclesCleared": [
"A"
]
}
"h_heatedRemoteRunwaySpaceJump"
{
"heatFrames": 185
}Exit condition: {
"leaveSpinning": {
"remoteRunway": {
"length": 10,
"openEnd": 1
}
}
}Unlocks doors: {"types":["missiles"],"requires":[{"heatFrames":50}]}
{"types":["super"],"requires":[]}
{"types":["powerbomb"],"requires":[{"heatFrames":50}]}Dev note: It is assumed that the door was shot open when entering on the right, but extra heat frames are included here for it. |
From: 5
Bottom Junction Right of Morph Tunnel
To: 2
Bottom Right Door
Requires: {
"obstaclesCleared": [
"A"
]
}
"h_heatedRemoteRunwaySpaceJump"
{
"heatFrames": 165
}Exit condition: {
"leaveWithMockball": {
"remoteRunway": {
"length": 10,
"openEnd": 1
},
"landingRunway": {
"length": 4,
"openEnd": 1
},
"minExtraRunSpeed": "$2.0"
}
}Unlocks doors: {"types":["missiles"],"requires":[{"heatFrames":50}]}
{"types":["super"],"requires":[]}
{"types":["powerbomb"],"requires":[{"heatFrames":50}]} |
From: 5
Bottom Junction Right of Morph Tunnel
To: 2
Bottom Right Door
Requires: {
"obstaclesCleared": [
"A"
]
}
"h_heatedRemoteRunwaySpaceJump"
{
"heatFrames": 165
}Exit condition: {
"leaveWithSpringBallBounce": {
"remoteRunway": {
"length": 10,
"openEnd": 1
},
"landingRunway": {
"length": 4,
"openEnd": 1
},
"minExtraRunSpeed": "$2.0",
"movementType": "uncontrolled"
}
}Unlocks doors: {"types":["missiles"],"requires":[{"heatFrames":50}]}
{"types":["super"],"requires":[]}
{"types":["powerbomb"],"requires":[{"heatFrames":50}]} |
|
Requires: {
"obstaclesCleared": [
"A",
"B",
"C"
]
}
"canDash"
"h_heatedRemoteRunwayPreciseSpaceJump"
{
"heatFrames": 200
}Exit condition: {
"leaveSpaceJumping": {
"remoteRunway": {
"length": 28,
"openEnd": 1
},
"minExtraRunSpeed": "$4.0"
}
}Unlocks doors: {"types":["ammo"],"requires":[],"useImplicitRequires":false} |
From: 2
Right Door
To: 1
Left Door
Requires: {
"obstaclesCleared": [
"A",
"B",
"C"
]
}
"canDash"
"h_heatedRemoteRunwaySpaceJump"
{
"heatFrames": 200
}Exit condition: {
"leaveSpinning": {
"remoteRunway": {
"length": 28,
"openEnd": 1
},
"minExtraRunSpeed": "$4.0"
}
}Unlocks doors: {"types":["ammo"],"requires":[],"useImplicitRequires":false} |
From: 2
Right Door
To: 1
Left Door
Requires: {
"obstaclesCleared": [
"A",
"B"
]
}
"canDash"
"h_heatedRemoteRunwaySpaceJump"
{
"heatFrames": 200
}Exit condition: {
"leaveWithMockball": {
"remoteRunway": {
"length": 28,
"openEnd": 1
},
"landingRunway": {
"length": 5,
"openEnd": 1
},
"minExtraRunSpeed": "$4.0"
}
}Unlocks doors: {"types":["super"],"requires":[]}
{"types":["missiles","powerbomb"],"requires":[]}Dev note: If coming from the right, the Ripper on the left may still be alive, but it is not too hard to avoid. |
From: 2
Right Door
To: 1
Left Door
Requires: {
"obstaclesCleared": [
"A",
"B"
]
}
"canDash"
"h_heatedRemoteRunwaySpaceJump"
{
"heatFrames": 200
}Exit condition: {
"leaveWithSpringBallBounce": {
"remoteRunway": {
"length": 28,
"openEnd": 1
},
"landingRunway": {
"length": 5,
"openEnd": 1
},
"minExtraRunSpeed": "$4.0",
"movementType": "uncontrolled"
}
}Unlocks doors: {"types":["super"],"requires":[]}
{"types":["missiles","powerbomb"],"requires":[]}Dev note: If coming from the right, the Ripper on the left may still be alive, but it is not too hard to avoid. |
From: 3
Junction Left of Green Gate
To: 1
Left Door
Requires: {
"obstaclesCleared": [
"B",
"C"
]
}
"canDash"
"h_heatedRemoteRunwayPreciseSpaceJump"
{
"heatFrames": 230
}Exit condition: {
"leaveSpaceJumping": {
"remoteRunway": {
"length": 18,
"openEnd": 1
},
"minExtraRunSpeed": "$2.0"
}
}Unlocks doors: {"types":["ammo"],"requires":[],"useImplicitRequires":false} |
From: 3
Junction Left of Green Gate
To: 1
Left Door
Requires: {
"obstaclesCleared": [
"B",
"C"
]
}
"canDash"
"h_heatedRemoteRunwaySpaceJump"
{
"heatFrames": 230
}Exit condition: {
"leaveSpinning": {
"remoteRunway": {
"length": 18,
"openEnd": 1
},
"minExtraRunSpeed": "$2.0"
}
}Unlocks doors: {"types":["ammo"],"requires":[],"useImplicitRequires":false} |
From: 3
Junction Left of Green Gate
To: 1
Left Door
Requires: {
"obstaclesCleared": [
"B"
]
}
"canDash"
"h_heatedRemoteRunwaySpaceJump"
{
"heatFrames": 230
}Exit condition: {
"leaveWithMockball": {
"remoteRunway": {
"length": 18,
"openEnd": 1
},
"landingRunway": {
"length": 5,
"openEnd": 1
},
"minExtraRunSpeed": "$2.0"
}
}Unlocks doors: {"types":["super"],"requires":[]}
{"types":["missiles","powerbomb"],"requires":[]}Dev note: If coming from the right, the Ripper on the left may still be alive, but it is not too hard to avoid. |
From: 3
Junction Left of Green Gate
To: 1
Left Door
Requires: {
"obstaclesCleared": [
"B"
]
}
"canDash"
"h_heatedRemoteRunwaySpaceJump"
{
"heatFrames": 230
}Exit condition: {
"leaveWithSpringBallBounce": {
"remoteRunway": {
"length": 18,
"openEnd": 1
},
"landingRunway": {
"length": 5,
"openEnd": 1
},
"minExtraRunSpeed": "$2.0",
"movementType": "uncontrolled"
}
}Unlocks doors: {"types":["super"],"requires":[]}
{"types":["missiles","powerbomb"],"requires":[]}Dev note: If coming from the right, the Ripper on the left may still be alive, but it is not too hard to avoid. |
|
Requires: {
"heatFrames": 60
}
"h_heatedRemoteRunwaySpaceJump"Exit condition: {
"leaveSpaceJumping": {
"remoteRunway": {
"length": 4,
"openEnd": 1
}
}
} |
From: 1
Left Door
To: 5
Spring Ball Maze Junction (Past the Bomb Blocks)


Spacejump through the room and break the bomb blocks in the Morph tunnel with Speedbooster. It is very helpful for the final jump to be close to the missile platform, to be as close to the tunnel as possible when Morphing. Entrance condition: {
"comeInBlueSpinning": {
"minExtraRunSpeed": "$6.E",
"unusableTiles": 0
}
}Requires: {
"notable": "Air Speedball"
}
"canPreciseSpaceJump"
"canInsaneJump"
"canLateralMidAirMorph"
"canSpeedball"
"canMomentumConservingMorph"
{
"heatFrames": 110
}Dev note: This is possible with less extra speed but where you jump changes with your speed and room entry. |
Come In Getting Blue Speed, Space Jump Through Morph Tunnel
(Extreme)
Lower Norfair Spring Ball Maze
From: 1
Left Door
To: 5
Spring Ball Maze Junction (Past the Bomb Blocks)
Spacejump through the room and break the bomb blocks in the Morph tunnel with Speedbooster. It is very helpful for the final jump to be close to the missile platform, to be as close to the tunnel as possible when Morphing. Entrance condition: {
"comeInGettingBlueSpeed": {
"length": 5,
"openEnd": 1,
"minExtraRunSpeed": "$5.B"
}
}Requires: {
"notable": "Air Speedball"
}
"canPreciseSpaceJump"
"canInsaneJump"
"canLateralMidAirMorph"
"canSpeedball"
"canMomentumConservingMorph"
{
"heatFrames": 110
} |
From: 4
Junction Above Bomb Block
To: 2
Right Door
Precisely weave between the pillars to avoid needing to wait for the acid. Requires: {
"obstaclesNotCleared": [
"B"
]
}
"Morph"
"canPreciseSpaceJump"
{
"heatFrames": 355
}
{
"or": [
"canDash",
{
"and": [
{
"haveBlueSuit": {}
},
{
"heatFrames": 65
}
]
}
]
} |
From: 3
Top Right Door
To: 3
Top Right Door
Requires: {
"obstaclesCleared": [
"A"
]
}
"canPreciseSpaceJump"Exit condition: {
"leaveSpaceJumping": {
"remoteRunway": {
"length": 15,
"openEnd": 2
}
}
} |
From: 3
Top Right Door
To: 3
Top Right Door
Requires: {
"obstaclesCleared": [
"A"
]
}
"canPreciseSpaceJump"Exit condition: {
"leaveWithSpringBallBounce": {
"remoteRunway": {
"length": 15,
"openEnd": 2
},
"landingRunway": {
"length": 8,
"openEnd": 1
},
"movementType": "uncontrolled"
}
} |
From: 2
Bottom Left Door
To: 1
Top Left Doorway

Turn around to the left just before bonking the ceiling, to retain upward momentum. Then turn back to the right and go through the morph tunnel to the right, avoiding crab damage. Entrance condition: {
"comeInSpaceJumping": {
"speedBooster": "no",
"minTiles": 6
}
}Requires: {
"notable": "Cross Room Jump Morph"
}
"canCrossRoomJumpIntoWater"
"canPreciseSpaceJump"
"canMomentumConservingTurnaround"
"canMidAirMorph"Dev note: Jump low through the door with at least $1.D extra run speed. |
From: 2
Bottom Left Door
To: 1
Top Left Doorway
Turn around to the left just before bonking the ceiling, to retain upward momentum. Then turn back to the right and go through the morph tunnel to the right, avoiding crab damage. Entrance condition: {
"comeInSpaceJumping": {
"speedBooster": "yes",
"minTiles": 3.5625
}
}Requires: {
"notable": "Cross Room Jump Morph"
}
"canCrossRoomJumpIntoWater"
"canPreciseSpaceJump"
"canMomentumConservingTurnaround"
"canMidAirMorph"Dev note: Jump low through the door with at least $1.5 extra run speed. |
From: 2
Bottom Left Door
To: 1
Top Left Doorway

Turn around to the left just before bonking the ceiling, to retain upward momentum. Then morph while passing through the crab and go through the morph tunnel to the left. Entrance condition: {
"comeInSpaceJumping": {
"speedBooster": "no",
"minTiles": 3.5625
}
}Requires: {
"notable": "Cross Room Jump Morph"
}
"canCrossRoomJumpIntoWater"
"canPreciseSpaceJump"
"canMomentumConservingTurnaround"
"canMidAirMorph"
"canKago"
{
"or": [
{
"enemyDamage": {
"enemy": "Sciser",
"type": "contact",
"hits": 1
}
},
"h_pauseAbuseMinimalReserveRefill"
]
}Dev note: Jump low through the door with at least $1.4 extra run speed. |
From: 2
Bottom Left Door
To: 1
Top Left Doorway
Turn around to the left just before bonking the ceiling, to retain upward momentum. Then morph while passing through the crab and go through the morph tunnel to the left. Entrance condition: {
"comeInSpaceJumping": {
"speedBooster": "yes",
"minTiles": 3
}
}Requires: {
"notable": "Cross Room Jump Morph"
}
"canCrossRoomJumpIntoWater"
"canPreciseSpaceJump"
"canMomentumConservingTurnaround"
"canMidAirMorph"
"canKago"
{
"or": [
{
"enemyDamage": {
"enemy": "Sciser",
"type": "contact",
"hits": 1
}
},
"h_pauseAbuseMinimalReserveRefill"
]
}Dev note: Jump low through the door with at least $1.2 extra run speed. |
From: 3
Bottom Right Door
To: 4
Top Right Doorway

Turn around to the right just before bonking the ceiling, to retain upward momentum. Then morph and go through the tunnel to the right. Entrance condition: {
"comeInSpaceJumping": {
"speedBooster": "no",
"minTiles": 3.5625
}
}Requires: {
"notable": "Cross Room Jump Morph"
}
"canCrossRoomJumpIntoWater"
"canPreciseSpaceJump"
"canMomentumConservingTurnaround"
"canMidAirMorph"Dev note: Jump low through the door with at least $1.5 extra run speed. |
From: 3
Bottom Right Door
To: 4
Top Right Doorway


Turn around to the right just before bonking the ceiling, to retain upward momentum. Then morph and go through the tunnel to the right. Entrance condition: {
"comeInSpaceJumping": {
"speedBooster": "yes",
"minTiles": 3
}
}Requires: {
"notable": "Cross Room Jump Morph"
}
"canCrossRoomJumpIntoWater"
"canPreciseSpaceJump"
"canMomentumConservingTurnaround"
"canMidAirMorph"Dev note: Jump low through the door with at least $1.2 extra run speed. |
|
Gain blue speed by running right-to-left on the 20-tile runway below the items. Then use Space Jump to carry it across the top of the room to break the bomb blocks. To cross the room most easily, blue speed can be gained with low momentum by pressing pause, running a few tiles, stuttering just before the pause hits, disabling Gravity suit, continuing to run left, then re-enabling Gravity suit before jumping. Alternatively, a regular shortcharge can be used in combination with either HiJump or a precise amount of extra run speed ($2.0 or $2.1), to cross the room at higher speed. Requires: {
"notable": "Blue Space Jump"
}
"Gravity"
"canPreciseSpaceJump"
{
"or": [
{
"and": [
"canDisableEquipment",
"h_stutterWaterGetBlueSpeed"
]
},
{
"and": [
{
"getBlueSpeed": {
"usedTiles": 20,
"openEnd": 2
}
},
{
"or": [
"HiJump",
"canTrickyDashJump"
]
}
]
}
]
}
"canBlueSpaceJump" |
From: 1
Left Door
To: 2
Bottom Right Door
Entrance condition: {
"comeInGettingBlueSpeed": {
"length": 2,
"openEnd": 1,
"maxExtraRunSpeed": "$2.4"
}
}Requires: "canBlueSpaceJump" "canPreciseSpaceJump" "canChainTemporaryBlue" Exit condition: {
"leaveWithTemporaryBlue": {}
}Unlocks doors: {"types":["ammo"],"requires":[]} |
From: 1
Left Door
To: 3
Top Right Door
Entrance condition: {
"comeInGettingBlueSpeed": {
"length": 2,
"openEnd": 1
}
}Requires: "canBlueSpaceJump" "canPreciseSpaceJump" "canChainTemporaryBlue" Exit condition: {
"leaveWithTemporaryBlue": {}
}Unlocks doors: {"types":["ammo"],"requires":[]} |
From: 2
Bottom Right Door
To: 1
Left Door
Entrance condition: {
"comeInGettingBlueSpeed": {
"length": 1,
"openEnd": 1,
"maxExtraRunSpeed": "$1.9"
}
}Requires: "Gravity" "HiJump" "canBlueSpaceJump" "canPreciseSpaceJump" "canChainTemporaryBlue" Exit condition: {
"leaveWithTemporaryBlue": {}
}Unlocks doors: {"types":["ammo"],"requires":[]}Dev note: This can be done at greater speed (at least up to $2.3) but would be more difficult. |
From: 2
Bottom Right Door
To: 3
Top Right Door
Requires running a precise distance of 7 tiles with no open end in the adjacent room, to hit a peak of the speed vs height graph (at extra run speed $2.0 or $2.1). This needs a last-frame Space Jump in the previous room. At the lower of the two possible speeds ($2.0), the jump must be done very low through the door; at the higher speed ($2.1) there is a relatively large window of vertical positions that work. Entrance condition: {
"comeInSpaceJumping": {
"speedBooster": "yes",
"minTiles": 6.4375
}
}Requires: "canTrickyDashJump" "canPreciseSpaceJump" "canInsaneJump" "canCrossRoomJumpIntoWater" "canBufferedMomentumConservingTurnaround" "canDownGrab" |
|
Gain speed using at least 18 tiles of runway, then Space Jump through the door transition. Entrance condition: {
"comeInSpaceJumping": {
"speedBooster": "yes",
"minTiles": 18.4375
}
}Requires: "canPreciseSpaceJump" "canCrossRoomJumpIntoWater" "canBufferedMomentumConservingTurnaround" |
From: 3
Top Right Door
To: 1
Left Door
Entrance condition: {
"comeInGettingBlueSpeed": {
"length": 2,
"openEnd": 1
}
}Requires: "canBlueSpaceJump" "canPreciseSpaceJump" "canChainTemporaryBlue" Exit condition: {
"leaveWithTemporaryBlue": {}
}Unlocks doors: {"types":["ammo"],"requires":[]} |
From: 2
Right Door
To: 2
Right Door
Requires: "Gravity" "HiJump" "canPreciseSpaceJump" Exit condition: {
"leaveWithMockball": {
"remoteRunway": {
"length": 5,
"openEnd": 1
},
"landingRunway": {
"length": 3,
"openEnd": 1
}
}
} |
From: 1
Left Door
To: 1
Left Door
Requires: "Gravity" "canPreciseSpaceJump" Exit condition: {
"leaveSpaceJumping": {
"remoteRunway": {
"length": 14,
"openEnd": 1
}
}
}Dev note: FIXME: If Morph or X-Ray is available, an extra half tile of runway could be gained by standing up inside the last tile of the platform. |
From: 1
Left Door
To: 2
Right Door
Use Space jumps or Spring Ball bounces to carry blue speed across the room. Then chain temporary blue into the next room. It helps to enter with a relatively low amount of run speed, using a 4-tap. Entrance condition: {
"comeInGettingBlueSpeed": {
"length": 4,
"openEnd": 1,
"minExtraRunSpeed": "$1.2",
"maxExtraRunSpeed": "$1.F"
}
}Requires: {
"notable": "Leave With Temporary Blue"
}
"canChainTemporaryBlue"
{
"or": [
"canTrickySpringBallBounce",
"canPreciseSpaceJump"
]
}Exit condition: {
"leaveWithTemporaryBlue": {}
}Unlocks doors: {"types":["ammo"],"requires":[]}Dev note: Higher or lower amounts of run speed can work in some cases. |
From: 2
Right Door
To: 1
Left Door


Use Space jumps or Spring Ball bounces to carry blue speed across the room. Then chain temporary blue into the next room. It helps to enter with a relatively low amount of run speed, using a 4-tap. Entrance condition: {
"comeInGettingBlueSpeed": {
"length": 4,
"openEnd": 1,
"minExtraRunSpeed": "$1.4",
"maxExtraRunSpeed": "$1.F"
}
}Requires: {
"notable": "Leave With Temporary Blue"
}
"canChainTemporaryBlue"
{
"or": [
"canTrickySpringBallBounce",
"canPreciseSpaceJump"
]
}Exit condition: {
"leaveWithTemporaryBlue": {}
}Unlocks doors: {"types":["ammo"],"requires":[]}Dev note: Higher or lower amounts of run speed can work in some cases. |
From: 2
Right Door
To: 2
Right Door
Requires: "canPreciseSpaceJump" Exit condition: {
"leaveSpaceJumping": {
"remoteRunway": {
"length": 6,
"openEnd": 2
}
}
} |
|
Space Jump into the room with full run speed without Speed Booster, jumping as low as possible through the doorway. Aim down when close to bonking the ceiling. Samus should land on the first pillar. Entrance condition: {
"comeInSpaceJumping": {
"speedBooster": "no",
"minTiles": 6.4375
}
}Requires: "canPreciseSpaceJump" "canInsaneJump" "canTrickyDodgeEnemies" |
From: 1
Left Door
To: 4
Junction Below Sand Entrance


Space Jump into the room relatively low through the doorway. Do a momentum-conserving morph to avoid bonking on the corner at the edge of the sandfall. The morph should happen relatively early, in order to avoid an Evir projectile hit. Jump into the room with extra run speed of at least $1.B At low speed, Samus may not make it onto the pillar and will not have time to unmorph until close to the sand; in this case, crouch jumping can be the safest way to escape. Entrance condition: {
"comeInSpaceJumping": {
"speedBooster": "no",
"minTiles": 5.4375
}
}Requires: "canPreciseSpaceJump" "canMomentumConservingMorph" "canTrickyDodgeEnemies" "canPlayInSand" Dev note: Lower speeds can also work (as low as $1.4), with damage from an Evir projectile. |
From: 1
Left Door
To: 4
Junction Below Sand Entrance
With Speed Booster equipped, Space Jump into the room relatively low through the doorway. Do a momentum-conserving morph on the ceiling. Jump into the room with extra run speed of at least $1.3. Entrance condition: {
"comeInSpaceJumping": {
"speedBooster": "yes",
"minTiles": 3.4375
}
}Requires: "canPreciseSpaceJump" "canMomentumConservingMorph" "canTrickyDodgeEnemies" |
From: 2
Right Door
To: 4
Junction Below Sand Entrance
Space Jump into the room with full run speed without Speed Booster, jumping as low as possible through the doorway. To avoid getting caught on the overhang, release jump slightly before bonking, and aim down to clear the Evir. Entrance condition: {
"comeInSpaceJumping": {
"speedBooster": "no",
"minTiles": 6.4375
}
}Requires: "canPreciseSpaceJump" "canInsaneJump" "canTrickyDodgeEnemies" "canPlayInSand" |
|


Entrance condition: {
"comeInBlueSpaceJumping": {
"minExtraRunSpeed": "$1.B"
}
}Requires: "canPreciseSpaceJump" Clears obstacles: A |
|


Entrance condition: {
"comeInBlueSpaceJumping": {
"minExtraRunSpeed": "$1.B"
}
}Requires: "canPreciseSpaceJump" Clears obstacles: A |
|
Space Jump into the room with extra run speed at least $5.2. Land on the floating block before the first Evir. Entrance condition: {
"comeInSpaceJumping": {
"speedBooster": "yes",
"minTiles": 26
}
}Requires: "canPreciseSpaceJump" "canInsaneJump" |
From: 2
Right Door
To: 5
Left Pillar Junction


In the other room, gain run speed using at least 36 tiles (extra run speed at least $6.4), and Space Jump low through the door. Land on the block just past the last Evir. Entrance condition: {
"comeInSpaceJumping": {
"speedBooster": "yes",
"minTiles": 36
}
}Requires: {
"notable": "Cross Room Space Jump (Right to Left)"
}
"canPreciseSpaceJump"
"canInsaneJump"
"canDownGrab" |
|
Requires: {
"or": [
"canTrickyDodgeEnemies",
{
"and": [
"canMetroidAvoid",
"Ice"
]
},
"ScrewAttack",
"canPseudoScrew",
{
"obstaclesCleared": [
"A",
"B"
]
}
]
}
"canPreciseSpaceJump"Exit condition: {
"leaveSpaceJumping": {
"remoteRunway": {
"length": 31,
"openEnd": 1
}
}
}Unlocks doors: {"types":["ammo"],"requires":[]} |
|
Requires: {
"or": [
"canTrickyDodgeEnemies",
{
"and": [
"canMetroidAvoid",
"Ice"
]
},
"ScrewAttack",
"canPseudoScrew",
{
"obstaclesCleared": [
"A",
"B"
]
}
]
}
"canPreciseSpaceJump"Exit condition: {
"leaveWithMockball": {
"remoteRunway": {
"length": 31,
"openEnd": 1
},
"landingRunway": {
"length": 3,
"openEnd": 1
}
}
}Unlocks doors: {"types":["ammo"],"requires":[]}Dev note: It is possible to open the door with ammo and mockball out in one motion. But the timing makes it harder than crossing the room multiple times. |
From: 1
Left Door
To: 2
Right Door
Requires: {
"or": [
"canTrickyDodgeEnemies",
{
"and": [
"canMetroidAvoid",
"Ice"
]
},
"ScrewAttack",
"canPseudoScrew",
{
"obstaclesCleared": [
"A",
"B"
]
}
]
}
"canTrickyJump"
"canPreciseSpaceJump"Exit condition: {
"leaveWithSpringBallBounce": {
"remoteRunway": {
"length": 31,
"openEnd": 1
},
"landingRunway": {
"length": 3,
"openEnd": 1
},
"movementType": "uncontrolled"
}
}Unlocks doors: {"types":["ammo"],"requires":[]} |
From: 3
Bottom of Shaft
To: 1
Left Door
Climbing the shaft with Space Jump is slower than other methods, so it is necessary to move quickly in order to minimize acid damage. With each Space Jump, release jump early rather than doing a full-height jump, in order to be able to Space Jump again more quickly. After reaching the top, fall down on the left side, keeping between the Pirates and the platforms. If Morph is available, use it to reset fall speed by unmorphing soon after taking damage from the bottom Pirate. With greater difficulty, the bottom Pirate can be avoided, resetting fall speed soon after getting past it. If Morph is not available, then take damage from the bottom Pirate, press against the left wall, and fire a carefully timed shot downward to open the door; in this case, use a down-back to fall directly into the doorway. If done quickly enough, it is possible to avoid any acid damage. Requires: {
"notable": "Bootless Walljumpless Space Jump"
}
"canPreciseSpaceJump"
{
"or": [
{
"and": [
"canInsaneJump",
"canResetFallSpeed"
]
},
{
"and": [
"canInsaneJump",
"canDownBack",
{
"enemyDamage": {
"enemy": "Tourian Space Pirate (all)",
"type": "contact",
"hits": 1
}
}
]
},
{
"and": [
"canResetFallSpeed",
{
"enemyDamage": {
"enemy": "Tourian Space Pirate (all)",
"type": "contact",
"hits": 1
}
}
]
}
]
}Exit condition: {
"leaveNormally": {}
}Unlocks doors: {"types":["ammo"],"requires":["never"]}Dev note: The leaveNormally exit condition is to prevent use of implicit door unlock strats, since unlocking the door would probably require some acid damage; FIXME: refine the door unlock requirements. |
From: 3
Bottom of Shaft
To: 1
Left Door
Climbing the shaft with Space Jump is slower than other methods, so it is necessary to move quickly in order to minimize acid damage. With each Space Jump, release jump early rather than doing a full-height jump, in order to be able to Space Jump again more quickly. After reaching the top, fall down on the right side to land on the platform above the door. Then press against the left wall and pass through the last Pirate while firing a Plasma shot down to open the door; with precise timing, damage from the Pirate can be avoided by hitboxing through it. Hold left to land directly in the doorway. If done quickly enough, it is possible to avoid any acid damage. Requires: {
"notable": "Bootless Walljumpless Space Jump"
}
"canPreciseSpaceJump"
"canTrickyJump"
"Plasma"
{
"or": [
{
"enemyDamage": {
"enemy": "Tourian Space Pirate (all)",
"type": "contact",
"hits": 1
}
},
{
"and": [
"canHitbox",
"canInsaneJump"
]
}
]
}Exit condition: {
"leaveNormally": {}
}Unlocks doors: {"types":["ammo"],"requires":["never"]}Dev note: The leaveNormally exit condition is to prevent use of implicit door unlock strats, since unlocking the door would probably require some acid damage; FIXME: refine the door unlock requirements. FIXME: leave with runway could be ok here, though in most cases you could just reset the room, so it doesn't matter much. |
From: 3
Bottom of Shaft
To: 1
Left Door

Climbing the shaft with Space Jump is slower than other methods, so it is necessary to move quickly in order to minimize acid damage. With each Space Jump, release jump early rather than doing a full-height jump, in order to be able to Space Jump again more quickly. After reaching the top, fall down on the right side to land on the platform below the door, taking a brief dip in acid before jumping into the door. Requires: {
"notable": "Bootless Walljumpless Space Jump"
}
"canPreciseSpaceJump"
"canInsaneJump"
{
"acidFrames": 50
}Exit condition: {
"leaveNormally": {}
}Unlocks doors: {"types":["missiles"],"requires":[{"acidFrames":50}]}
{"types":["super"],"requires":[]}
{"types":["powerbomb"],"requires":[{"acidFrames":110}]}Dev note: The leaveNormally exit condition is for two reasons: 1) to prevent use of the runway, since it might not be an air environment, 2) to prevent use of implicit door unlock strats, since unlocking the door requires more acid damage. |
From: 3
Bottom of Shaft
To: 1
Left Door

Climbing the shaft with Space Jump is slower than other methods, so it is necessary to move quickly in order to minimize acid damage. With each Space Jump, release jump early rather than doing a full-height jump, in order to be able to Space Jump again more quickly. After reaching the top, fall down on the right side to land on the platform above the door. Run left, falling off the platform and firing a Super downward to kill the last Pirate. Buffer a beam shot to open the door immediately afterward; using weapon auto-cancel can help simplify the inputs. If the shot is fired early enough, it is possible to hold left to land directly in the doorway. Otherwise a down-back can be used to squeeze in. If done quickly enough, it is possible to avoid any acid damage. Requires: {
"notable": "Bootless Walljumpless Space Jump"
}
"canPreciseSpaceJump"
{
"enemyKill": {
"enemies": [
[
"Tourian Space Pirate (all)"
]
],
"explicitWeapons": [
"Super"
]
}
}Exit condition: {
"leaveNormally": {}
}Unlocks doors: {"types":["ammo"],"requires":["never"]}Dev note: The leaveNormally exit condition is to prevent use of implicit door unlock strats, since unlocking the door would probably require some acid damage; FIXME: refine the door unlock requirements. FIXME: leave with runway could be ok here, though in most cases you could just reset the room, so it doesn't matter much. |
|
Requires: "canPreciseSpaceJump" Exit condition: {
"leaveSpaceJumping": {
"remoteRunway": {
"length": 9,
"openEnd": 0
}
}
} |
From: 2
Right Door
To: 2
Right Door
Requires: "canPreciseSpaceJump" Exit condition: {
"leaveWithSpringBallBounce": {
"remoteRunway": {
"length": 9,
"openEnd": 0
},
"landingRunway": {
"length": 4,
"openEnd": 1
},
"movementType": "uncontrolled"
}
} |