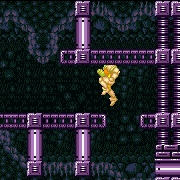
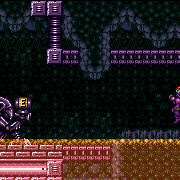
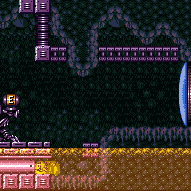
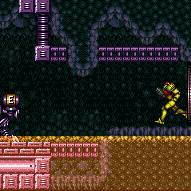
canSlowShortCharge (Expert)
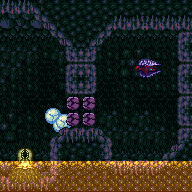
The ability to control Samus' run speed while shortcharging by releasing run after achieving blue. Being able to 4 tap is expected as that brings out the most value from this tech.
Dependencies: canDash
Dev note: The h_anyBoosterItem and canDash requirements are included for clarity, though they are redundant with the shinecharge or blue speed requirements that always accompany this tech (enforced by tests).
Strats ()
|
Enter the room with a very specific run speed to jump from the door, and land a speedball perfectly in the tunnel to break the Bomb block. Entrance condition: {
"comeInGettingBlueSpeed": {
"length": 1,
"openEnd": 0,
"minExtraRunSpeed": "$5.2",
"maxExtraRunSpeed": "$5.F"
}
}Requires: {
"notable": "Morph Tunnel SpeedBall"
}
"canInsaneJump"
"canSpeedball"
"canTrickyDashJump"
"canSlowShortCharge"Dev note: There is 1 unusable tile in this runway. Speeds between $6.2 and $6.A can also work but are more difficult. |
|
Enter the room with a very specific run speed to jump from the door, squeeze by the ceiling, and land a speedball perfectly in the tunnel to break the Bomb block. Entrance condition: {
"comeInGettingBlueSpeed": {
"length": 2,
"openEnd": 0,
"minExtraRunSpeed": "$4.4",
"maxExtraRunSpeed": "$4.7"
}
}Requires: {
"notable": "Morph Tunnel SpeedBall"
}
"canSpeedball"
"canTrickyDashJump"
"canSlowShortCharge"
"canInsaneJump"
"canBeExtremelyPatient"Dev note: There is 1 unusable tile in this runway. The canBeExtremelyPatient requirement is for difficulty placement. |
From: 1
Top Left Door
To: 6
Right of Morph Tunnel with Temporary Blue
Using only the short runway and spike pit, use one or two speedkeeps to speedball towards the item location. This requires either a very short shortcharge, or a second speedkeep in the spikes which also resets Samus' run speed with a crouch jump before spike i-frames expire. Requires: {
"notable": "In-Room SpeedKeep for Temporary Blue"
}
"canSpeedKeep"
"canSlowShortCharge"
{
"doorUnlockedAtNode": 1
}
{
"or": [
{
"and": [
"canChainTemporaryBlue",
{
"getBlueSpeed": {
"usedTiles": 13,
"openEnd": 1
}
},
{
"spikeHits": "n_speedKeepAttempts"
}
]
},
{
"and": [
{
"getBlueSpeed": {
"usedTiles": 14,
"openEnd": 1
}
},
{
"spikeHits": {
"mul": [
2,
"n_speedKeepAttempts"
]
}
}
]
},
{
"and": [
"canChainTemporaryBlue",
{
"spikeHits": {
"mul": [
{
"add": [
"n_speedKeepAttempts",
2
]
},
"n_speedKeepAttempts"
]
}
}
]
}
]
}
"canSpeedball"Dev note: 1 - Stop and bounce on left ledge. 2 - Jump from ledge and bounce in spikes. 3 - Stop and bounce on left ledge, then stop in spikes and speedkeep again. |
From: 1
Top Left Door
To: 6
Right of Morph Tunnel with Temporary Blue
Bounce into the spikes and use a speedkeep to run on spikes to setup for a speedball towards the item. Bouncing on the platform near the door saves a spike hit. Or a damage boost speedkeep could be used instead of a spike speedkeep with enough runspeed. Entrance condition: {
"comeInRunning": {
"speedBooster": "yes",
"minTiles": 12
}
}Requires: "canSpeedKeep"
"canCarefulJump"
"canSlowShortCharge"
"can4HighMidAirMorph"
{
"spikeHits": "n_speedKeepAttempts"
}
"canSpeedball" |
|
Bring temporary blue from the right side door all the way to the missile location using Springball, SpaceJump, or Morph-UnMorphs. Entrance condition: {
"comeInShinecharging": {
"length": 1,
"openEnd": 1
}
}Requires: "canTemporaryBlue"
"canInsaneJump"
{
"or": [
"canLongChainTemporaryBlue",
{
"and": [
"canSpeedball",
"canSpringBallBounce",
"canSlowShortCharge"
]
},
{
"and": [
"canBlueSpaceJump",
"canMockball",
"canSlowShortCharge"
]
}
]
}Clears obstacles: A Dev note: There is 1 unusable tile in this runway. |
|
Use SpeedBooster to break the runway Bomb block and then to shinespark across the room, saving Power Bombs. One Power Bomb is still needed to break the tunnel block. The shinespark timer is very tight and breaking the runway block while storing the Shinespark is required as it saves movement frames. Entrance condition: {
"comeInShinecharging": {
"length": 8,
"openEnd": 0
}
}Requires: {
"notable": "Spark Master"
}
"canSlowShortCharge"
"canShinechargeMovementTricky"
"h_usePowerBomb"
"HiJump"
"Gravity"
{
"acidFrames": 16
}
"canInsaneJump"
{
"shinespark": {
"frames": 93,
"excessFrames": 15
}
}Dev note: There are variations with Screw or Bombs that wouldn't need Gravity. But then you can cross the room normally. |
From: 2
Right Door
To: 4
Middle Junction (Left of Morph Tunnel)
Entrance condition: {
"comeInGettingBlueSpeed": {
"length": 1,
"openEnd": 0
}
}Requires: "canSpeedball"
"canCarefulJump"
"canSlowShortCharge"
{
"acidFrames": 60
}Dev note: There are 9 unusable tiles in this runway. |
From: 1
Left Door
To: 2
Right Door
Entrance condition: {
"comeInGettingBlueSpeed": {
"length": 6,
"openEnd": 1,
"steepUpTiles": 1,
"steepDownTiles": 1,
"minExtraRunSpeed": "$1.2",
"maxExtraRunSpeed": "$2.8"
}
}Requires: "canSlowShortCharge" "canSpeedball" "canSpringBallBounce" "canTrickyJump" Clears obstacles: A Dev note: FIXME: Larger speeds (as high as max speed $7.0) can also work but require greater precision It would also be possible to stop in the middle of the room and then gain blue speed in-room to continue. |
|
Requires: {
"getBlueSpeed": {
"usedTiles": 14,
"openEnd": 1
}
}
"canSlowShortCharge"
"canSpeedball"Clears obstacles: A |
From: 2
Right Door
To: 1
Left Door
Requires: "h_frozenEnemyRunway"
{
"getBlueSpeed": {
"usedTiles": 15,
"openEnd": 1
}
}
"canSlowShortCharge"
"canSpeedball"Clears obstacles: A |
From: 1
Left Door
To: 4
Right Hidden Item
Speedball through the morph tunnel and use it to break the bomb blocks in front of the hidden Missile location. This can be done using Spring Ball, or by unmorphing and using temporary blue to bounce through the bomb blocks. Entrance condition: {
"comeInBlueSpinning": {
"maxExtraRunSpeed": "$3.0",
"unusableTiles": 4
}
}Requires: "canSpeedball"
"canTrickyJump"
{
"or": [
"canChainTemporaryBlue",
{
"and": [
"h_useSpringBall",
"canSlowShortCharge"
]
}
]
}Collects items: 3 |
From: 7
Right Side - Door Behind Super Block
To: 13
Central Junction
Quickly jump and precisely shoot the super block and in the same motion take out the bomb blocks with a speedball. Entrance condition: {
"comeInGettingBlueSpeed": {
"length": 5,
"openEnd": 0
}
}Requires: {
"notable": "Super Block Speedball"
}
"canSpeedball"
"canTrickyJump"
"canSlowShortCharge"
{
"ammo": {
"type": "Super",
"count": 1
}
}Clears obstacles: F Dev note: The runway here has two unusable tiles. |
From: 13
Central Junction
To: 7
Right Side - Door Behind Super Block
Break the bomb blocks by jumping into them with speed. These is more easily done at low run speed. It is most lenient if Samus is still moving up while entering the tunnel. Requires: {
"notable": "Off Screen Super Block"
}
{
"notable": "Break Raised Bomb Blocks with Blue Speed"
}
{
"getBlueSpeed": {
"usedTiles": 20,
"openEnd": 2
}
}
"canSlowShortCharge"
"canSpeedball"
"canLateralMidAirMorph"
"canTrickyJump"
"canOffScreenSuperShot"Clears obstacles: F |
|
A very low horizontal speed is needed to drop down and break the block without hitting the corner to the left or the block above the bomb block. Or with Temporary Blue, Samus can bounce into the bomb block. Requires: {
"notable": "Speedball"
}
"Morph"
{
"obstaclesCleared": [
"C"
]
}
{
"obstaclesNotCleared": [
"D"
]
}
{
"or": [
{
"and": [
{
"getBlueSpeed": {
"usedTiles": 17,
"openEnd": 0
}
},
"canSlowShortCharge",
"canSpeedball"
]
},
{
"and": [
{
"canShineCharge": {
"usedTiles": 30,
"openEnd": 1
}
},
"canTemporaryBlue",
"canLateralMidAirMorph"
]
}
]
}Clears obstacles: B |
From: 1
Left Door
To: 2
Right Door
Jump into the room with blue speed, and fall between the door ledge and the first floating platform, to speedball through the room. Entrance condition: {
"comeInBlueSpinning": {
"minExtraRunSpeed": "$0.E",
"maxExtraRunSpeed": "$1.9",
"unusableTiles": 3
}
}Requires: "canSpeedball"
"canSlowShortCharge"
"canInsaneJump"
{
"heatFrames": 360
} |
From: 1
Left Door
To: 2
Right Door
Entrance condition: {
"comeInGettingBlueSpeed": {
"length": 3,
"openEnd": 1,
"minExtraRunSpeed": "$0.E",
"maxExtraRunSpeed": "$1.B"
}
}Requires: "canSpeedball"
"canSlowShortCharge"
{
"heatFrames": 350
}Dev note: Some heat frames are implicit in the entrance condition. |
From: 2
Right Door
To: 5
Below Left Door Junction
Enter the room blue with very low run speed (e.g. with a 4-tap). Use a precisely timed jump to bonk the large stalagtite in the ceiling and fall through both pirates, killing them with the blue speed. Enter the acid while aiming down to shrink Samus' hitbox. This strat works with all combinations of movement items and suits. Entrance condition: {
"comeInGettingBlueSpeed": {
"length": 9,
"openEnd": 1,
"gentleDownTiles": 4
}
}Requires: {
"notable": "Reverse Acid Dive"
}
{
"notable": "Reverse Thread the Needle"
}
{
"obstaclesNotCleared": [
"A"
]
}
"h_blueJump"
"canInsaneJump"
"canSuitlessLavaDive"
"canSlowShortCharge"
{
"heatFrames": 330
}
{
"acidFrames": 210
} |
From: 1
Top Left Door
To: 4
Top Right Door
Entrance condition: {
"comeInShinecharging": {
"length": 7,
"openEnd": 0
}
}Requires: {
"shineChargeFrames": 45
}
{
"heatFrames": 45
}
"canSlowShortCharge"
"canShinechargeMovementComplex"Exit condition: {
"leaveShinecharged": {}
}Unlocks doors: {"types":["super"],"requires":[]}
{"types":["missiles","powerbomb"],"requires":["never"]}Dev note: FIXME: a max run speed requirement should be included in the entrance condition. FIXME: A 'Full Runway' variant could also be added. |
From: 4
Top Right Door
To: 1
Top Left Door
Entrance condition: {
"comeInShinecharging": {
"length": 6,
"openEnd": 0
}
}Requires: {
"shineChargeFrames": 50
}
{
"heatFrames": 50
}
"canSlowShortCharge"
"canShinechargeMovementComplex"
"canInsaneJump"Exit condition: {
"leaveShinecharged": {}
}Unlocks doors: {"types":["super"],"requires":[]}
{"types":["missiles","powerbomb"],"requires":["never"]}Dev note: This direction is much more difficult than left-to-right, because the shot block is a tile closer to the door. FIXME: A max run speed requirement should be included in the entrance condition. FIXME: There could be a more appropriate tech to describe the precise shot, instead of canInsaneJump. FIXME: A 'Full Runway' variant could also be added. |
|
Entrance condition: {
"comeInBlueSpinning": {
"maxExtraRunSpeed": "$2.8",
"unusableTiles": 1
}
}Requires: "canSpeedball" "canCarefulJump" "canSlowShortCharge" Clears obstacles: A |
From: 1
Left Door
To: 2
Item (Behind the Bomb Wall)
Kago into the worker robot and start running away from the wall until the bomb blocks are broken with SpeedBooster. The short charge taps are extremely precise because gaining too much run speed and Samus will exit the robot. Requires: {
"notable": "Robot Clip Run-In-Place"
}
"canMidAirMorph"
{
"getBlueSpeed": {
"usedTiles": 15,
"openEnd": 1
}
}
"canSlowShortCharge"
"canKago"Dev note: If Phantoon is dead, 'Blue Speed Jump' can be used instead. Note that this strat is useless in vanilla, as the item only spawns if Phantoon has been killed. |
From: 2
Right Door
To: 1
Left Door
Gain a speedball in the other room, and either roll in or do a controlled bounce to enter while descending close to the ground. Bounce anywhere on the platform in front of the door, clearing the whole room at once. If needed, blue speed will destroy any Evirs along the way and allow bouncing on the sand at the end to make it onto the ledge. Entrance condition: {
"comeInWithBlueSpringBallBounce": {
"movementType": "controlled",
"minExtraRunSpeed": "$2.0"
}
}Requires: {
"notable": "Cross-Room Blue Spring Ball Bounce (Right to Left)"
}
{
"or": [
"canTrickyJump",
"canSlowShortCharge"
]
} |
